|
|
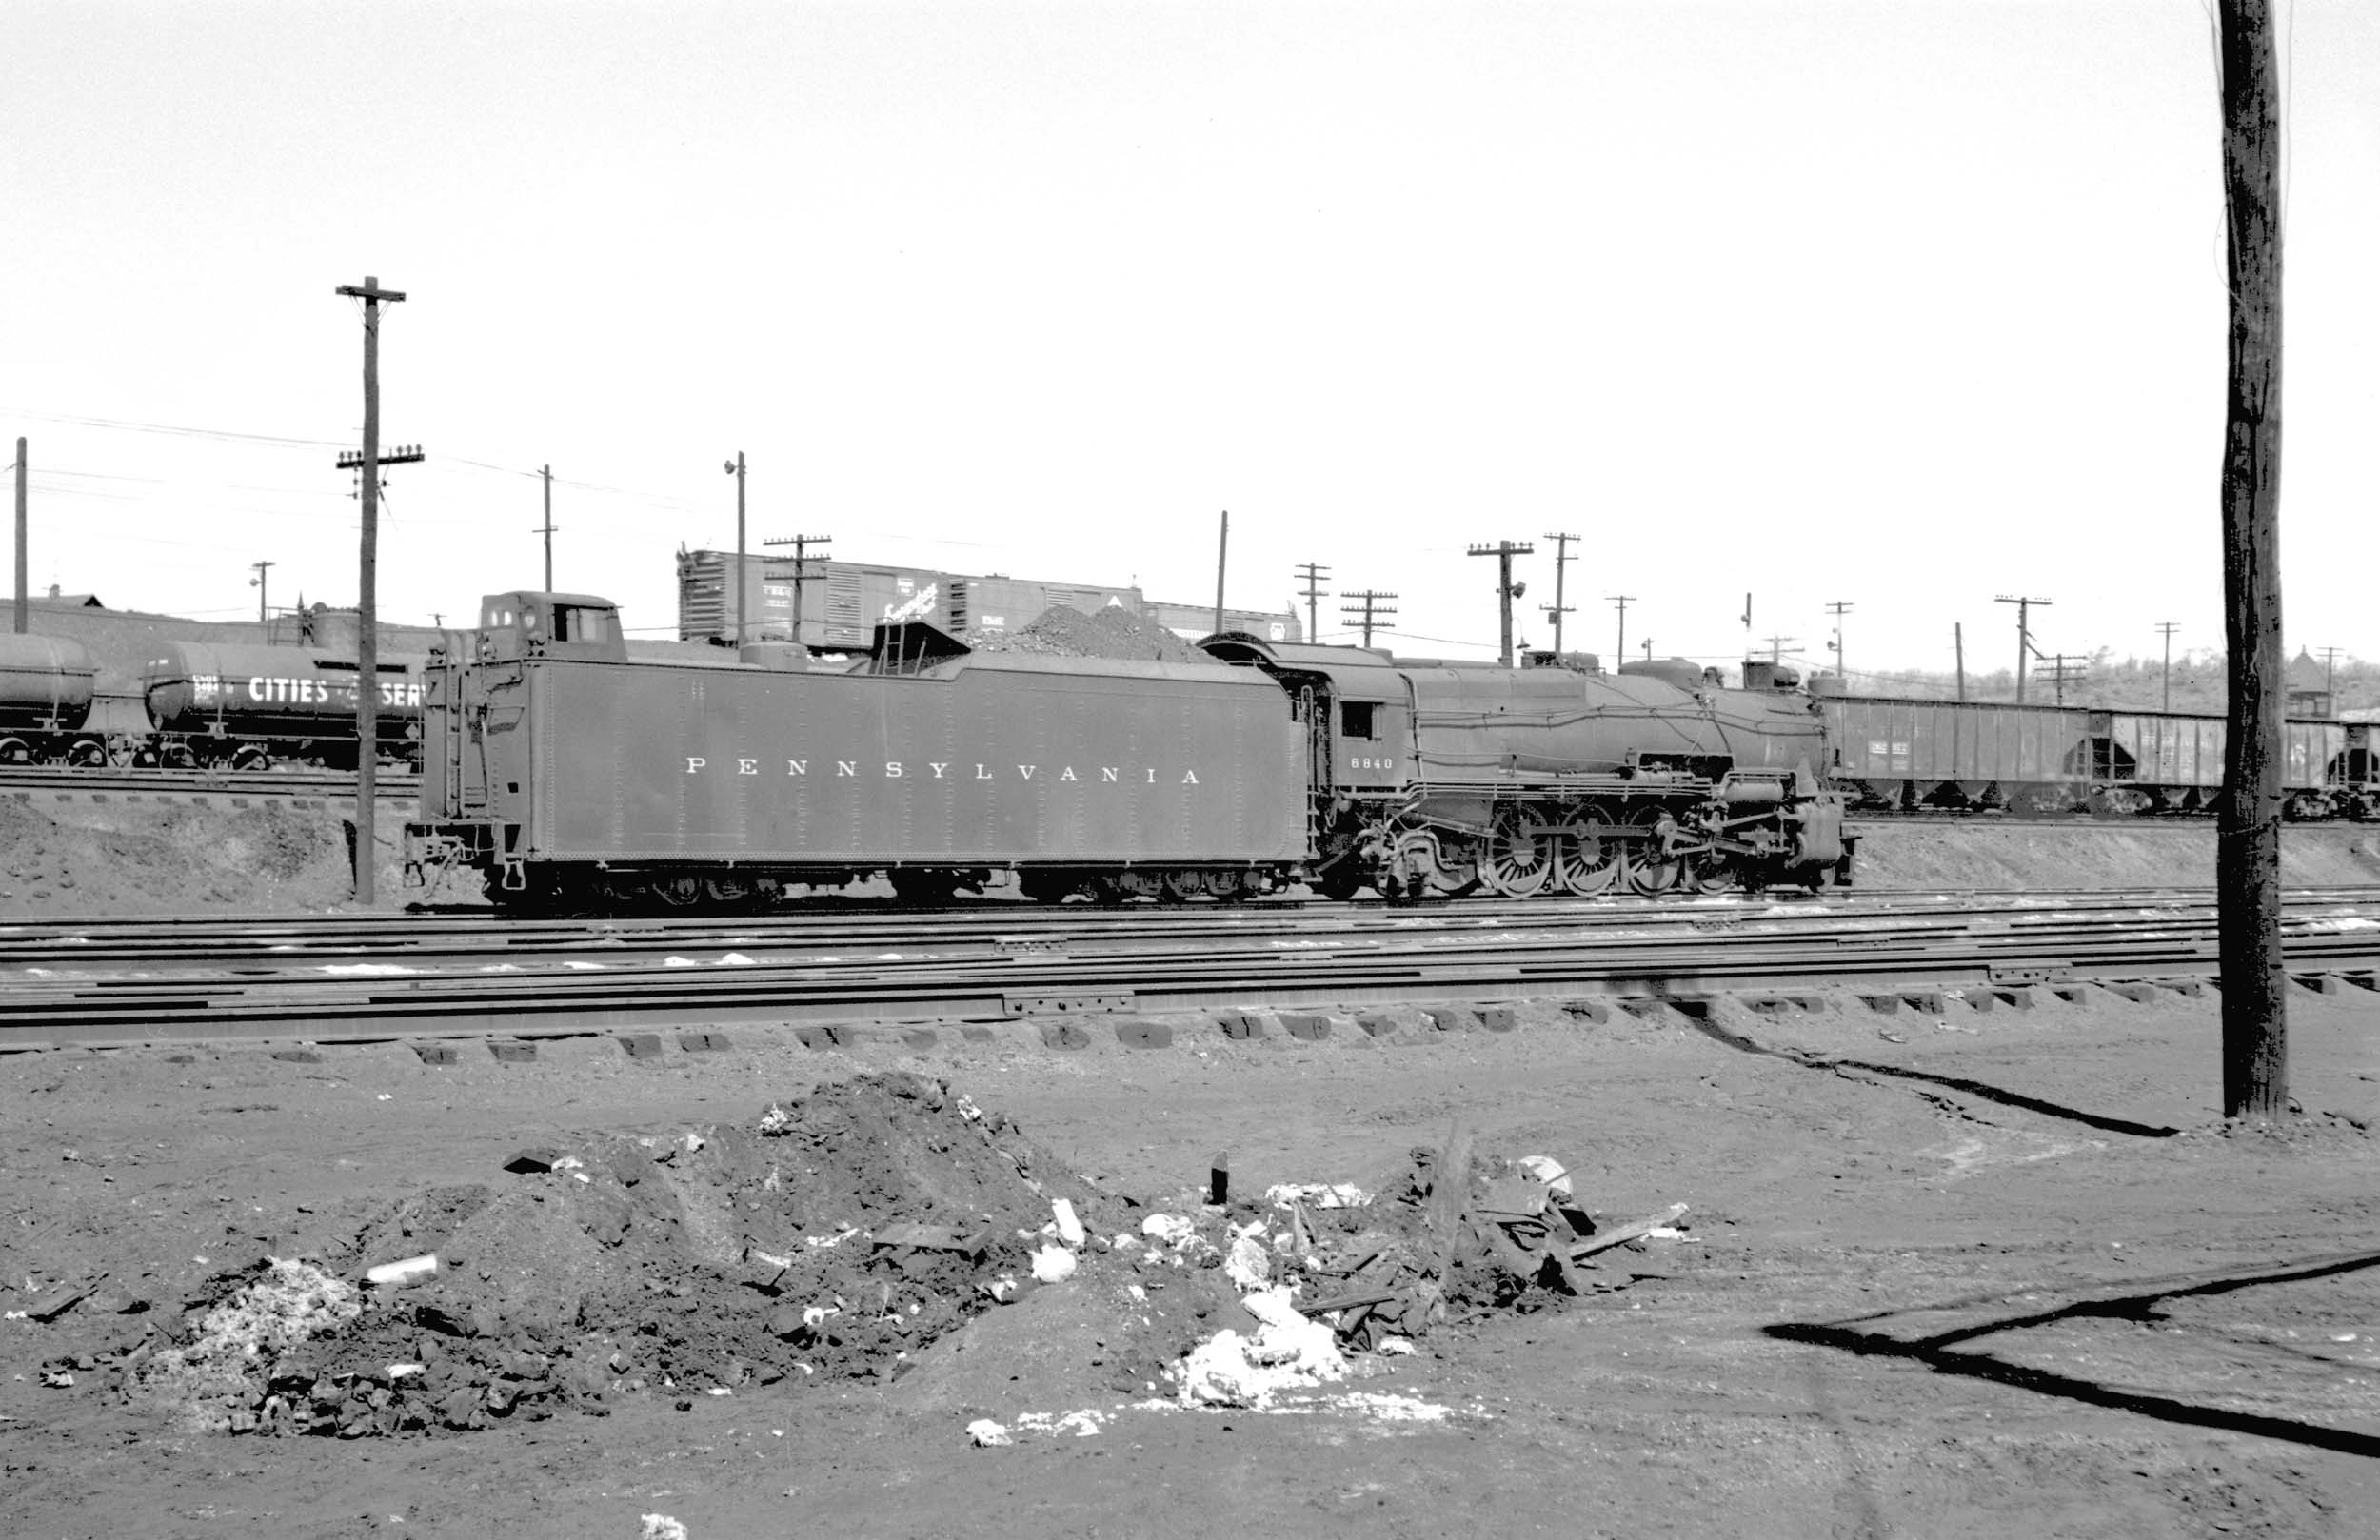
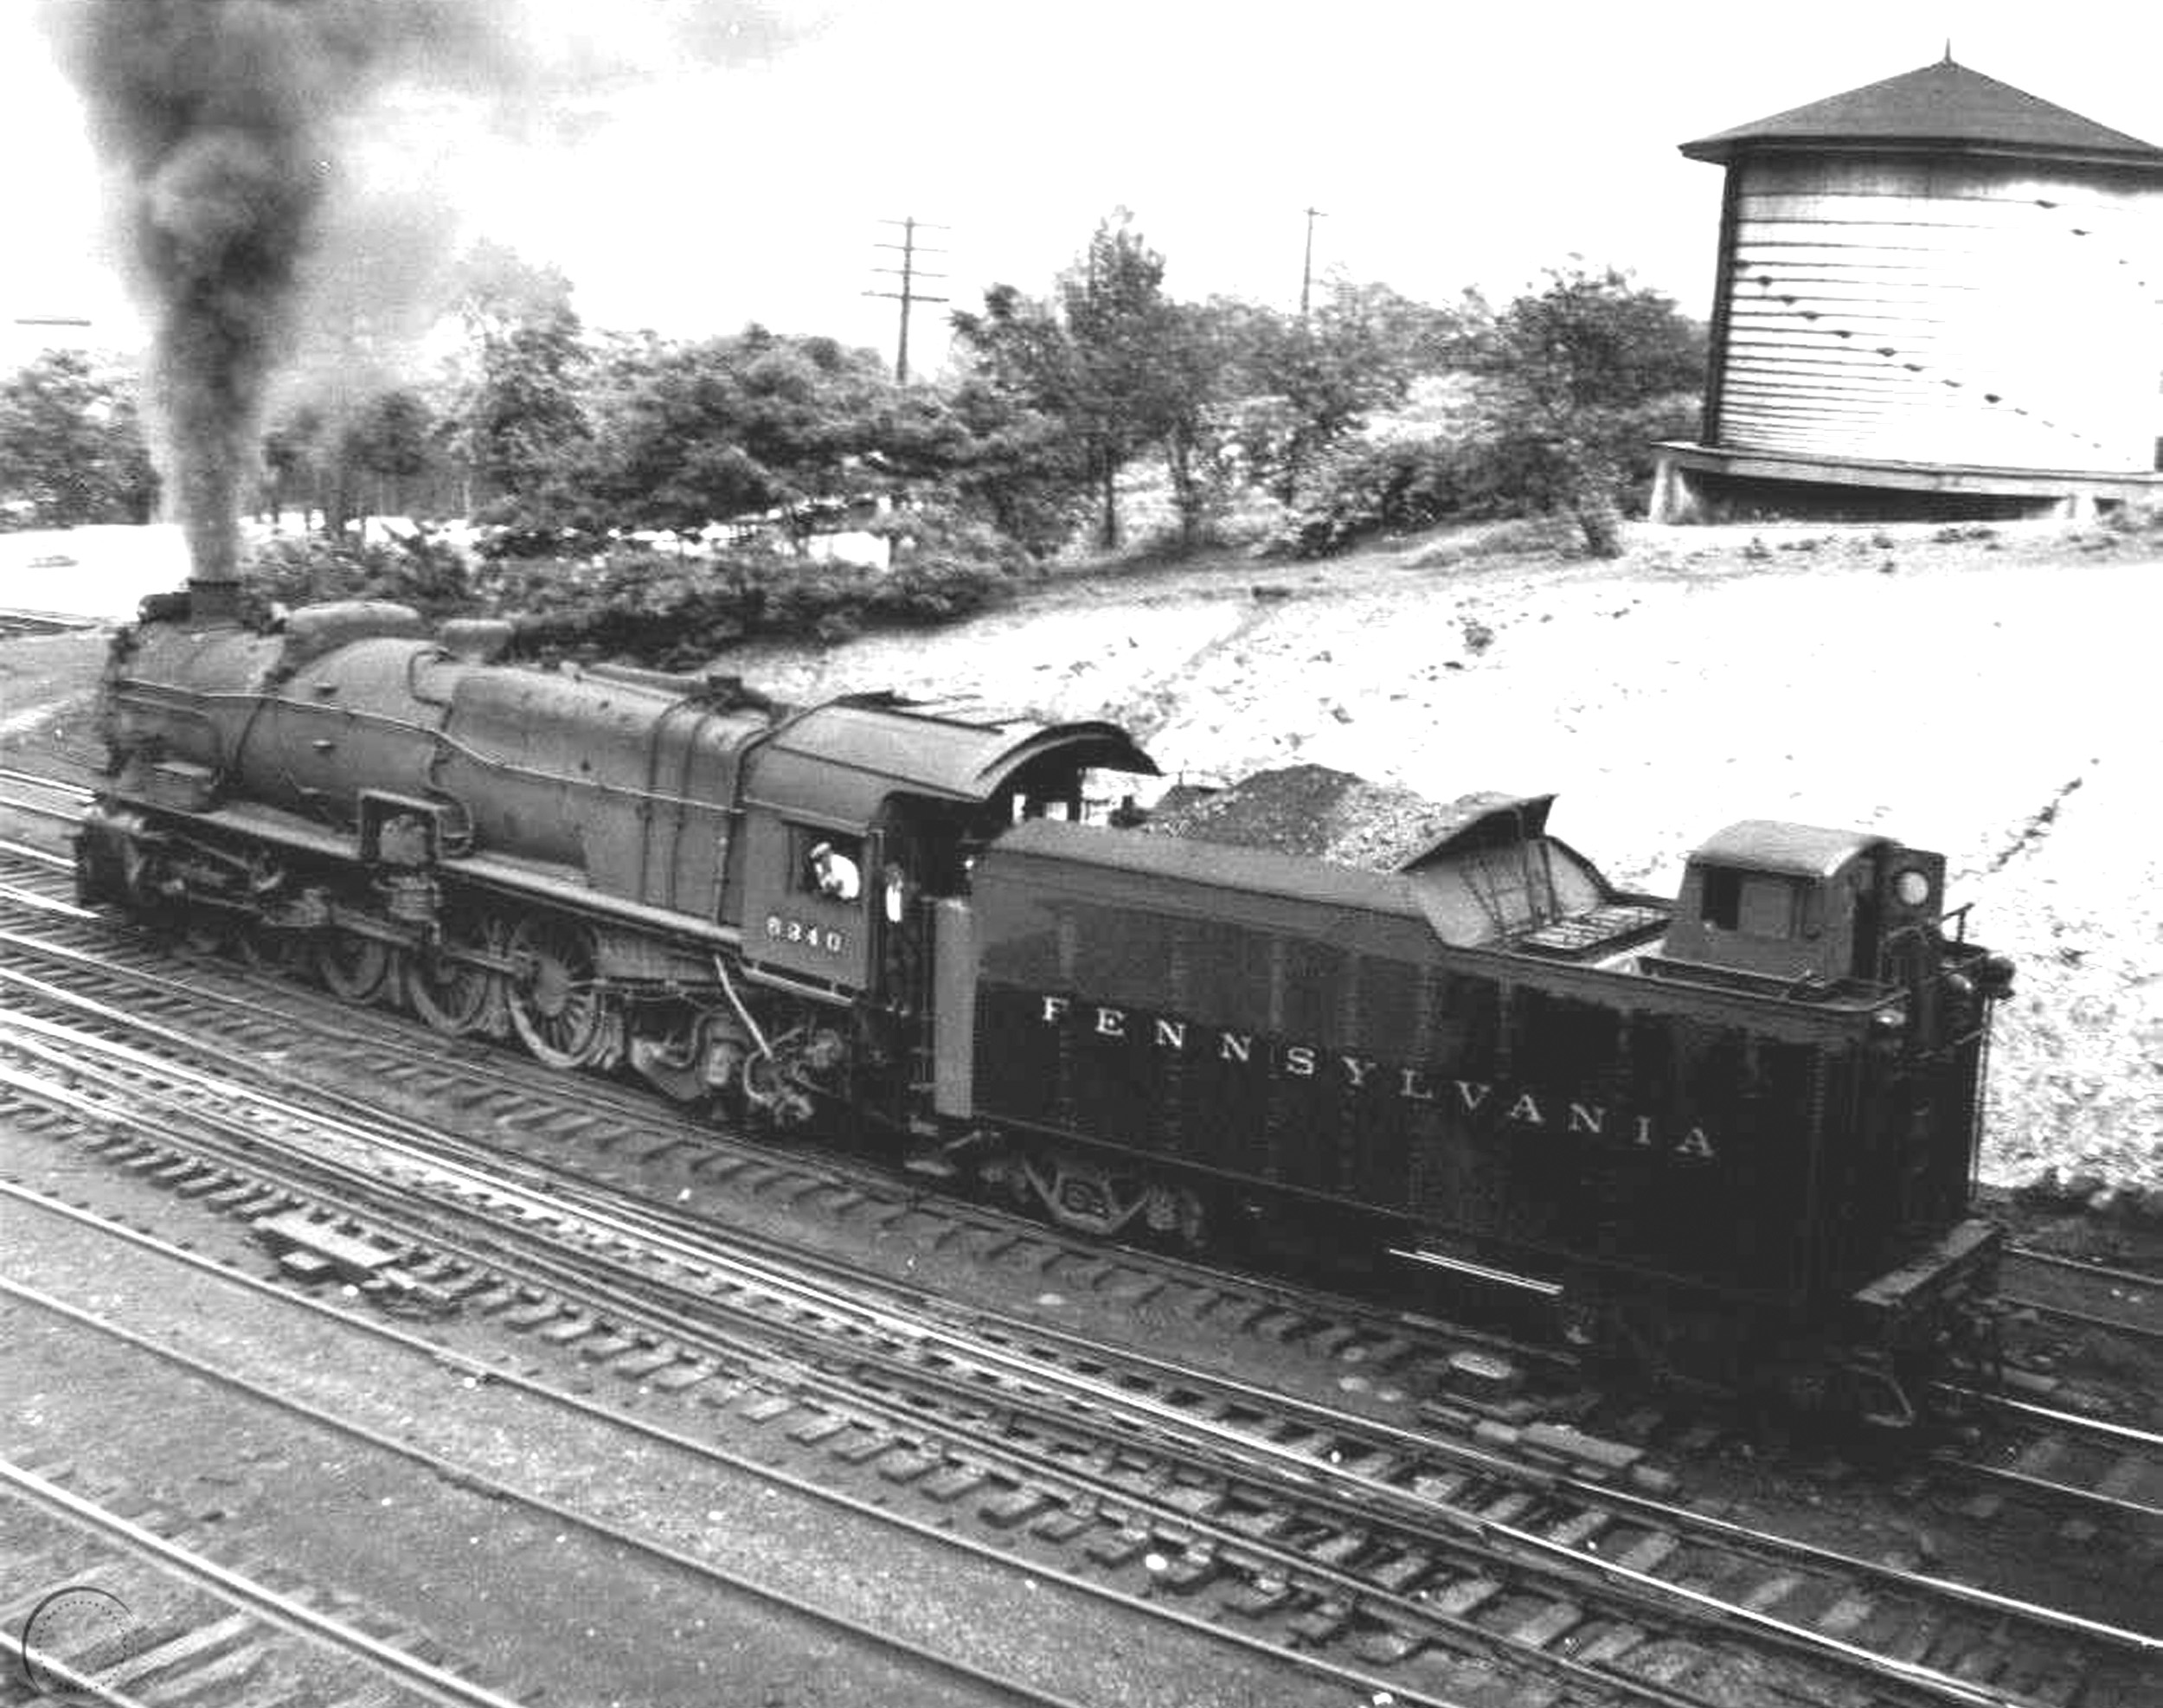
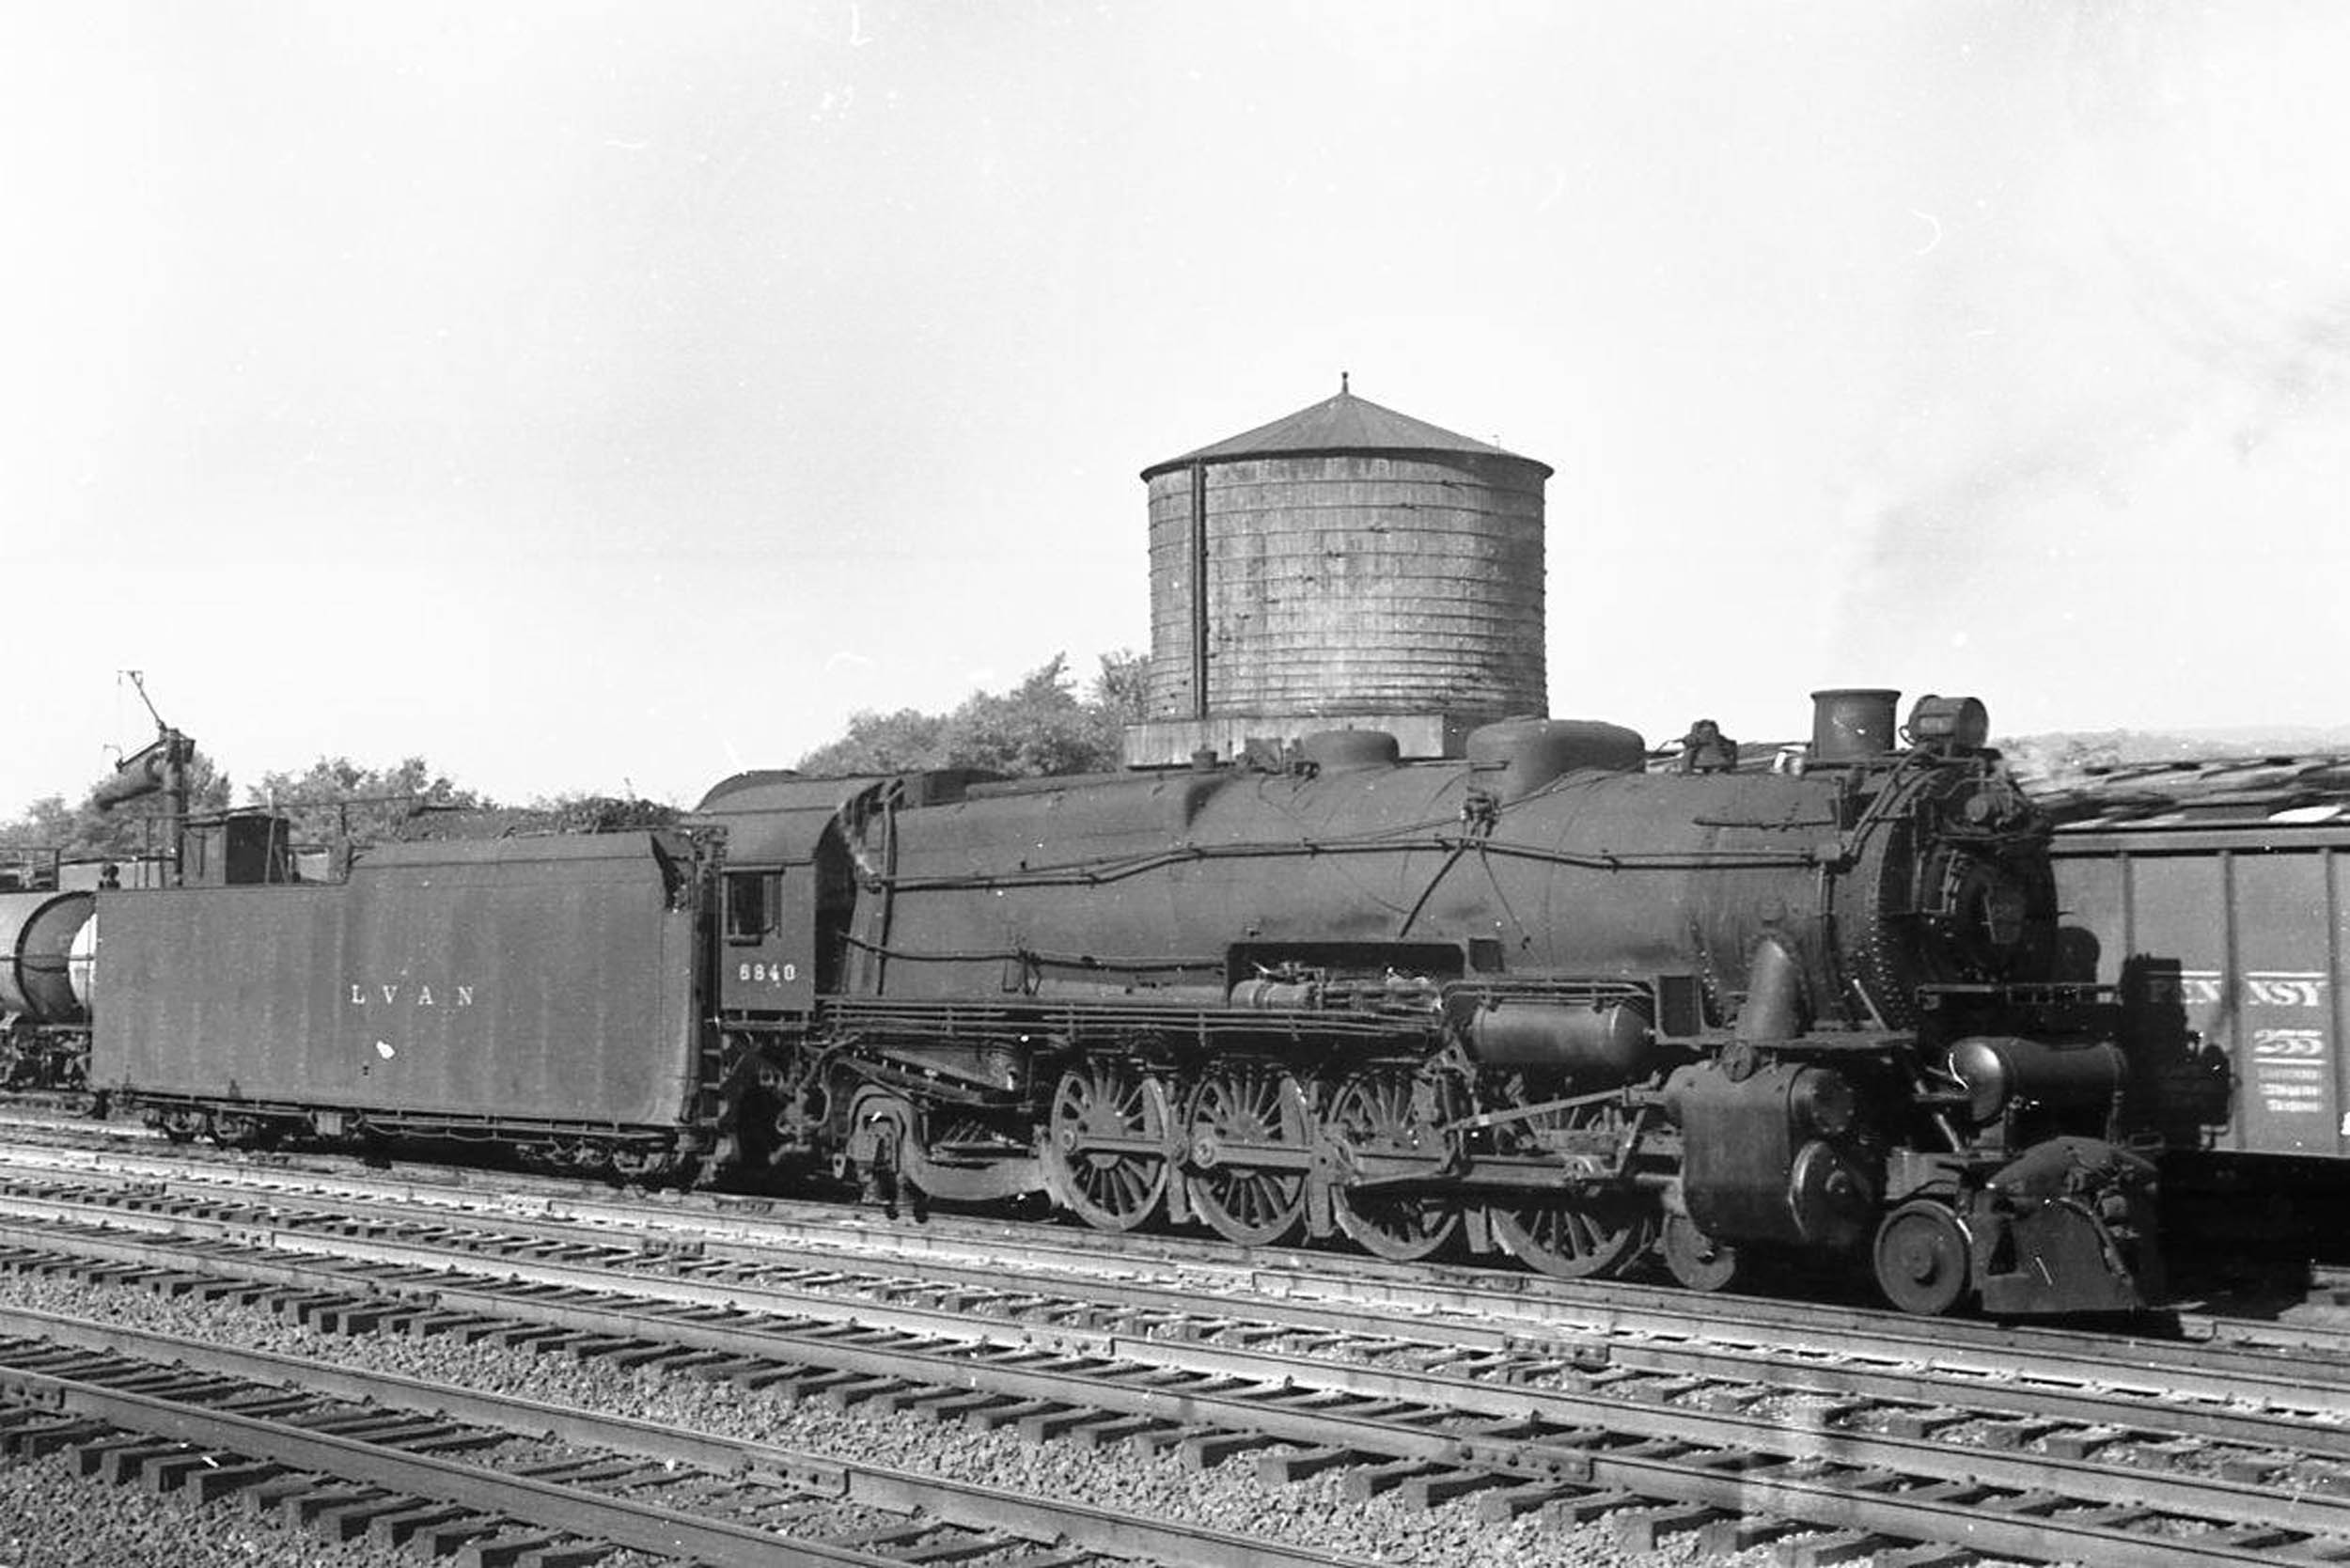
It is interesting that I found 6840 photos with 3 different
tenders.
No
one would believe you that the Pennsylvania was on the tender with only a few
letters showing, and was still in service.
|
|


The
Omnicon PRR M1 was released in 1989 after a successful PRR K4 and PRR L1
project. The M1 was made by FM Models. Charlie Sandersfeld, the owner of
Omnicon wanted Samhongsa to build it, but got a significant price increase of
over the K4 and L1, so he contracted with FM Models. When I first saw the pilot model at the 1988
Central Jersey S Scalers Fall Get Together, I met Charlie for the first time.
That
was a magical time in S Scale. I asked Charlie if the PRR Trainphone antennas
were going to be included on the tenders. He said “I will have to check into
that”. Actually both tenders made for the M1 project had the PRR antennas. You
had direct contact to the company owner and input to things as they were being
made. That was a major attraction for me as a fresh convert to S Scale at that
time.
The
M1 and M1a proved to be very problematic for Omnicon with all flanged drivers.
I am sure they lost a lot of money over it. The model was built too close to
the real PRR frame axle spacing drawing not allowing for model proportion wheel
flange clearance. Models can have selective enlarging of dimensions to ensure a
good running model. 3 sets of drivers
were made. The models were delivered with all flanged drivers. That quickly
became a problem because the flanges touched each other. The loco would not run
at ALL even on straight track. Next was making 2 code 115 blind center drivers.
The code 115 blind was a problem on most layouts with sharper curves. The center
axles fell off the rails in a curve. The code 148 blind drivers proved to be
the most reliable and desirable. There are M1 and M1a surviving into 2020 that
are all flanged drivers making them permanent shelf models. Getting the correct
code 148 center drivers now would be beyond very difficult. I do not know if
enough code 148 center drivers were made in the first place. It would take a
skilled machinist with advanced model railroading experience to make the
correct code 148 tires and install them in the original centers.
I
have seen the M1 with all flanged drivers listed at times on eBay usually by an
unsuspecting seller. I have at times emailed the seller about the problem
telling them the problems that will happen if the buyer wants to run the model.
I have gotten mixed results – mostly leave me alone but 1 seller added my
message to the listing.
Omnicon
returned to building with Samhongsa for the PRR I1 and remaining few projects
until they closed.
I
traded away my factory painted M1 for an unpainted model in about 1995 in the
name of redoing it. I did not modernize that locomotive. In January 2017 I took
this locomotive out of the box and tried to run it for the first time ever. It
still had all flanged drivers as originally made by Omnicon. I wanted to test
it, but the flanges were touching so I installed the code 148 blind center
drivers. It ran for the first time on 1-22-17
Even
though I have had this loco for 25ish years, I was not sure if I ever would get
to finishing it. Modernizing it is an epic job. I even had thoughts of selling
it more than once. Even more epic was the virus of 2020 that left me with no
job and time so it got bumped to finishing with my M1b 6717, also a long term project.
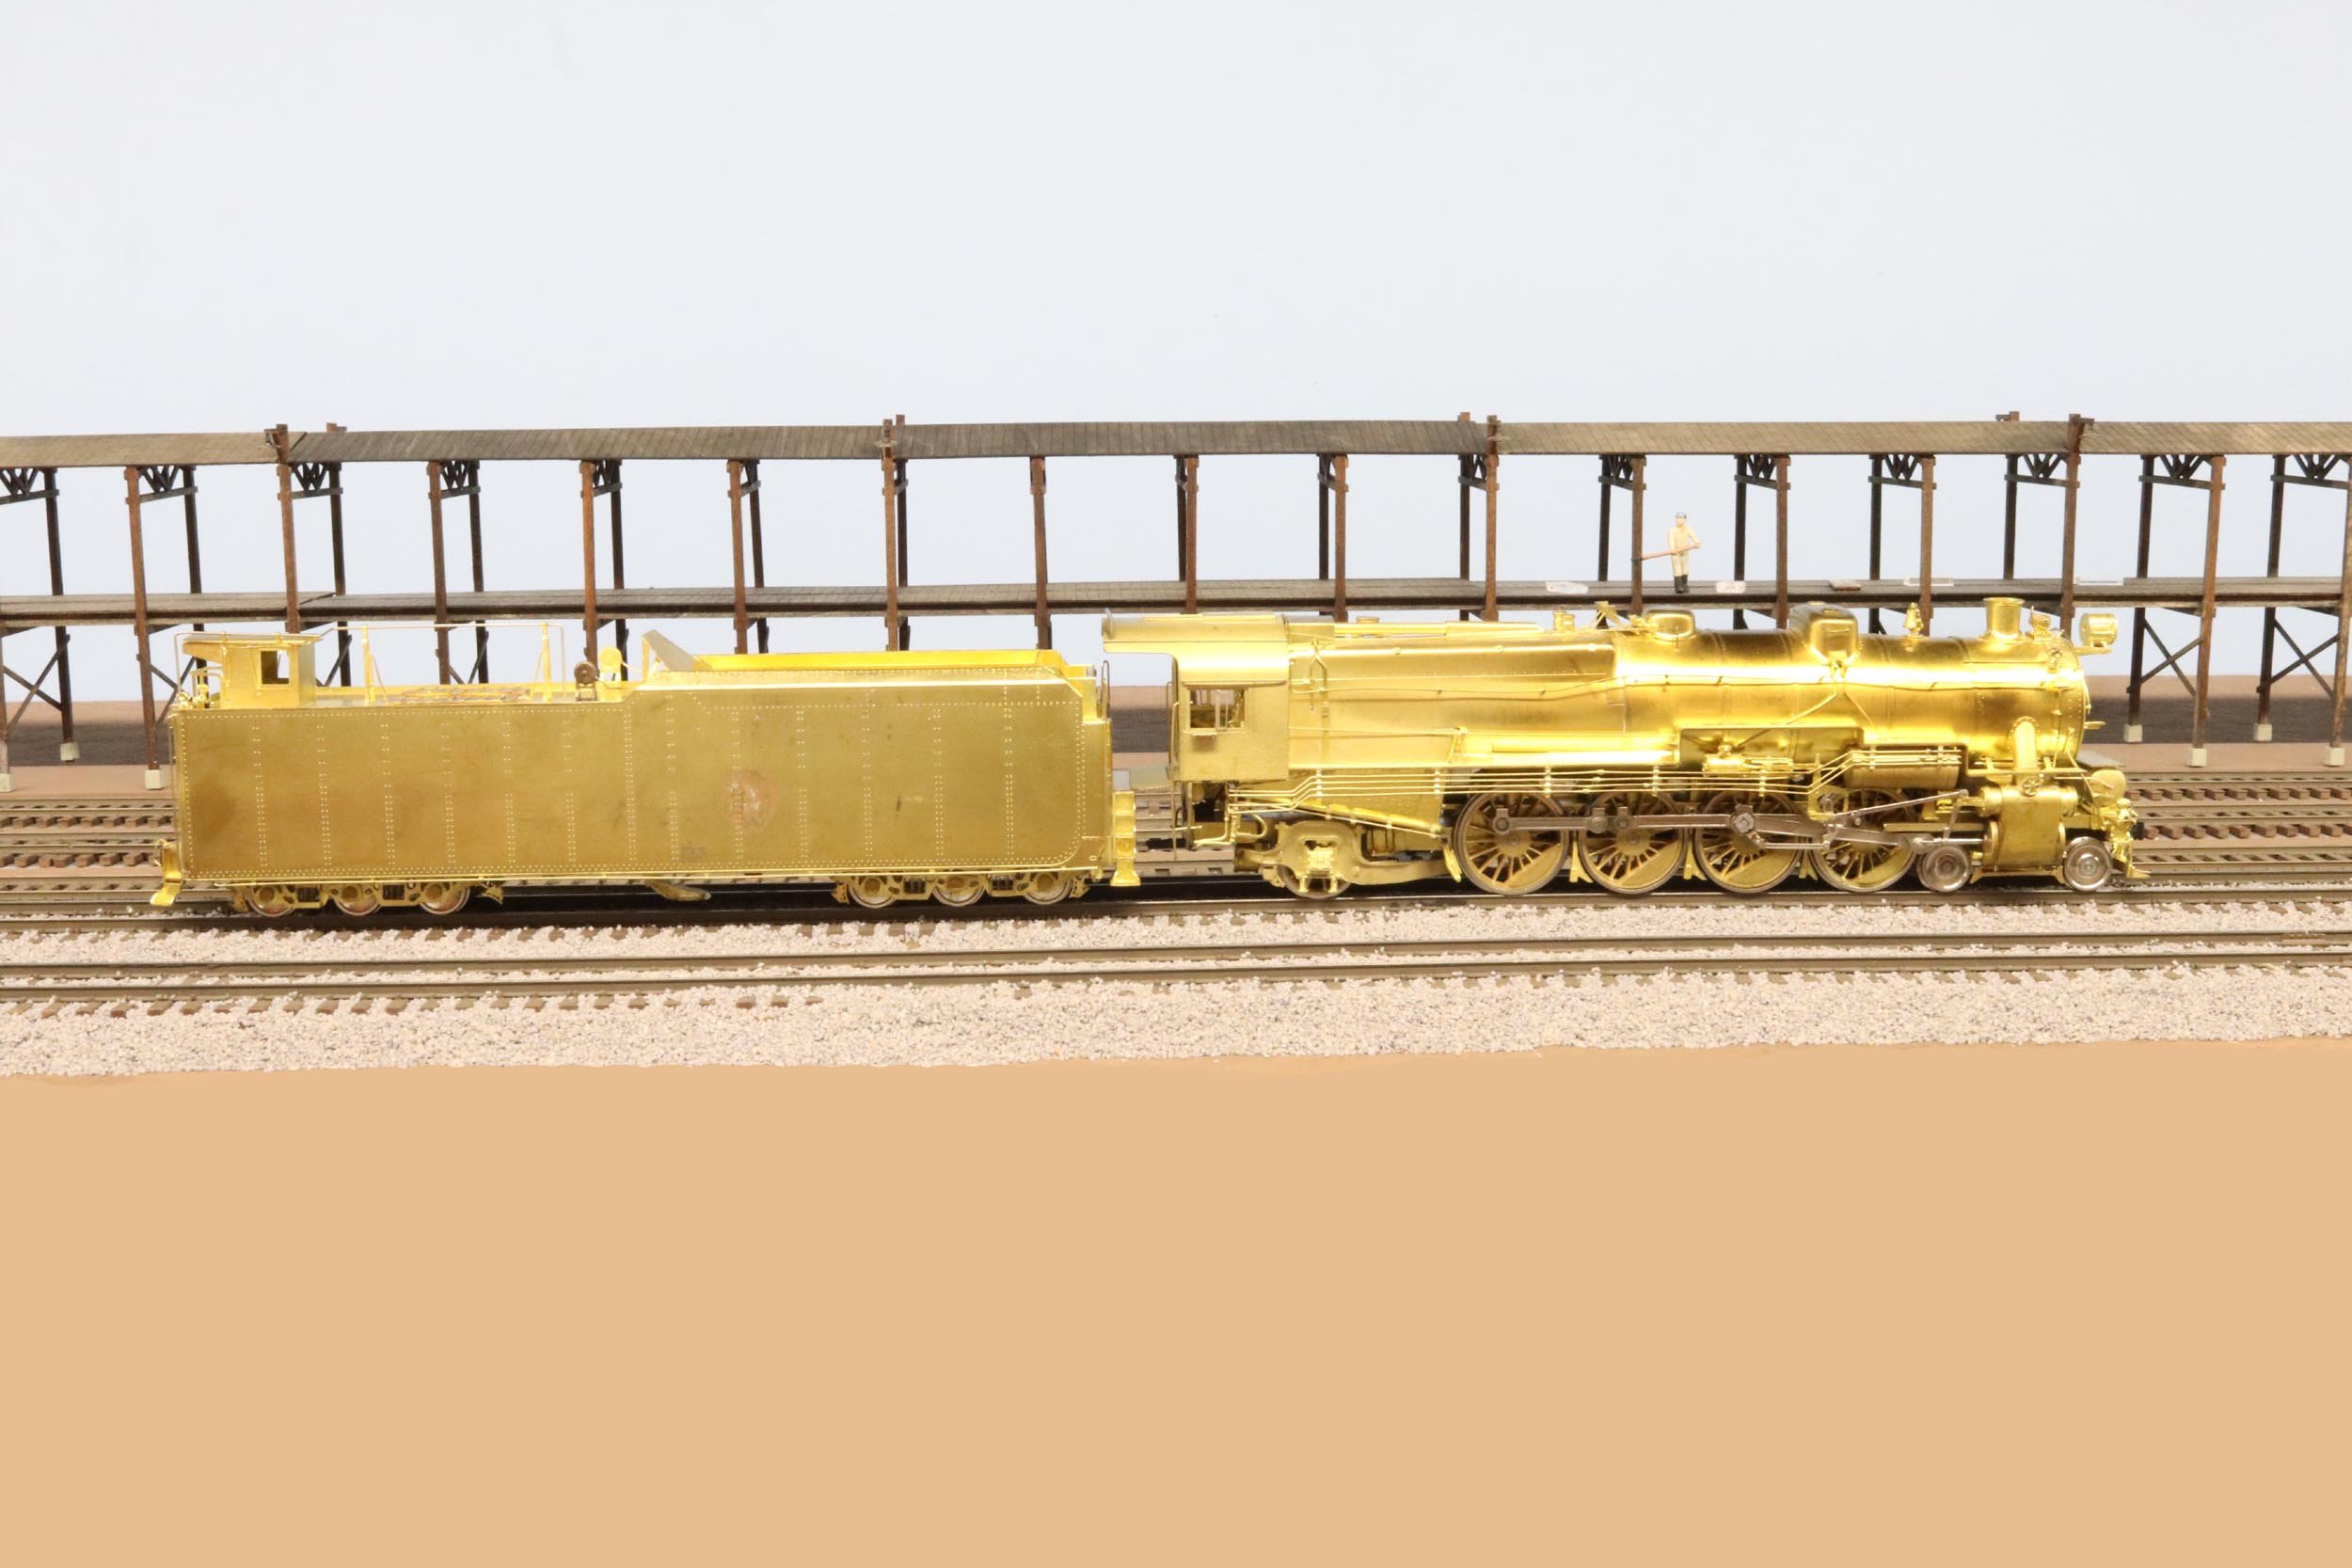
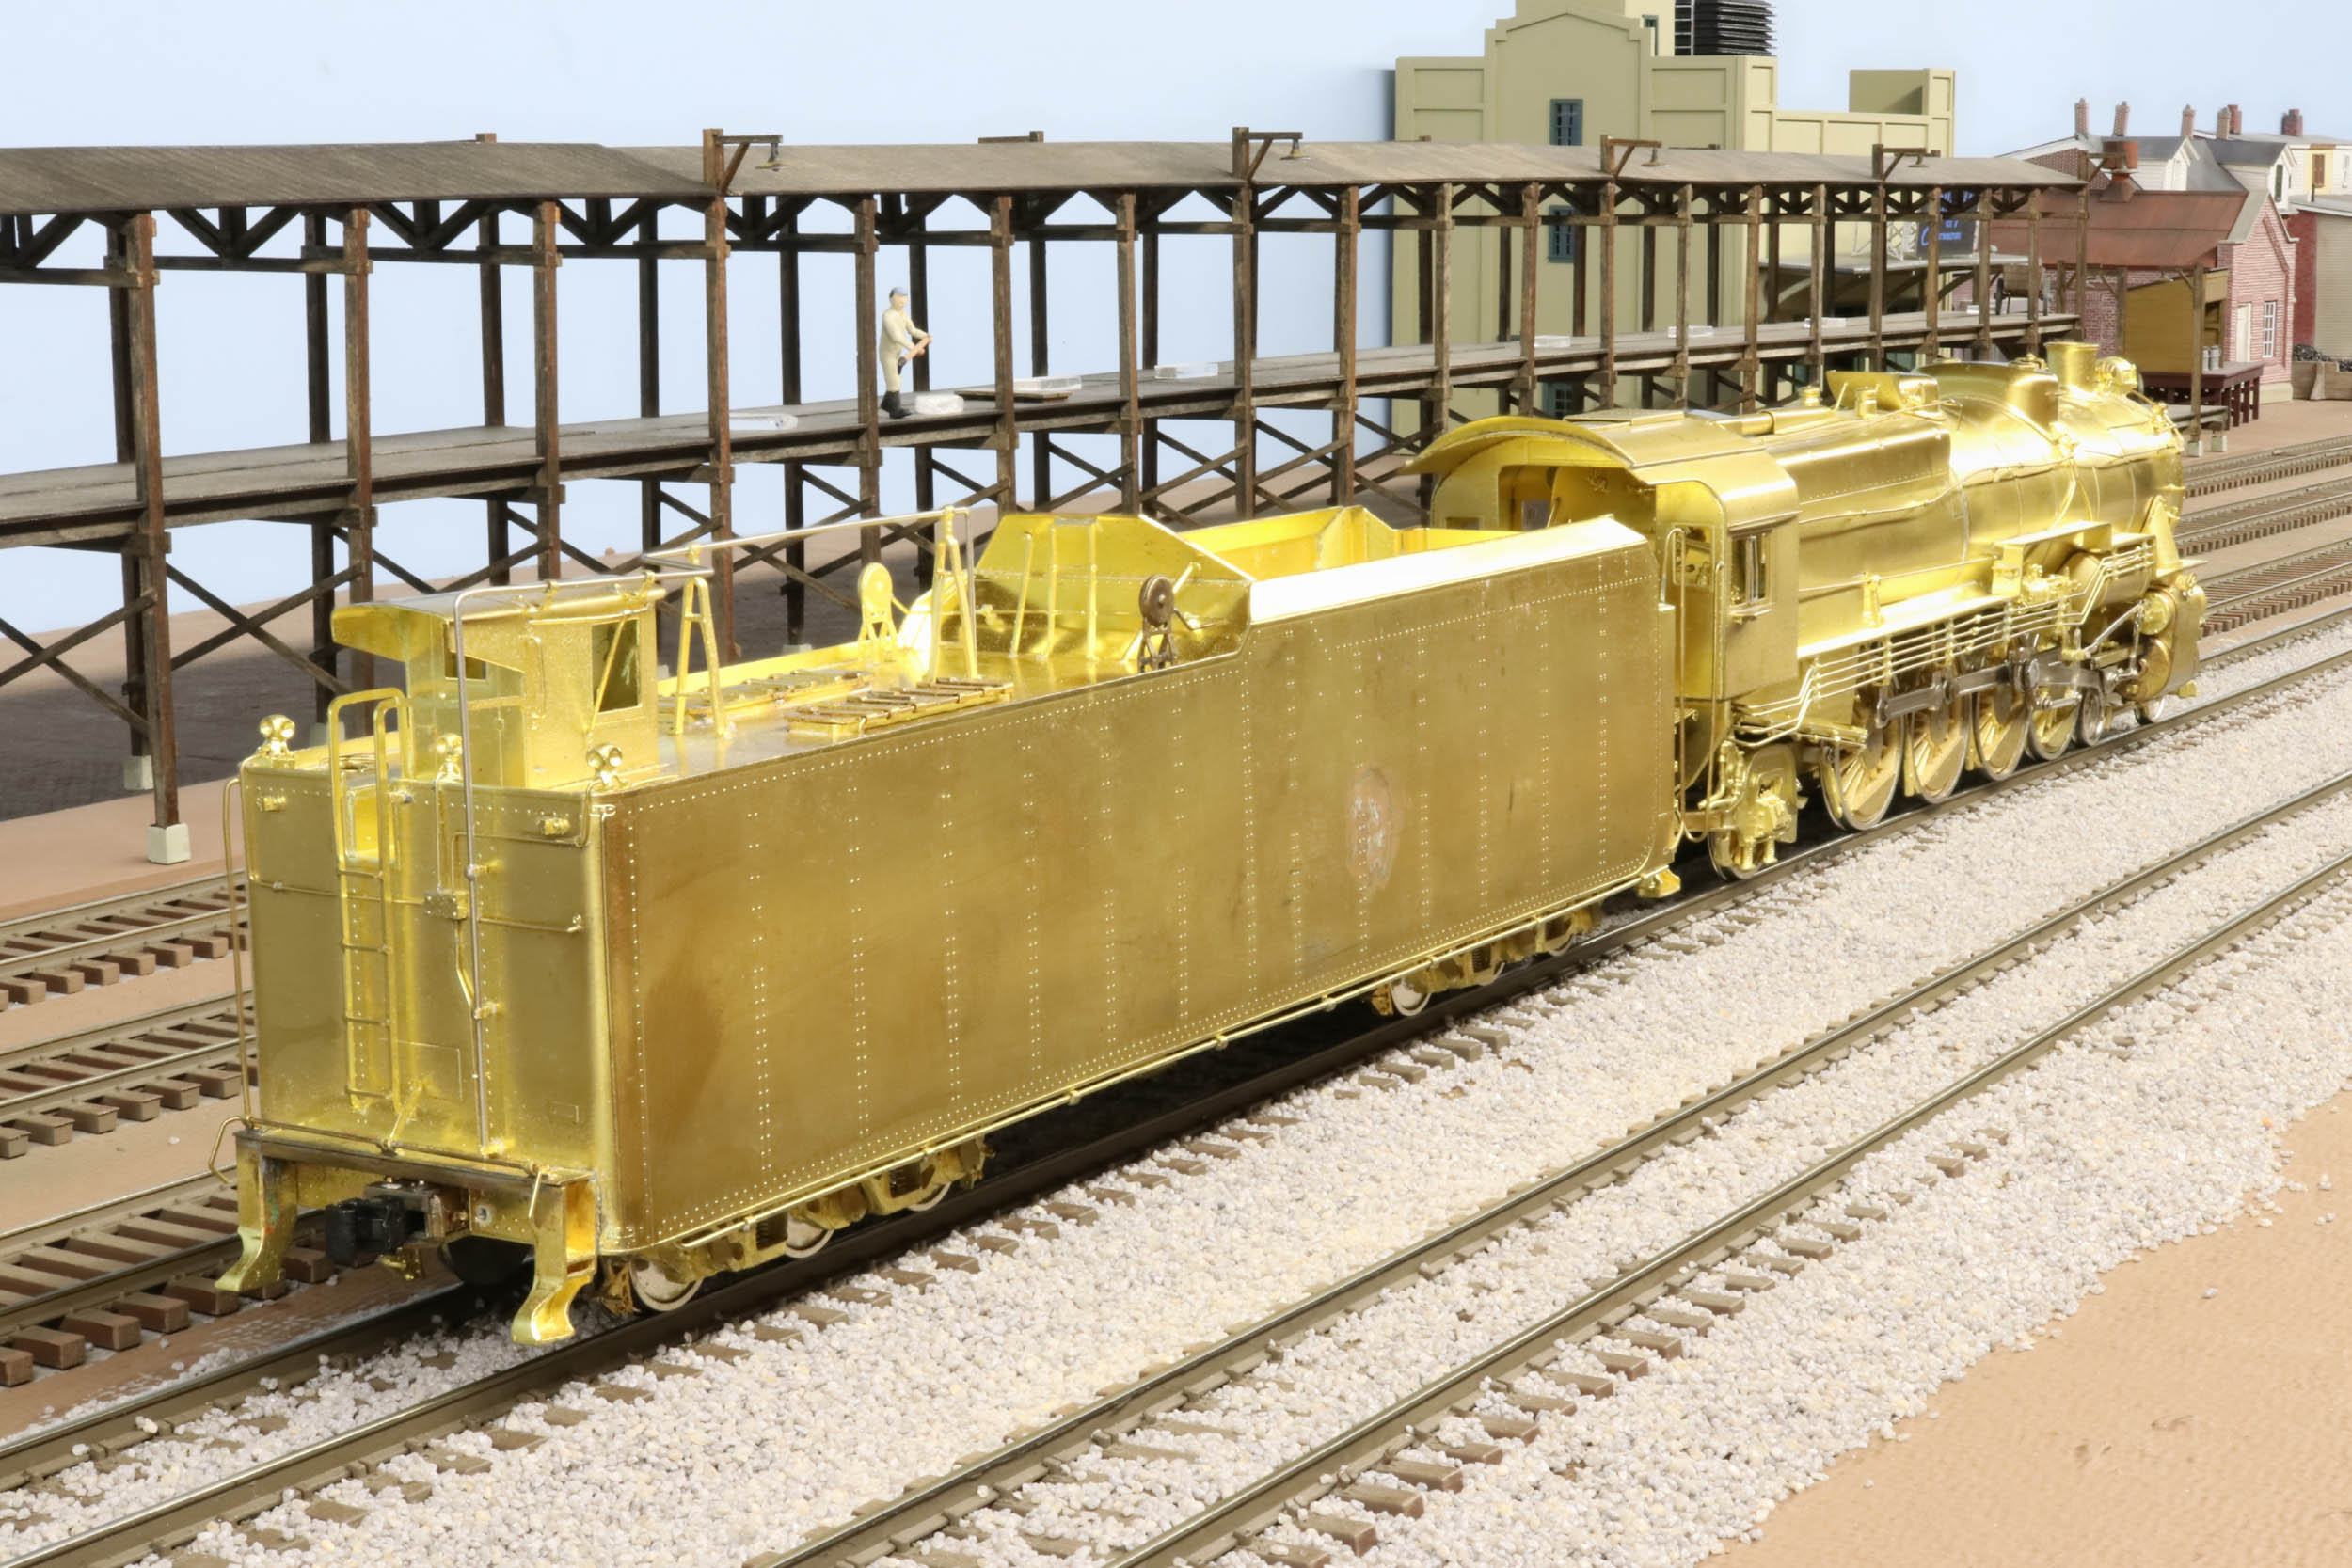
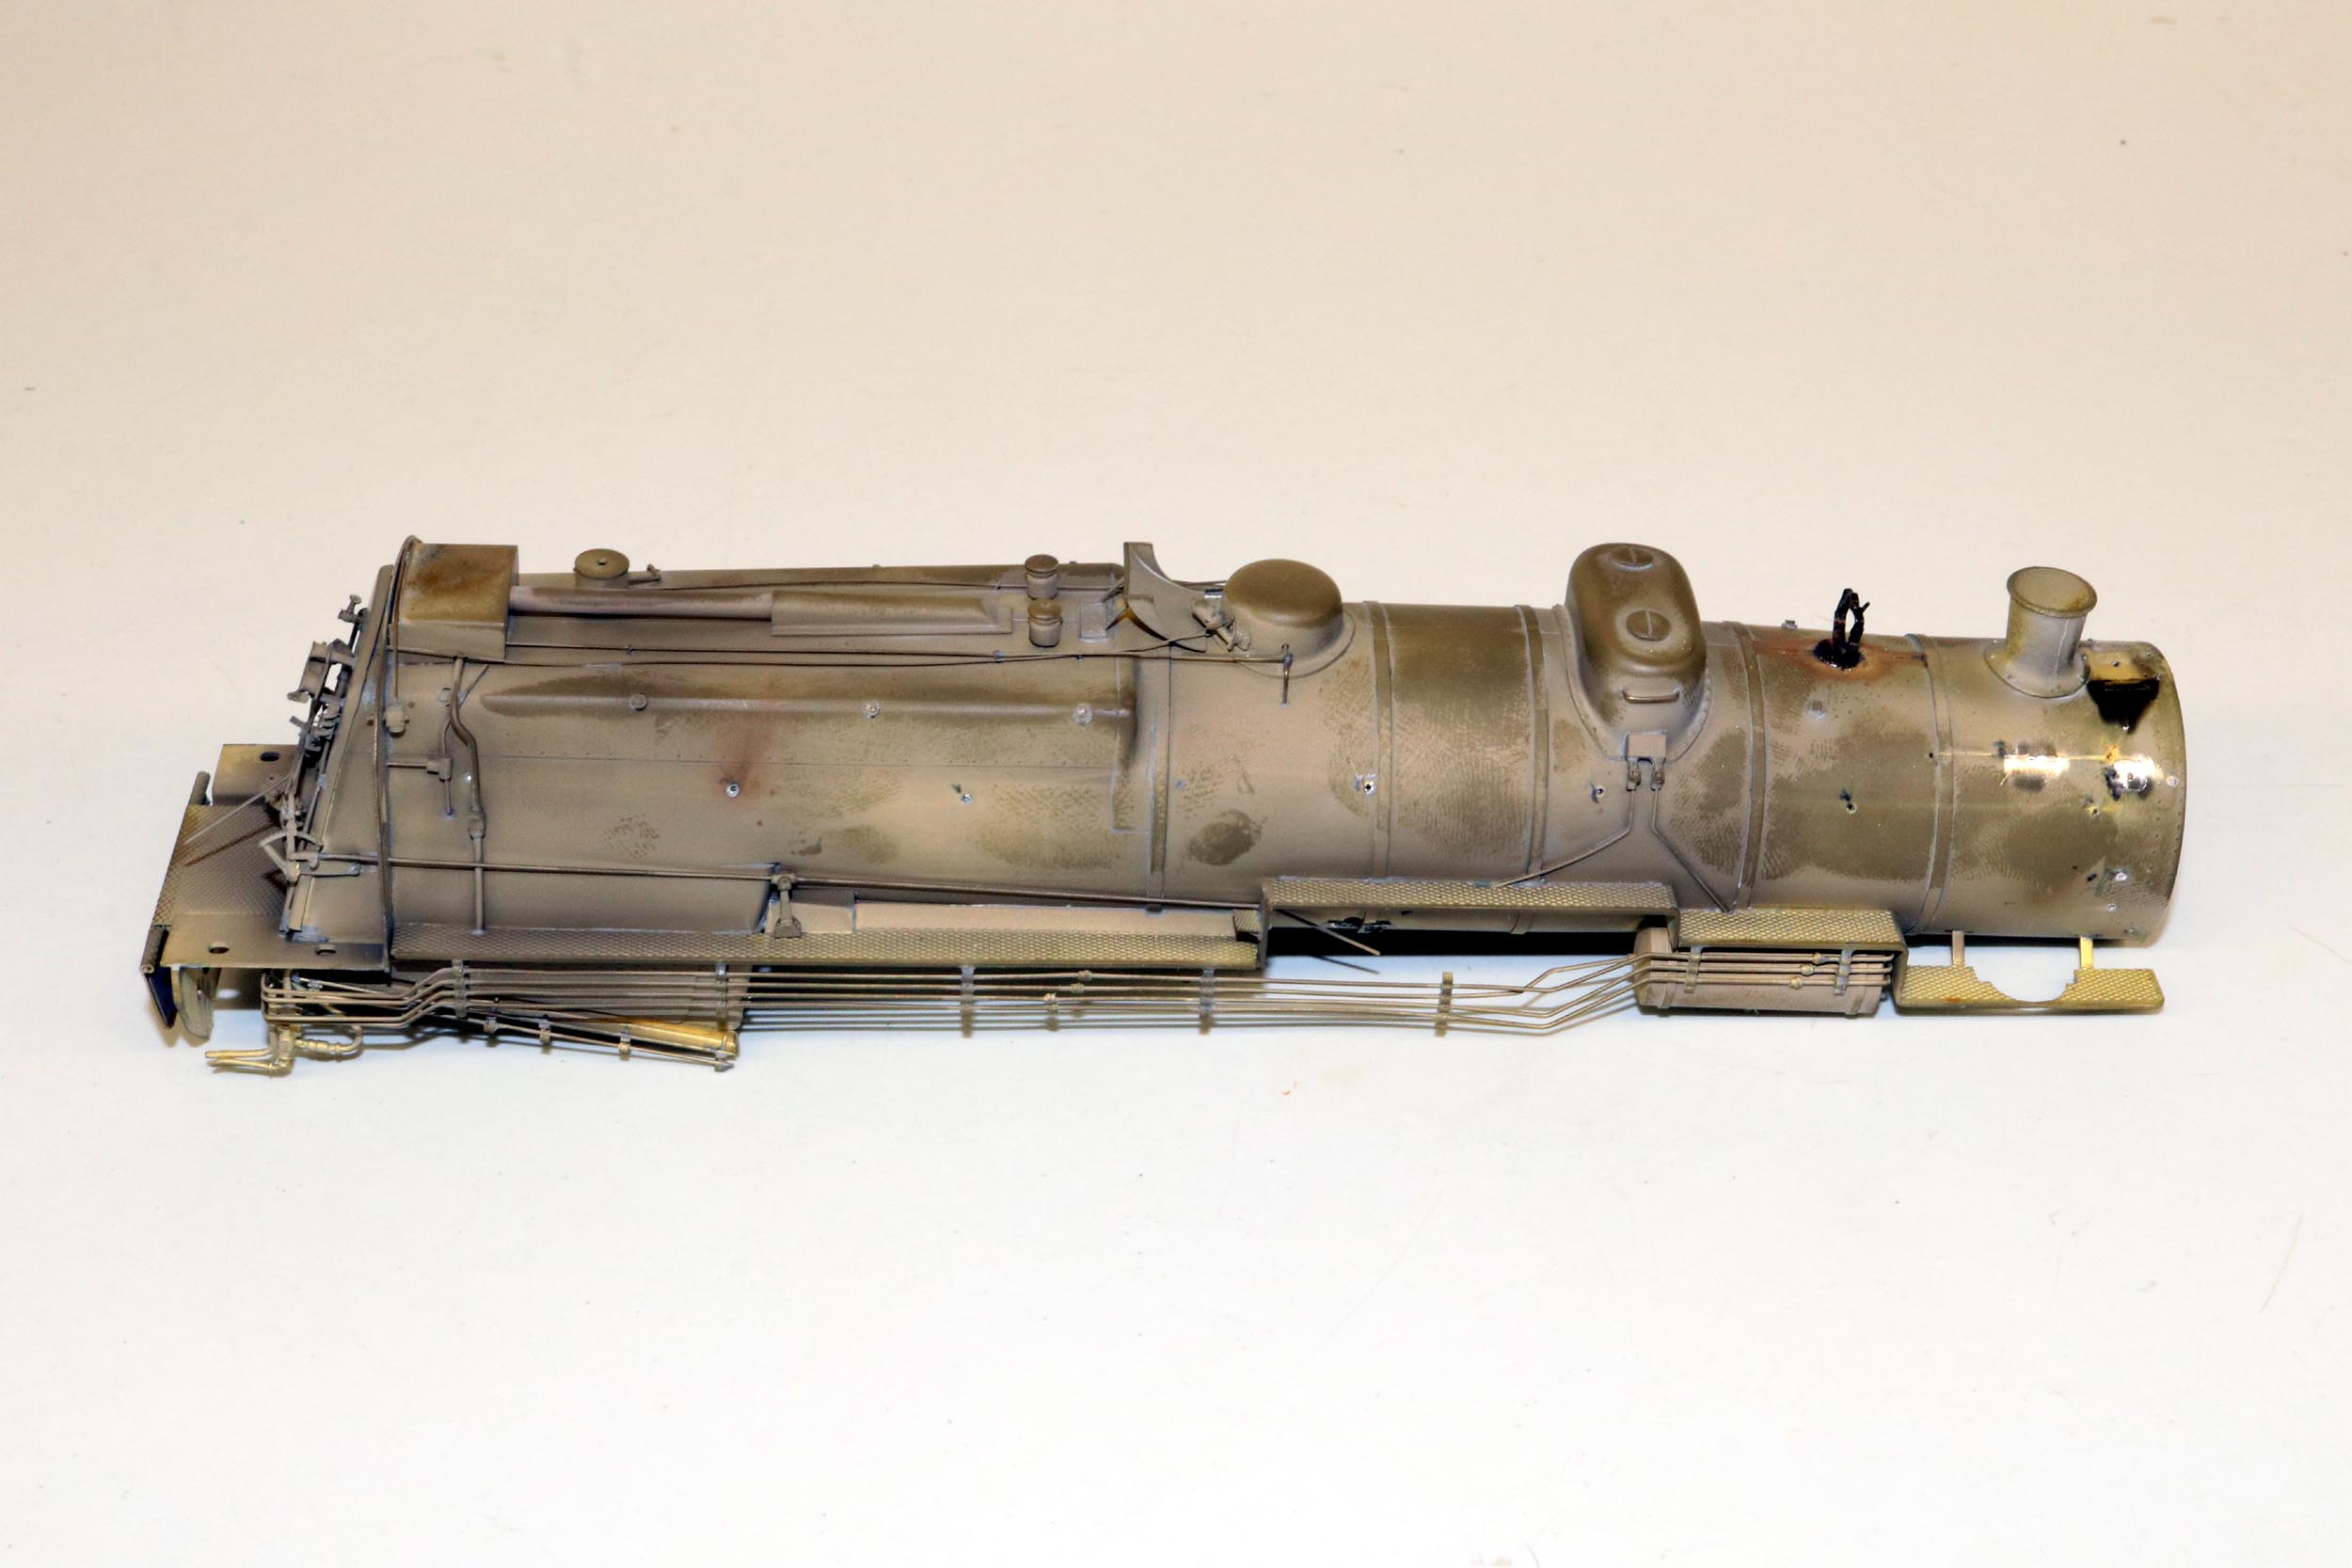
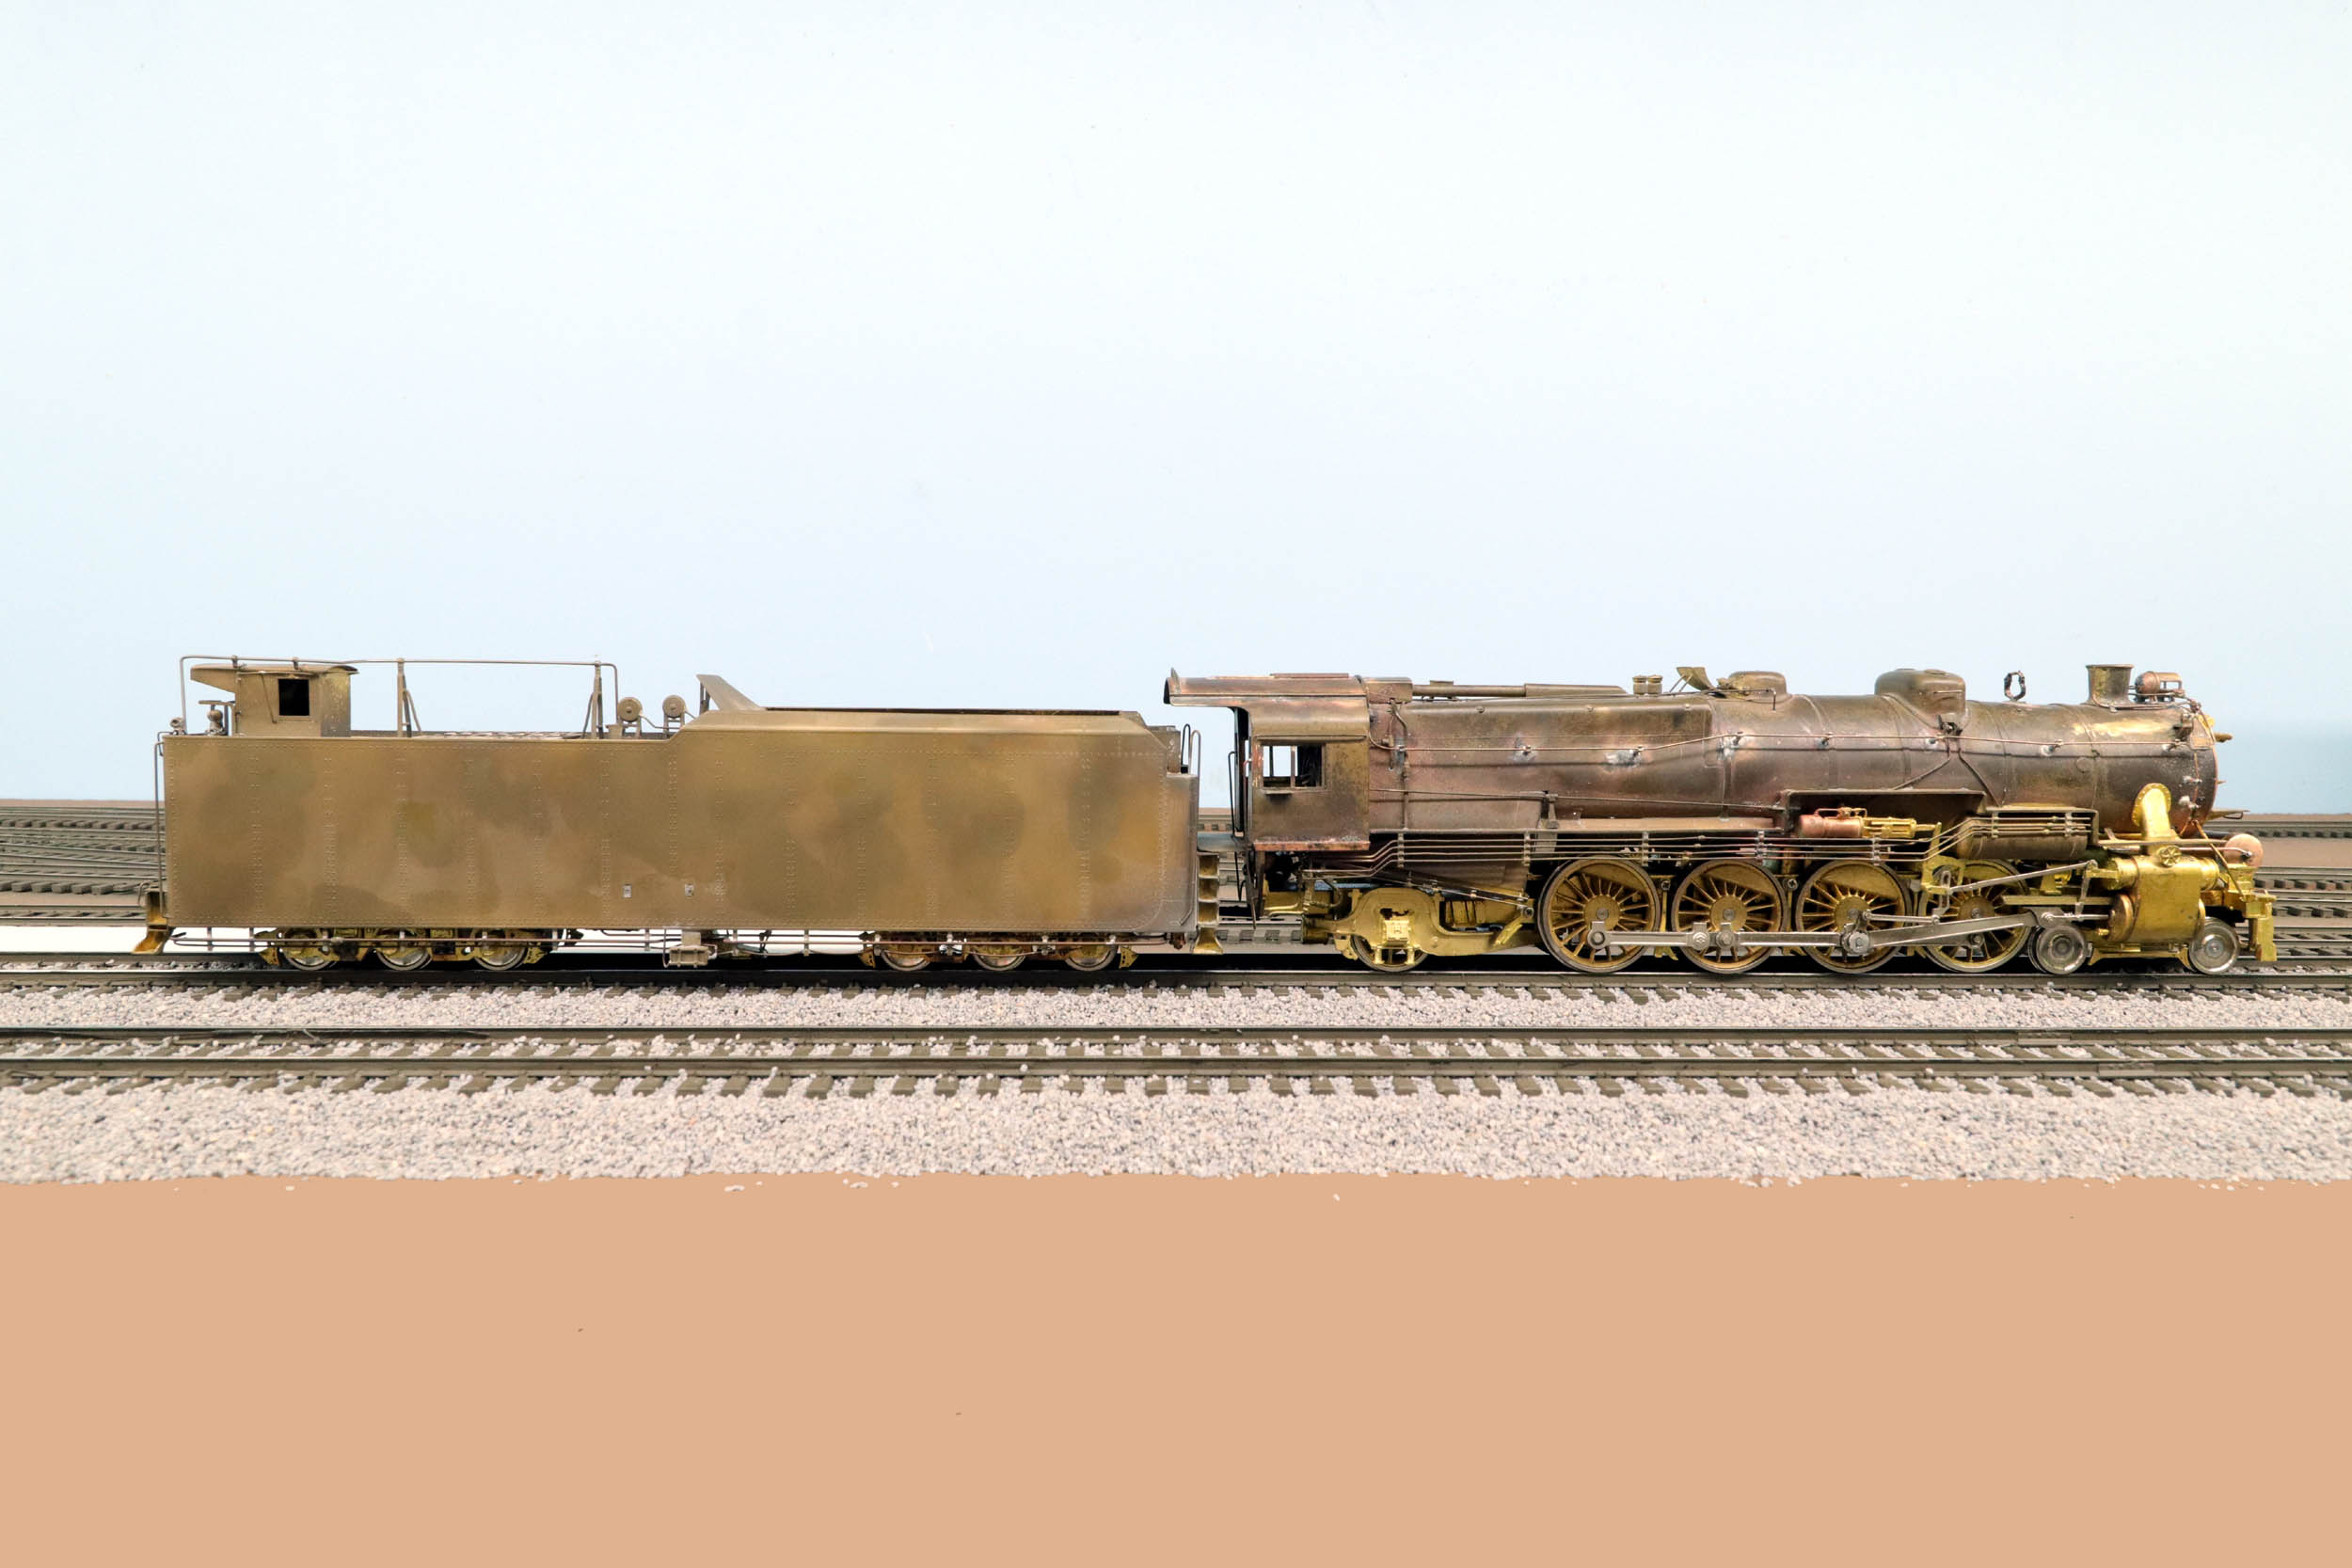
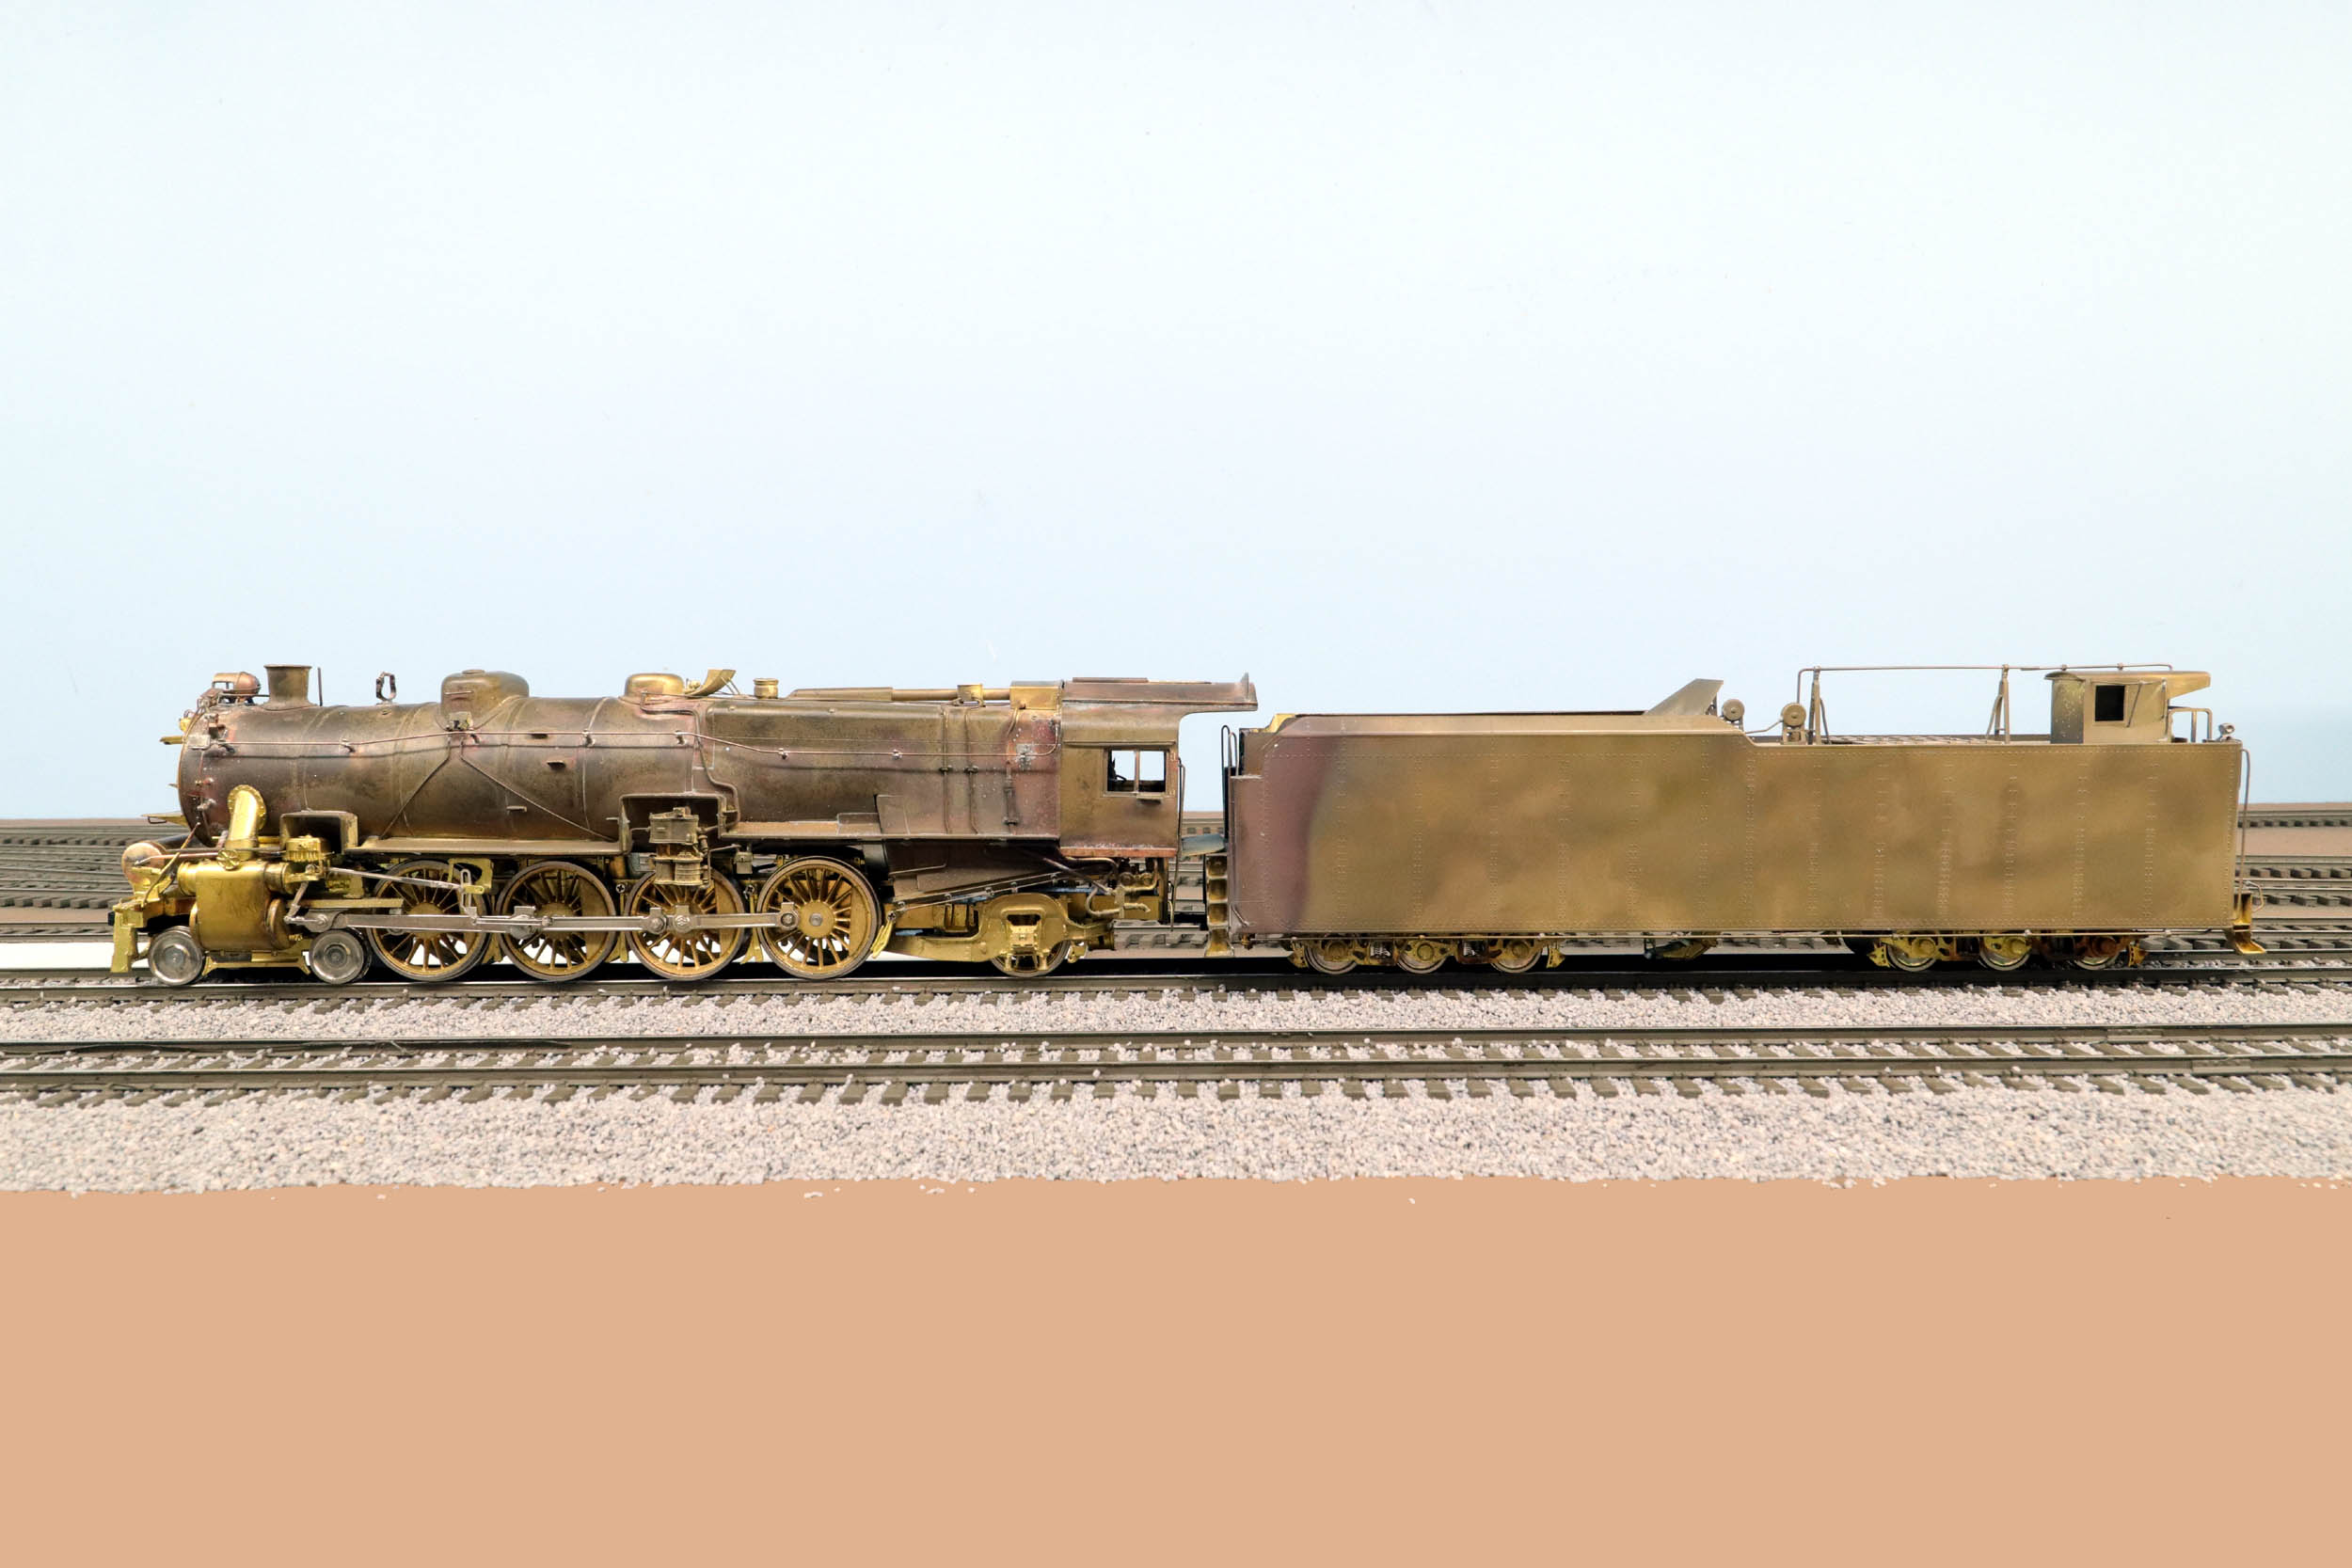
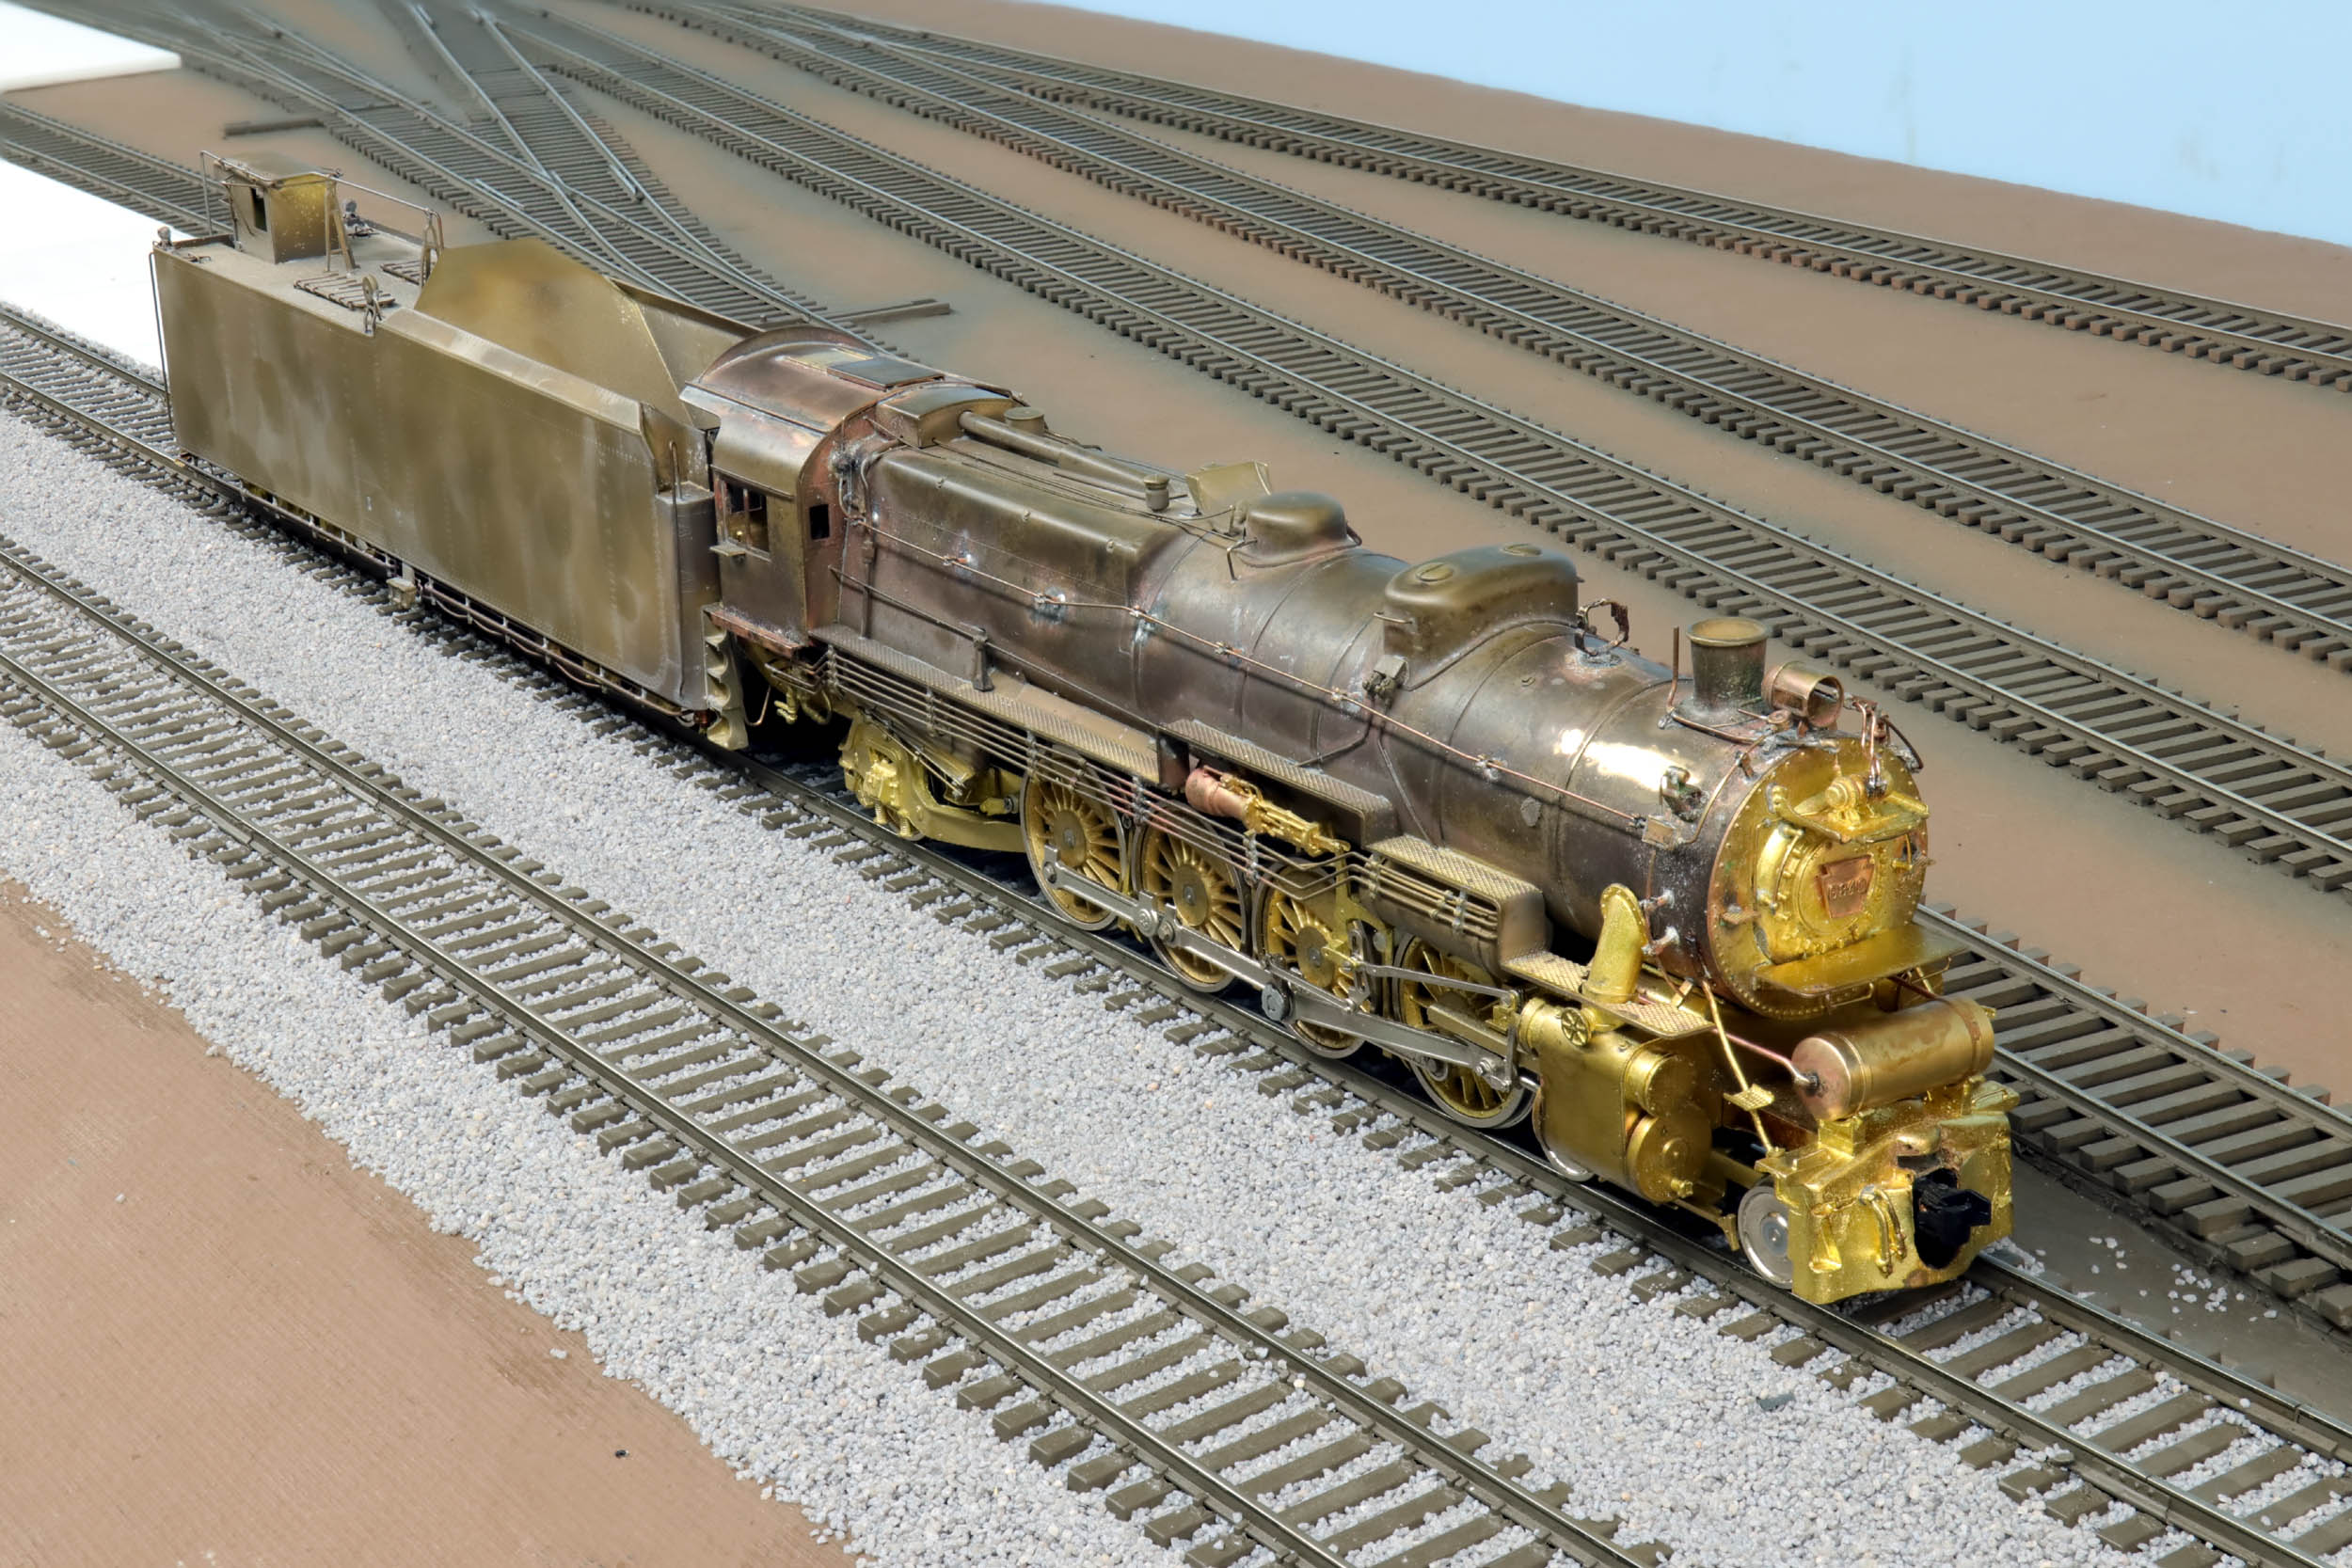
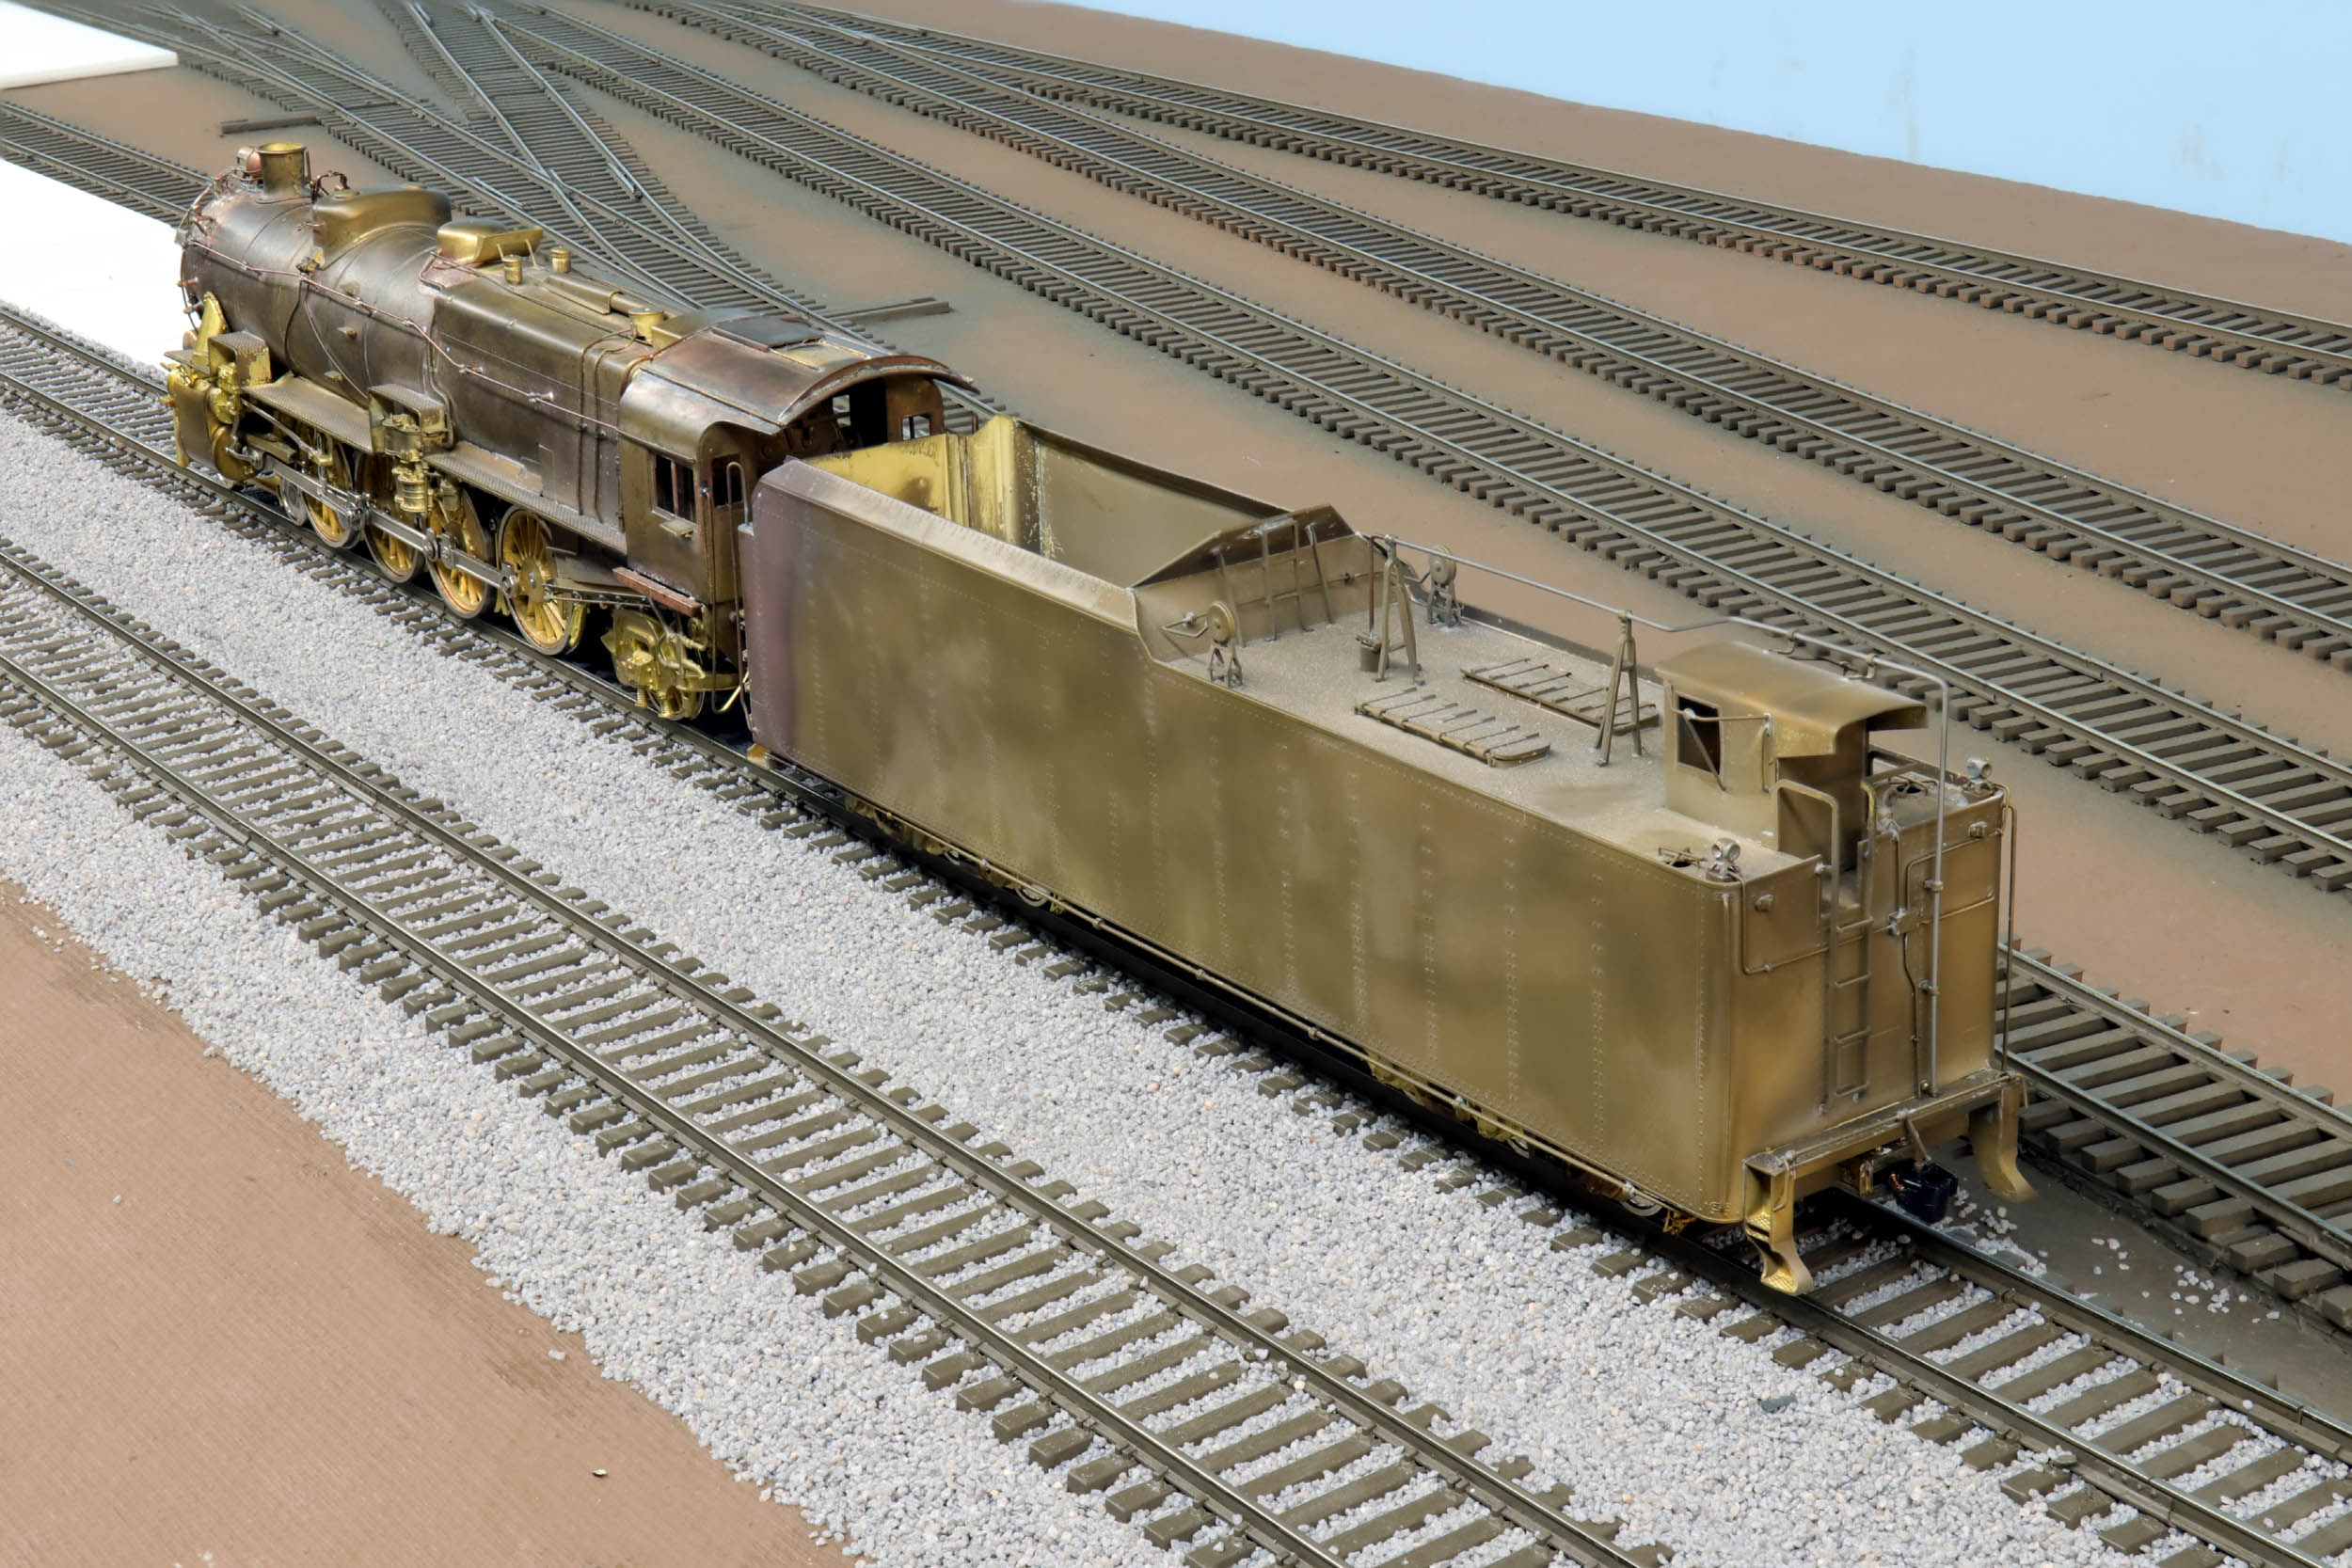
As Built By Omnicon
I
finally got some true untouched before photos when I started a project. This is
as built by Omnicon. I will try and document the build and completion process
better this time.
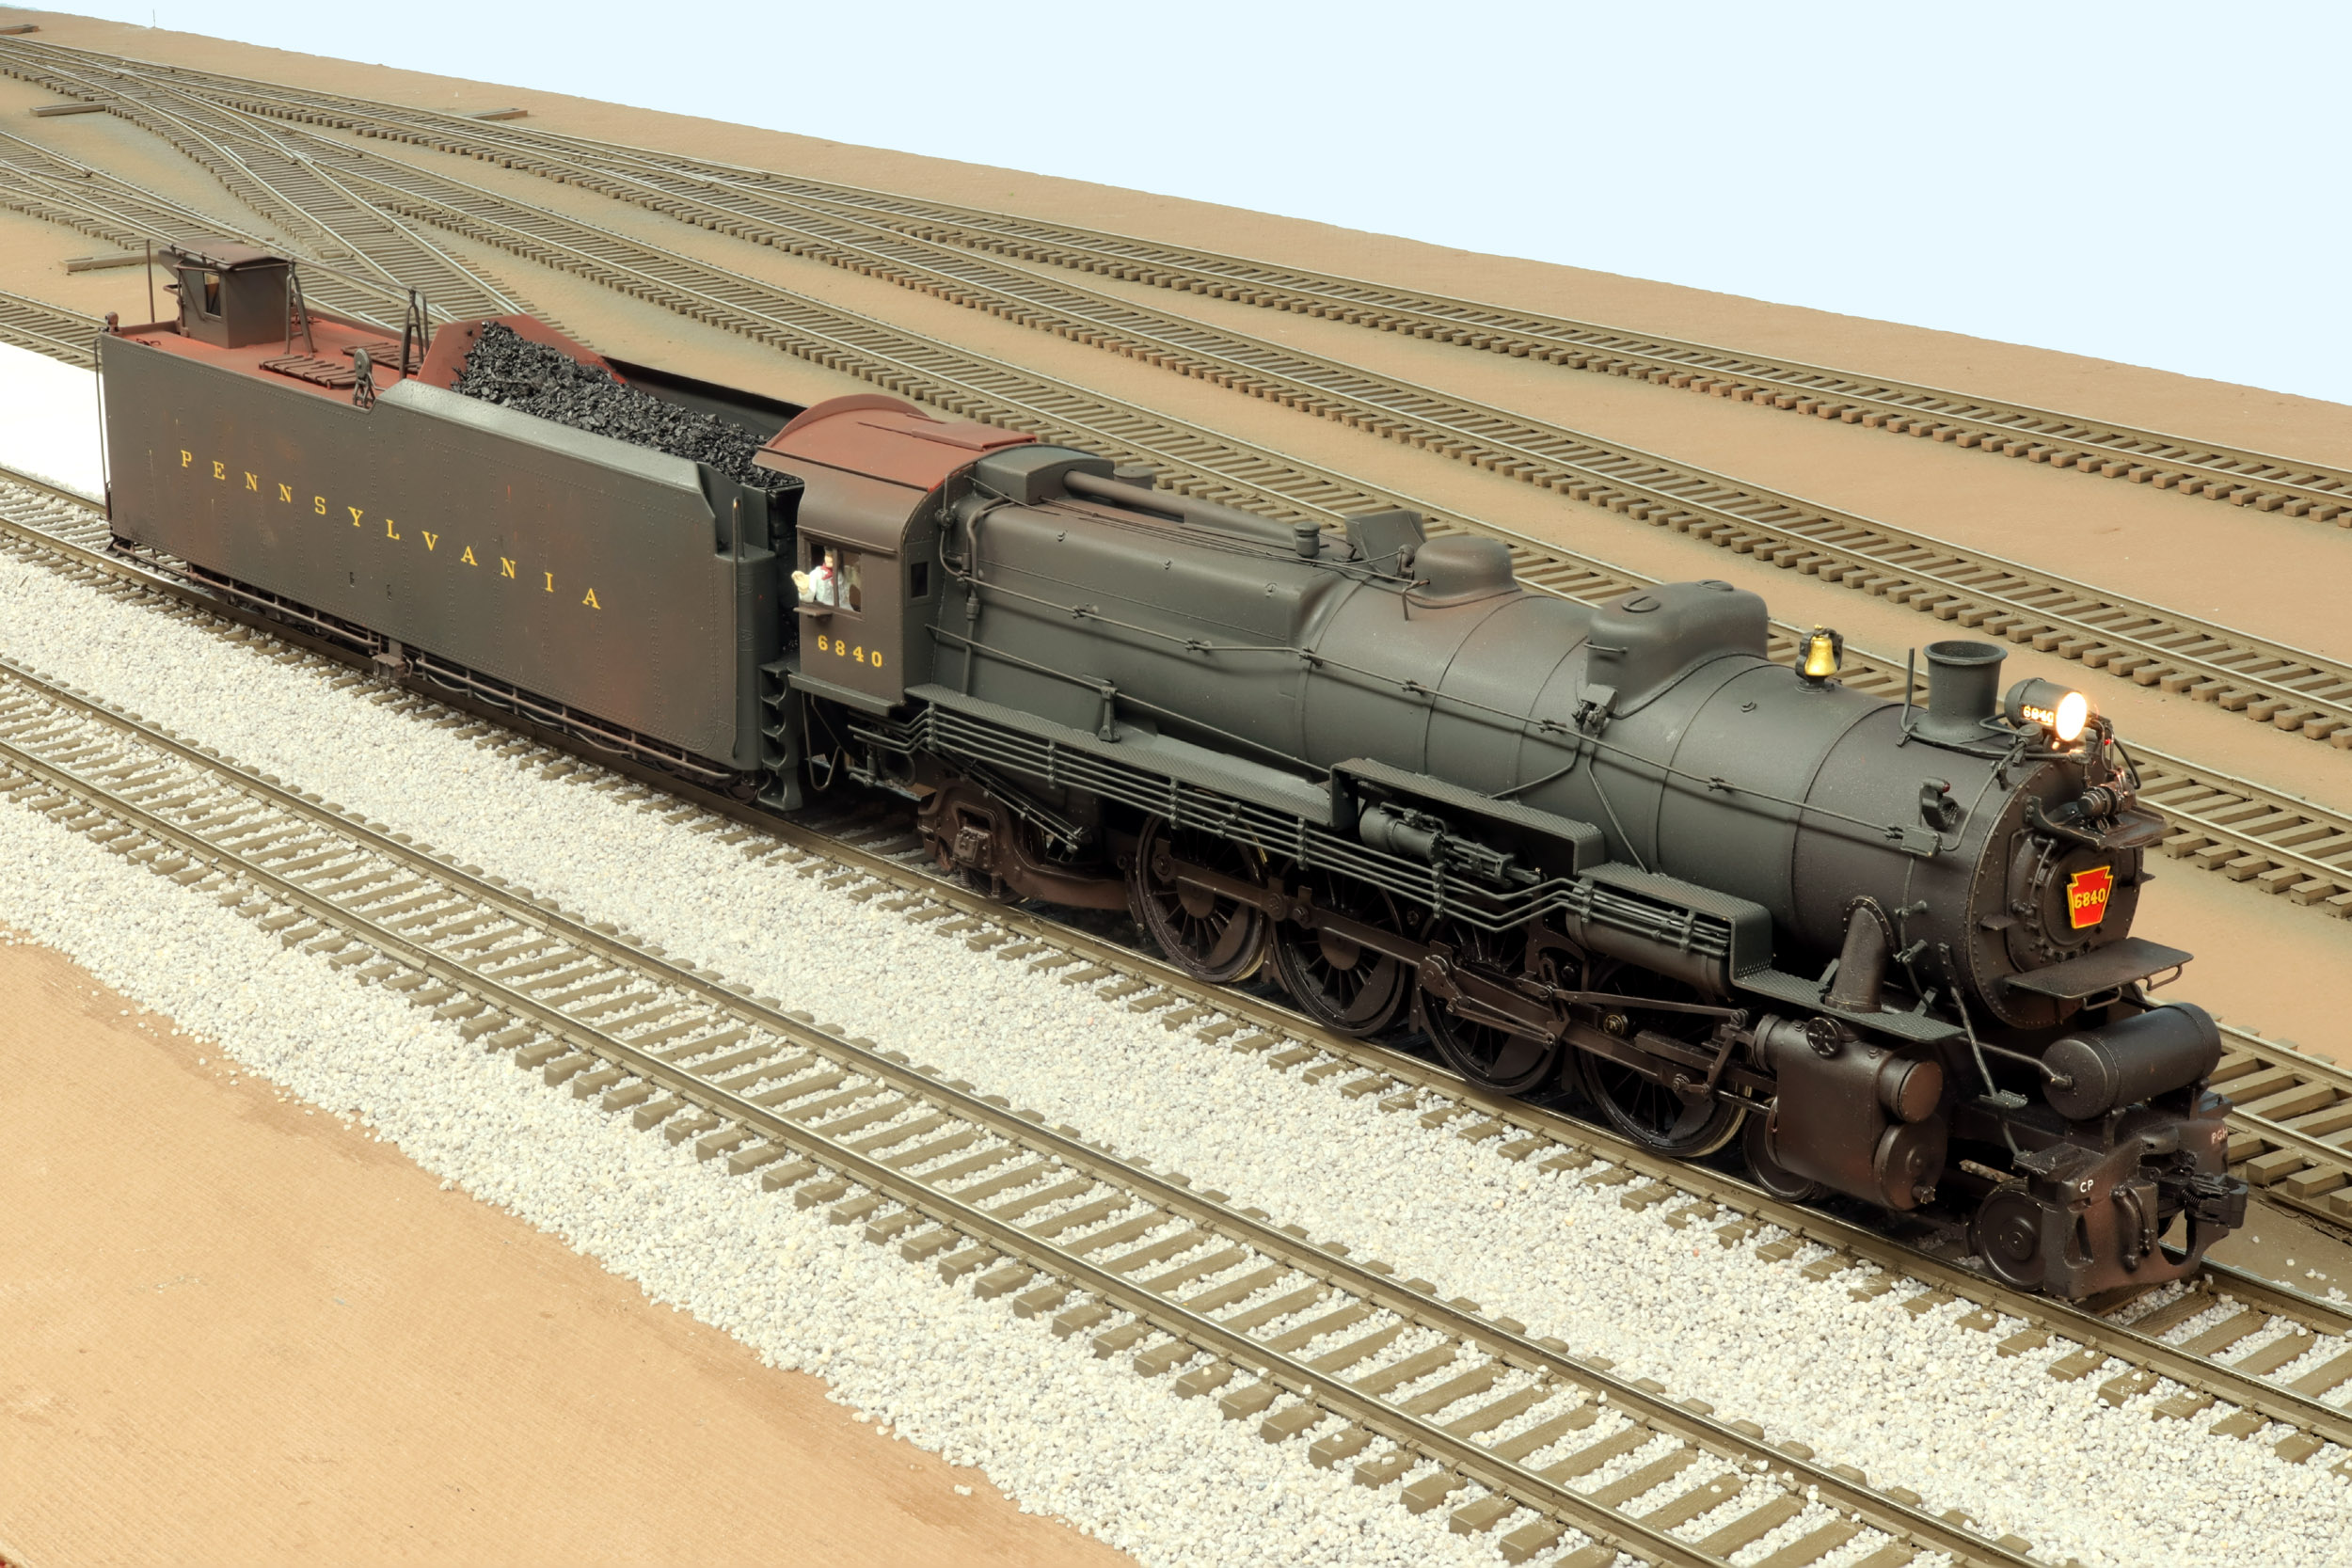
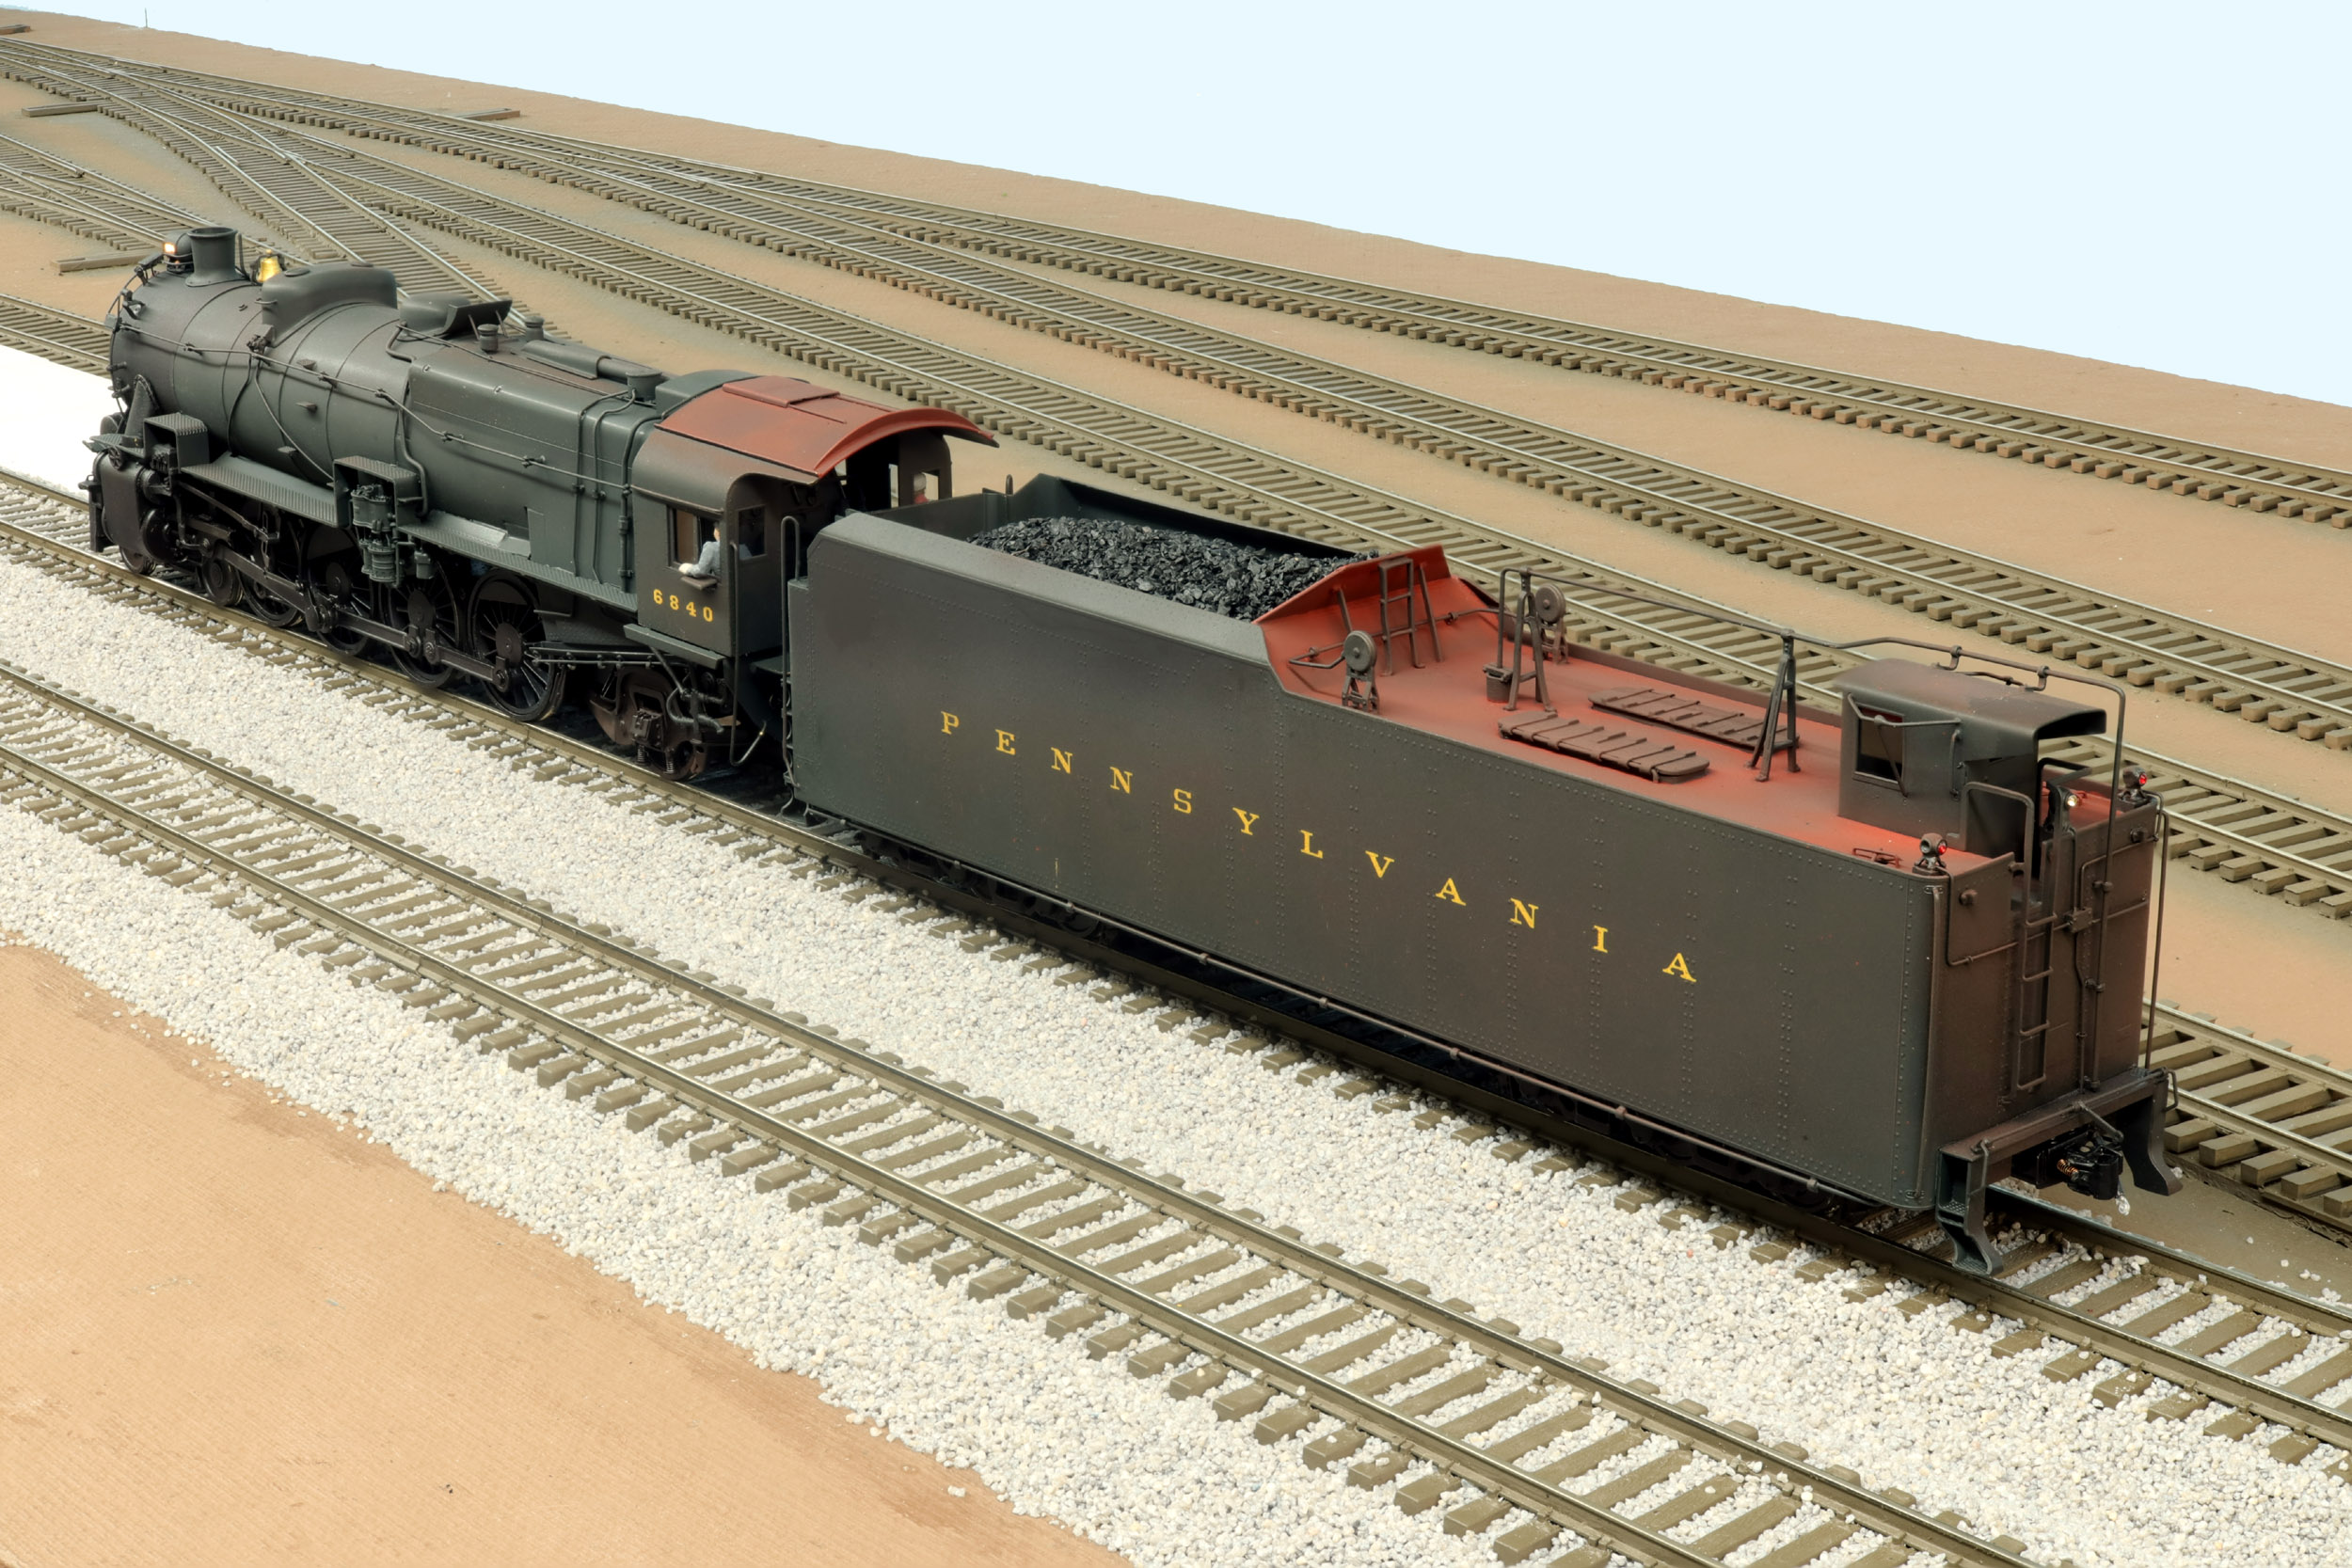
I
am FINALLY happy with taking photos of bare brass models in my basement under
the awful fluorescent lights. It has been YEARS and truly many 100s of photos
taken I was never happy with. The diagonal shots are stack photos.
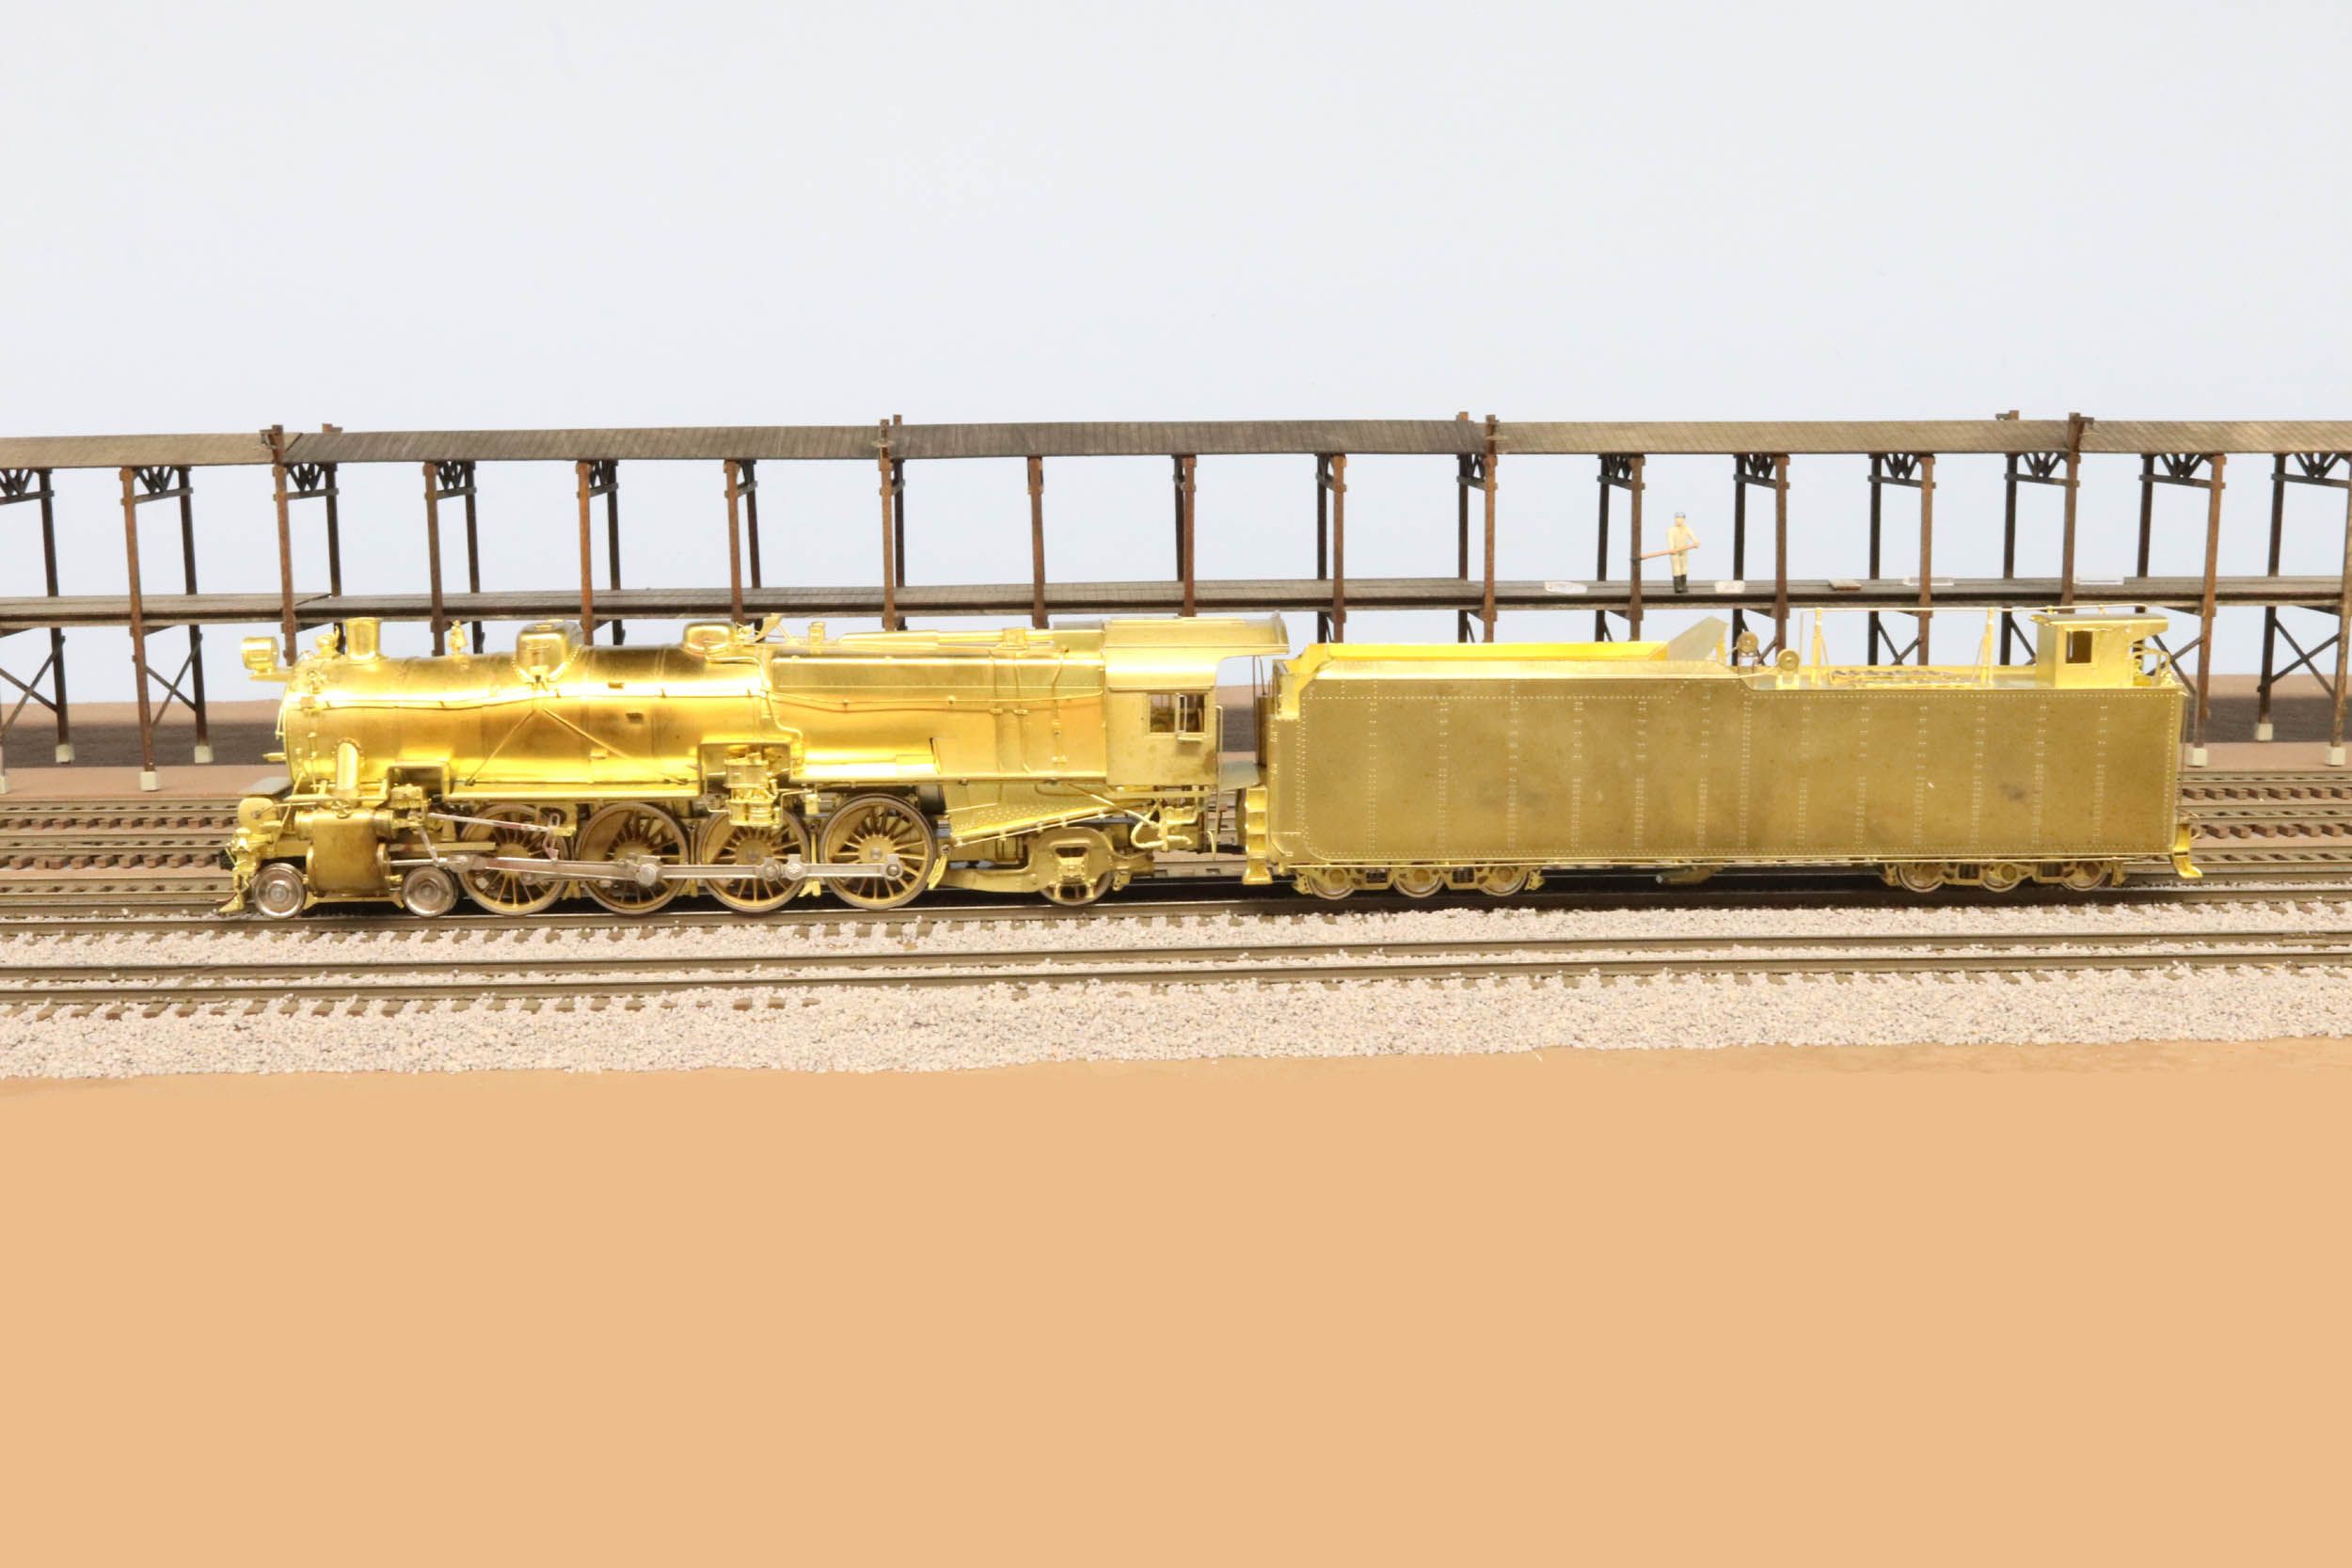
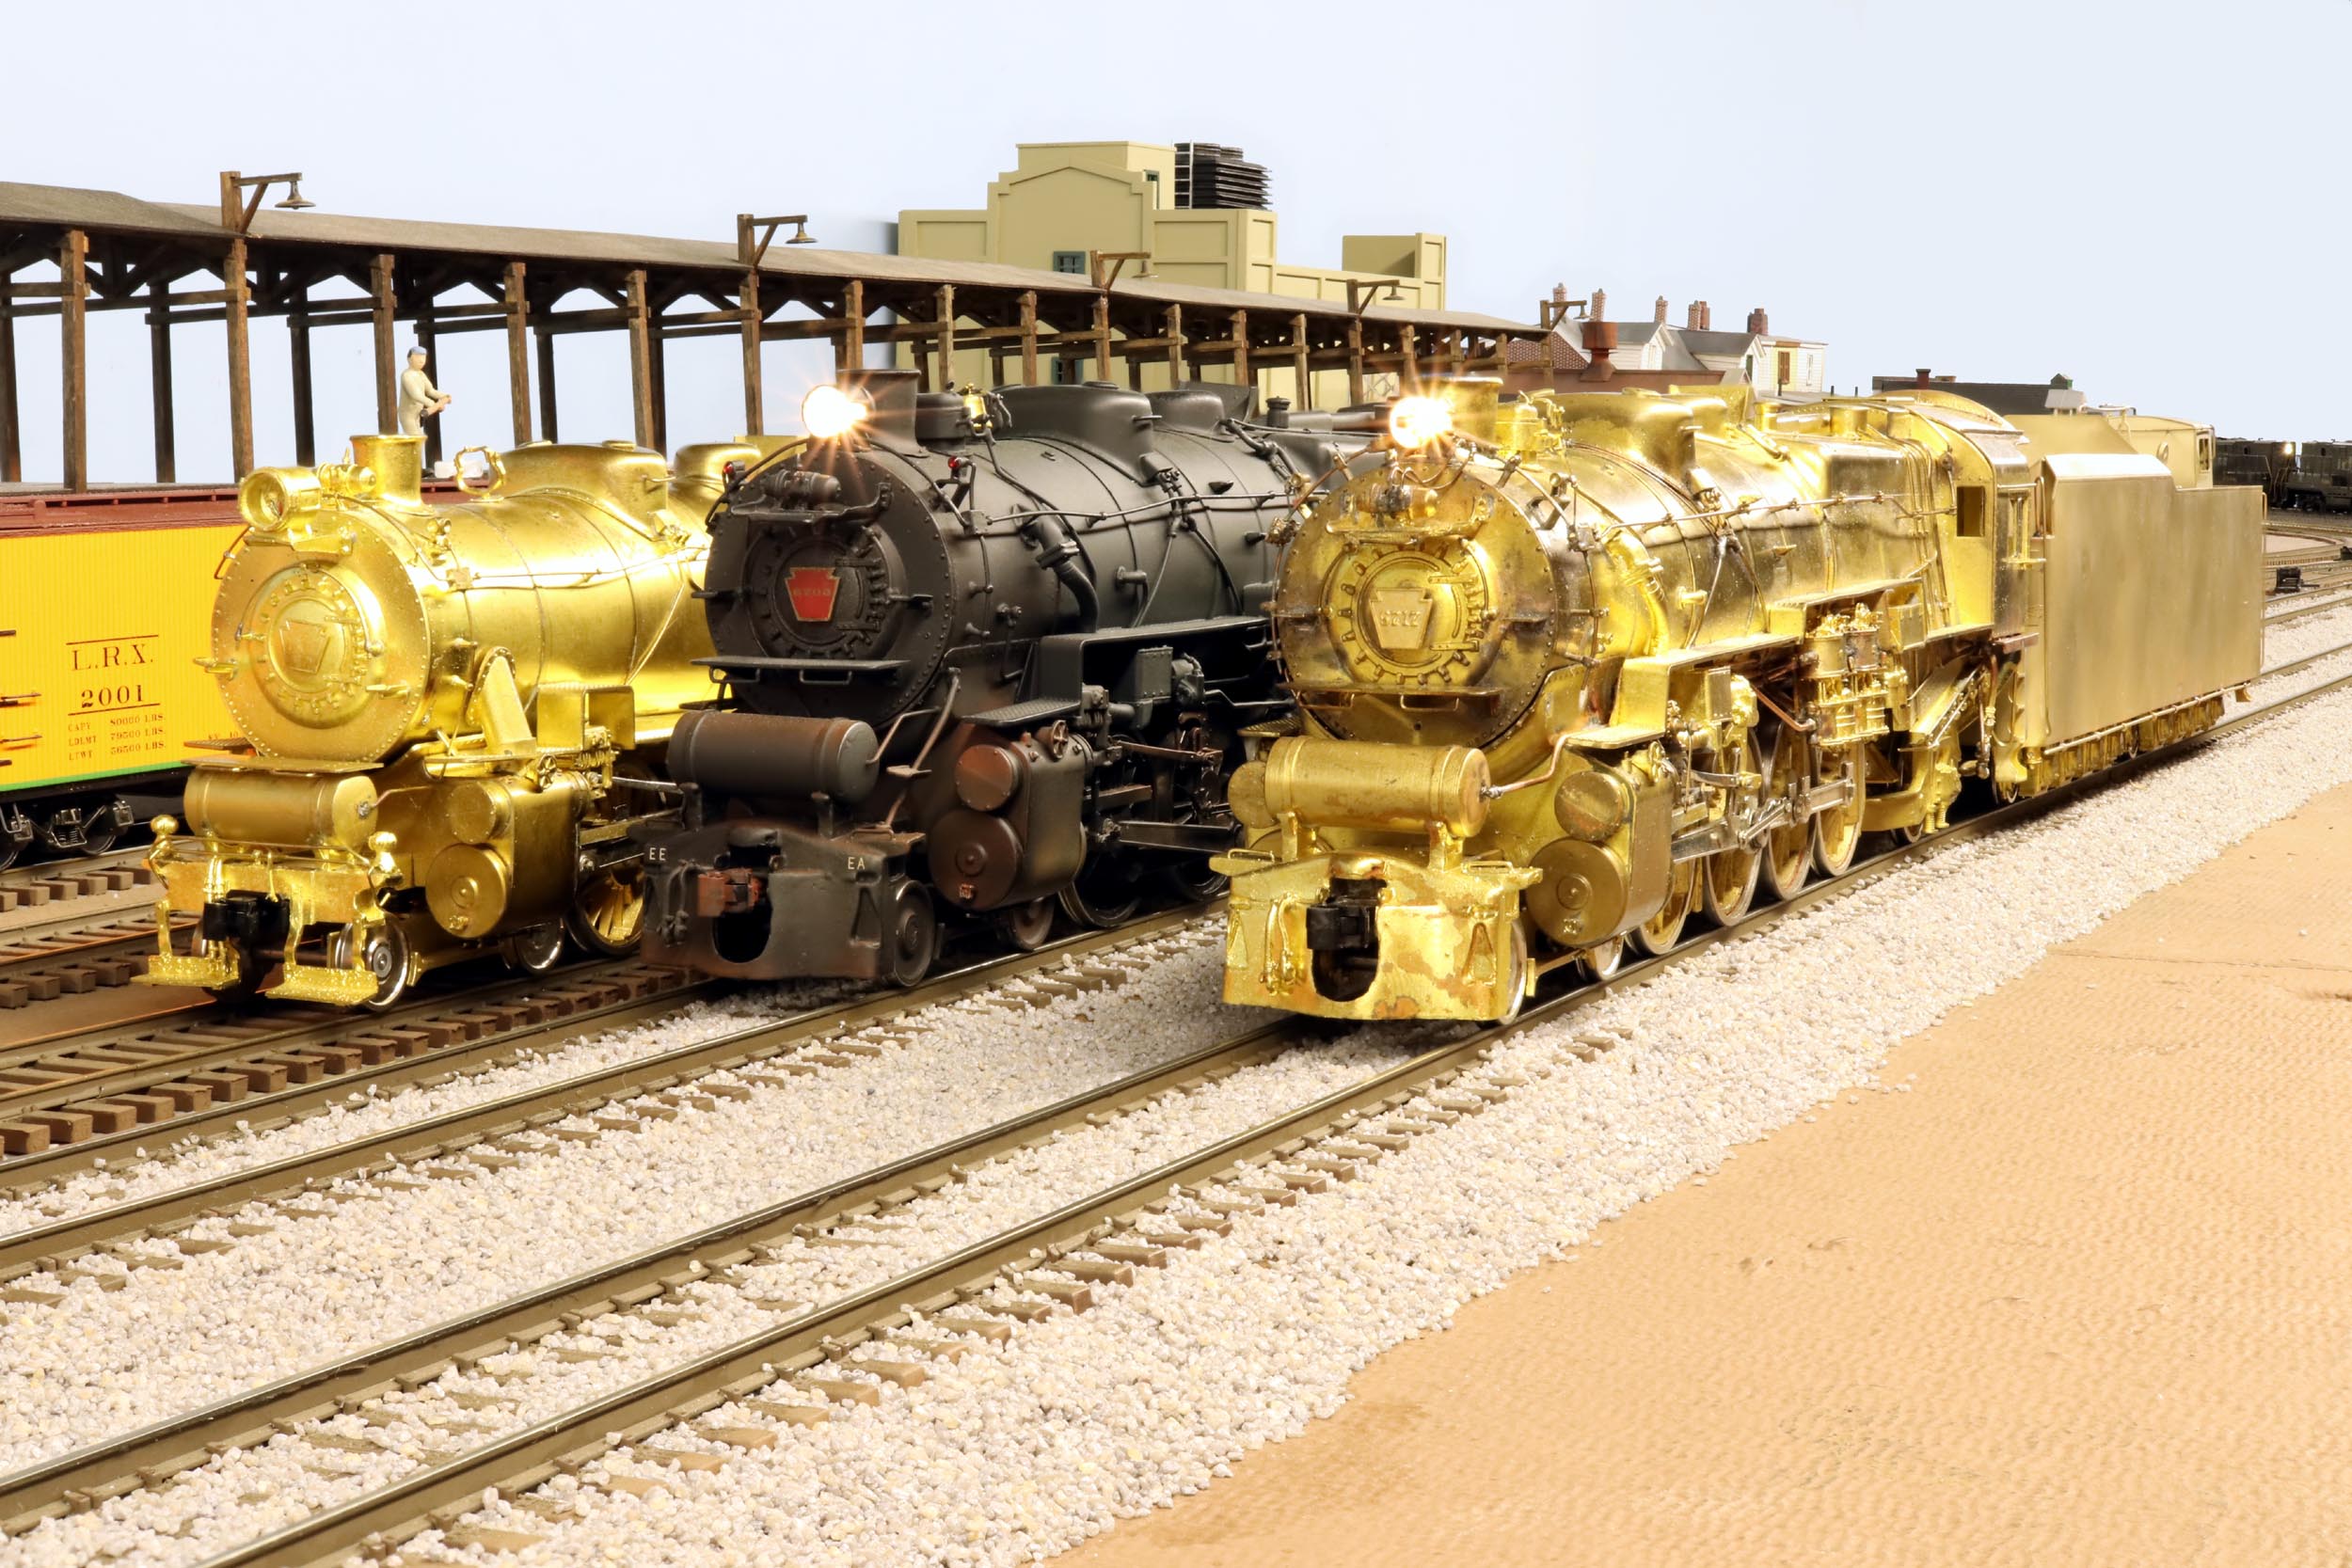
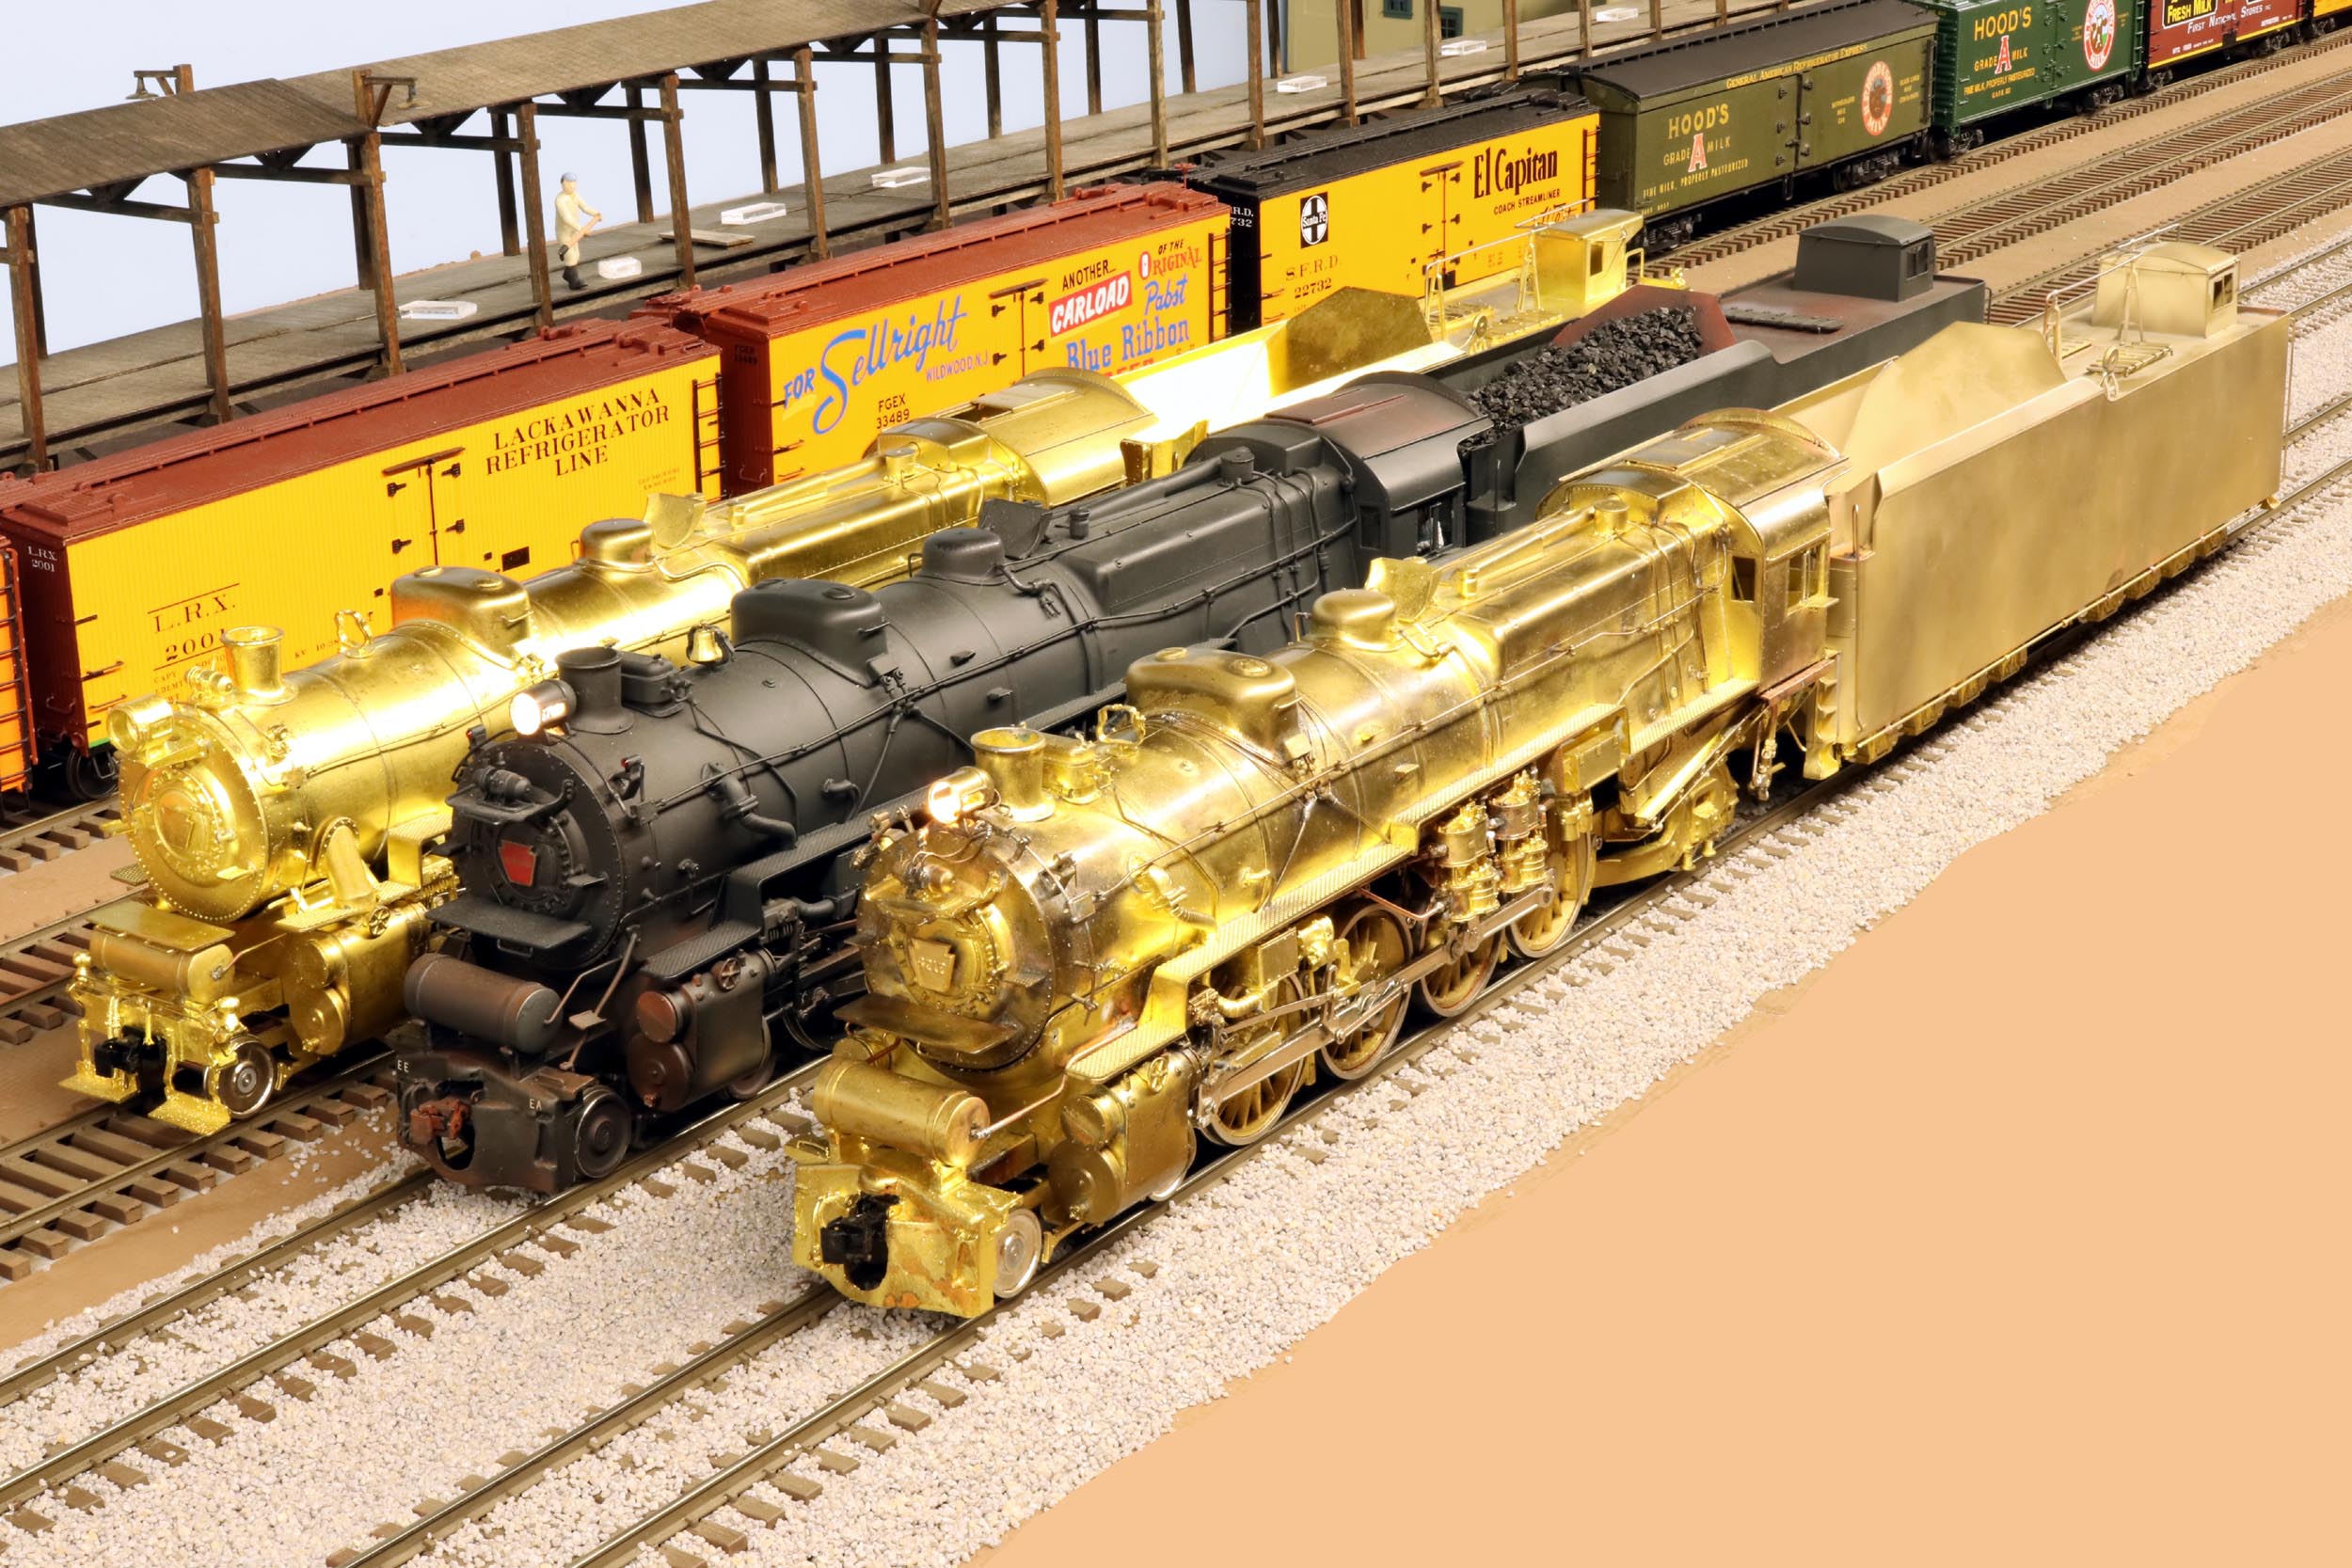
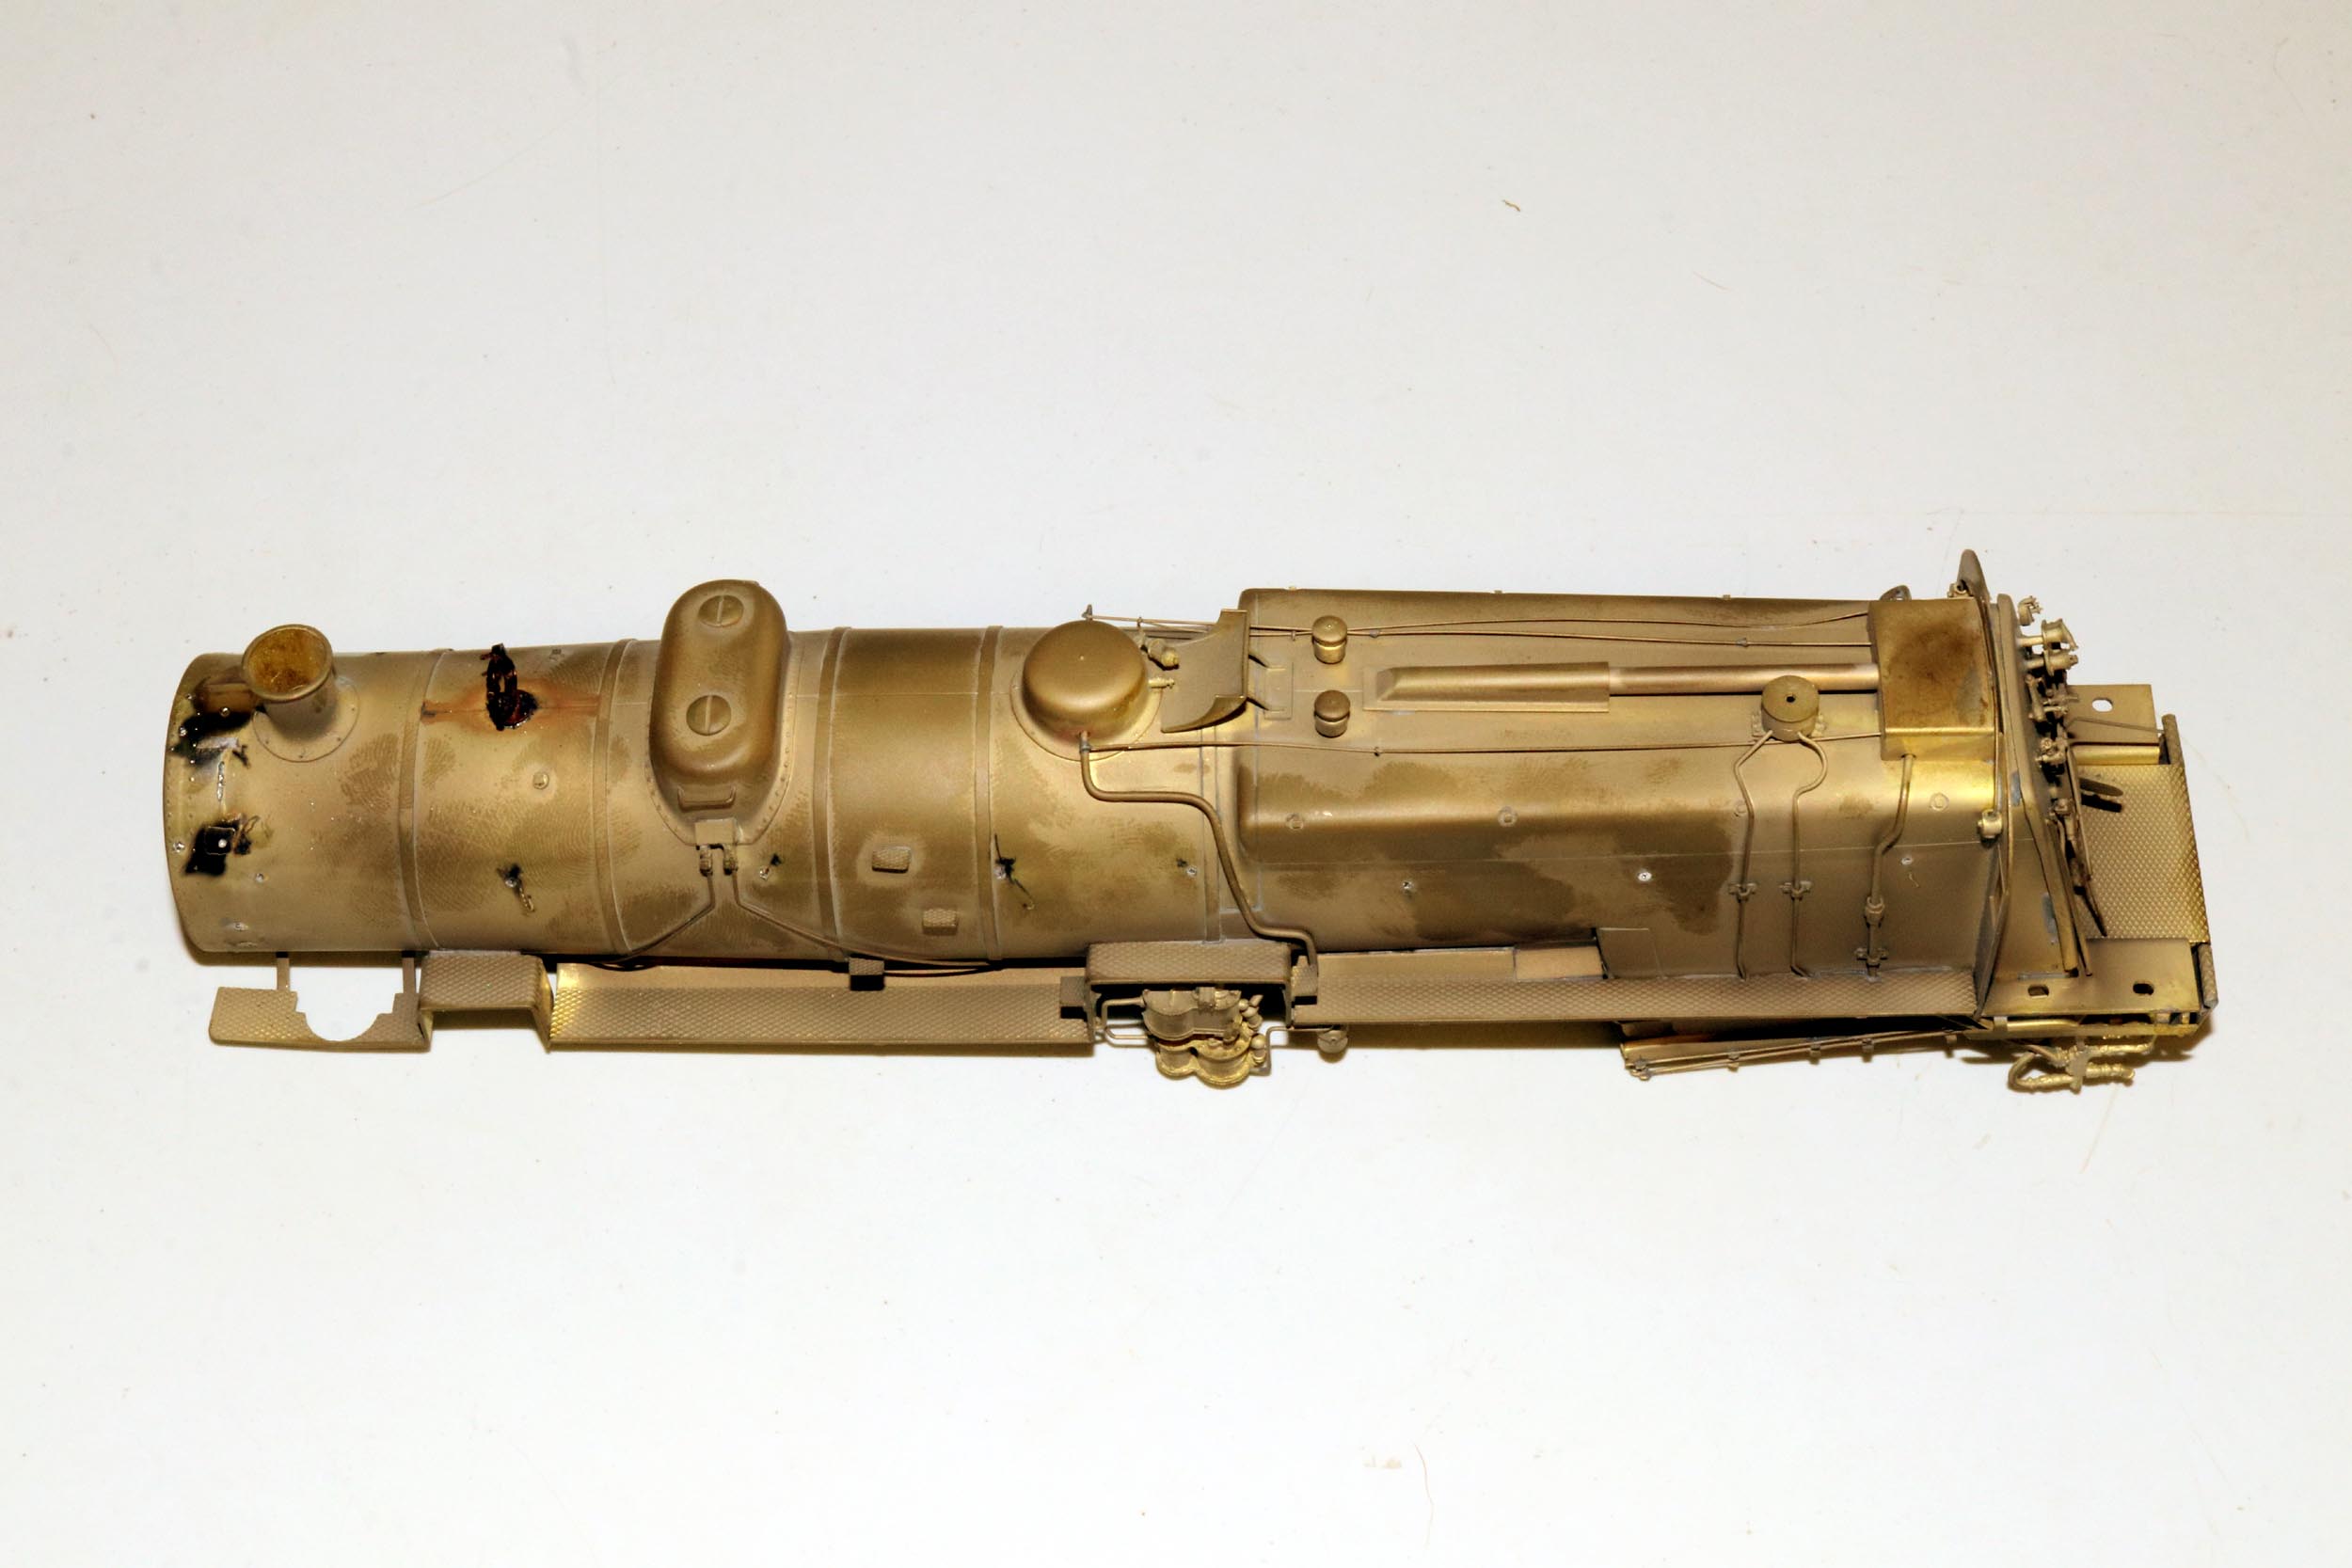
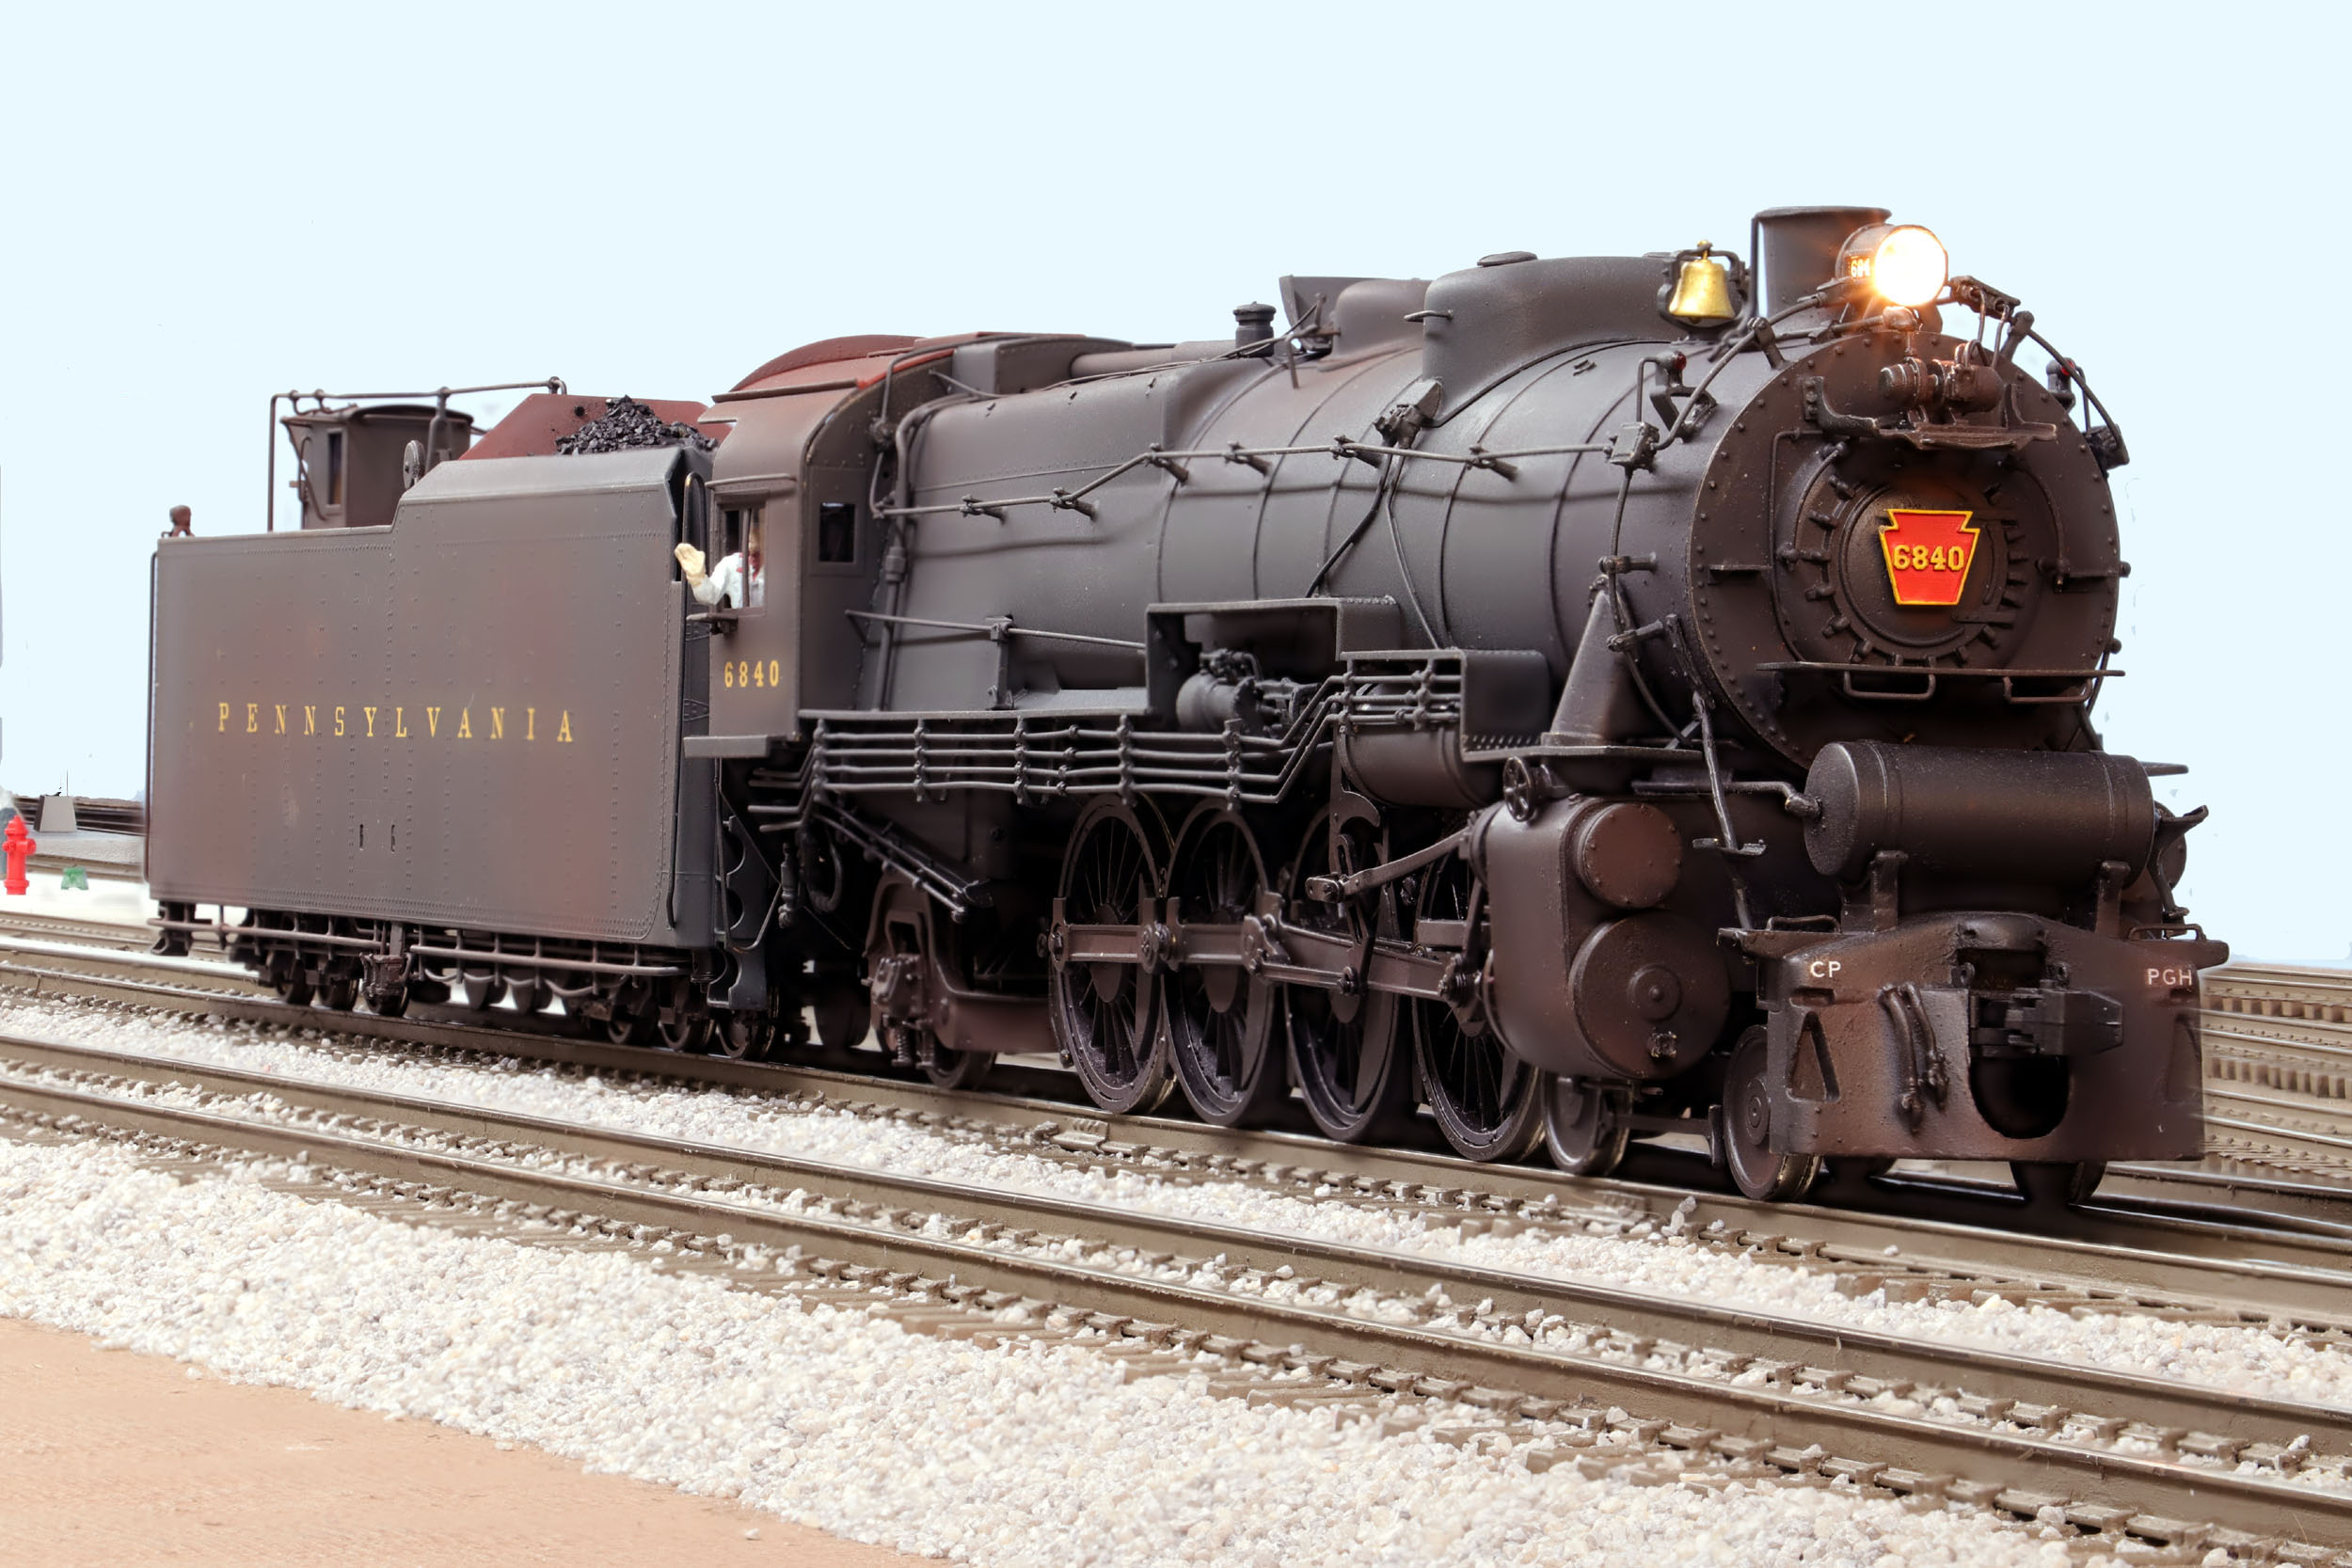
Before
I started the modernization of 6840 I briefly had 3 M1 running at 1 time on
5-15-20. There is no headlight in 6840 yet.
The
boiler is stripped down. Let the modernization begin.
Some
of the handrail work is done.
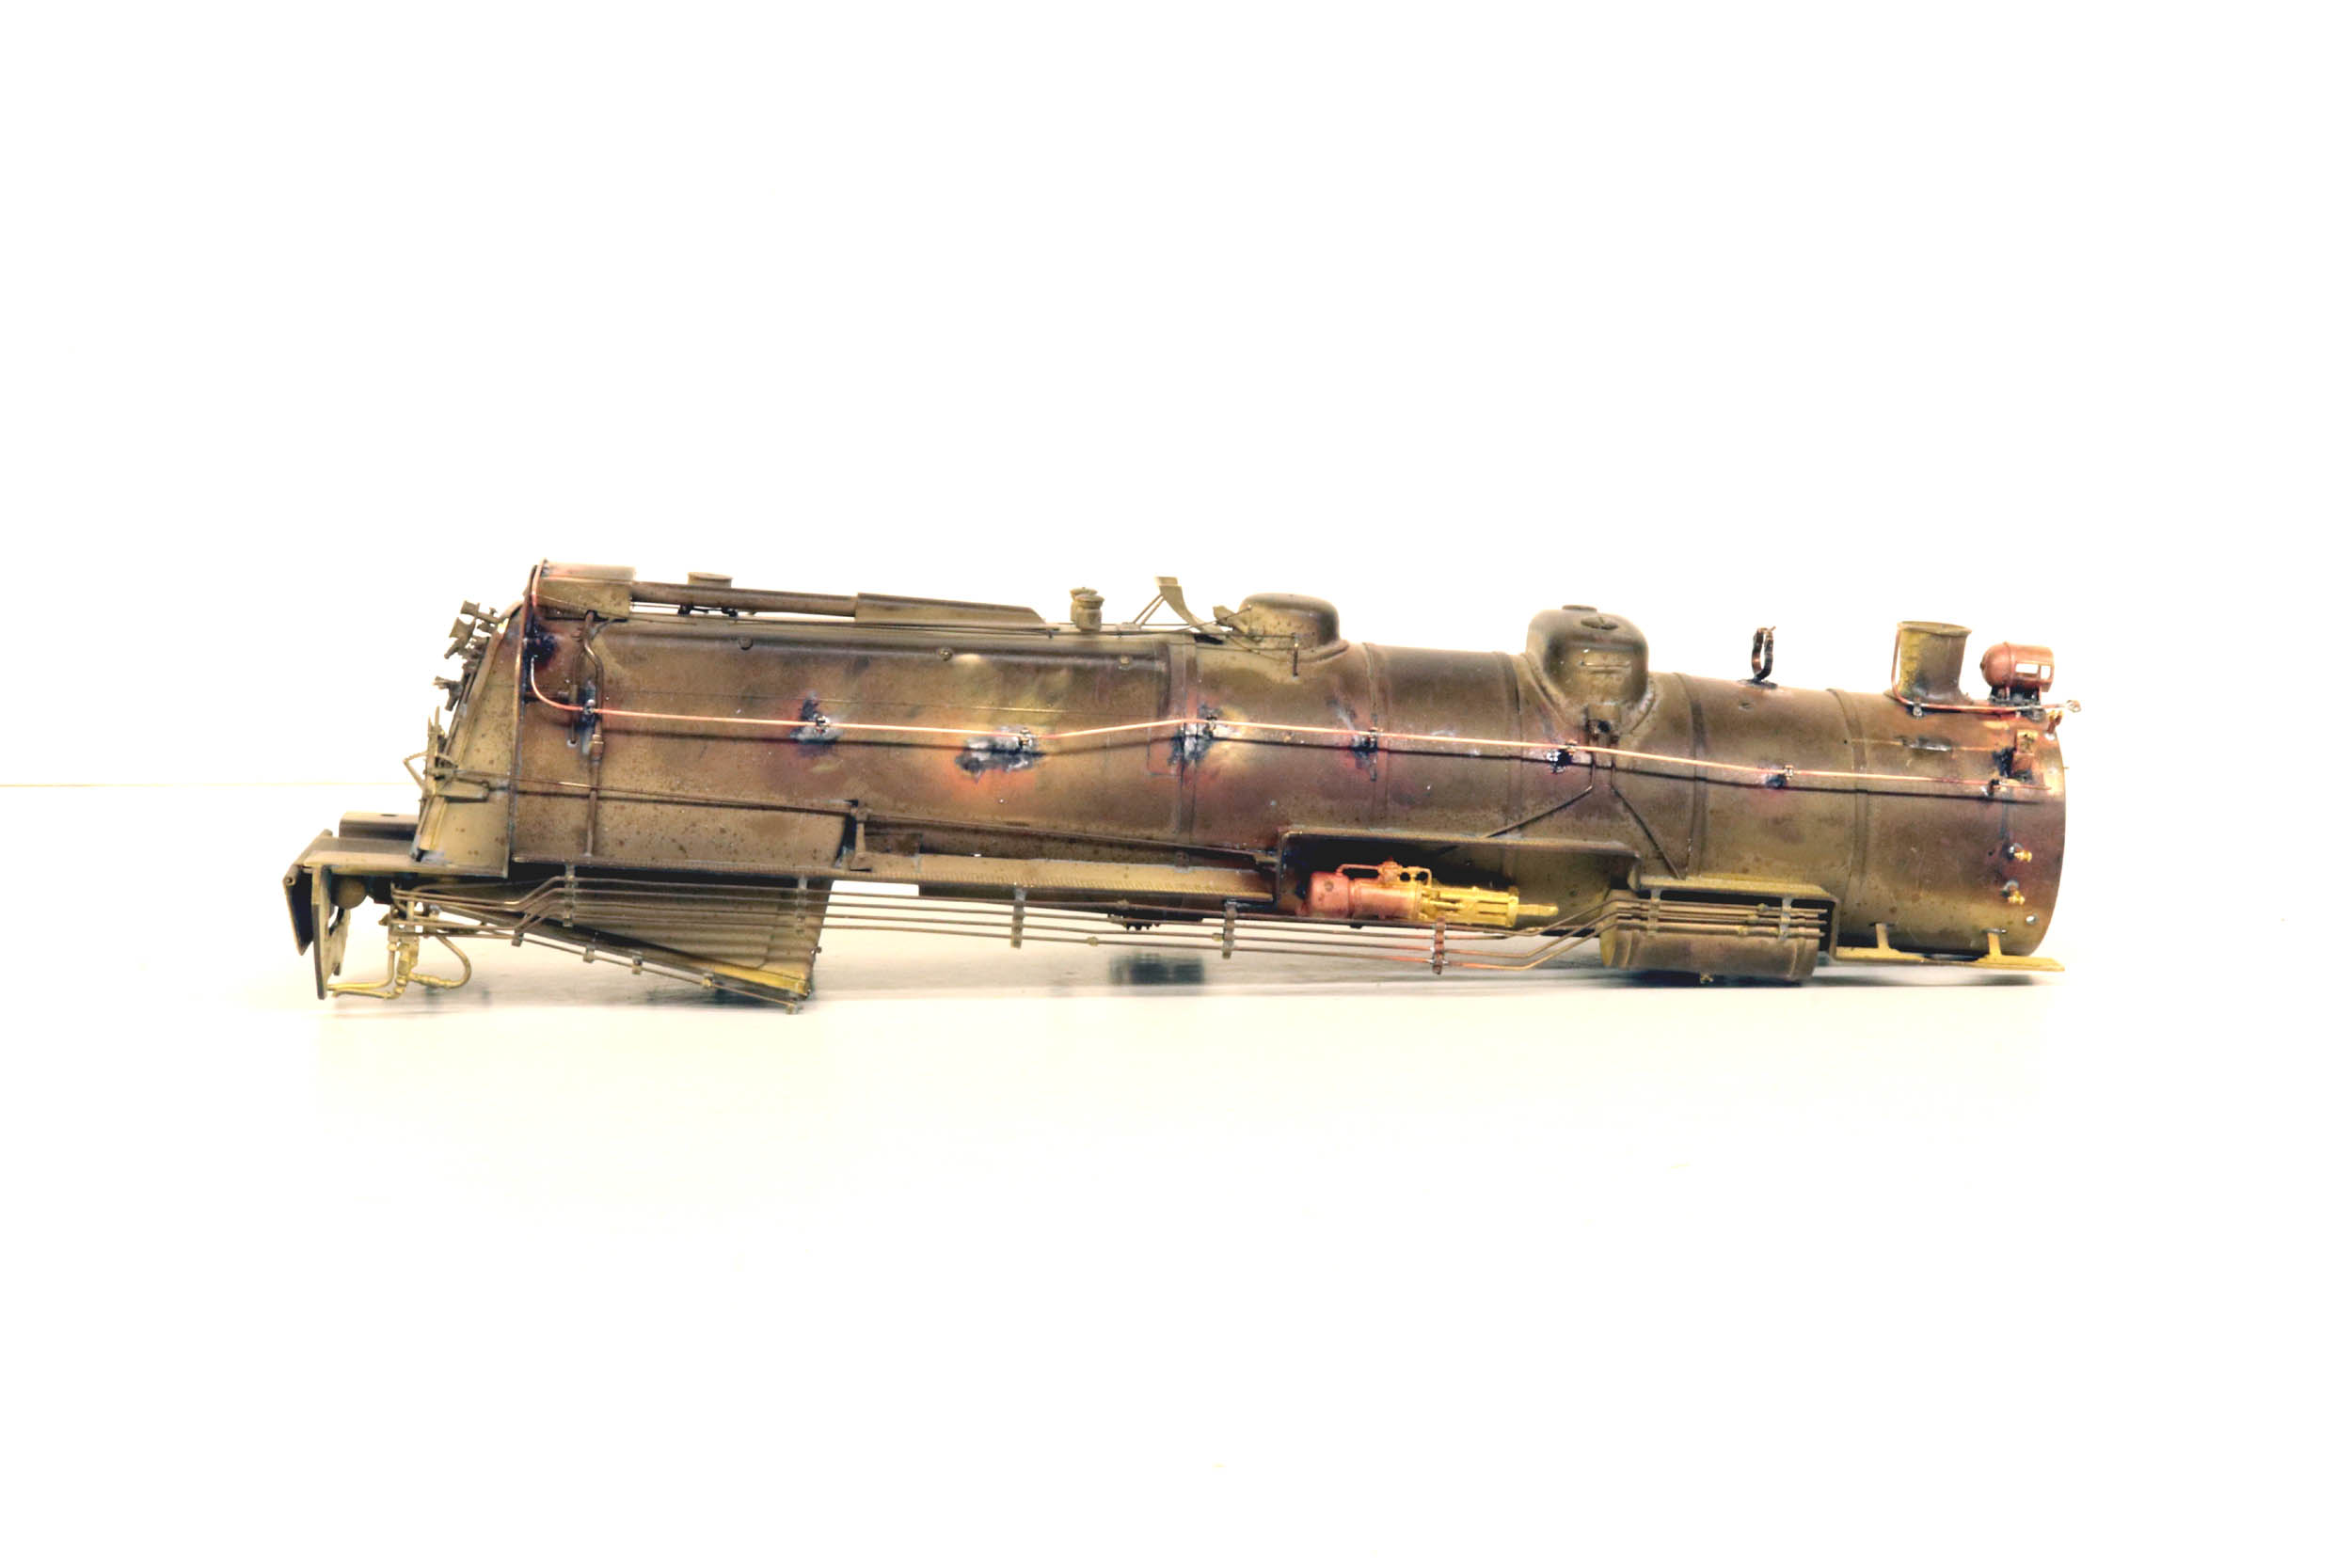
I
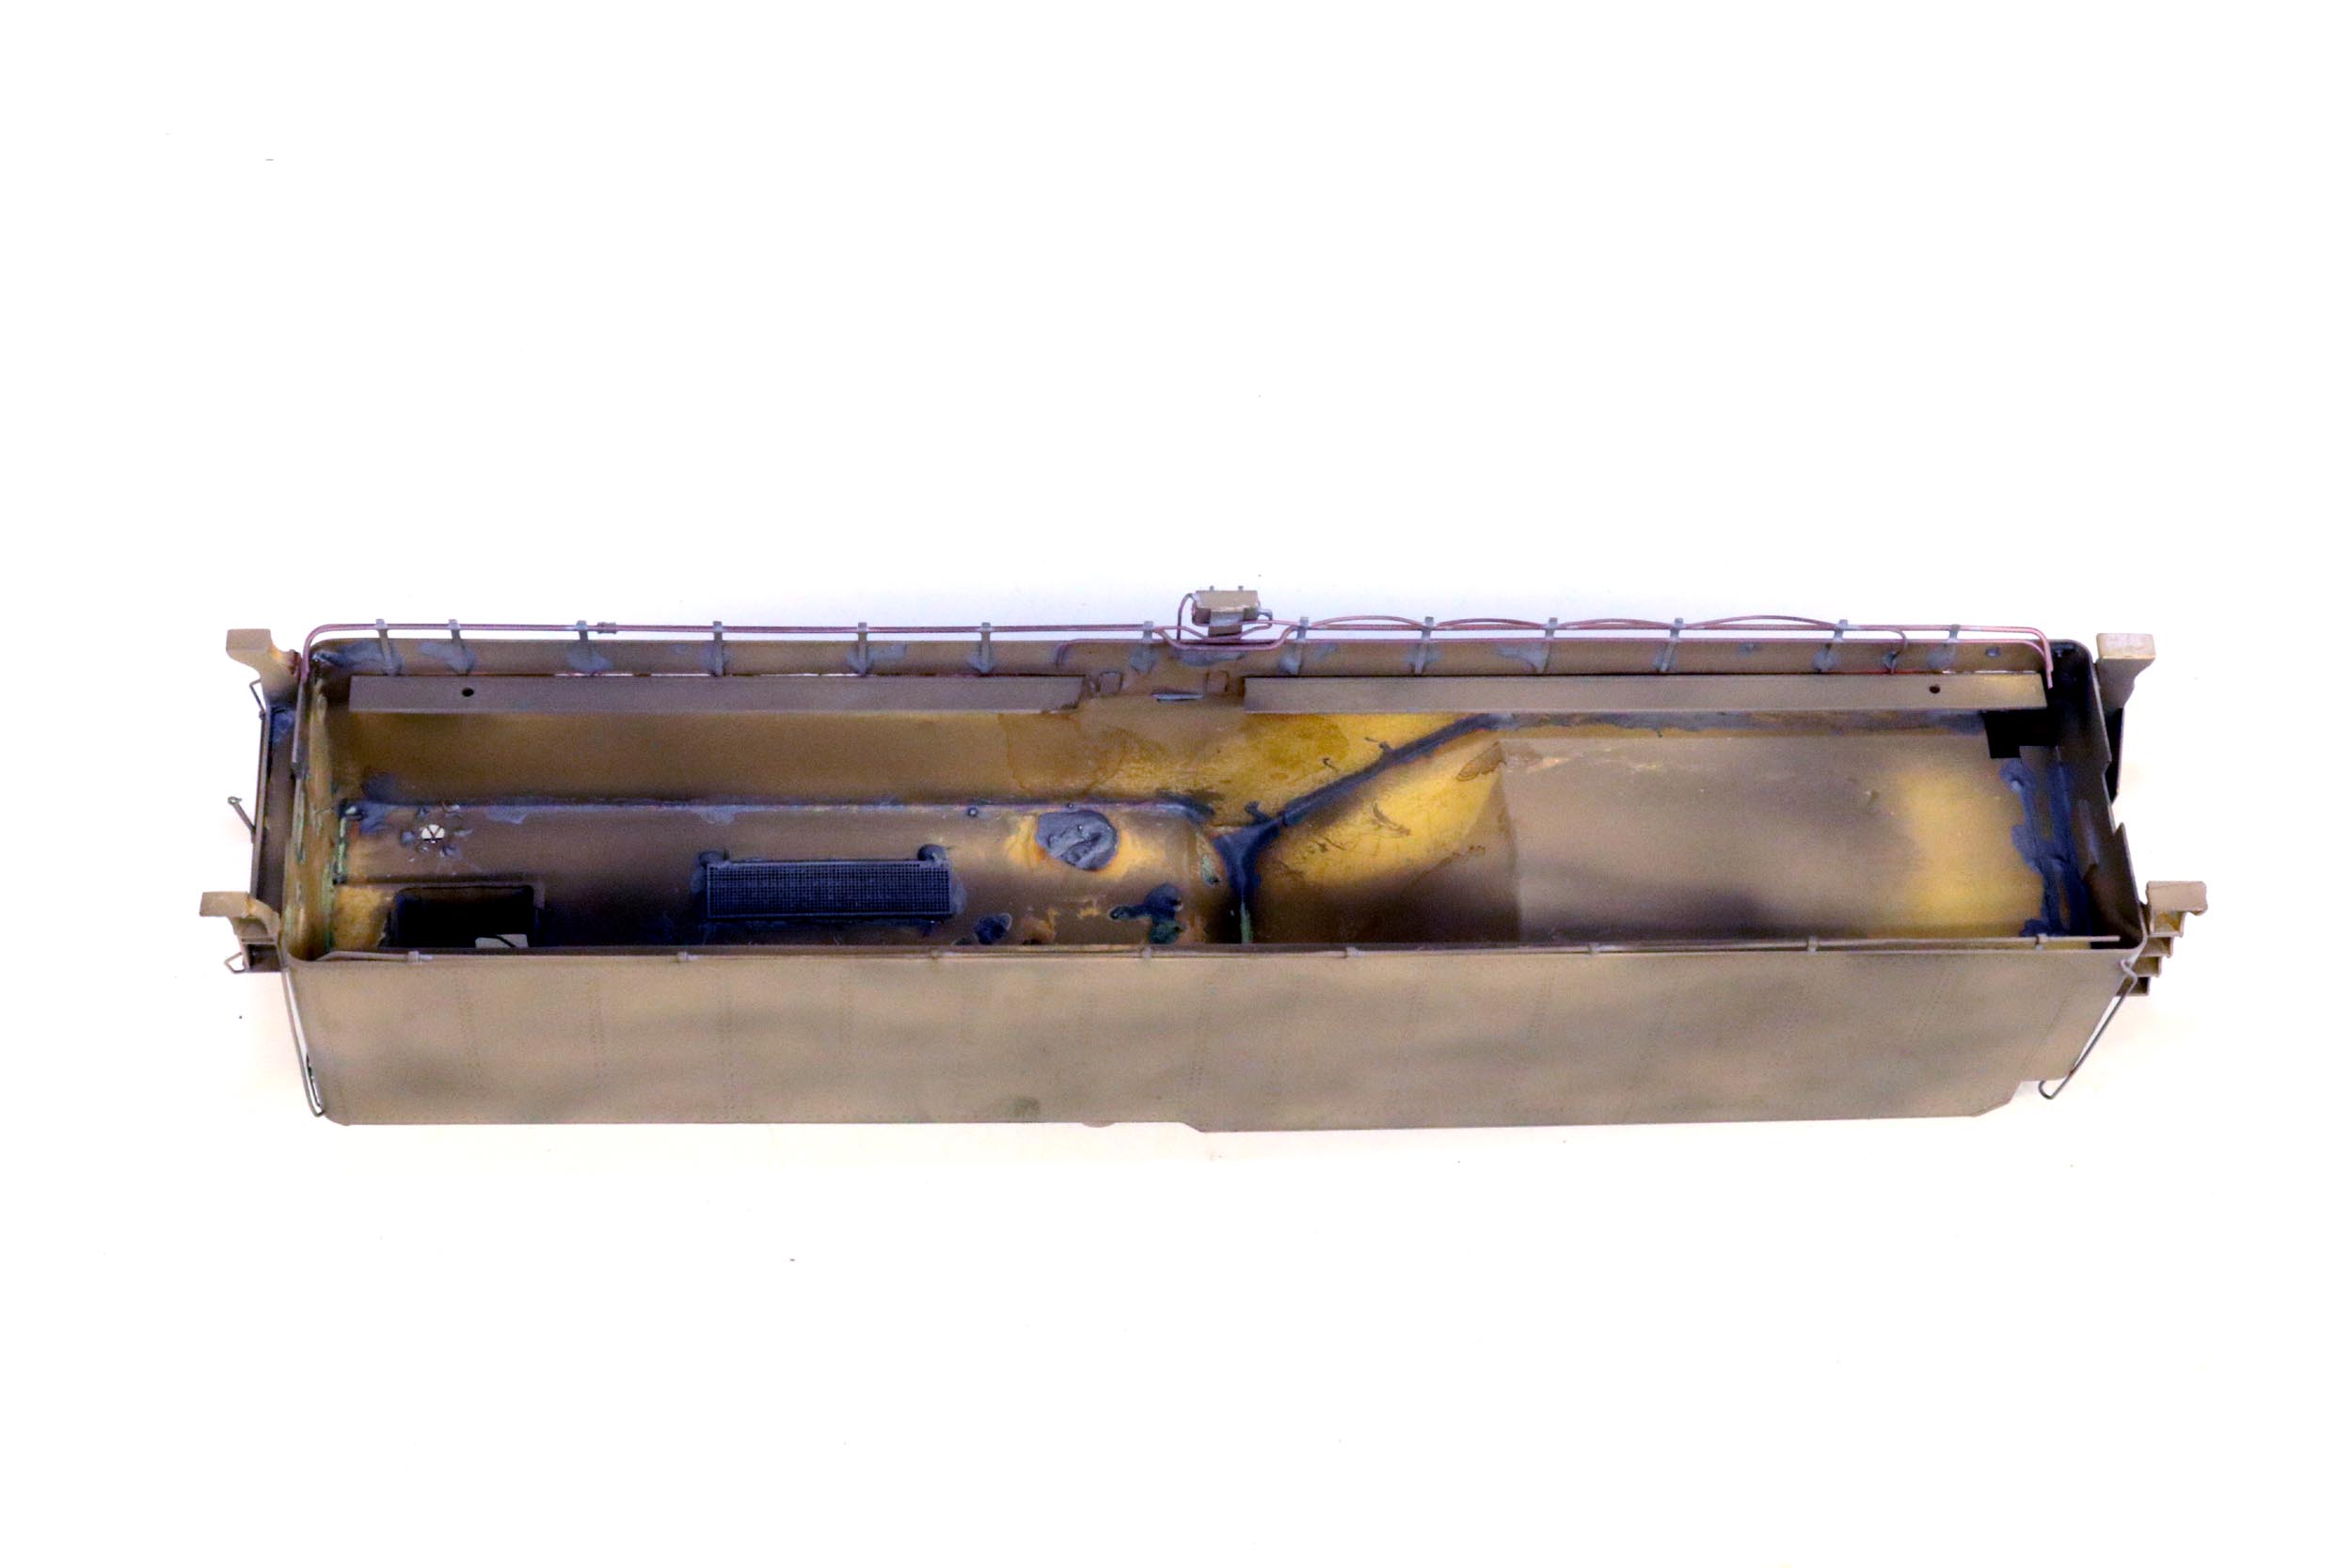
added an equipment box and other lines to the tender.
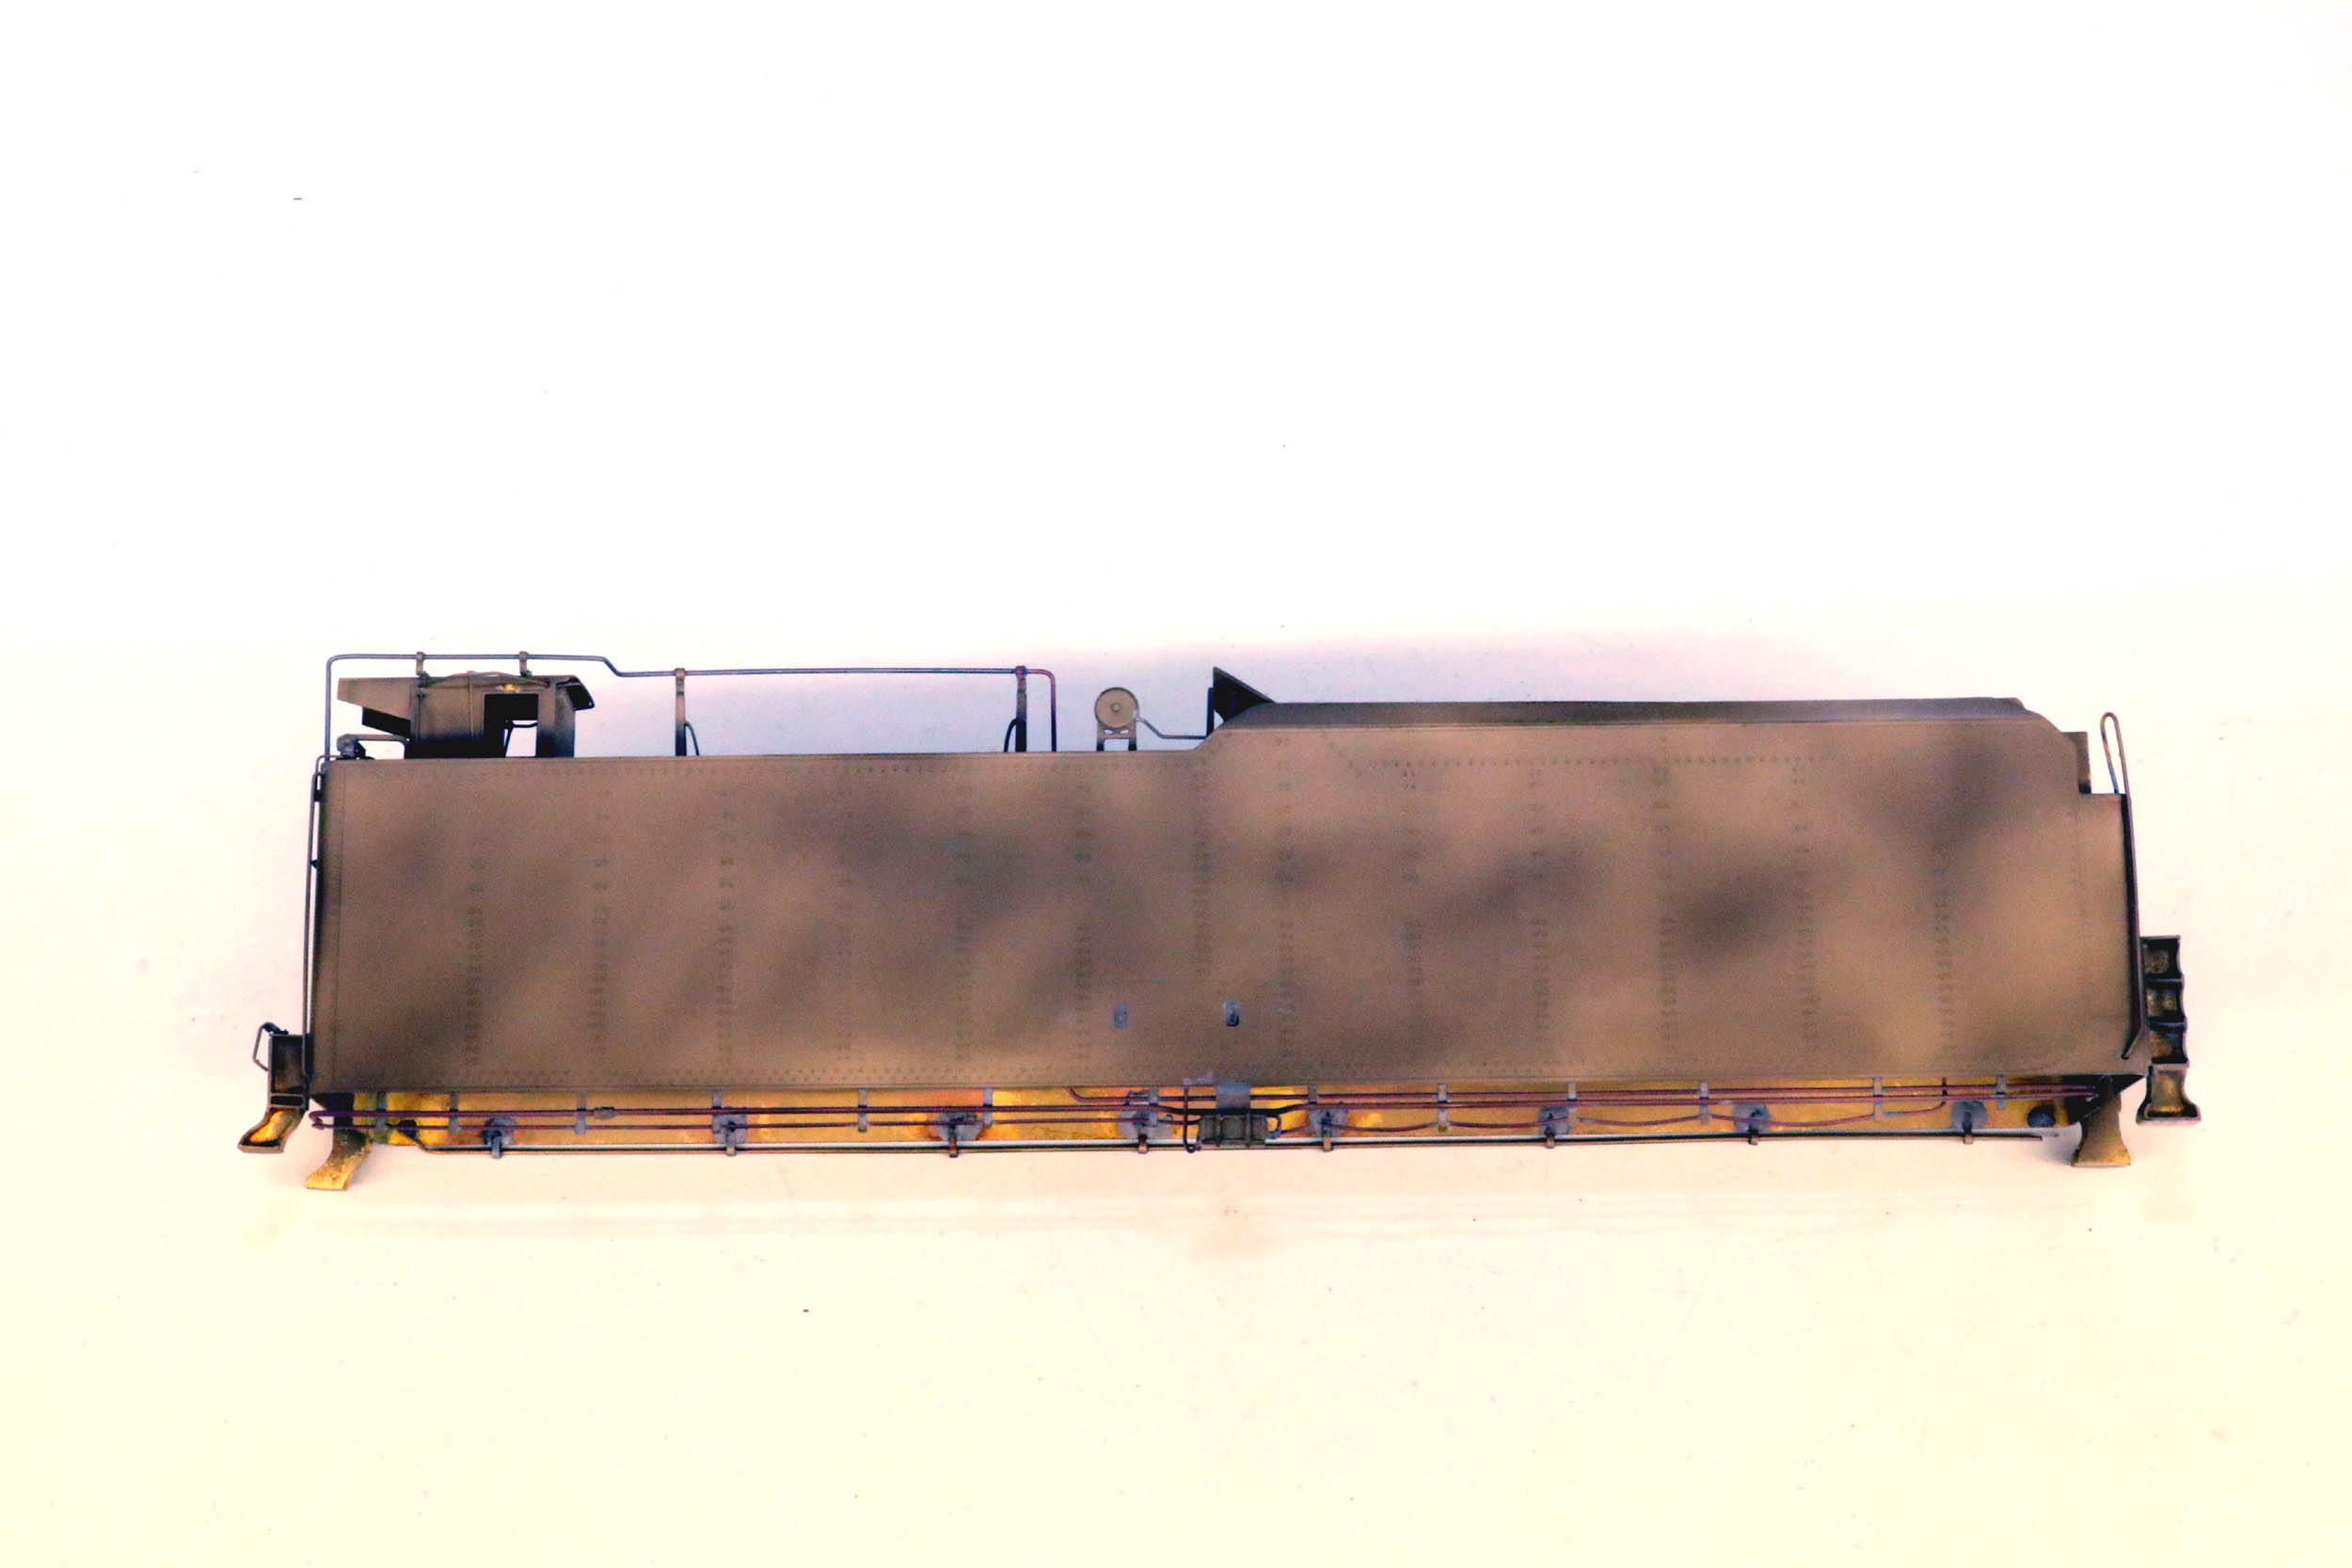
The
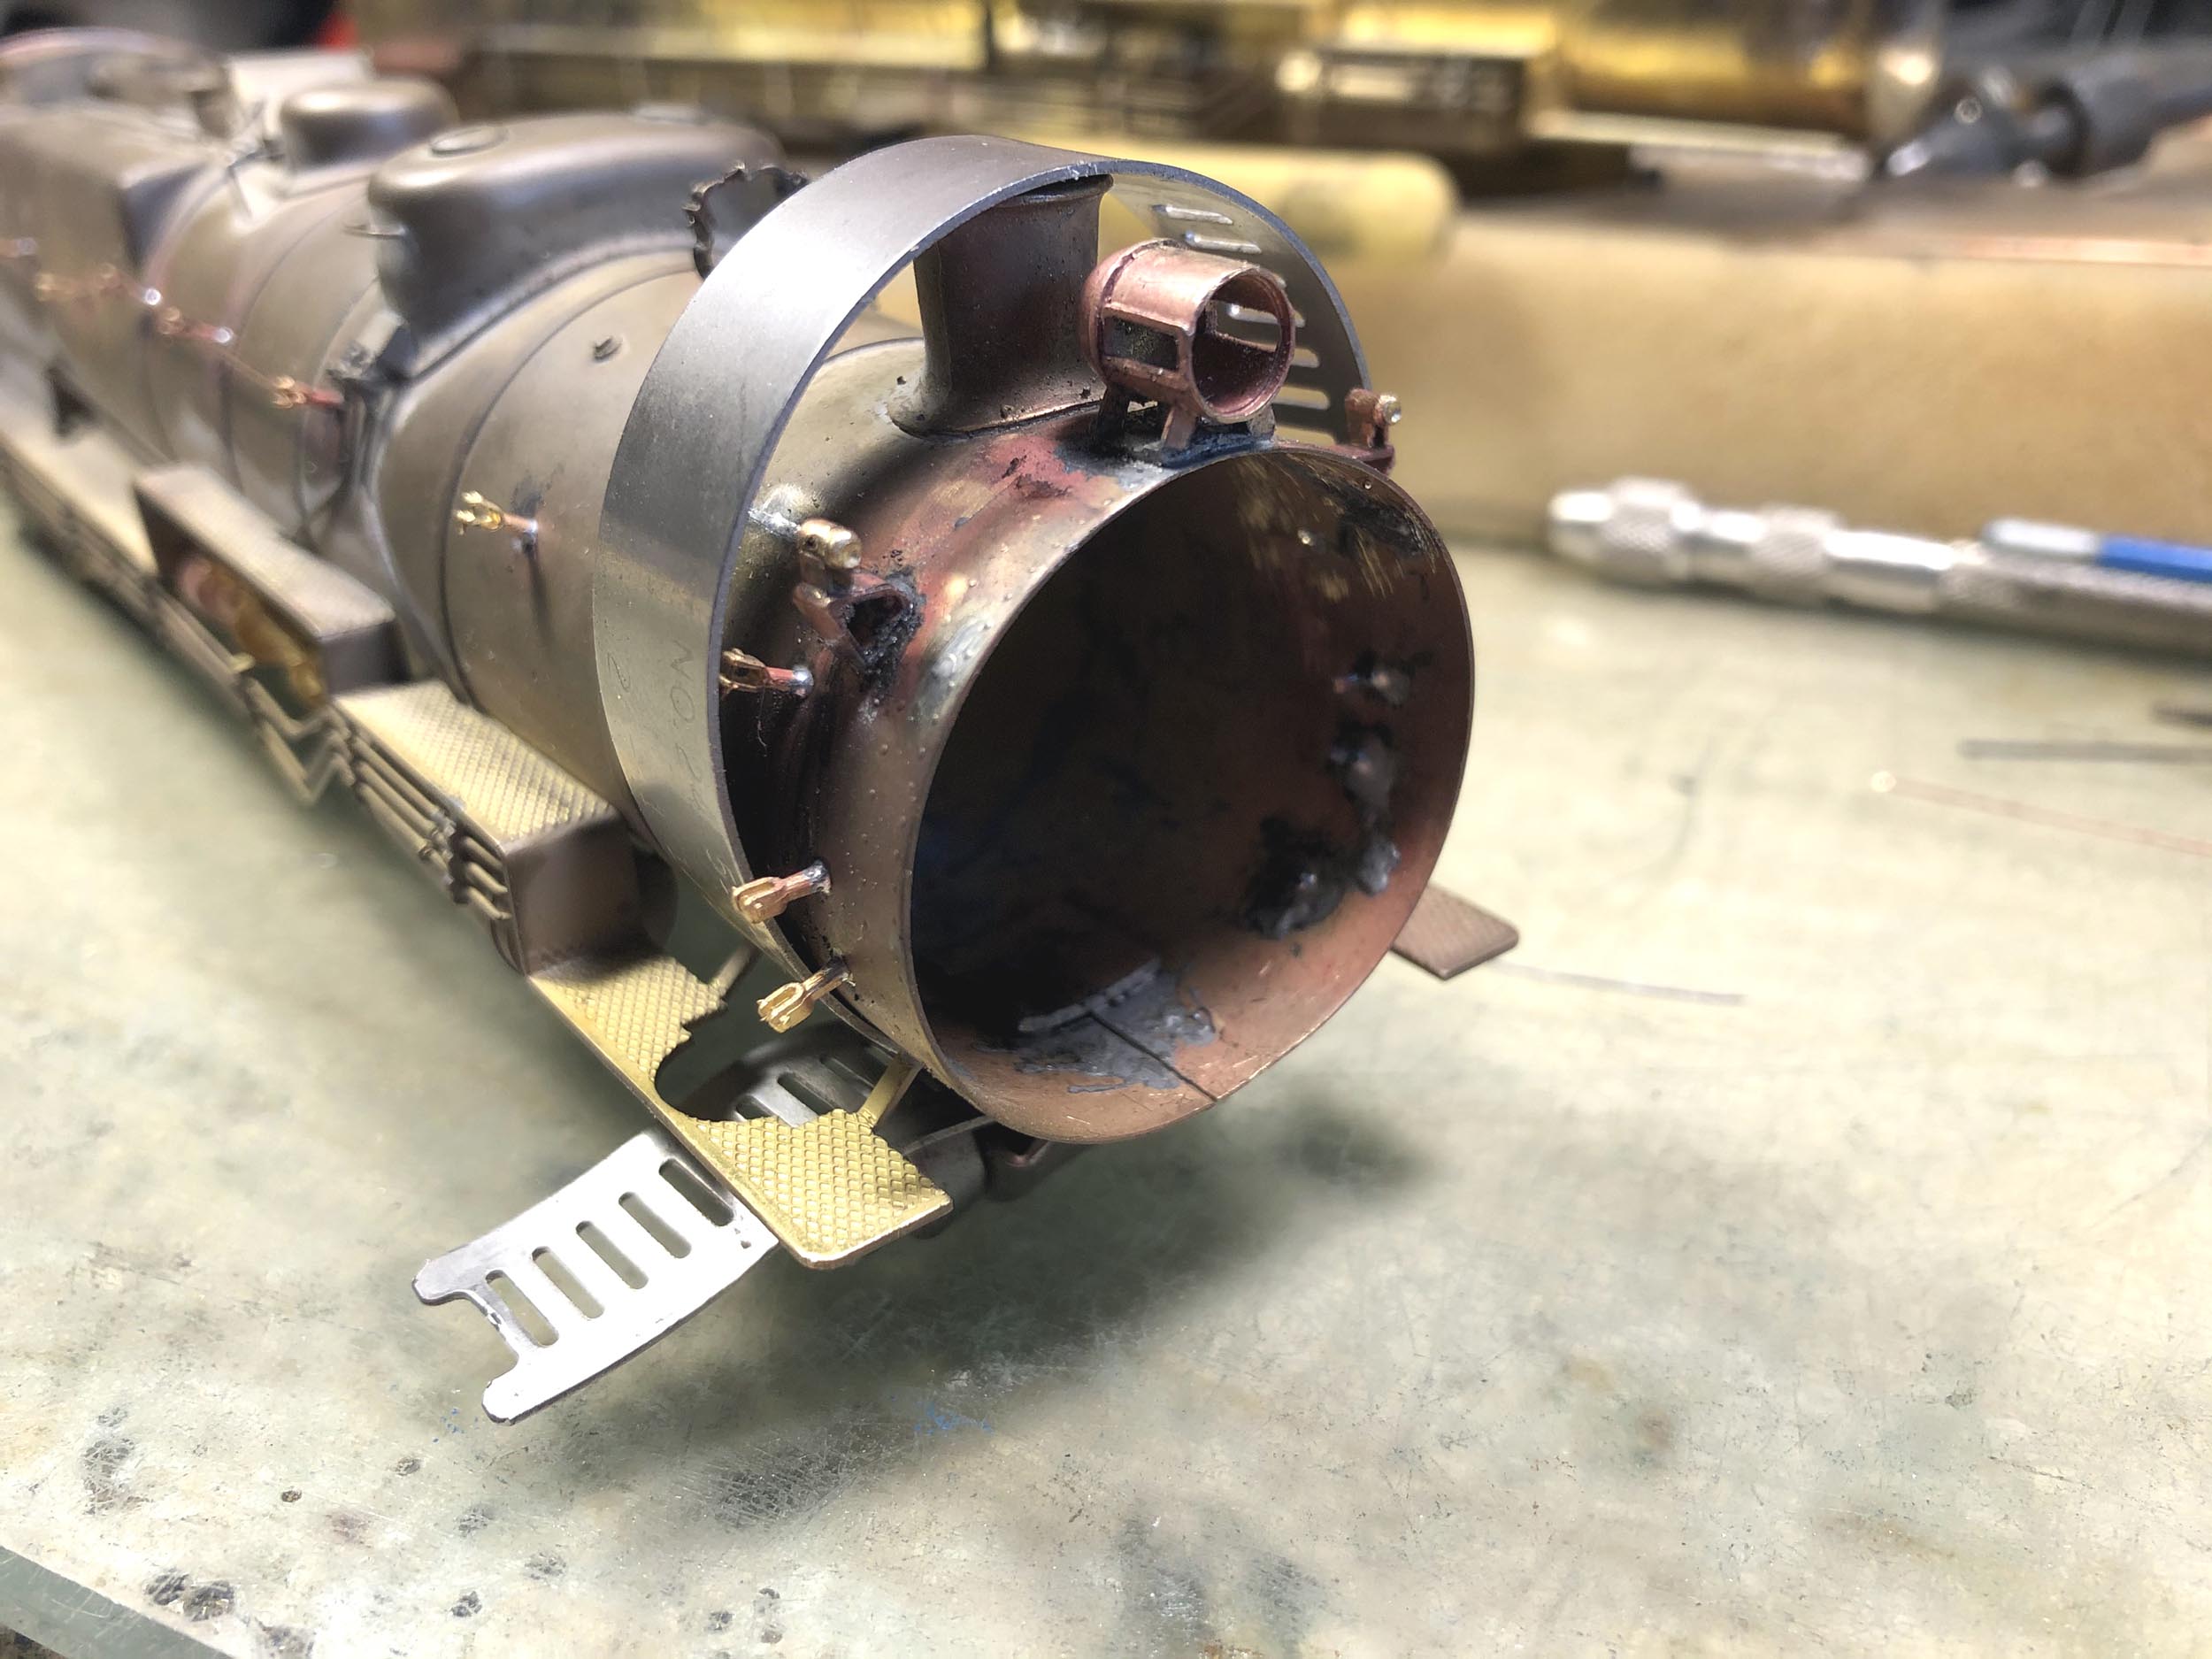
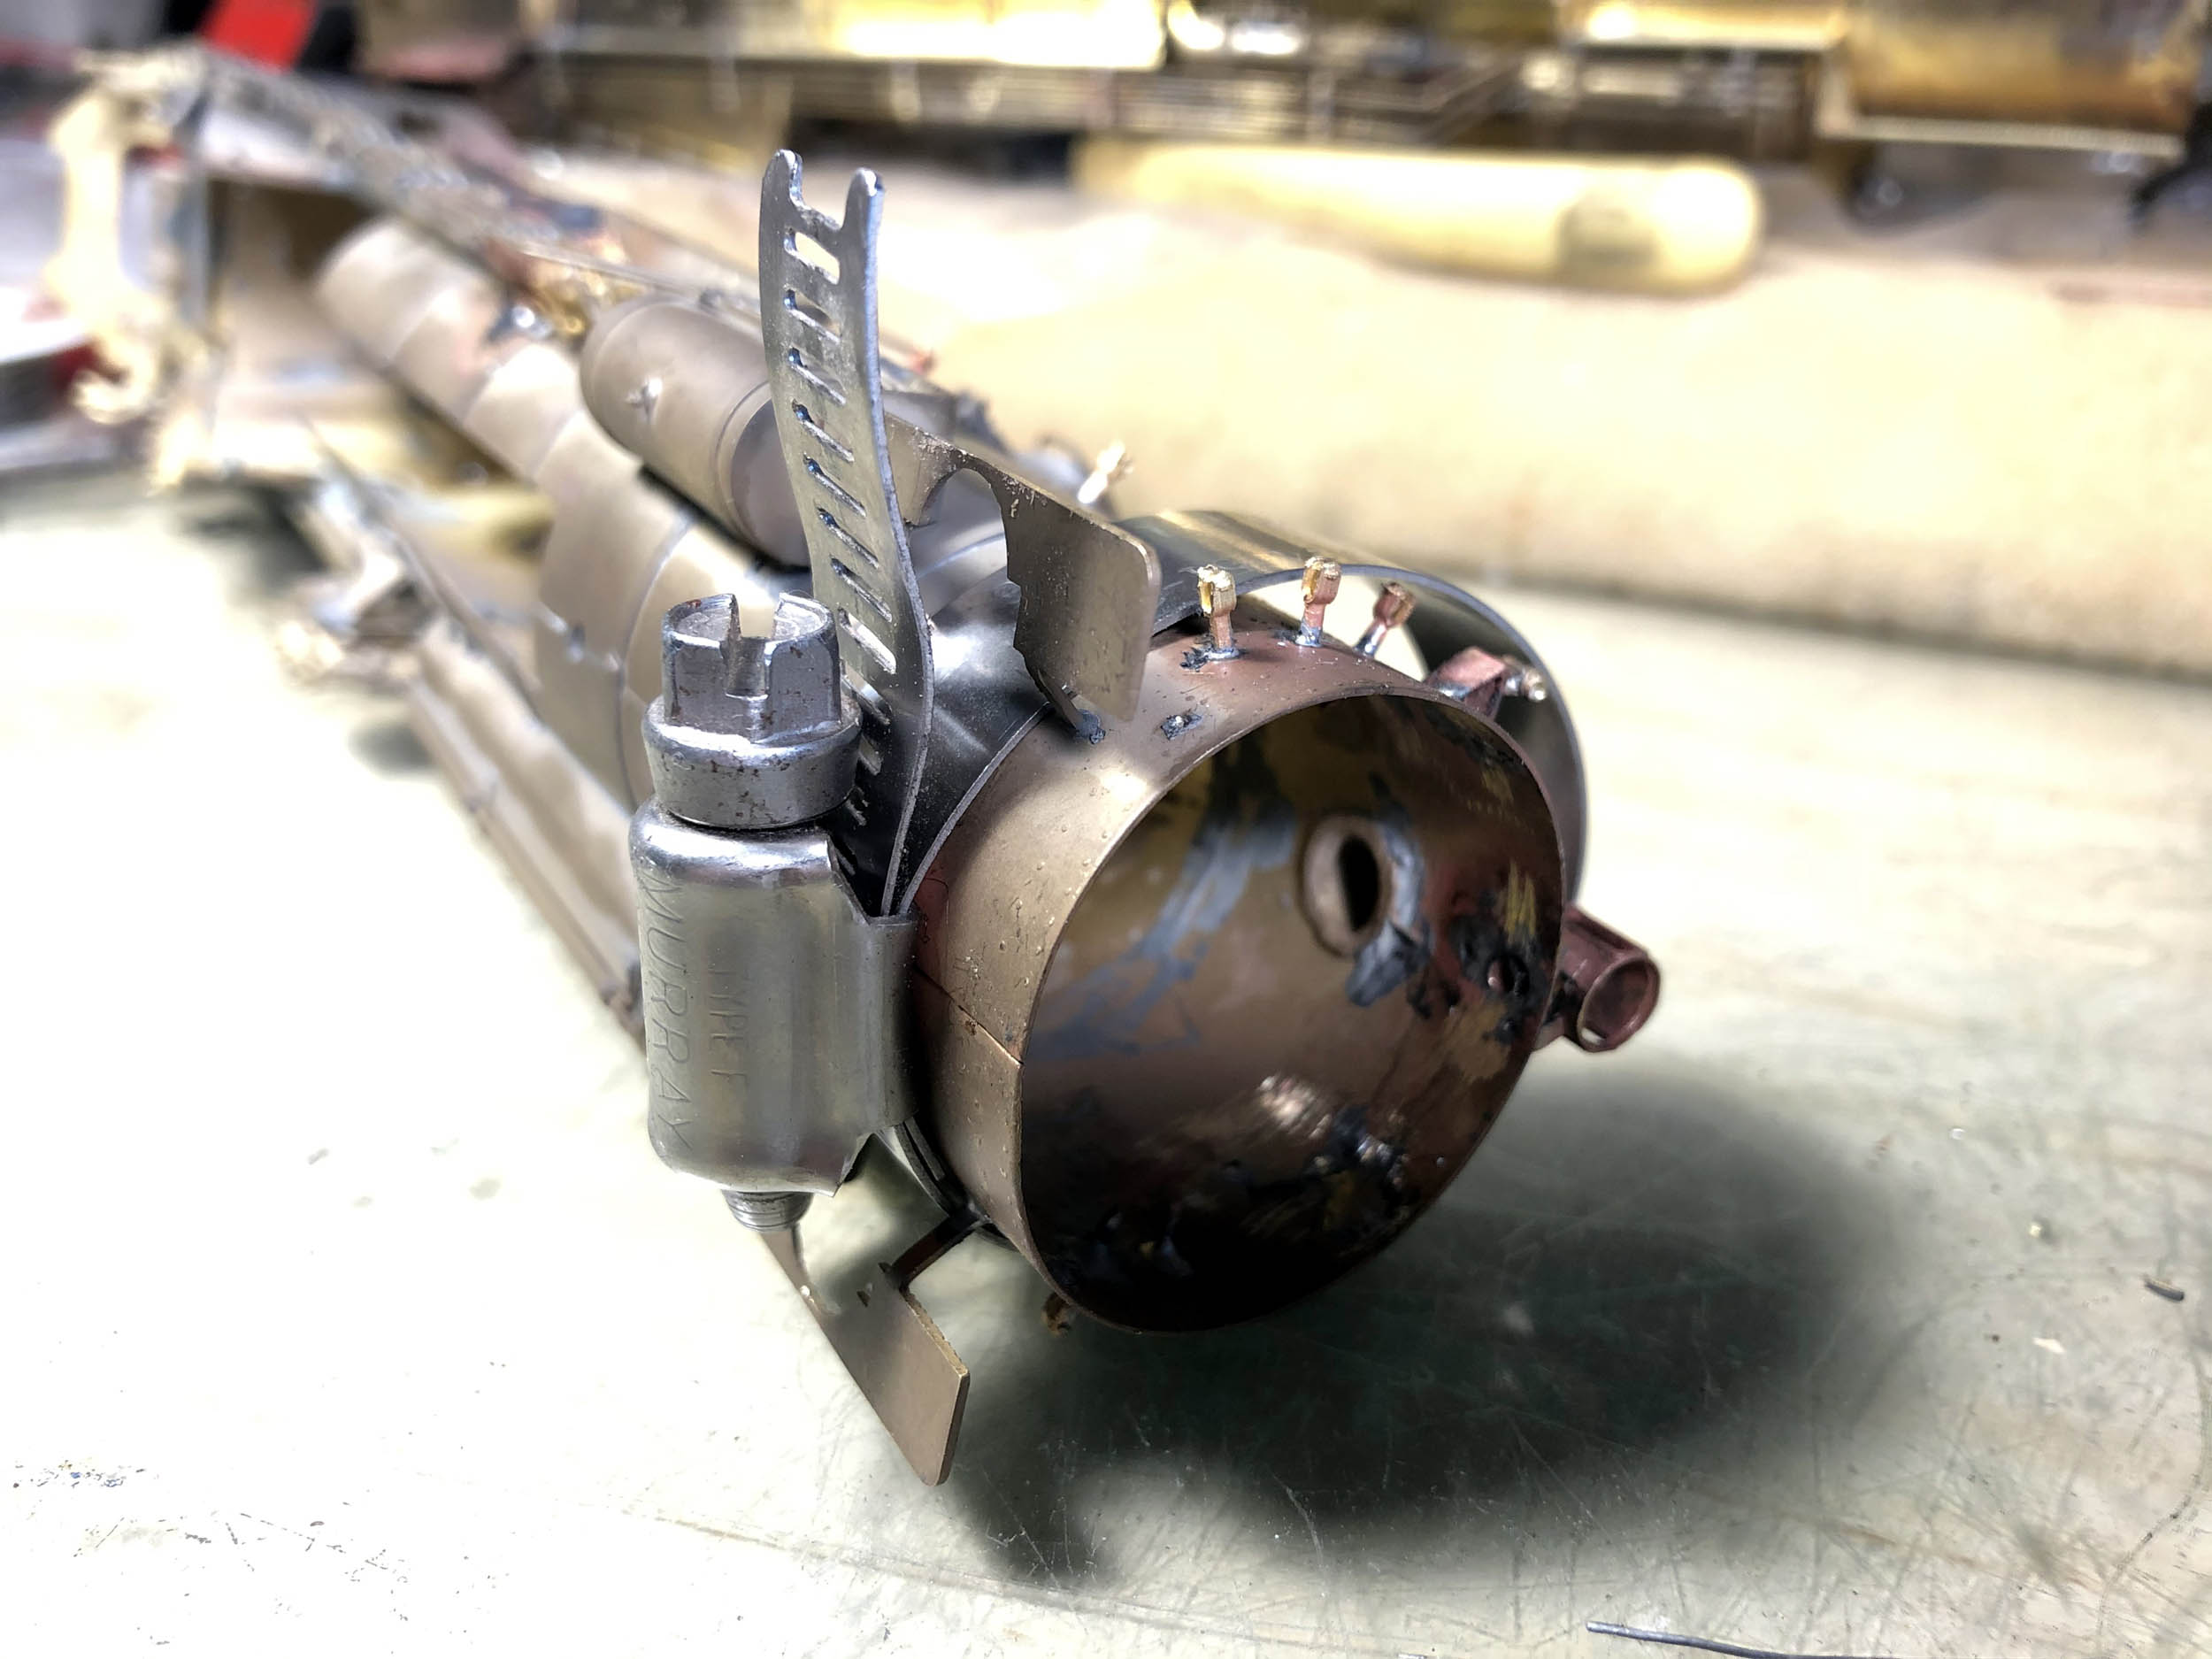
very front edge of the boiler was not closed tight when it was made new. This
made the boiler front casting loose and it fell off easily. I needed to tighten
the front edge up and close that gap. A simple hose clamp and my Hotip got it
done. It would have been better and easier if I did it before adding the
headlight and handrail stanchions. Oh well………
Added
3-2-21
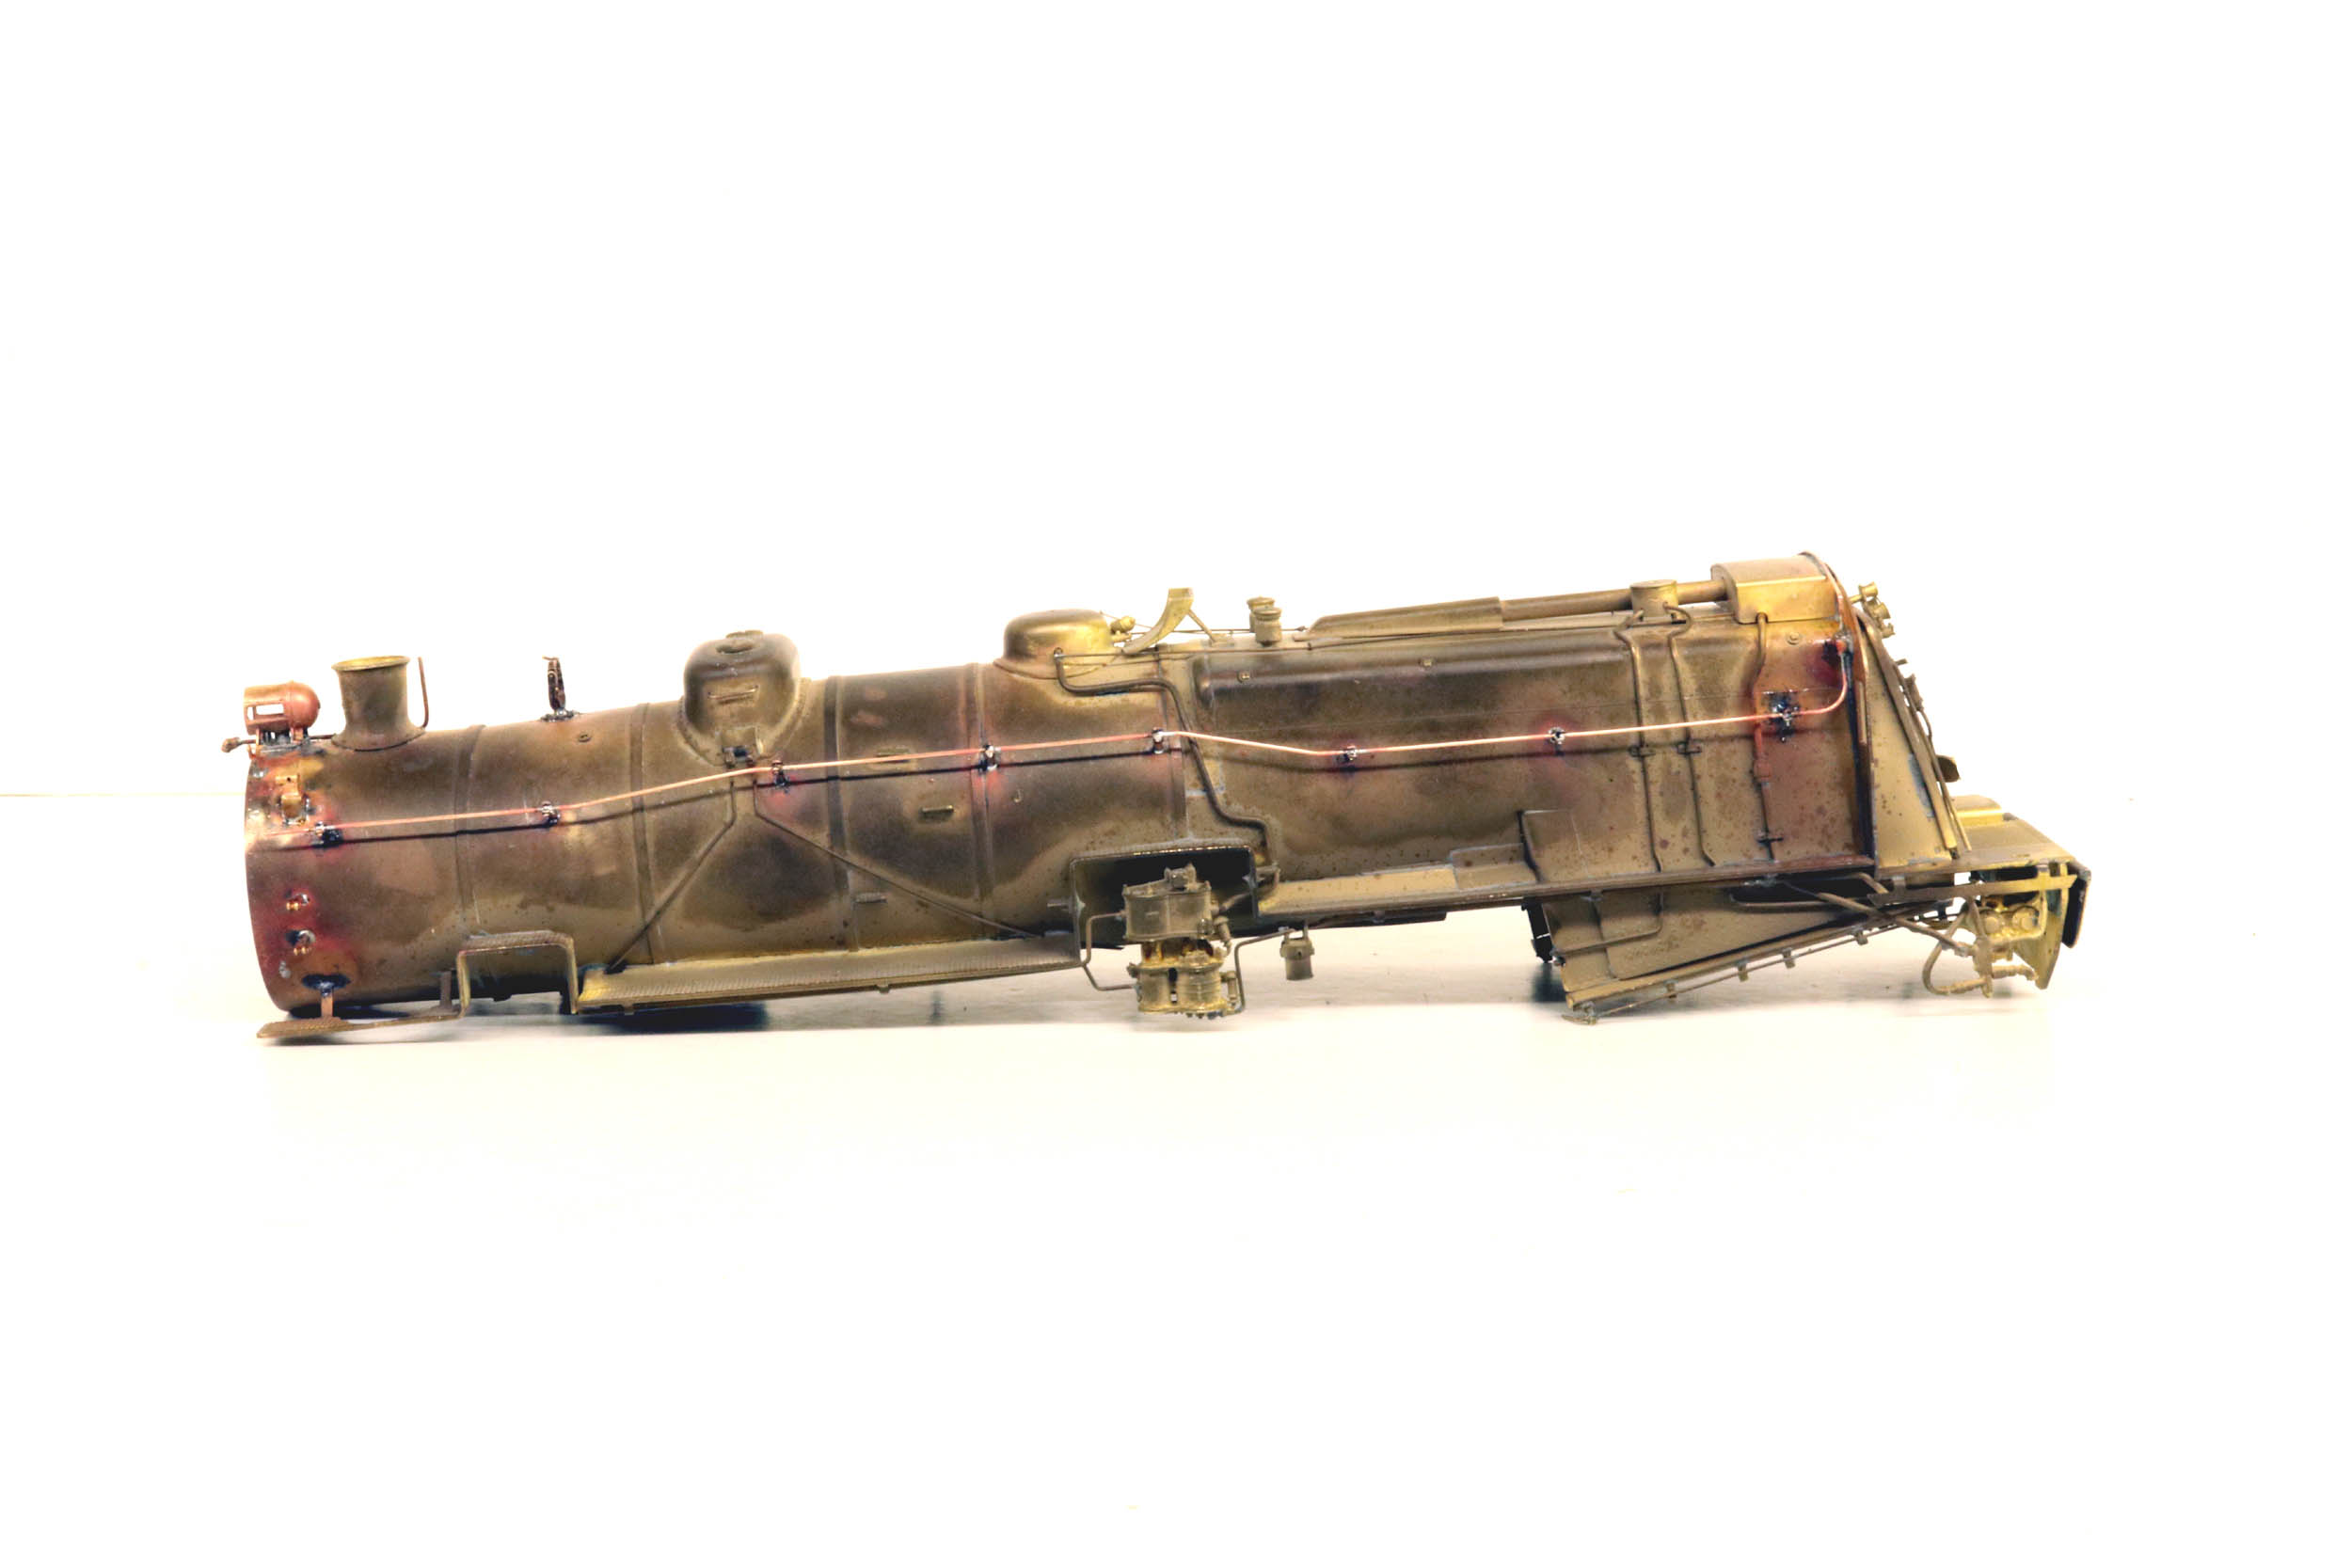
Ready
For Paint
After
6 months off I circled back and got this M1, the K4, and M1b
ready for paint. There were a few minor things left to do on all of them. I did
a lot more detailing to the M1b. The M1 was just a “get it done and running”
project.
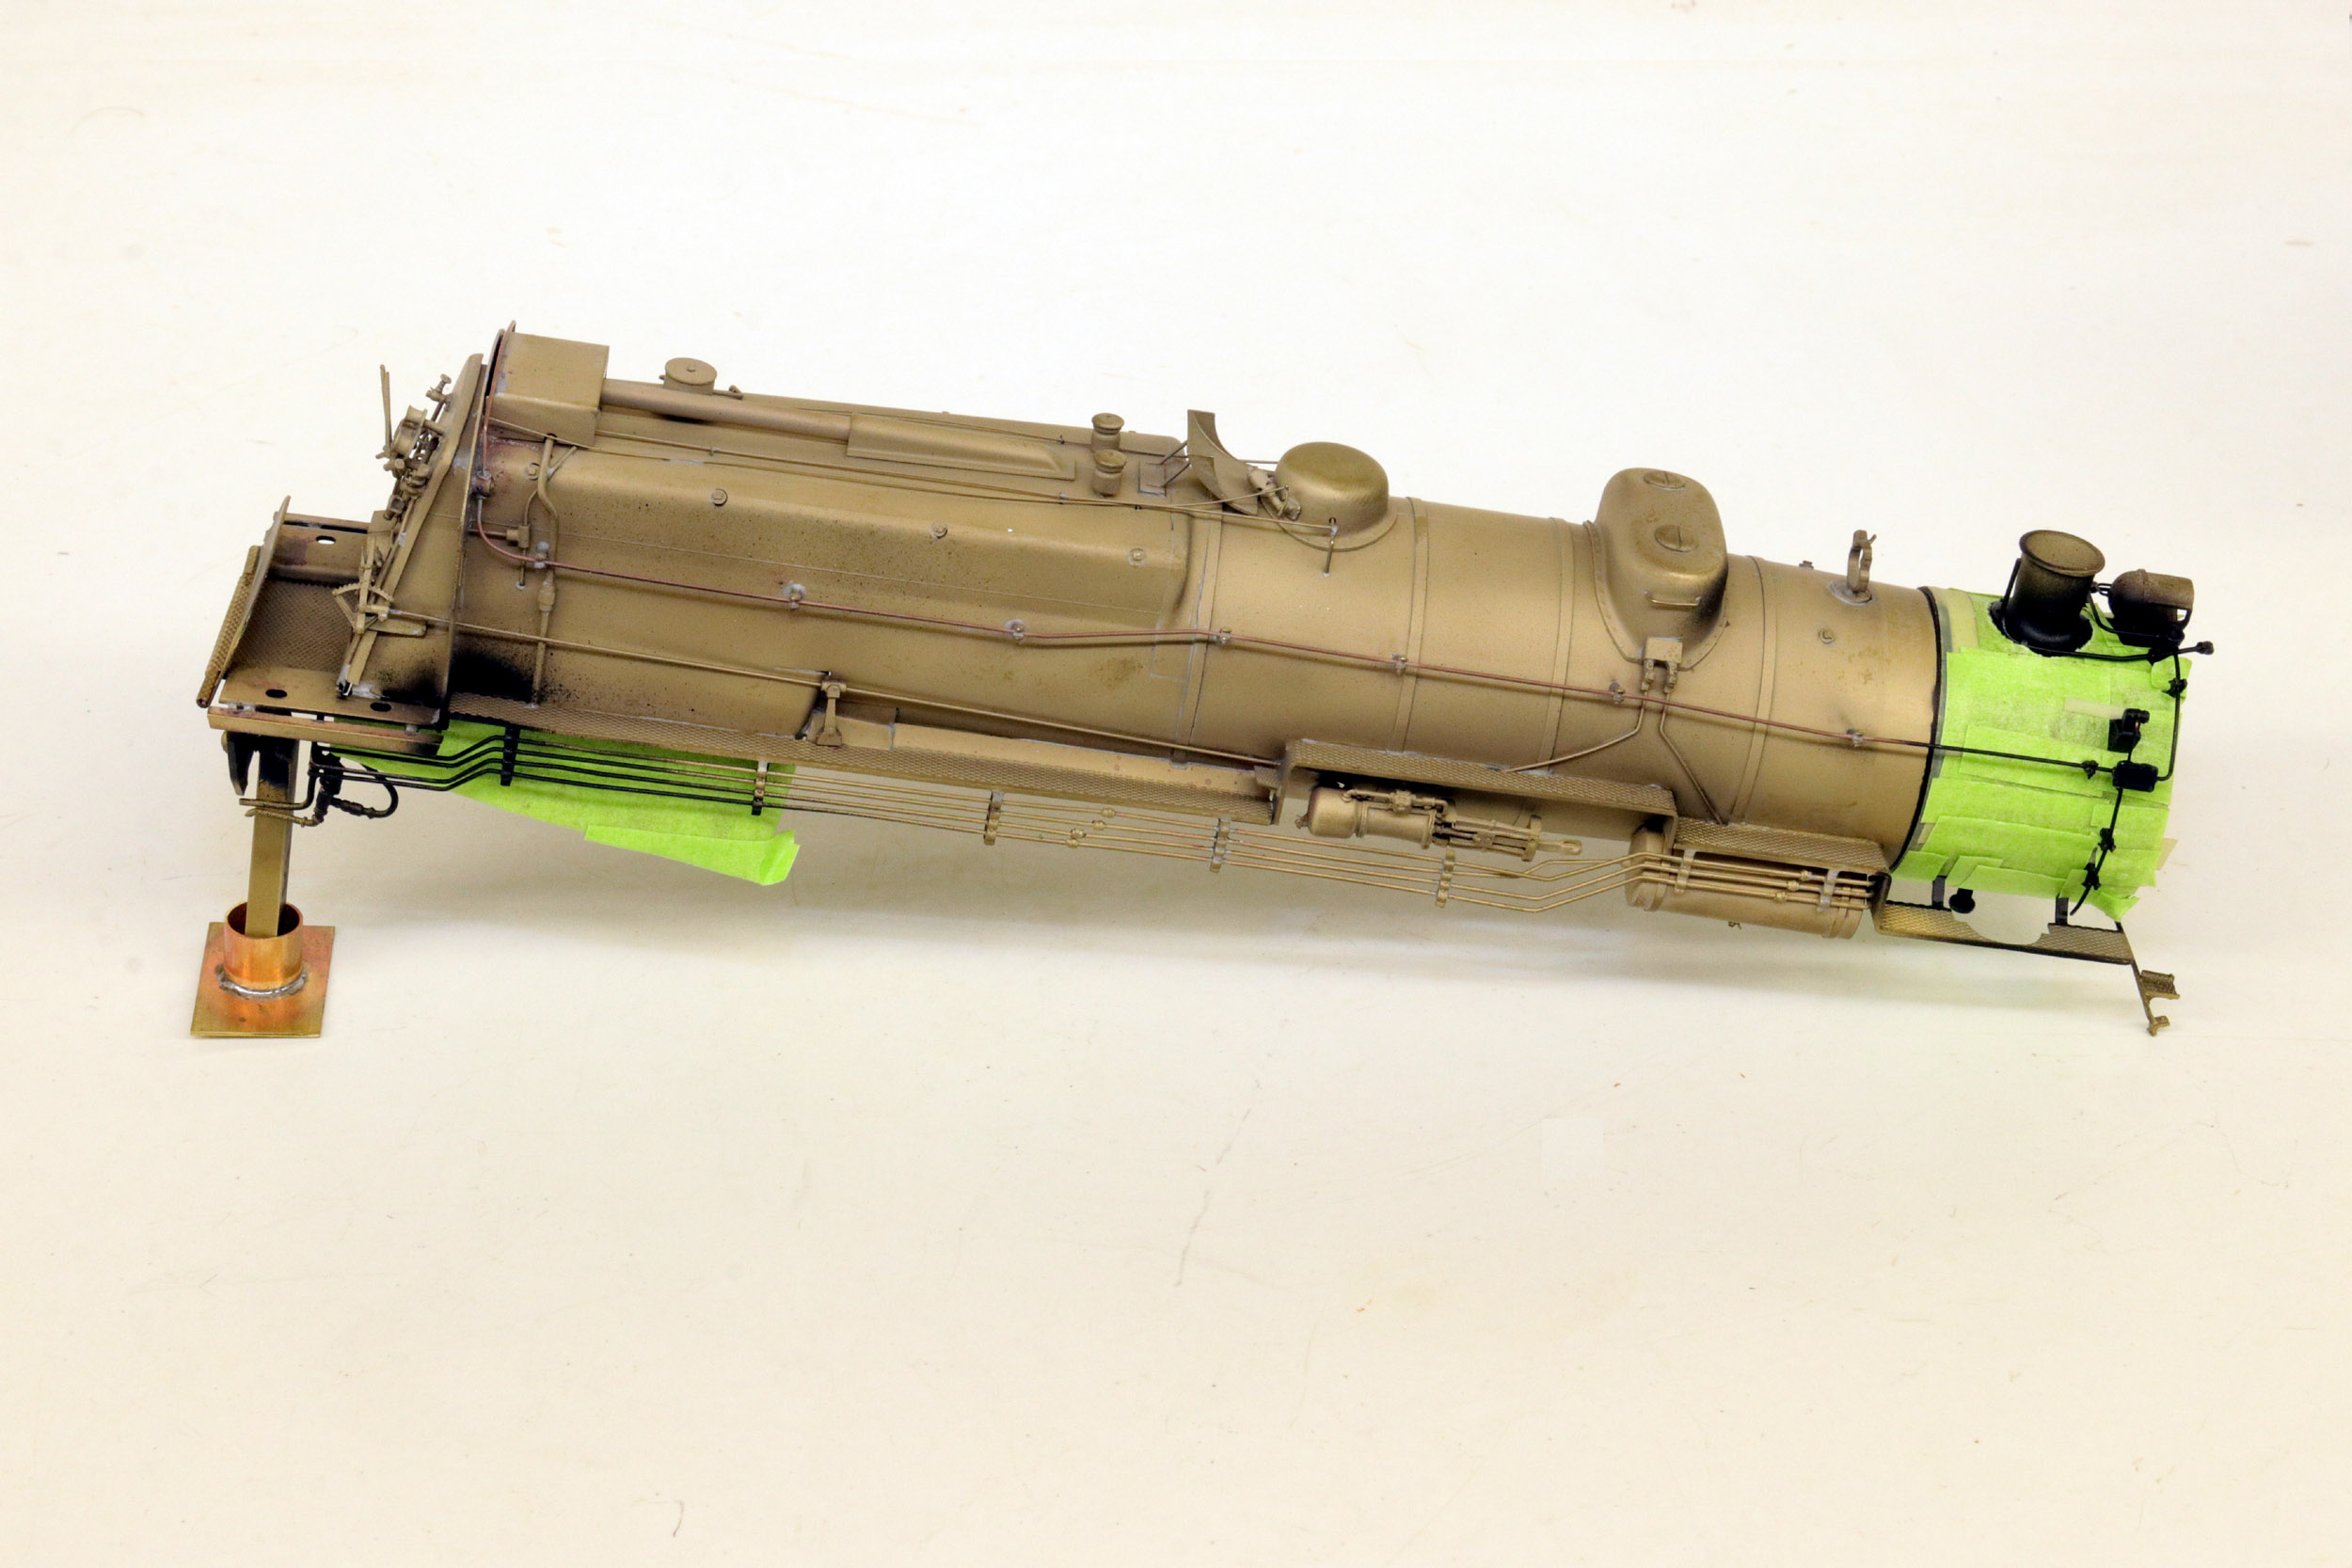
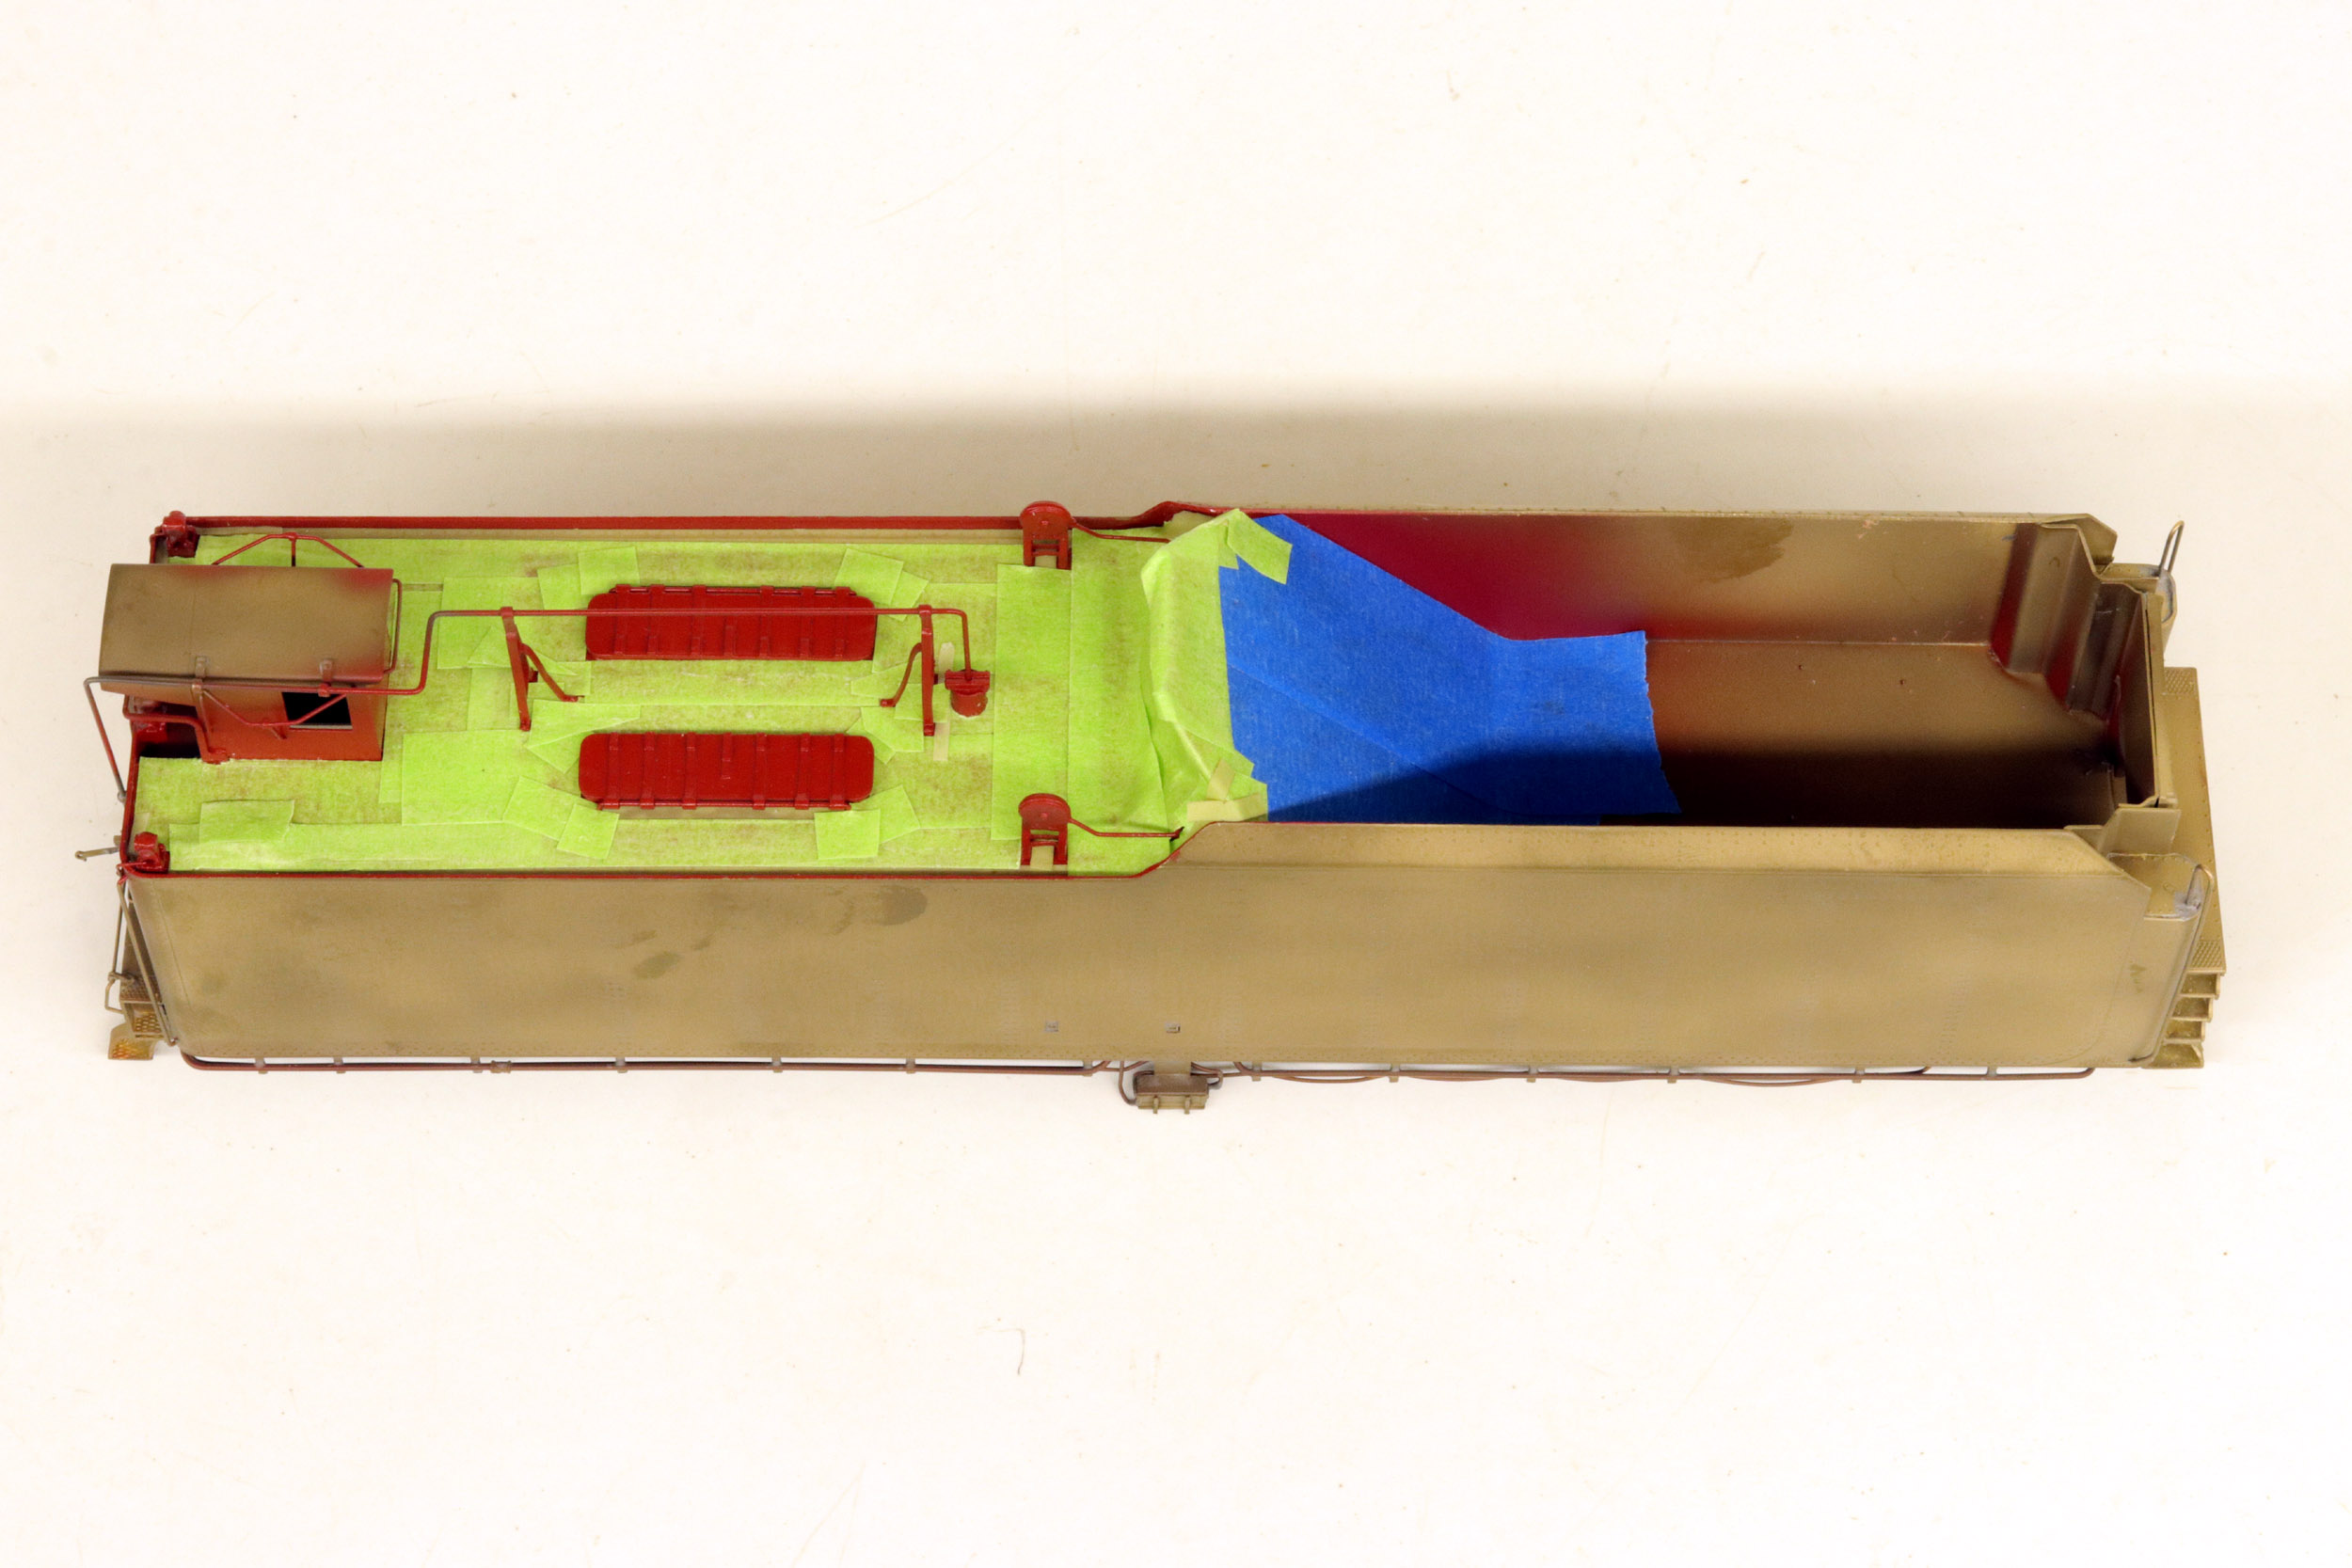
The tarnish turns dark brown when sitting for months. Tarnish actually starts rather quickly right after blasting which is why painting as SOON as possible is always best. Everything gets another blasting just before paint.
I
HATE Masking
Added 3-20-21
There
is nothing in working on my trains that I HATE more than masking for painting.
My goal is to do as little hand touch up as possible so that makes for an
extremely tedious job of masking the boiler and tender. The bracket on the back
of the boiler is a part of my painting holder.
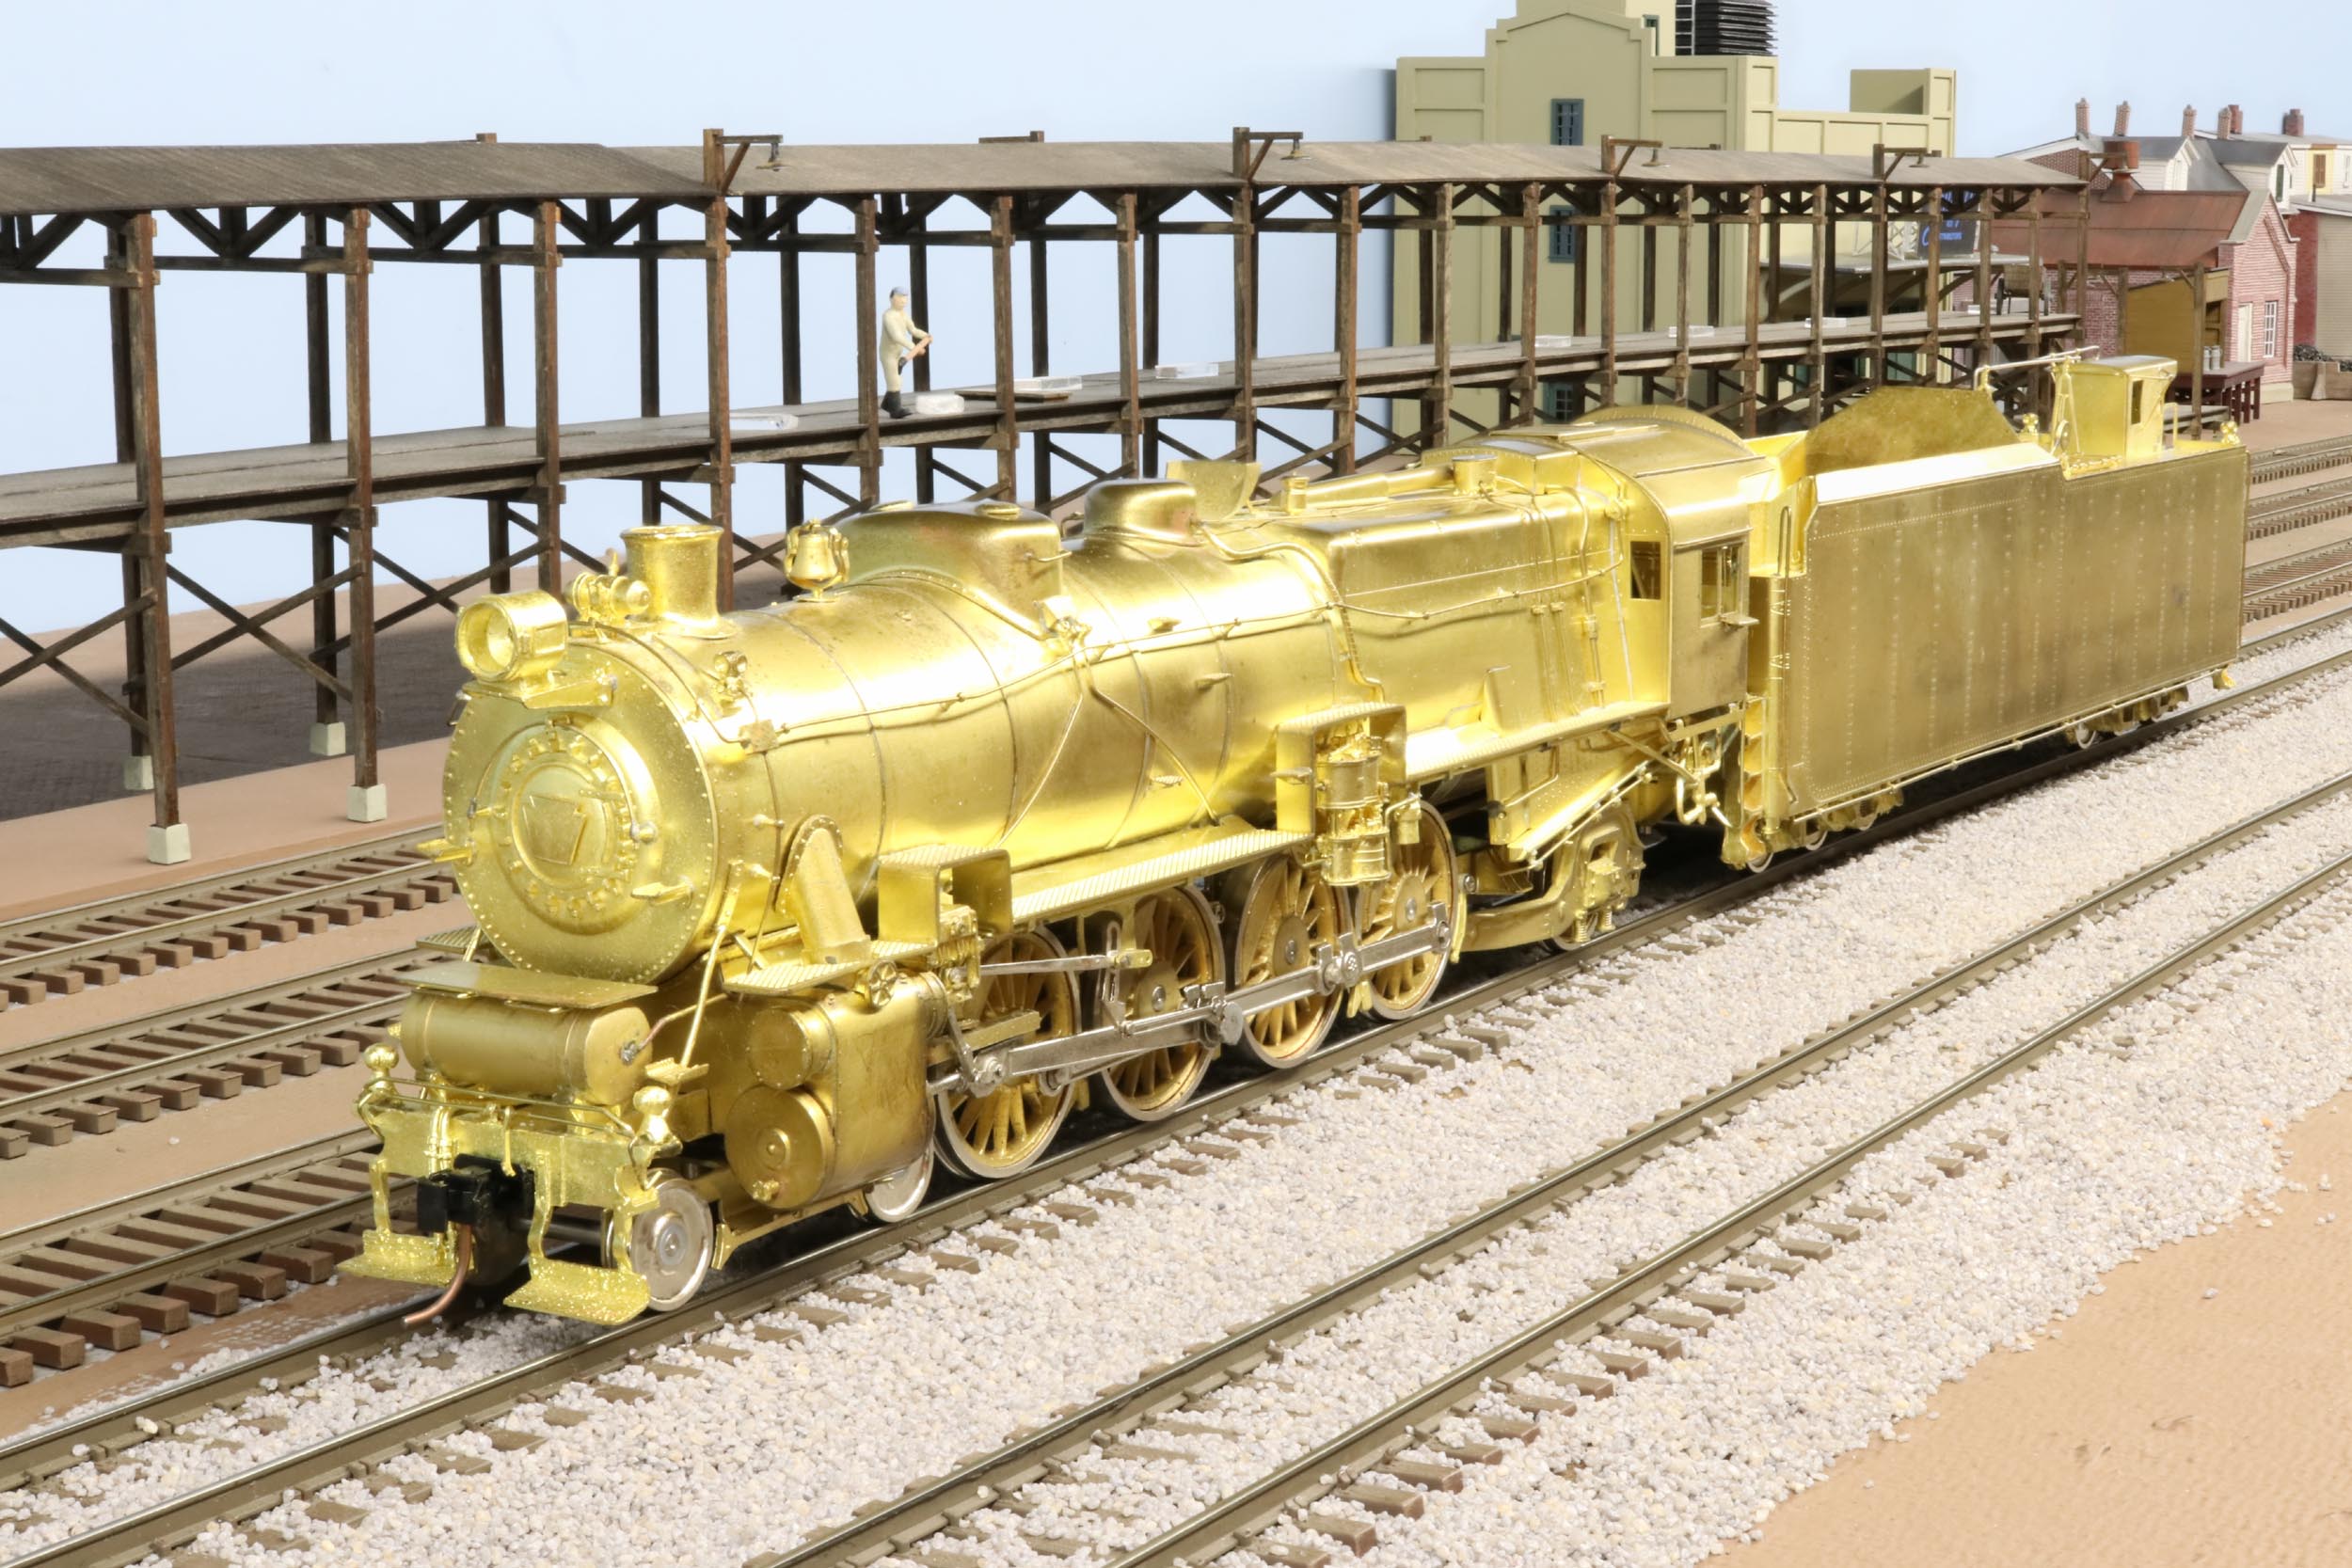
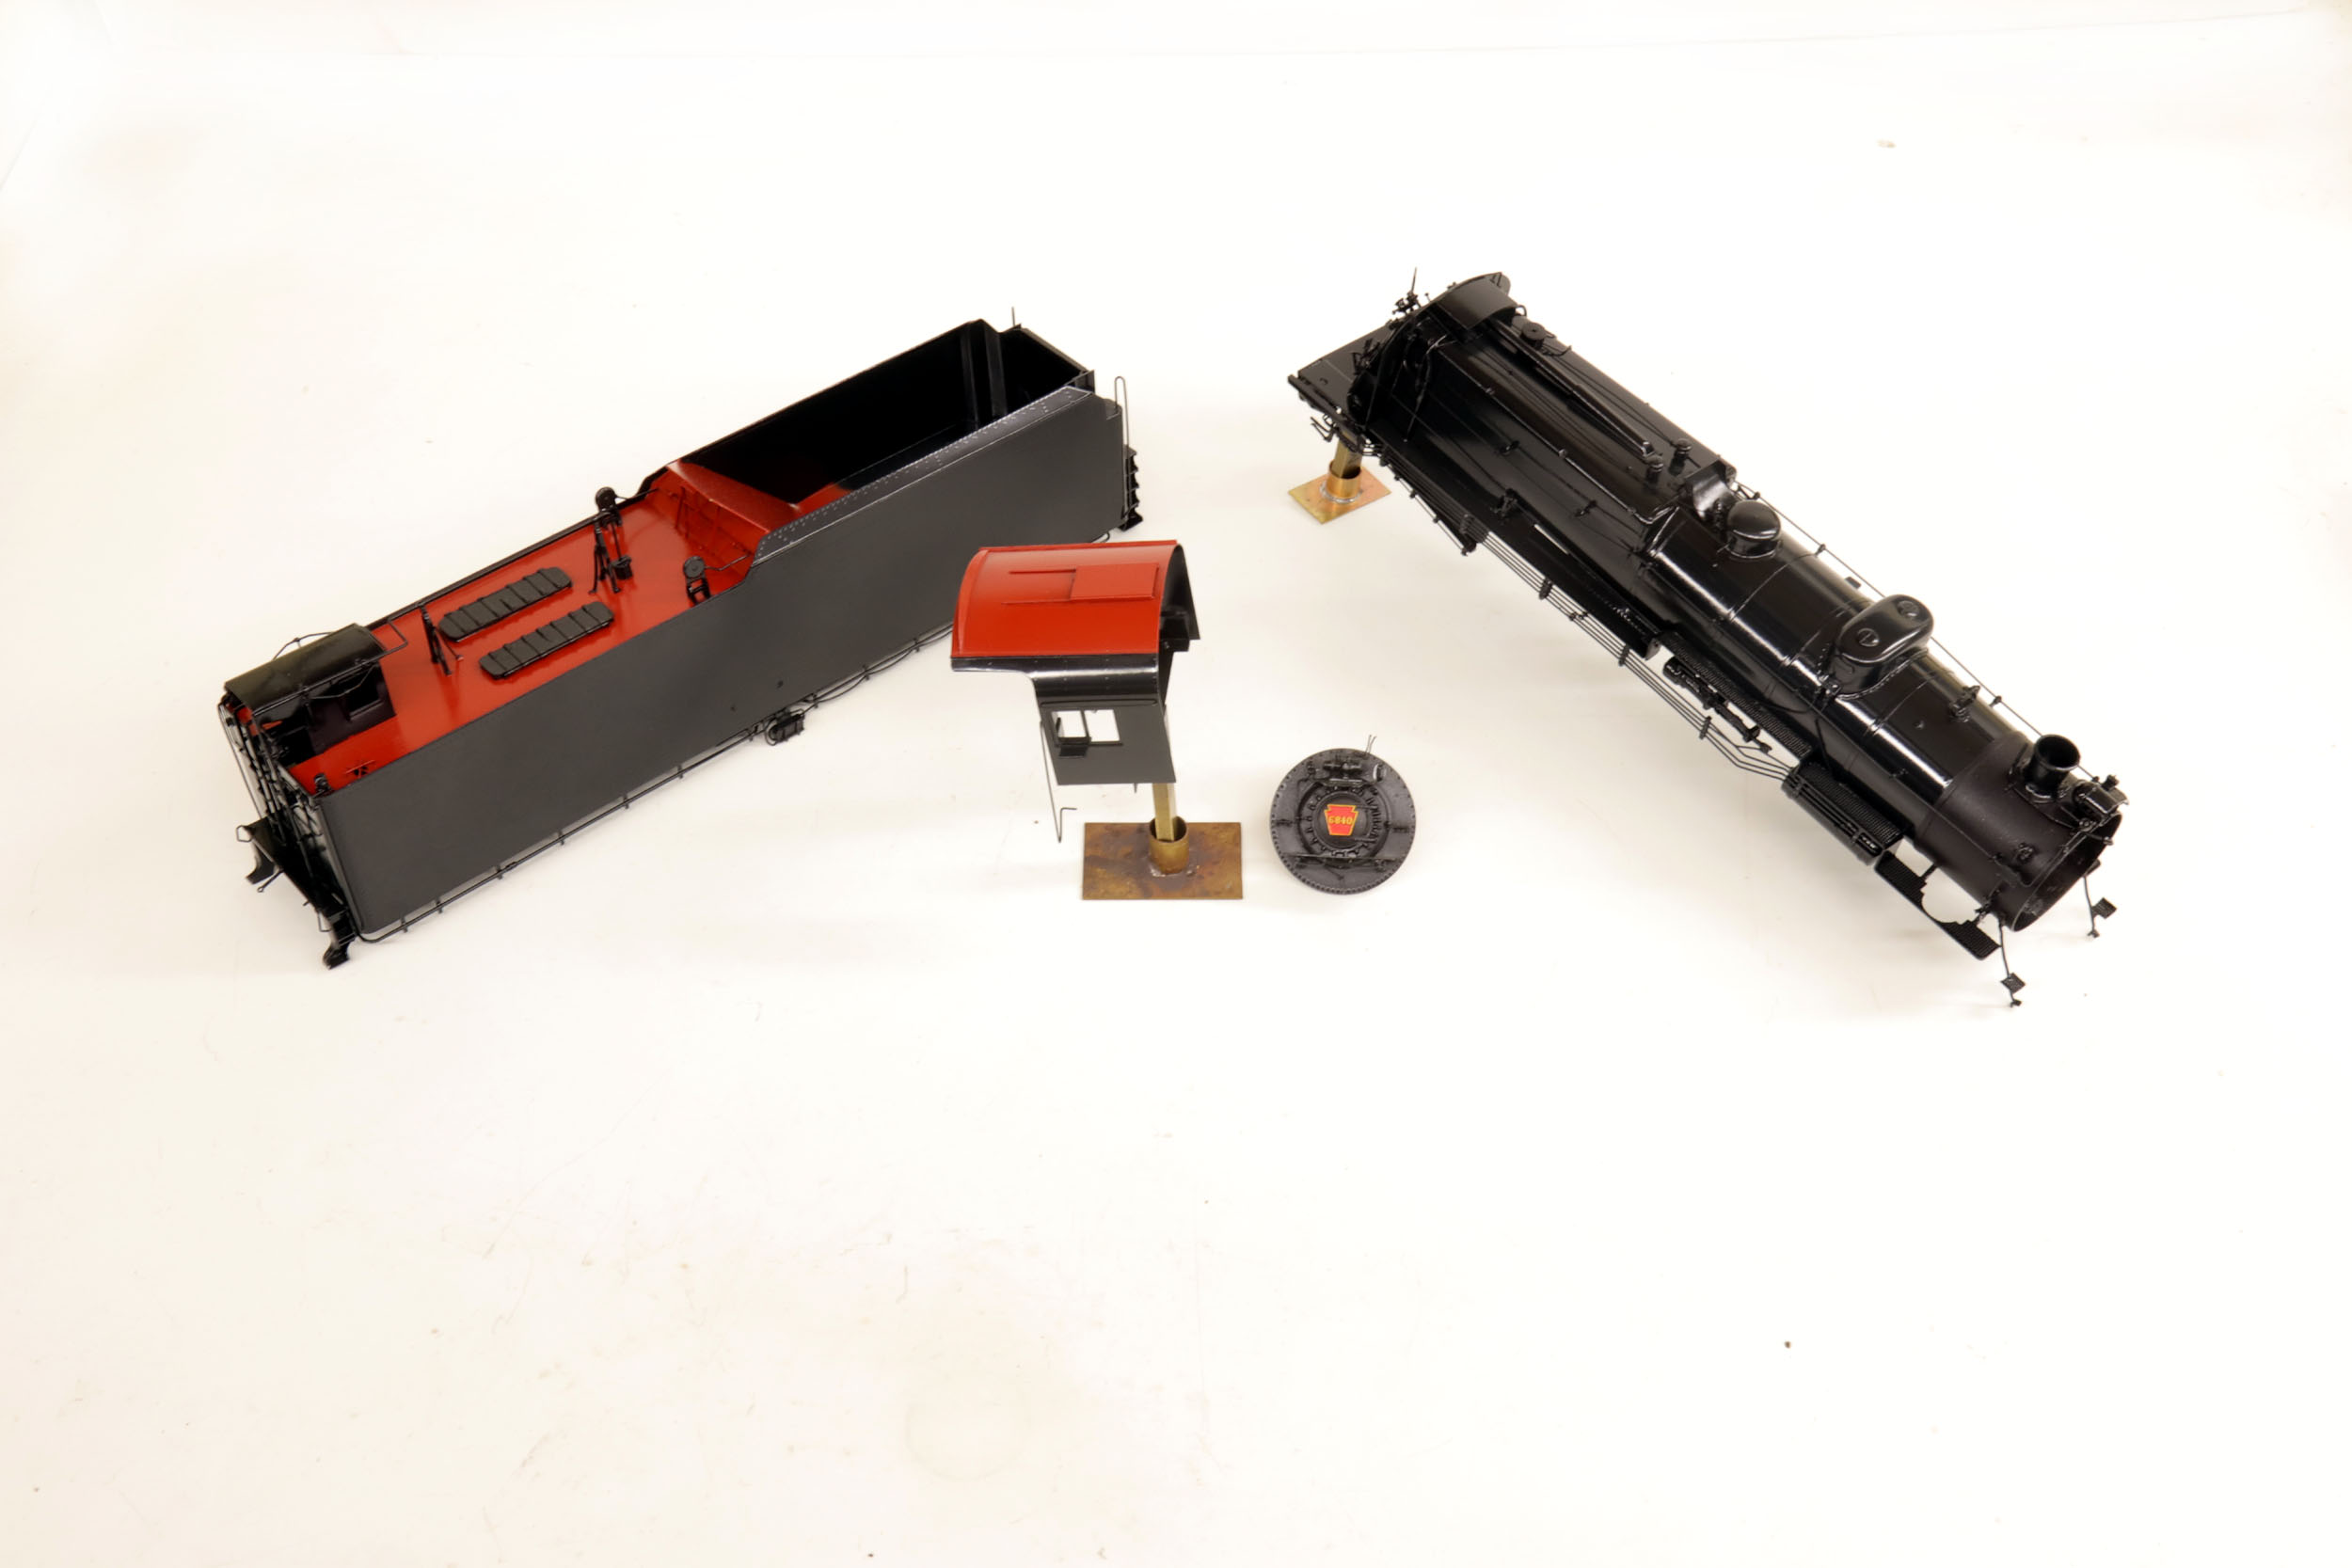
Painting Is Done
Added 3-24-21
Finally
the painting is done. Baking makes Scalecoat paint very glossy. I used Floquil
graphite for the smokebox paint. The numberplates turned out really well for the 3 locos in this
project. I used Tru Color flat Santa Fe red and flat yellow.
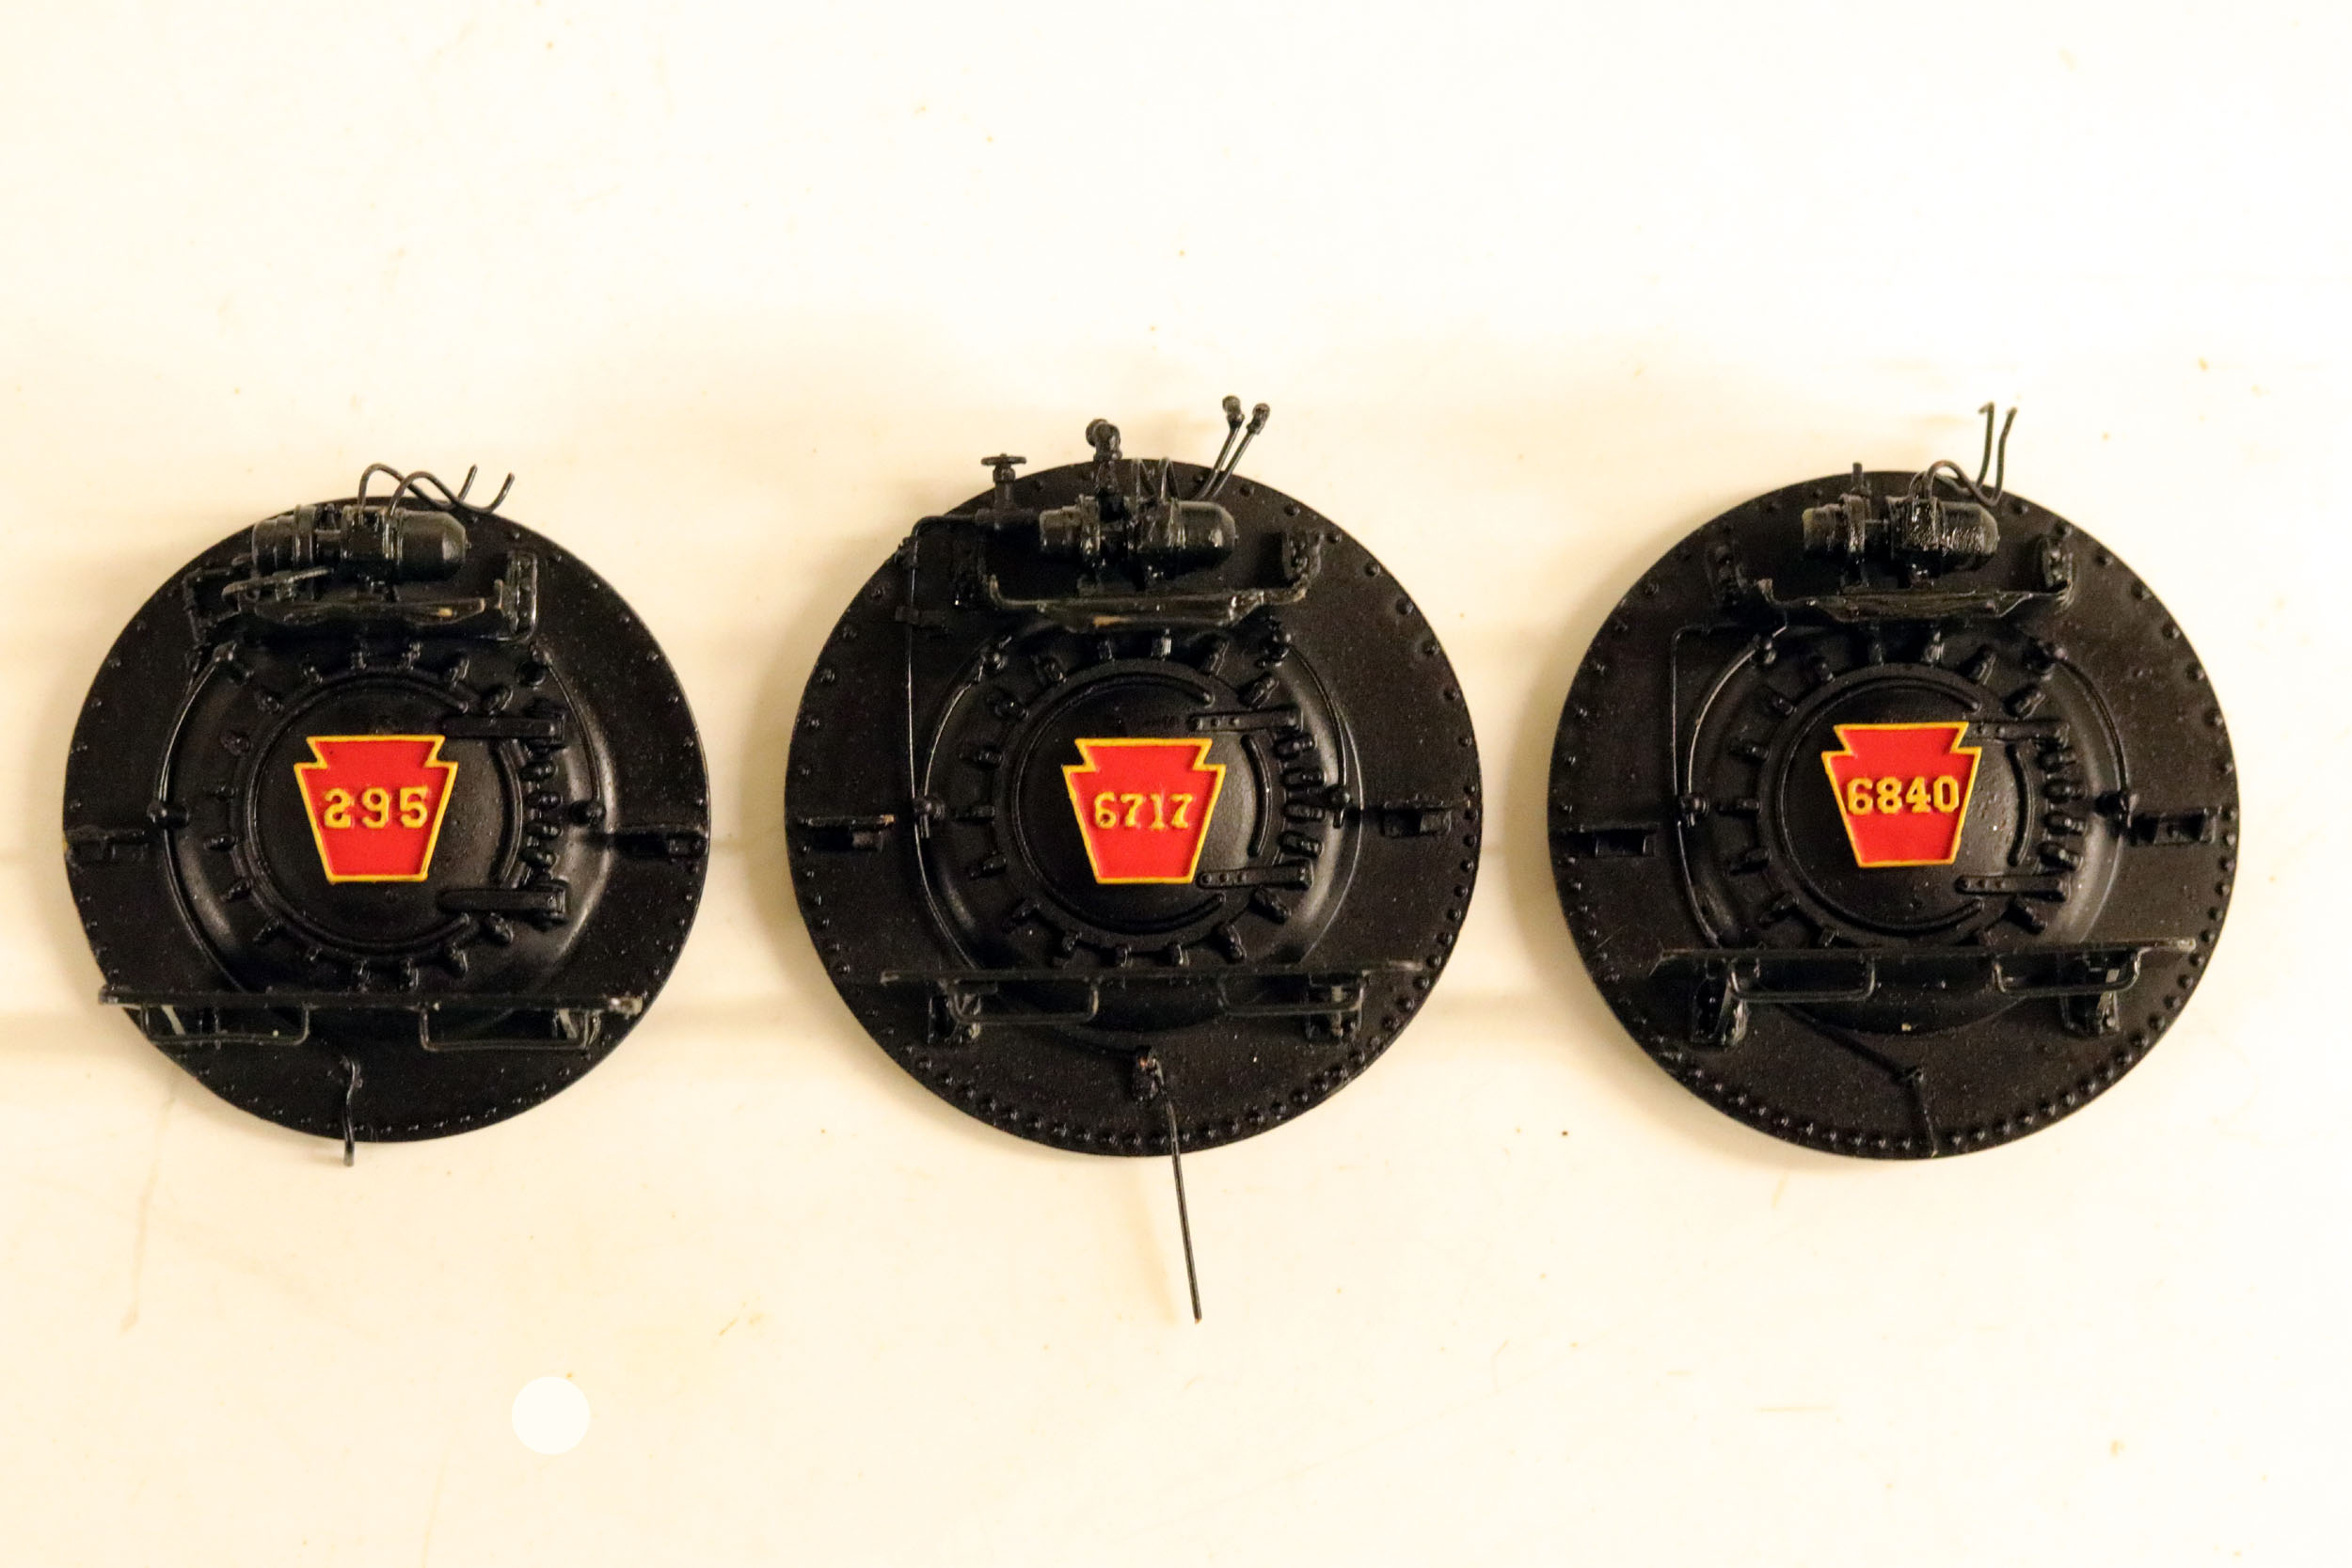
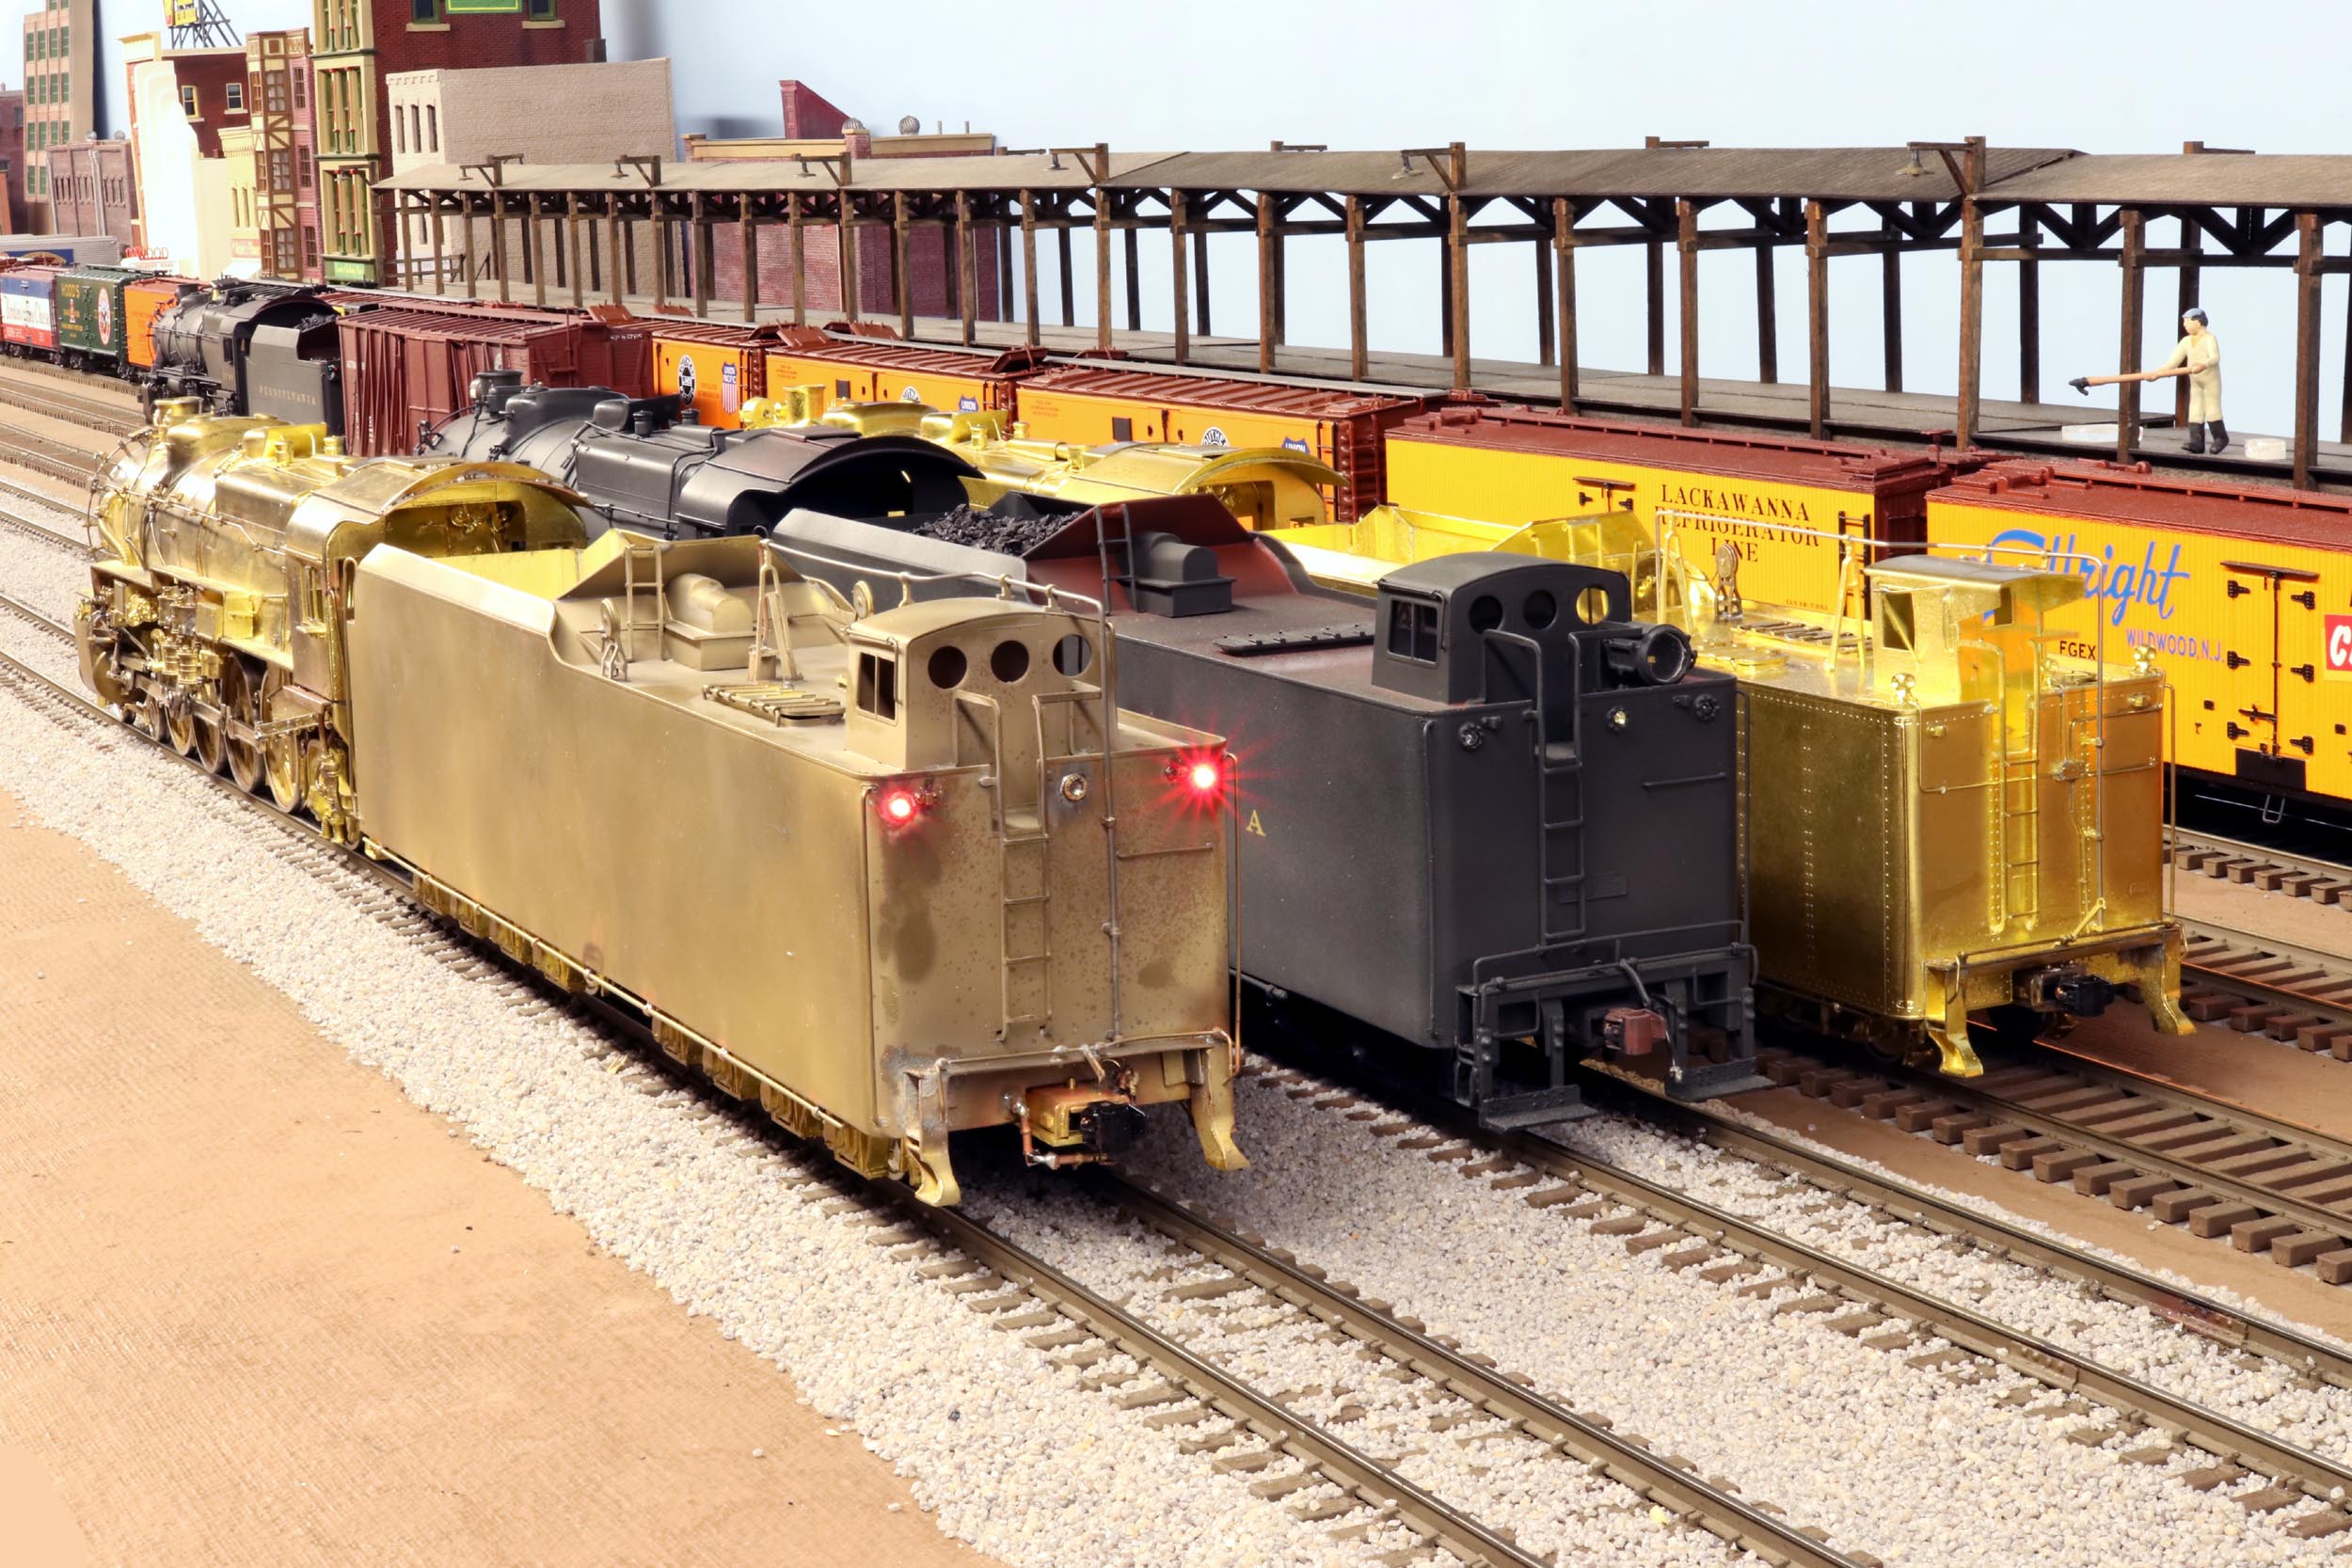
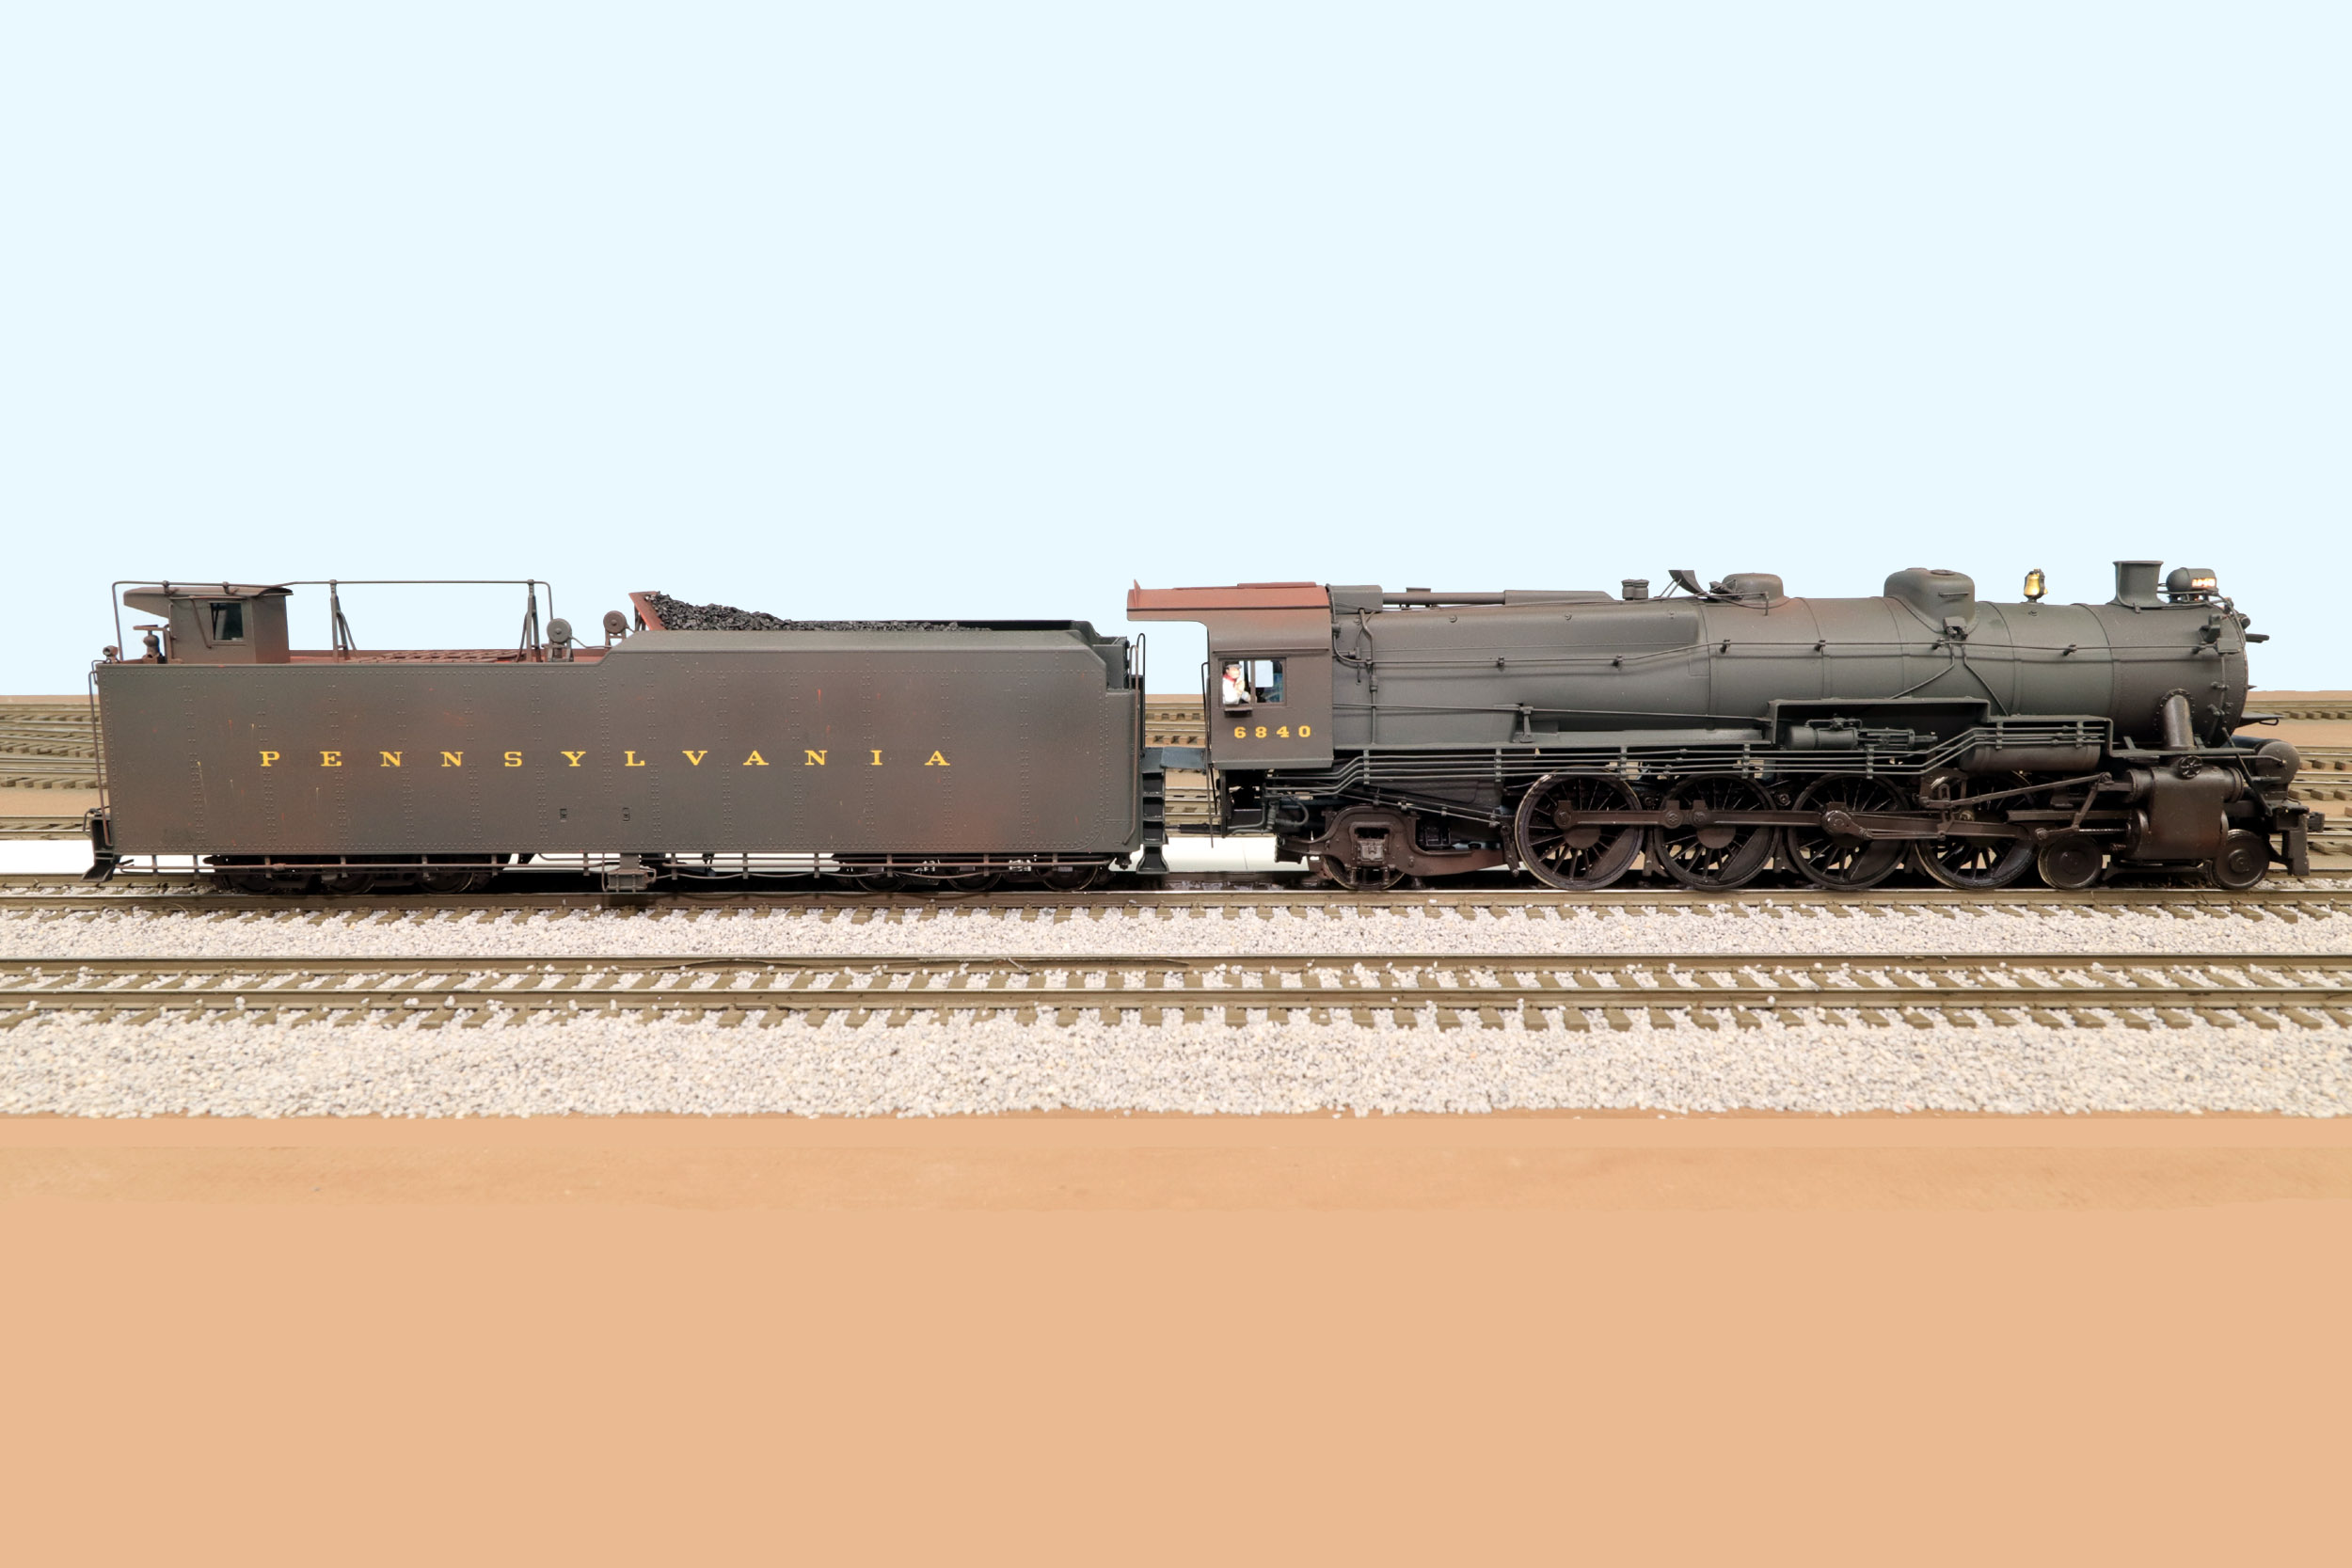
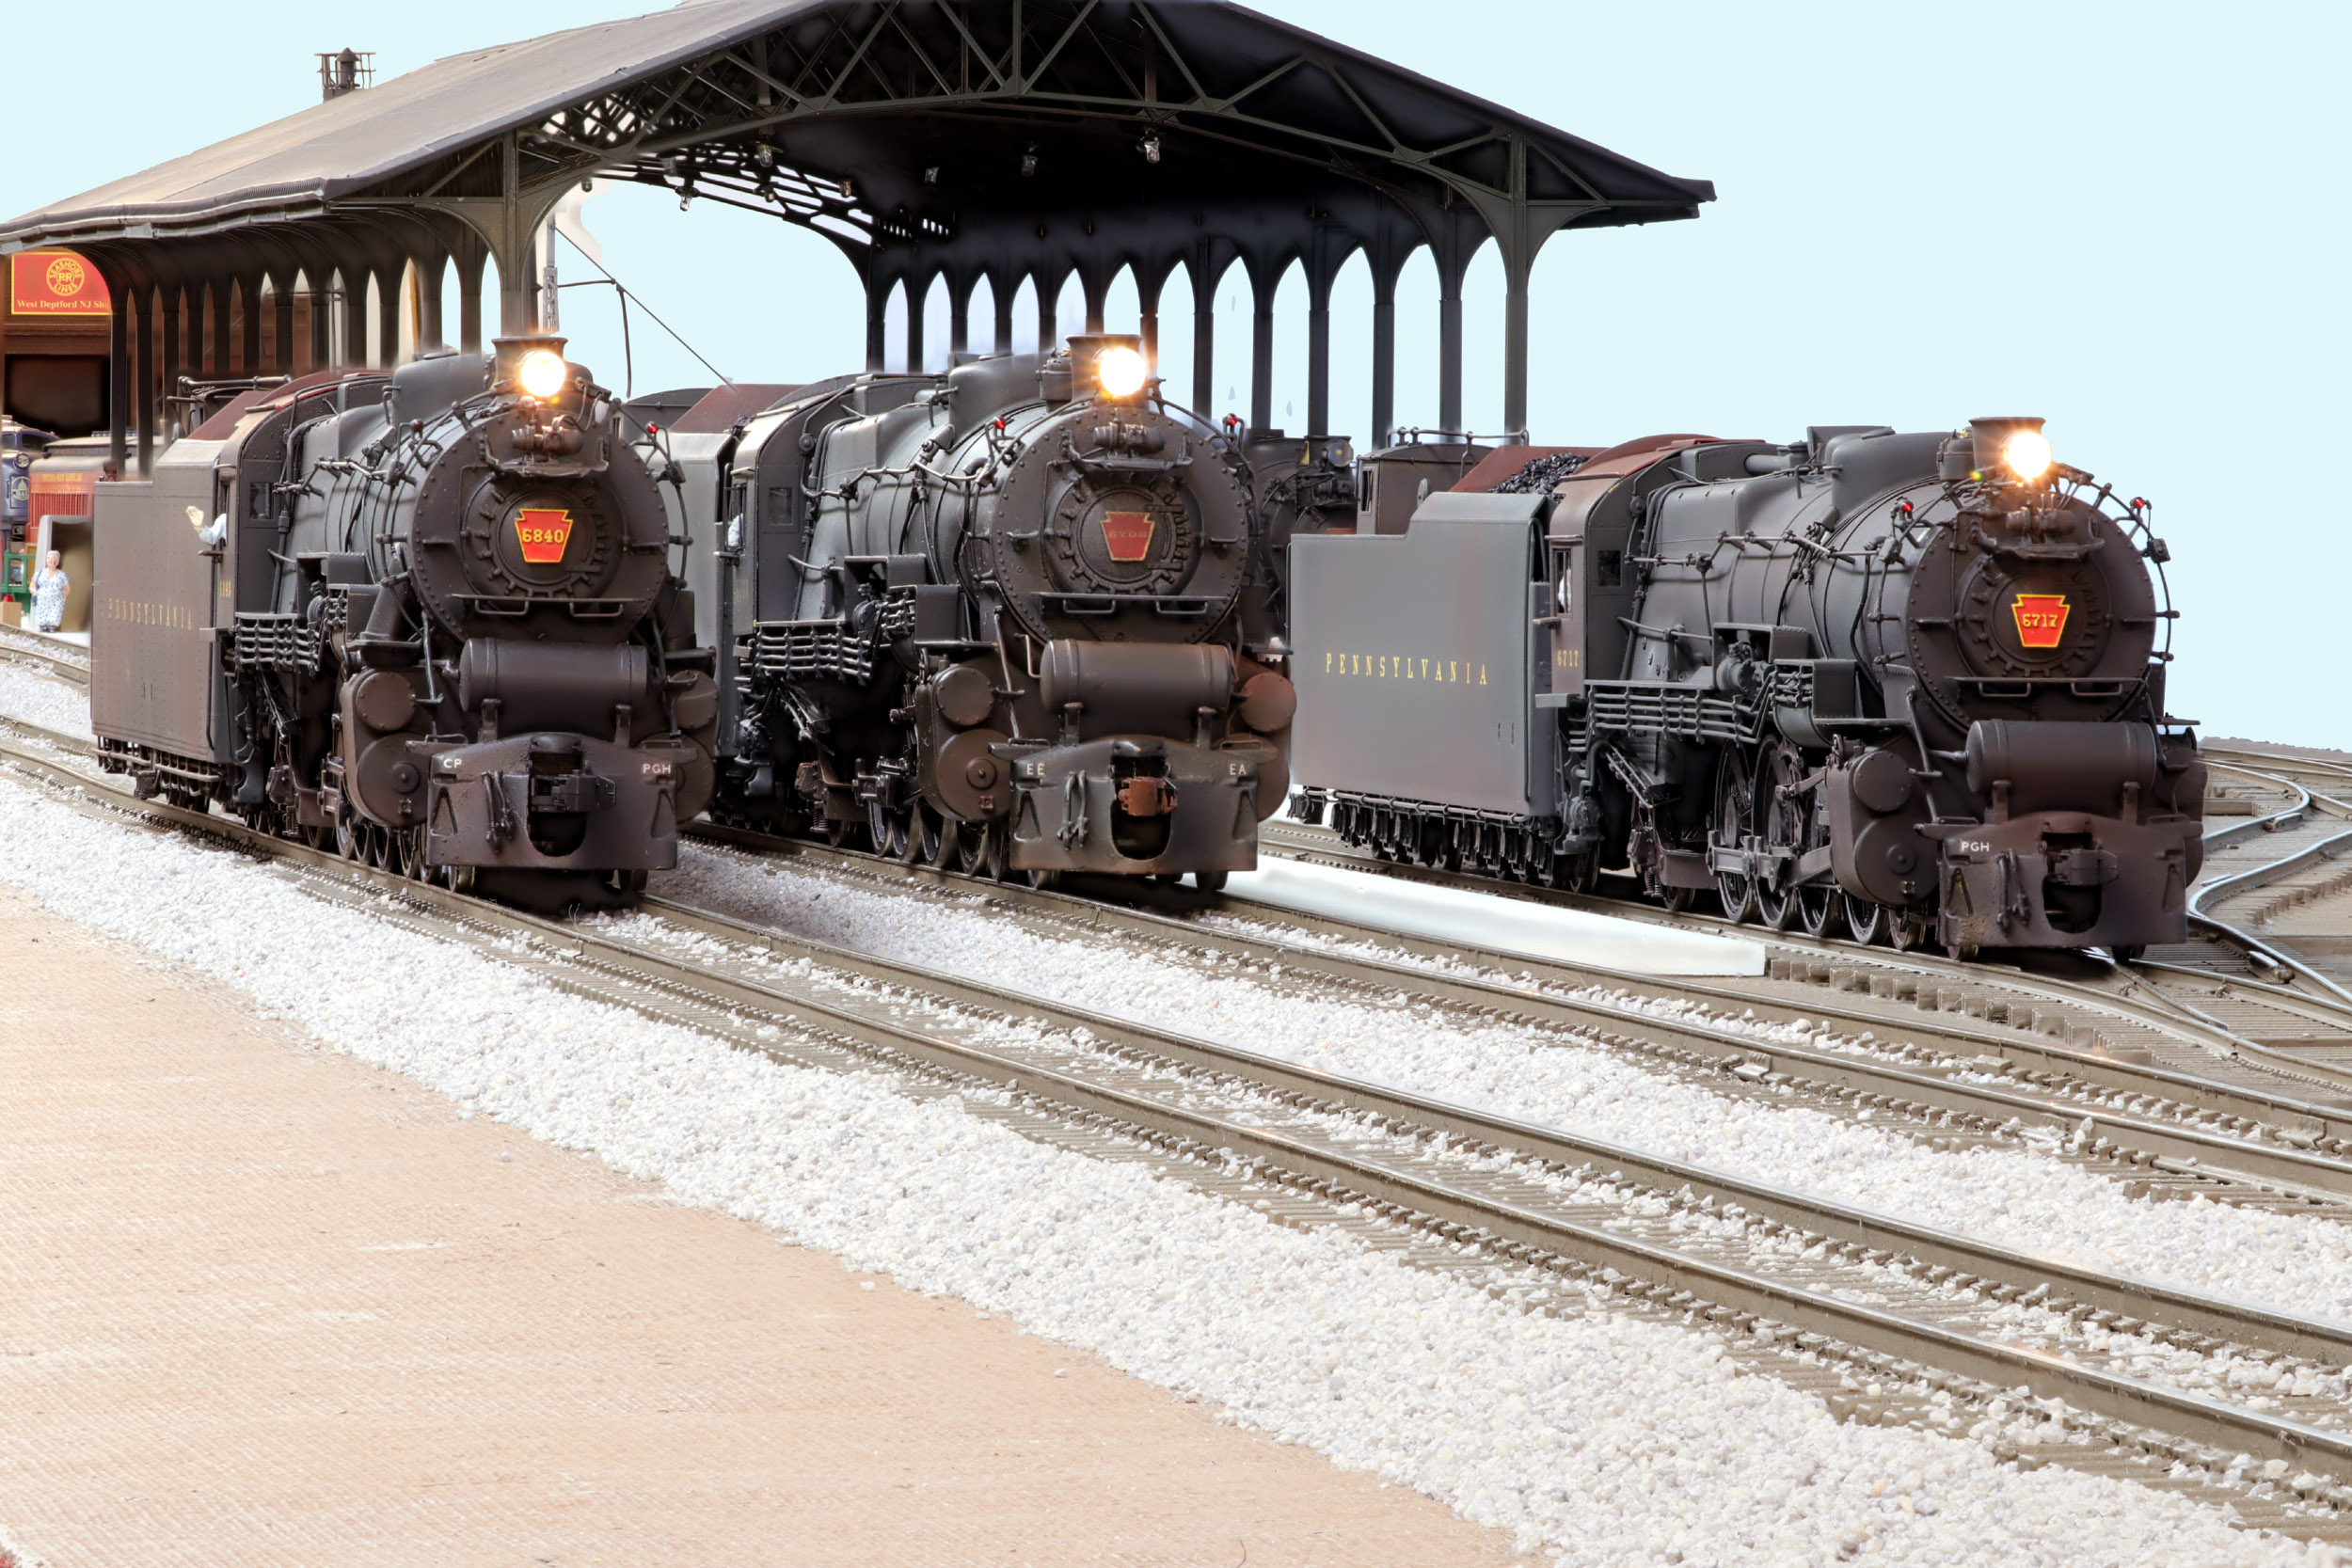
Completed 4-1-21
This
completes me having all my brass PRR locos in paint. The 3 in this project are
the last of existing brass PRR steam locos I will have. It is all but assured
no one else is going to make any new brass locos in the future. I am not buying
any more. The modernization is too much work. Still I have the most unique and
detailed collection of PRR steam locos in S Scale. Almost all of them have been
significantly modified with parts I made that no one else has. My M1a 6702 is
now my oldest surviving paint job. It is also my first modernization. I bought
a K4 that was
modernized and was a guide for later locos completed. Both could be updated and
improved at some point to better match the rest of the fleet.
I
was hitting my attention span wall again just trying to get the 3 locos done.
The weathering was by far the most minimal weathering I have done on my steam
locos. The cab roof and tender deck are still too bright. I had some thoughts
of making 1 of the 3 at least a semi gloss but that did not happen. This batch
of Scalecoat flat coat was pretty good and flat. Scalecoat paints can vary from
bottle to bottle.
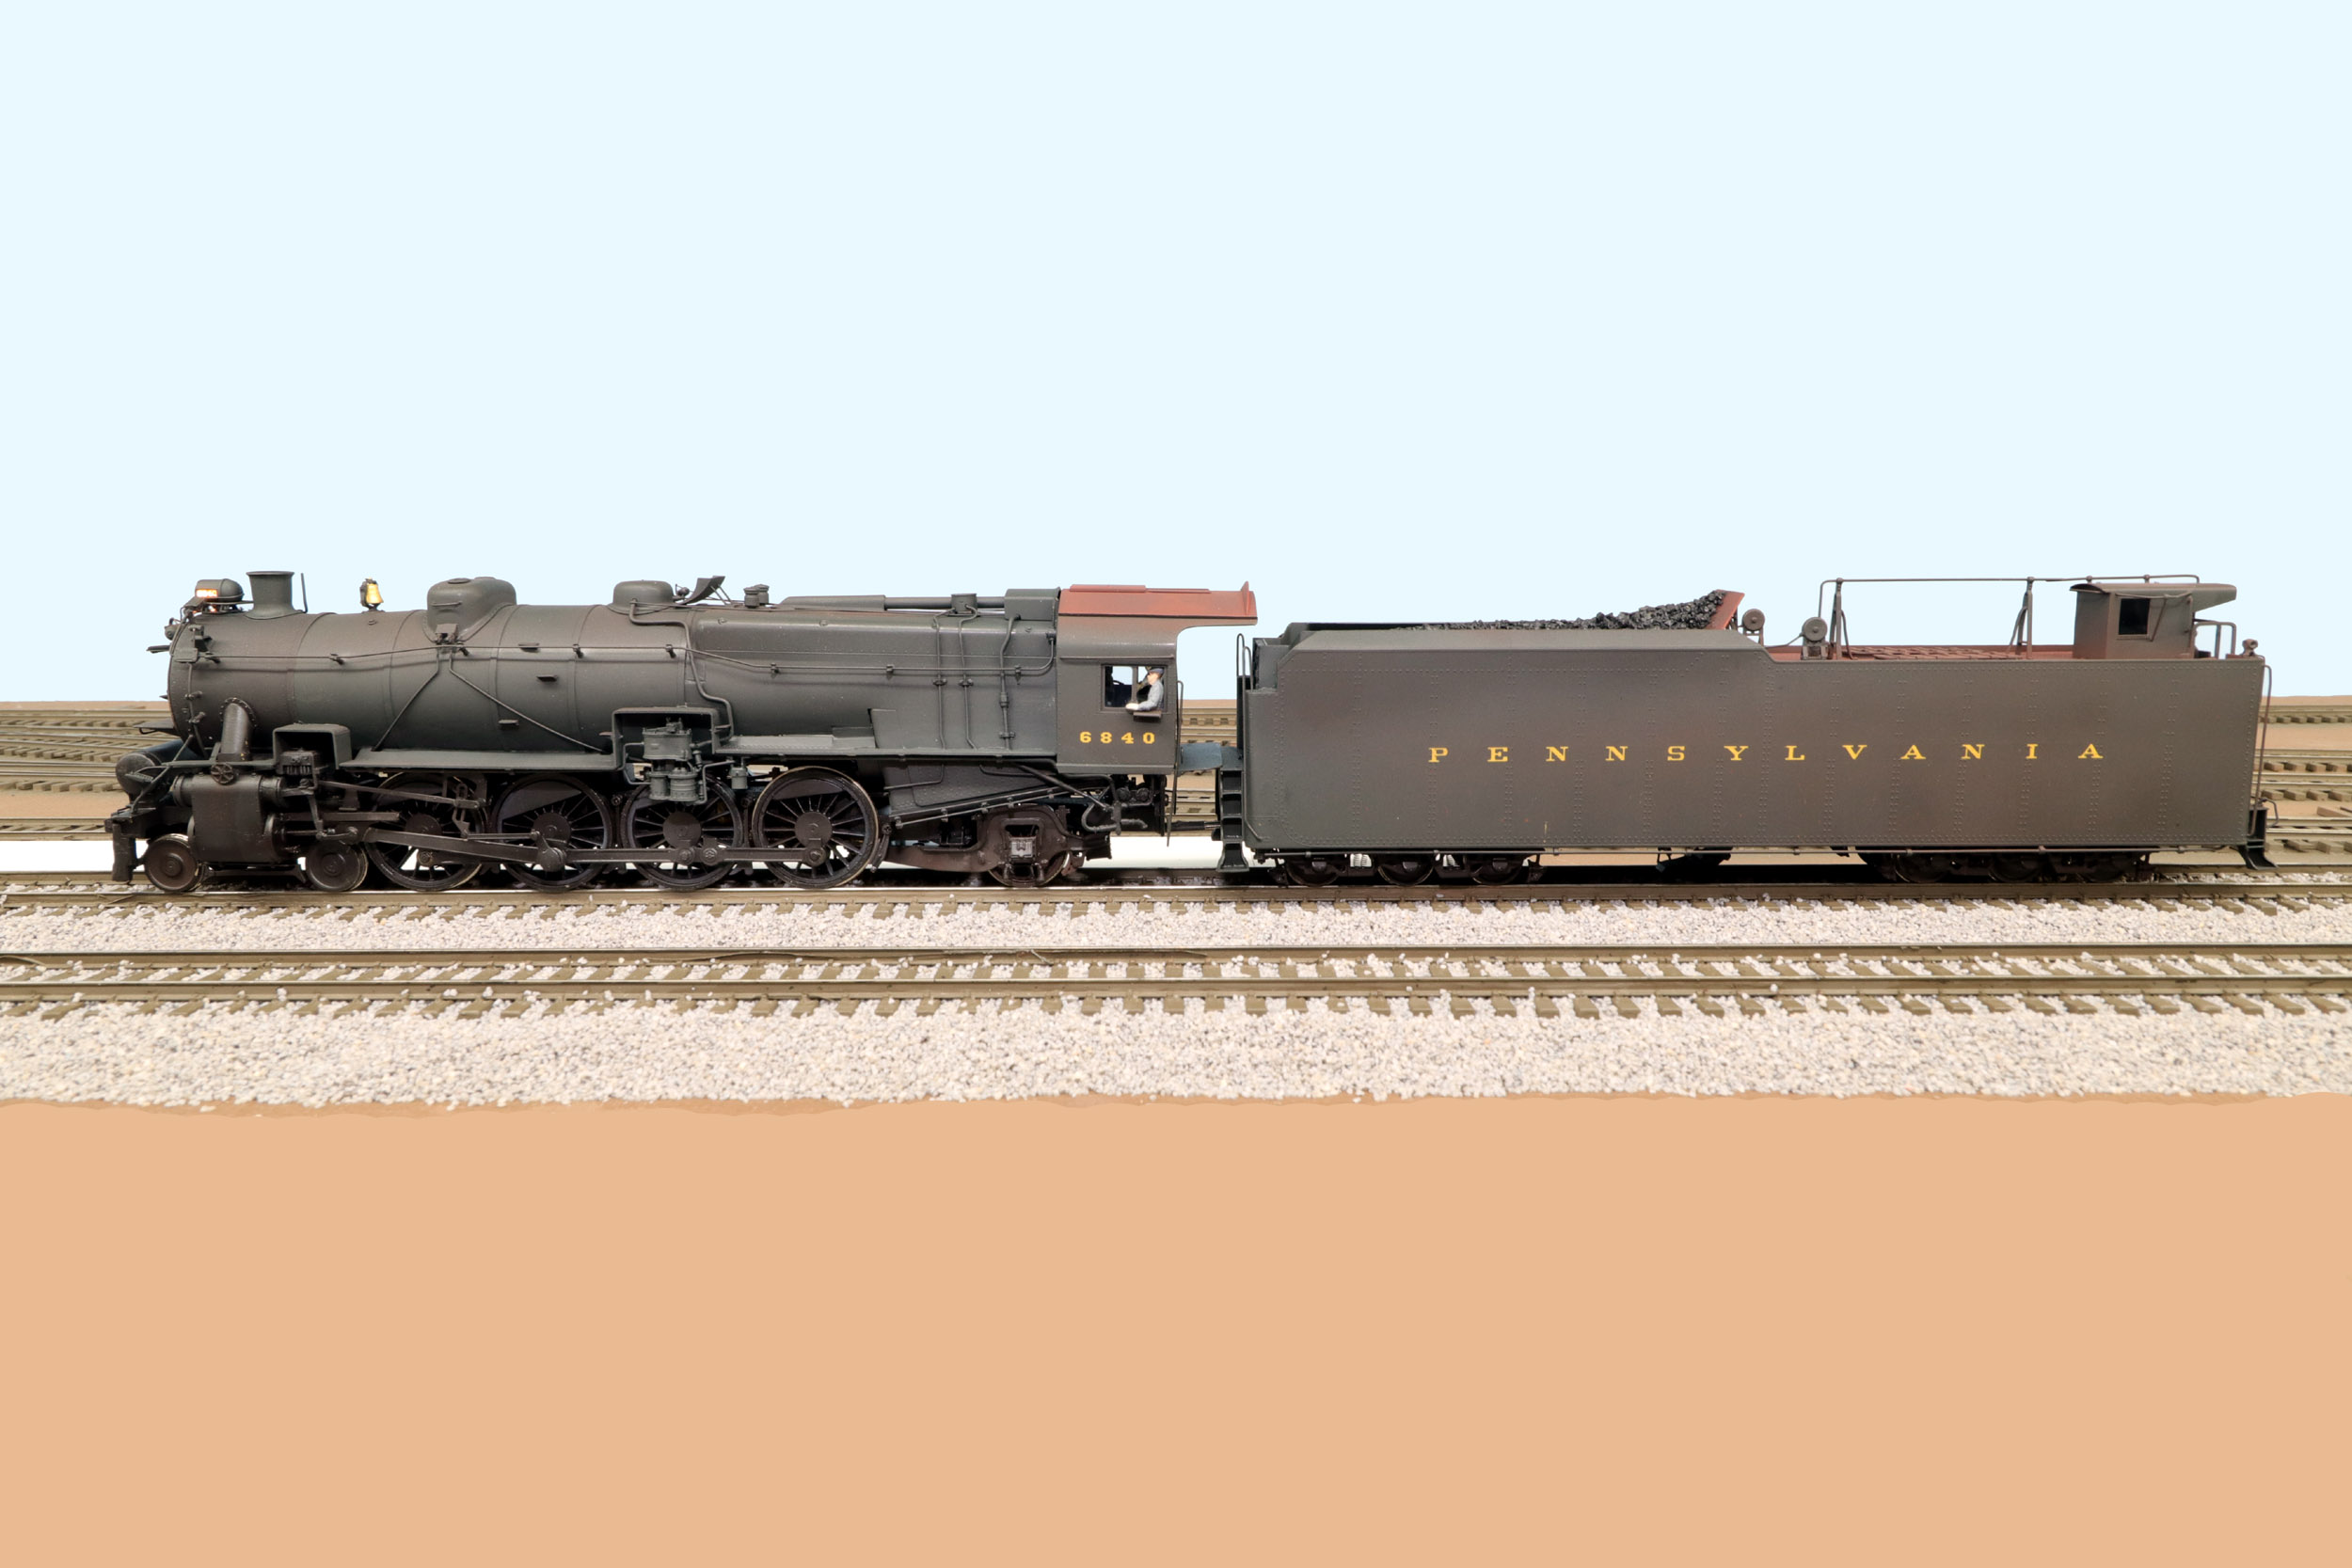
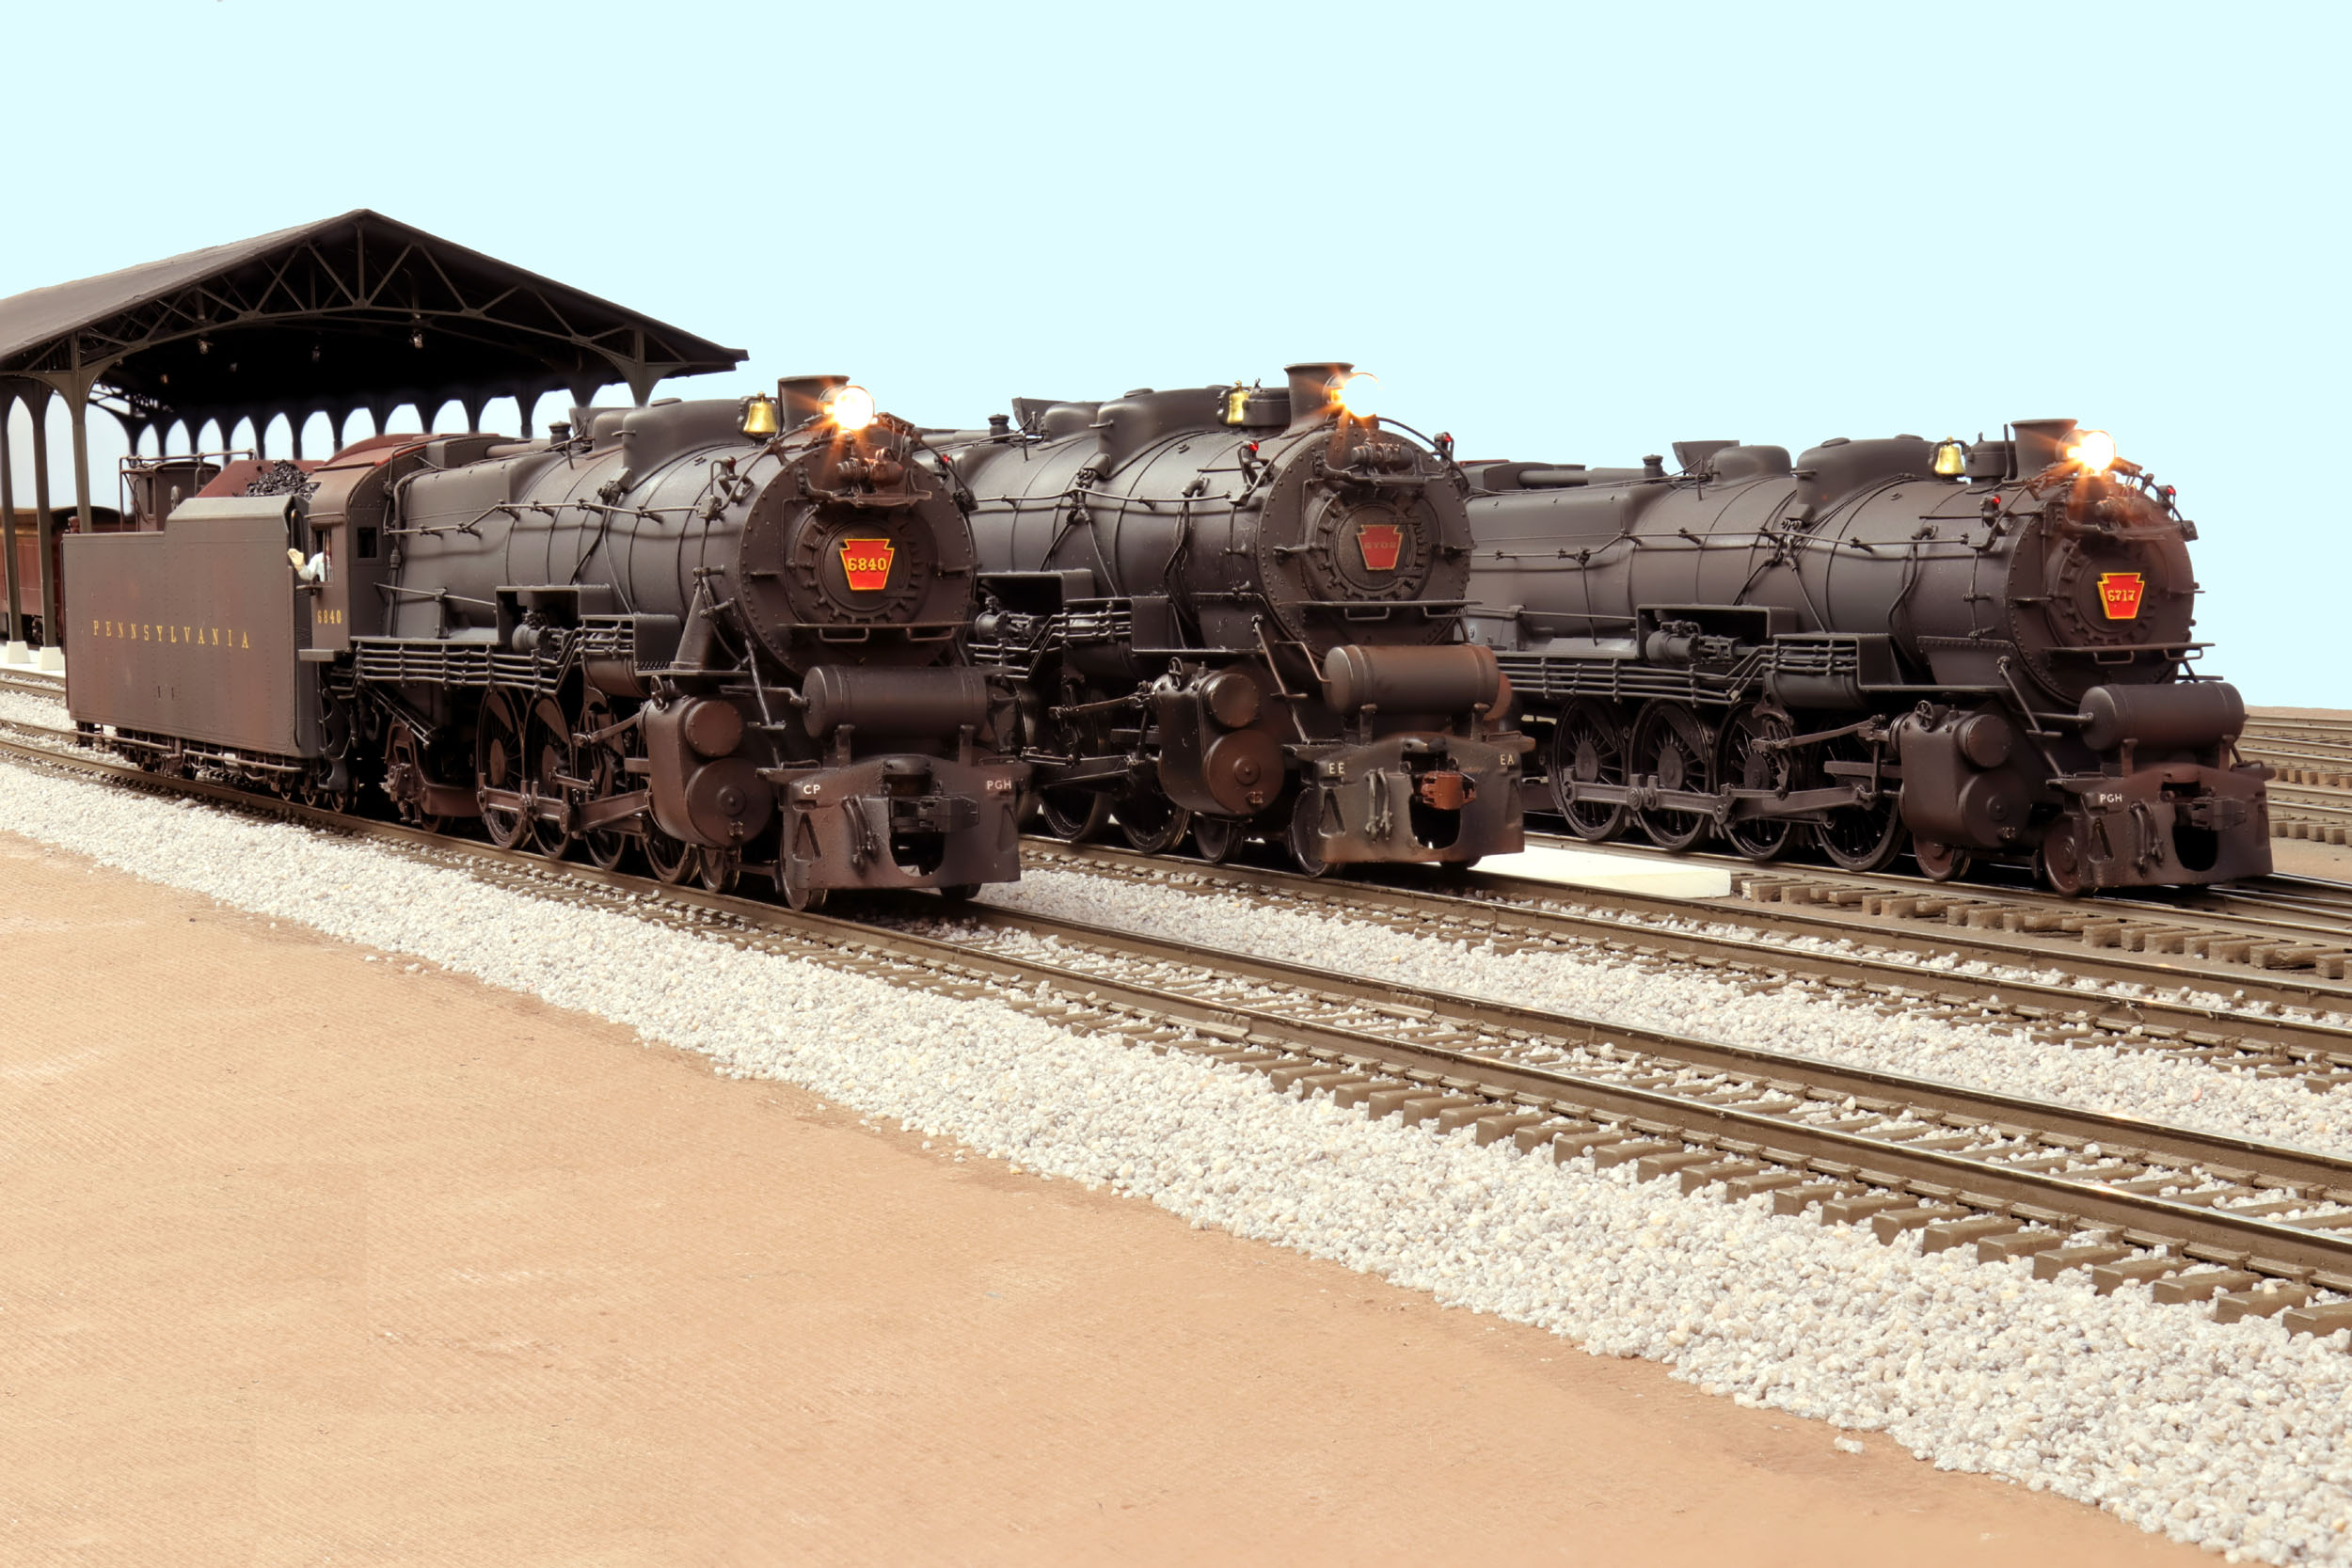
This
line up of the M1 at left, M1a and M1b does not exist anywhere else in S Scale.
The M1a in the center is likely my oldest existing paint job at about 25 years
old. All other old original paint jobs have been redone. It is my first attempt
at modernizing. That might get updated and repainted with a new cast
numberplate at some point.
Updated
4-1-21
All photos and content © Lanes Trains 2005-2021