|
|
Page
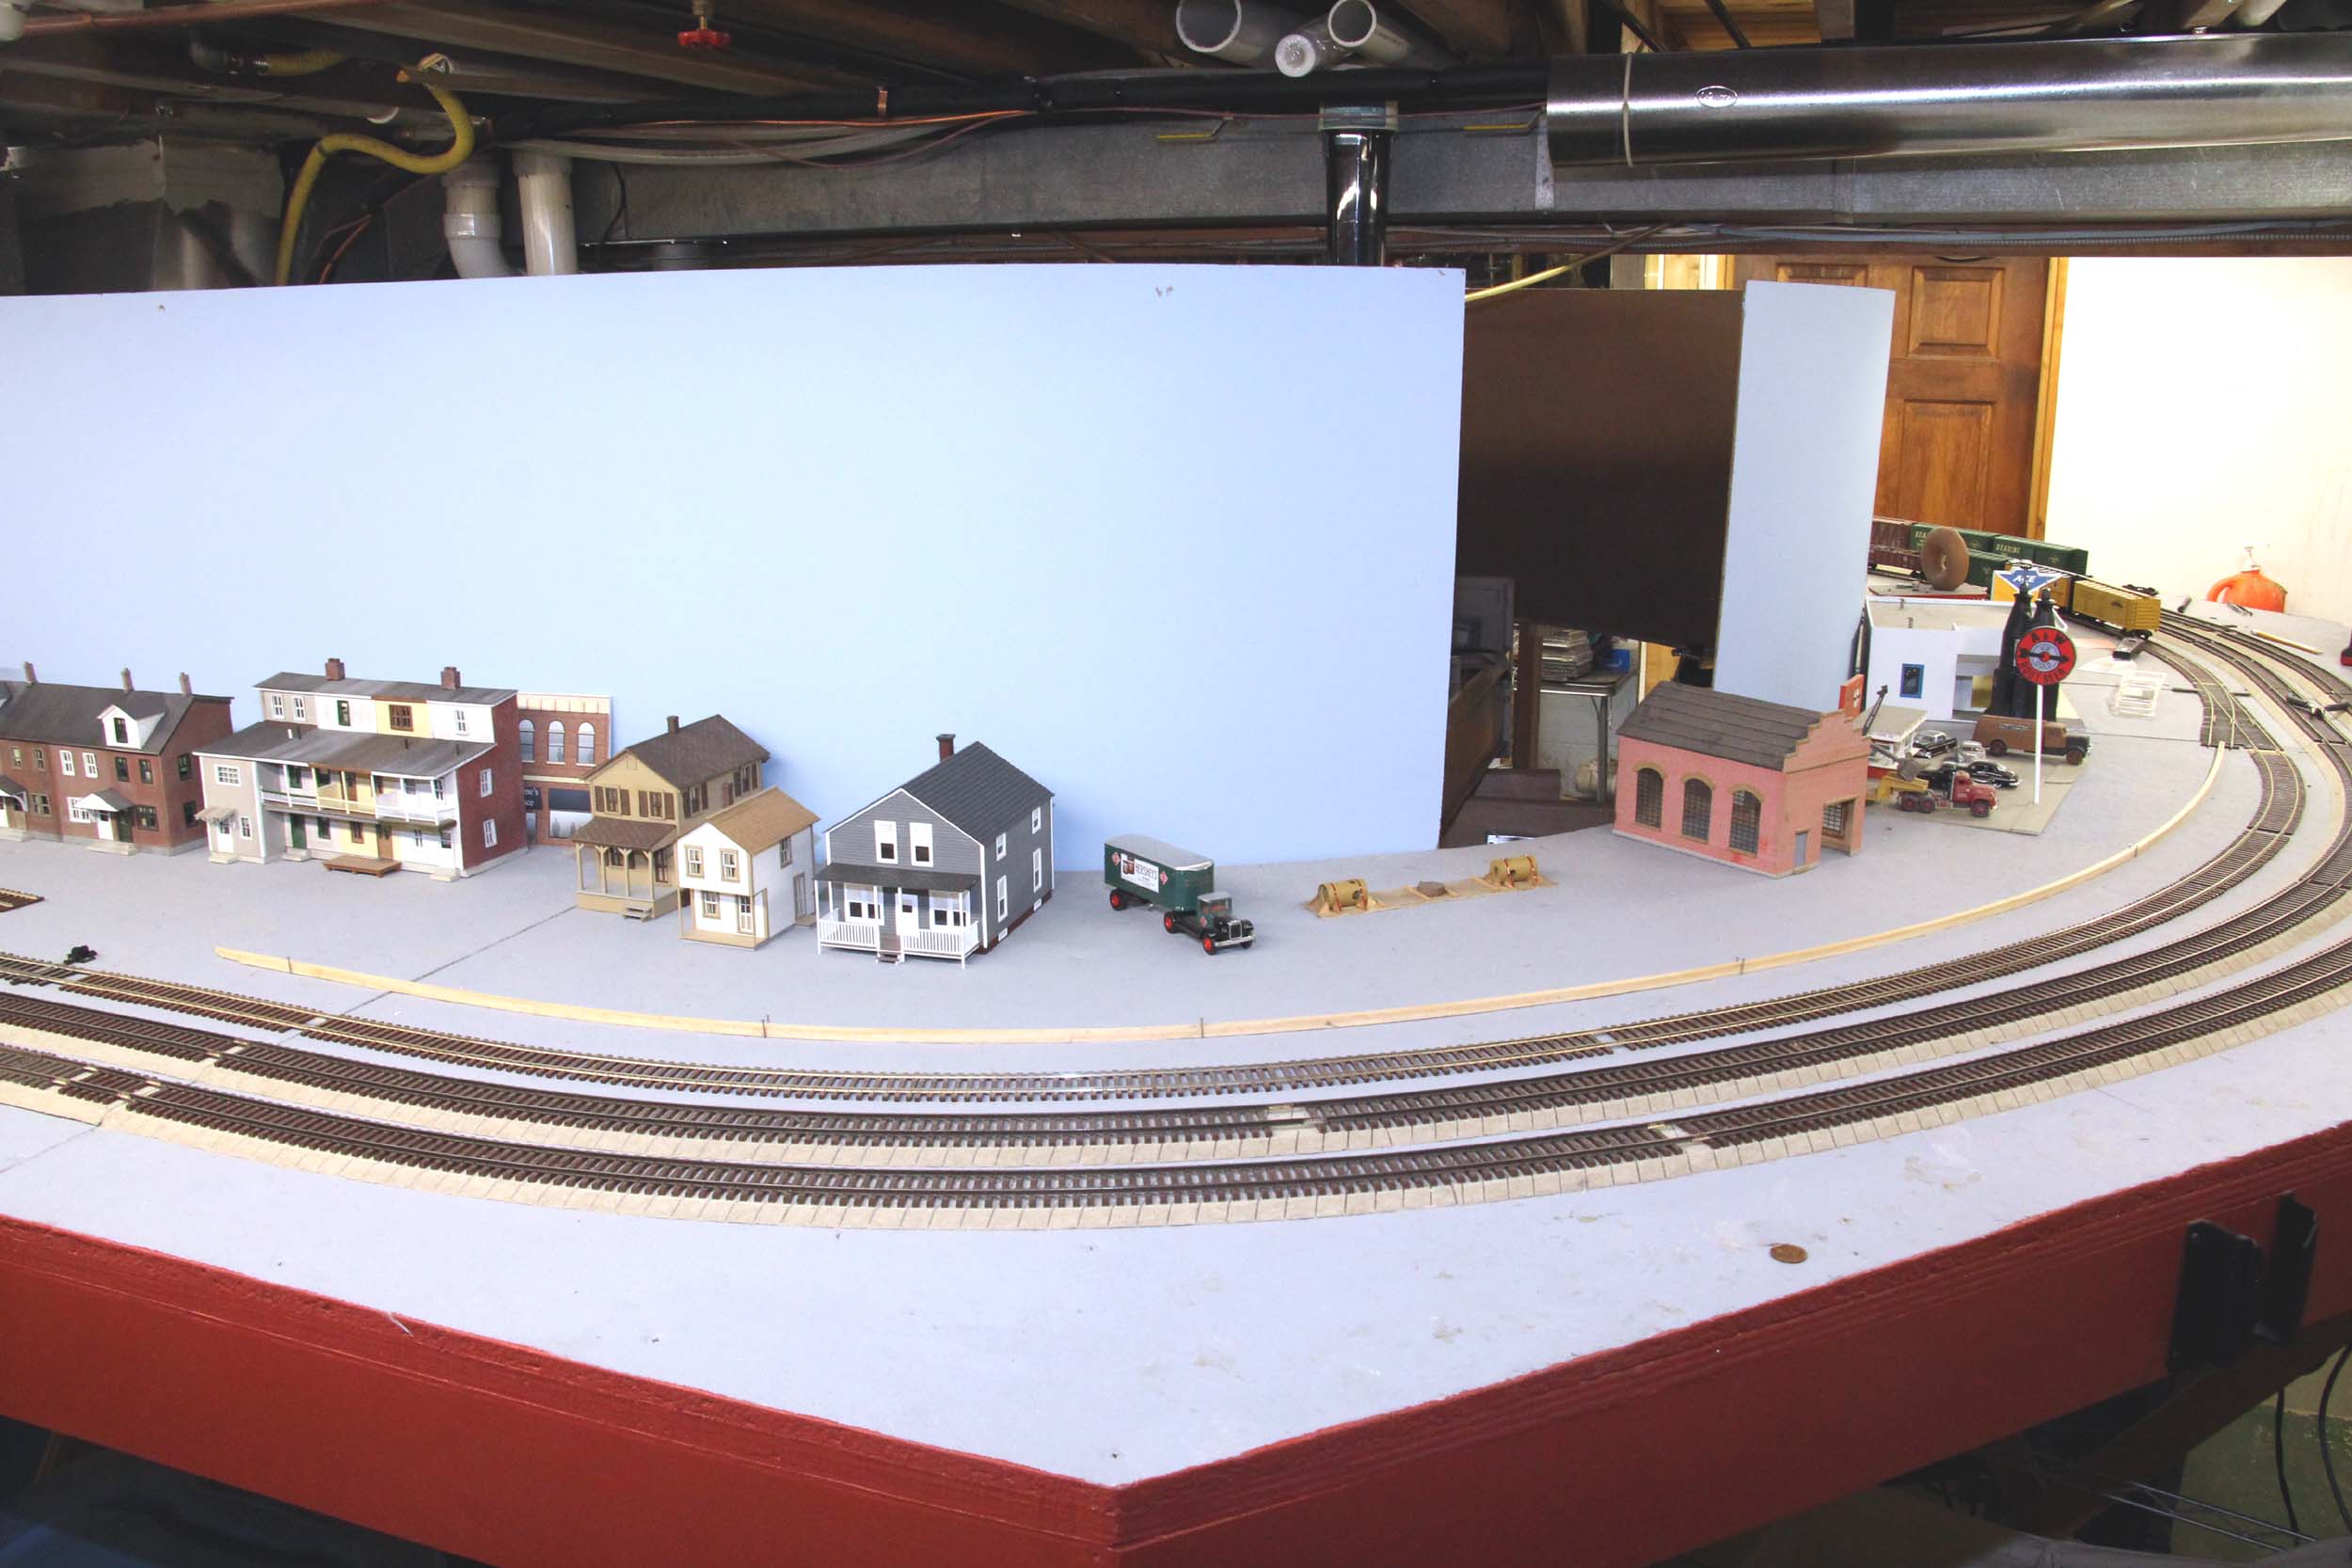
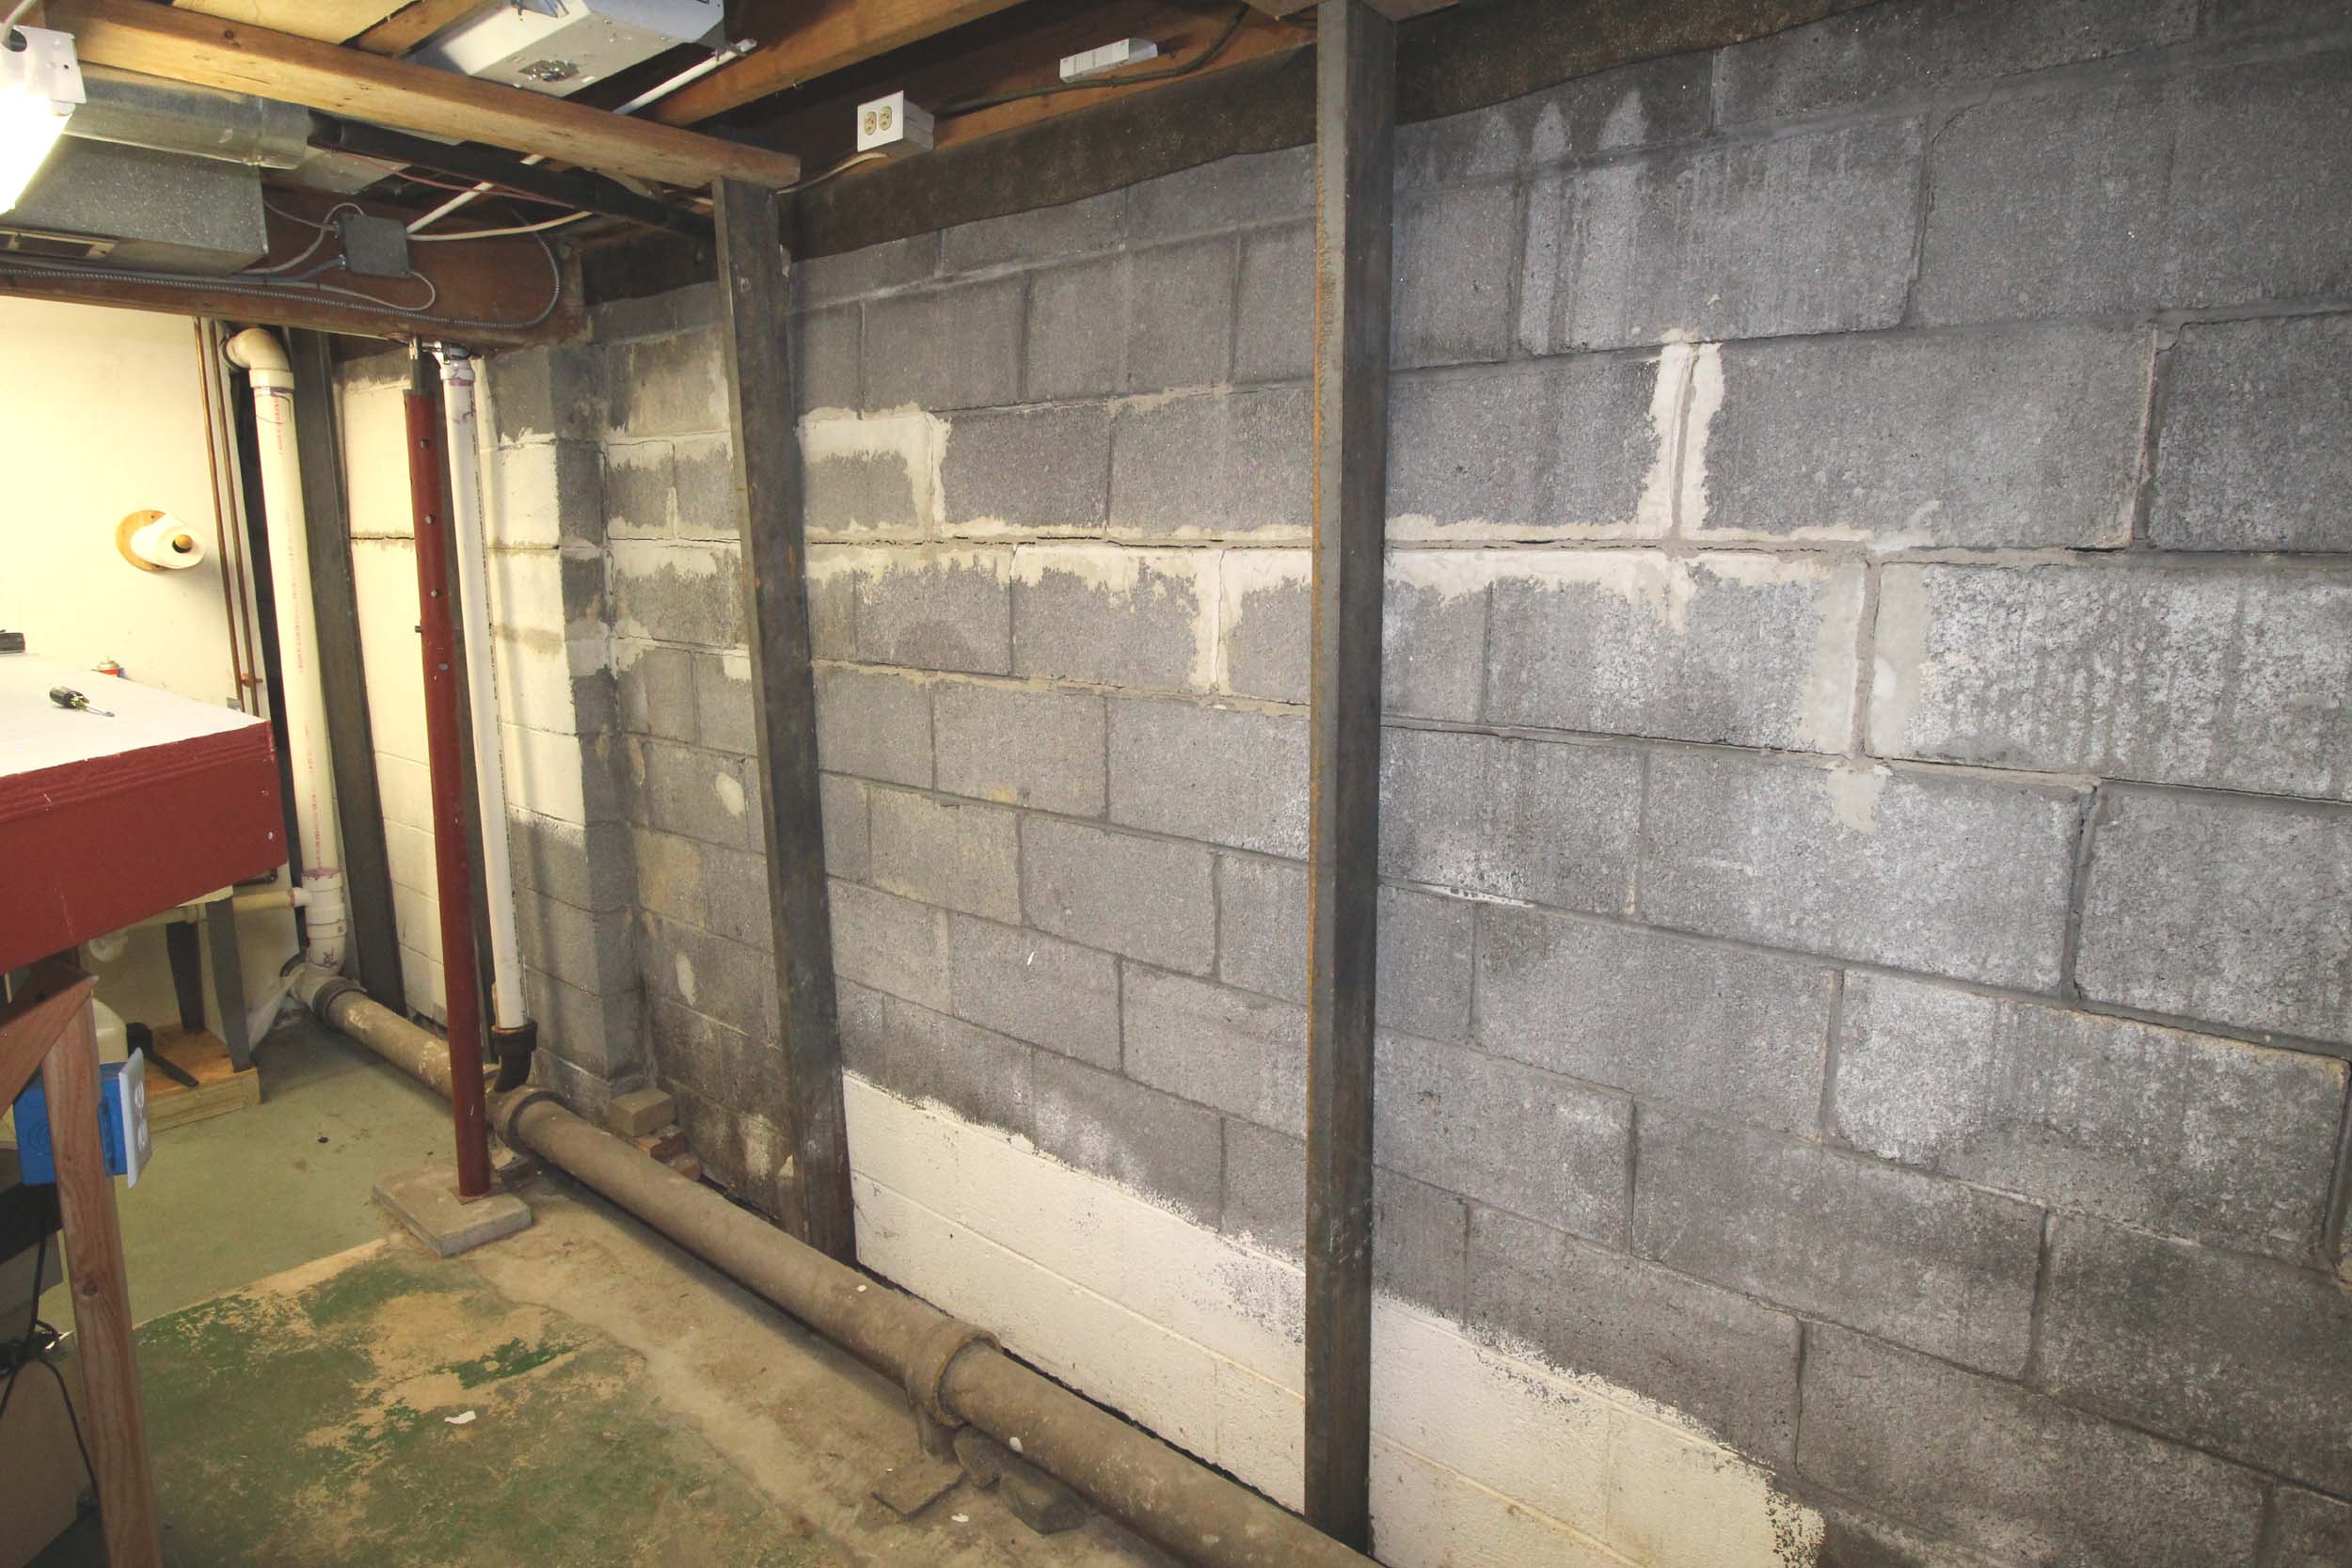
4 New
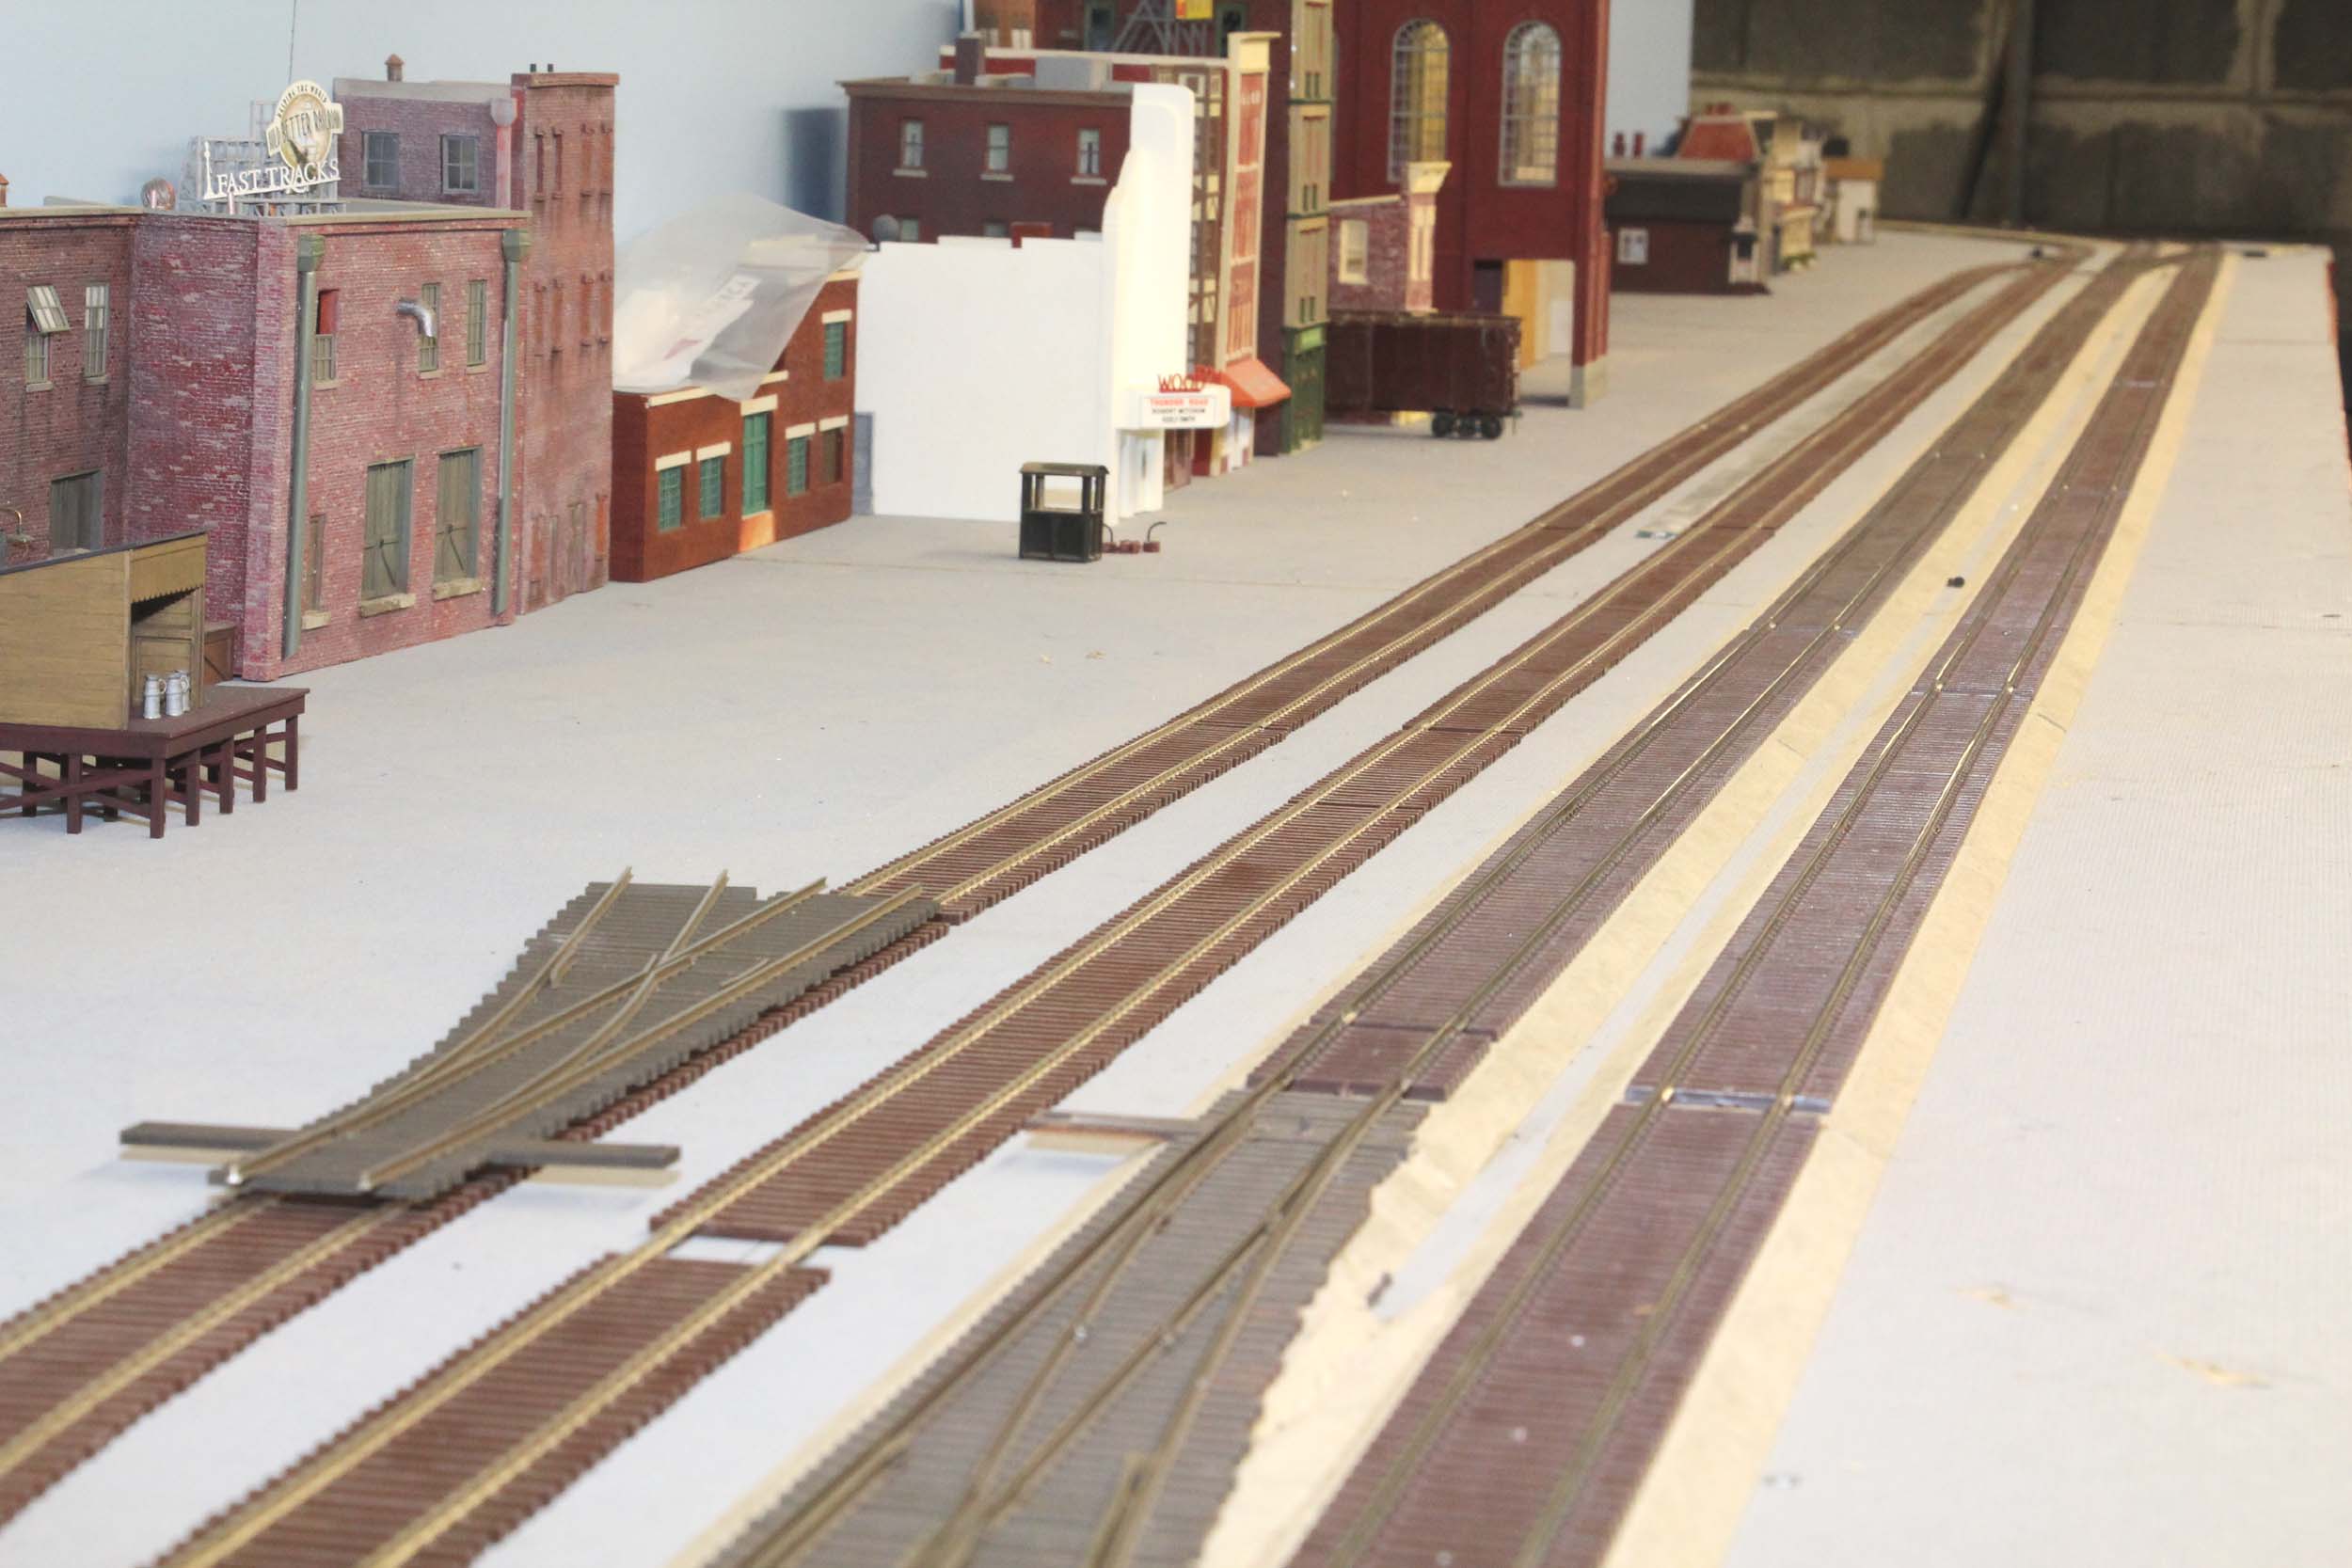
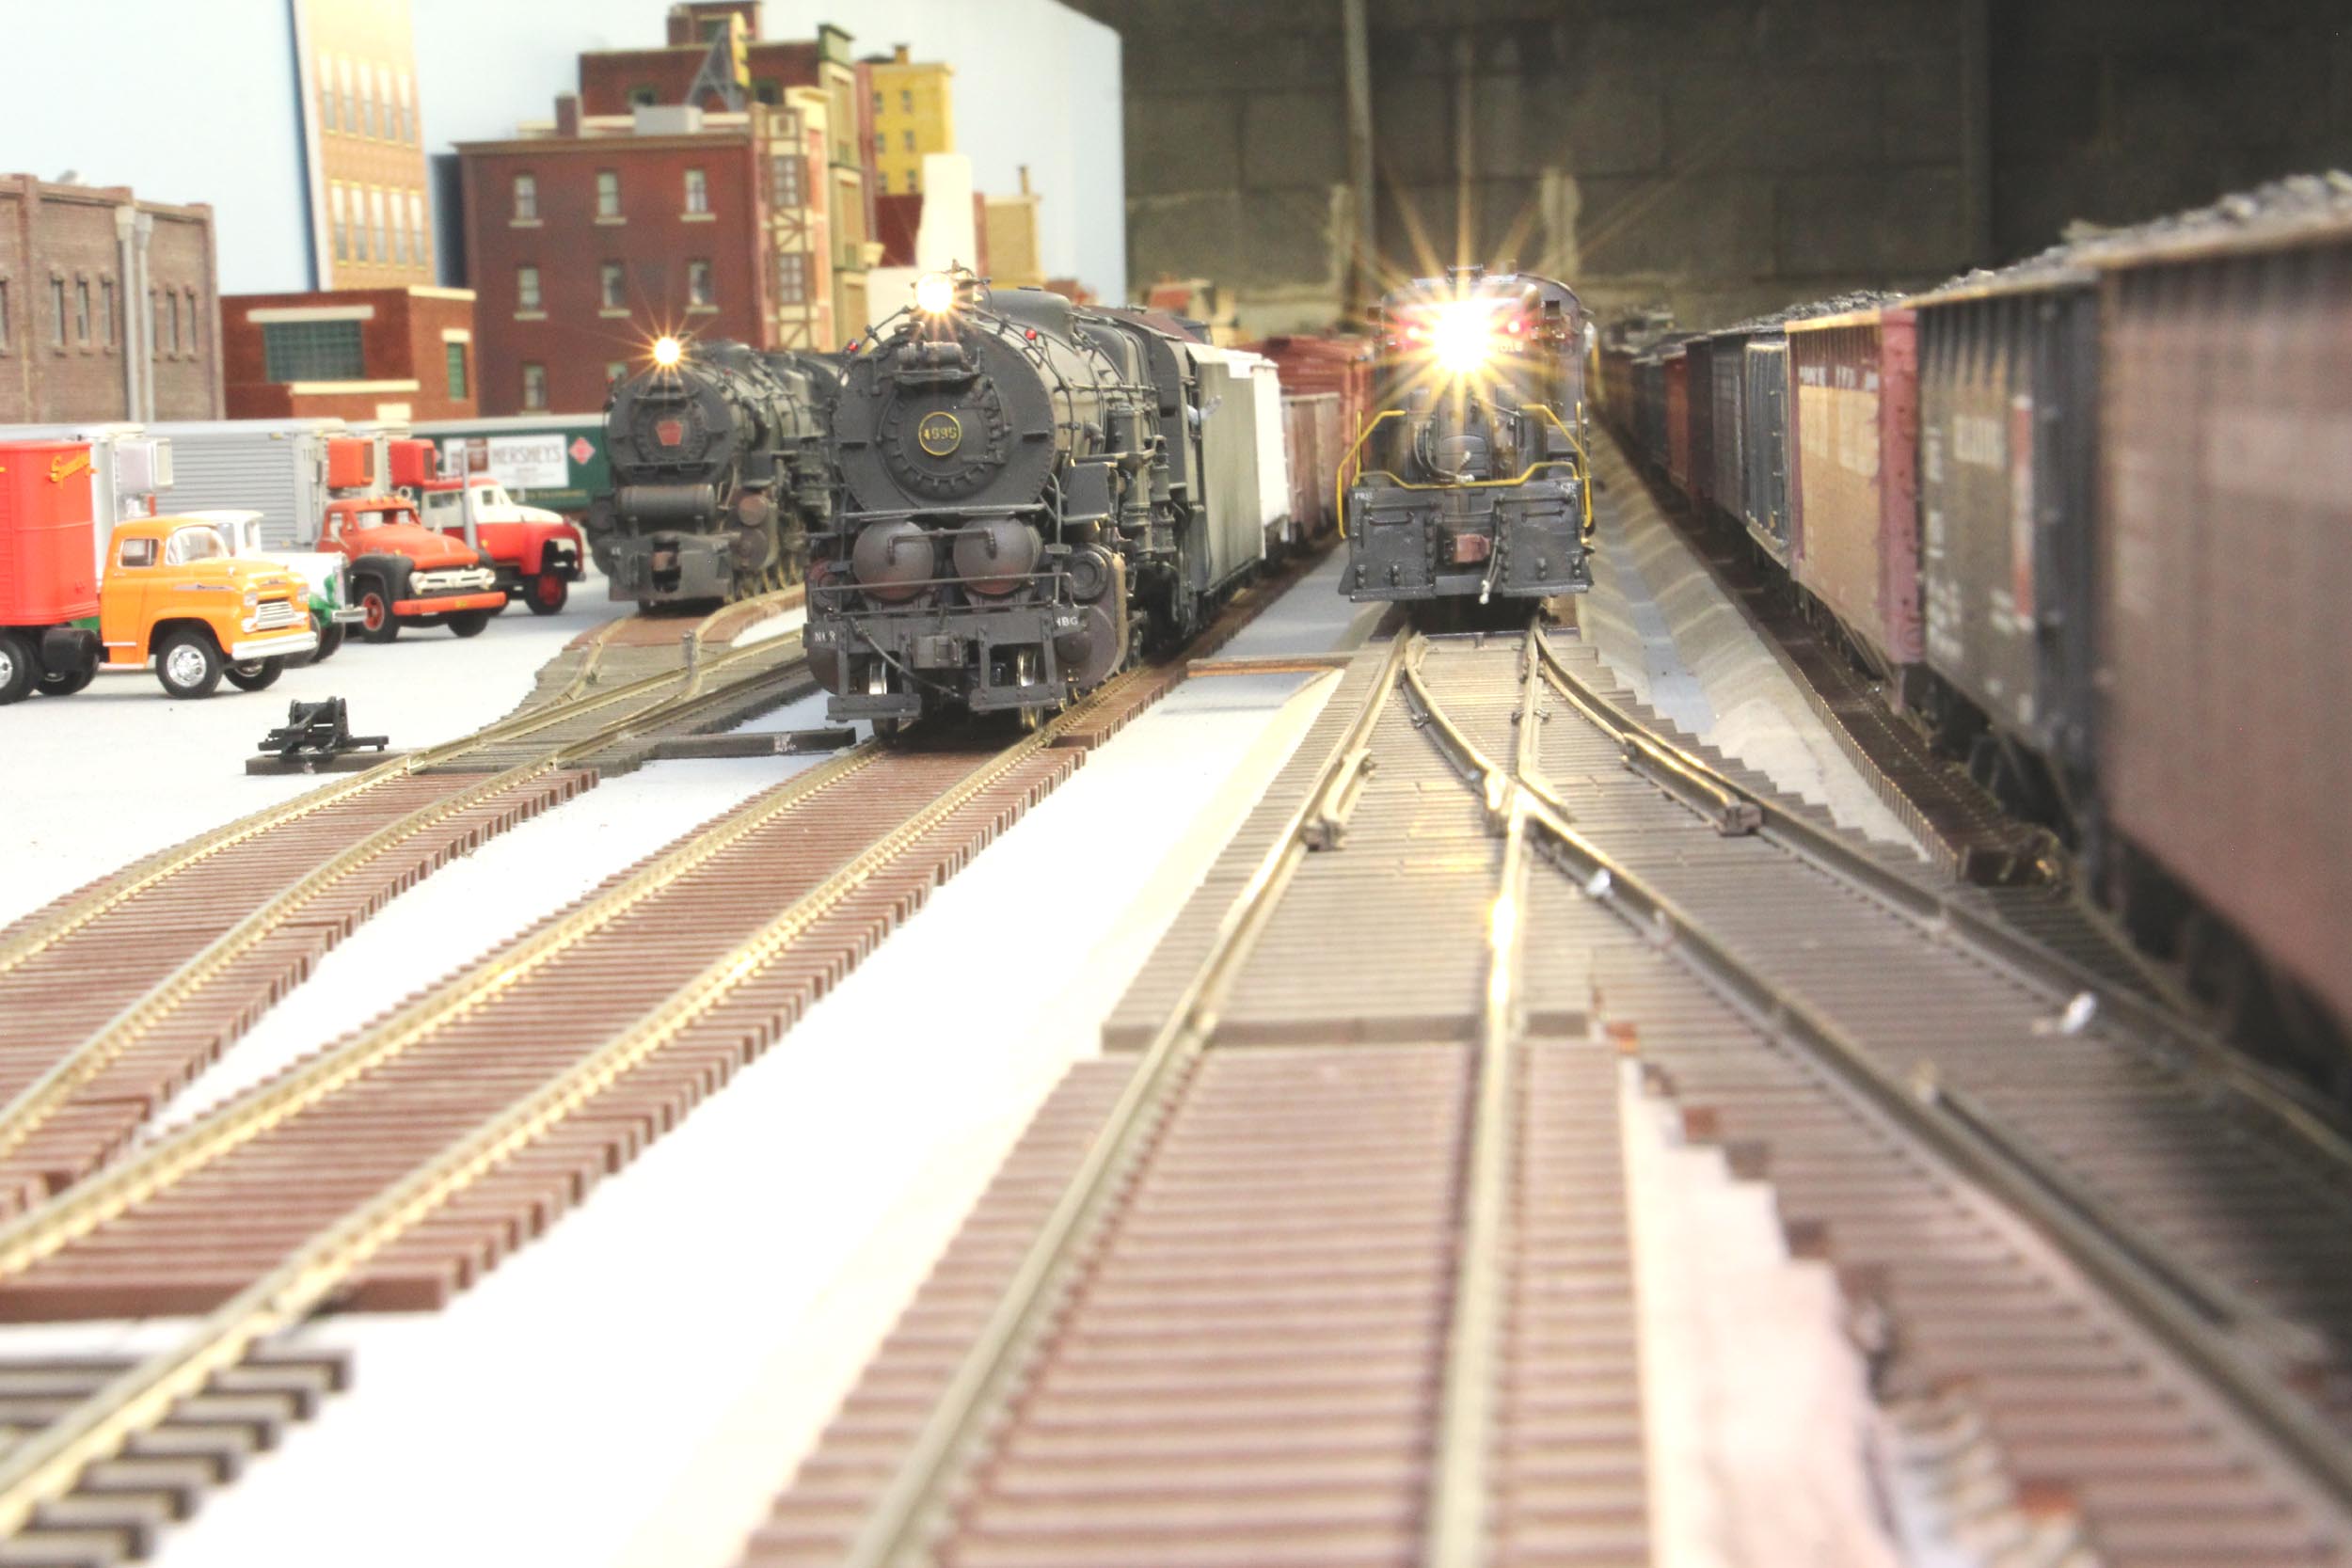
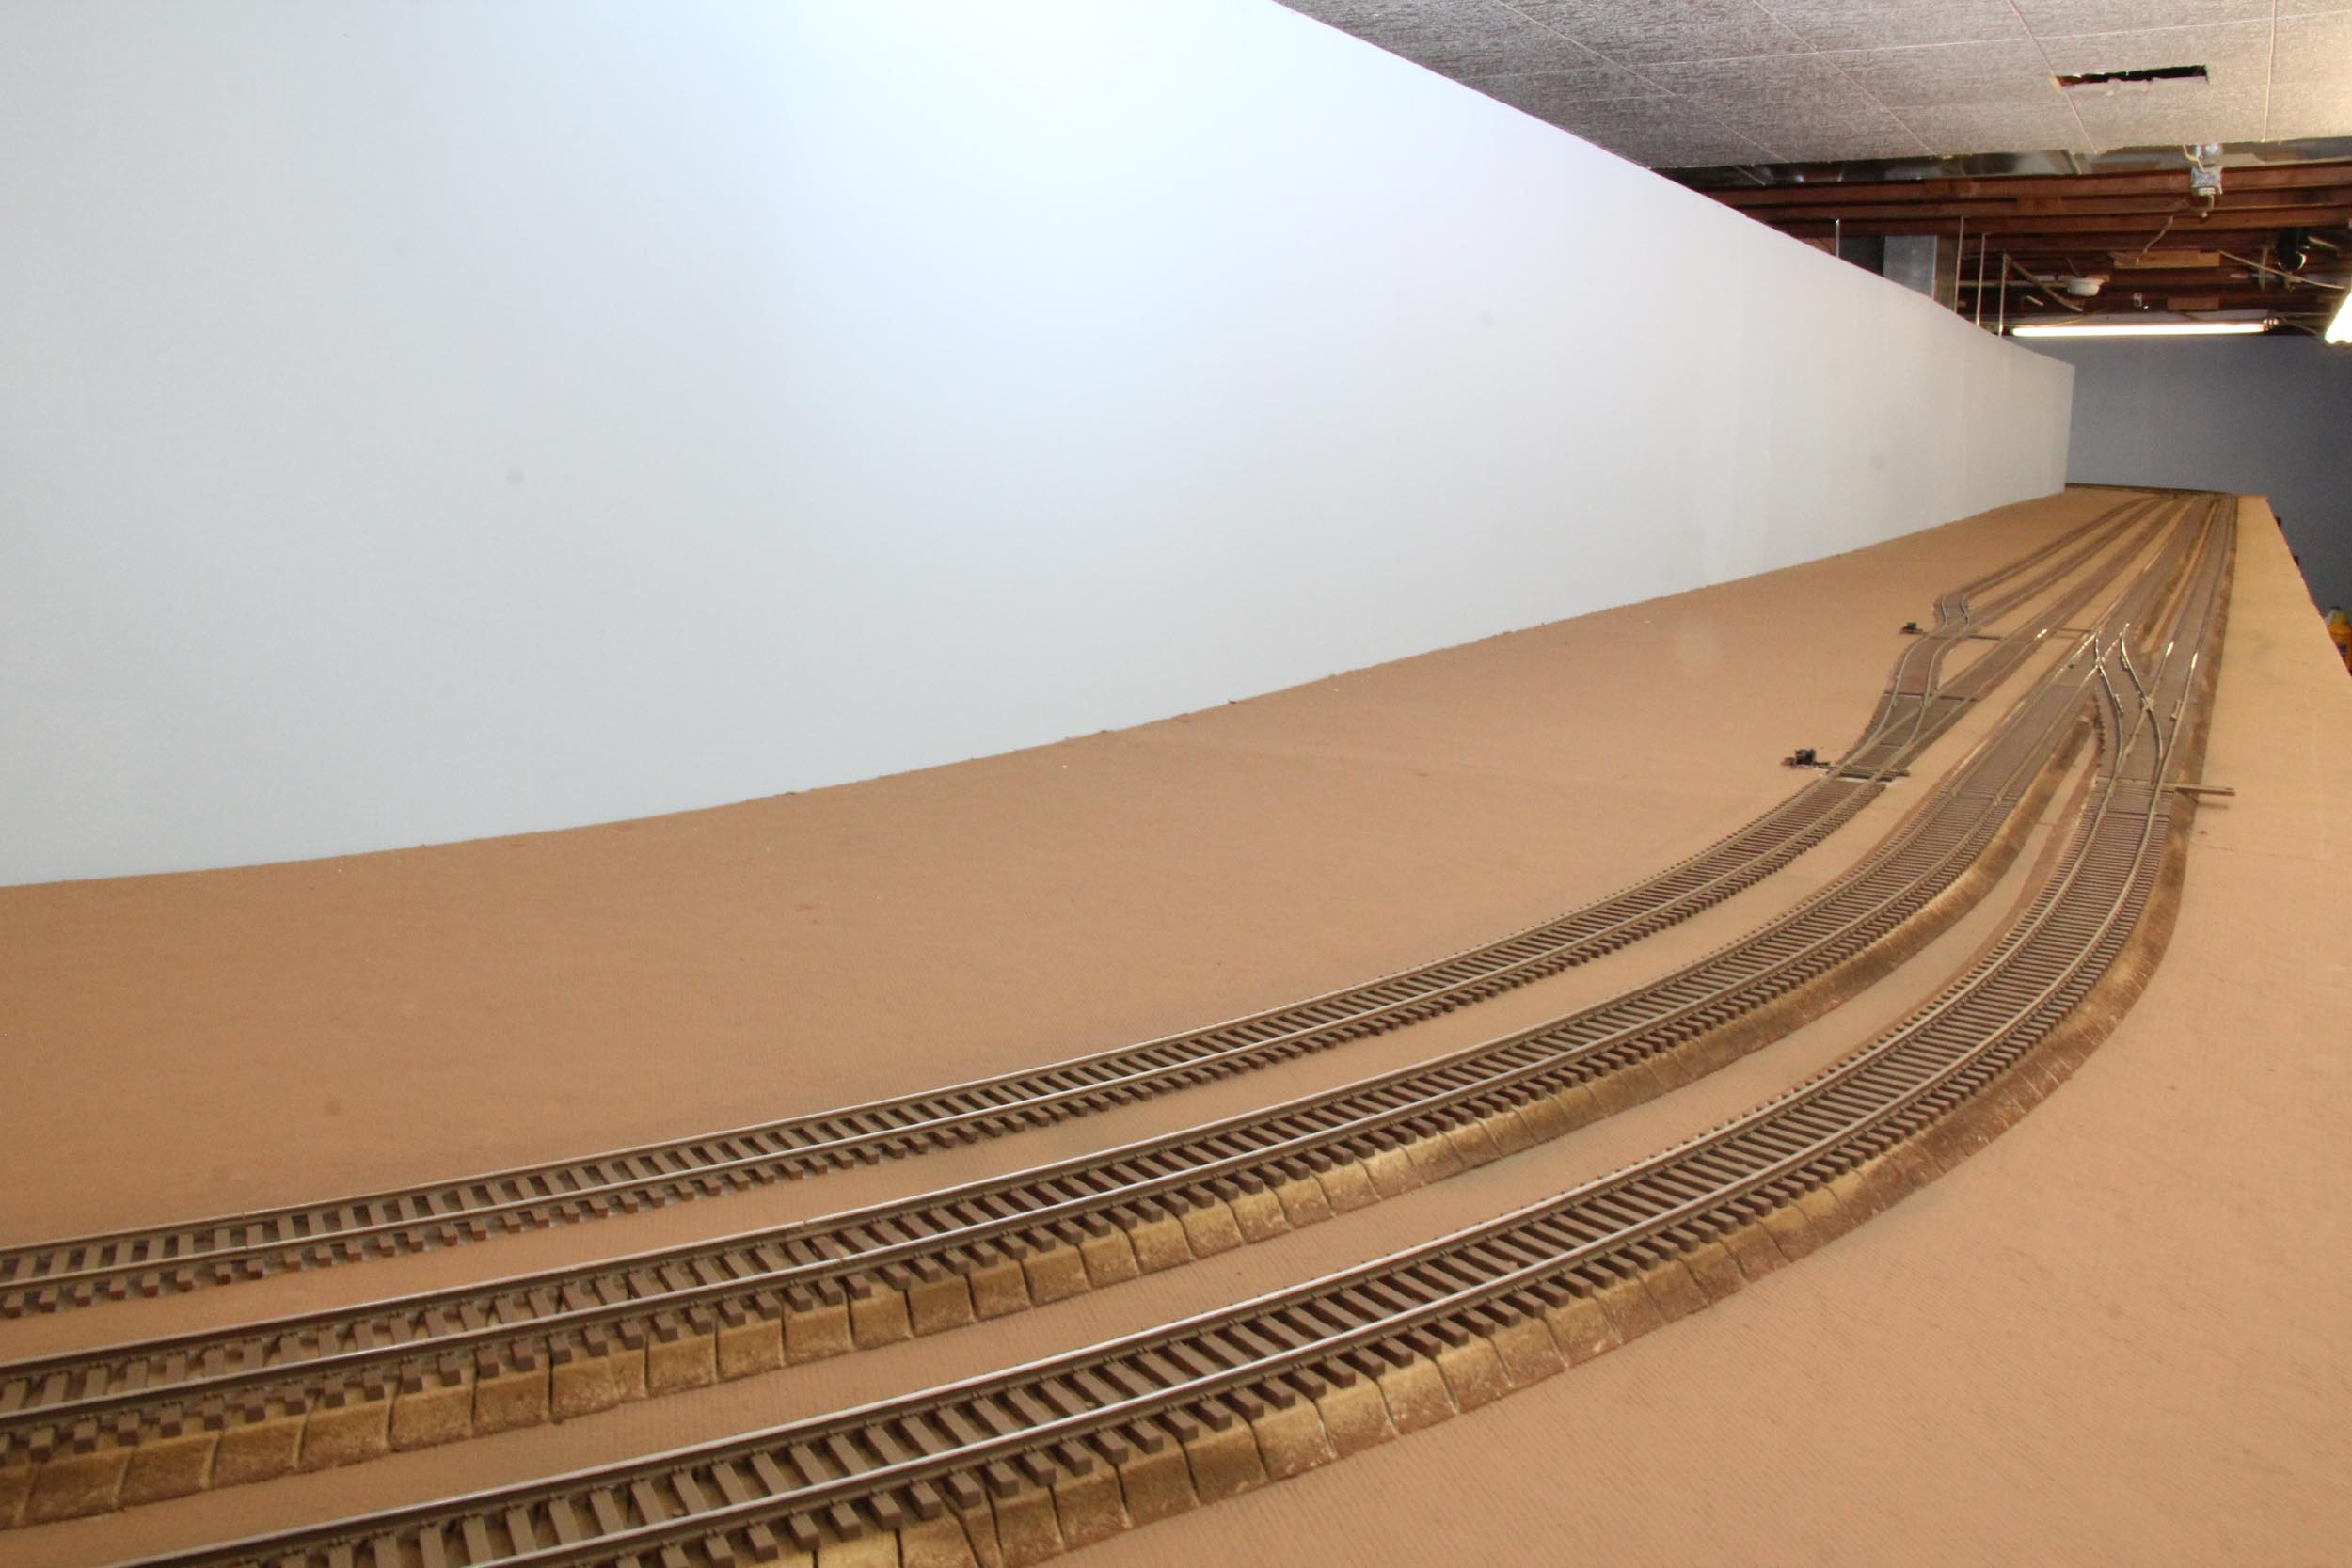
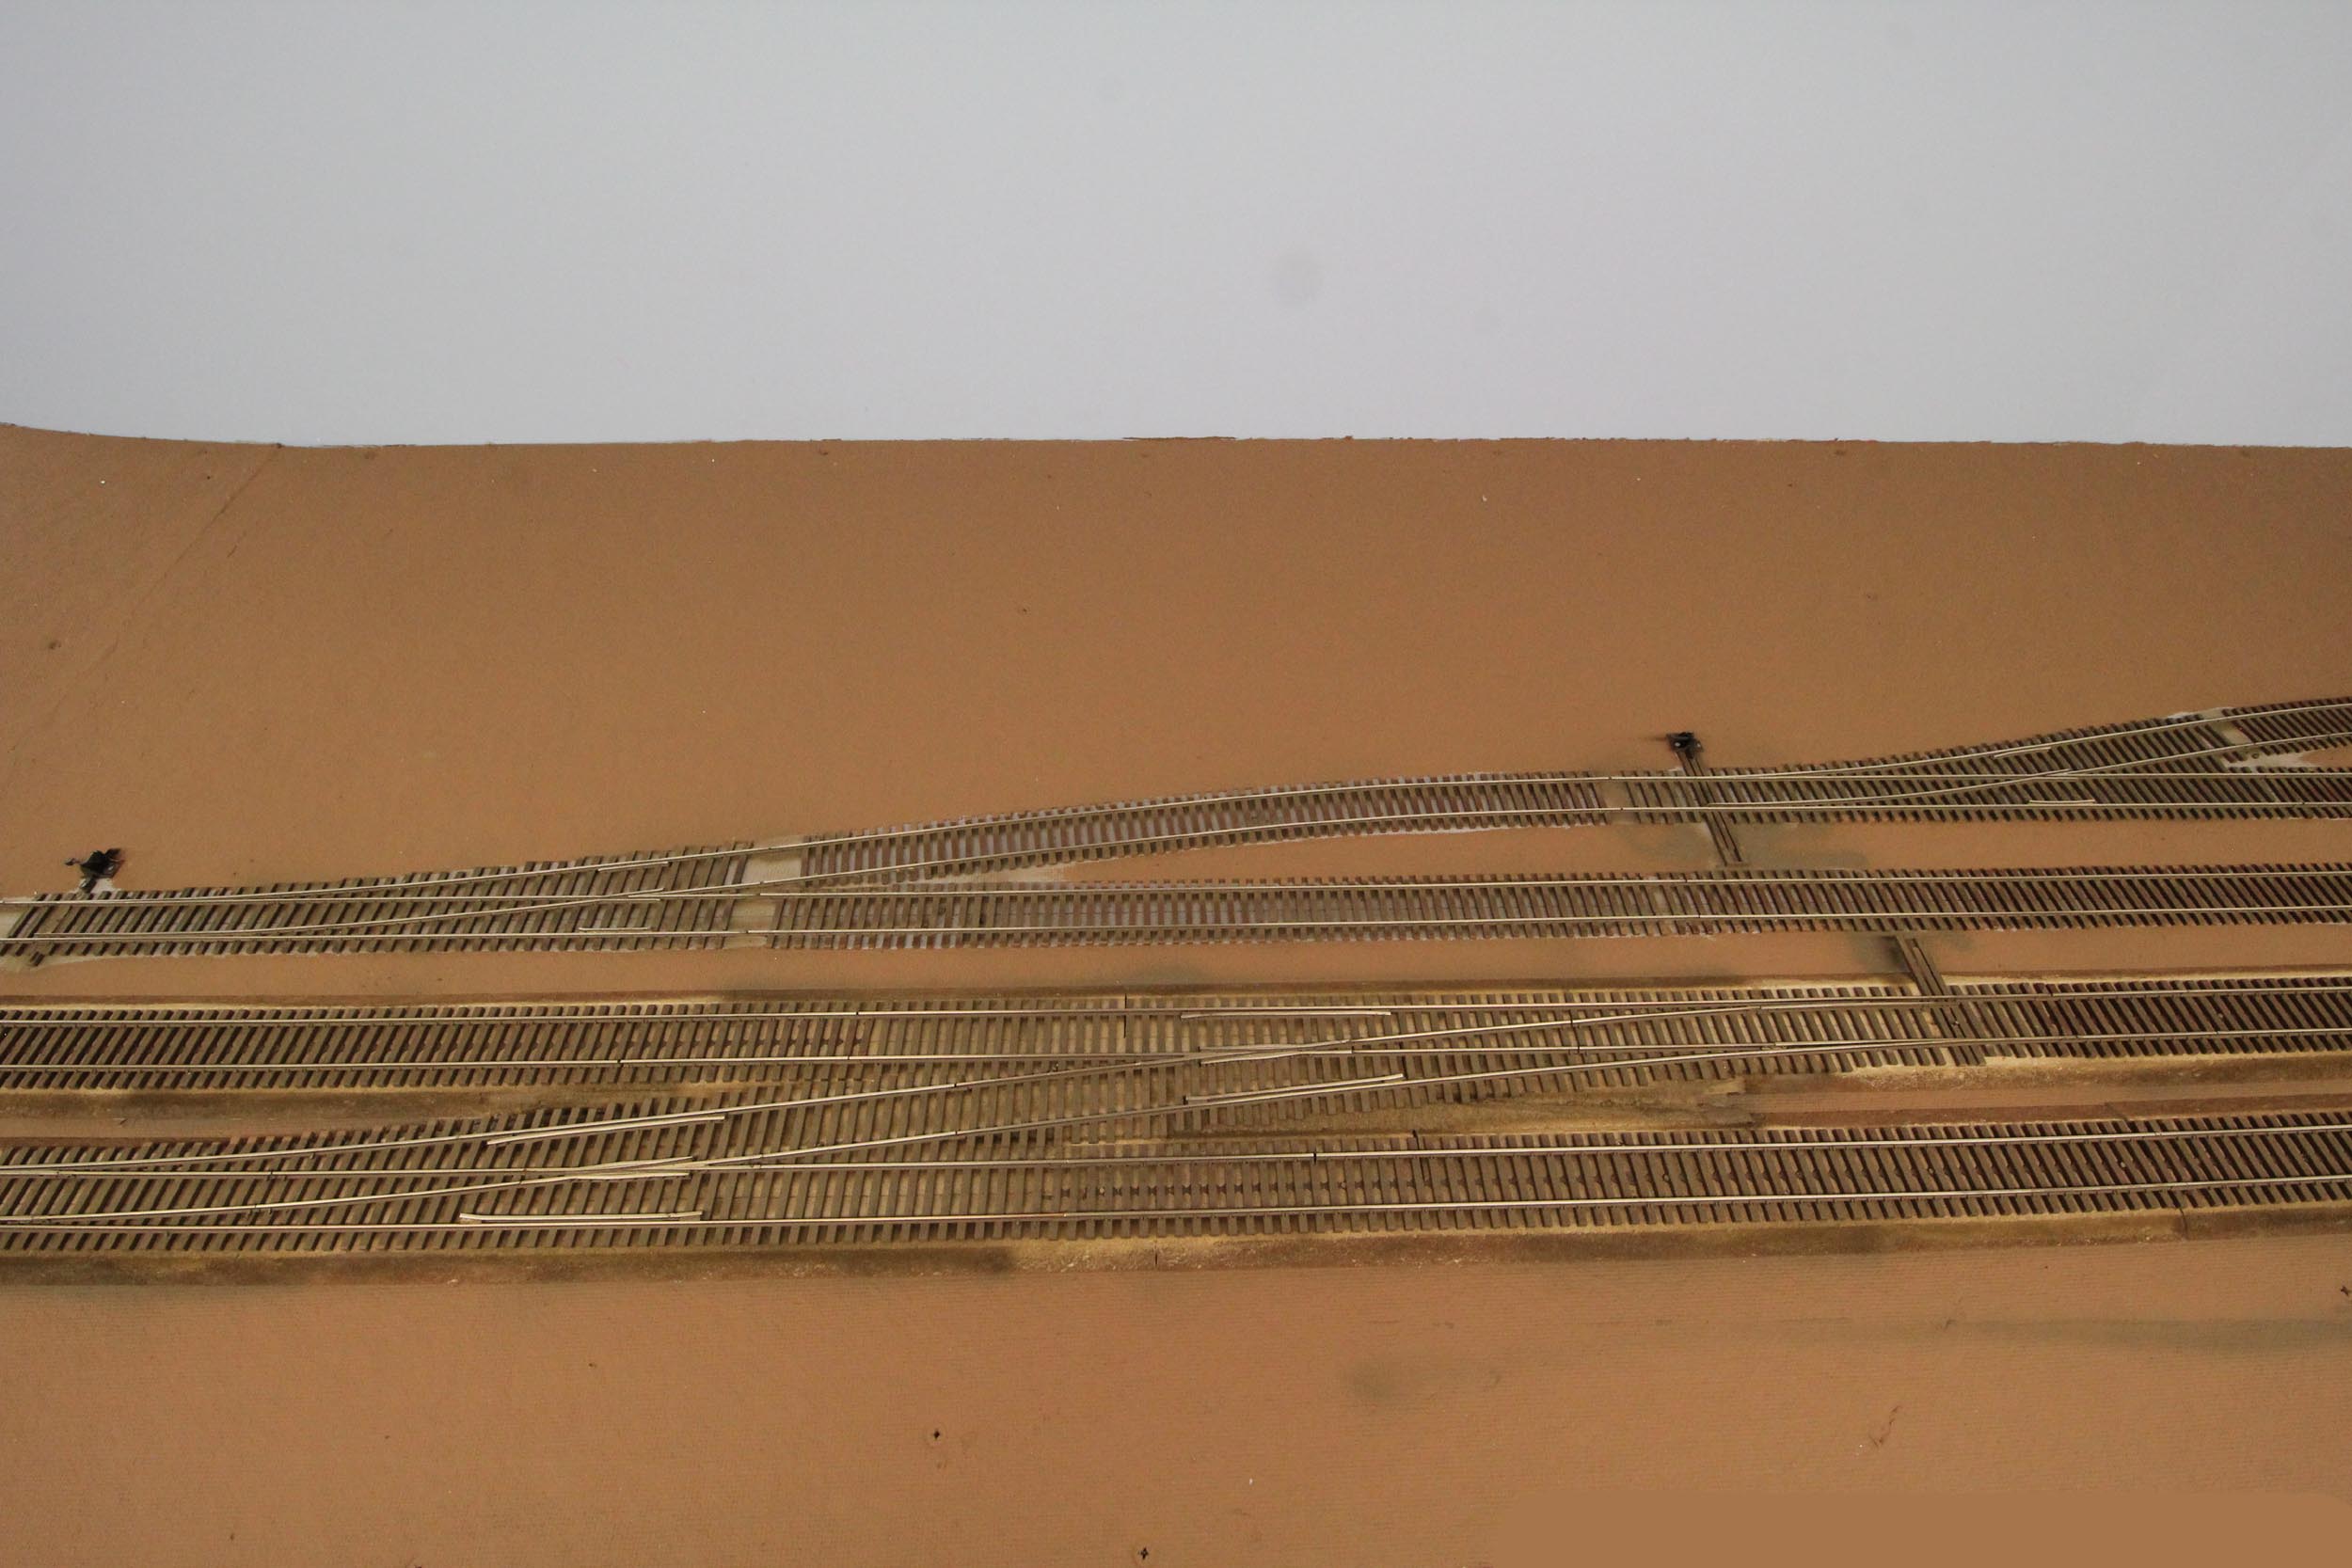
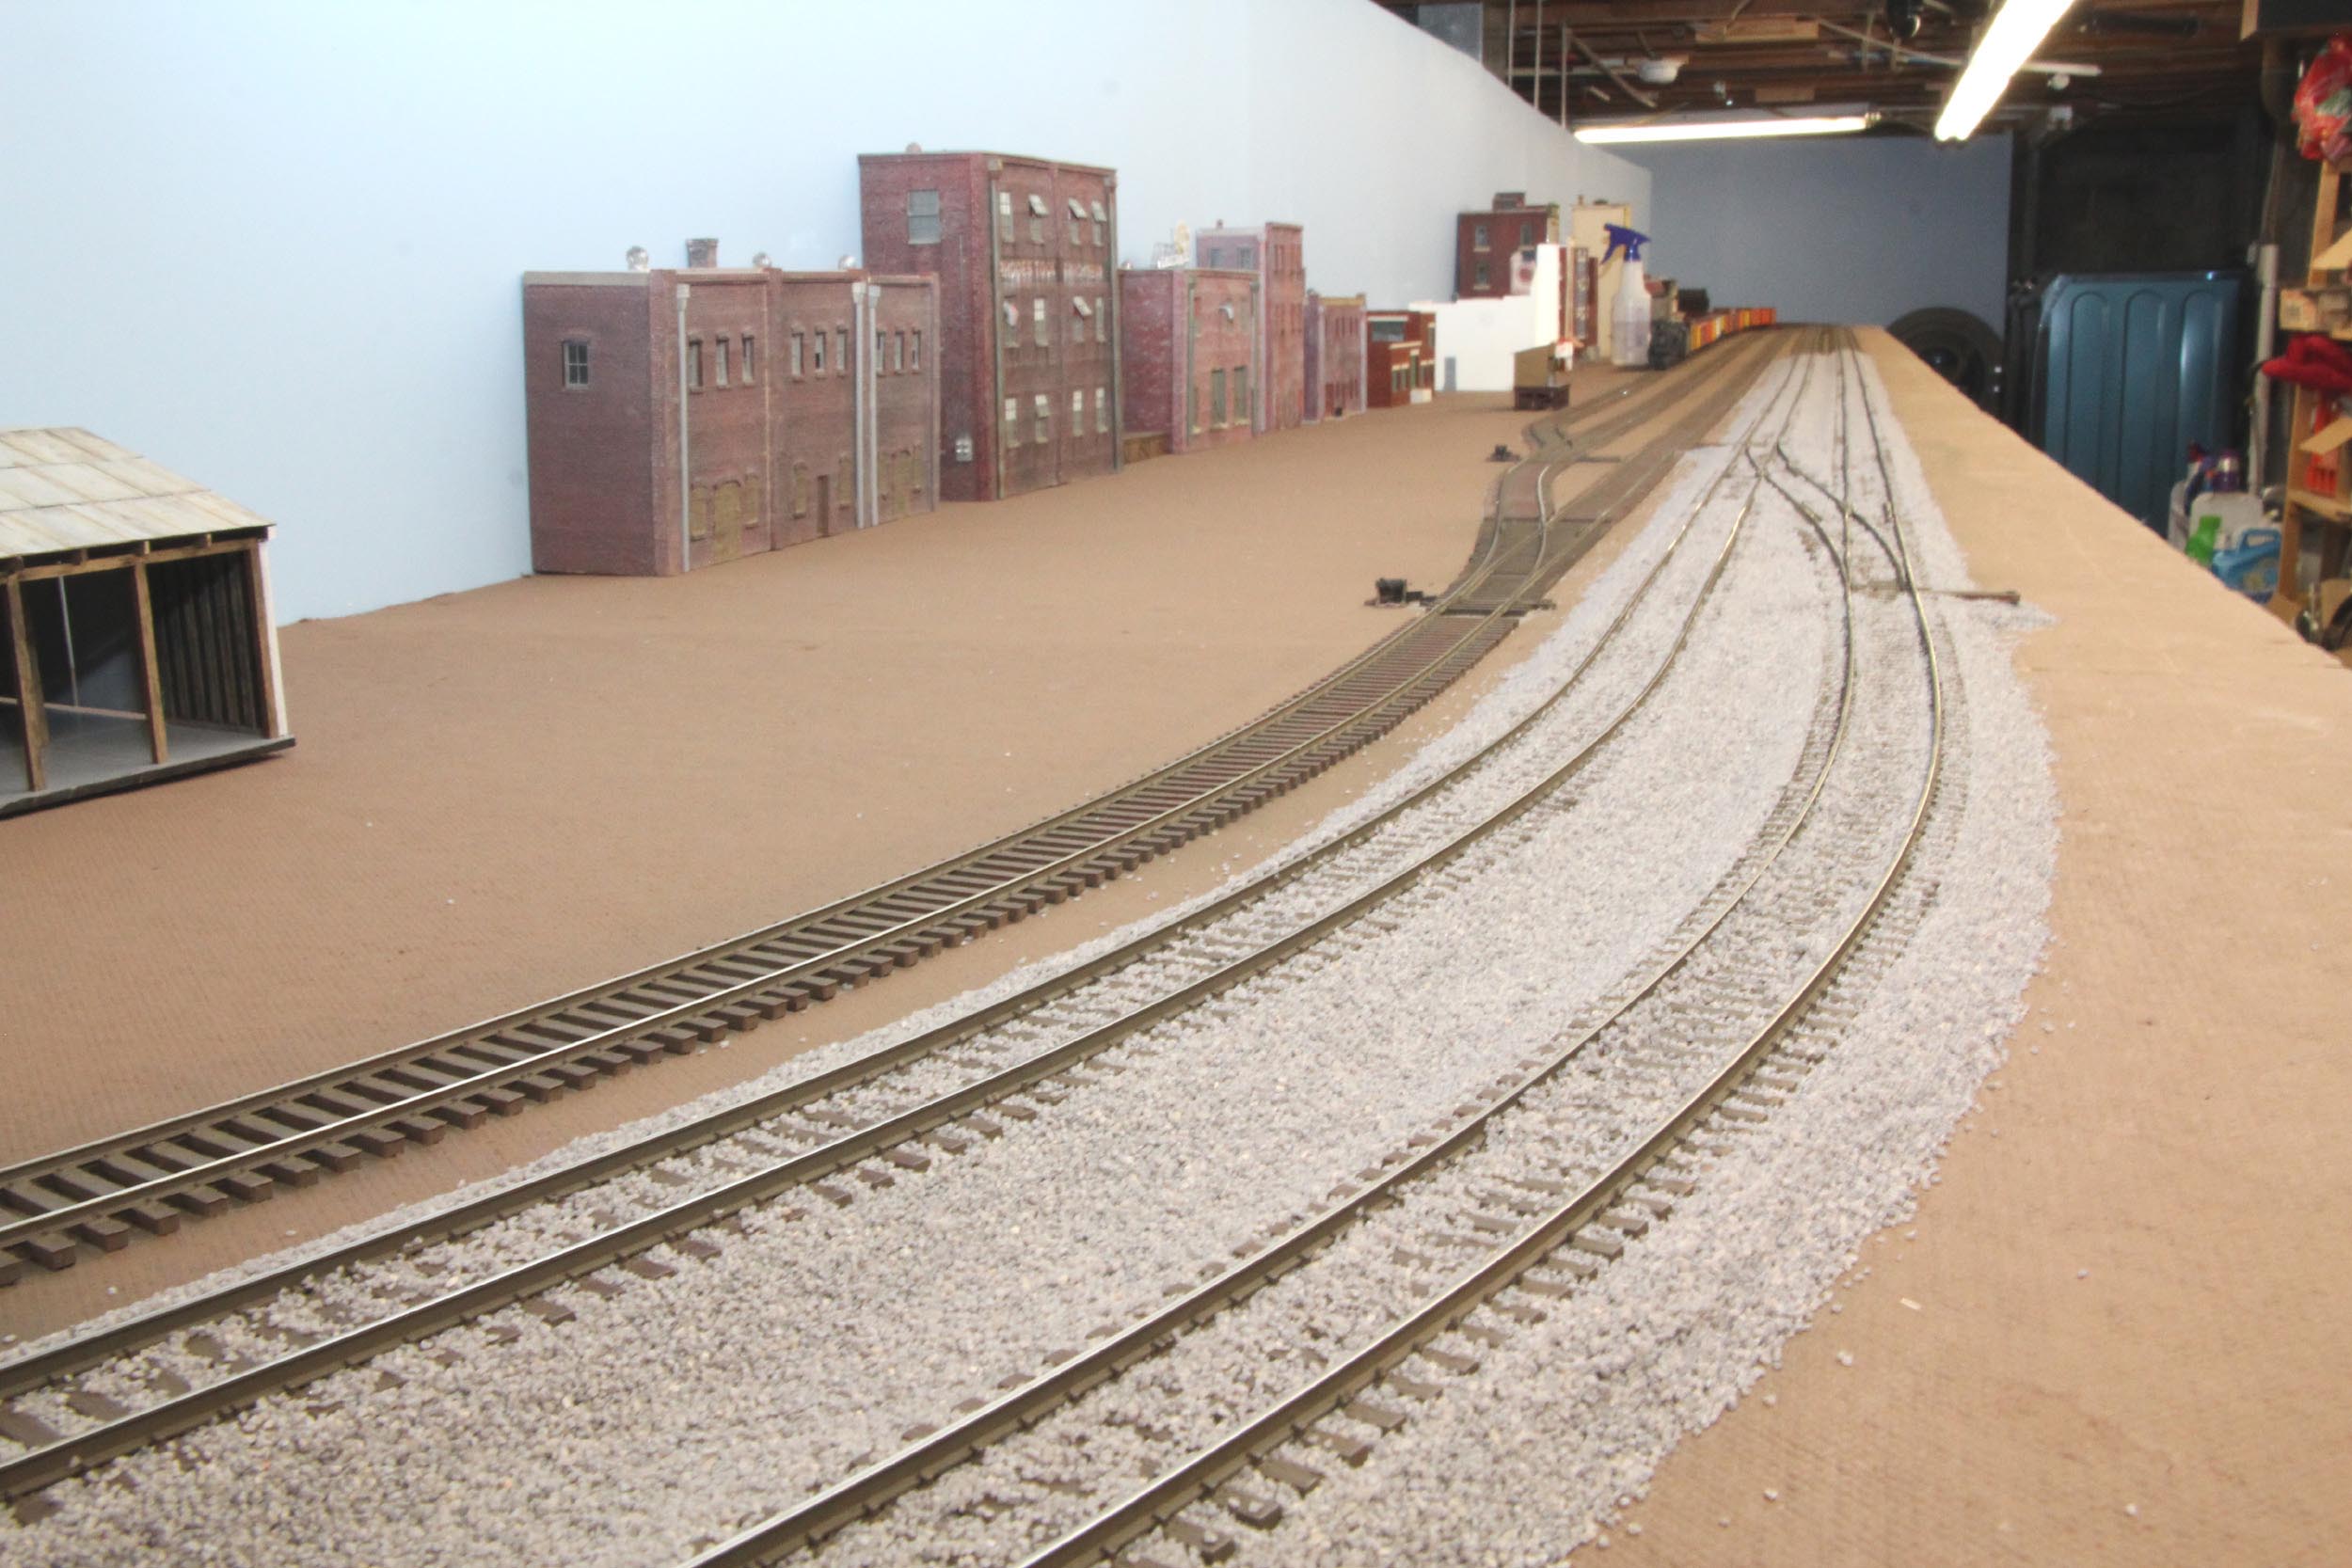
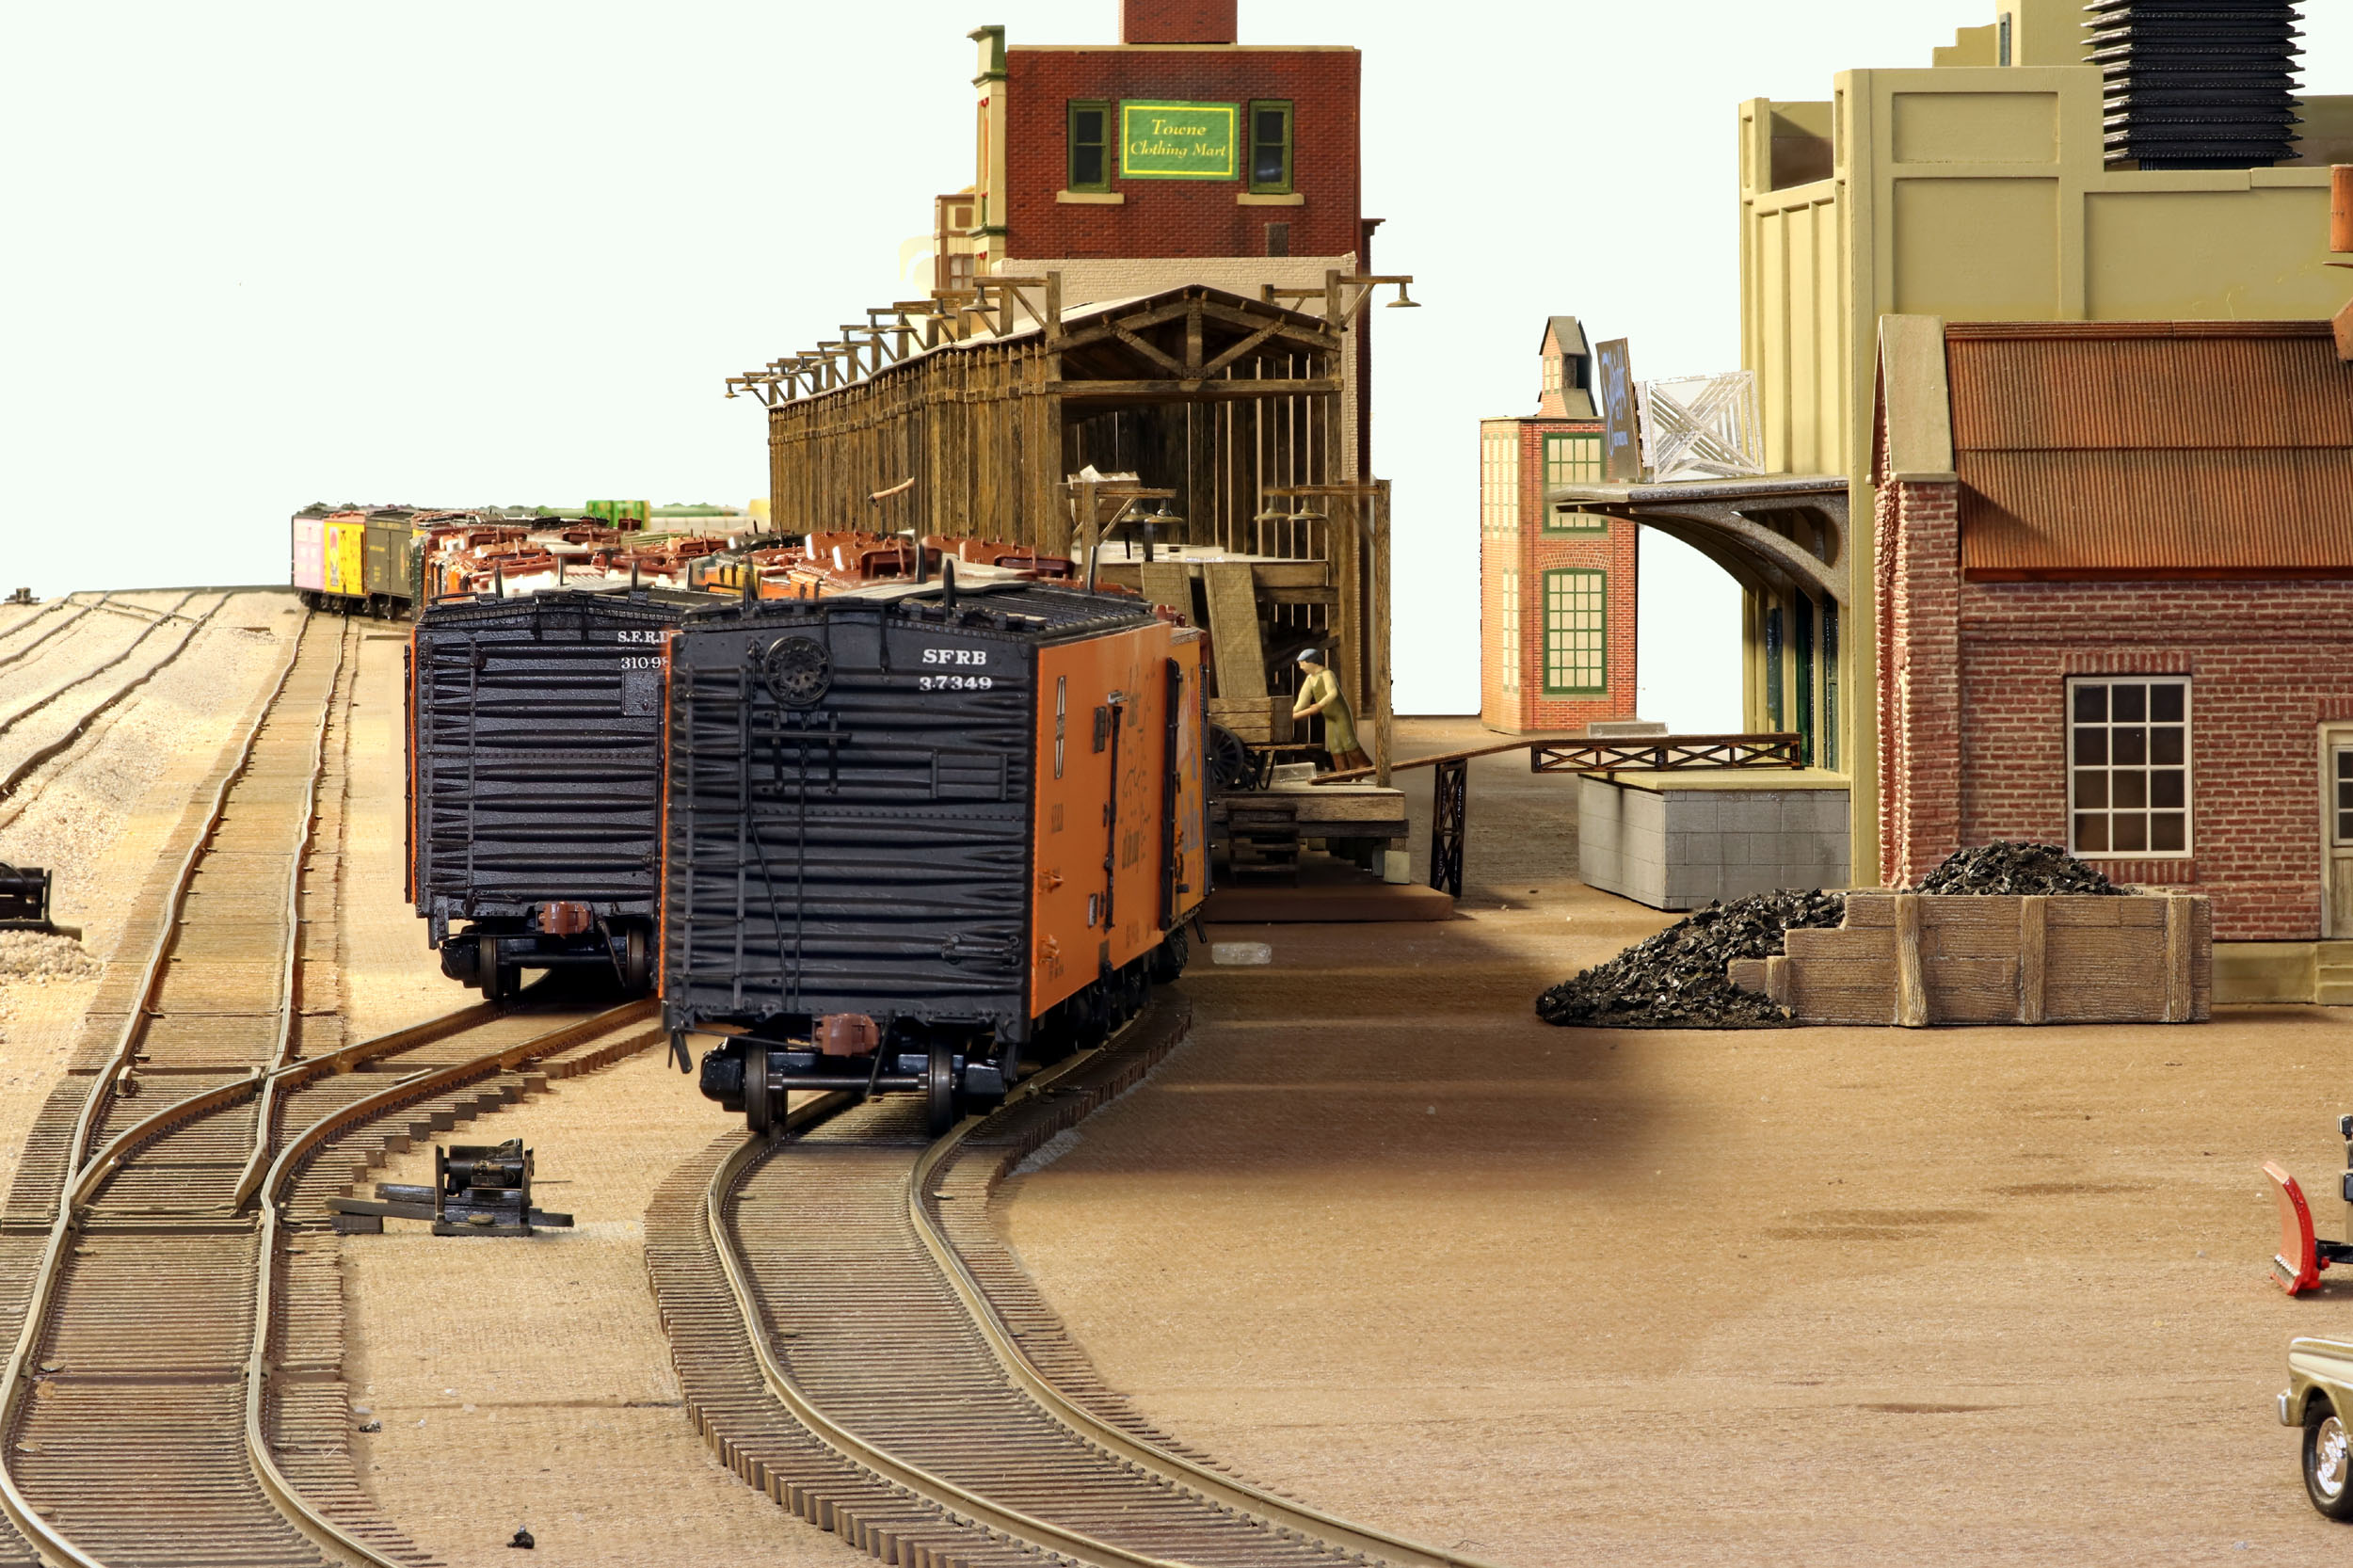
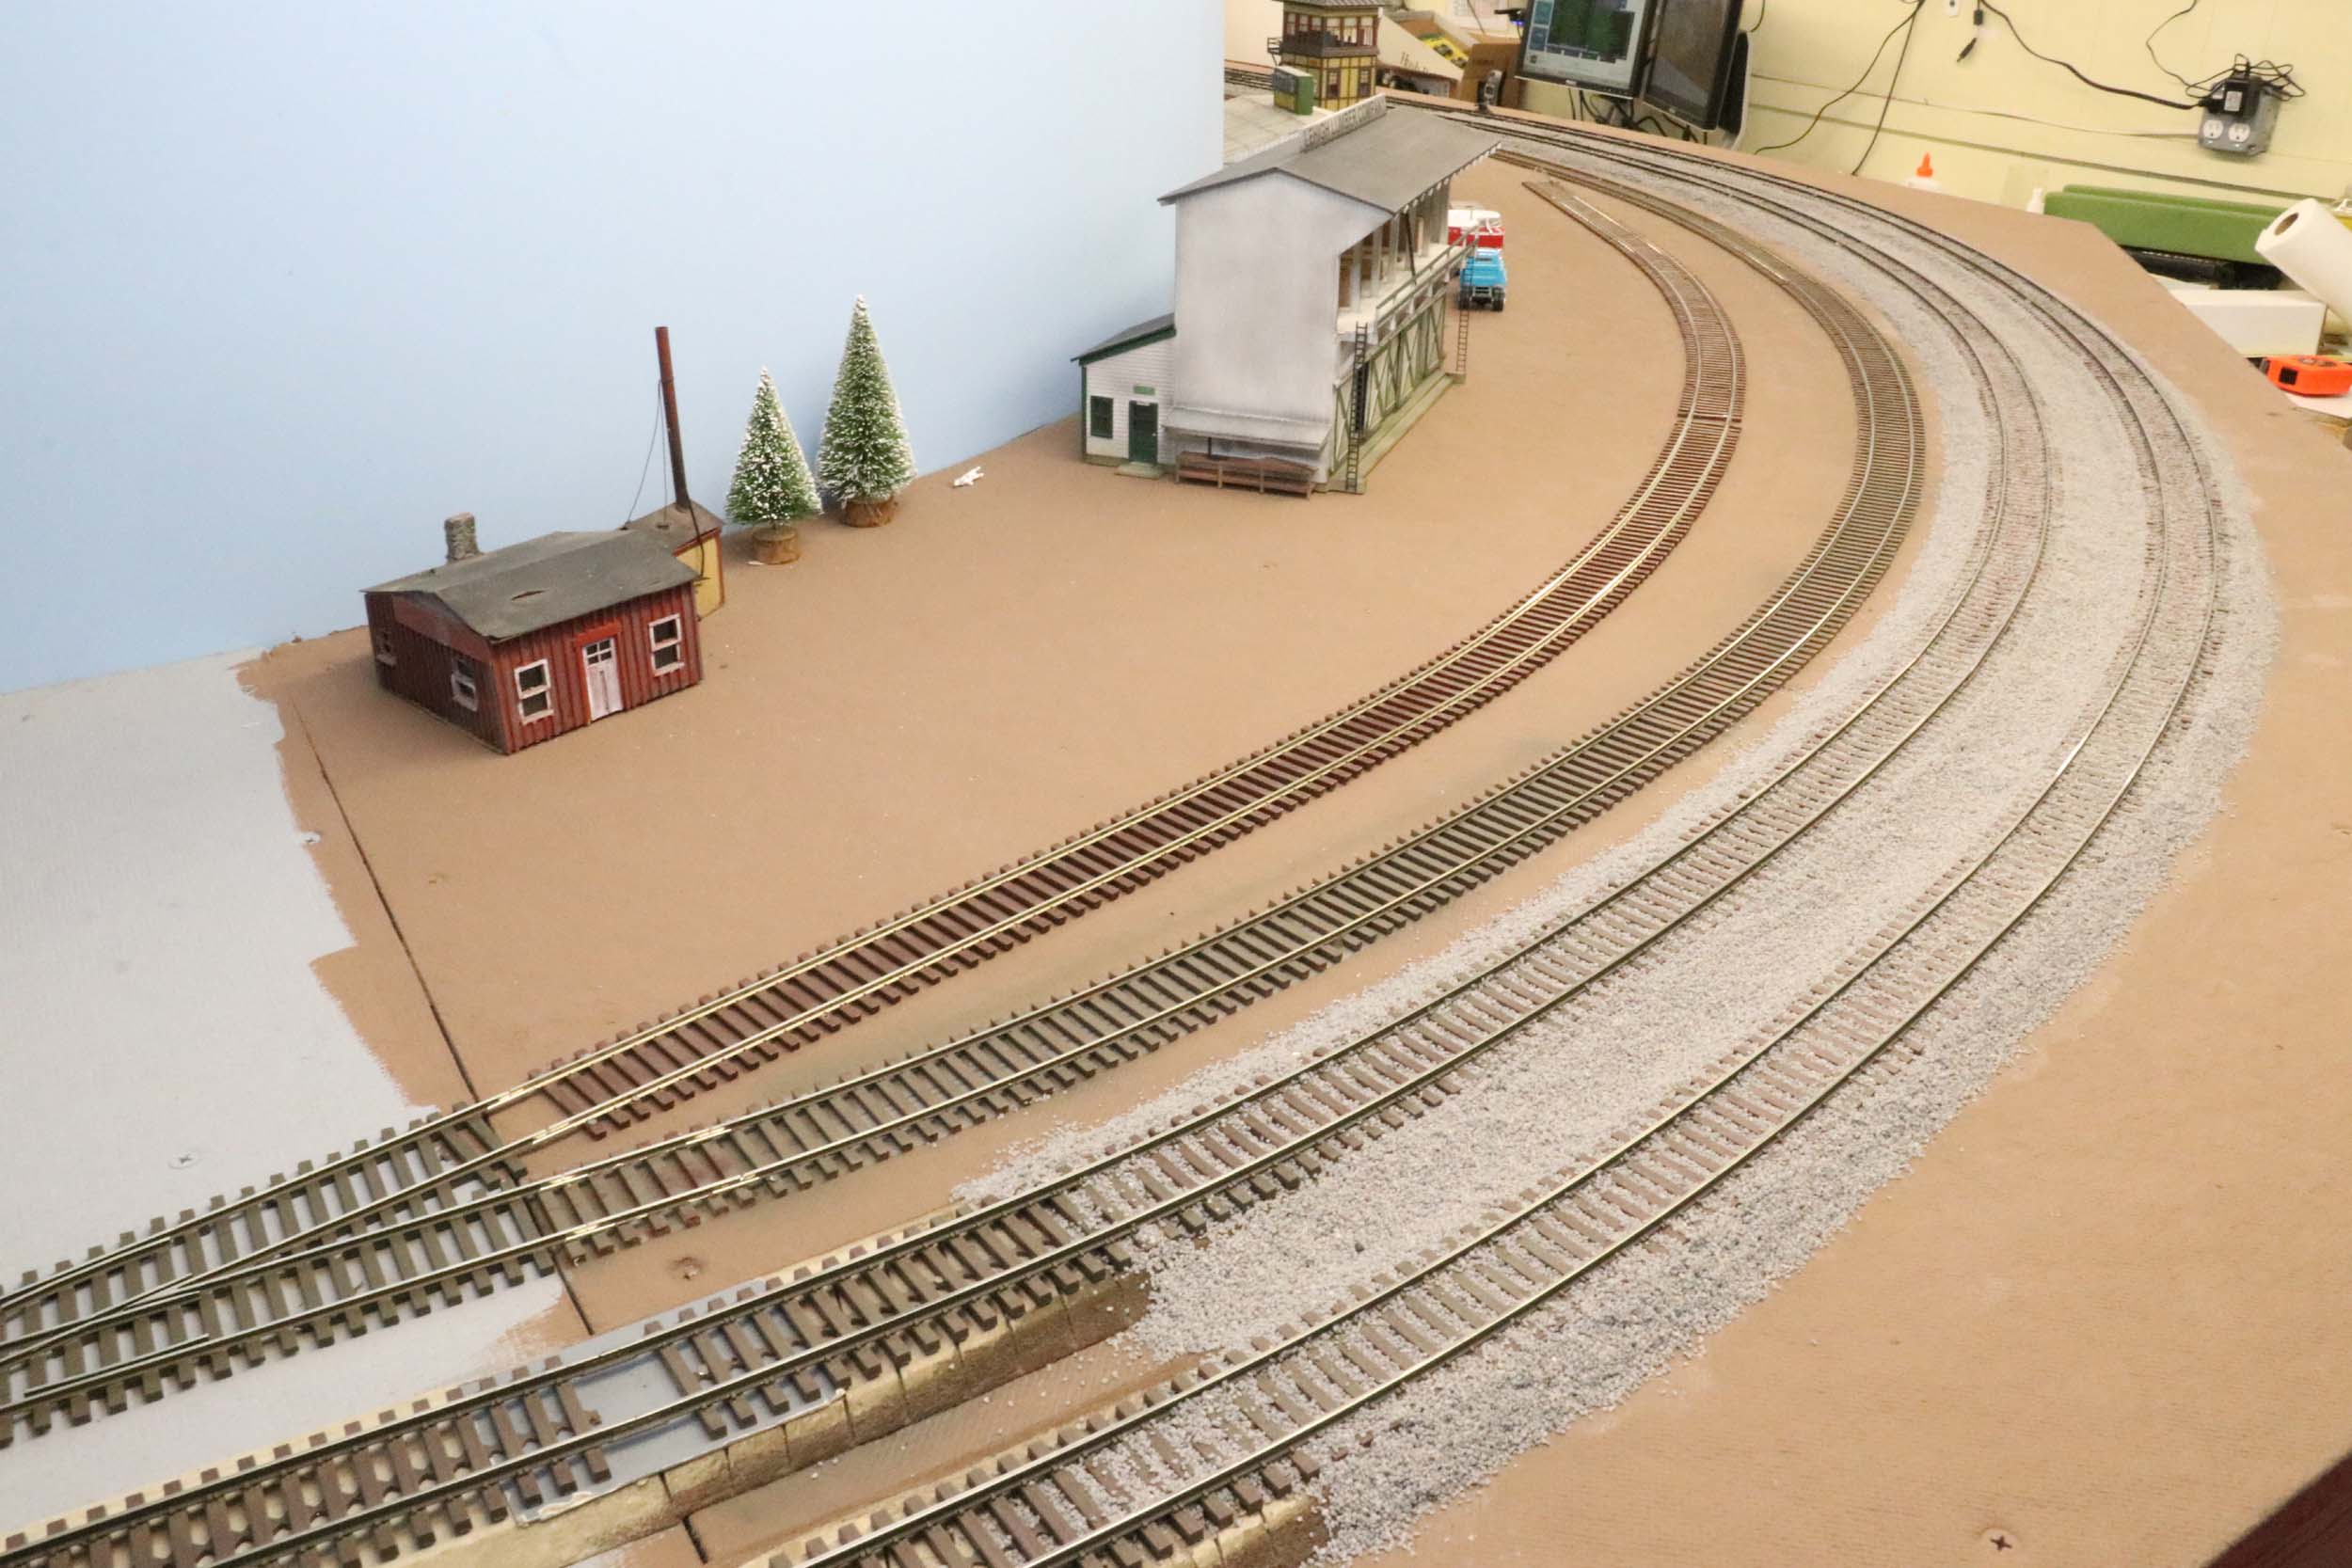
Siding for Reefer Icing Platform 5-29-18 Since
the layout addition I have had in my head for many years now is still in my
head and might not ever happen, I decided a new siding was in order. This is
the first new track on the layout in many years. There
is another well hidden loop route besides the main lines that can run another
train. It has not been clear enough from stored cars for that to happen for
years. But a big motivator was making a track for my reefer ice platform that
will be about 8 feet long. I can hold/store a killer reefer train that is all
in the boxes for now. I
was going to put the second turnout in the typical ladder fashion but decided
to keep going to the end of the layout. That greatly extended the length by
at least 10 feet to about 28 feet total.
|
|


I
started at the left end and worked right using a piece of aluminum flat stock
as a spacer to the next track. It made for a fast and straight new siding.
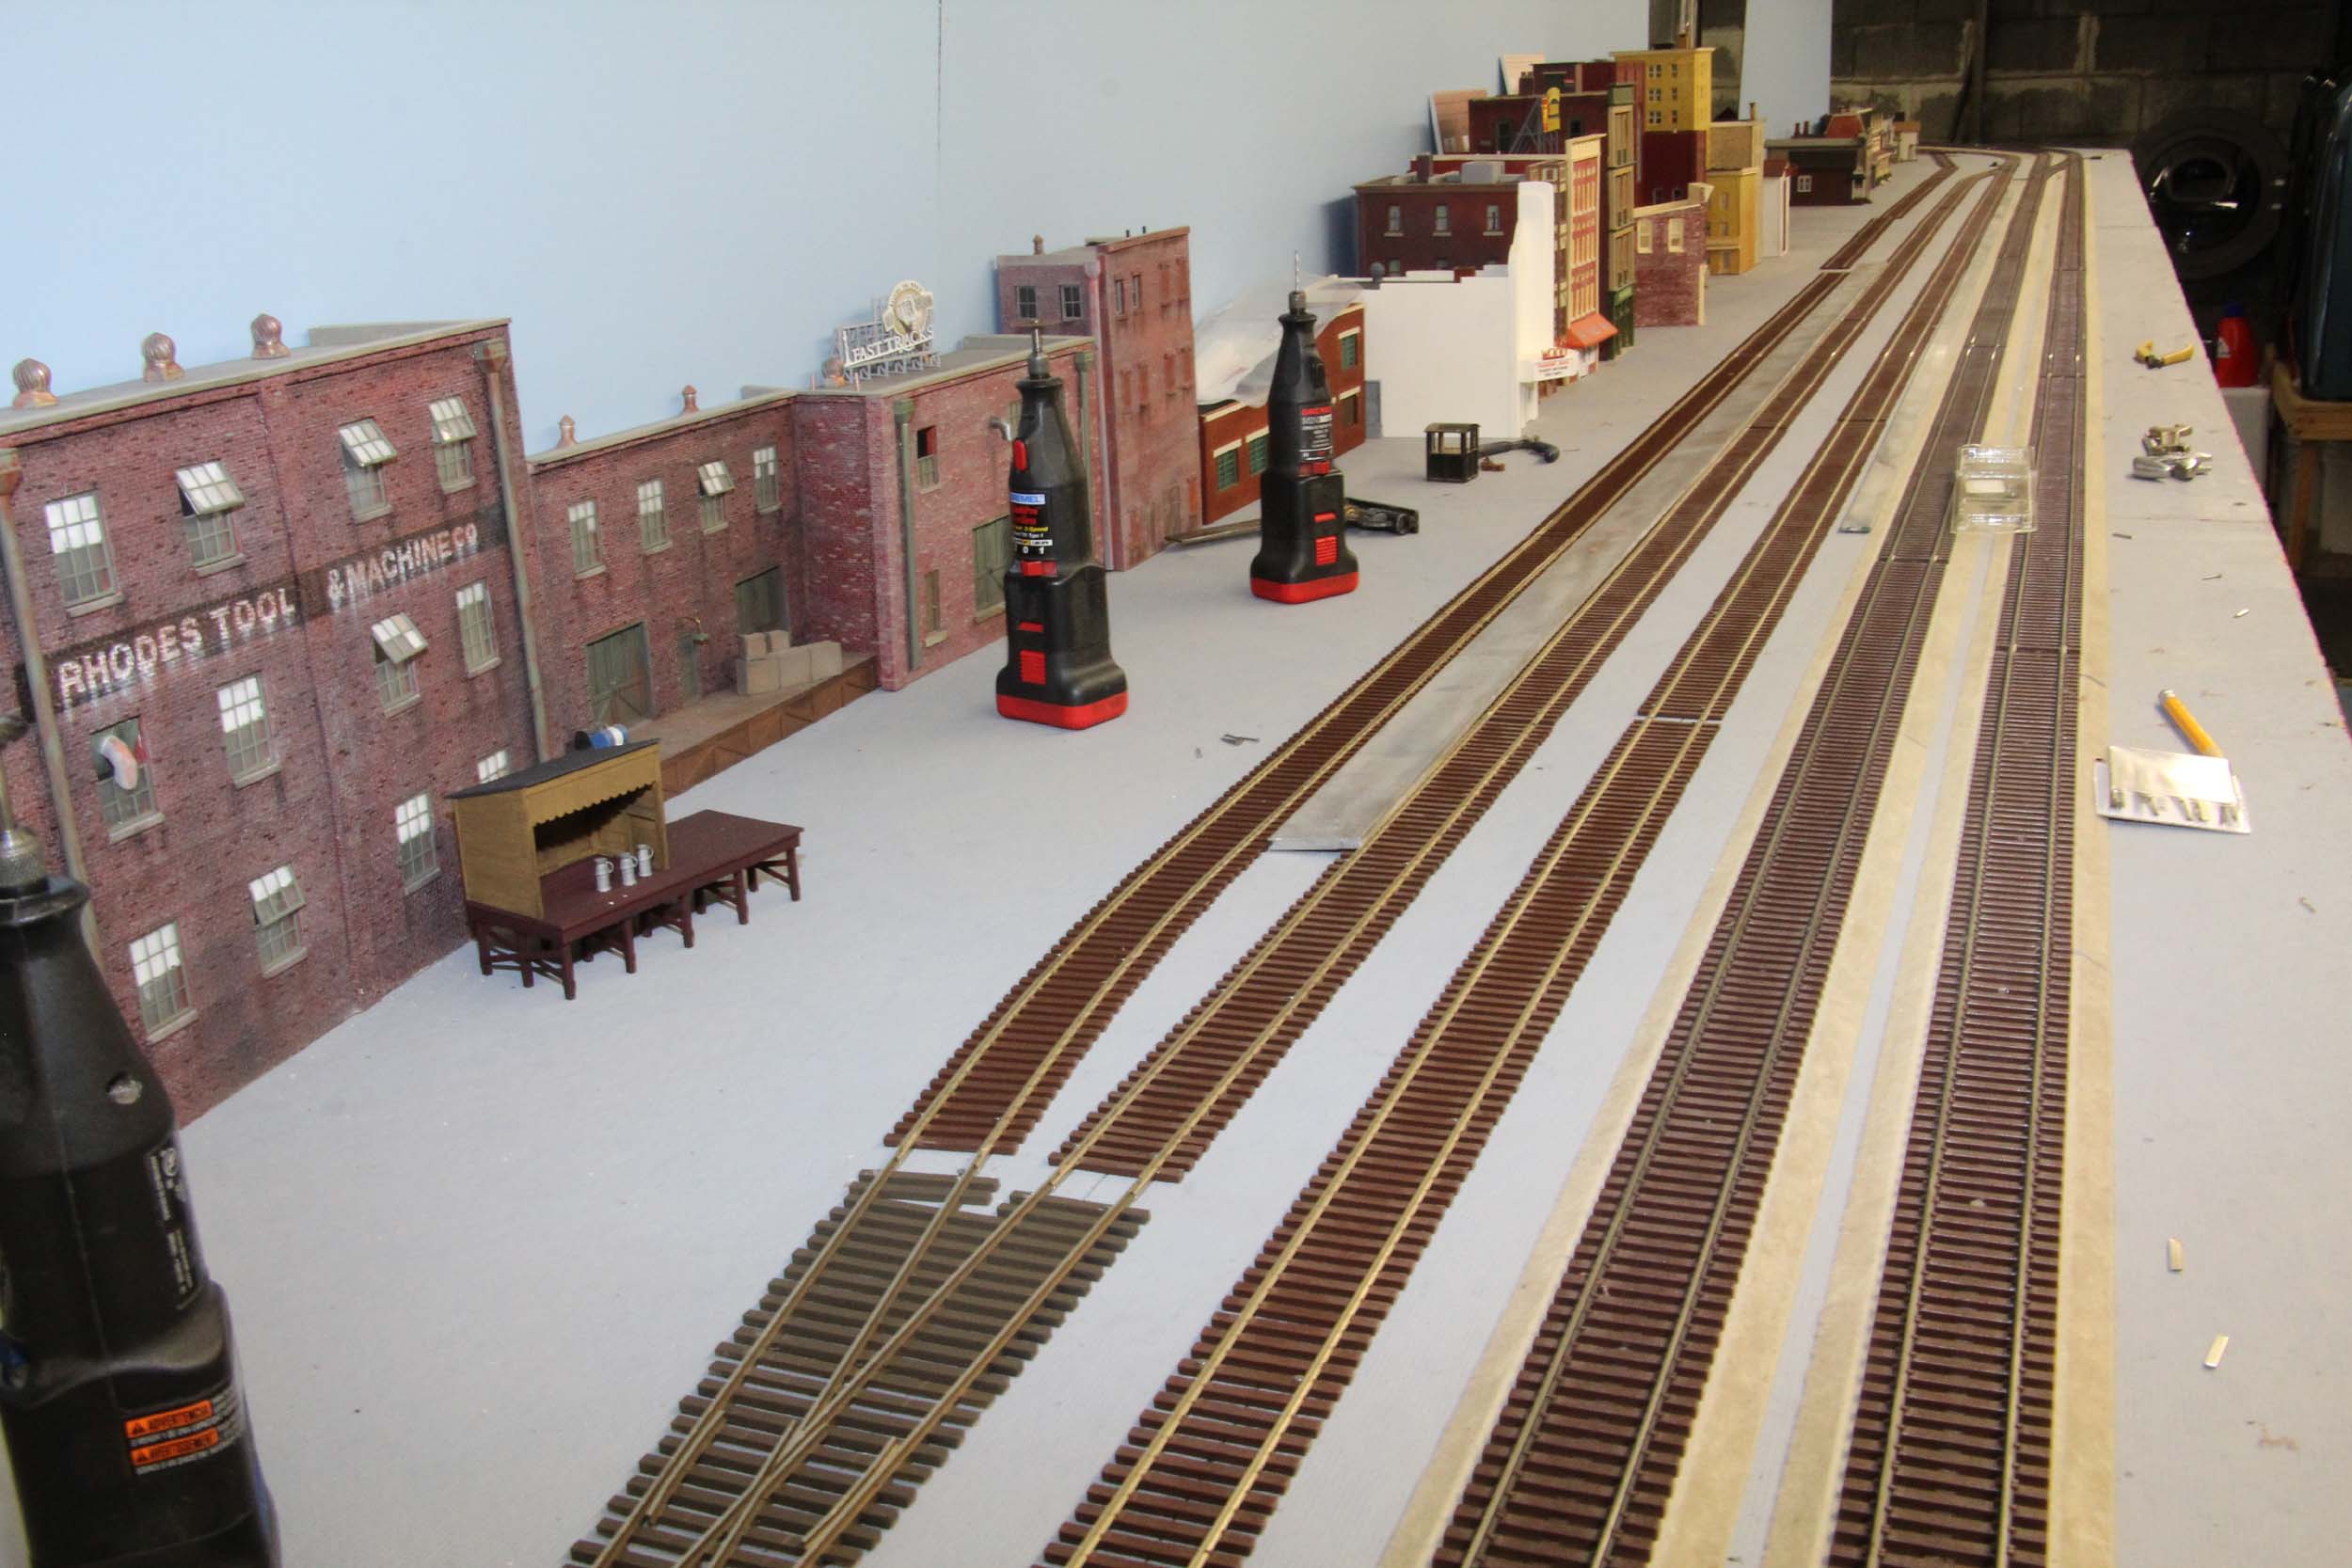
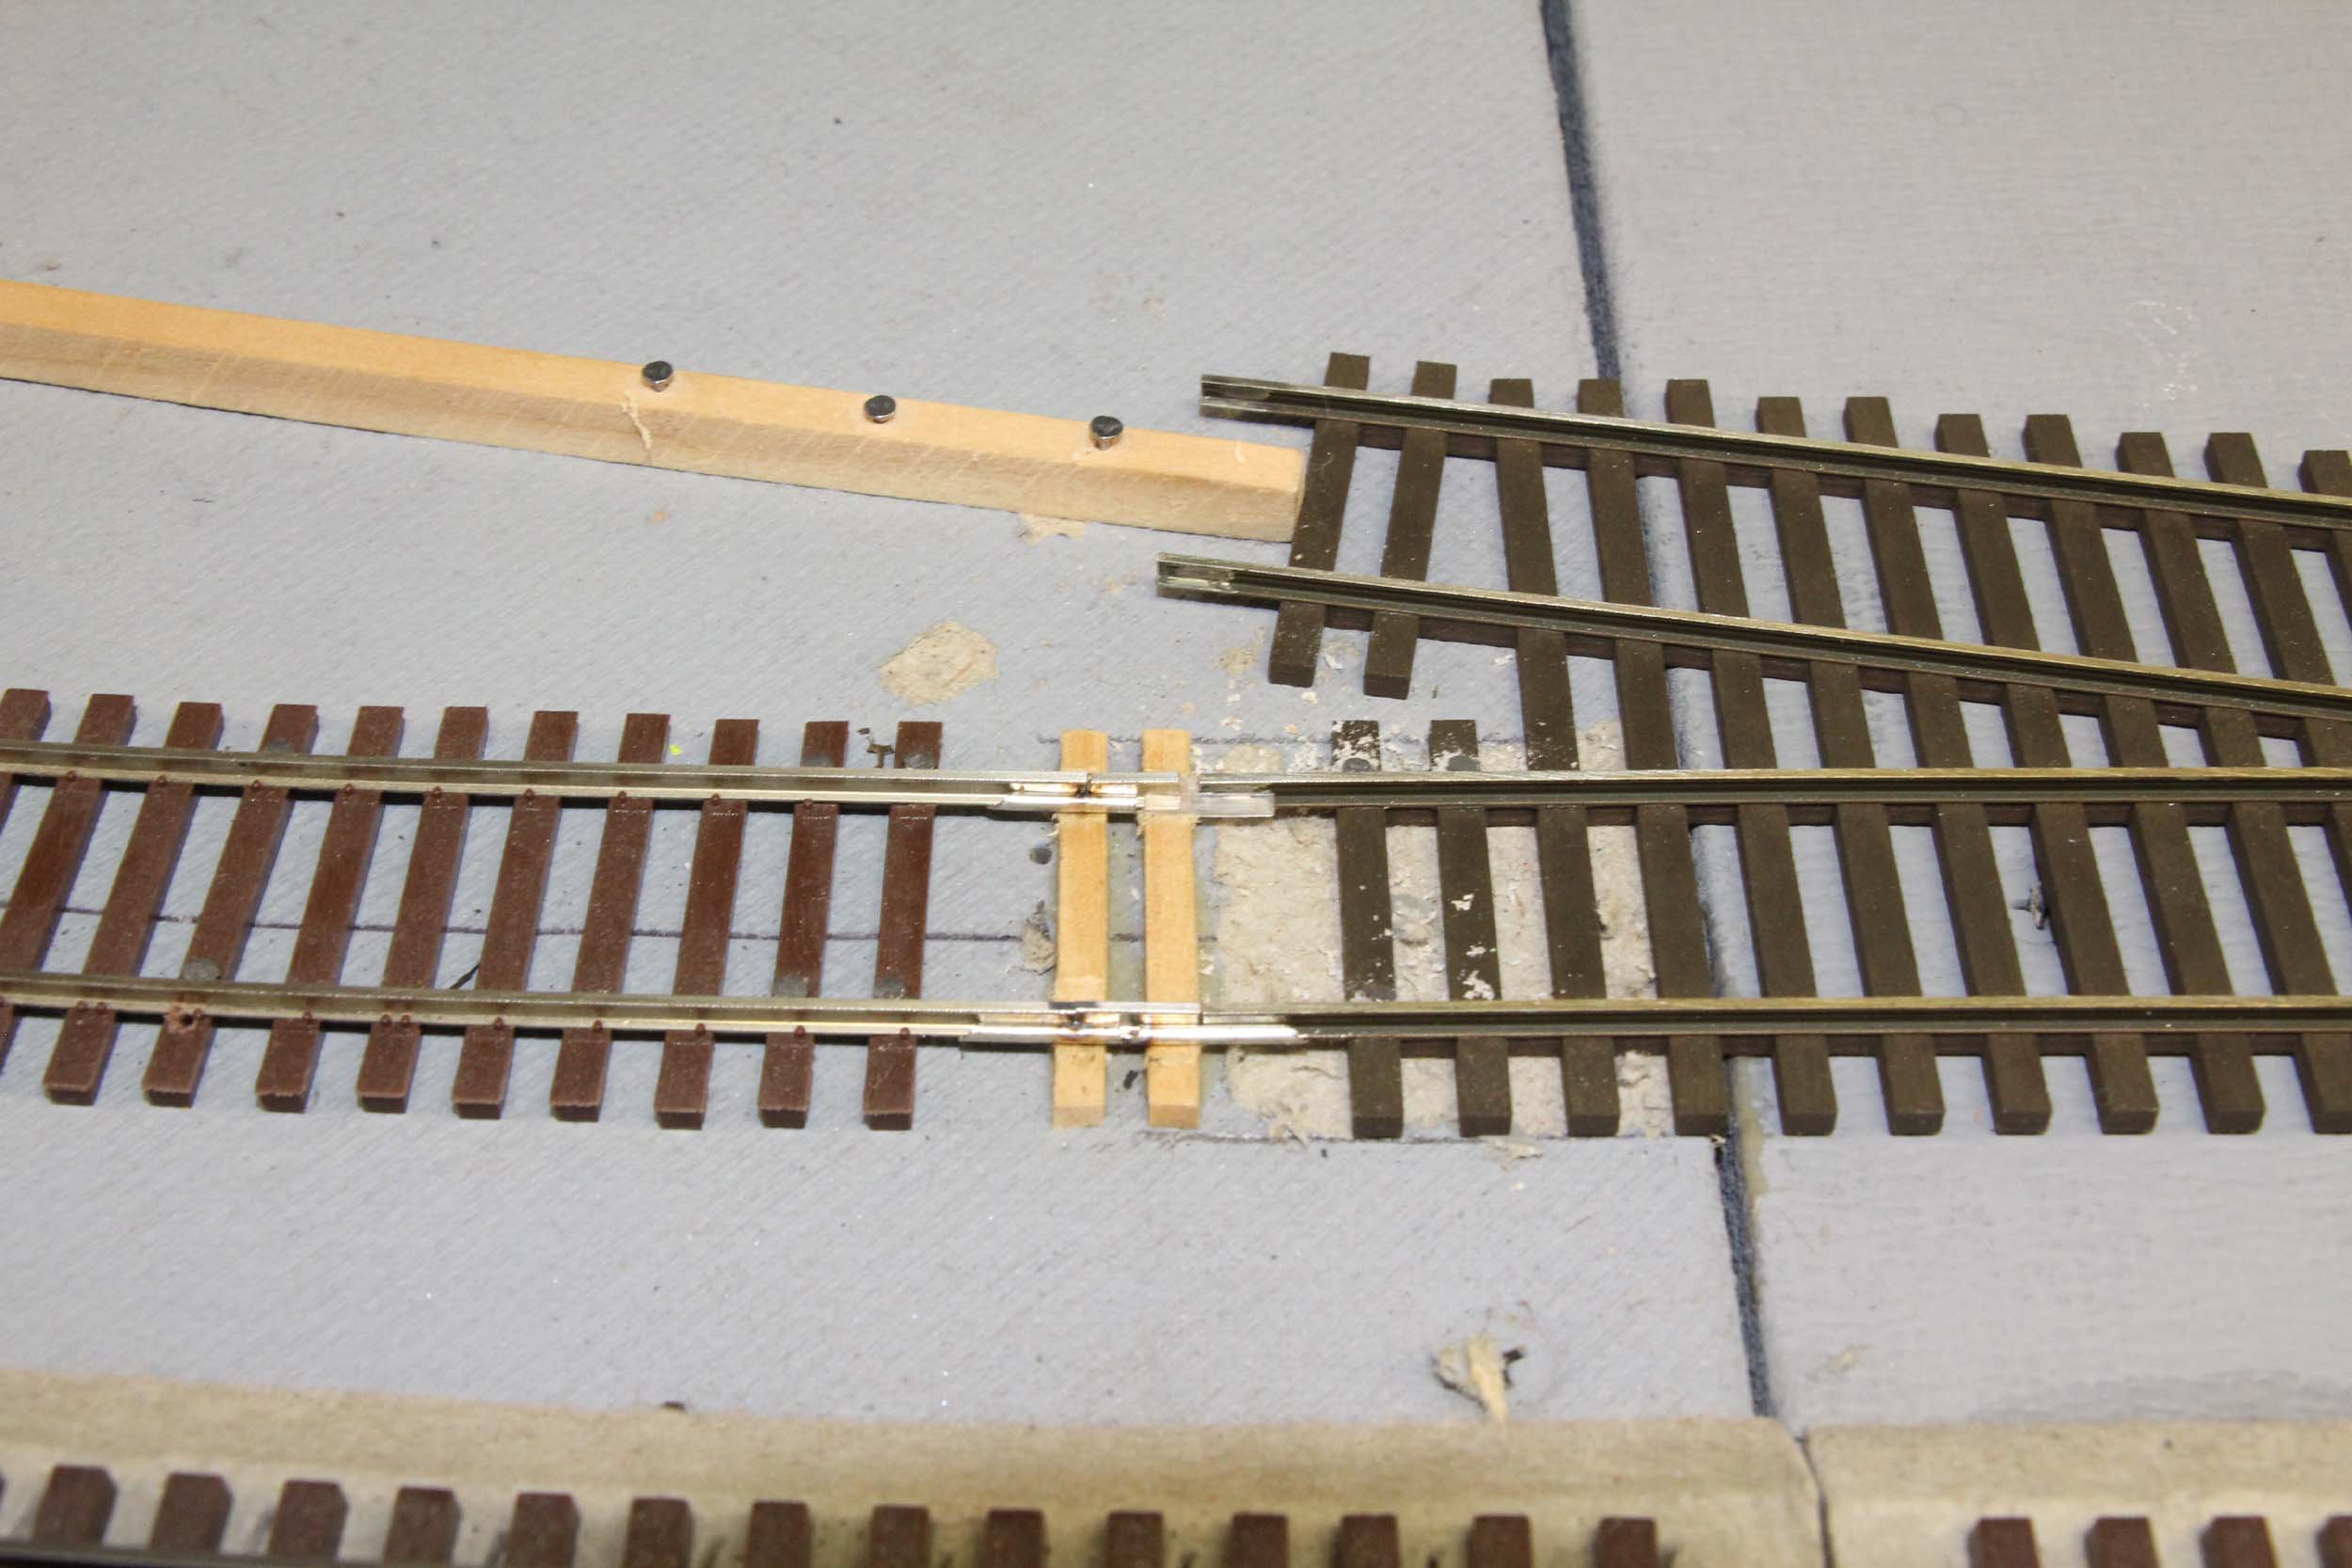
I
started at the other end and worked to the splice area. The turnout was about
3/16 short to fill the straight piece so I have to use the smallest spacer rail
ever!
As
in the past when the layout was first built, this turnout is where I used my ¼
x ½ pine spline to layout the curve. All you have to do is secure the start
point at the turnout, minimally set some guide points and let the wood do the
work. It makes perfect spiral easements, not a fixed firm measured radius.
It just FLOWS!
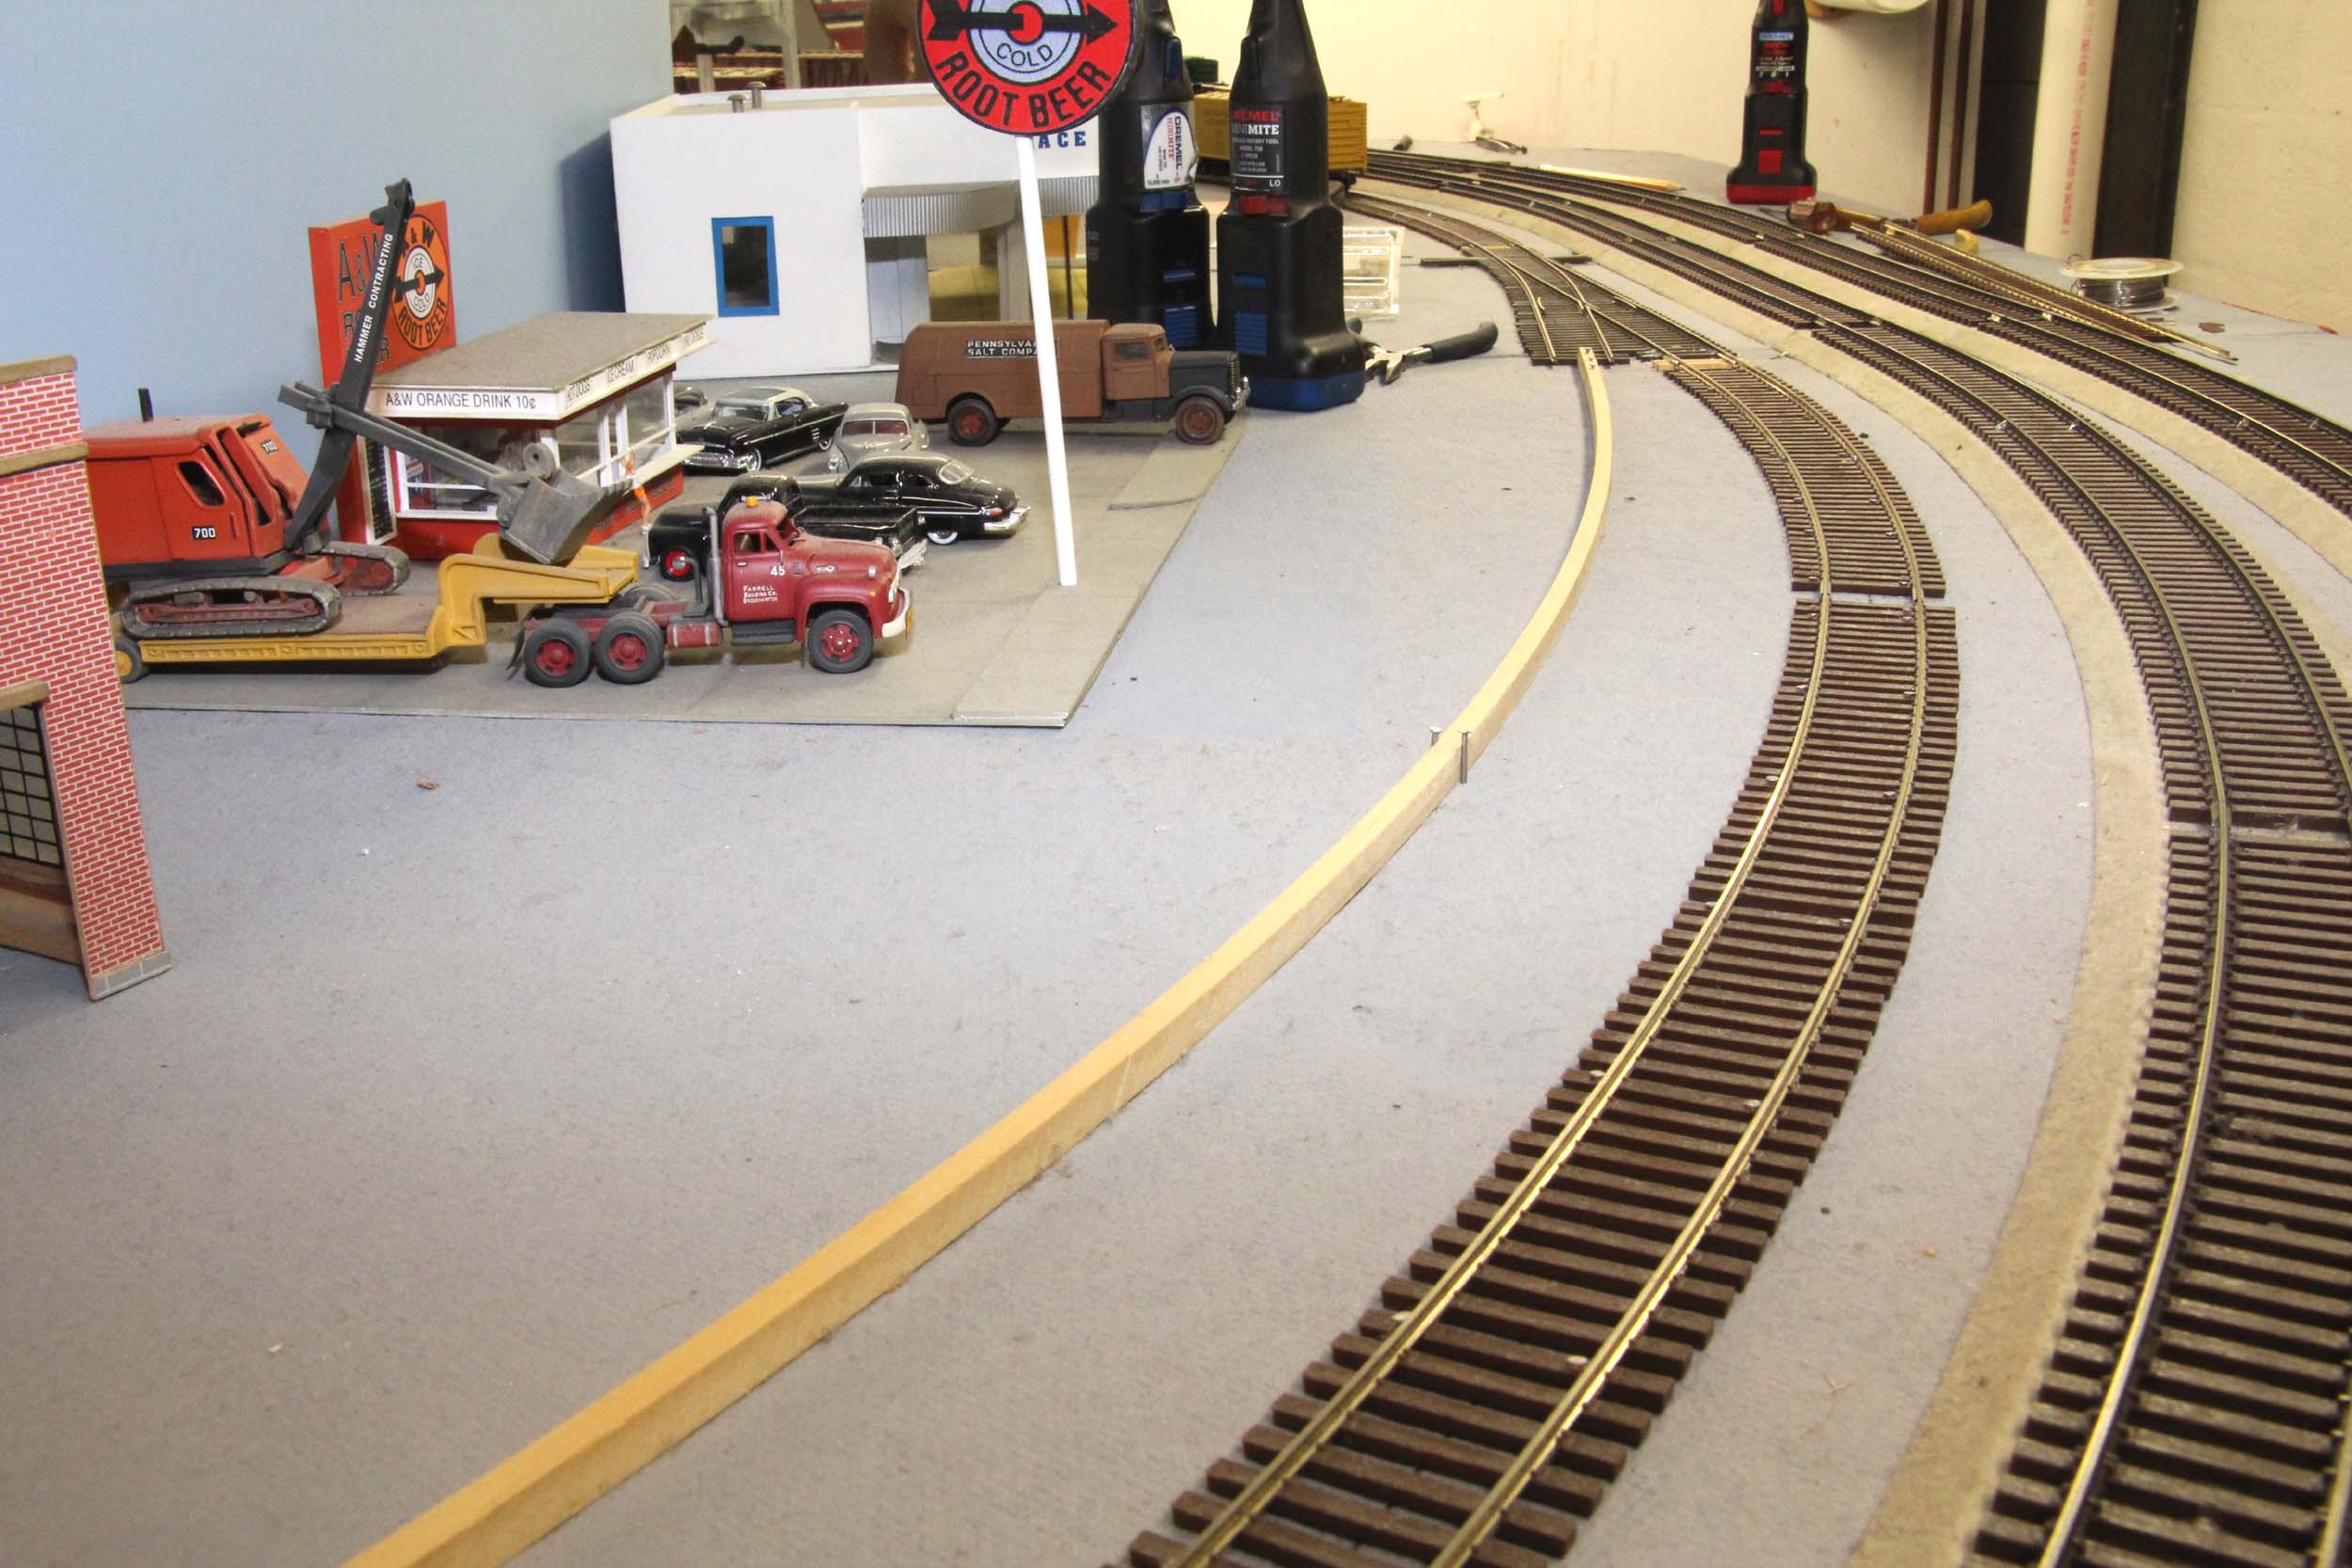
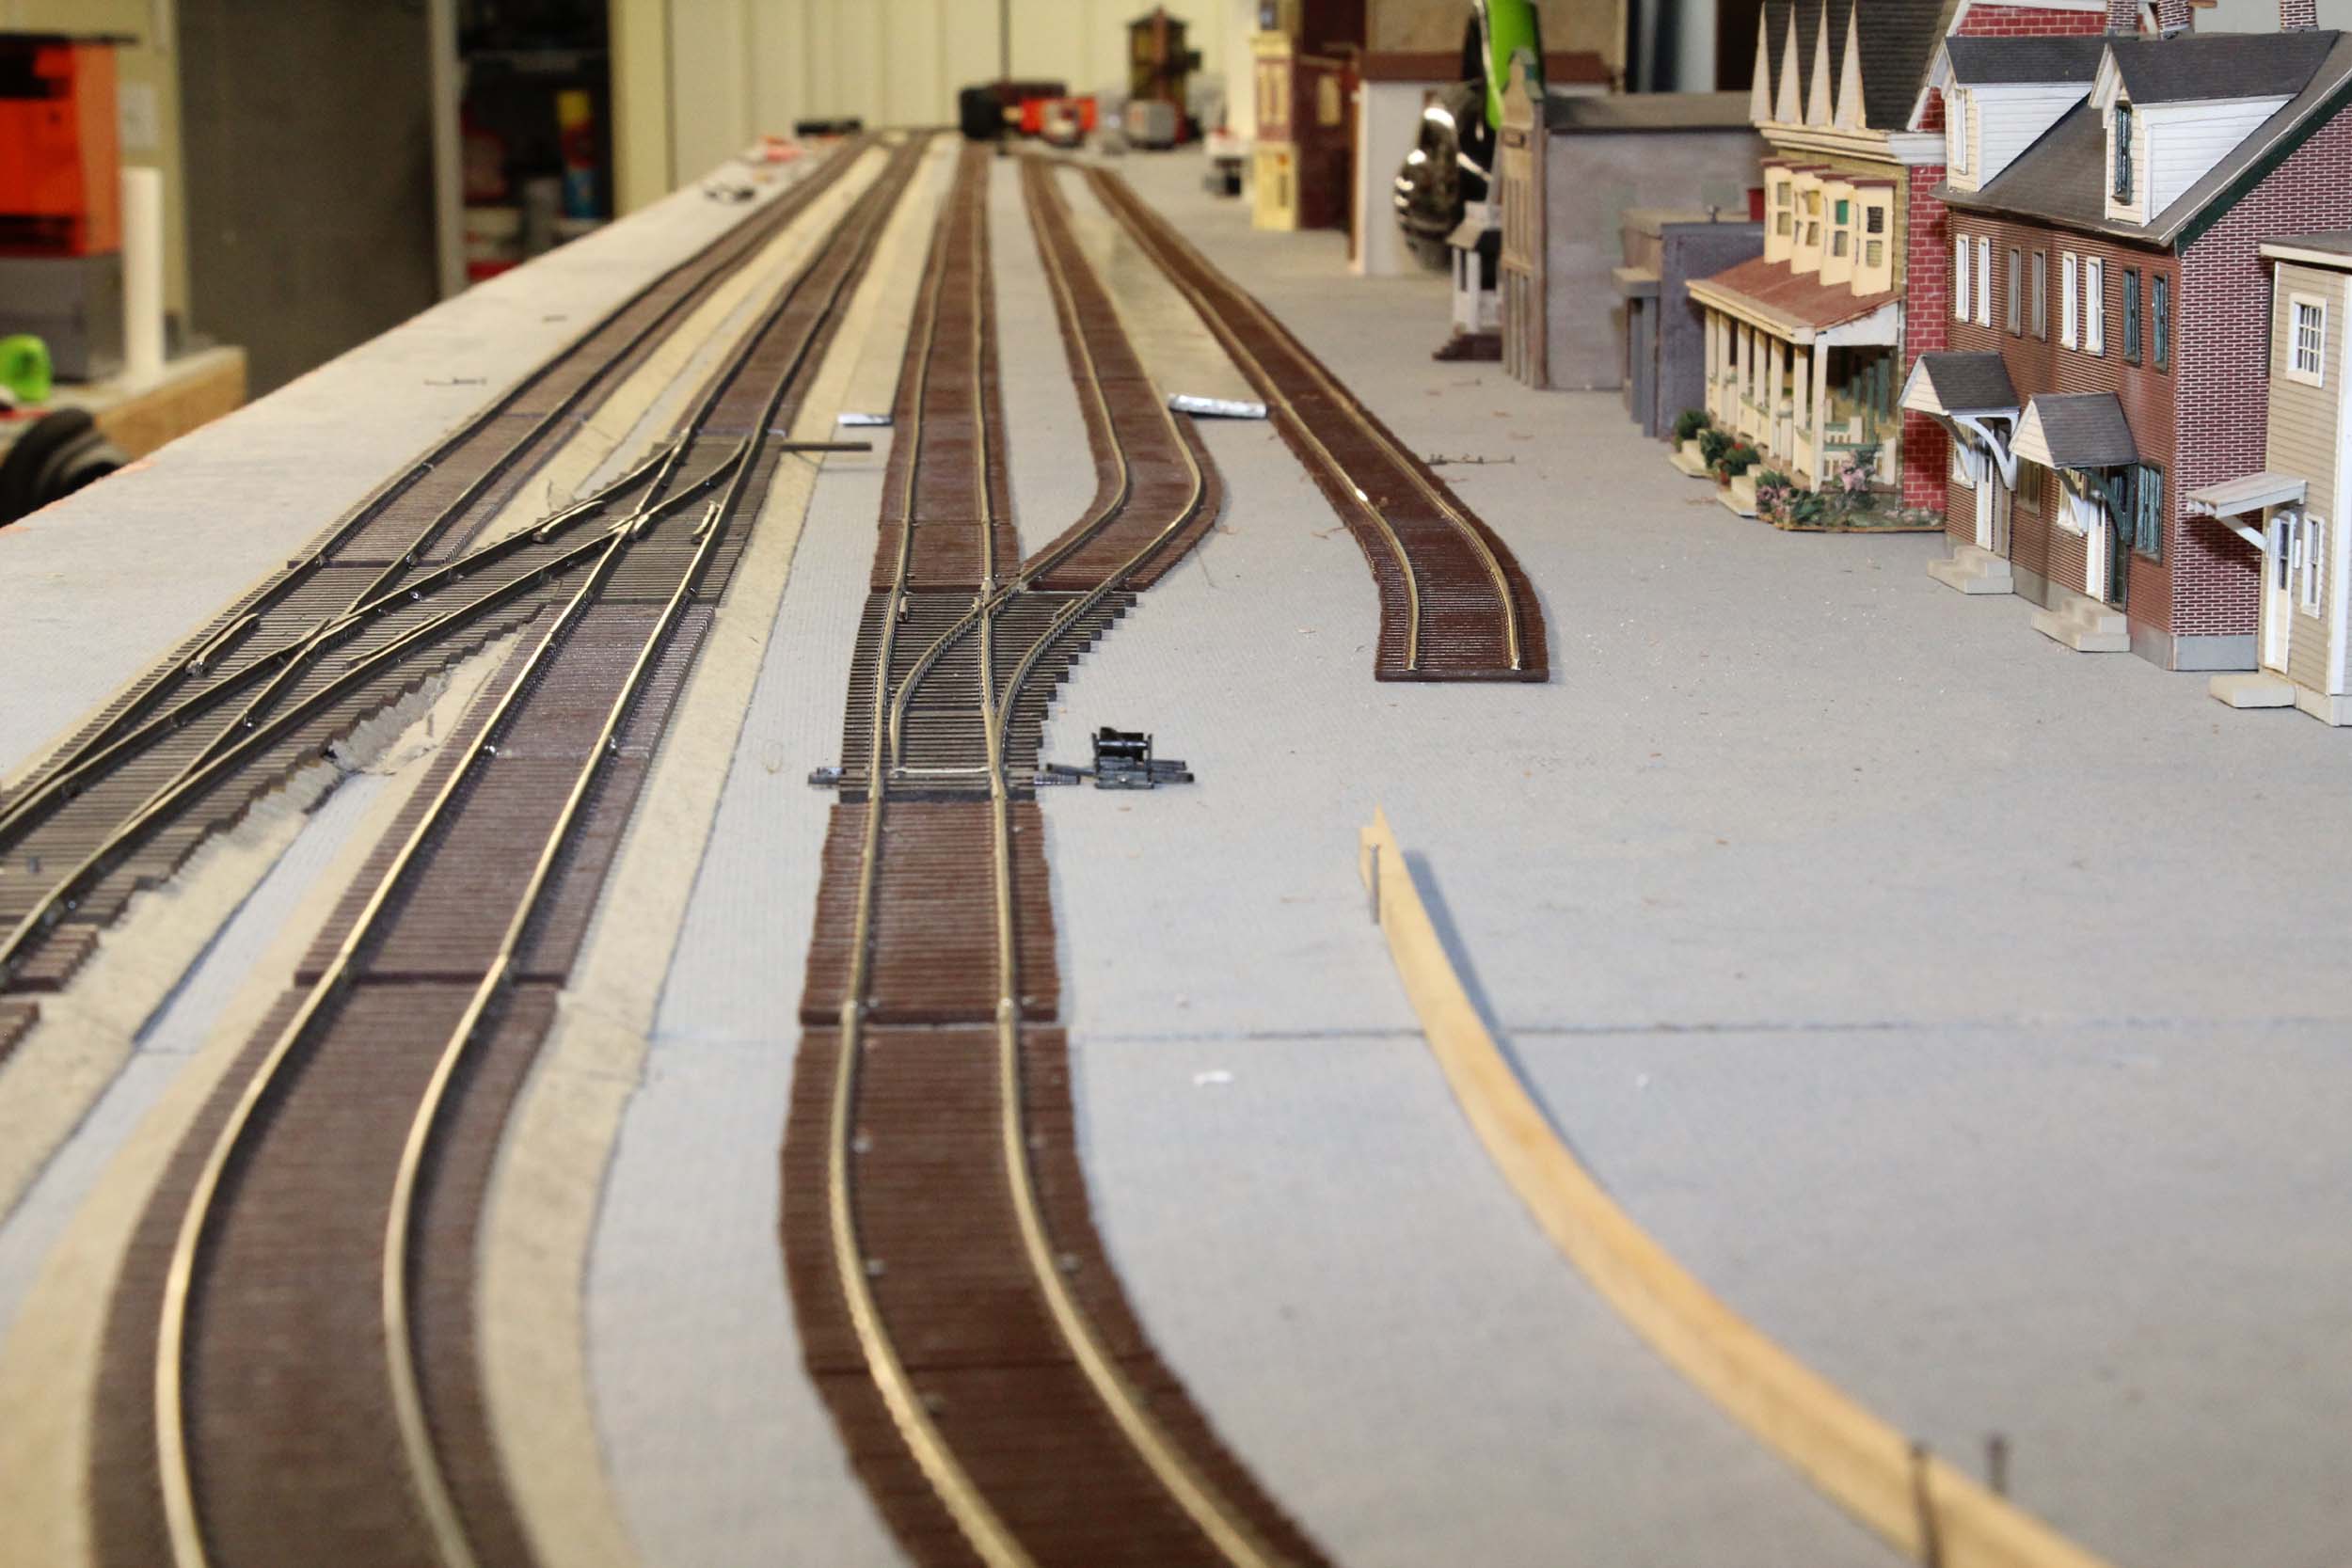
I
don’t know what the radius is but once again everything I own still can run
over every inch of track. I tested the EM1 and I1 so everything else should run
fine. With this new siding as long as I keep the rest of the track clear you
could actually do some switching which was a part of the original design with
long yard leads on both ends.
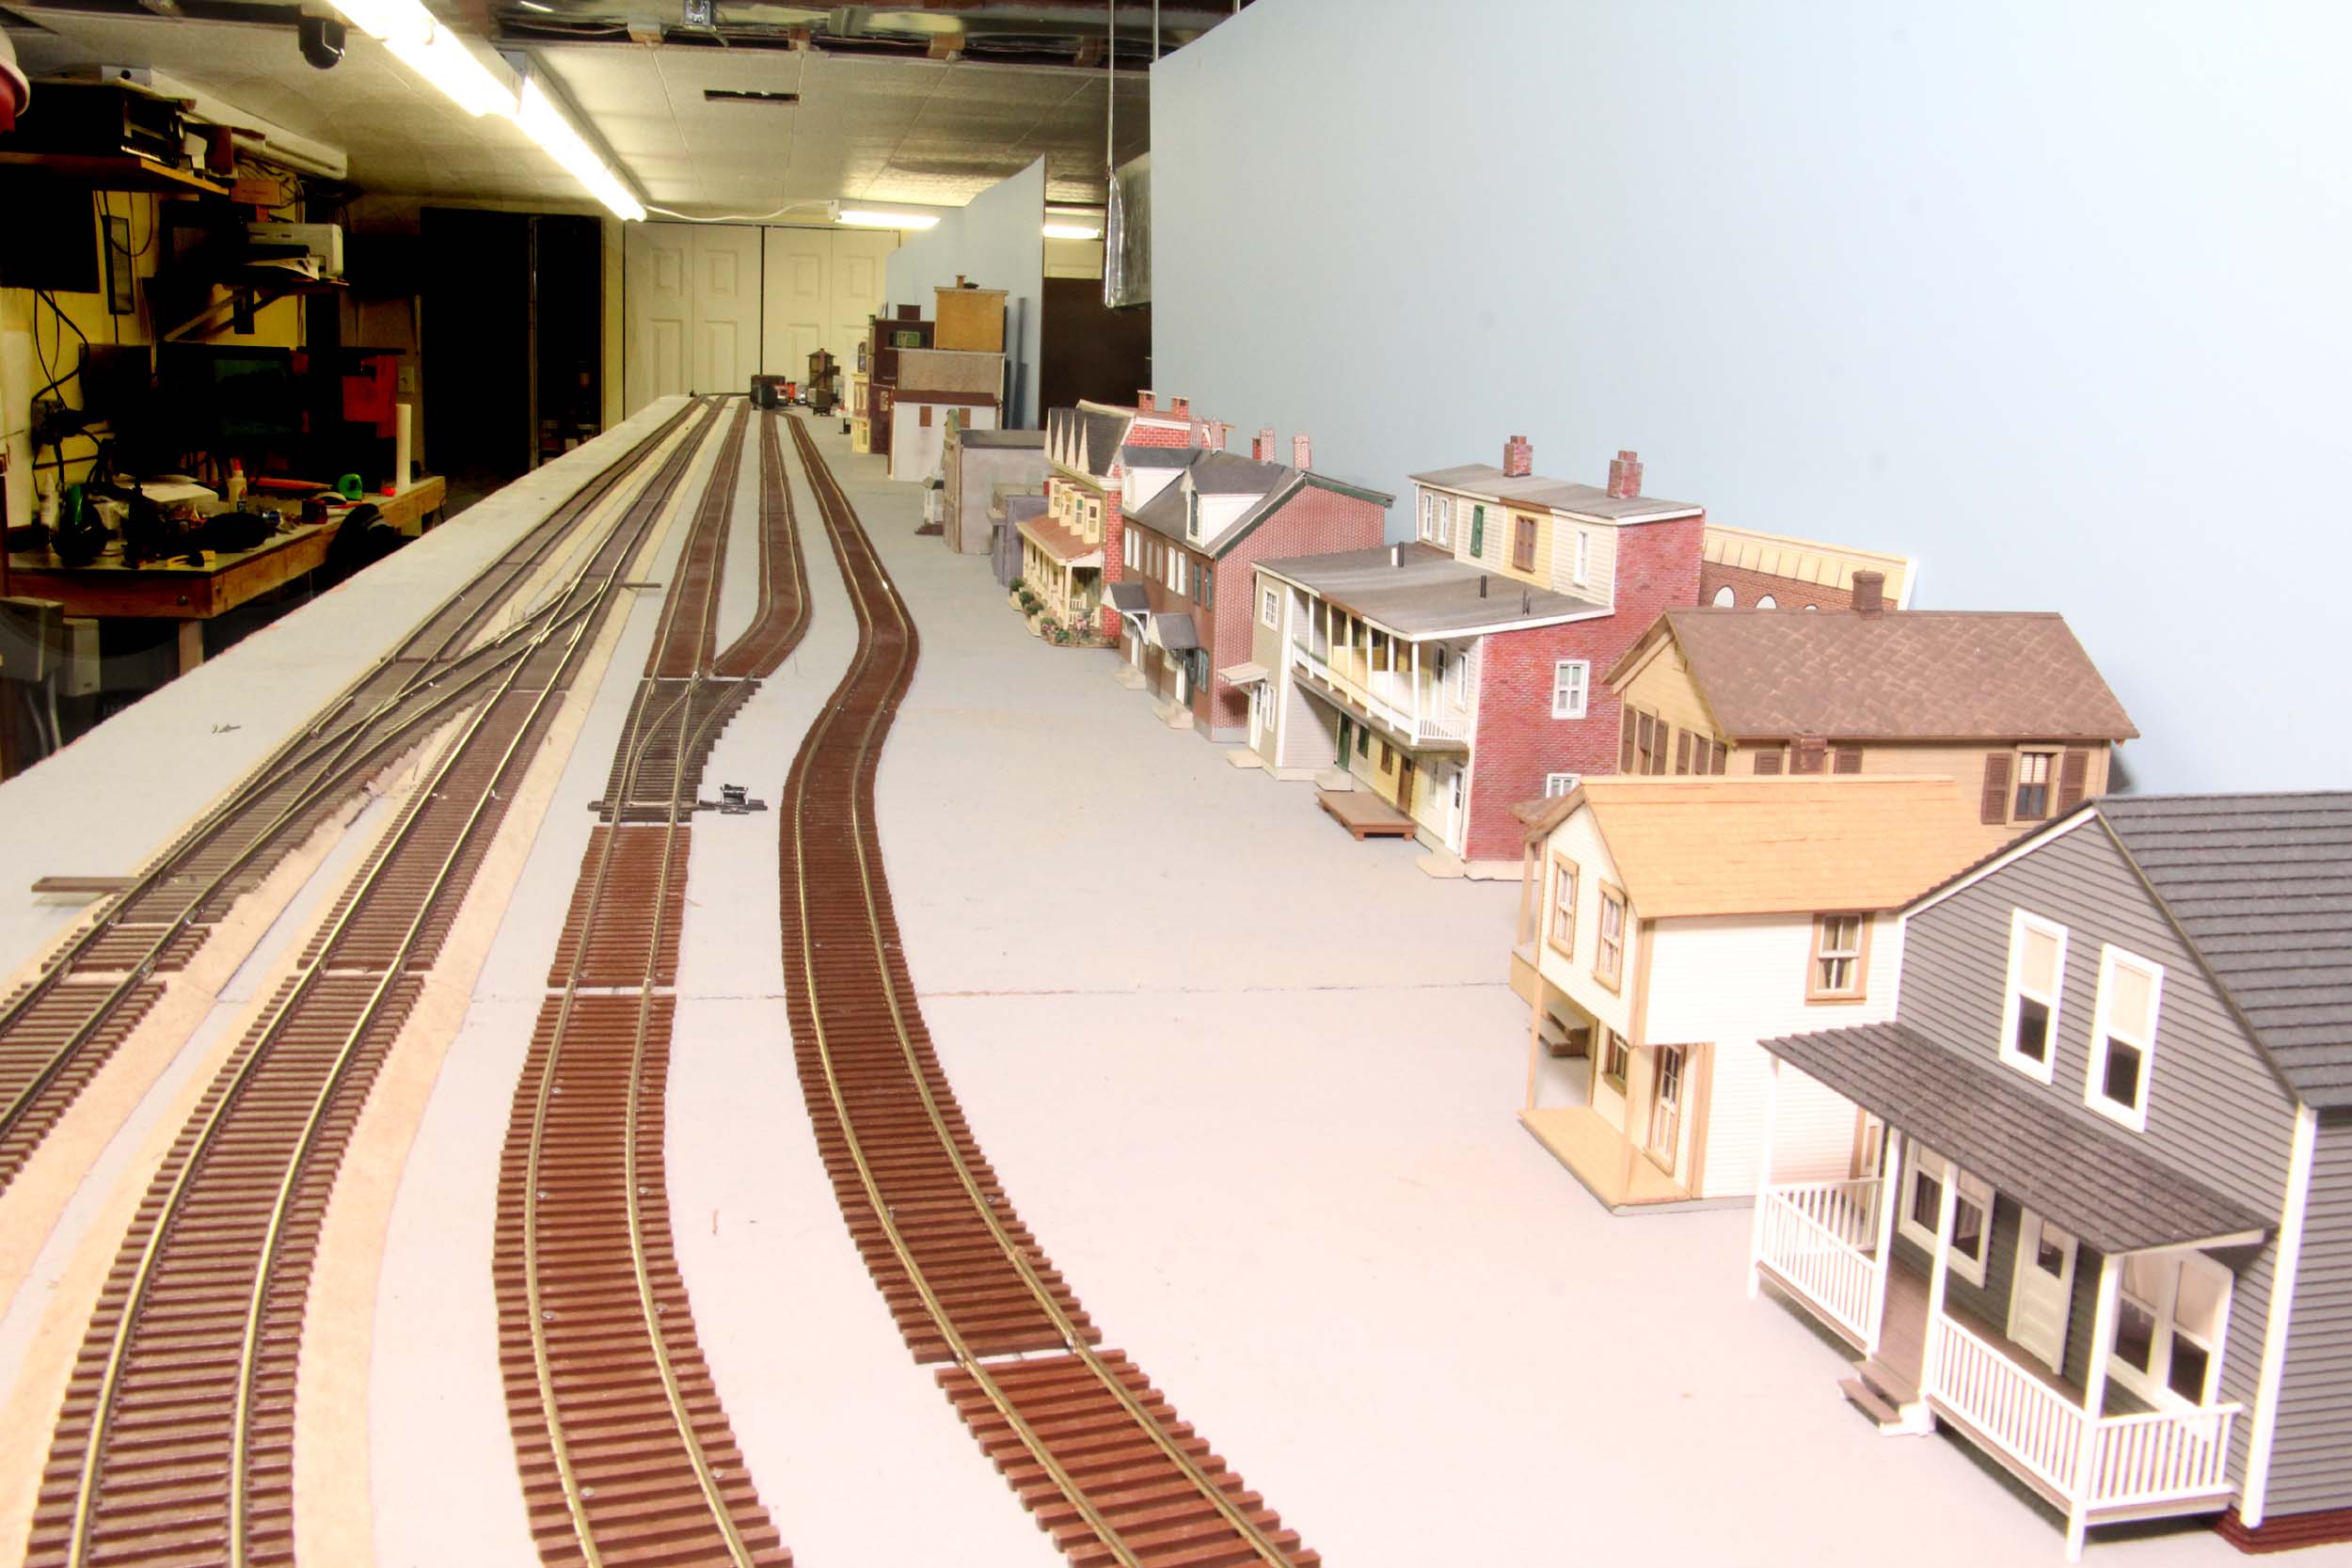
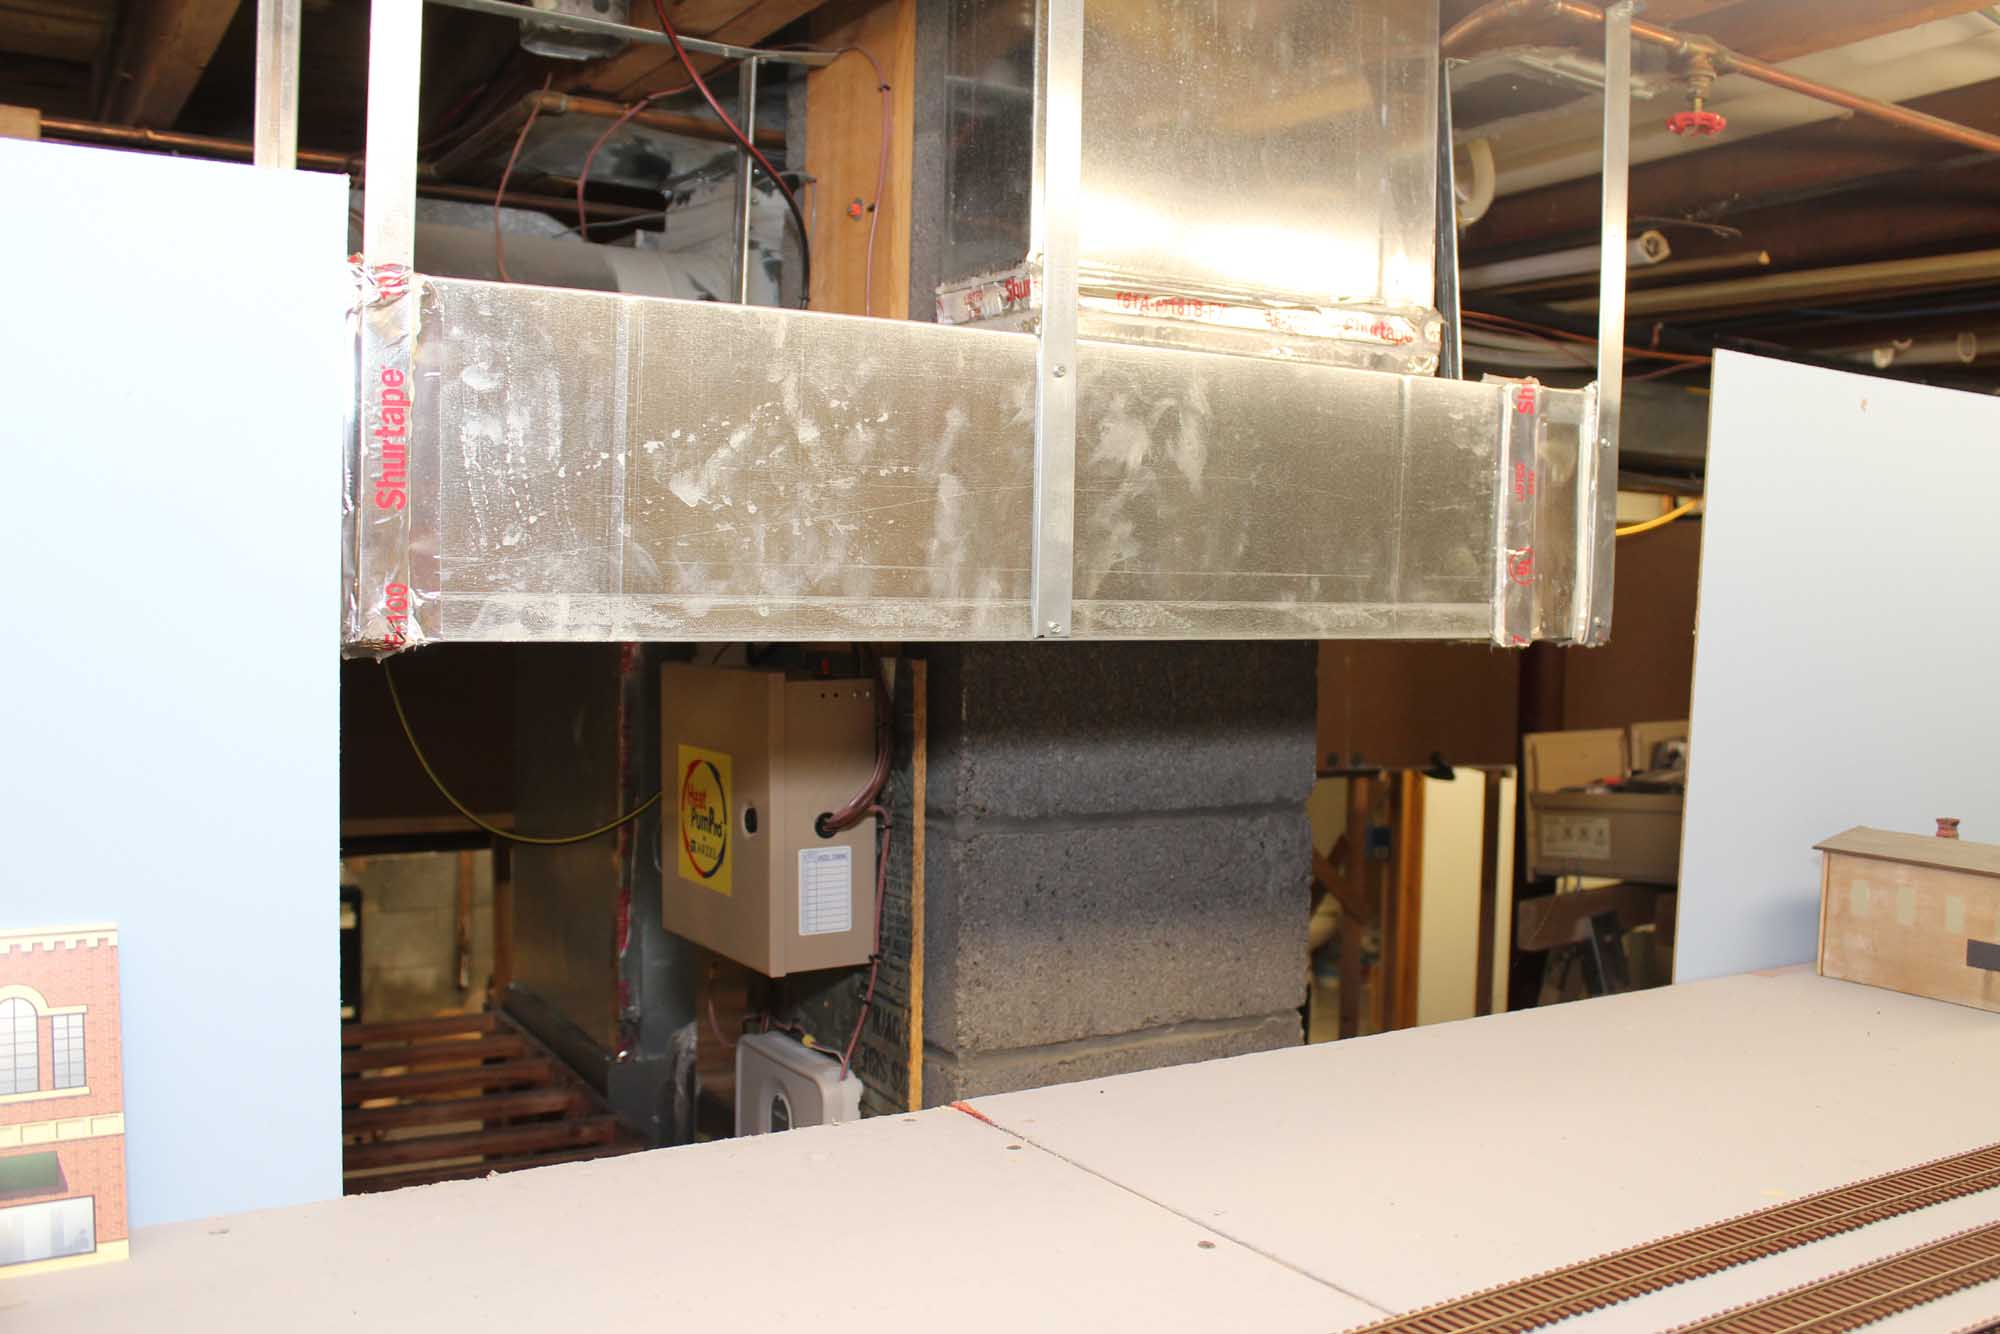
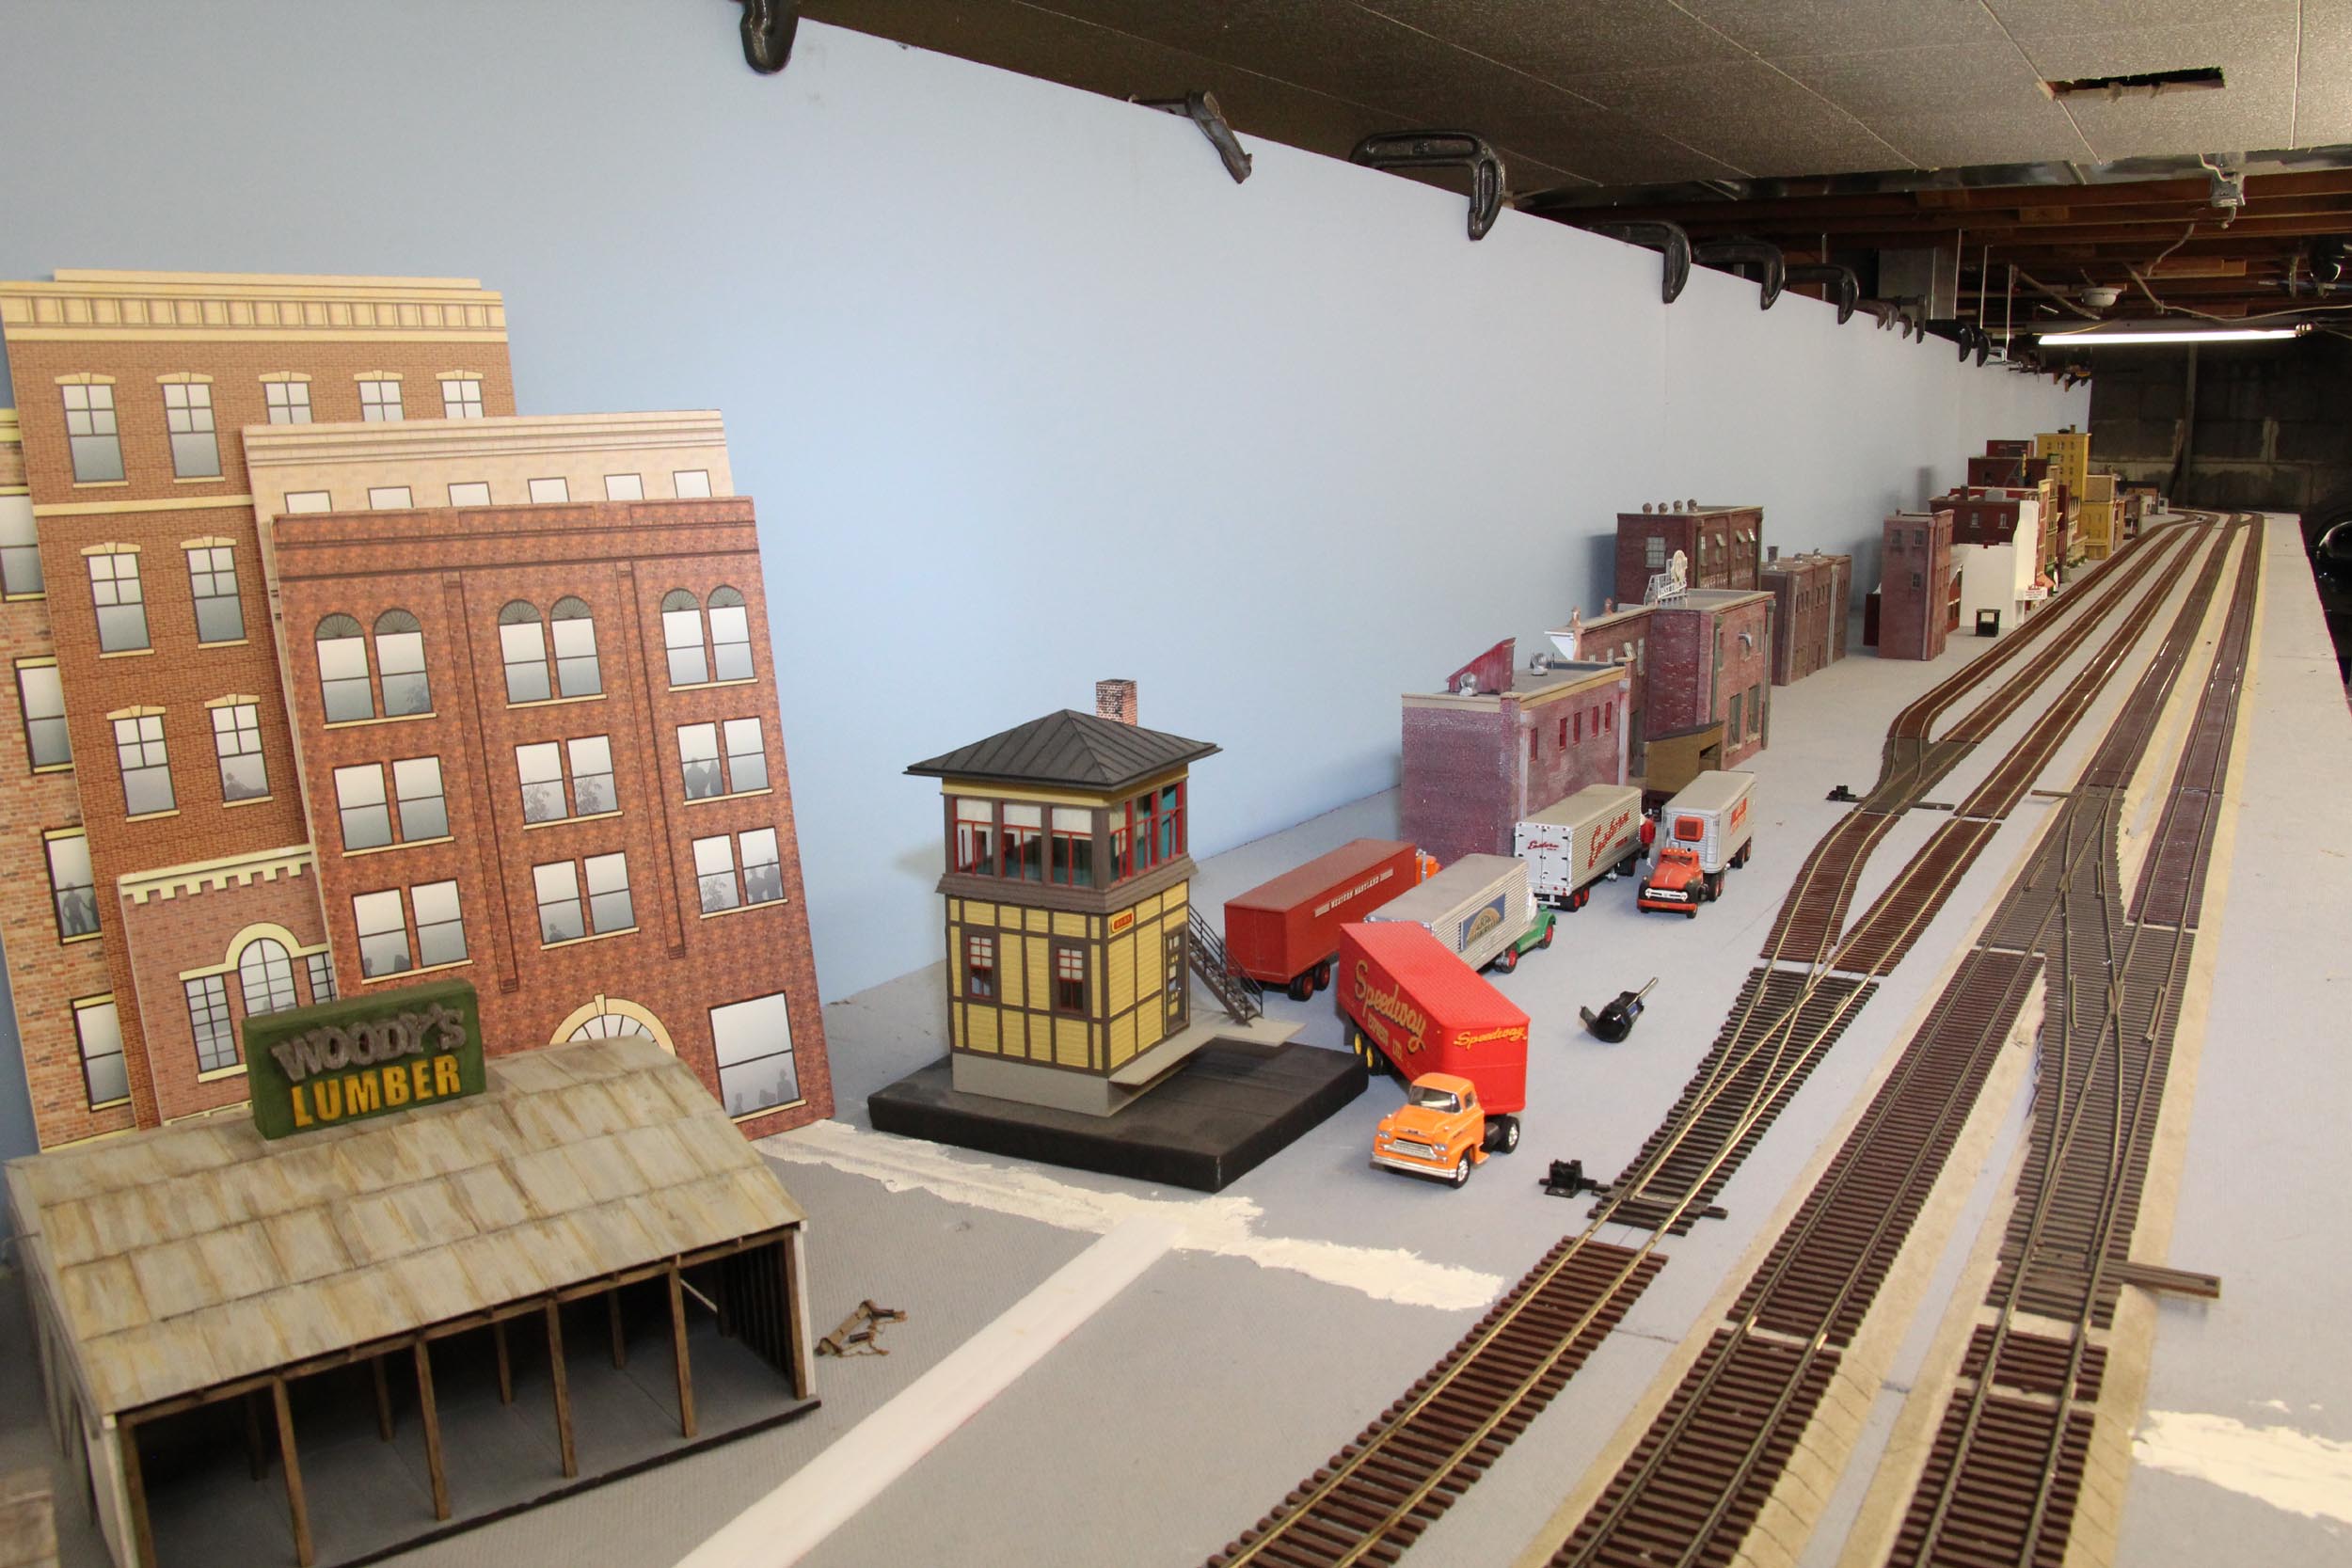
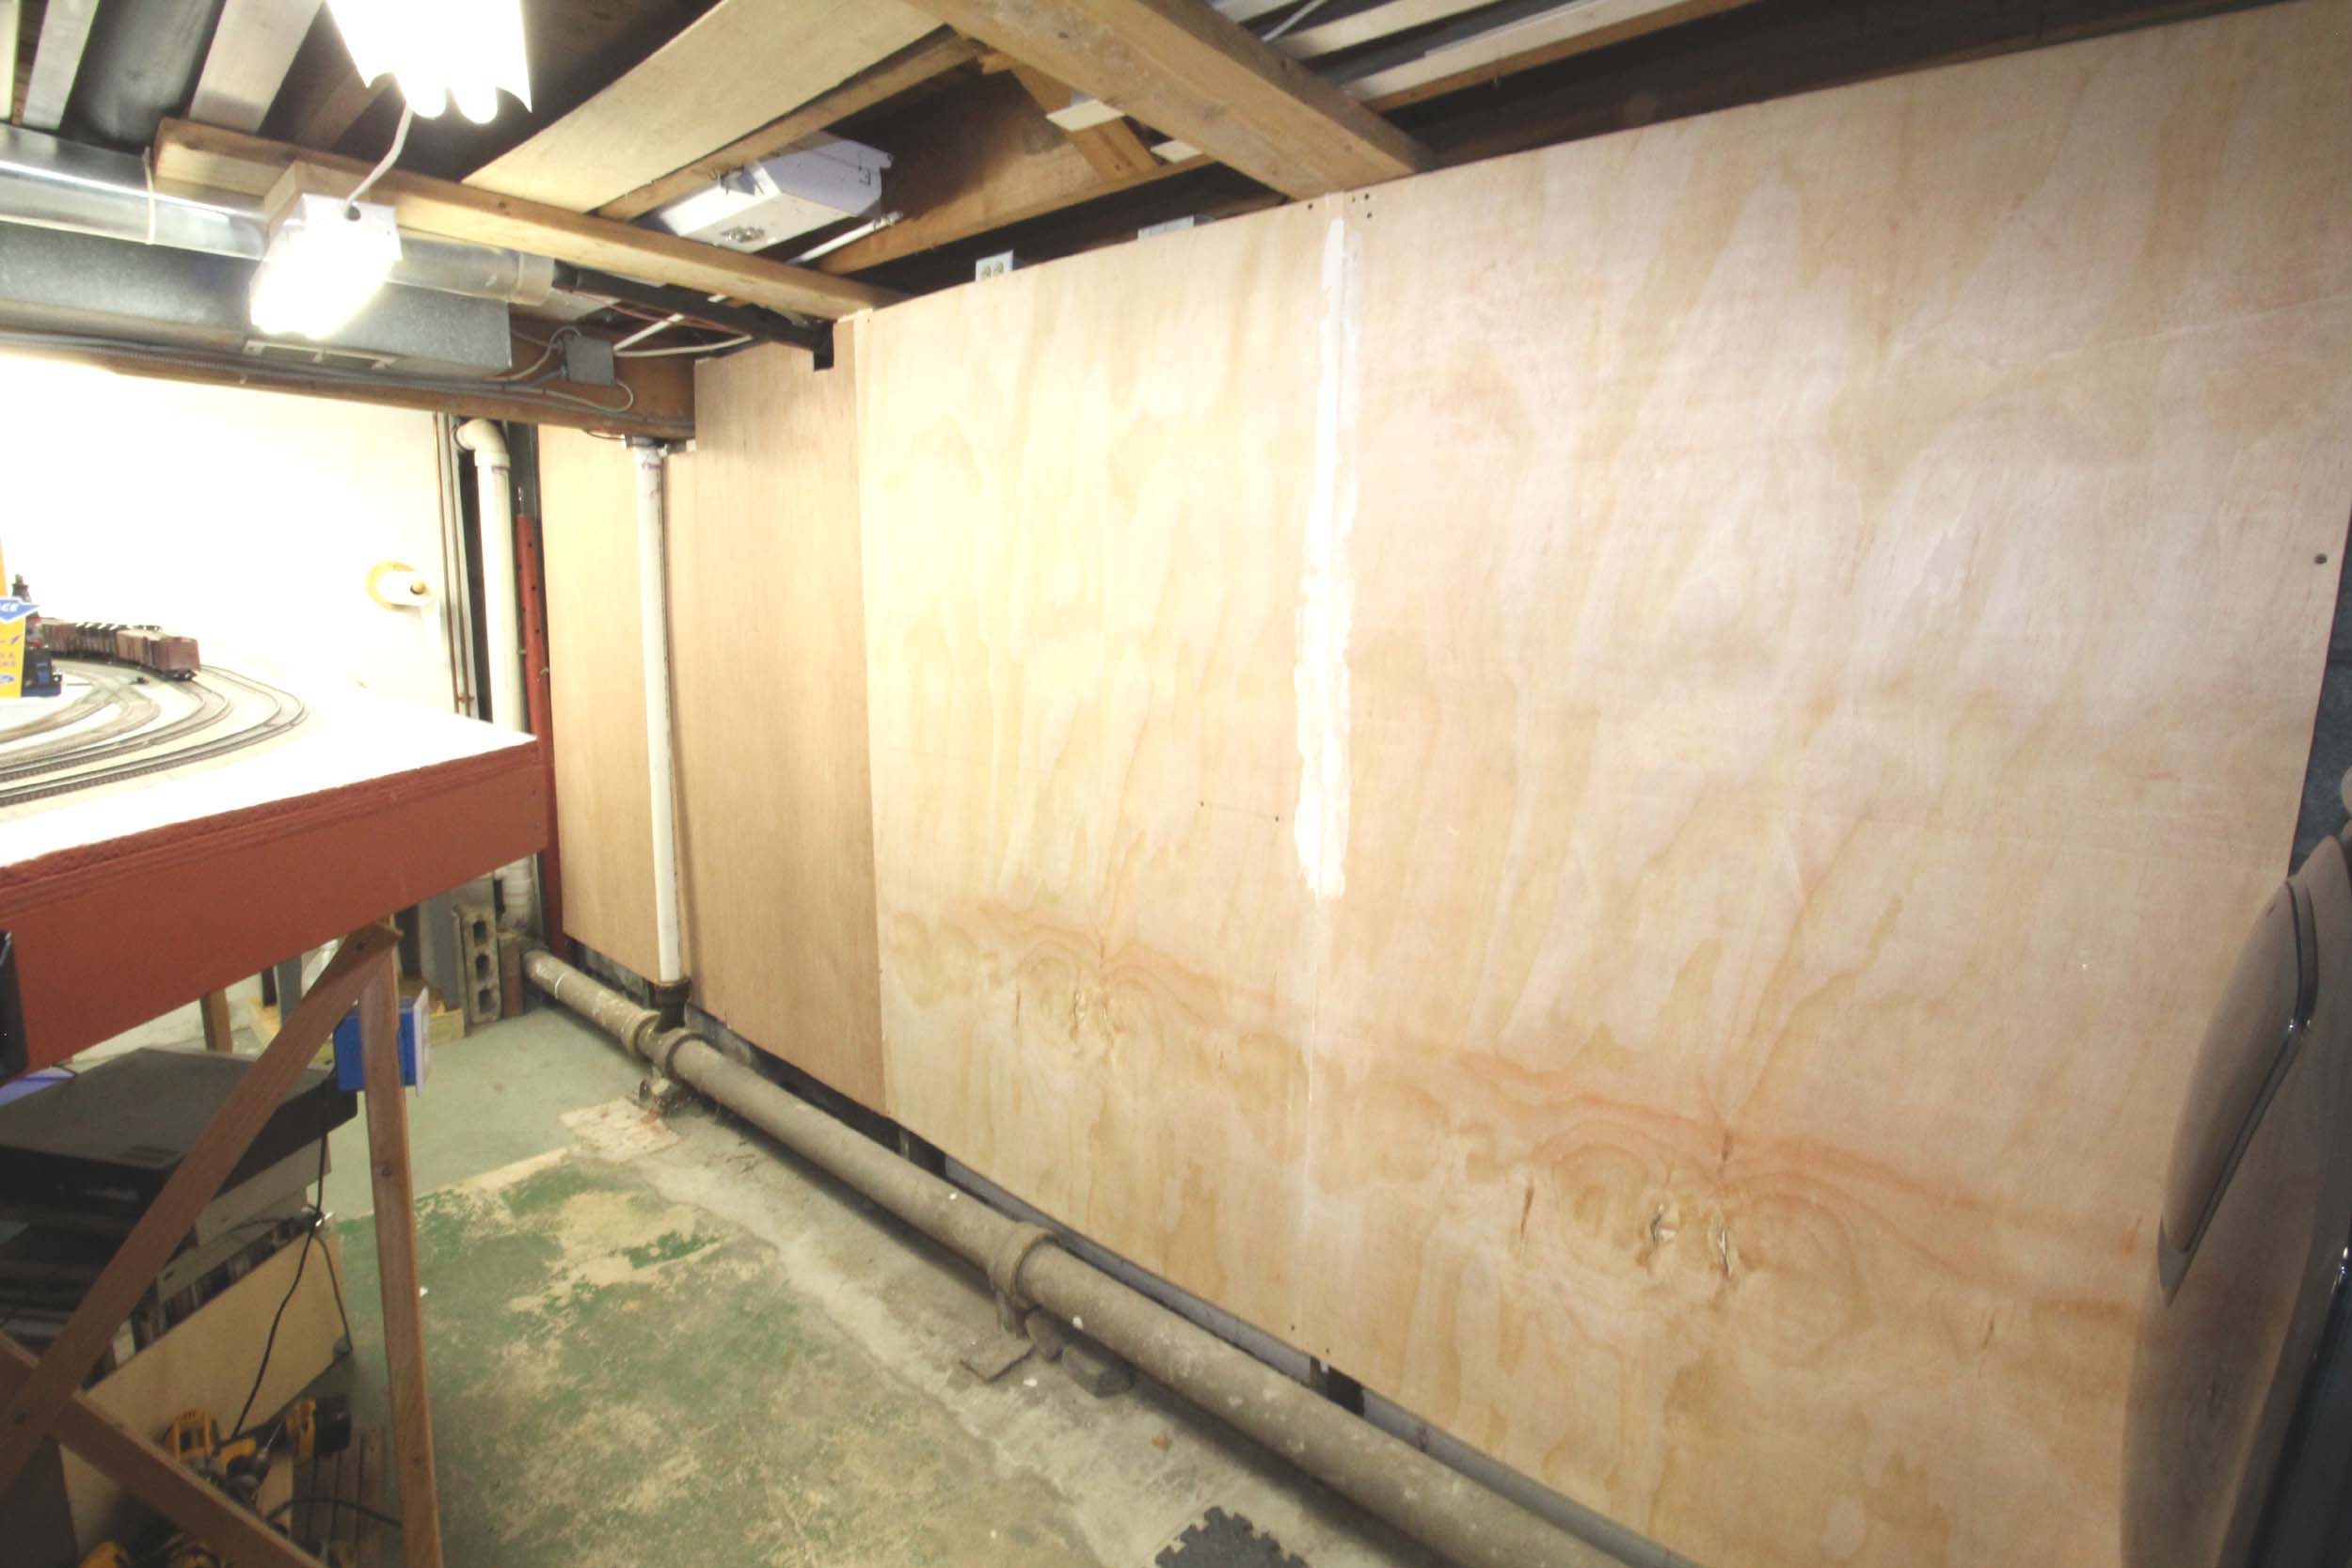
Backdrop
Added 6-9-18
For
the past 3 winters a goal was to improve my backdrop. I always thought the
Masonite backdrop was temporary even though it is 7 years old now. There was
always a gap for 1 reason or another, originally to clear a HVAC duct. Once the layout was widened it
cleared the duct but the gap 4 foot remained. I wanted to get 24” x 50 feet
aluminum coil stock, paint it blue and put it up in place of my Masonite. With
the inside circumference being about 80 running feet there would only be 2
seams. Well none of that happened!!
The
Masonite is what I am going with. Right after adding the ice reefer siding I
worked on the backdrop. For the first time ever there are no gaps in my
backdrop. There were previously 3 various gaps. I moved boards together and
filled 1 large gap. There is not that many seams I have to spackle and sand
which is what I am going to do. A friend helped glue some 1 x 2 on the back to
straighten and support.
Any
thoughts of having a new quart of paint match the original color perfectly
quickly ended when I tried some touch up. It will have to be completely
repainted in place when all is done. More later……
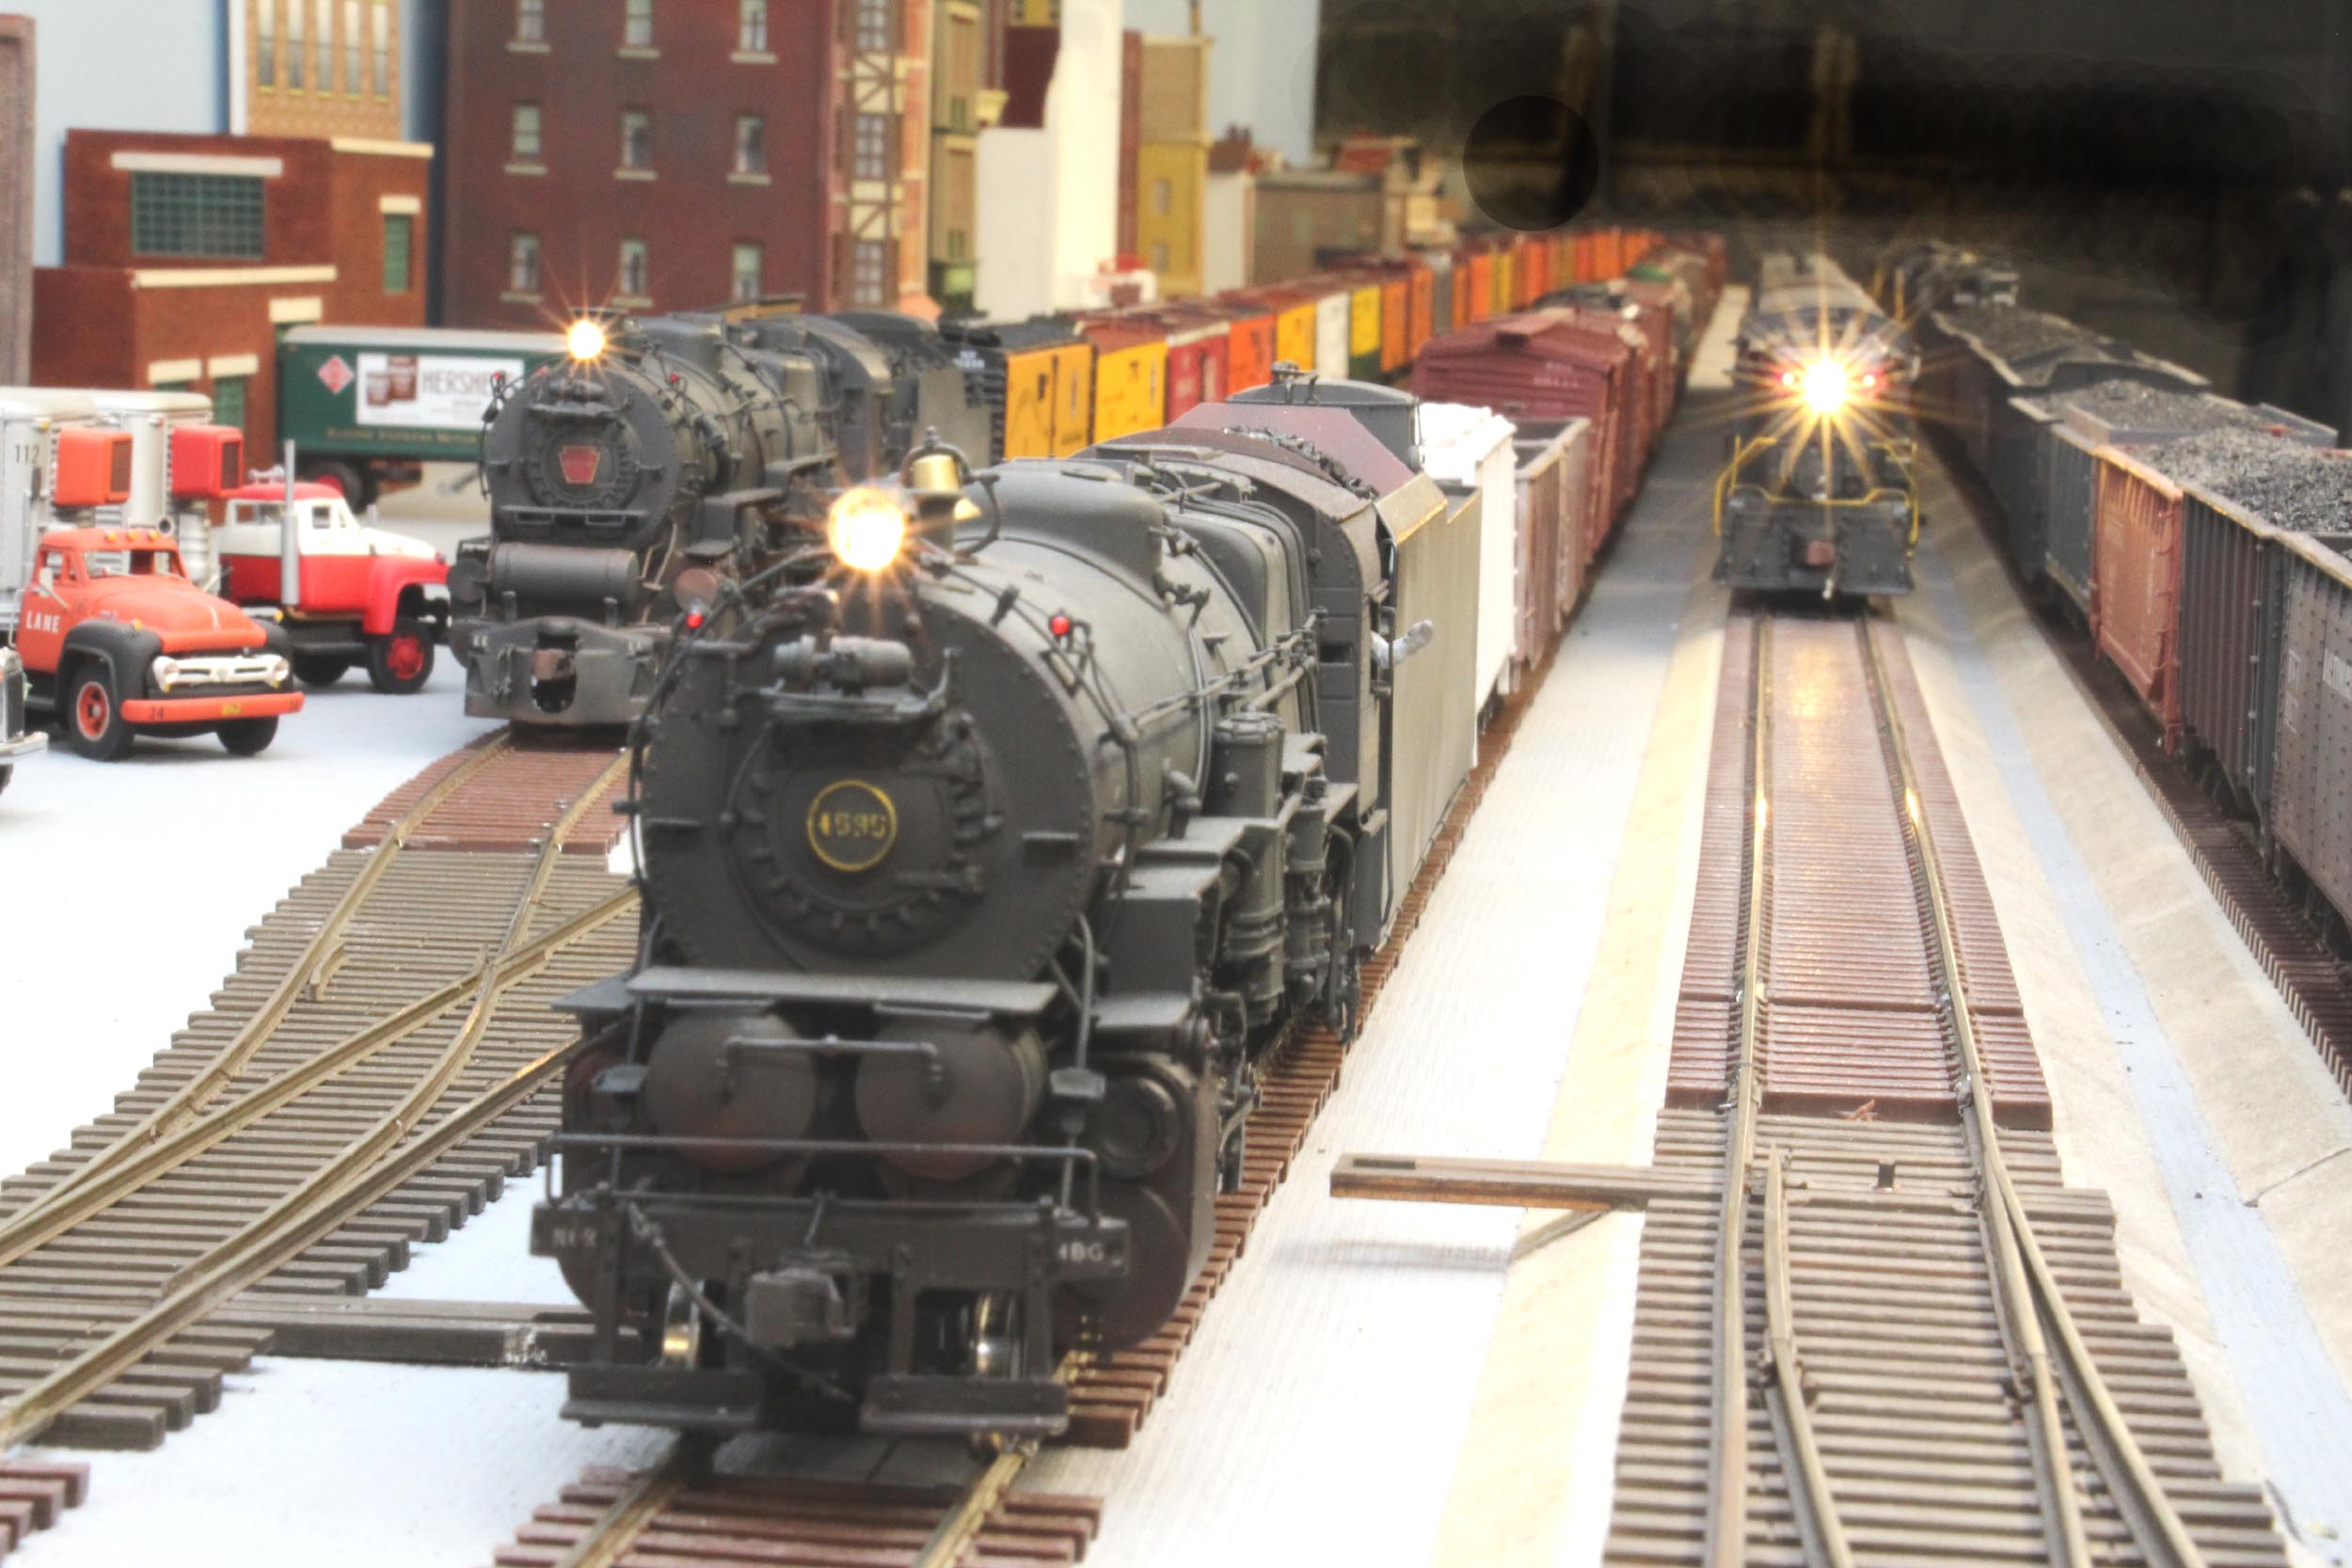
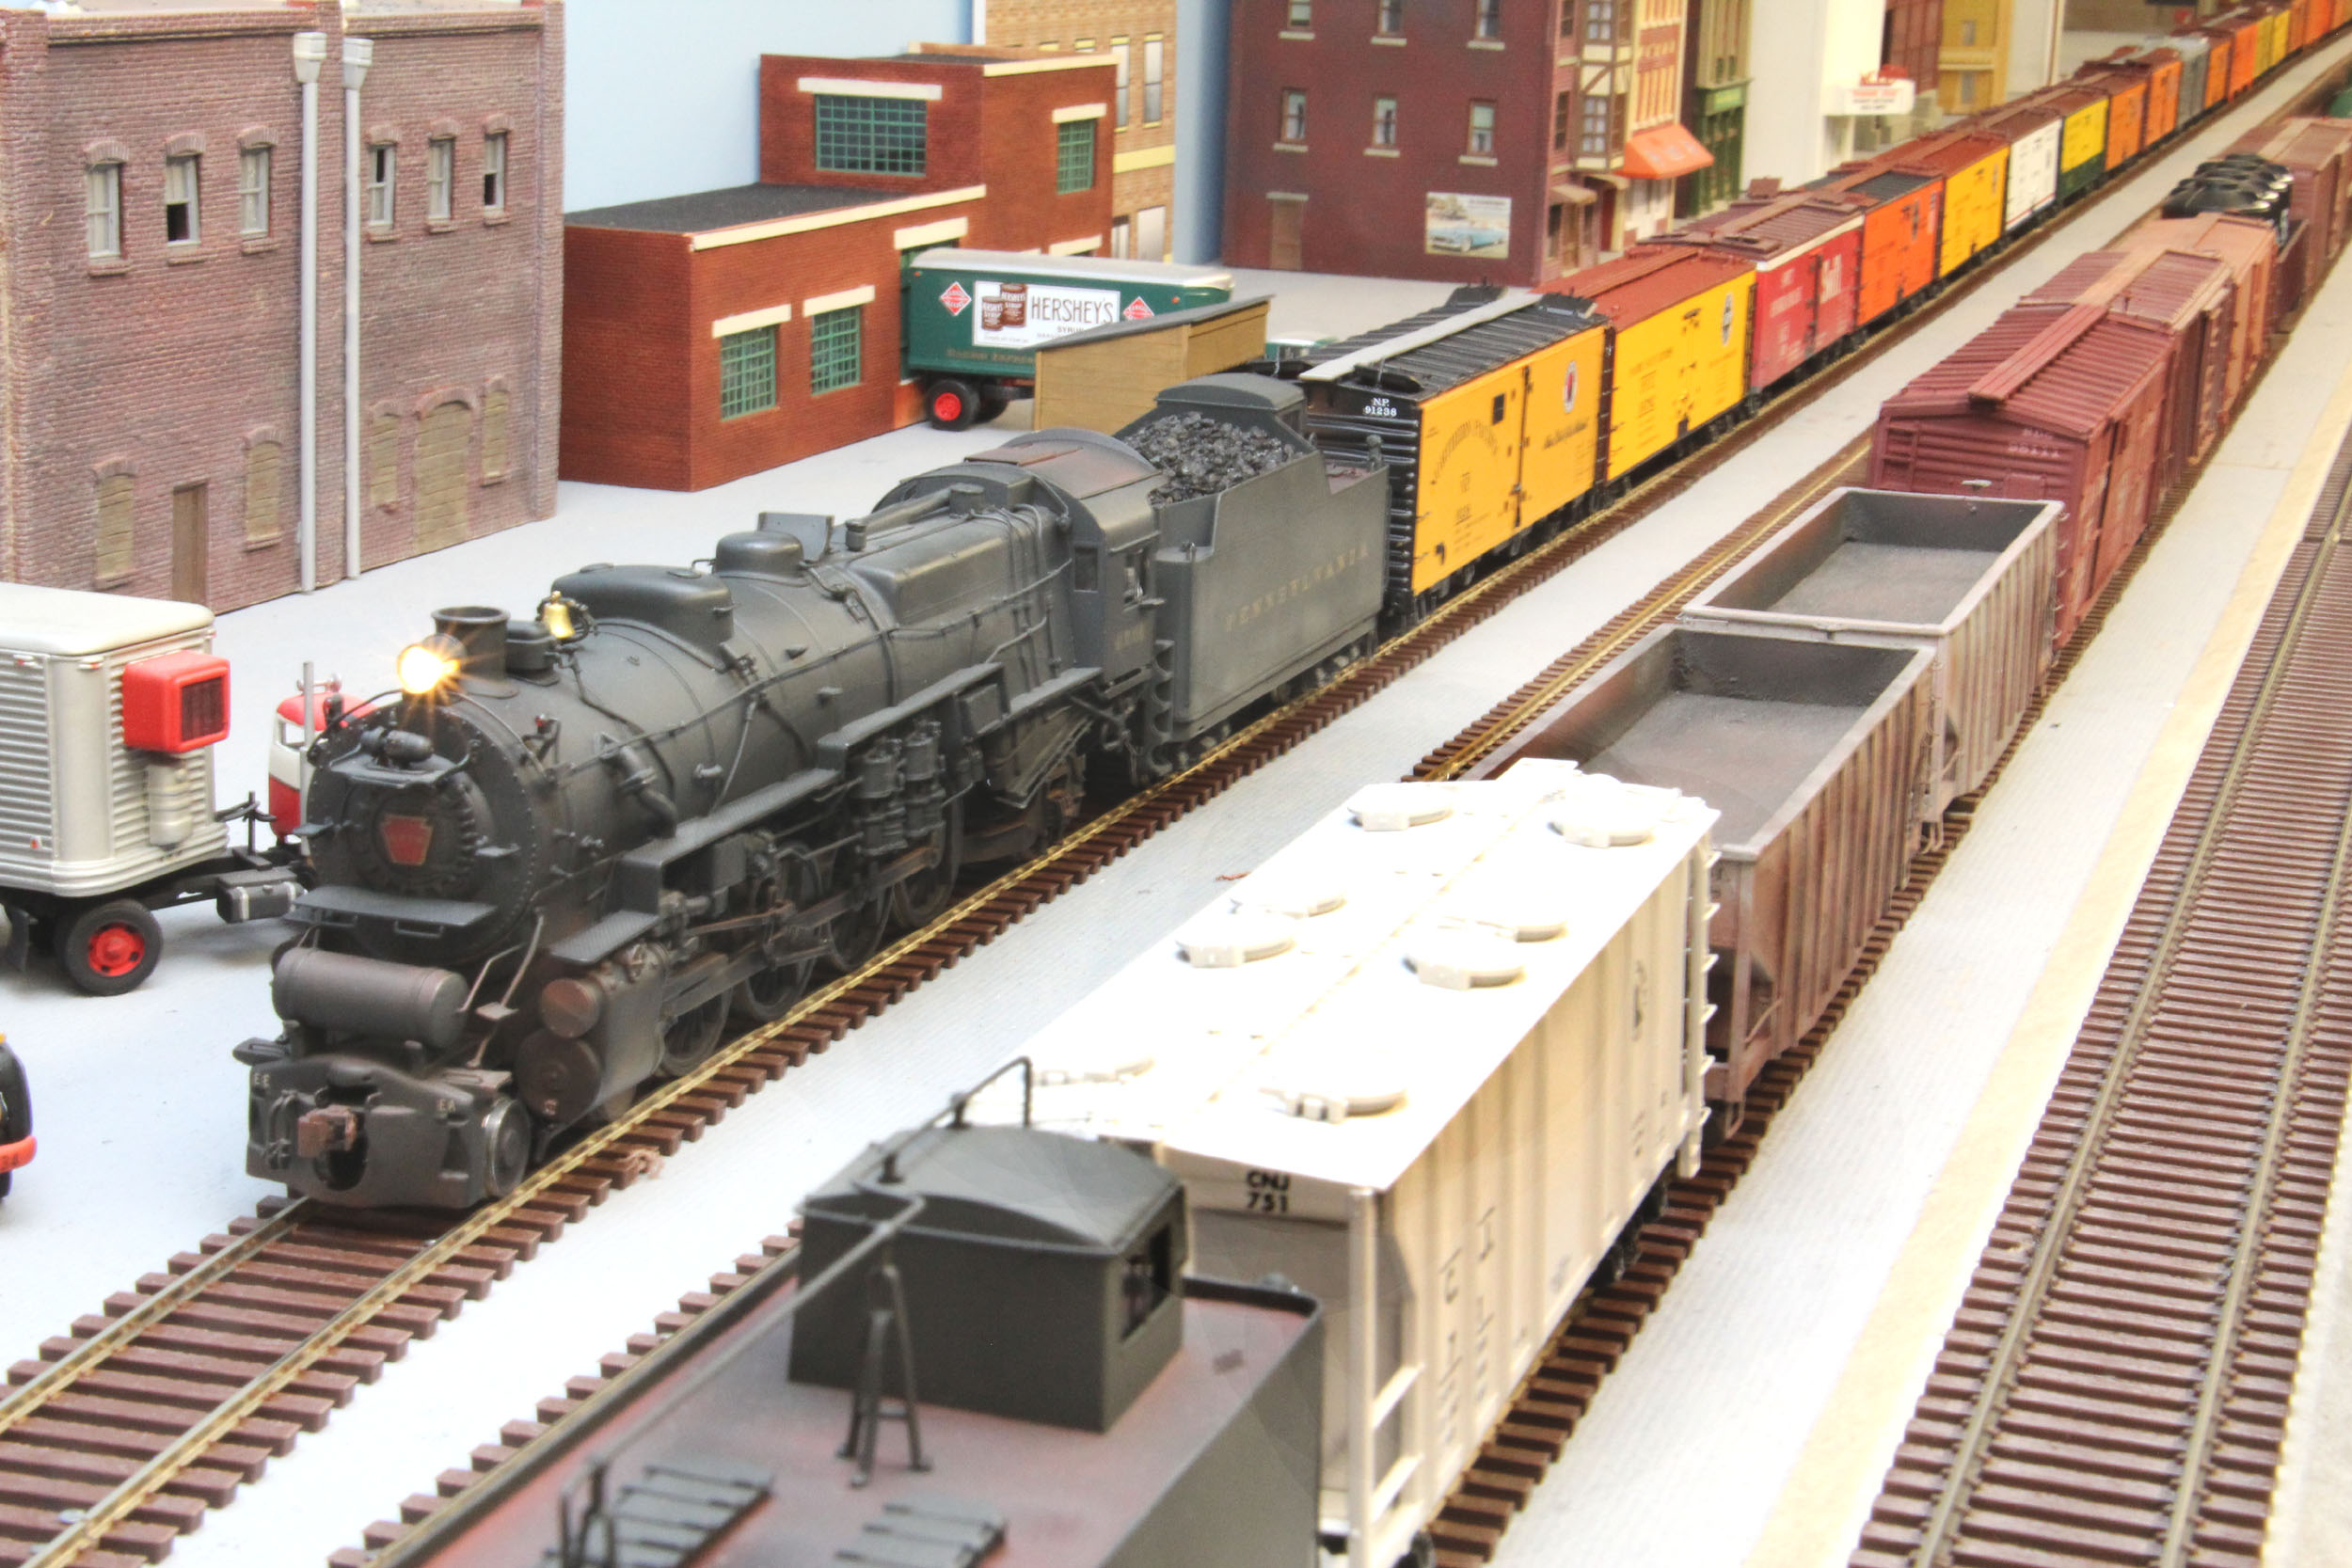
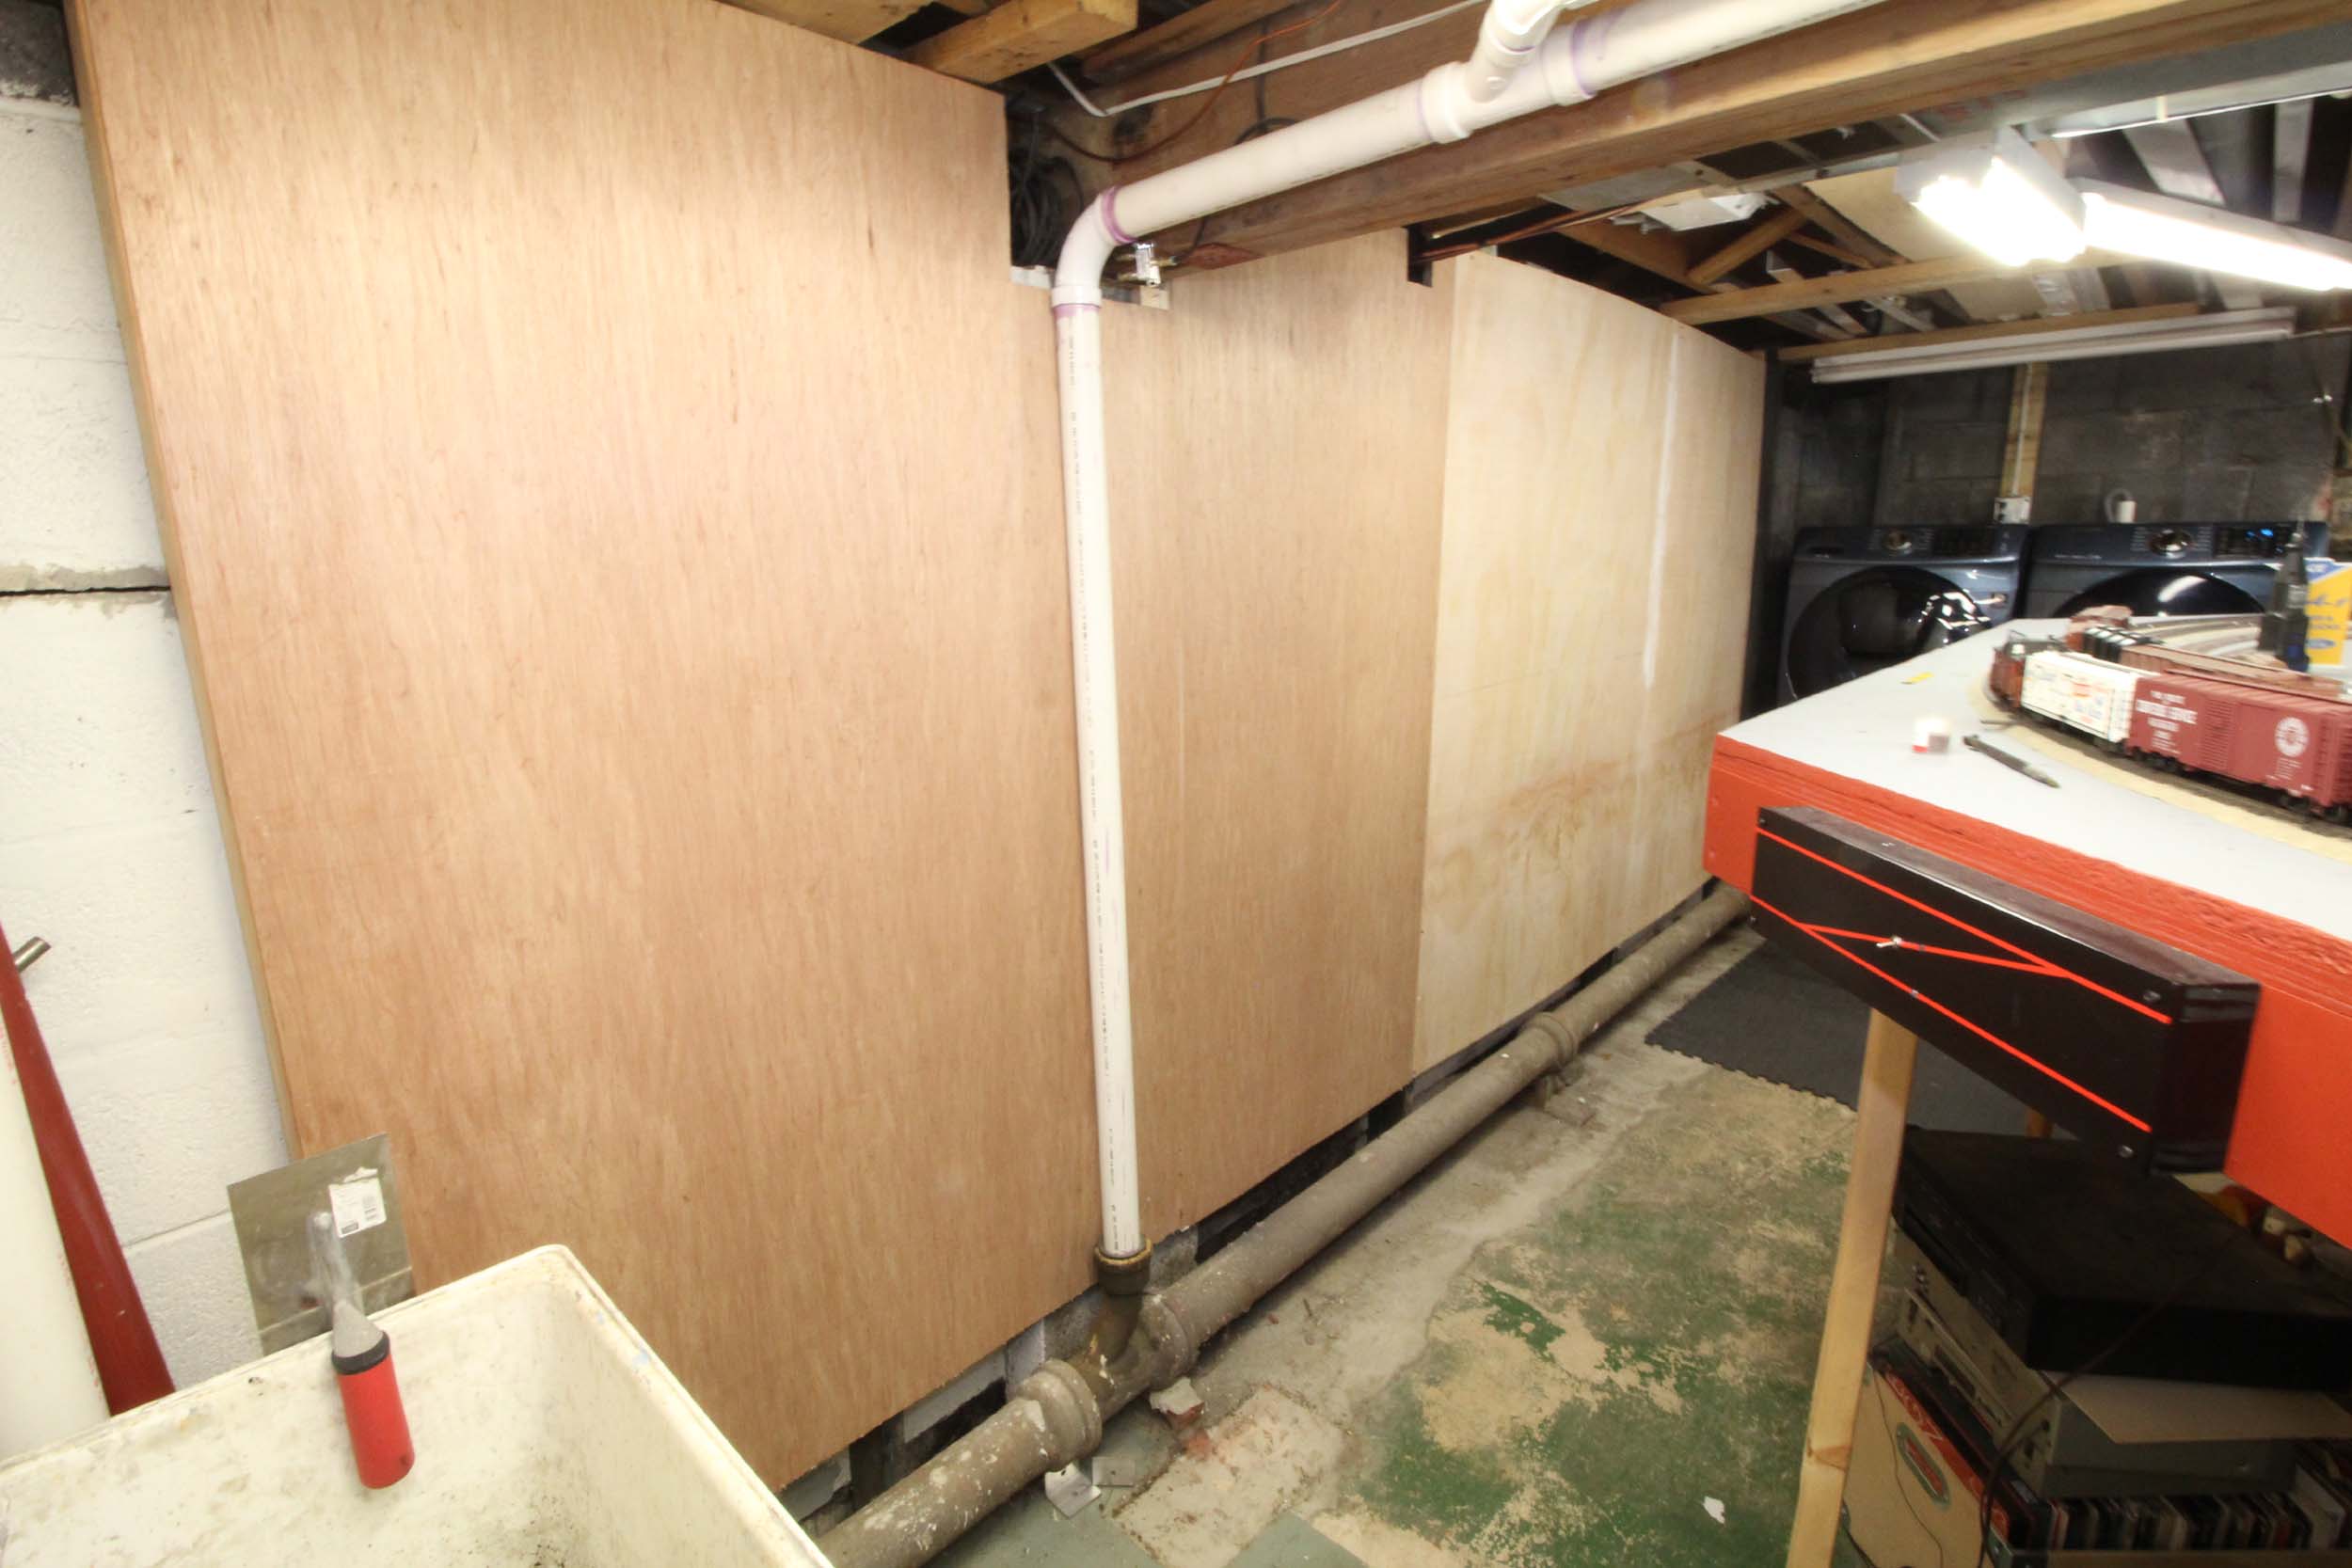
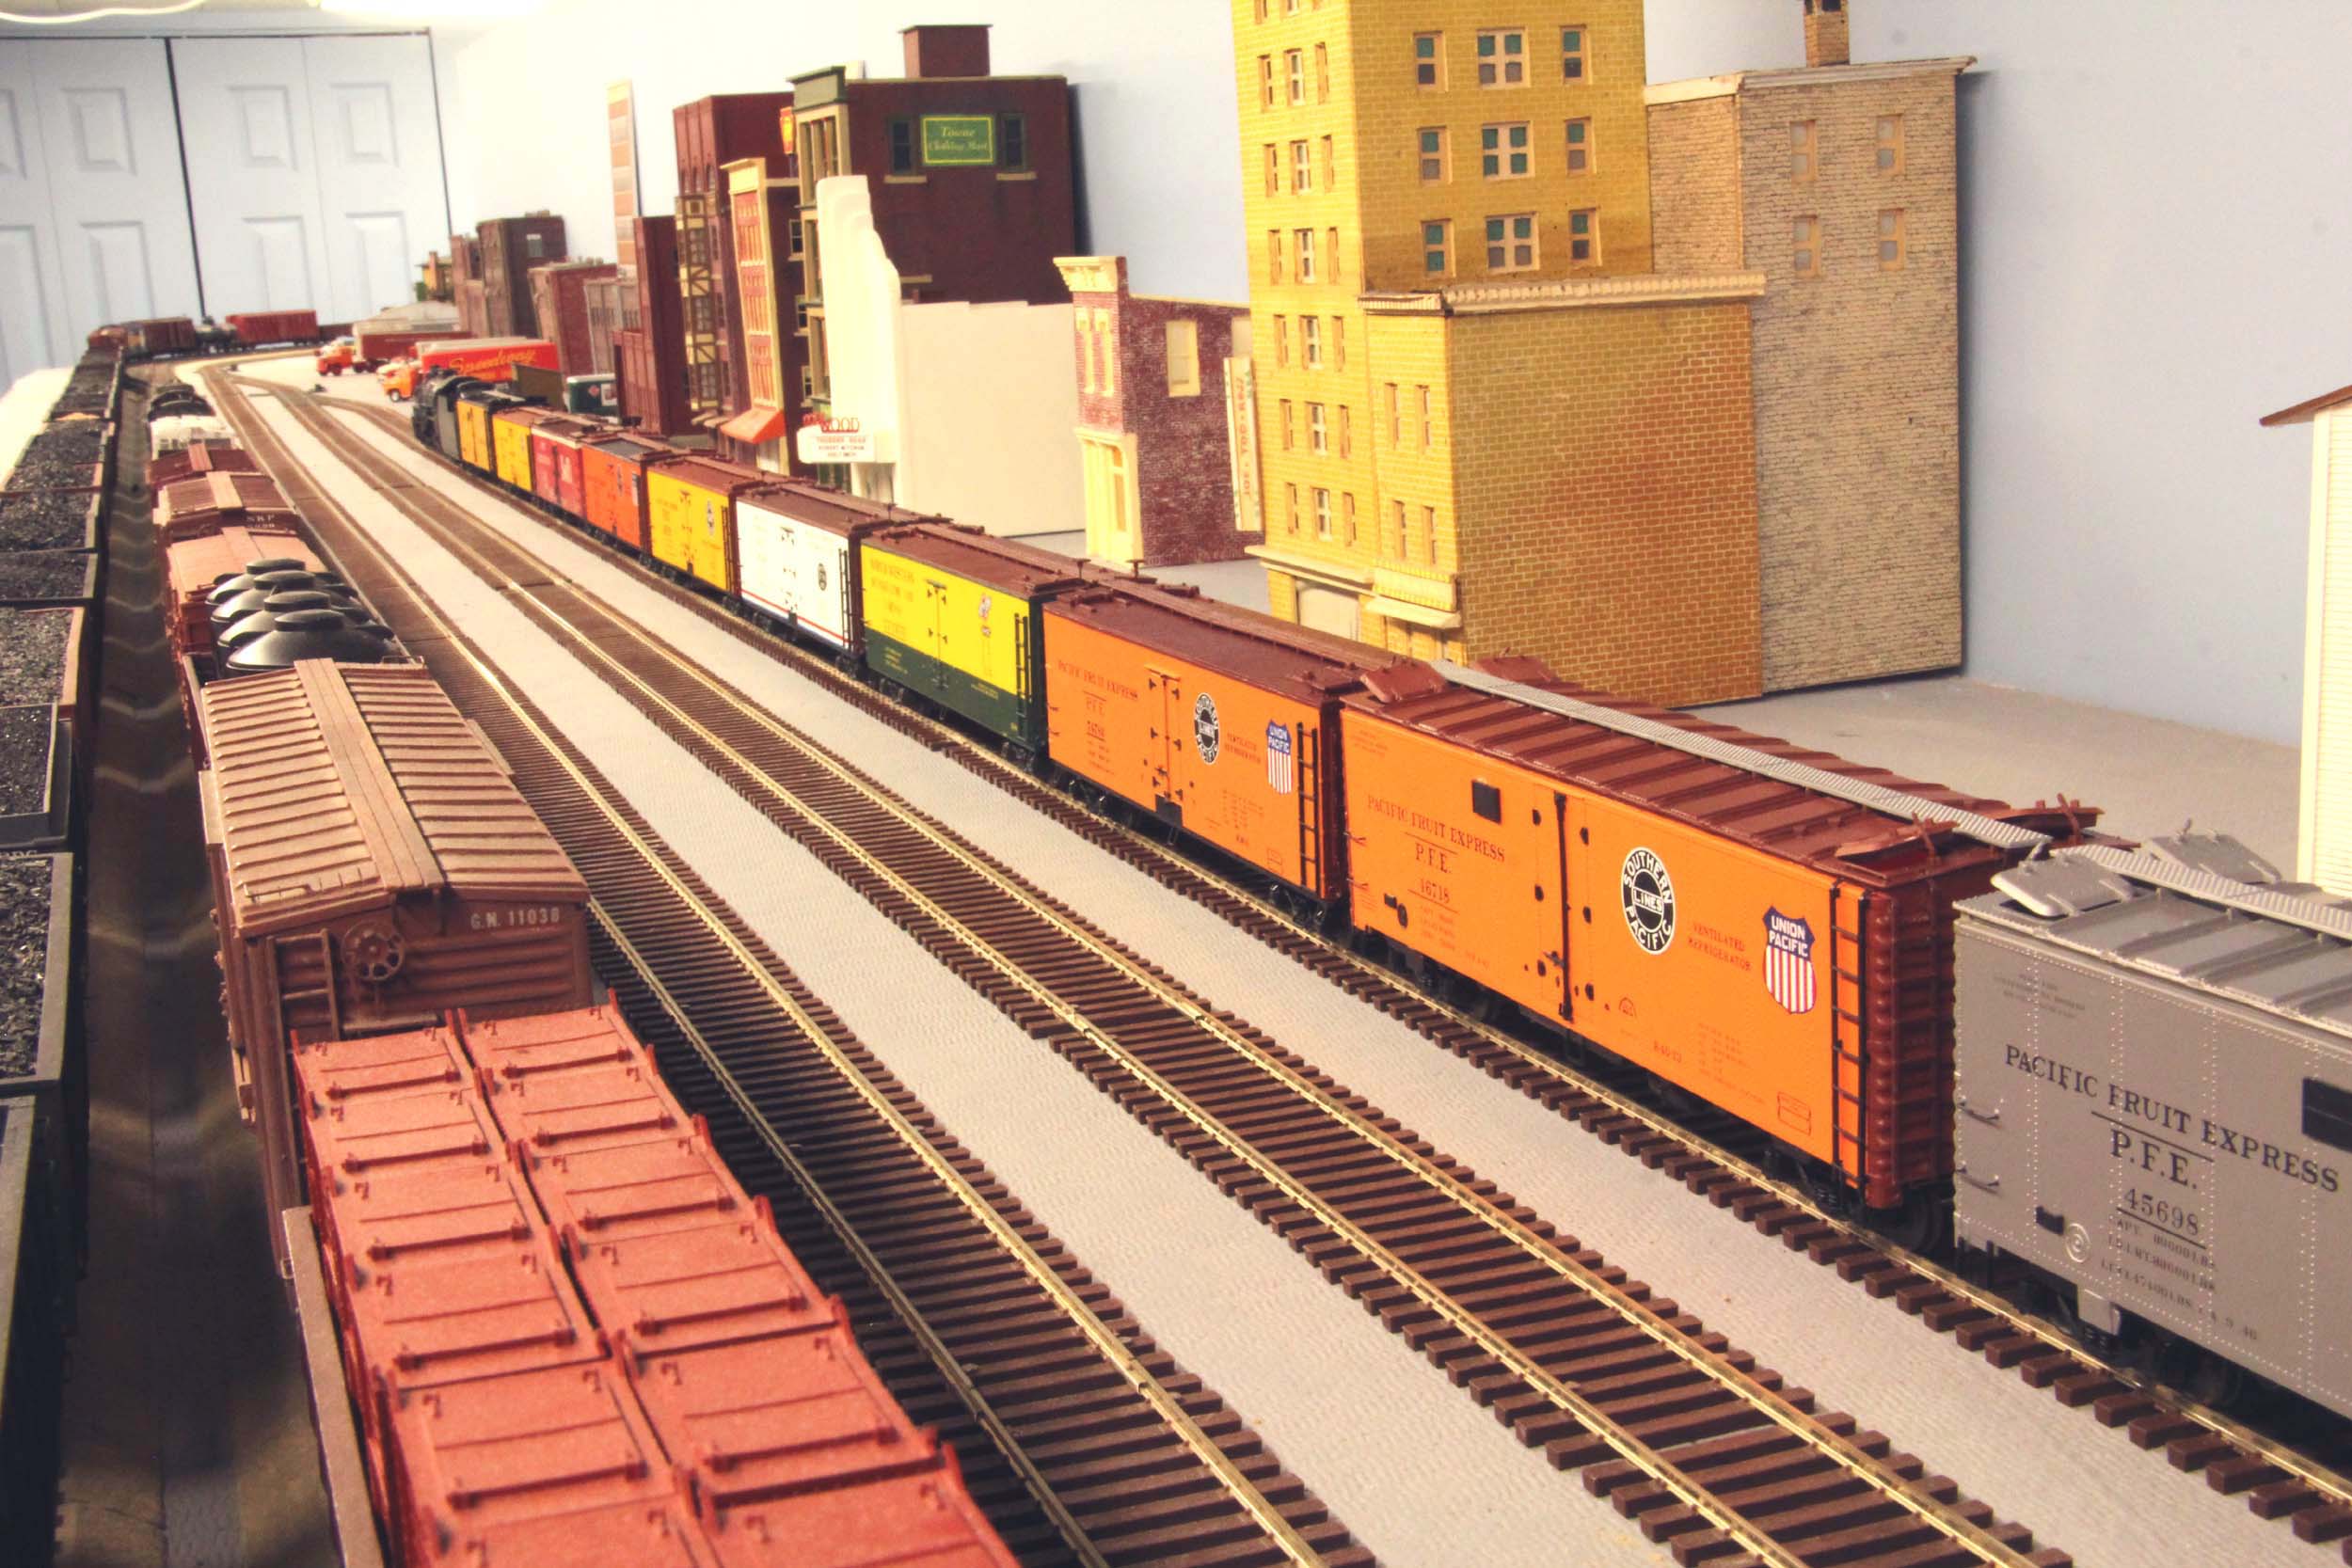
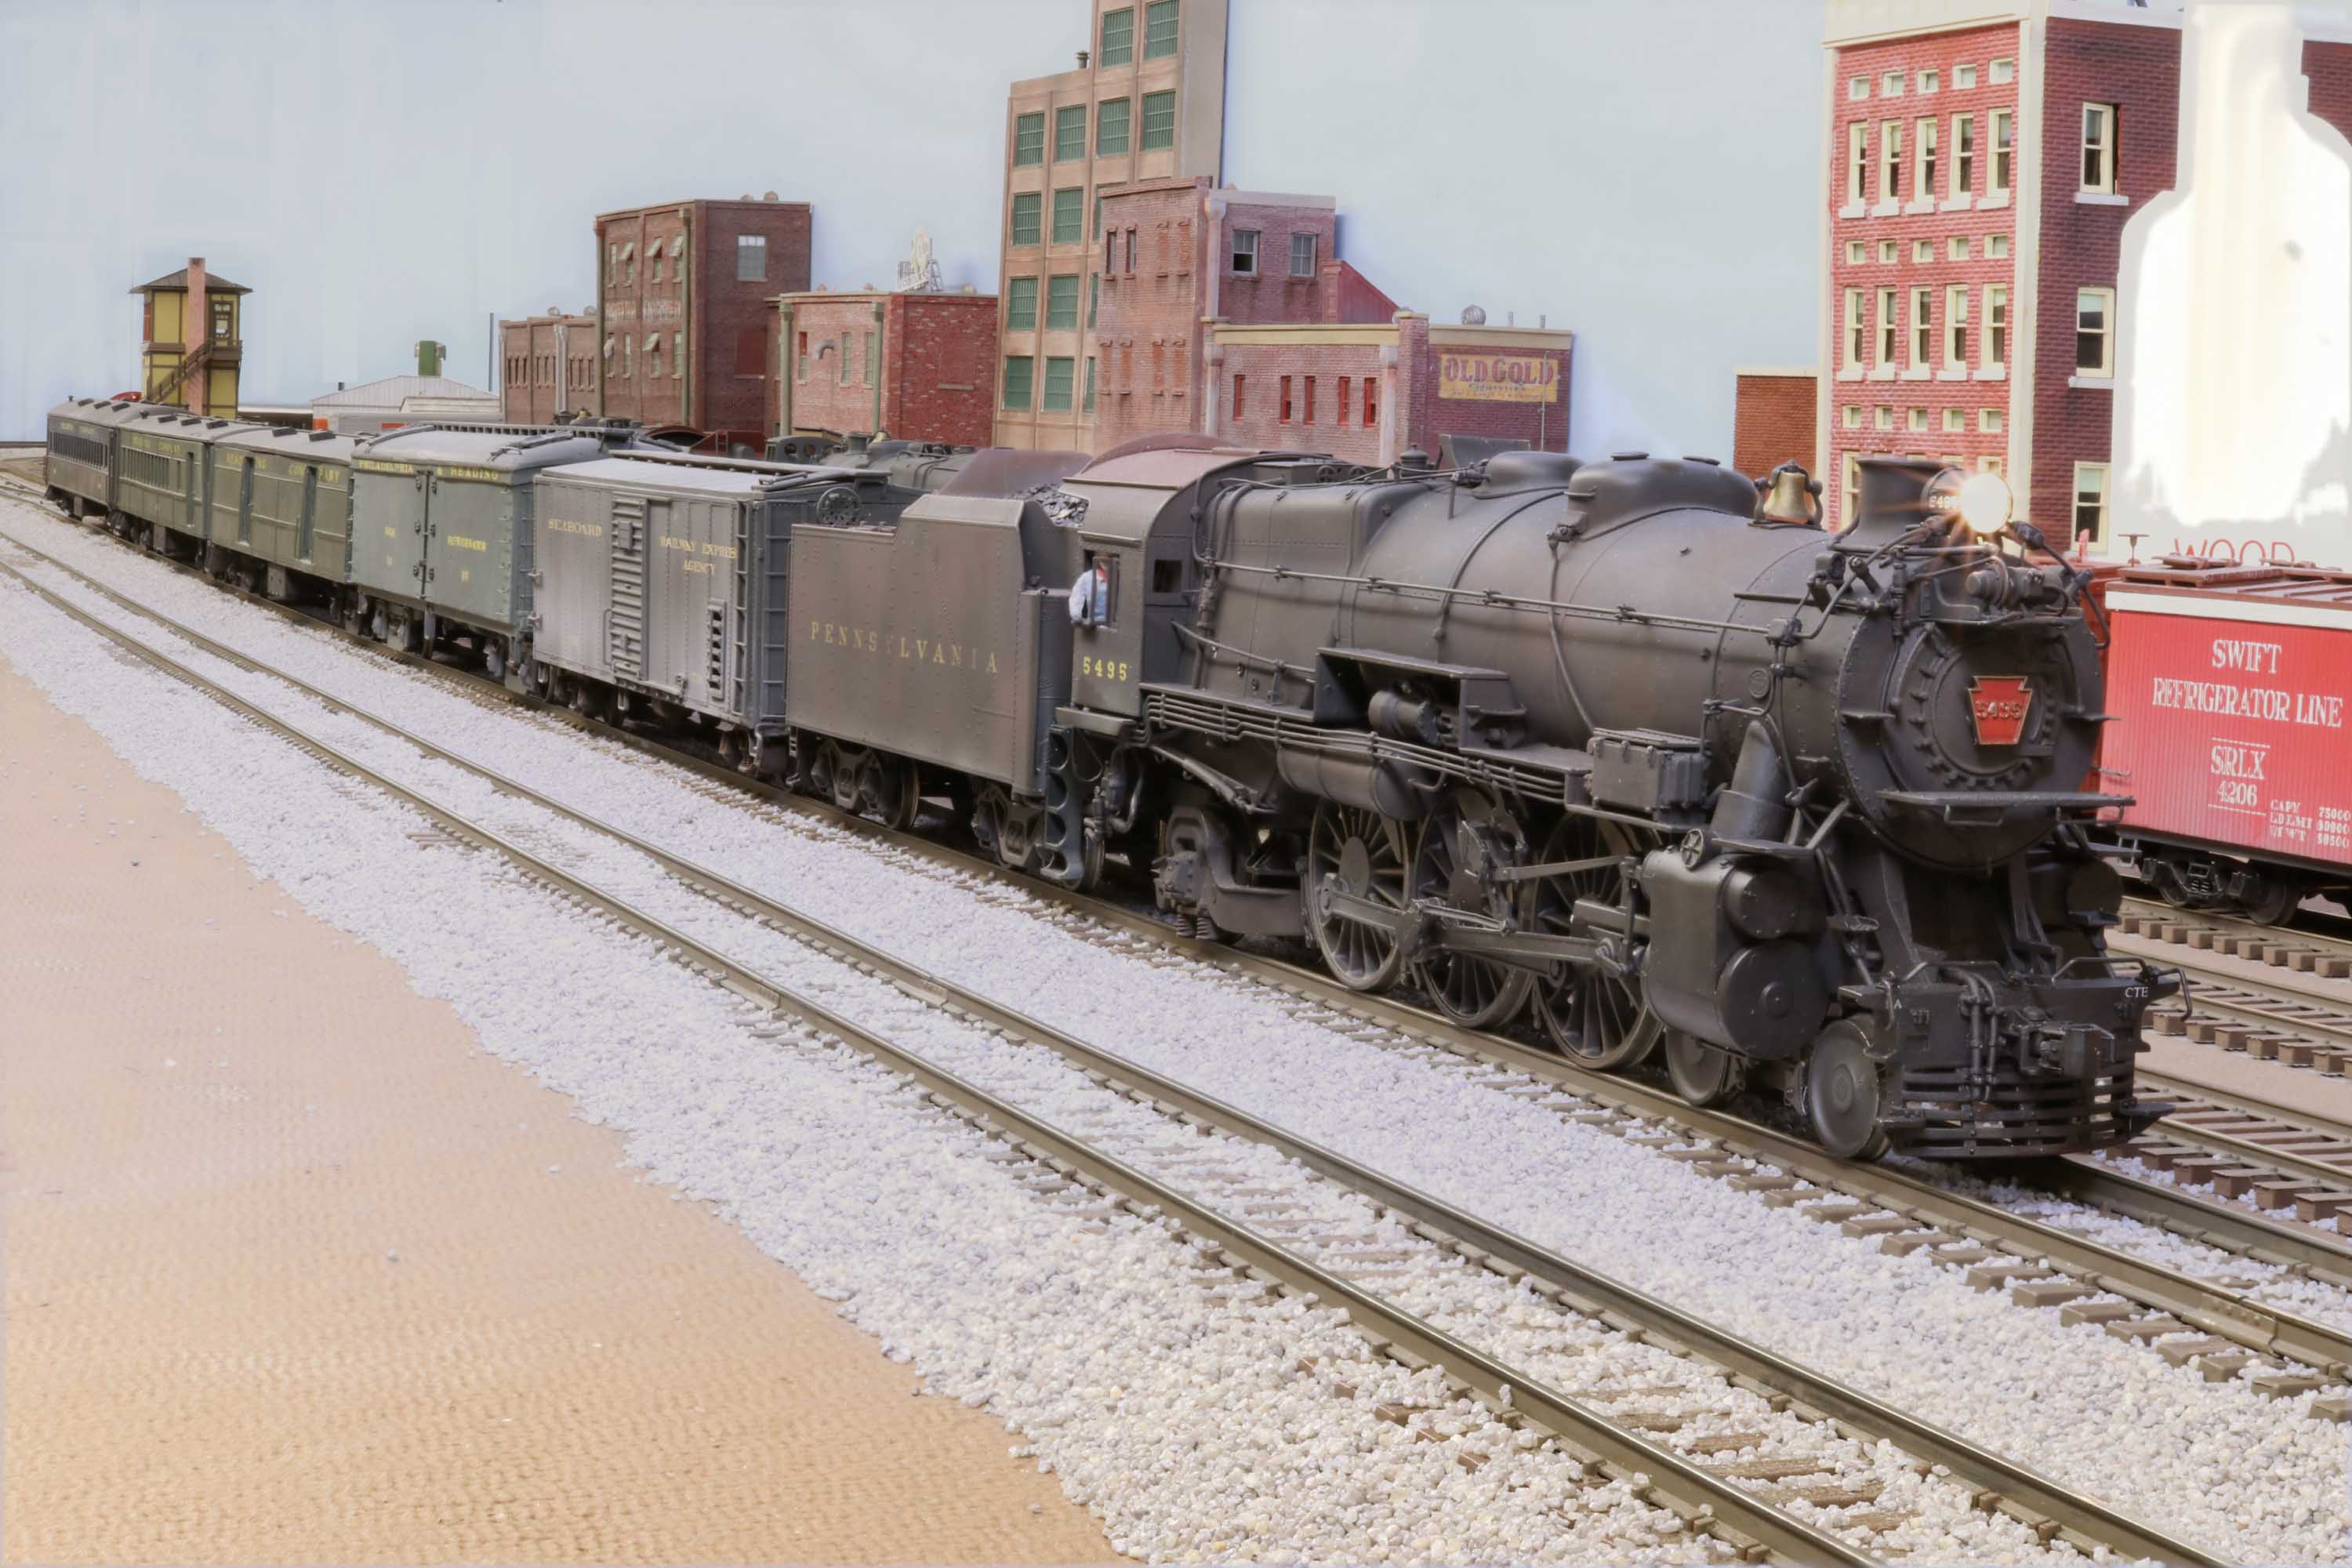
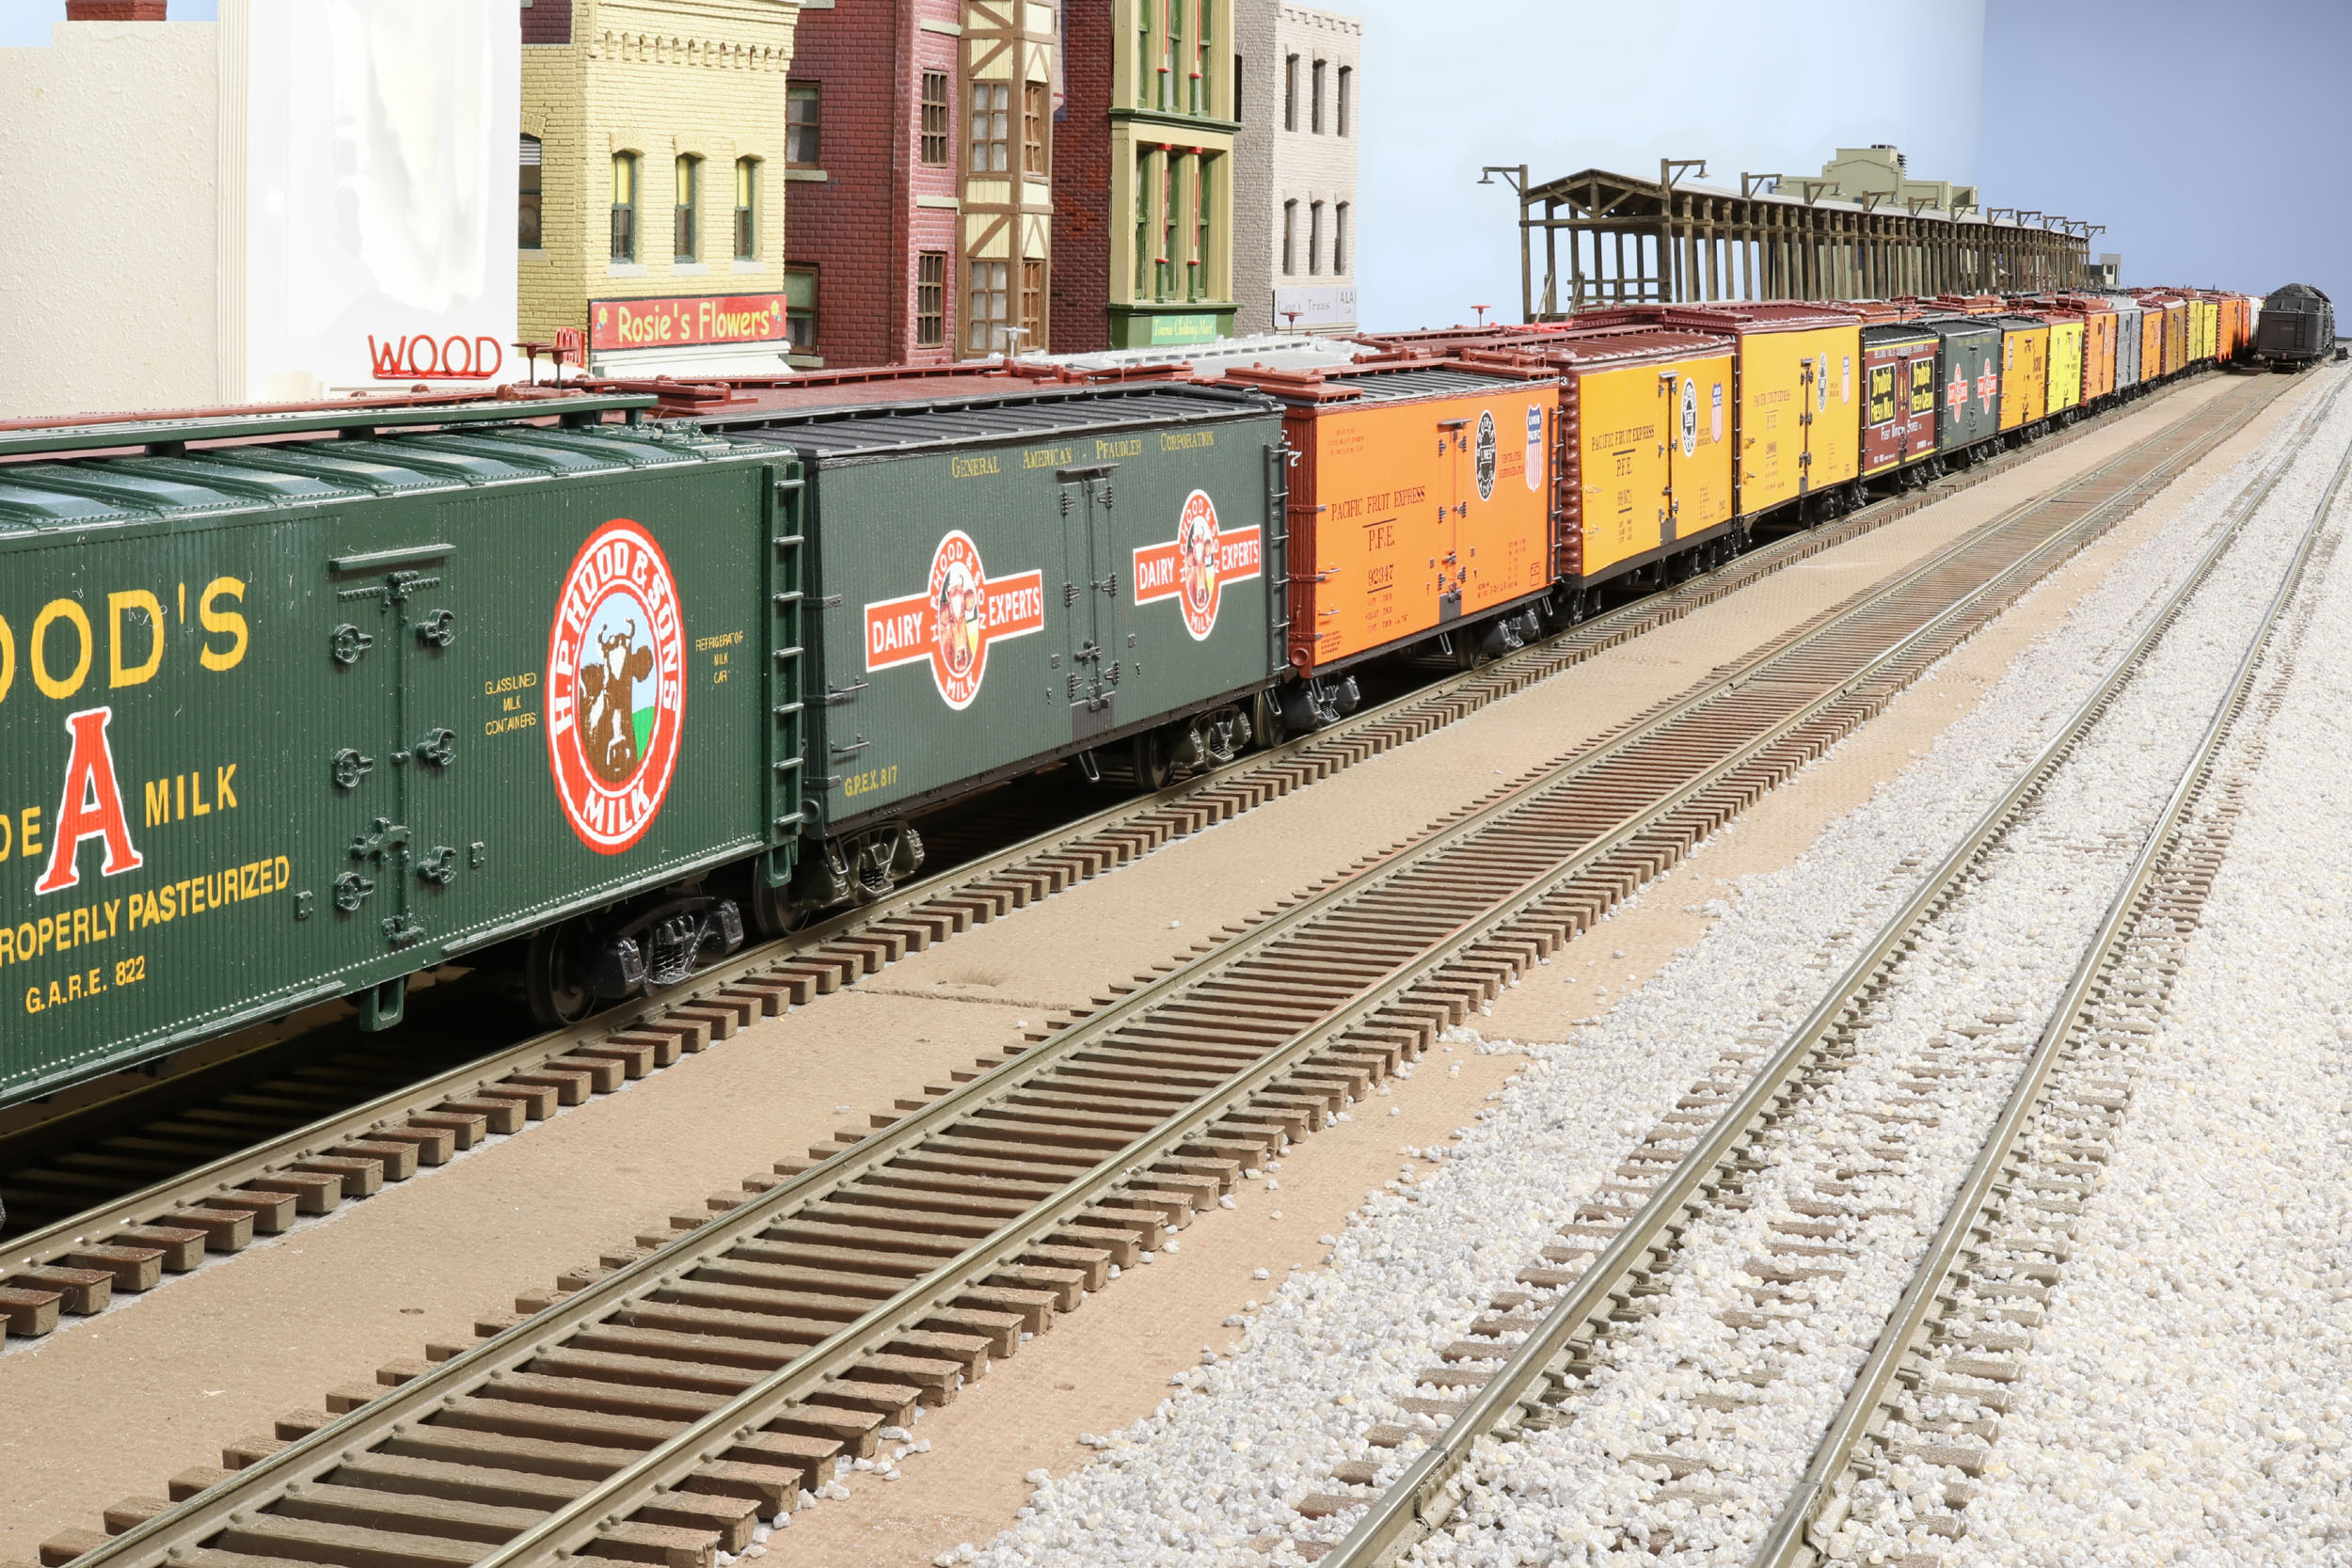
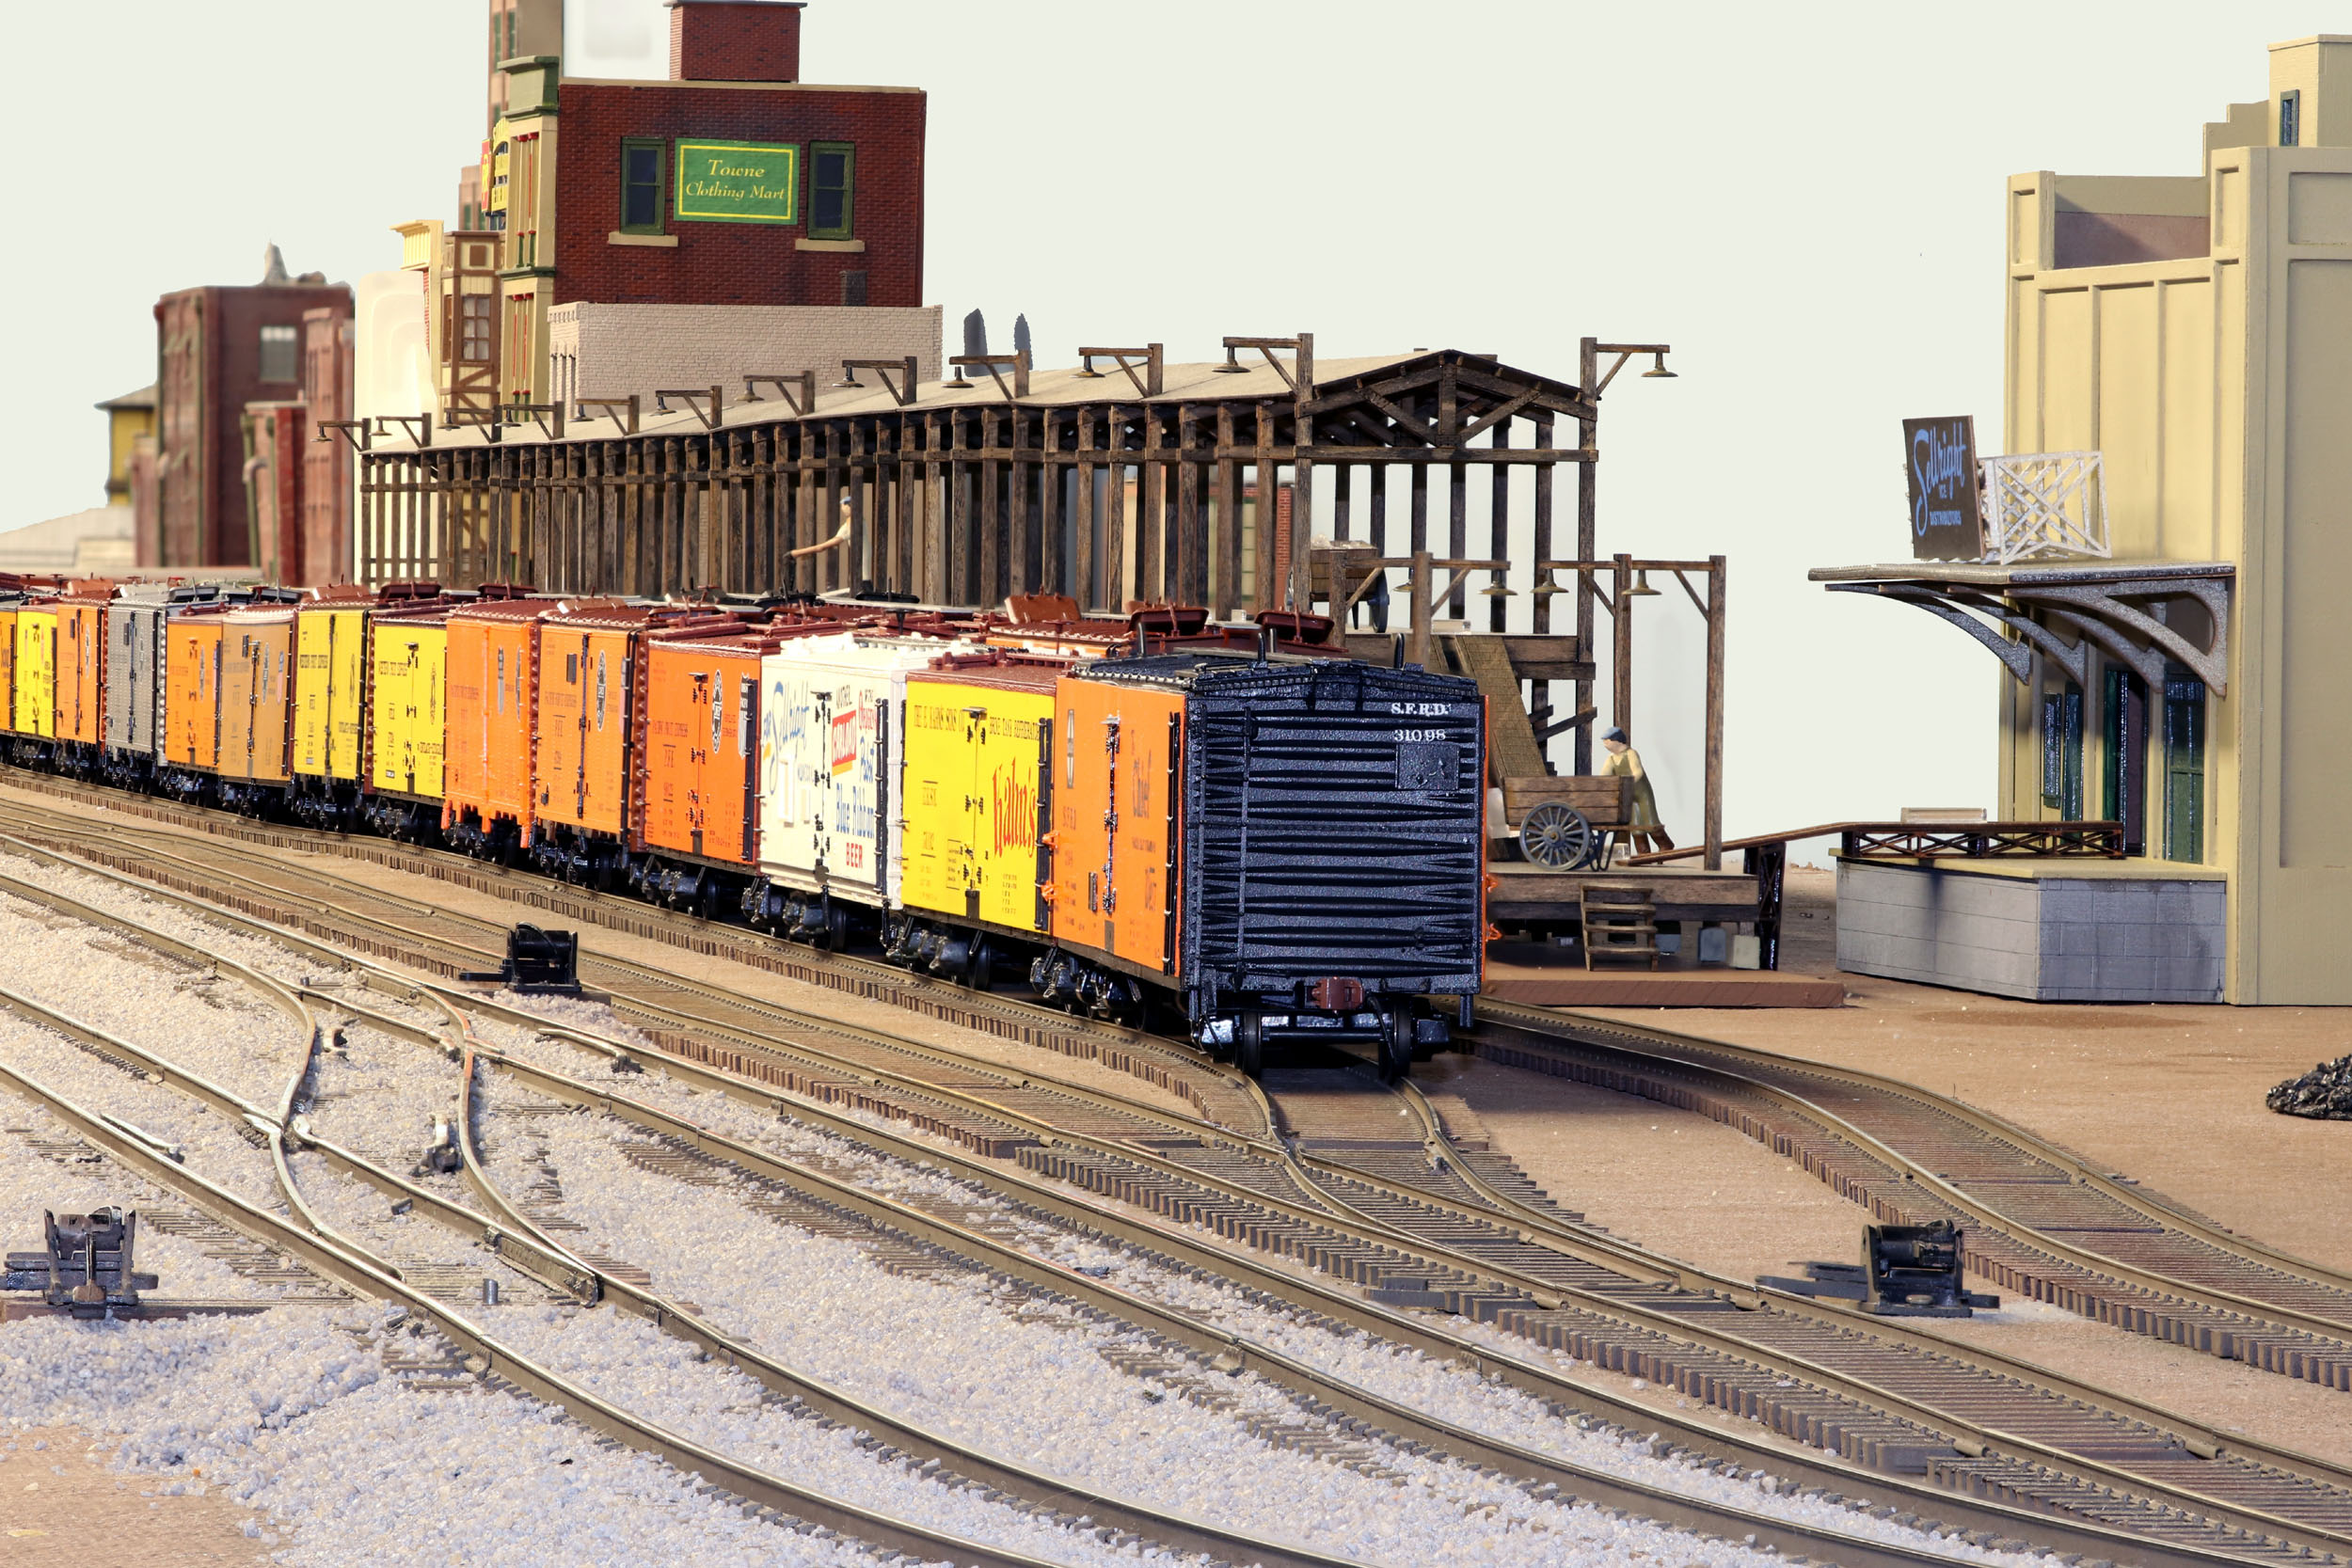
Reefer
Train On New Siding
Added 6-9-18
I
don’t take photos on this side of the layout as much. But since I fiddled with
the backdrop last weekend and did some cleanup in the somewhat random building
flop down it is a bit more presentable. It was the same trains slightly
rearranged and in different angles.
I
really like the M1a with the shorty tender on the
reefer train. It can easily pull that train by itself. I will paint the end walls
of the basement the same sky blue to match the backdrop.
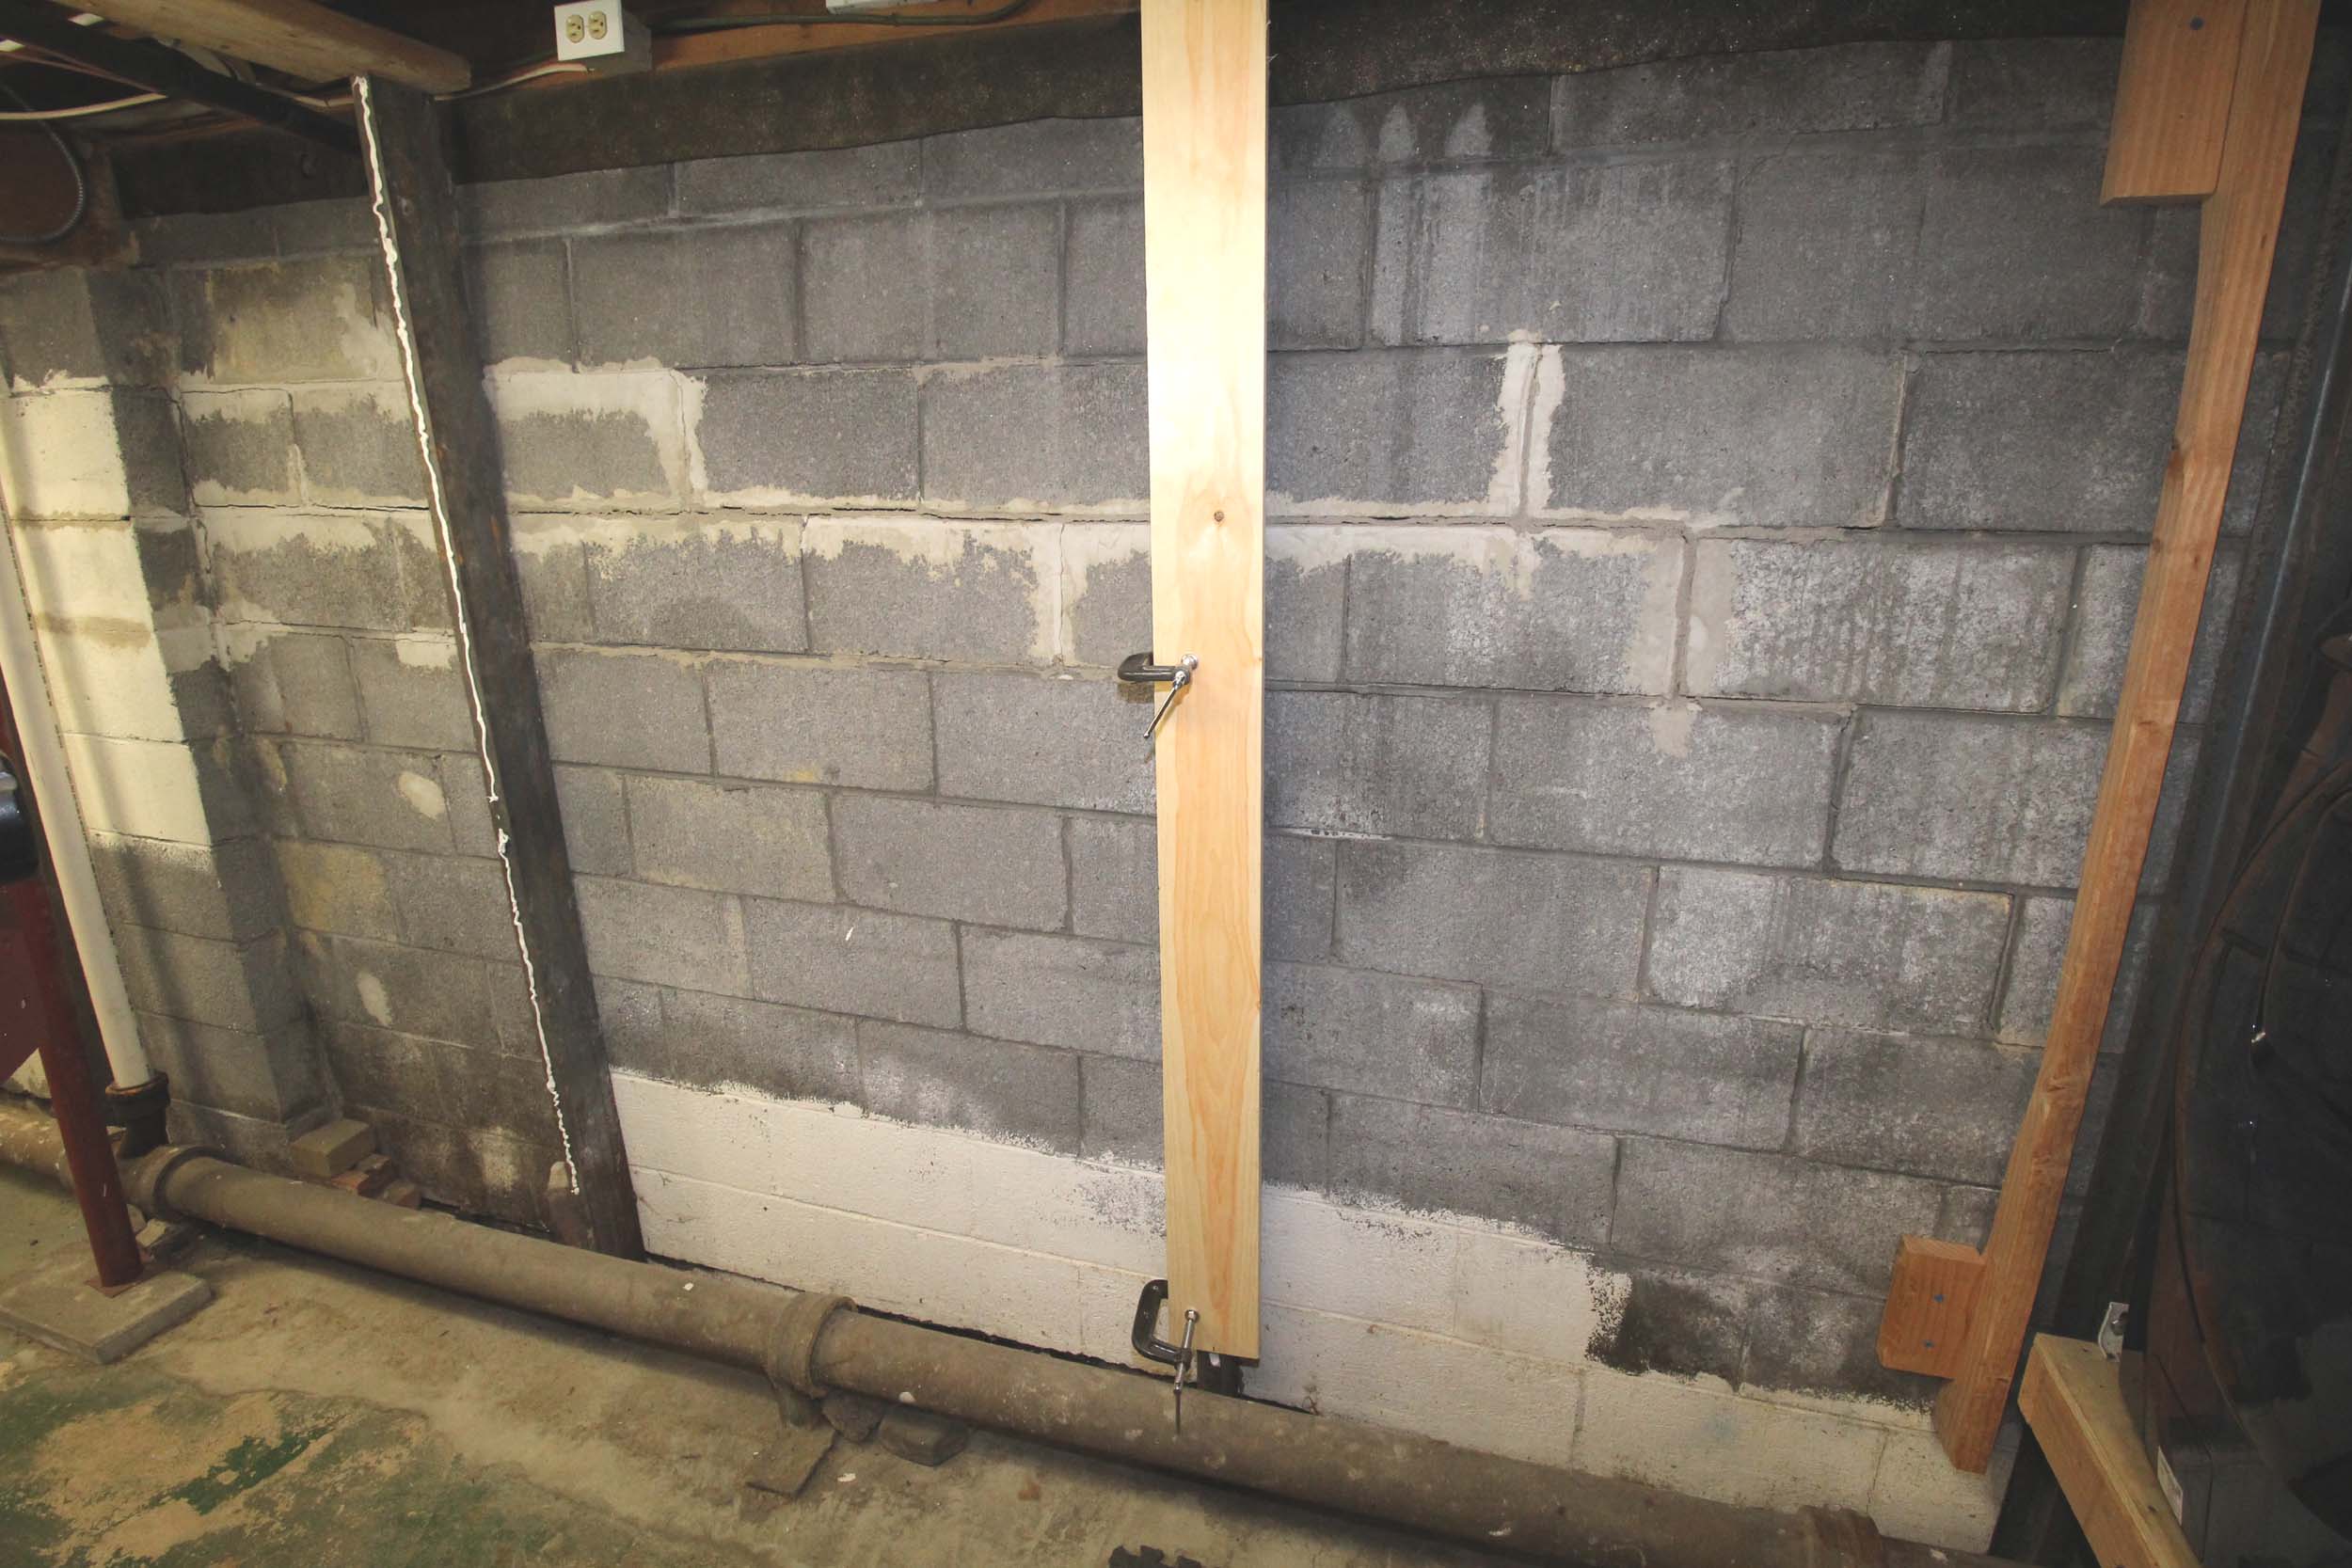
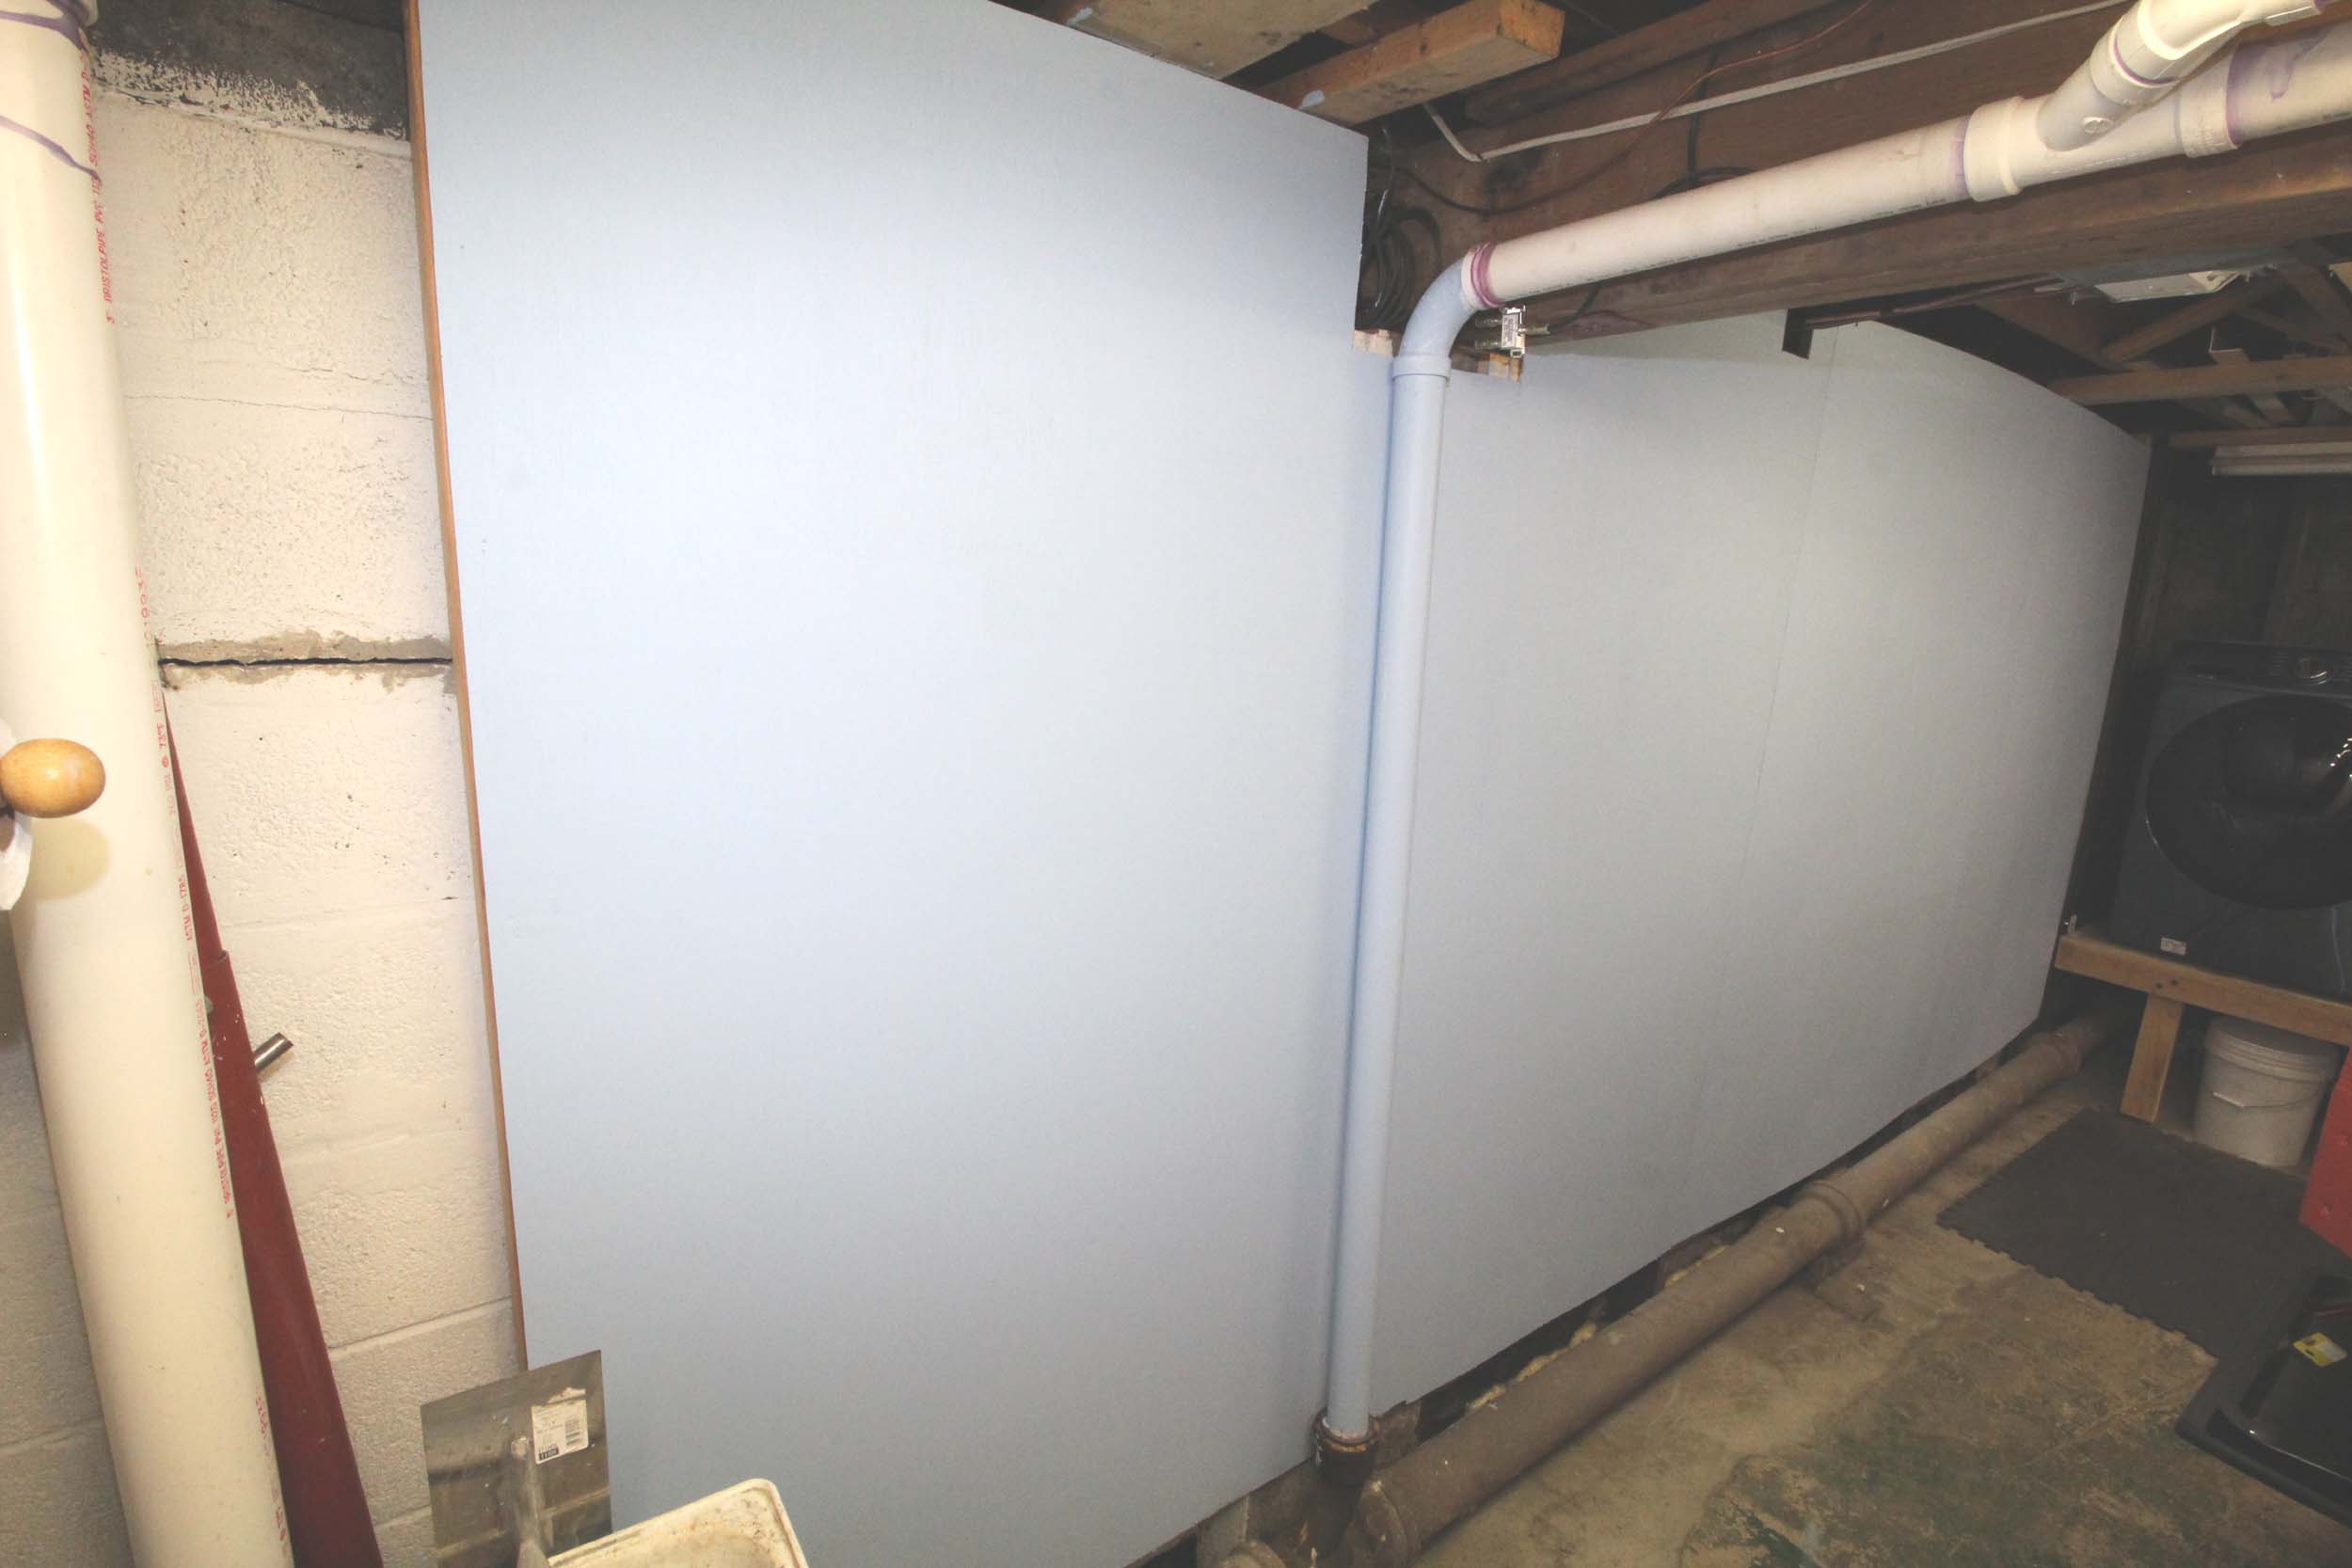
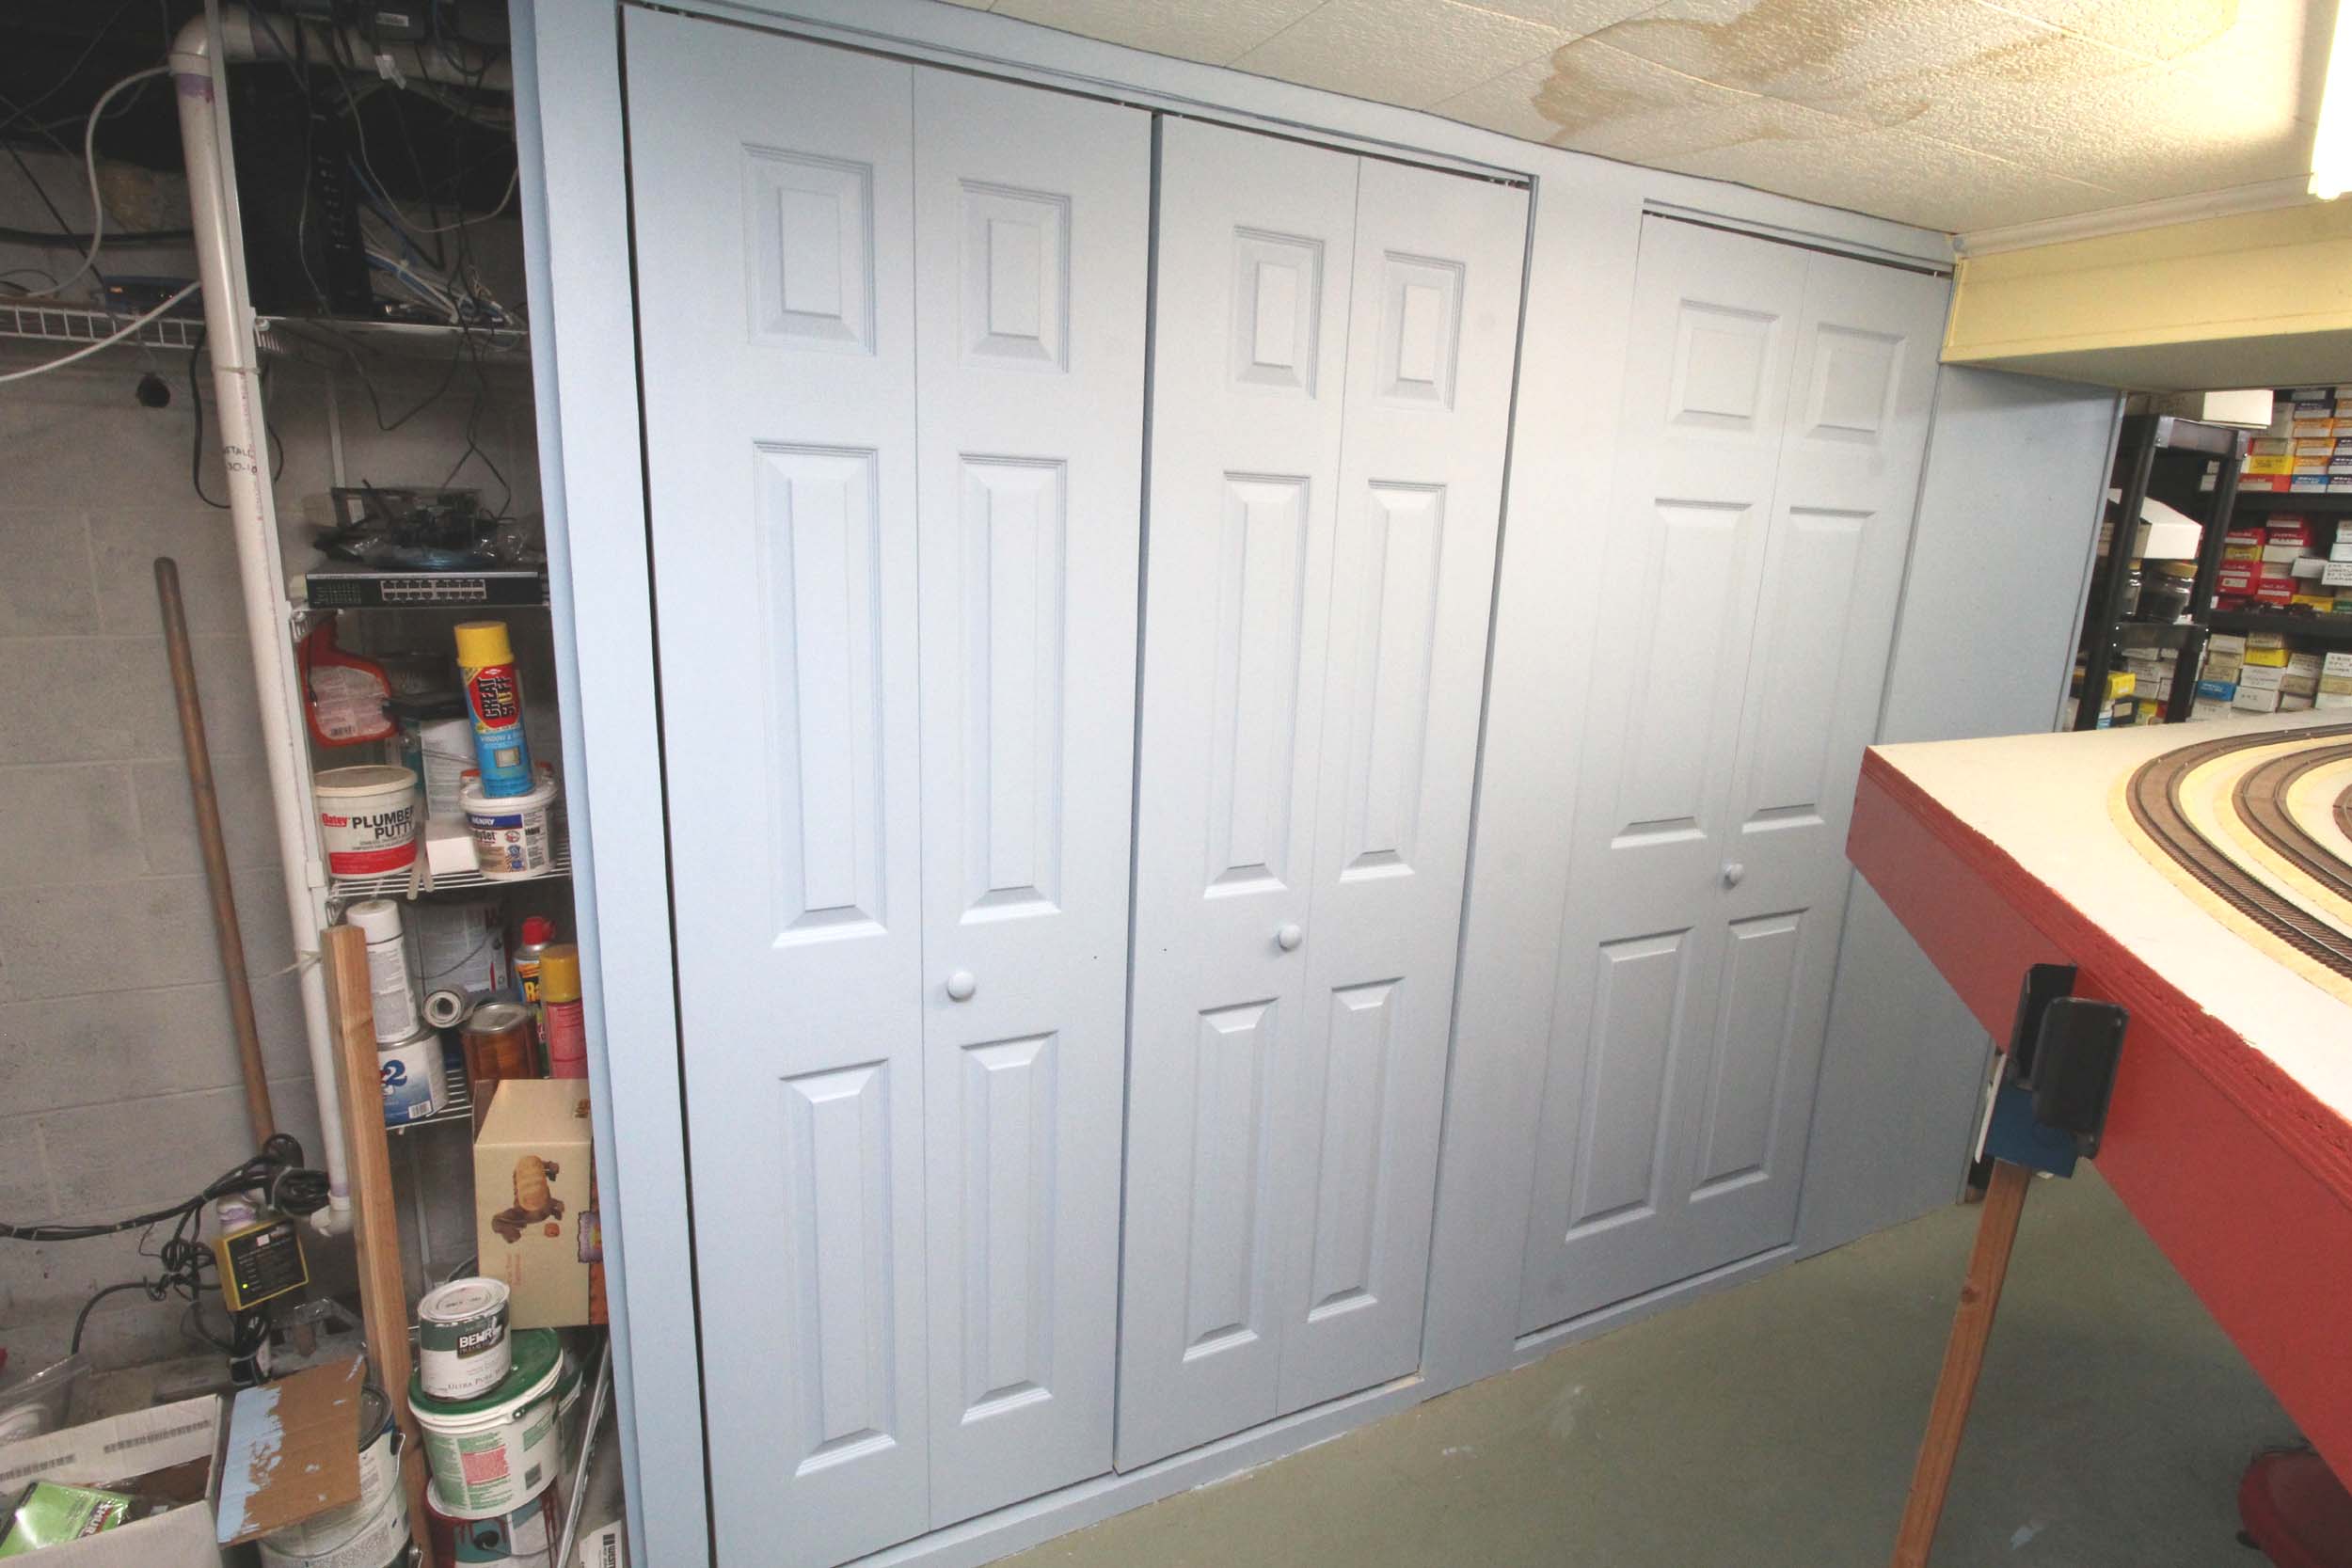
Sky
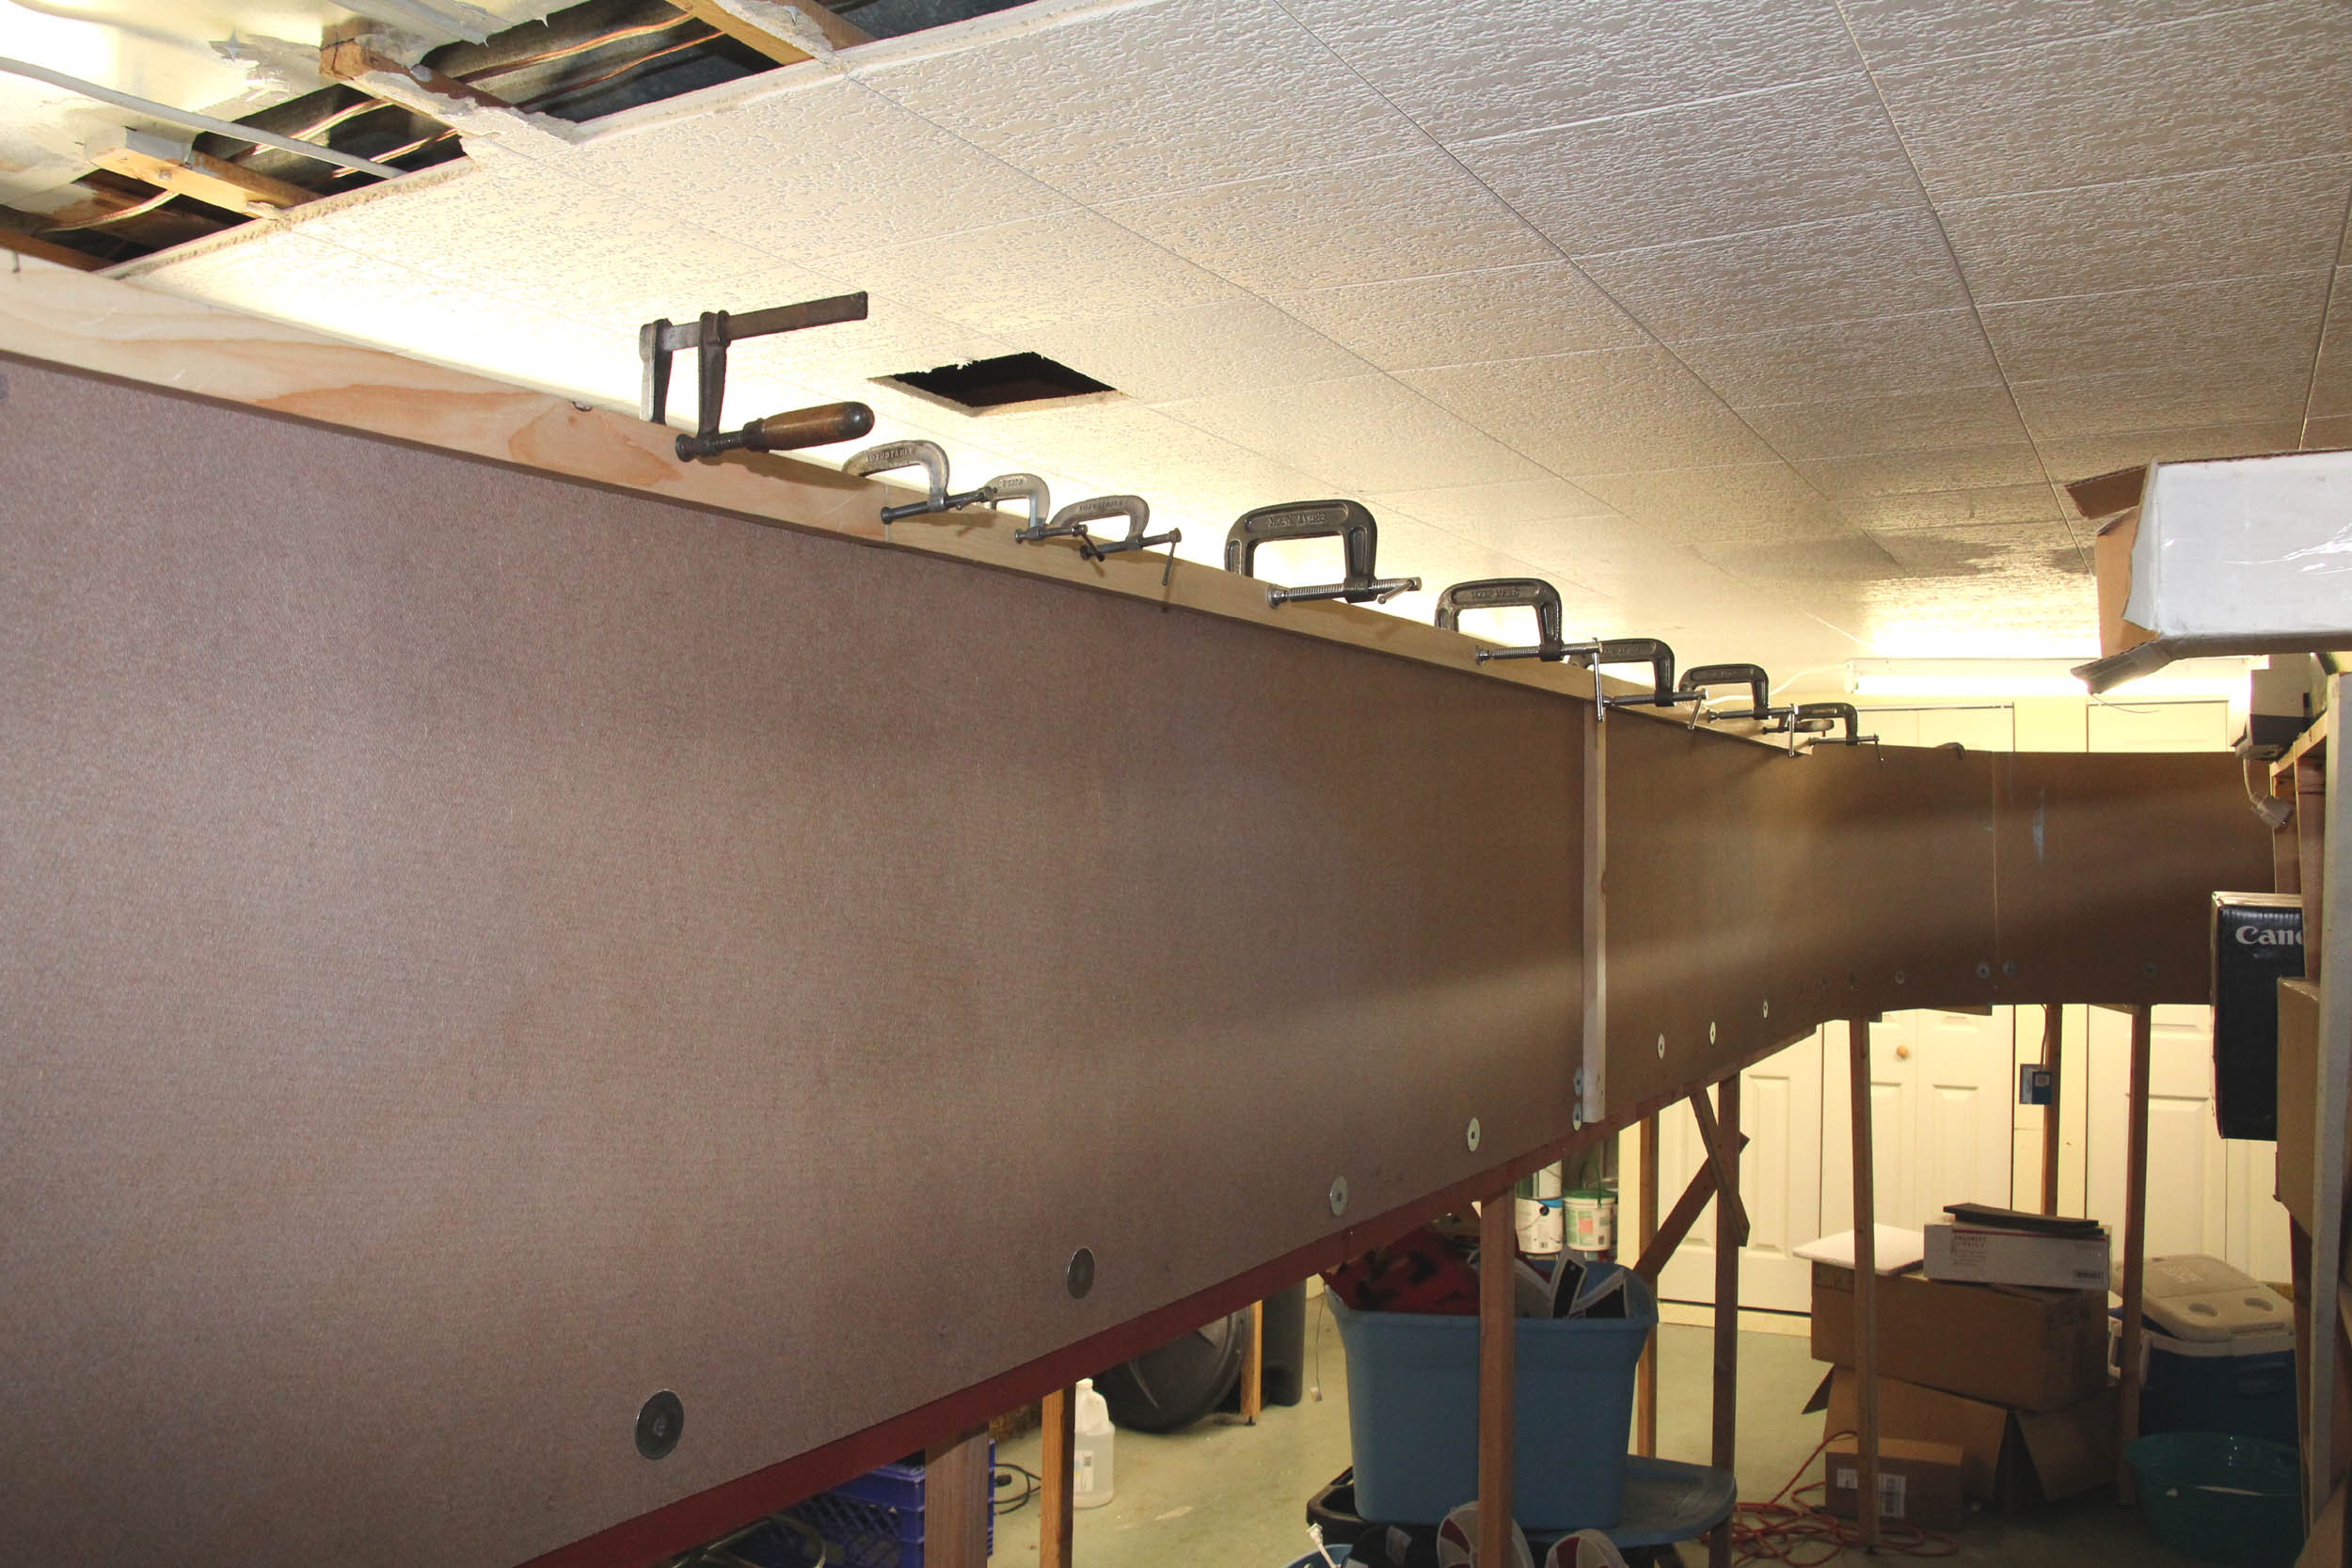
Blue Basement Walls
Added
6-17-18
As can be seen above a cinderblock wall at one end and closet
doors at the end make for distracting photos. The block wall end/corner of the basement has had significant repairs done before we
got the house to keep the block wall from buckling and keeping the outside out.
There is 4” steel C channels about every 4 feet embedded in the basement floor
and bolted into first floor joists.
For
years I was concerned about “watching” the walls and not covering them up.
Coming up on 9 years now it is a DRY wall and not moving at all. I got some 1 x
6 pine and luan, and made a very quick n dirty wall.
Luan is the least expensive smoothest surface you can get in a sheet besides
drywall. I really don’t like drywall and it absolutely would not have worked
for this. I had to weave under pipes etc. Drywall does not bend.
I
was not thrilled at the idea of drilling and tapping the steel channels to
laminate the pine so I tried the Gorilla brand of construction glue. Oh it
worked!!! That glue is bulletproof. In other places I needed studs so I made 2
x 4 with the center cut out to get around the bow of the block wall.
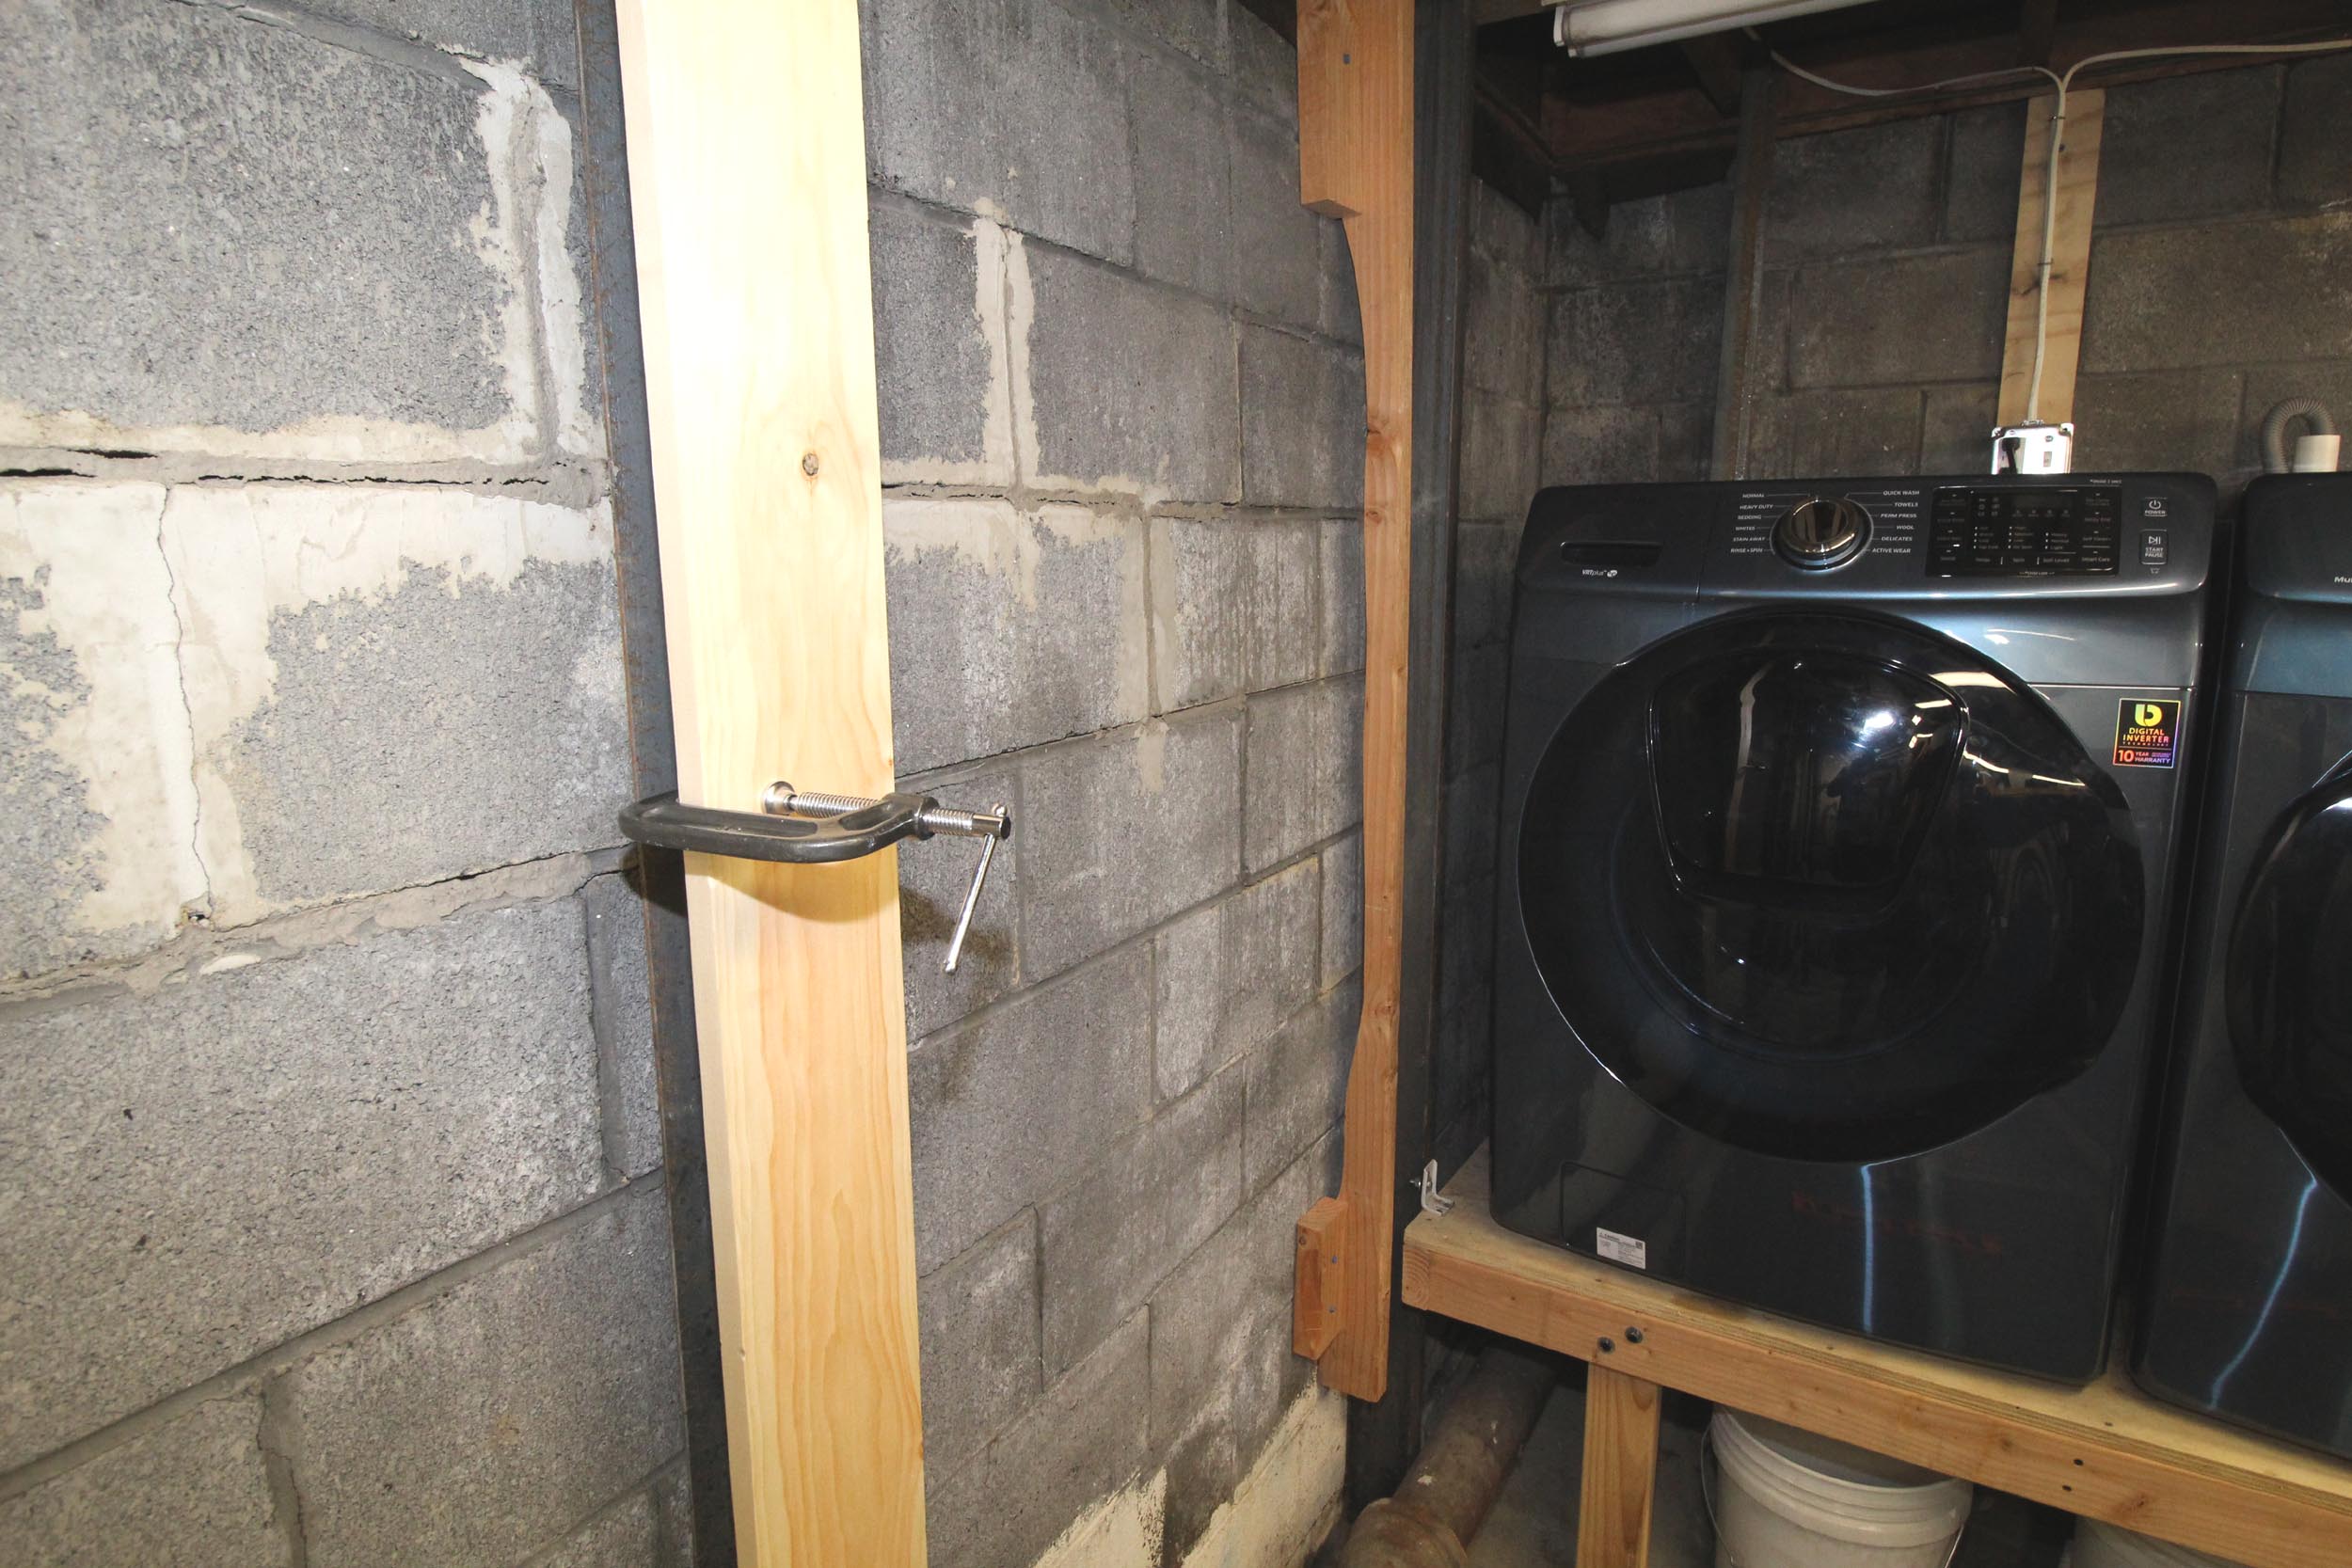
Since
the luan is thin I wanted to add some supports at about the half way point in
case it got bumped walking around. I did some minor spackling of the 1 joint.
The other joints are pretty well hidden and not in line for likely photo
angles.
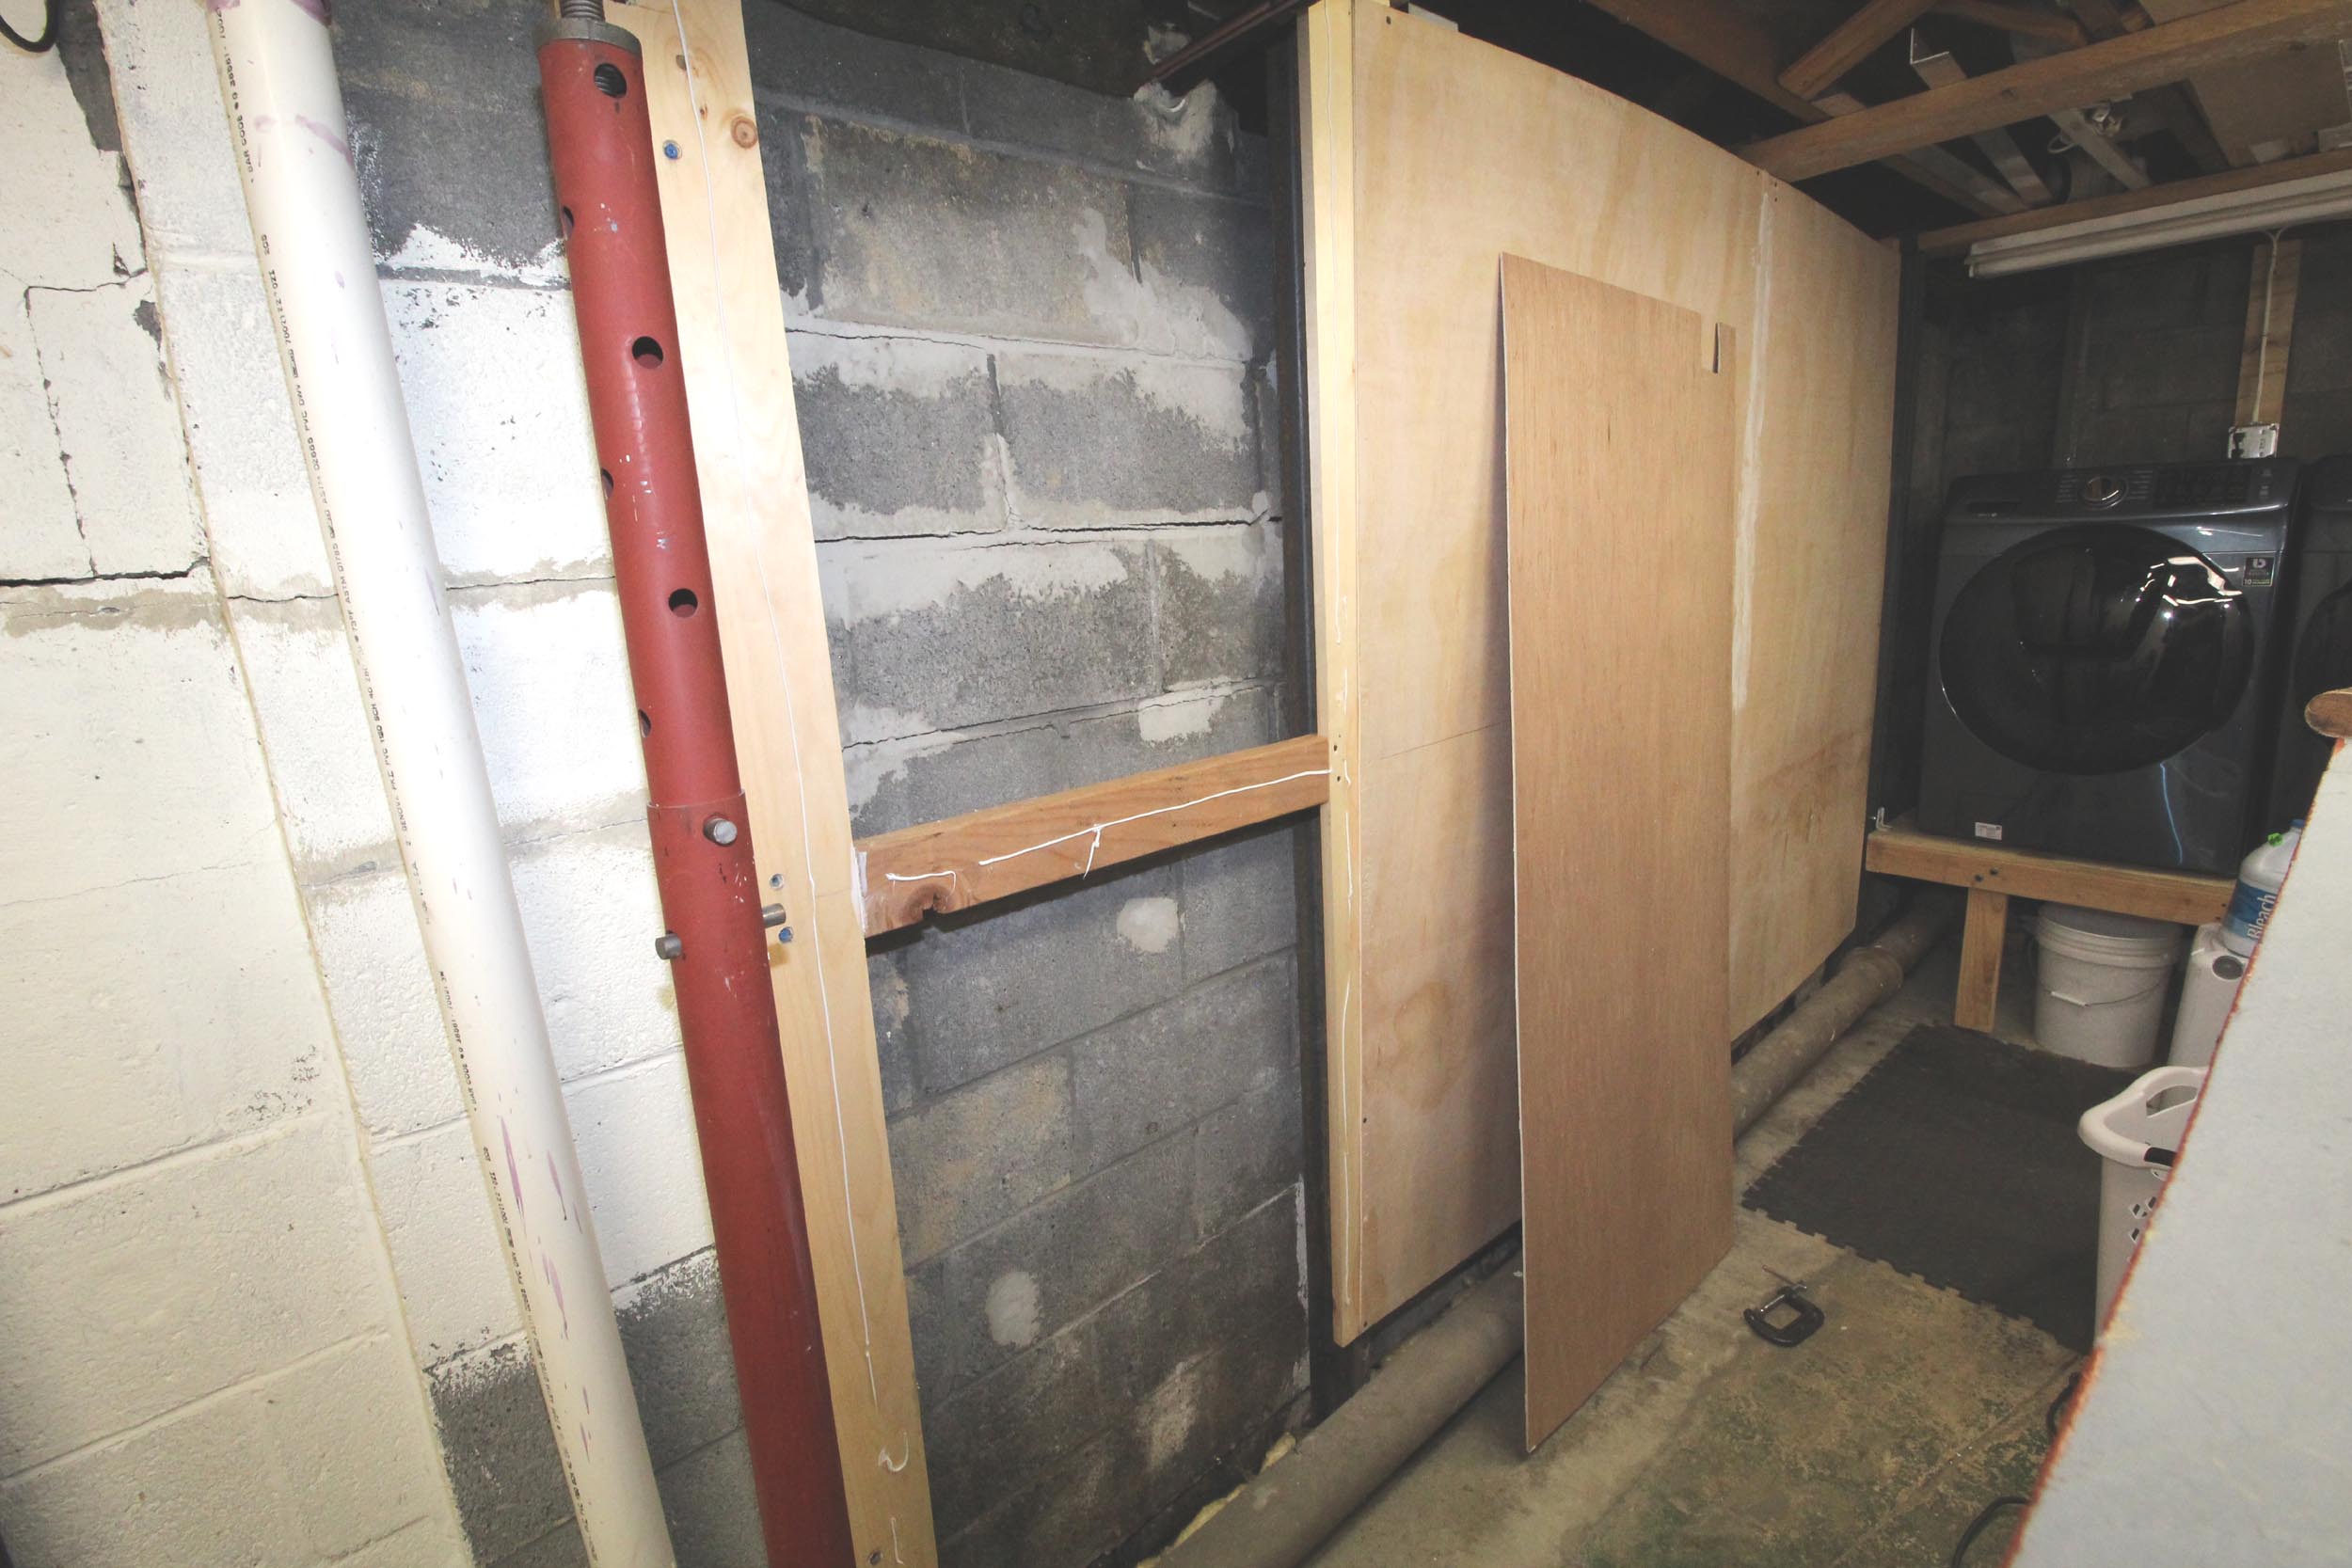
The
wall is by far not flat or perfect but as my Pop used to say “It does not have
to keep time”. Good enough.
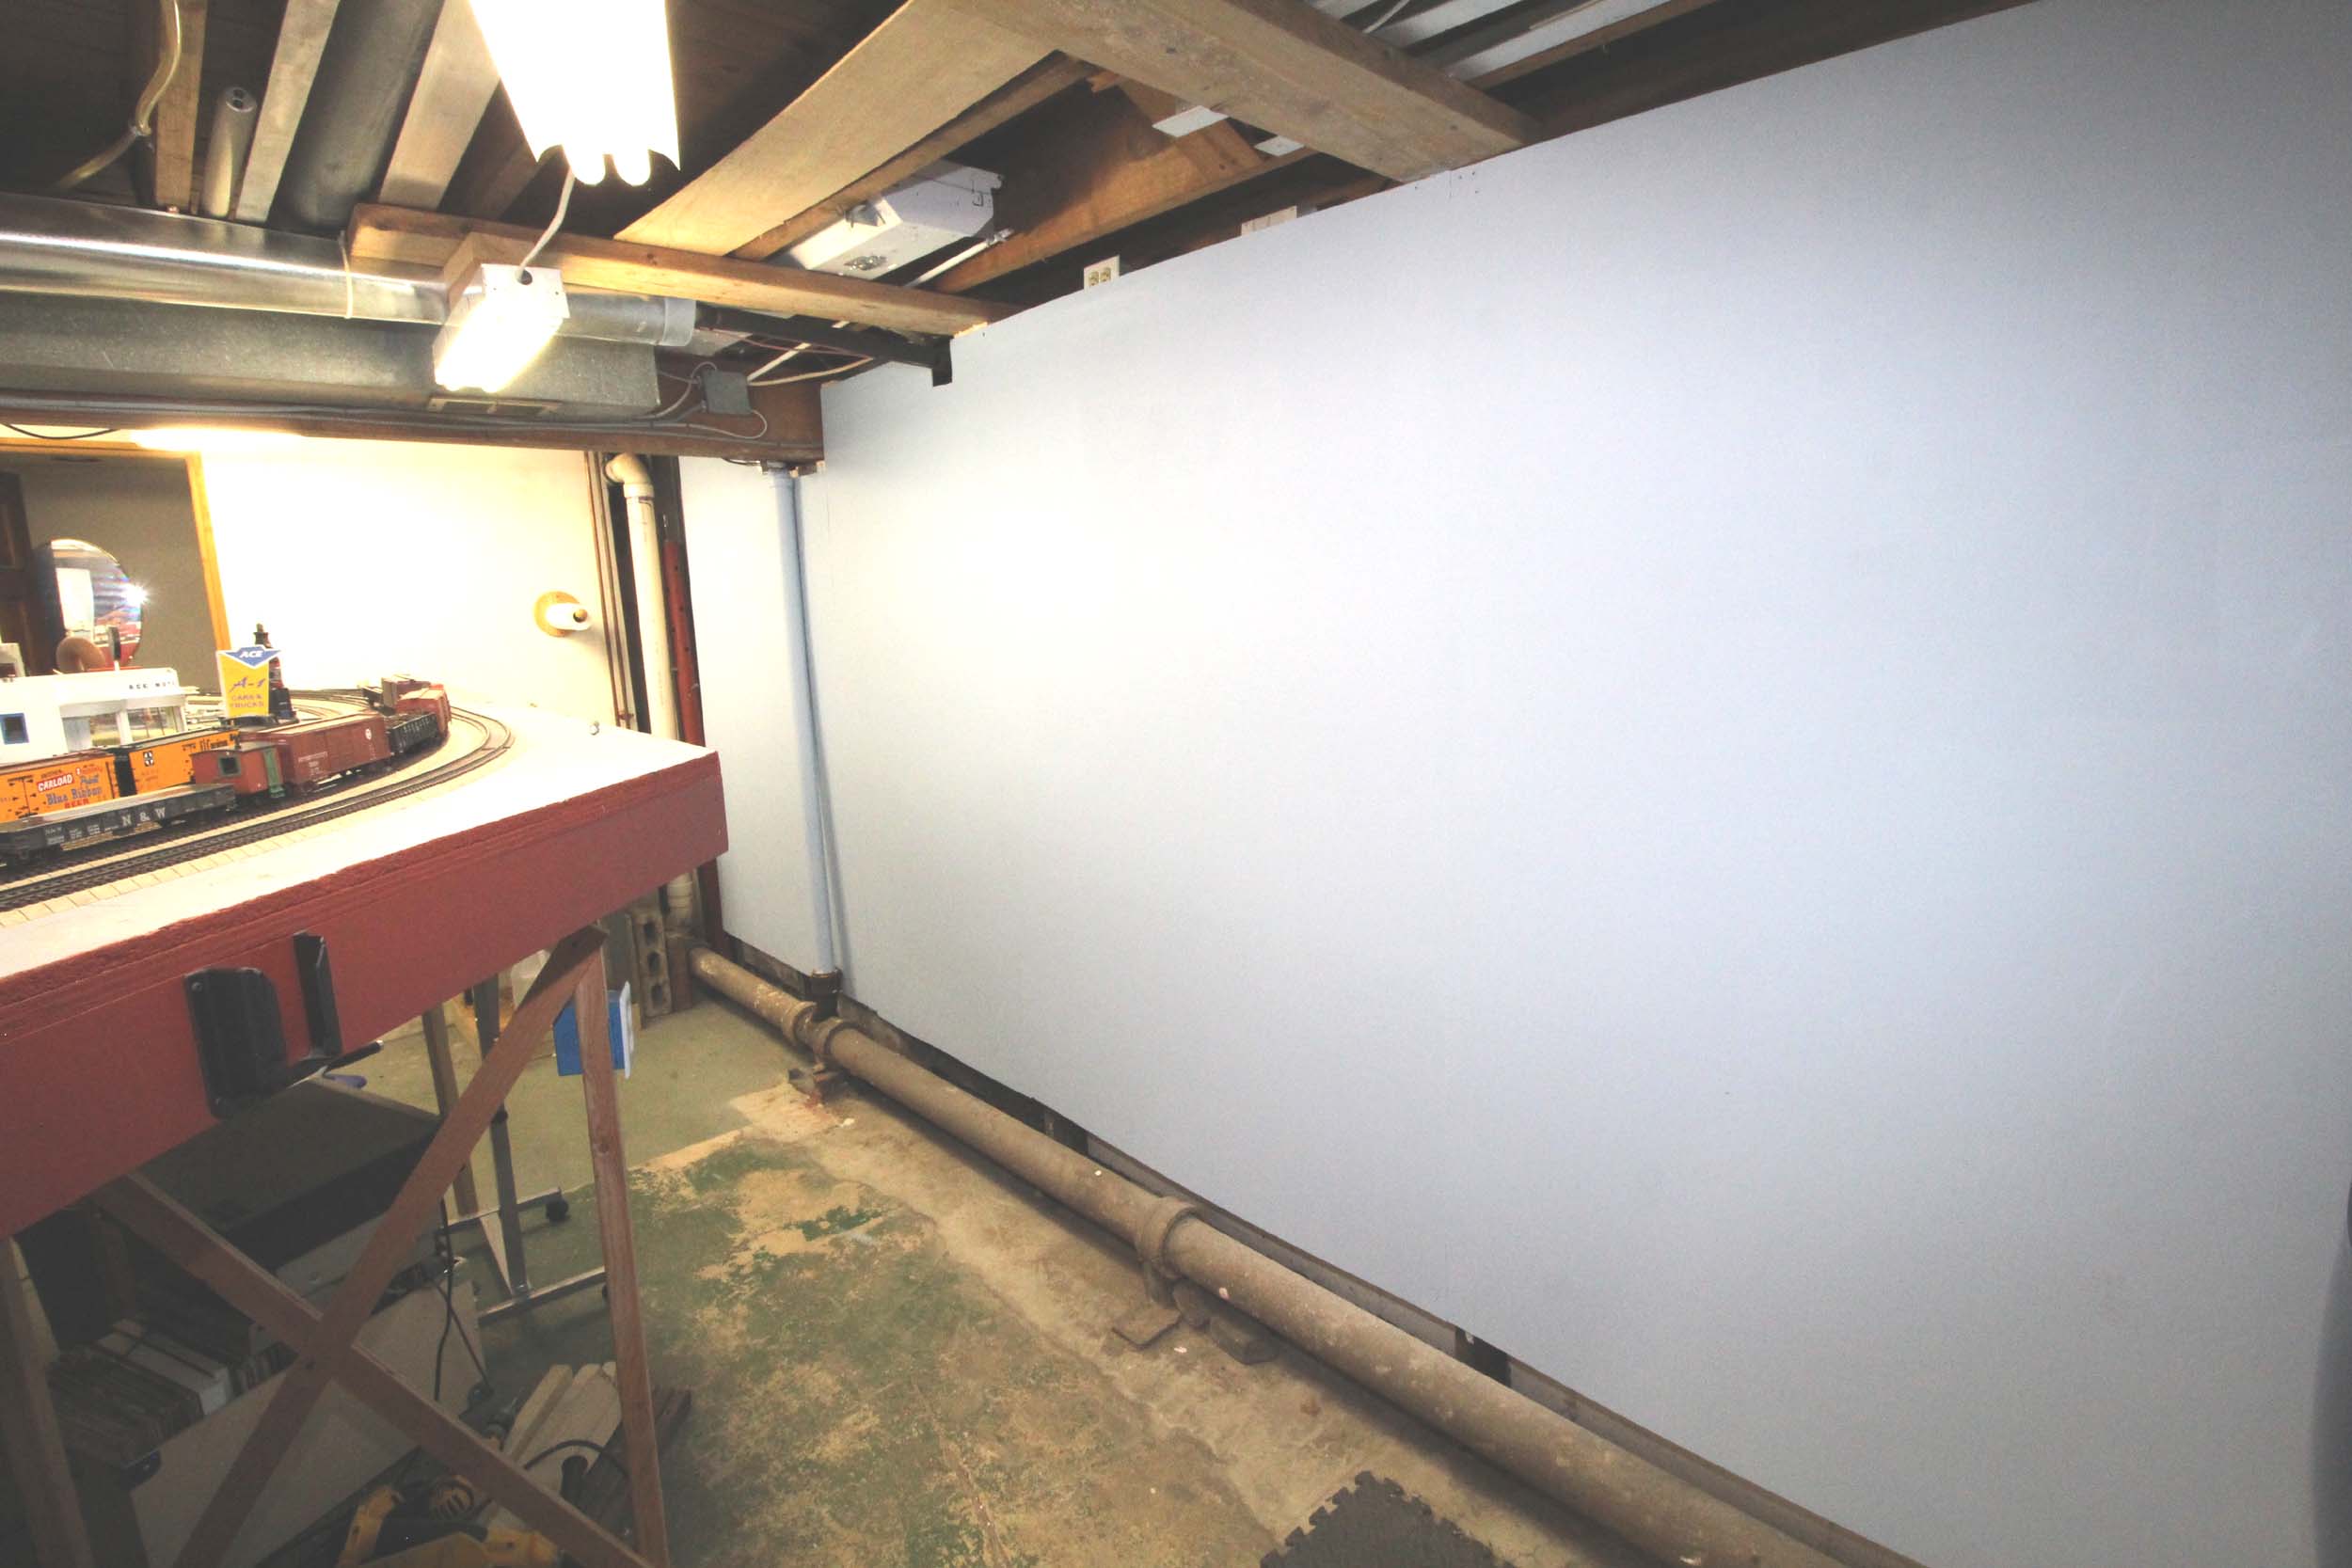
I
painted the bi-fold closet doors at the other end of the basement the same
color sky blue. I may have hoped or overestimated the camouflaging that the
painting would do. That did not go quite as well. They still look like closet
doors. Still I think the effort was worth the results especially on the wall
end.
Scenery
Added 9-8-18
I have
had almost no interest in doing scenery truly forever. I much prefer working on the trains
themselves, but friends have been nudging me to do something scenery related
for many years. The “colonial blue” that I first painted the layout with was
actually just a mix of the many leftover paints from when we got the house in
2009. I dumped them into a 5 gallon bucket and mixed it up. On the layout it
went to seal the Homasote.
It
was suggested to paint this brown. It did make a visual difference until whenever
I get to adding ground cover which I hope will be mostly static grass.
Ballast
After
the brown paint was done putting down ballast was started. Like on my modules
years ago I used http://estesco.com which is for commercial flooring
applications. It is quartz, but is very
uniform in size and color. The color is so uniform that is almost no difference
to a bag I bought in 2003. It has no dust that I can see, truly ready to use in
massive quantities. They are 50 pound bags at about $1.00 a pound, but your
price may vary. No Woodland Scenics bottles at $5.00
per ounce. The Estesco
local distributor is AGSCO Corporation http://www.agsco.com . The material is called “Trowel
Rite”. I bought gray and cool white. Most is going to be gray but I will use
white in some places. The material can also be used for hopper loads.
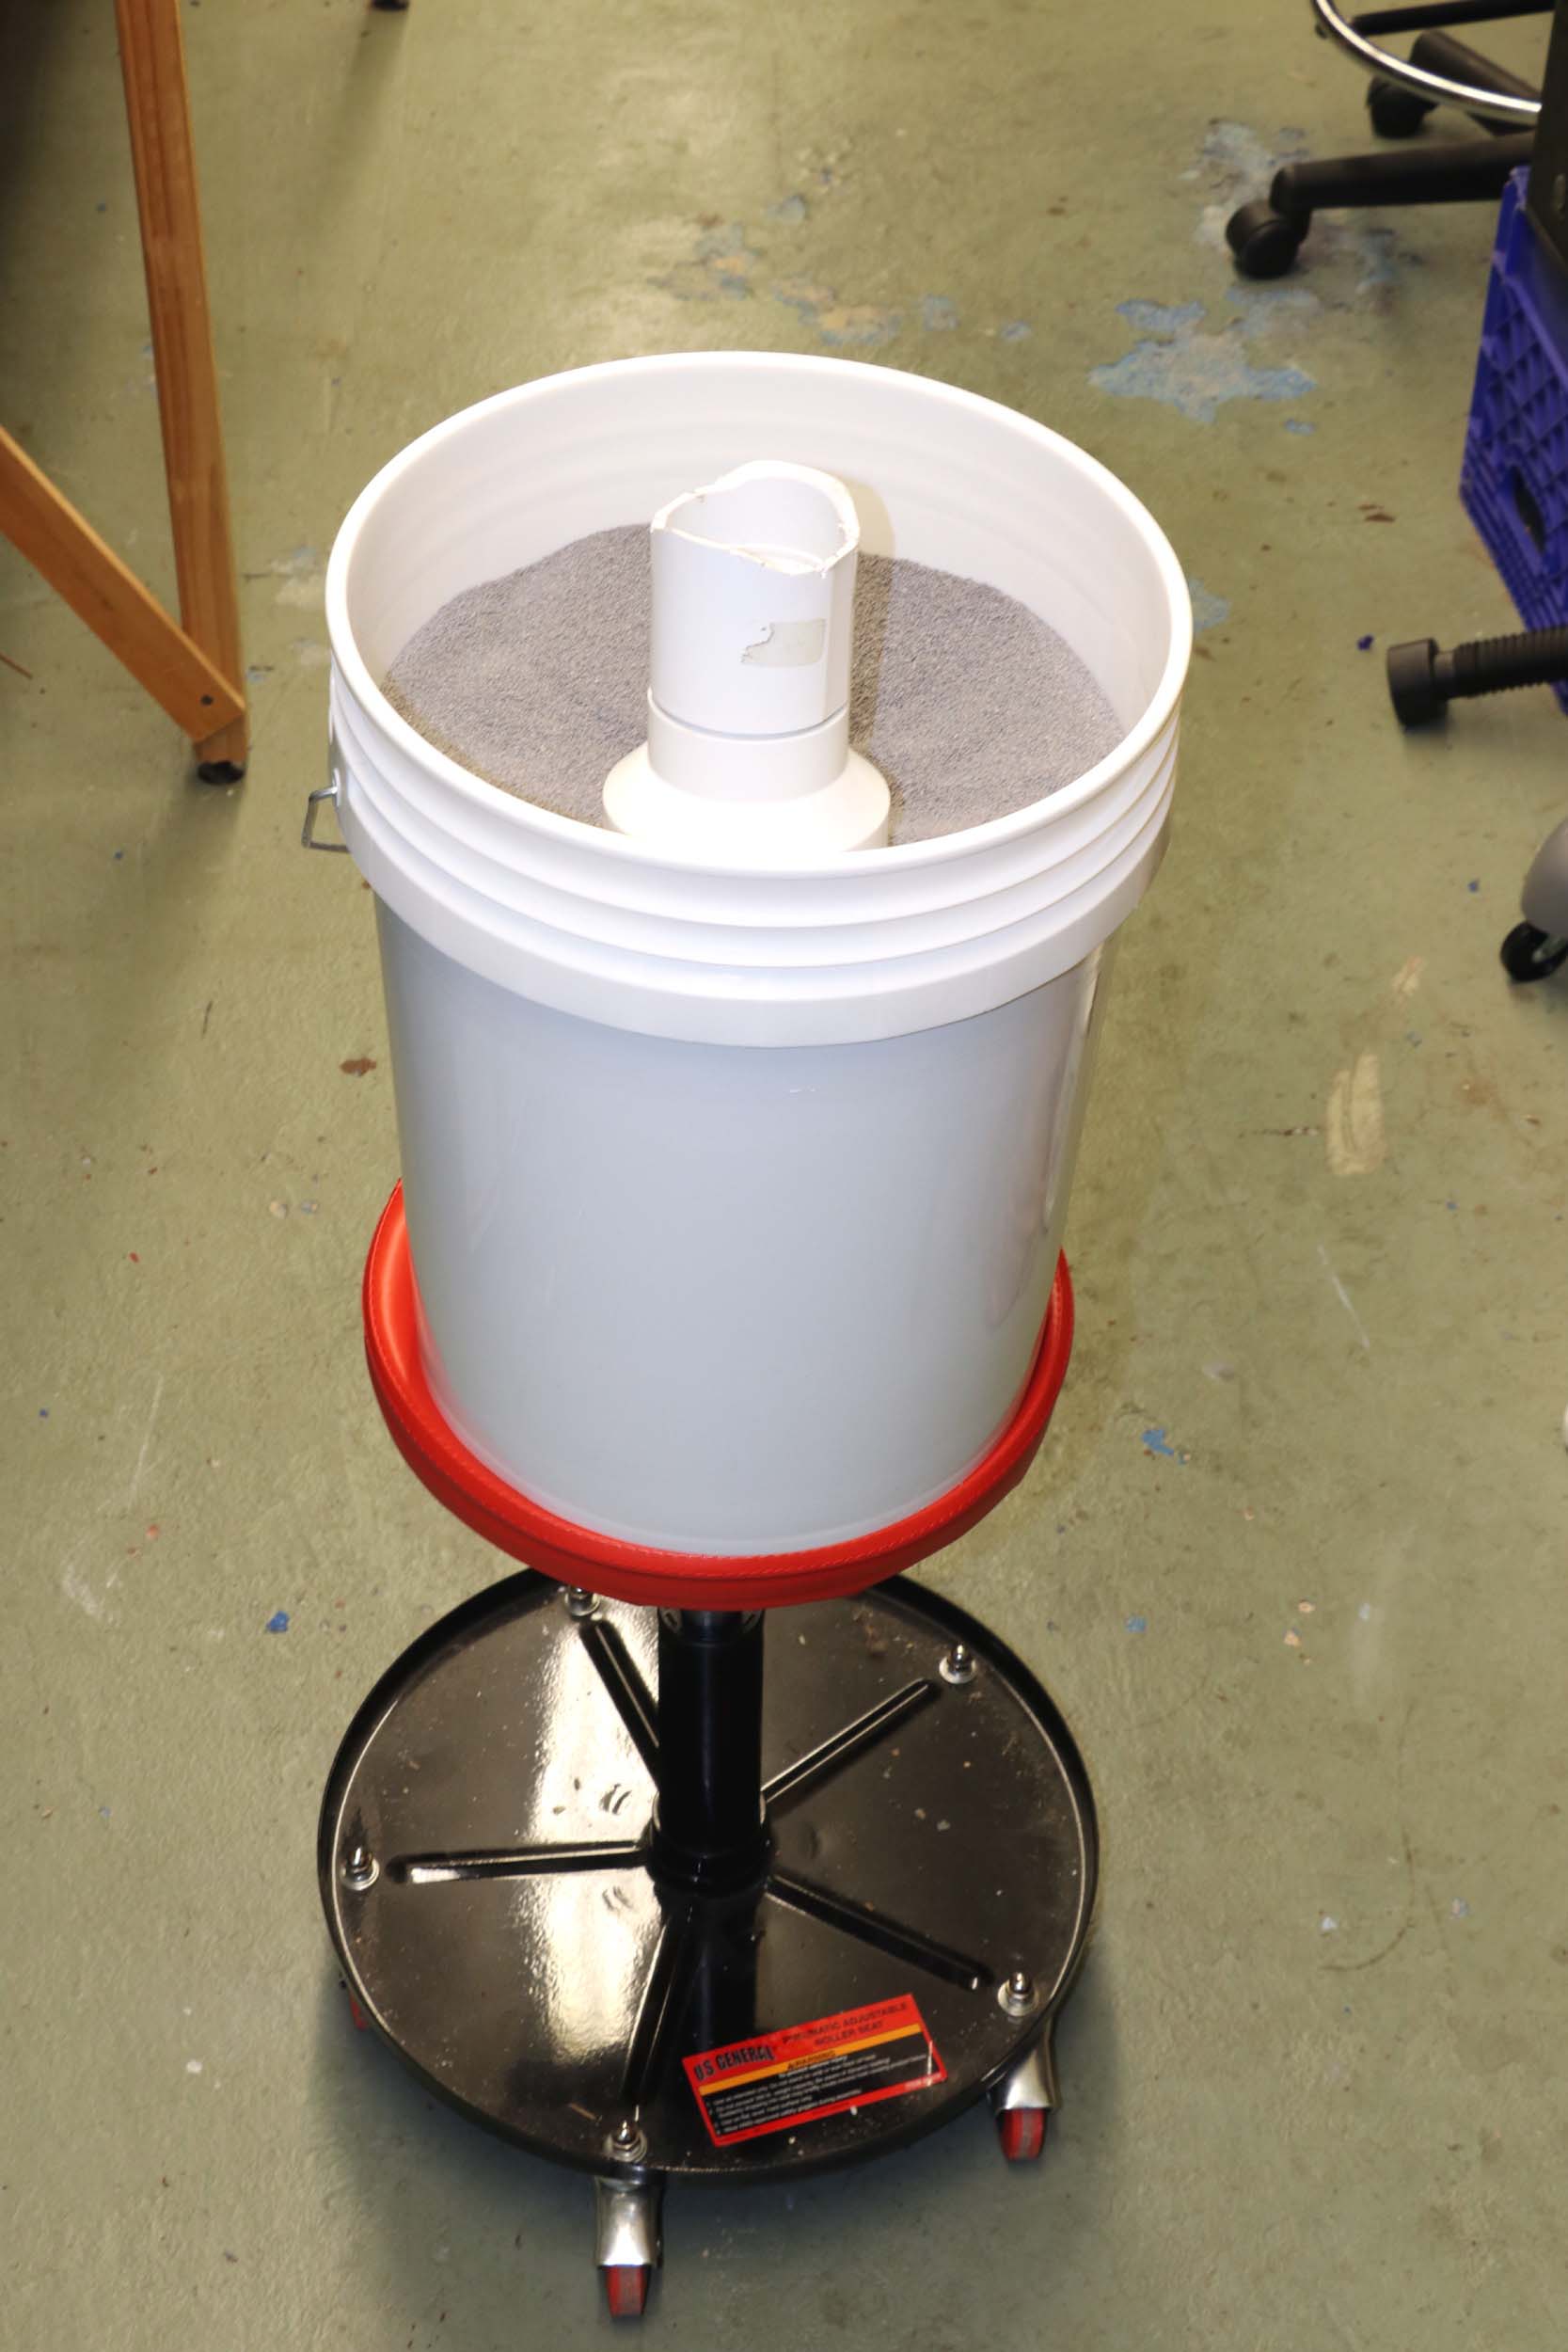
At
left are the sample bags from AGSCO. Just for a goof I made 2 ballast
dispensers from 1 ½” and 2” PVC pipe fittings. They
were BIG fun to make.
I cut the bottoms of the couplings to closely fit the track and roadbed
profile. There is a short piece of pipe inside and a 3” reducer coupling as a
bowl for more capacity. For the code 137 track on the Homabed I get about 8
feet of ballast deposited in 1 load. It is not perfect but mostly gets the
ballast in the right place. Some spreading around and adding is needed to get
it all right. I use my Harbor Freight mechanics stool to move the bucket of
ballast around.
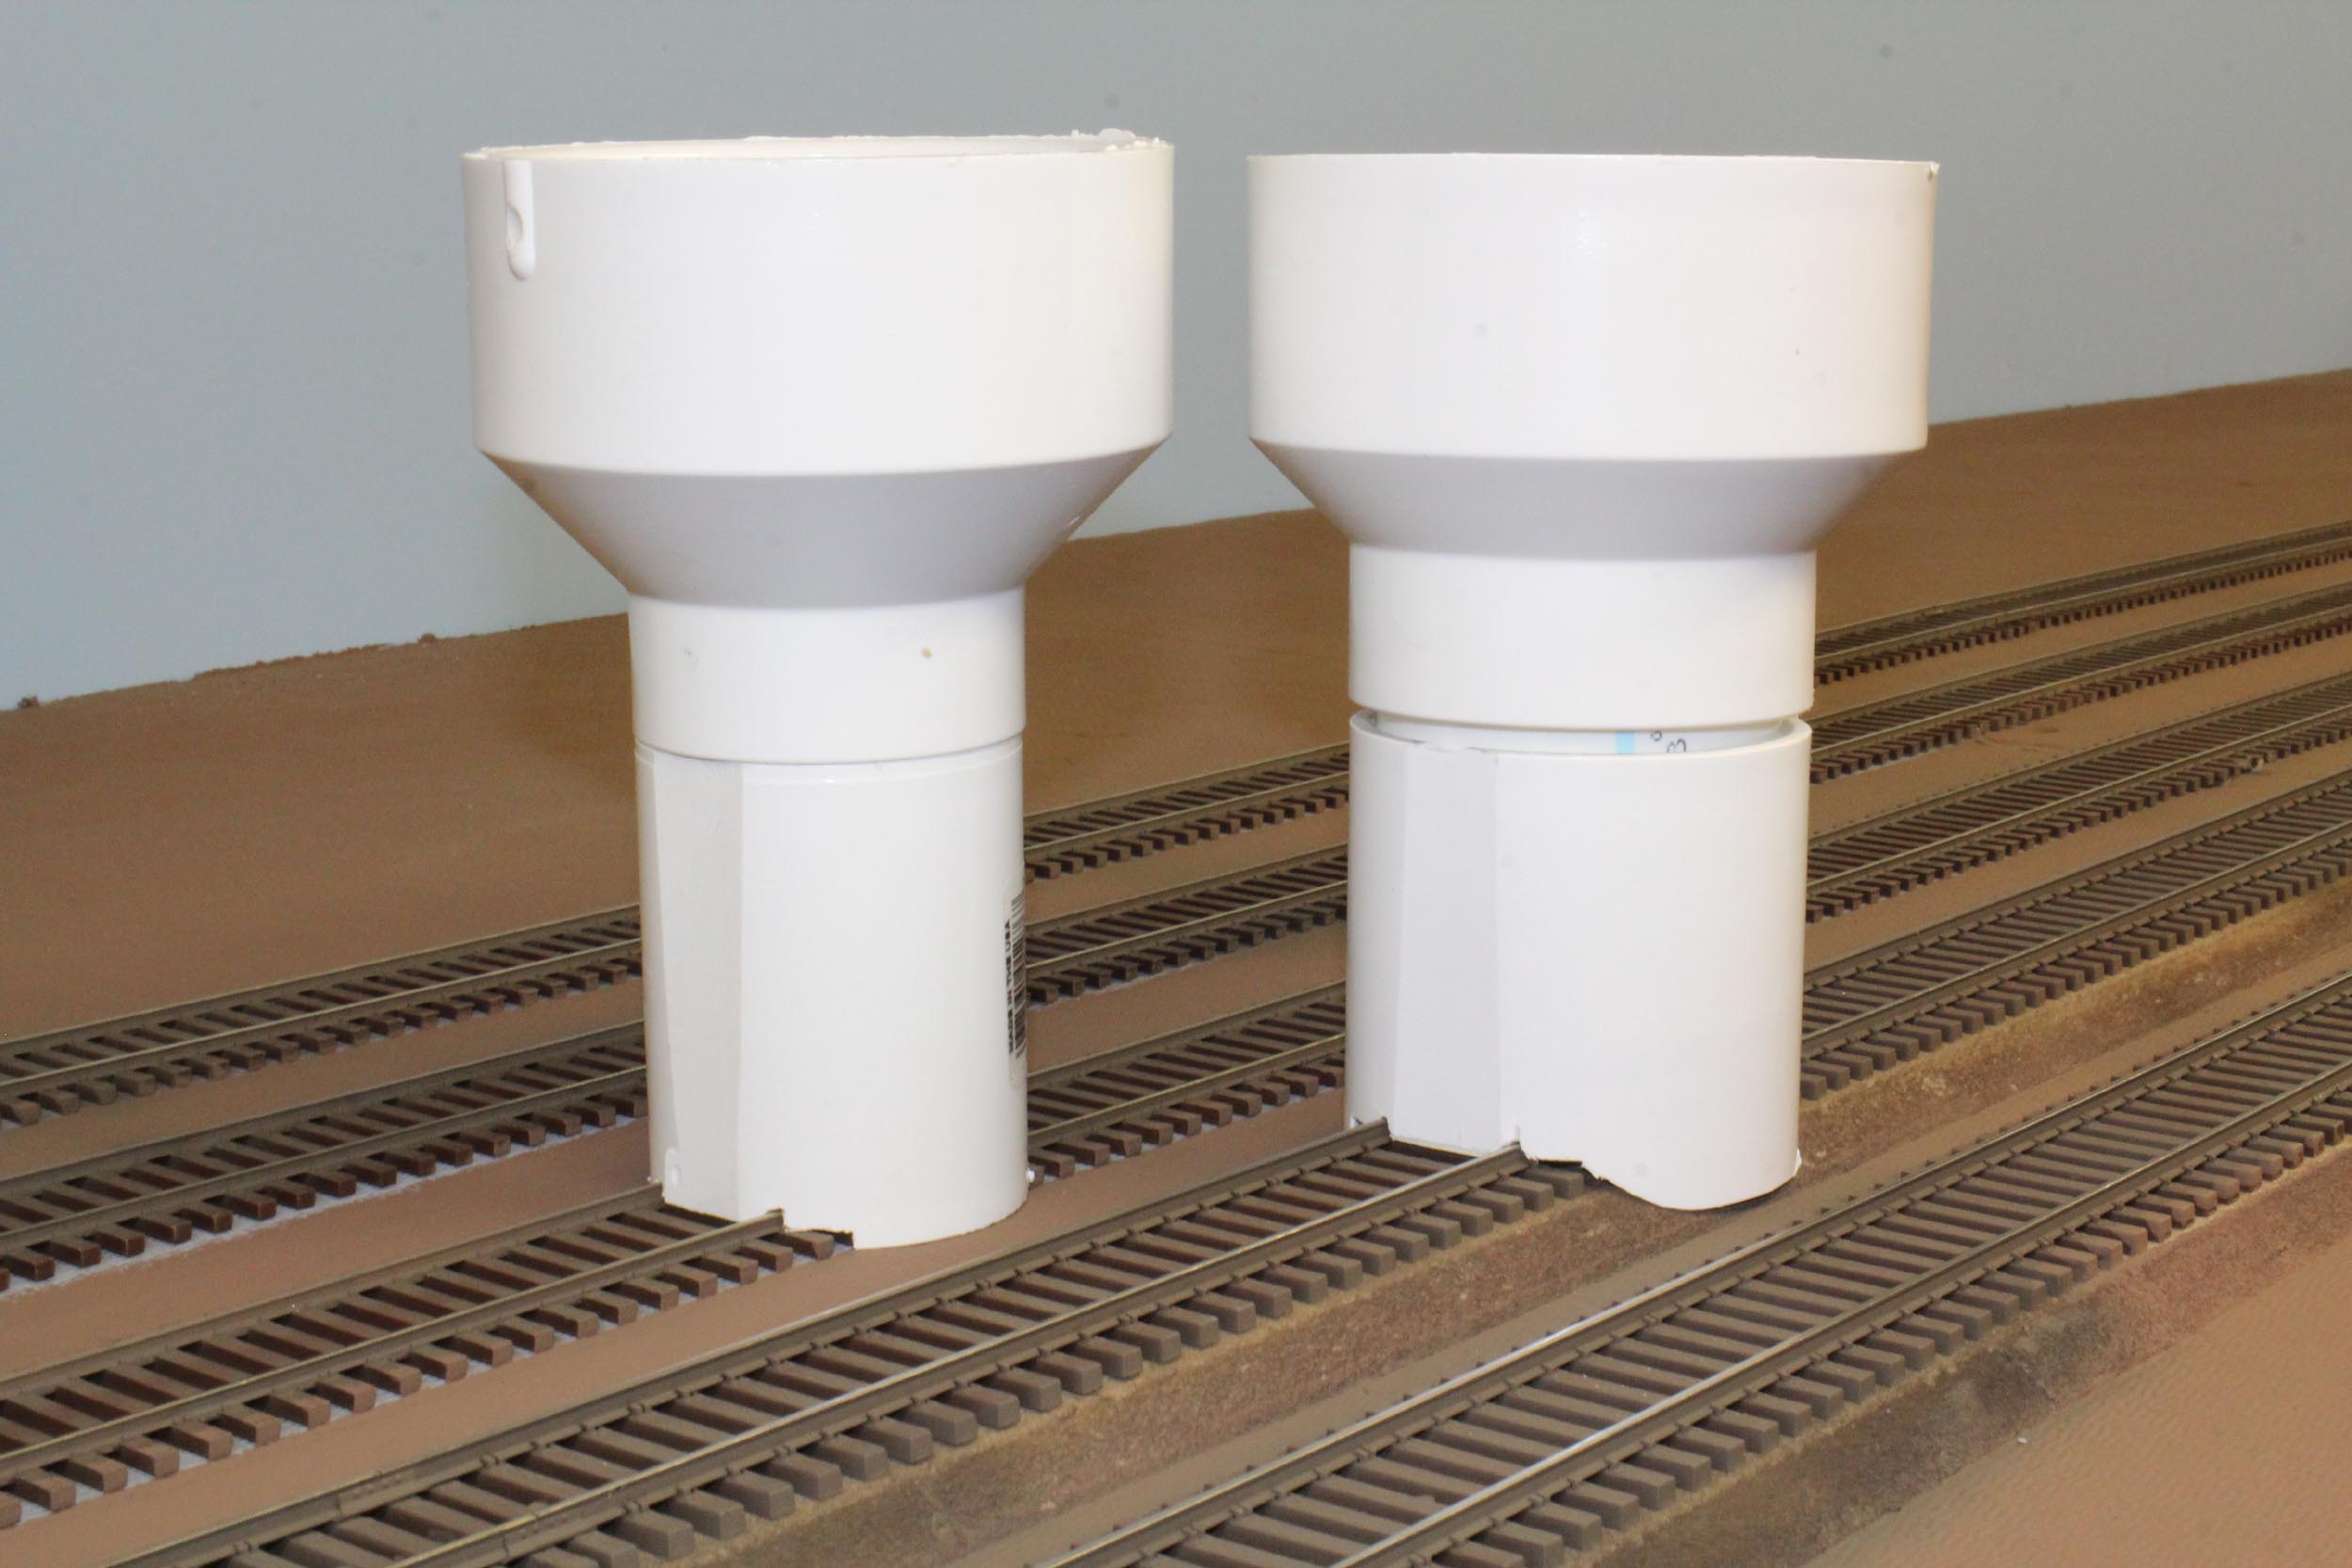
Revised 5-27-25
As
you will see on My Layout Page 7 I completed
ballasting everything on 5-11-25. I did not use any white ballast. My ballast
dispensers proved to be not worth using. They dumped too much ballast that took
too much time to spread forward. As I was doing the ballasting in 2025 I
thought about how to fix that by limiting the amount dispensed but did not
spend much time on perfecting anything.
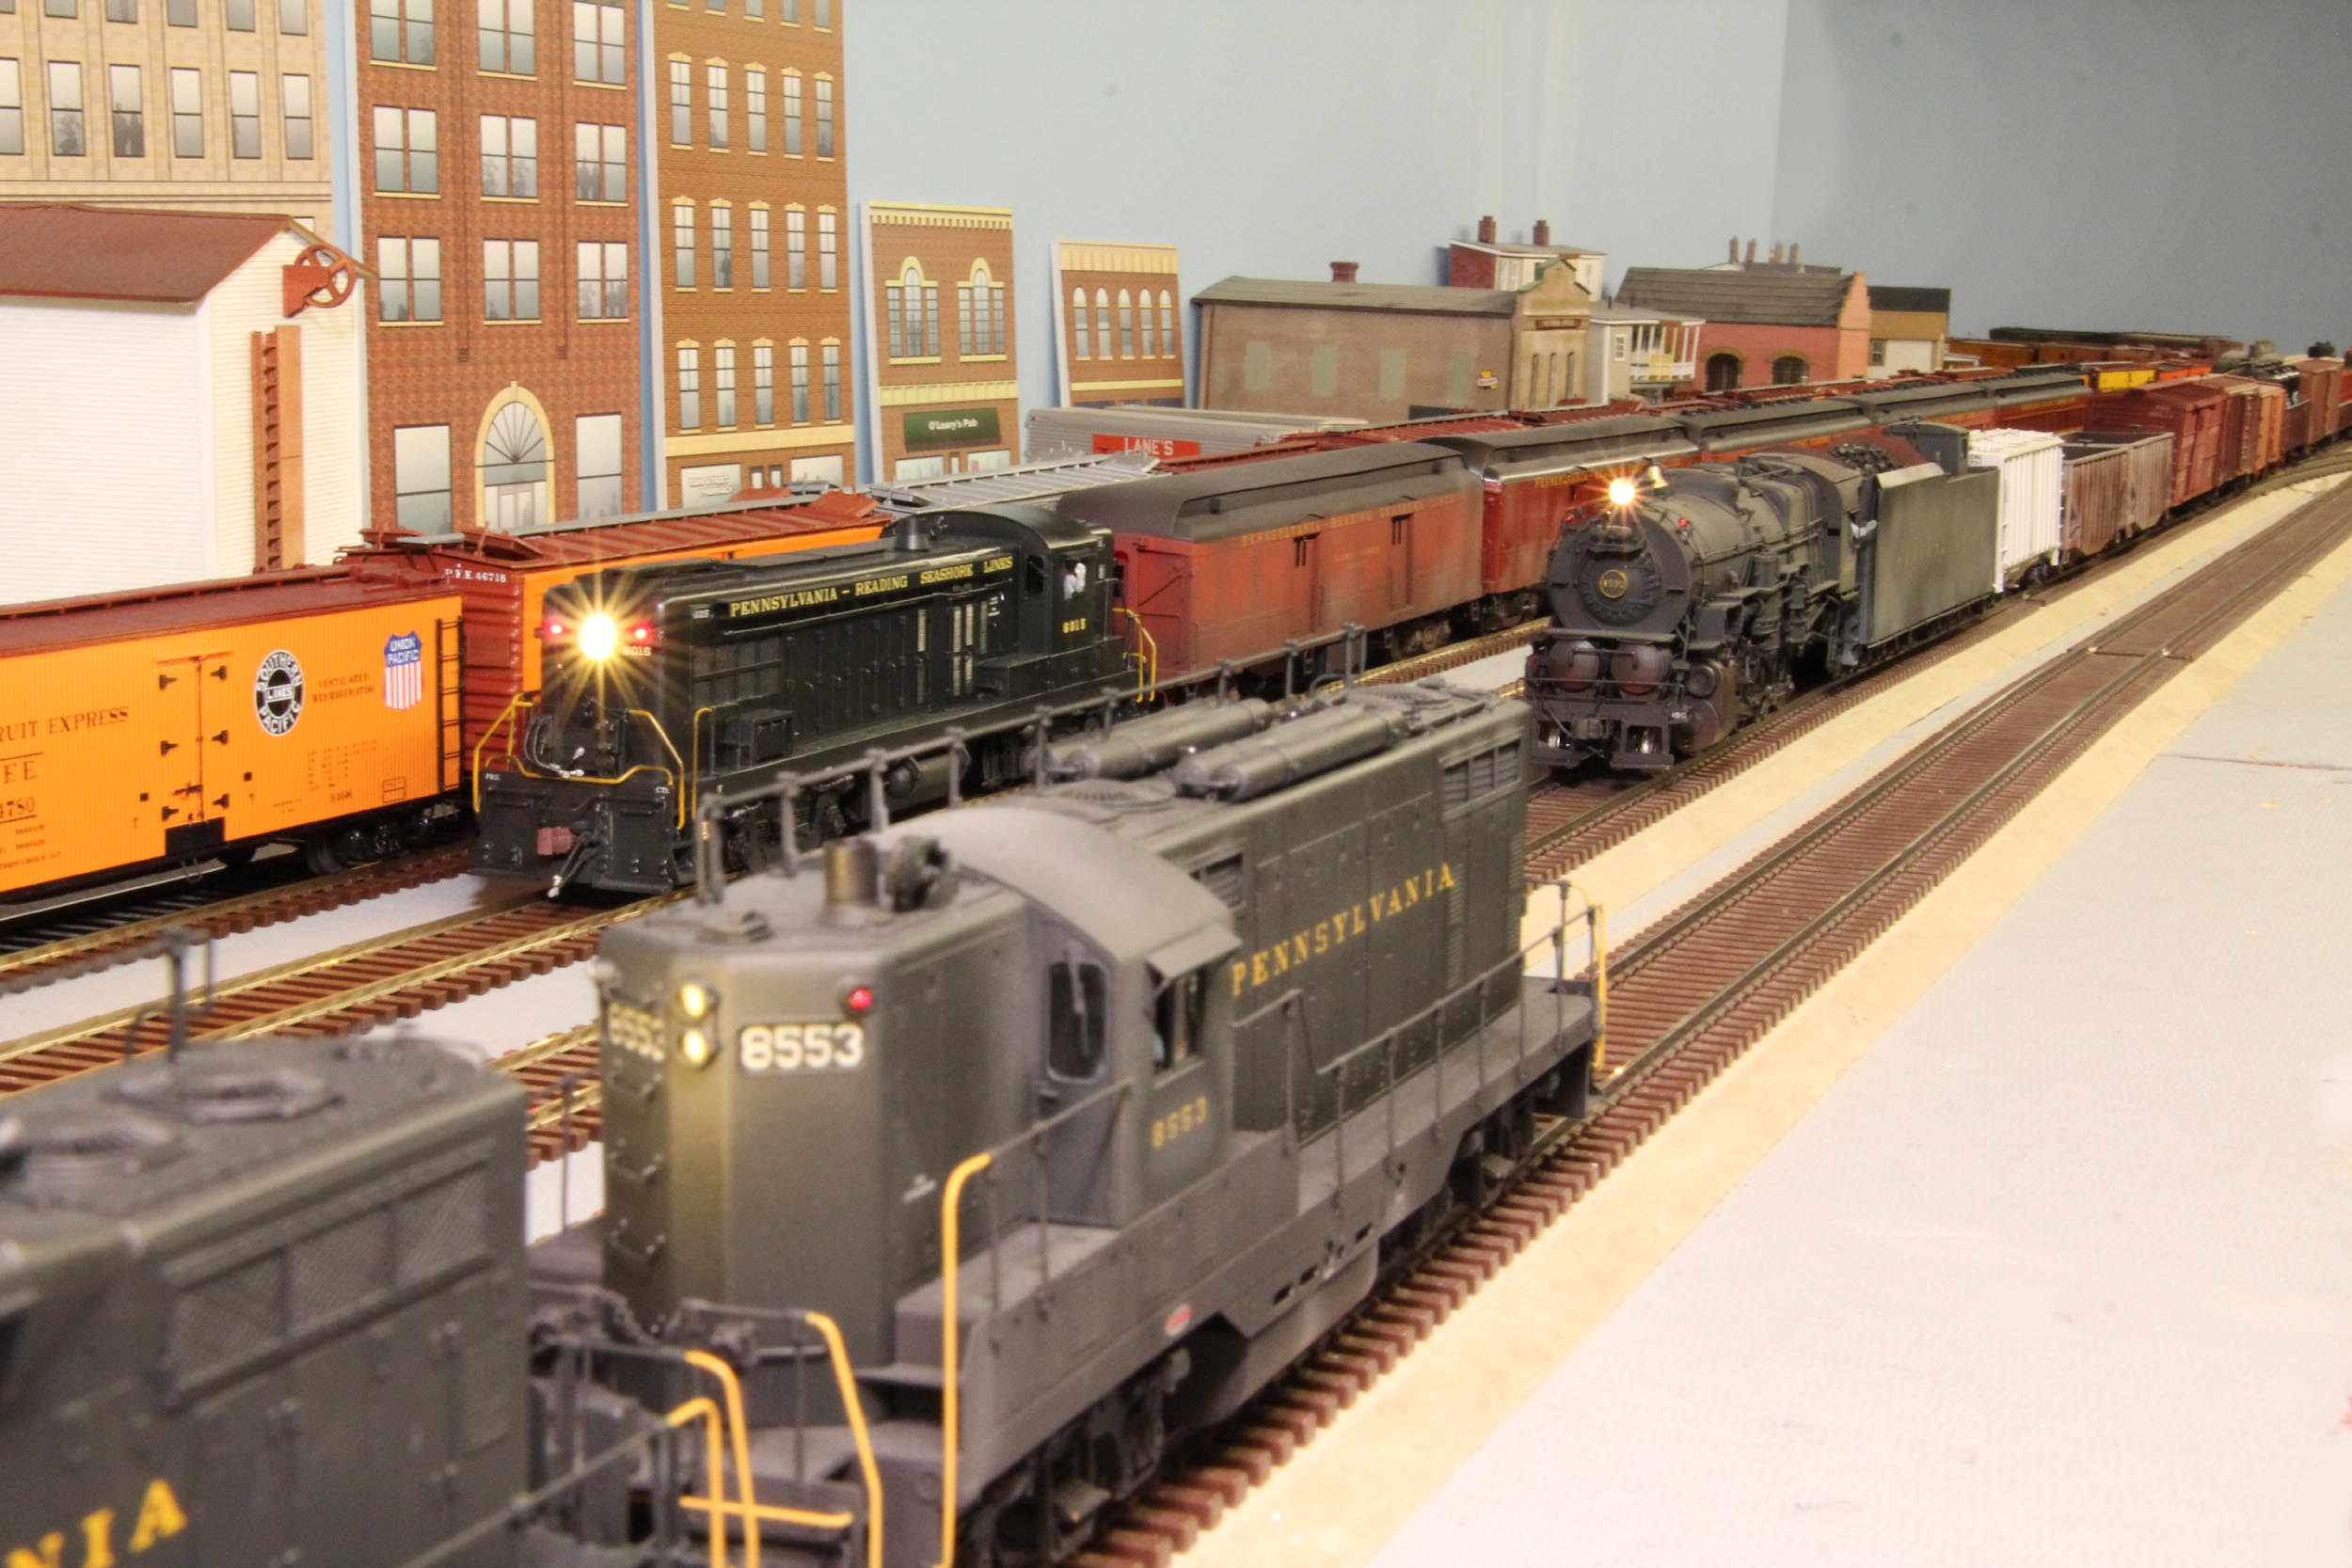
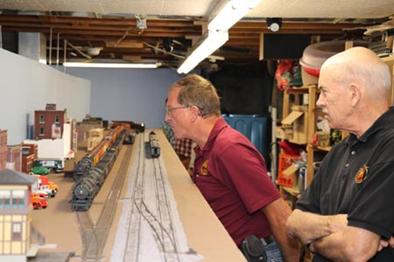
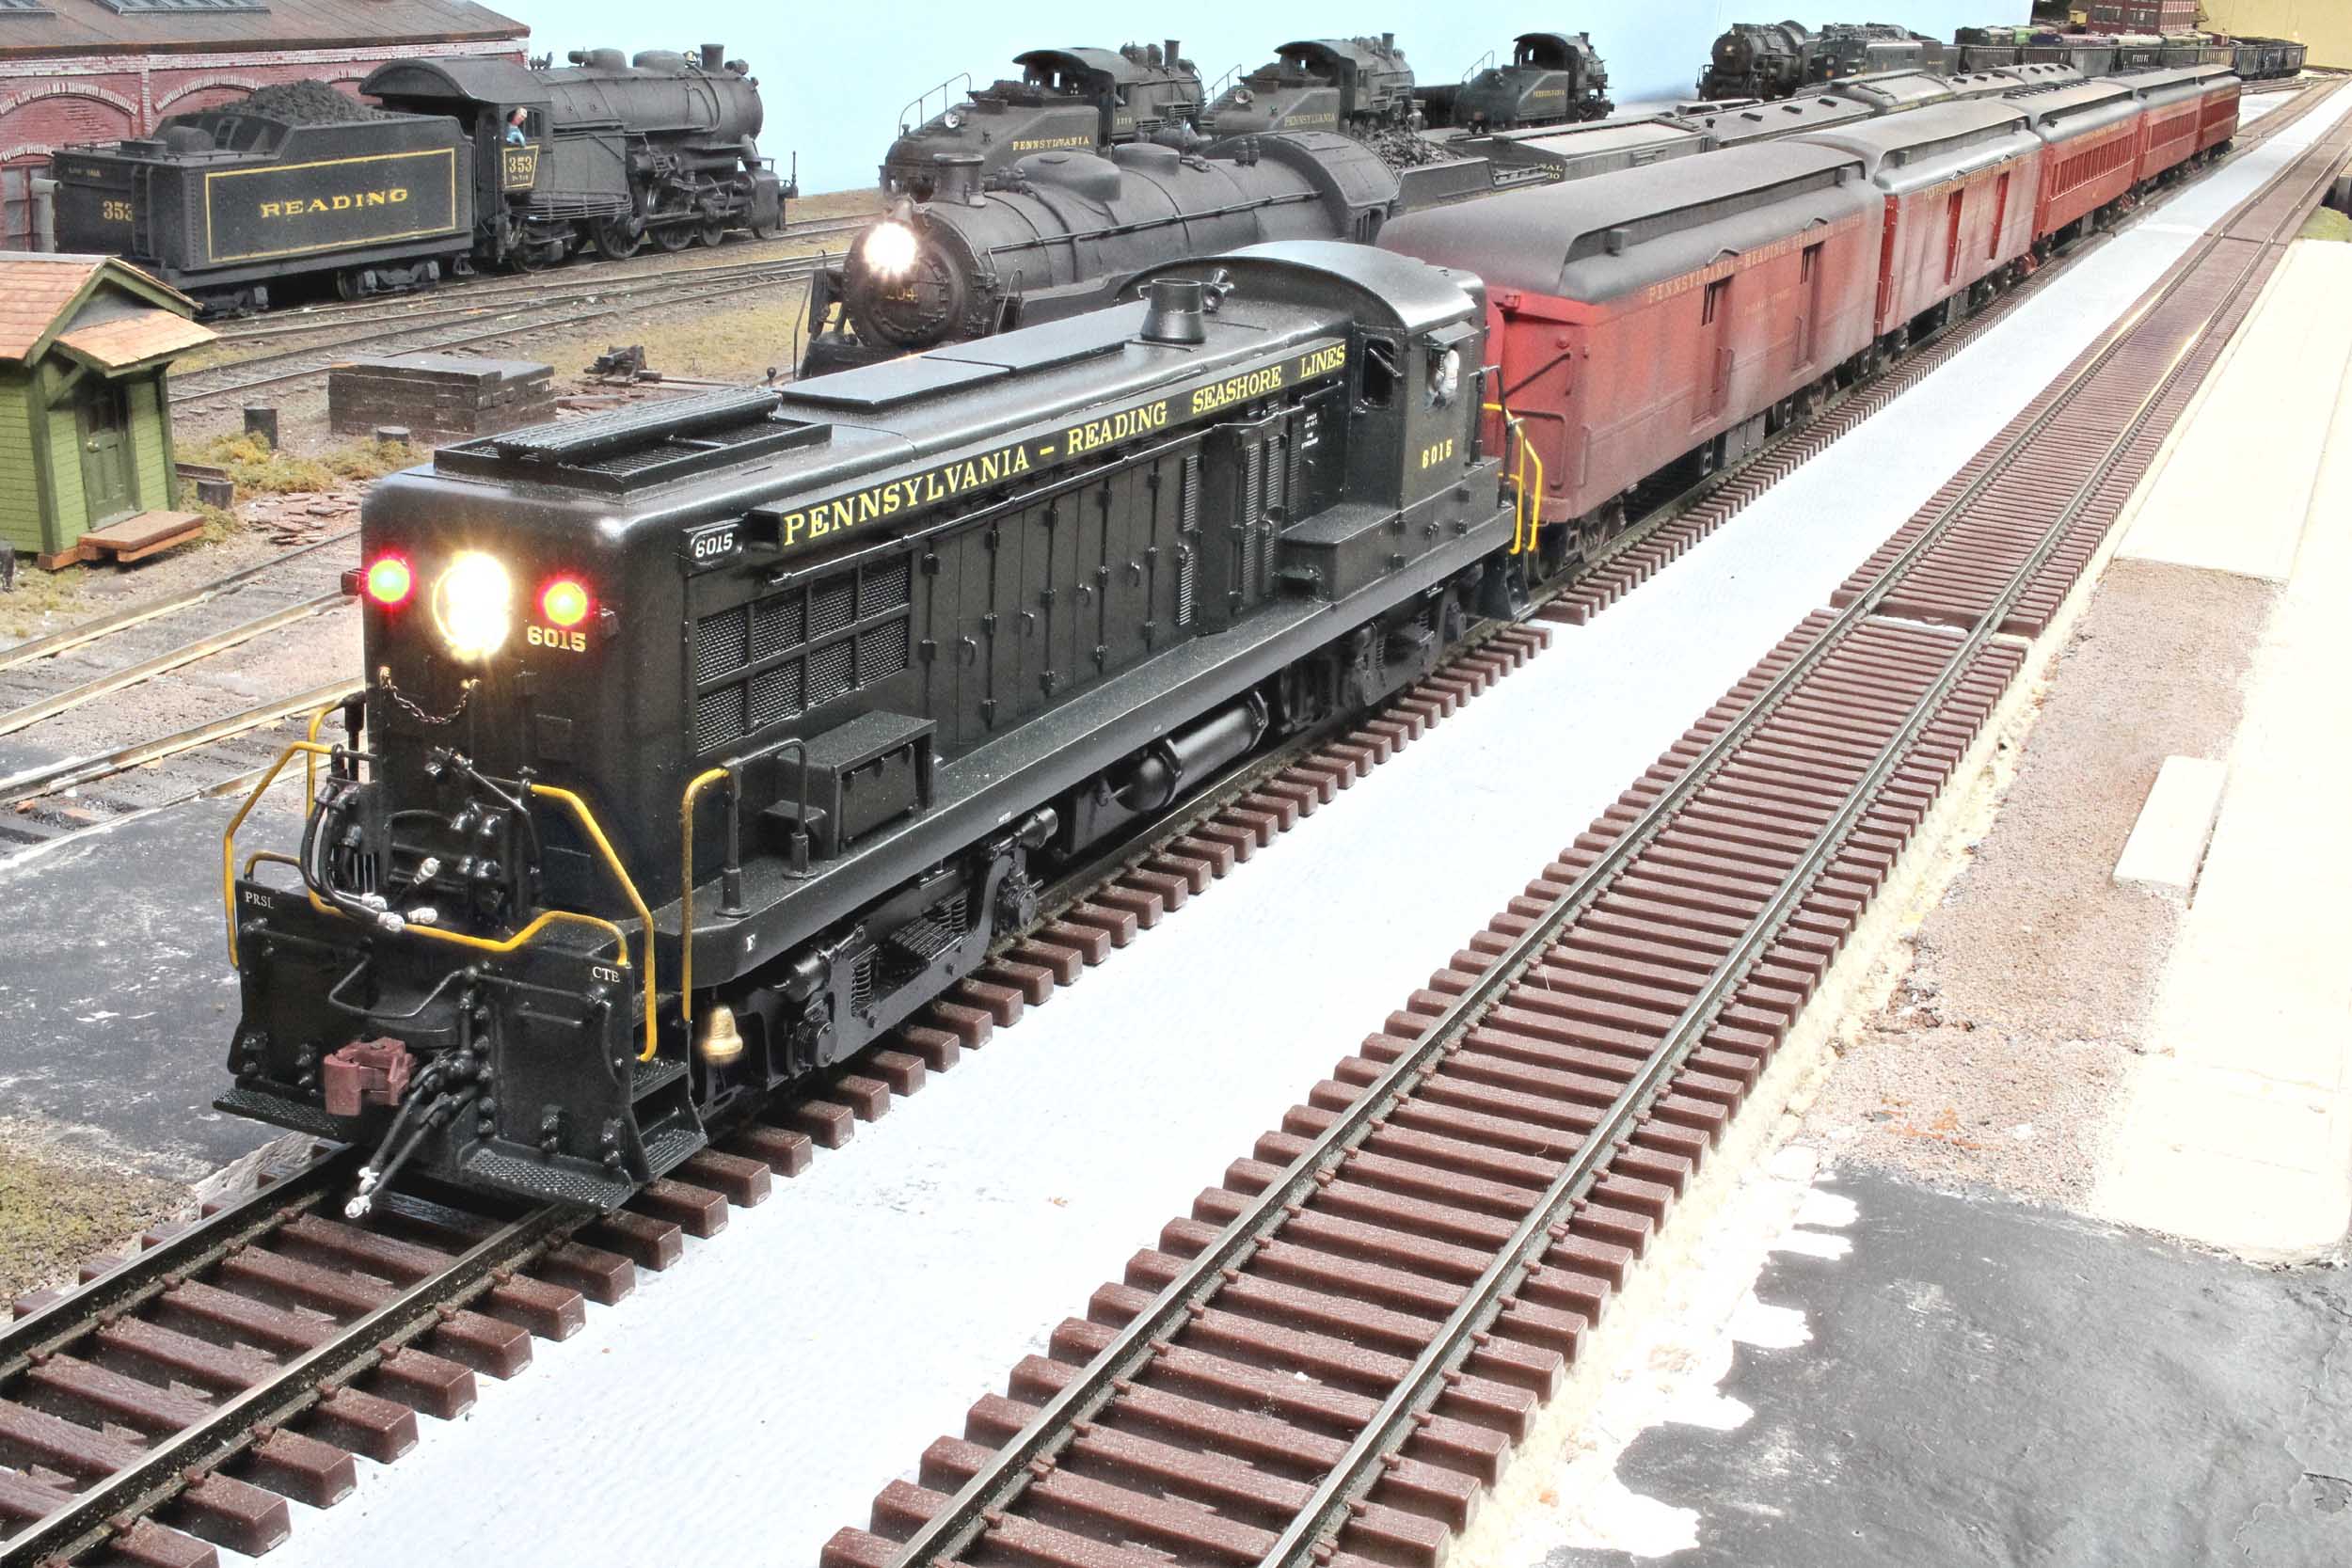
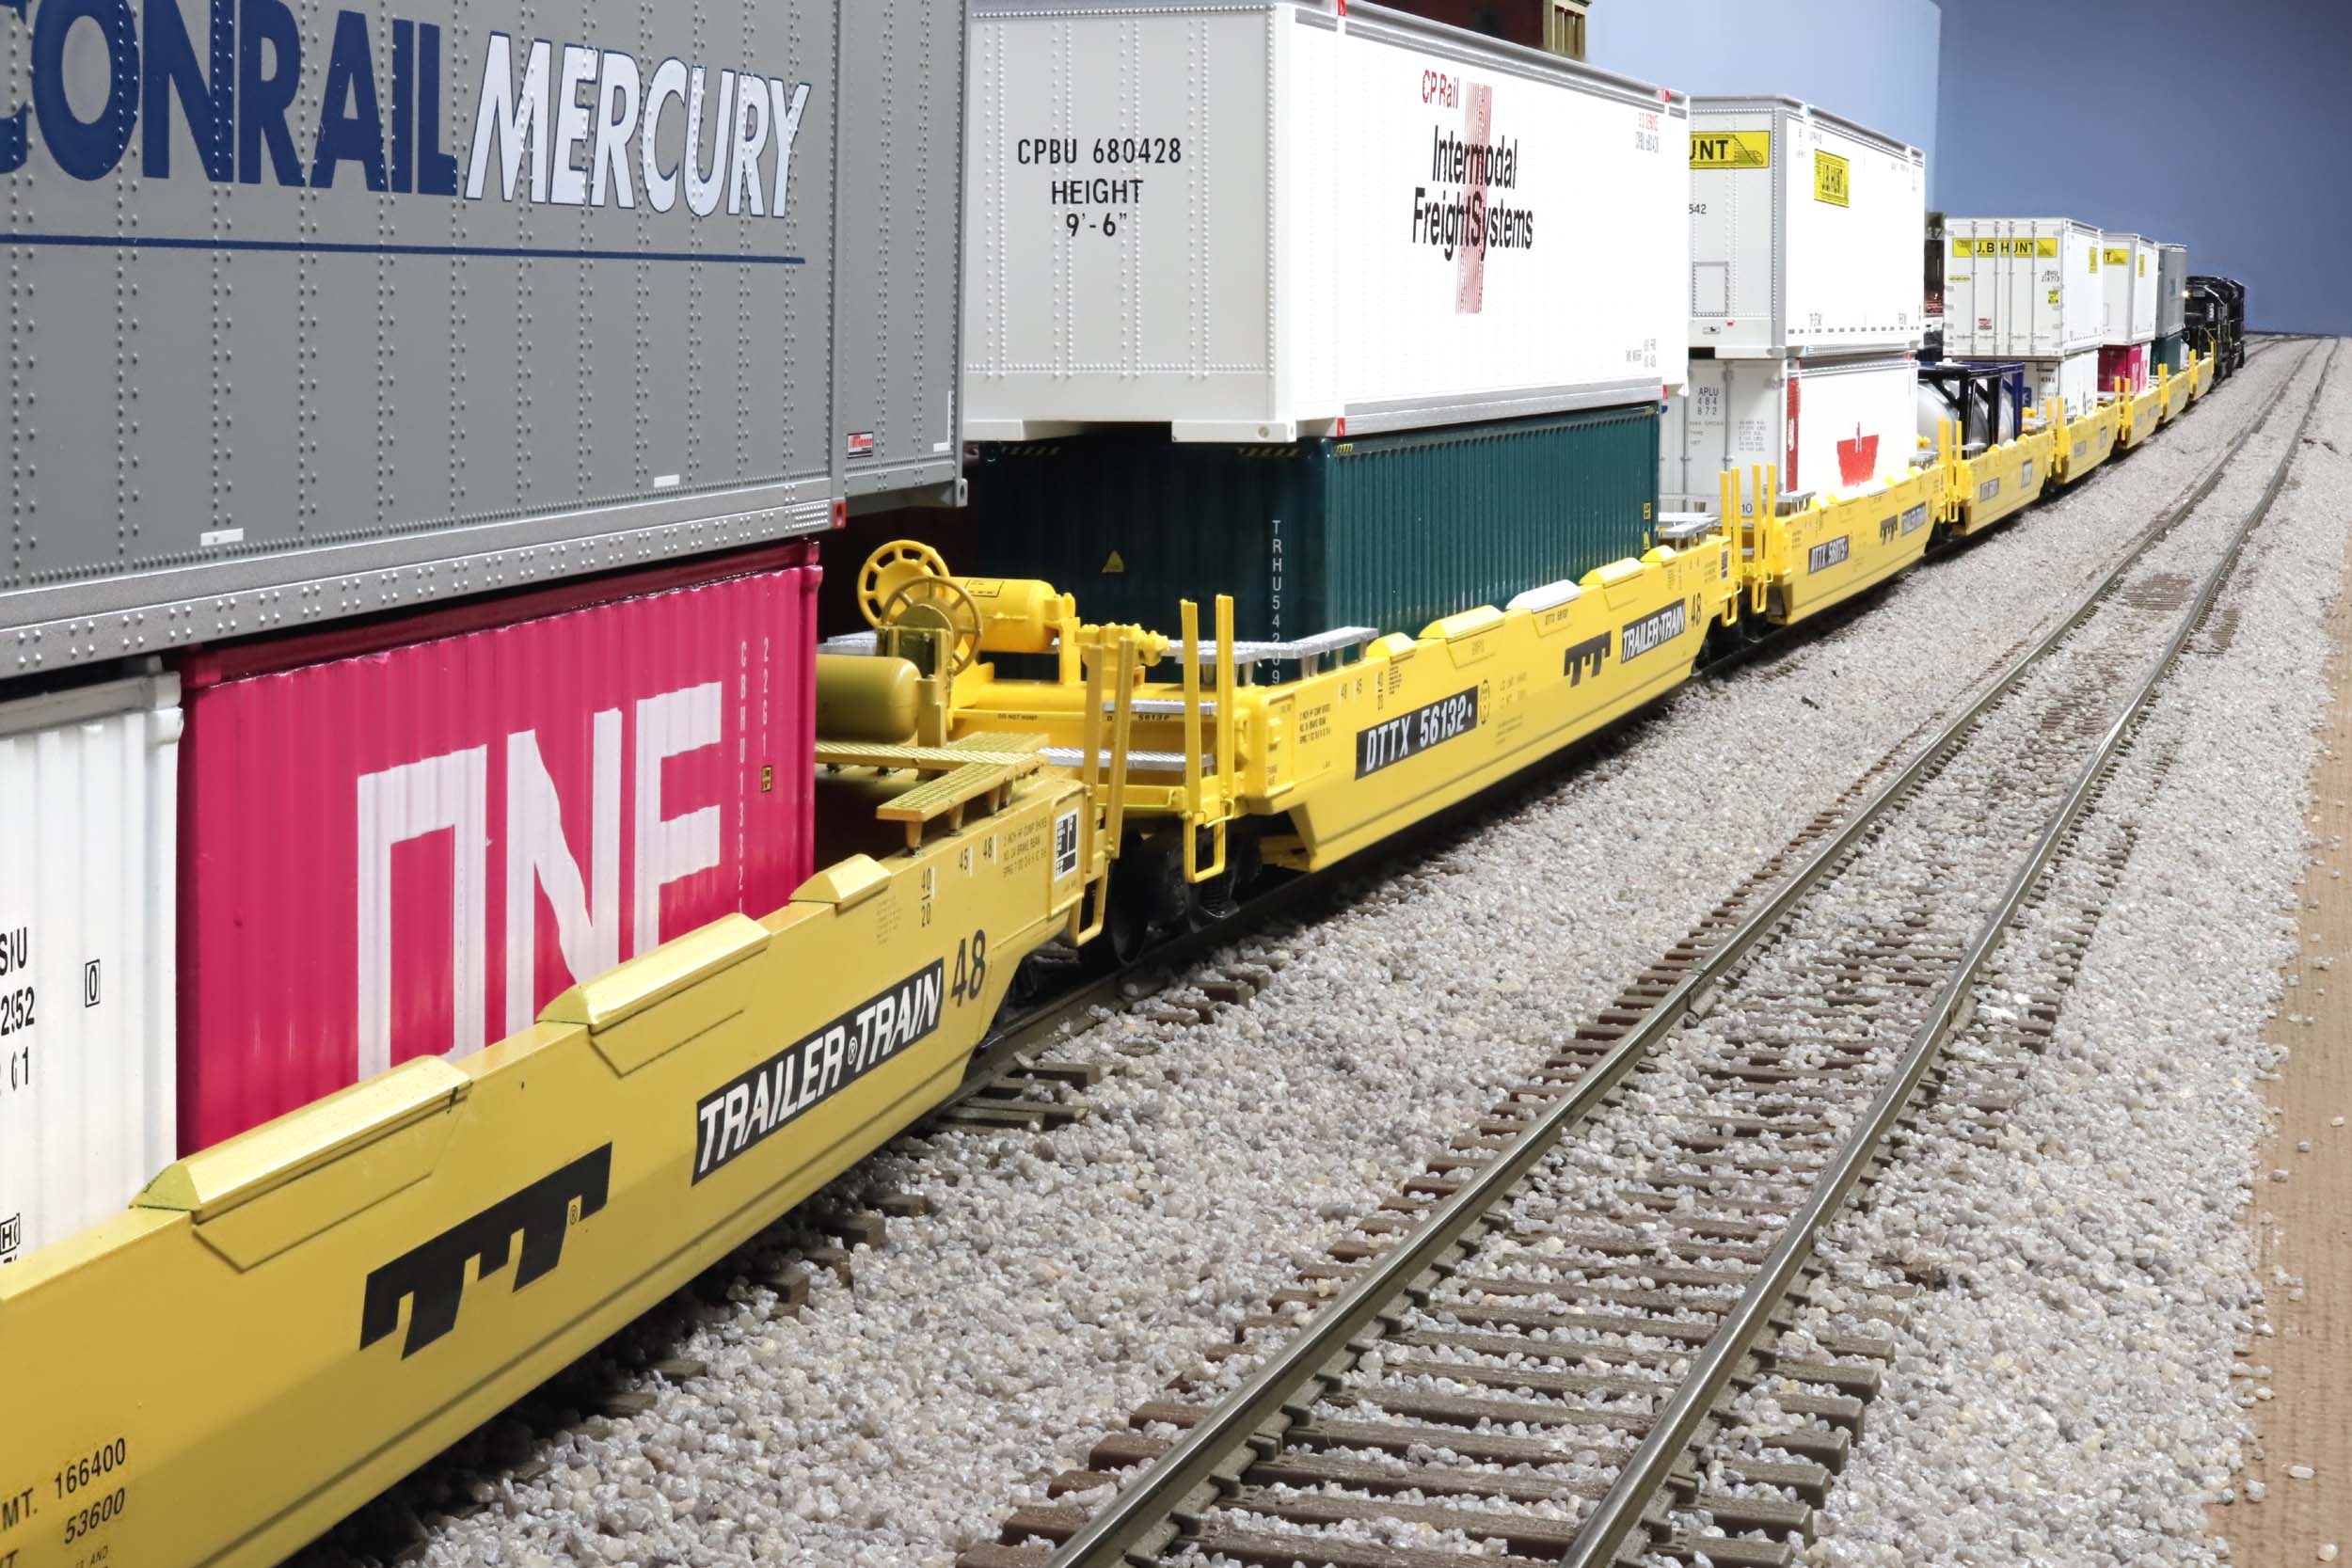
Layout Tour 9-22-18
A Little More Chessie
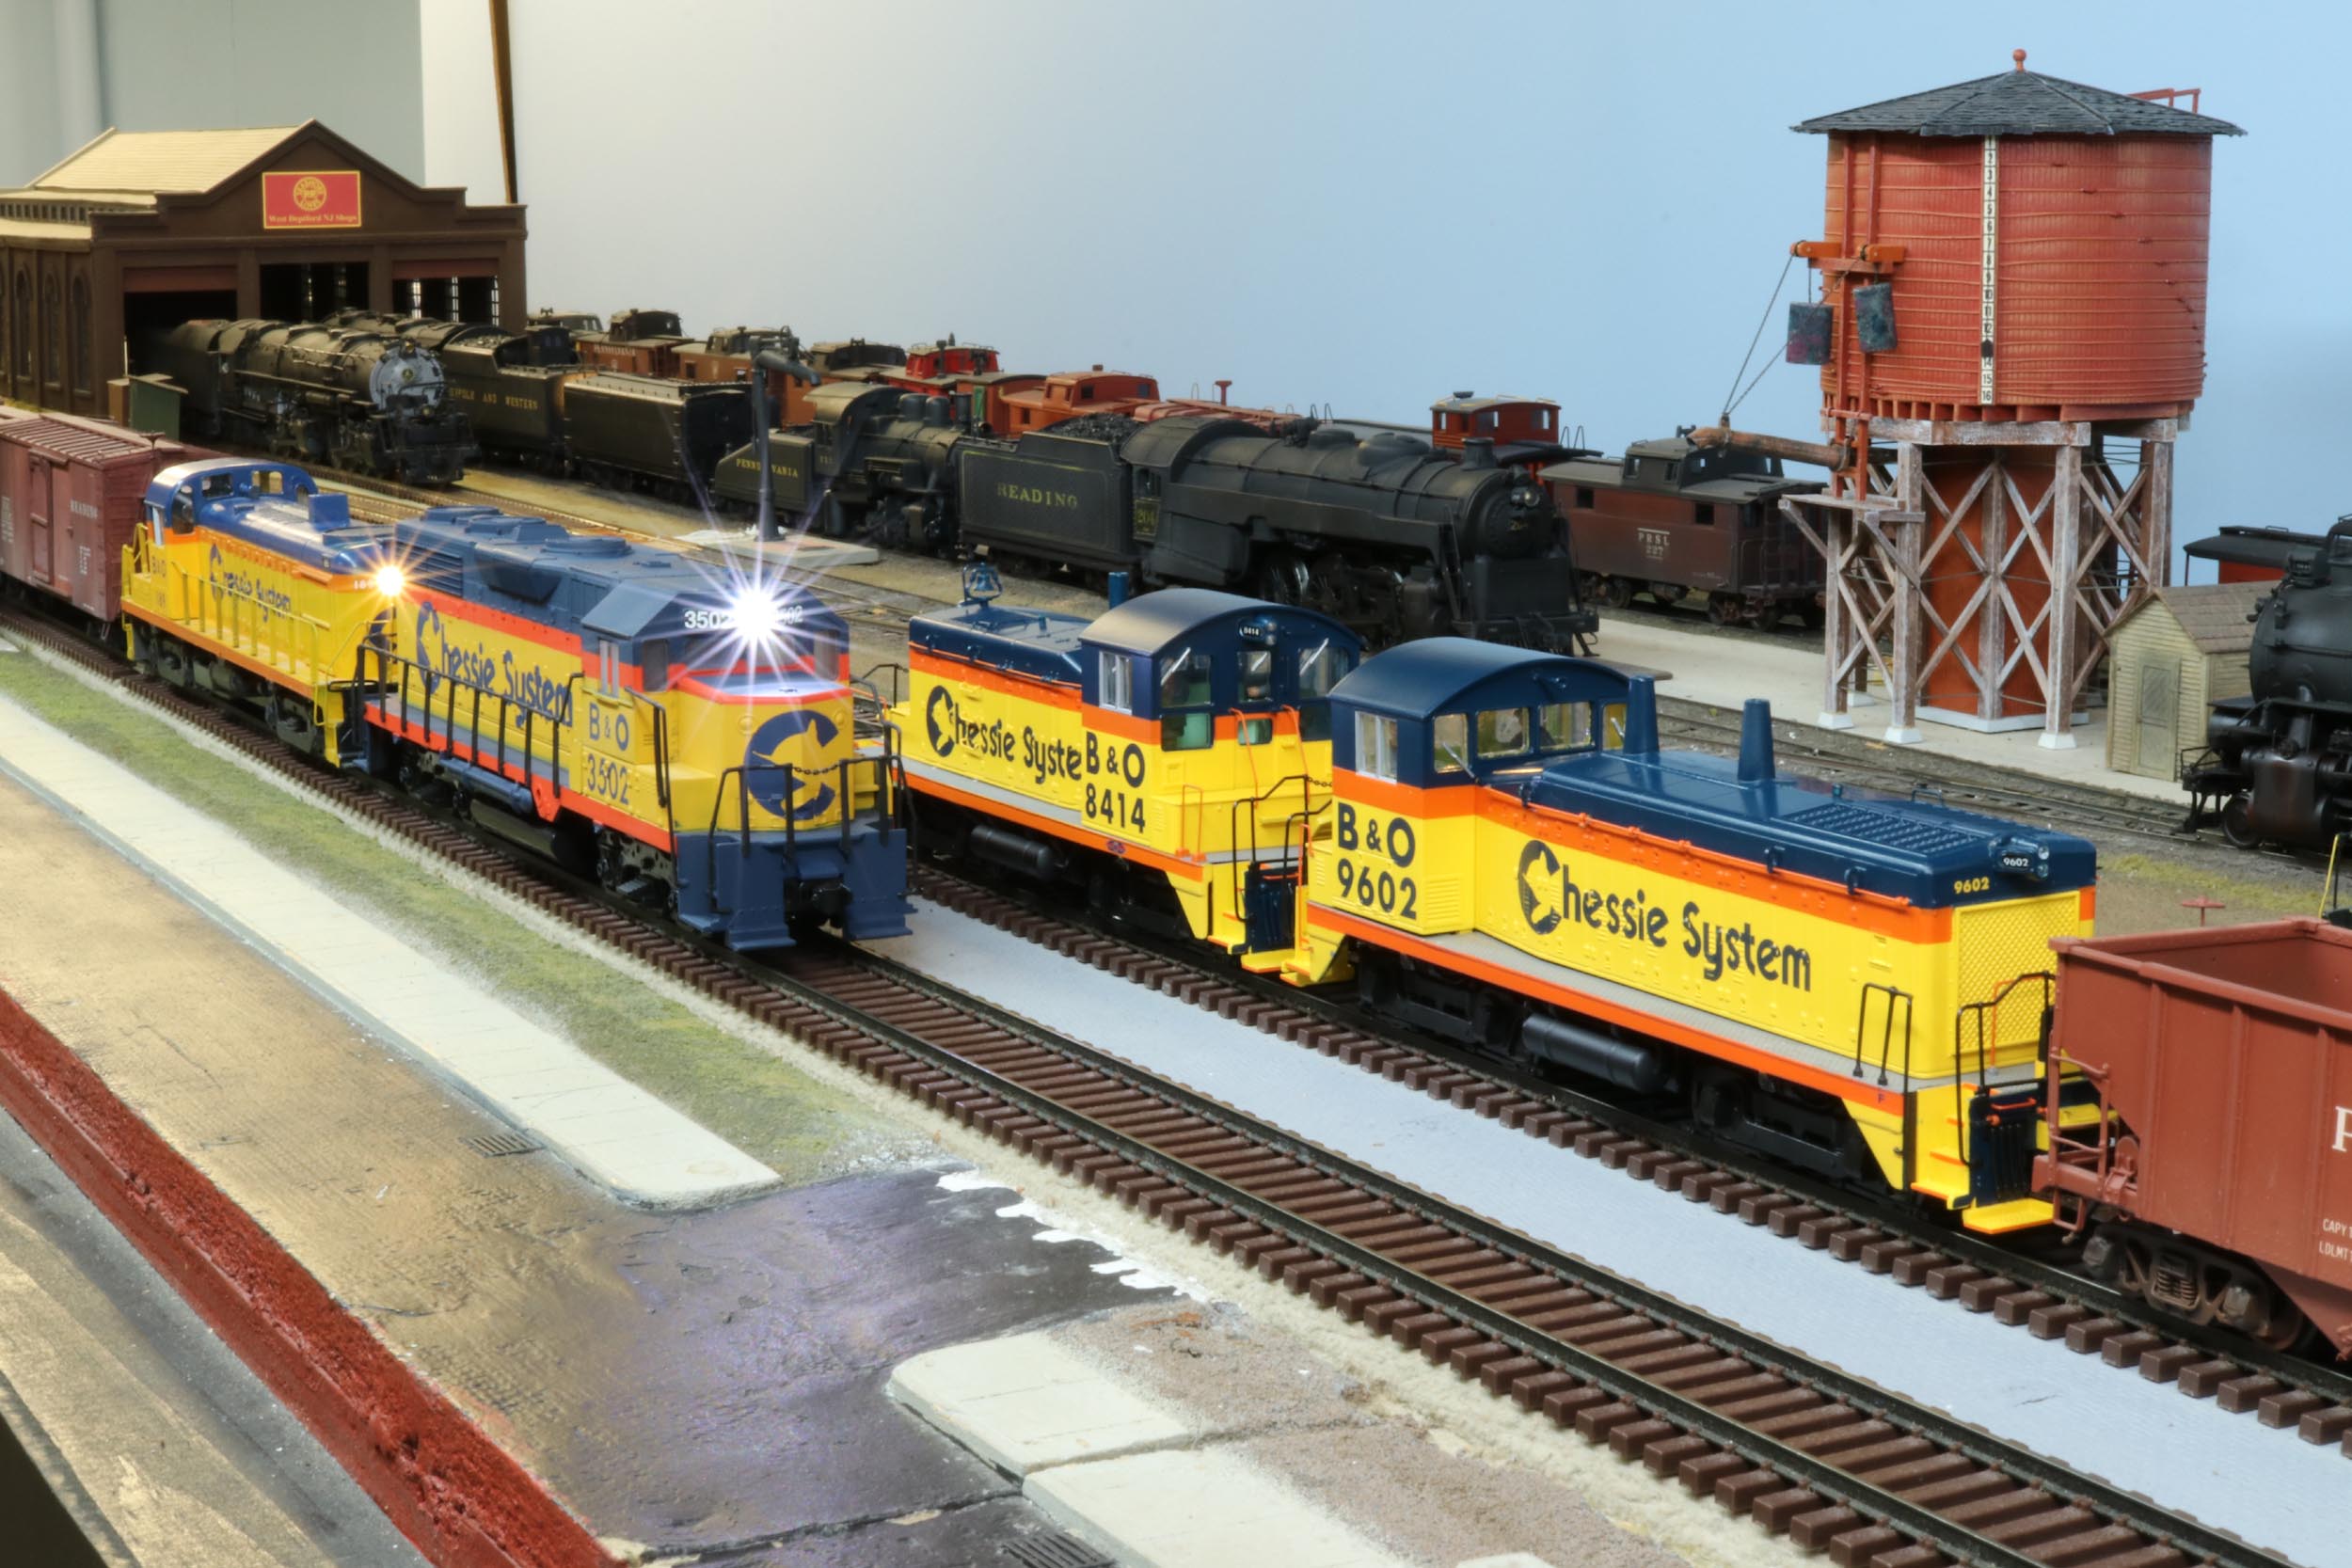
Added 12-27-18
After
the open house I got 2 more Chessie locos, a S Helper
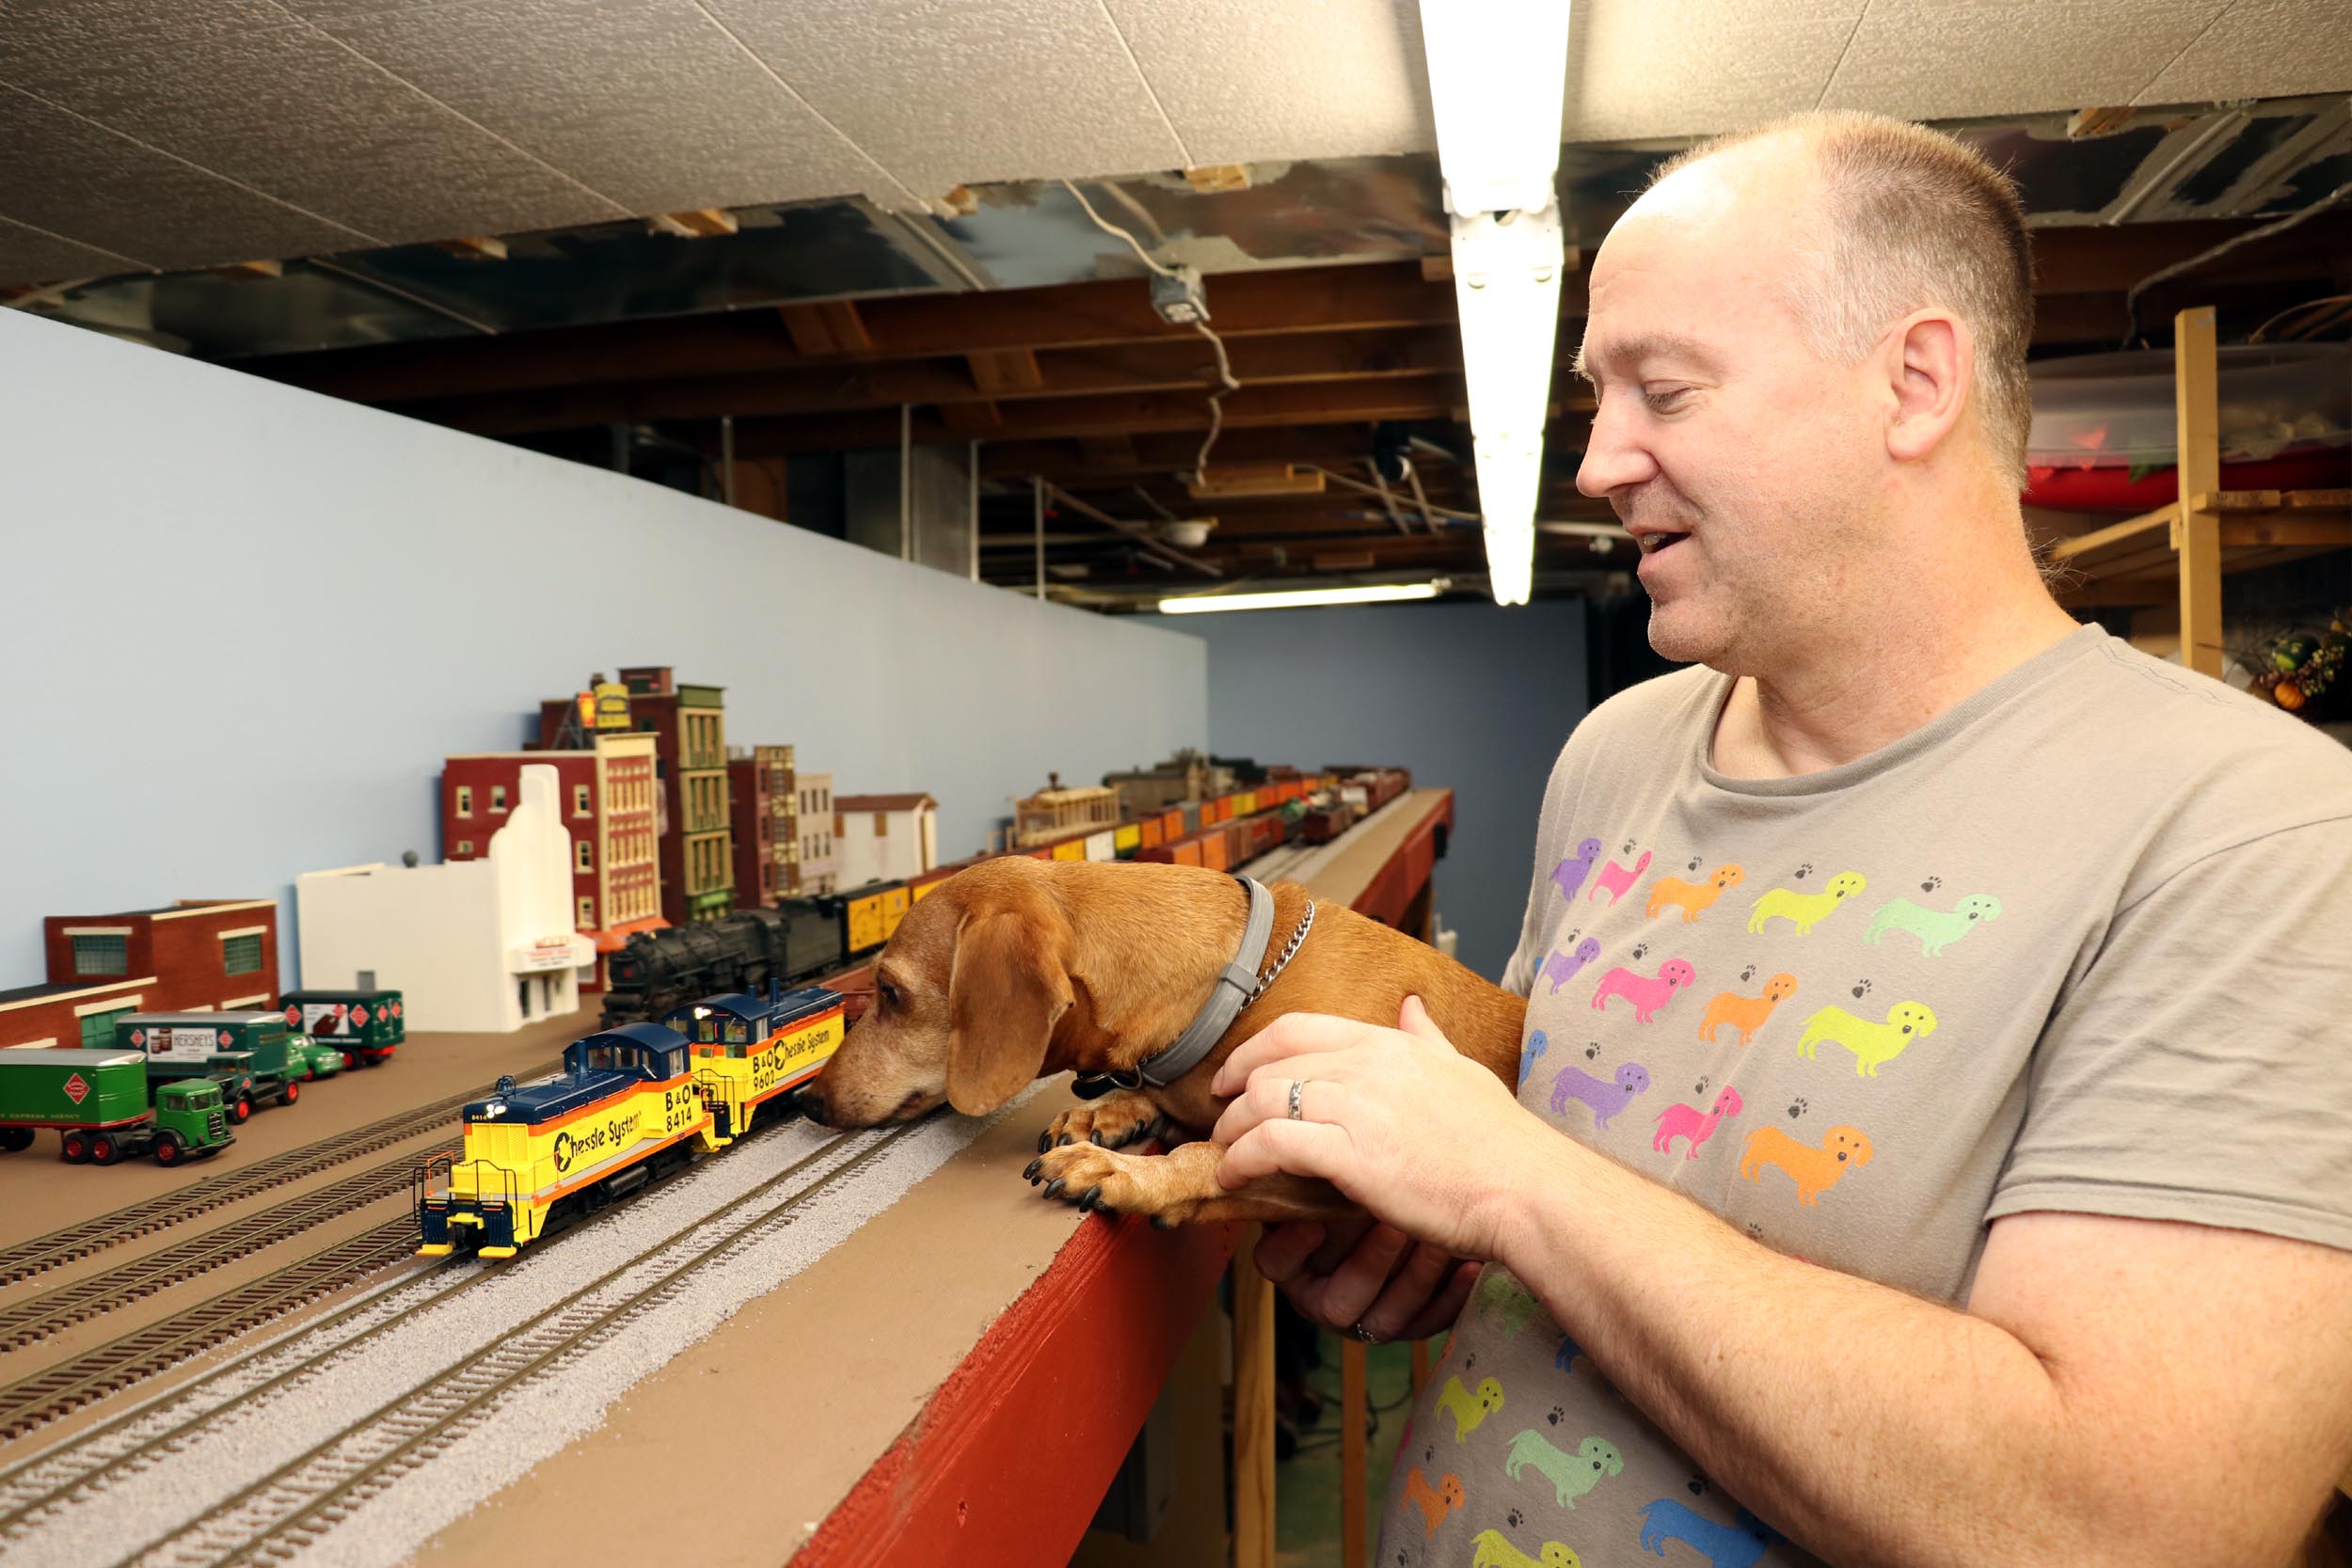
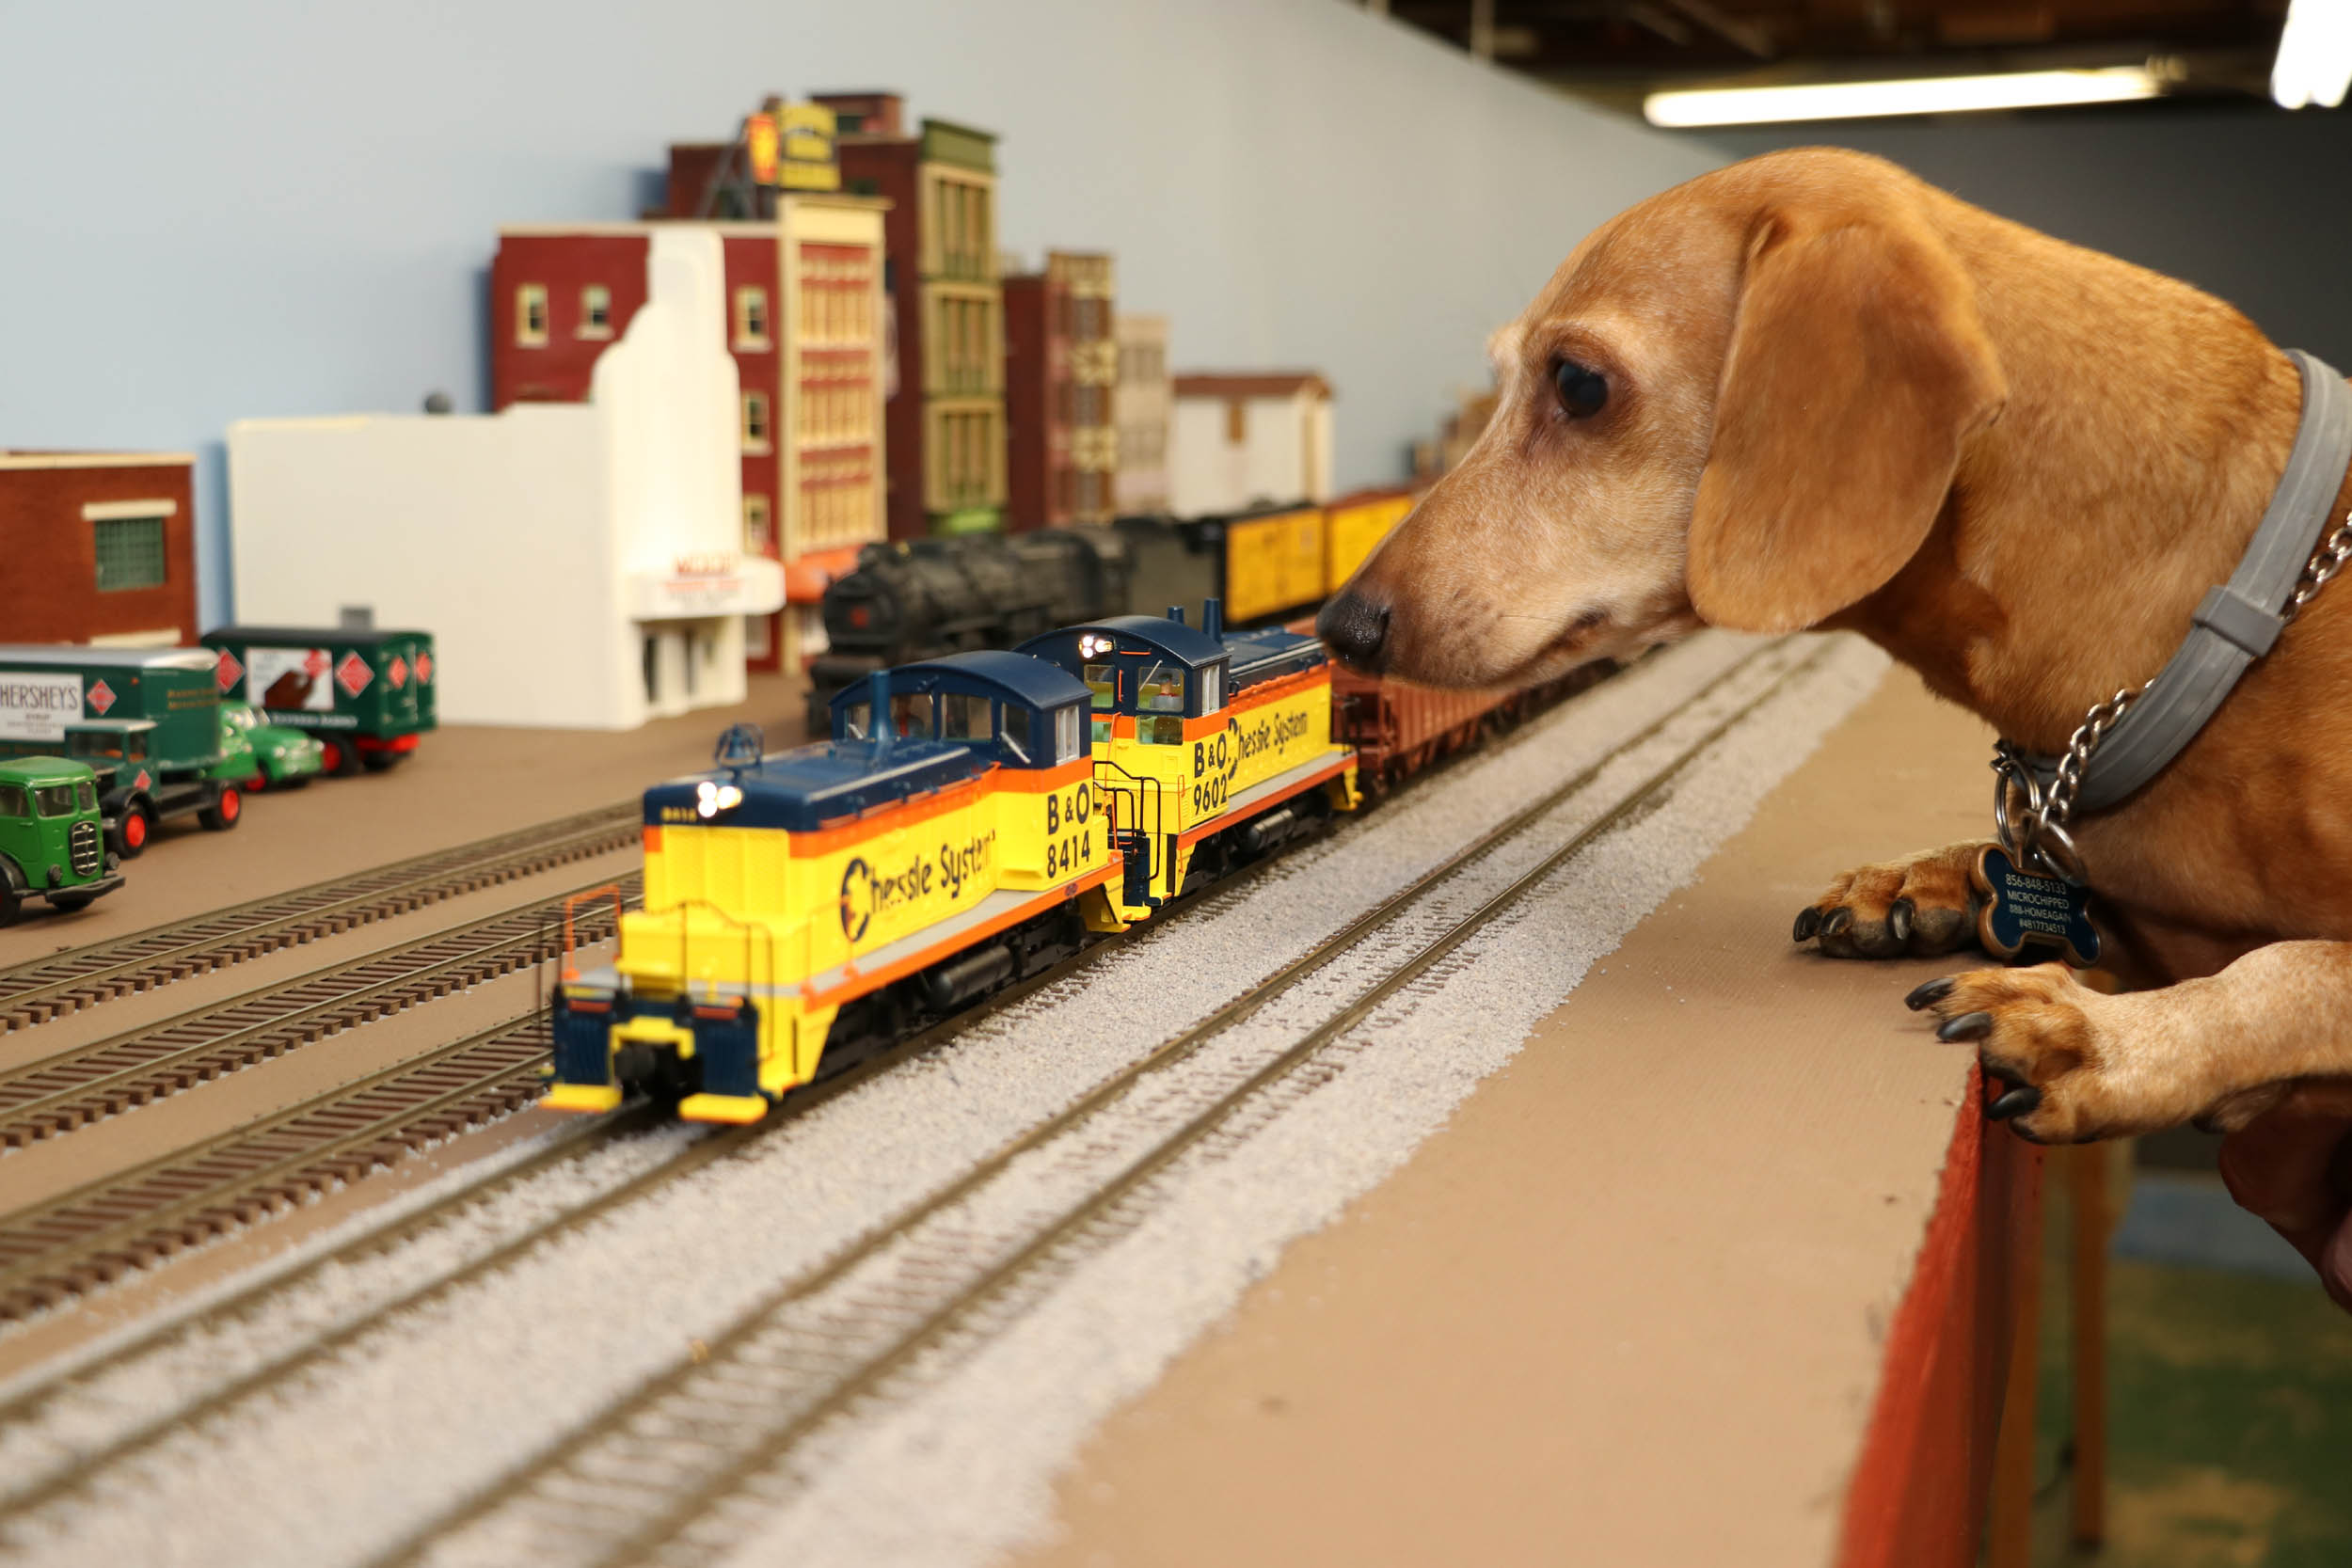
Service SW9 and American Models GP35. Pickles is
checking out the Chessie Cats on 10-5-18.
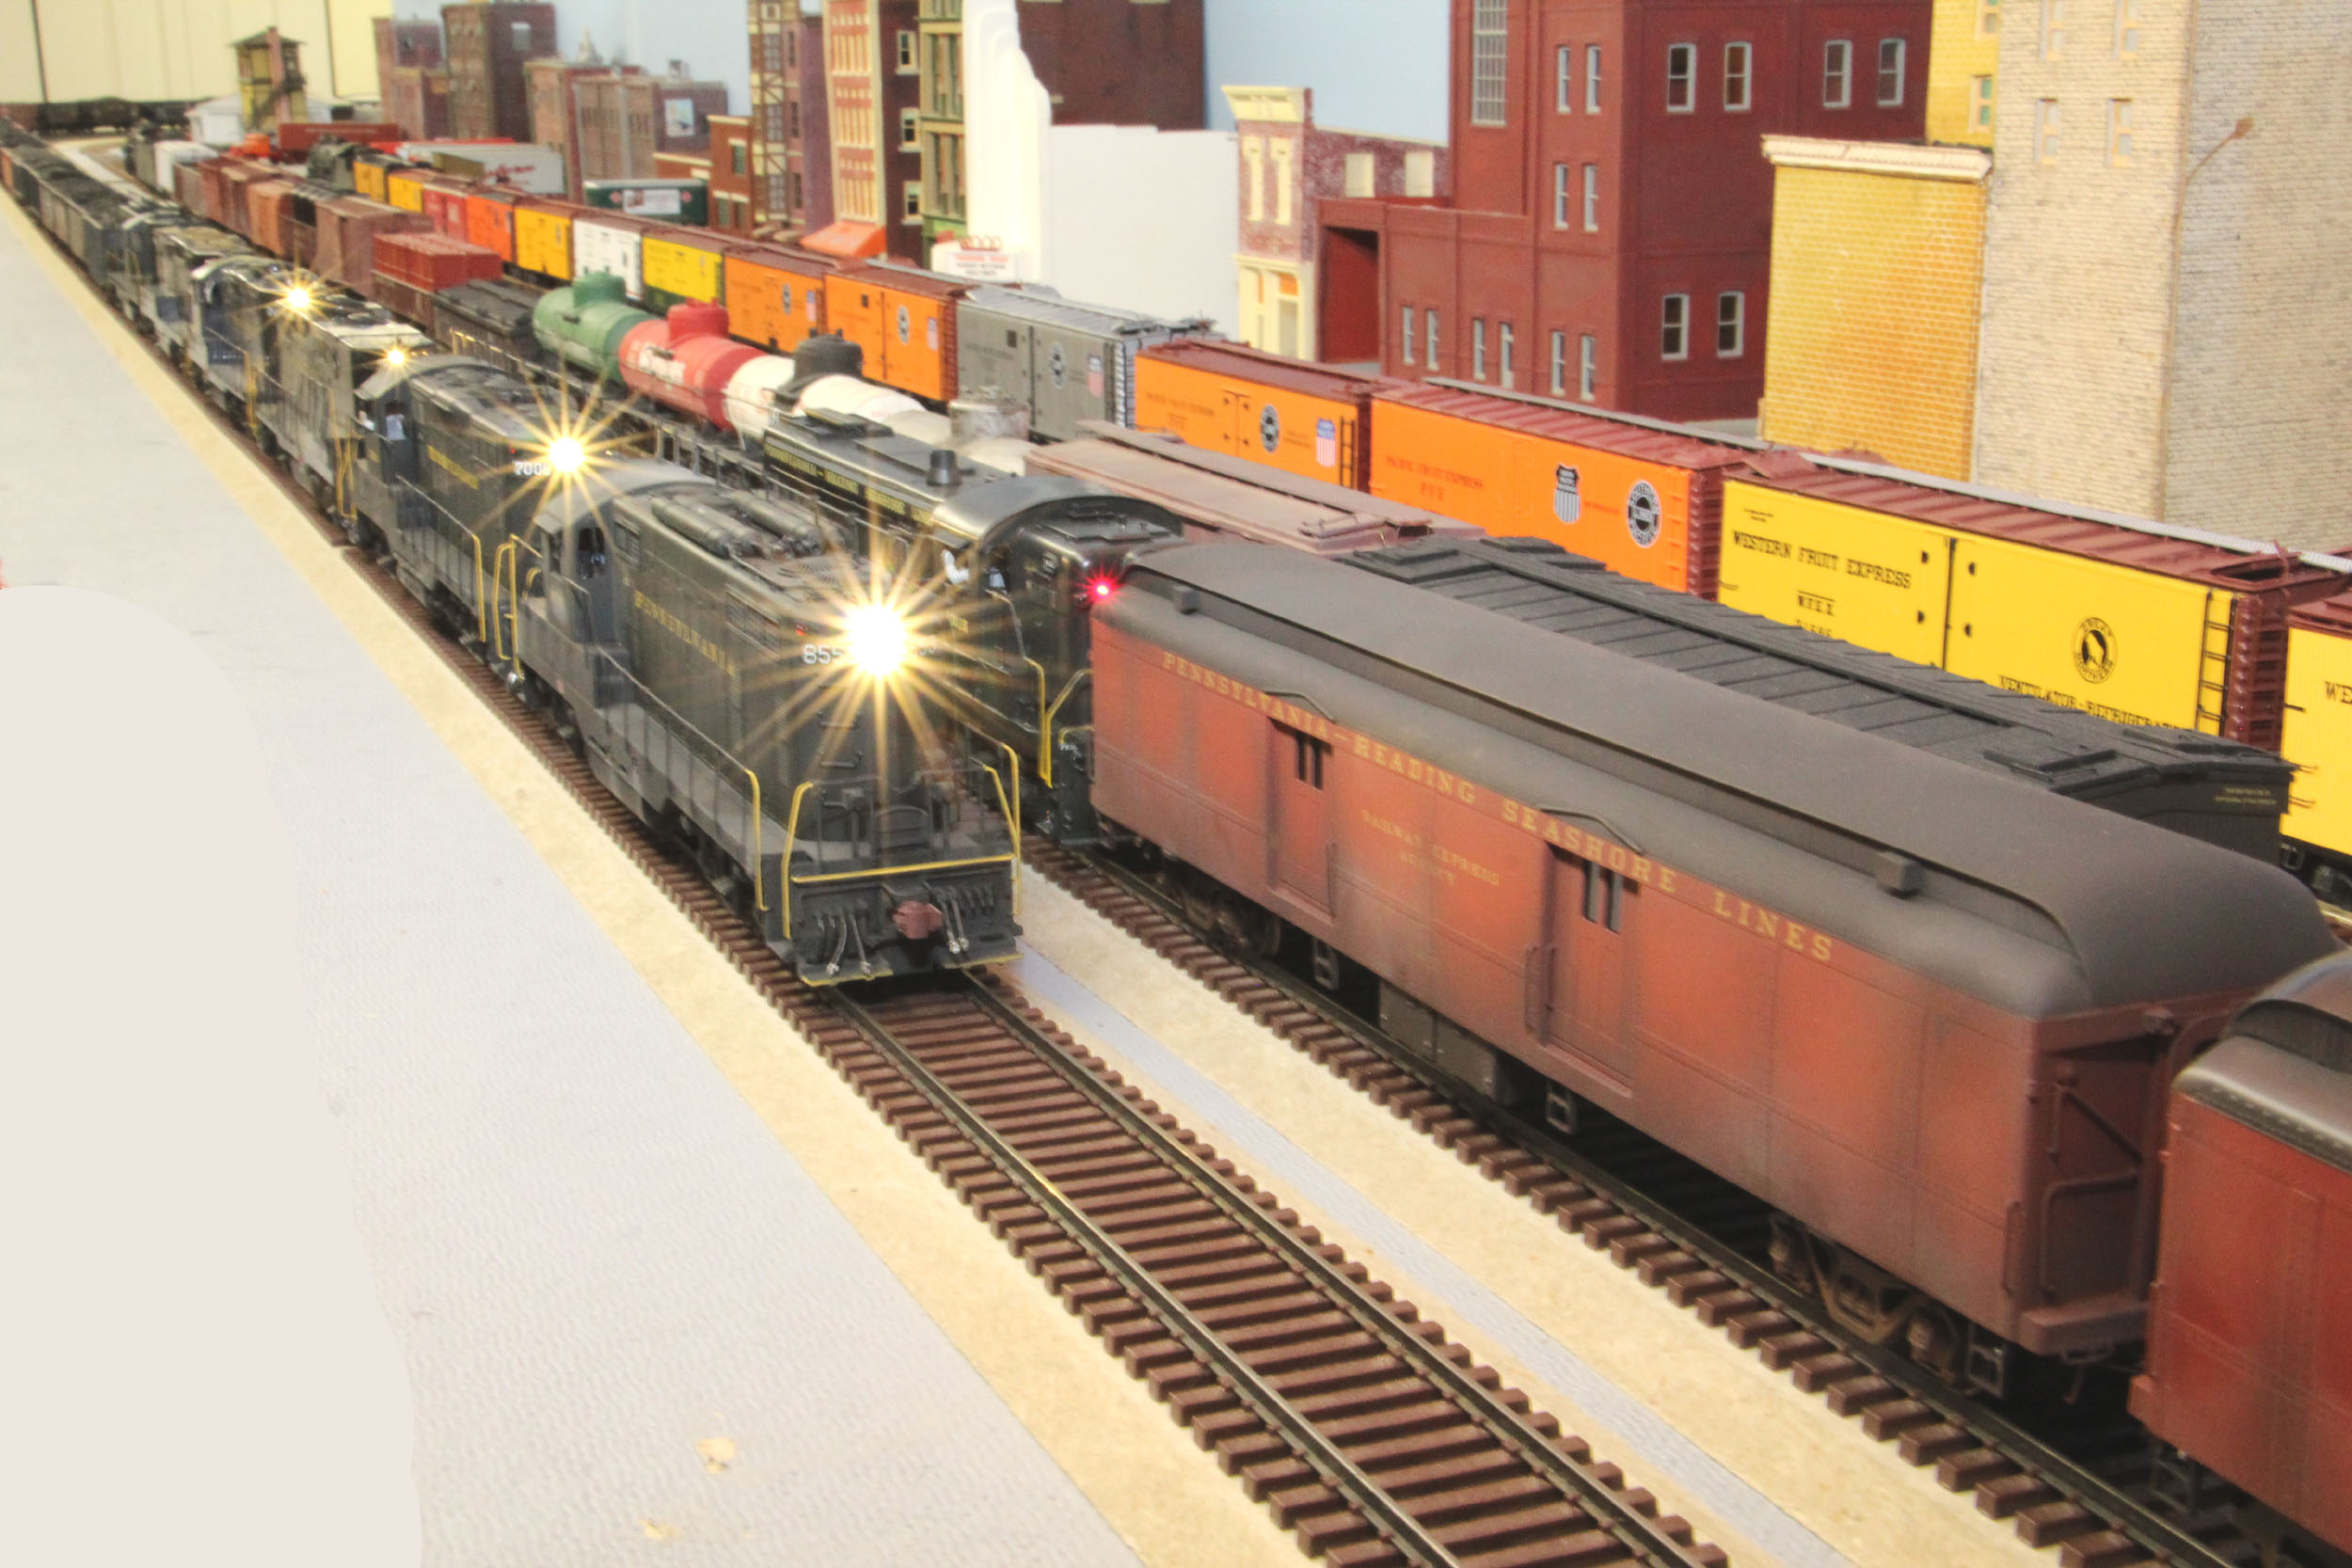
Helicon Focus Photos
Added 6-2-19
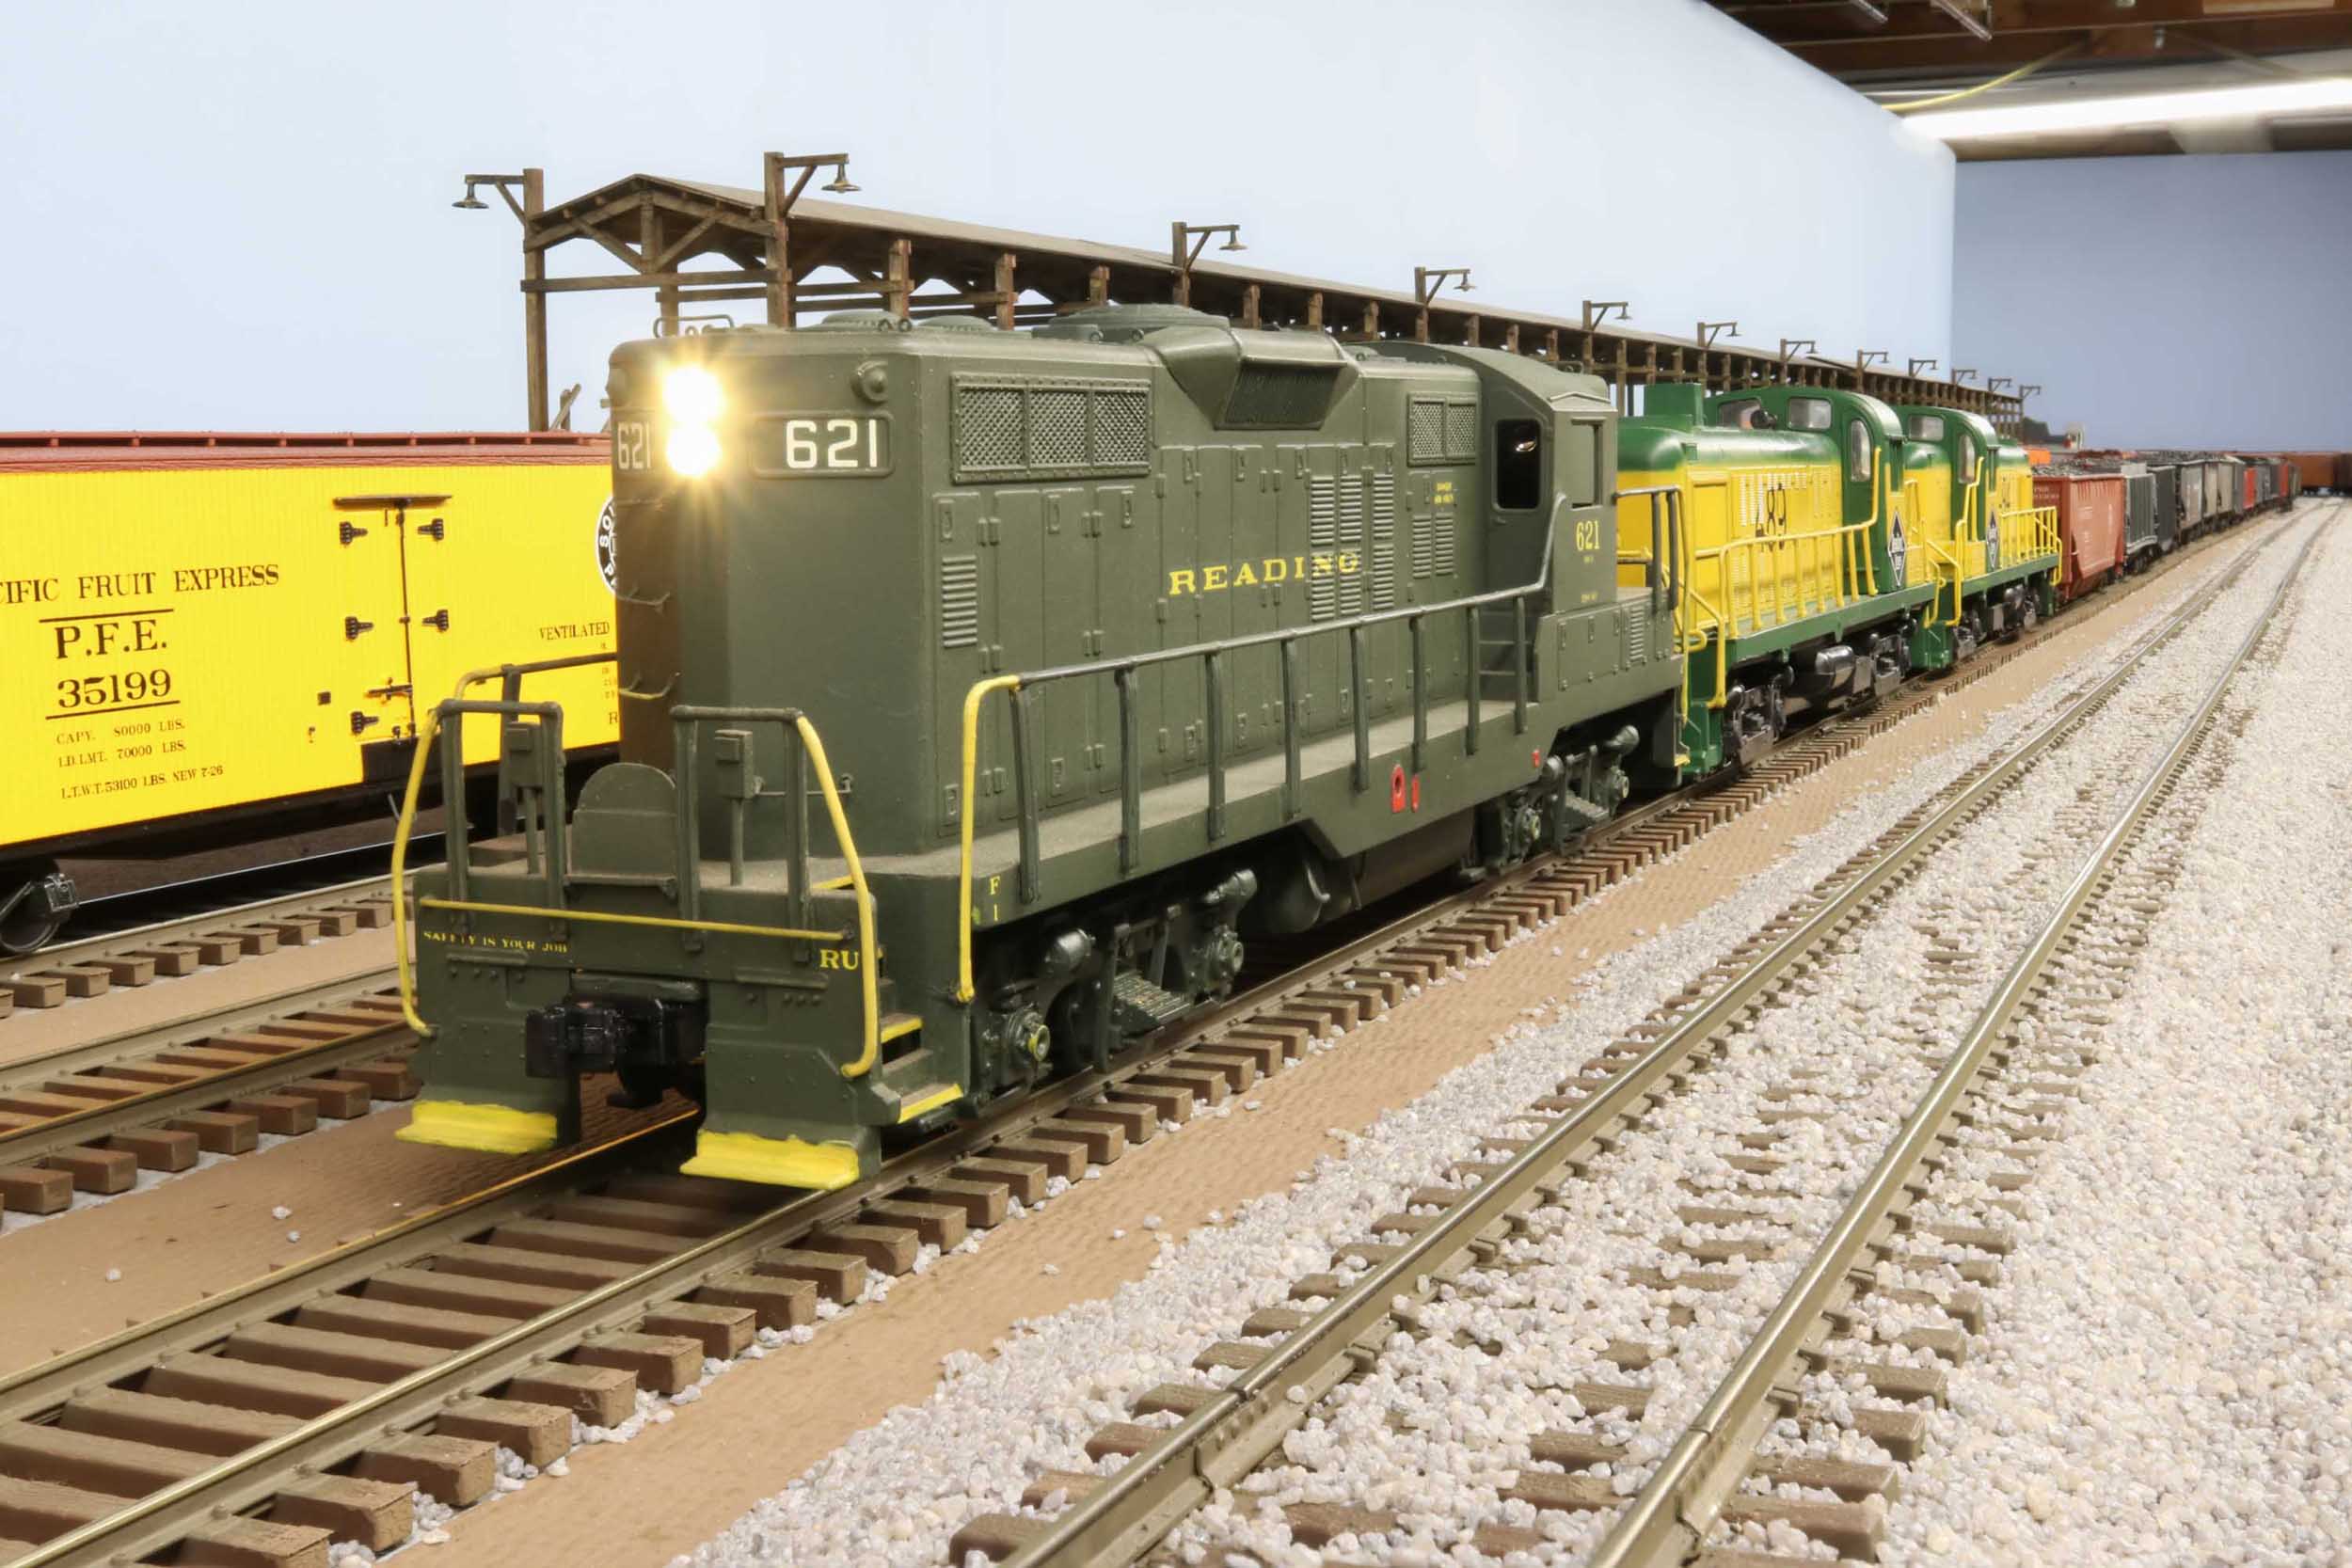
I
did photo stacking last year for a bit on the trial version of Helicon Focus
but I finally bought it. They are all 10-15 photos taken at slightly different
focus points rendered into 1 photo. This is all controlled by the computer.
Helicon syncs to the camera (Canon 80D) and does all the driving. It gives you
extreme depth of field and clarity you are just not going to get with a single
frame and small aperture. Believe me I have tried!
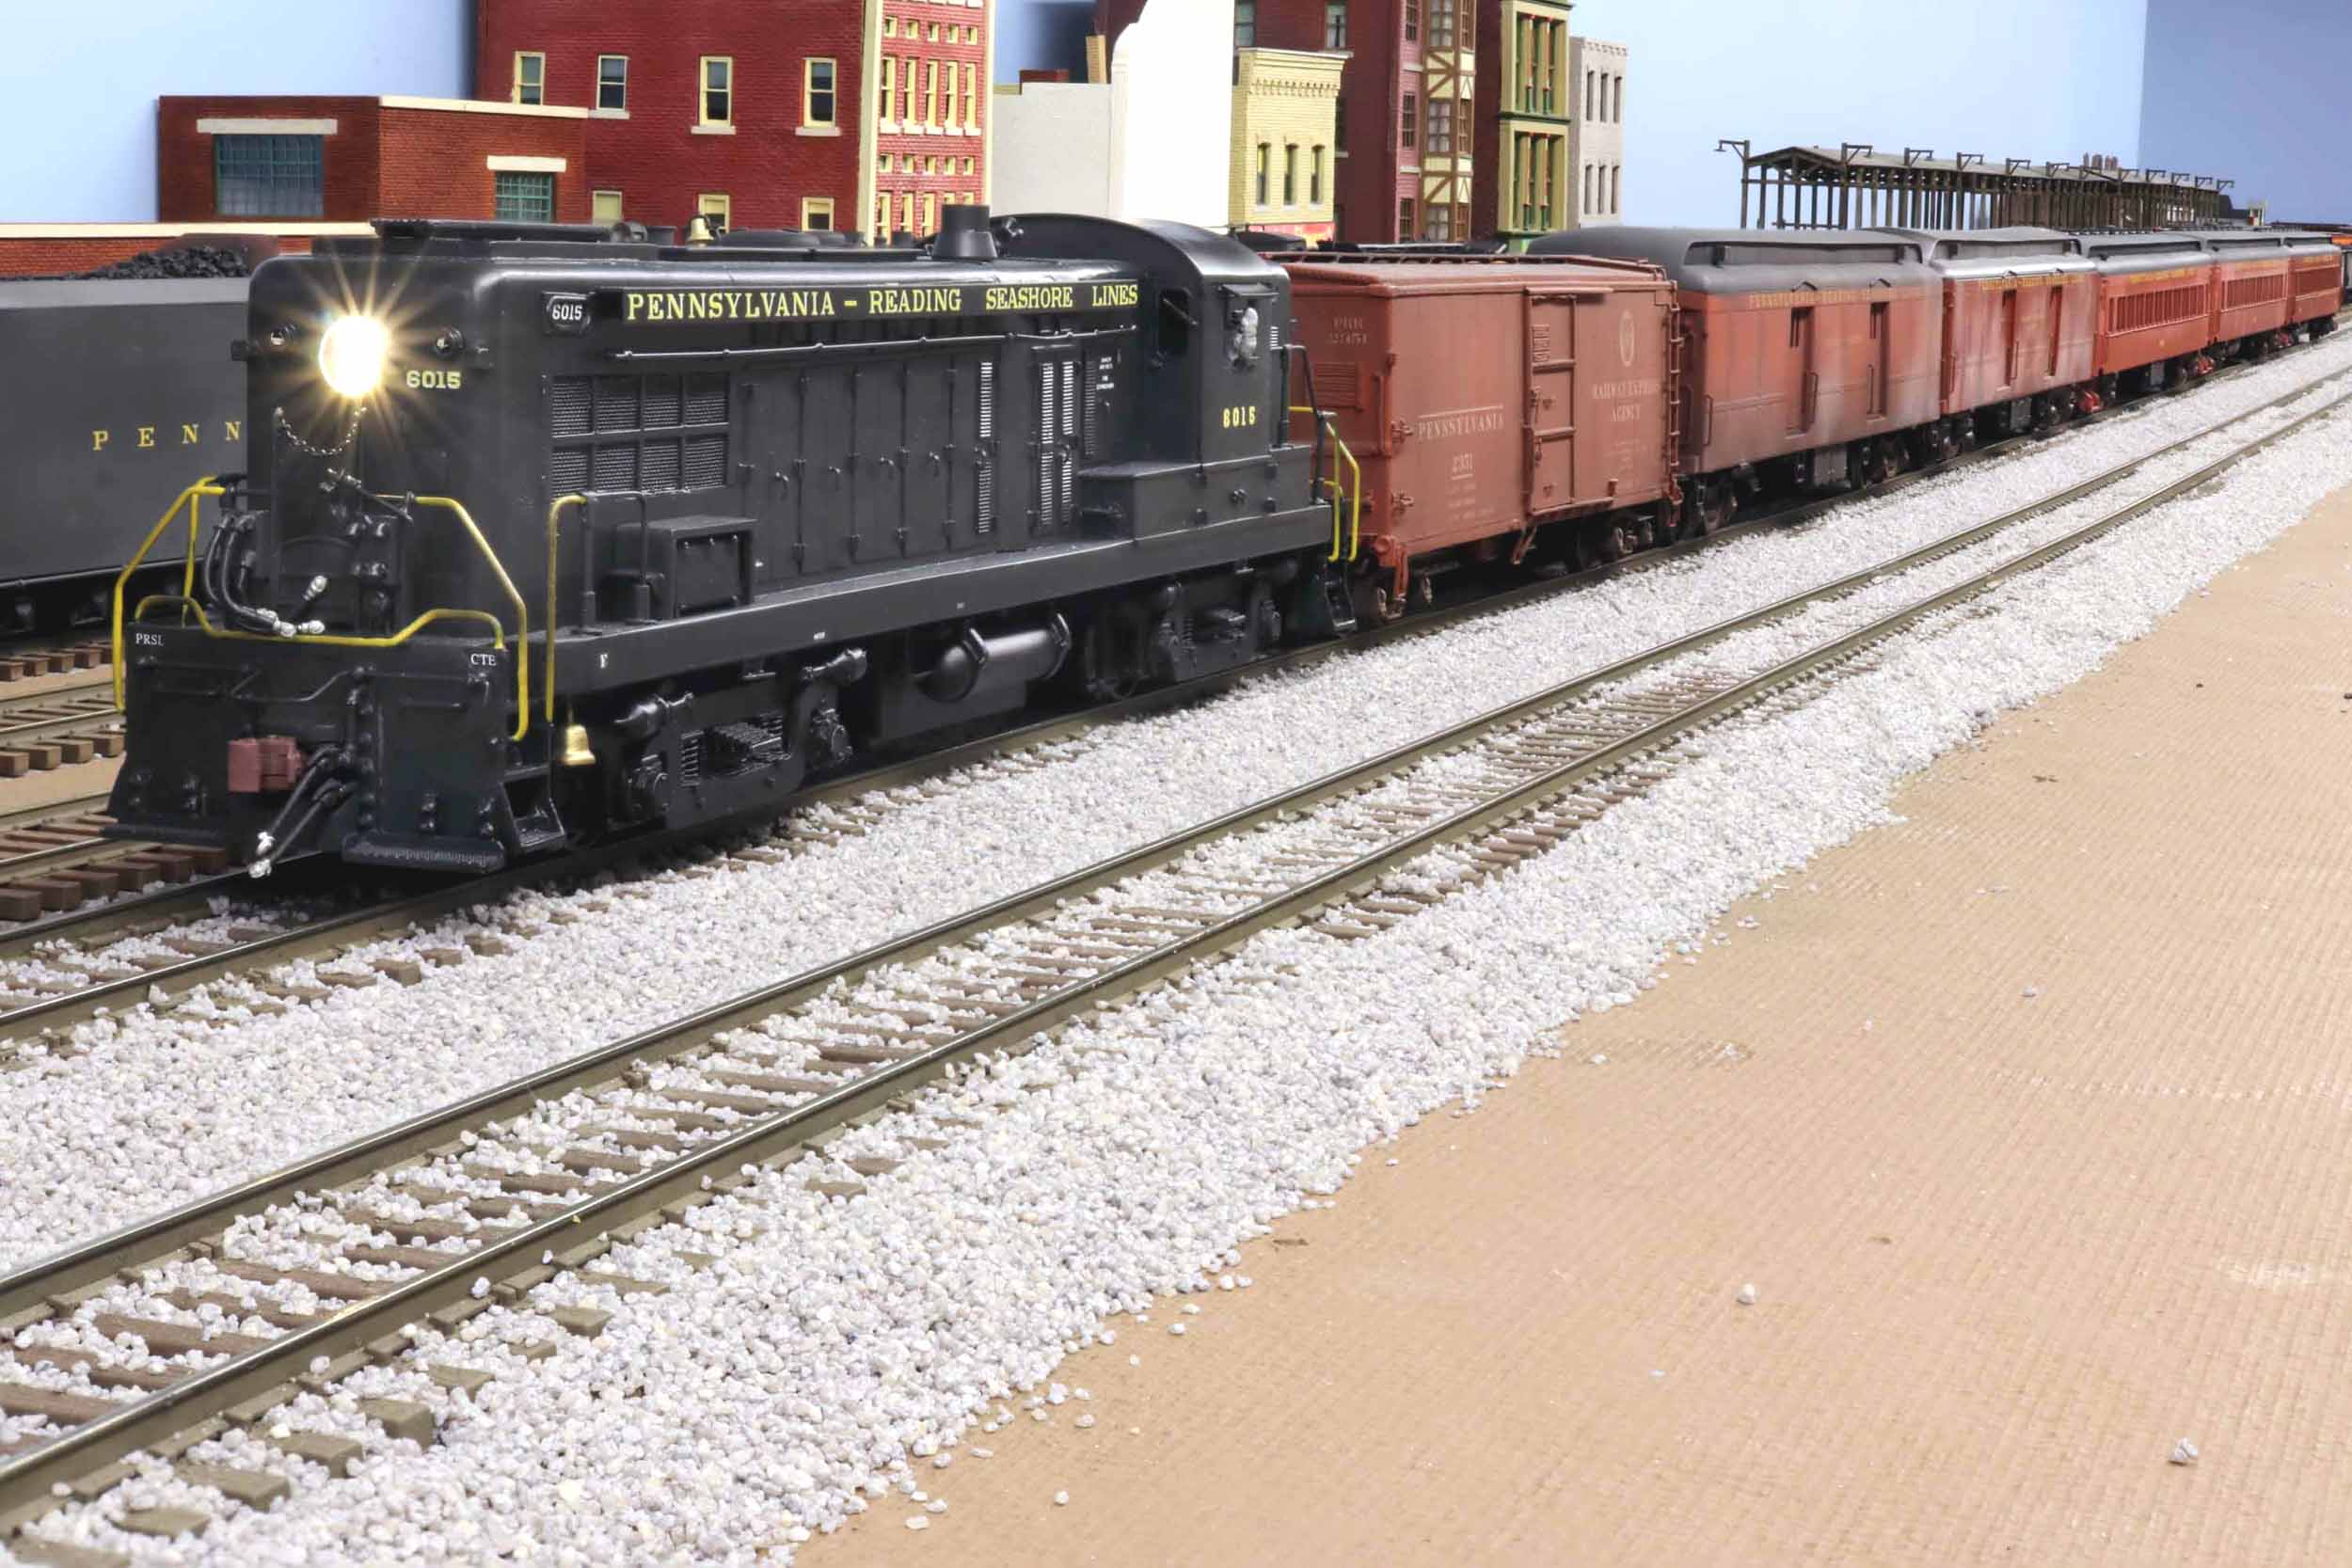

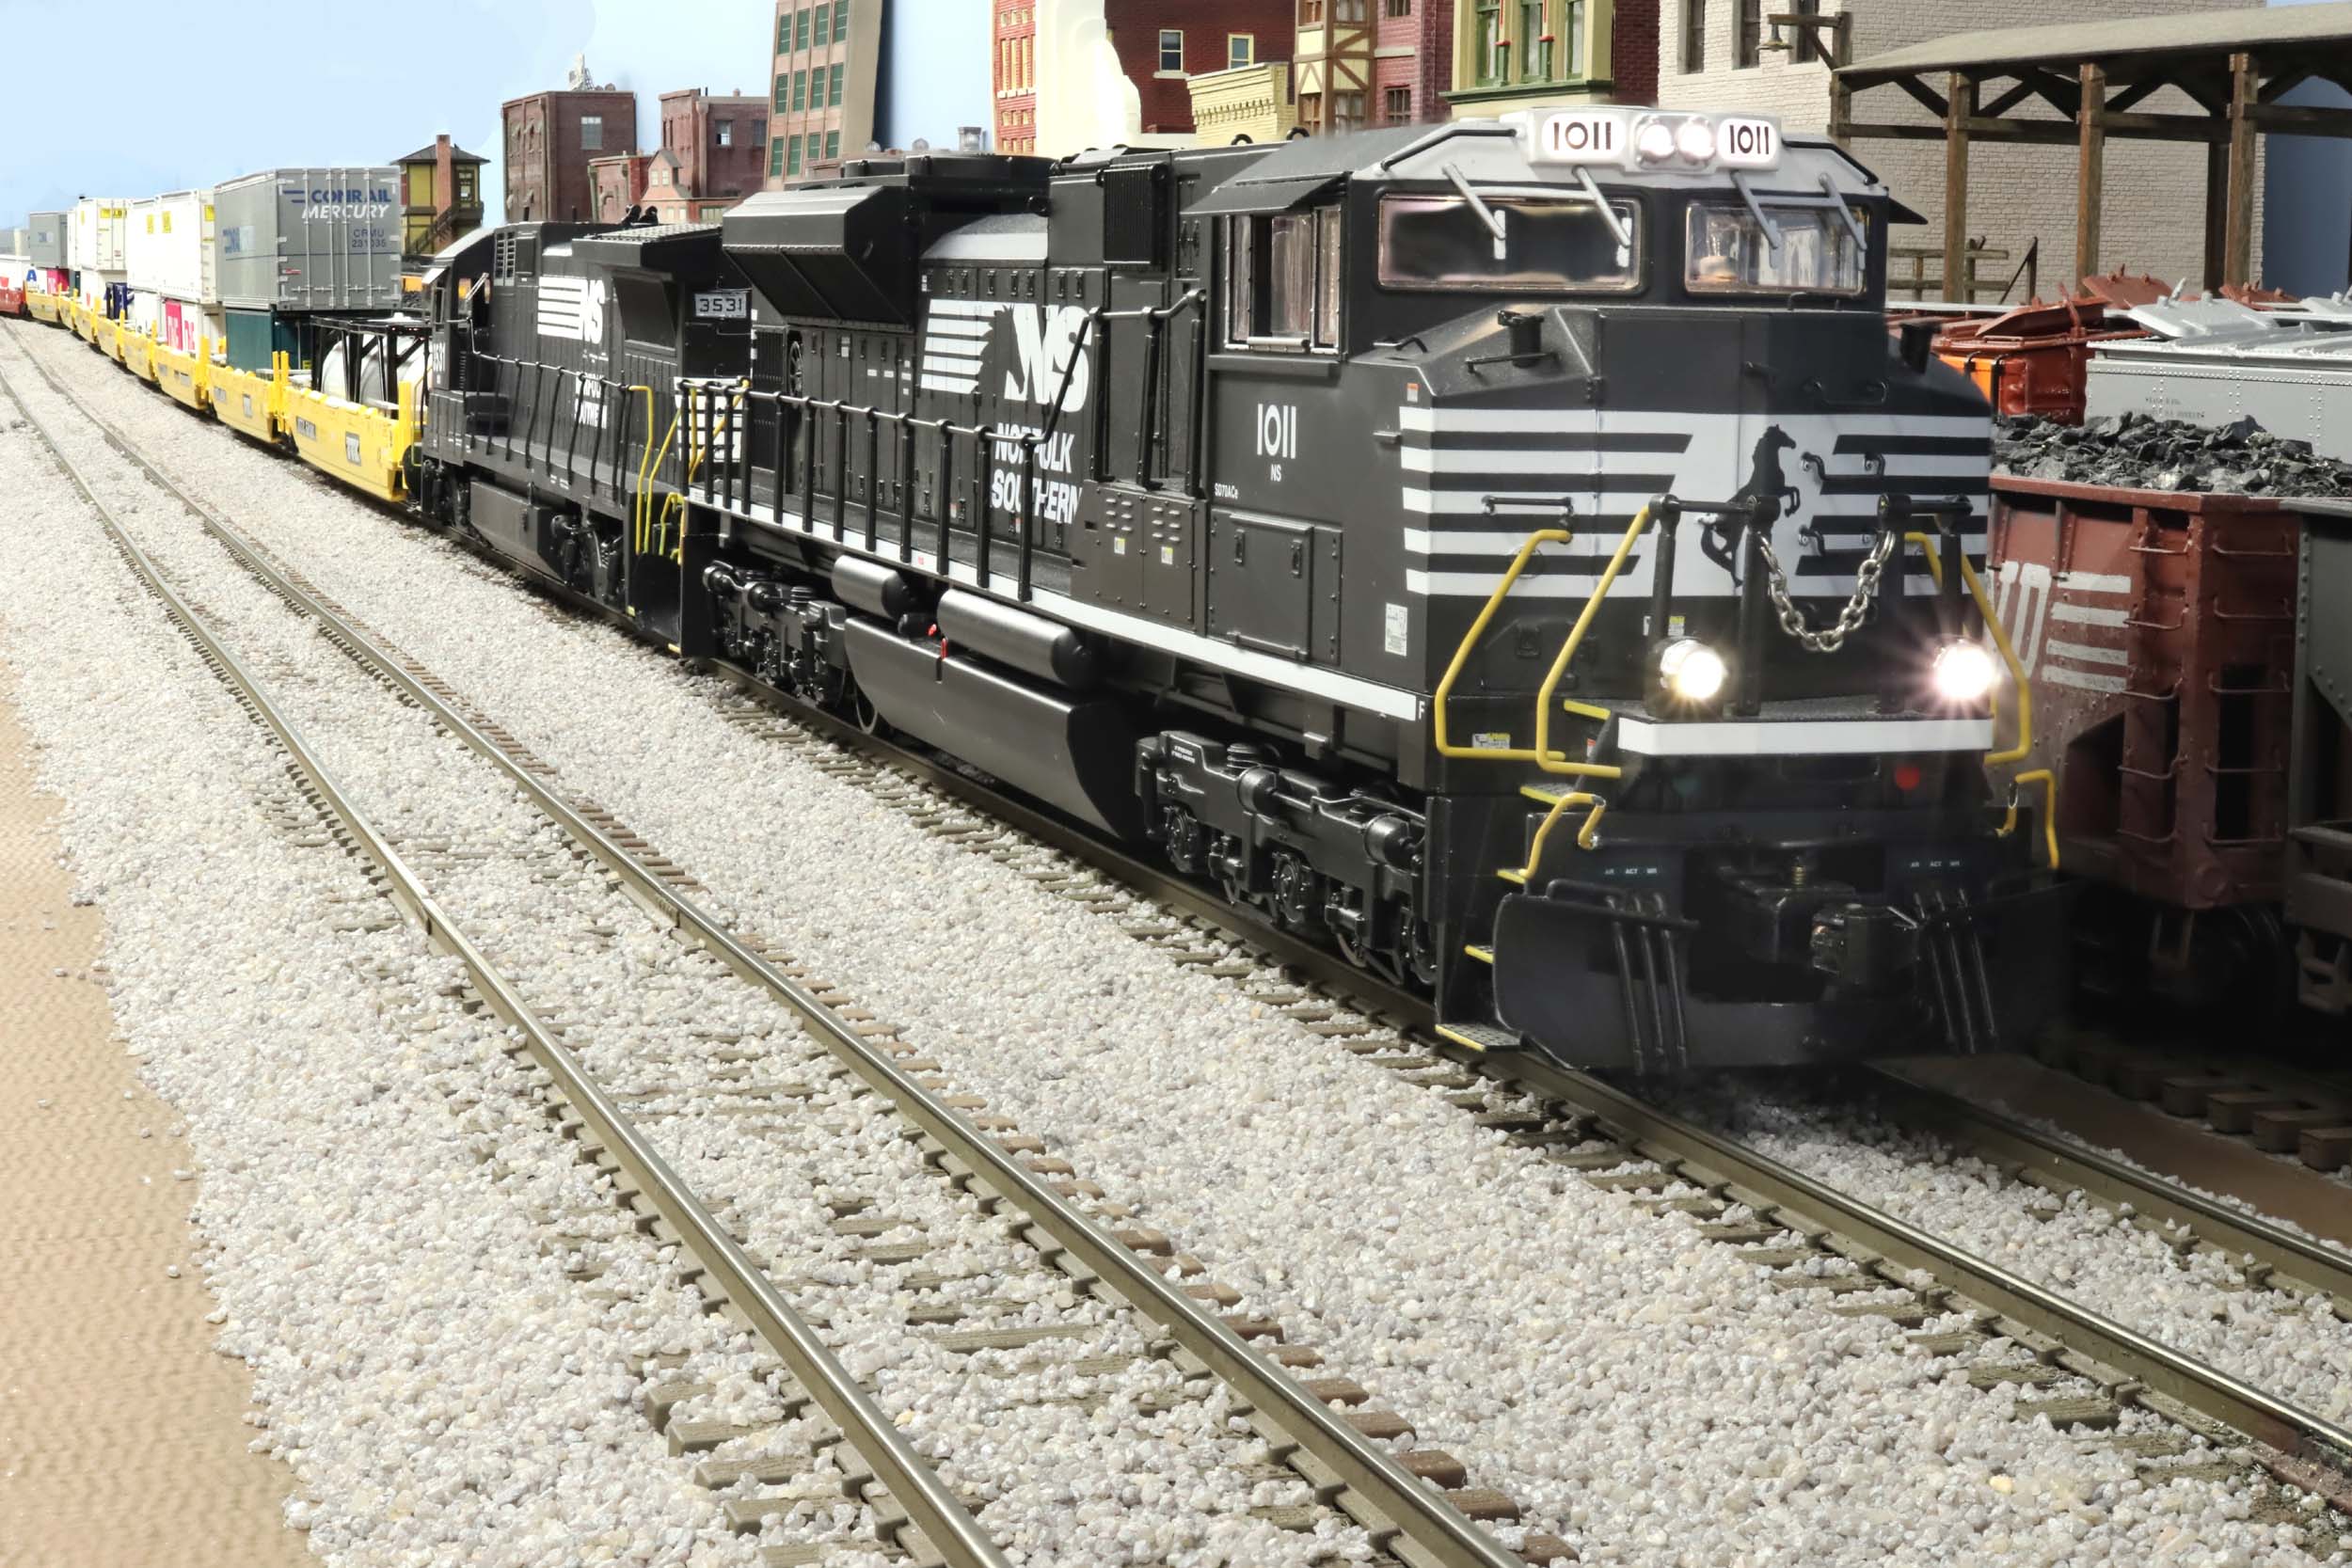
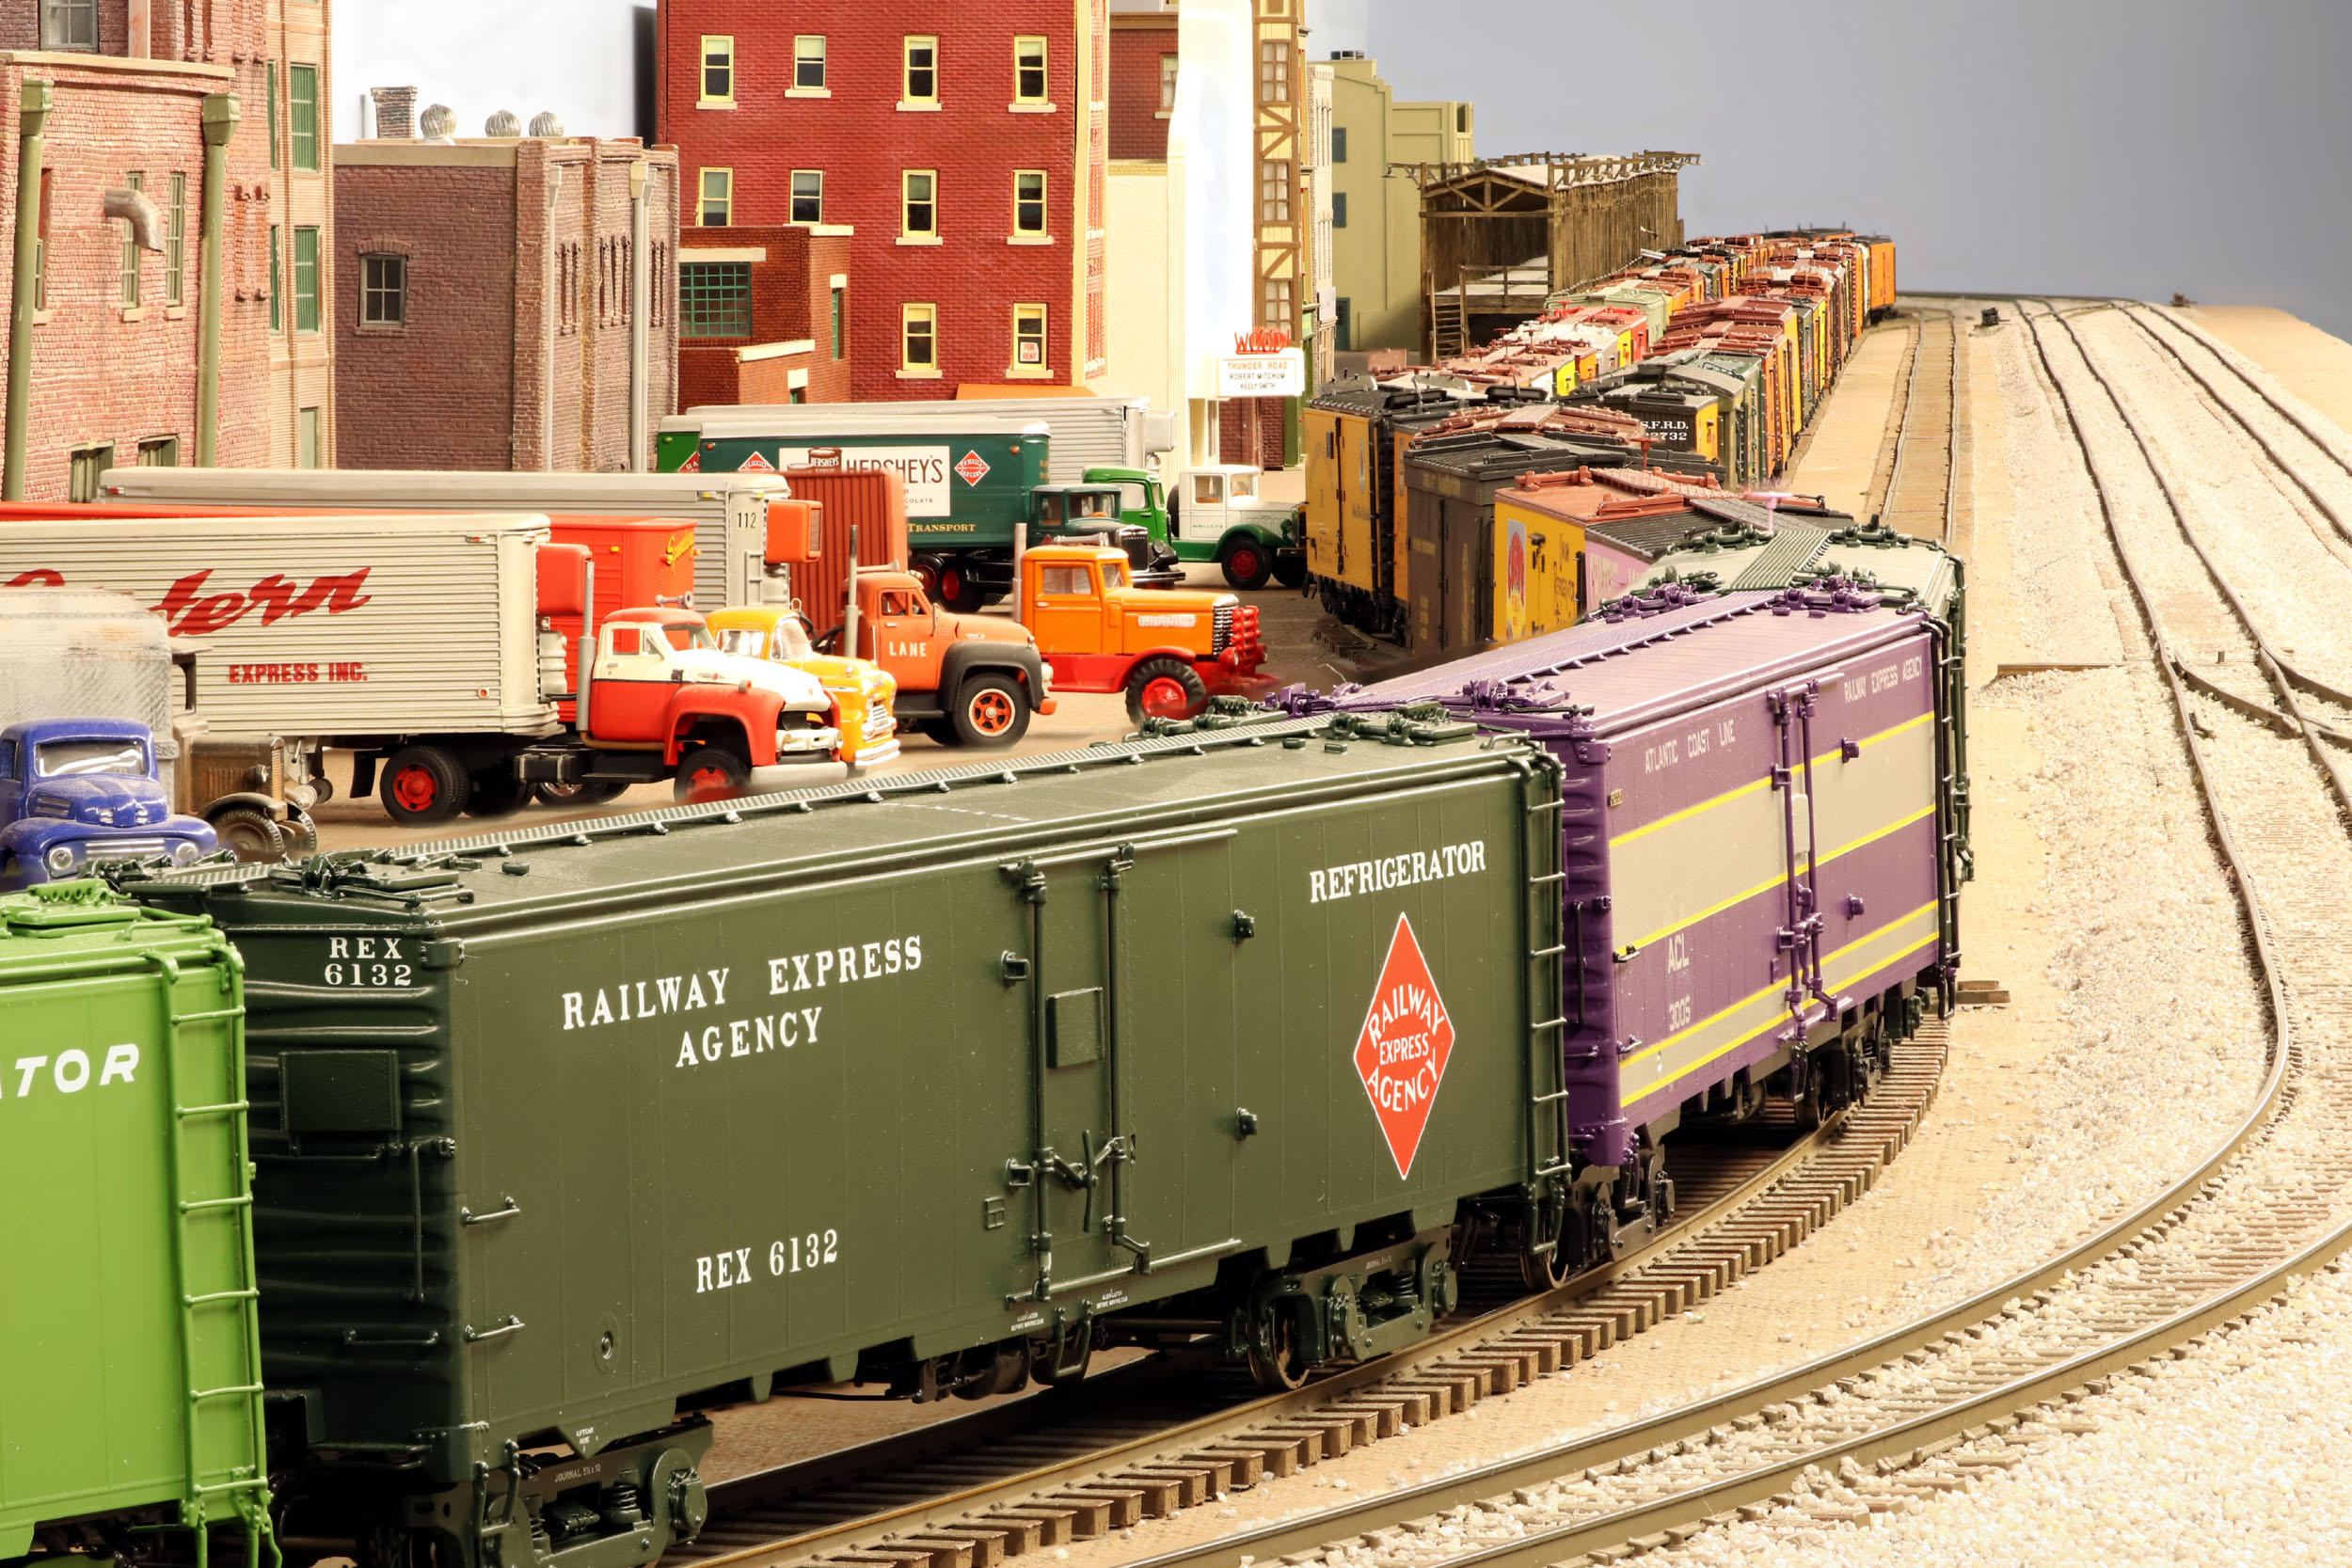
Added 1-8-20
This
is my Norfolk Southern - so far. I have a high hood GP38-2
planned. Don't mind the ice platform and
reefers in the background. 1011 is pretty much stock out of the box American
Flyer. It even came with the scale wheels.
3531 came
into this world as a urethane shell and frame. The
rest was up to the builder gathering the many parts from different sources.
Some serious heavy lifting was done to make this loco making a very rare S
Scale model. I bought it as is and added DCC. My favorite 1 of the 3 by a hair
is the stack cars with the locos at the other end. Look at the depth of field
on the stack car in focus right up to the left edge. That is about 15 feet.
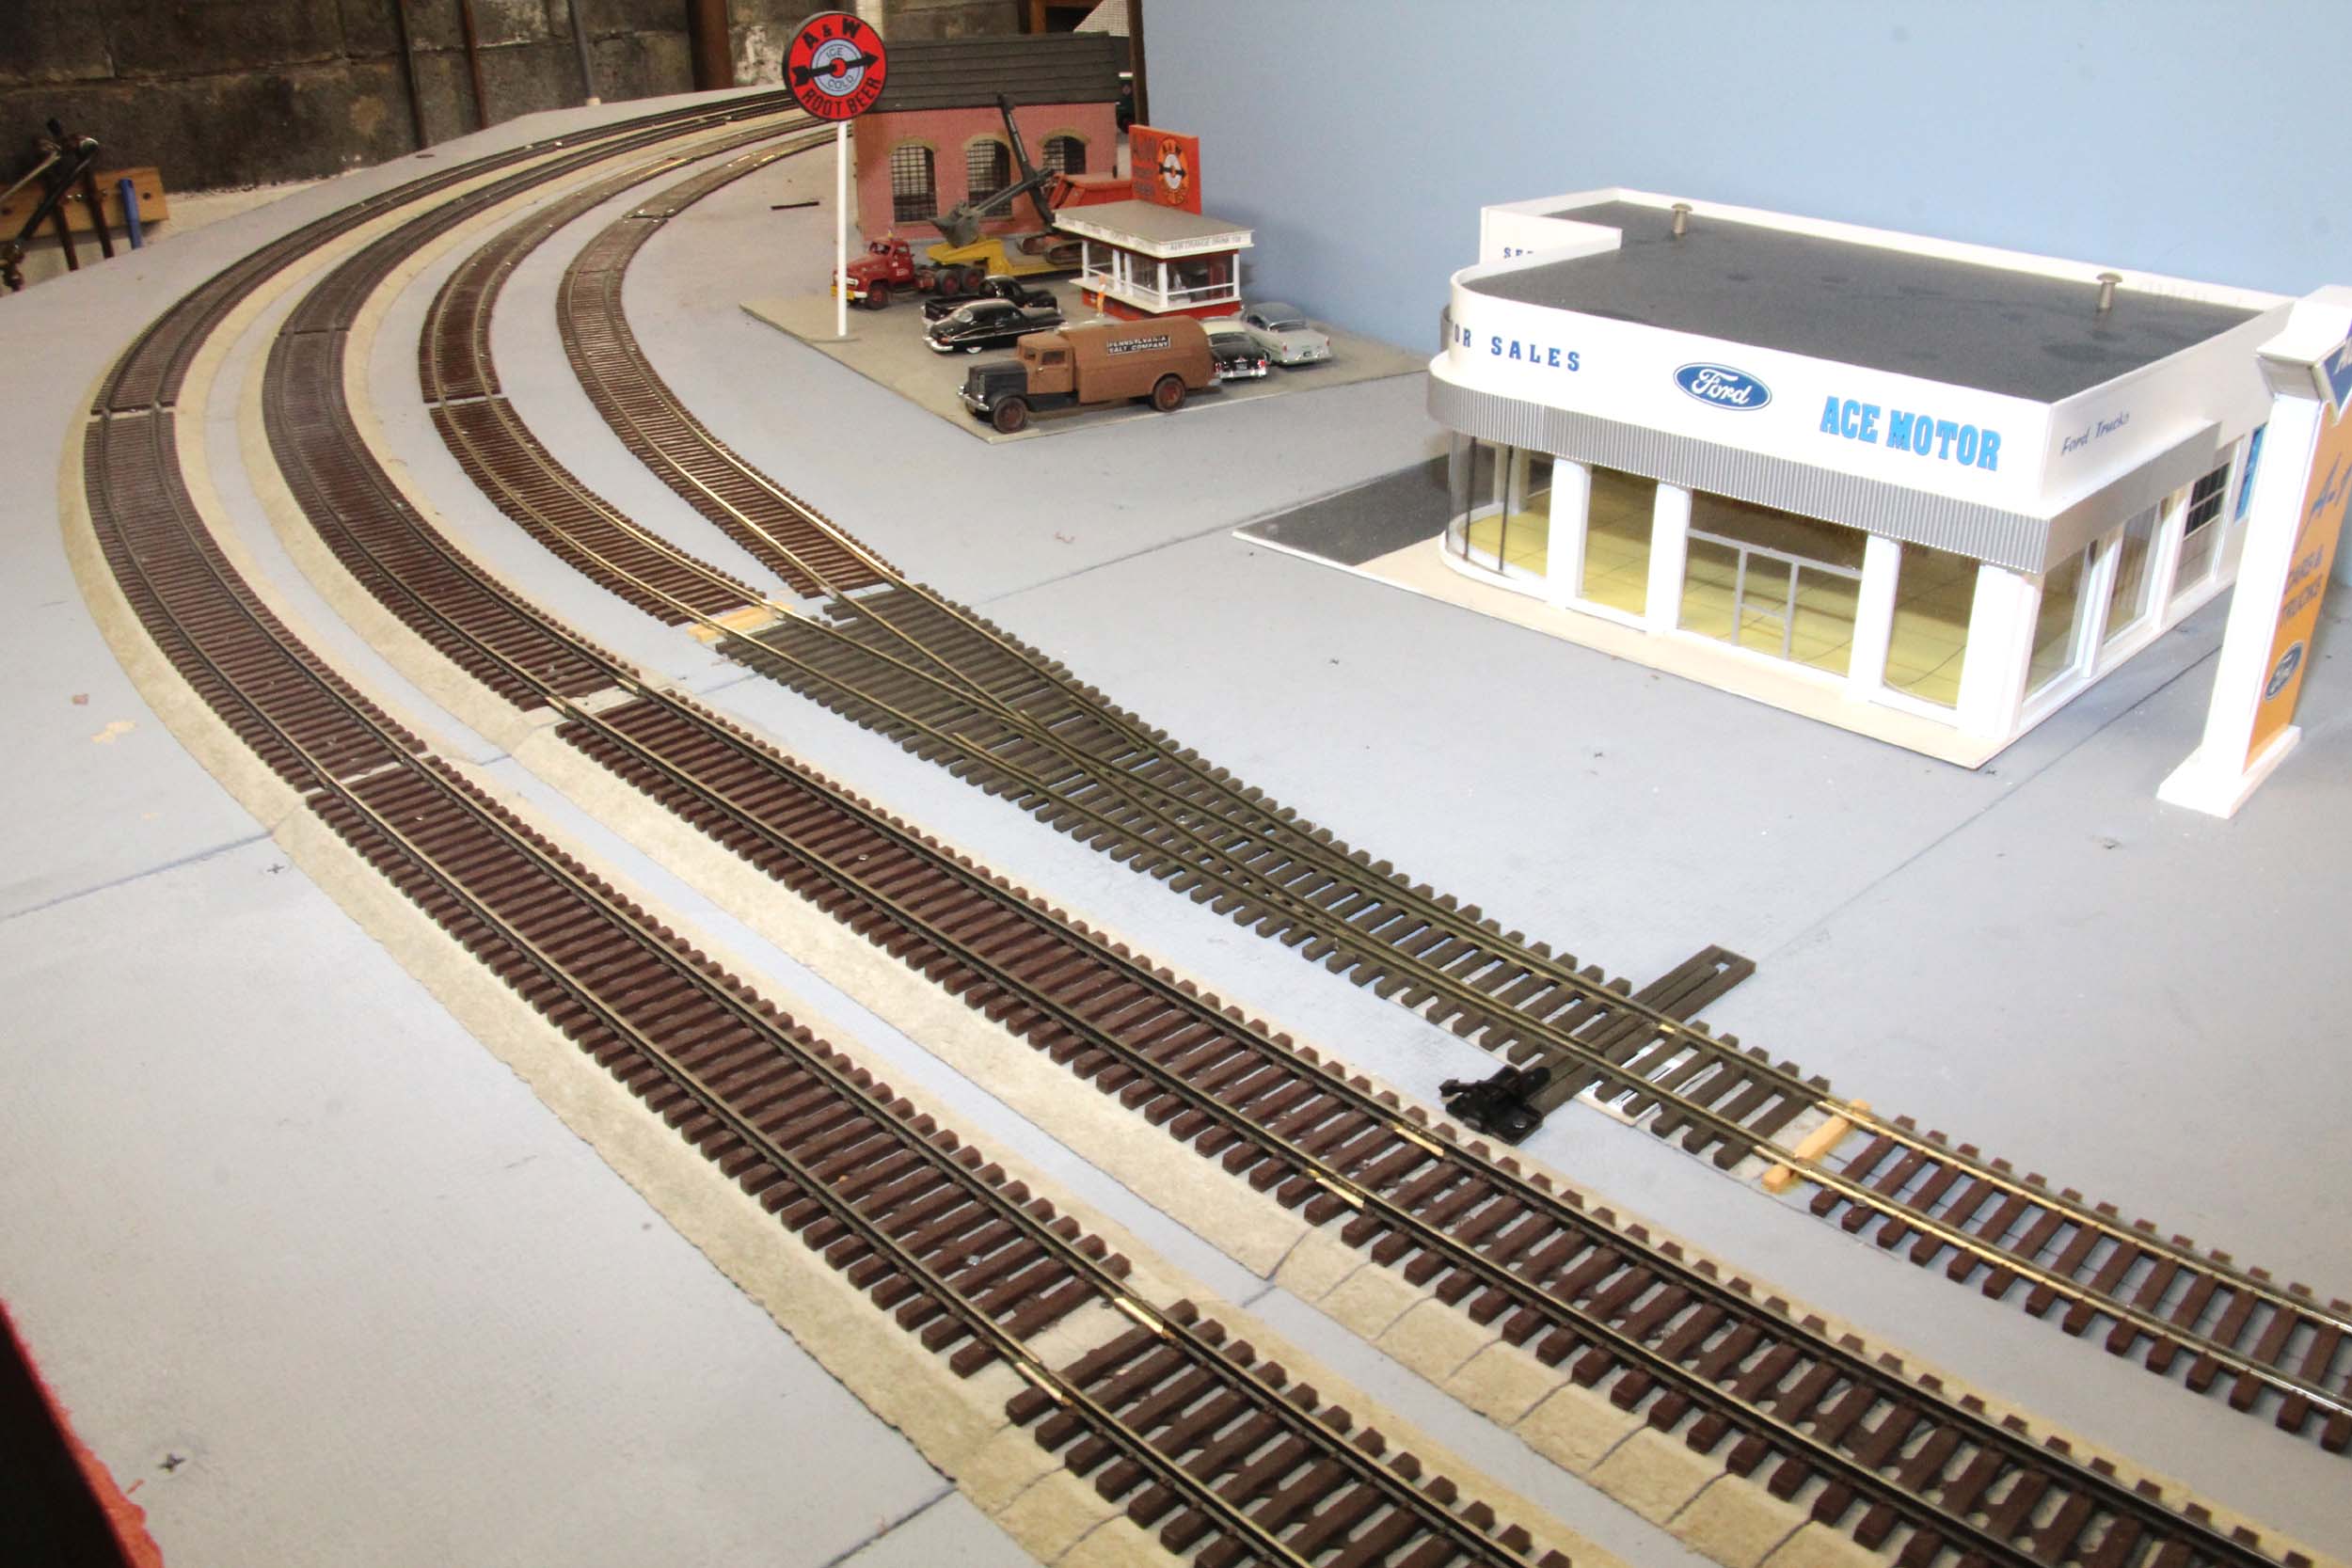
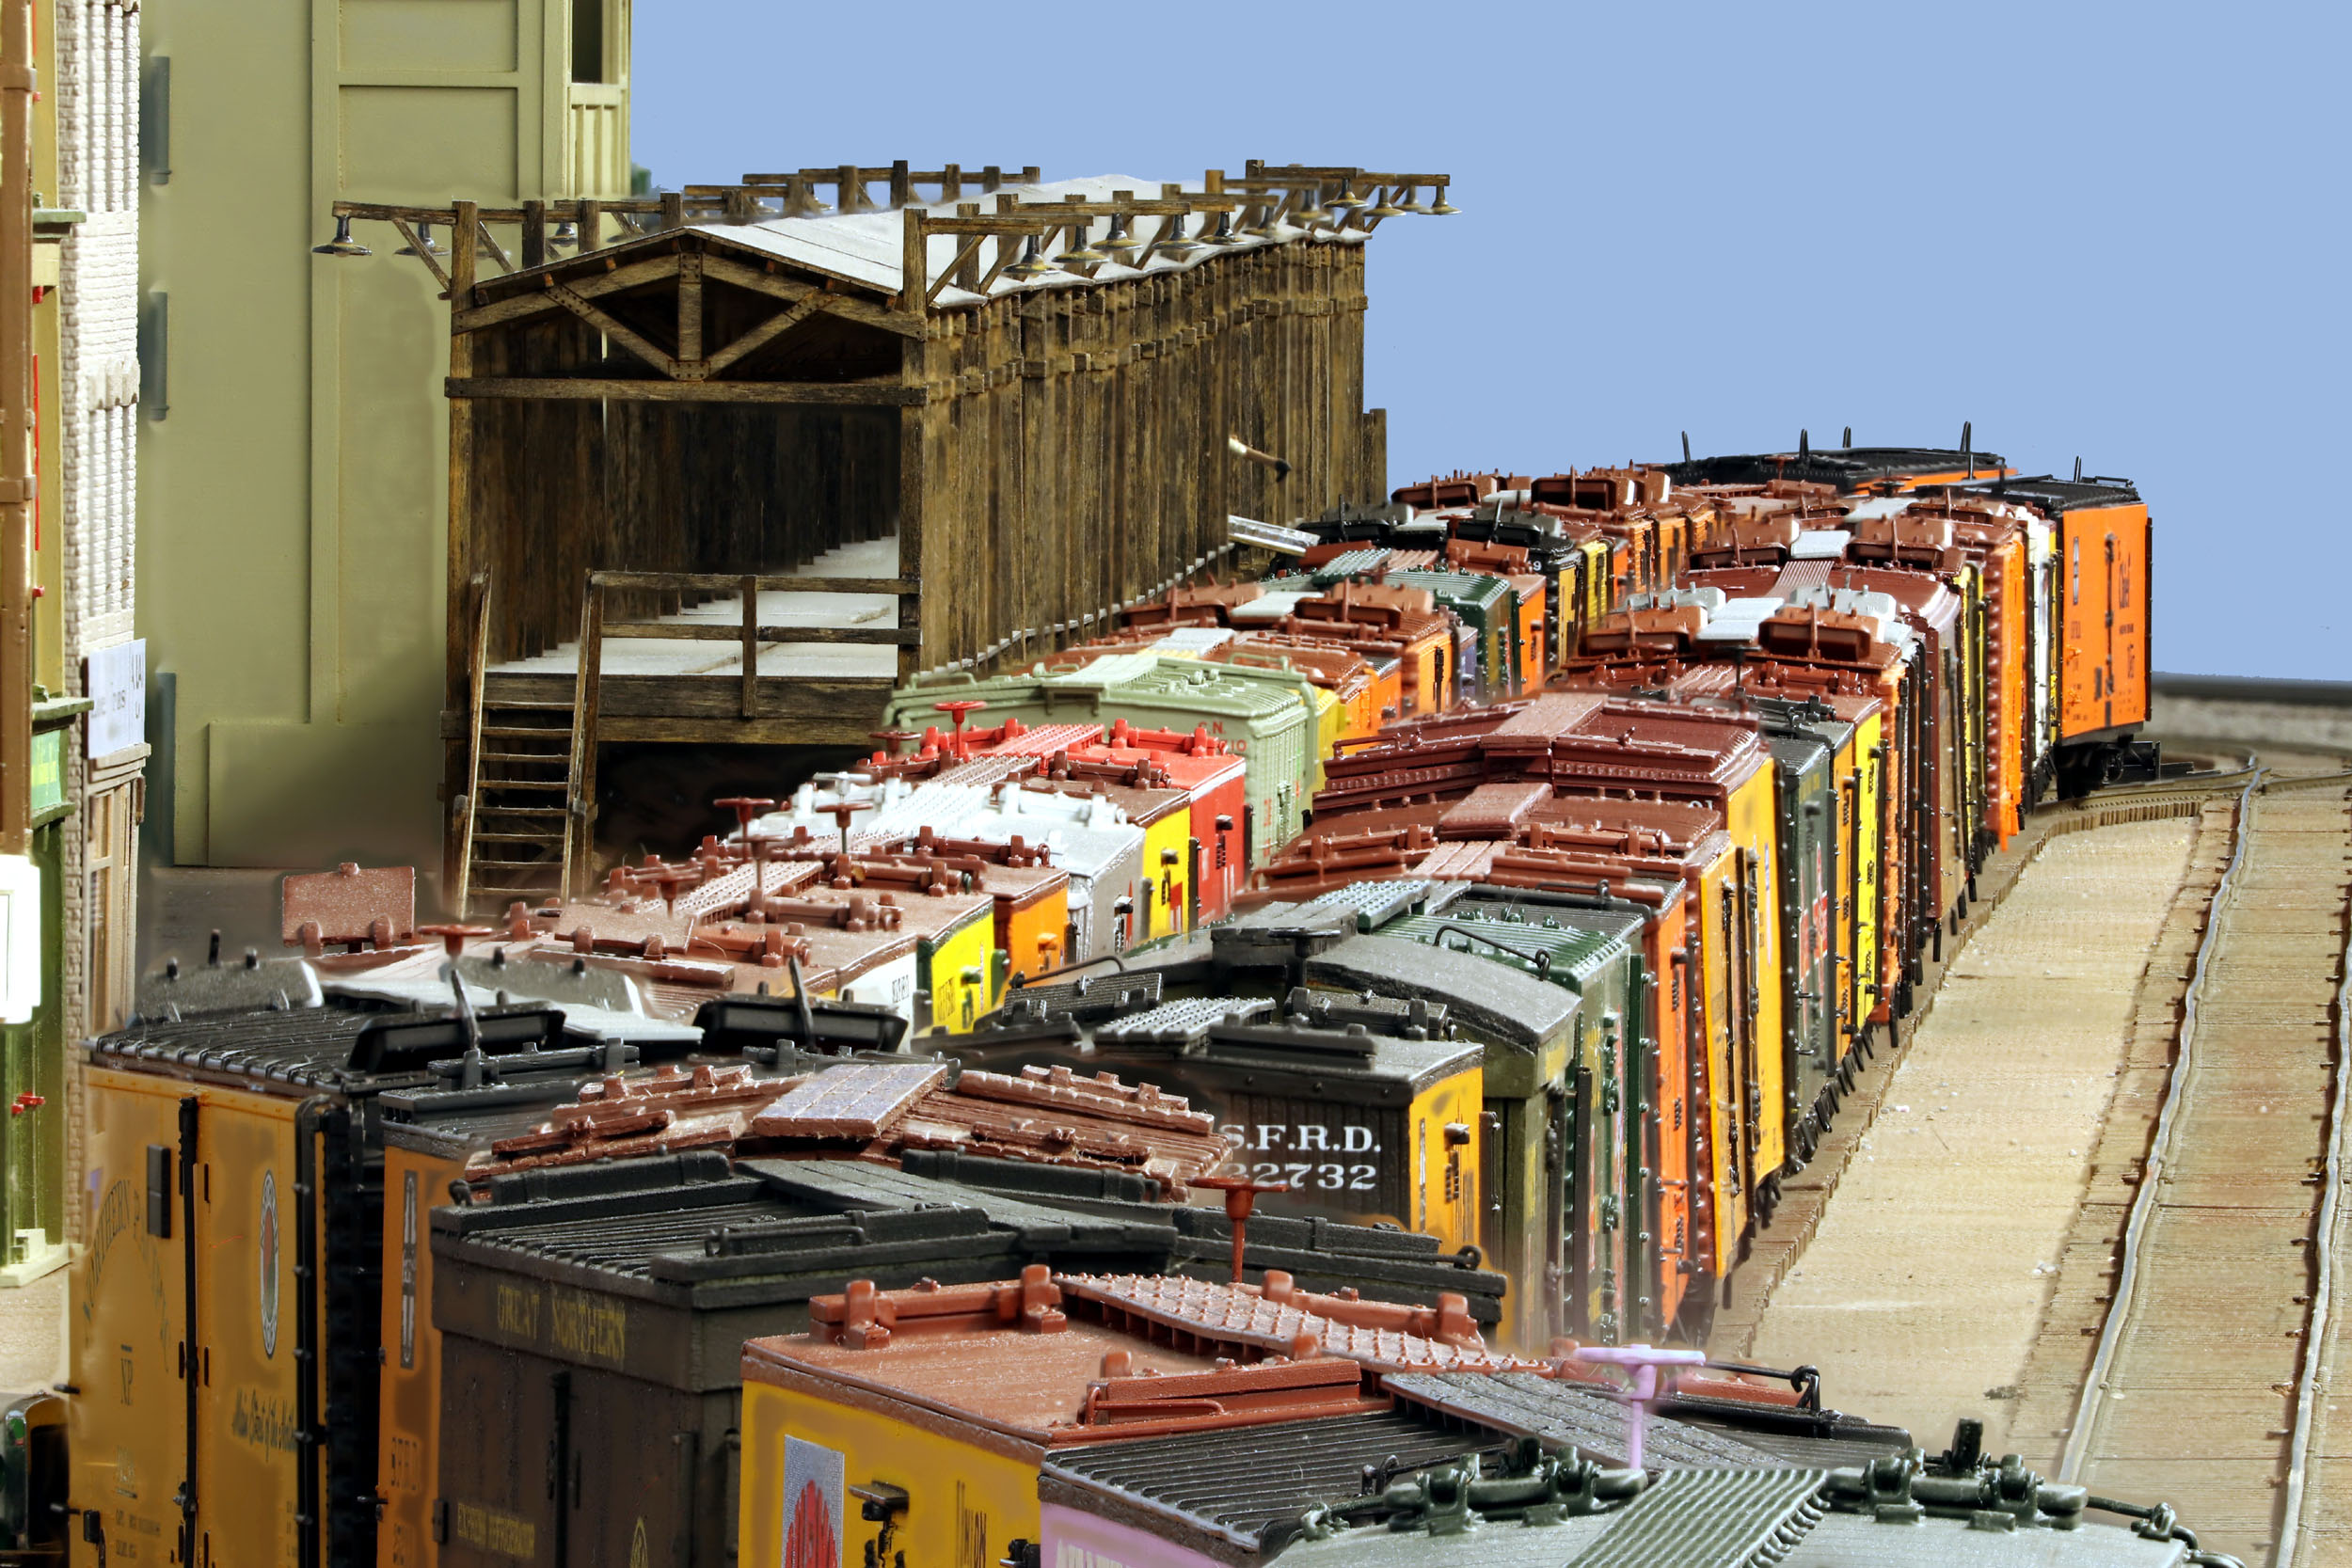
Sellright Ice Distributors
Added 6-16-19
I needed something to represent an ice source for the icing
platform. The ice storage building I had for years was not going to work so I
had 1 custom made for me by https://www.rightontrackmodels.com No detail or request was left behind. Lots of emails were
flipped. I knew what was happening during the whole process. It was about 5
weeks from first contact to in my hands. The end results were just what I
wanted. I am staying with the PRSL theme so I chose Sellright for the
name.
These are Helicon photos as well.
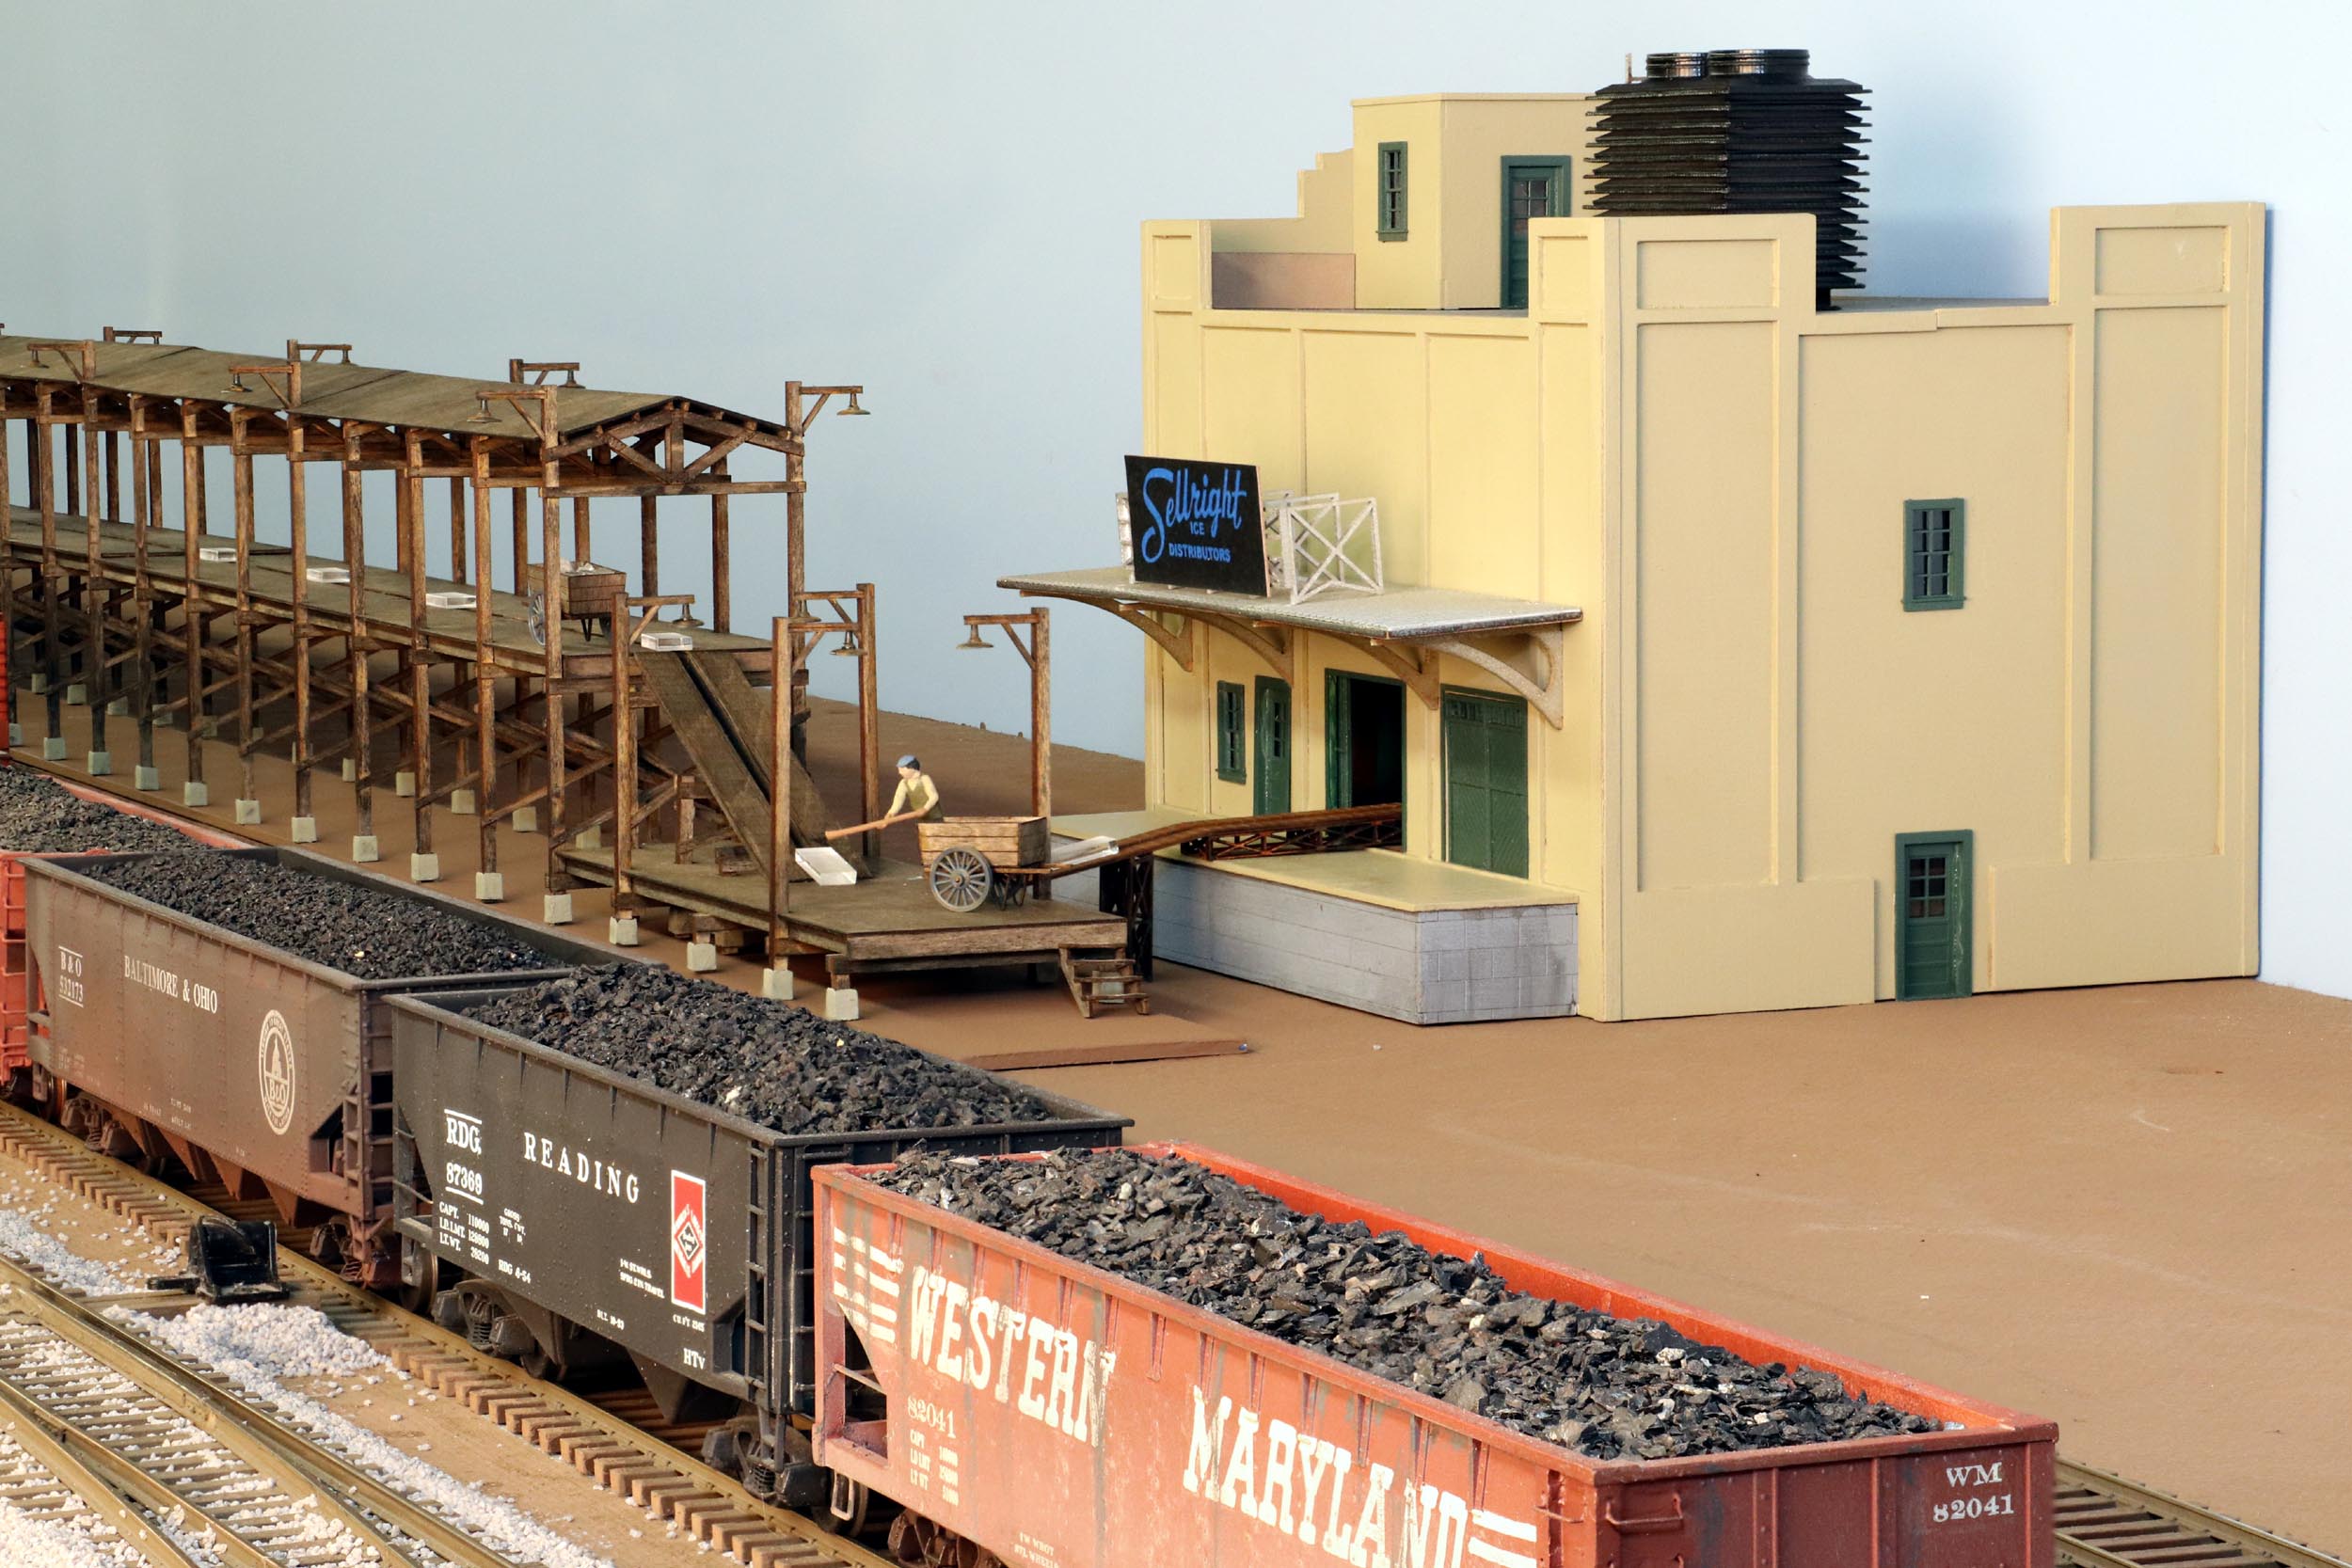
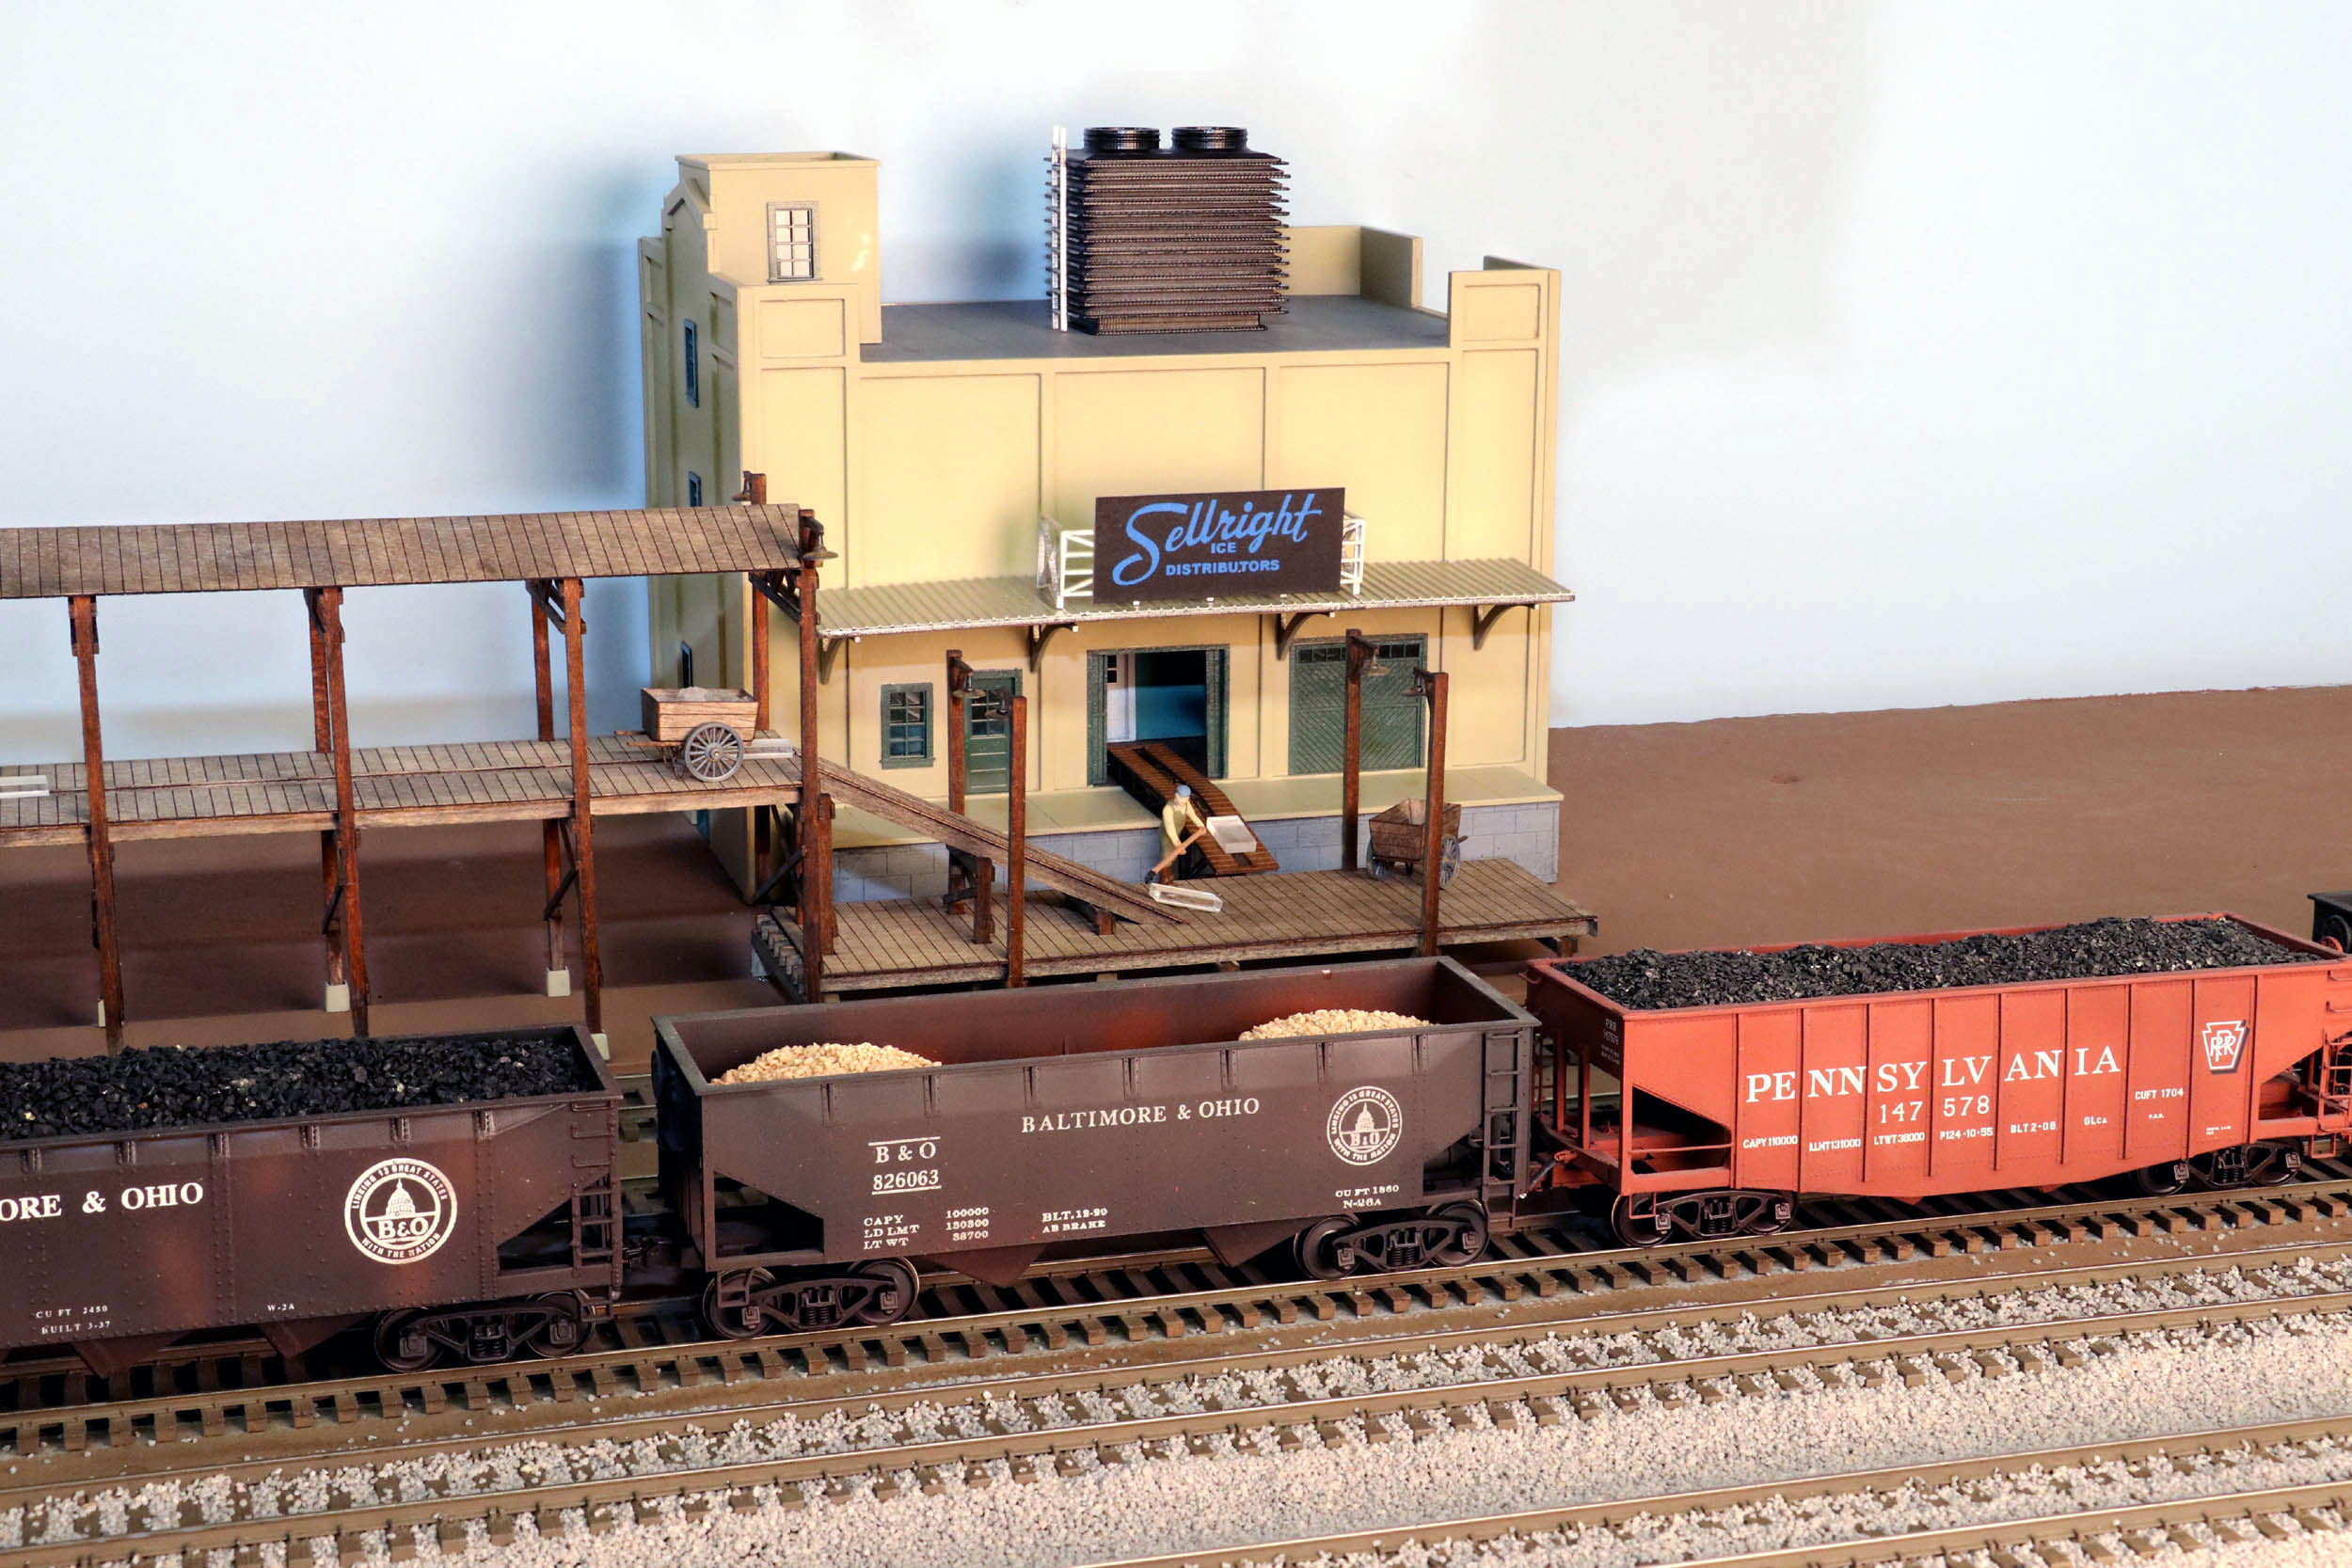
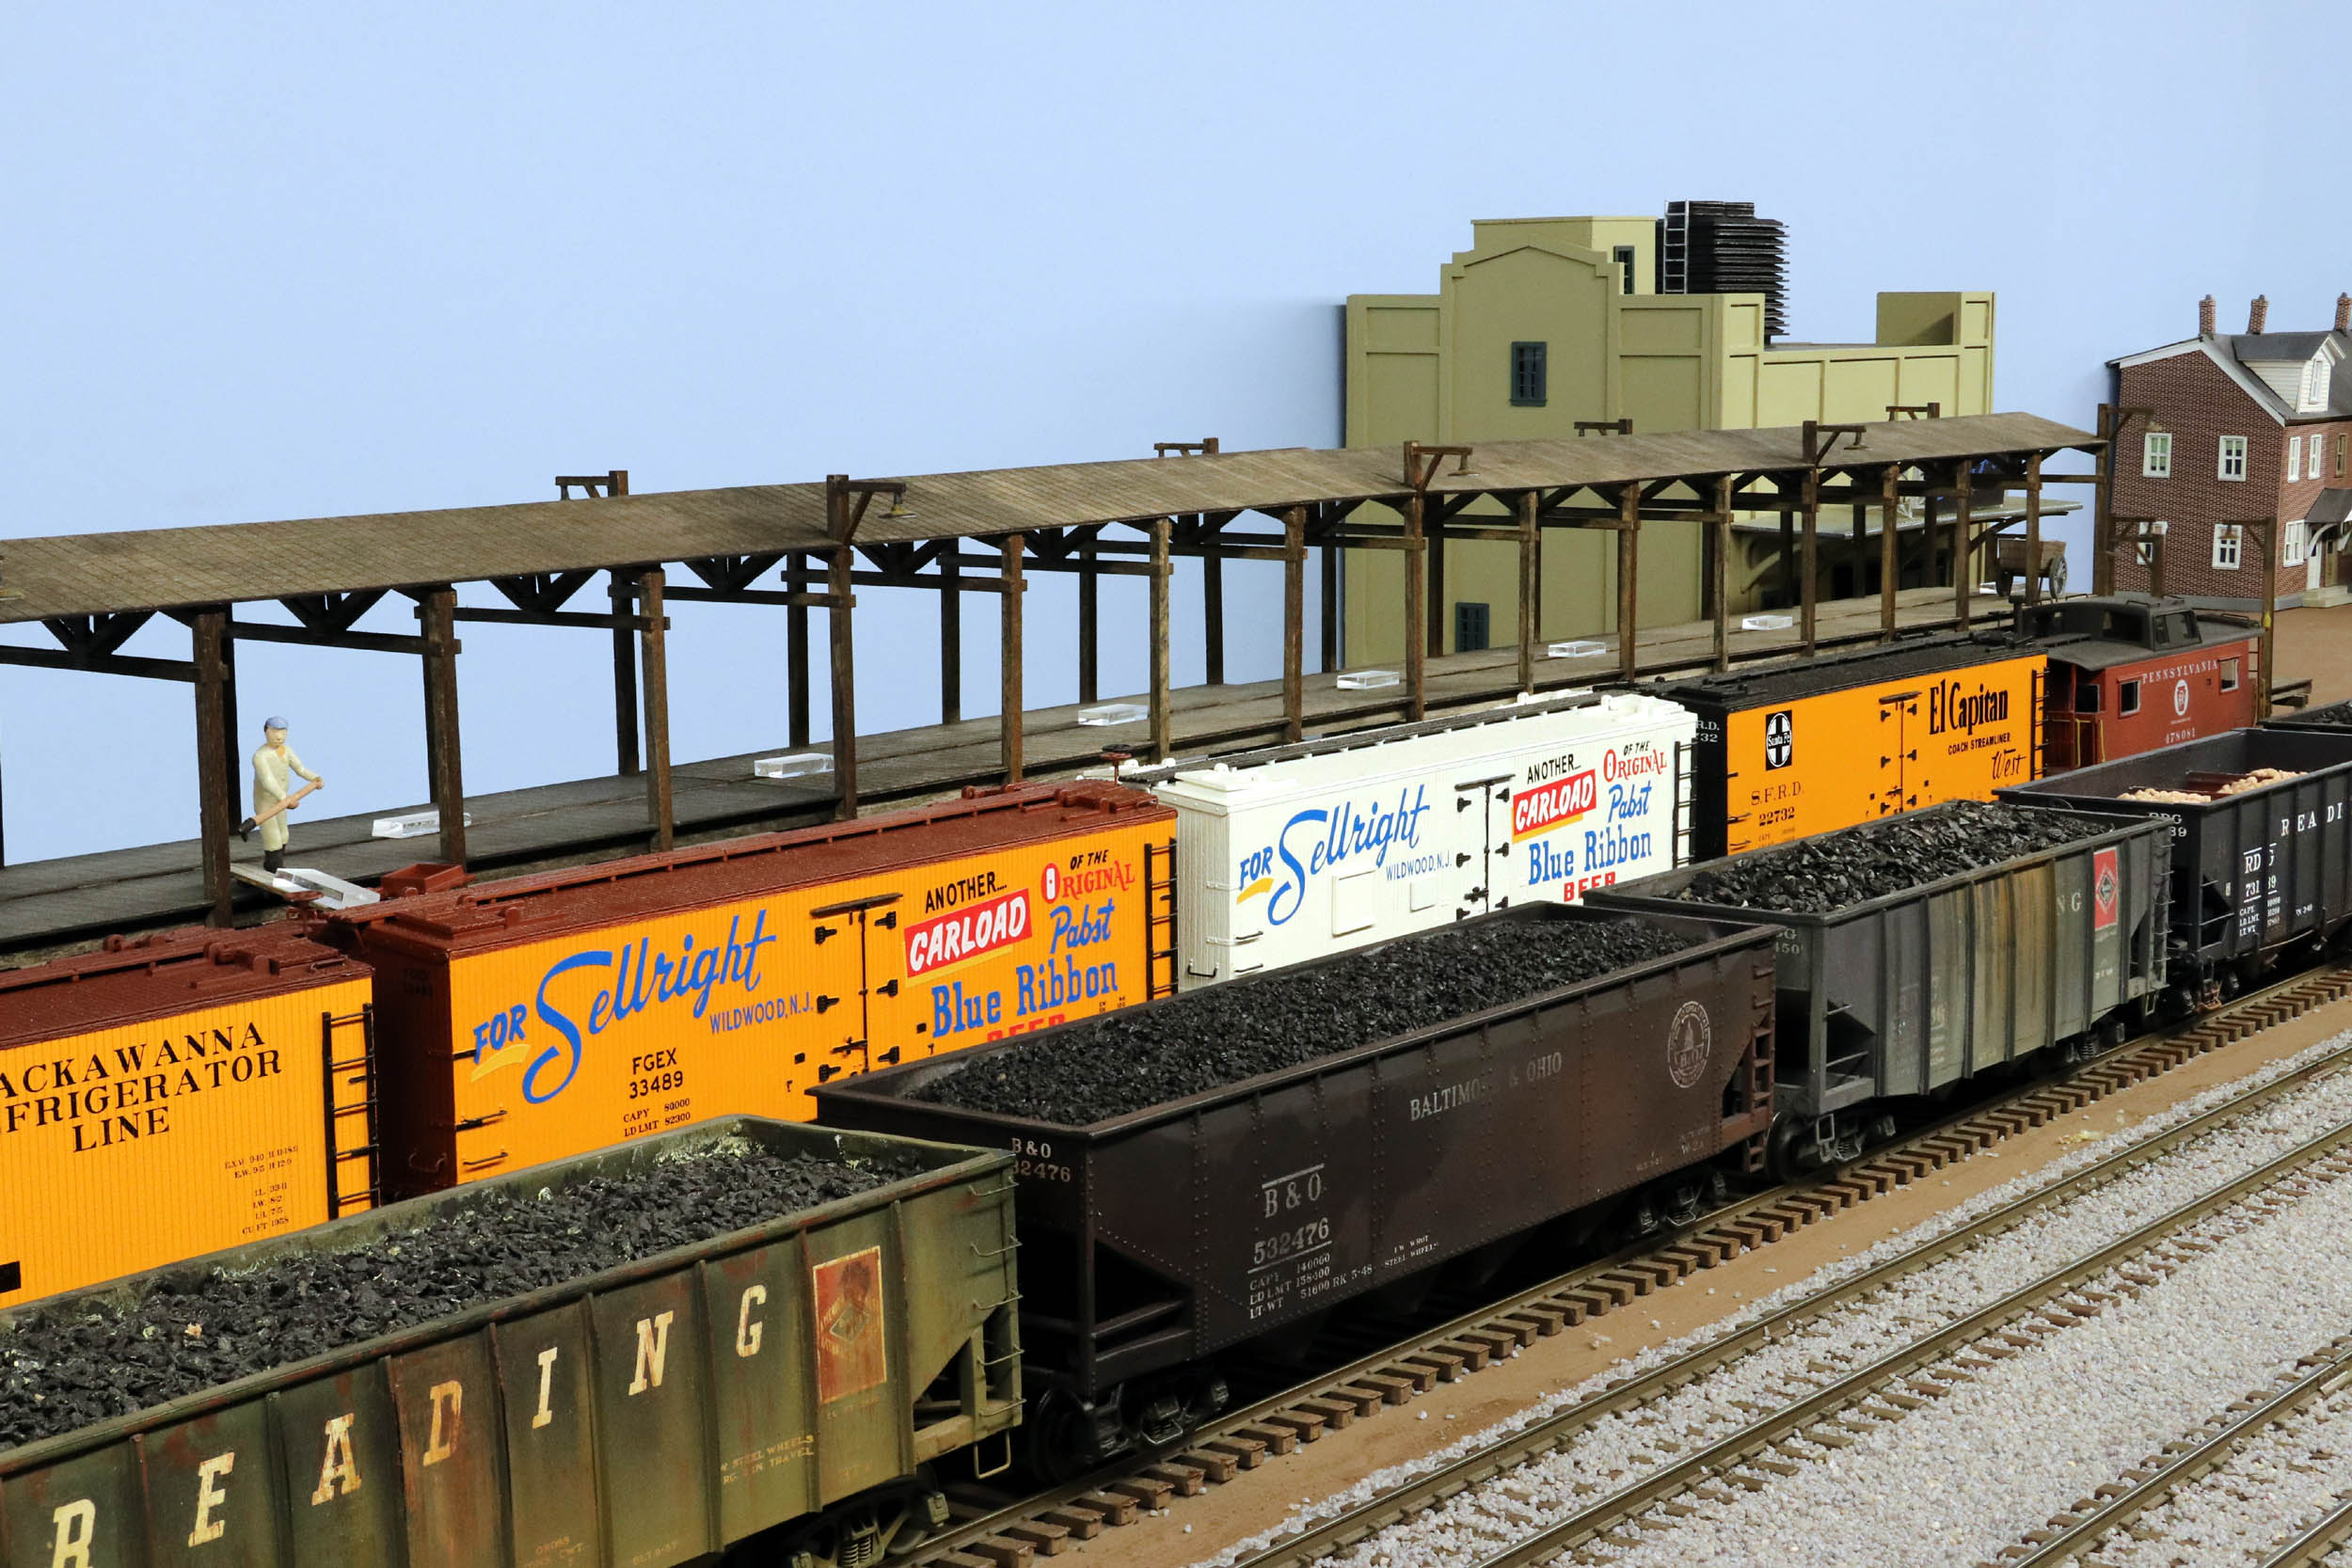
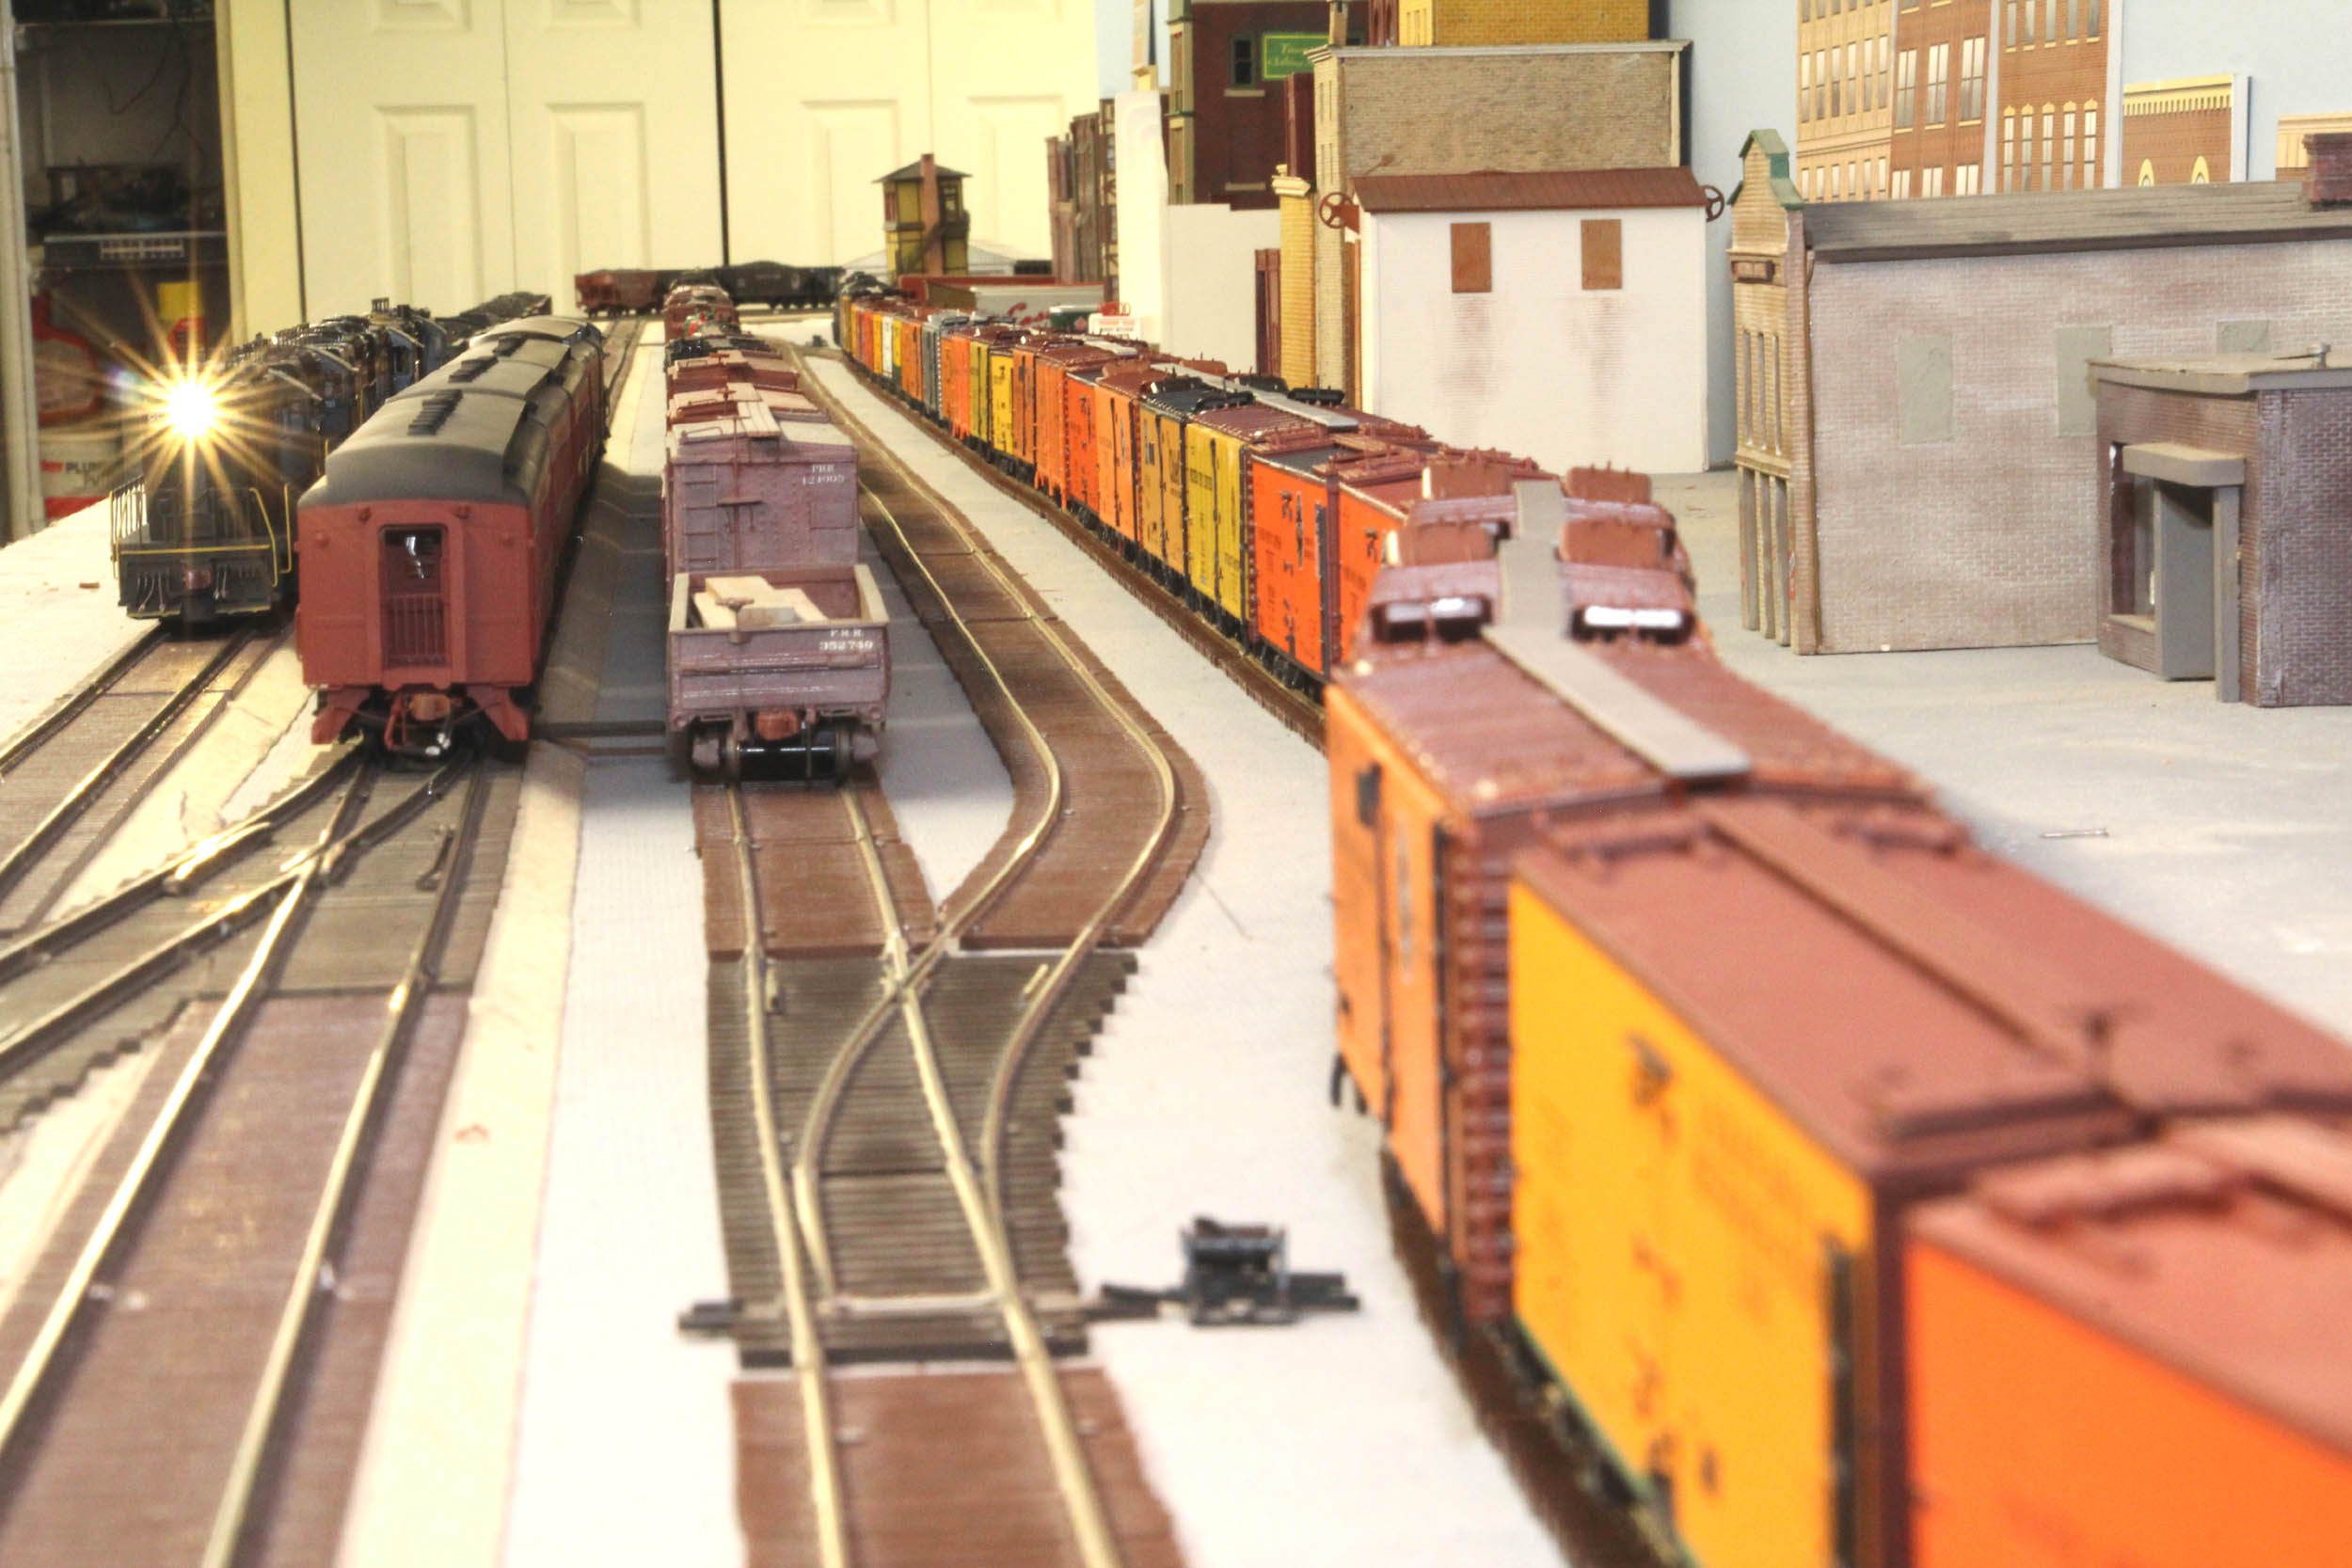
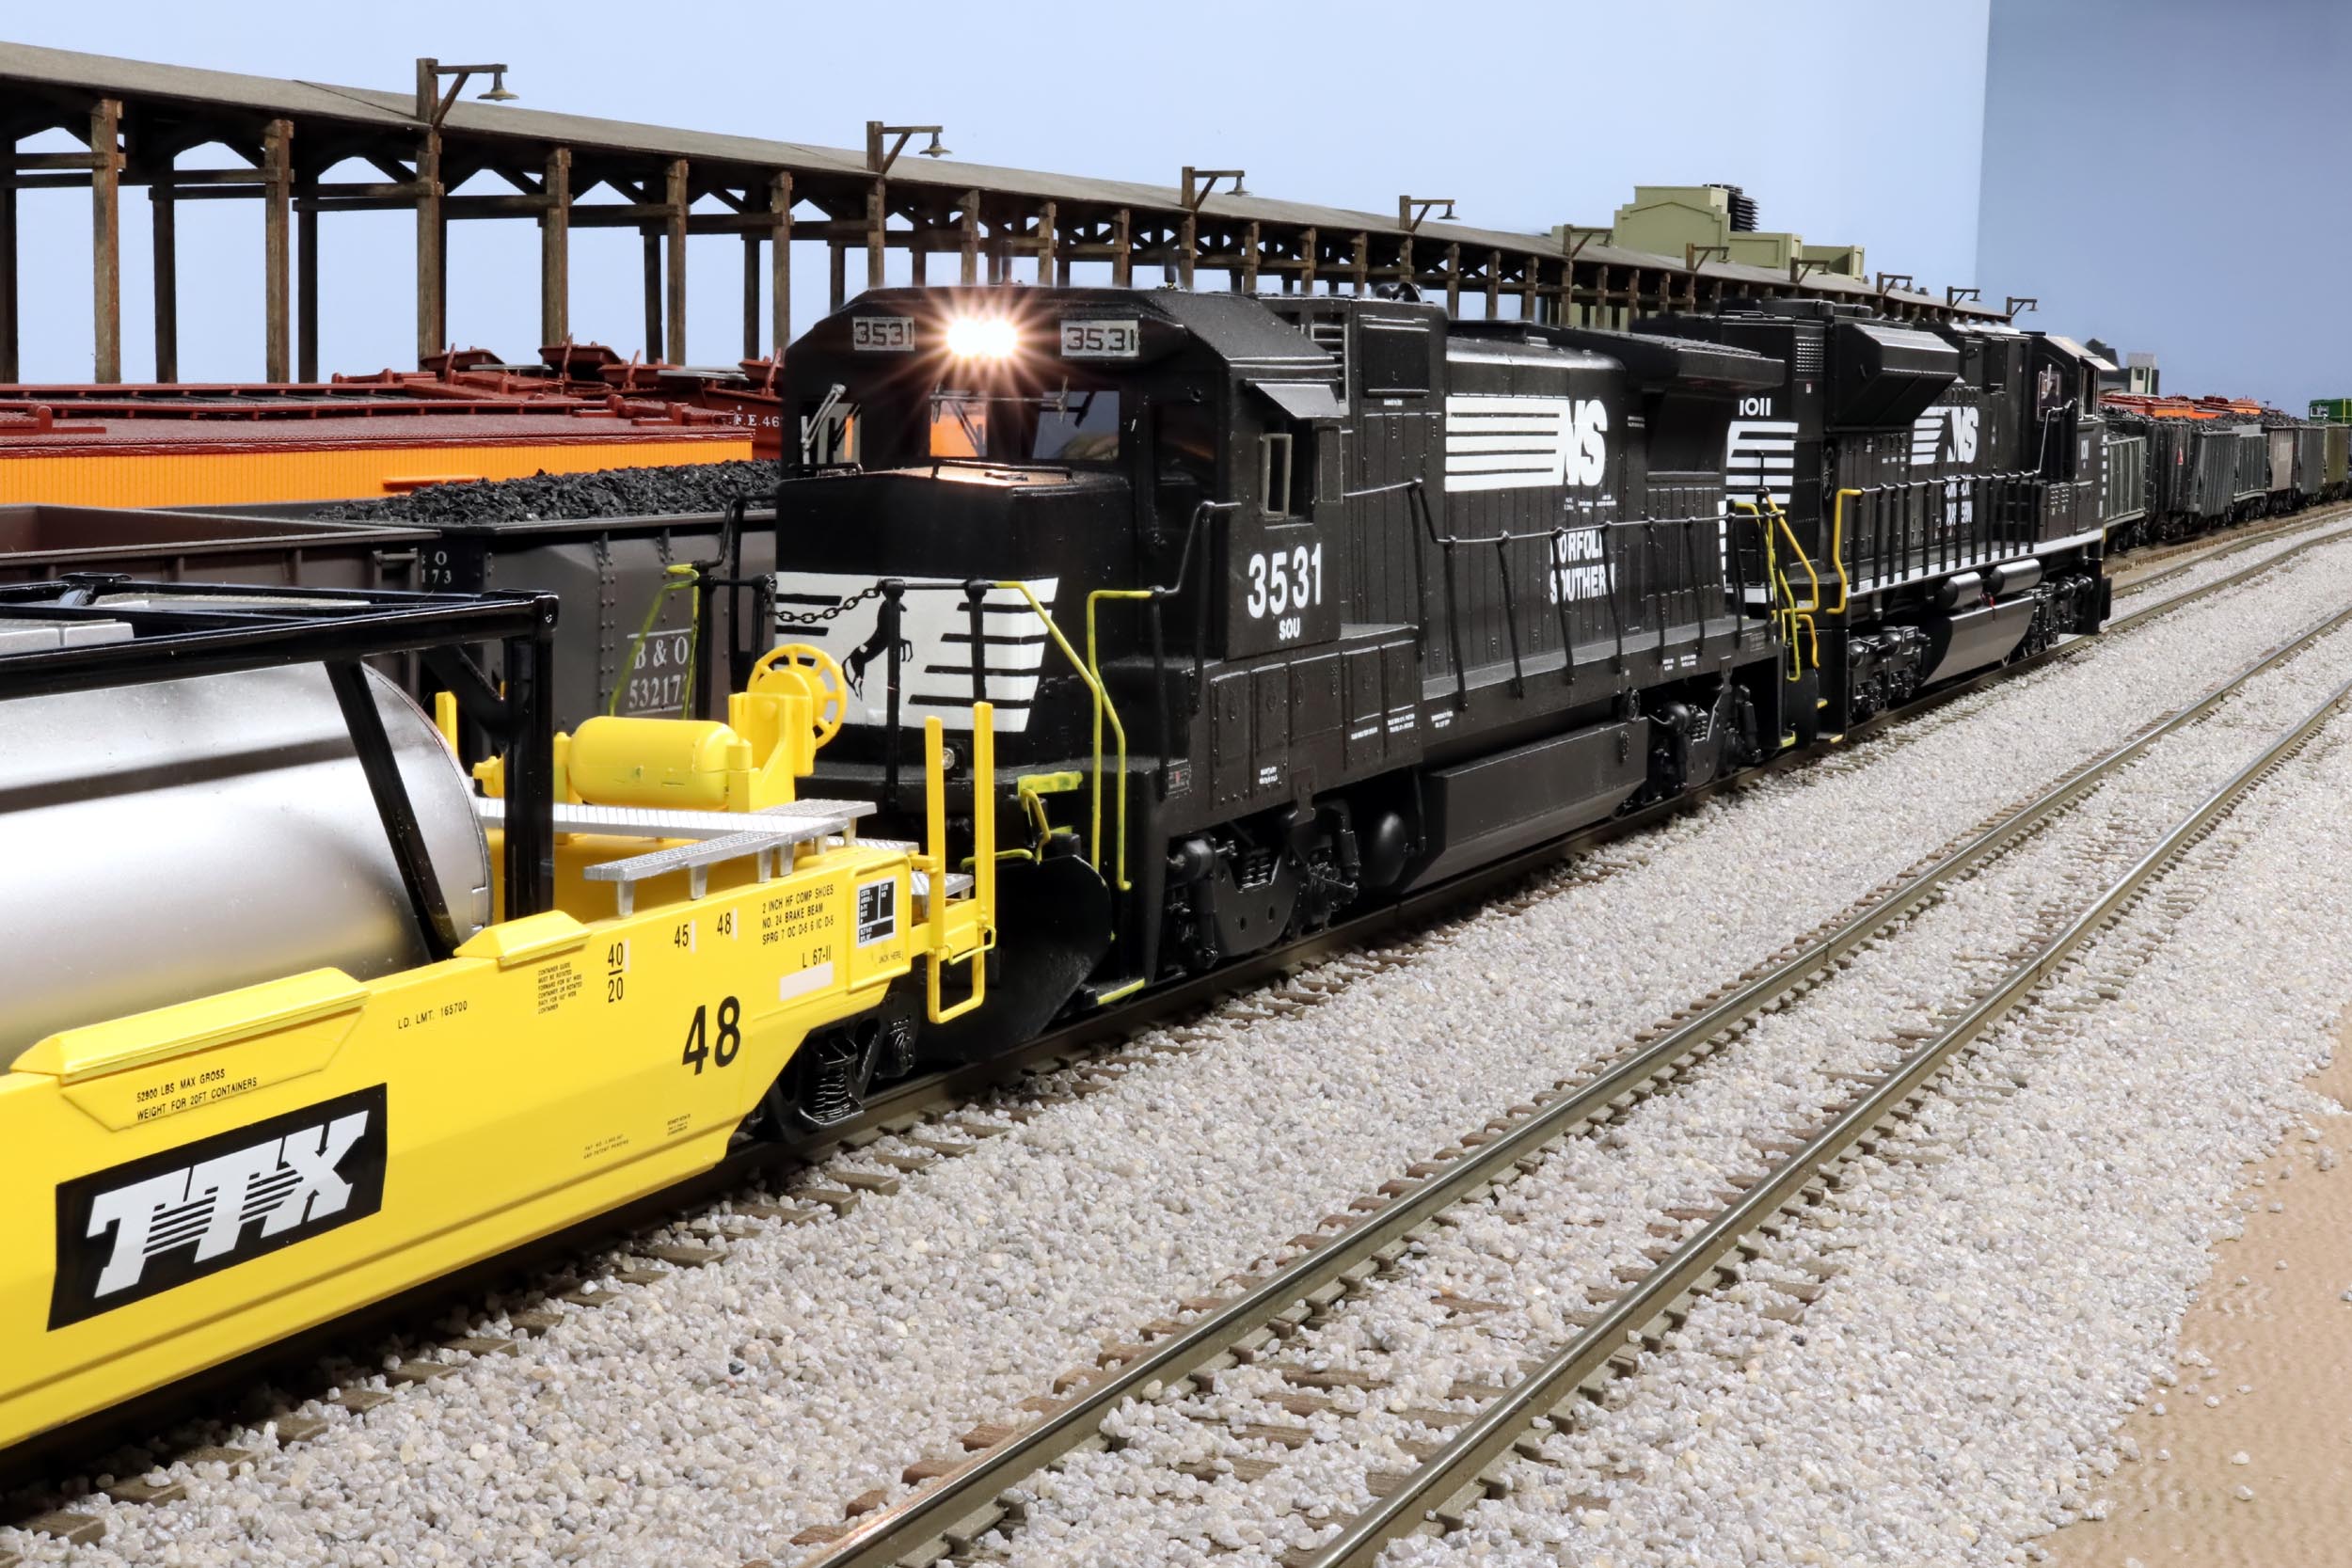
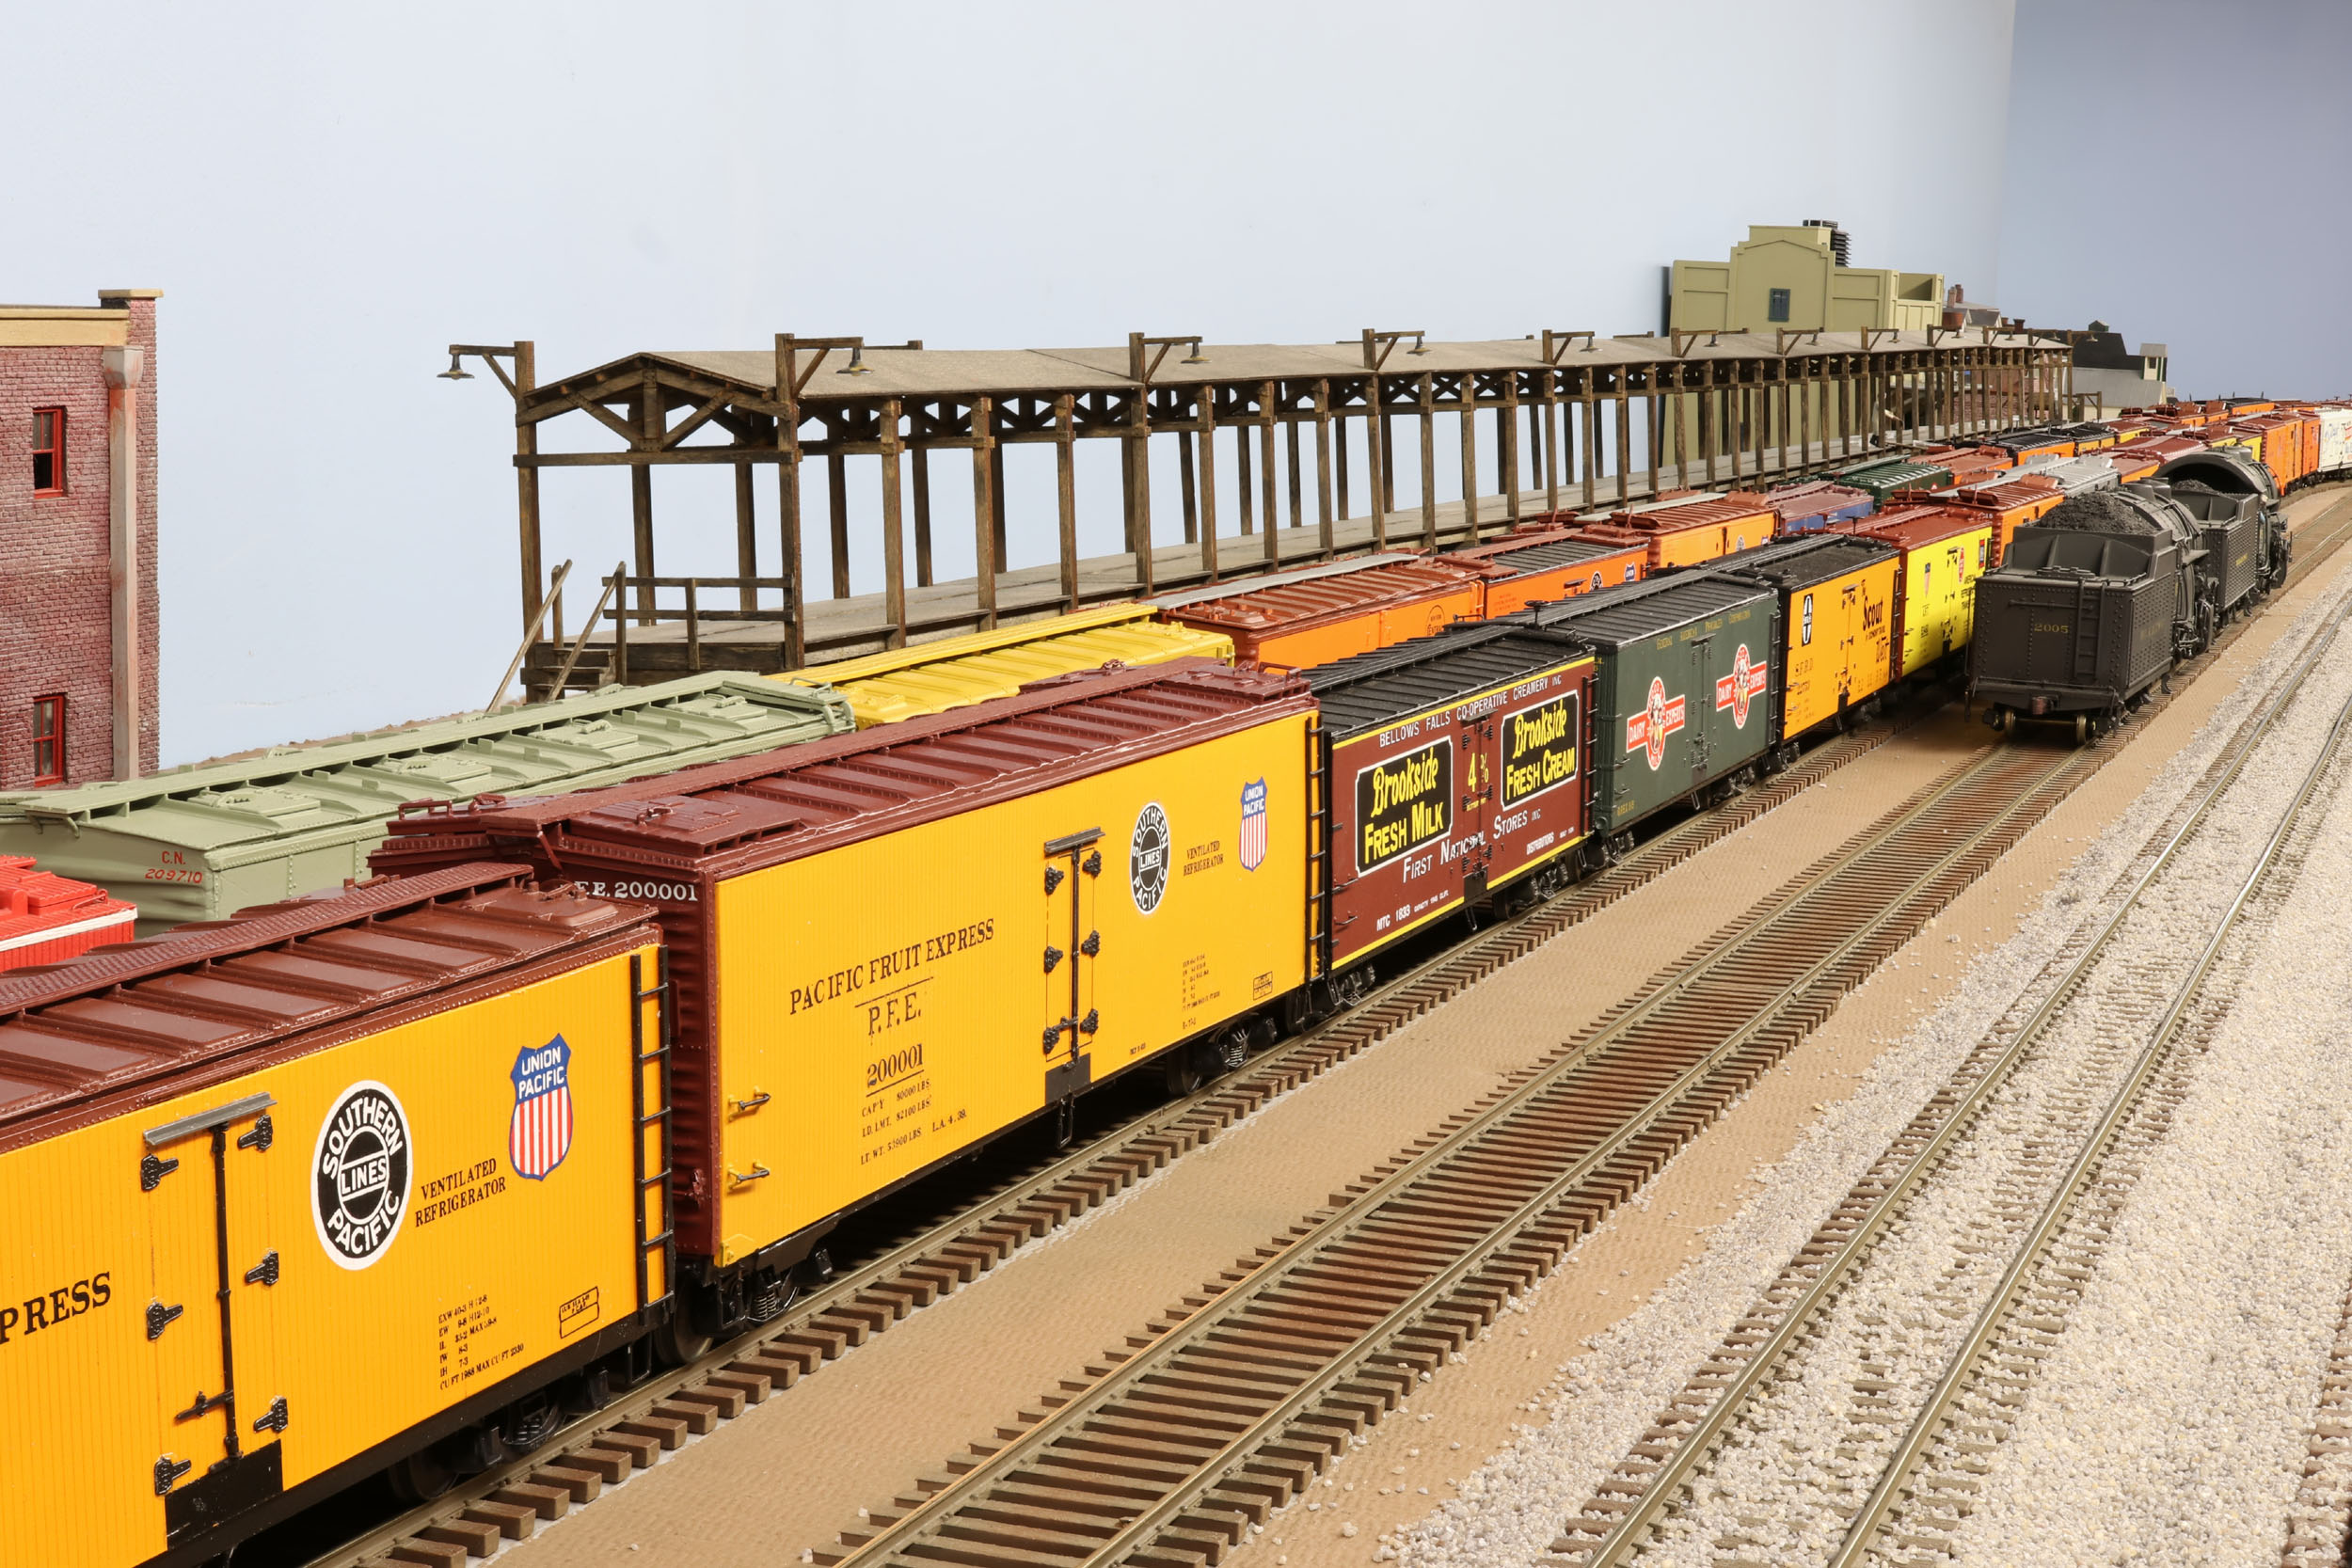
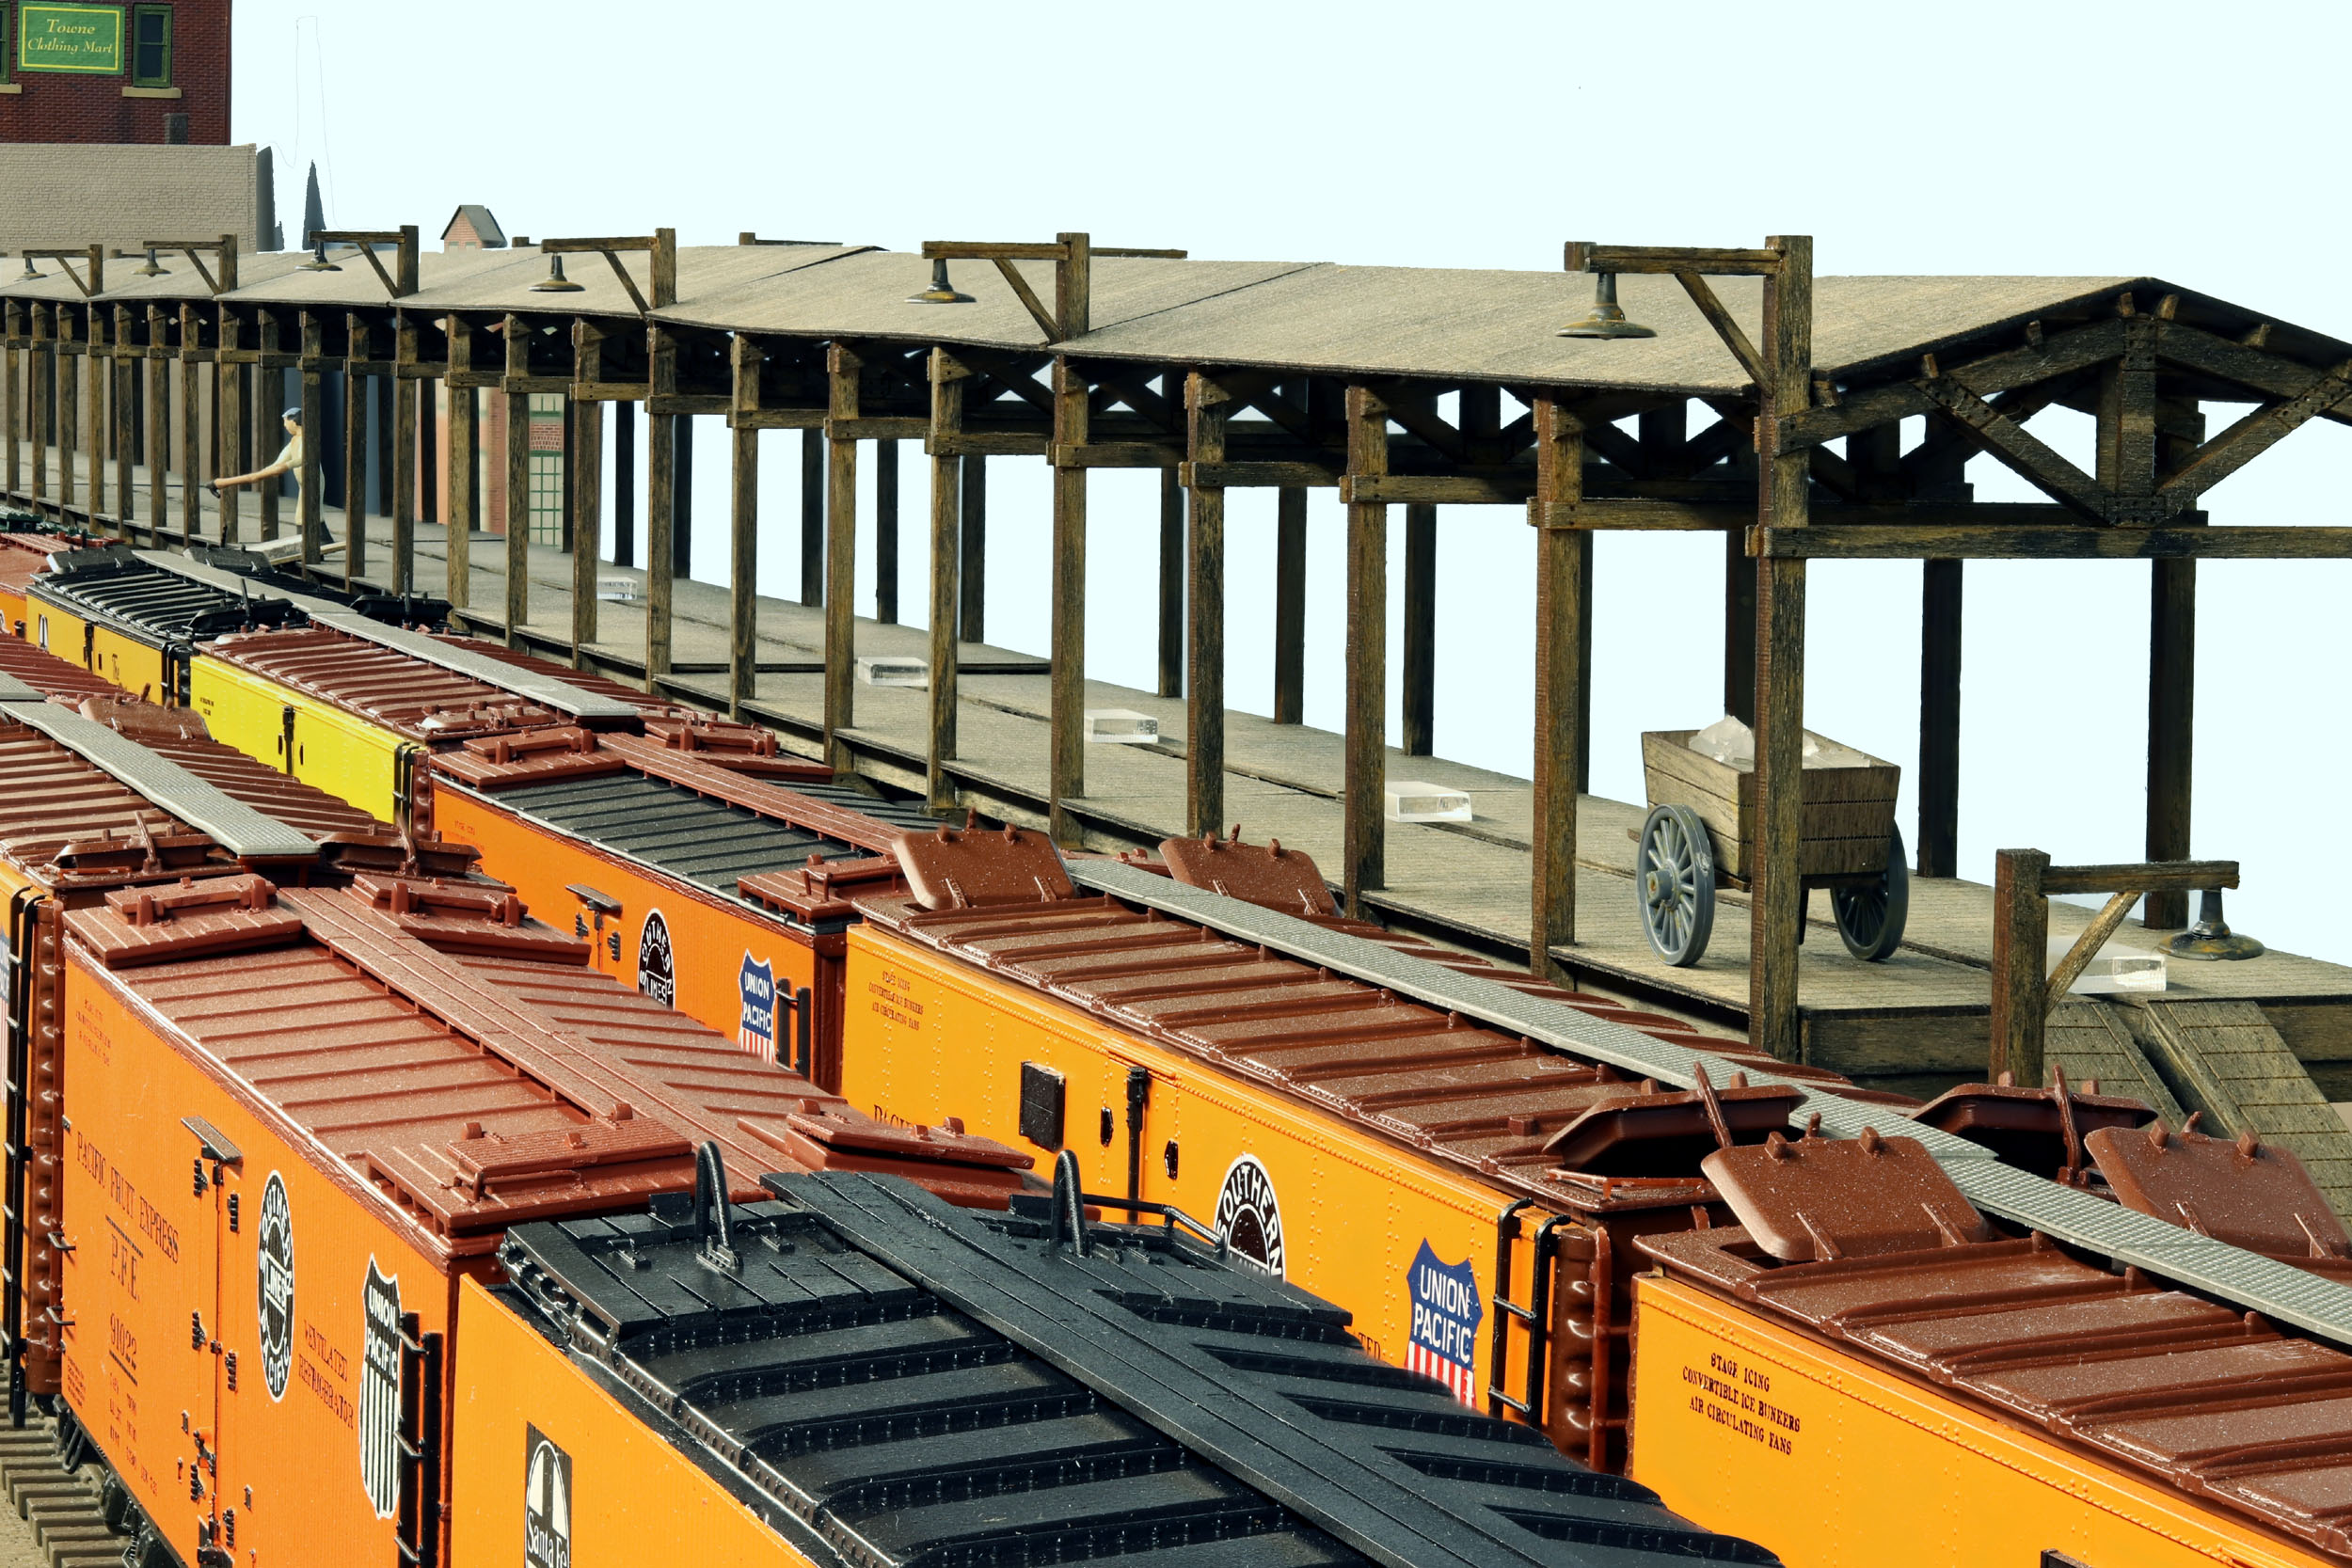
Ice Platform
Added 9-10-20
These
are more Helicon Focus stack photos I took to highlight my reefer train, ice
platform from my friend Al http://www.eastwestrailservice.com
and Sellright Ice. 1 stack was 118 photos, my most ever. I was using my Canon
80D camera and 100-400 USM II L lens. I had all my completed reefers out and
running. There are about 20 plastic reefer kits still to be assembled. There
are now 4 custom built 50’ reefers in the train as well. I determined I can fit
about 60 cars on both reefer tracks and still have a clear runaround for
switching. Even though getting sky right is a little off I really like these
photos.


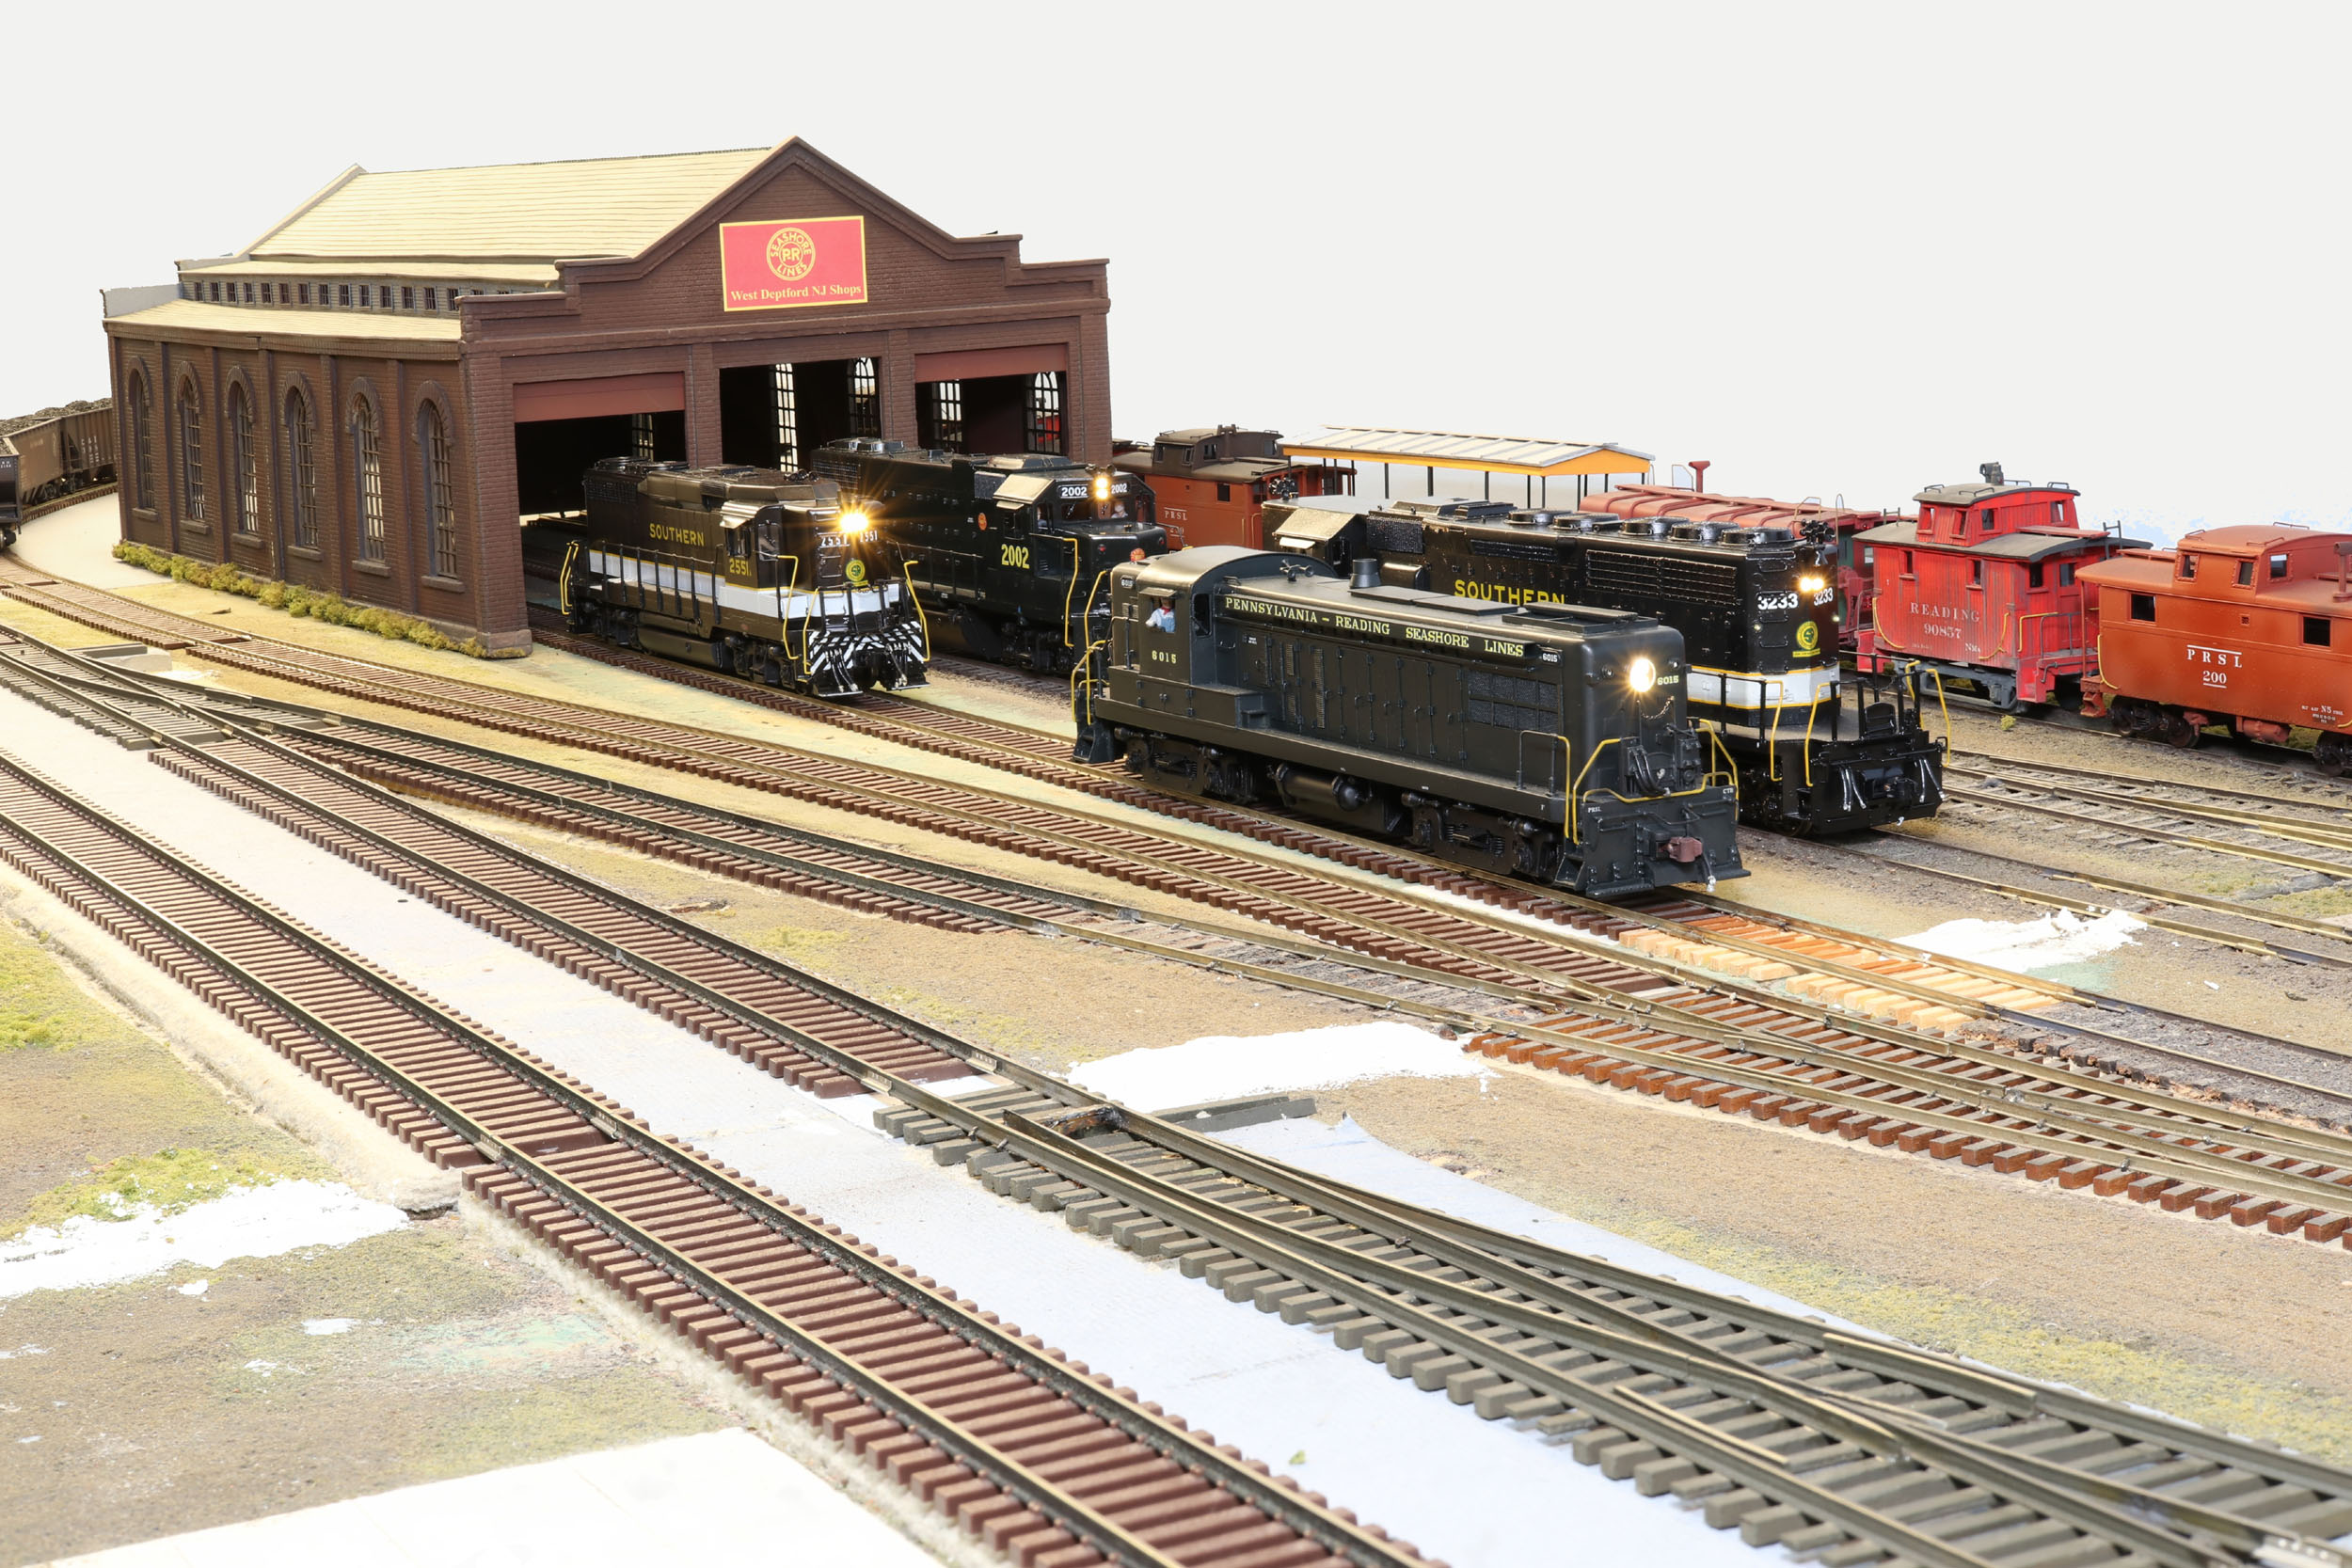
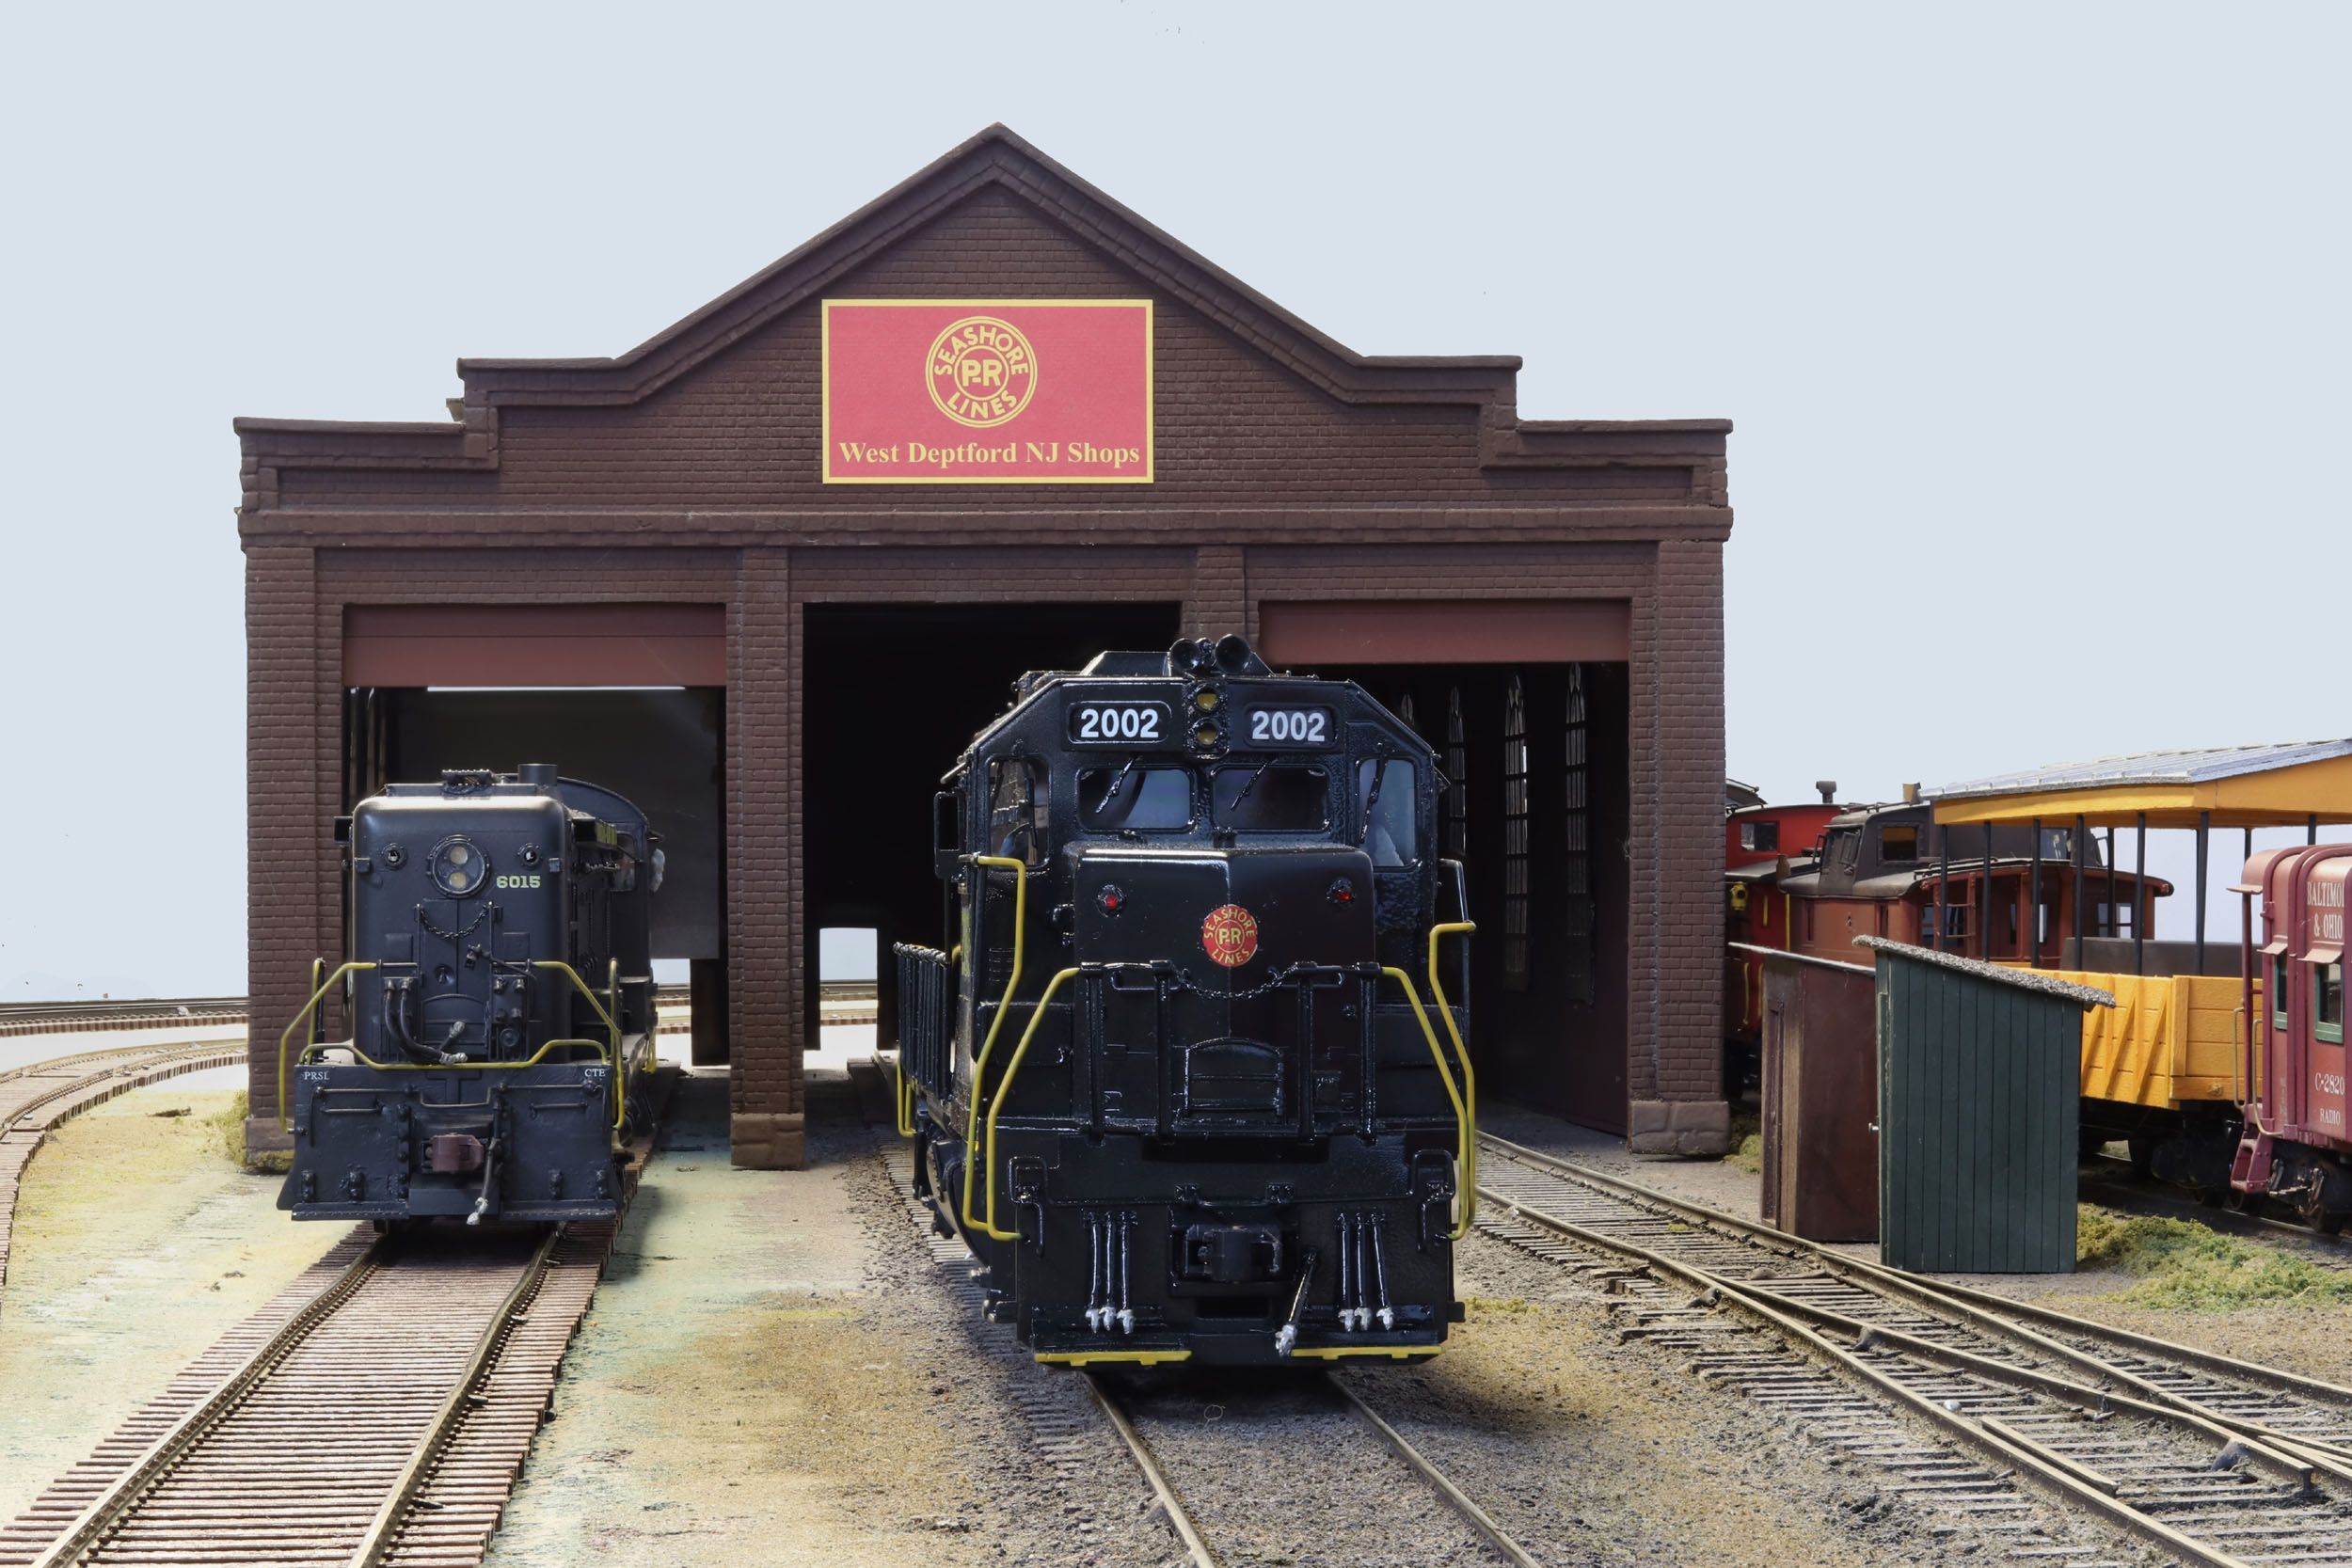
Engine
House
I took
some locos off the layout and boxed them for a while that have been there for
truly years. I just took a few that were left and posed at the enginehouse.
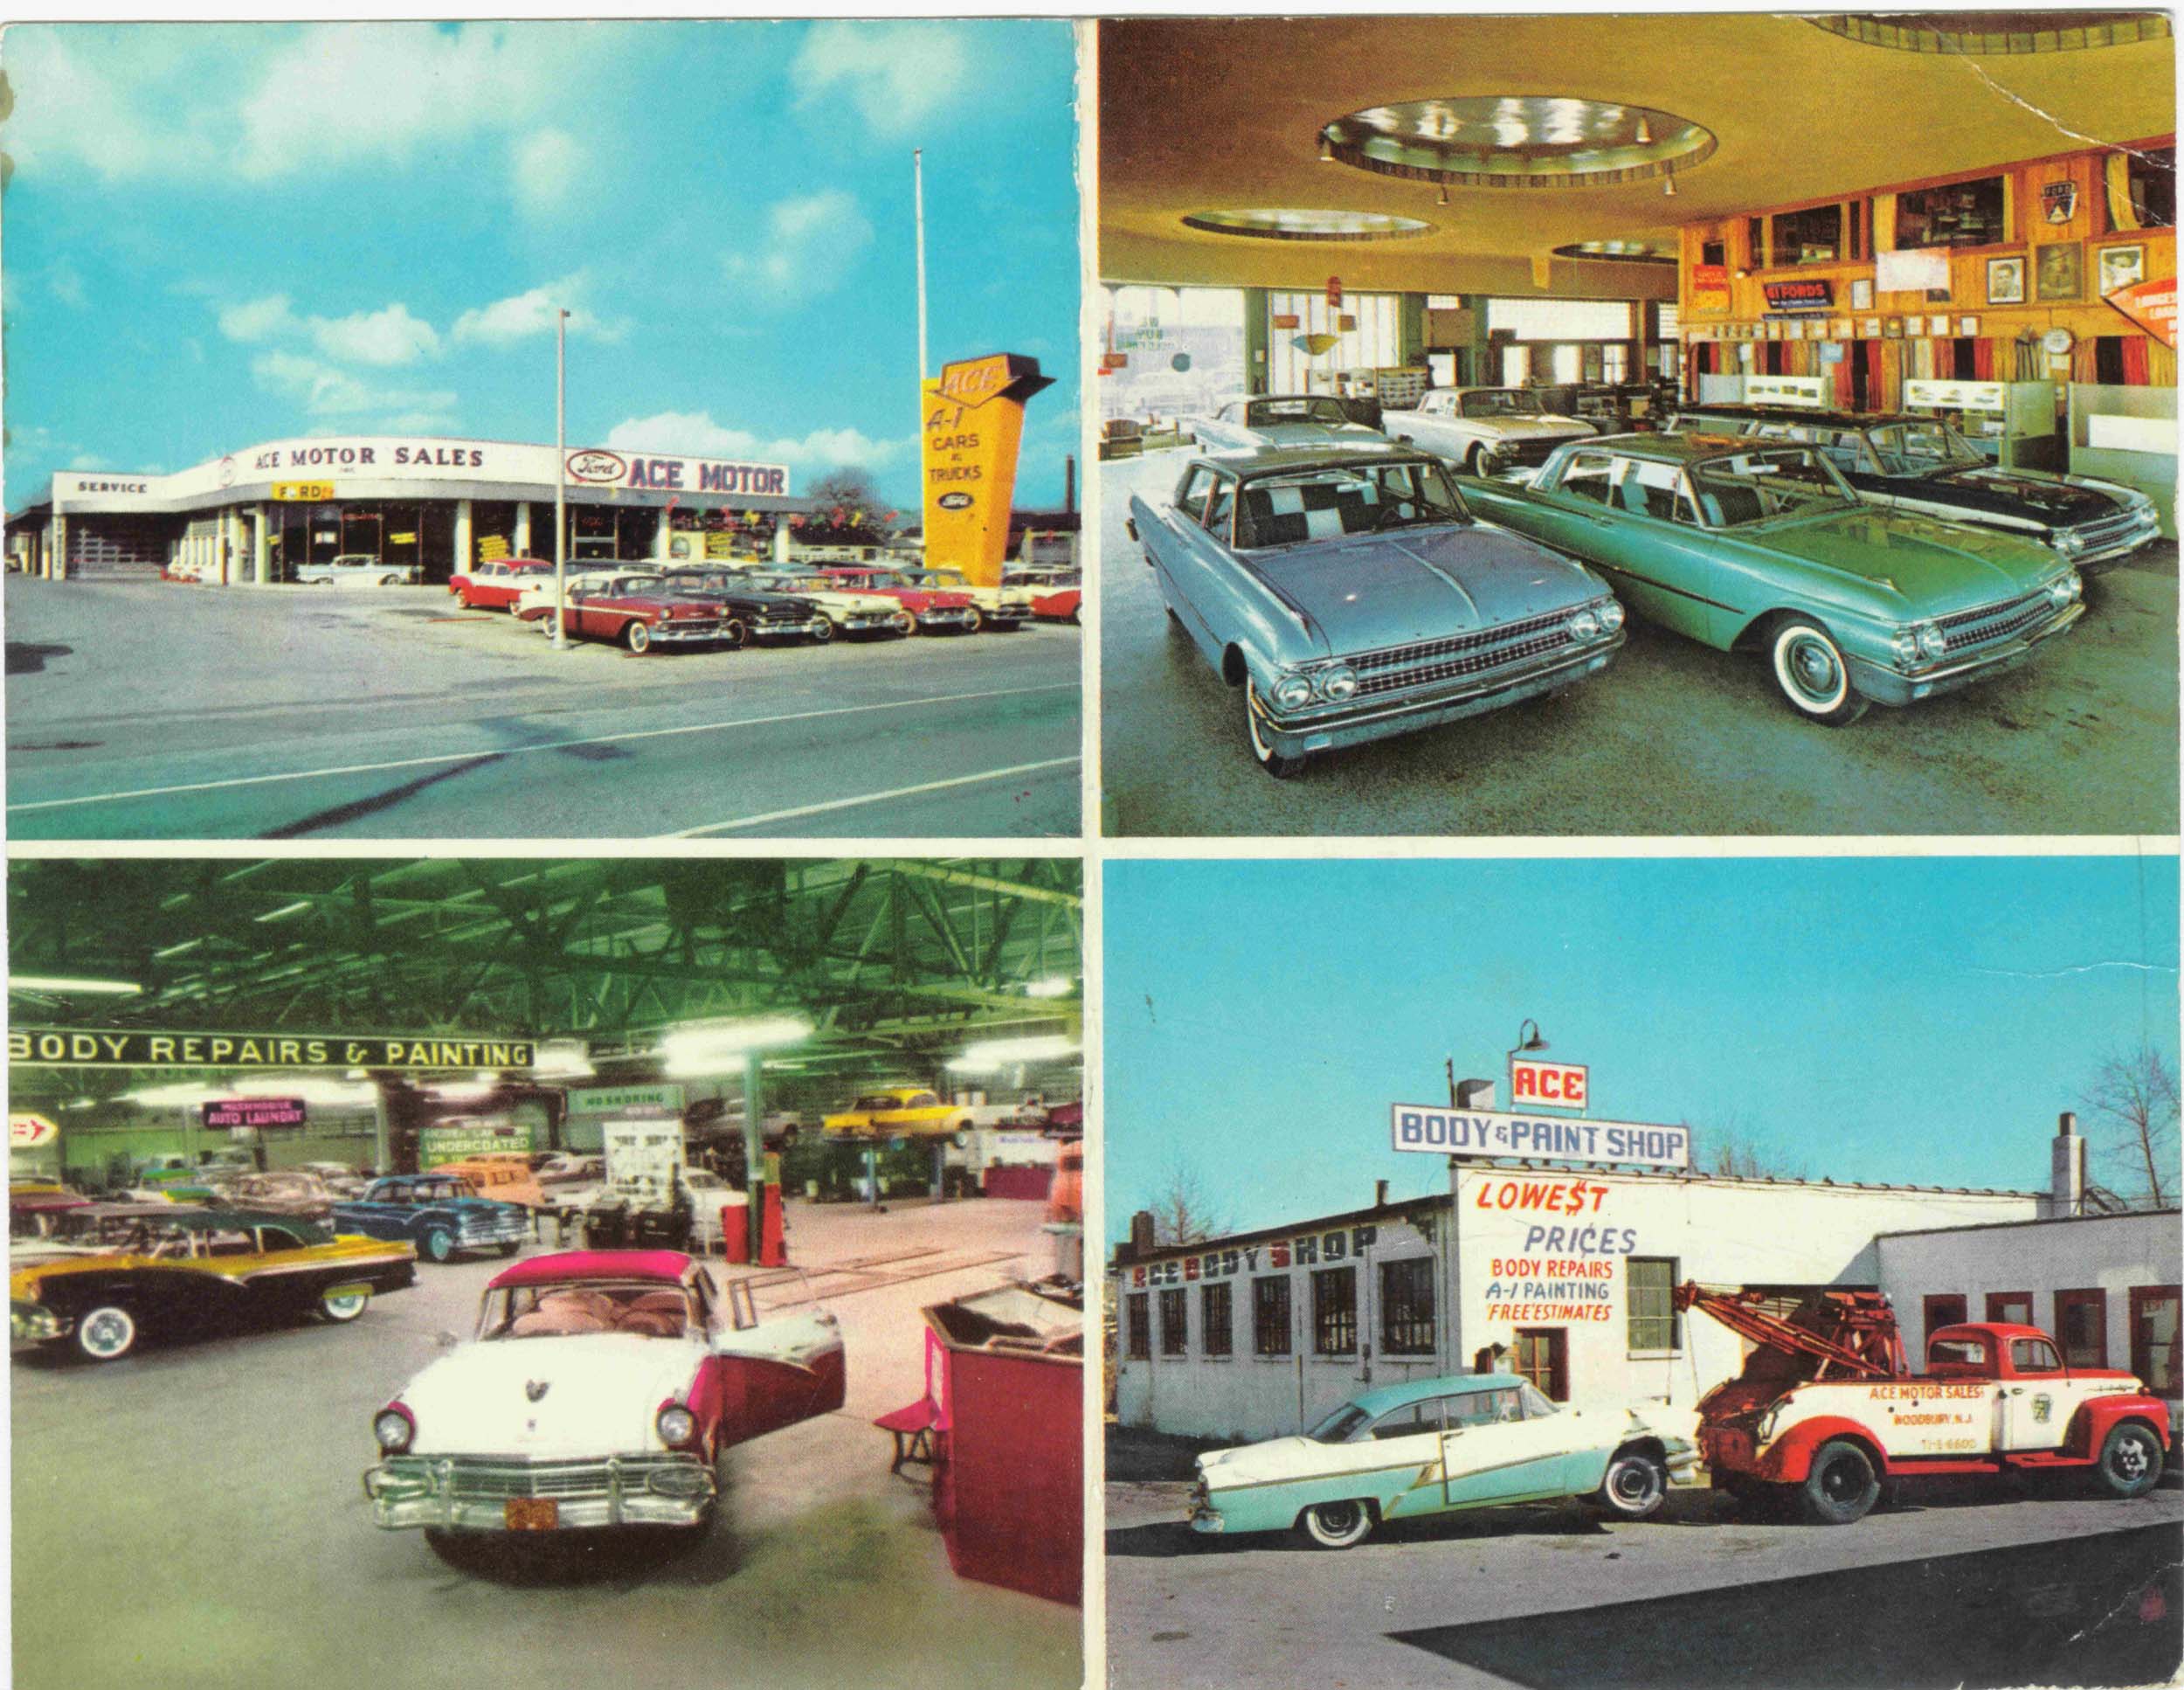
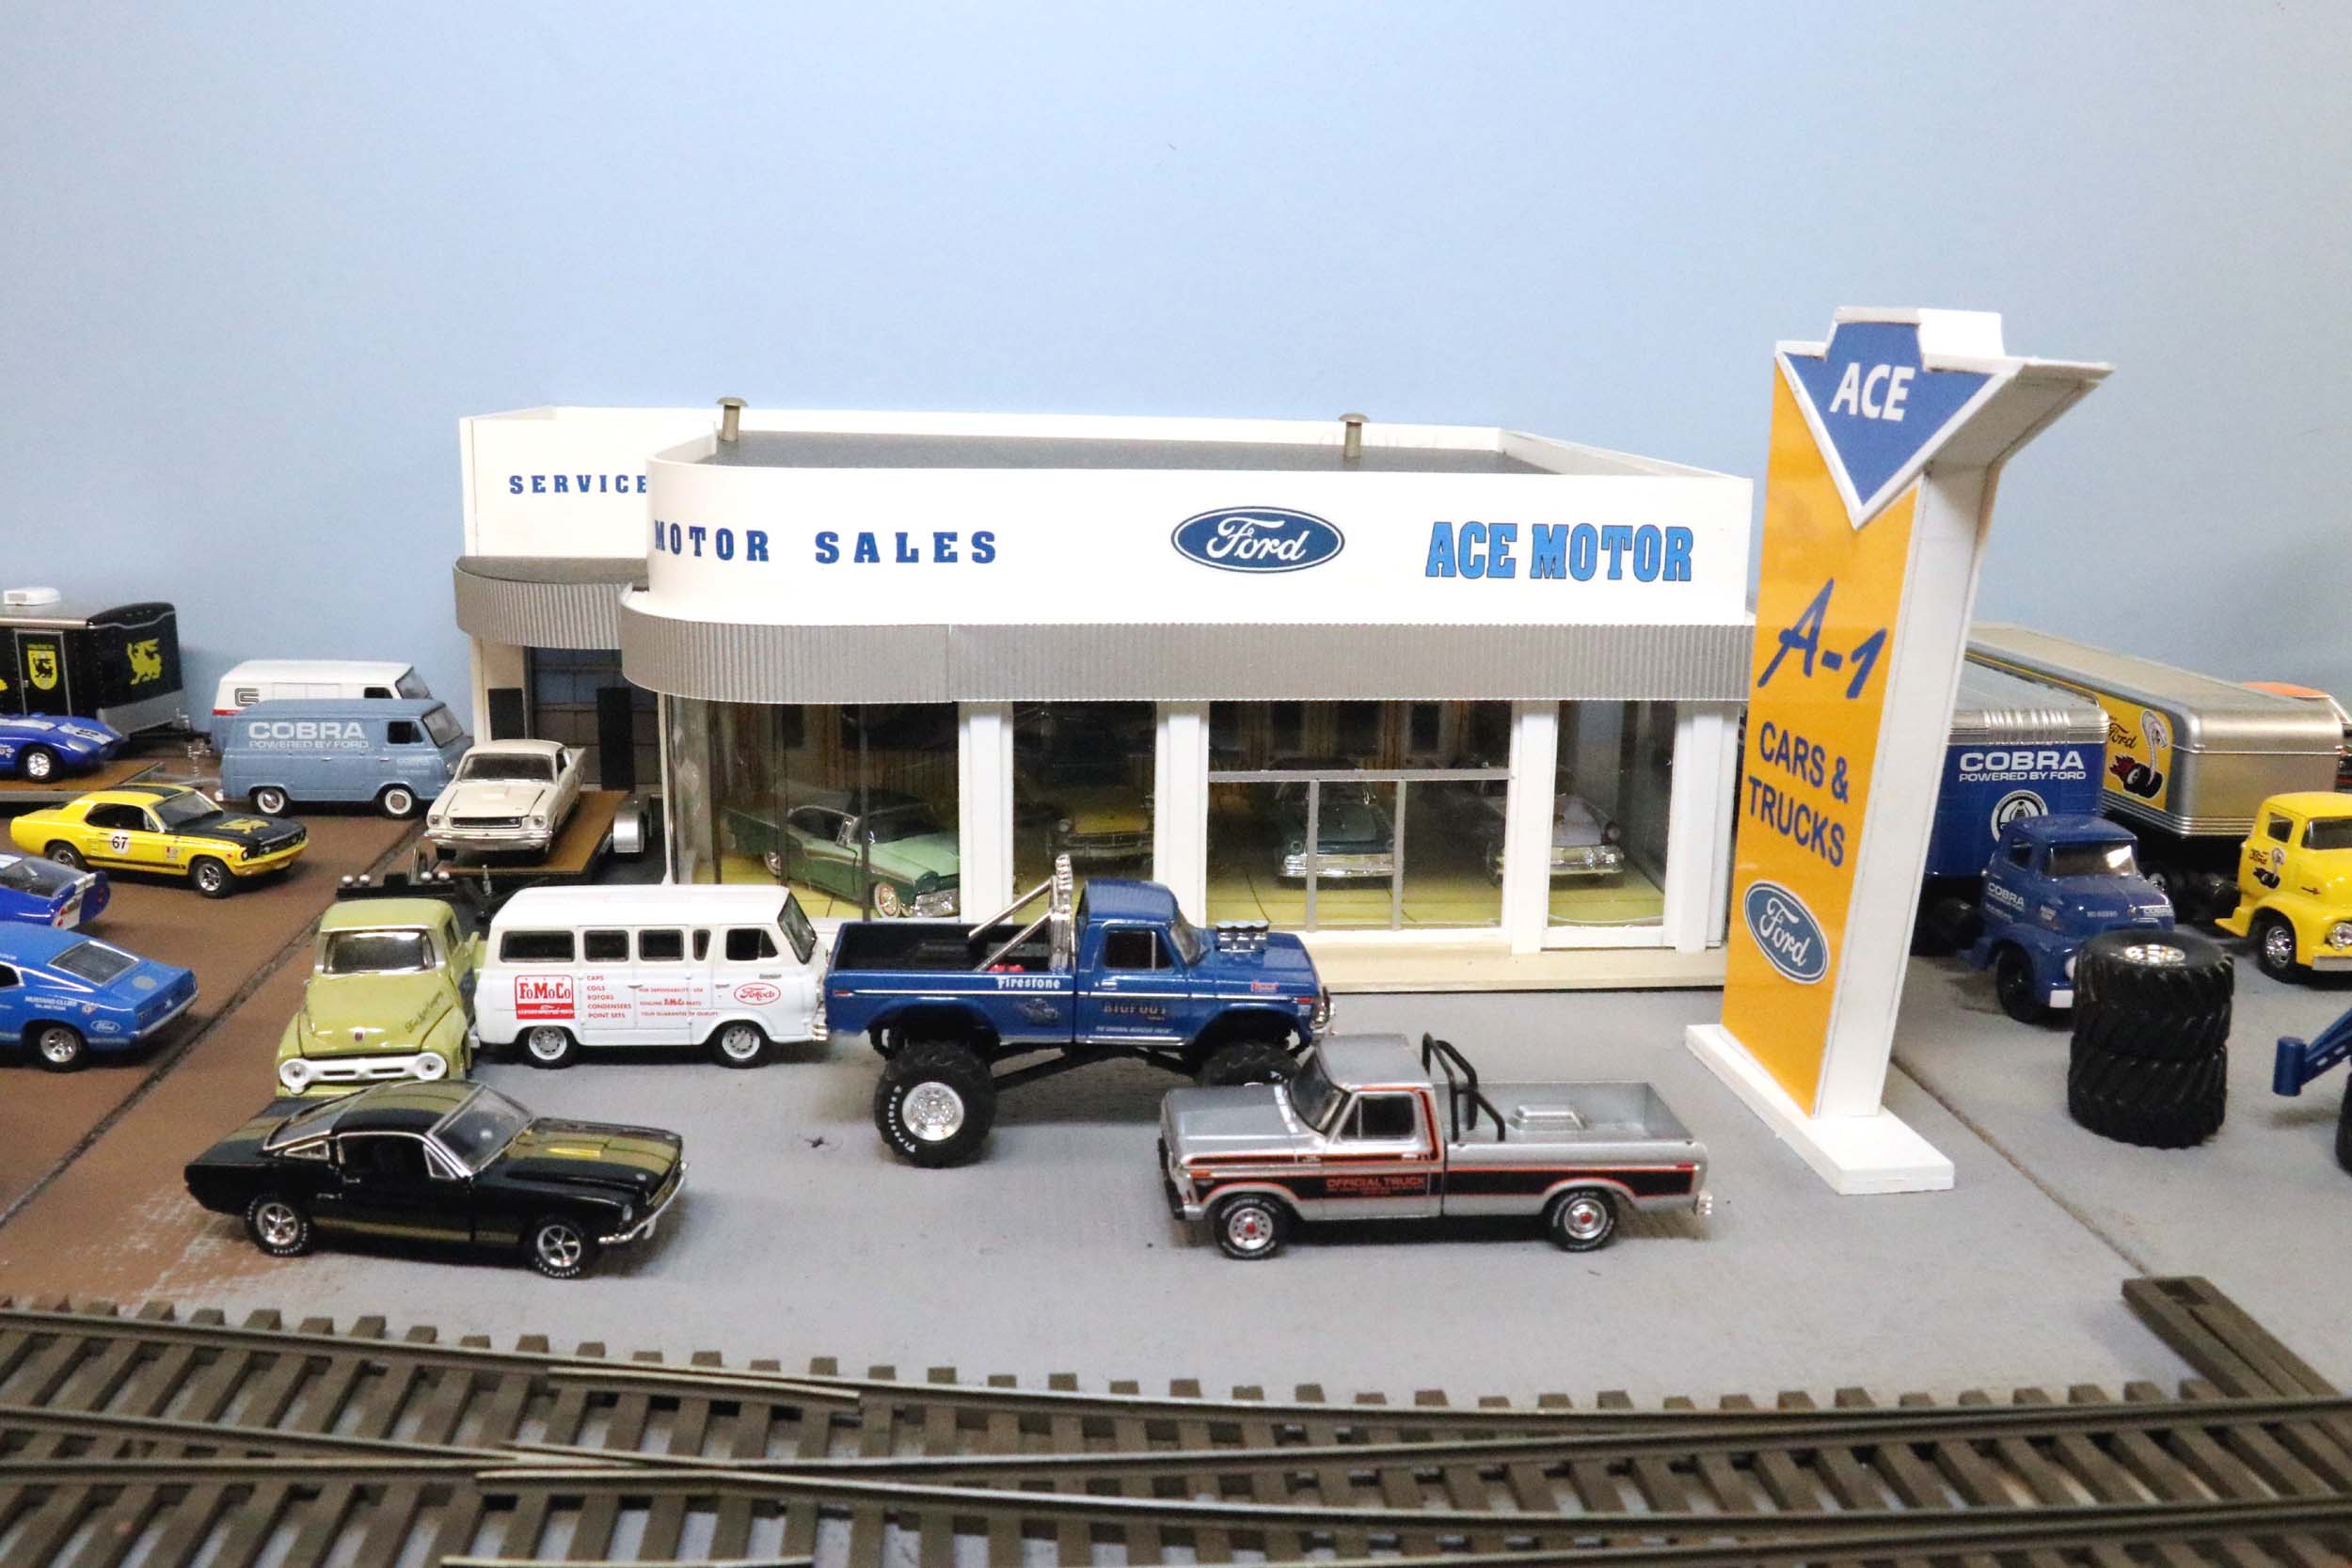
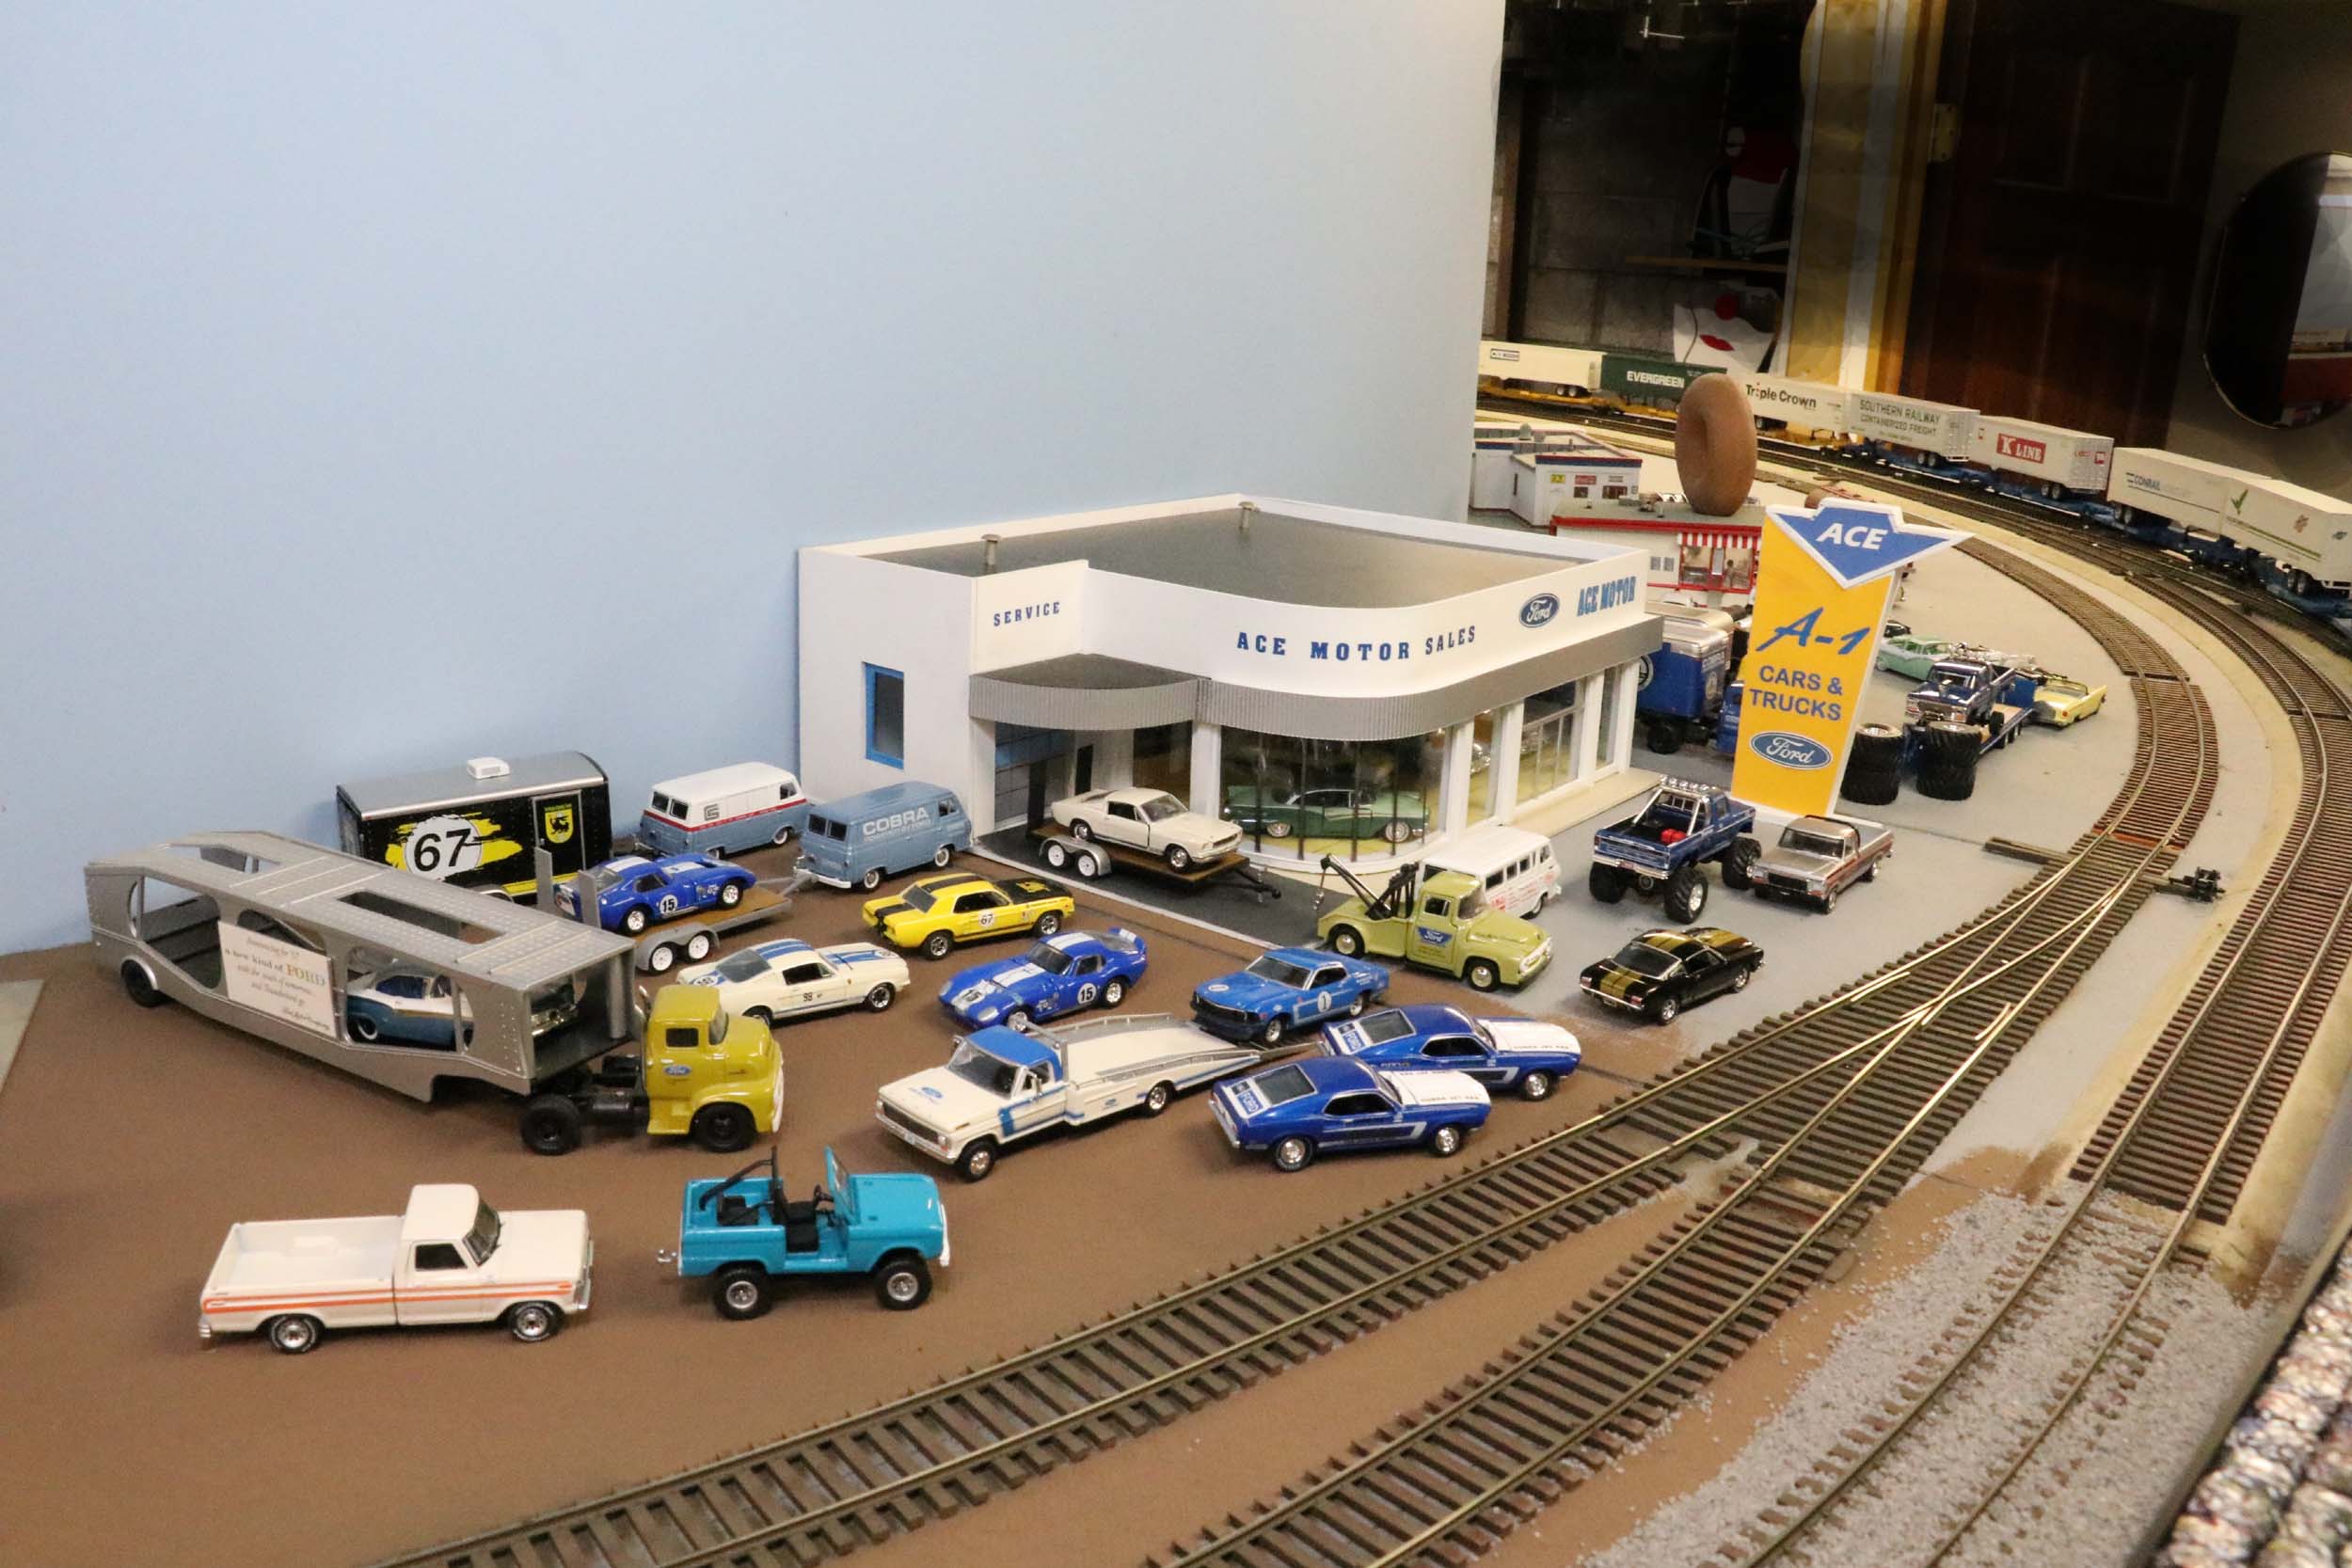
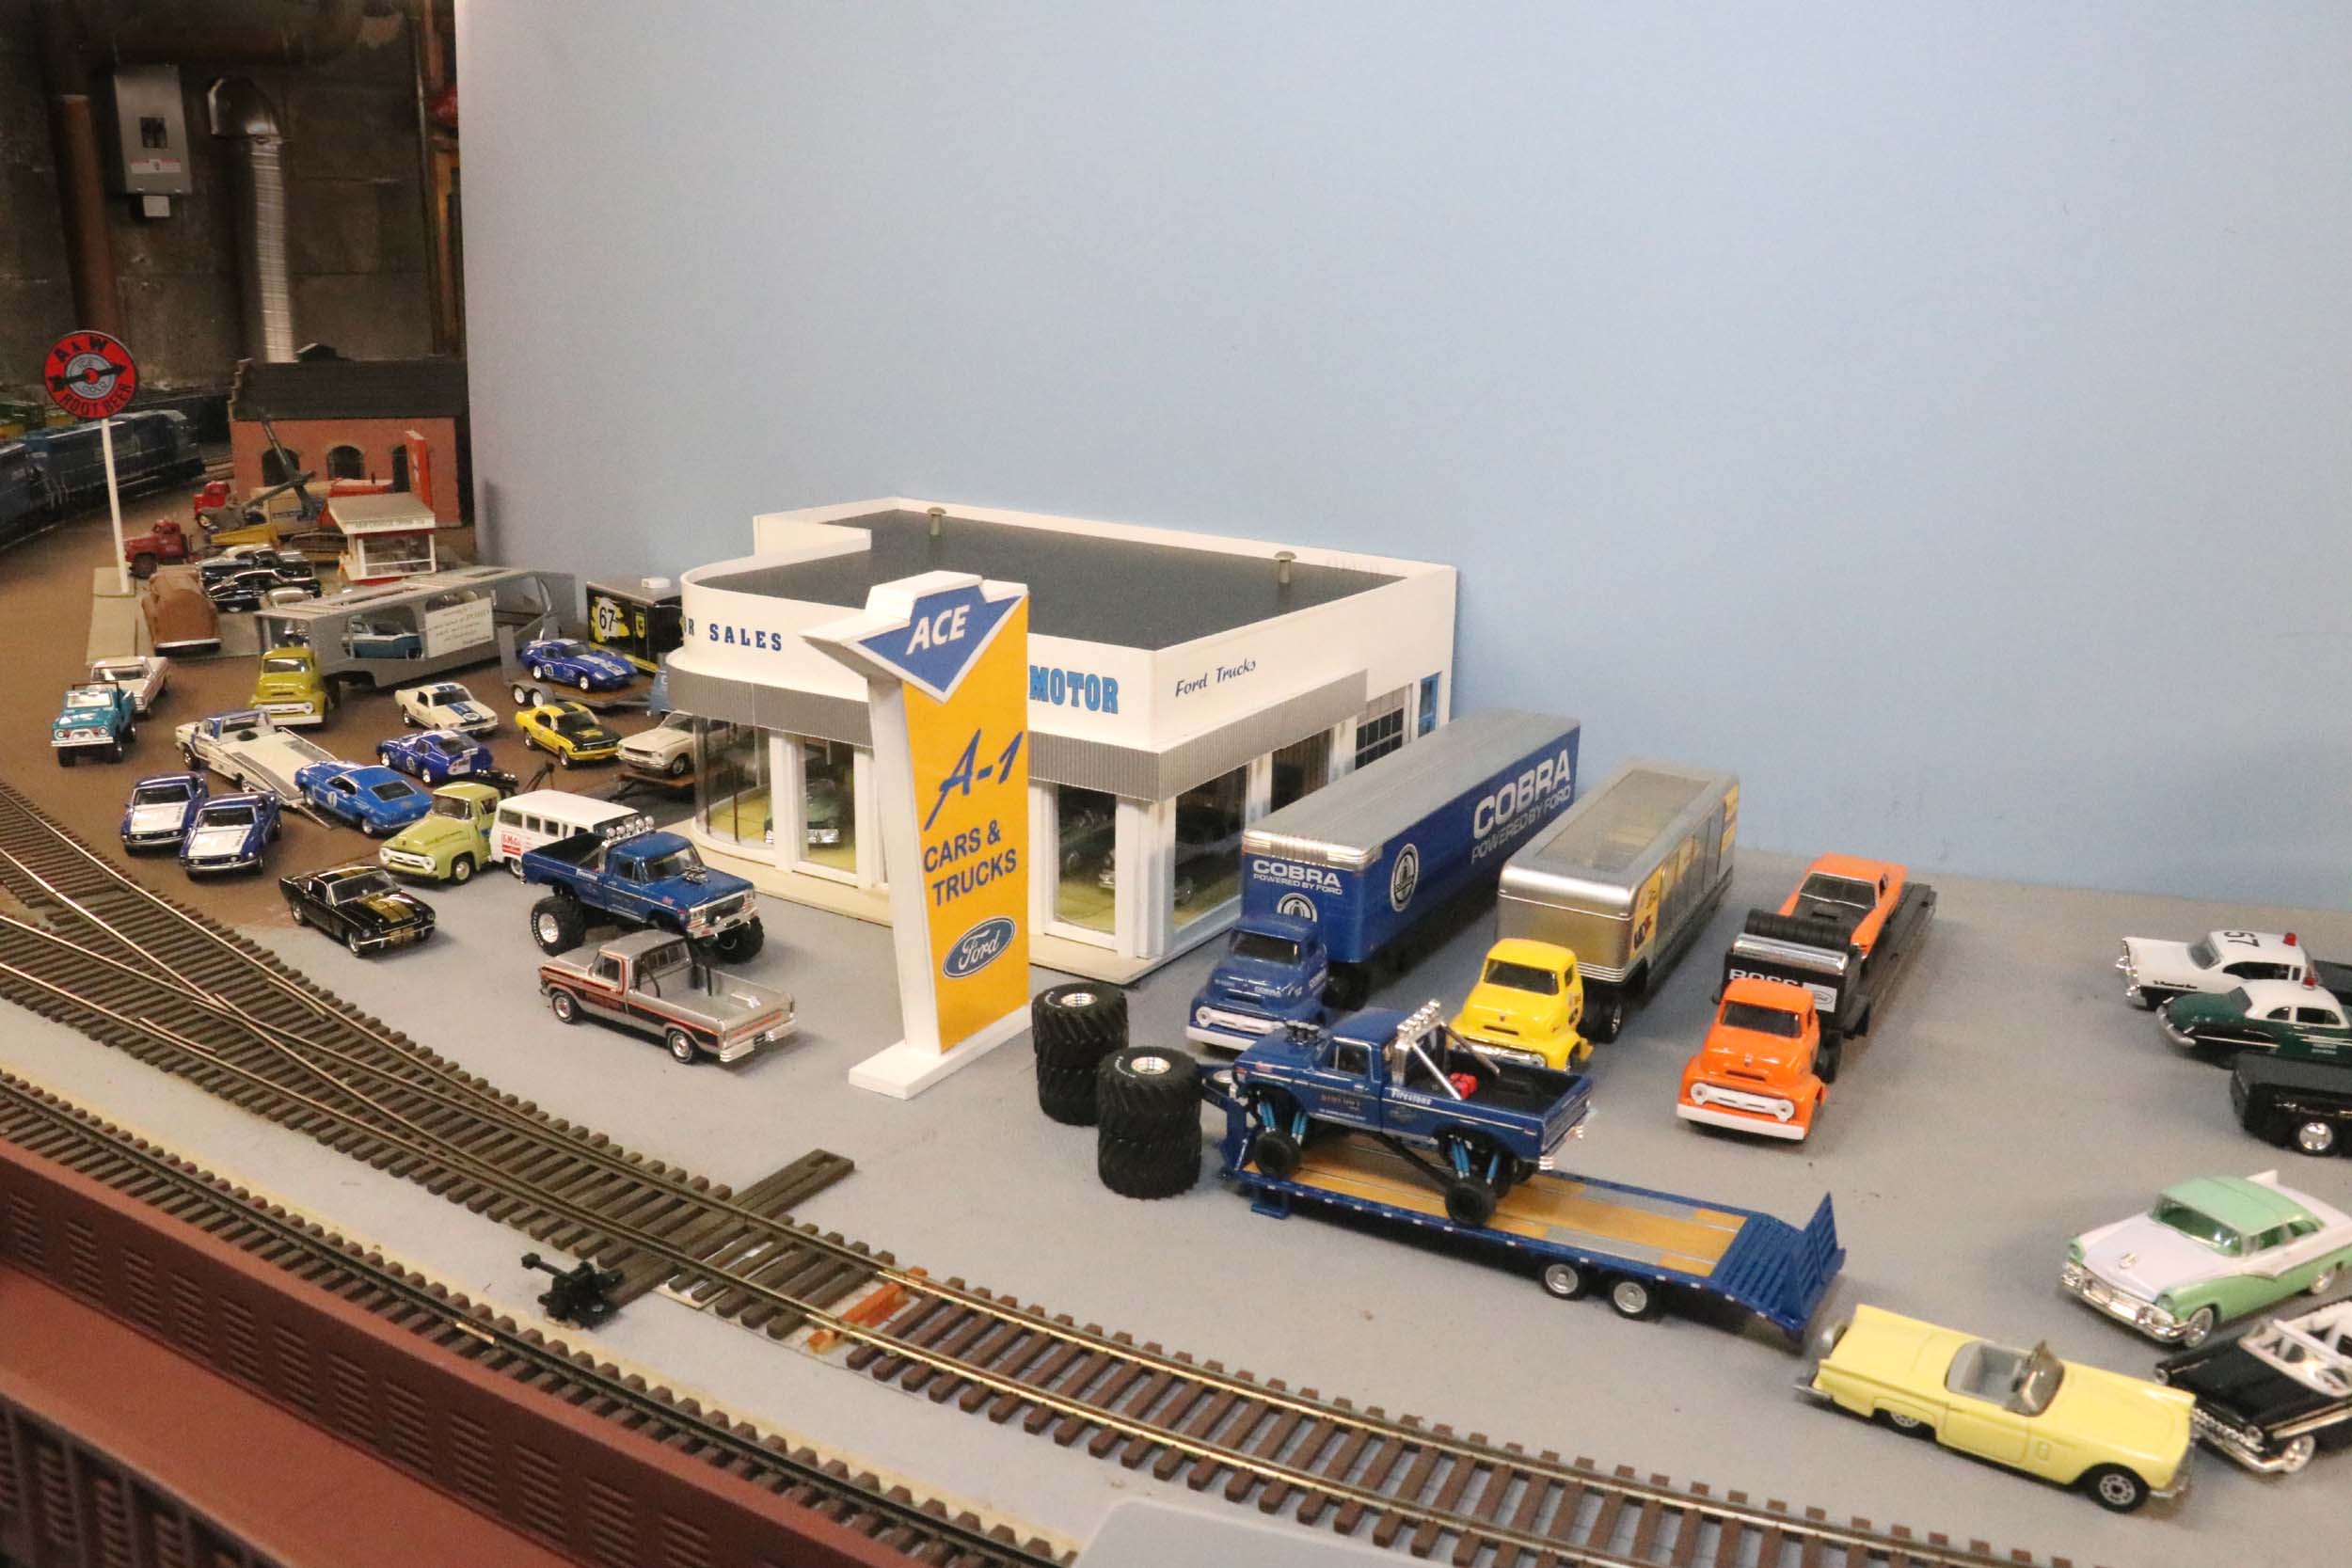
Ace
Ford
Added 10-9-19
I have
been a big FORD and especially Mustang fan since about 1975. I had this Ace
Ford custom made in 2014 but just never added photos to the layout pages. Ace
Ford really exists about 4 miles from me in Woodbury NJ. My version is a
reasonable likeness to the building in the 1950s but is much shorter as I don’t
have room for the shop. It has become the place for my displaying die cast Ford
and Shelby collection even though most of the cars are 1965 to 1979, not period
1957 era correct for the layout. S Scale (1/64) is a huge die cast car size so
there is a lot of cars and trucks to buy.
I will fix the out of era cars at some point if and when I get serious
with my scenery.
PRR Alphabet 2019
These
are more Helicon Focus photos taken 12-26-19. My A5, B6, I1, J1, K4, L1 and M1a
are shown. No other PRR classes exist in S Scale. My E6 is not completed yet. I
have 2 each of the I1, L1 and K4 but decided to not show them here this time. I
also show how I took the 1 photo with a bracket I made for my tripod.
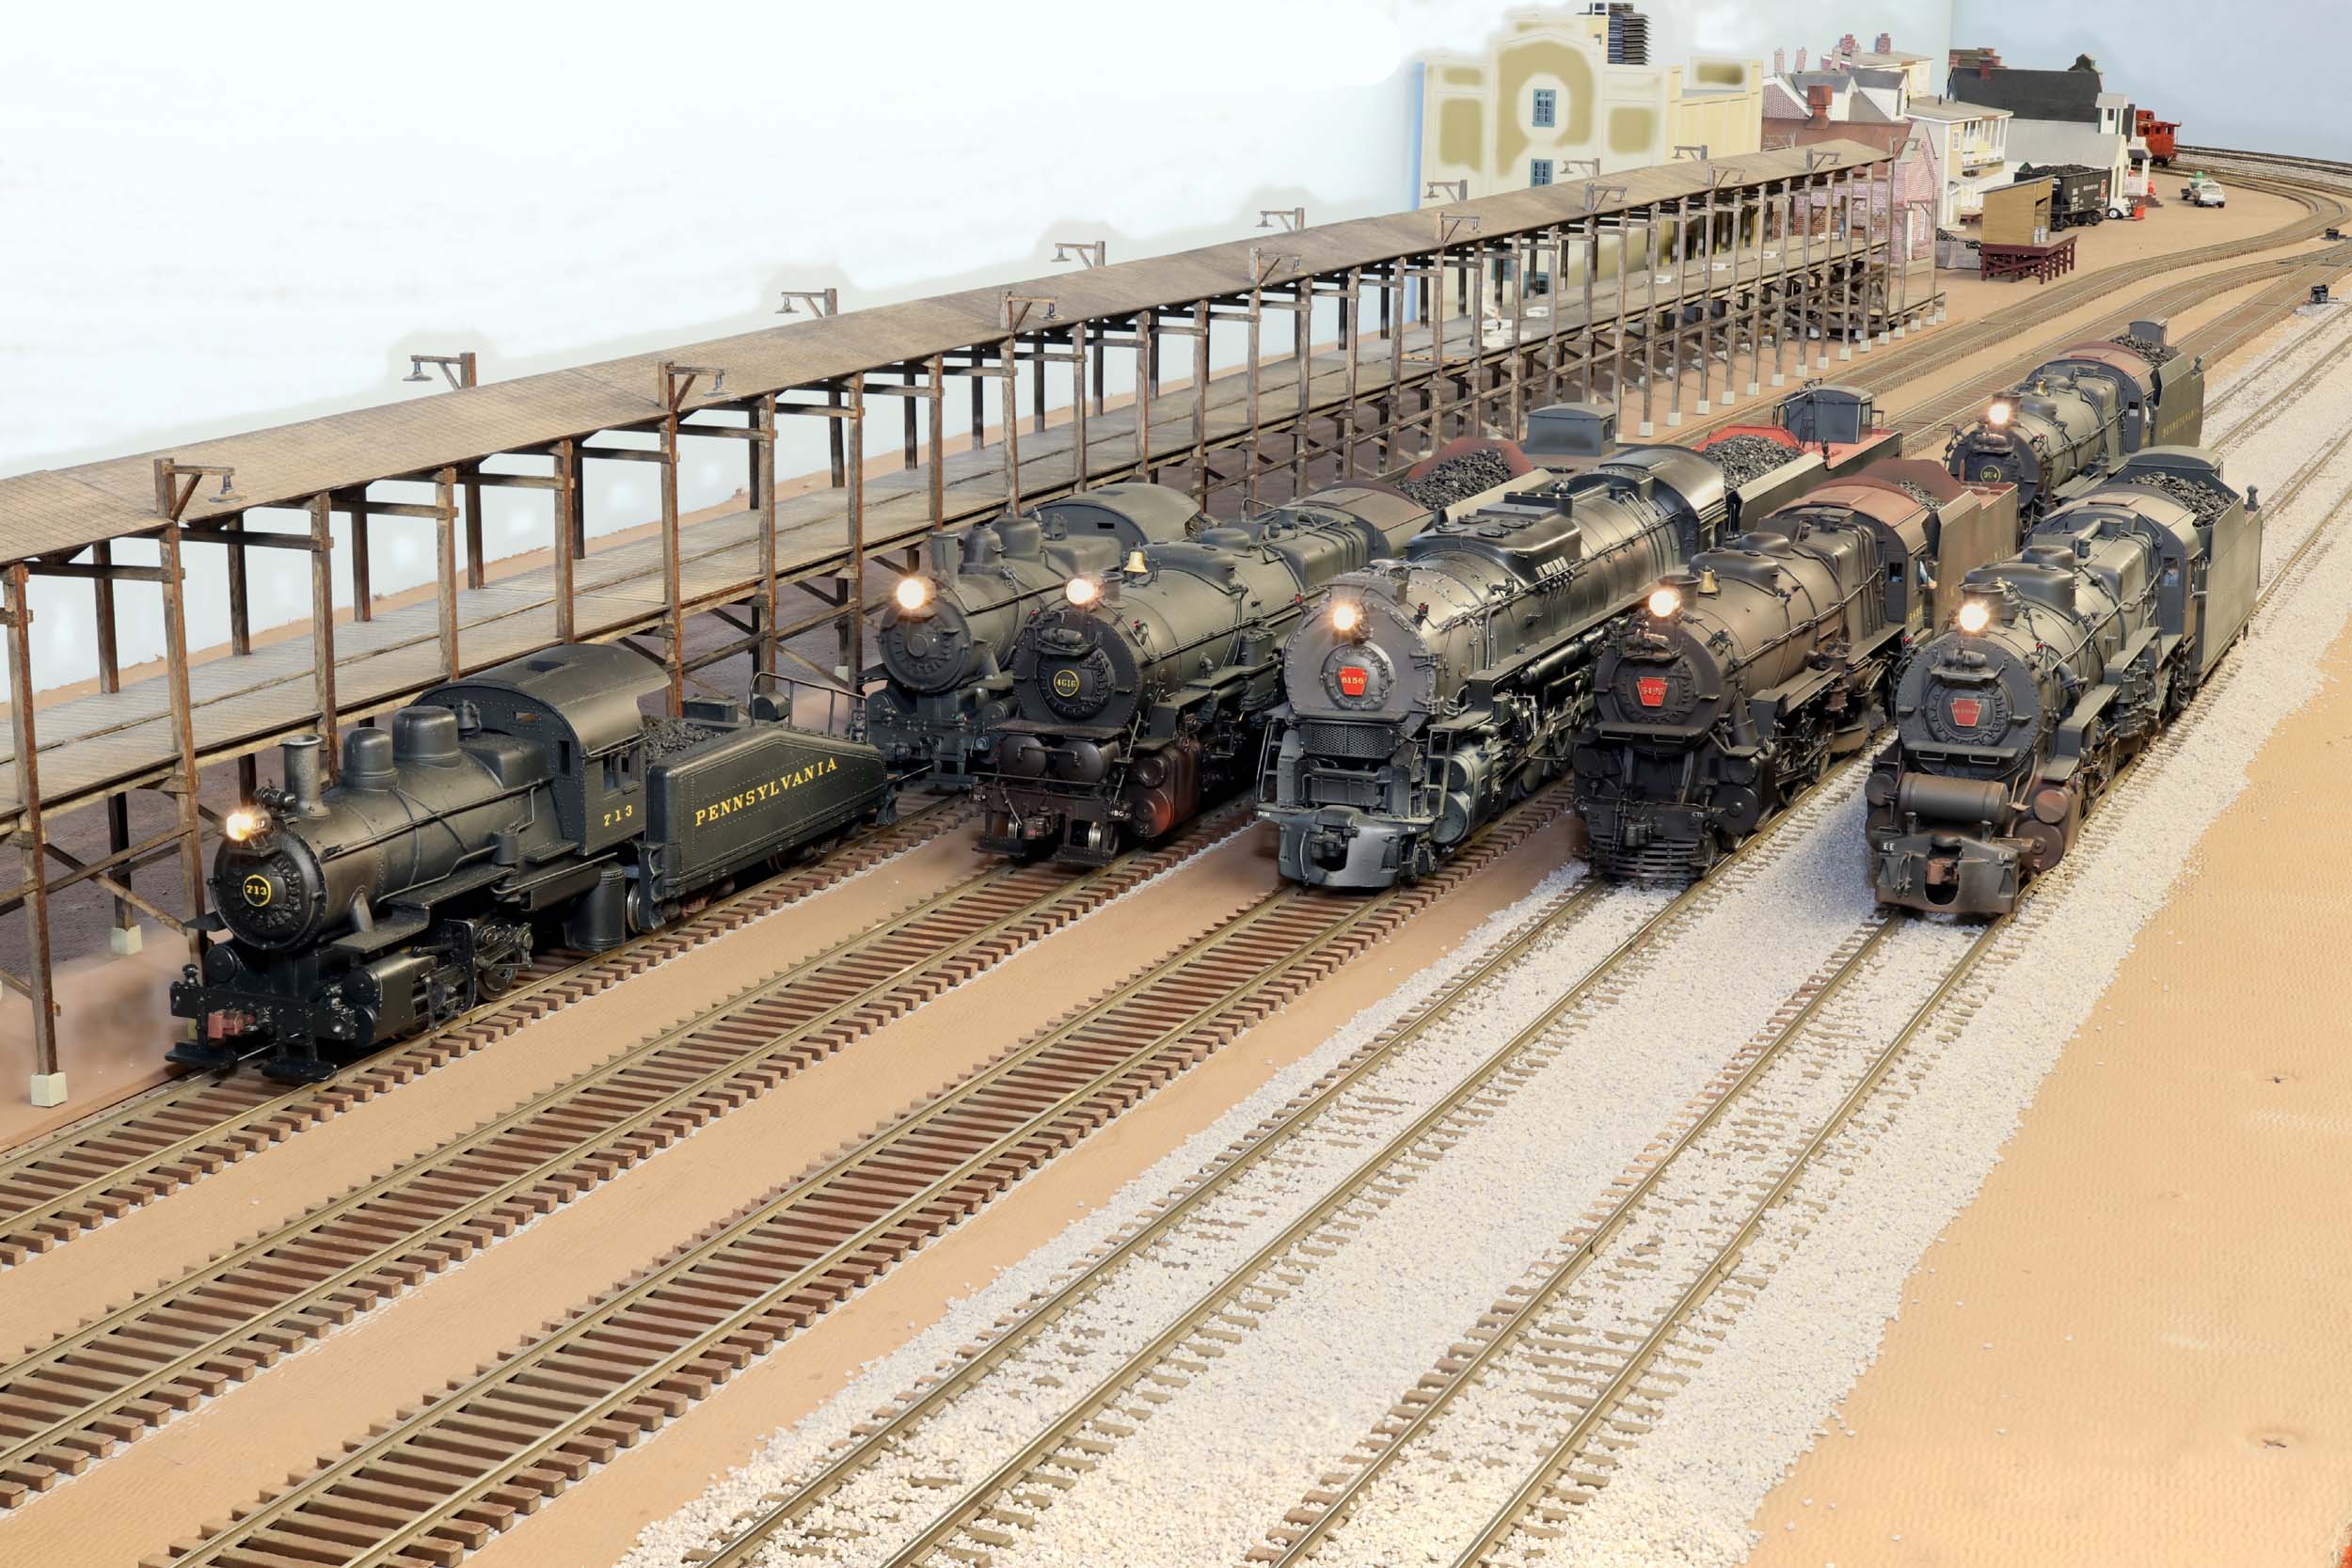


Added 1-5-20
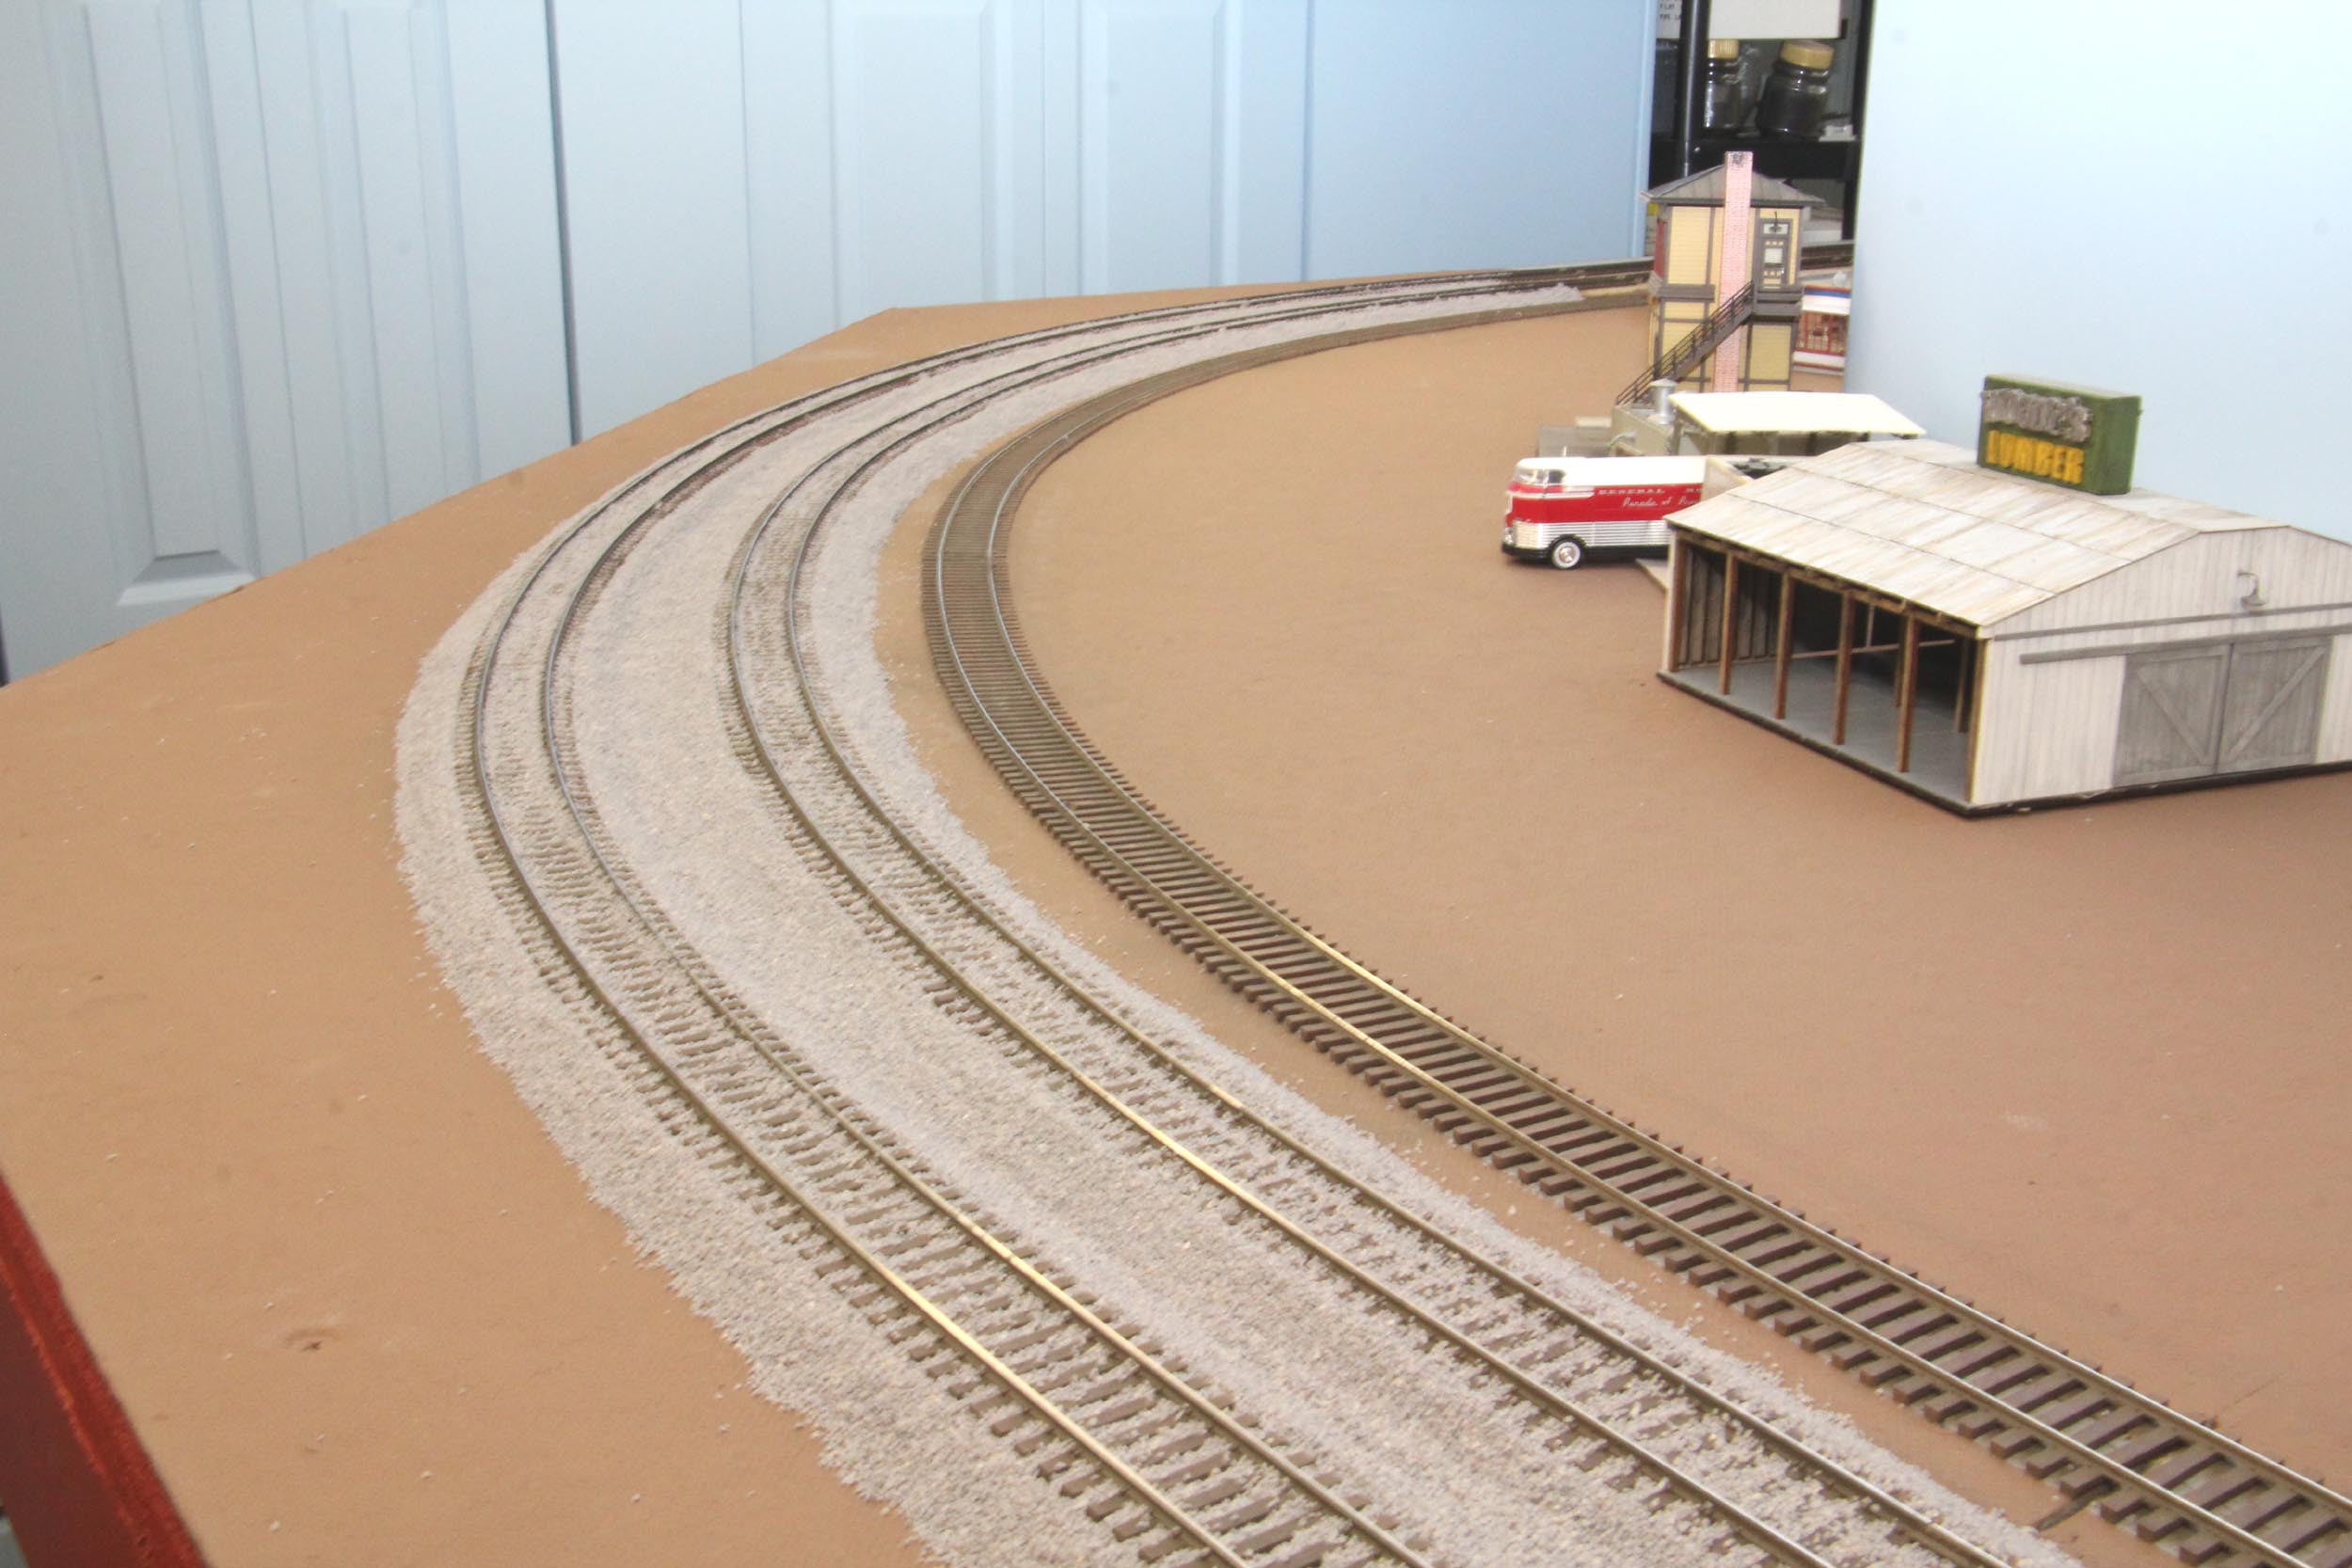
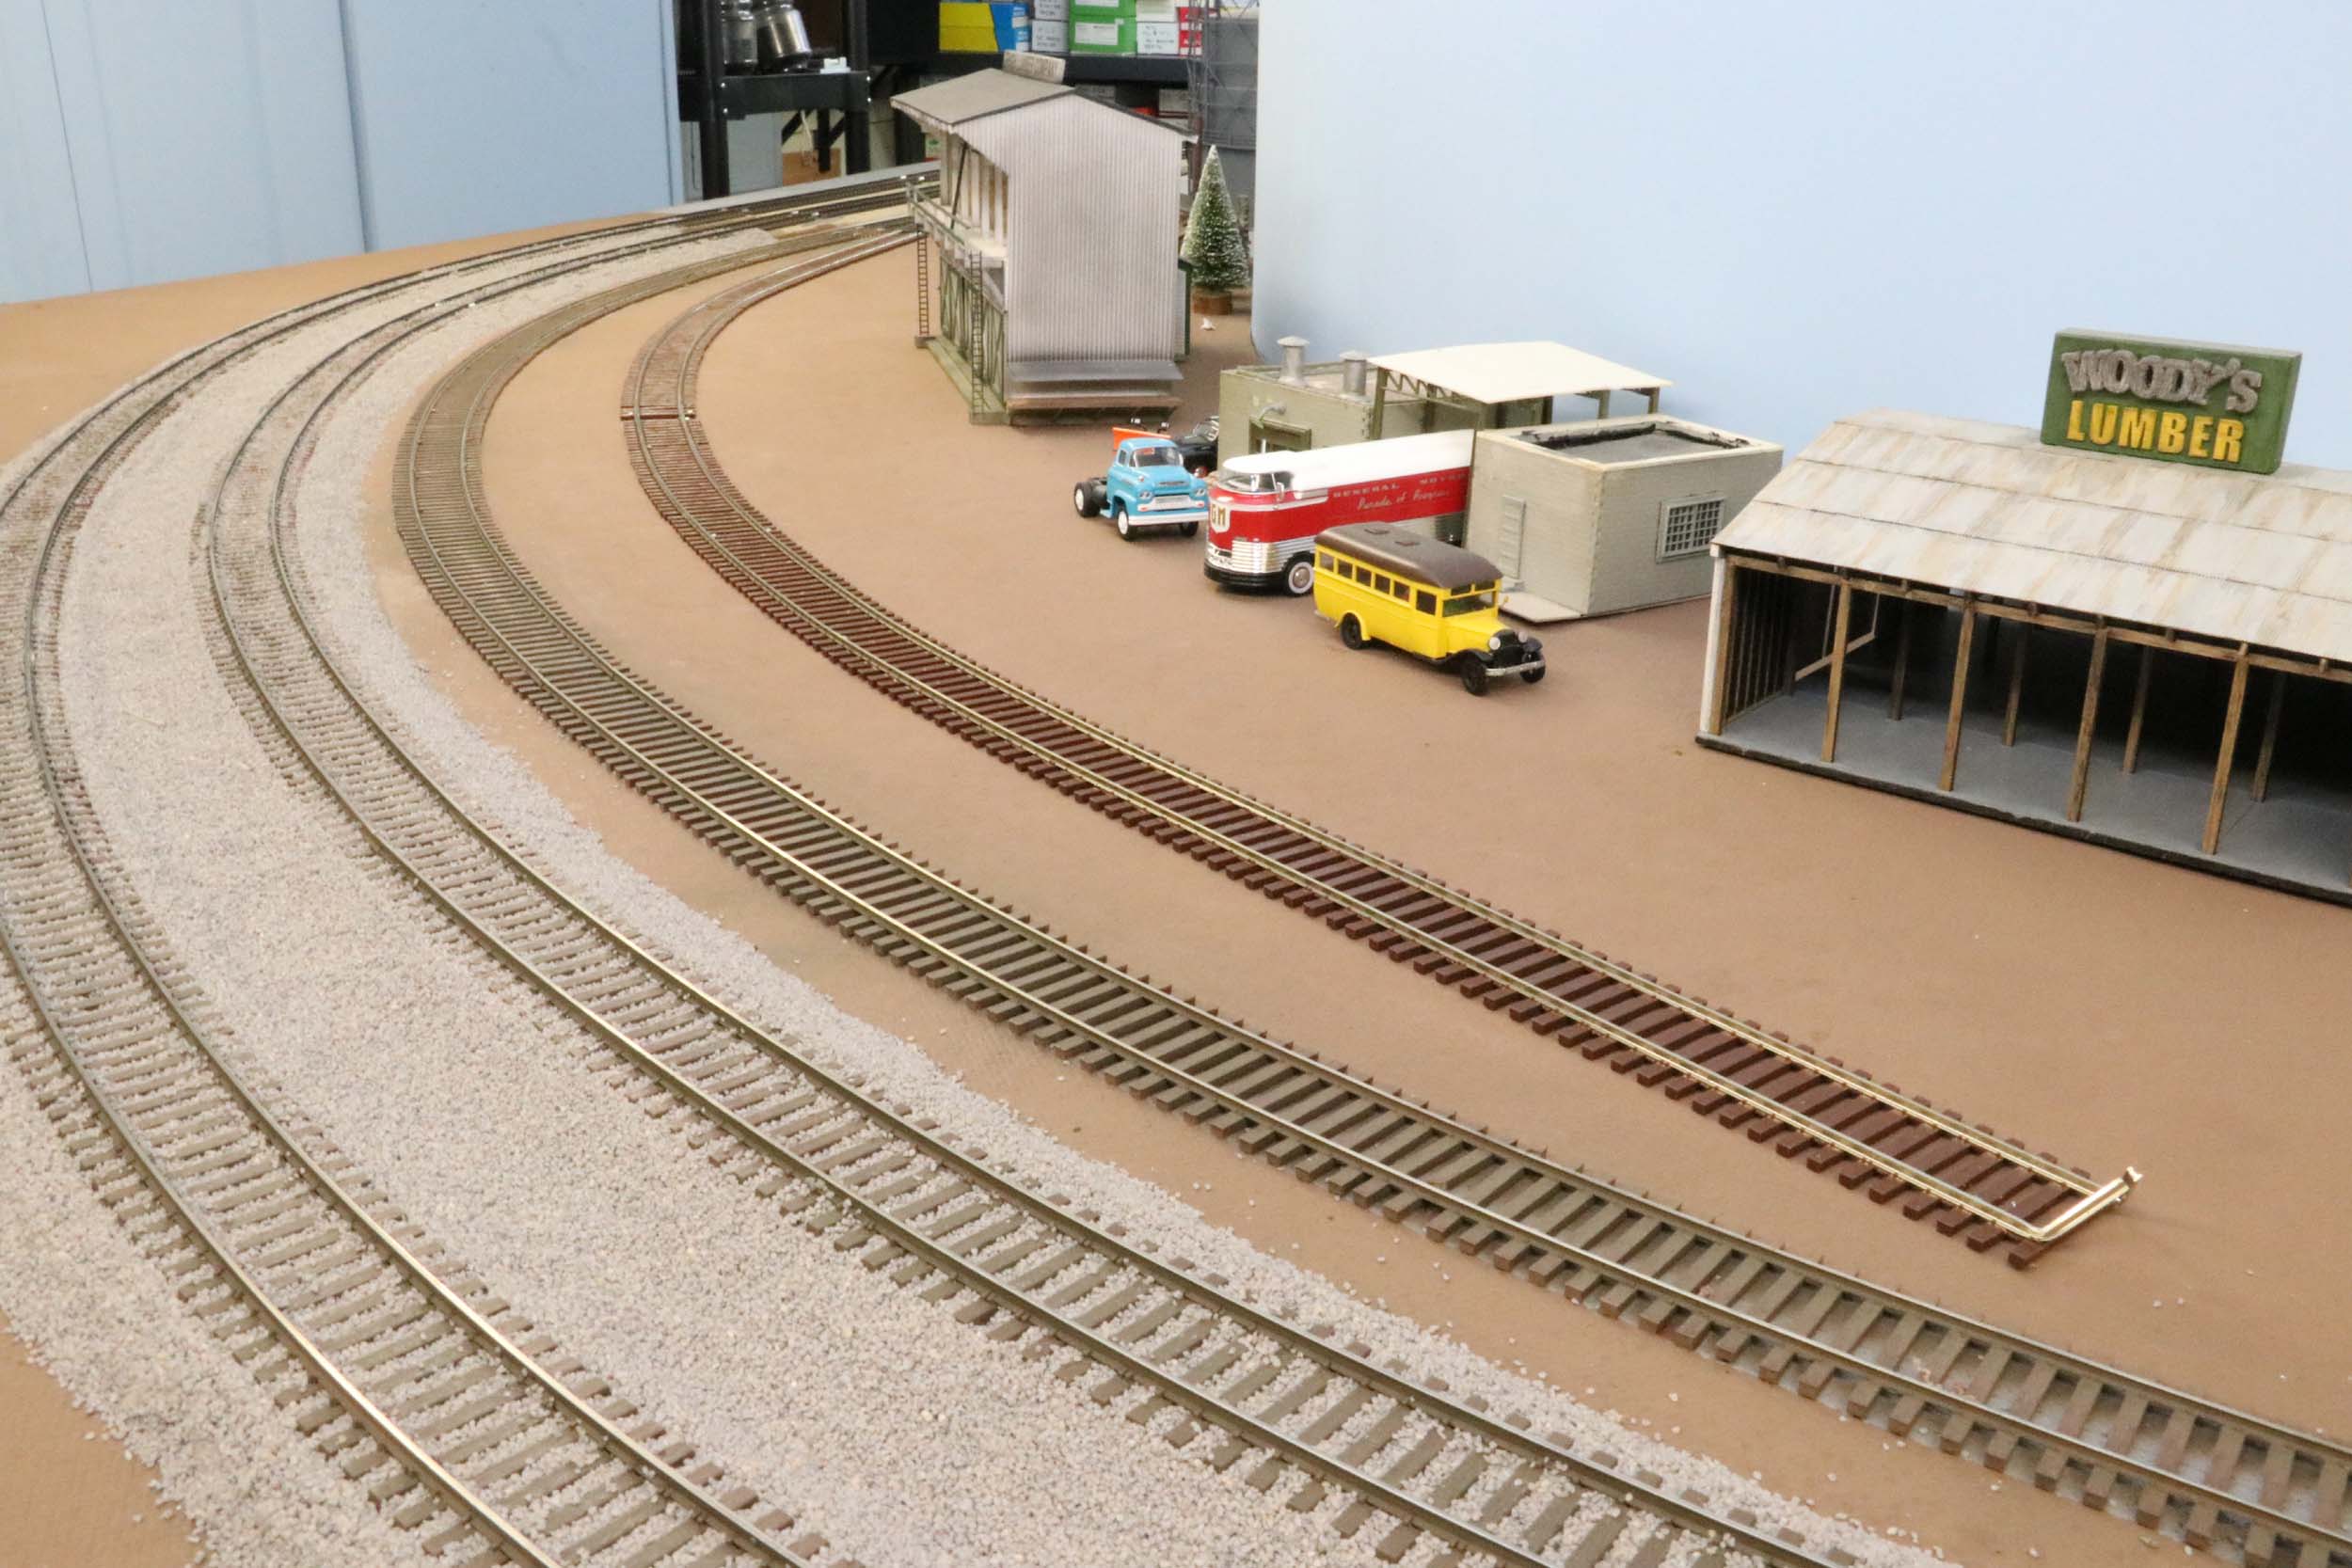
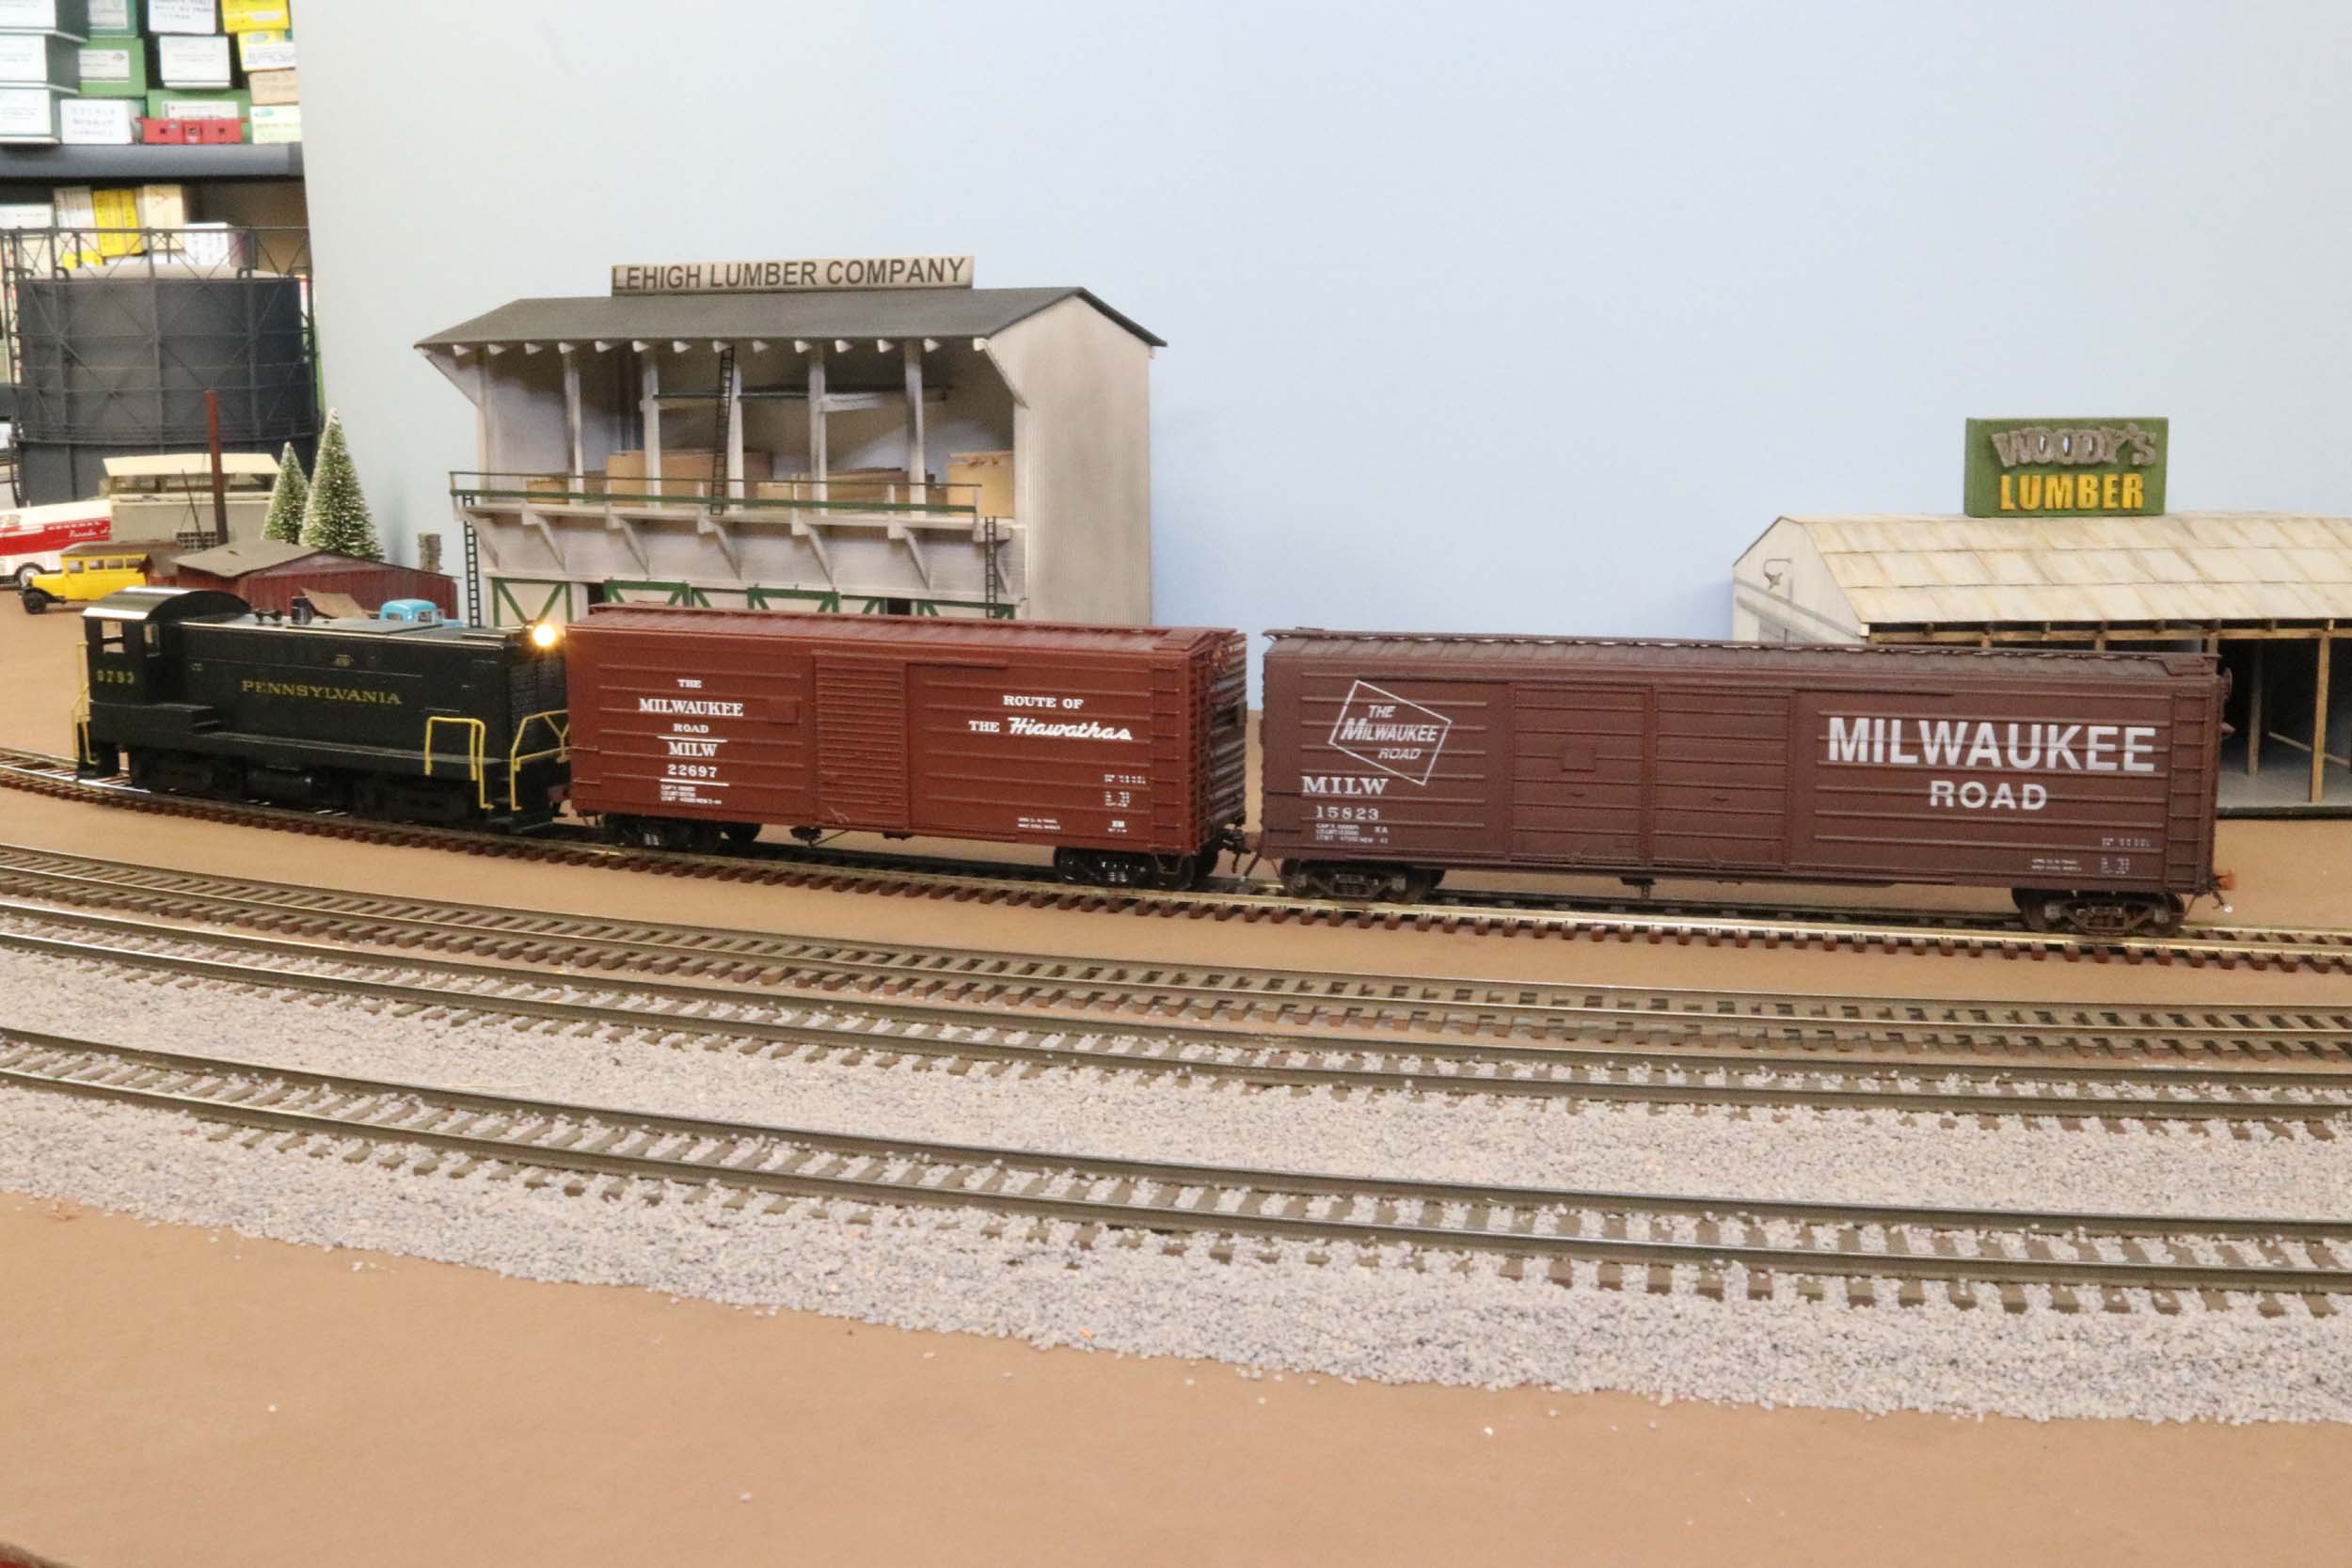
Lumber Yard Siding
I
have almost no switching or small industry sidings on my layout. With the big
radius turns and 30” wide throughout the layout there is not much room. On
12-1-19 I added this small siding for a lumber yard. There is actually 2
different lumber yard business there for now. It is my only #5 turnout. All
other turnouts are #6 and larger. Still the B&O EM1 can run on it - not
that I am switching a lumber yard with an EM1. It is more for scenery than
operation.
Since
I era shift this might not always be a lumber yard. I may time share it with
other buildings like a steel coil transfer yard.

Revised
5-27-25
All photos and content © Lanes Trains 2005-2026