|
|
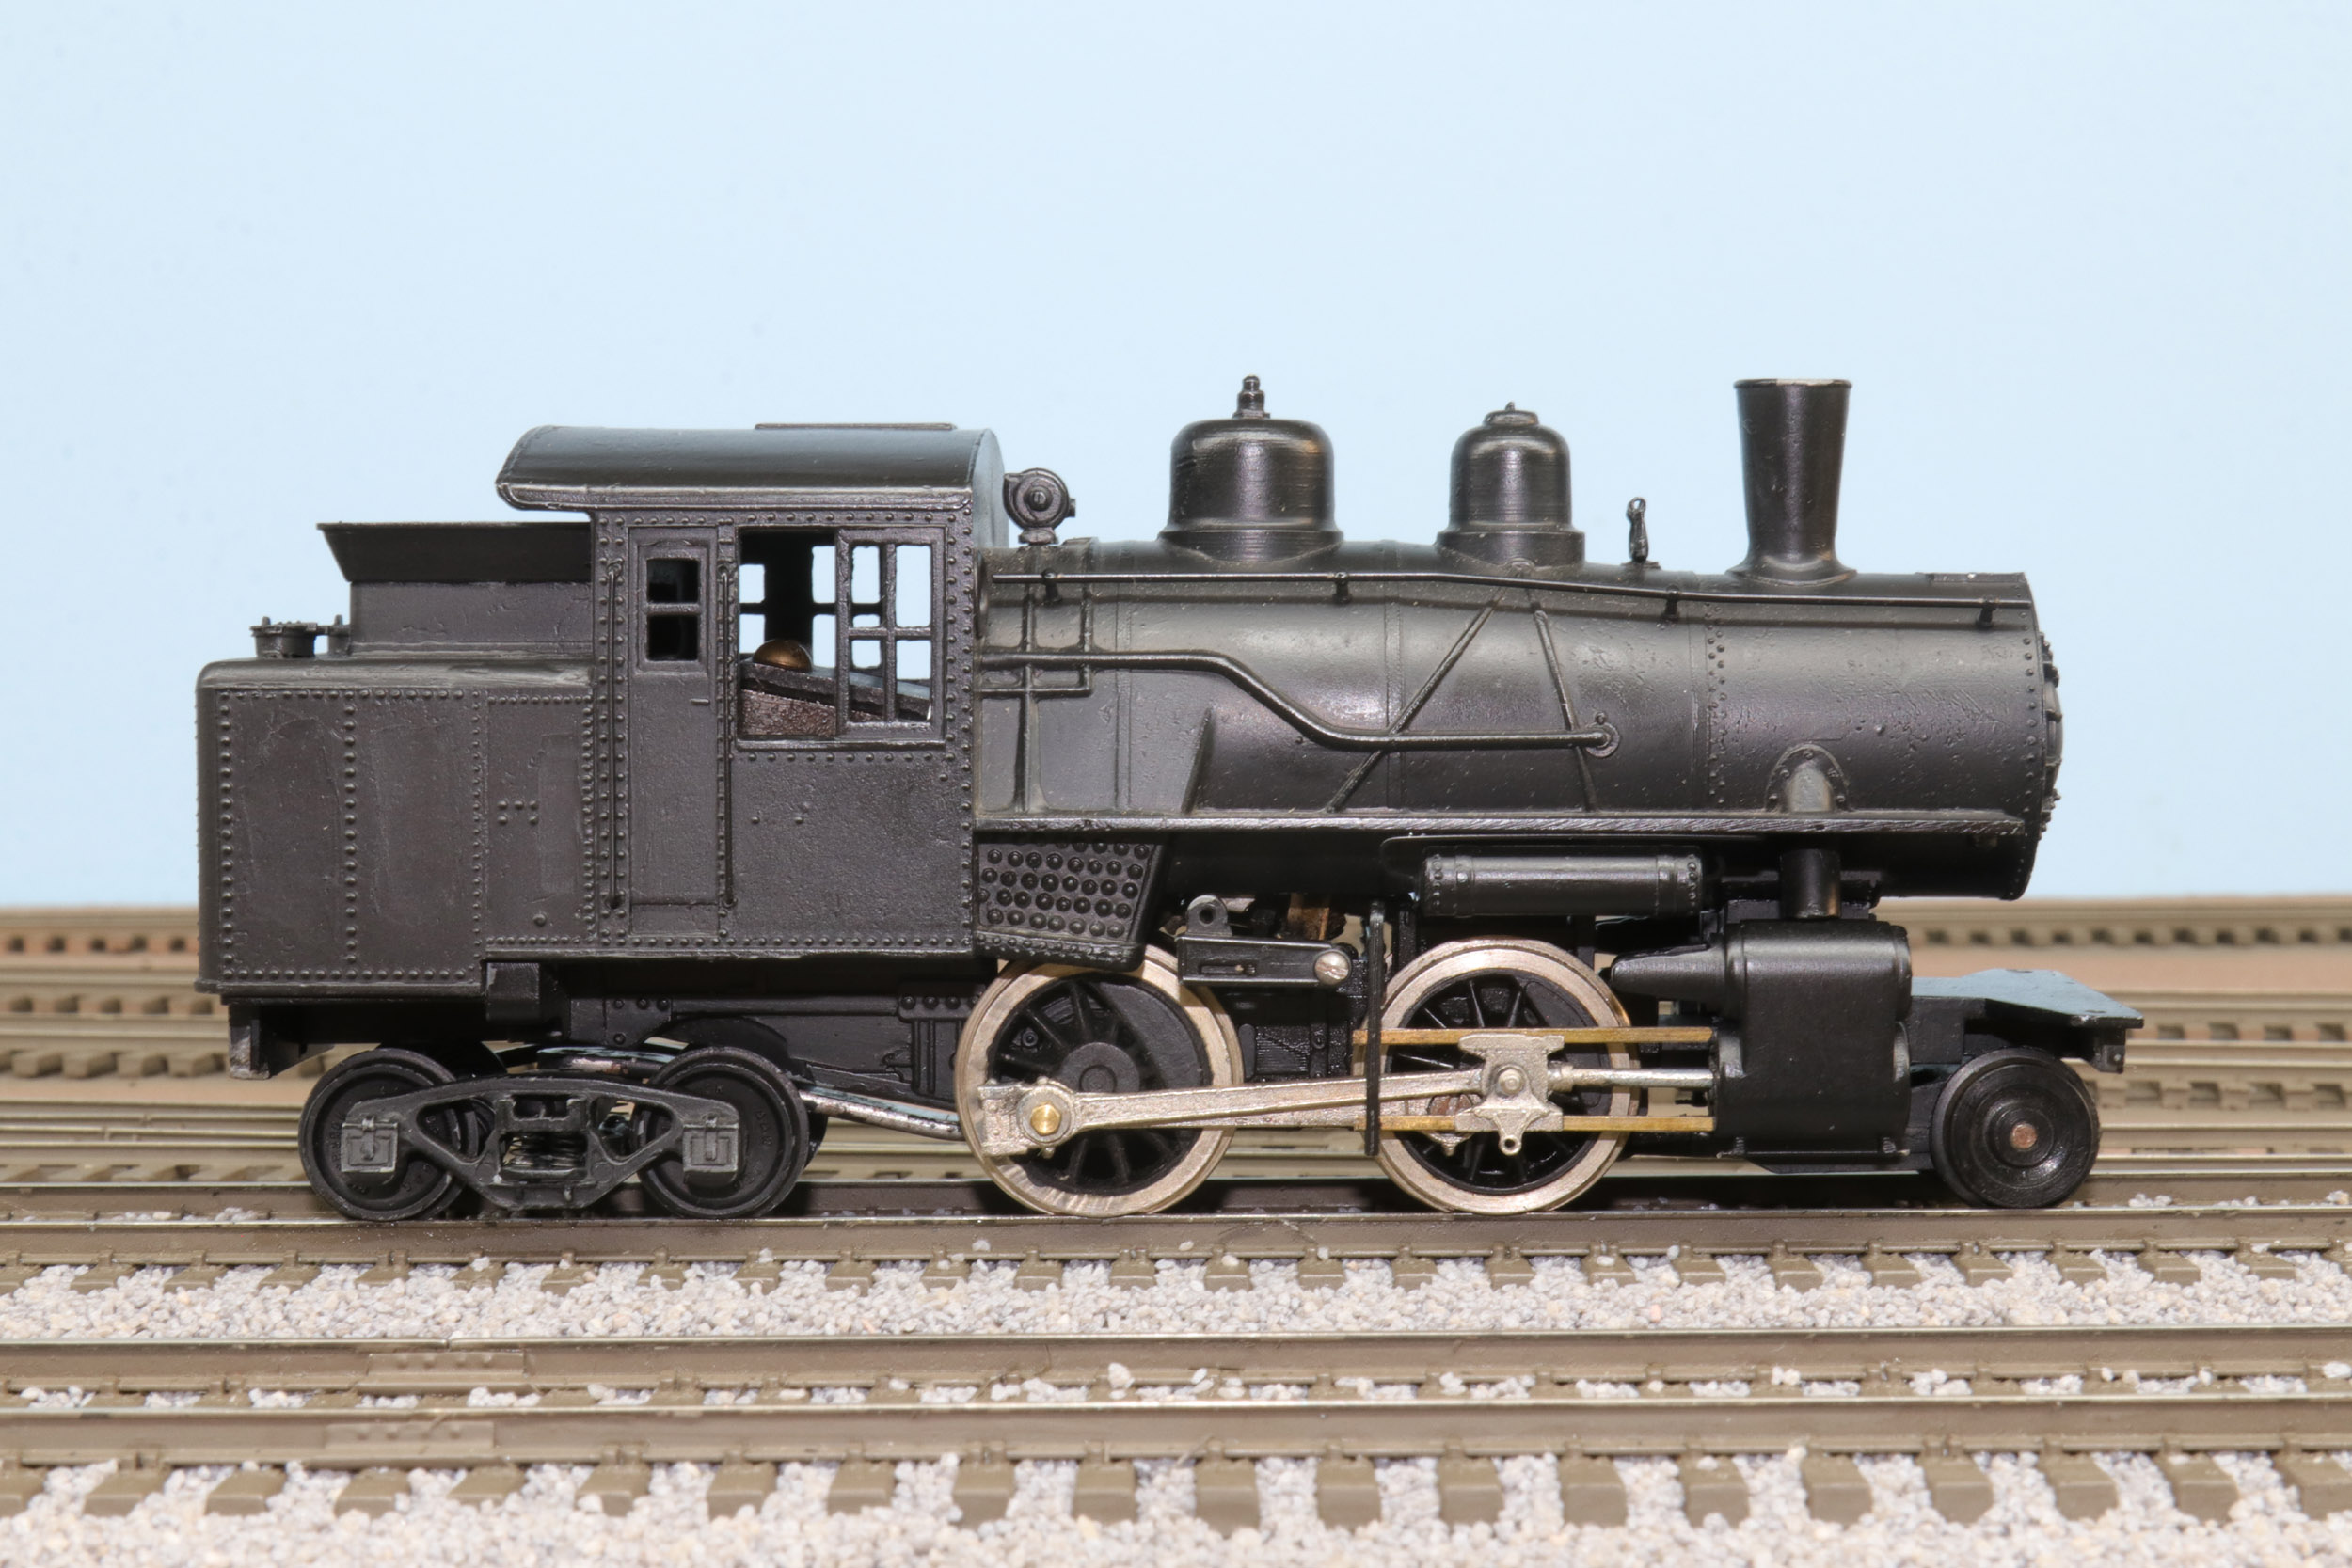
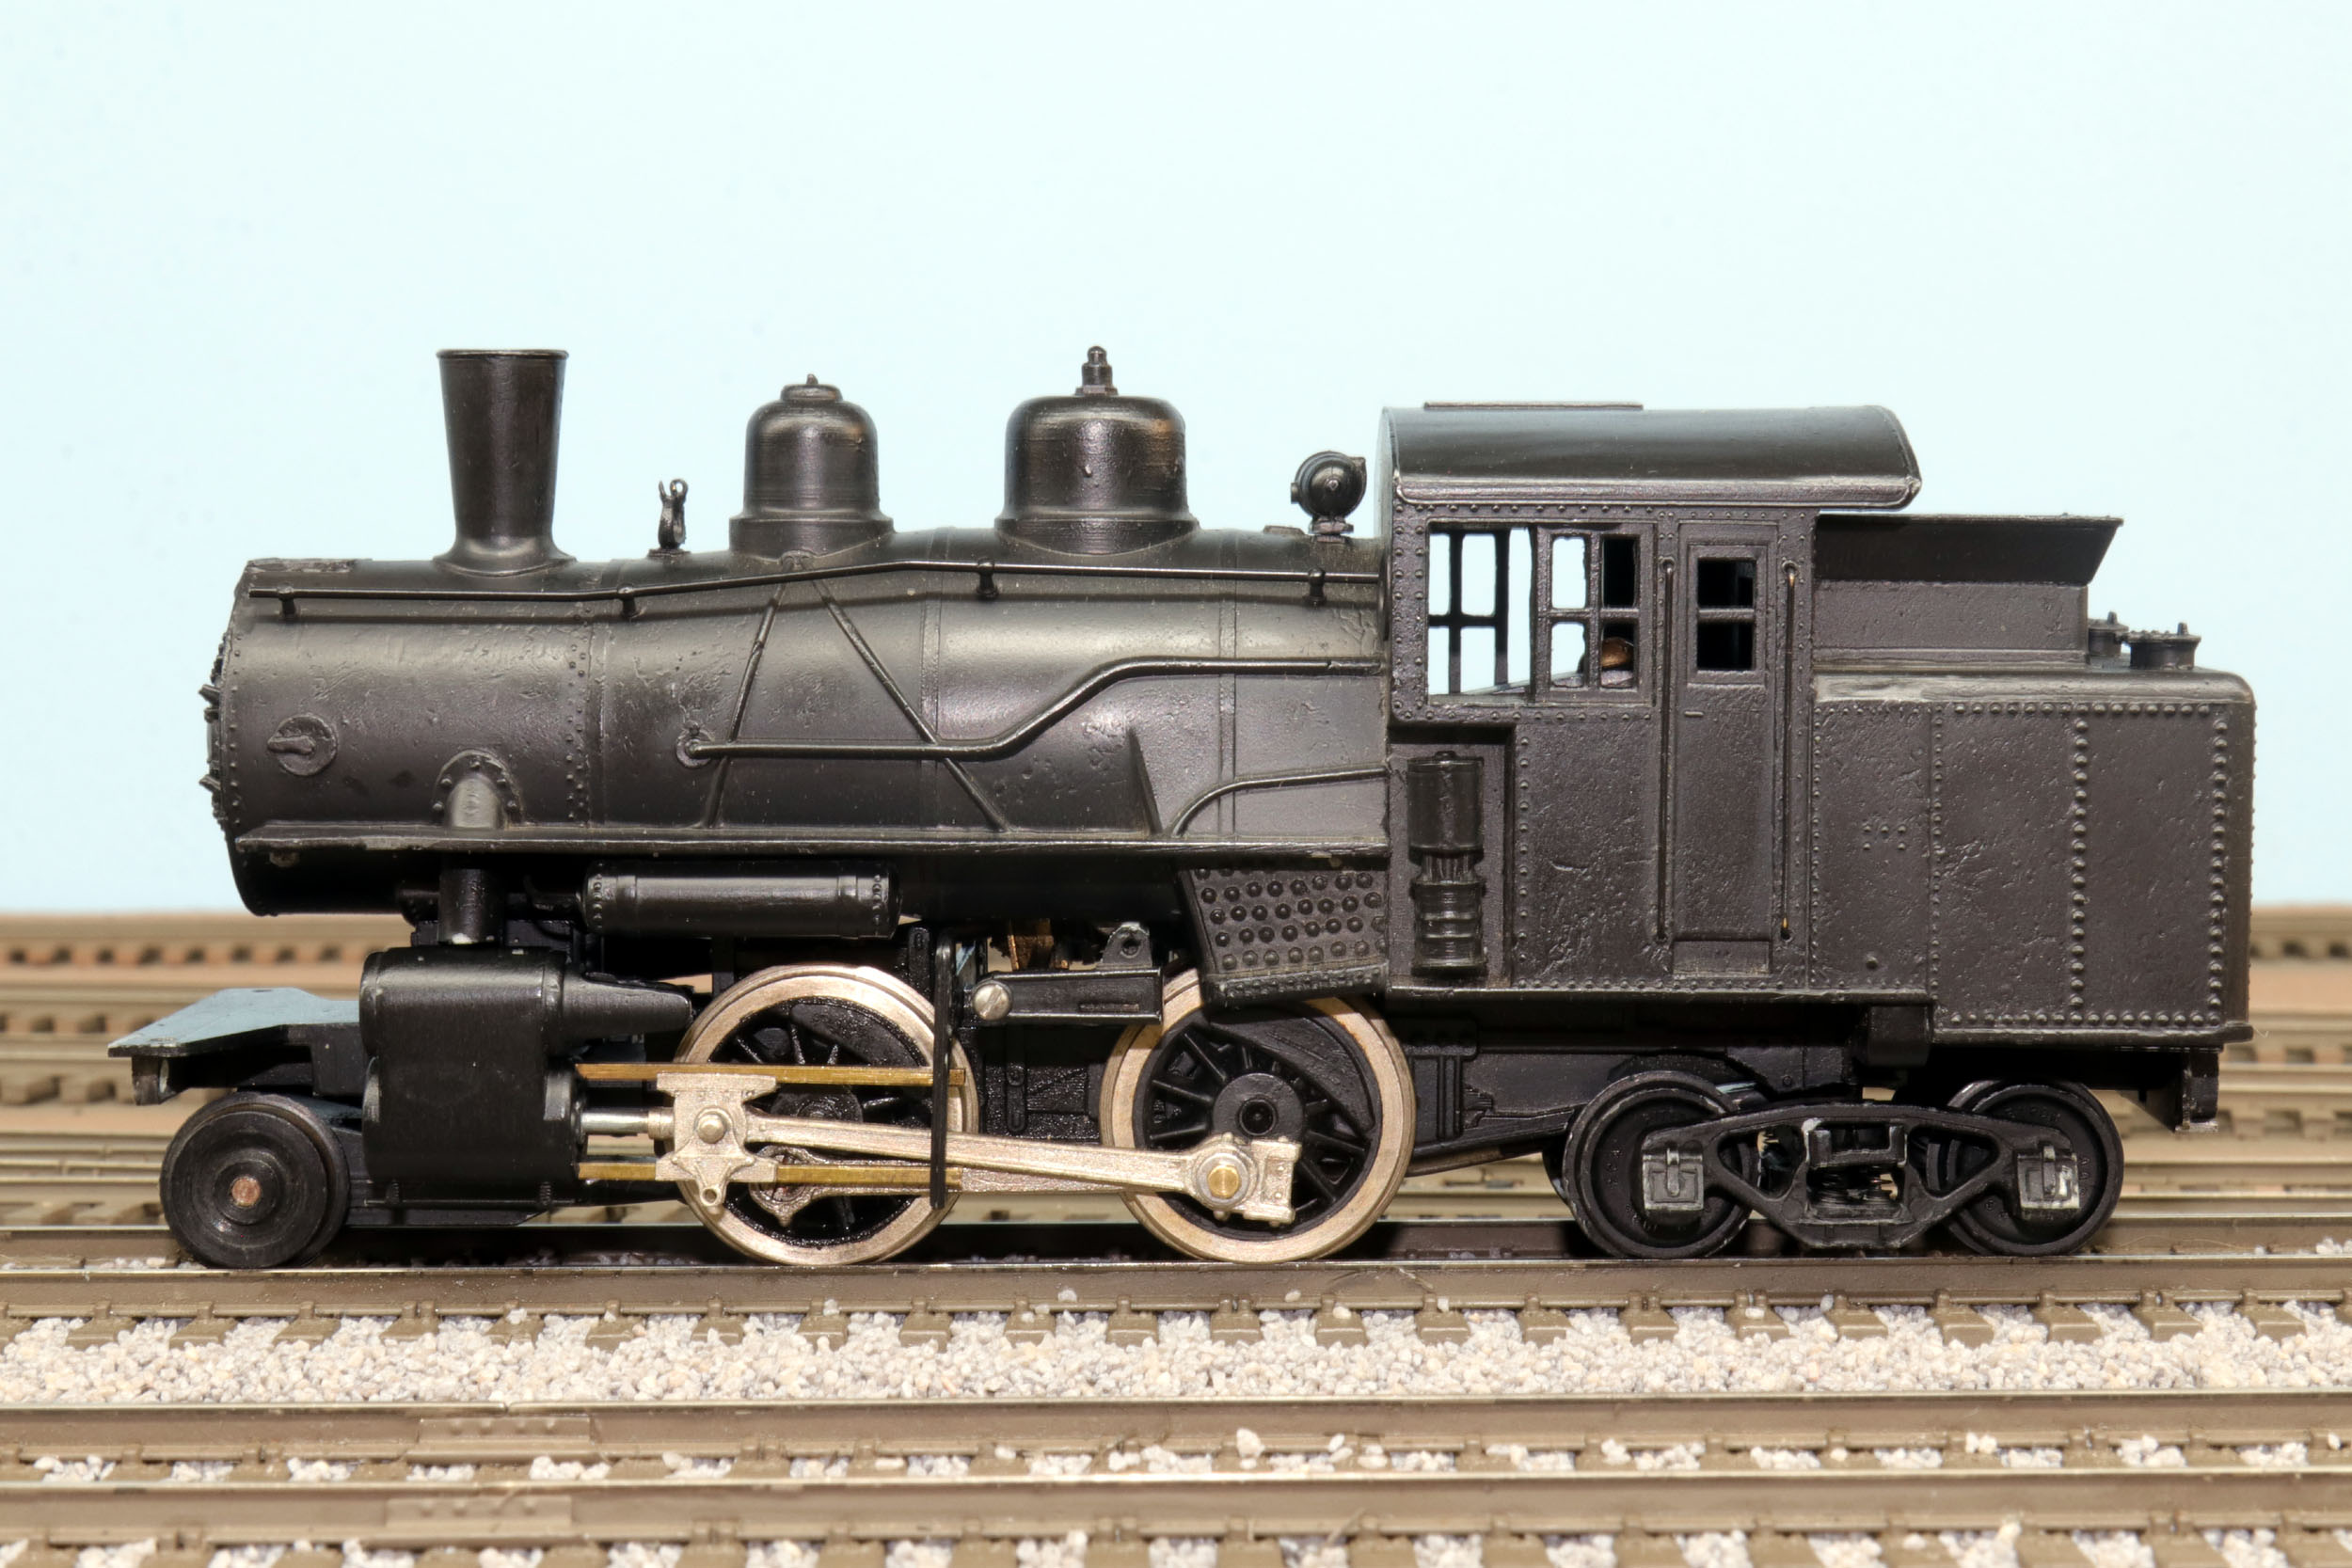
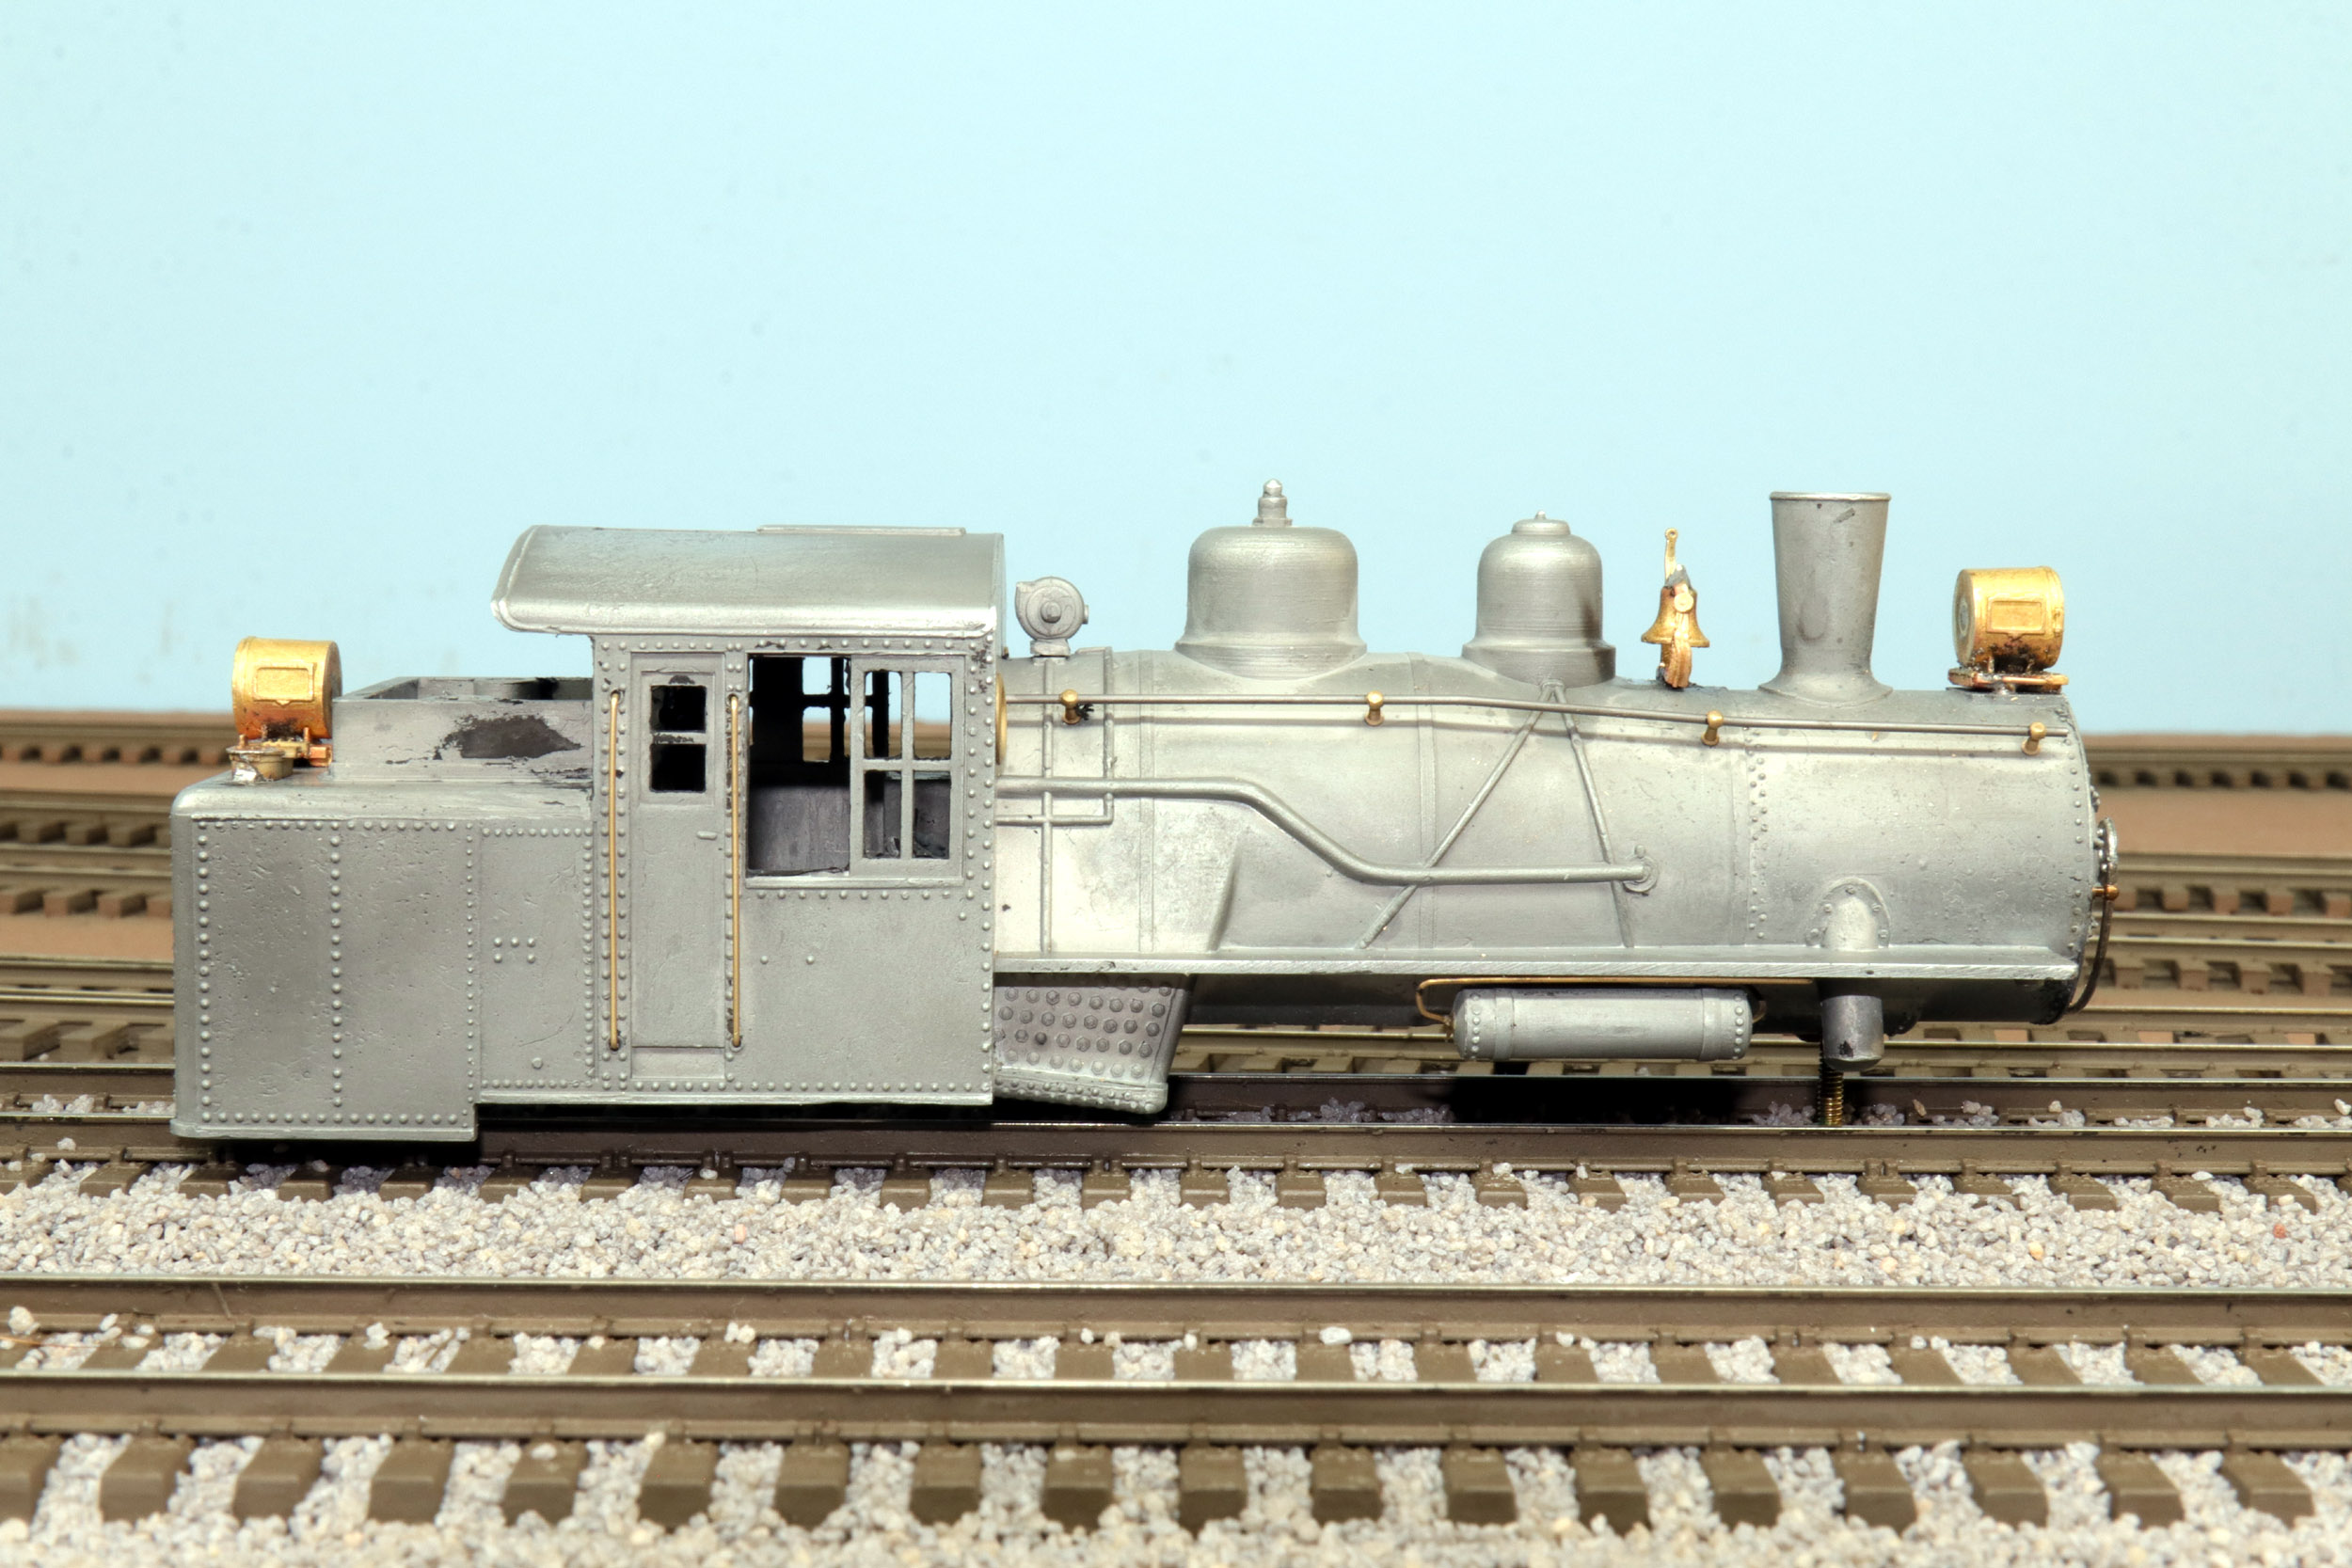
This
is a Rex Engineering “Suburban” die cast loco. Rex was the S Scale equivalent
to the early Mantua or Roundhouse die cast loco kits. According to the NASG
product page
it was first made in 1954 as a freelance model. Rex has had various owners
over years. It has been closed for many years now. Even if Rex is ever
resurrected the tooling for this loco does not exist anymore. Rex remains to
this day as the only S Scale manufacturer of small steam locos. Almost all of
the brass locos are larger. The small line
has been a favorite among S Scalers for freelance models and to kit bash into
many other things. With some effort they can be made onto a reasonable stand
in PRR B6
especially since there really is nothing else besides possibly some
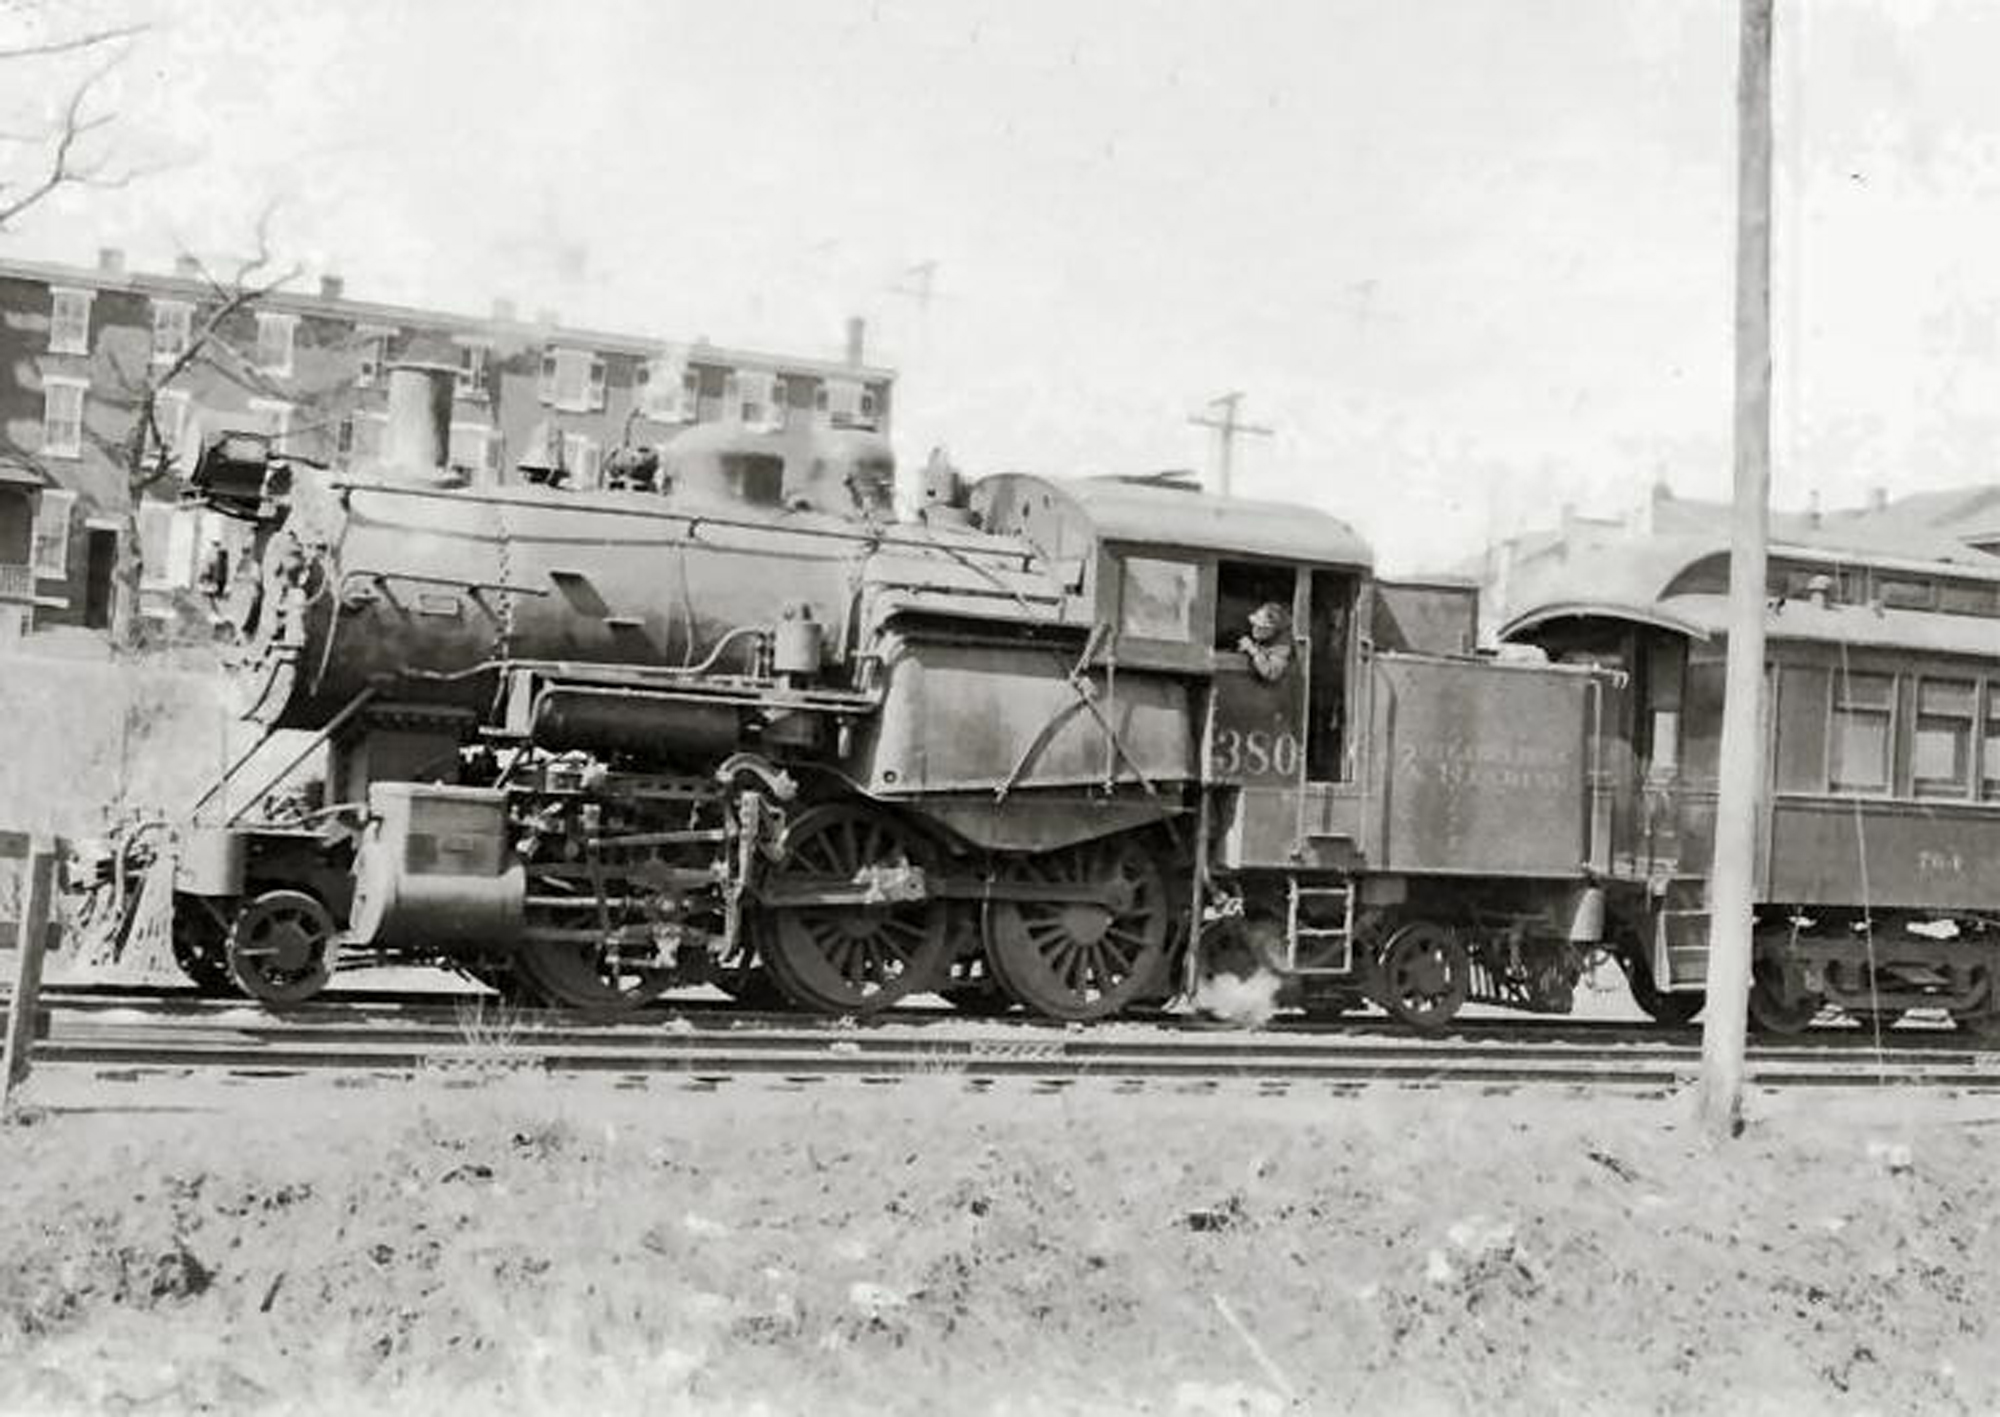
significant work to an American Flyer loco. I do not go off into fantasy projects often. The Rex model is massively different than the Reading commuter locos starting with it being a 2-4-4T instead of the Reading 2-6-4T. In my own terms I am making a “genuine foobie”. Going off the rails at times for projects like this can be fun and frees you from “rules” and research. Reading did not have a “Suburban” loco to the best of my knowledge. |
|


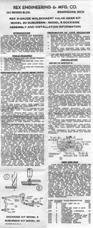
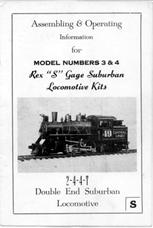
Documents
These
were some documents included in the box. It is interesting reading into the
history of S Scale and assembly of kits.
I
got this loco 1-10-21. It was significantly started. While I probably could
start with a new kit it would not have interested me that much to start from
the beginning. These photos were taken 4-16-21 as received from eBay.
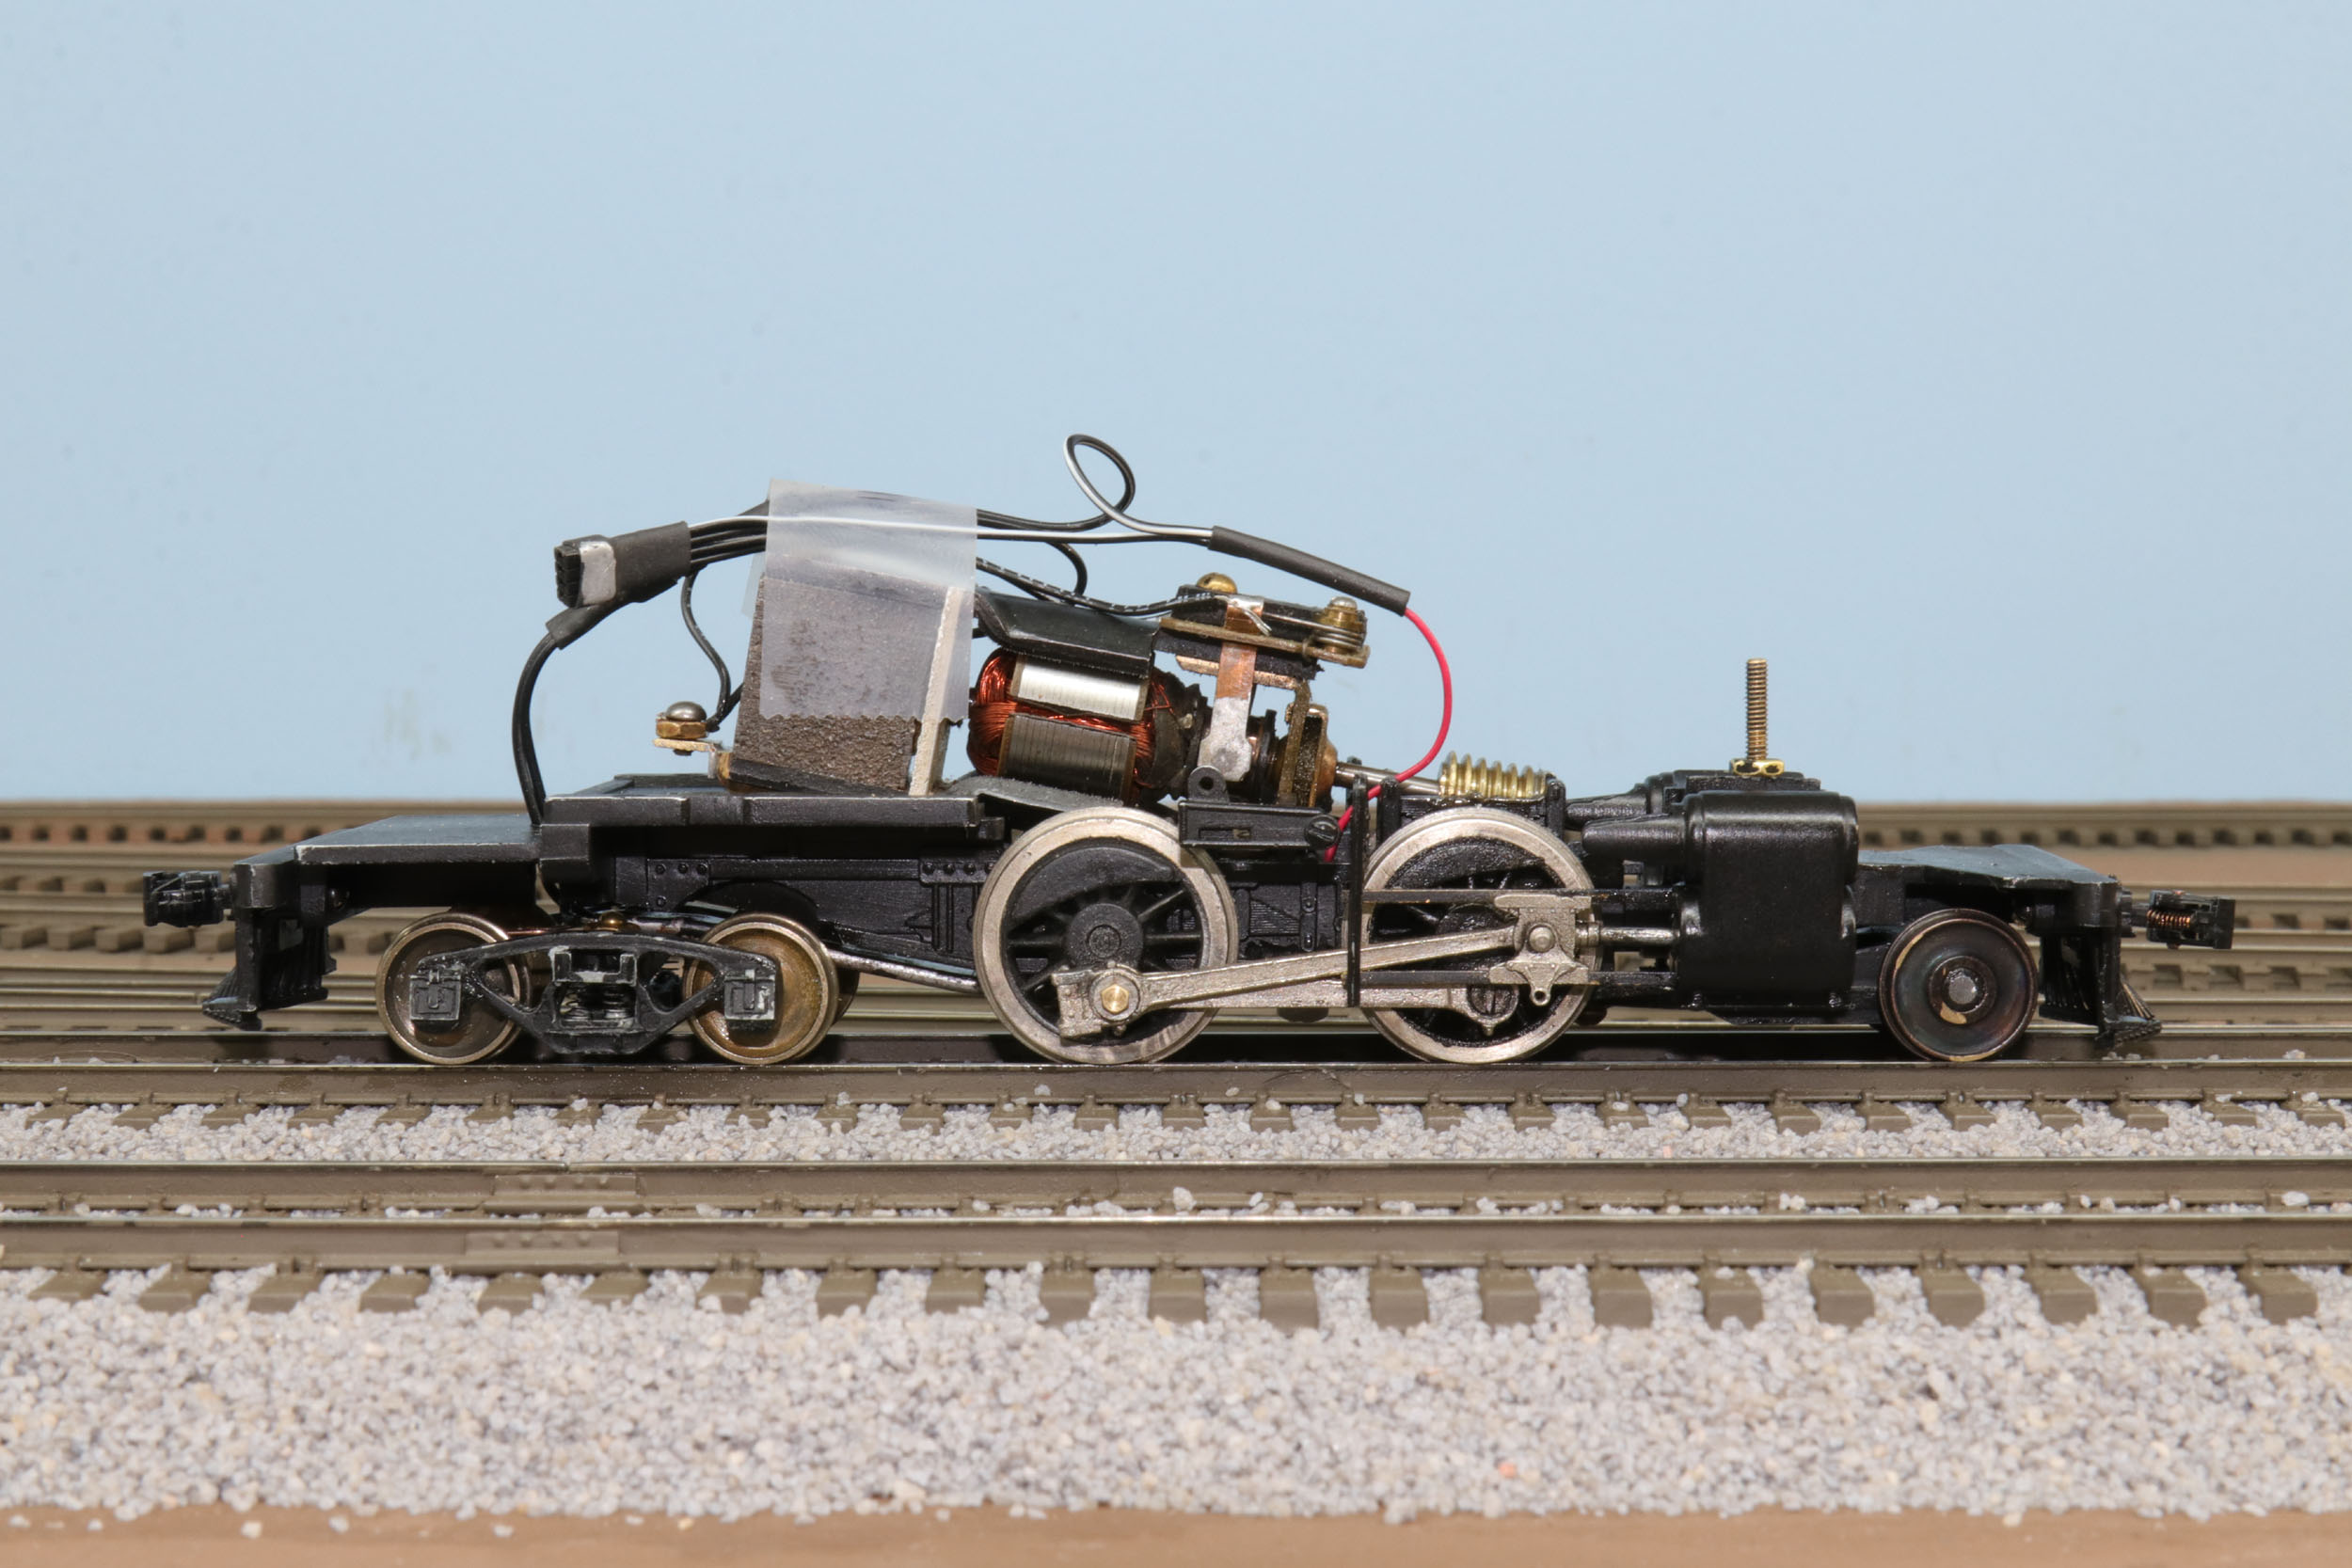
Drive
Changing
to a can motor is a lot of work. Previous attempts at using the original open
frame motor in Frank Titman built steam locos did not
go well. The large Pittman motors had issues with DCC in spite of the brushes
being insulated from the frame. It ran uncontrolled when the power was applied
to the decoder when put on the track only. I never could figure it out I just
changed to a can motor and fixed the problem.
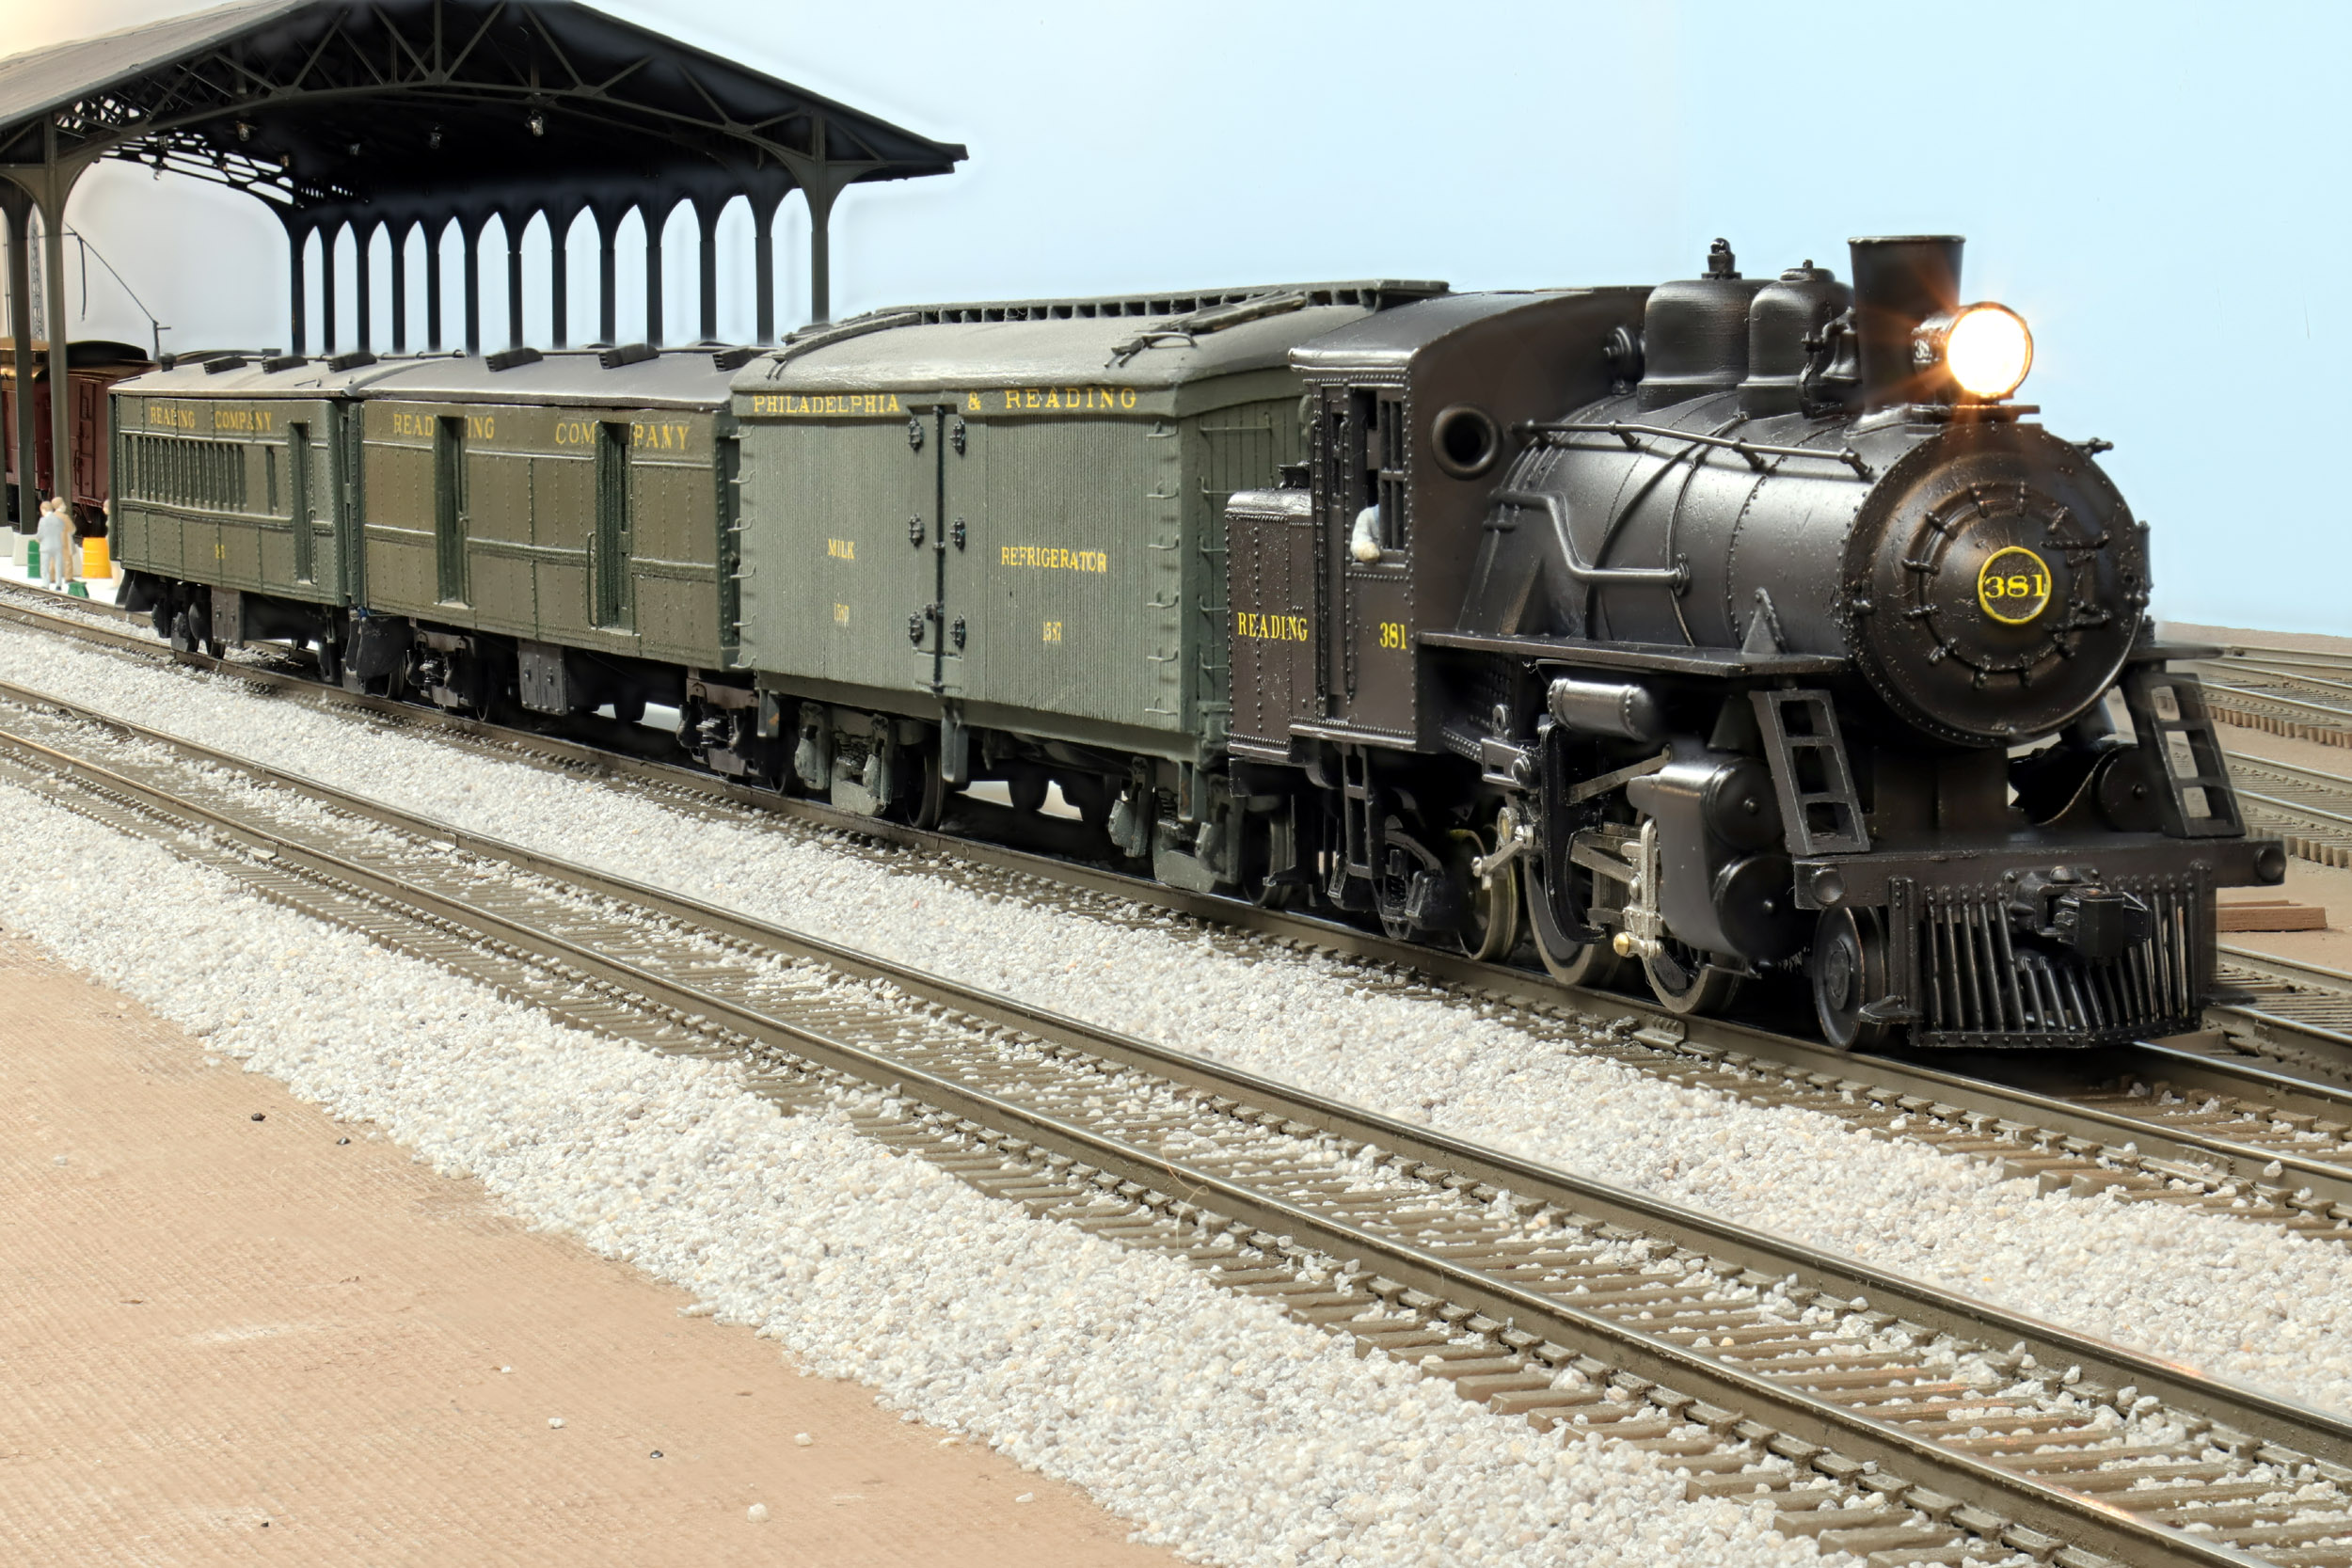
I
don’t have big expectations for this loco - just pull 3 or 4 cars. I figured I
would try again to use the original open frame motor and it finally worked to a
reasonable level. This is very likely my only loco running with an open frame
motor. The slow speed running is currently not that great but that is ok with
me.
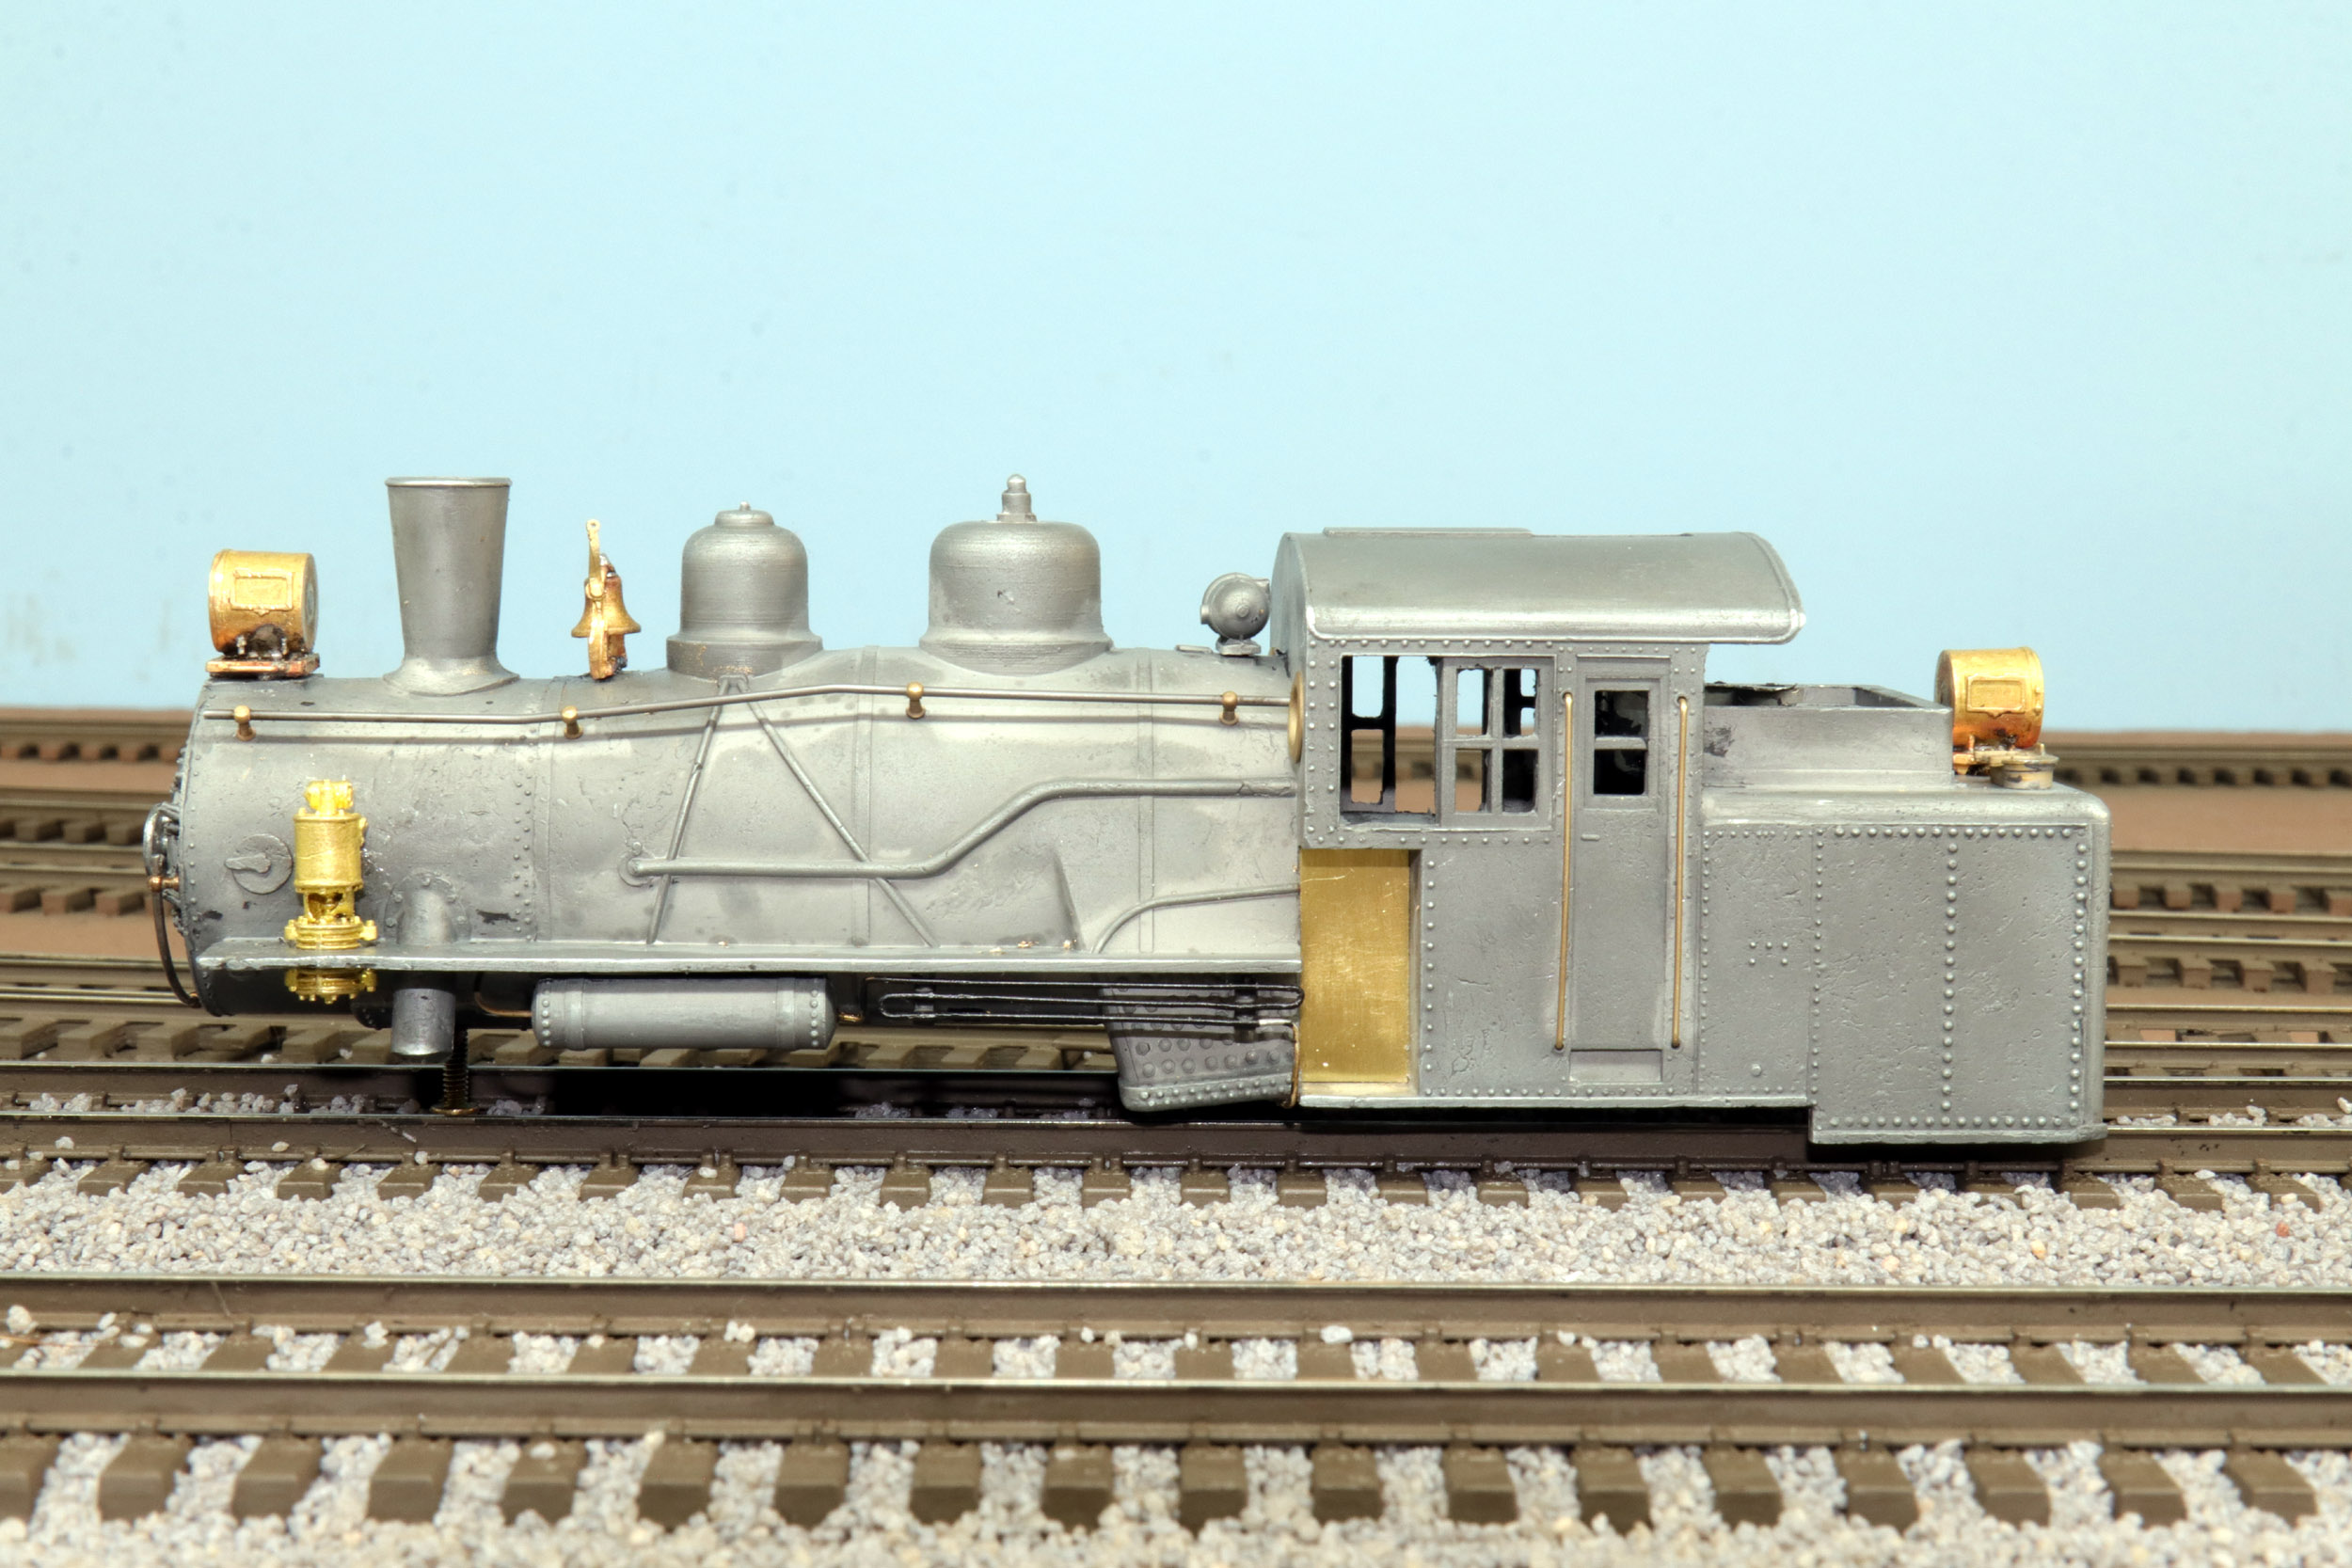
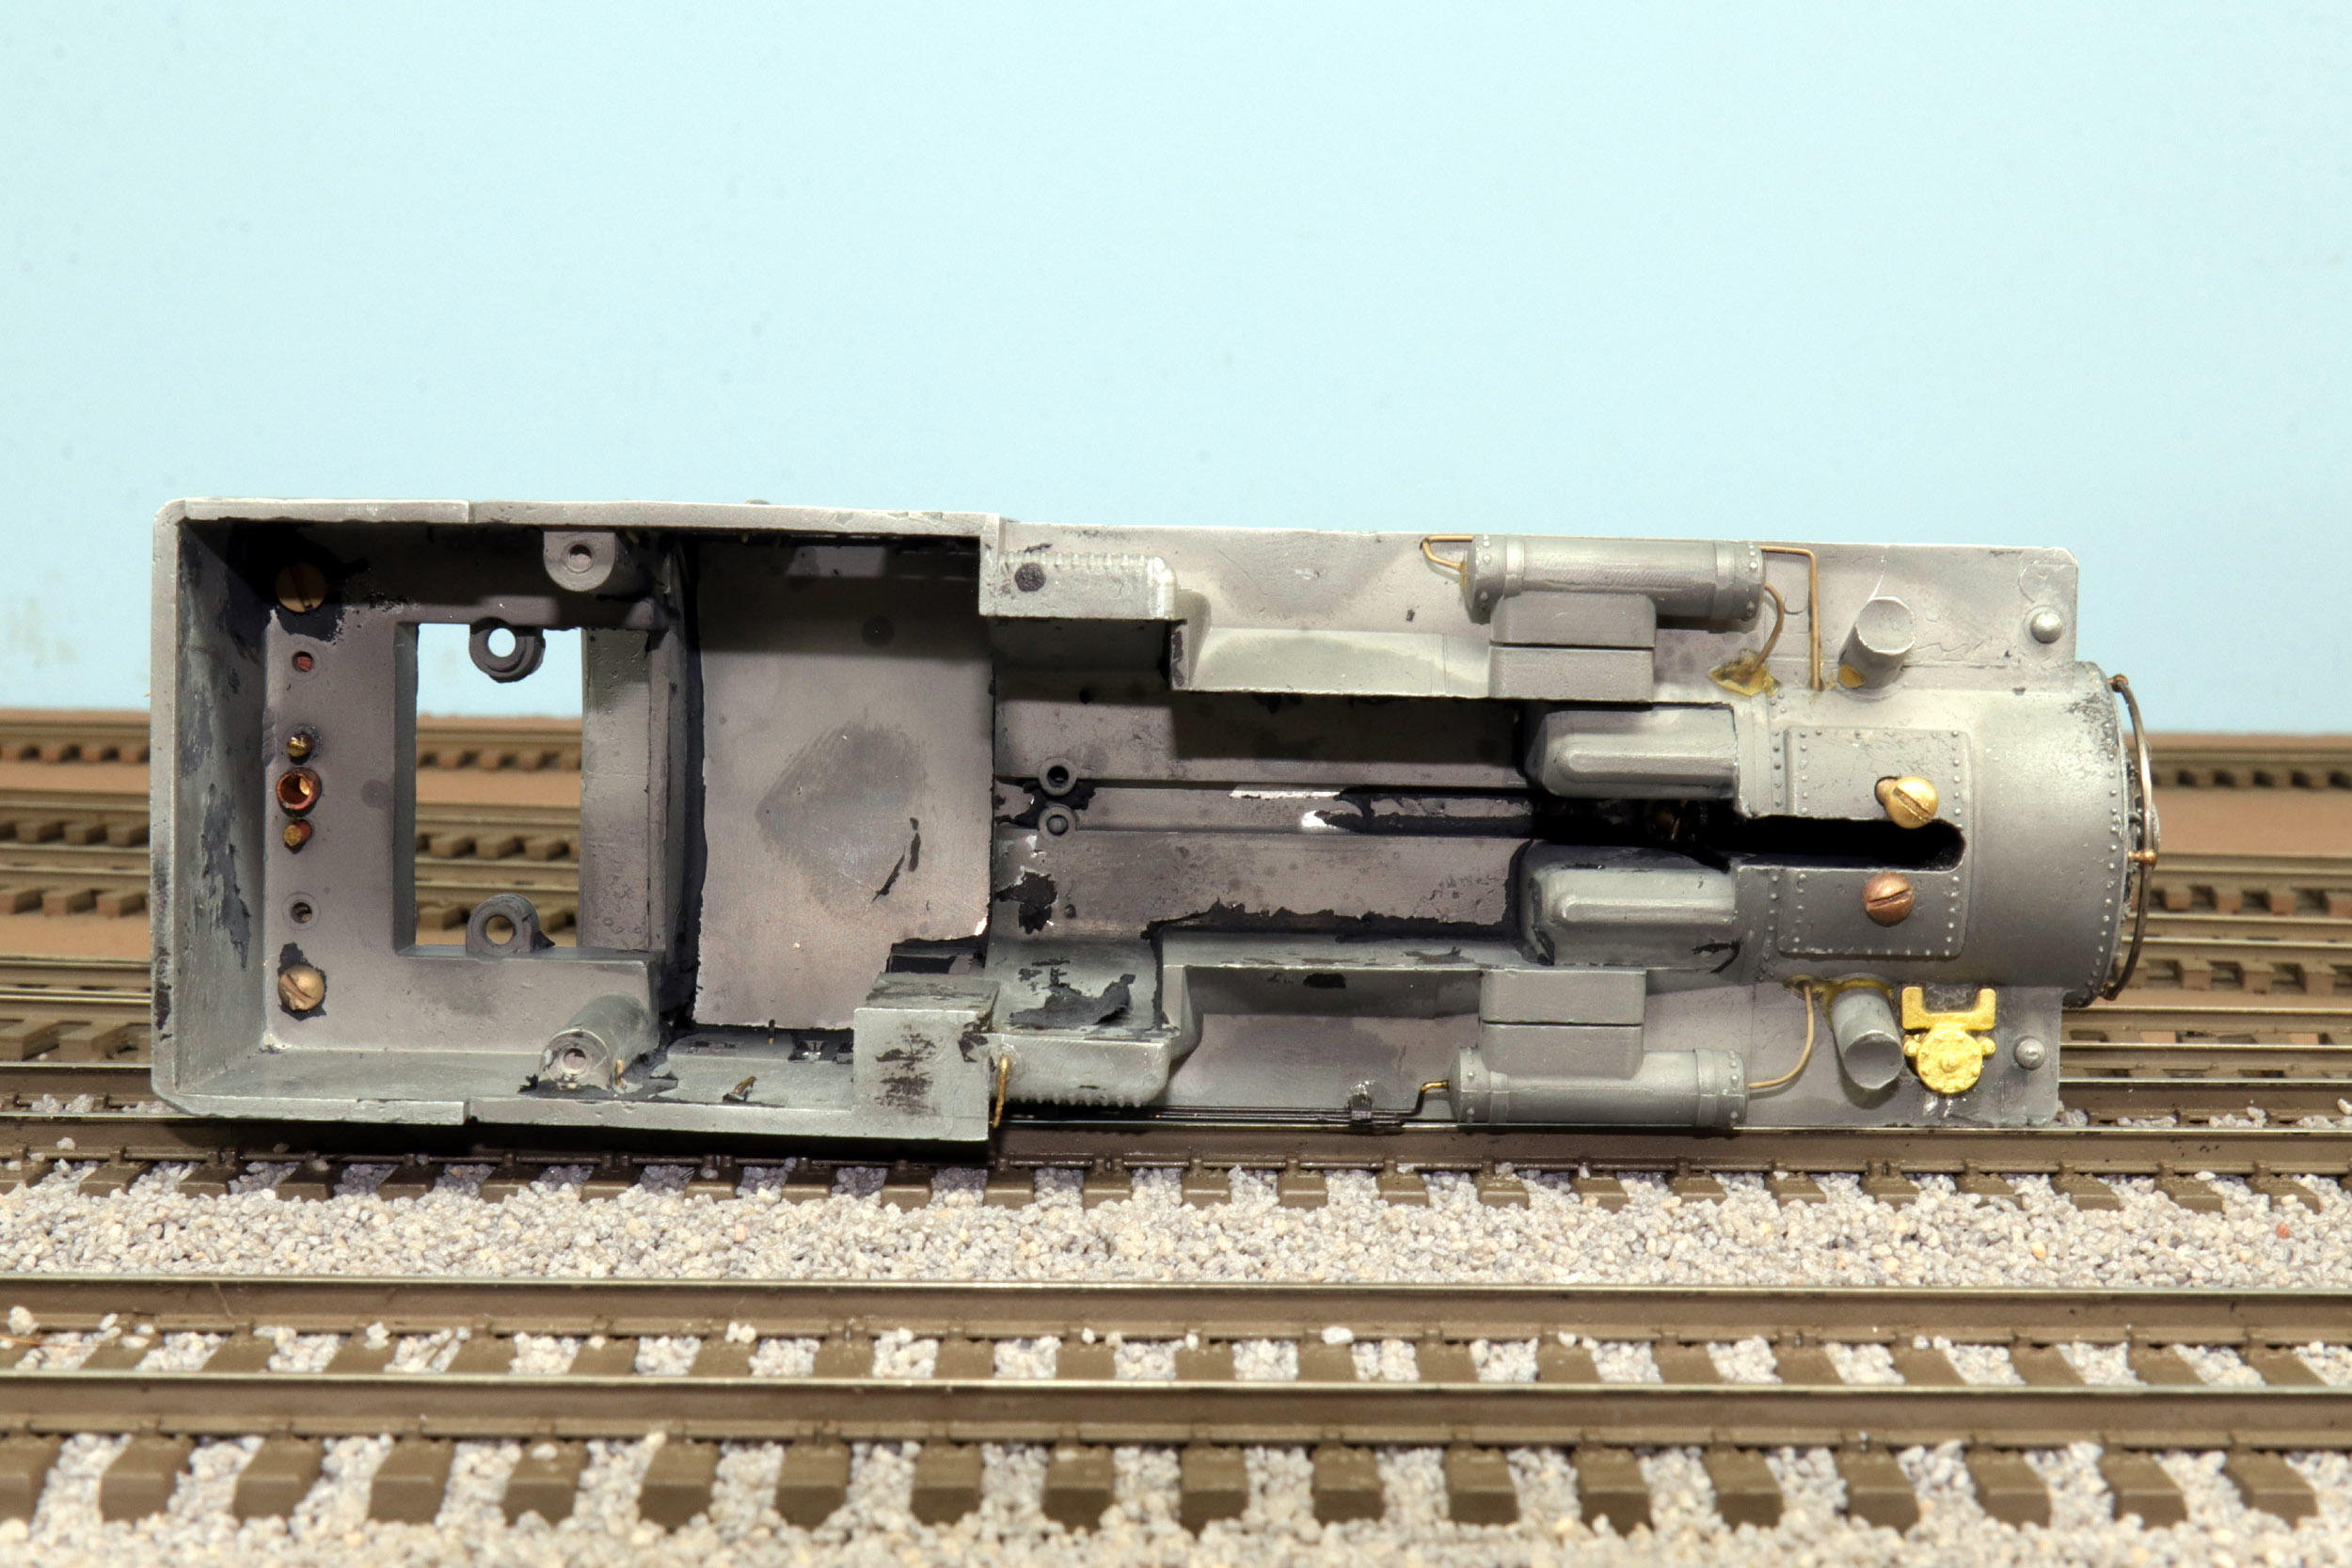
This
is the
typical drive for most Rex locos with the worm gear
directly driving the axle gear. A very few Rex locos
were sold with gearboxes towards the end of production. This type of drive can
be very time consuming getting the gear mesh correct.
There is not a sound unit for now. I used a NCE D13NHP but changing to a sound
decoder would be very easy. The lead and trailing truck wheels have been
changed to code 110. I used the recommended pick up to the drivers but note
that I also added pick ups to the trailing truck as
well.

Added
4-24-21
This
is the most I have worked on a Rex die cast loco. It
is really well designed. Everything fits like it is supposed to. The paint was
in good condition but I stripped it because of the work that needed to be done.
At least die cast does not instantly tarnish again after blasting.
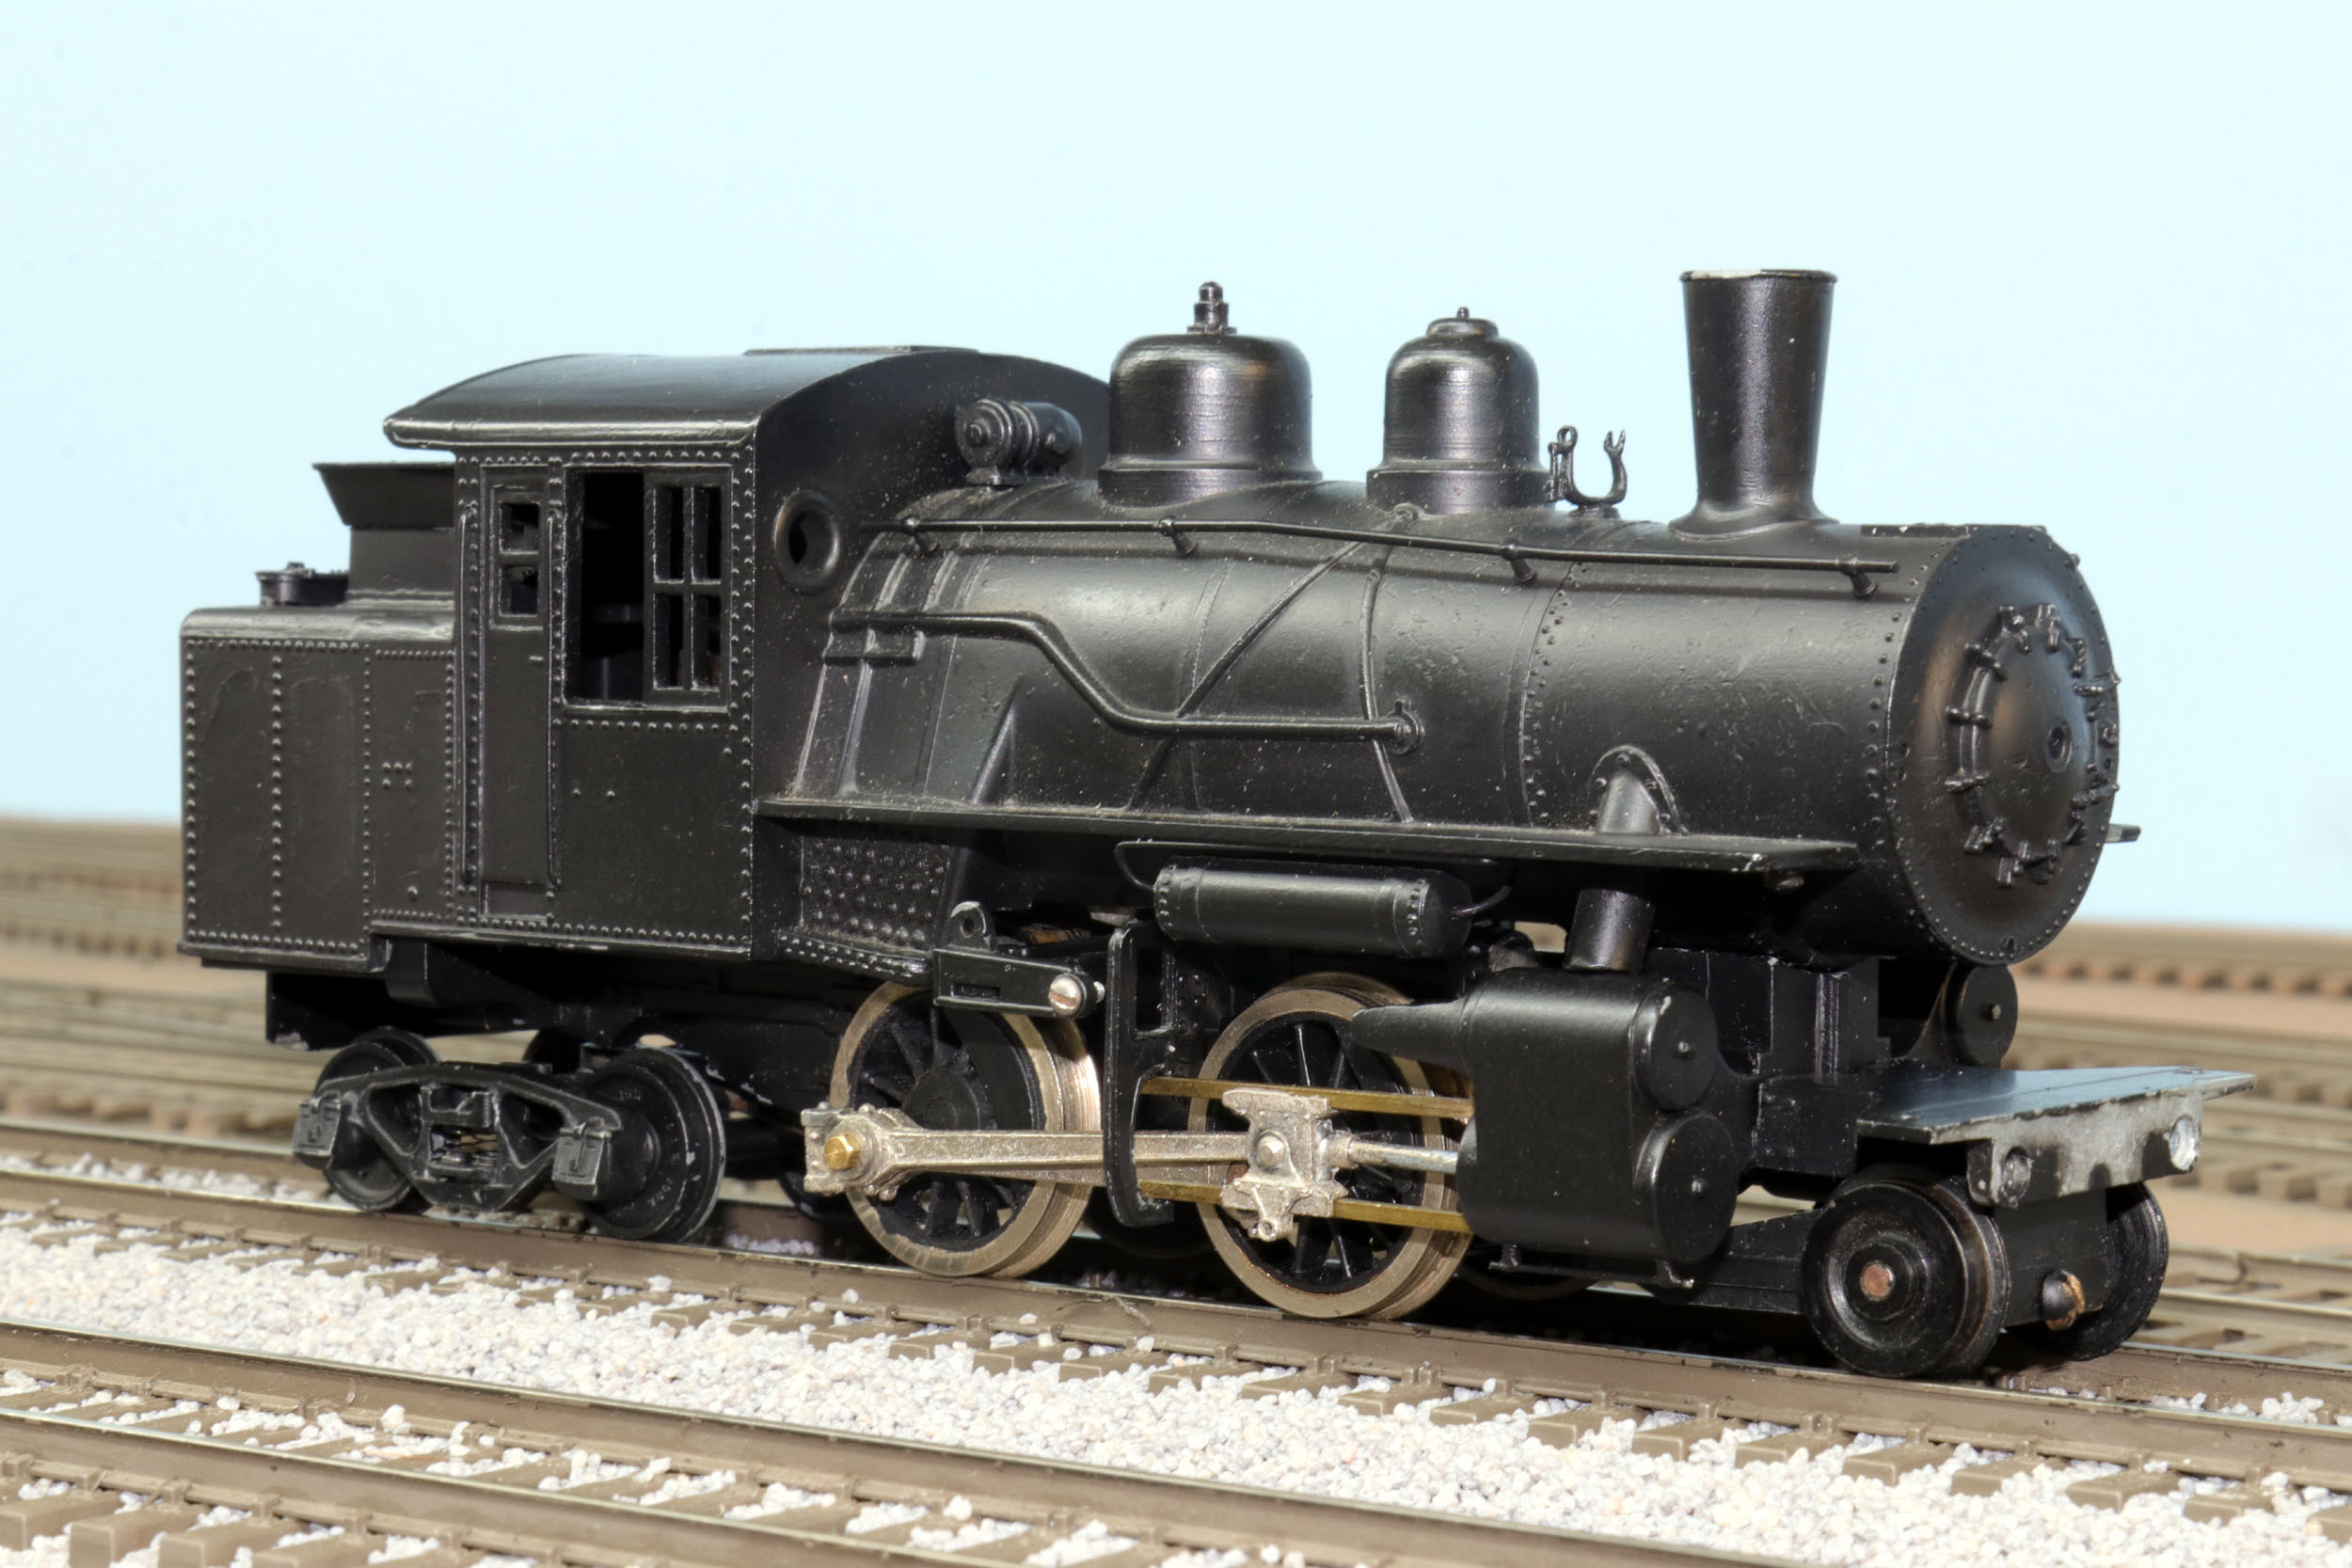
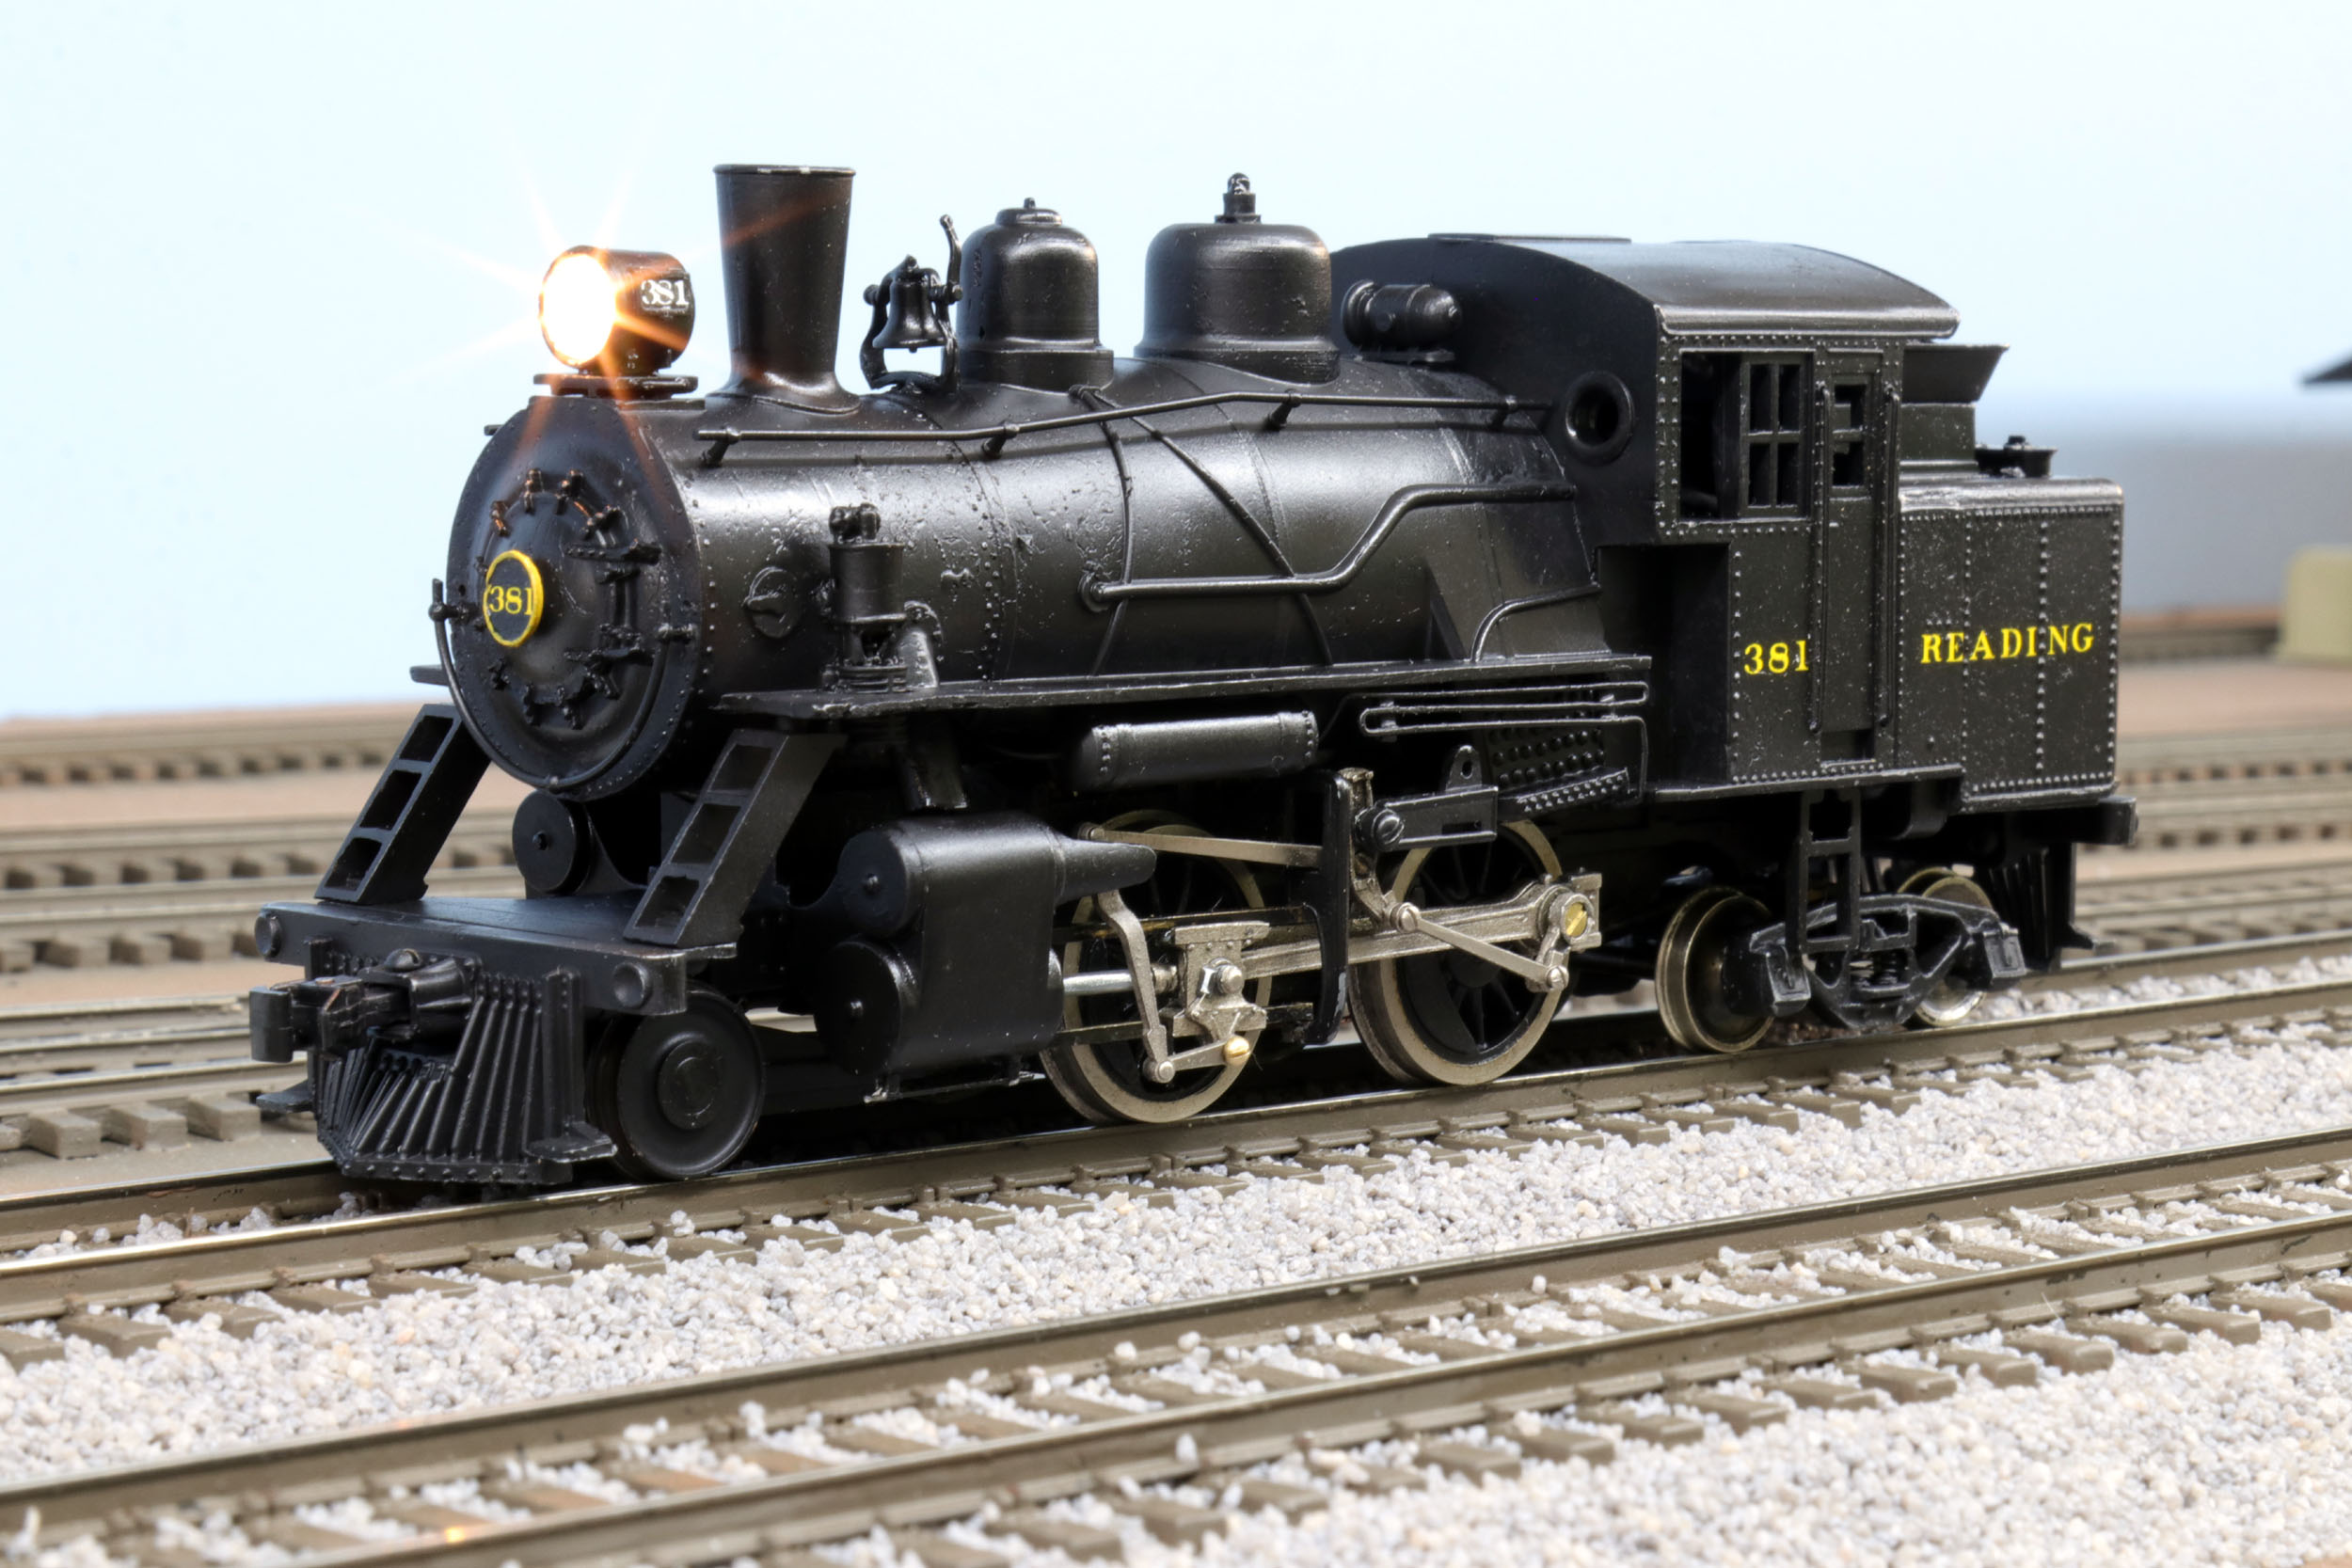
I
did not like the Rex headlights. I got River Raisin brass headlights and a
brass bell. Getting the headlights resolved was the biggest detail to complete.
There was no hole to the boiler front for a headlight. I put a 1/8 drill bit in
my Dewalt drill and just went for it. An angled hole
about 2” from the boiler front to the bottom long was needed. I got beyond
lucky and hit it perfectly into the slot cast in the bottom of the boiler. The
headlights are removable for now. I drilled the headlight for 1/8 round brass
tube and added 2 pins to the bottom headlight plate. That is visible in the
lower right photo.
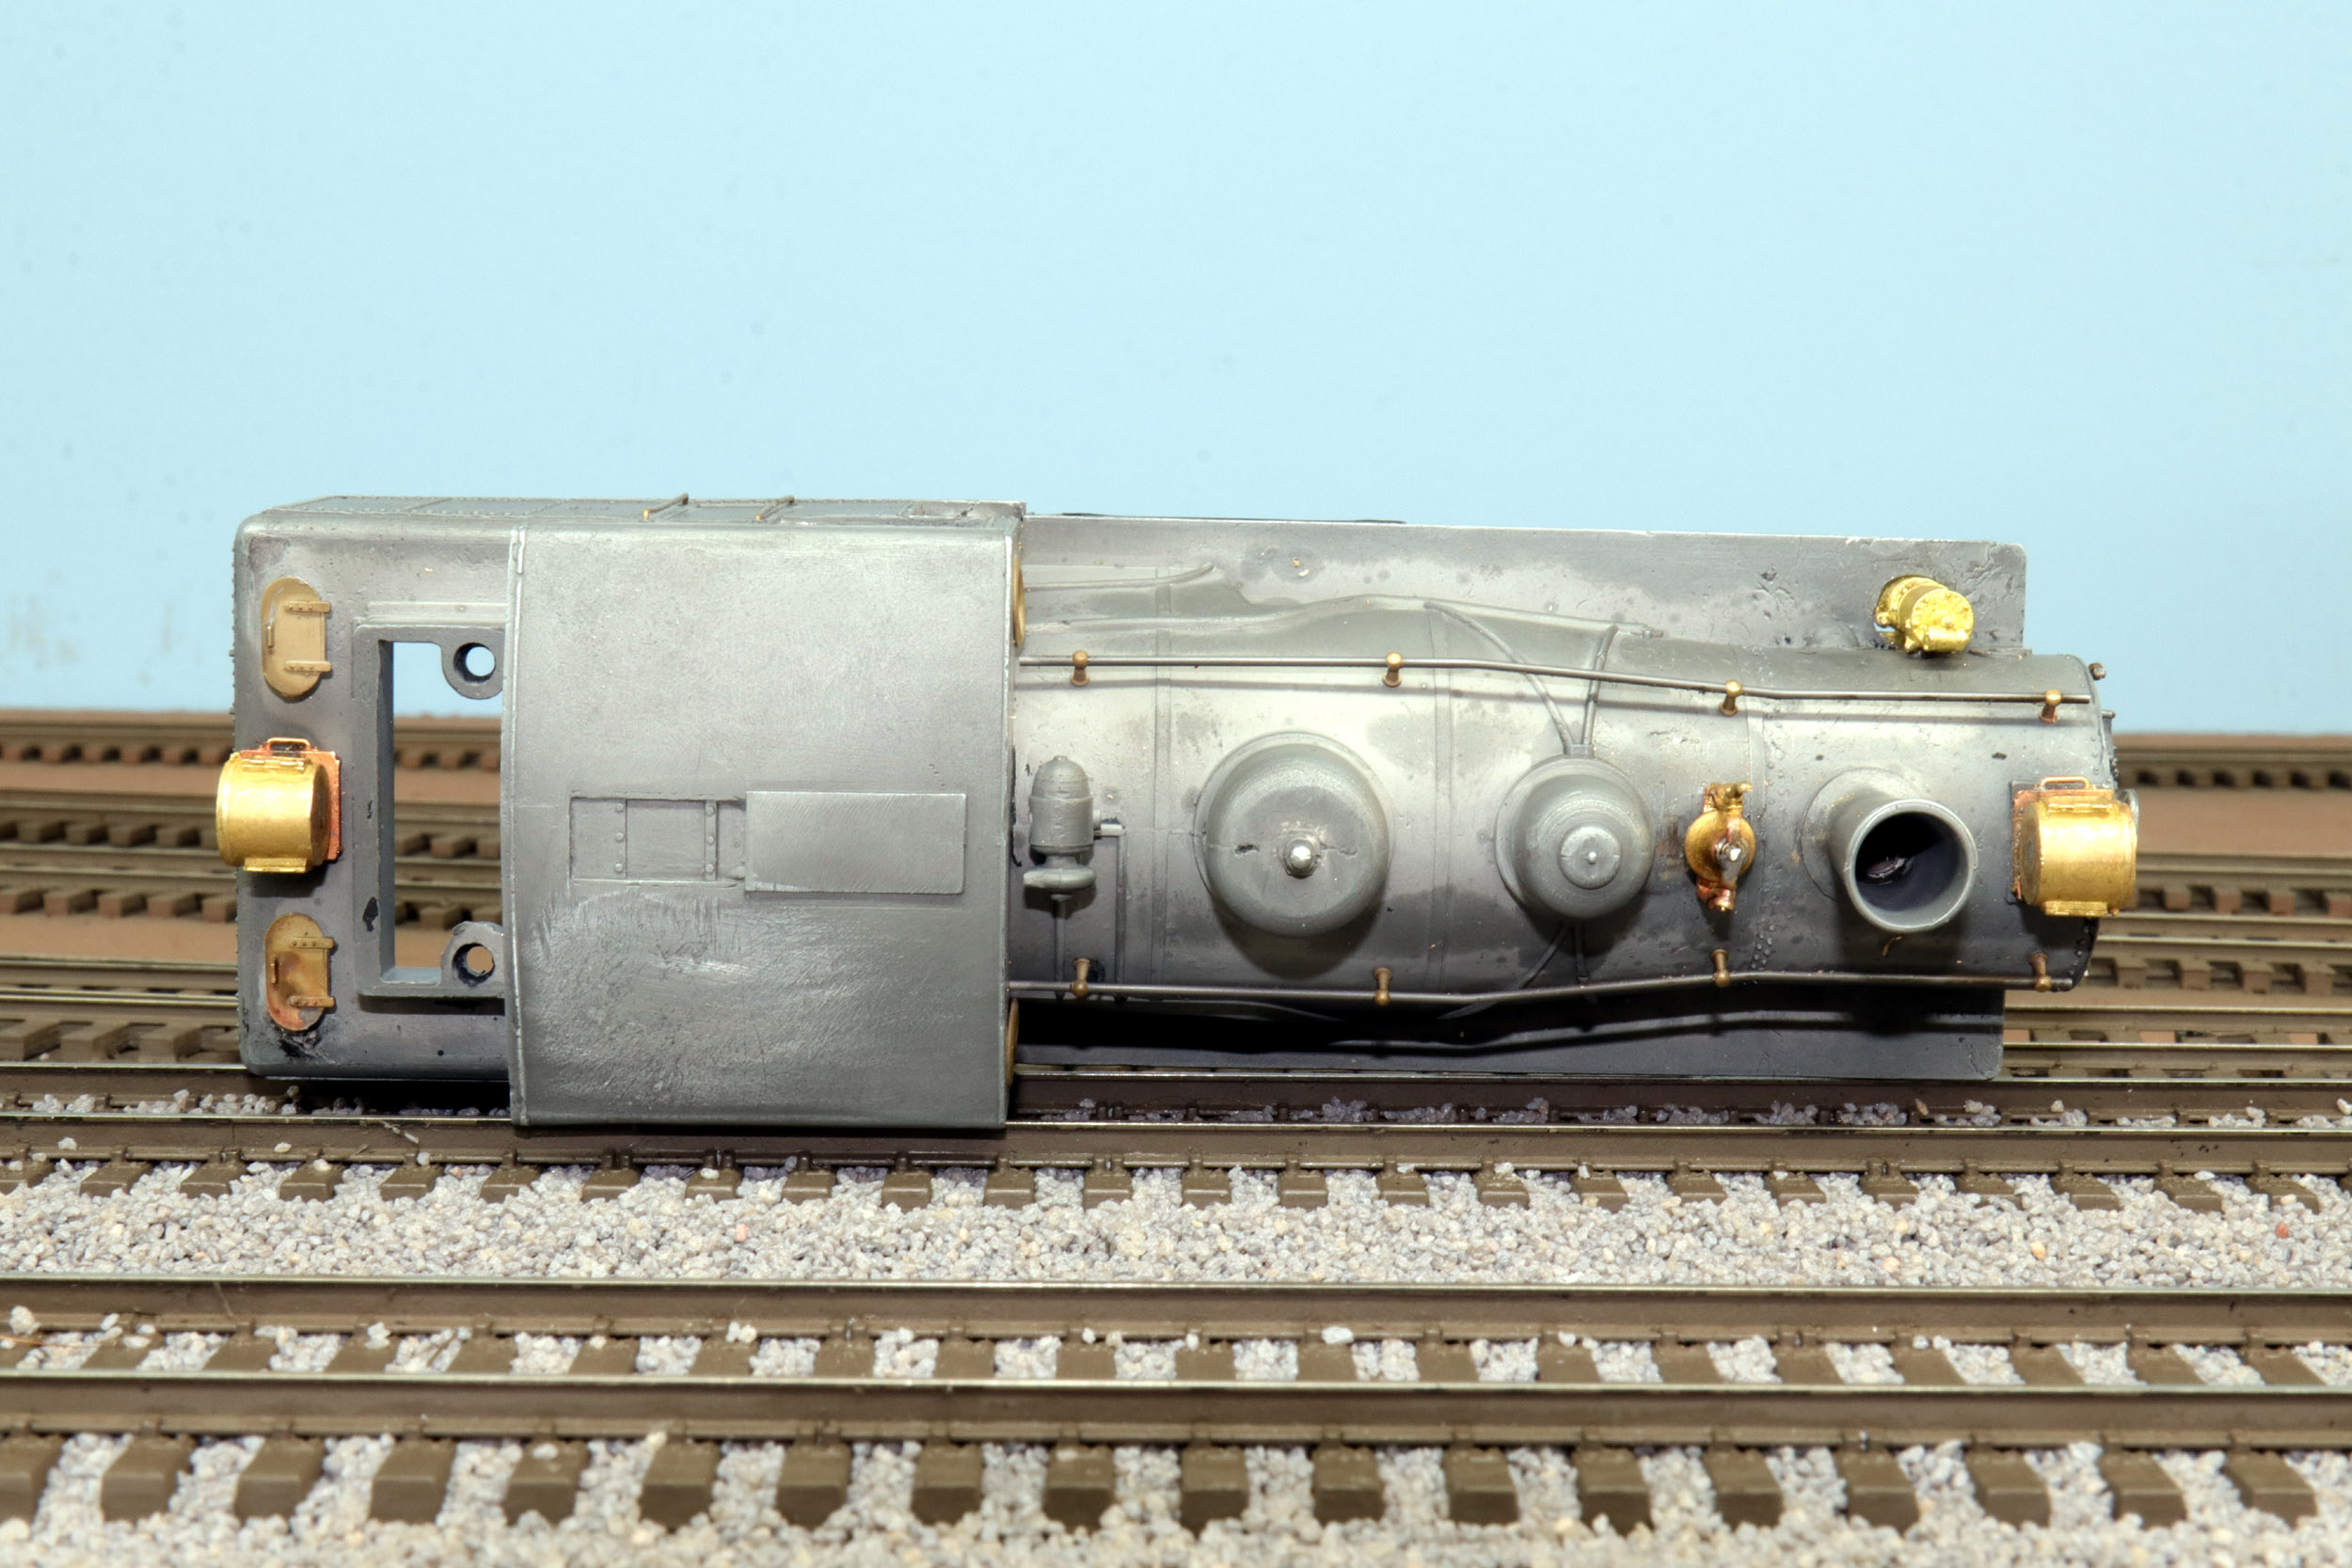
The
Rex air compressor was small and lacking much detail barely noticeable in a
recess in the cab side. I found a brass single cylinder compressor in my parts
box and installed it out front sort of like the Reading loco. The cab recess
remains it would have been difficult to make a patch box cover. I did make a
patch to cover the holes for the original compressor.
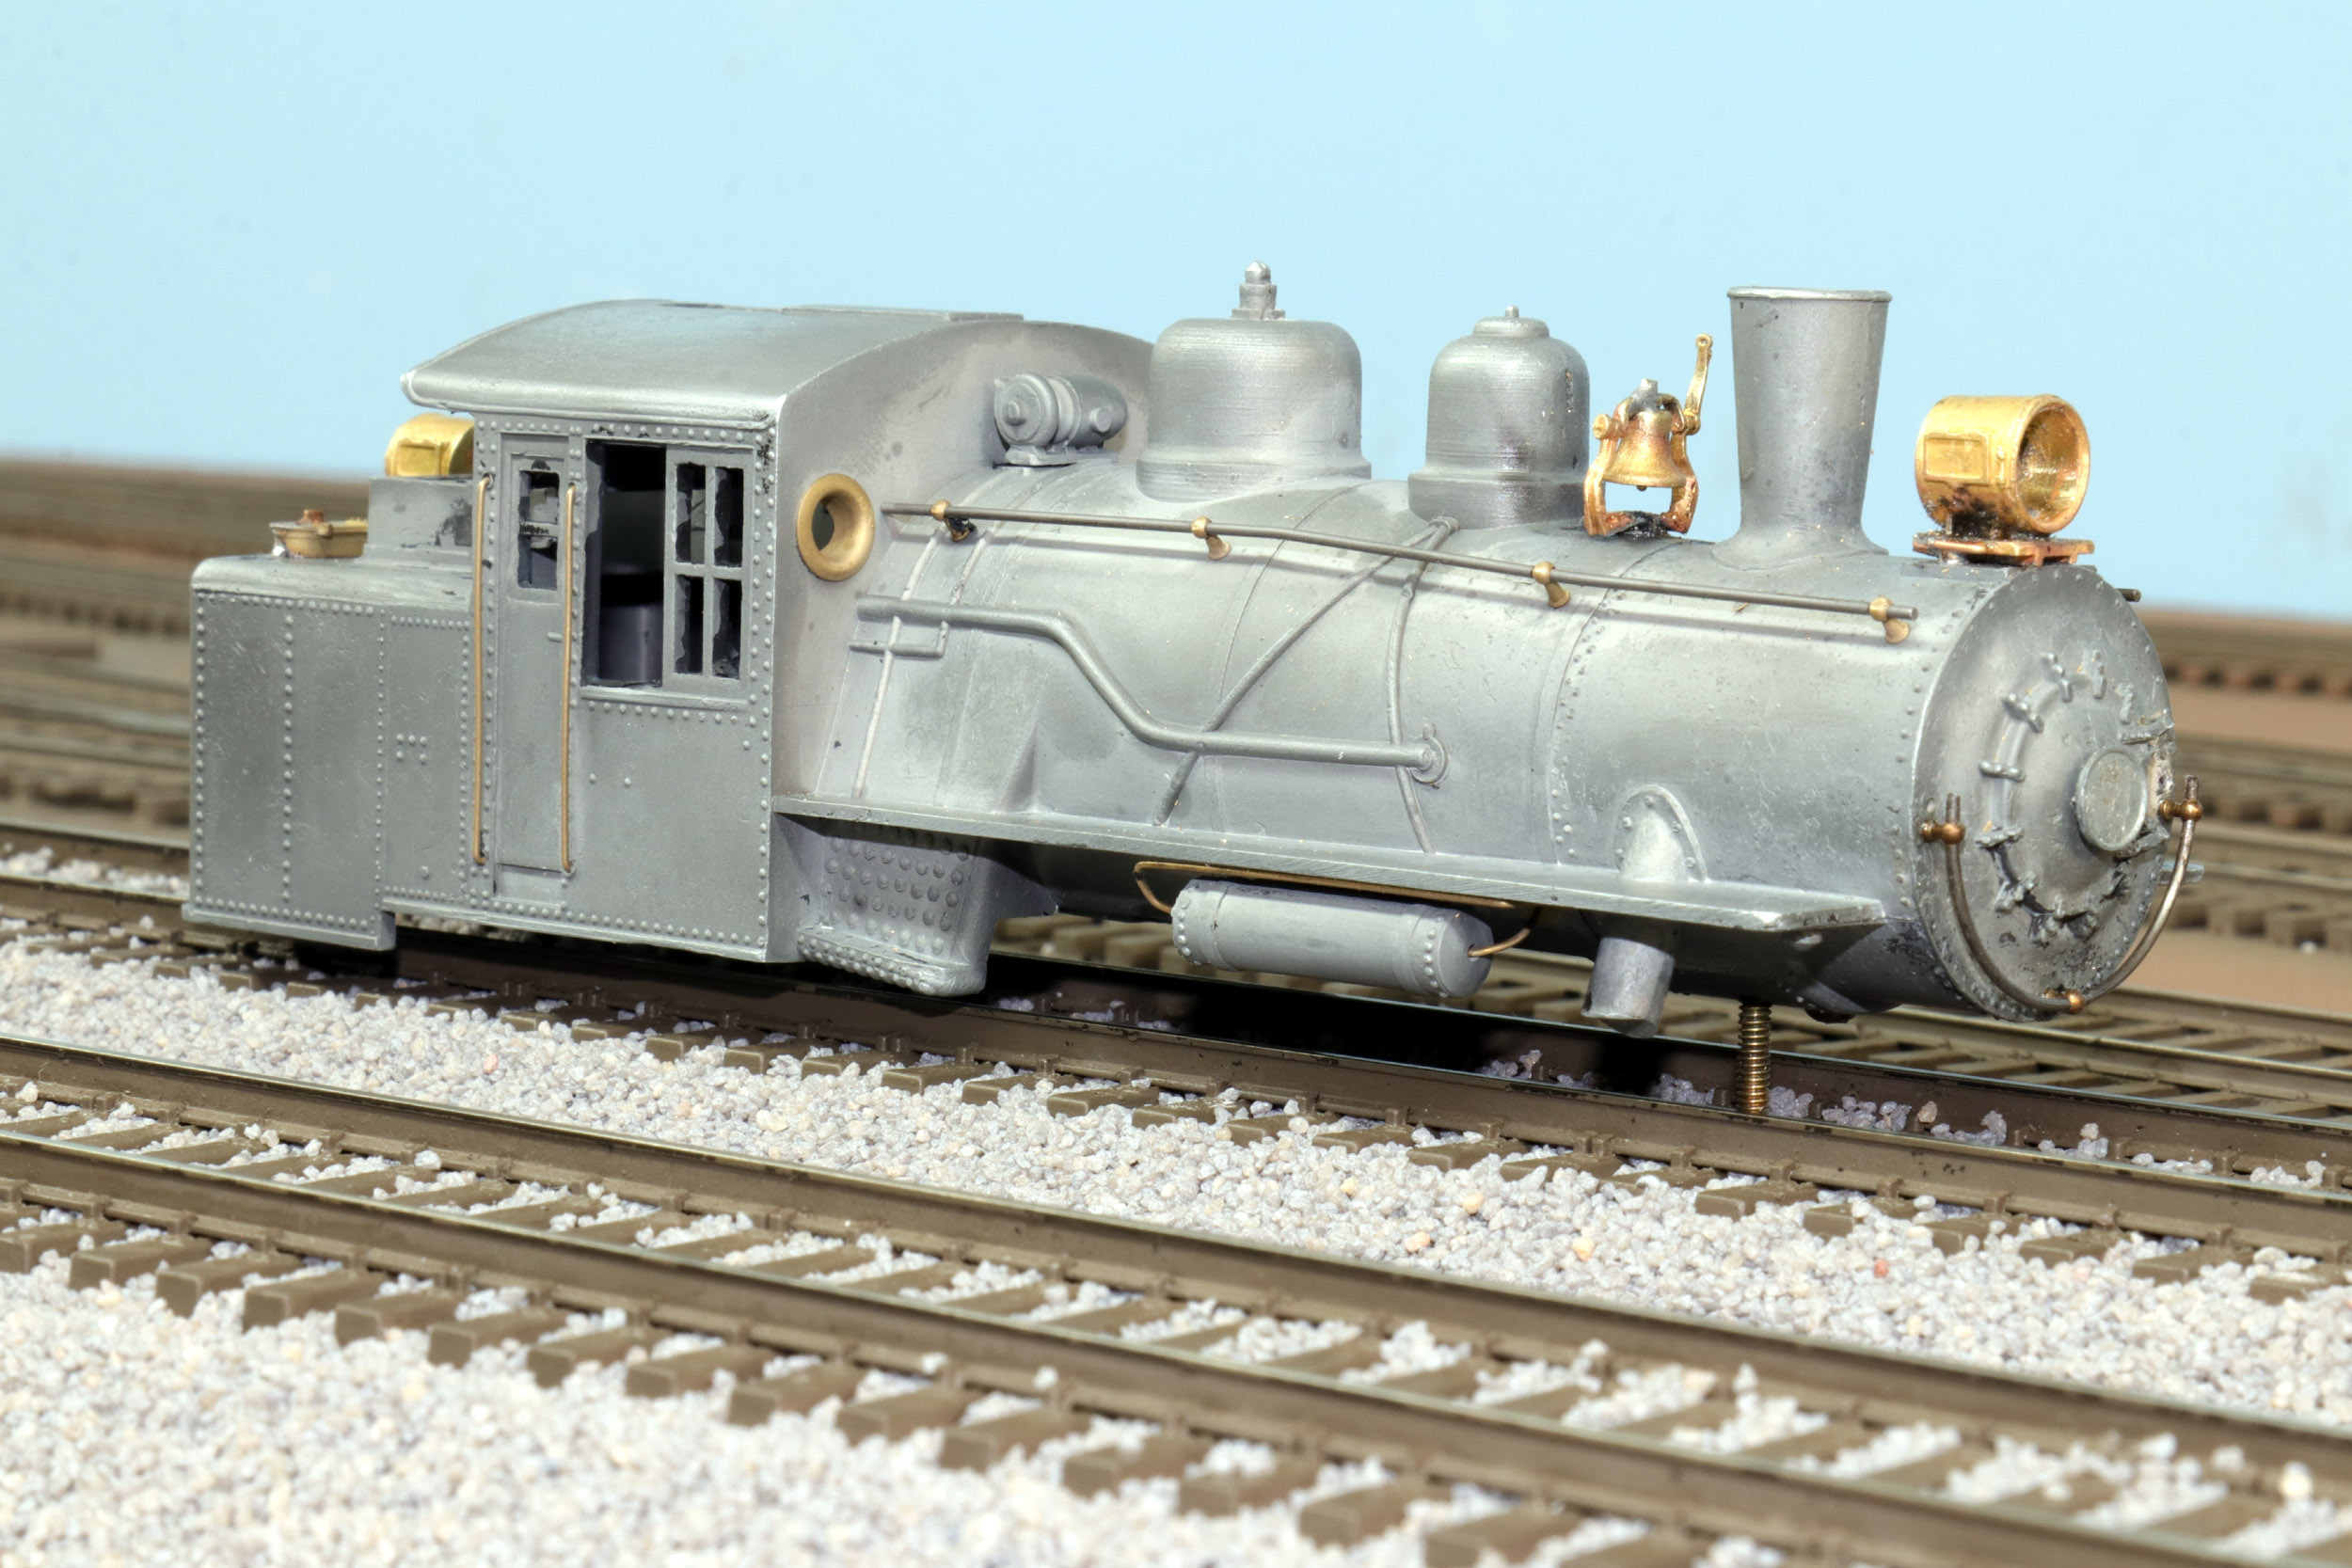
I like trying my best to make sure a mixed materials model is durable and it stays together. ACC is OK but fails as well especially when gluing metal to metal. I attached the bell by tapping a 2-56 screw up from the inside, drilling a new hole in the screw and soldering the bell to the brass screw. Other brass parts were attached the same way. I have also “pinned” parts together. I drilled a .026 hole and inserted a short piece of wire just sticking out of the boiler. I drilled a hole in the back of the compressor matching the location of the wire. There are no shear glue joints which ACC fails the most.
Ready For Paint
I
could have added a lot more piping but that is not want this build is about. It
is already a vintage 1950s fictional model. What are you going to improve? Something different and
basic.
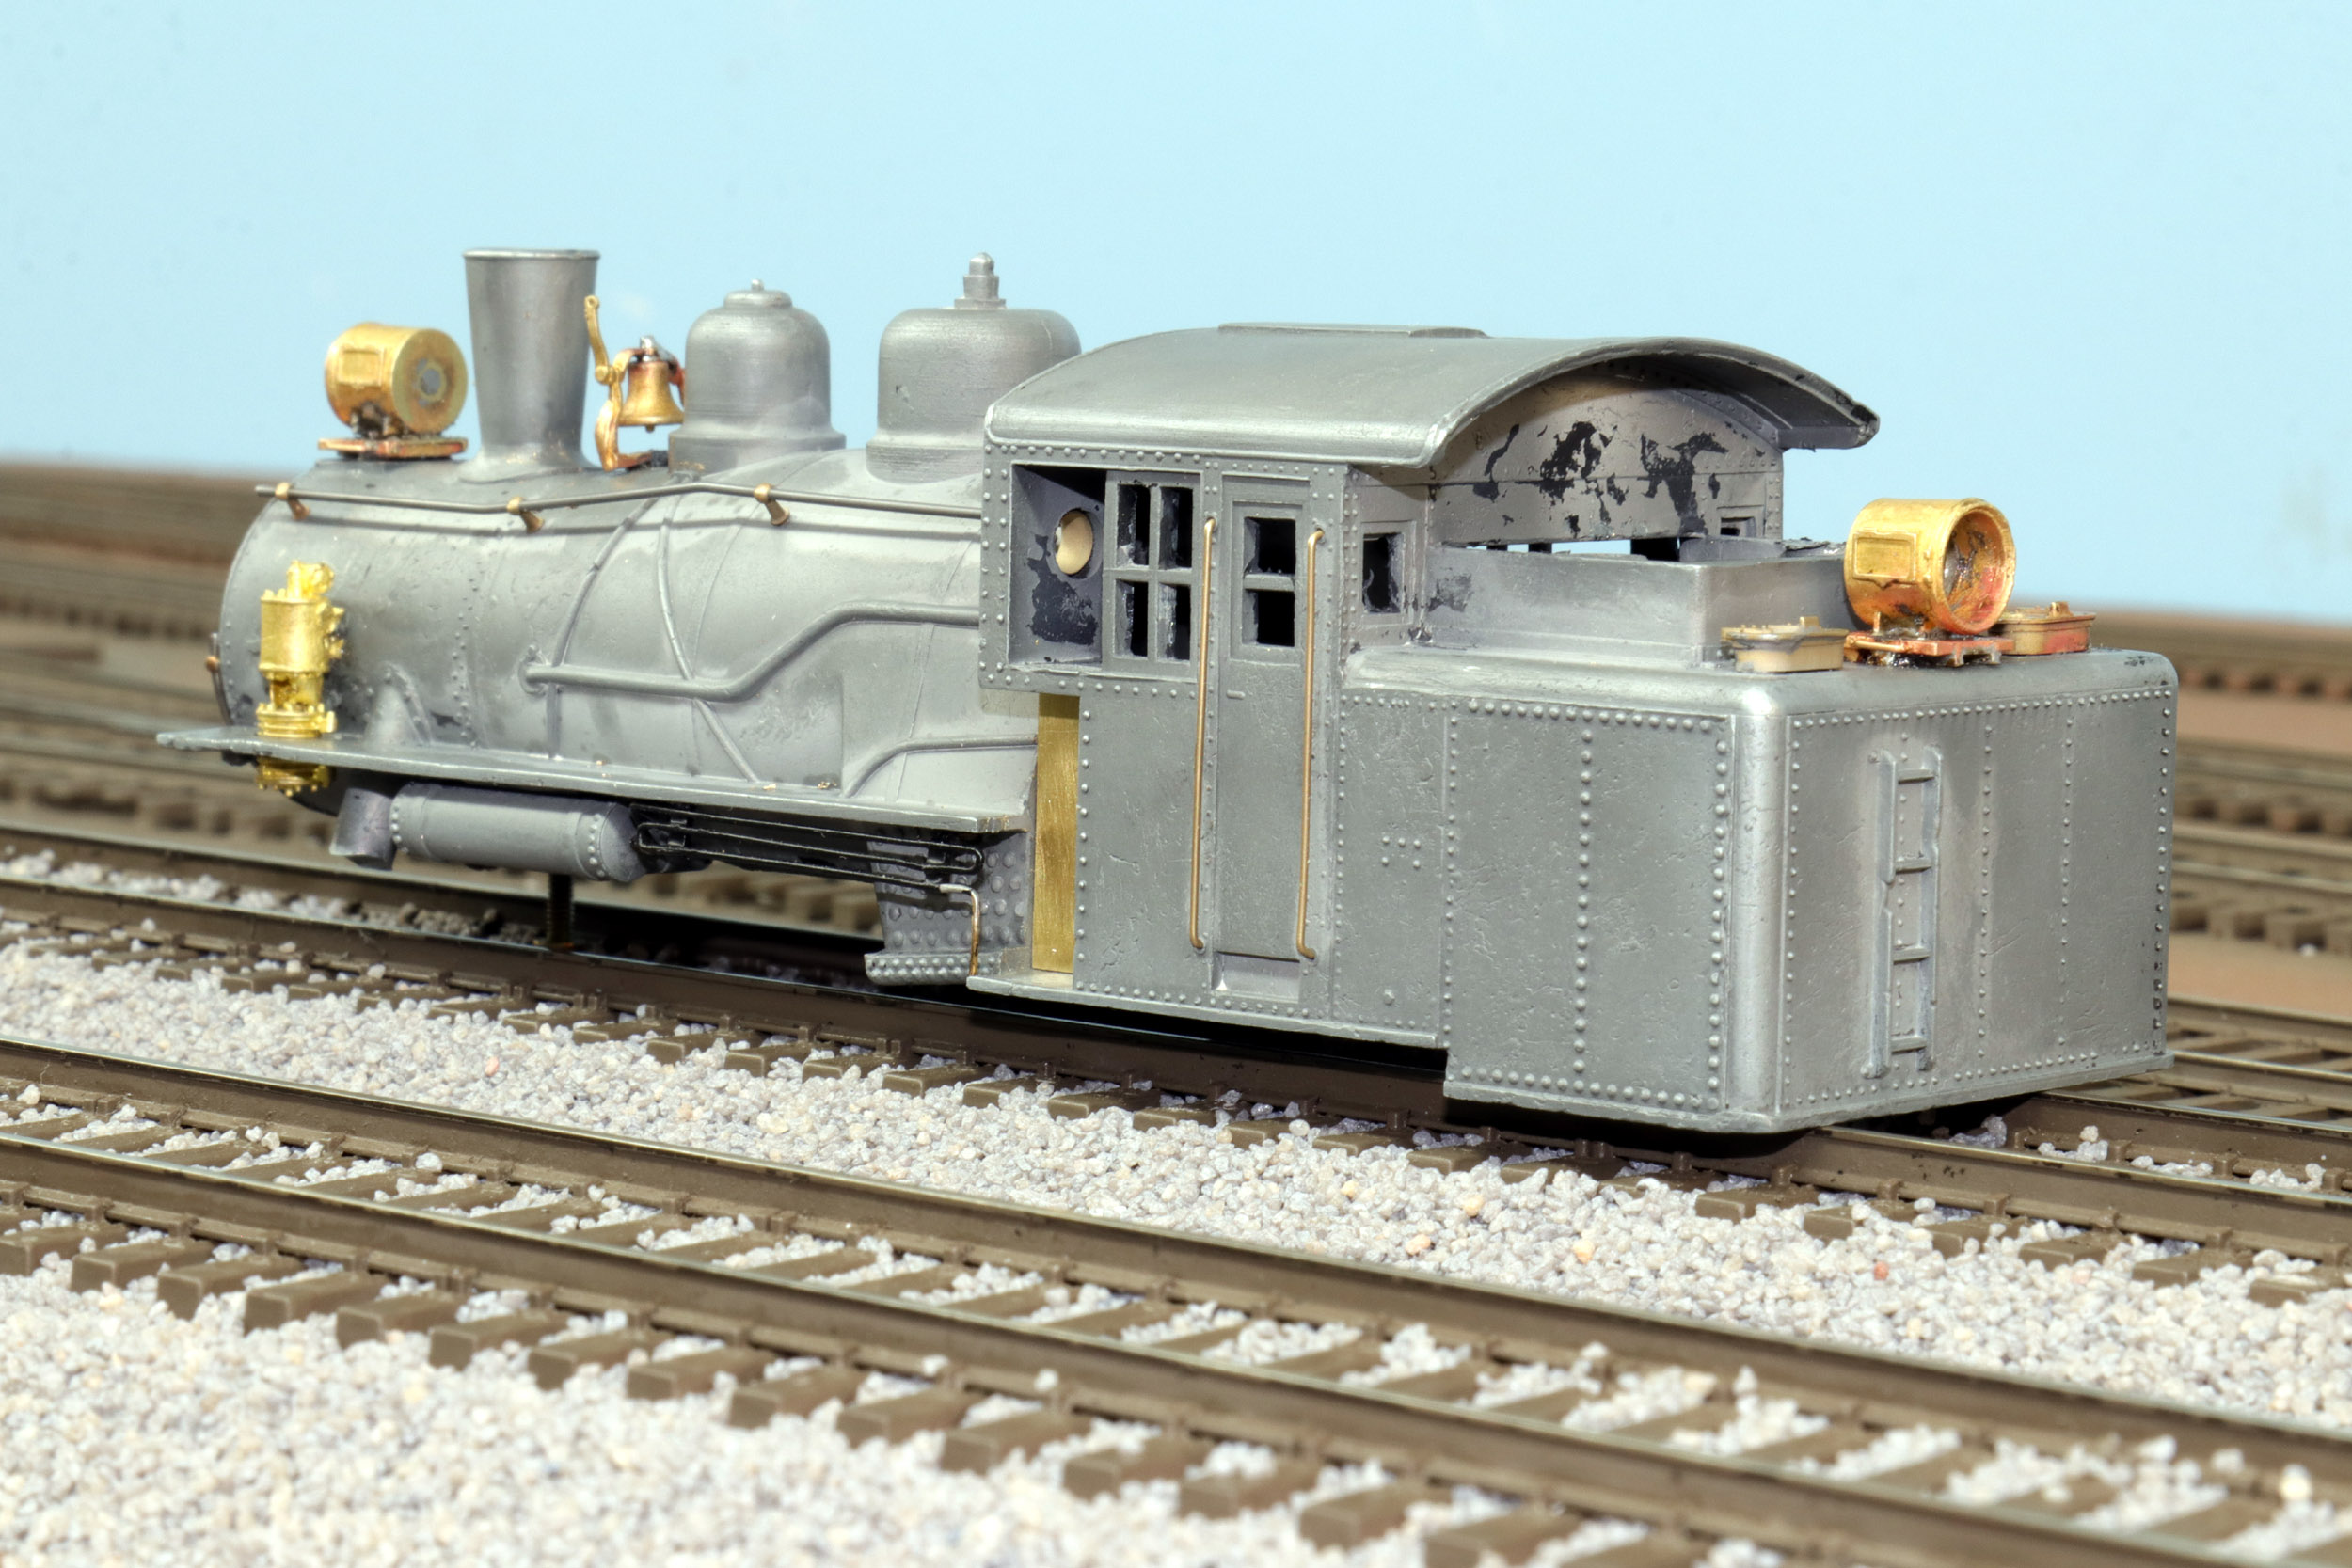
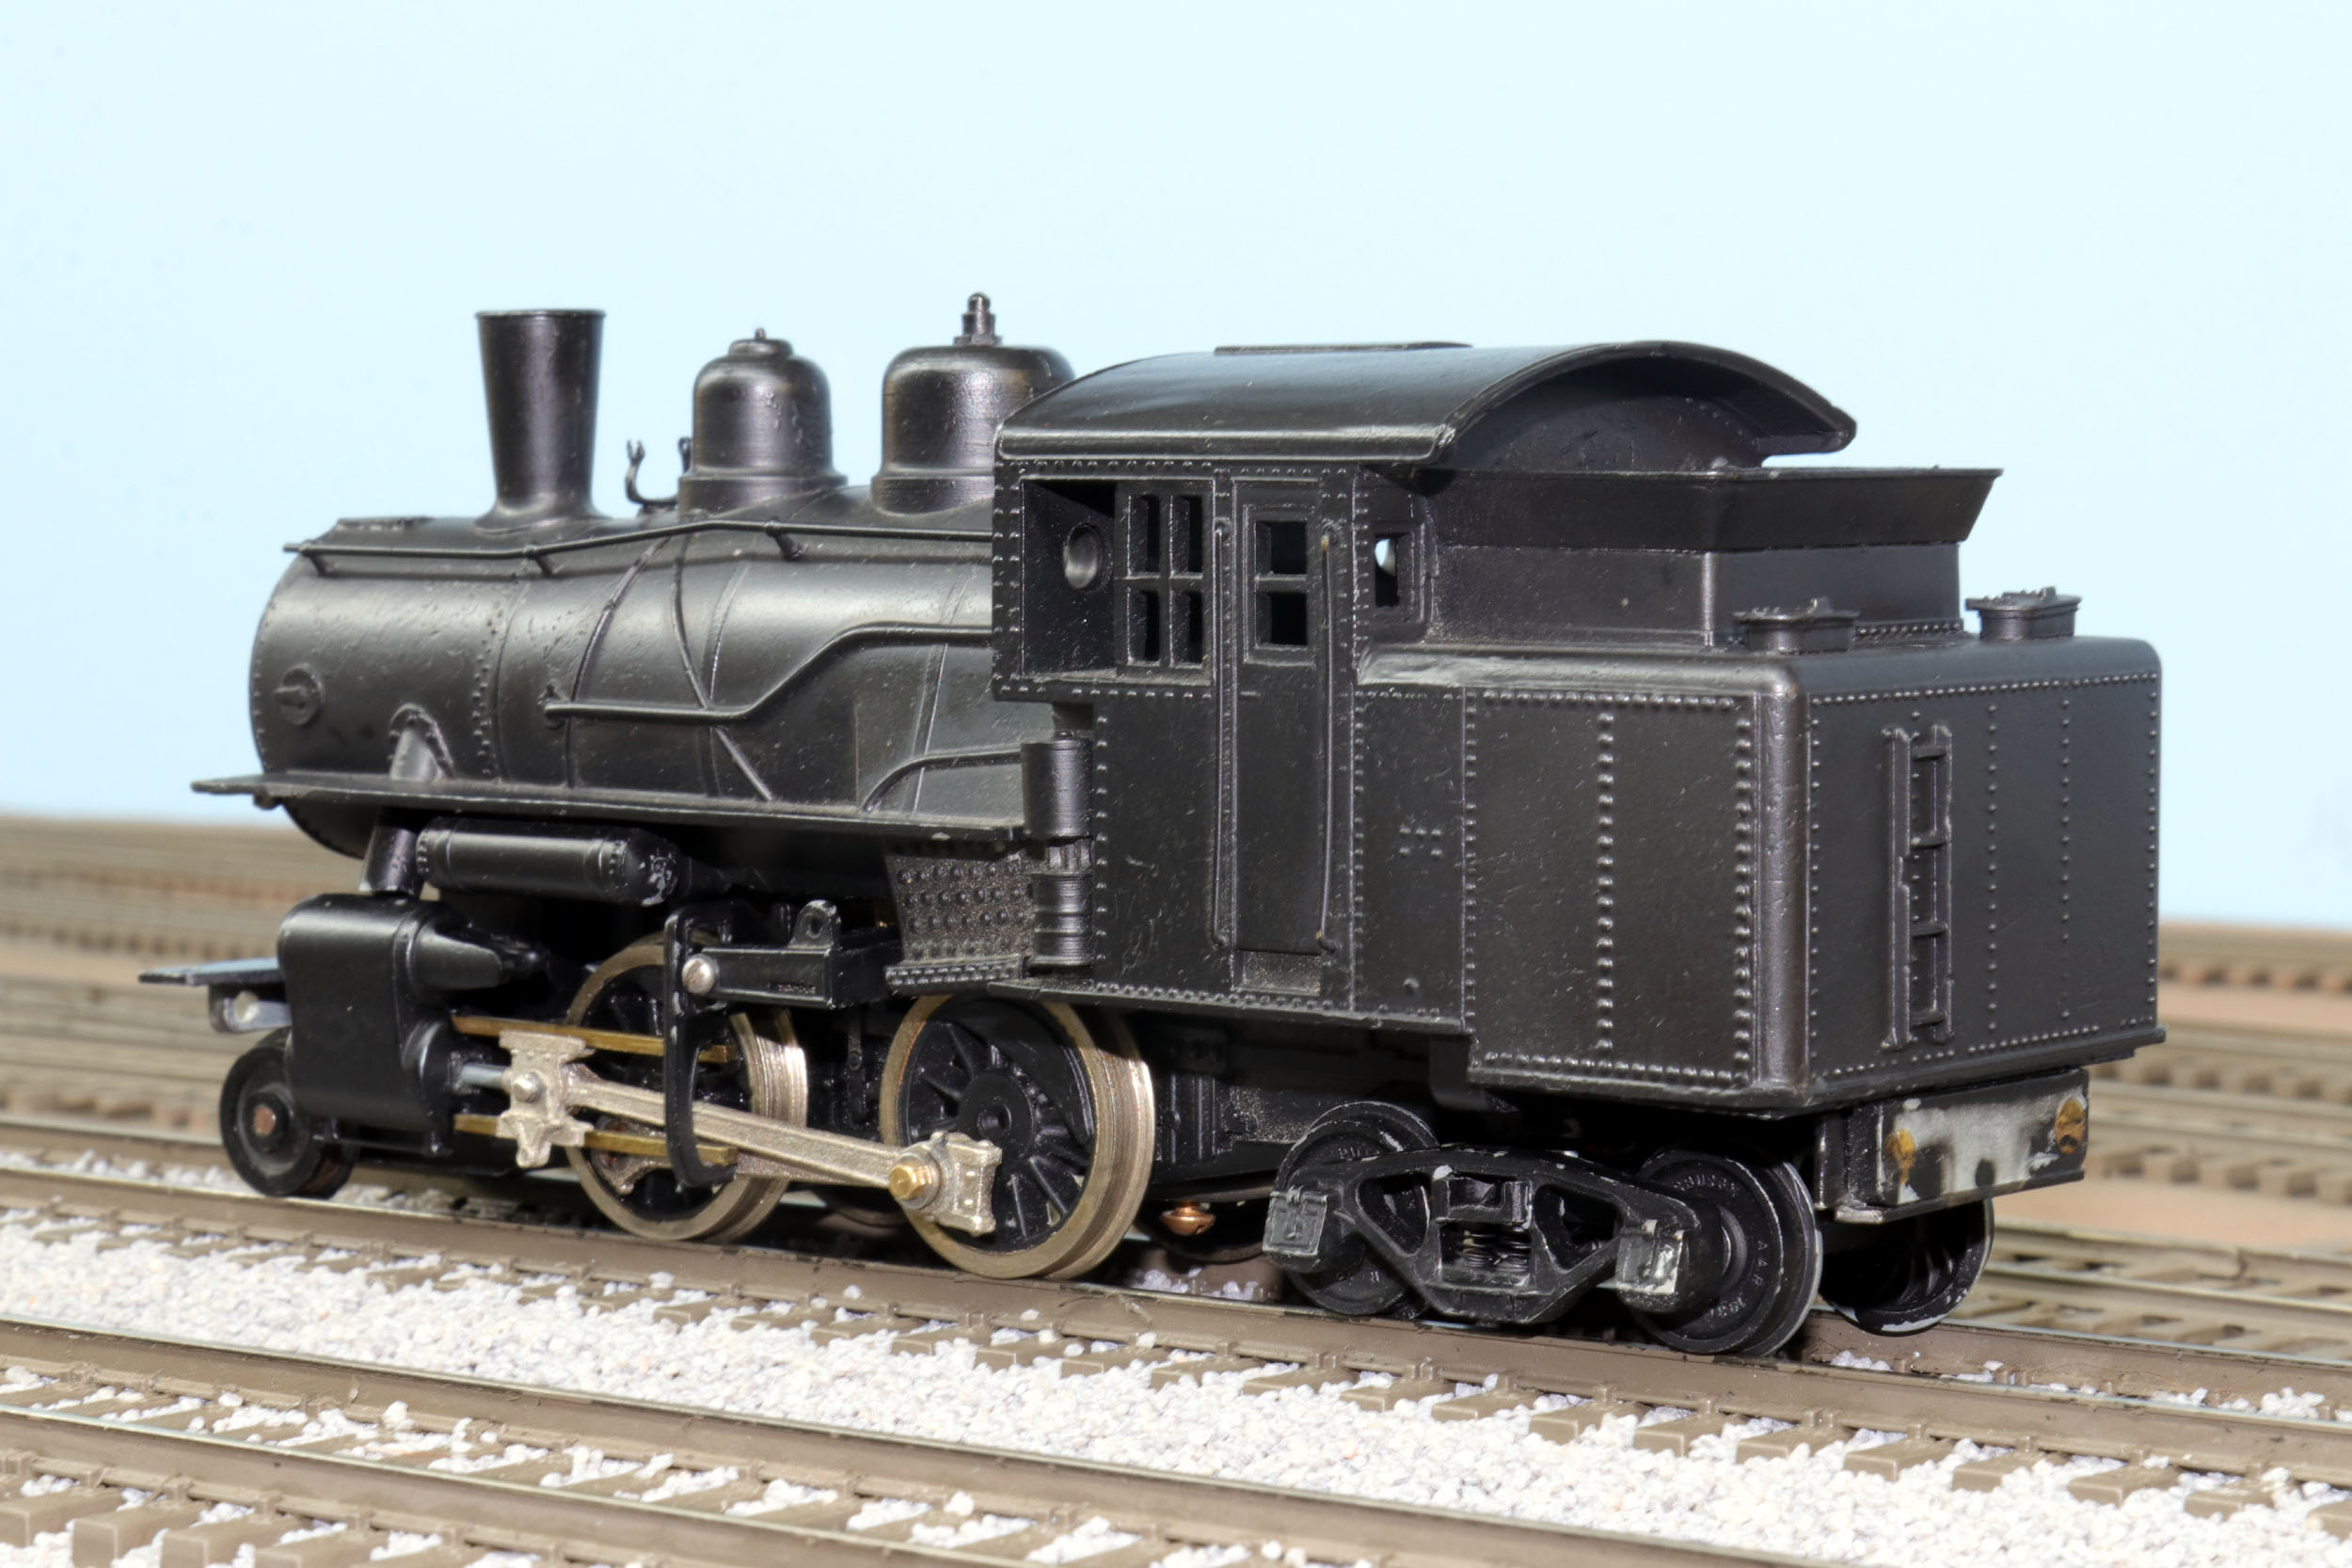
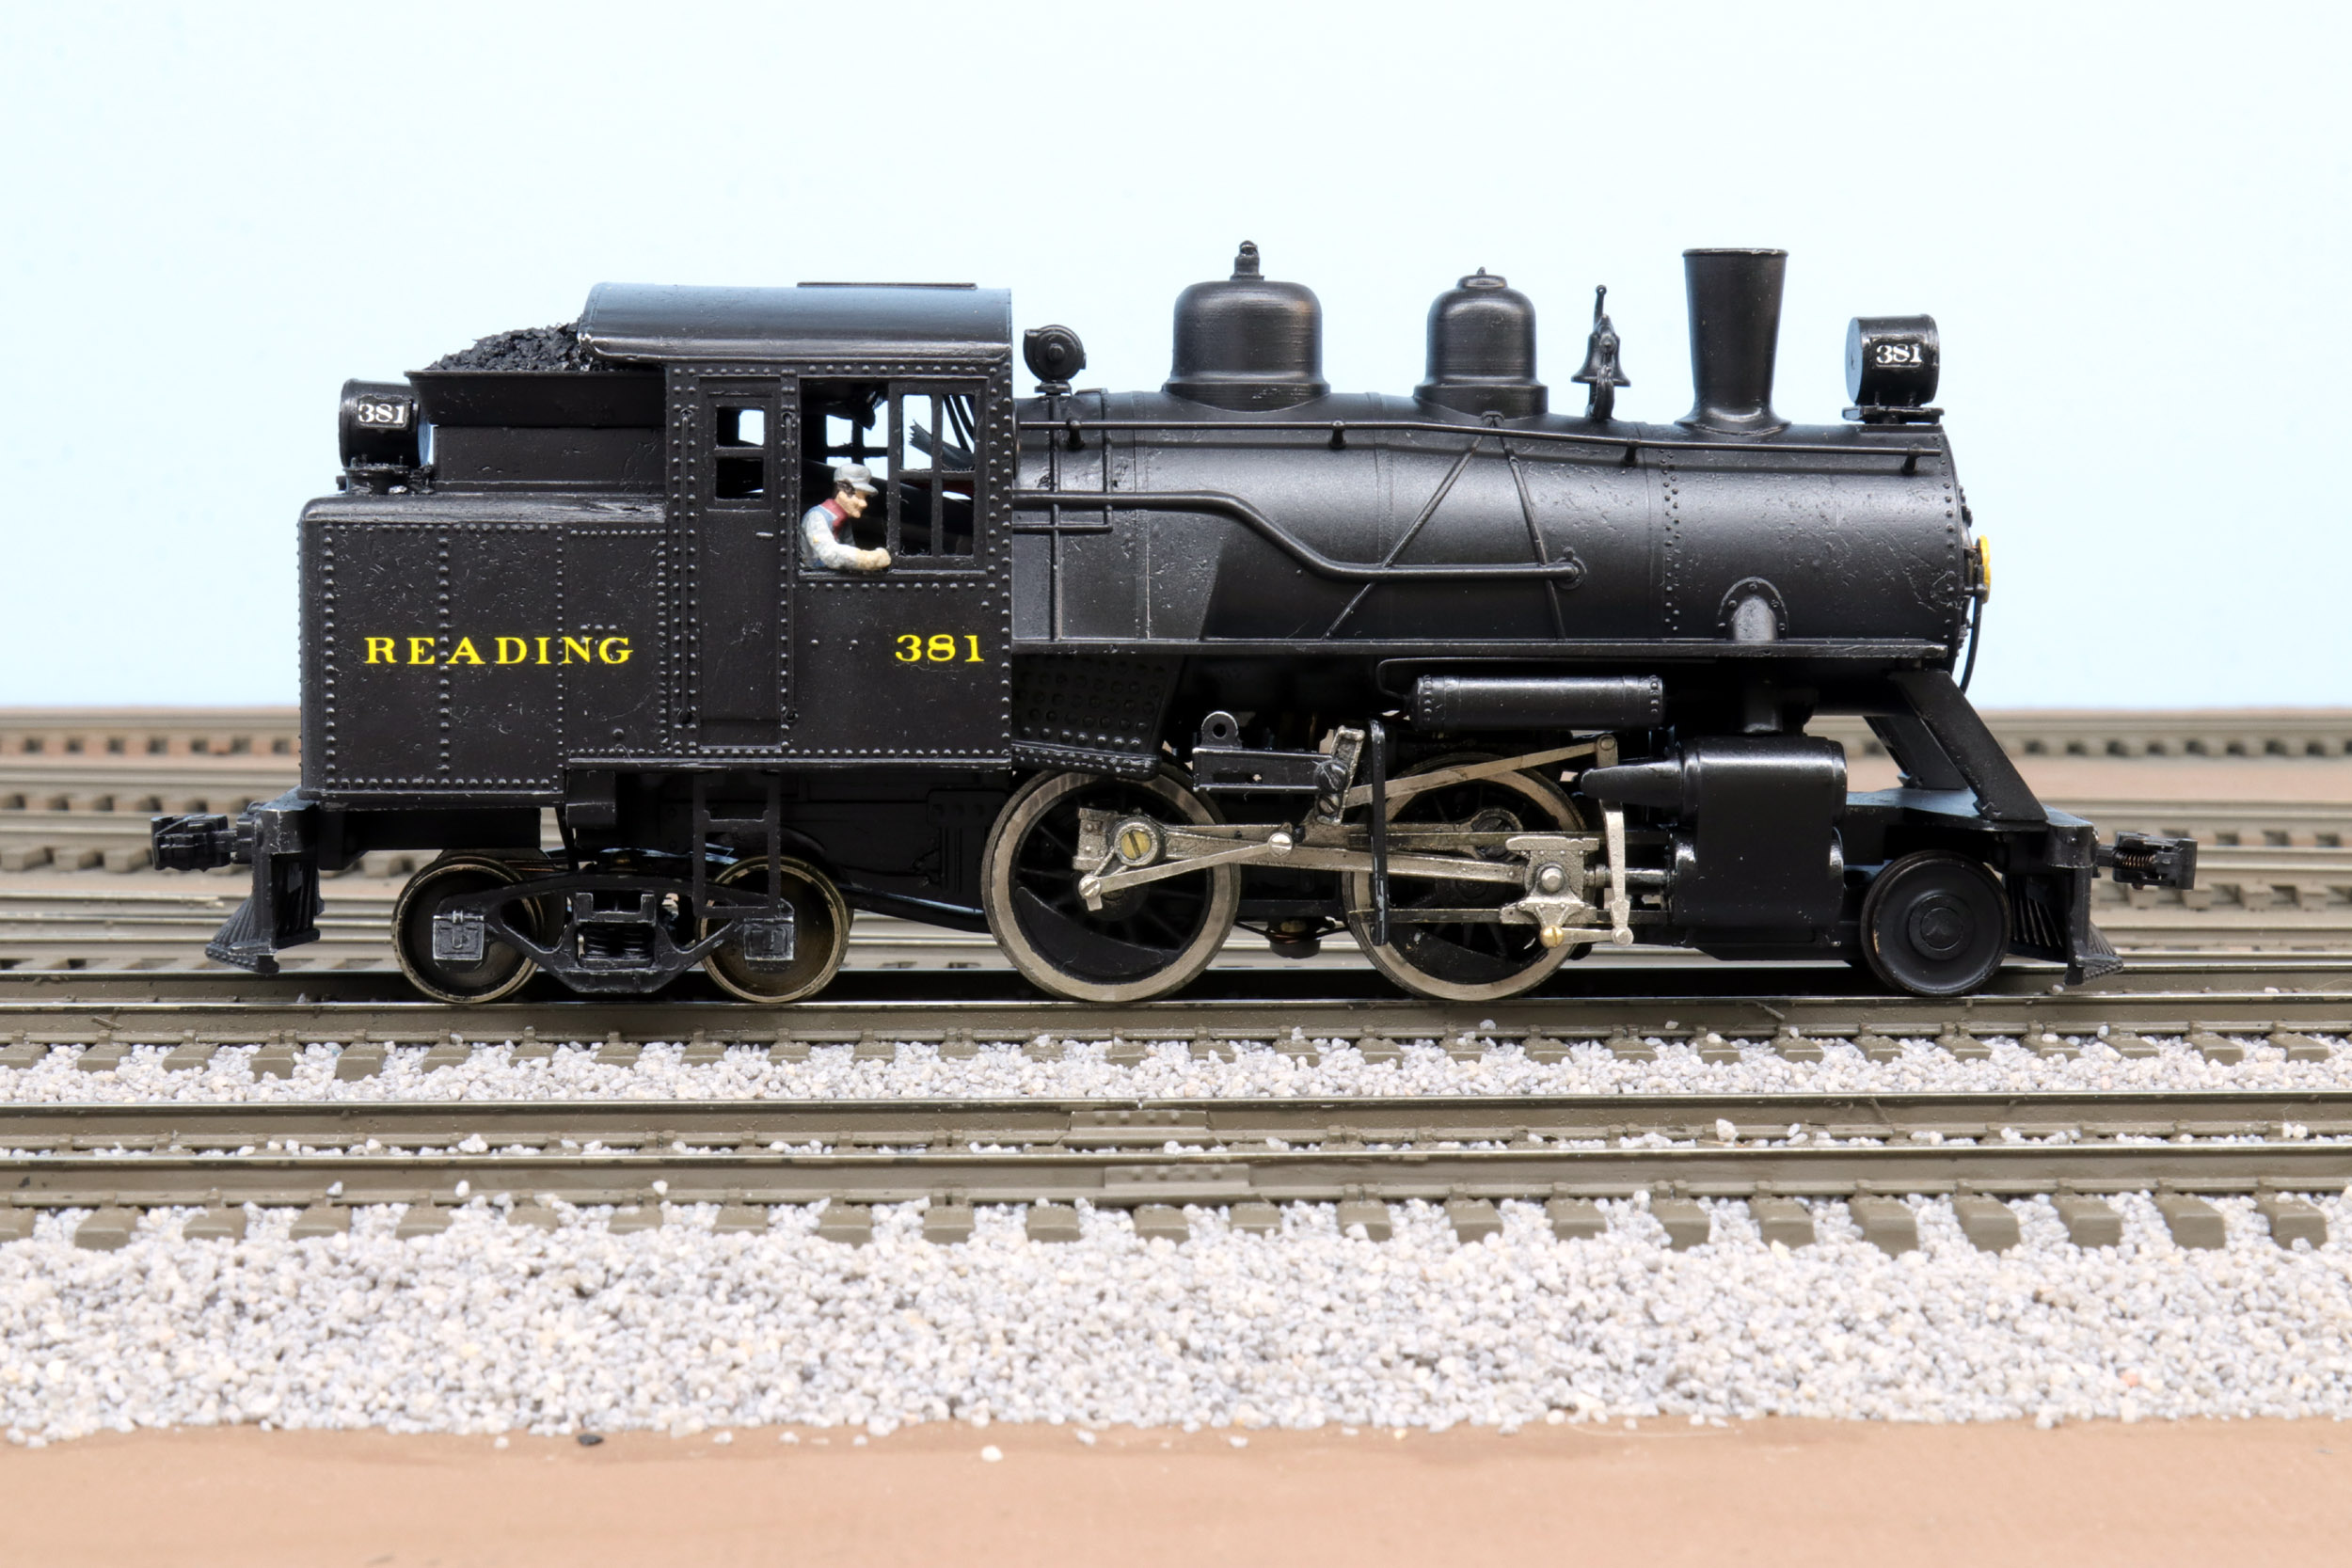
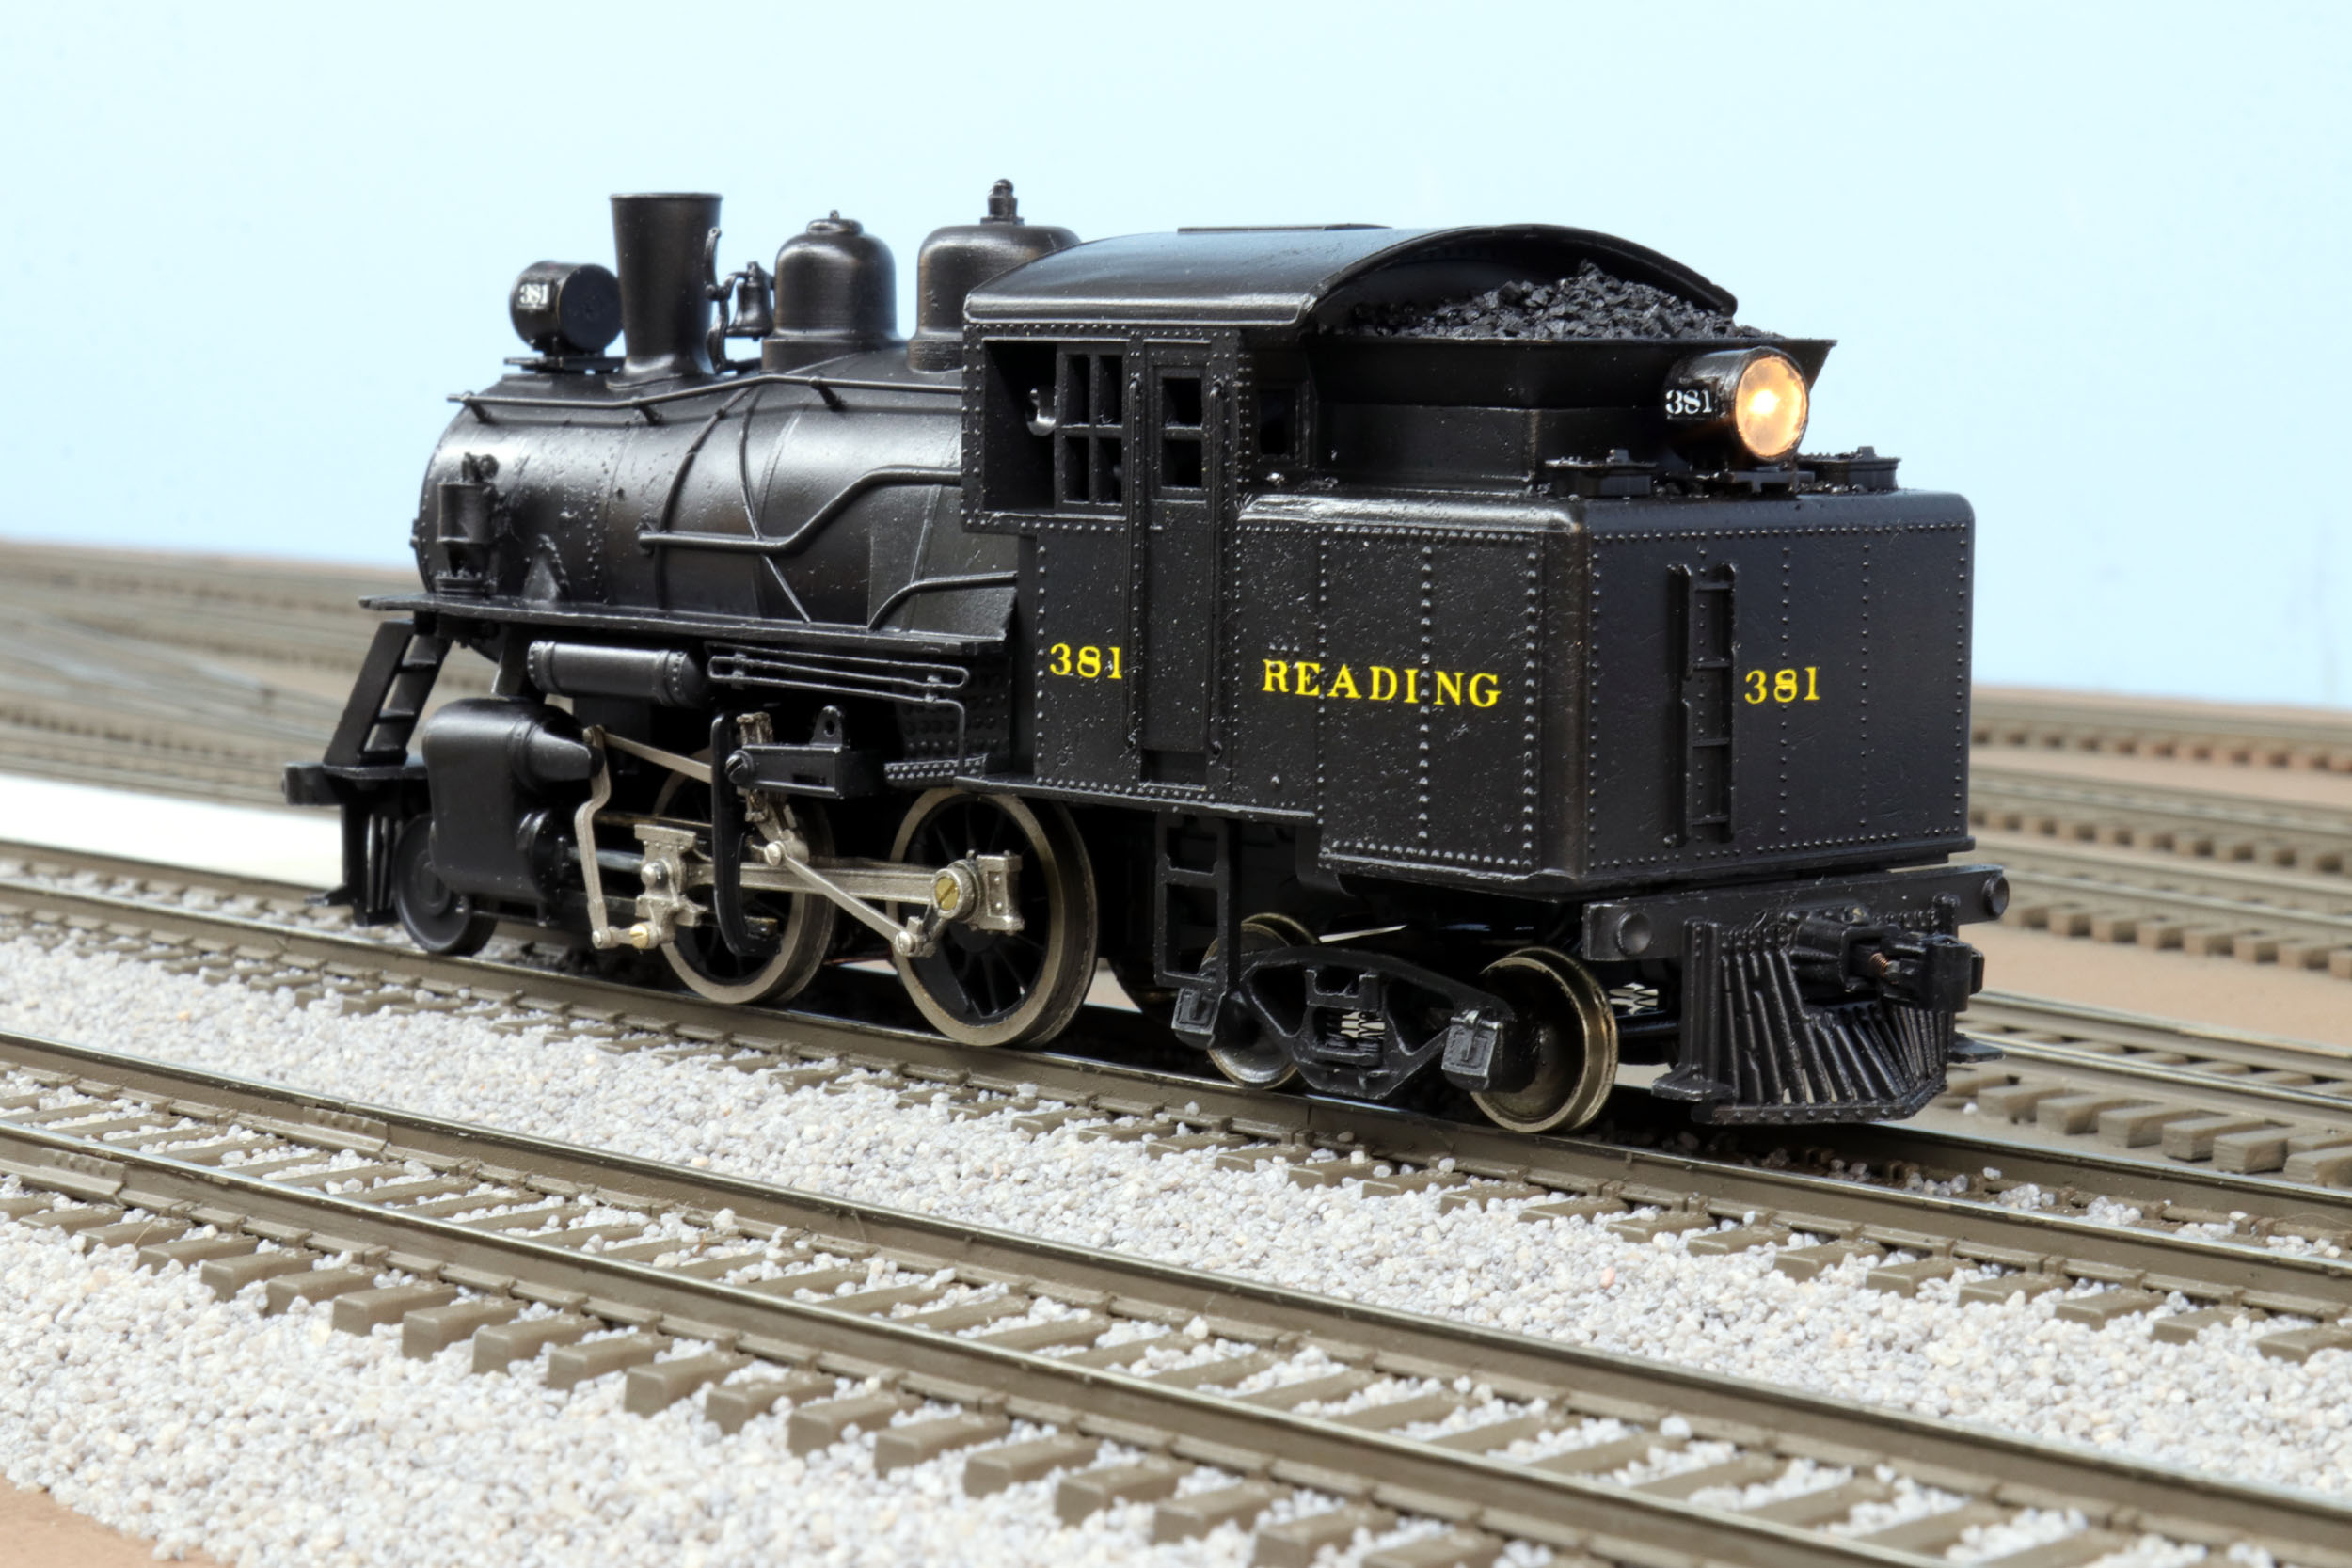
Reading 381
Completed 4-29-21
It was a fun and different project.
Maybe
the blasting worked a bit too well the body seemed to have more of a texture
than before blasting. The white metal might have been soft in some places and
the blast removed it. That is not an issue with brass. I was not expecting this
so I did not really look for a before surface. The decals are mostly a
Microscale alphabet set cutting out 1 letter at a time. The new headlights and
bell from River Raisin look MUCH better than what Rex made. There still is some
reasonable gear noise. It is running OK maybe not quite as well as I had hoped.
Maybe I should have put a can motor in. It will easily pull the 3-4 car passenger car train I envisioned. This has the world’s
smallest coal load. I did not put any windows in. The shape of the cab made
adding a fireman figure difficult. I thought about adding cut levers to the
pilots but decided it was DONE…..
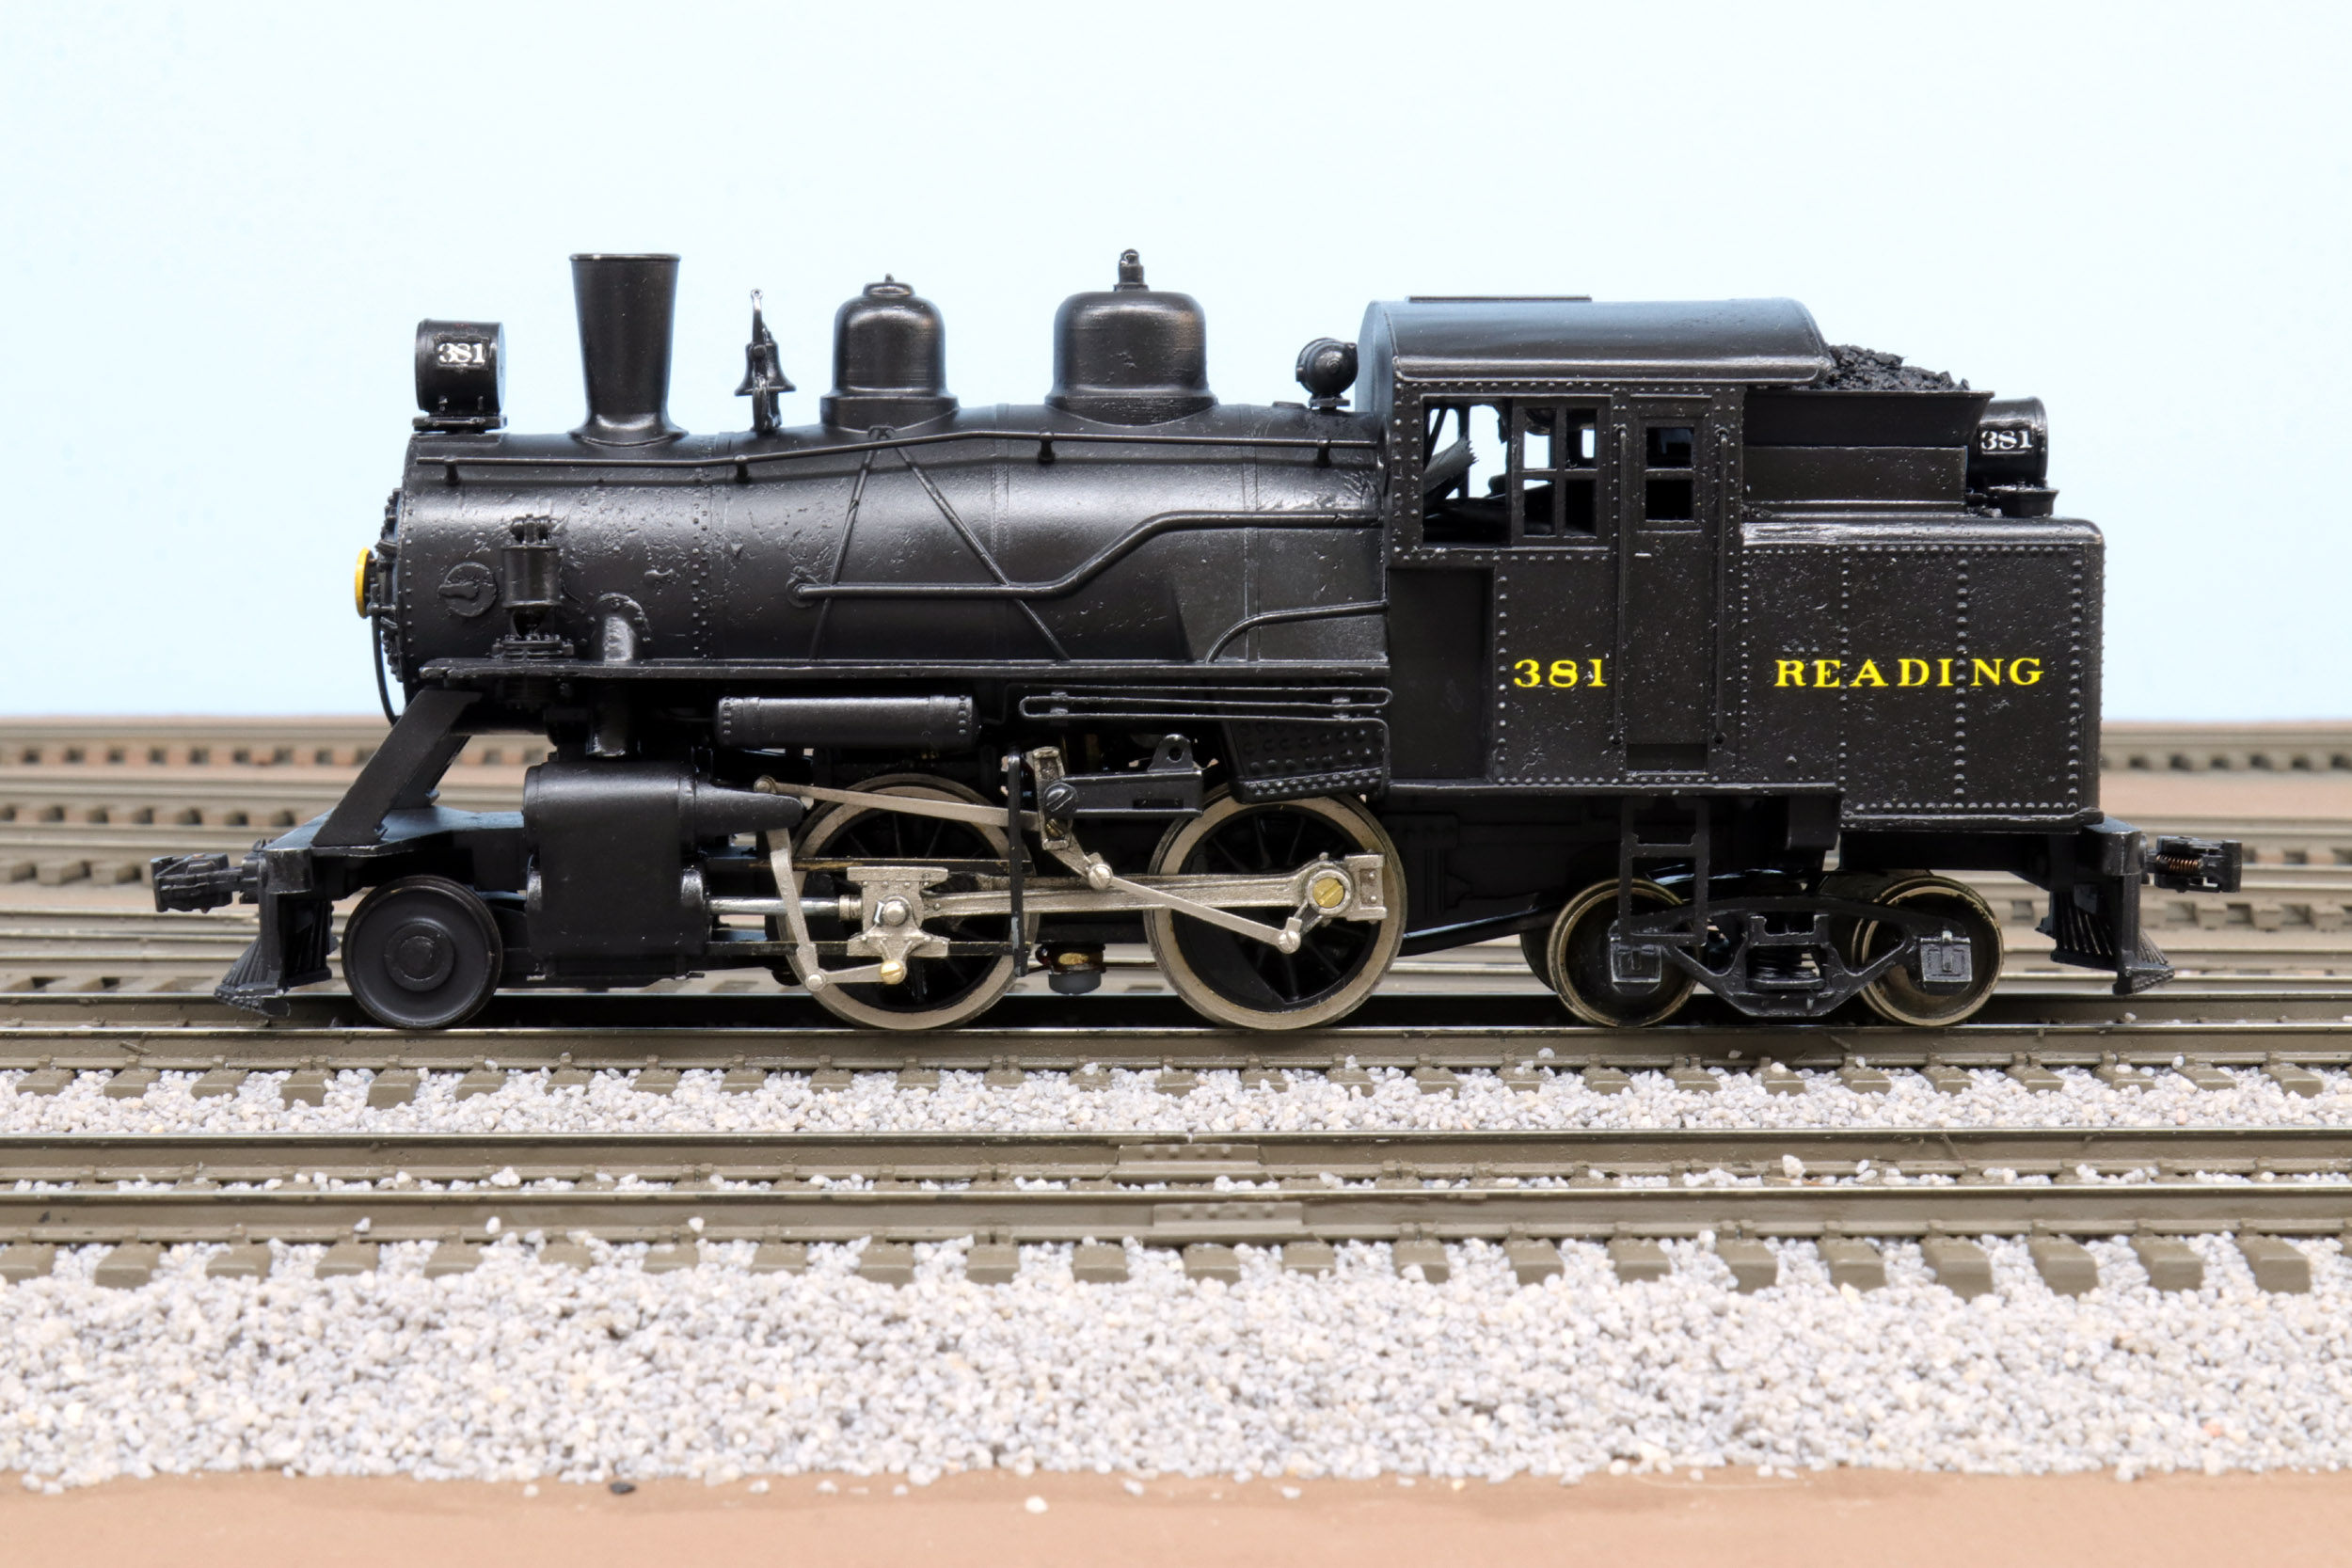
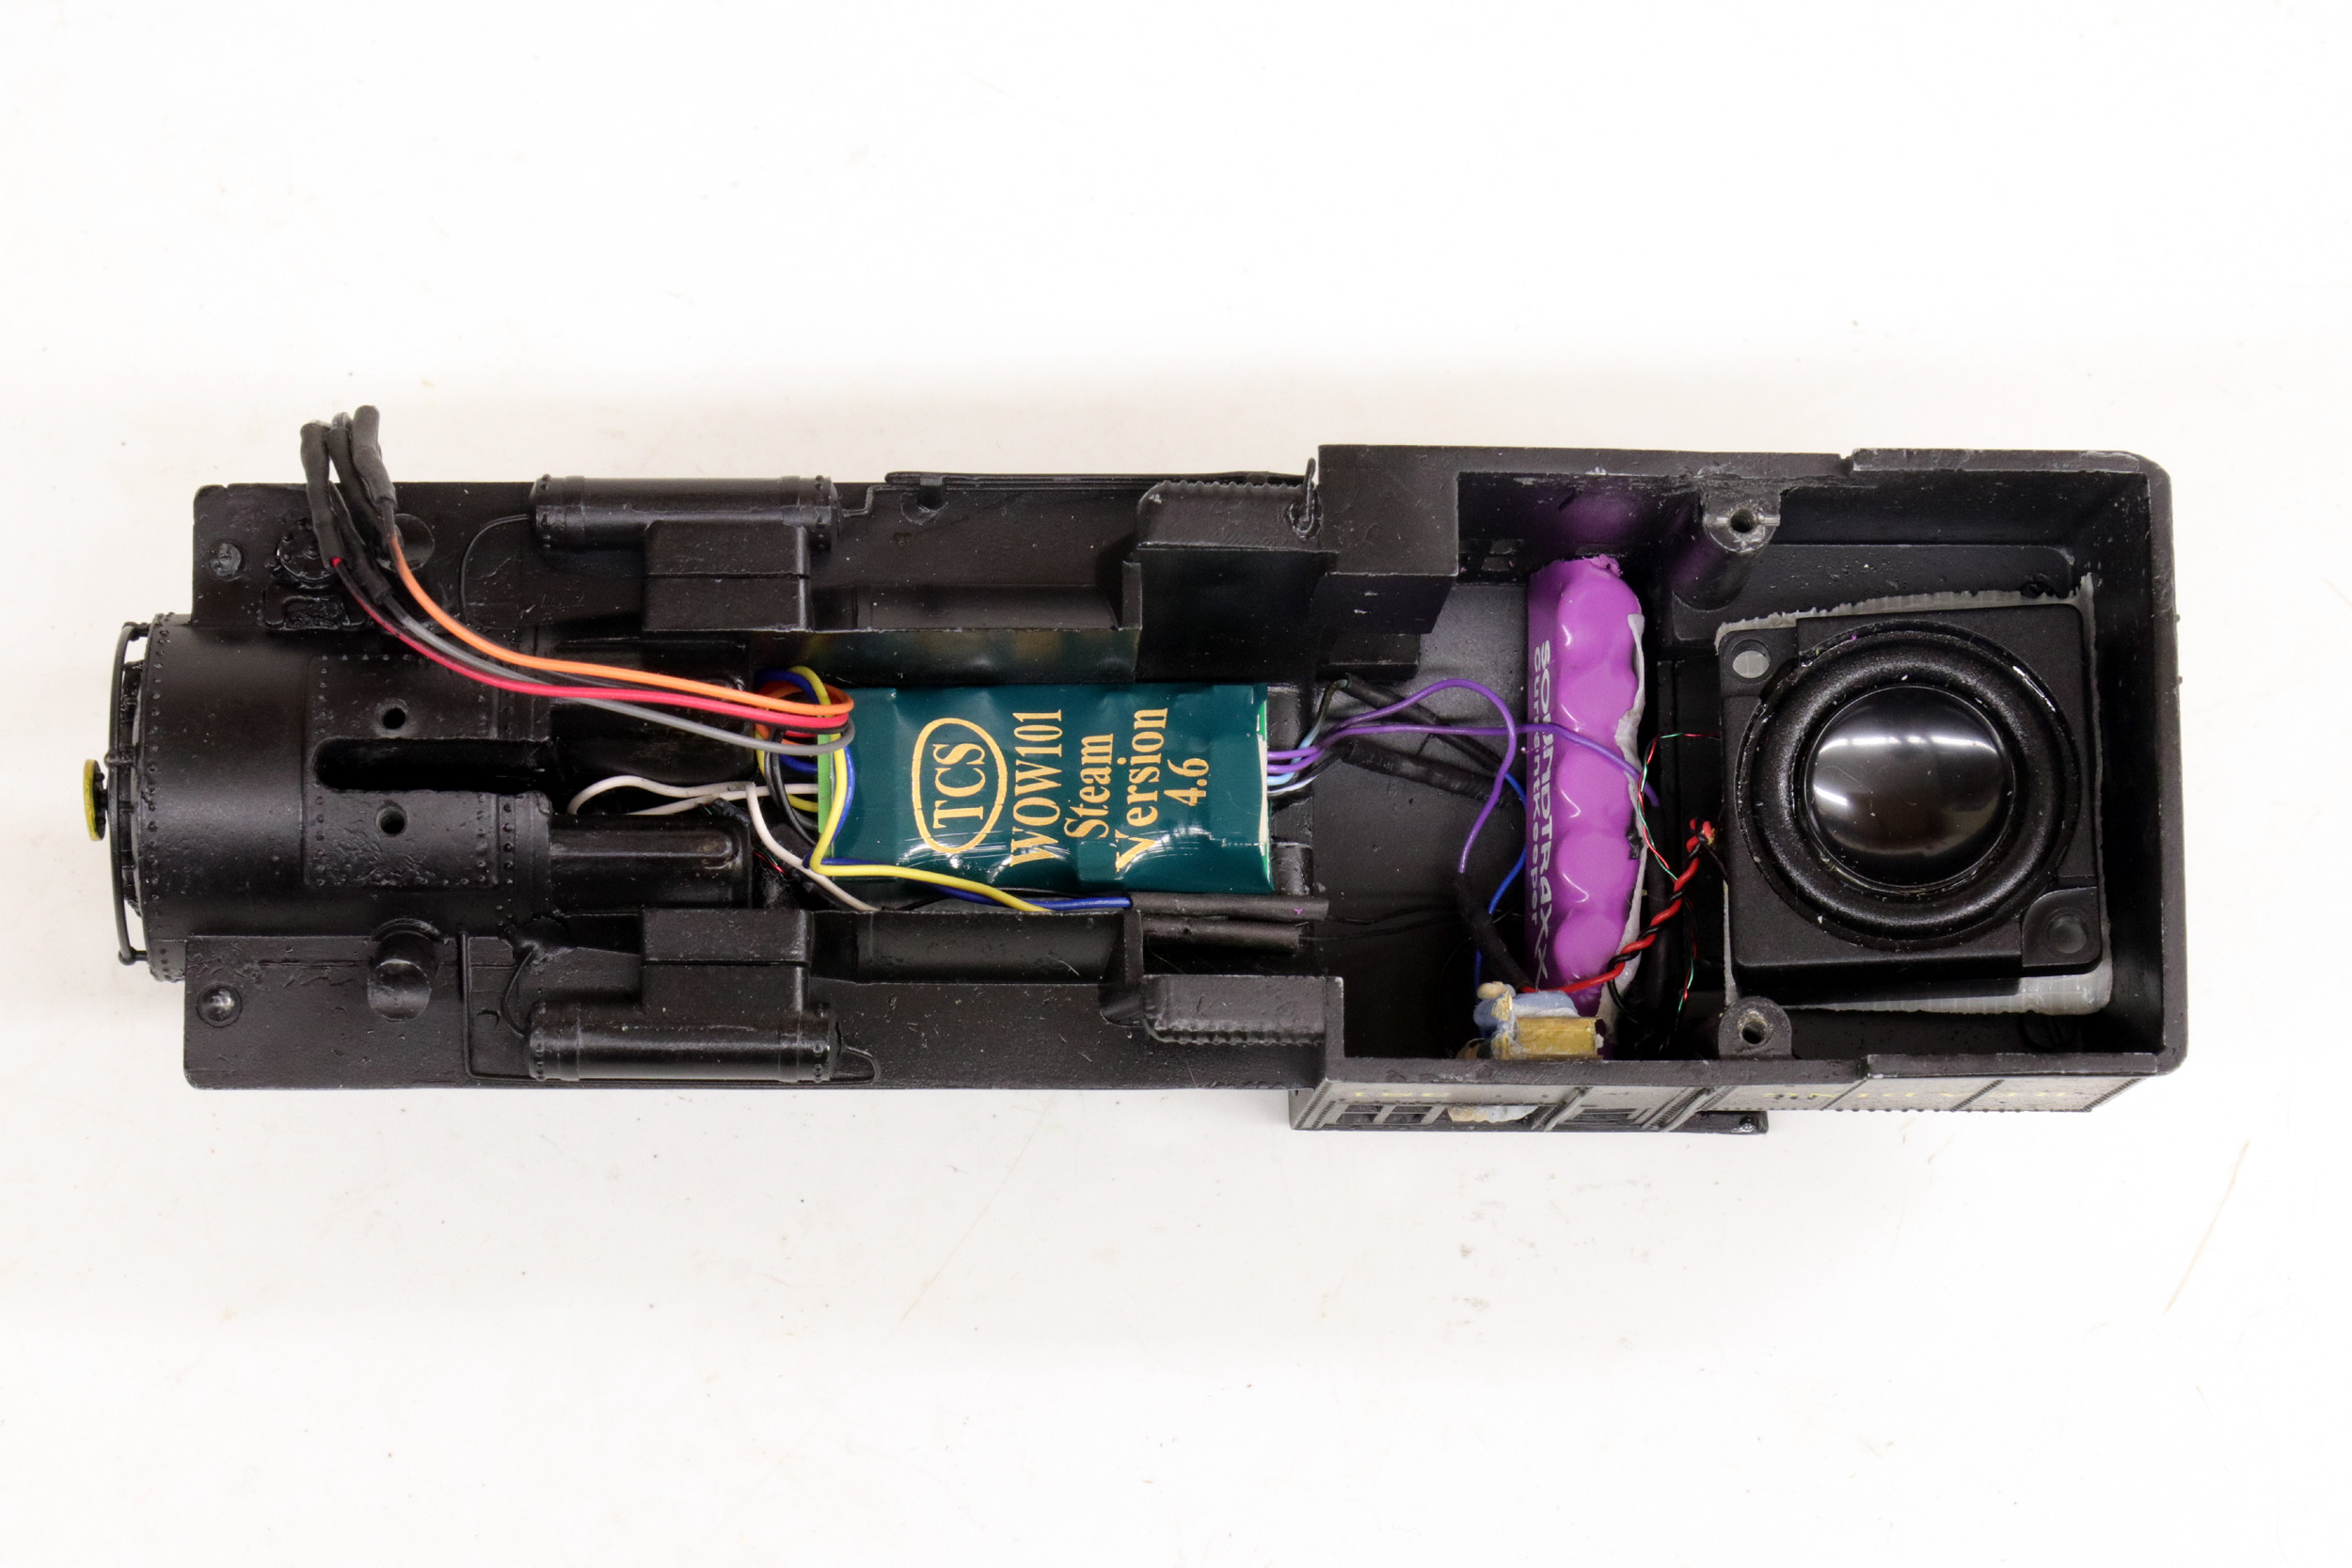
Added 12-14-22
Sound Decoder Added
As
mentioned above changing from a NCE decoder to a sound decoder would be pretty easy,
so I finally did it. I mostly try to have sound decoders in locos that were
involved projects. I did not have room for the DLG8 speaker and it is
noticeable in the sounds. Note that I am using a TSC decoder and Soundtraxx
Current Keeper which is going to be my new standard if I have room for
everything. Mixing brands here is fine. The Current Keeper has a huge
electrical storage capacity. With the limited pickup wheels of 2 drivers and
the trailing truck that should make this run really well. This is probably my
only completed loco that still has the open frame motor. I don’t know why this
open frame motor works with the DCC when no others have. Maybe it is the new
TCS decoder but this runs ***amazingly*** well now, removing any thoughts of a
can motor replacement in the future.

Updated
12-14-22
All photos and content © Lanes Trains 2005-2023