|
|
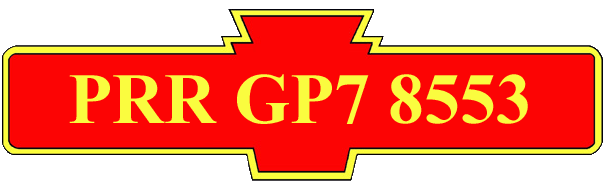
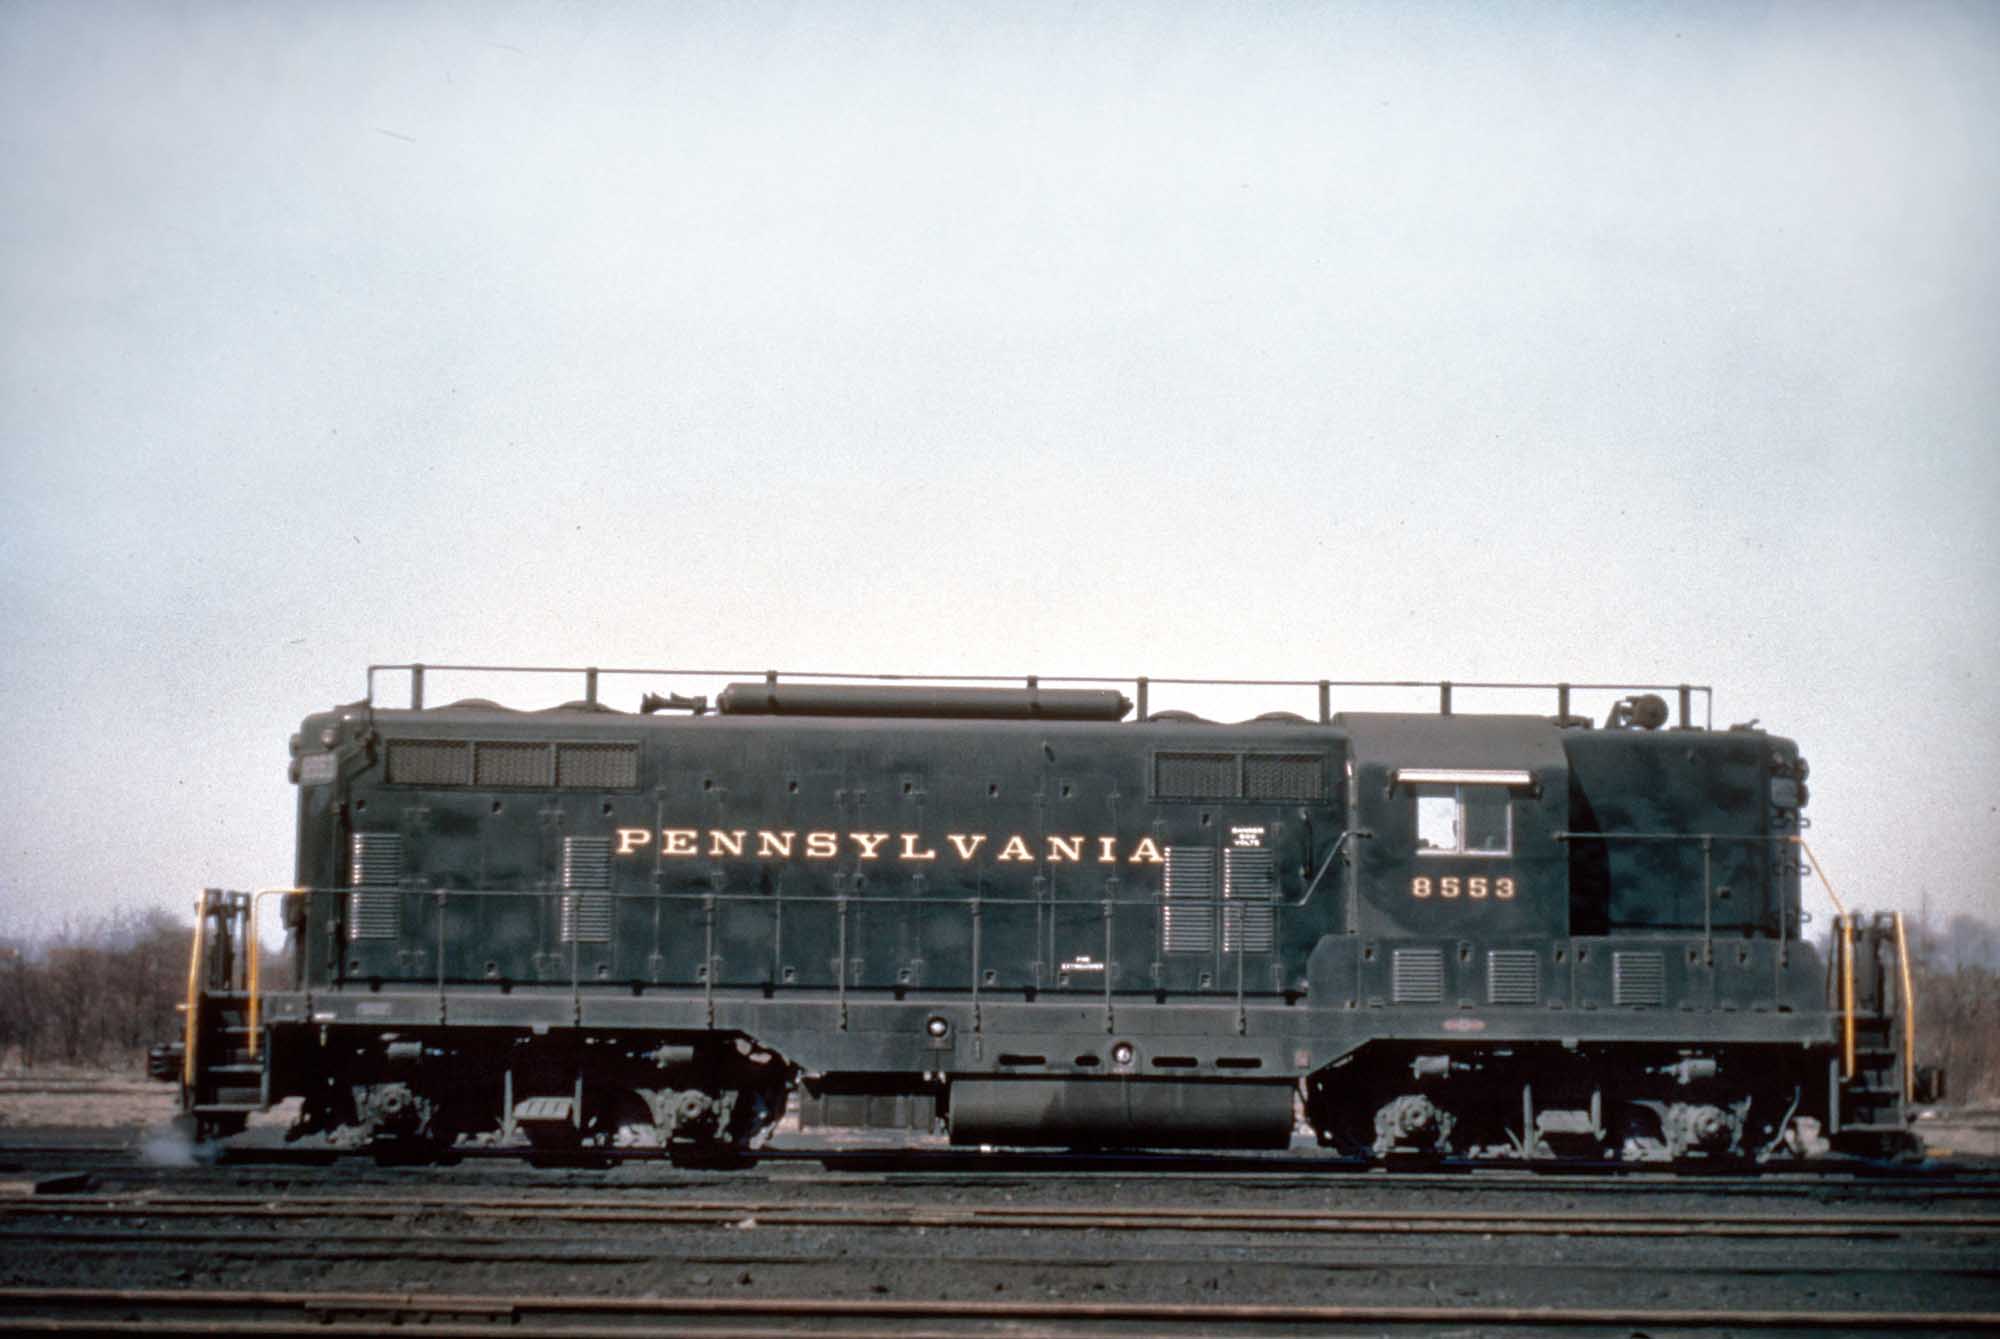
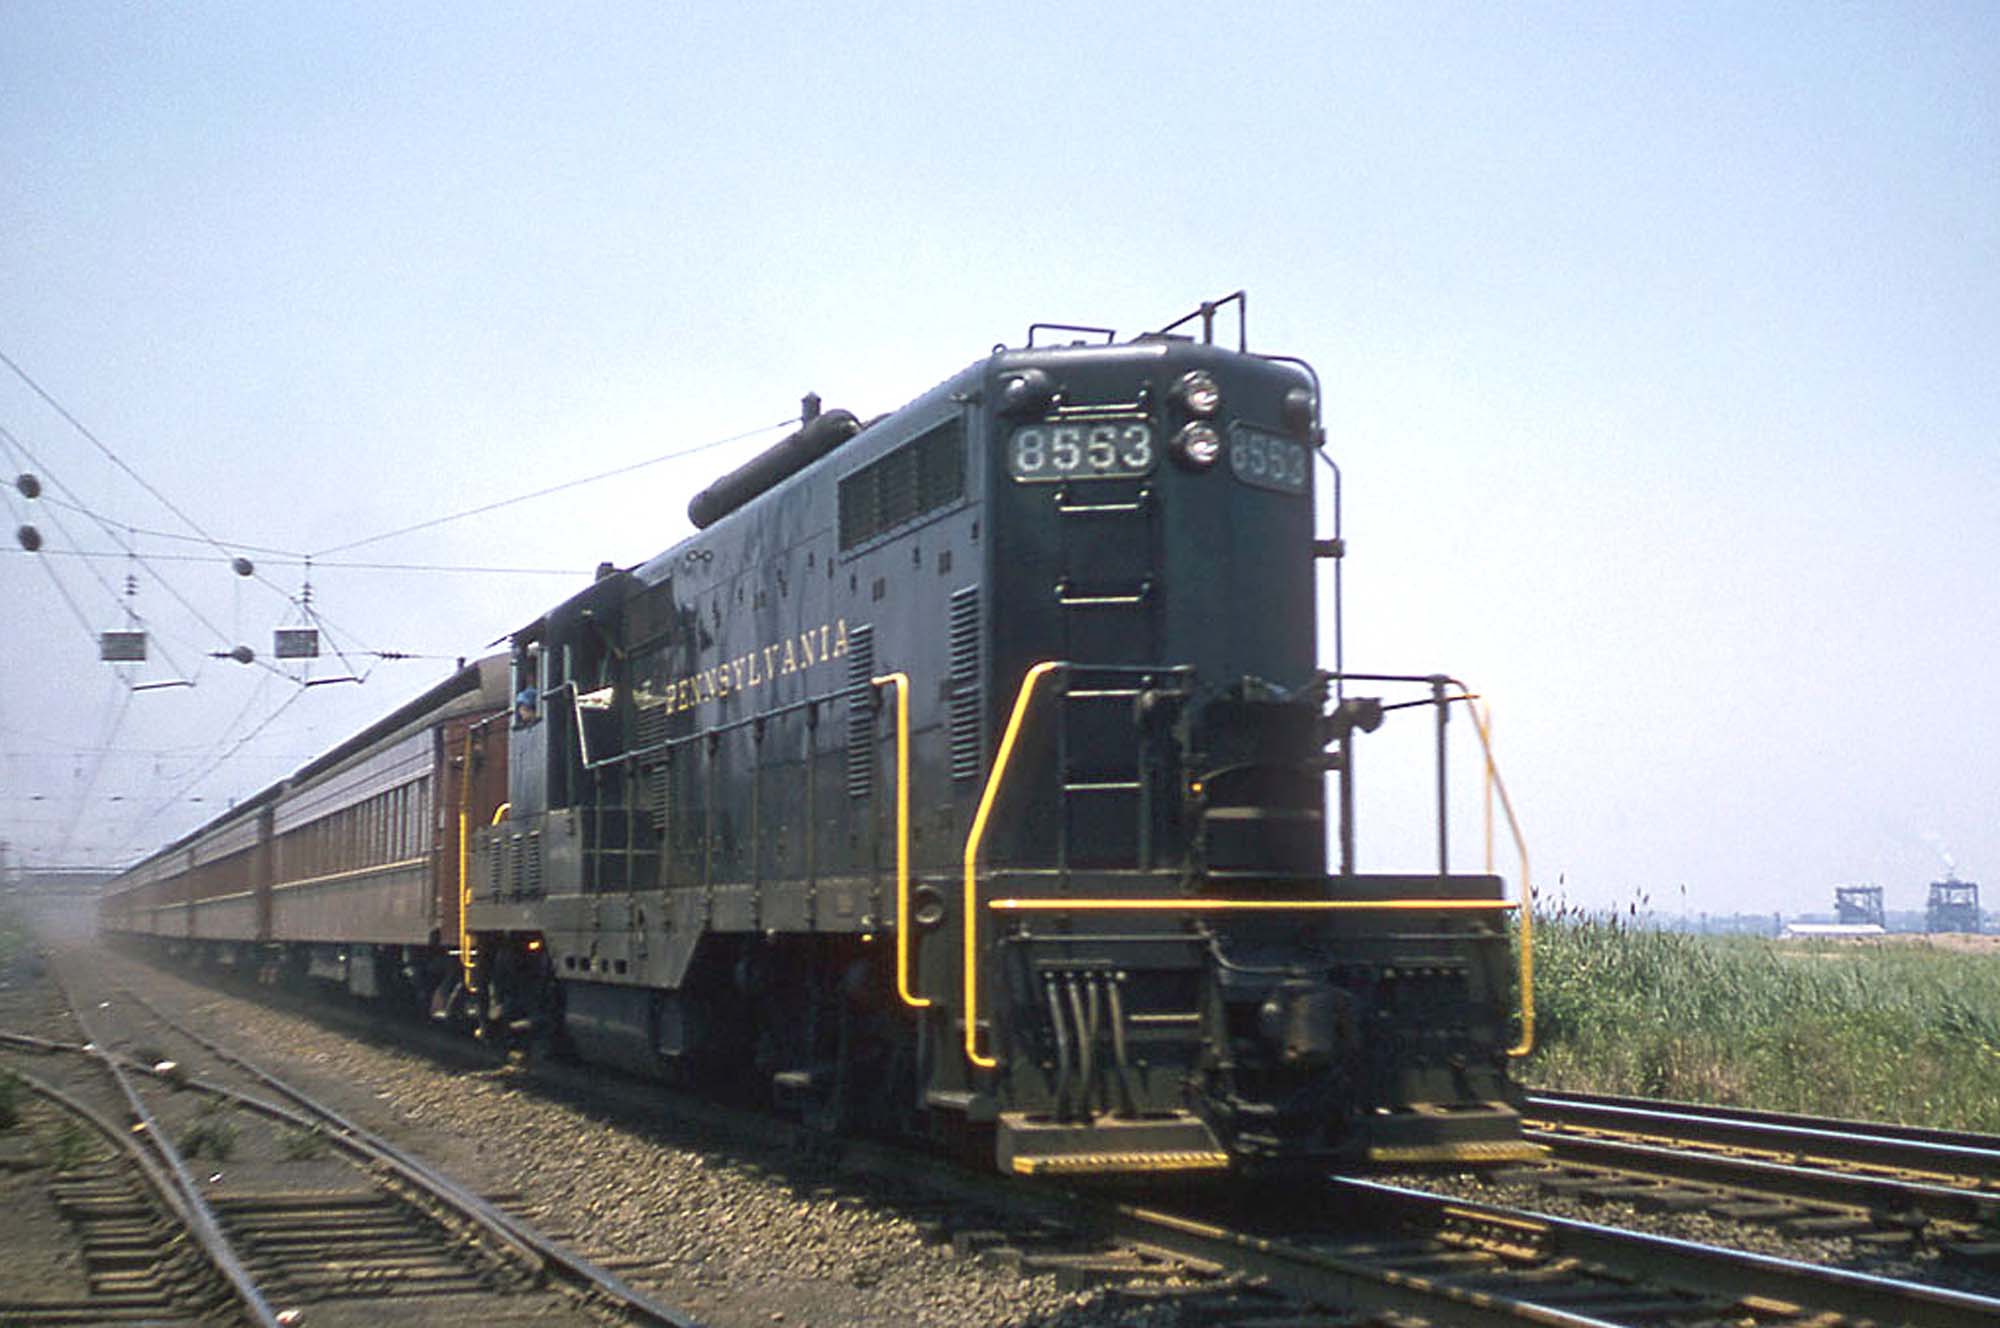
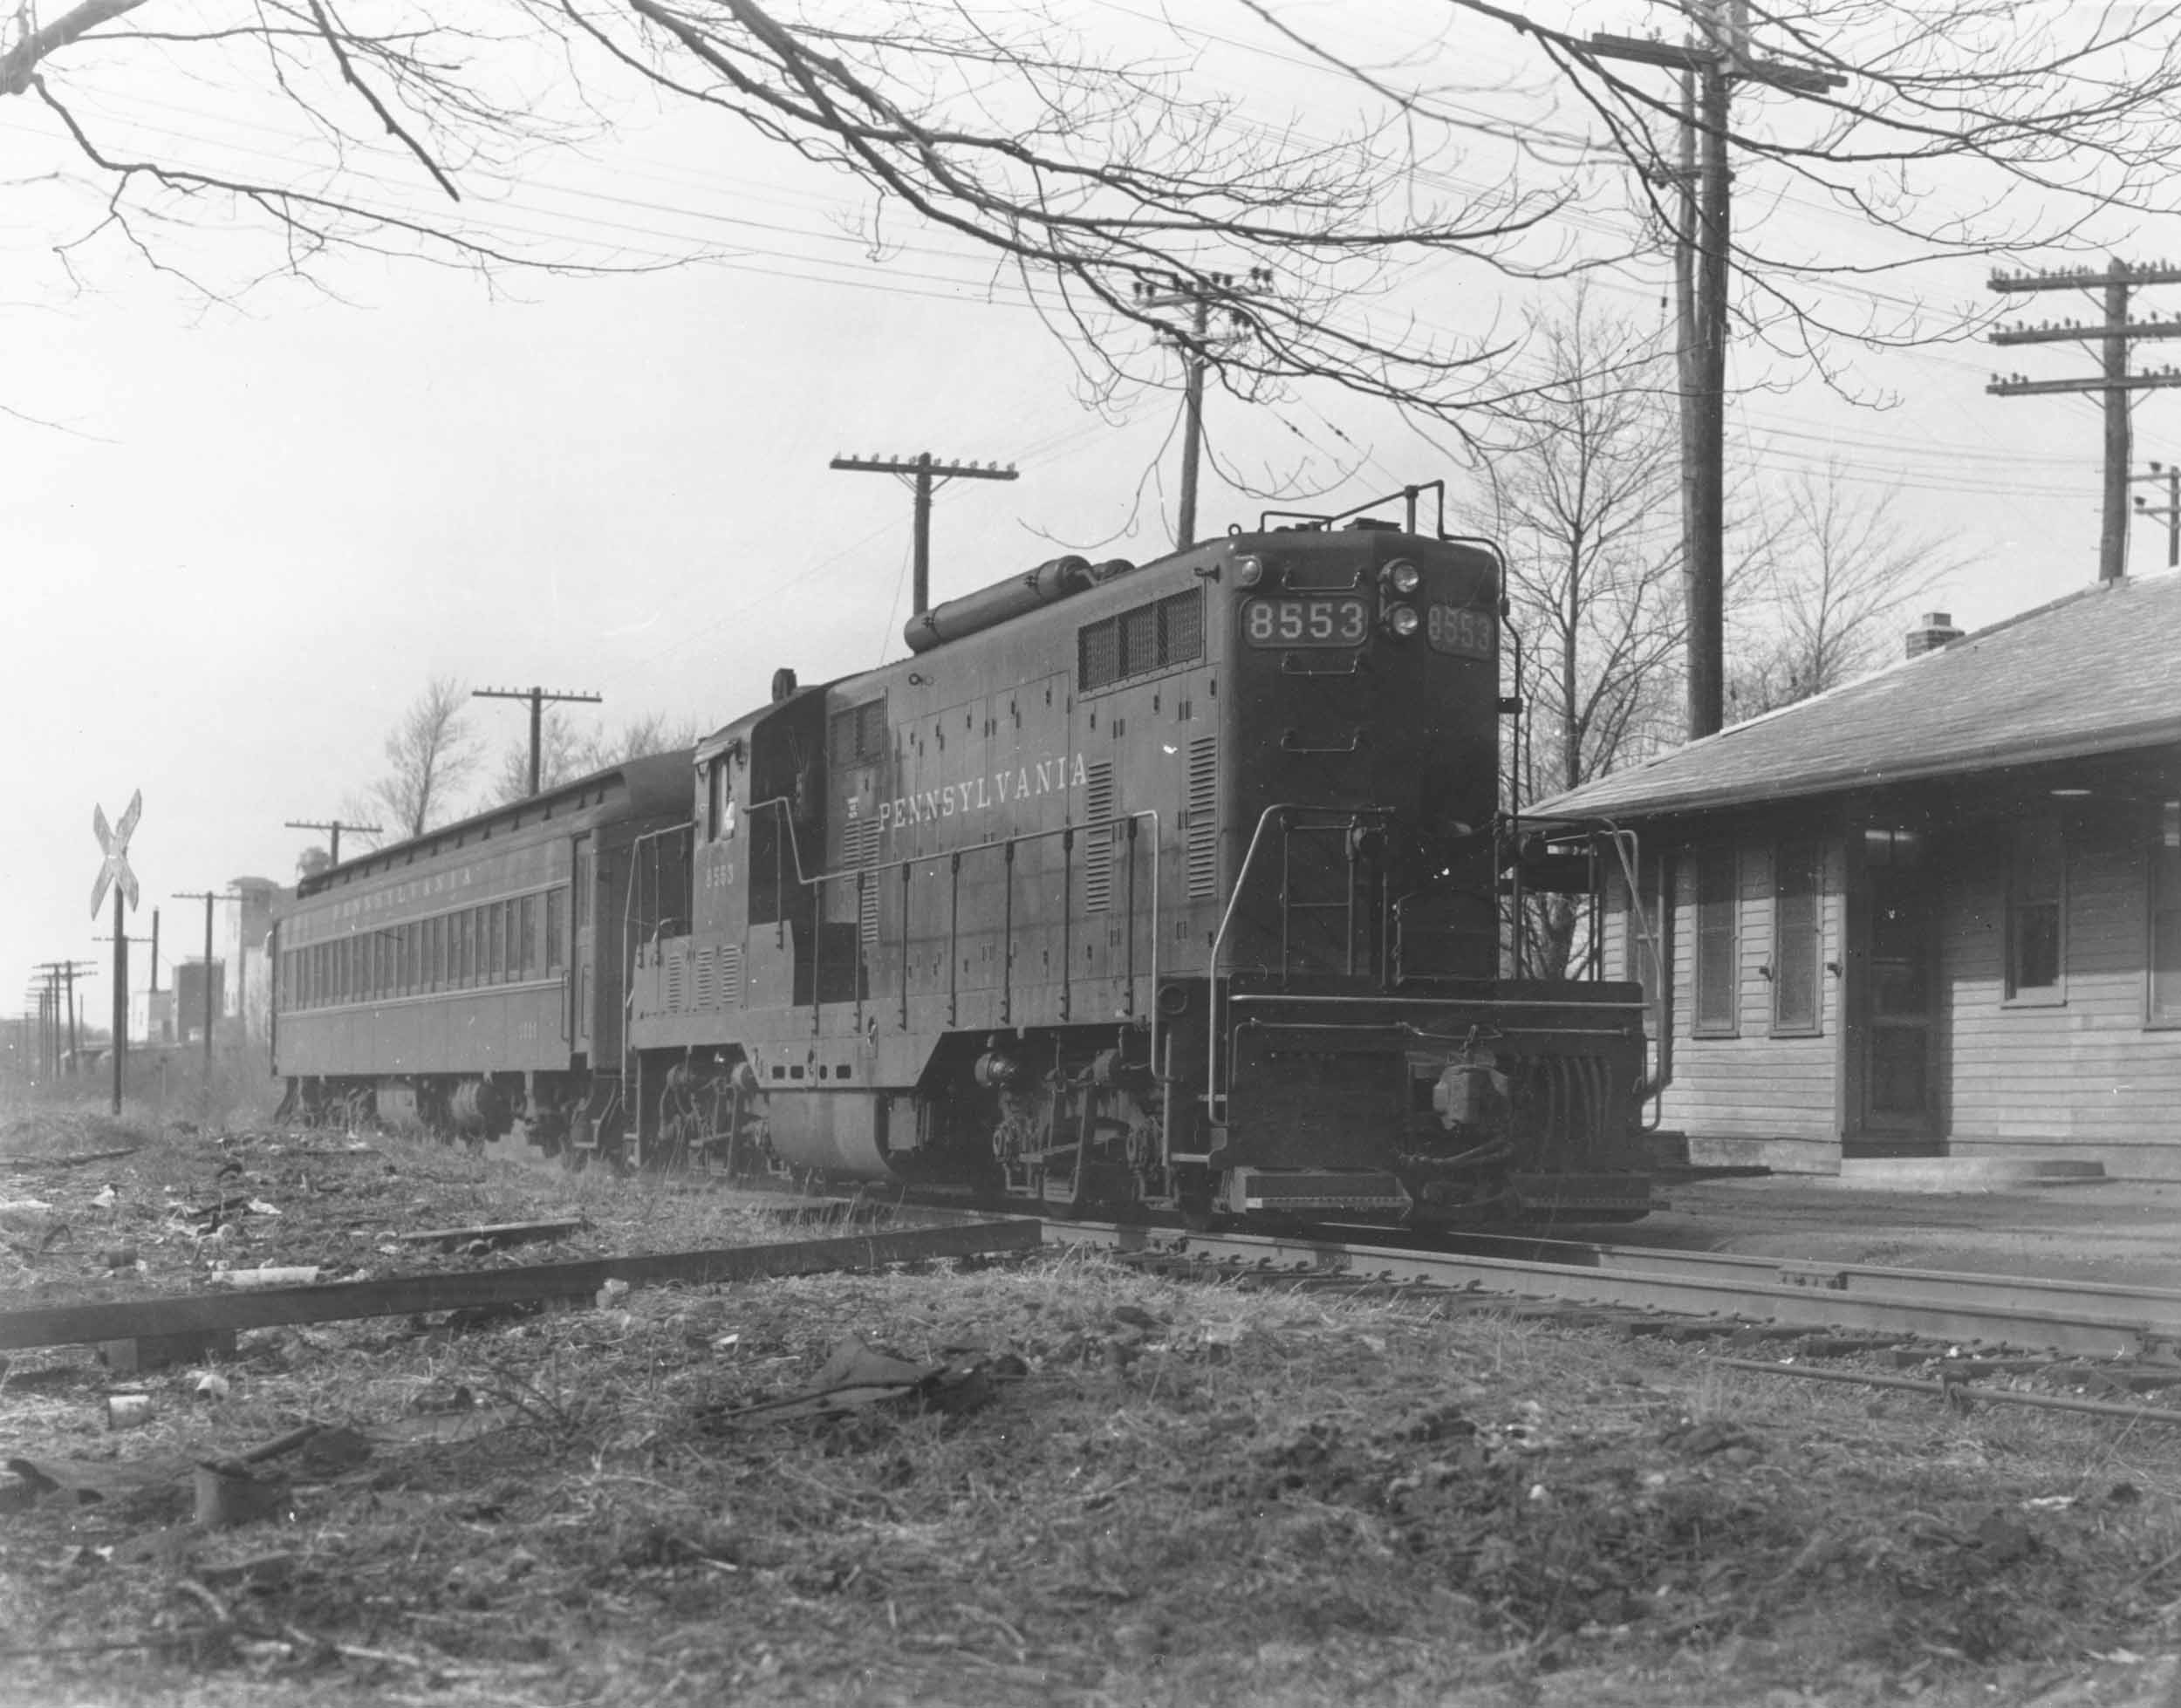
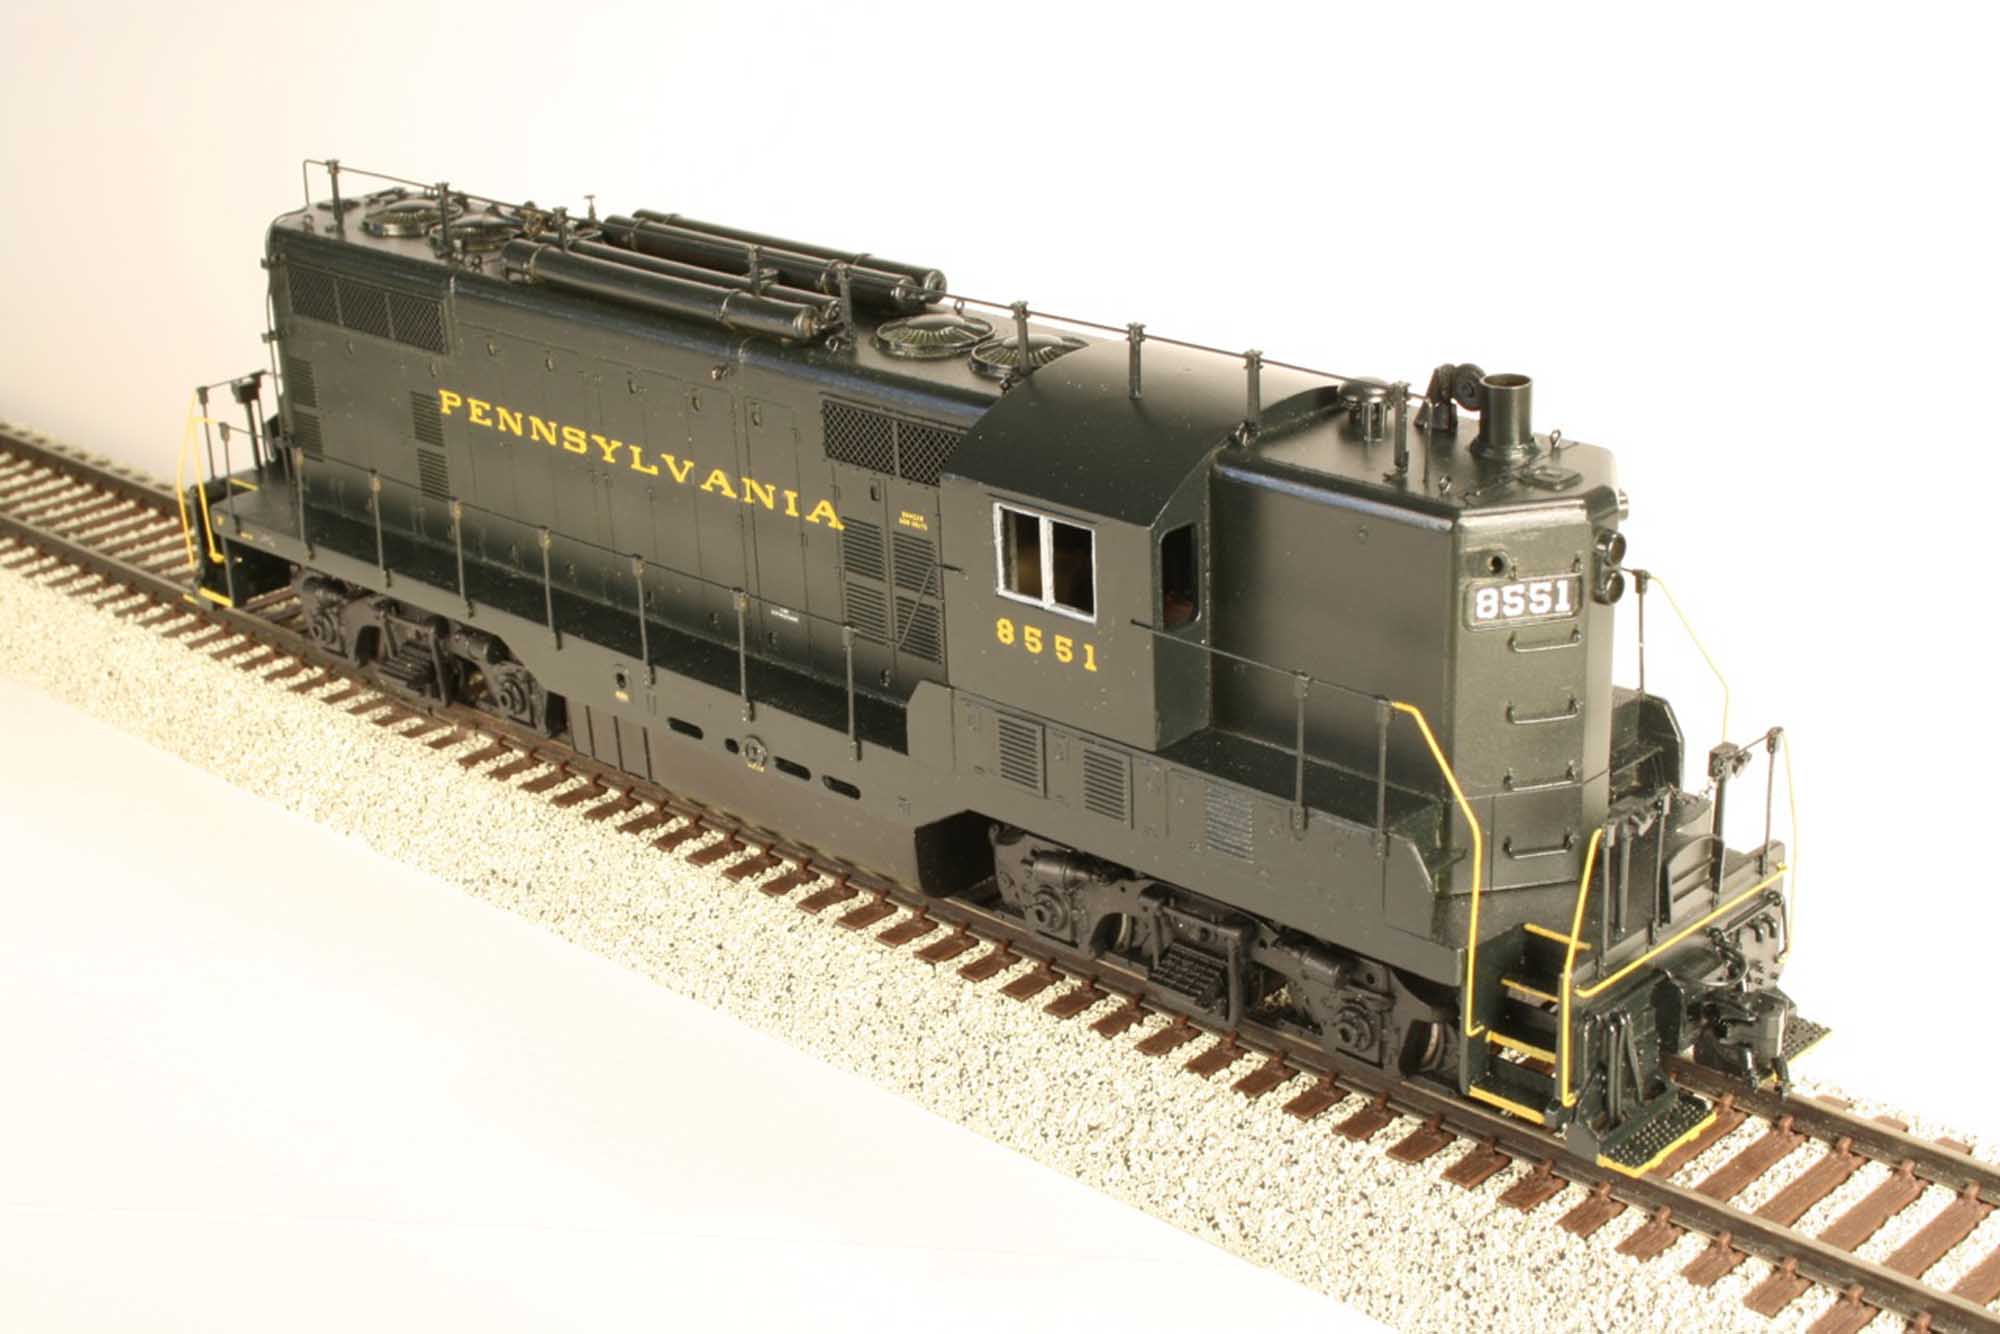
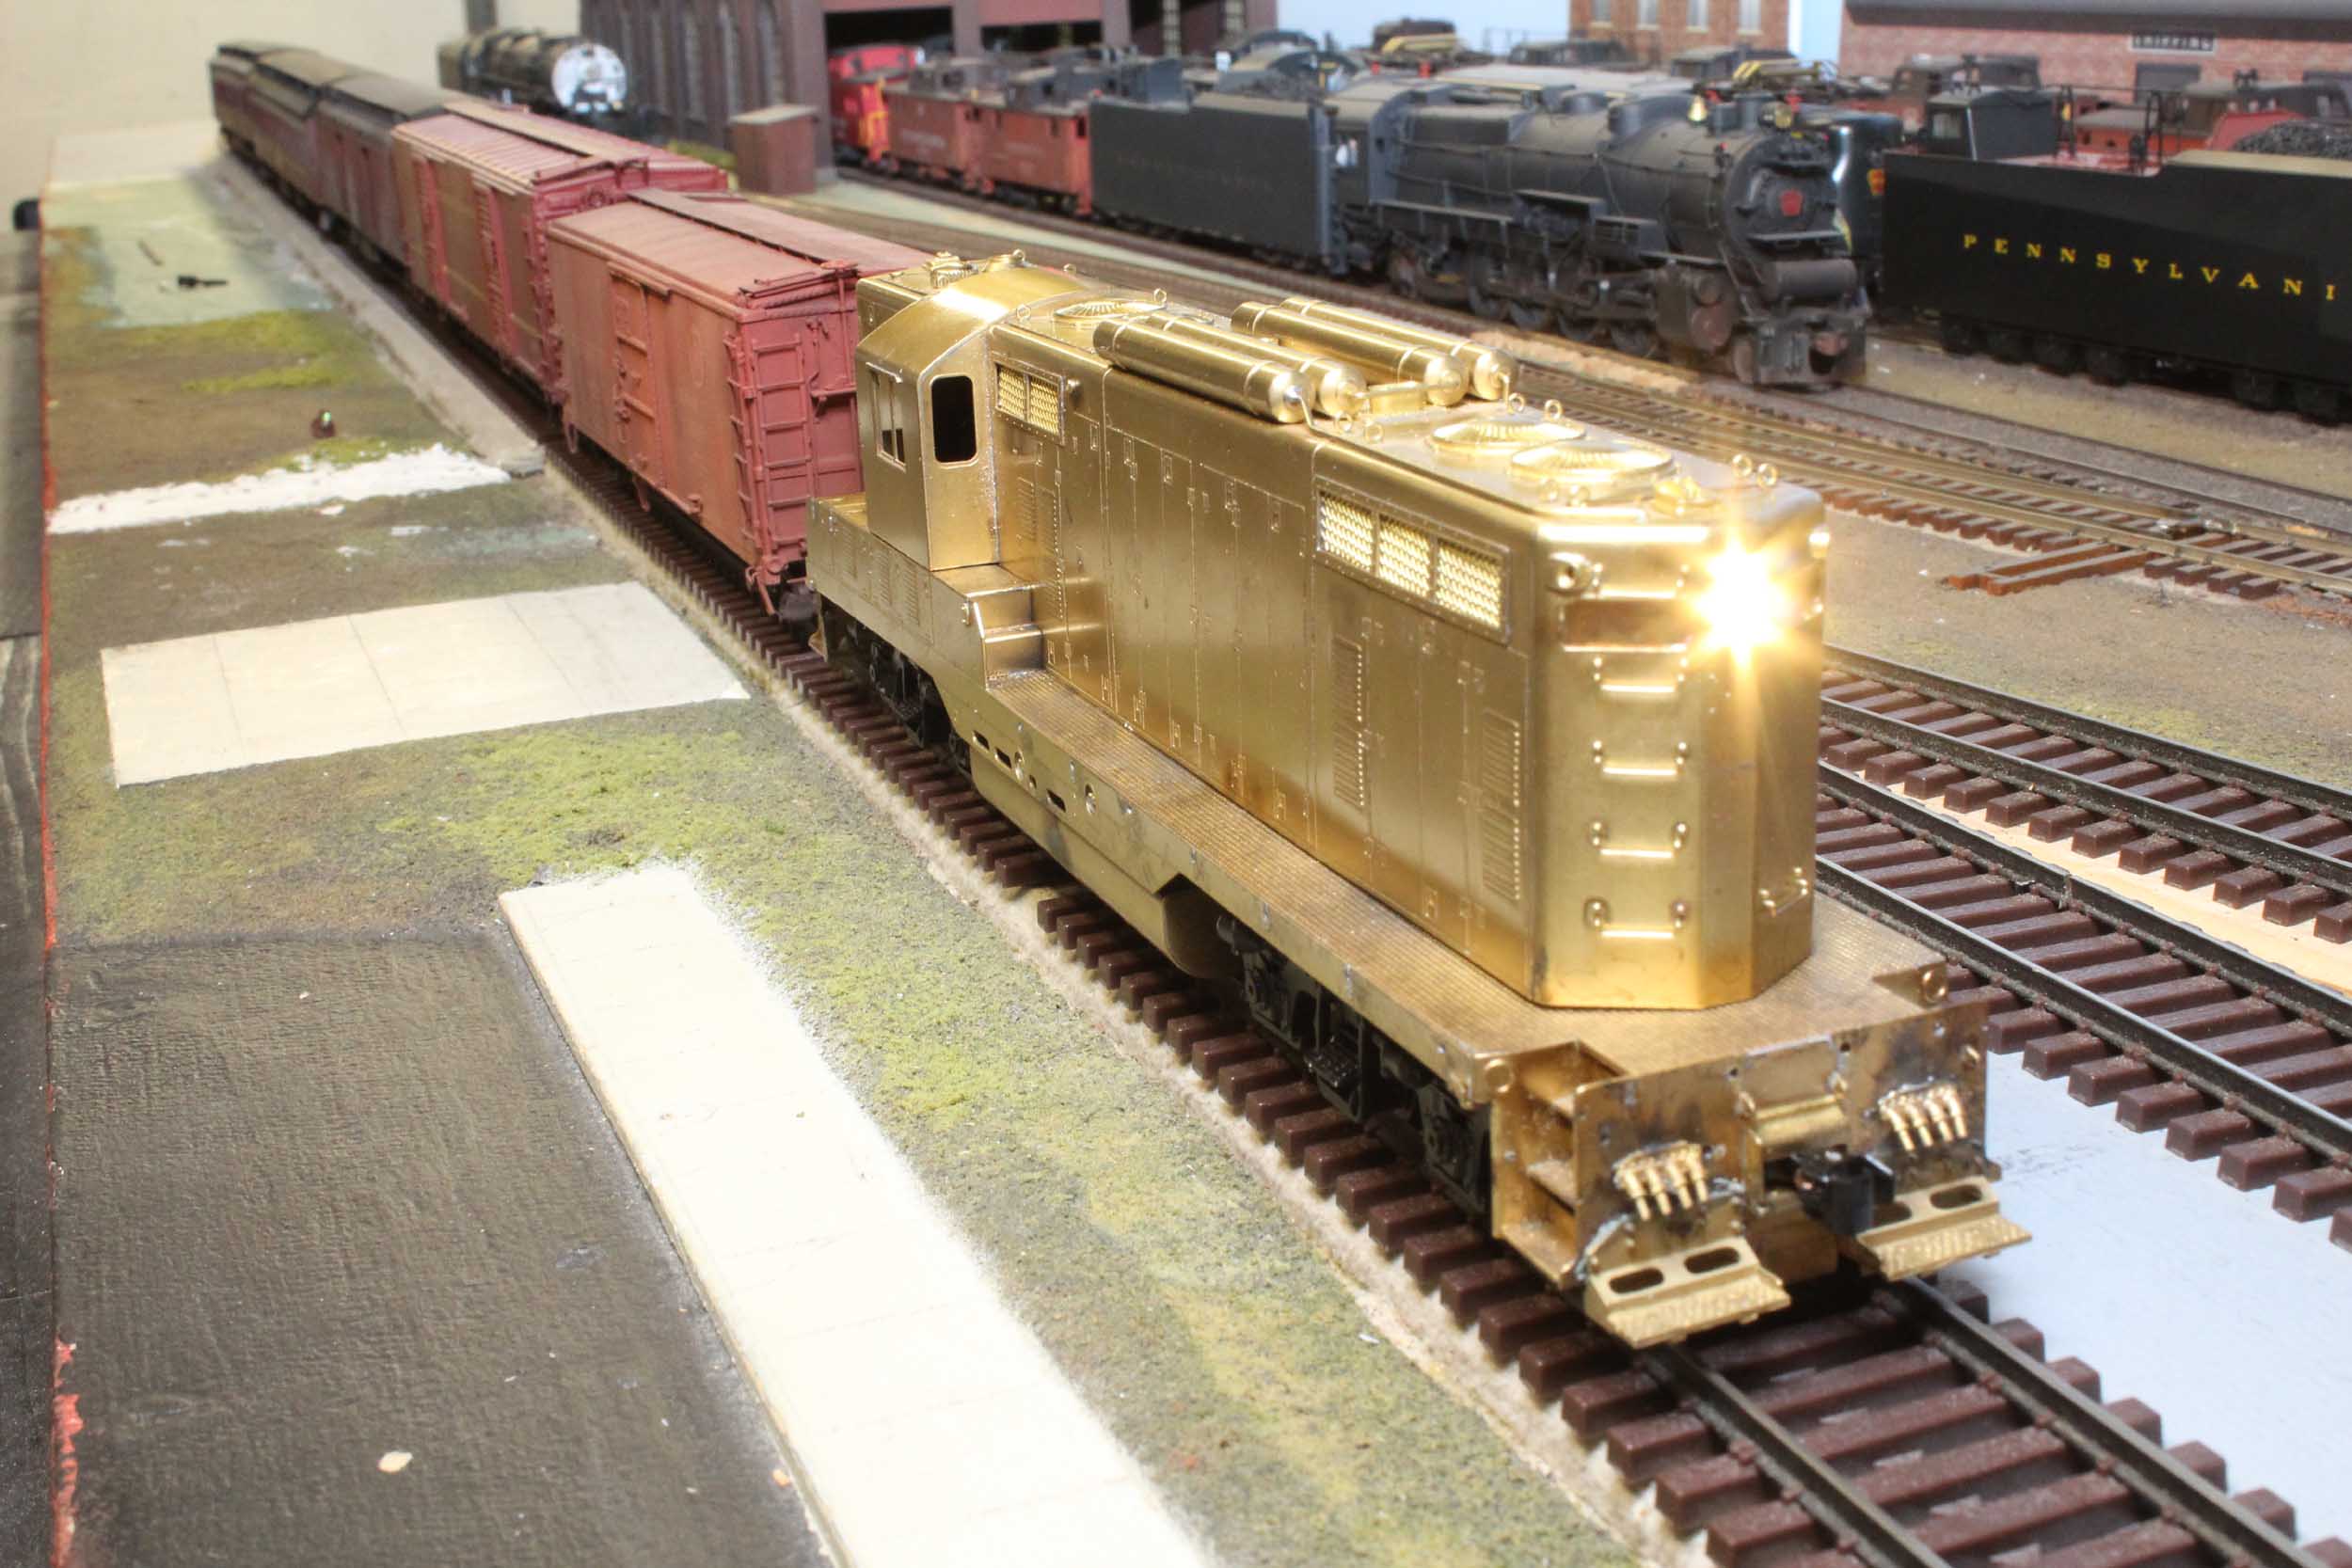
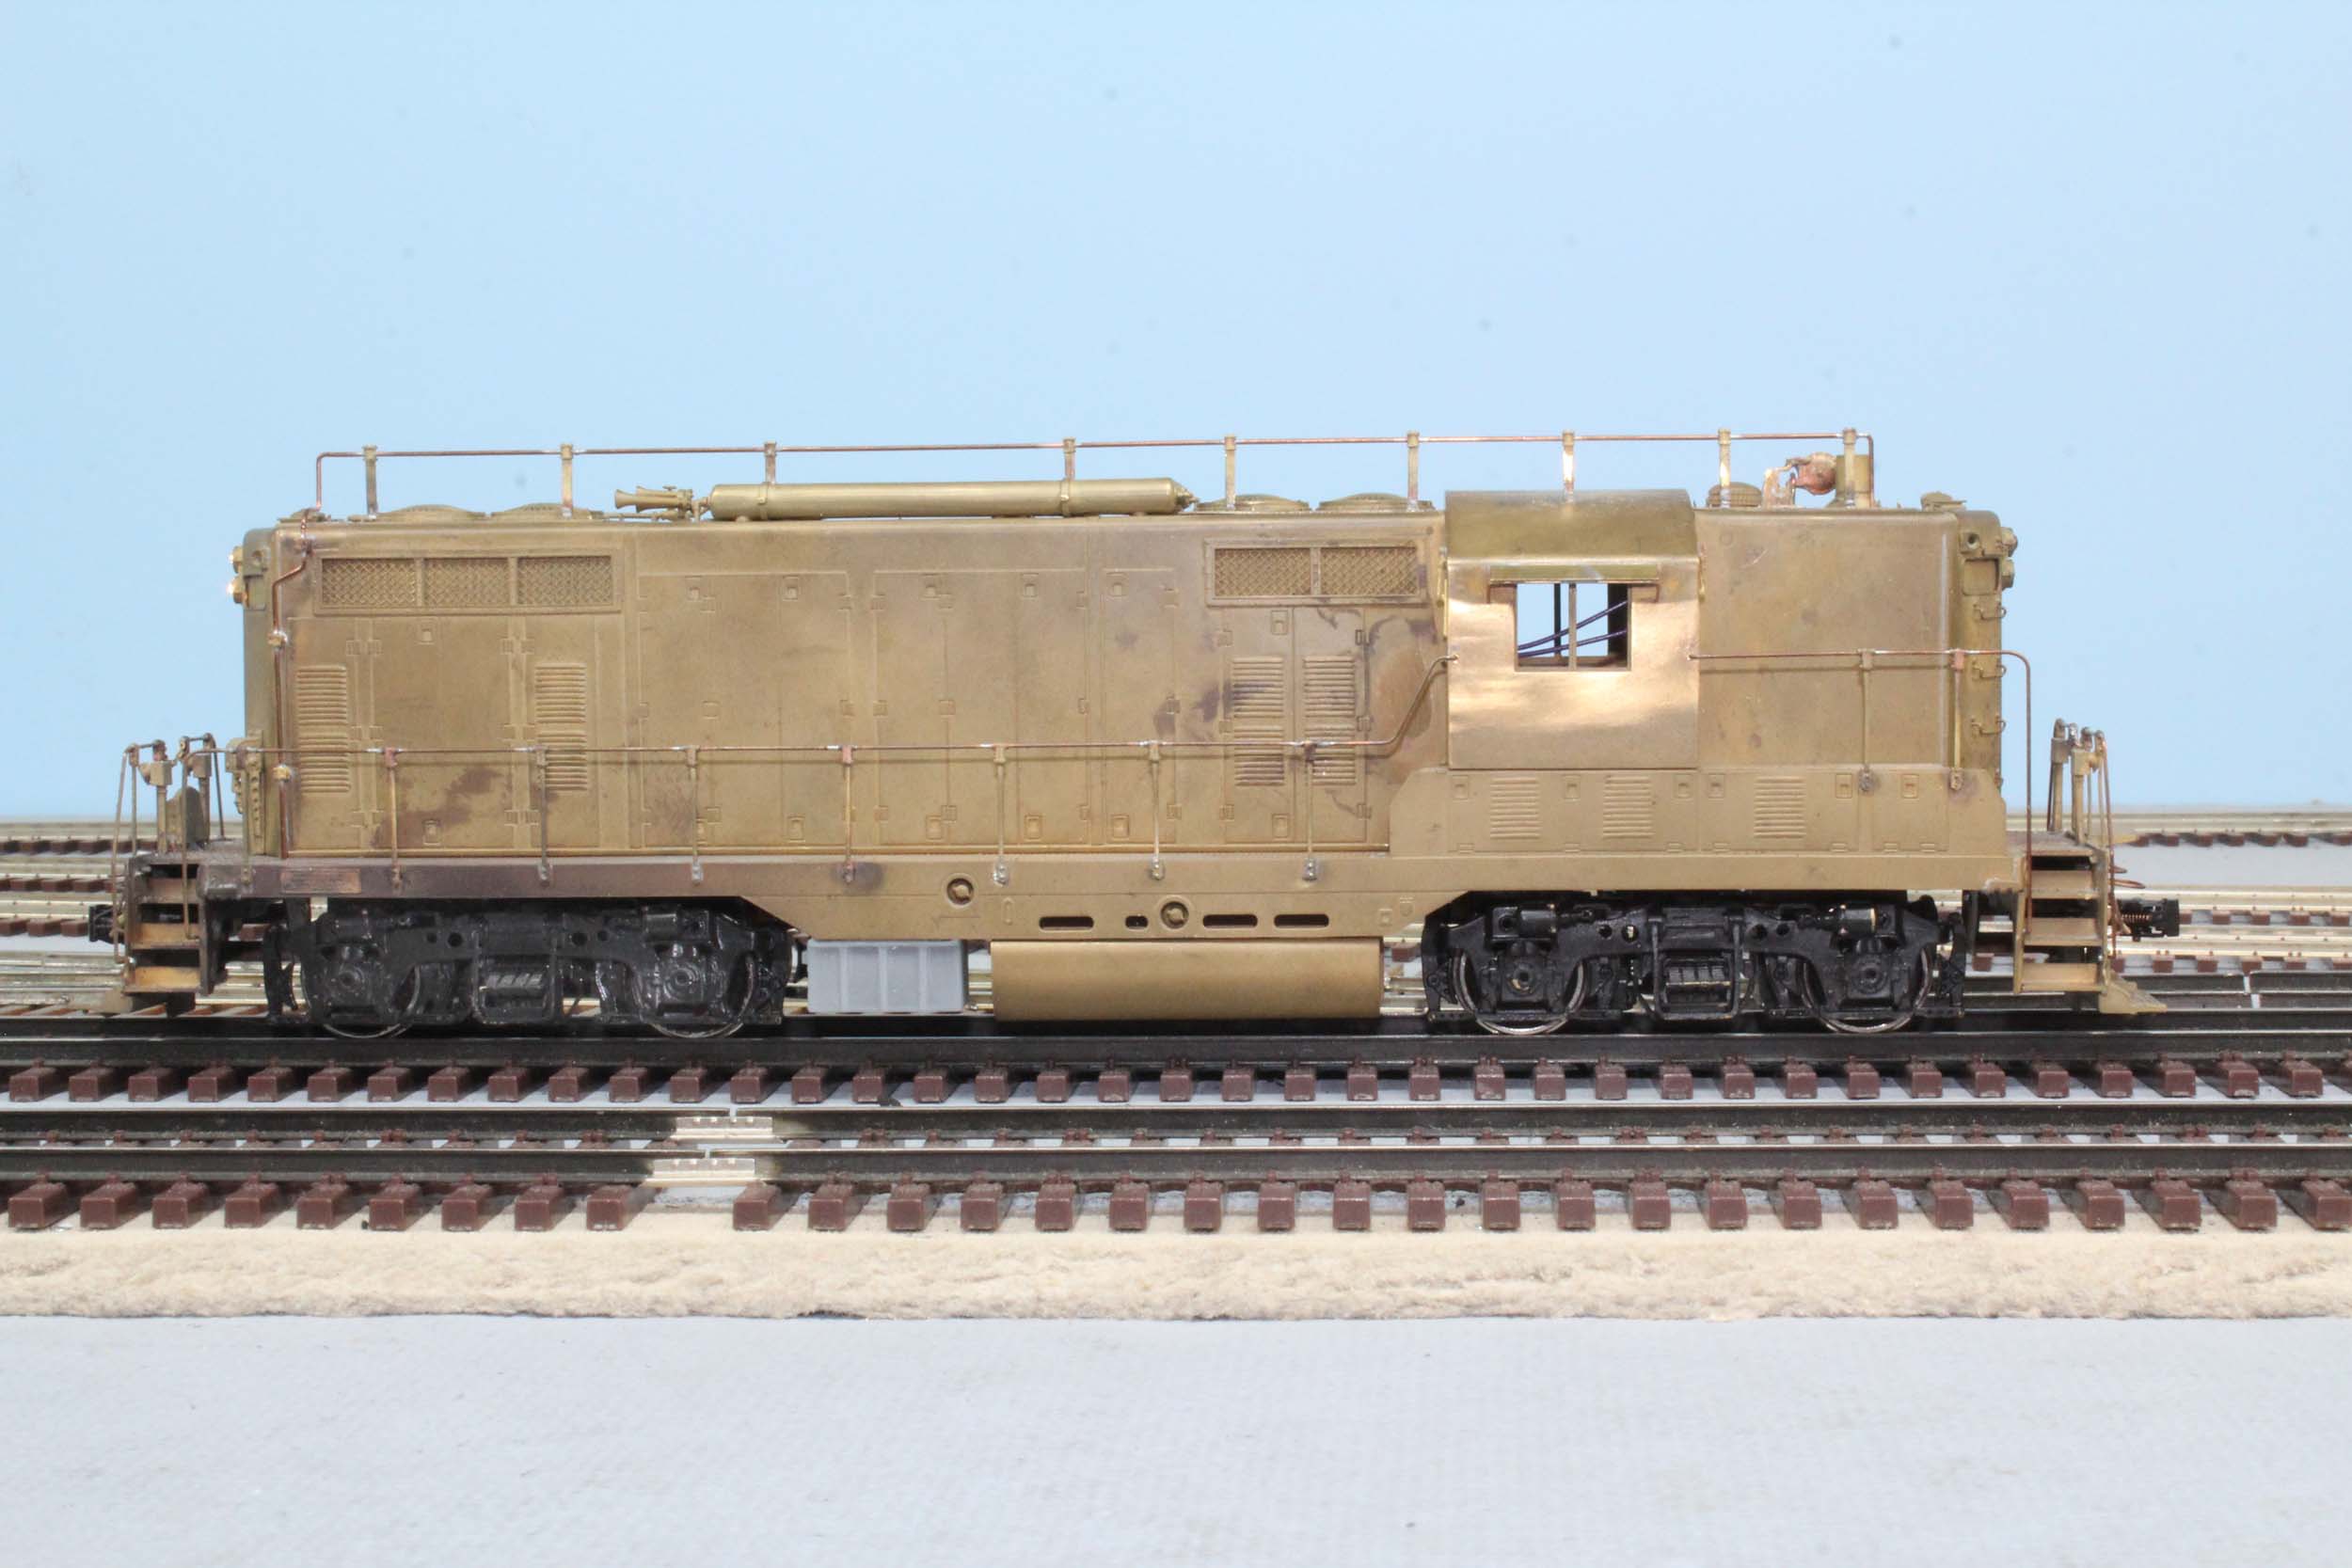
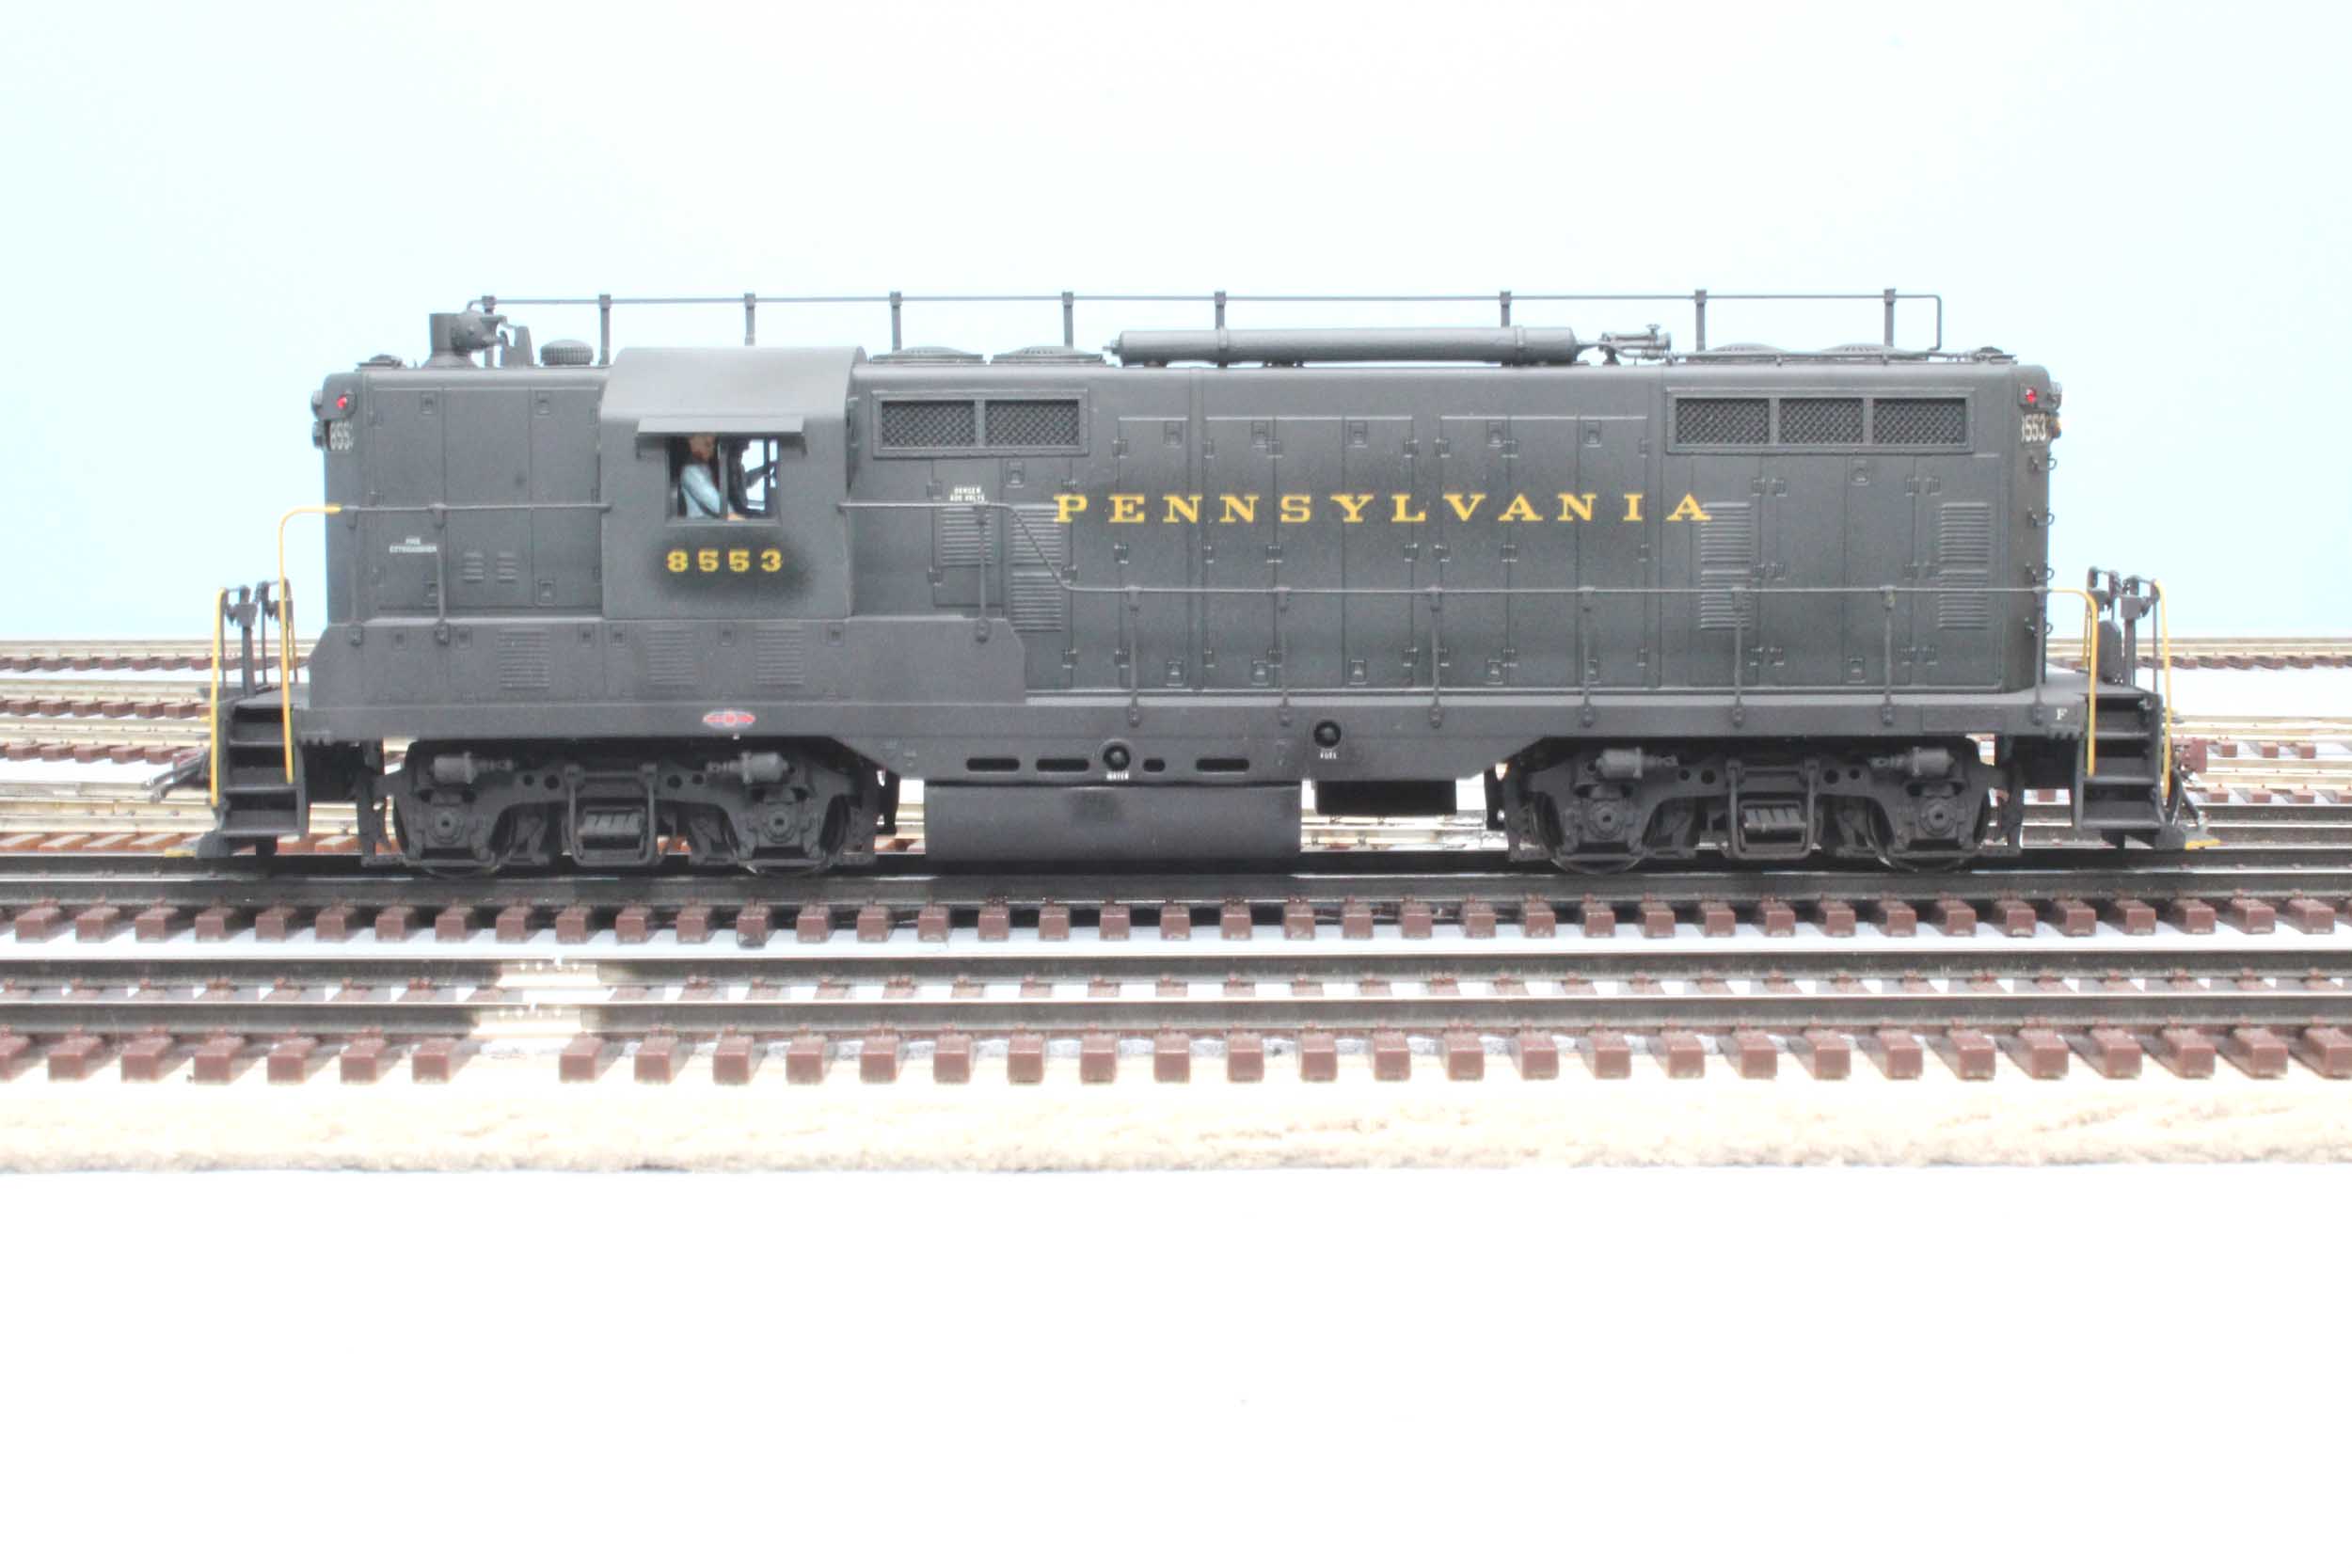
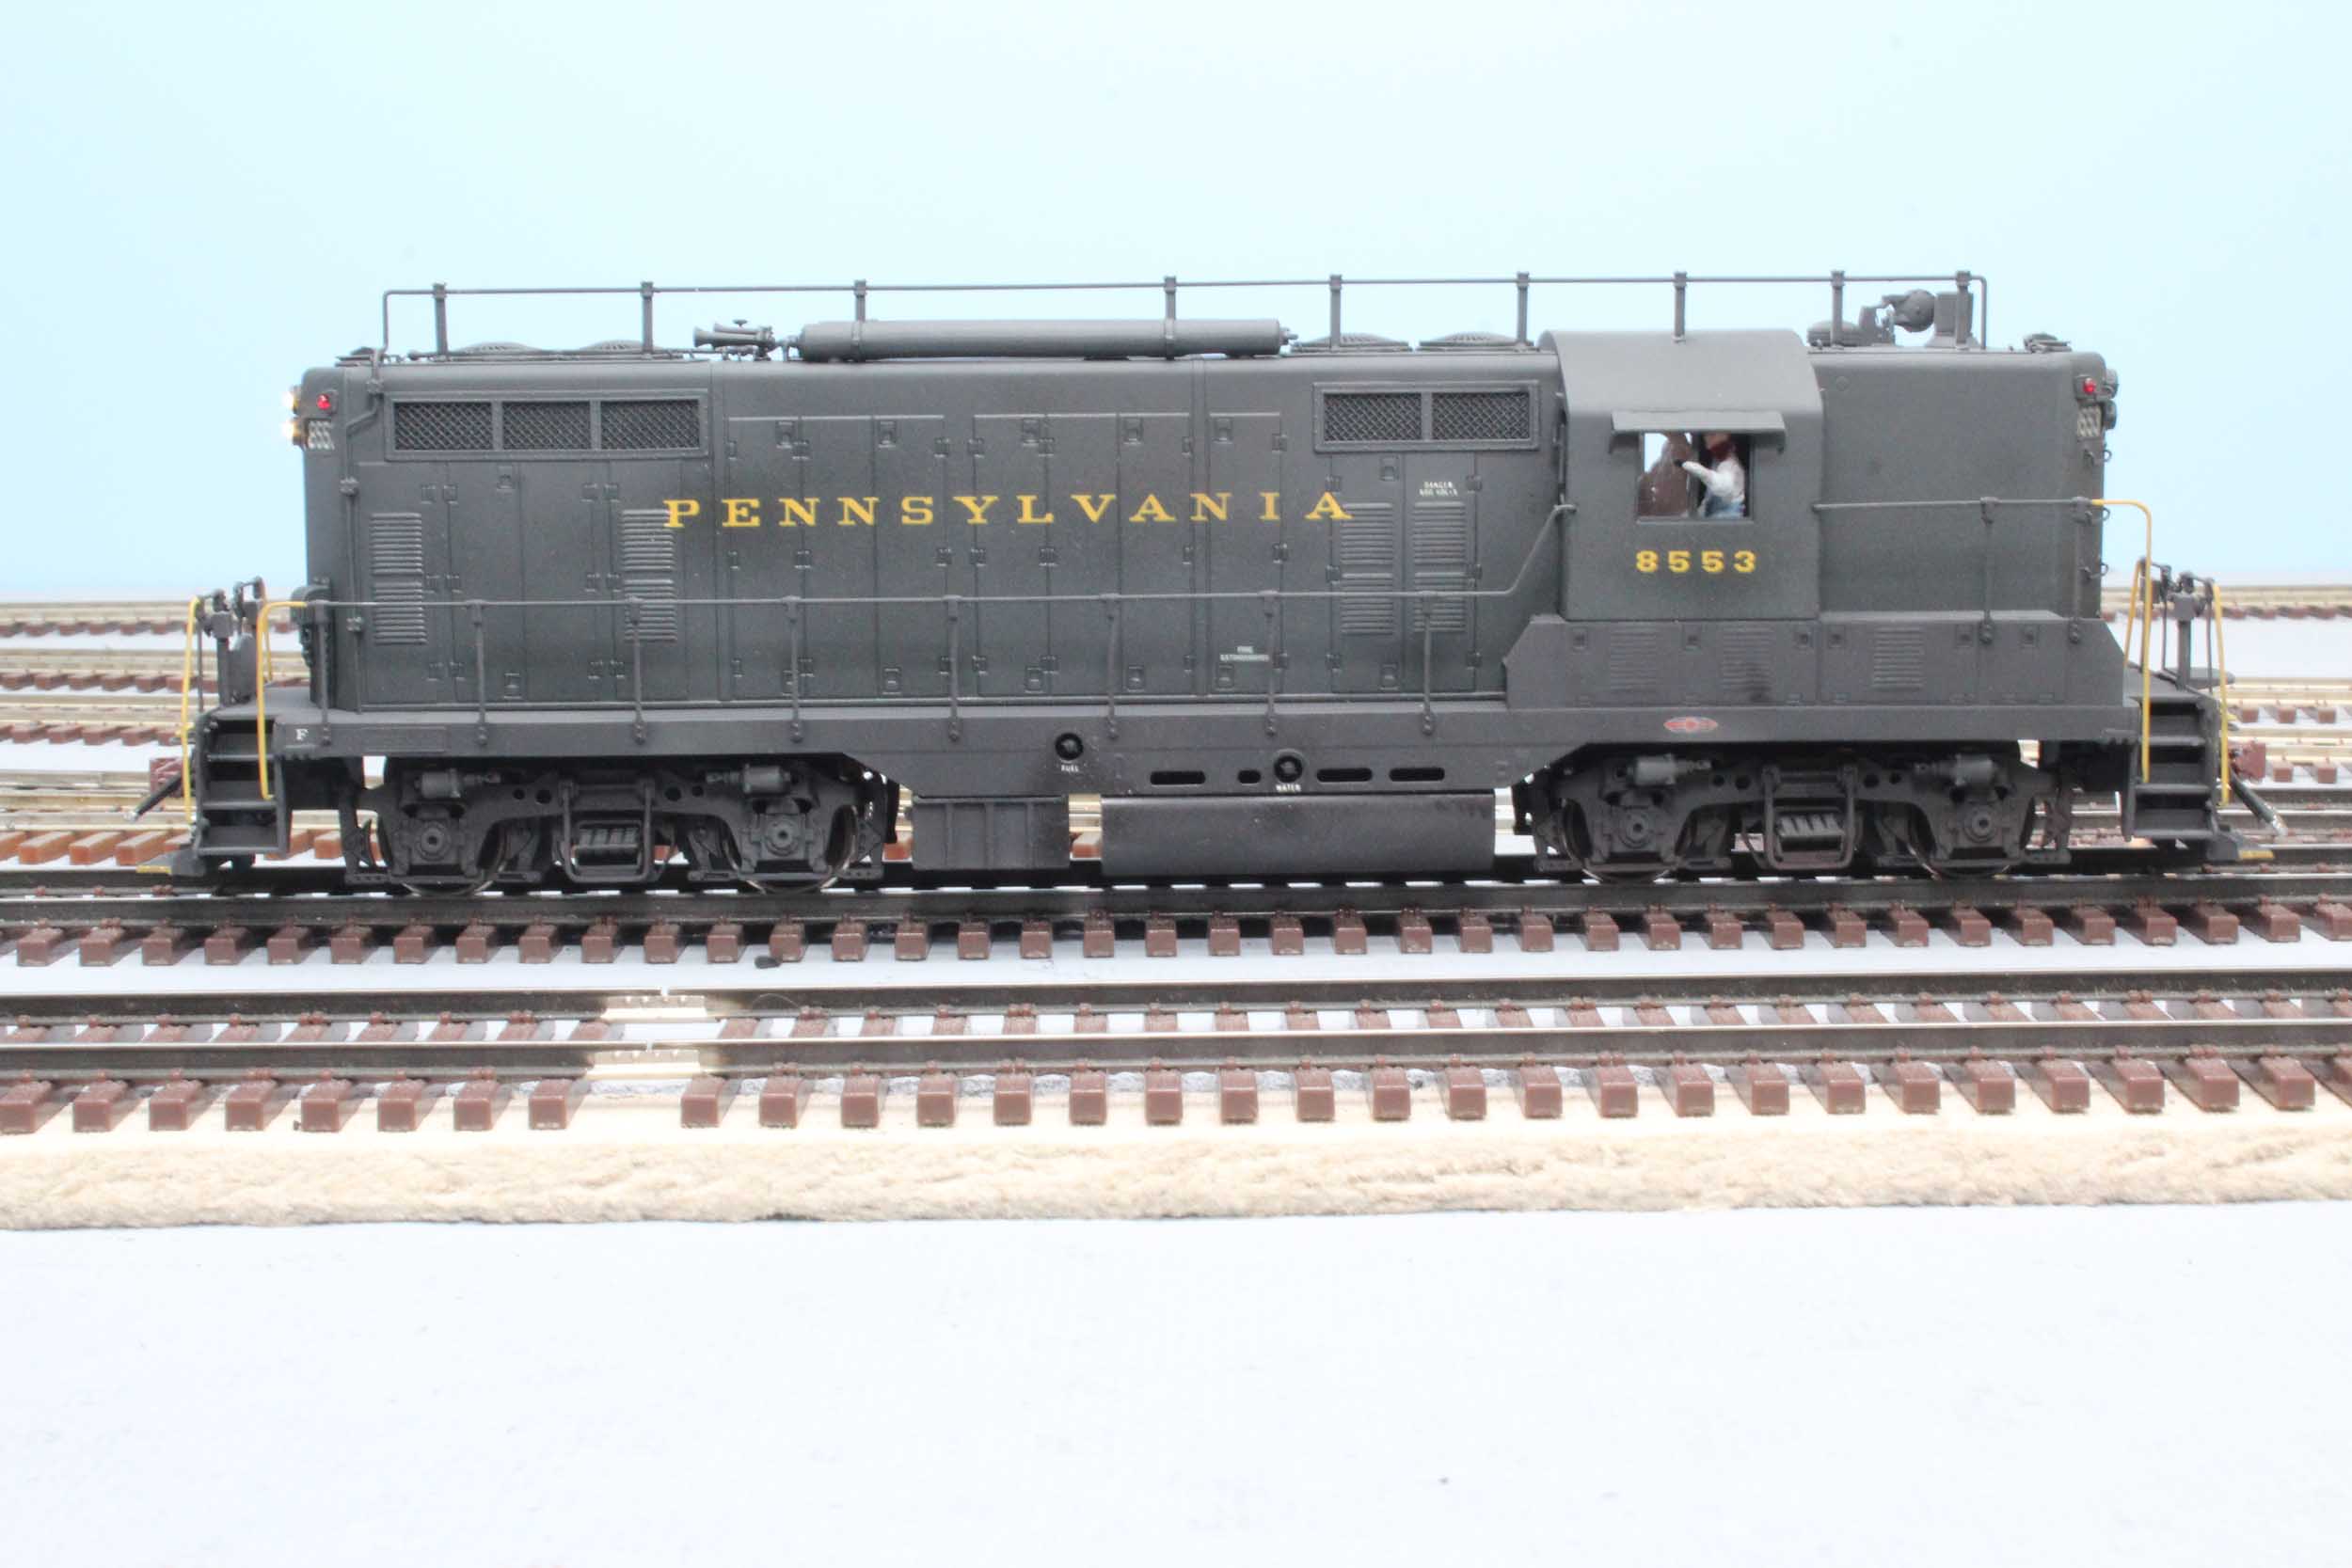
I bought this Sunset GP7 many years ago with the intention of
removing the roof top air tanks and making it a freight unit. This was made
in Japan in 1984 as very early S Scale brass. My procrastination of starting this loco lead to the discovery
of PRR 8553, which ran with some frequency on the PRSL as a passenger unit.
The PRR was ordering diesel locomotives purpose built with the equipment
options almost to the point of pulling a particular train. So, this all fits
my PRSL, the torpedo tanks stay, and I added the PRR antennas along with some
other modifications and details. |
|


Reworking The
Drive
The drive was this horrid straight shaft running the length of
the interior with cogged pulleys and rubber belts down to cogged pulleys on the
trucks. The rubber belts likely took a set in sitting making for an awful
runner. I hated the rubber belt drive so much I did not even pause to take any
photos of it. I stripped out the parts in a frenzy and
SOLD them!
Photos by Bill Winans and Rich Gajnak
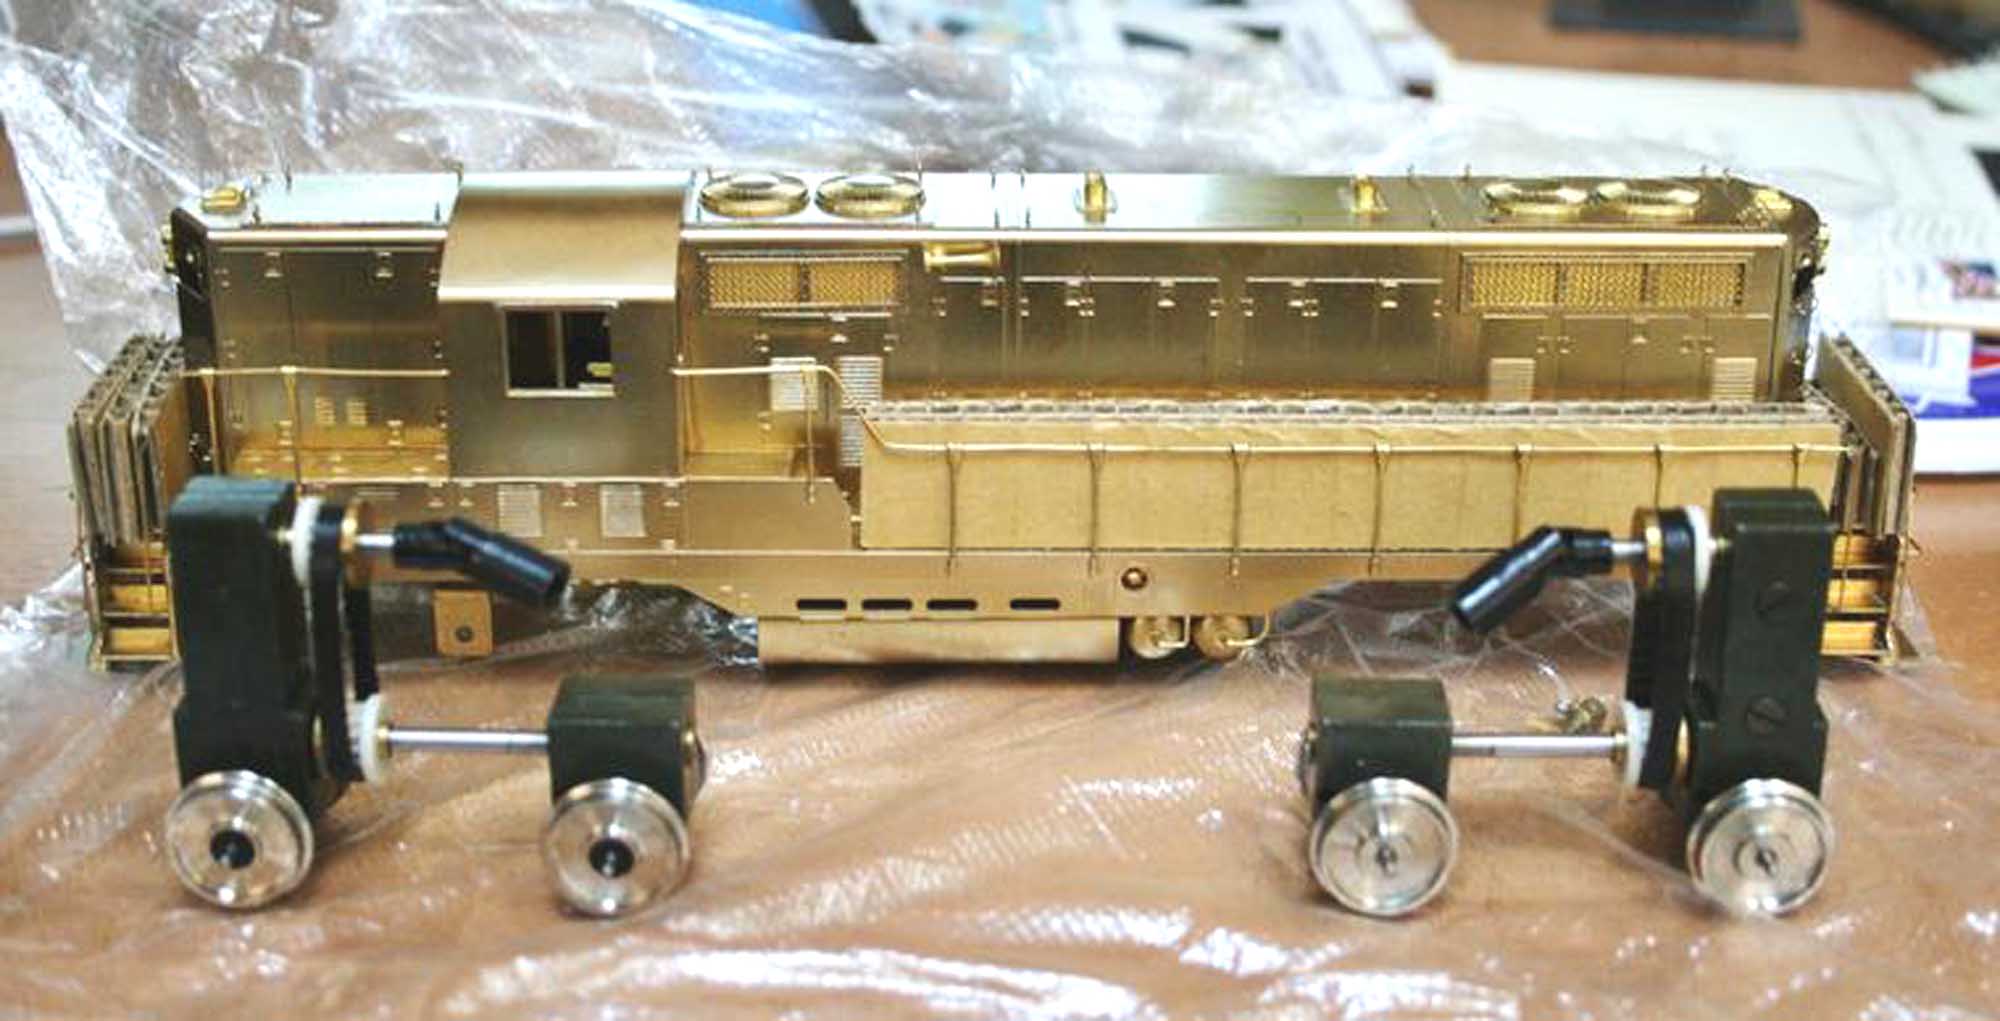
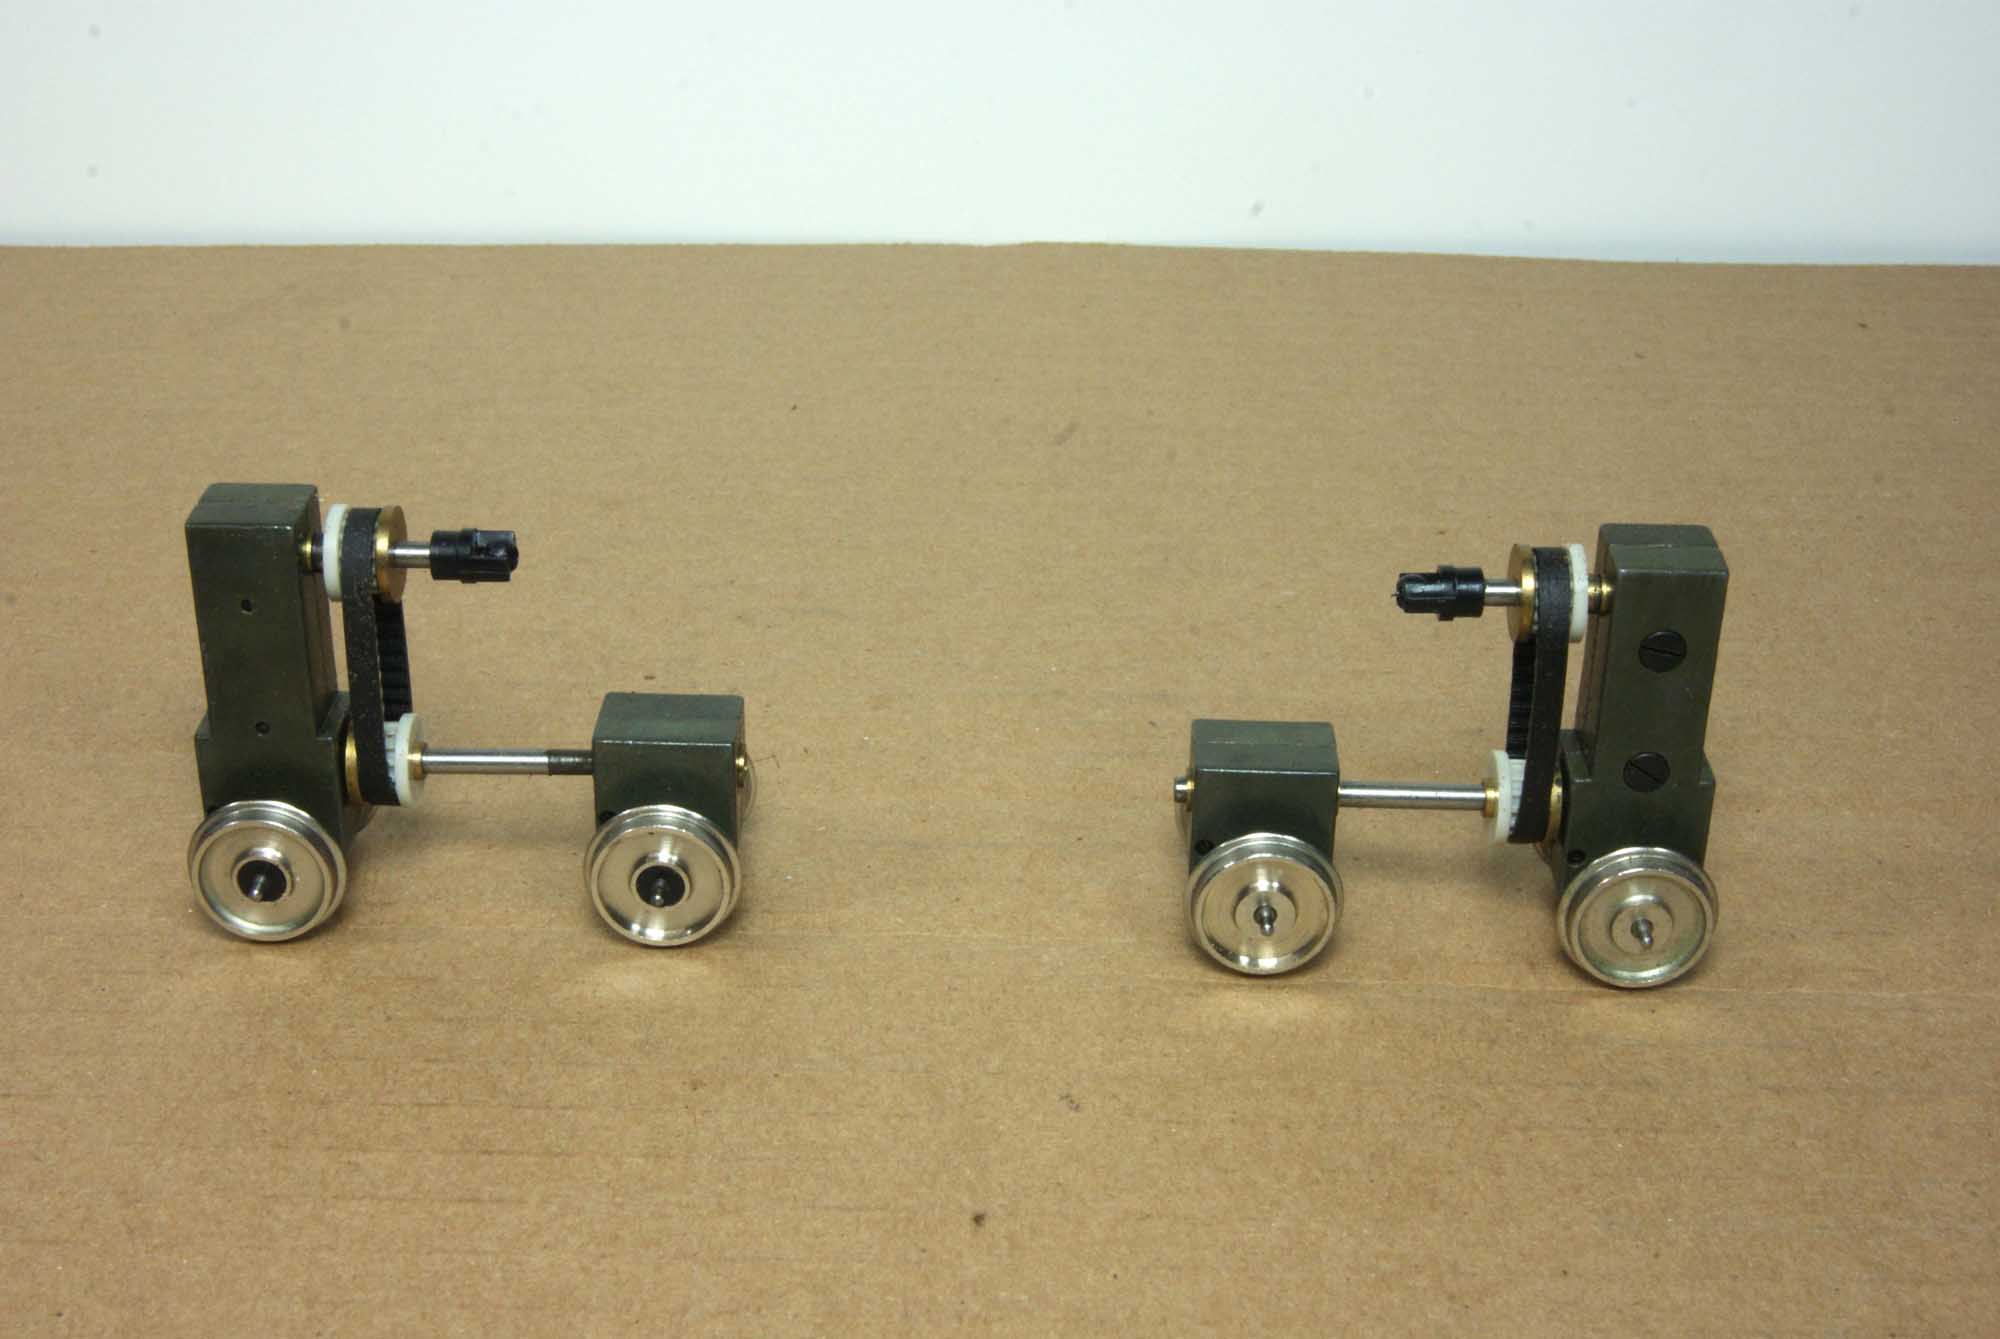

My delay starting this project worked well. The solution of using
some extraneous Overland F Unit gearboxes came to me and was a surprisingly
easy fix.
My first round of working on this project was in August 2013.
Below are some photos of the drive mock up. The lack of good driveshafts likely
killed progress for over 2 years. The later efforts are usually different and
better than I could have done previously. I have since moved away from wanting
to use flywheels, now depending more on the decoder programming for momentum.
And I did not have 3D printing capabilities in 2013 to come to the rescue in
solving the driveshaft problems.
December 2015
Progress on 8553 is reignited because my friend Bob Frascella
posted a photo of his completed 8551.
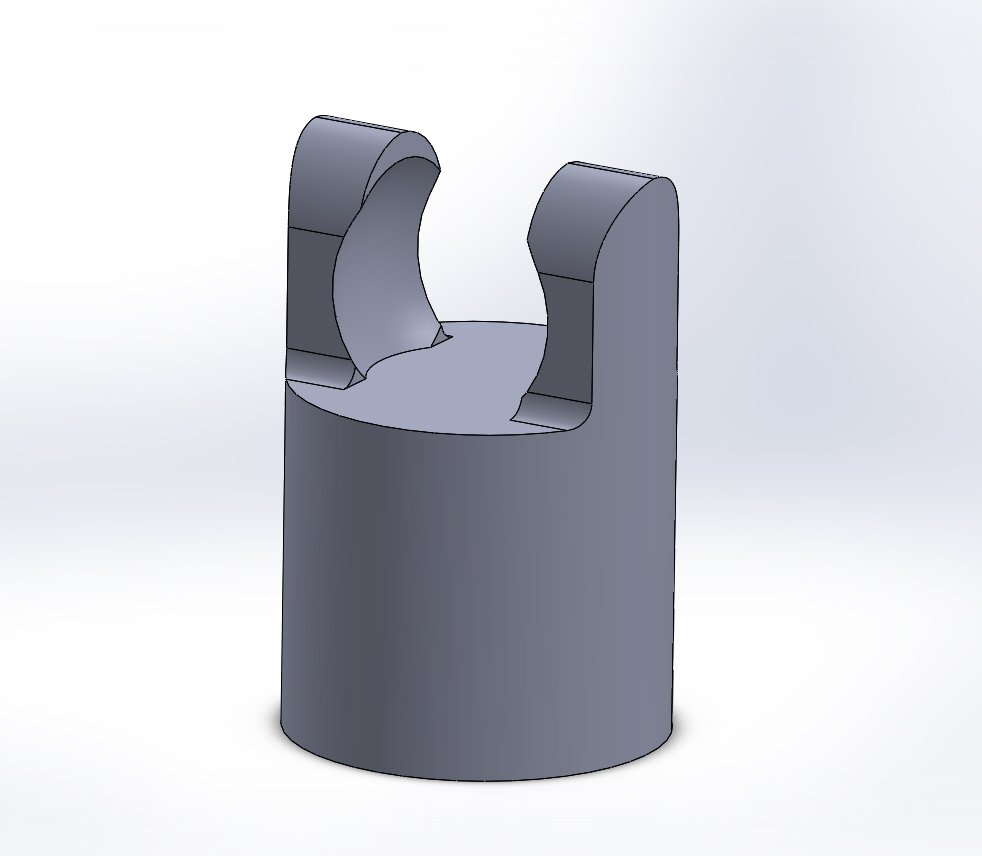
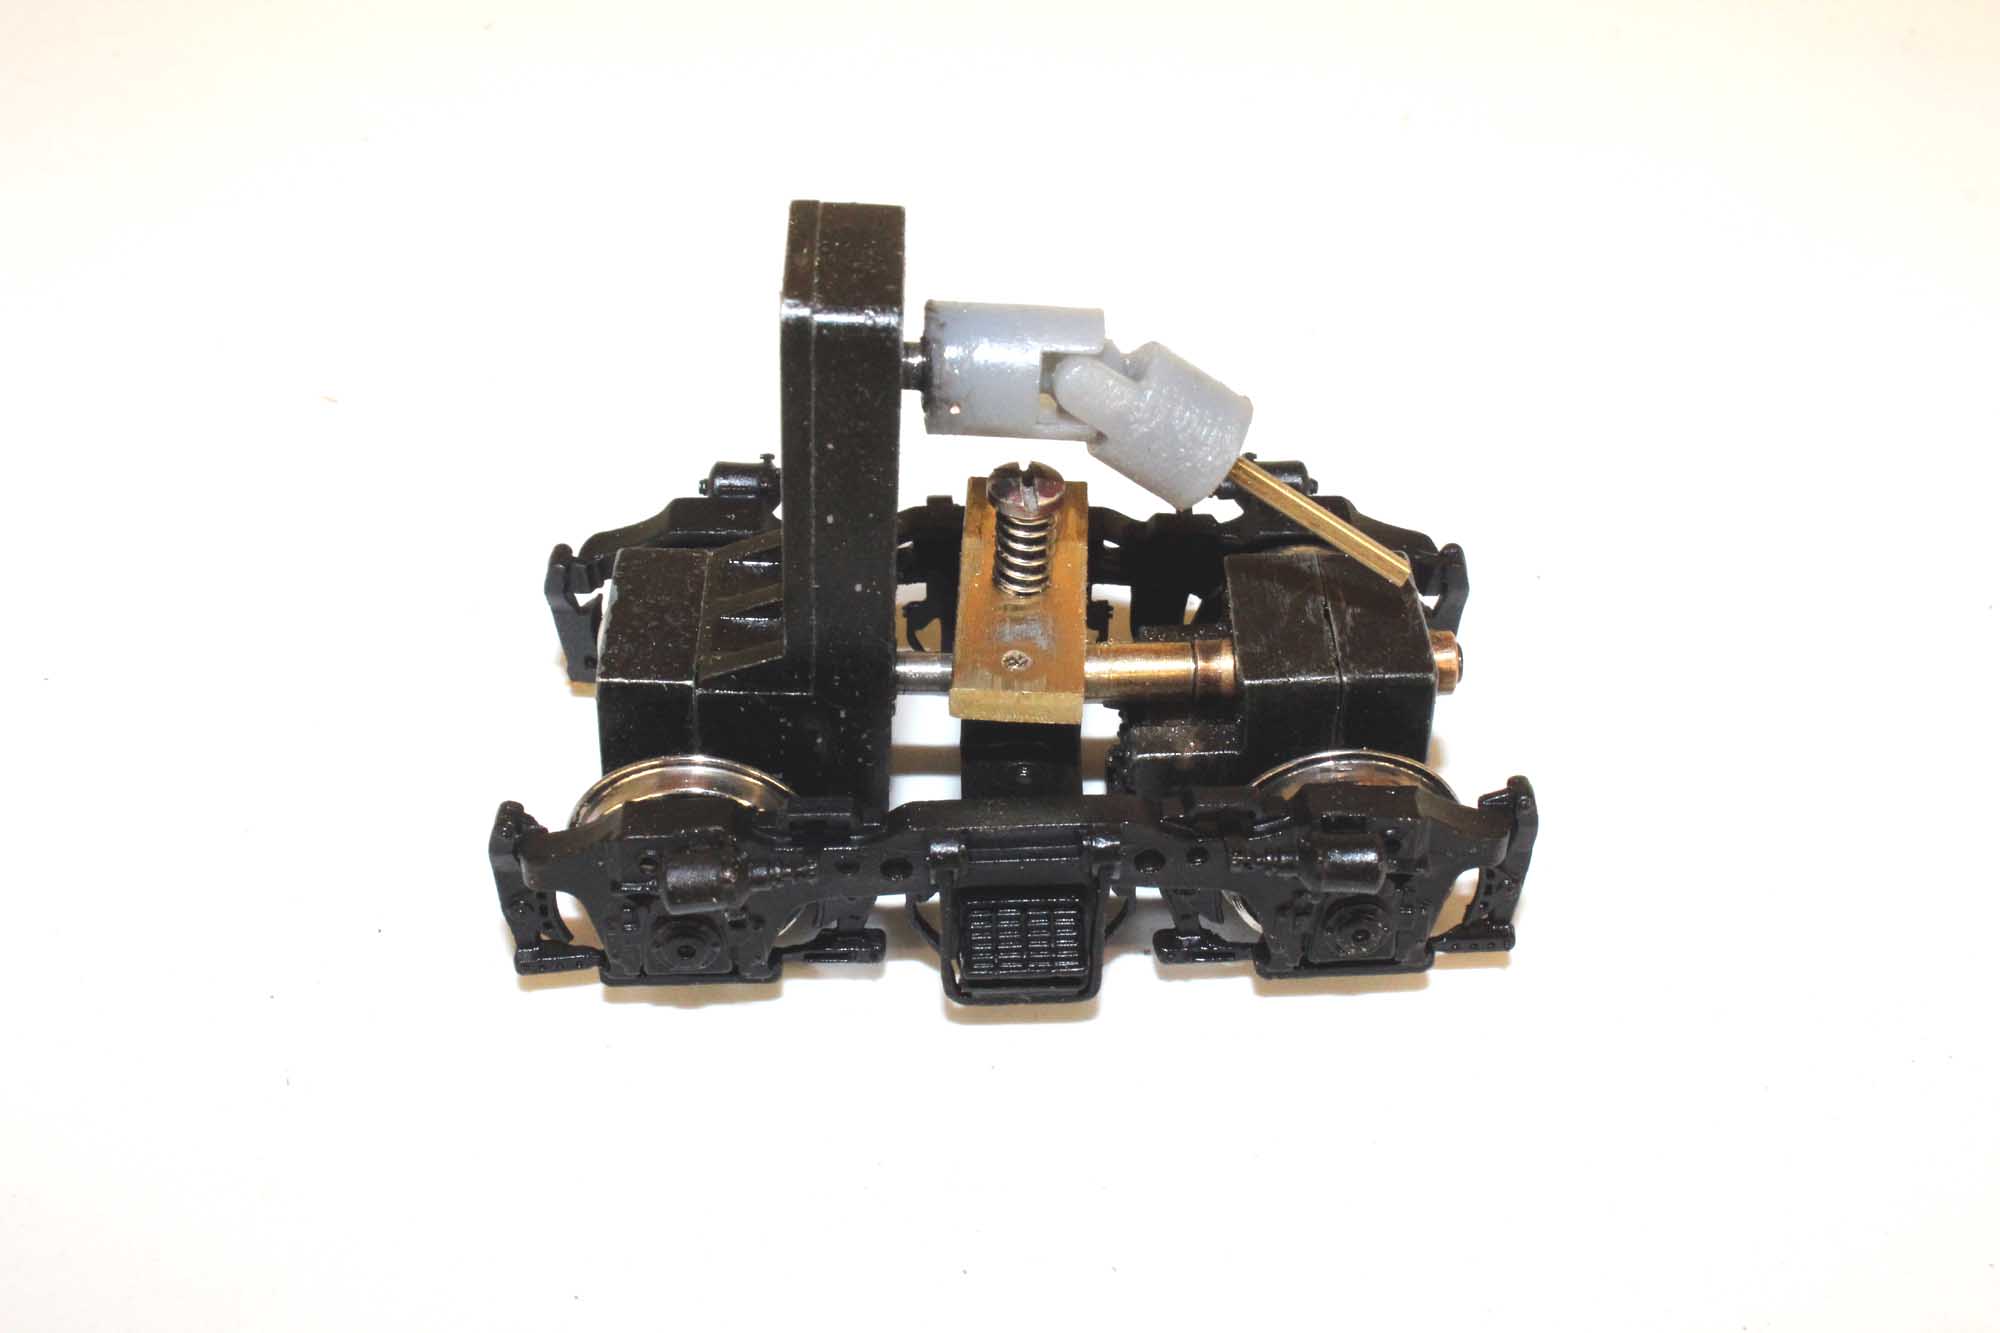
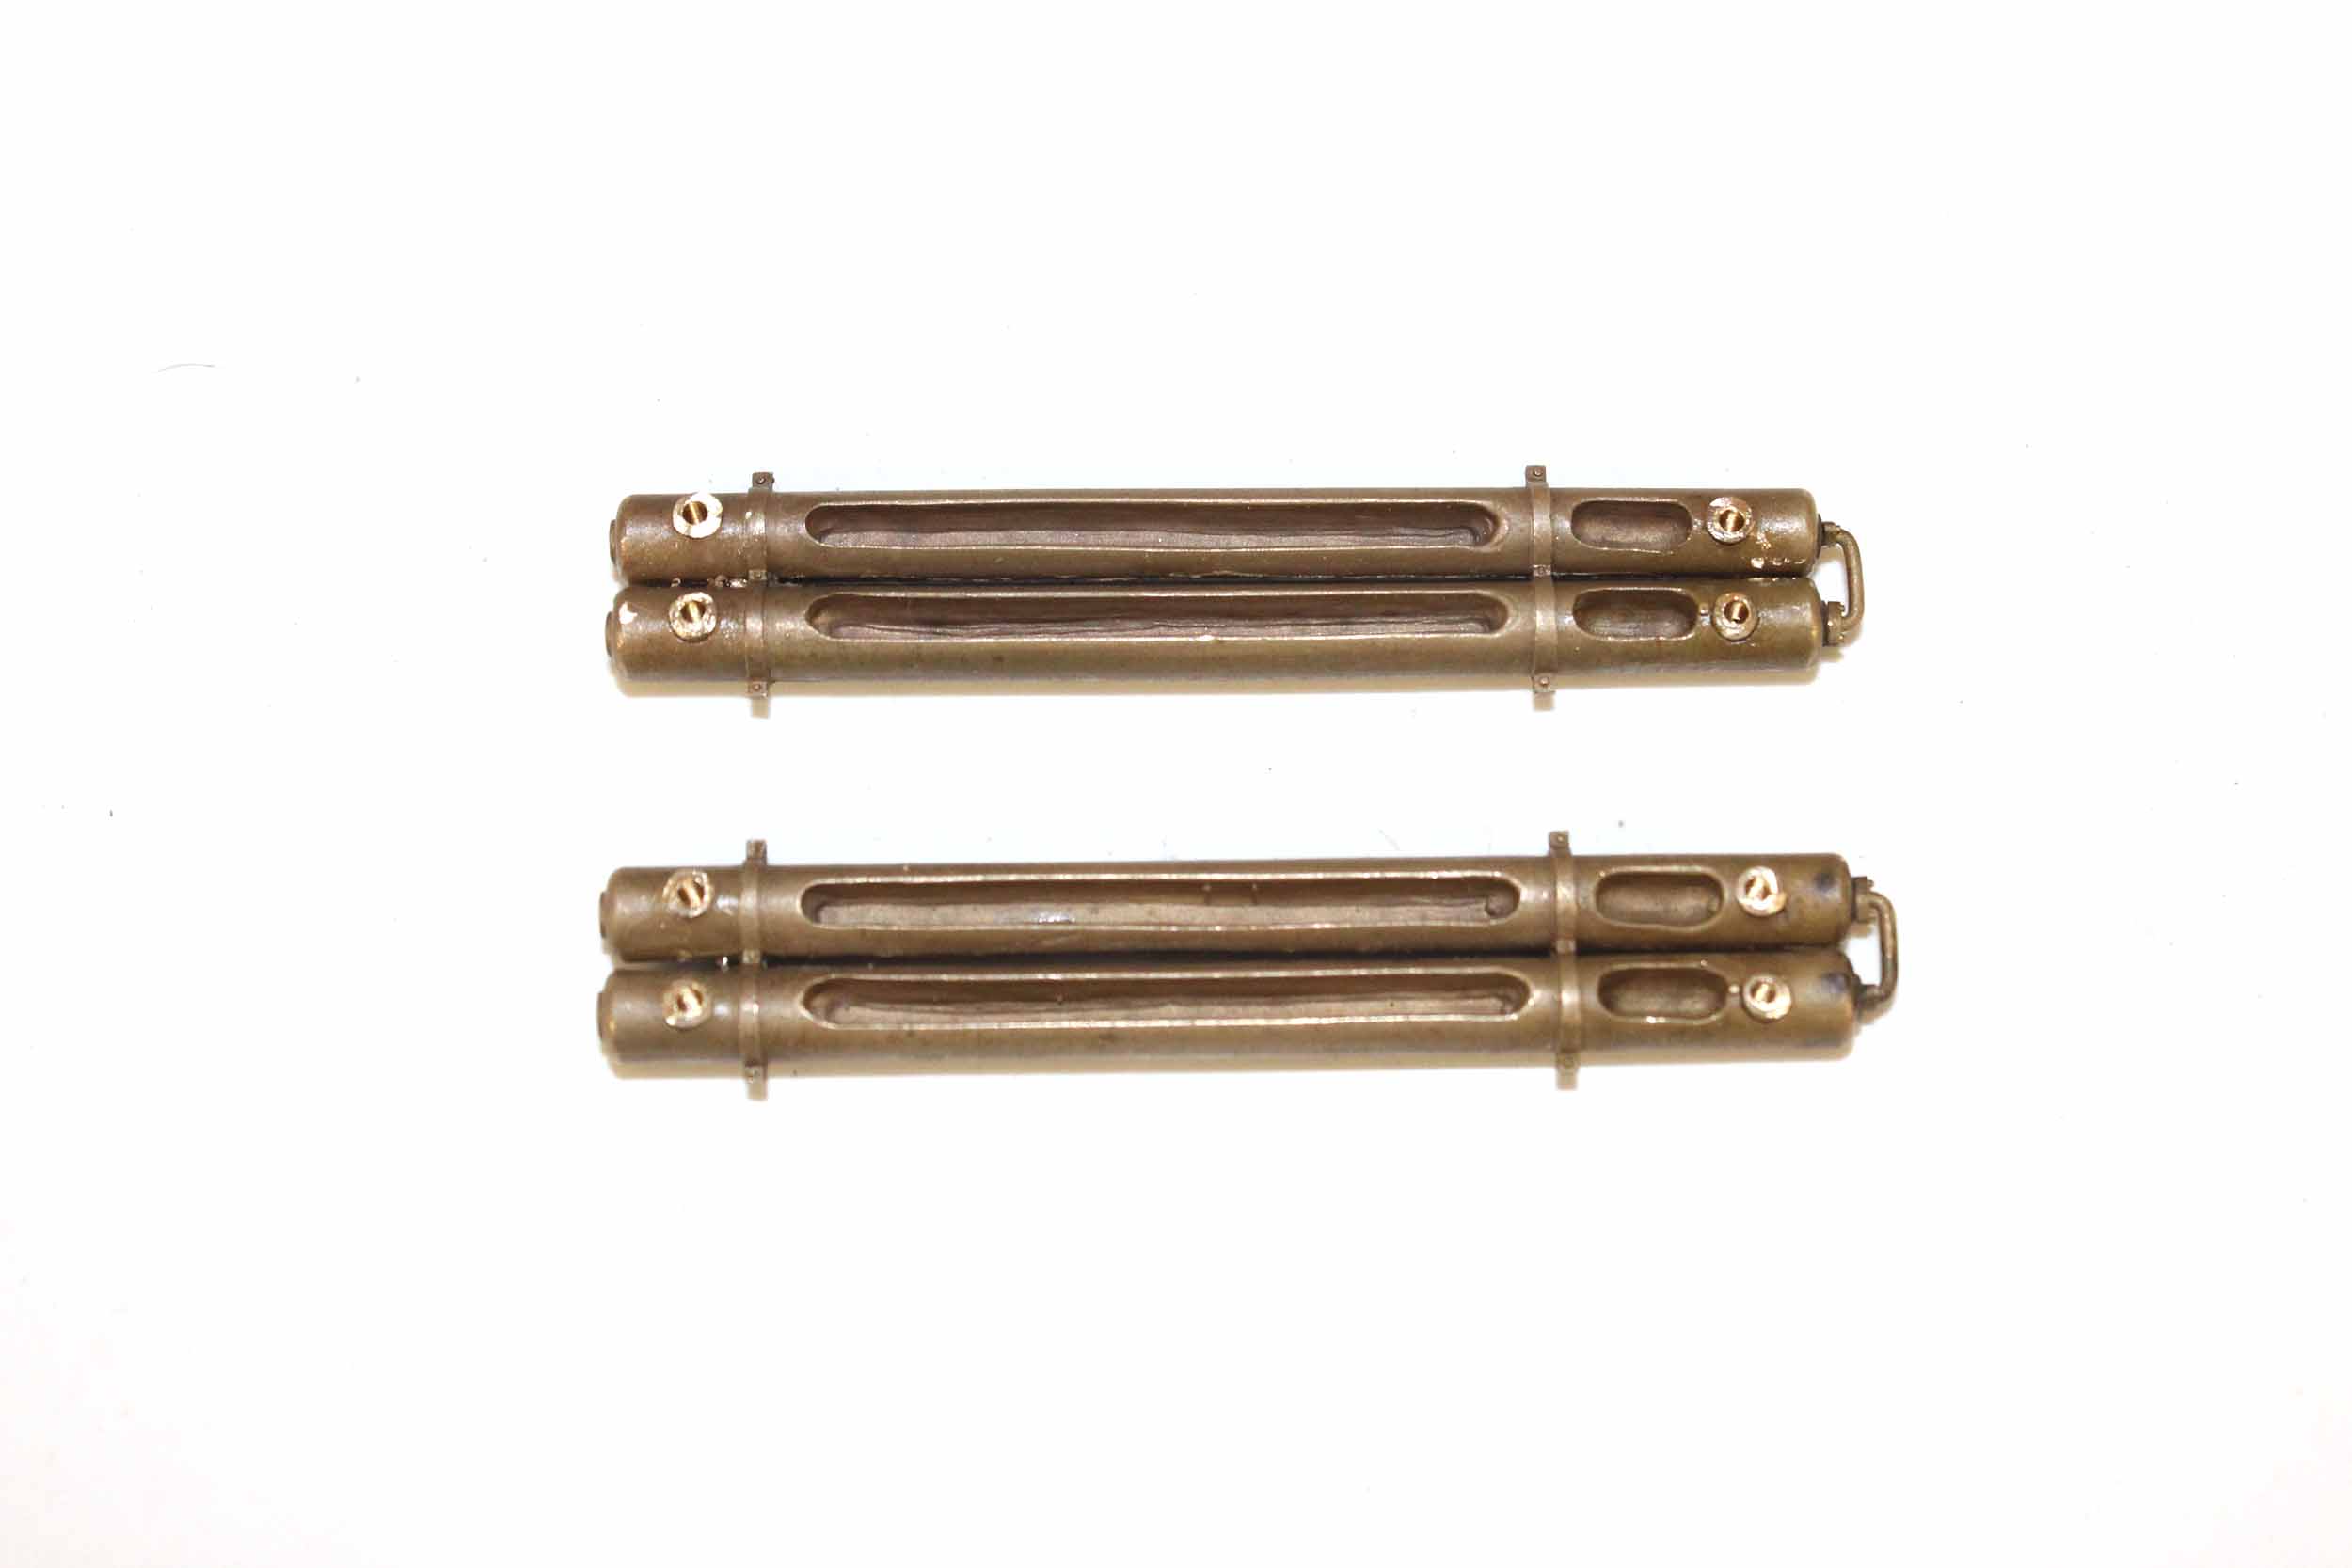
3D Printing
These
are the universal joints I designed and printed. There were various versions
but I settled on using square brass tube as the drive shaft because I needed
them to be telescopic. I probably could
have bought universal joints but making what I need is well apart of the
challenge and the FUN of it all for me. I got pretty lucky in the design of the
ball and socket. It mostly worked the first time with only some minor tweaking.
The 3D material is very slightly flexible when first printed. That is how I can
snap the socket onto the ball. But it gets harder and brittle in about a week
if exposed to light. I give it a liberal shot of oil, and think (HOPE) it will
be just as durable as plastic.
Universal Joints

Motor Mount
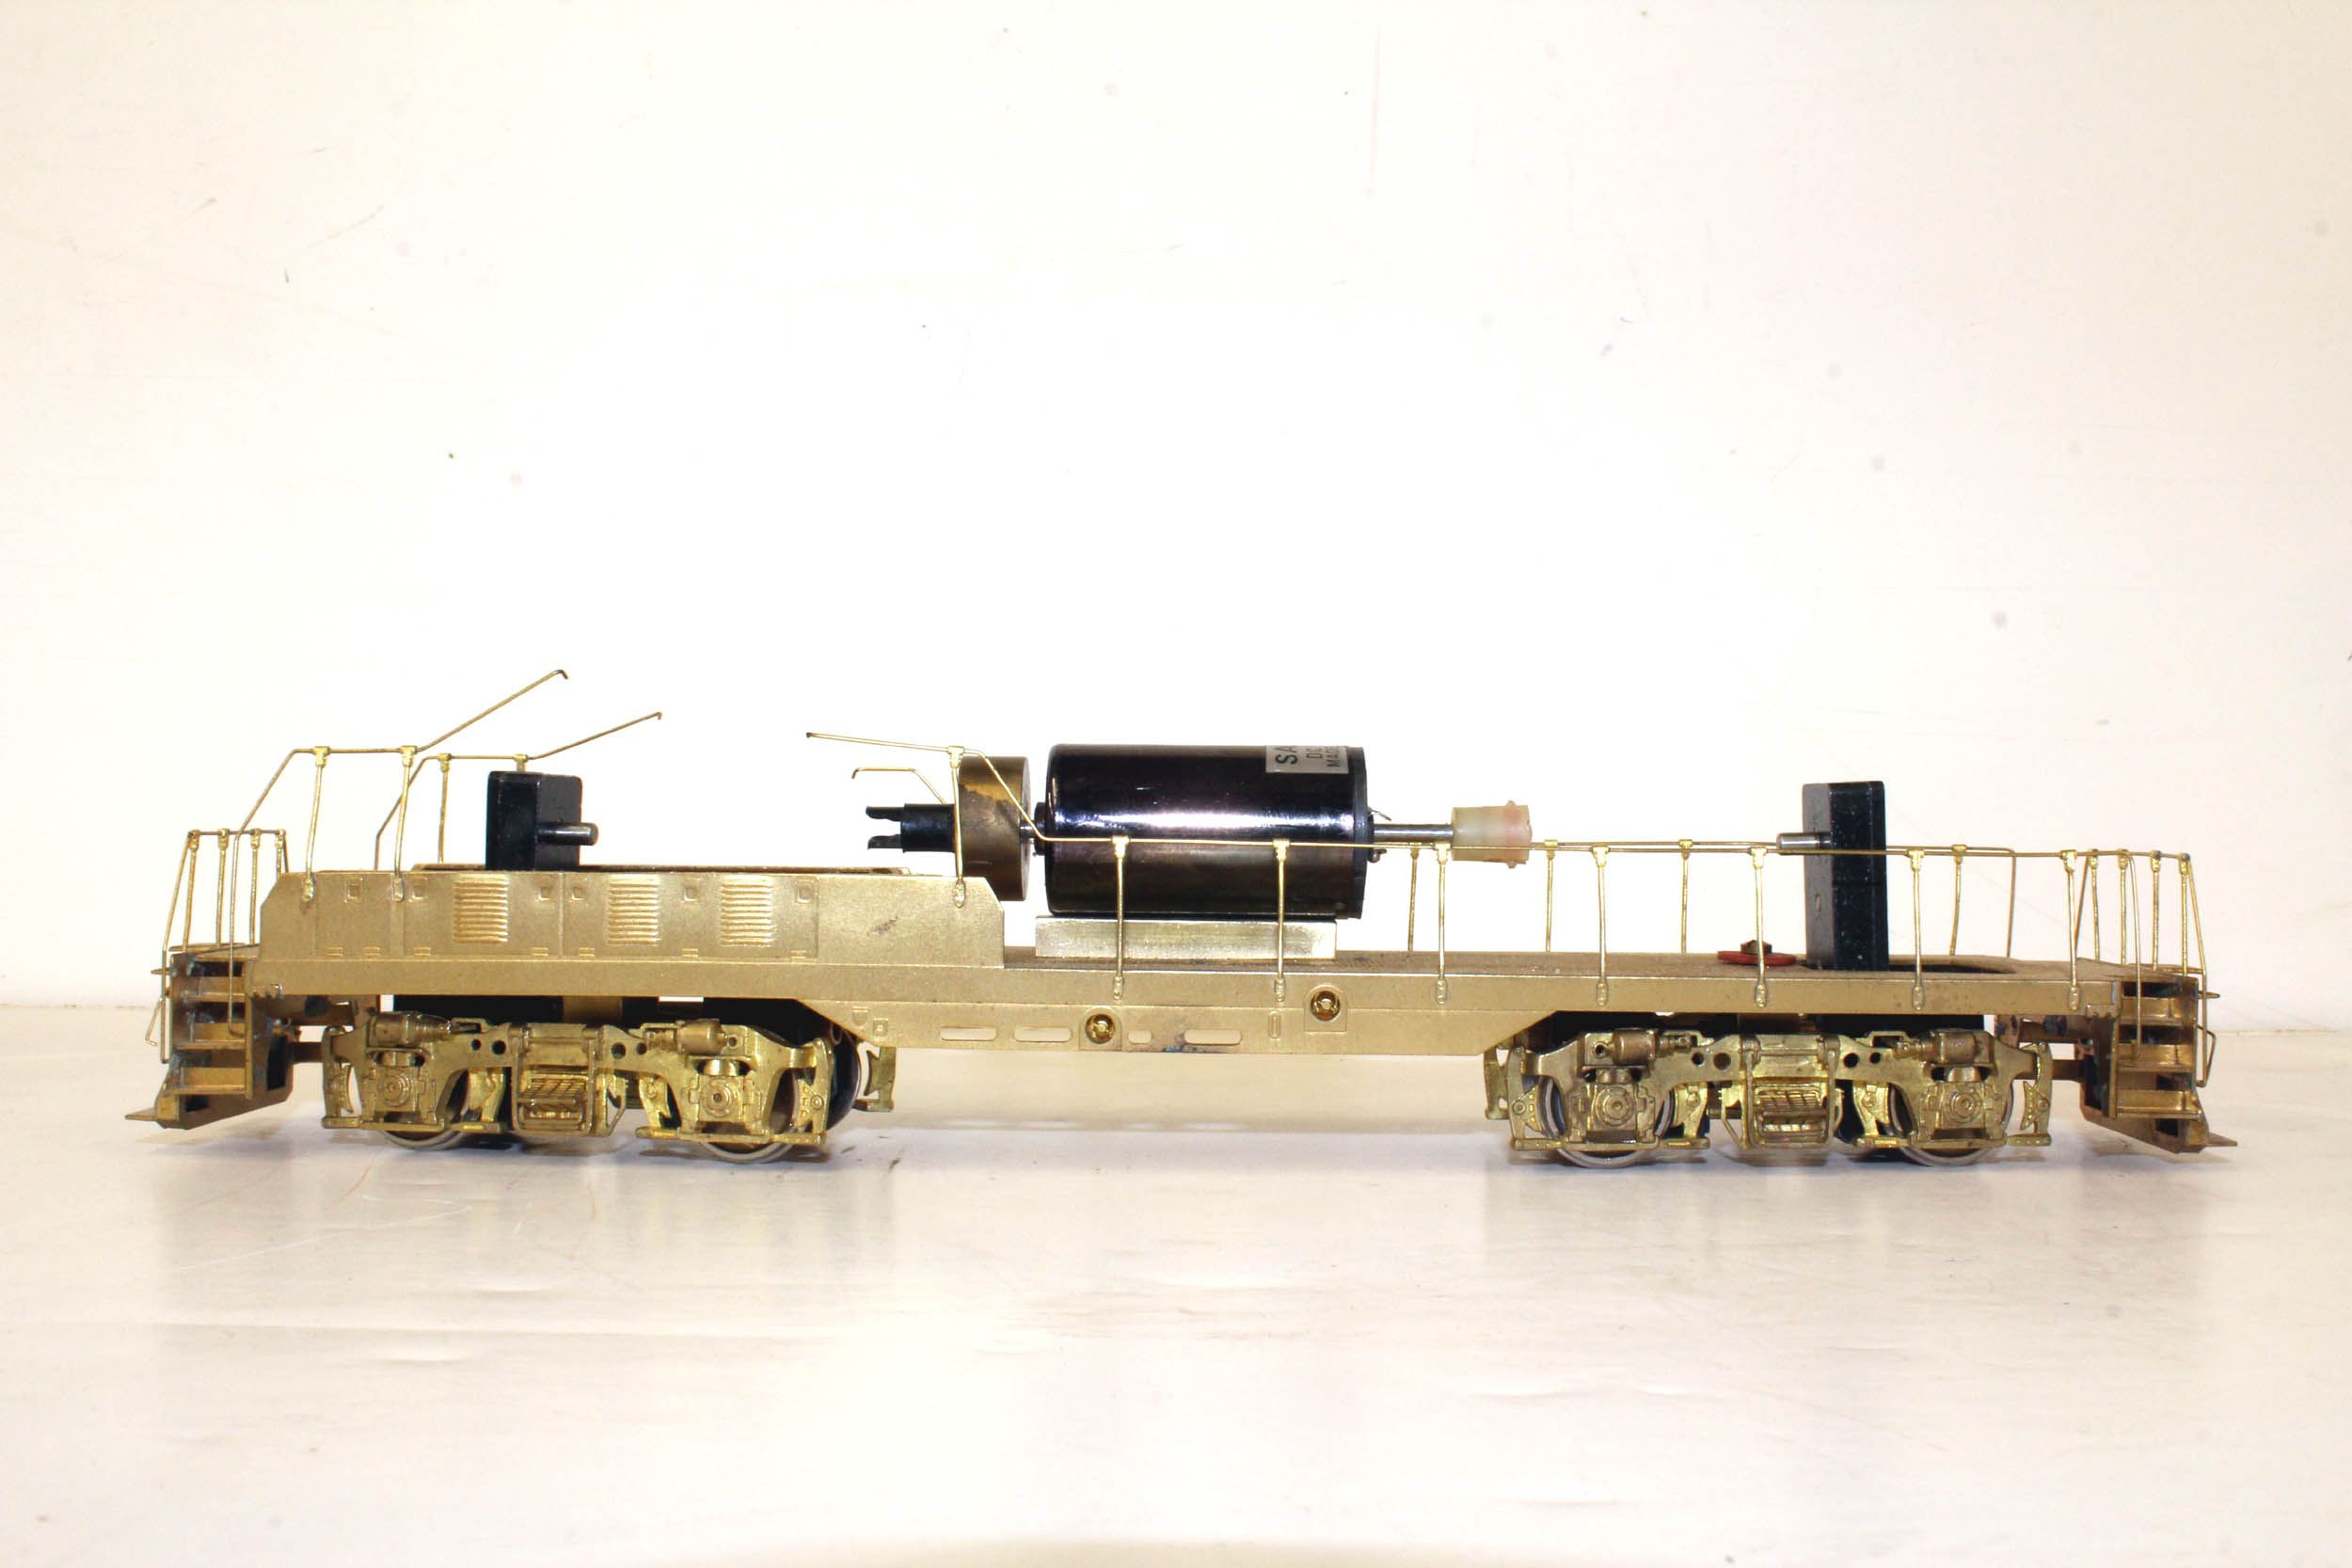
1-28-15
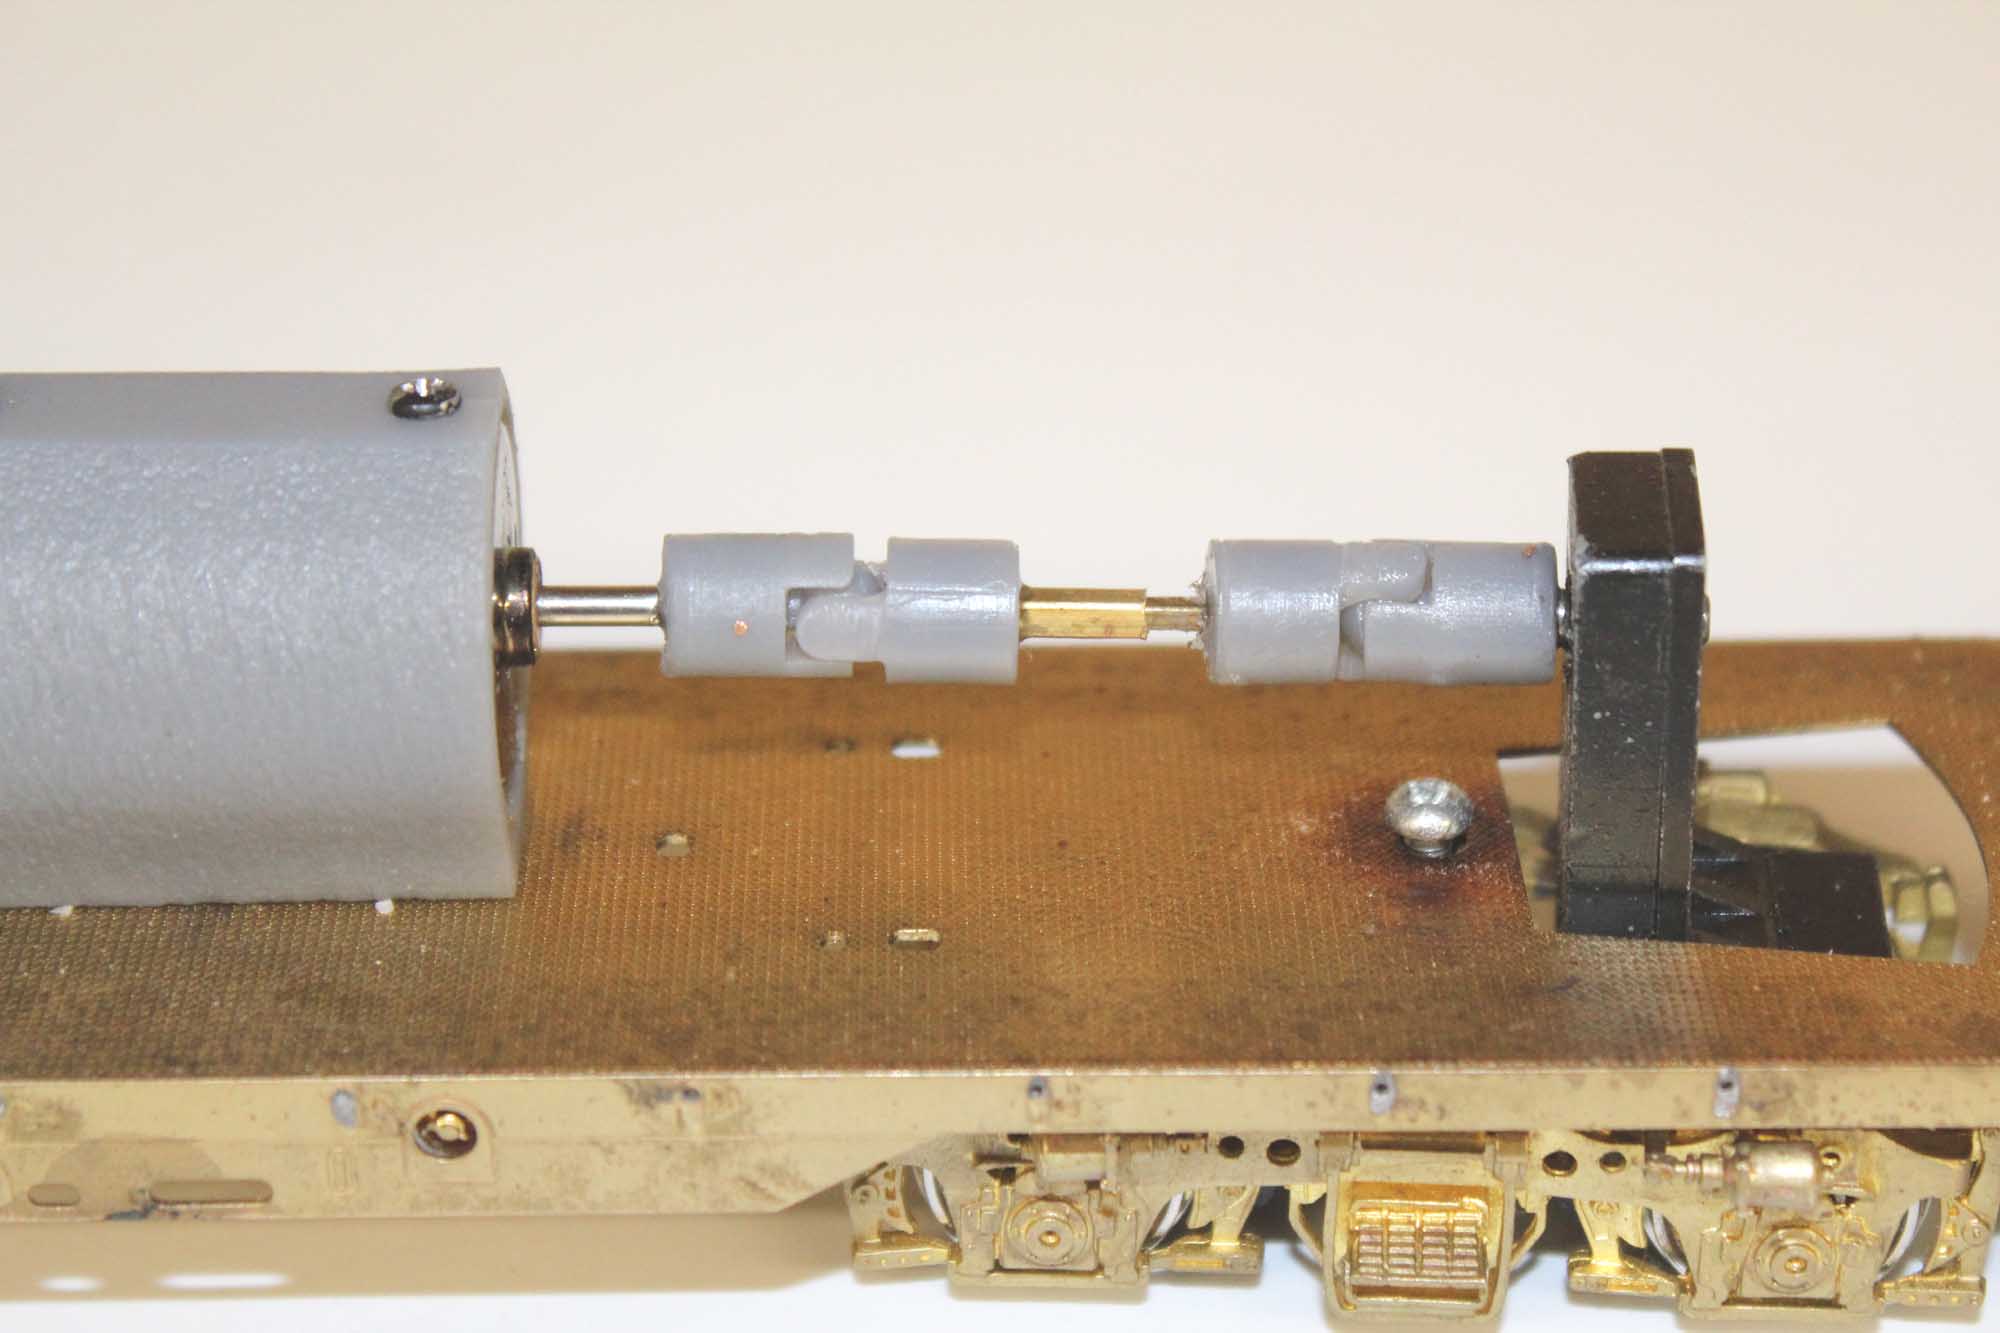
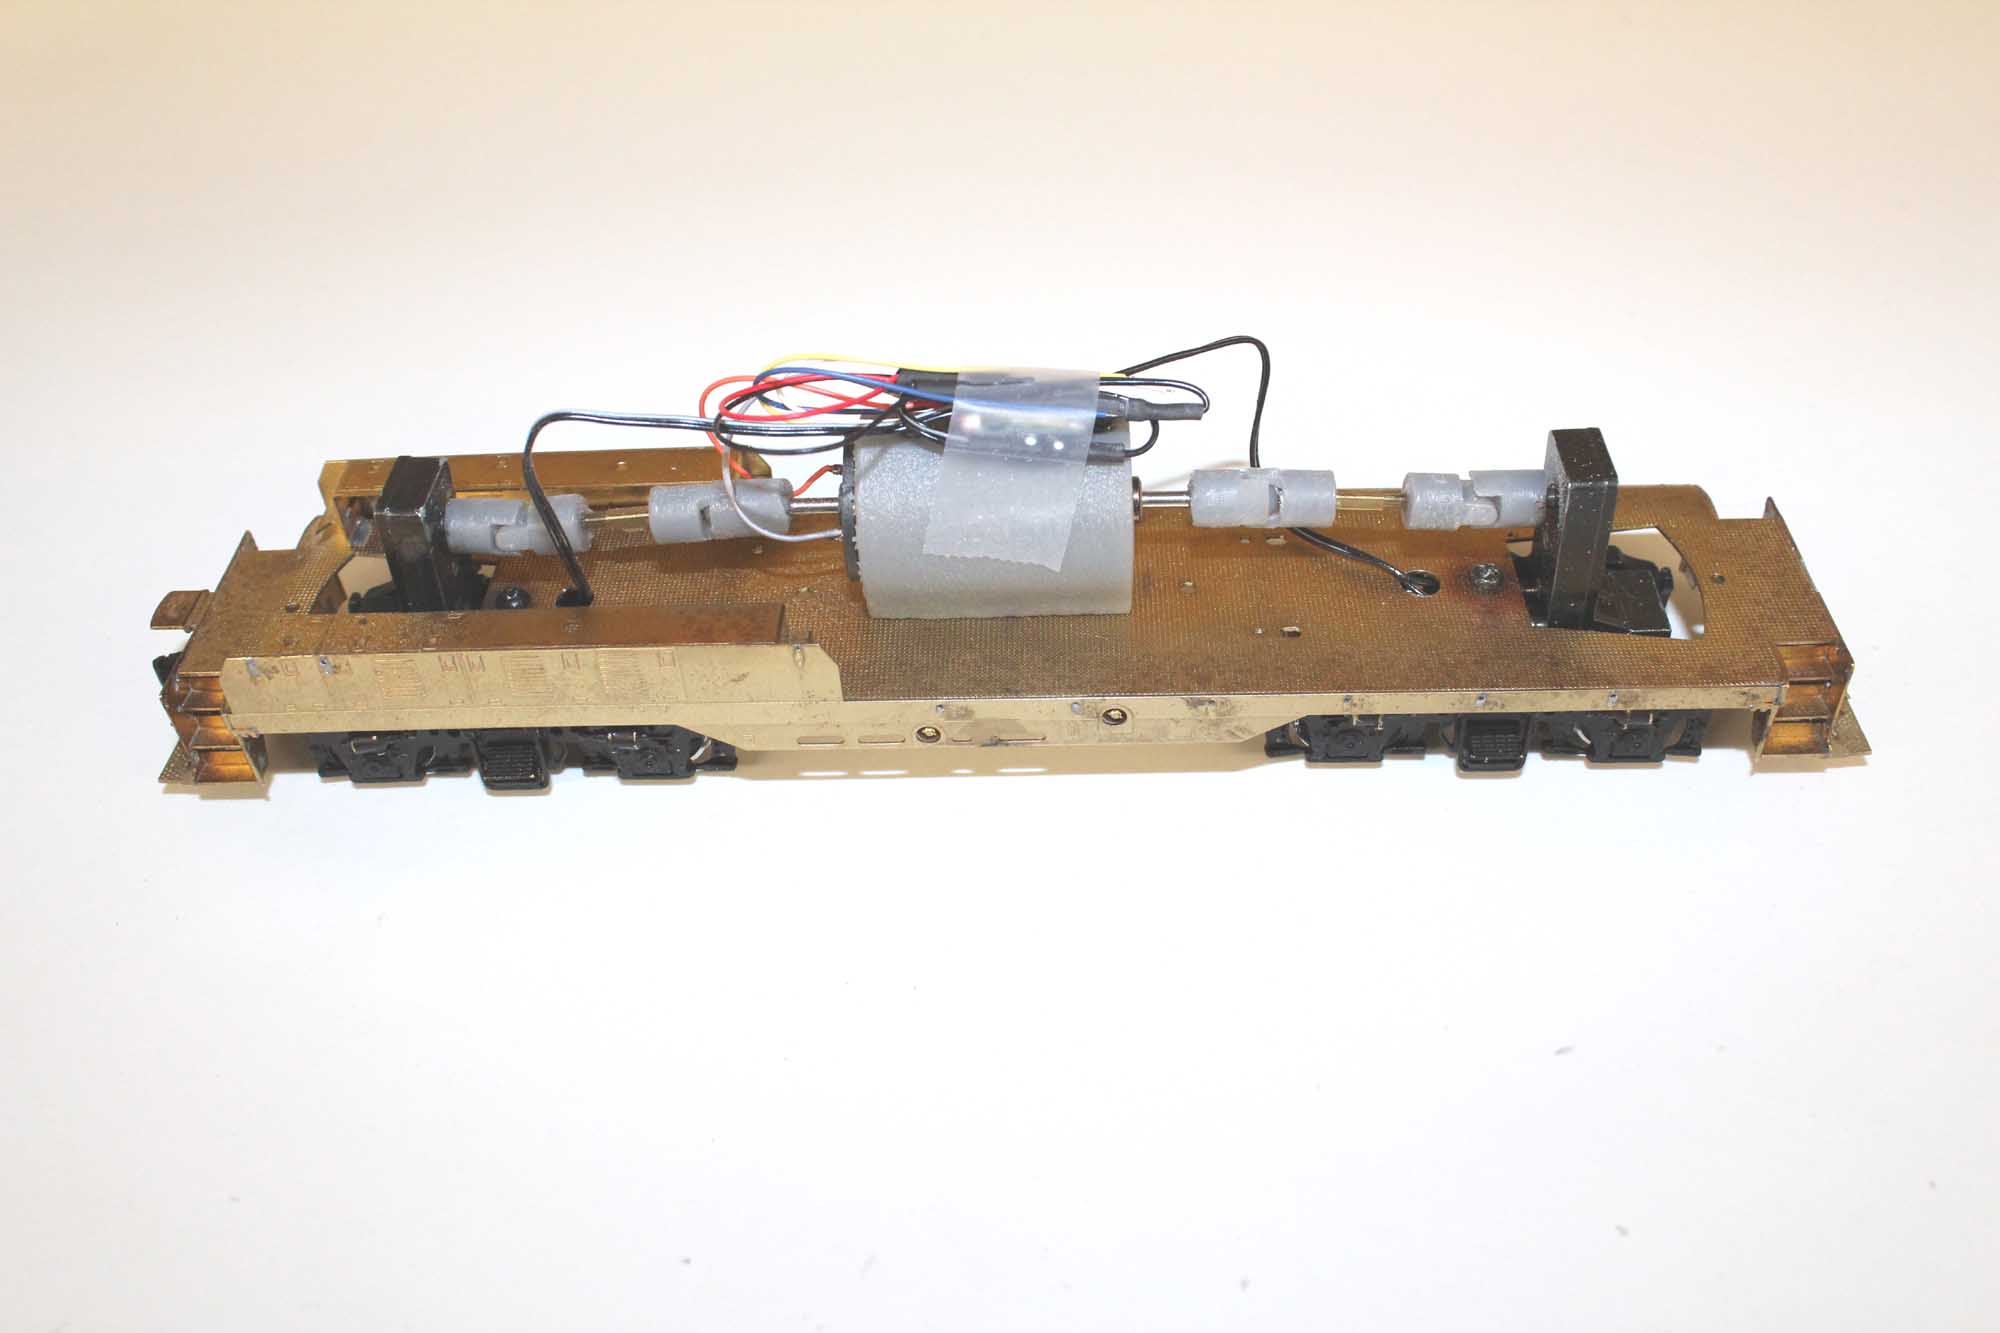
More work on the drive
The
truck bolster screw originally attached right to the
floor. Since the U Joint hubs are now permanently attached to the gear tower
shafts accessing the truck screw would be difficult. I made these spanner bars
to be able to access 2 screws on either side of the driveshafts.
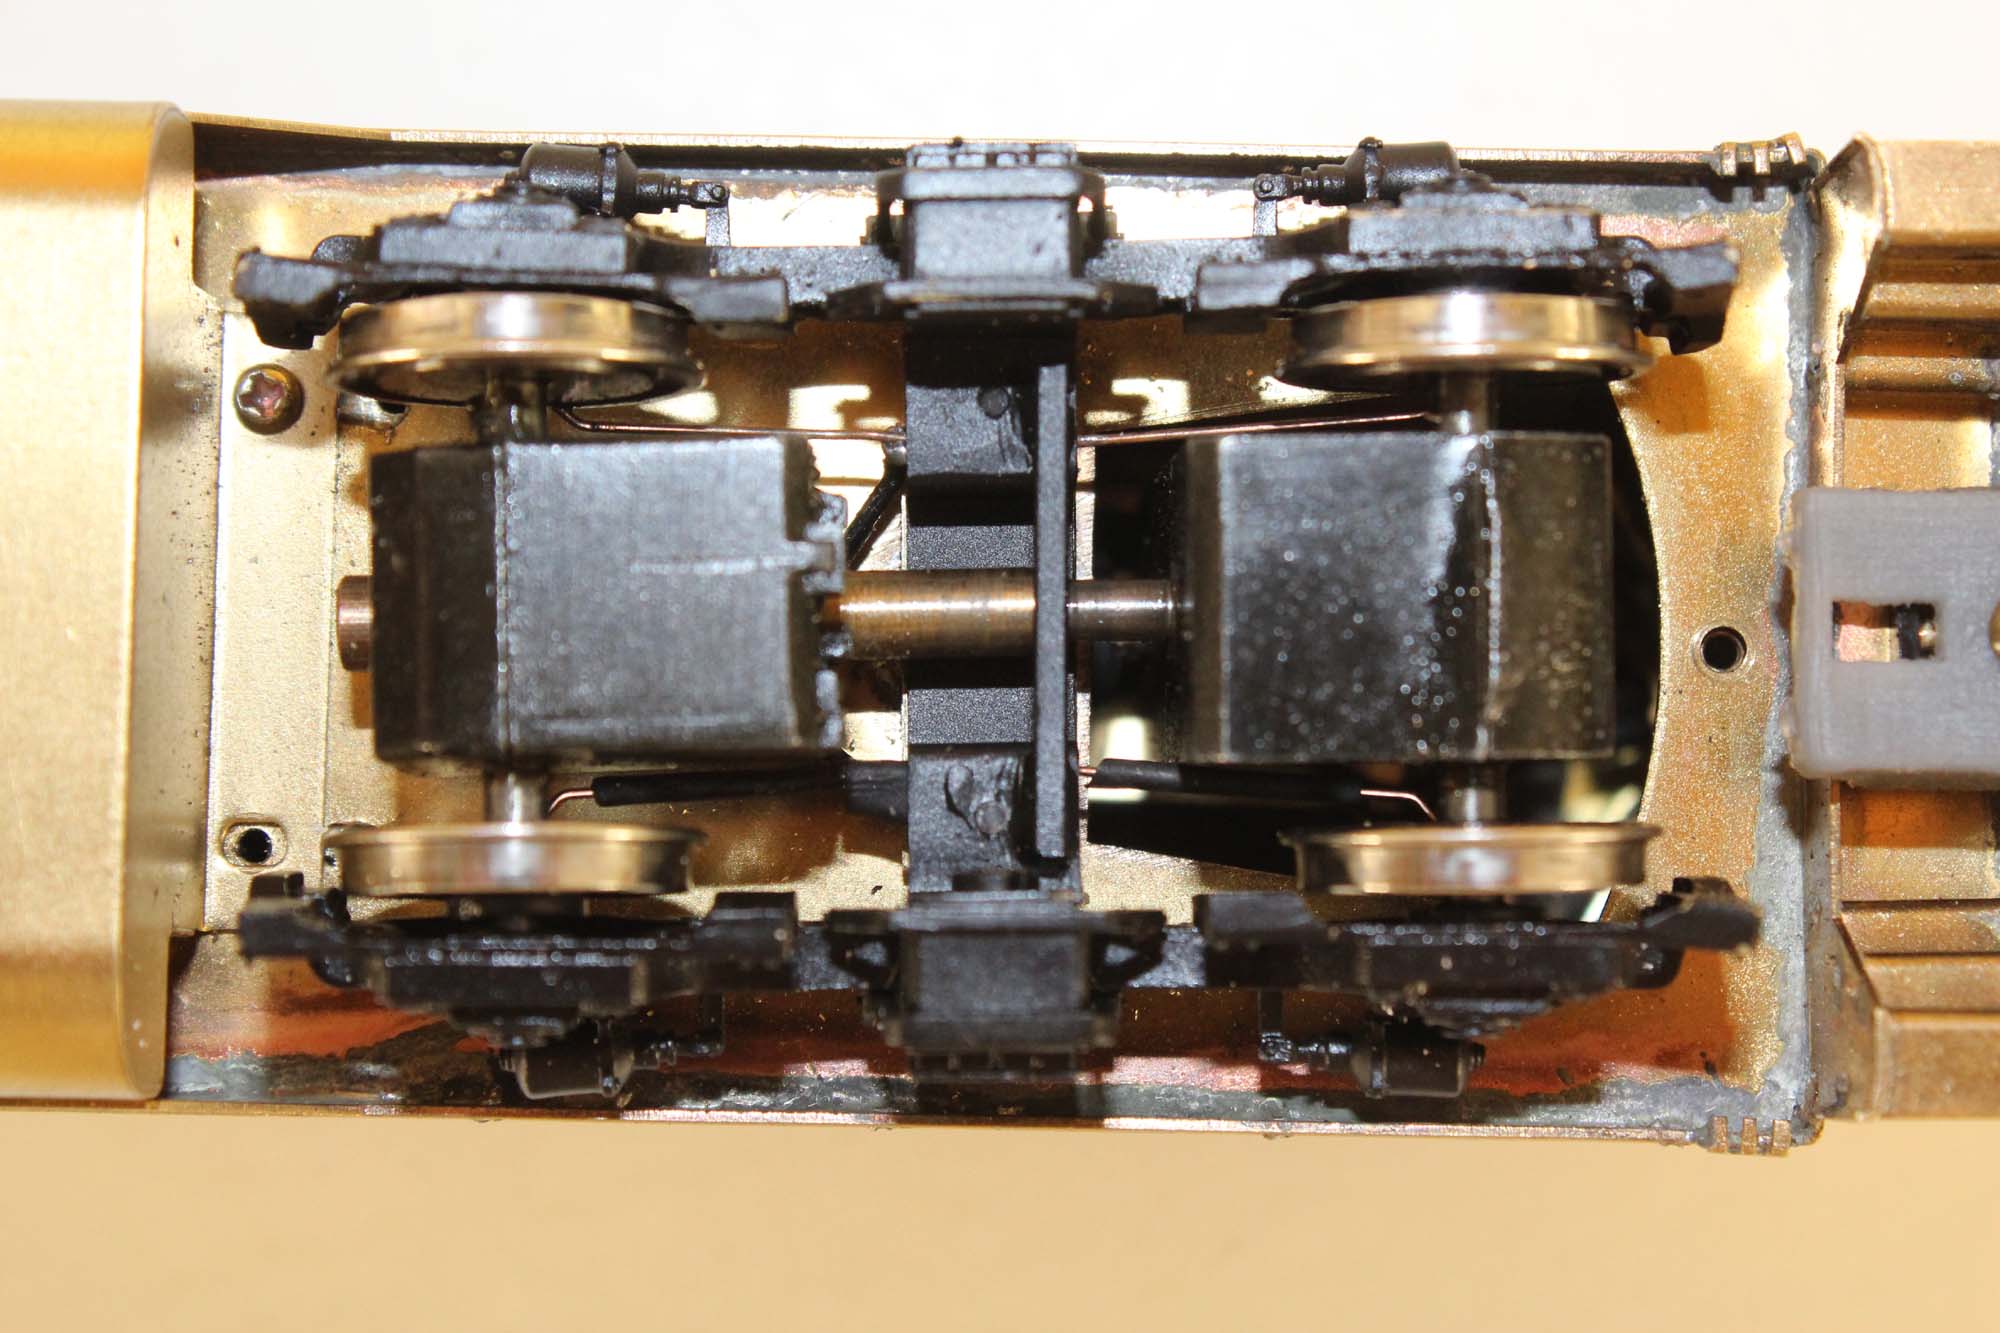
All Wheel Pickup
I
made my usual all wheel pick up system. I cut grooves in the back of the wheels
for the wiper wires to ride in. I use phosphor bronze wire only. All wheel
pickup is a LOT of work but it greatly improves performance.
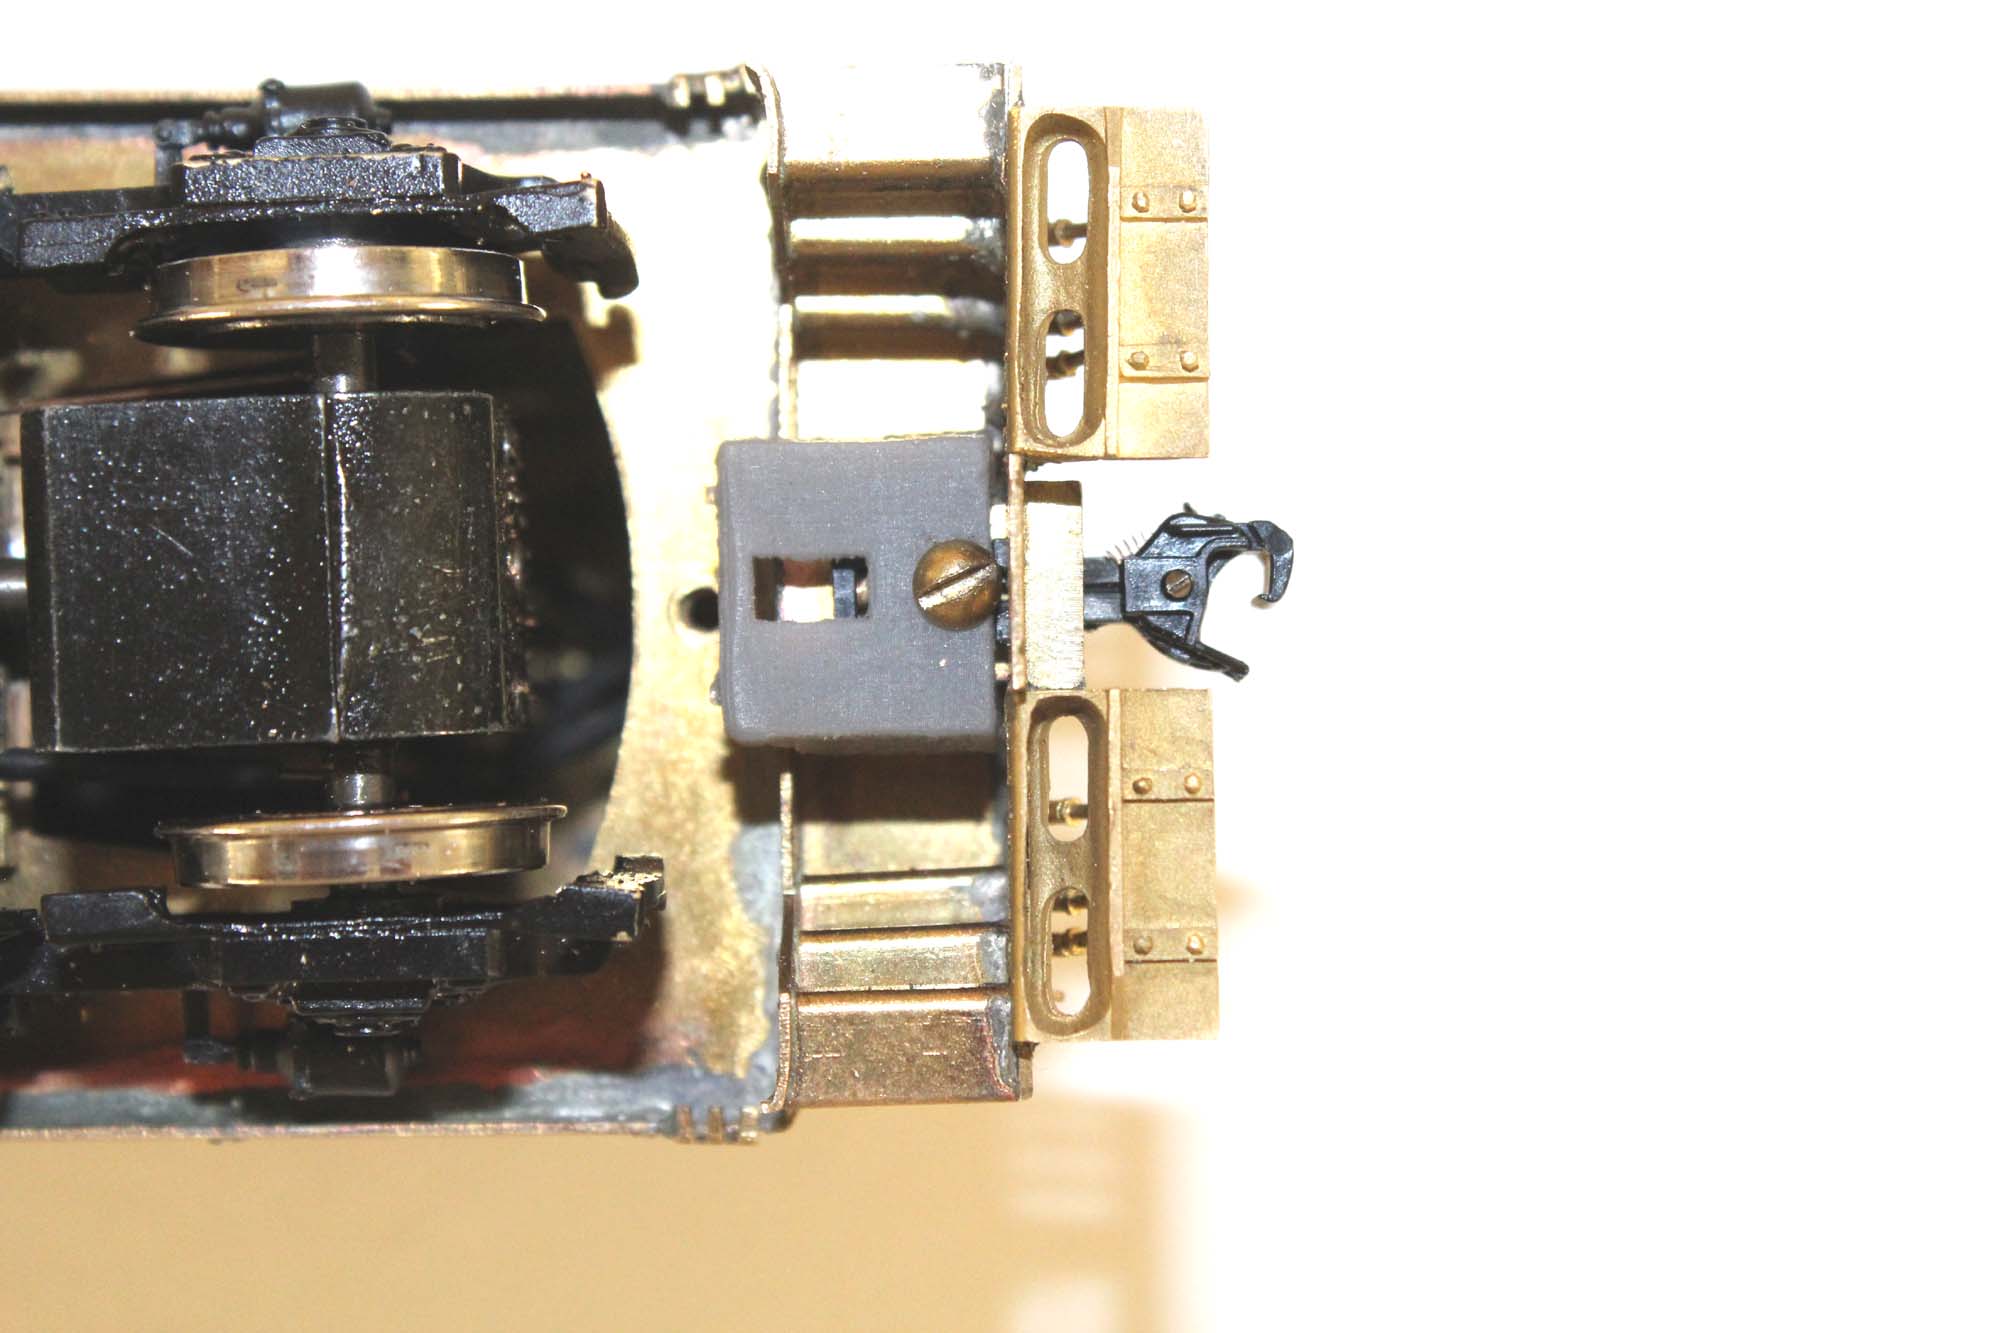
Couplers
The
model as built had a reasonable draft gear casting I hoped to use. But the
opening and coupler pad was originally designed for a Kadee #5 where I use
Kadee #802 for S Scale. I designed a custom box where there really is no
coupler box, at least in the draft gear. The 802 fits and centers well. The
opening is just a little wider than I would prefer, but does not bother me
enough to change it.

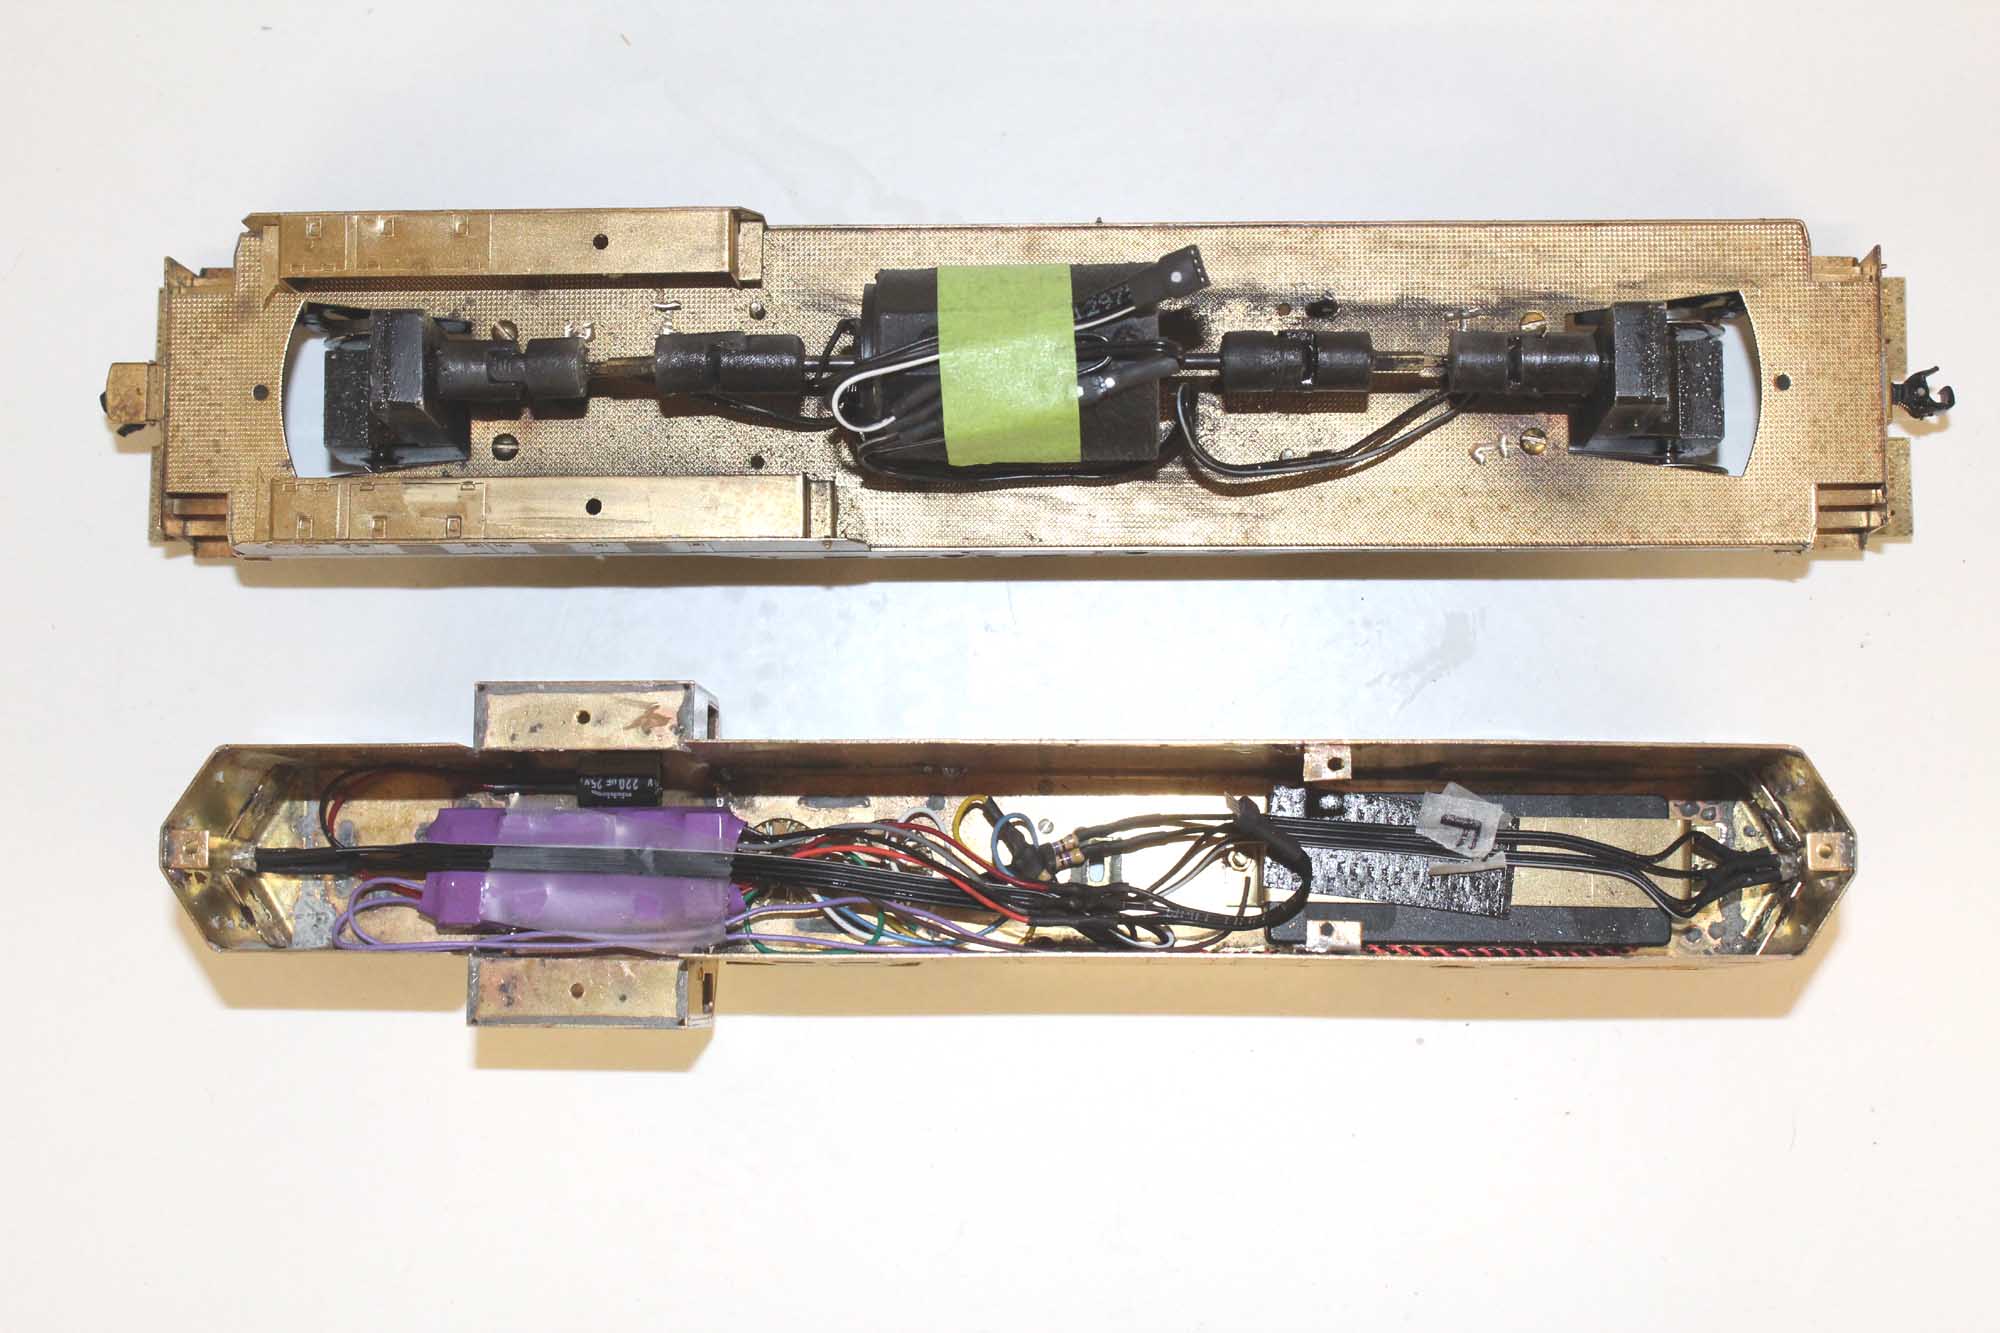
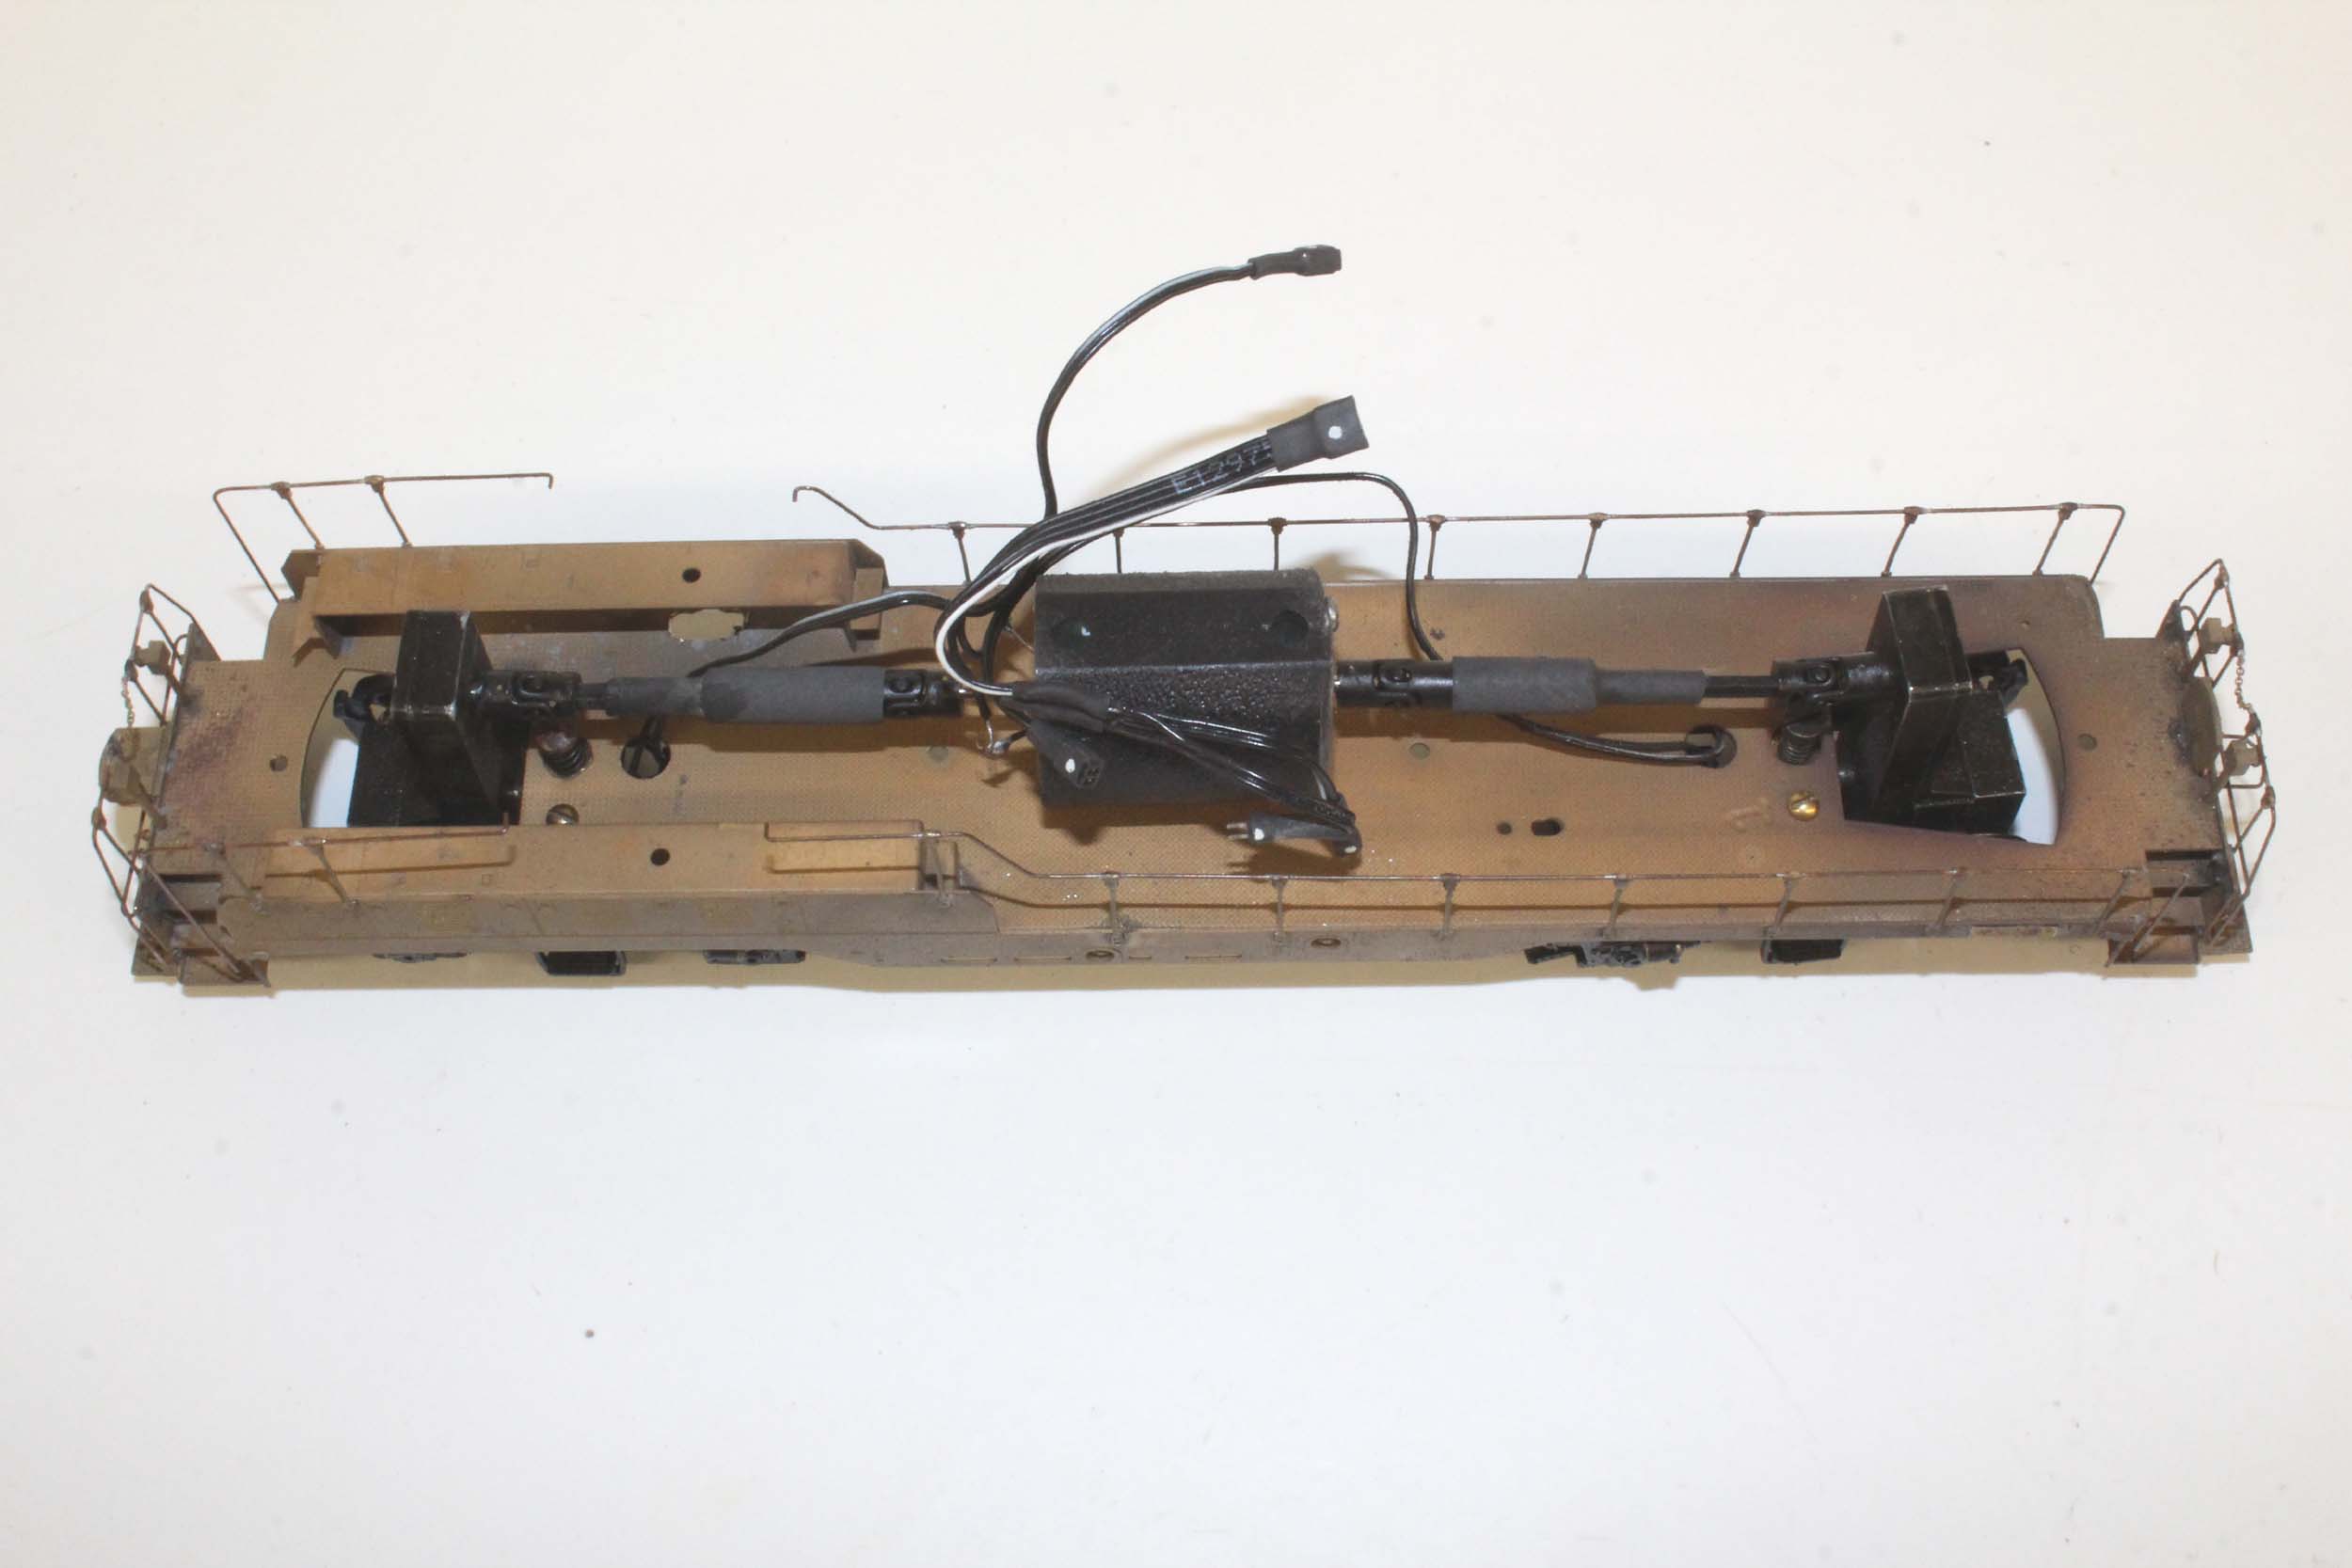
DCC
This
is the layout of the Tsunami decoder and speaker I chose. The decoder is not
visible in the roof of the cab. The speaker is available from RailMaster. http://www.railmasterhobbies.com/Speakers.htm
I use lots of Miniatronics plugs to make working on it easy. There is a 4 wire
plug to separate the shell from the drive for “power up – motor down” since the
decoder is attached to the roof. All the electronics and lights stay in the
roof of the shell. This is the general layout I use most of the time. I am
using all LEDs from now on.
Some test running before disassembly
12-13-15
12-20-15
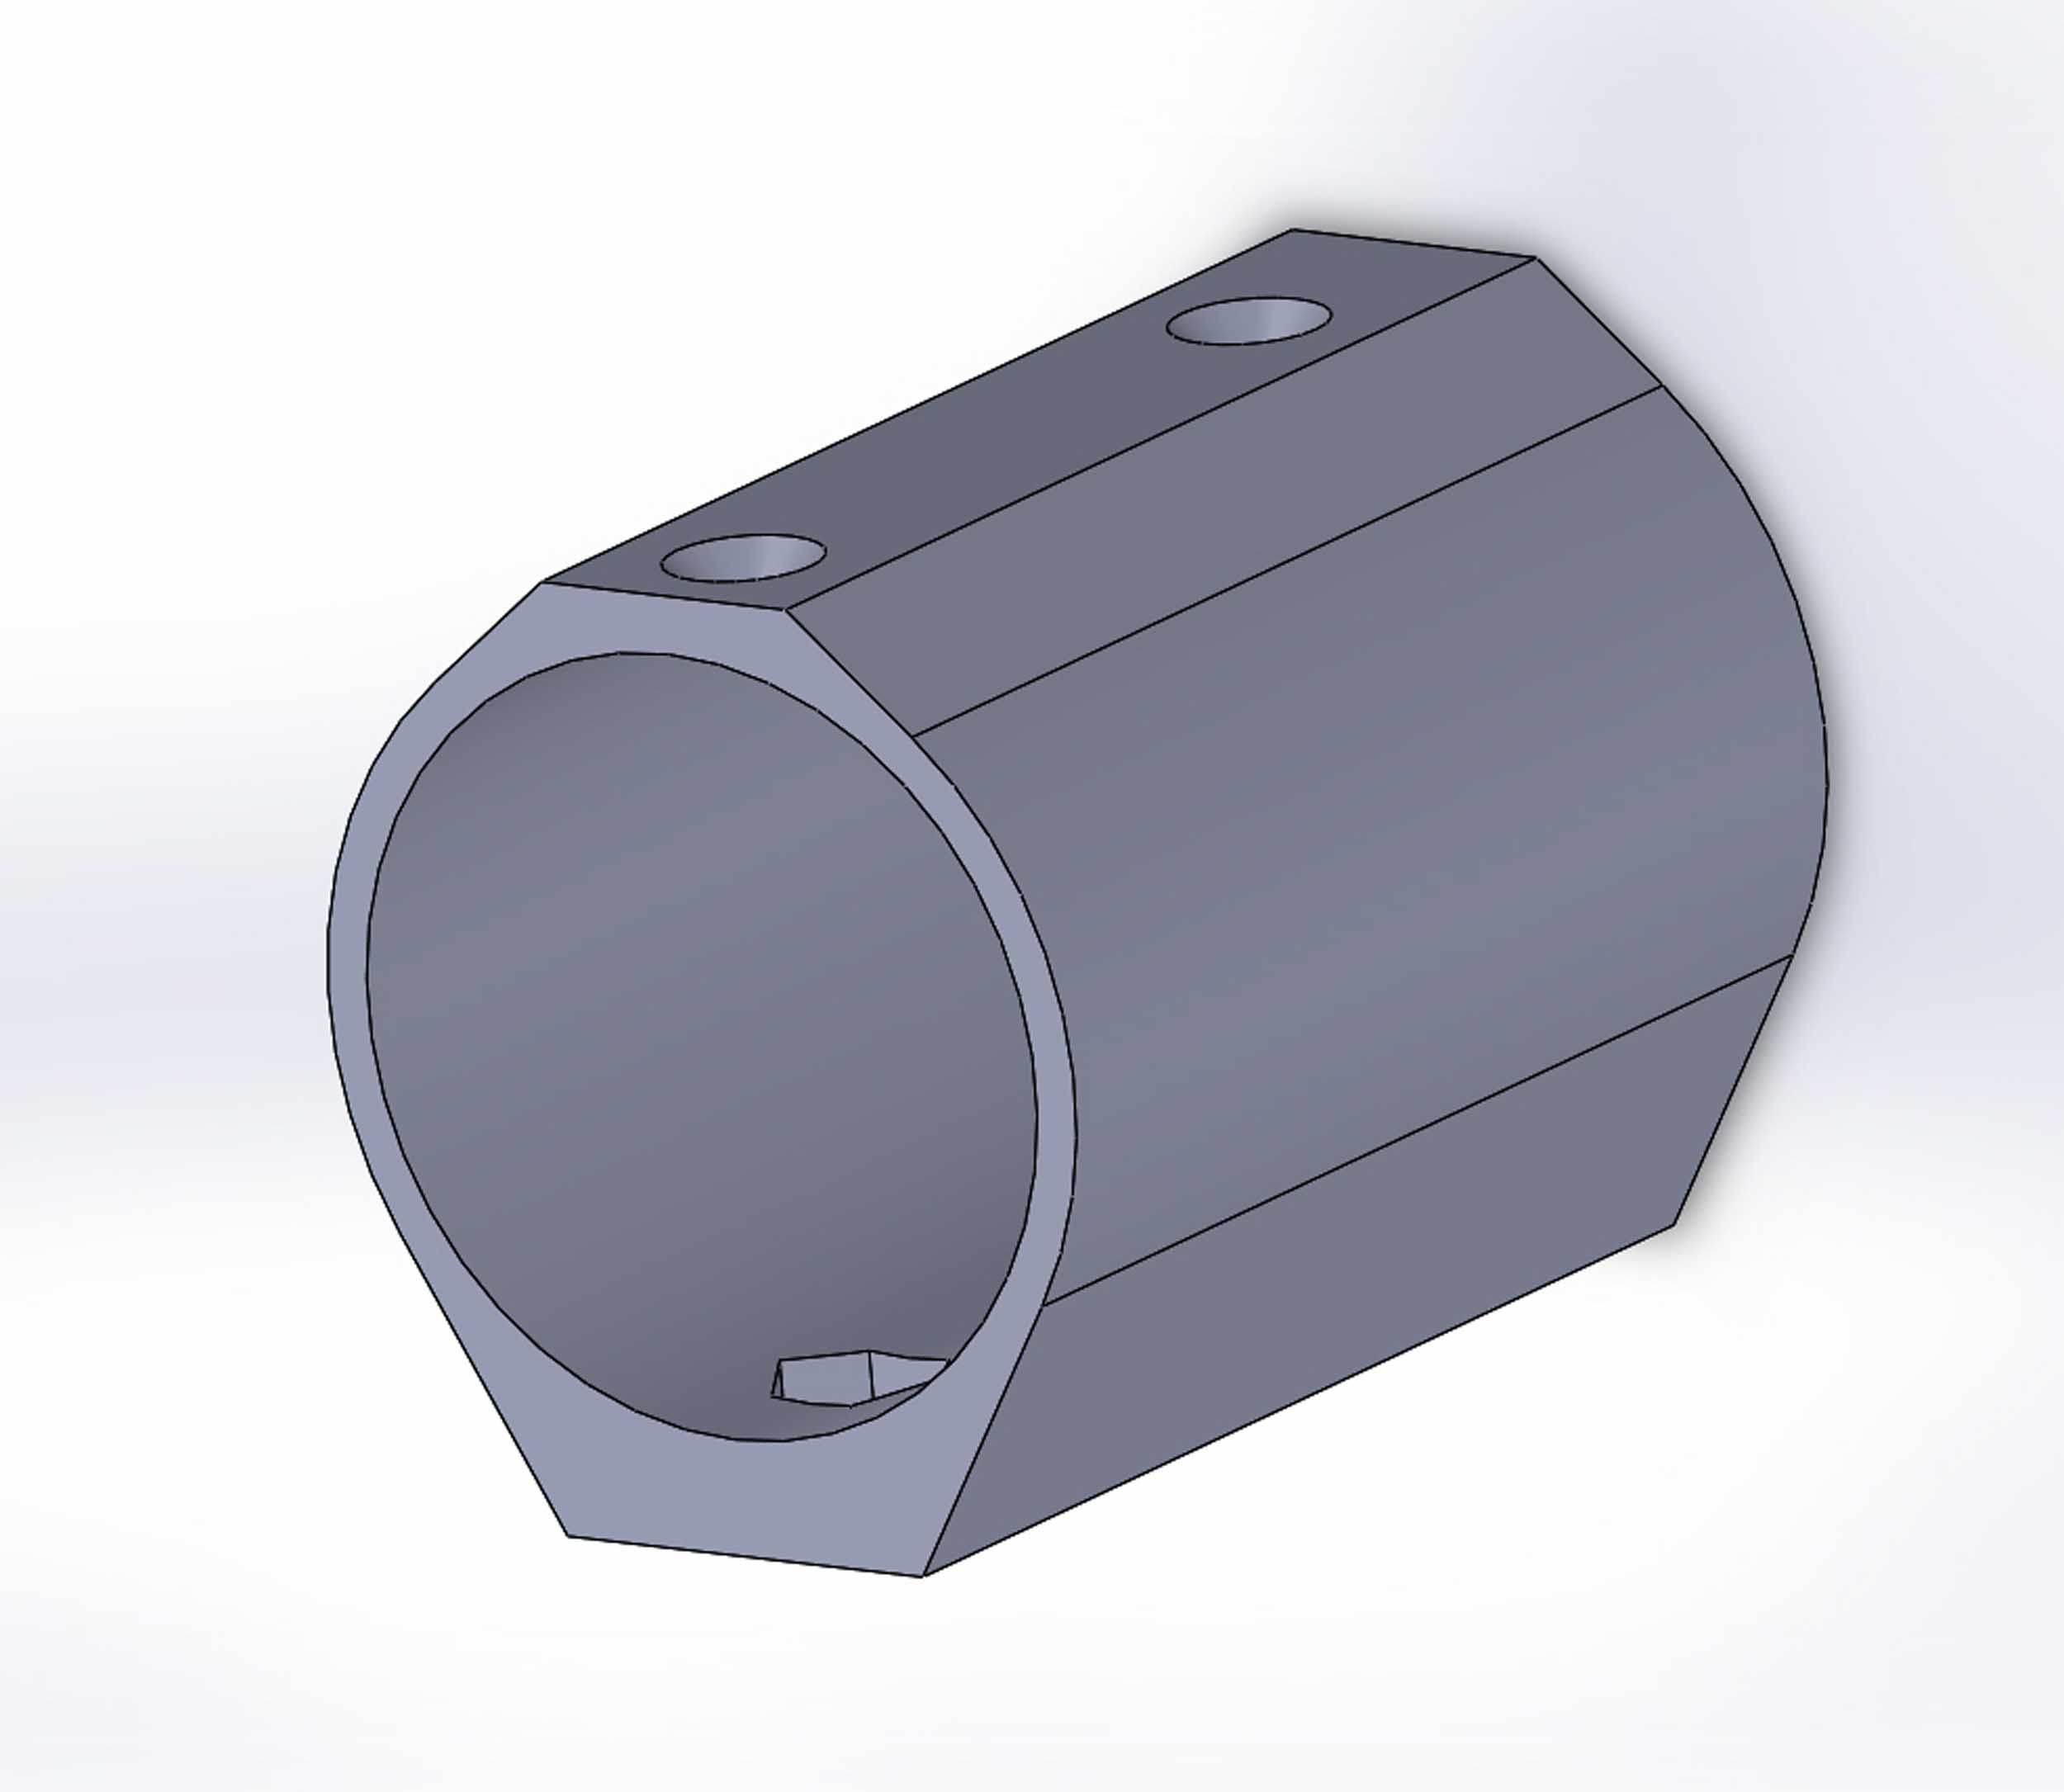
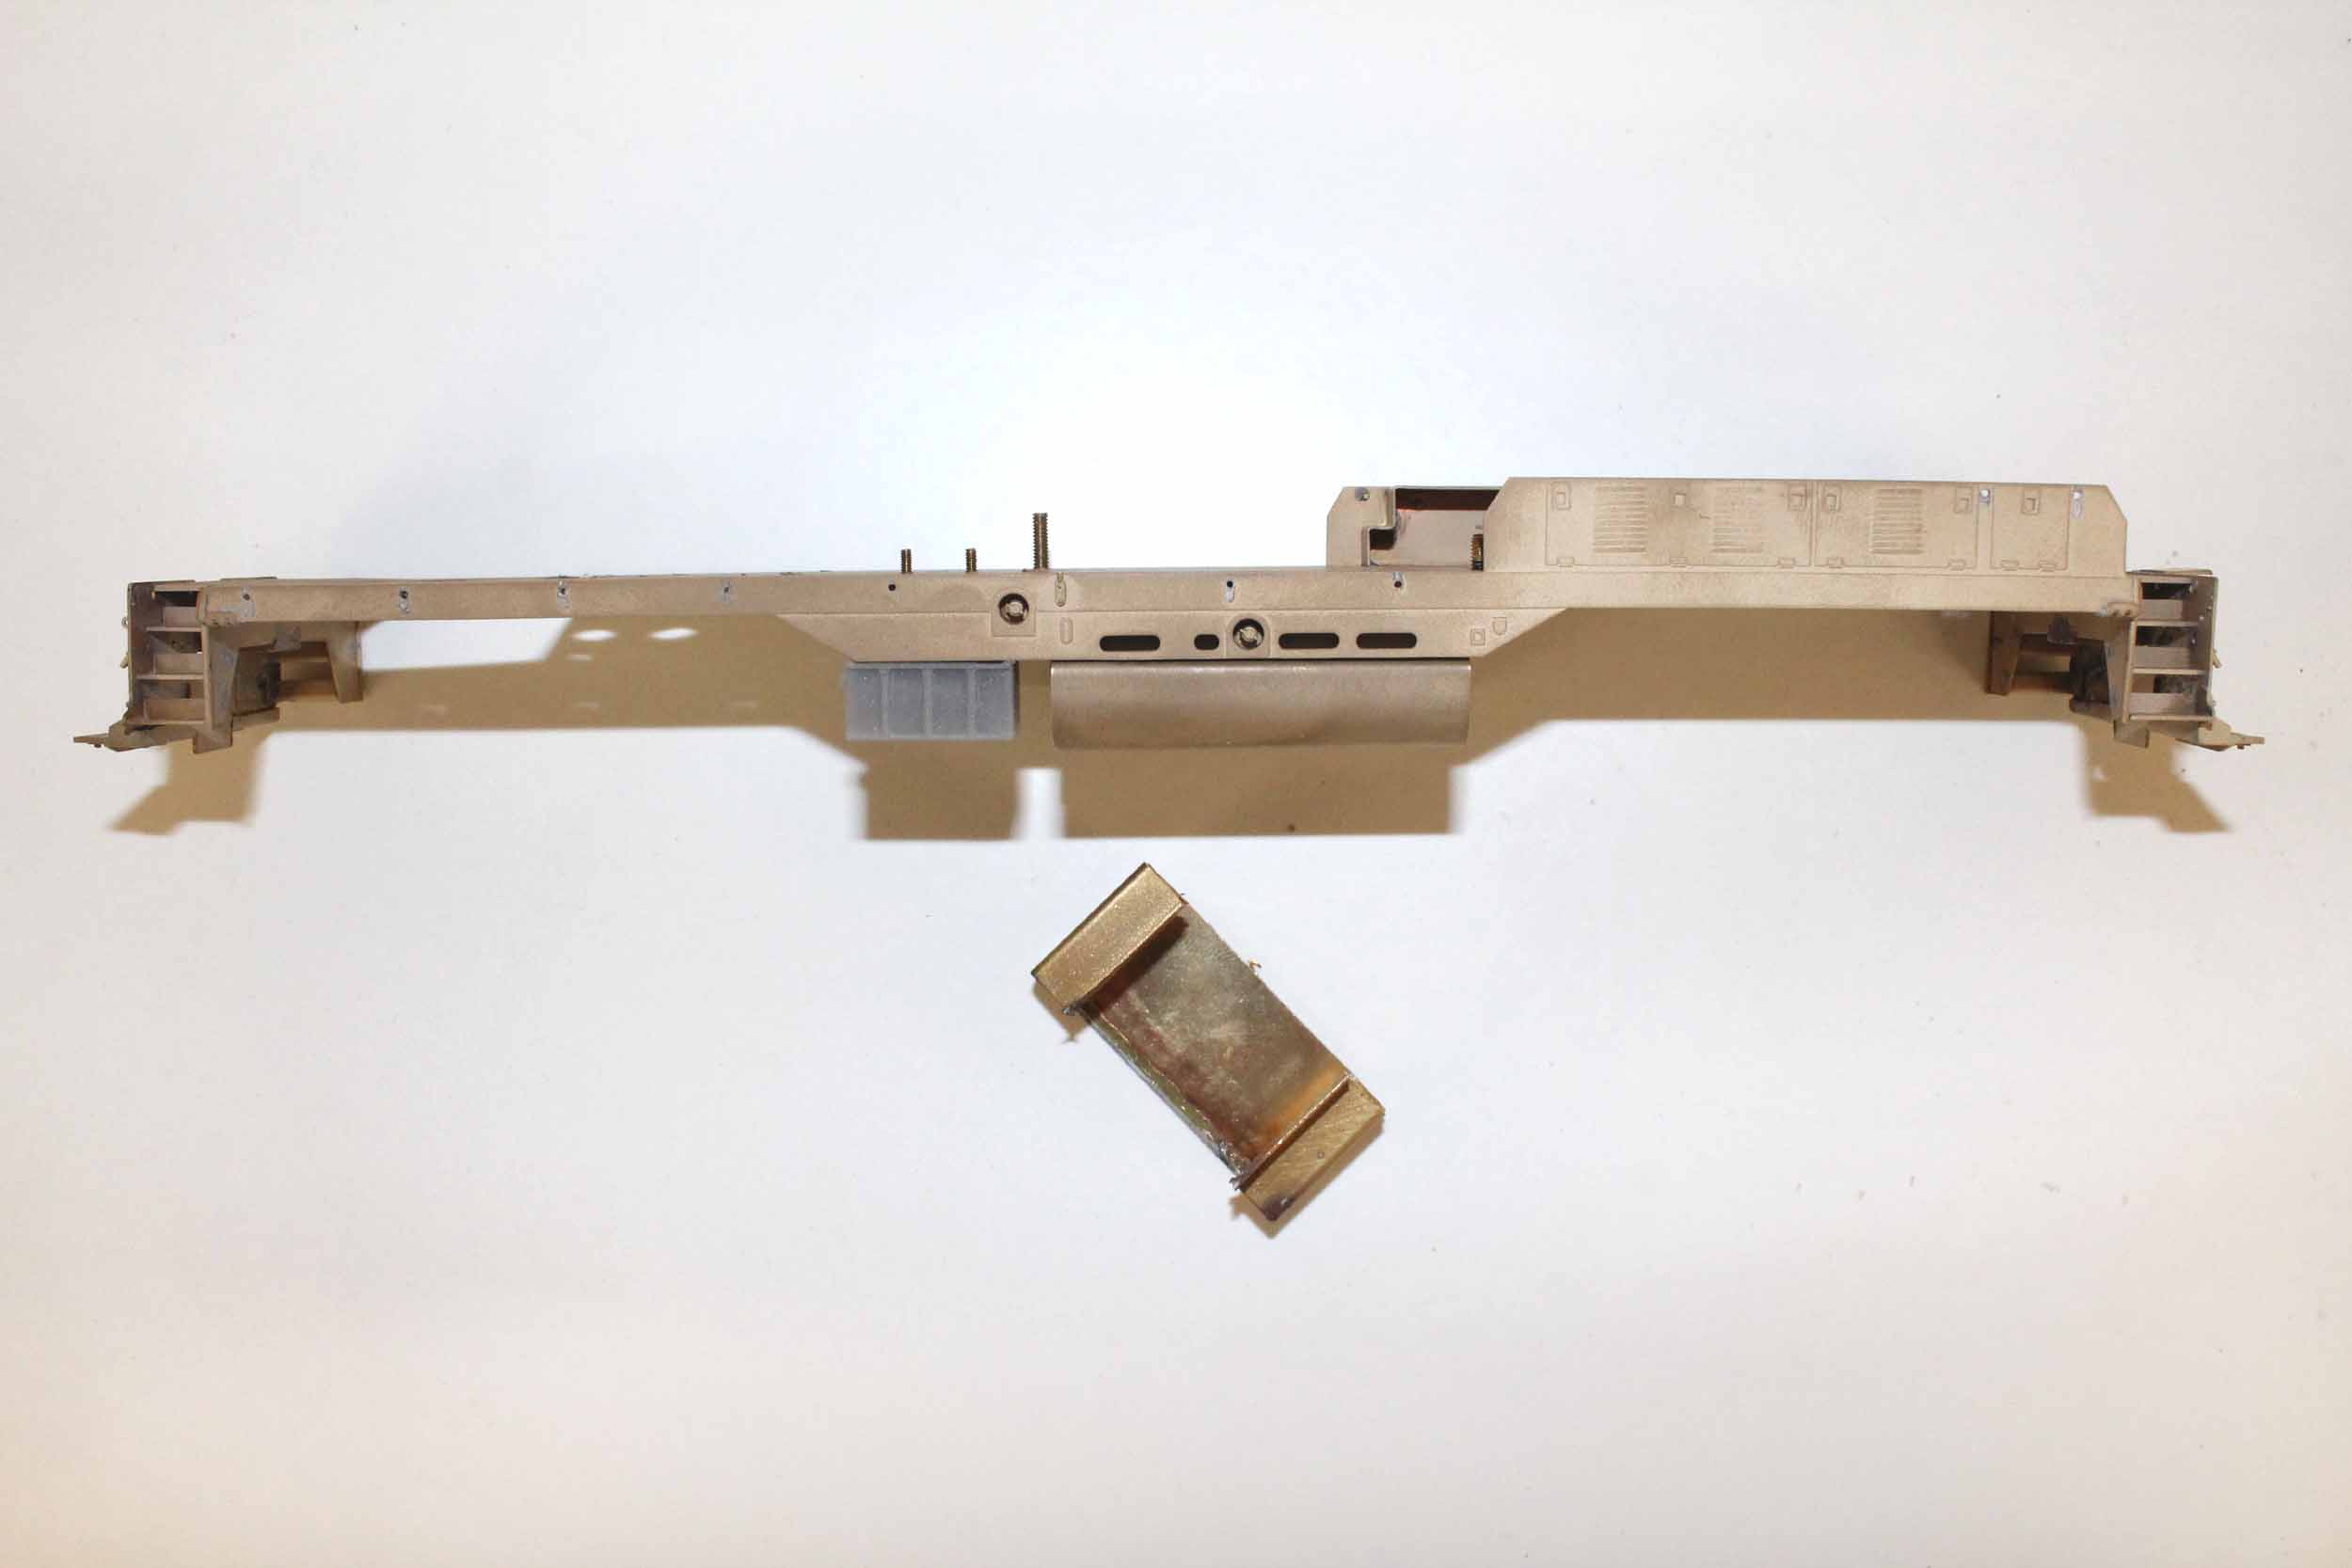
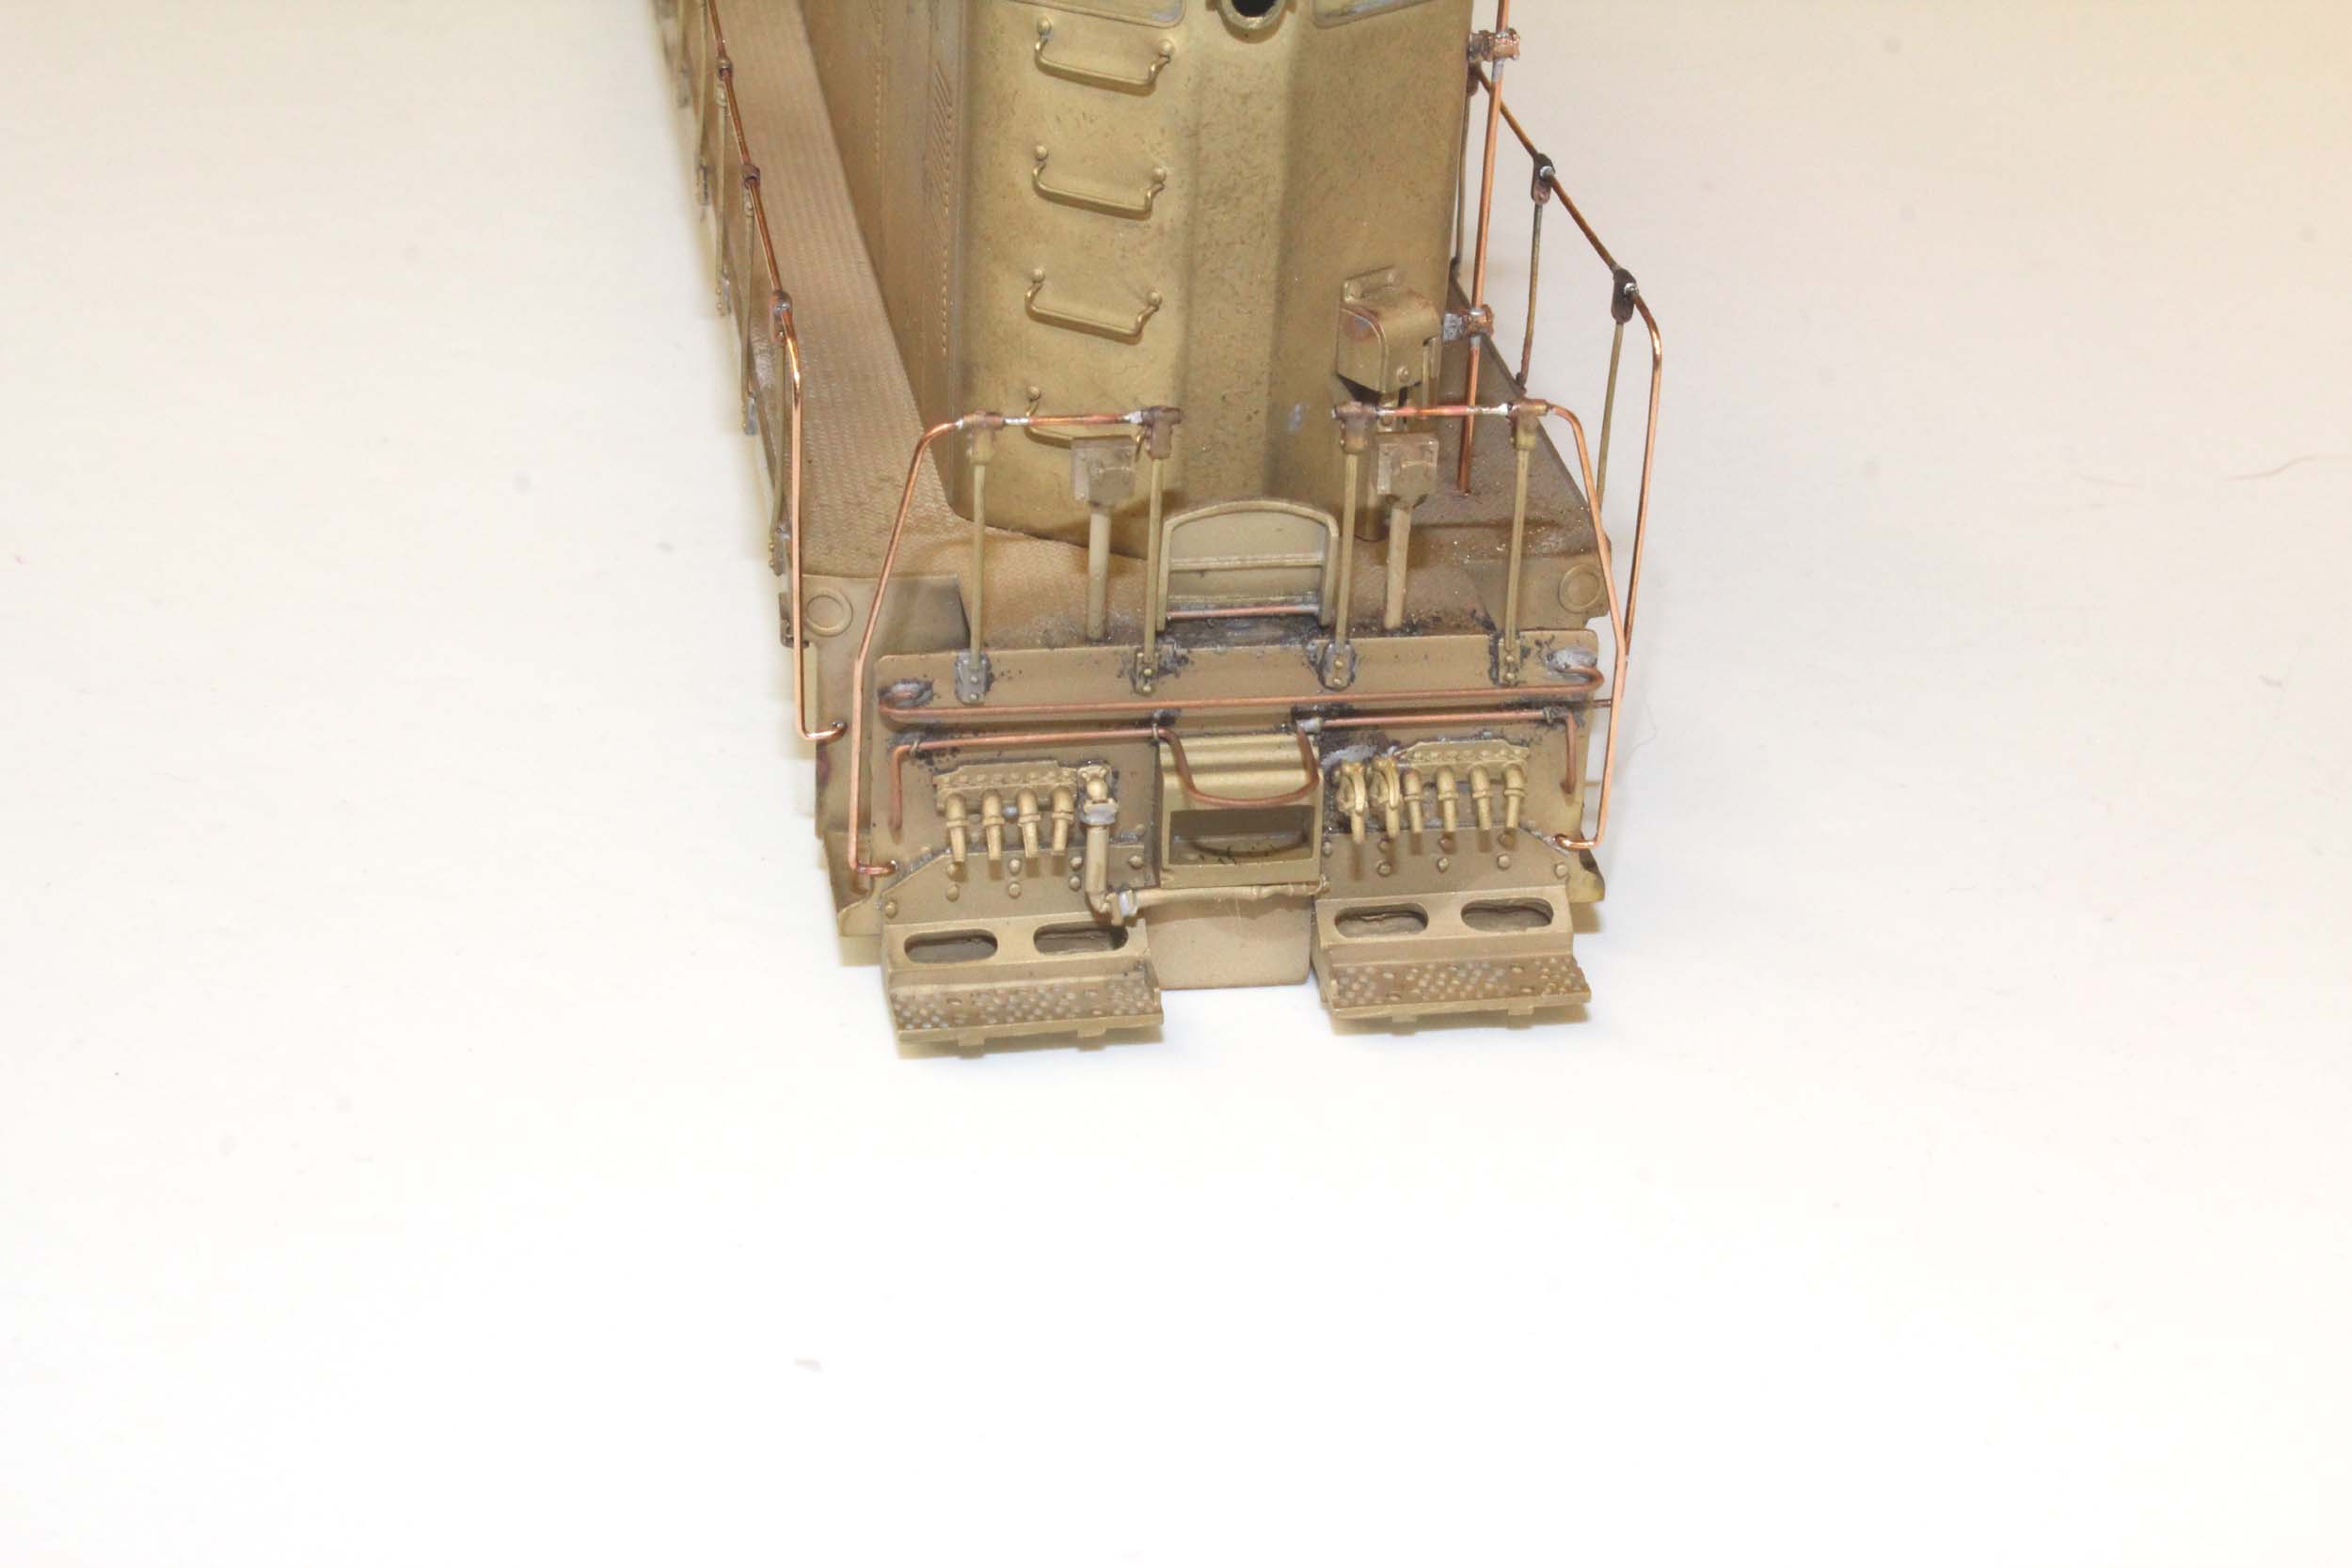
Fuel Tank and Train Control Box
The
fuel tank was too long so I shortened it almost 1 inch. For the first time I am
using 3D printed parts without getting them cast in brass on a brass model.
This is the train control box.
1-3-16
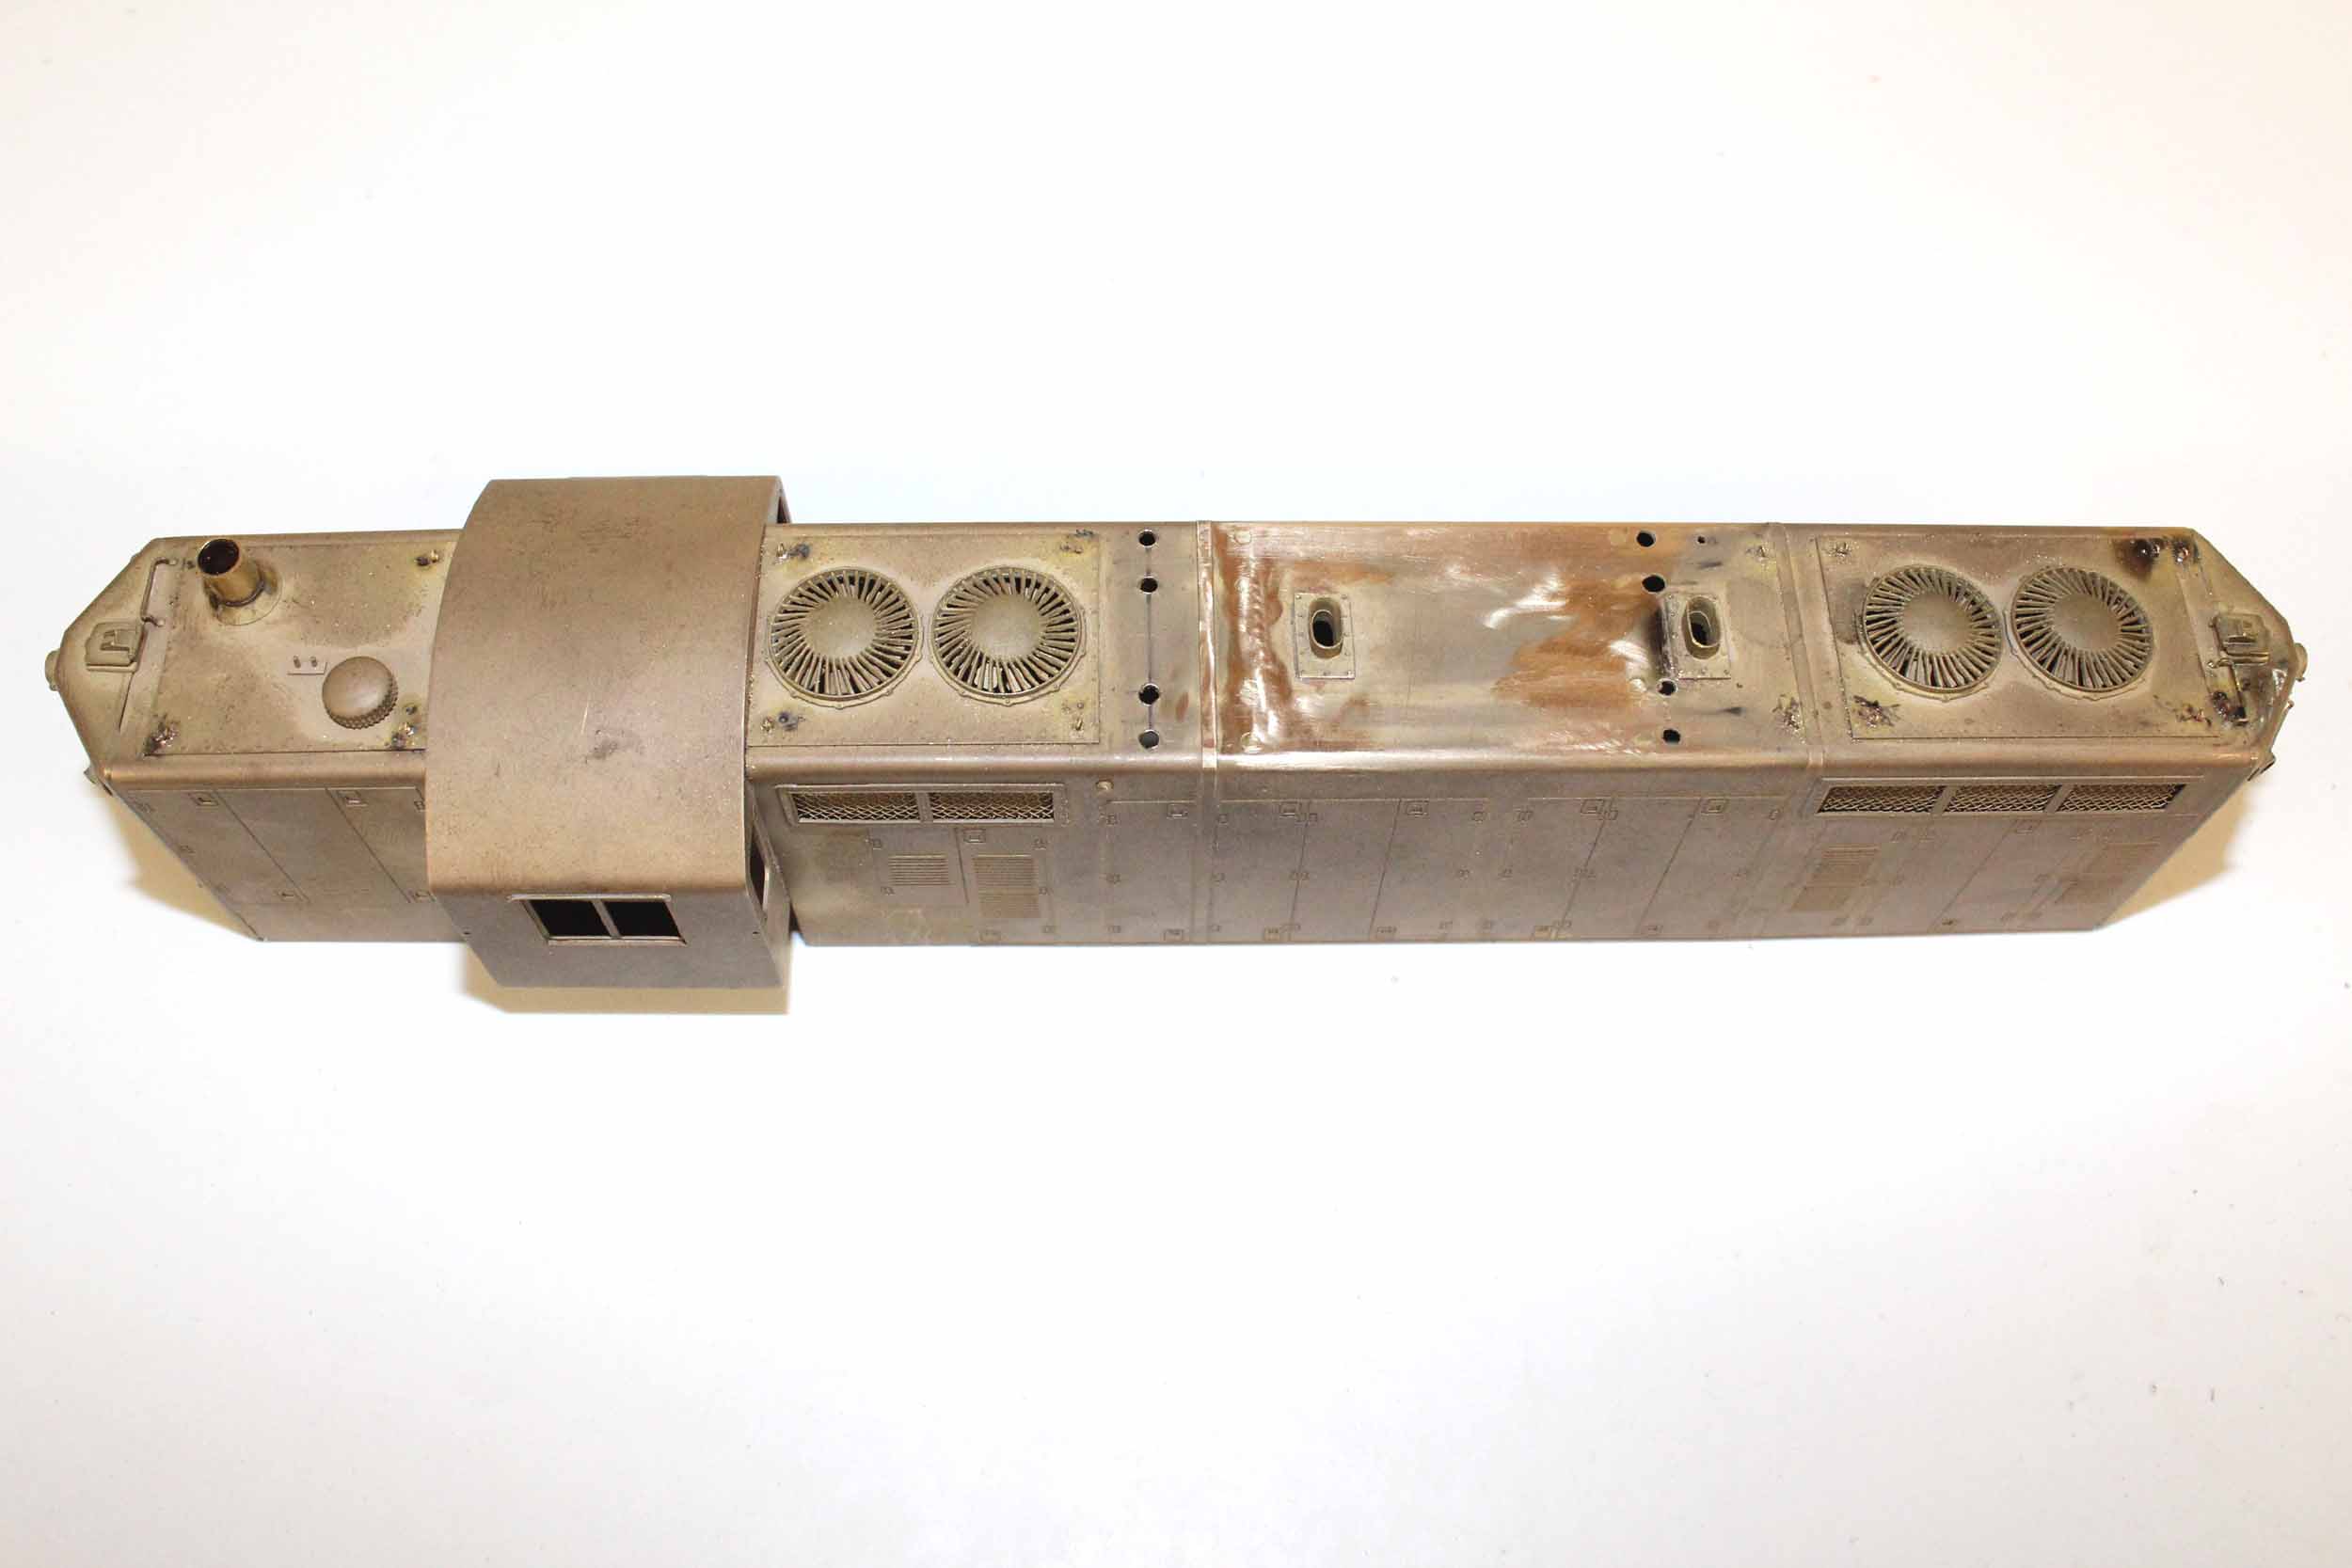
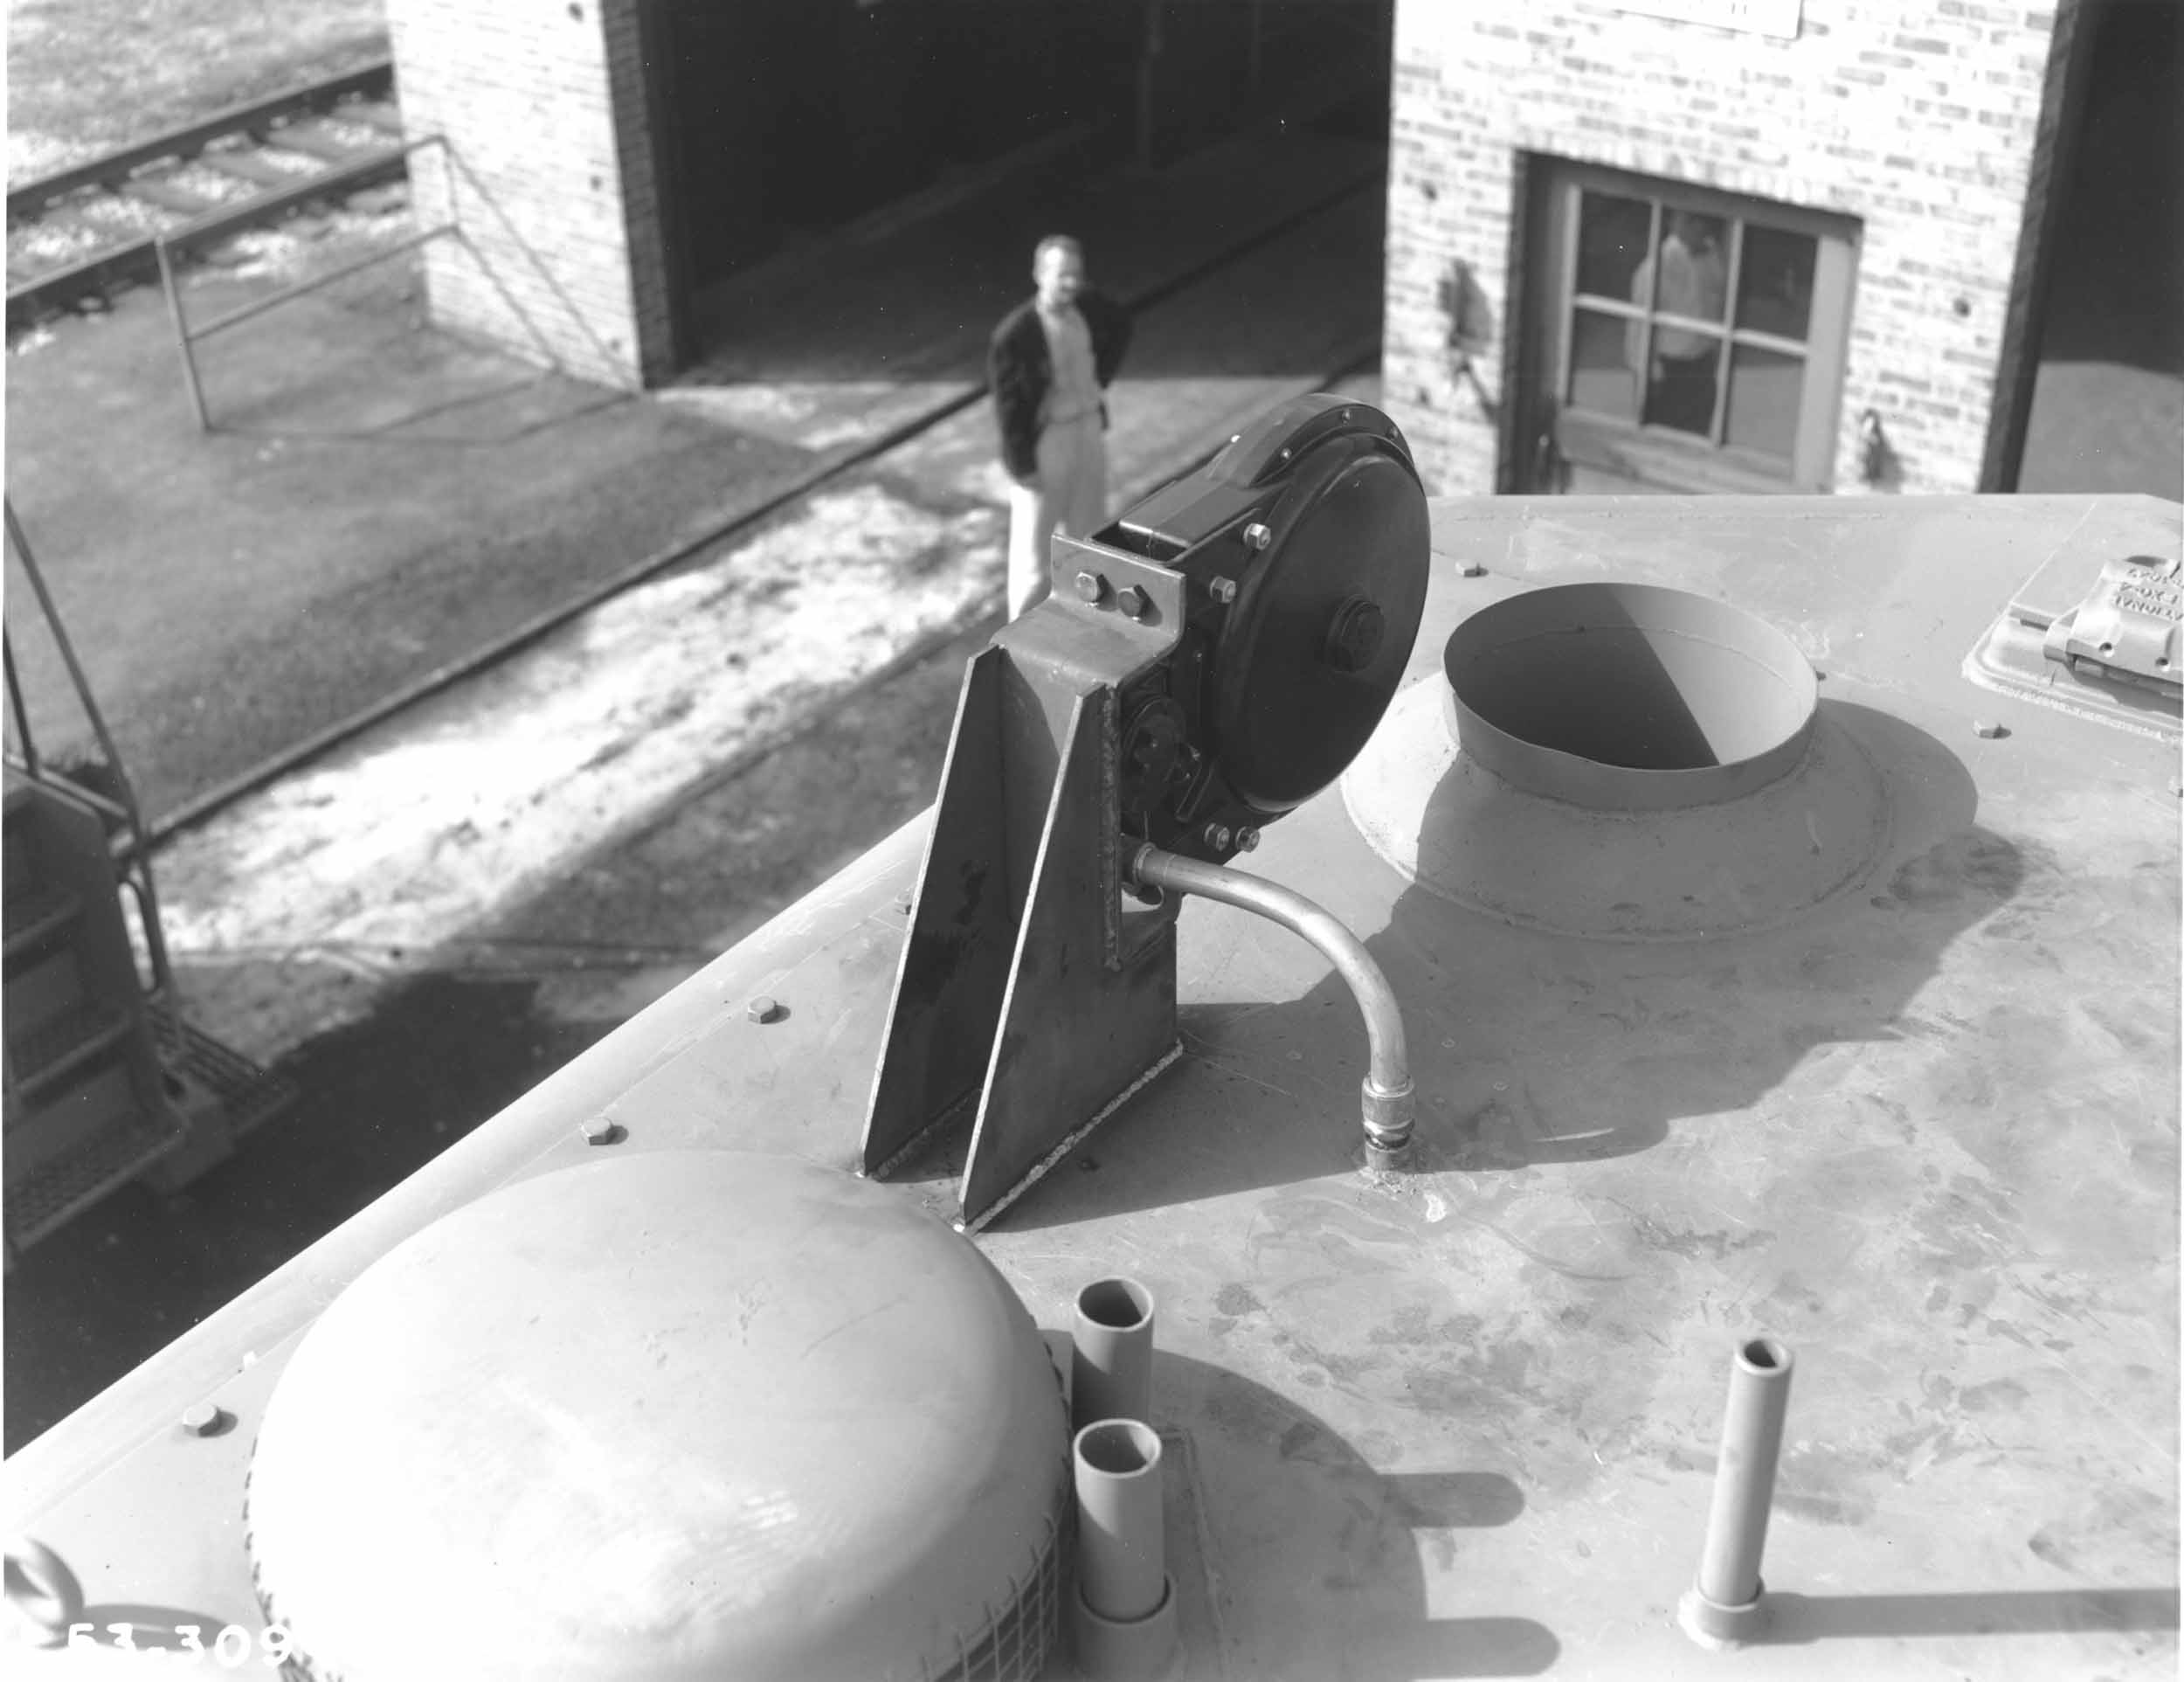
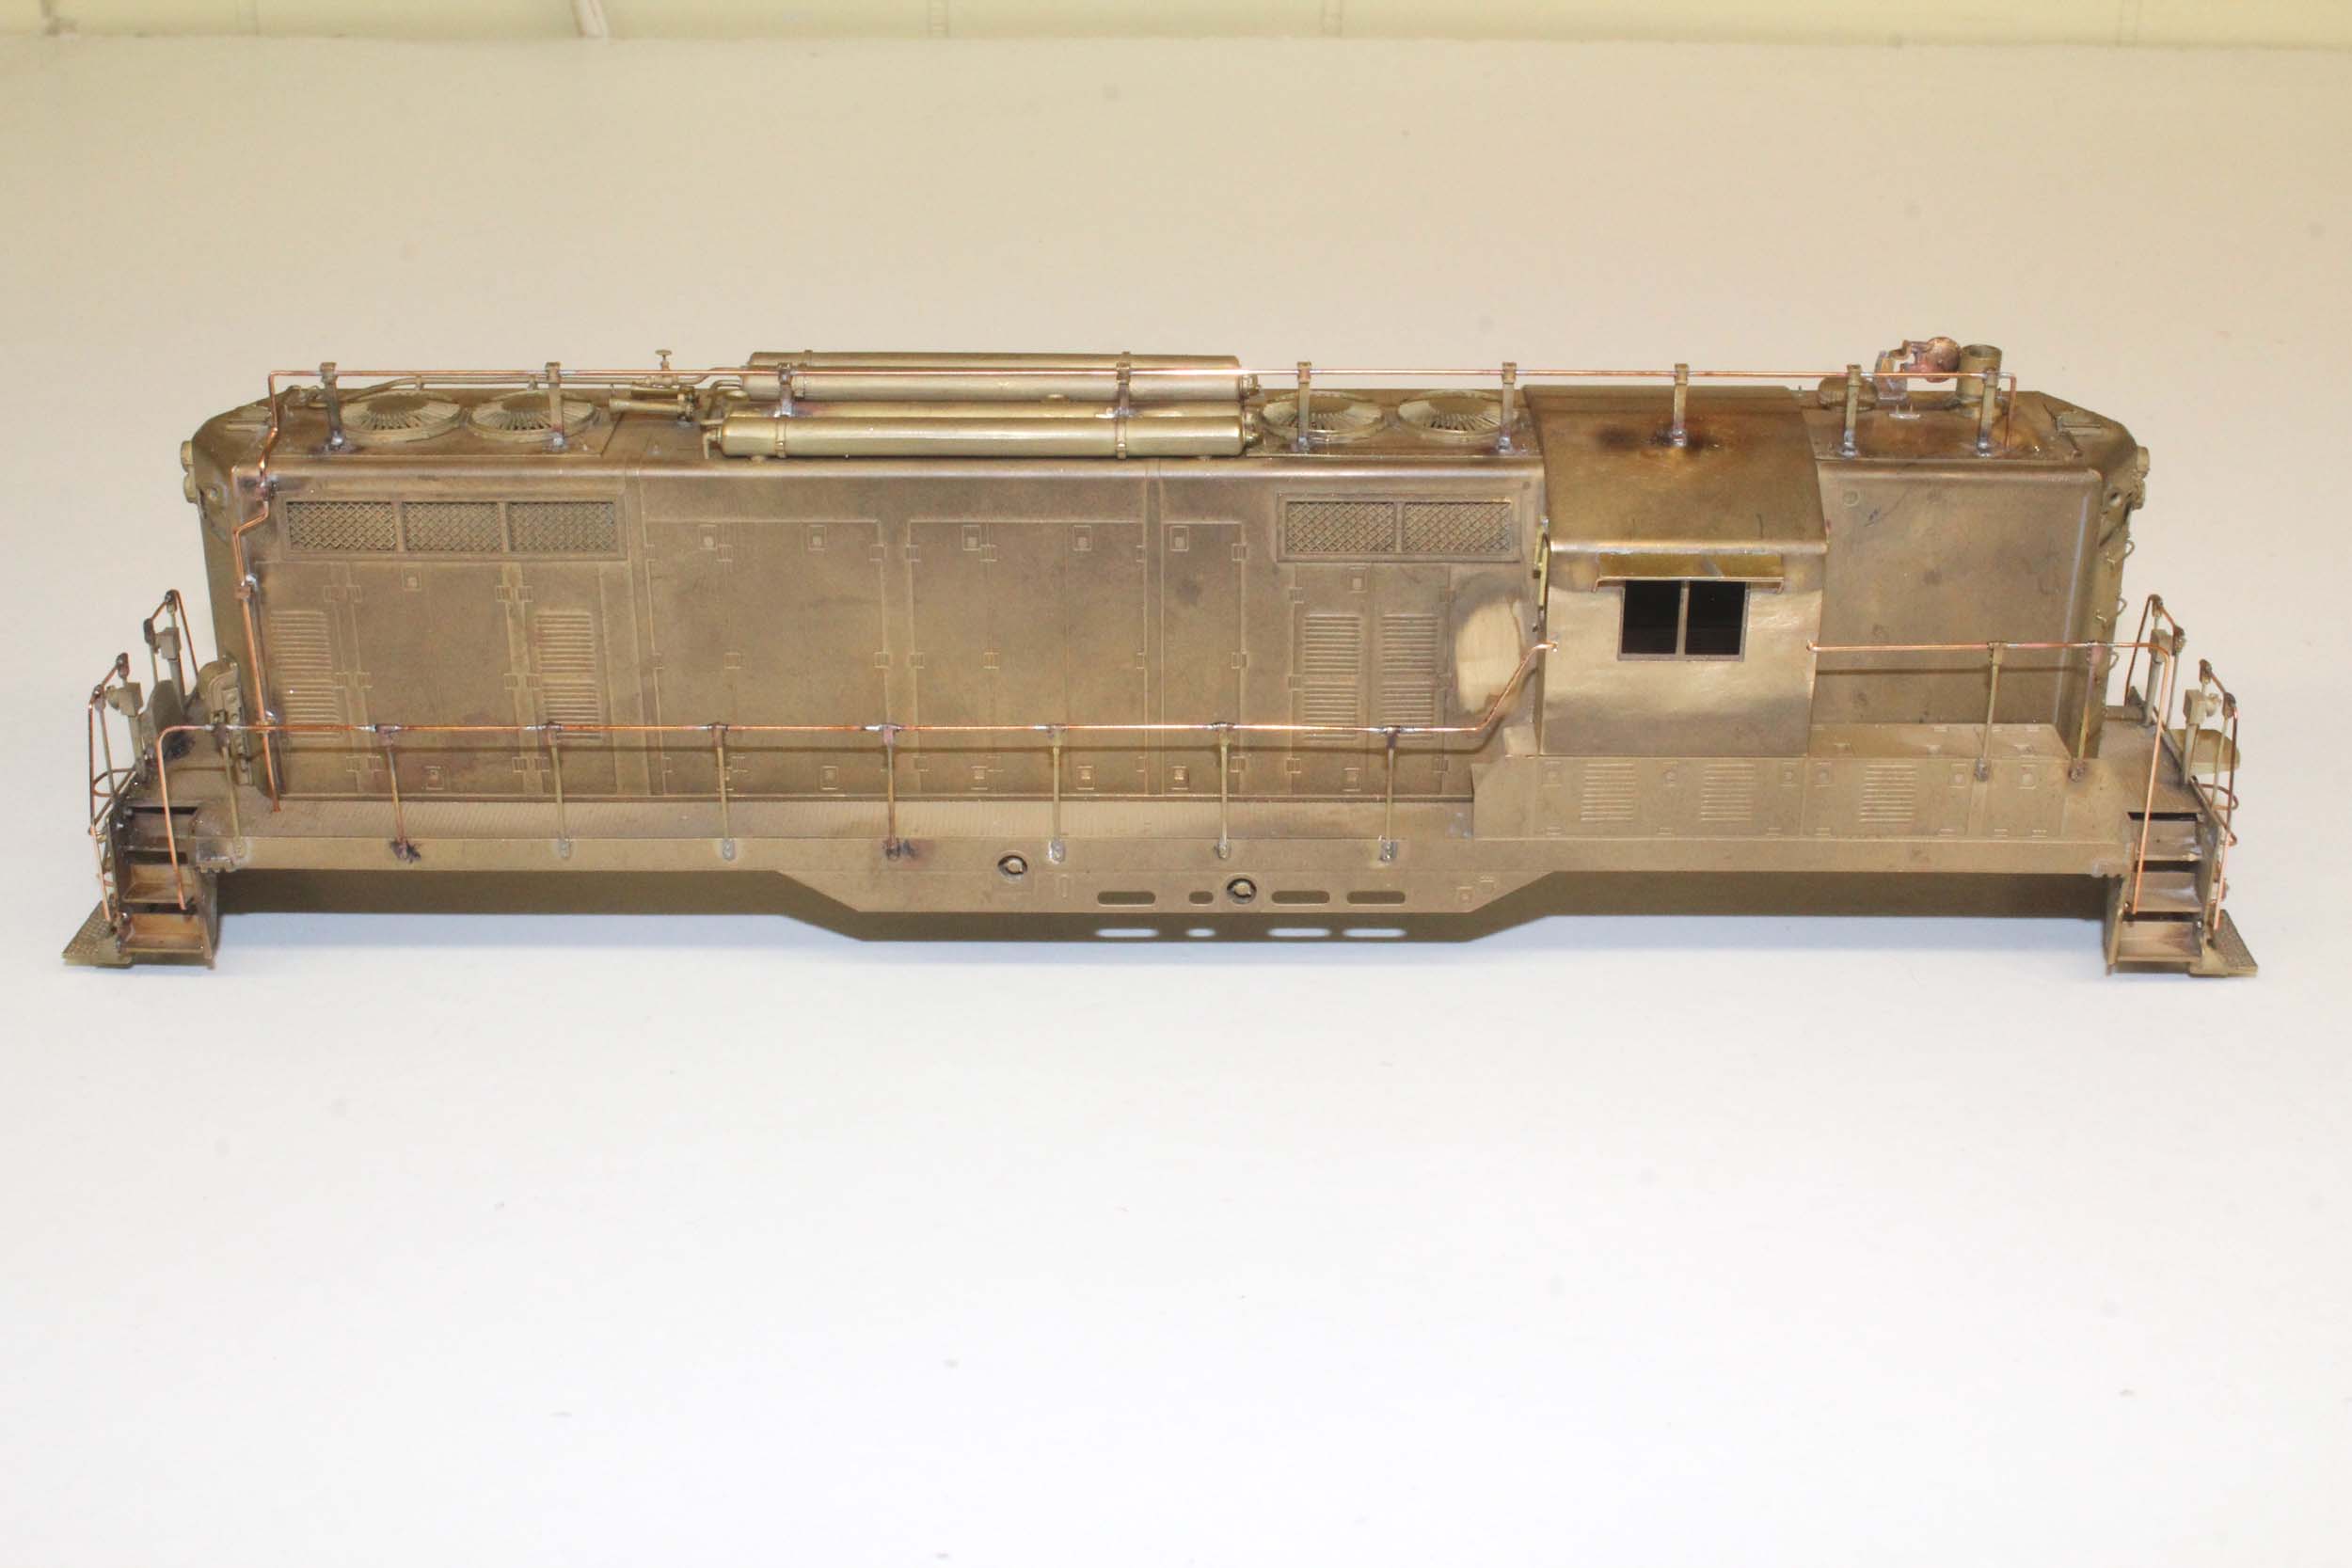
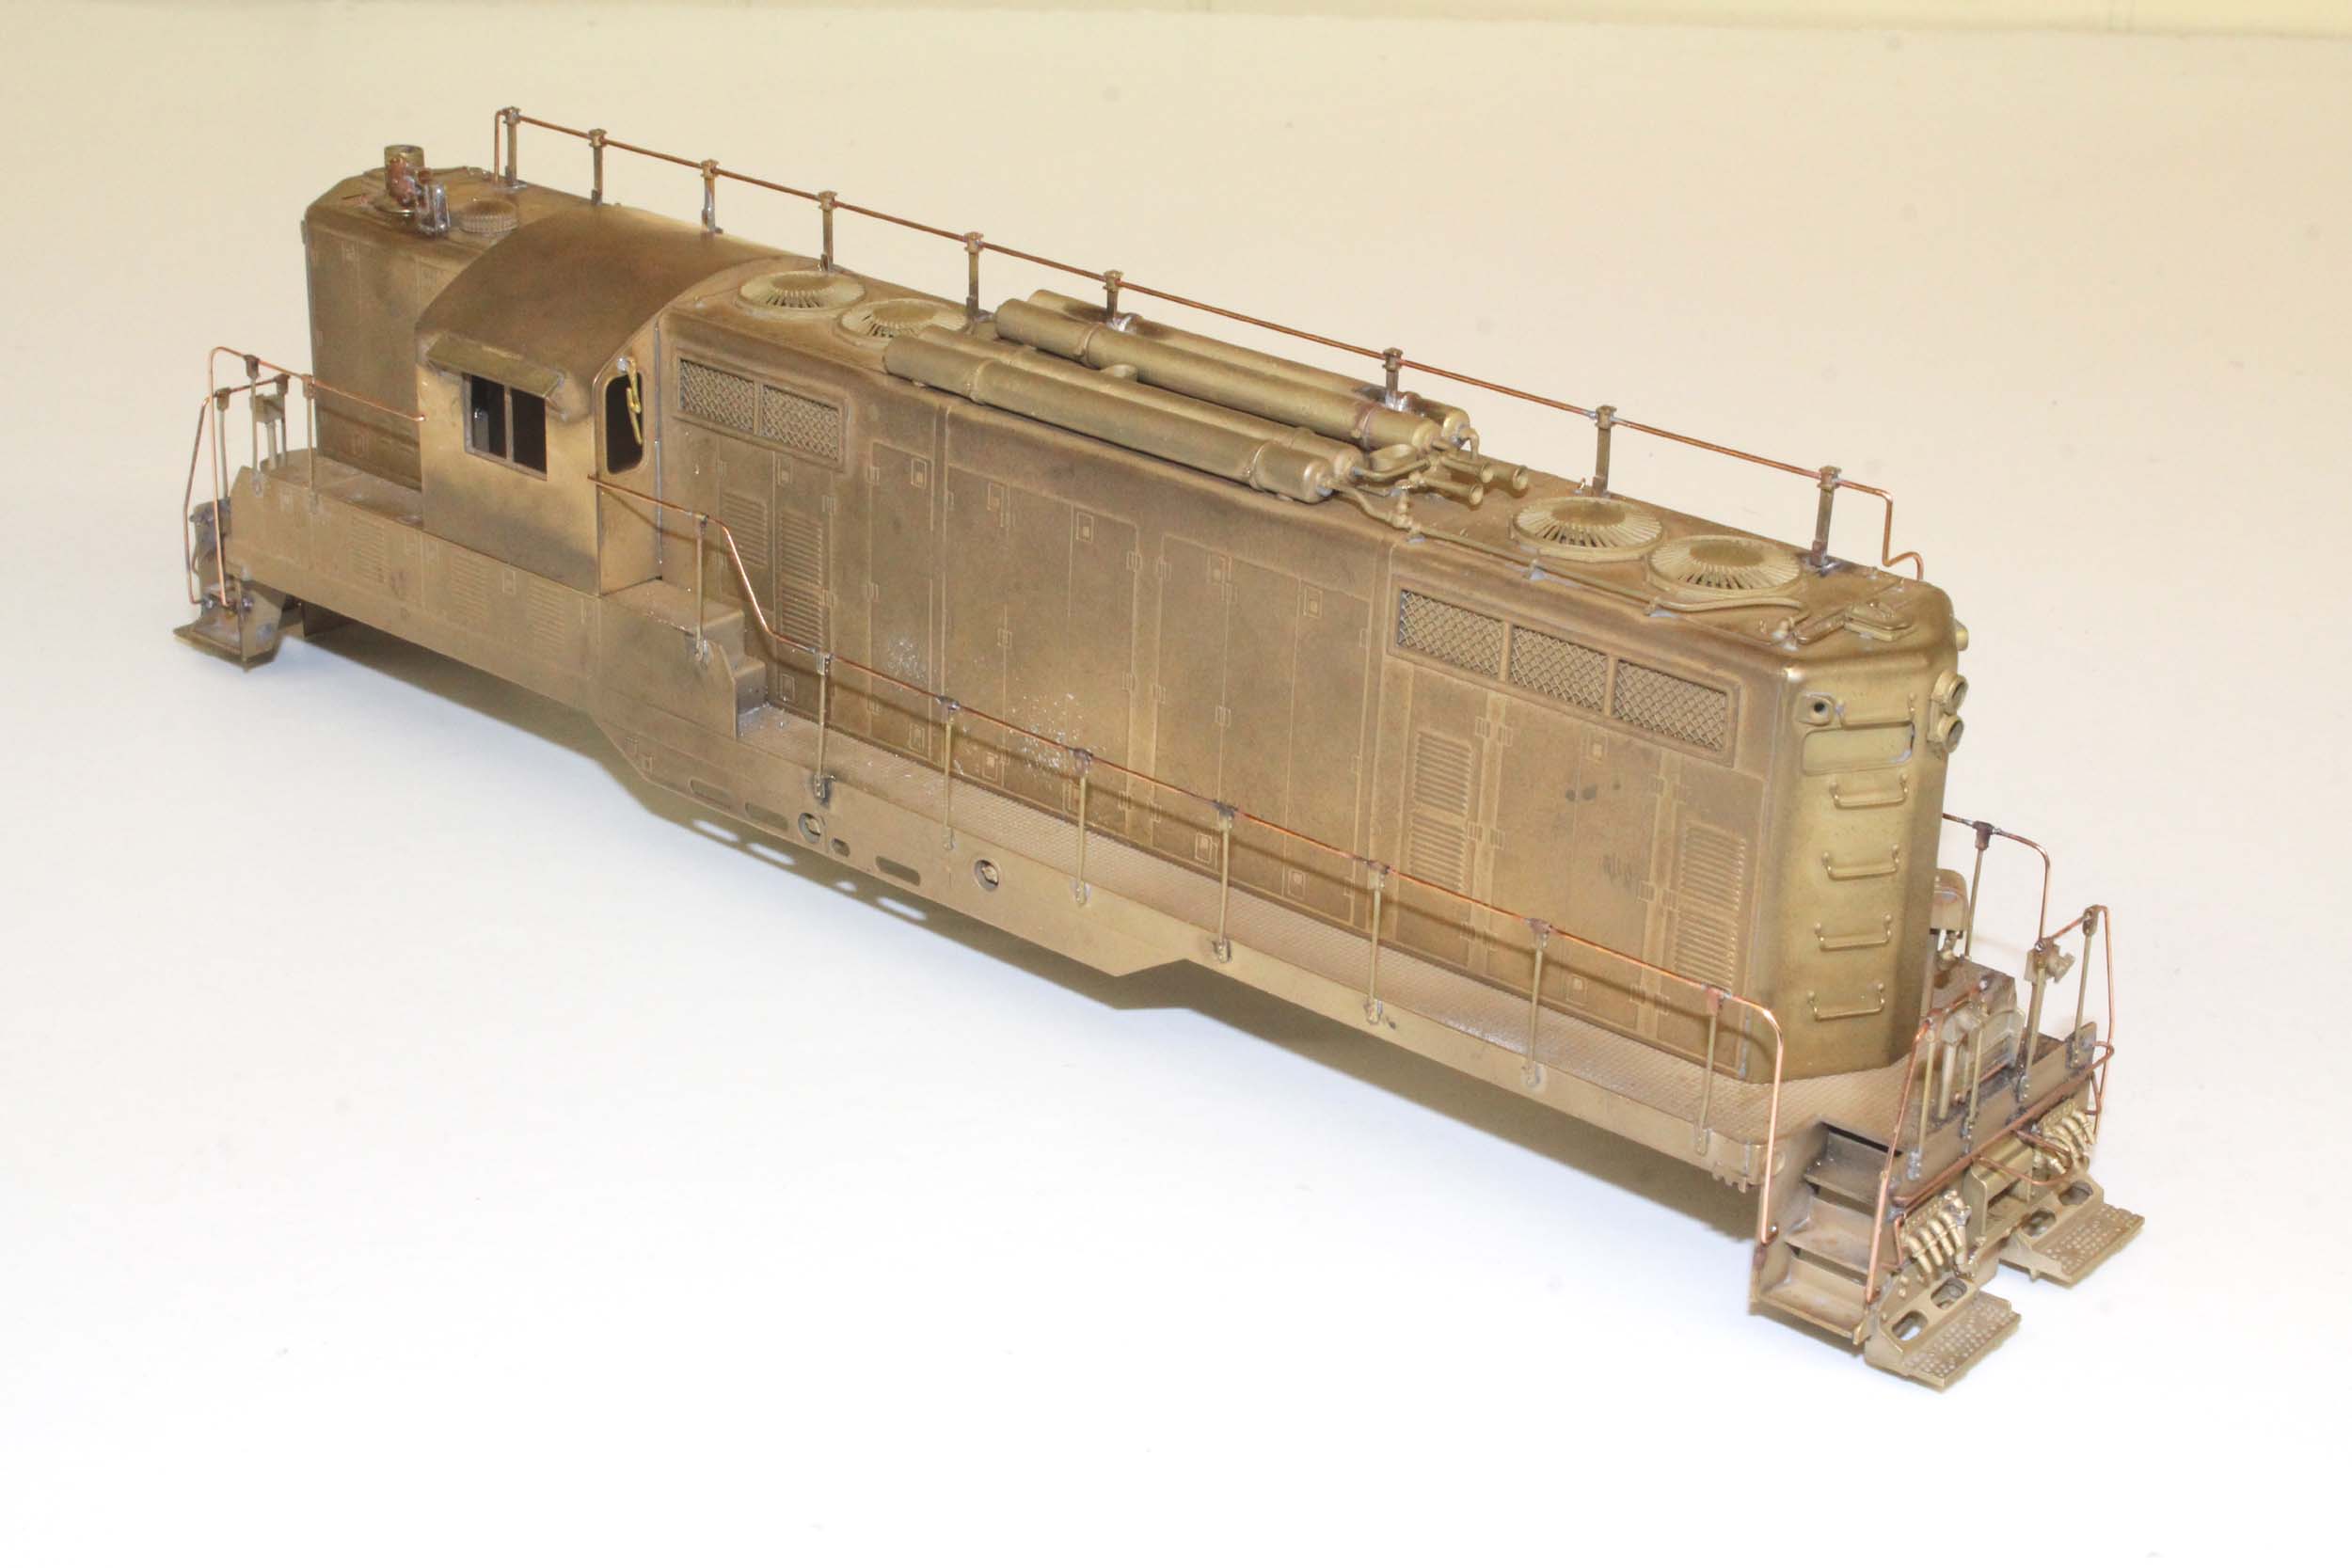
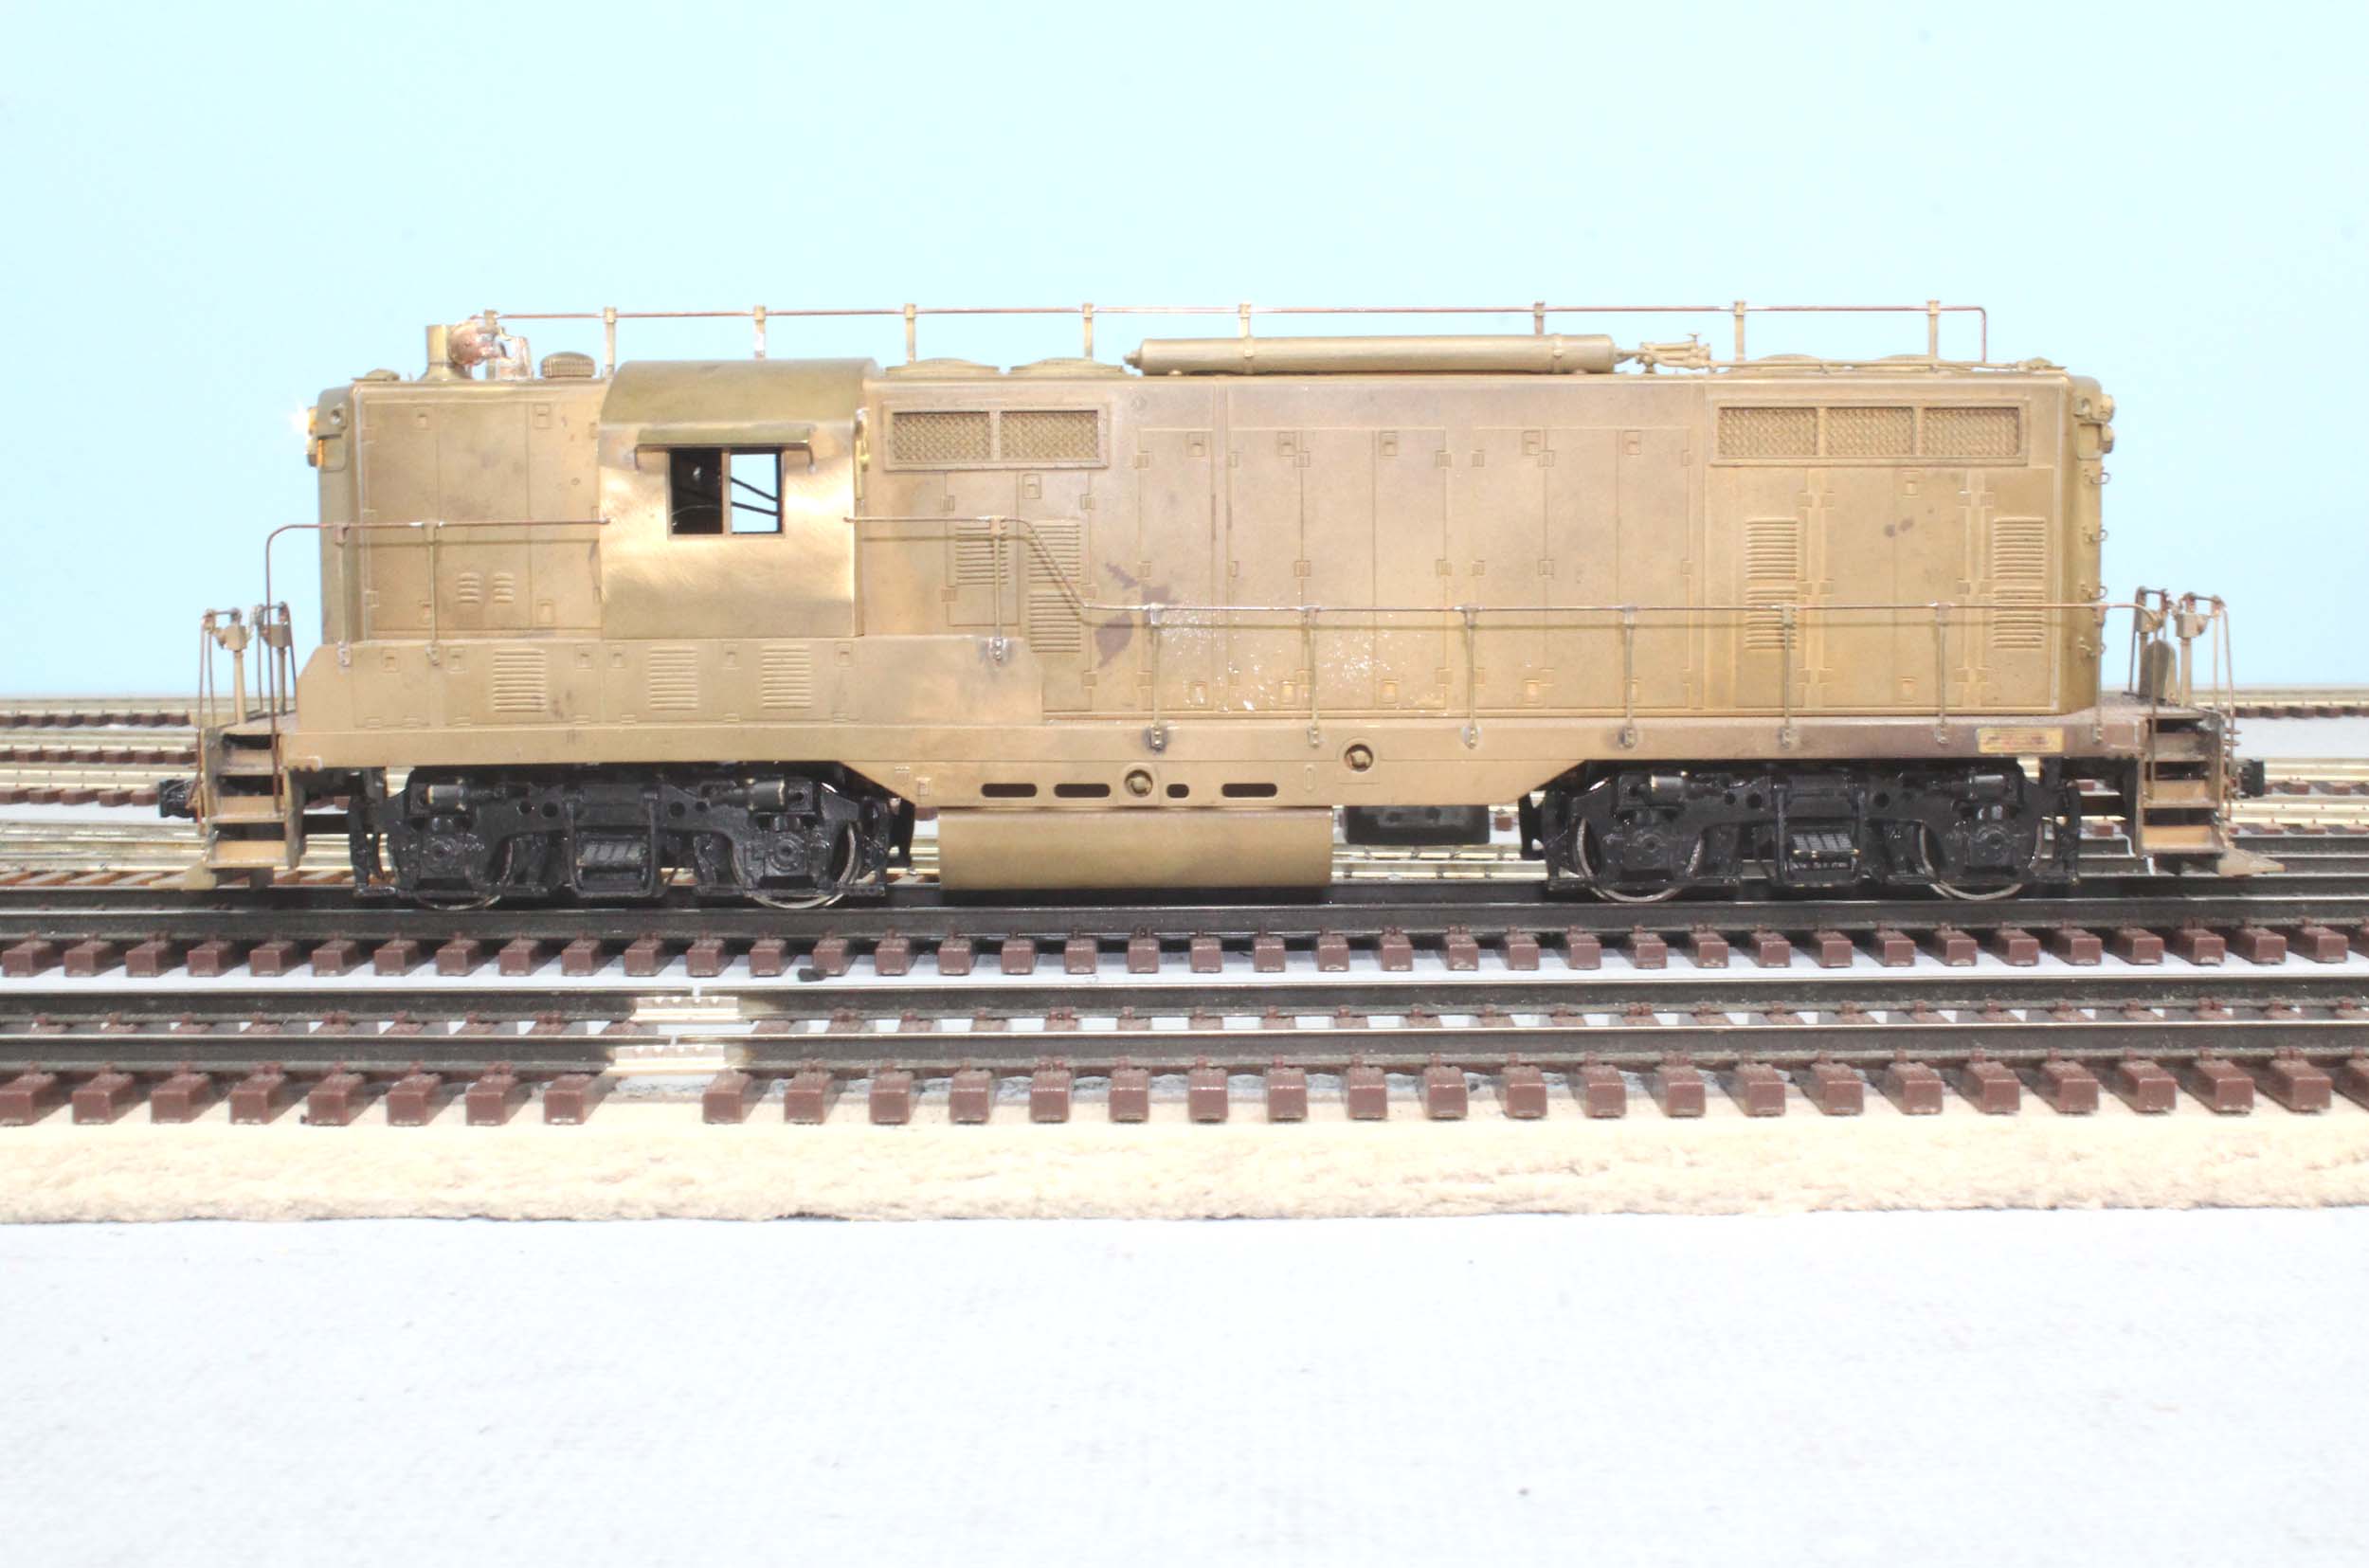
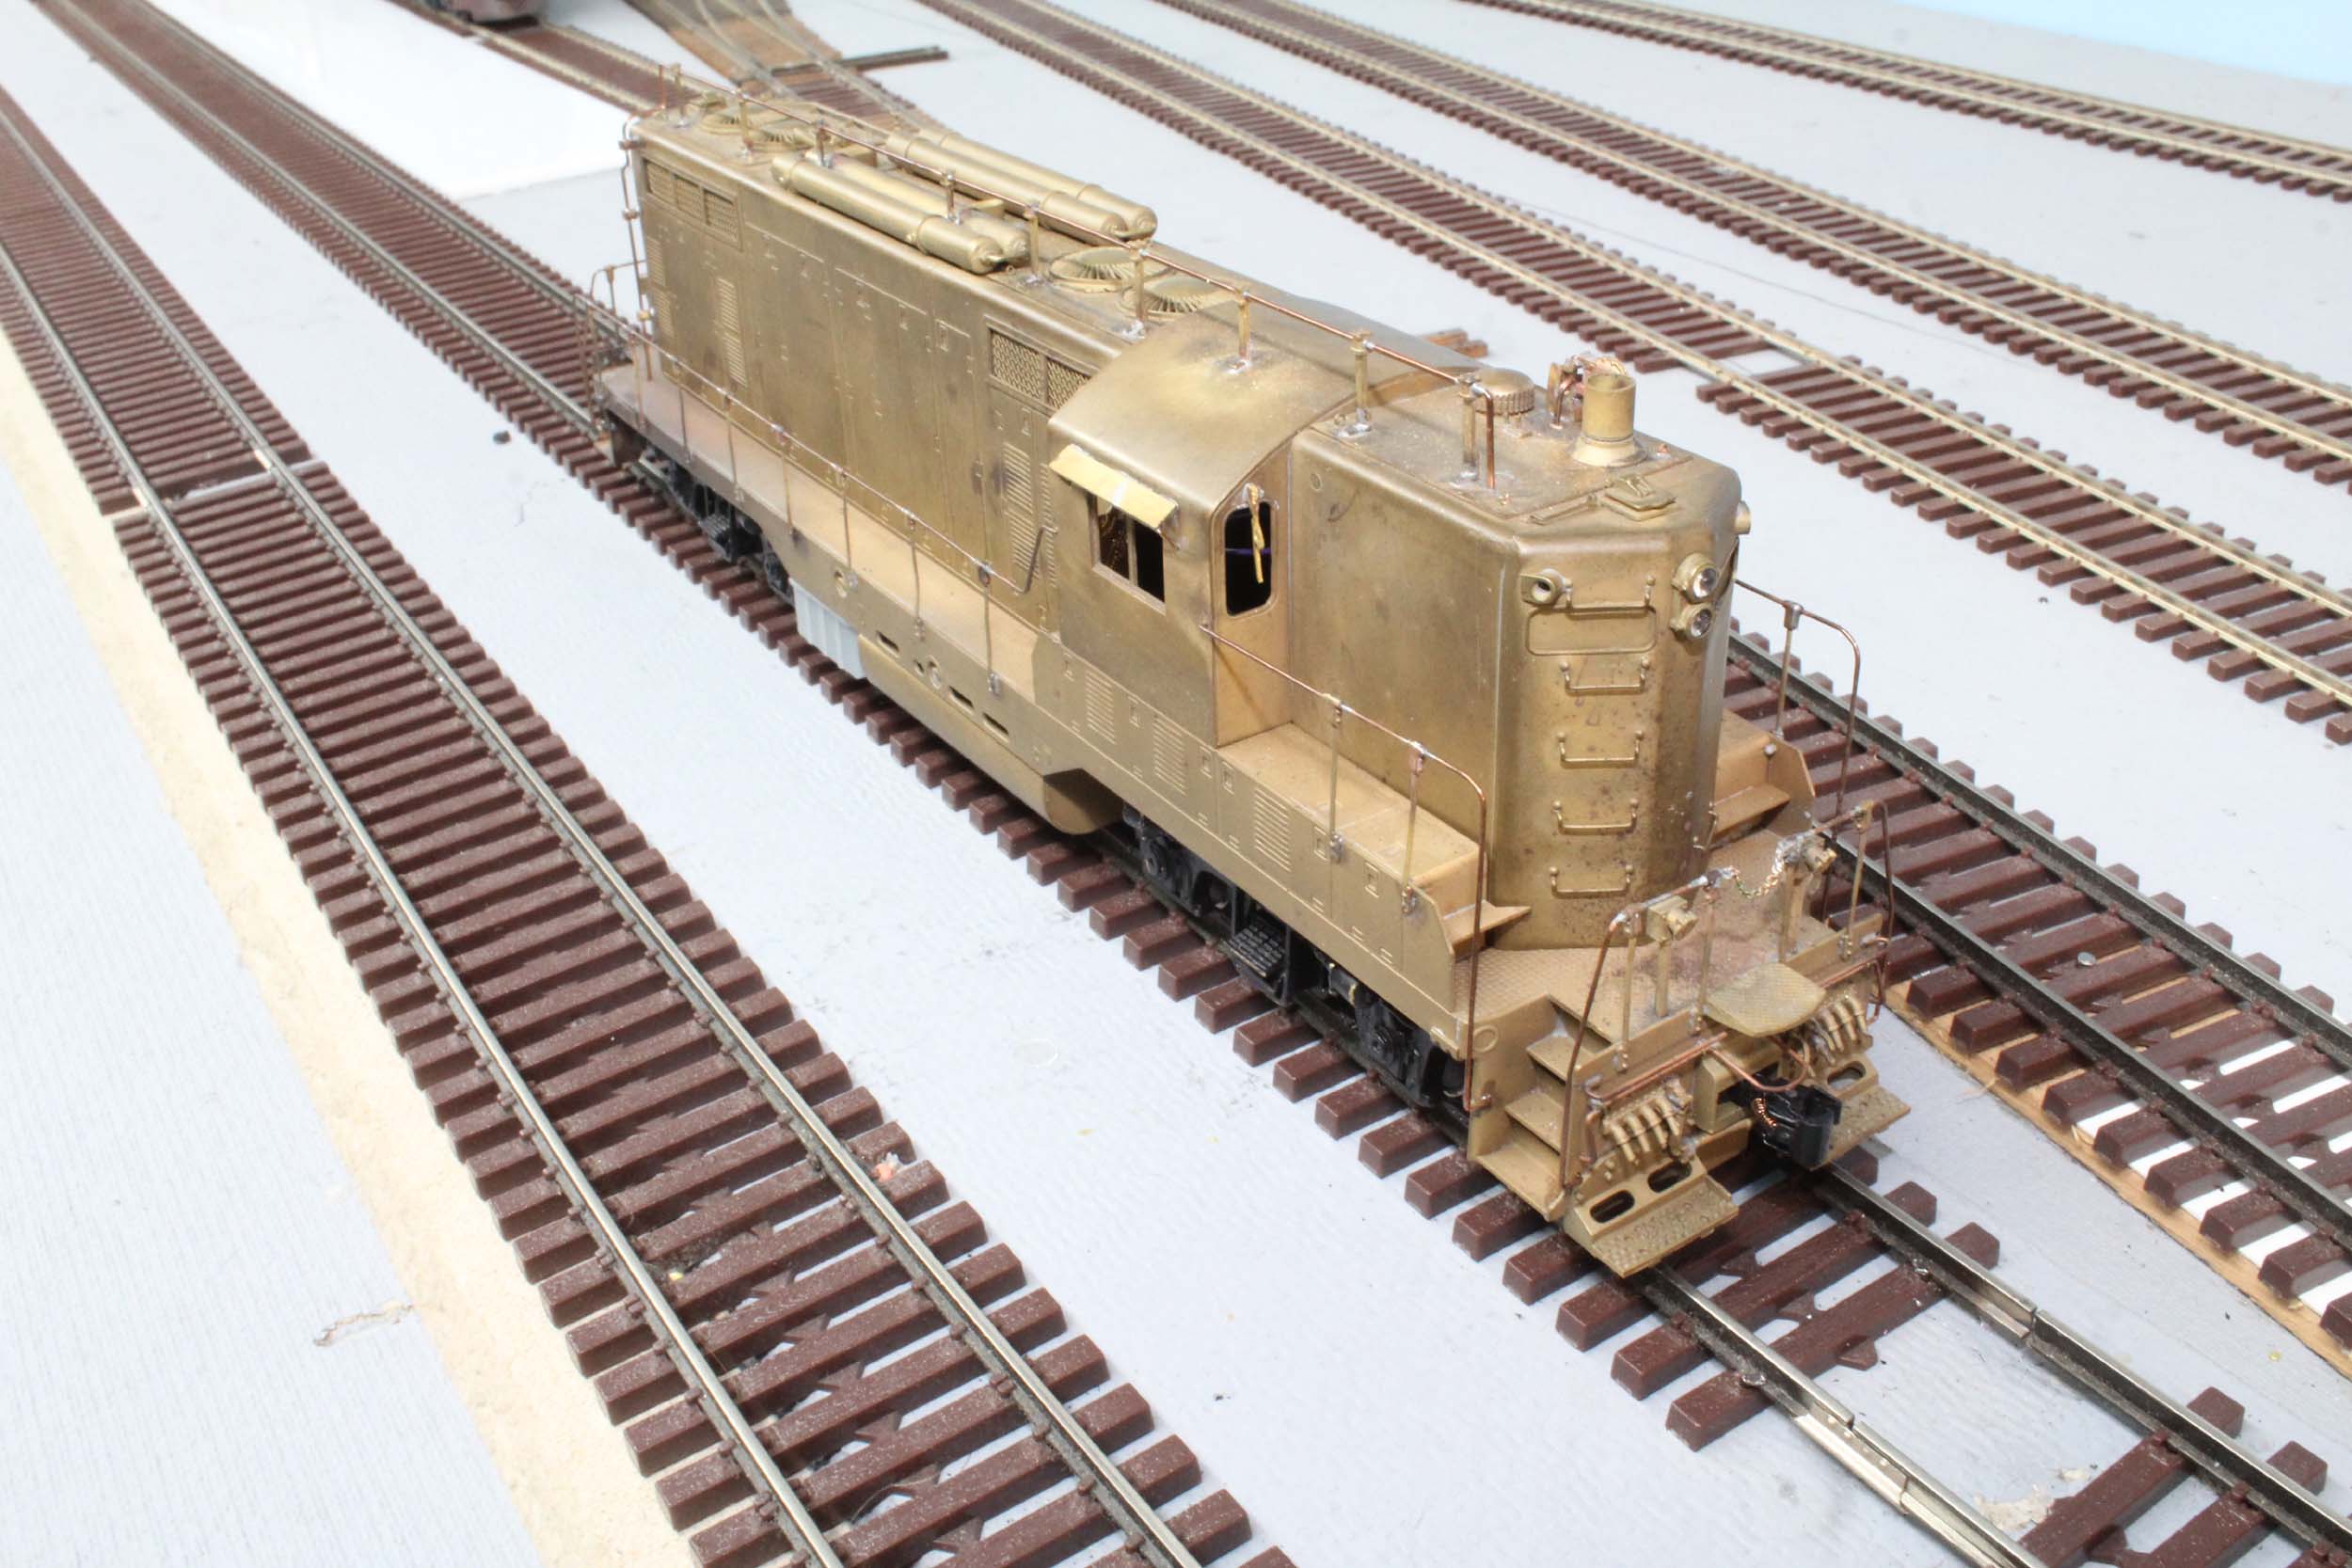
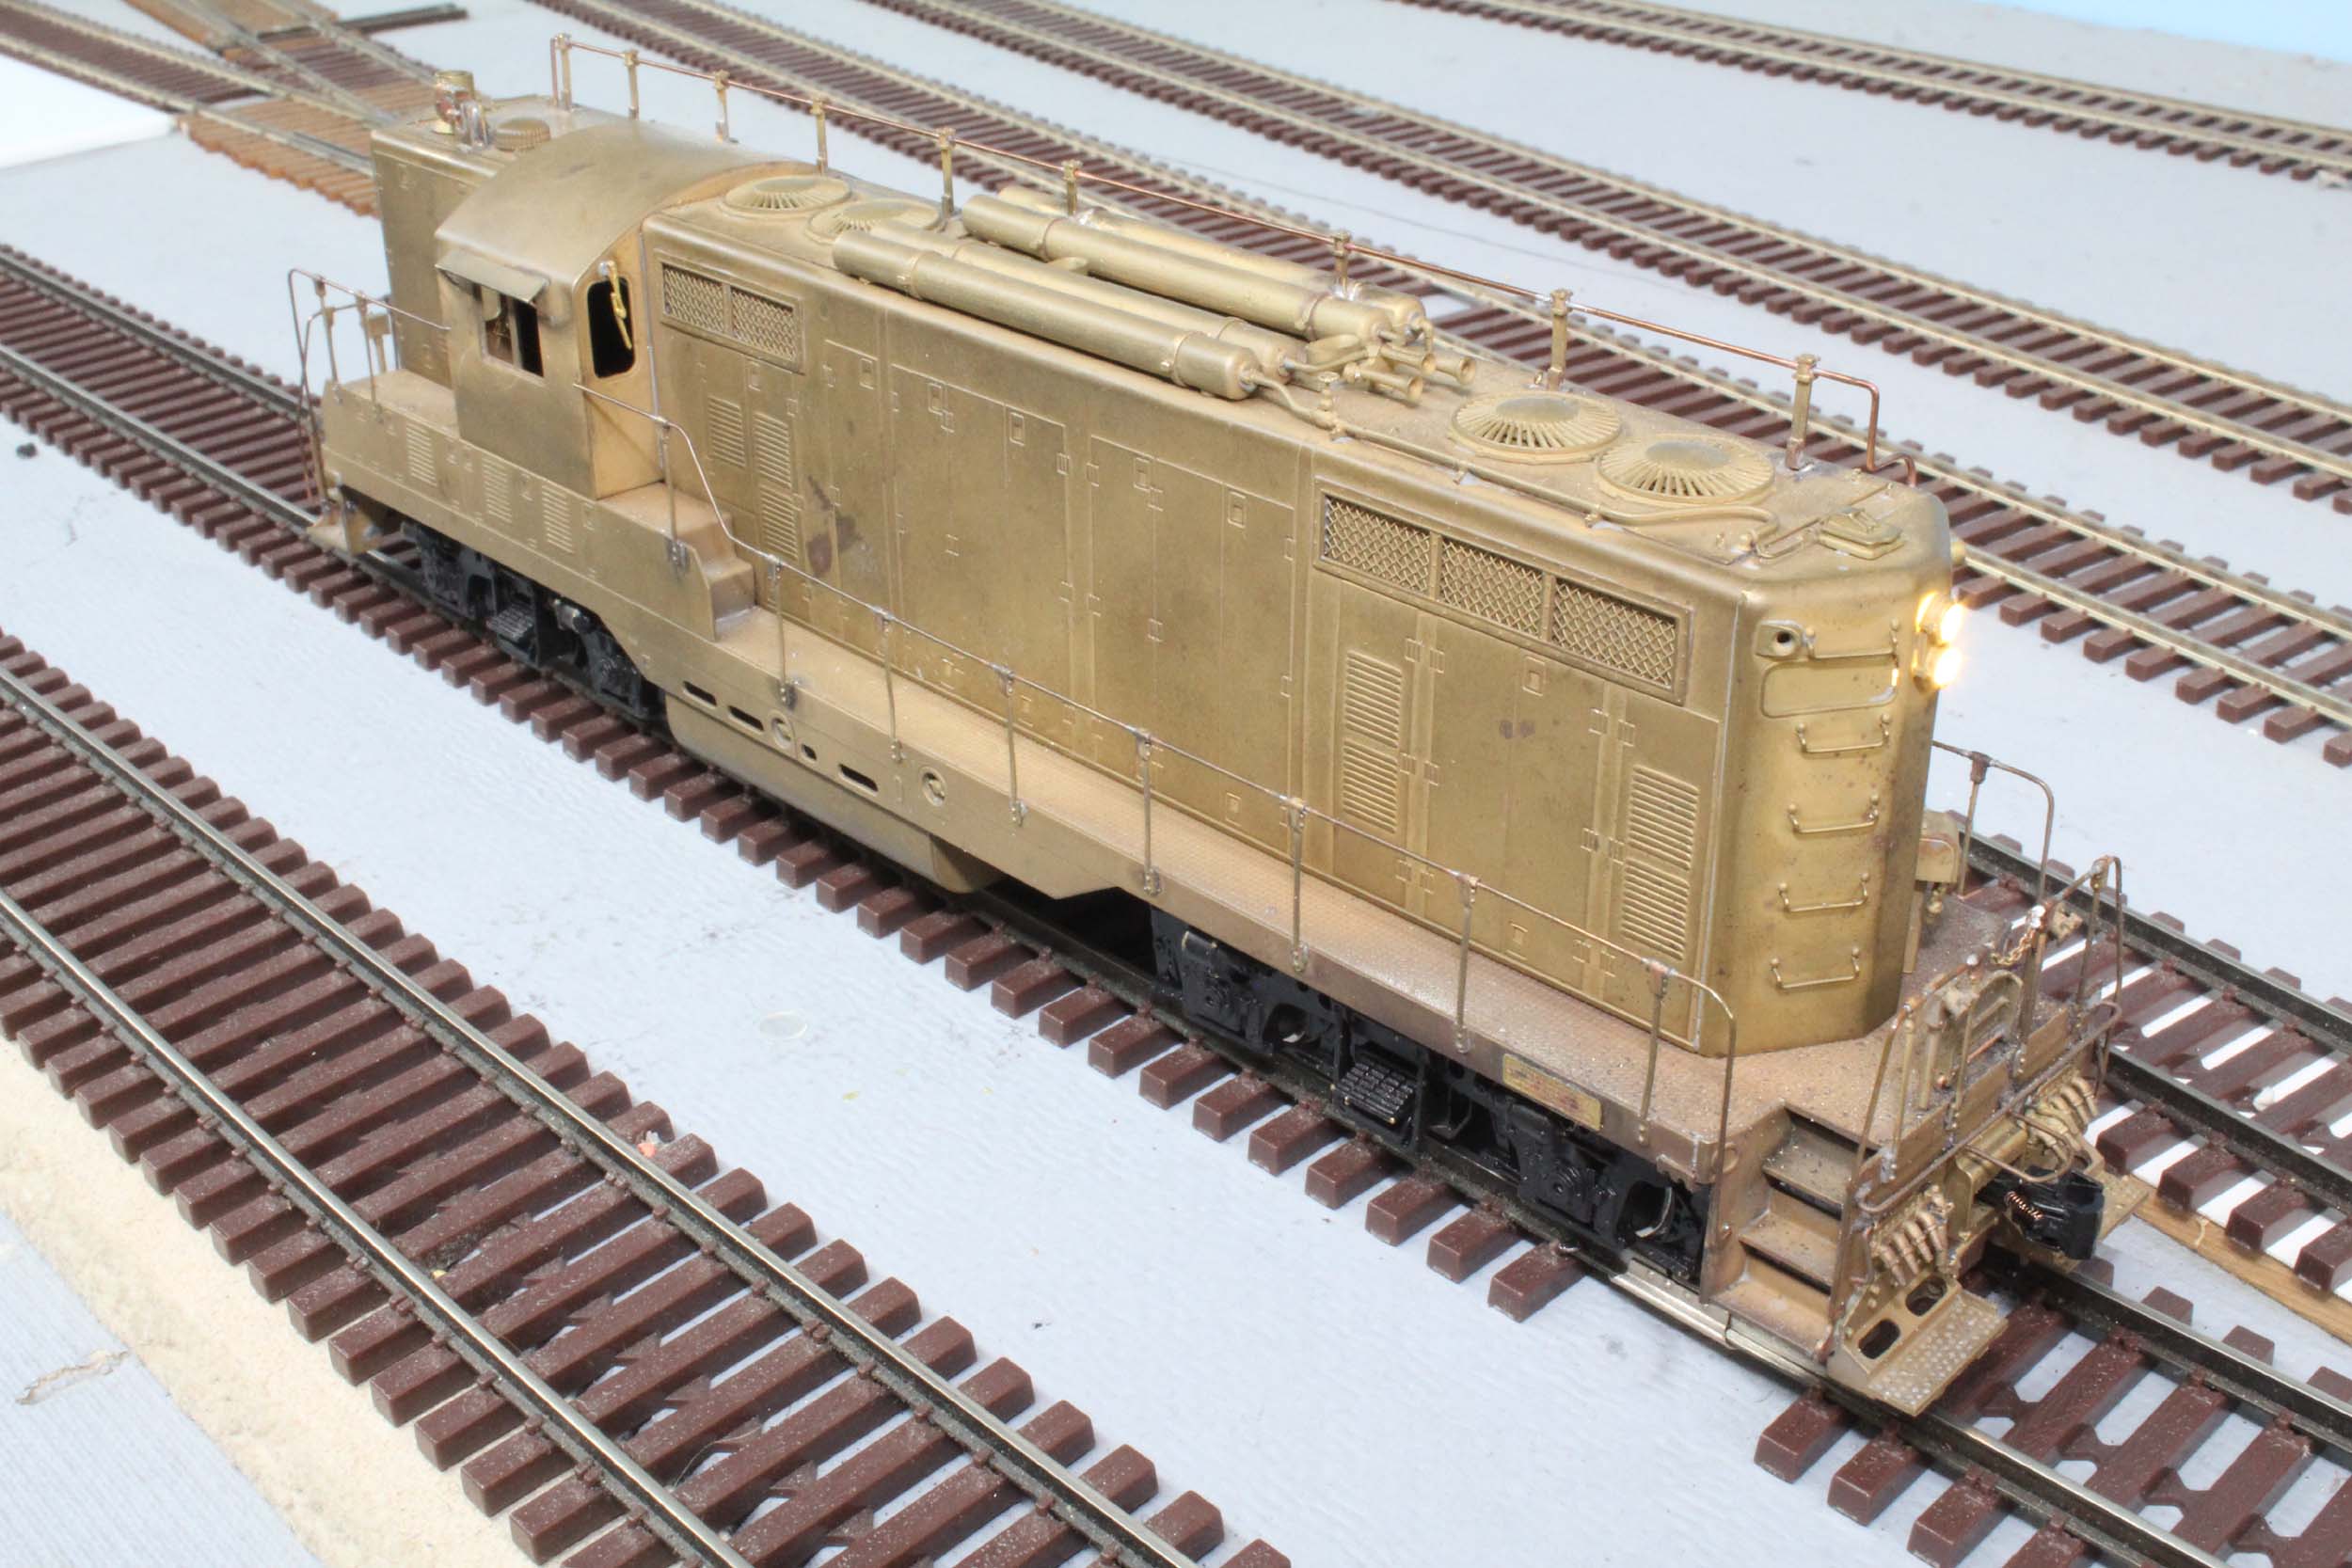
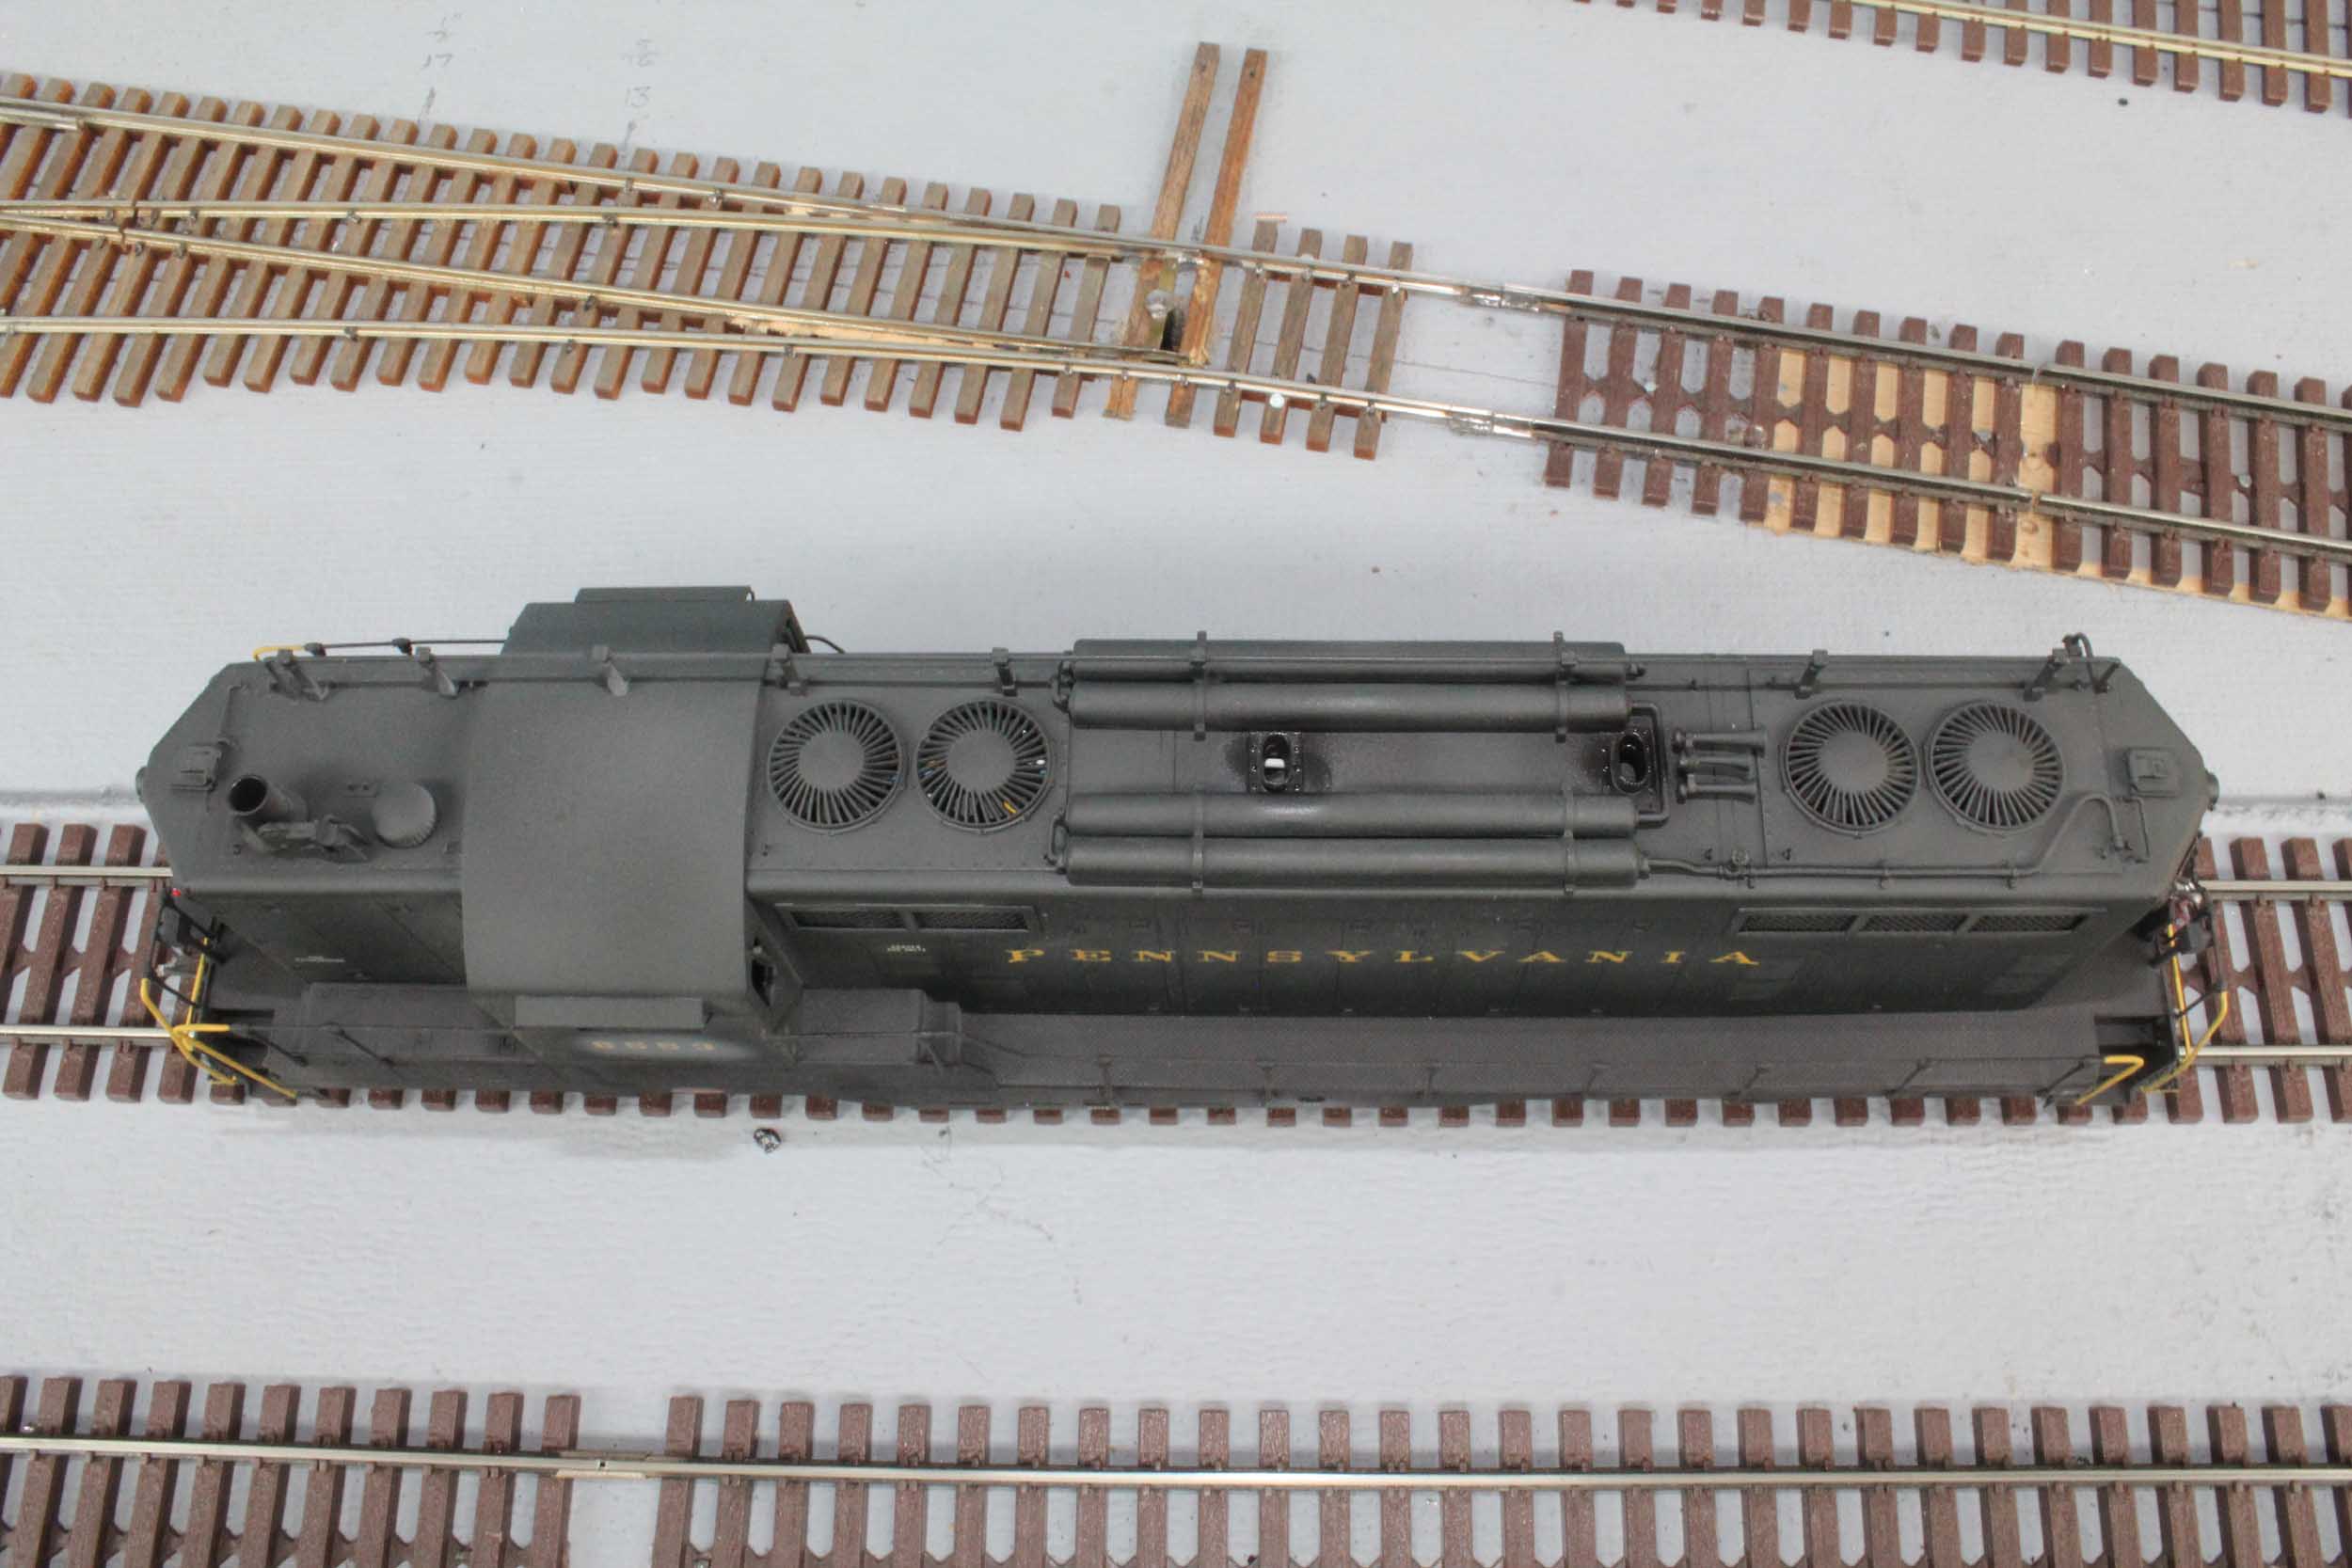
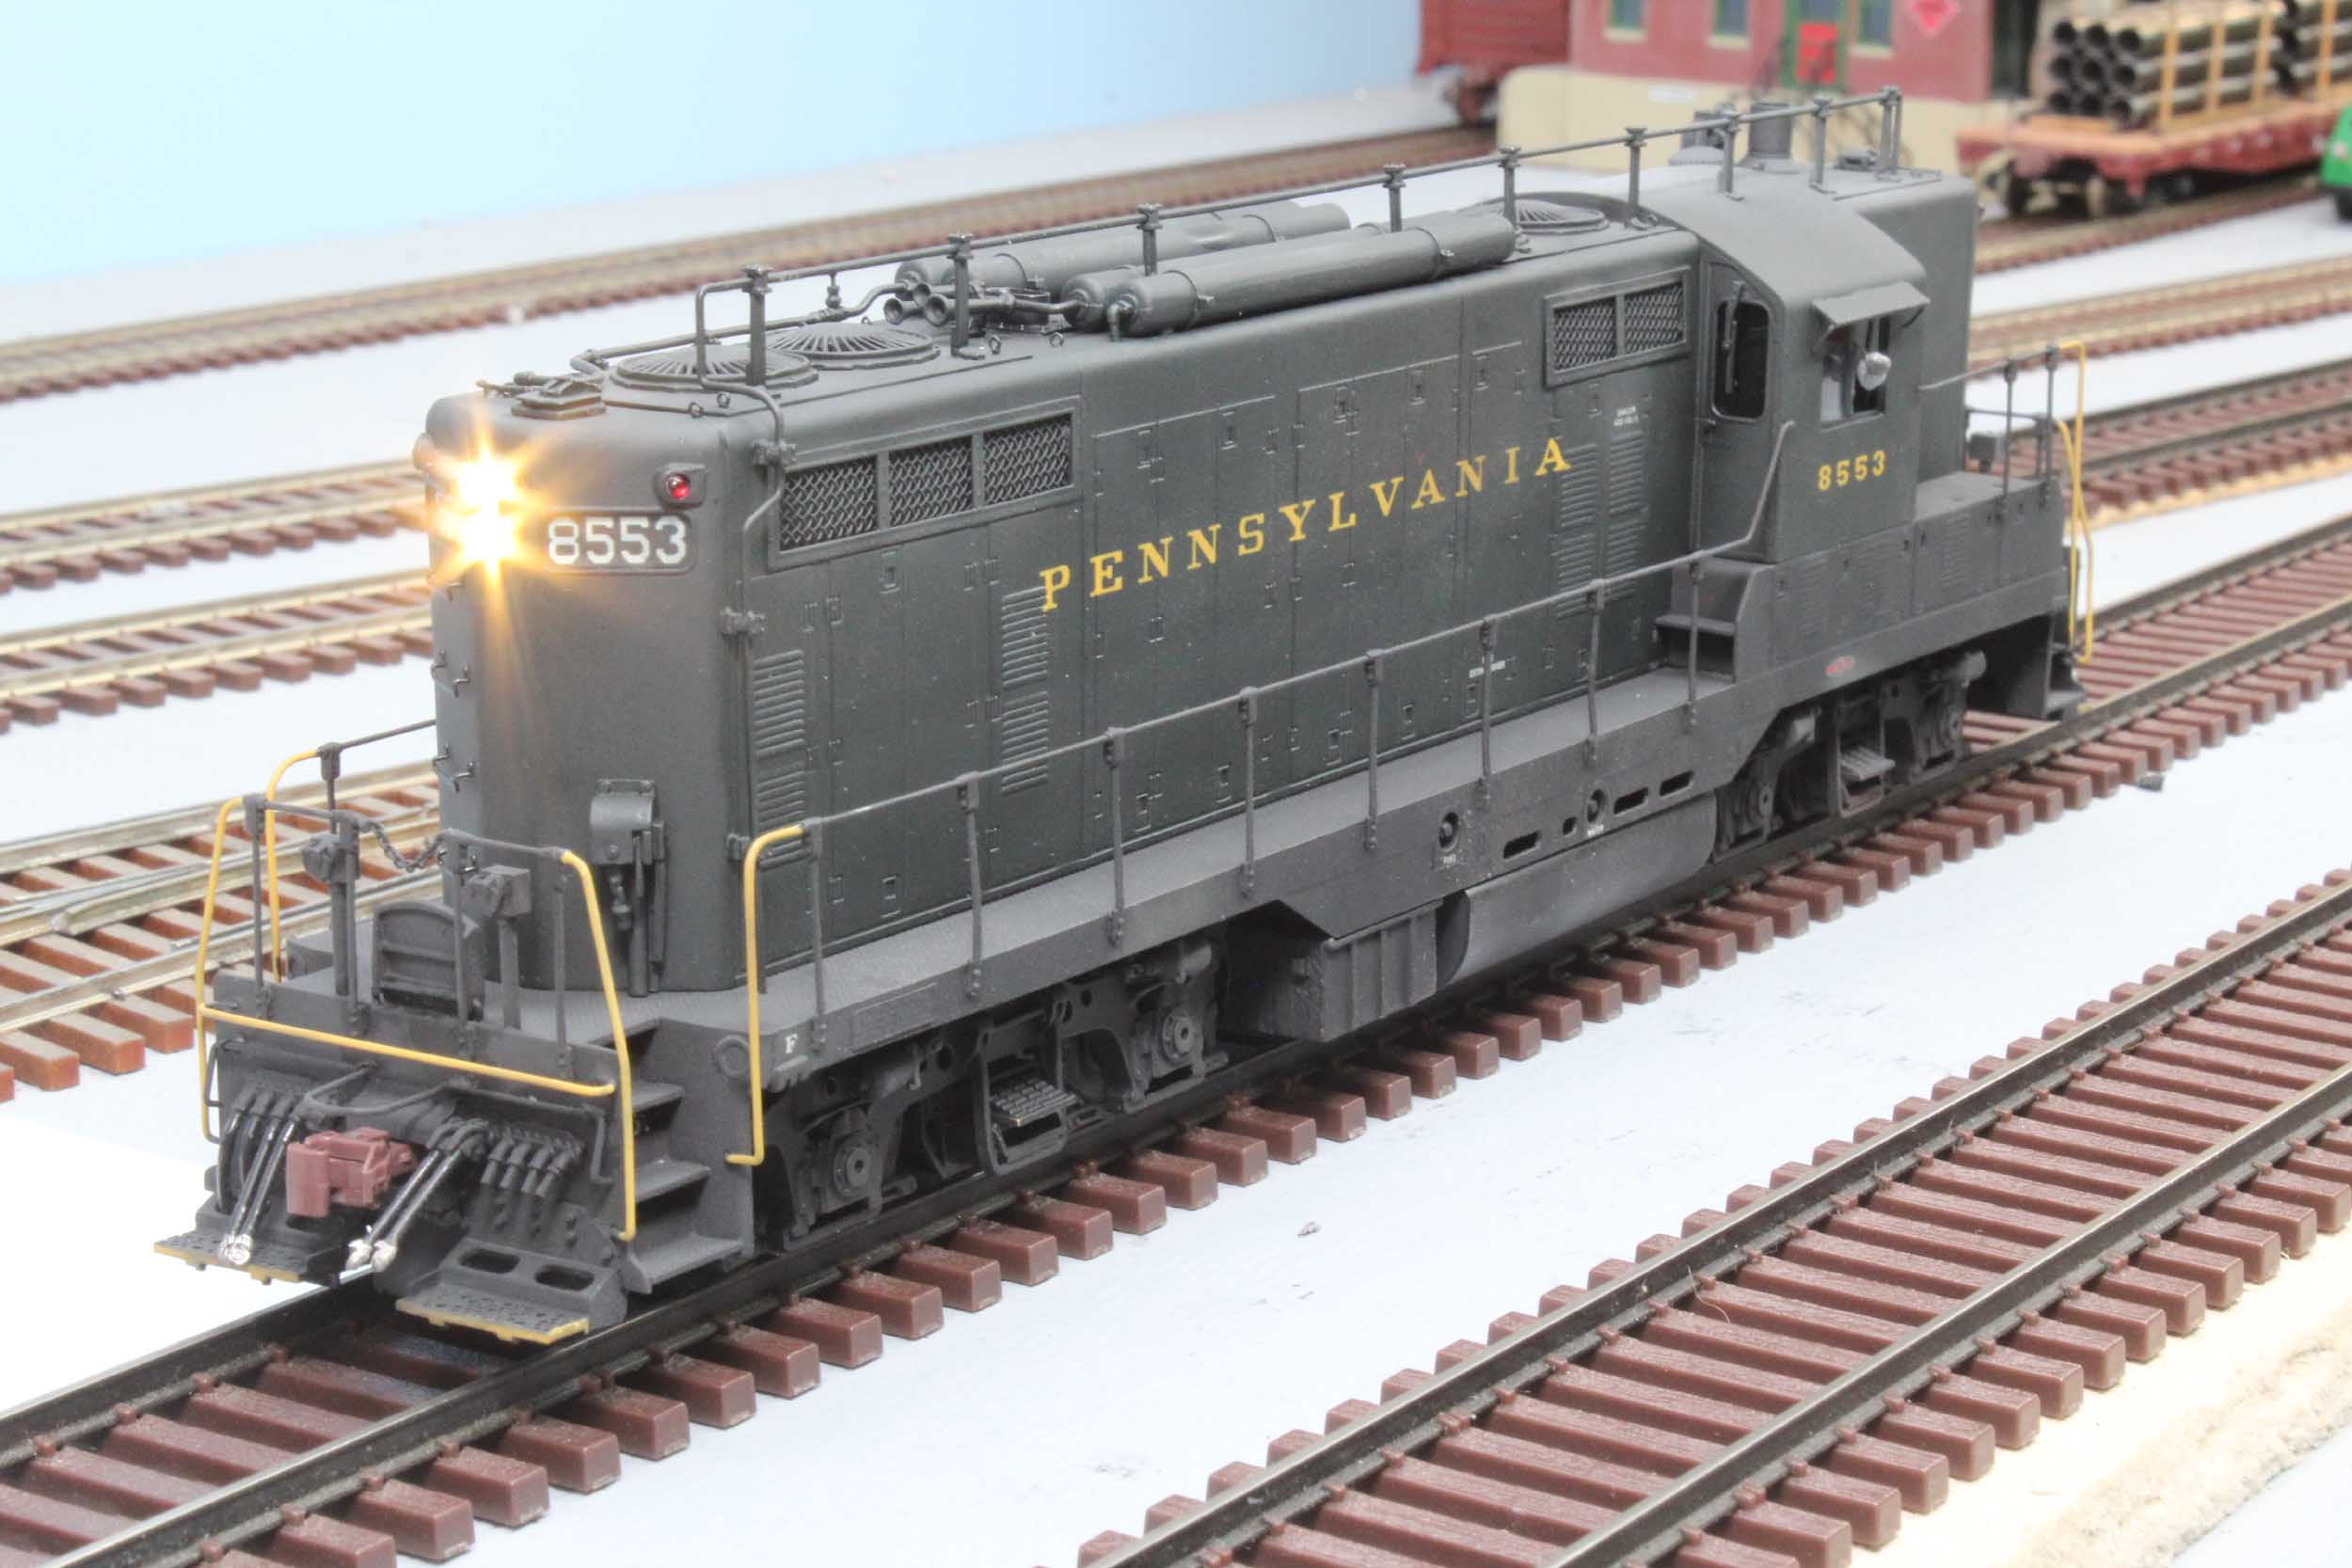
Rooftop “Torpedo” Air Tanks
I
decided the original Sunset torpedo air tanks were too wrong to keep. Among
other things they are too short. Bill’s Train Shop http://www.btsrr.com sells a tank kit that is
just perfect including the piping. The old tanks
had to go to use the BTS kit. The before photo is at left. They are various
stages of laying out the new holes, filling on the old holes, tapping the new
tanks and tank replacement completed. This improvement is 1 of the most
important changes I made.

1-12-16
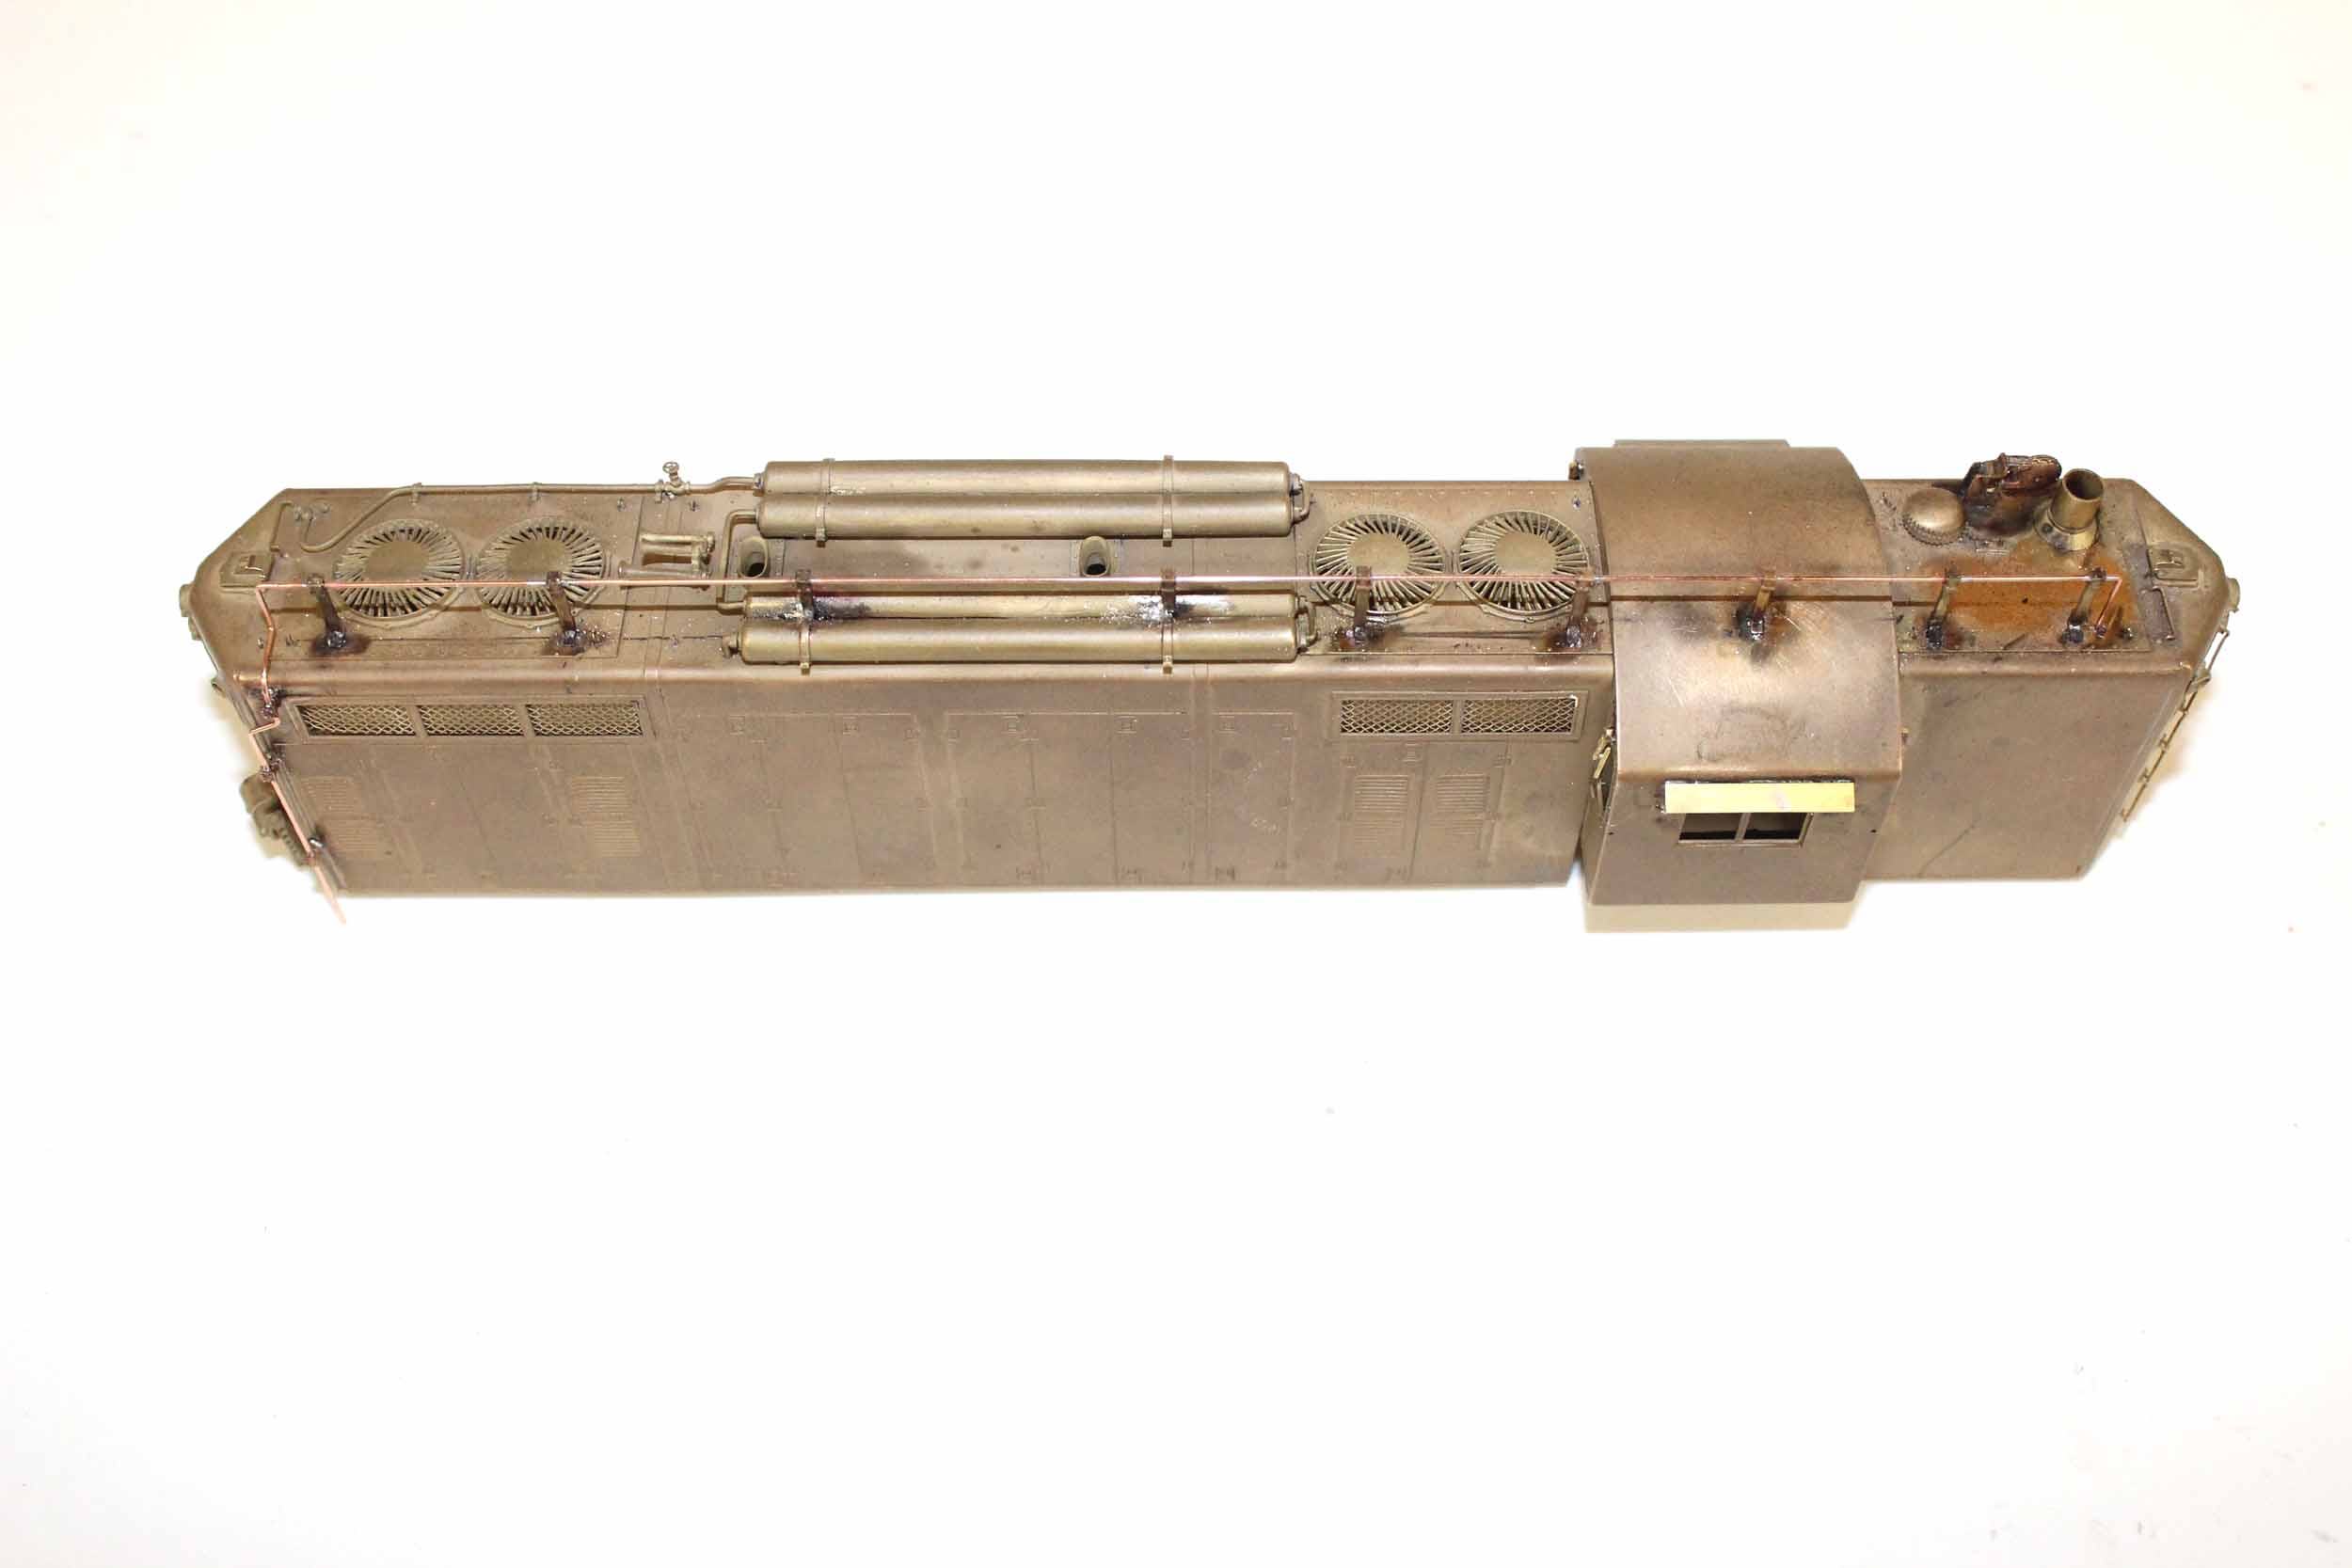
PRR Antennas & Ultrasonic Cleaning
There
is great angst and procrastination in adding antennas to a PRR loco. Getting
the stanchions in the correct place is important. I am obsessed with making
them in a straight line. That requires good measuring and layout. I have never
seen real PRR stanchion placement drawings. Finding overhead photos is
difficult. In this case I started with the stanchions on either end of the air
tanks and used them to set the shorter stanchions on the tanks. I could have
never soldered the stanchions to the air tanks without my resistance soldering
unit. I worked my way out in both directions until I was done. The shorter cab
stanchion was the last installed. Note that the steam generator exhaust stack
has been moved. It took all this time to notice it was on the wrong side of the
short hood!
I
got very lucky and won a photo on eBay of the Trainphone receiver coil of 8553!
I am sure it is an EMD photo. So I had a good reference to make my receiver
coil. Soldering the coil to the roof was a challenge without it falling back
into 3 pieces. Again, this work was not possible without my resistance
soldering unit.
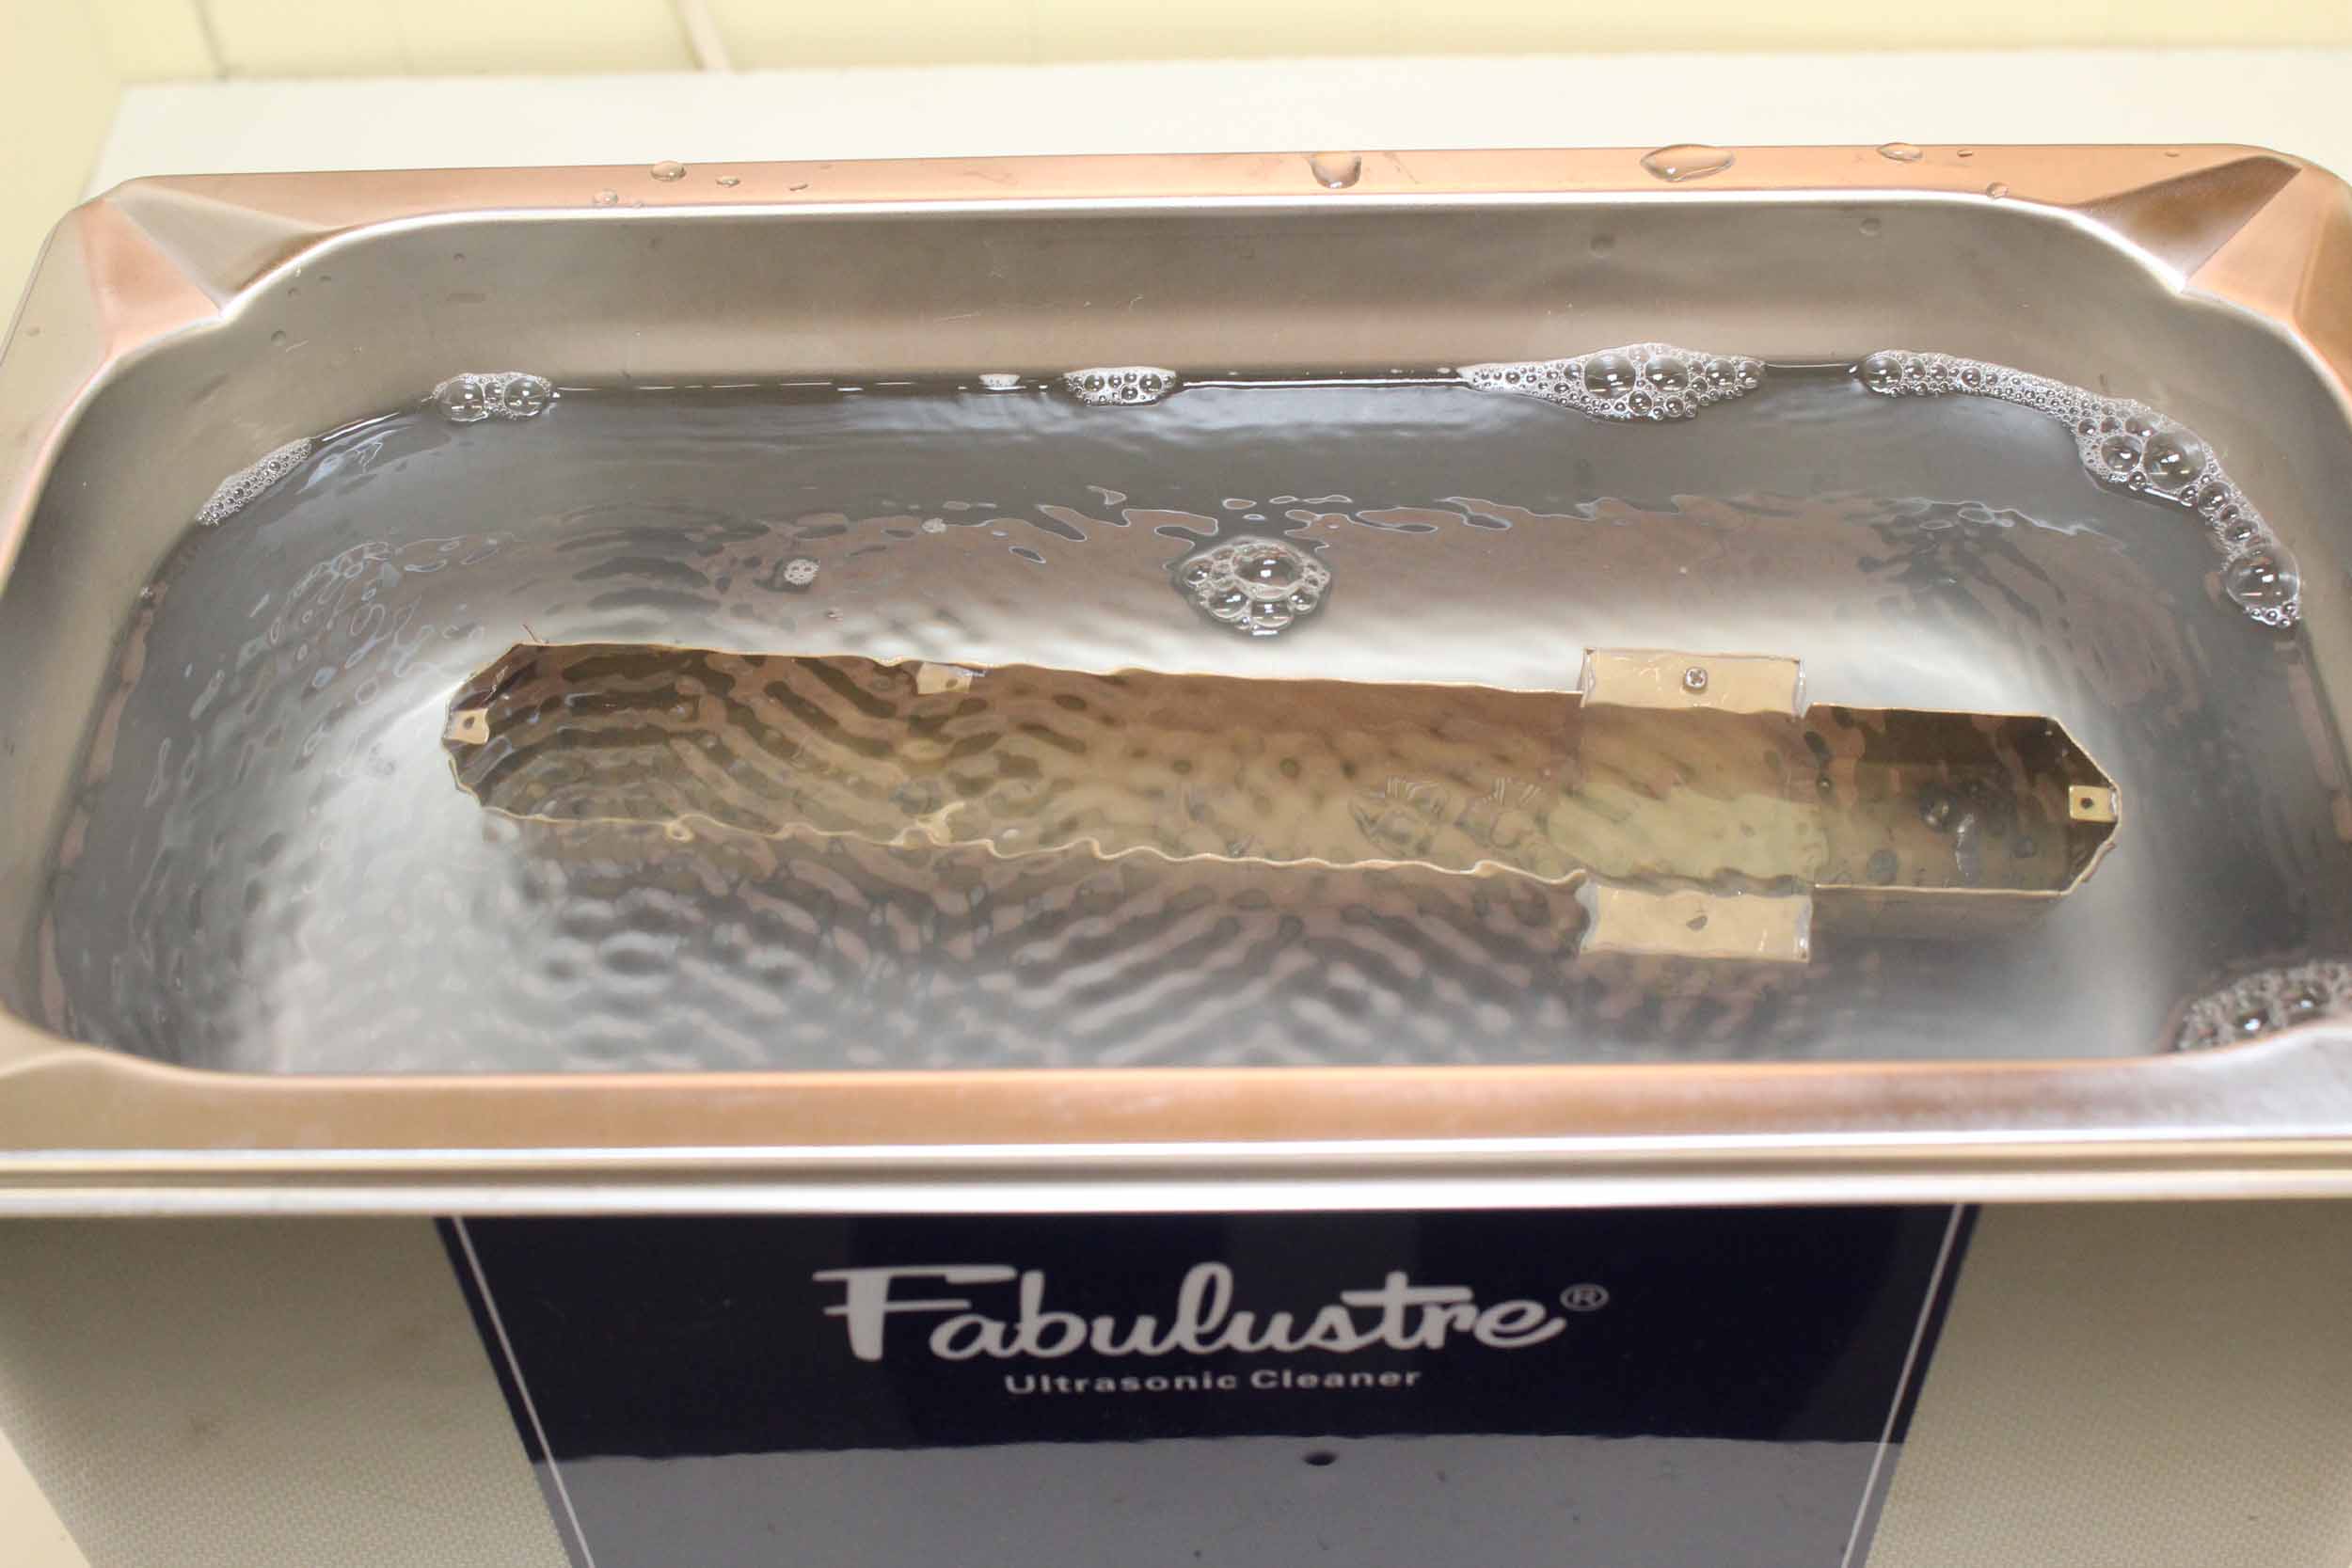
I
used solder flux for a lot of the detail work. This concerned me that there was
some flux left in areas I could not reach with the blast gun that could corrode
later and push the paint off. So I used my ultrasonic cleaner machine for the
first time. There are brass ultrasonic cleaning solutions that I was scared to
use, so I used water and some Dawn dish soap. I was skeptical that it was doing
anything, but after a few minutes the water was not as clear and there was some
debris in the bottom of the tank.
That
body modifications are done at this point. Onward to
completing the new handrails.
I still blasted the body just before paint.
2-17-16
I
must not have taken any in progress photos of making the handrails. They are
very fragile.

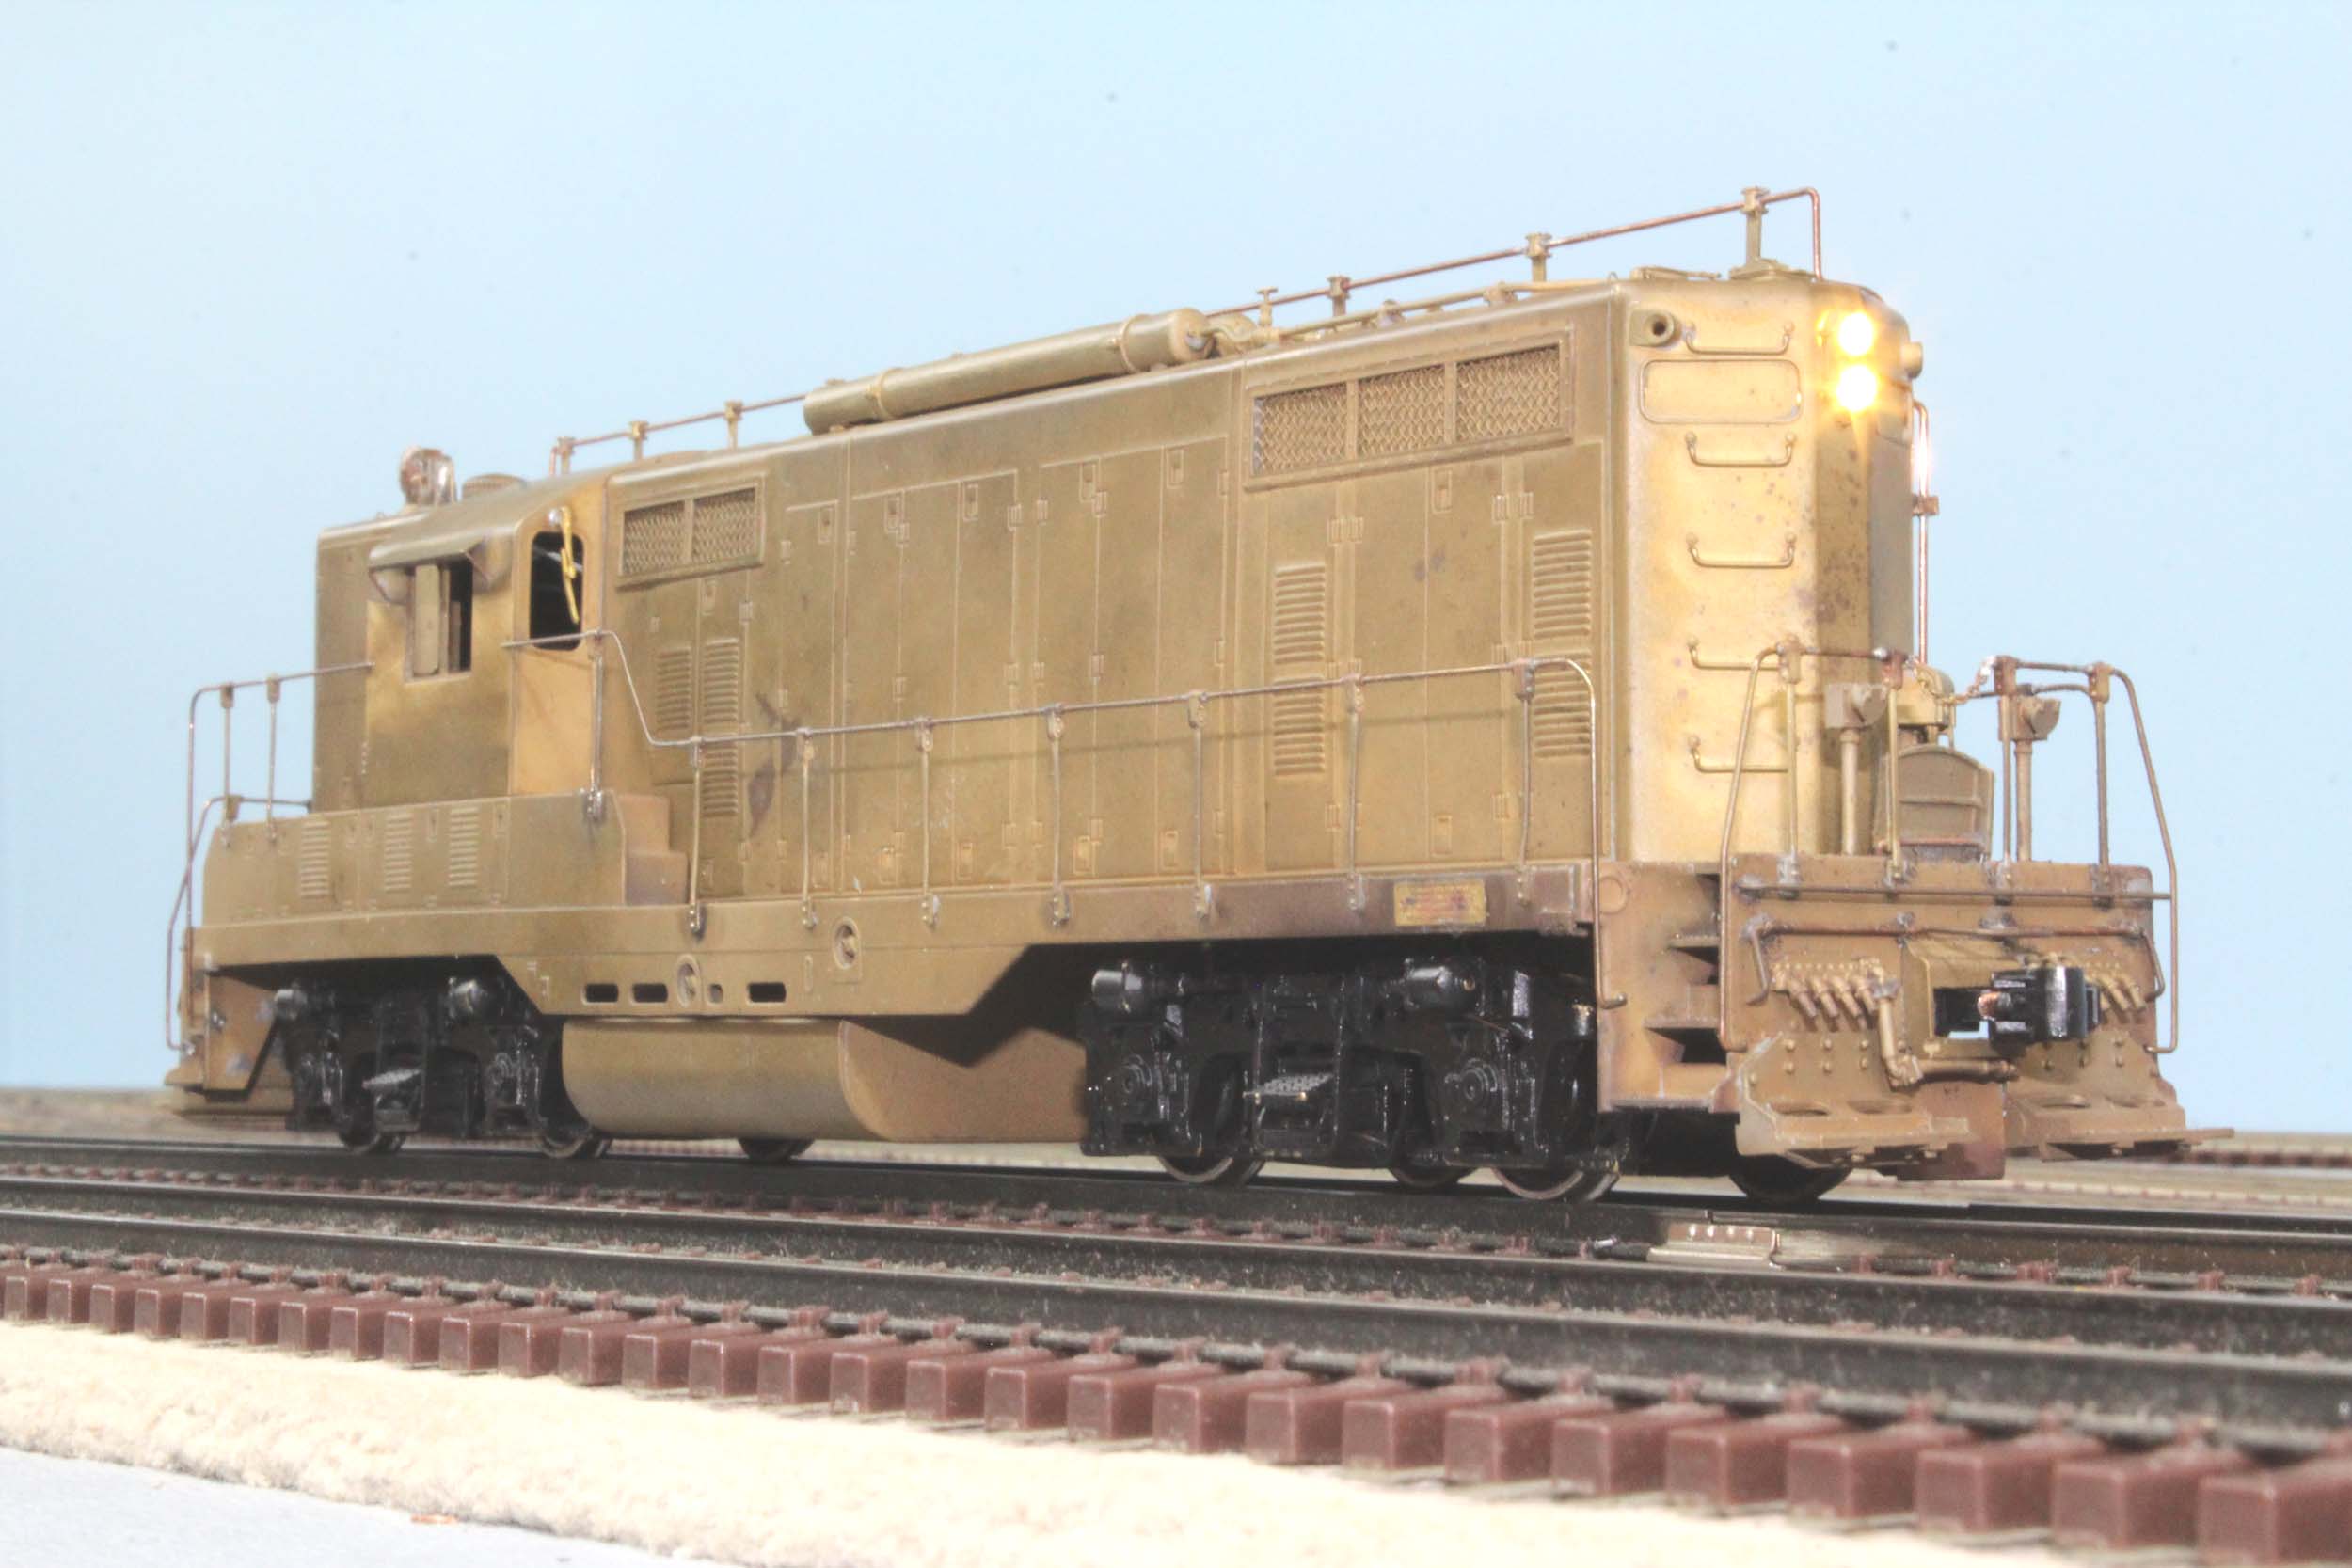
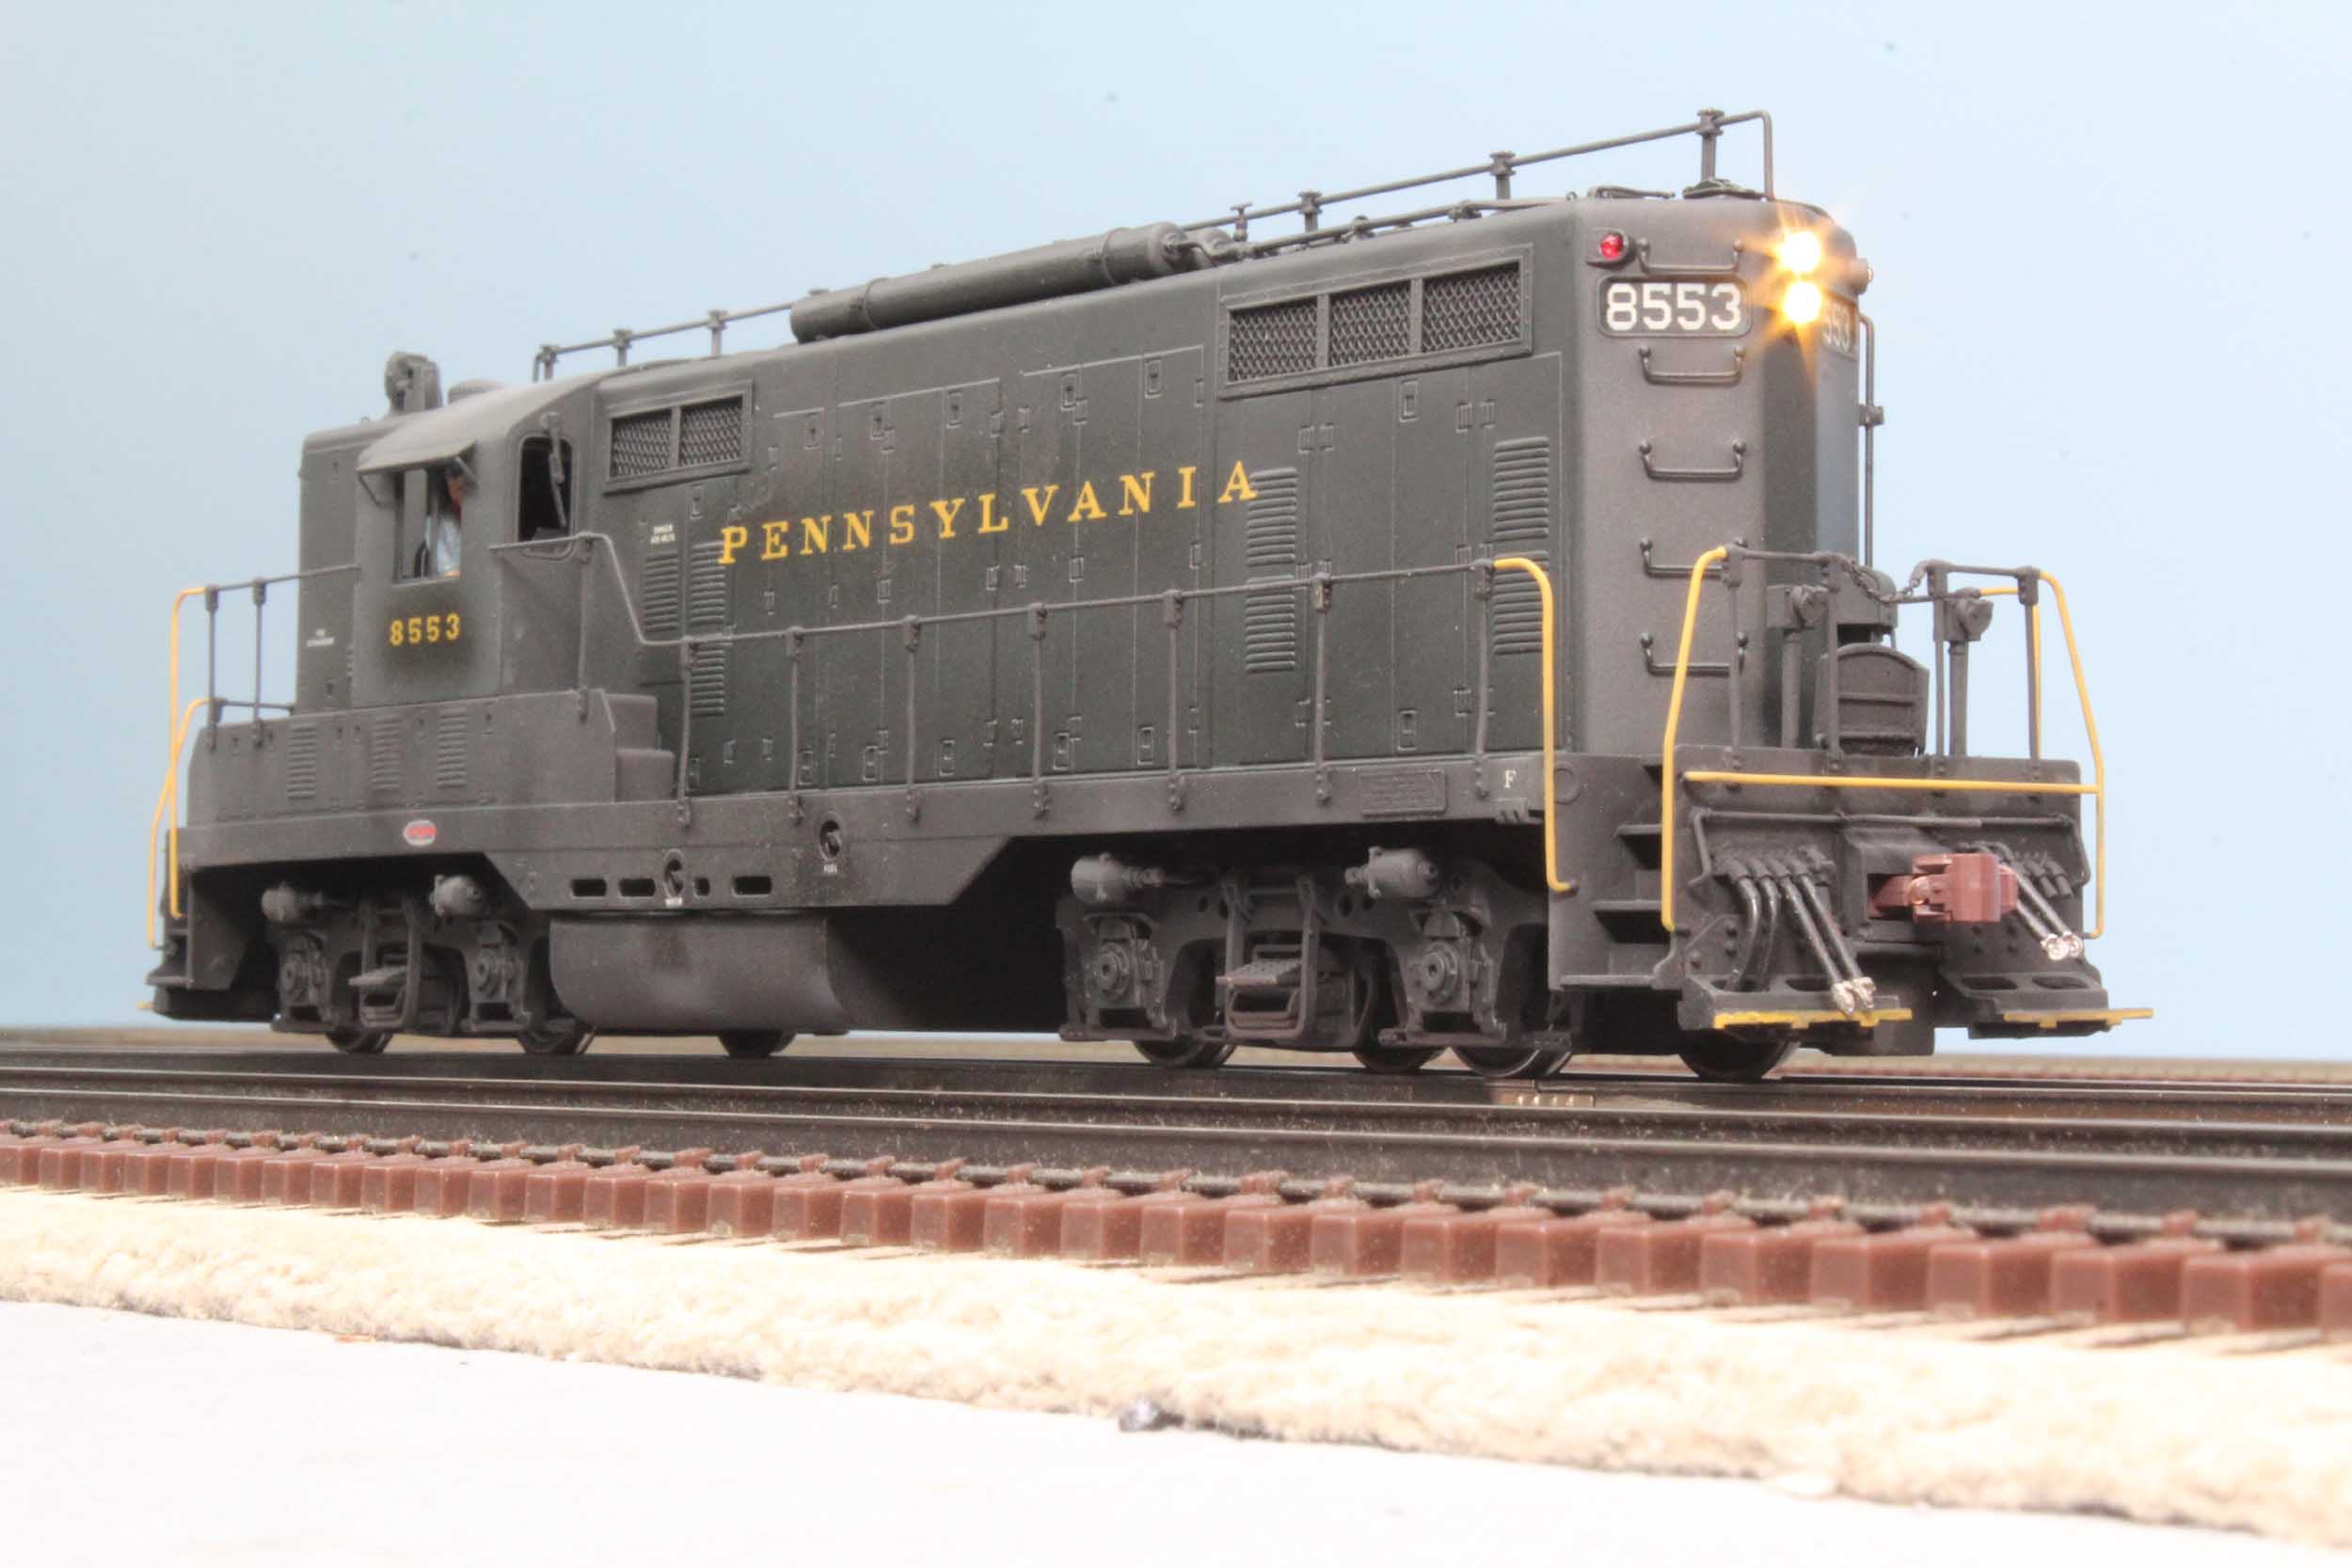
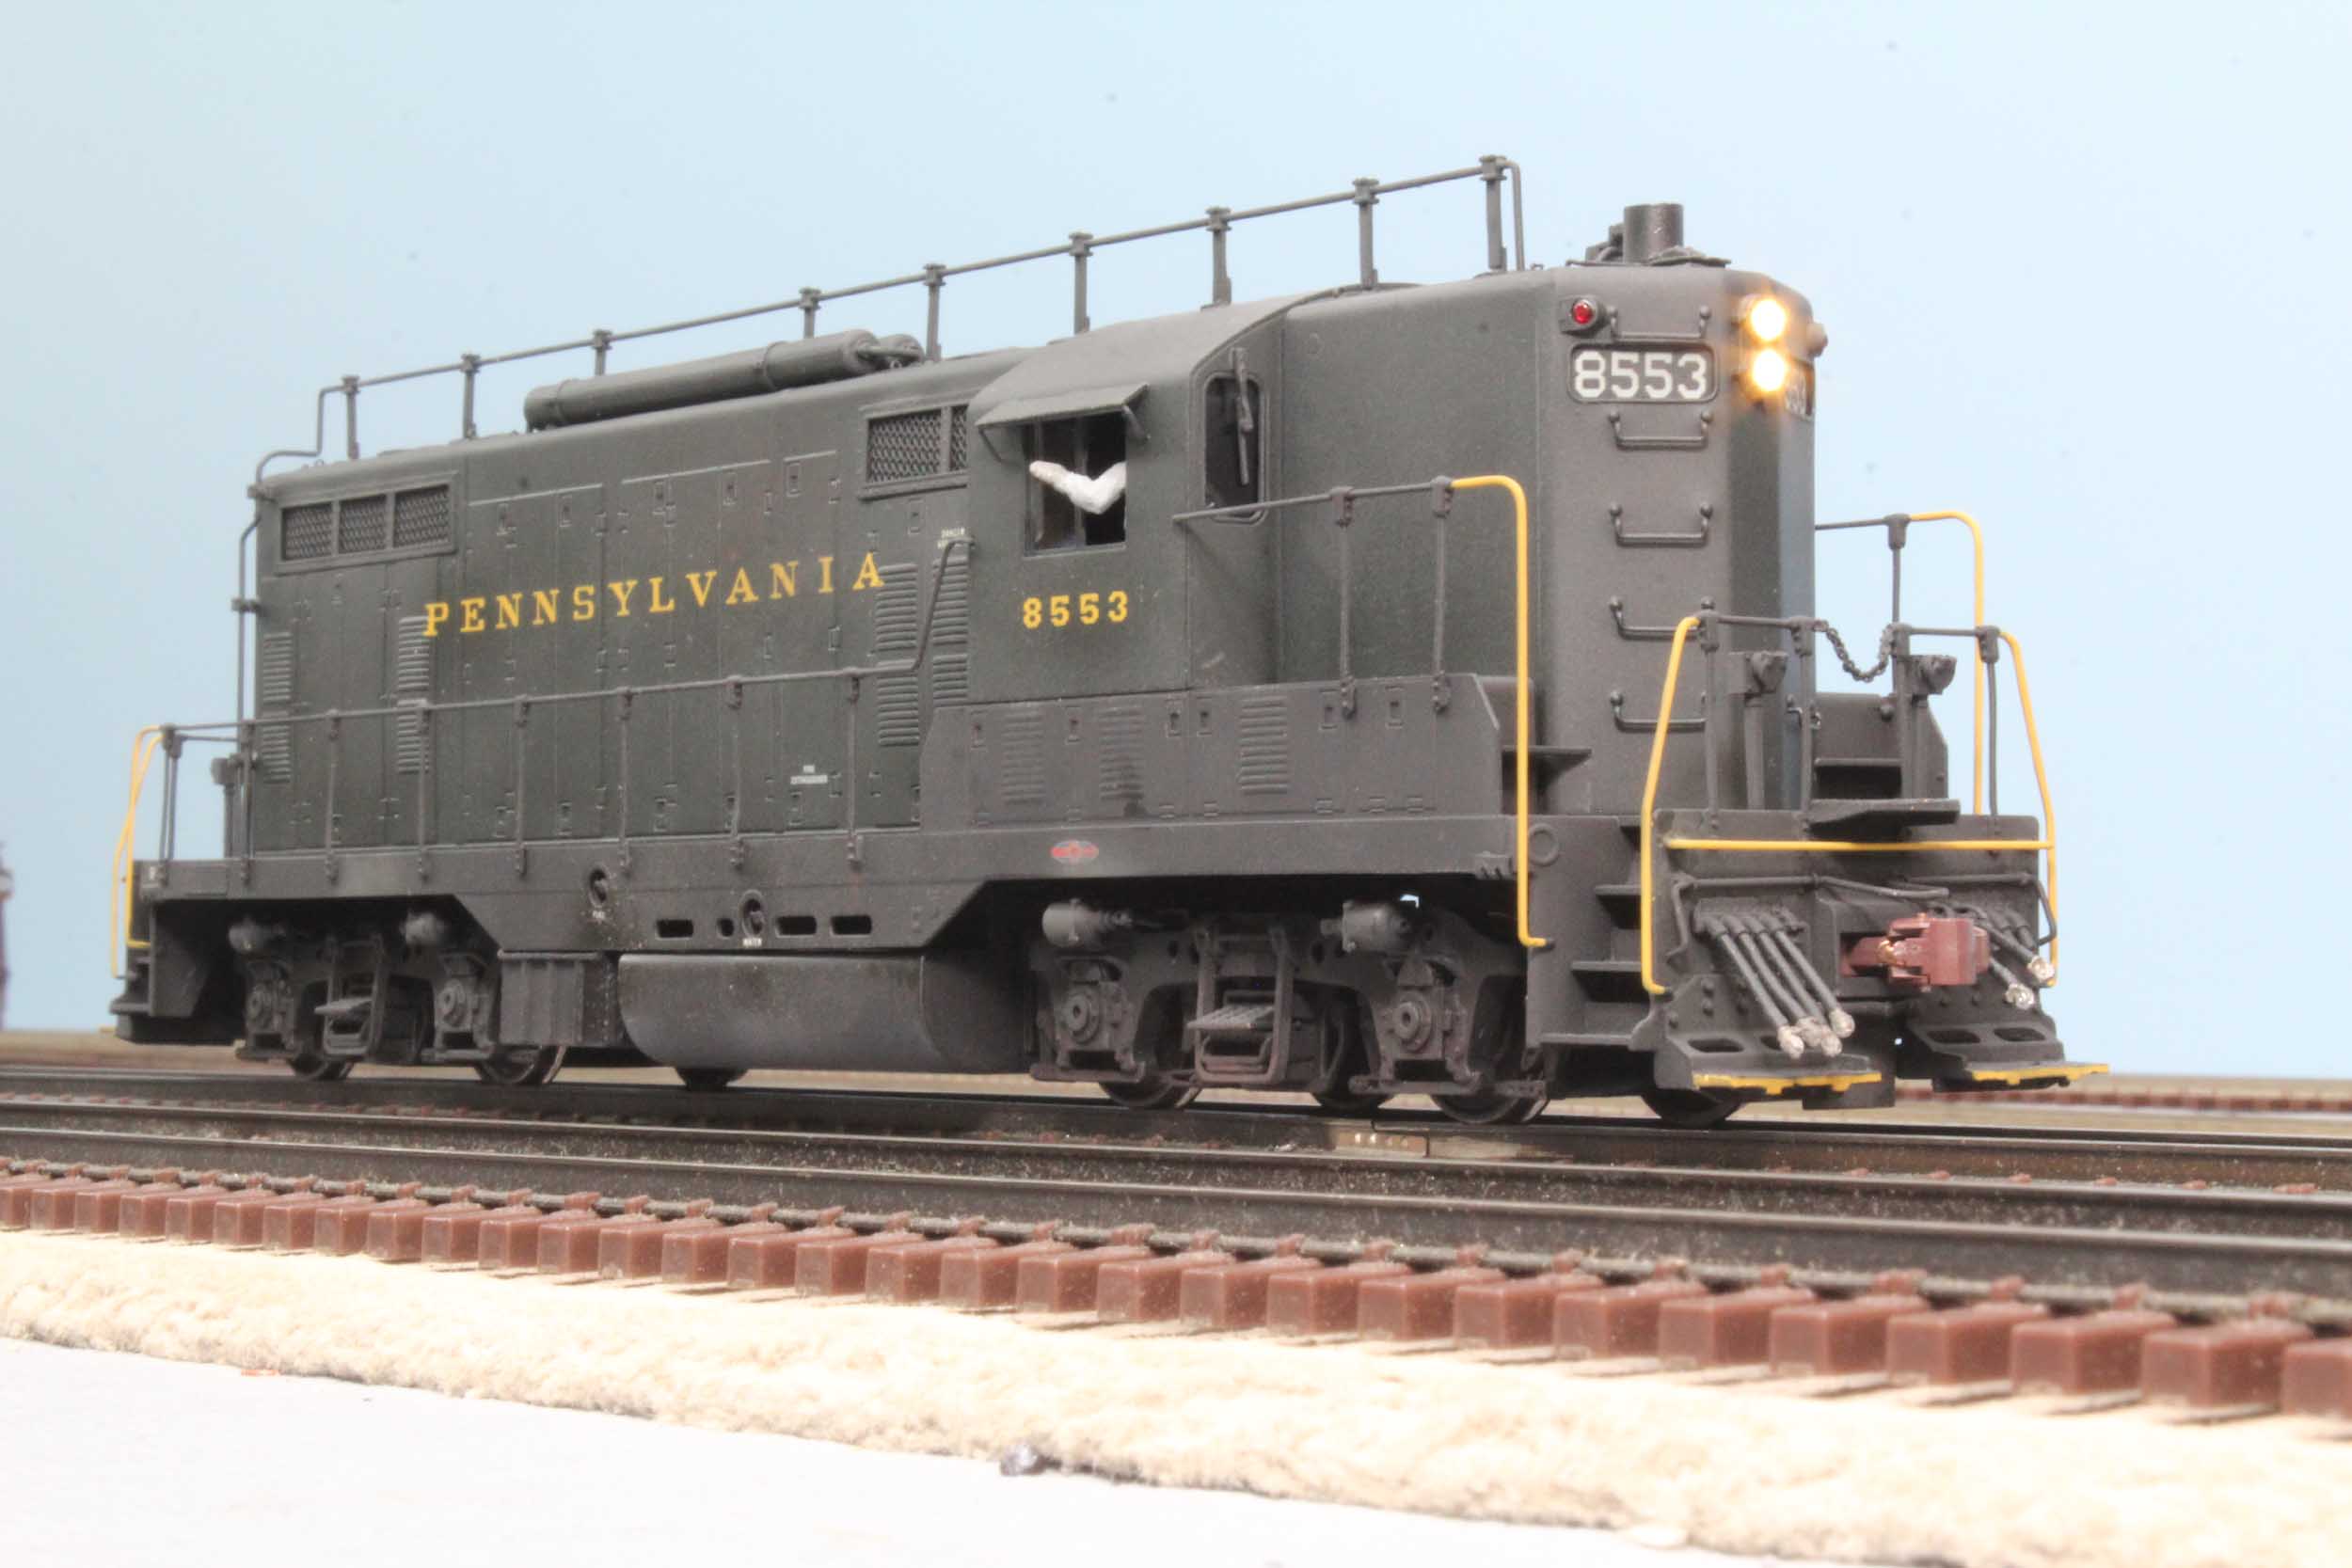
2017 Reboot
Added 5-28-17
Procrastination
hit again, that put 8553 back in the box for another 18 months. Among other
things in that time, I made a Reading Trainmaster, Reading SW1, and completed
my 2 PRR L1 and 2 PRR
I1. Completing the 4 steam locos was a major accomplishment.
Again,
this has taken a turn to become a different and better model. I am now
frequently using WOW4 decoders with a Keep Alive capacitor bank. The original
Tsunamis are going away. I also switched to the Overland HO diesel driveshafts.
The 3D printed U Joints I designed were fun to make, but very brittle. I had my
doubts even in back 2015 that they would durable enough to last as a wear part.
The Overland driveshafts are a little short so I used heat shrink tubing to
help keep them concentric. I used a barbeque lighter to shrink the tube with
the motor running! I skimmed the heat shrink tubing with a Dremel drum sander
to try and balance that rotation a little more. It helped a bit.
Since
I changed a few things in the drive I threw it back together for another test
run. It has never run before with the detailing done. I am pretty happy with
the results. I like flame throwing headlights. These LEDs are awesome. I found
a few distracting light leaks that have to be fixed before painting.
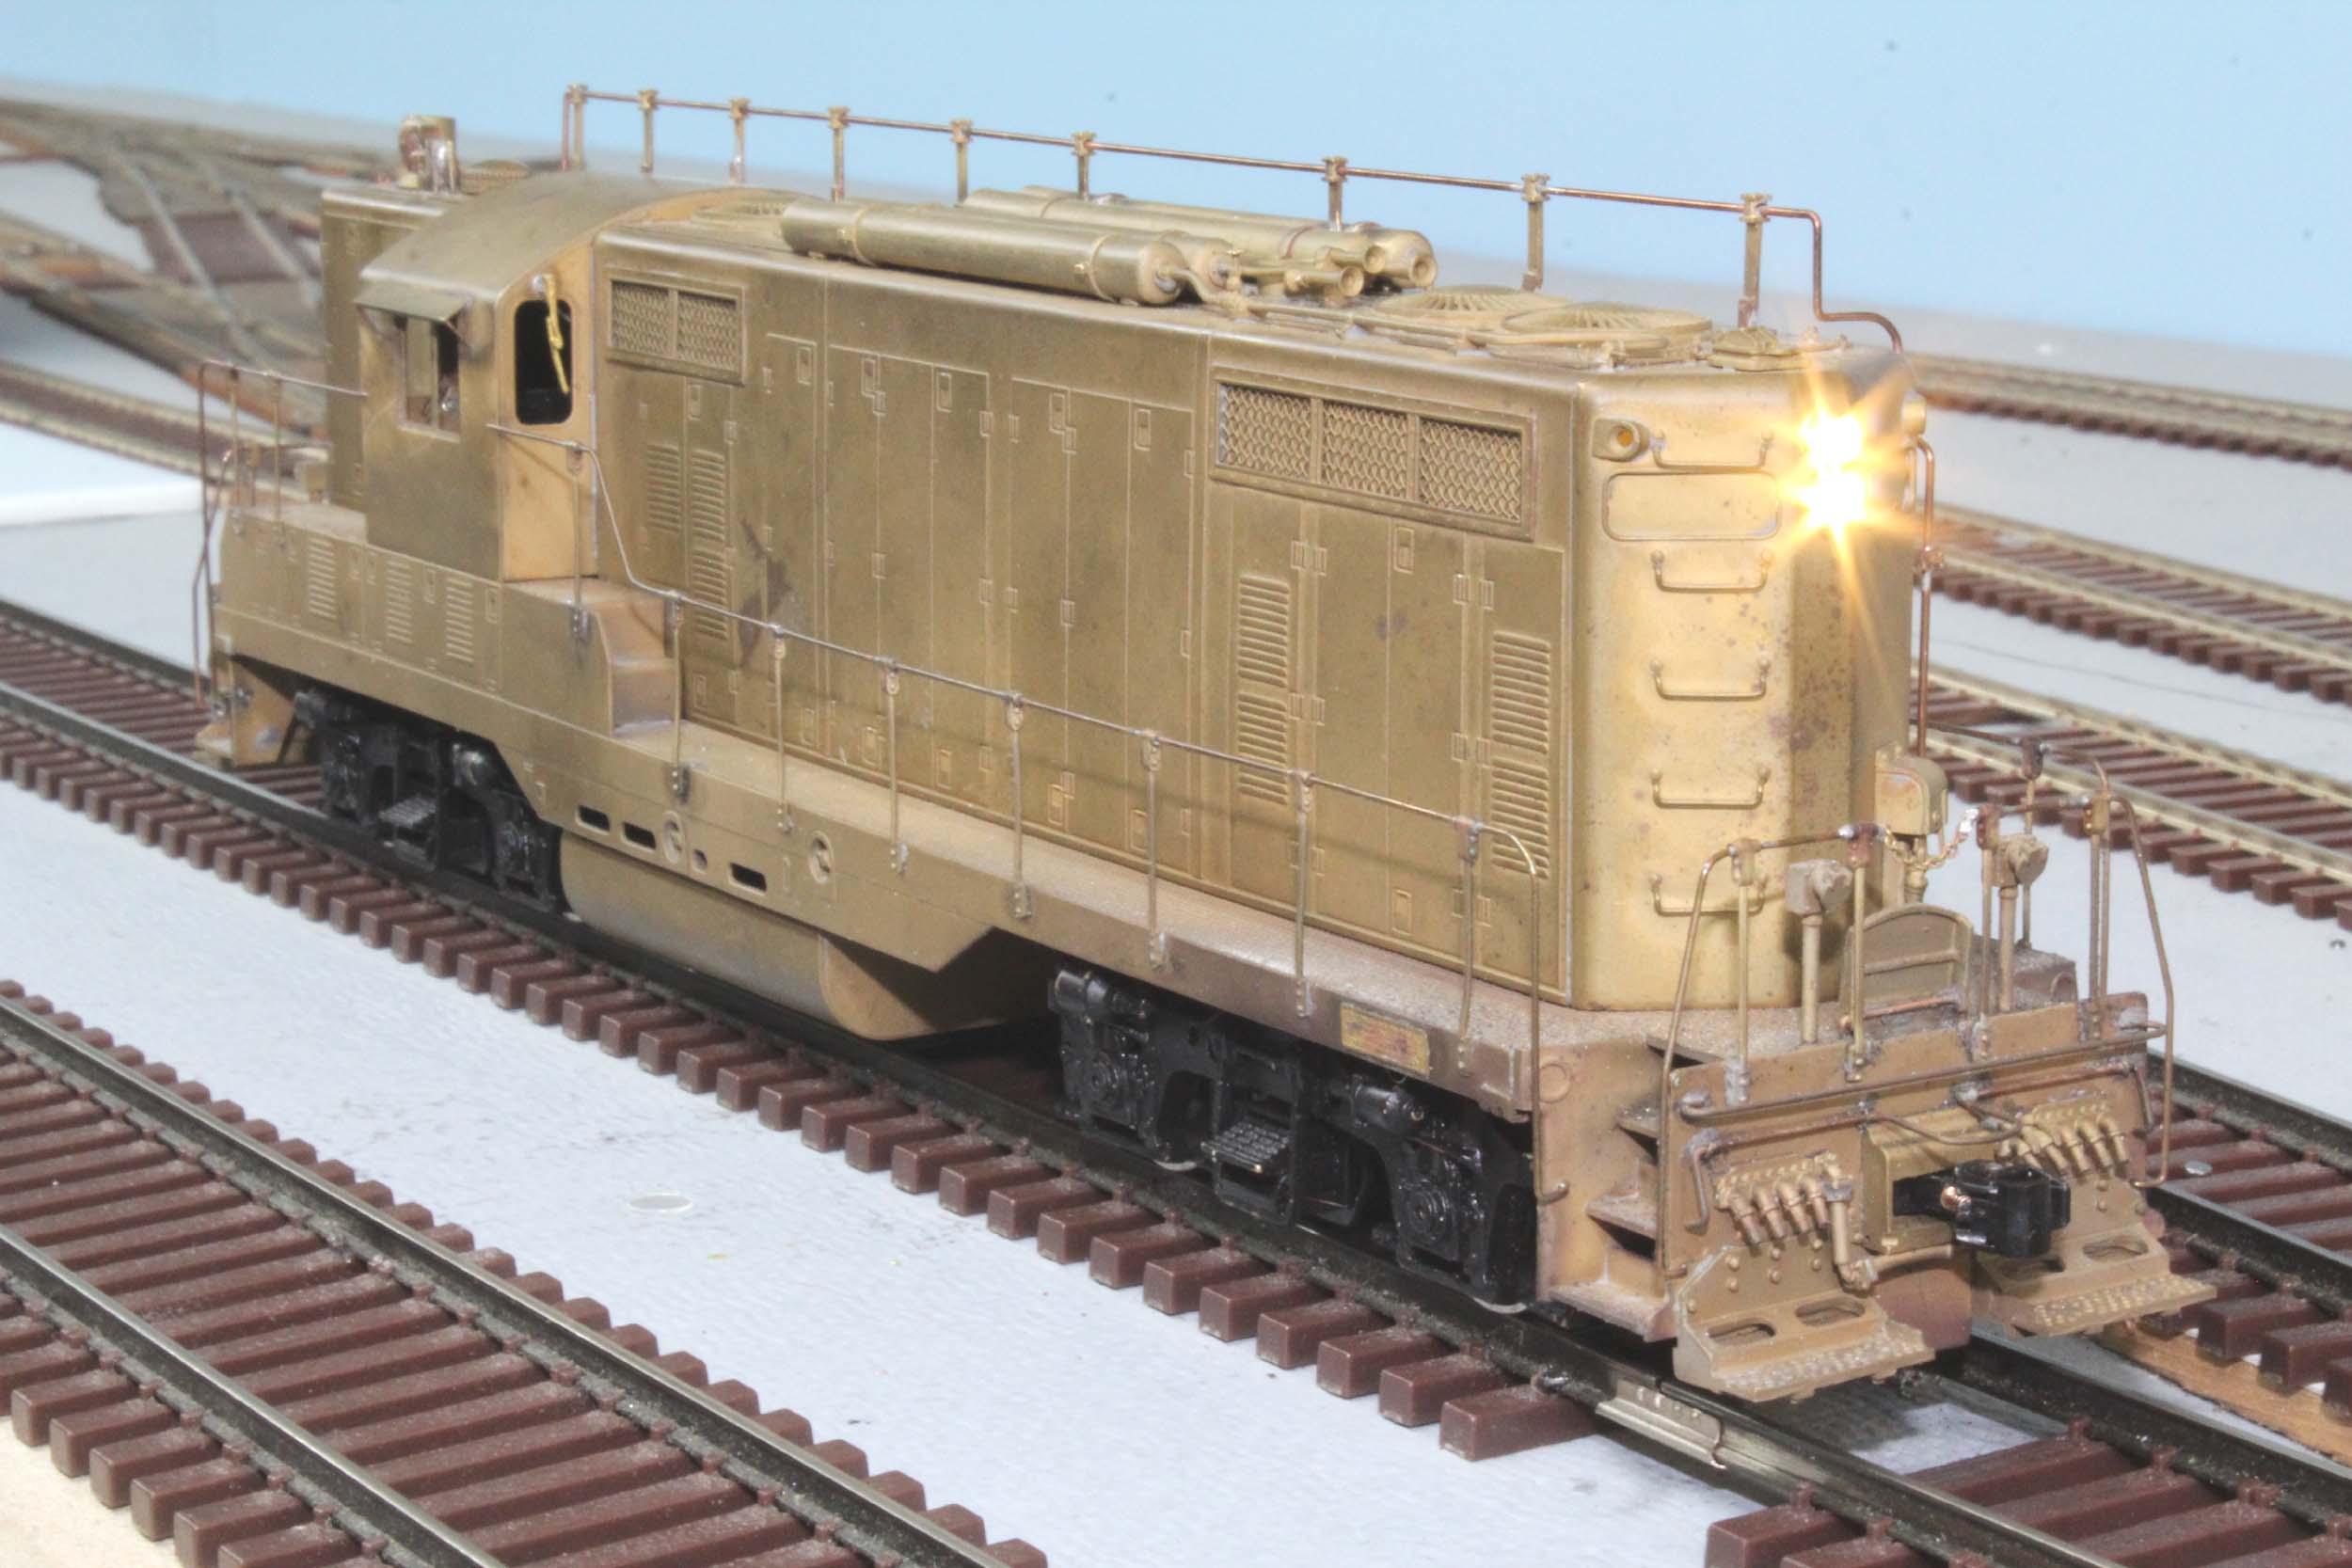
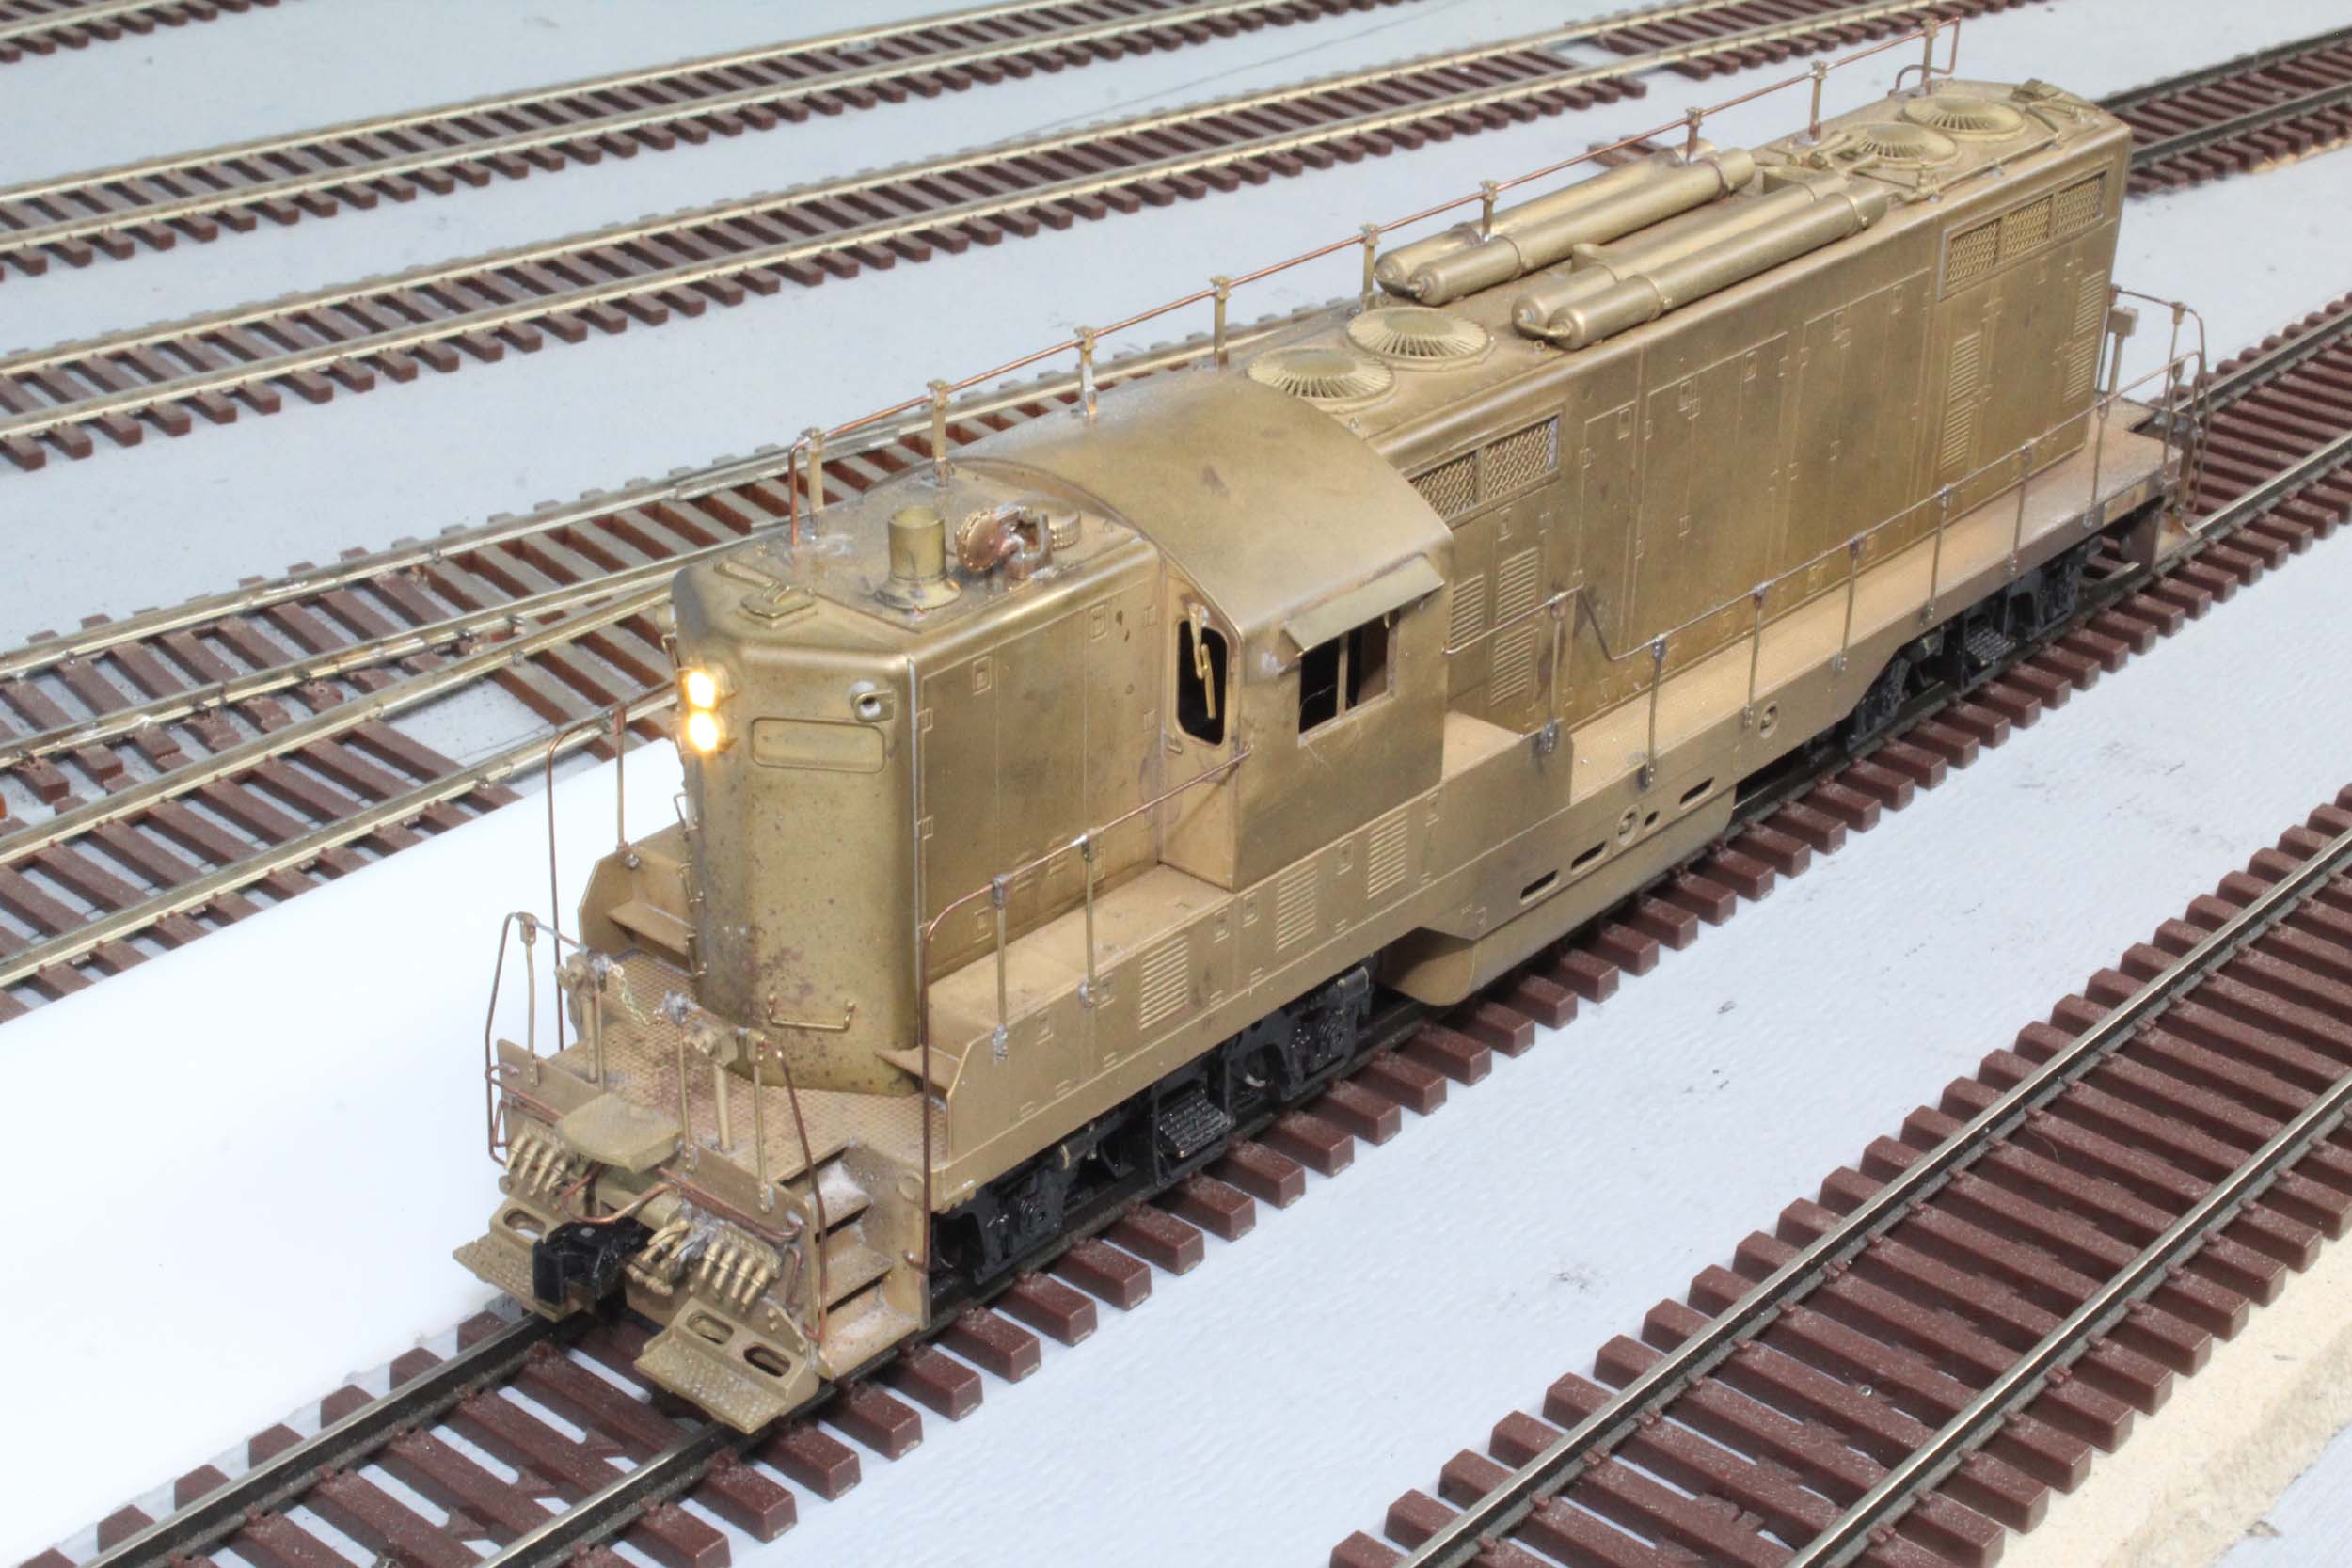
Completed 6-10-17
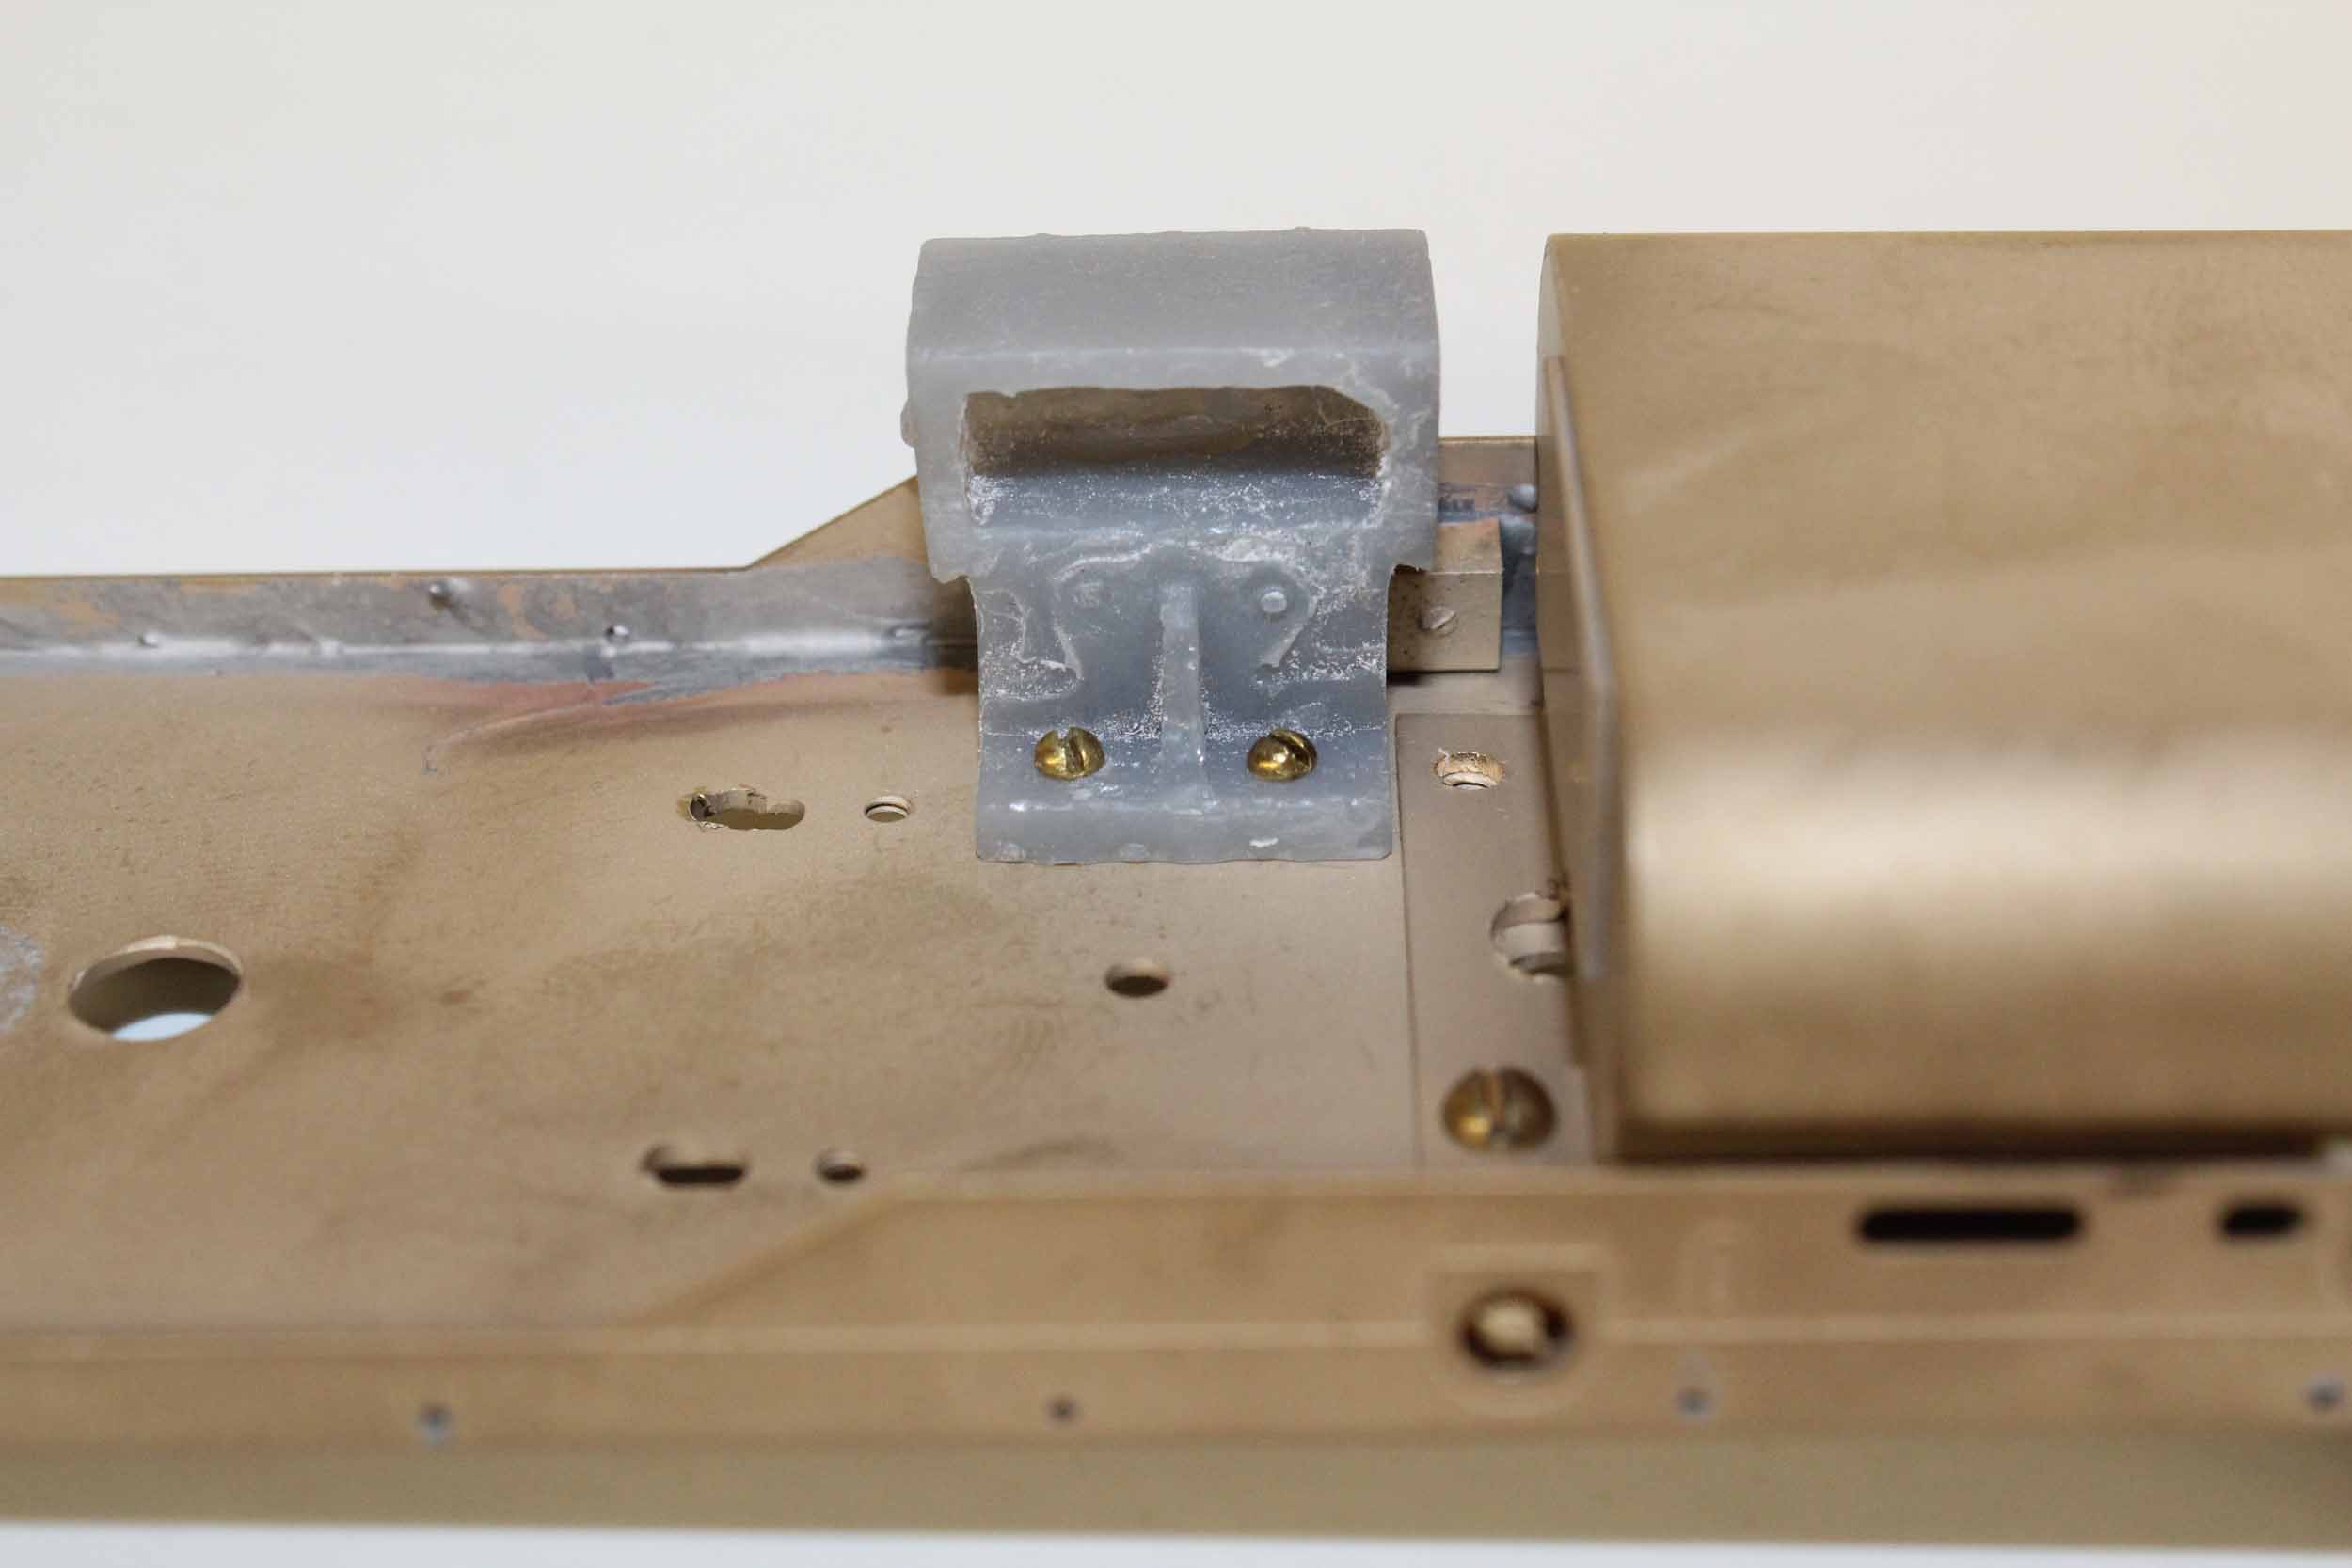
The
fuel tank is completely open without a gear tower, so it was perfect for adding
weight. I saw a mention of “Liquid Gravity”, instead of my idea to pour molten
lead in risking complete disassembly. It was a literal 2 minutes. It worked
very well. I gave a liberal dose of ACC. An hour later is it a rock. I gained
almost 6 ounces.
It
worked well, but was a little boring instead of the molten lead. Maybe
sometimes boring and safe are good! I still think it is a steel shot blast
media, not anything developed for model railroad use.

Updated
2-25-18
All photos and content © Lanes Trains 2005-2018