|
|
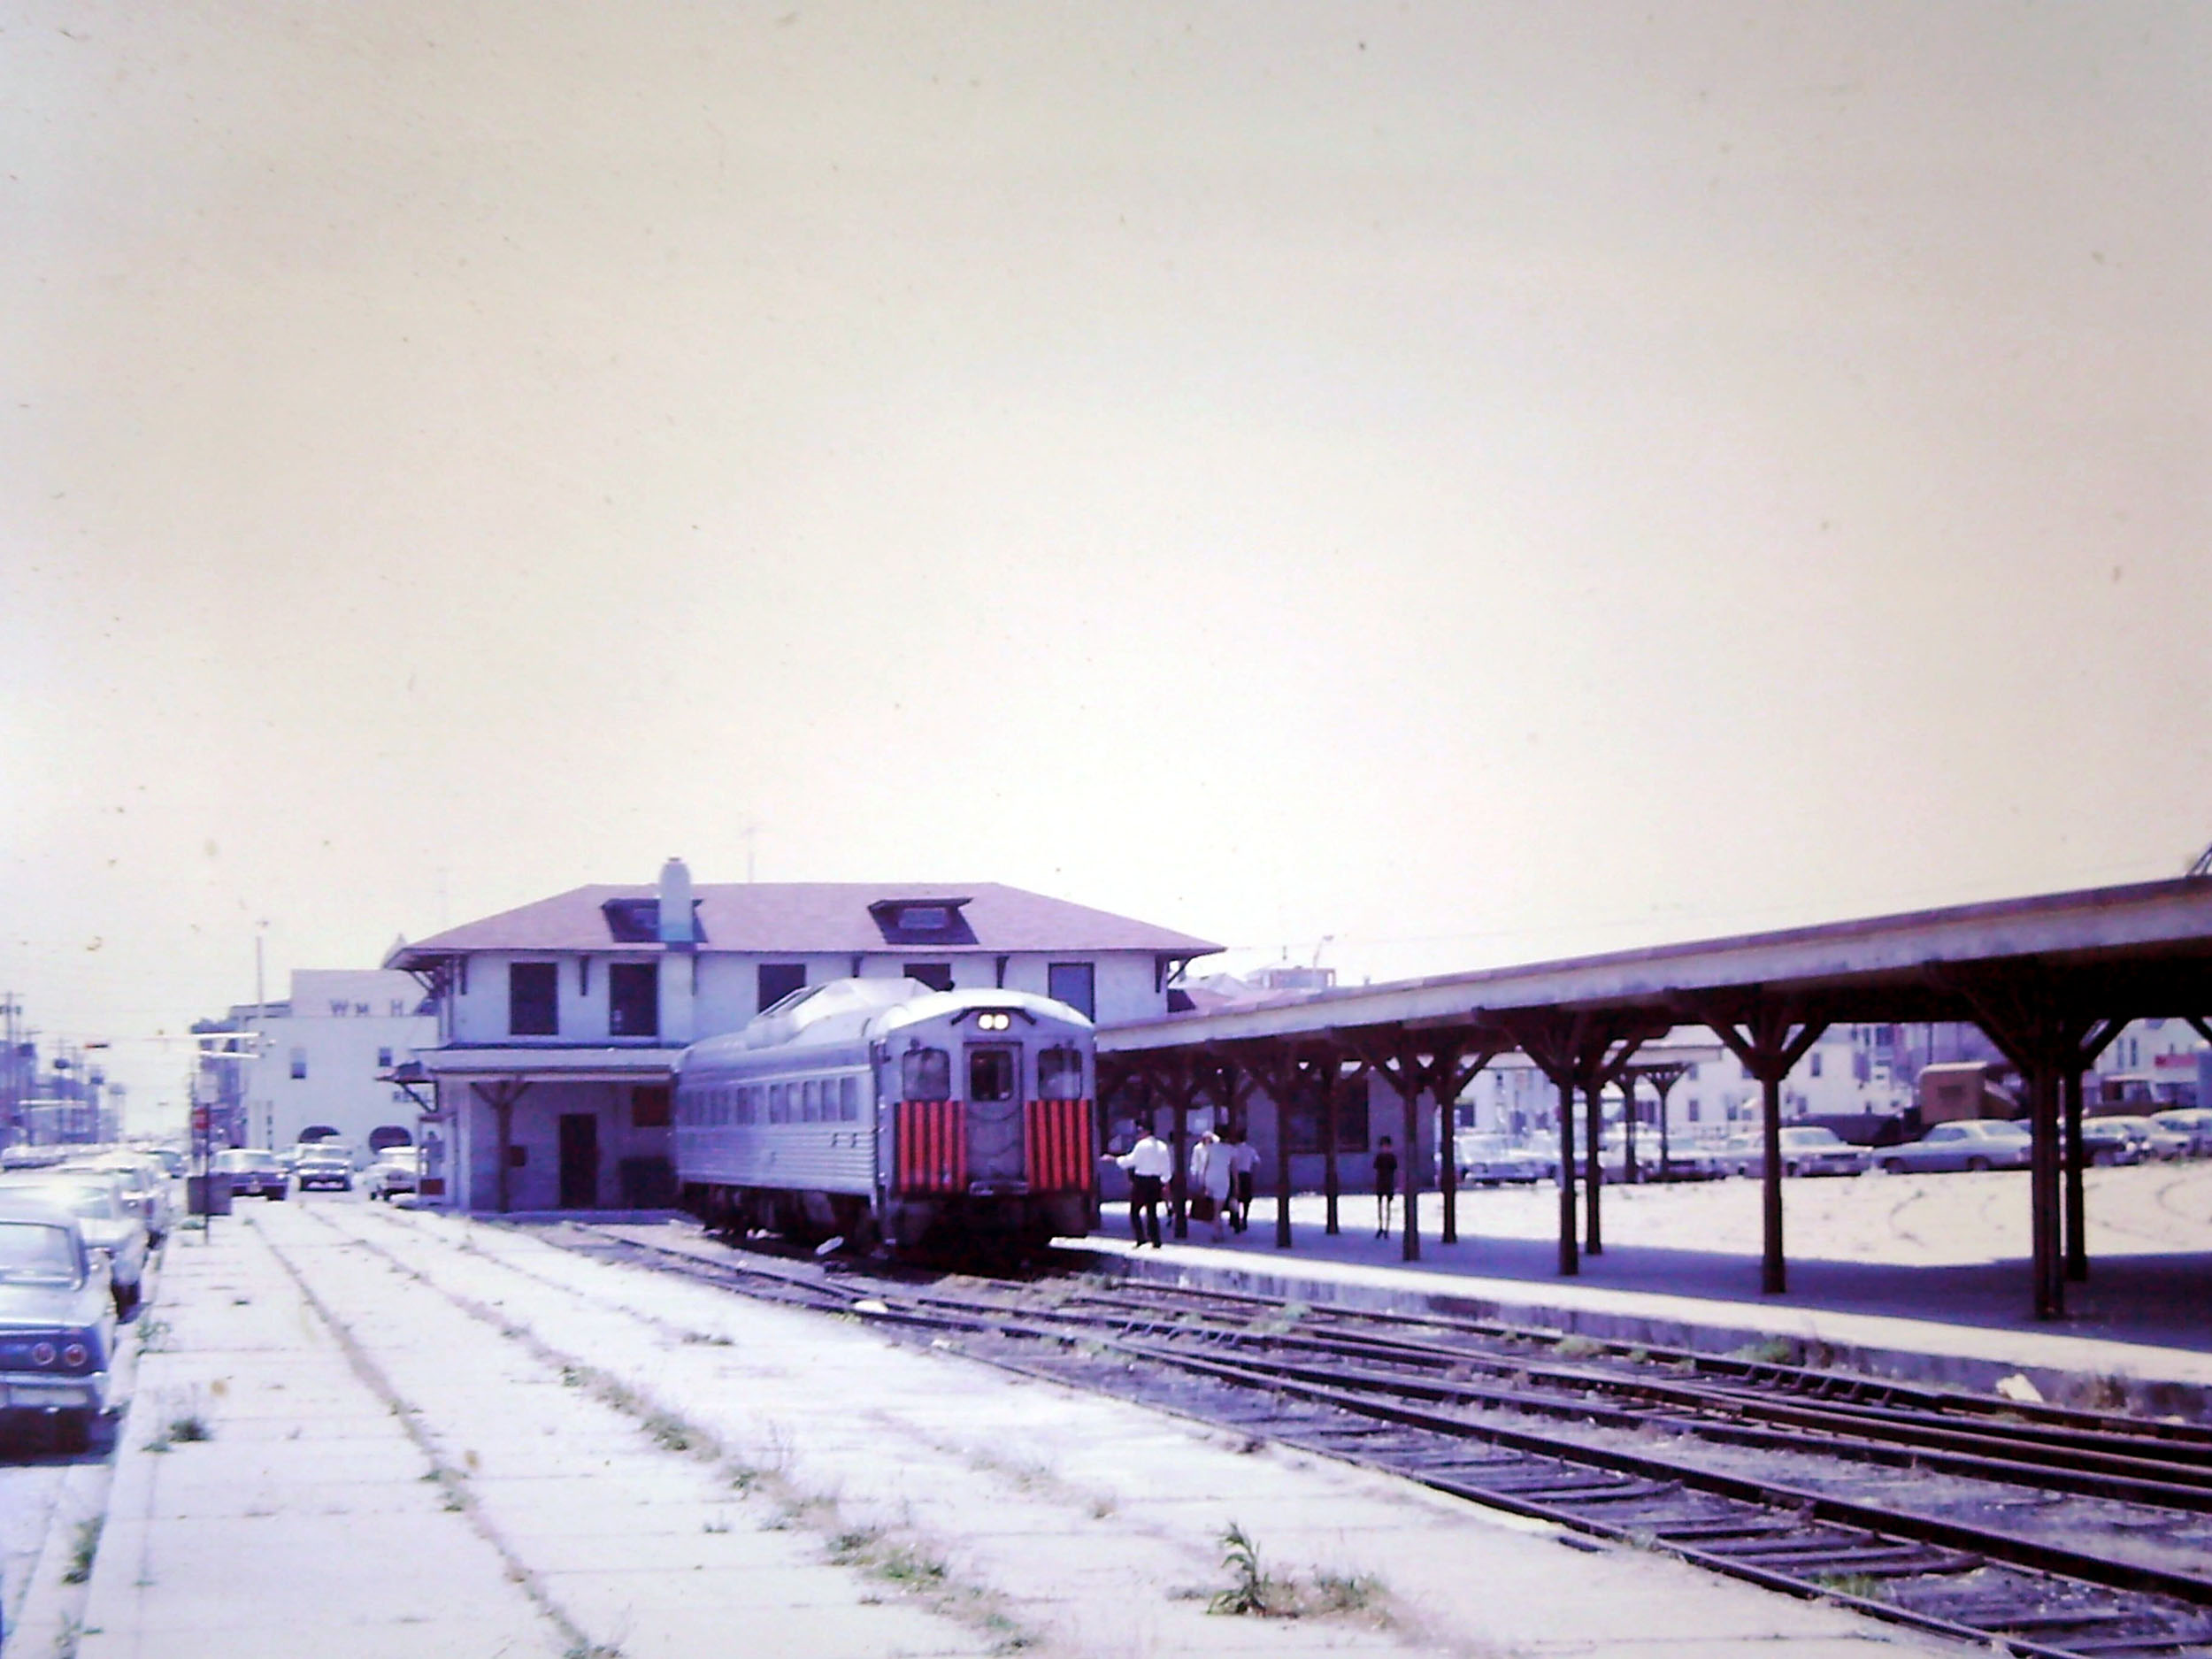
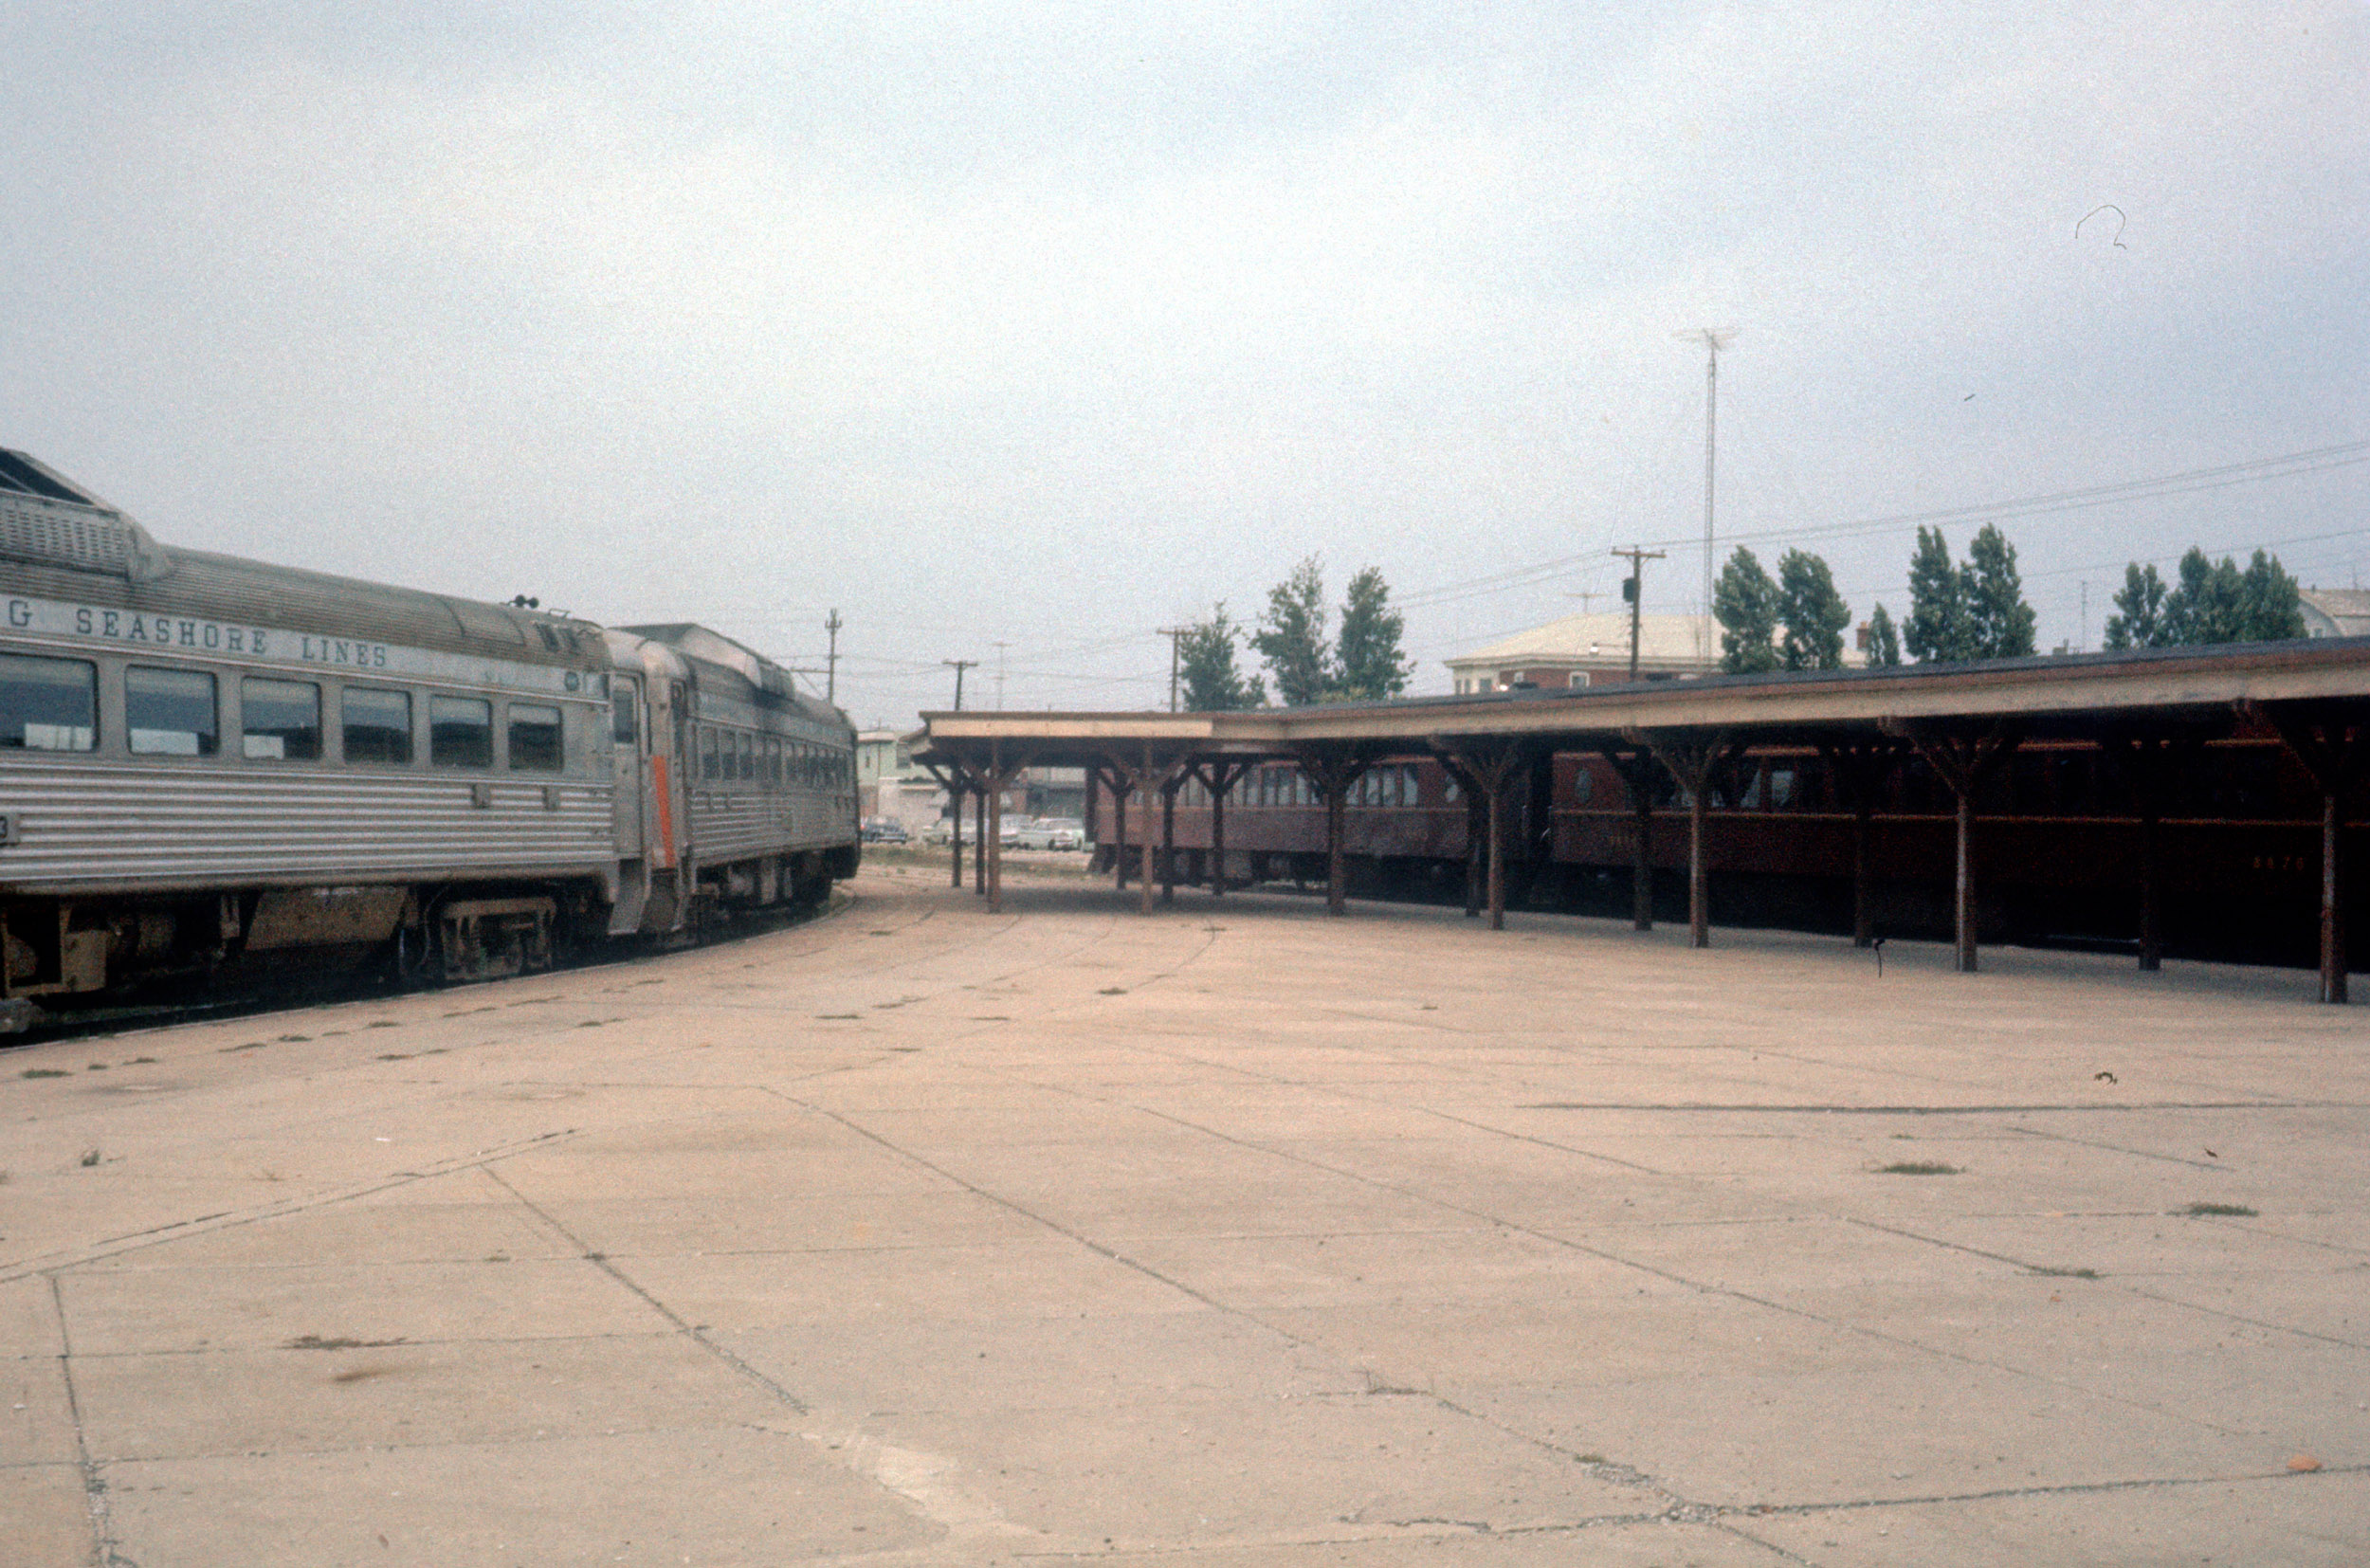
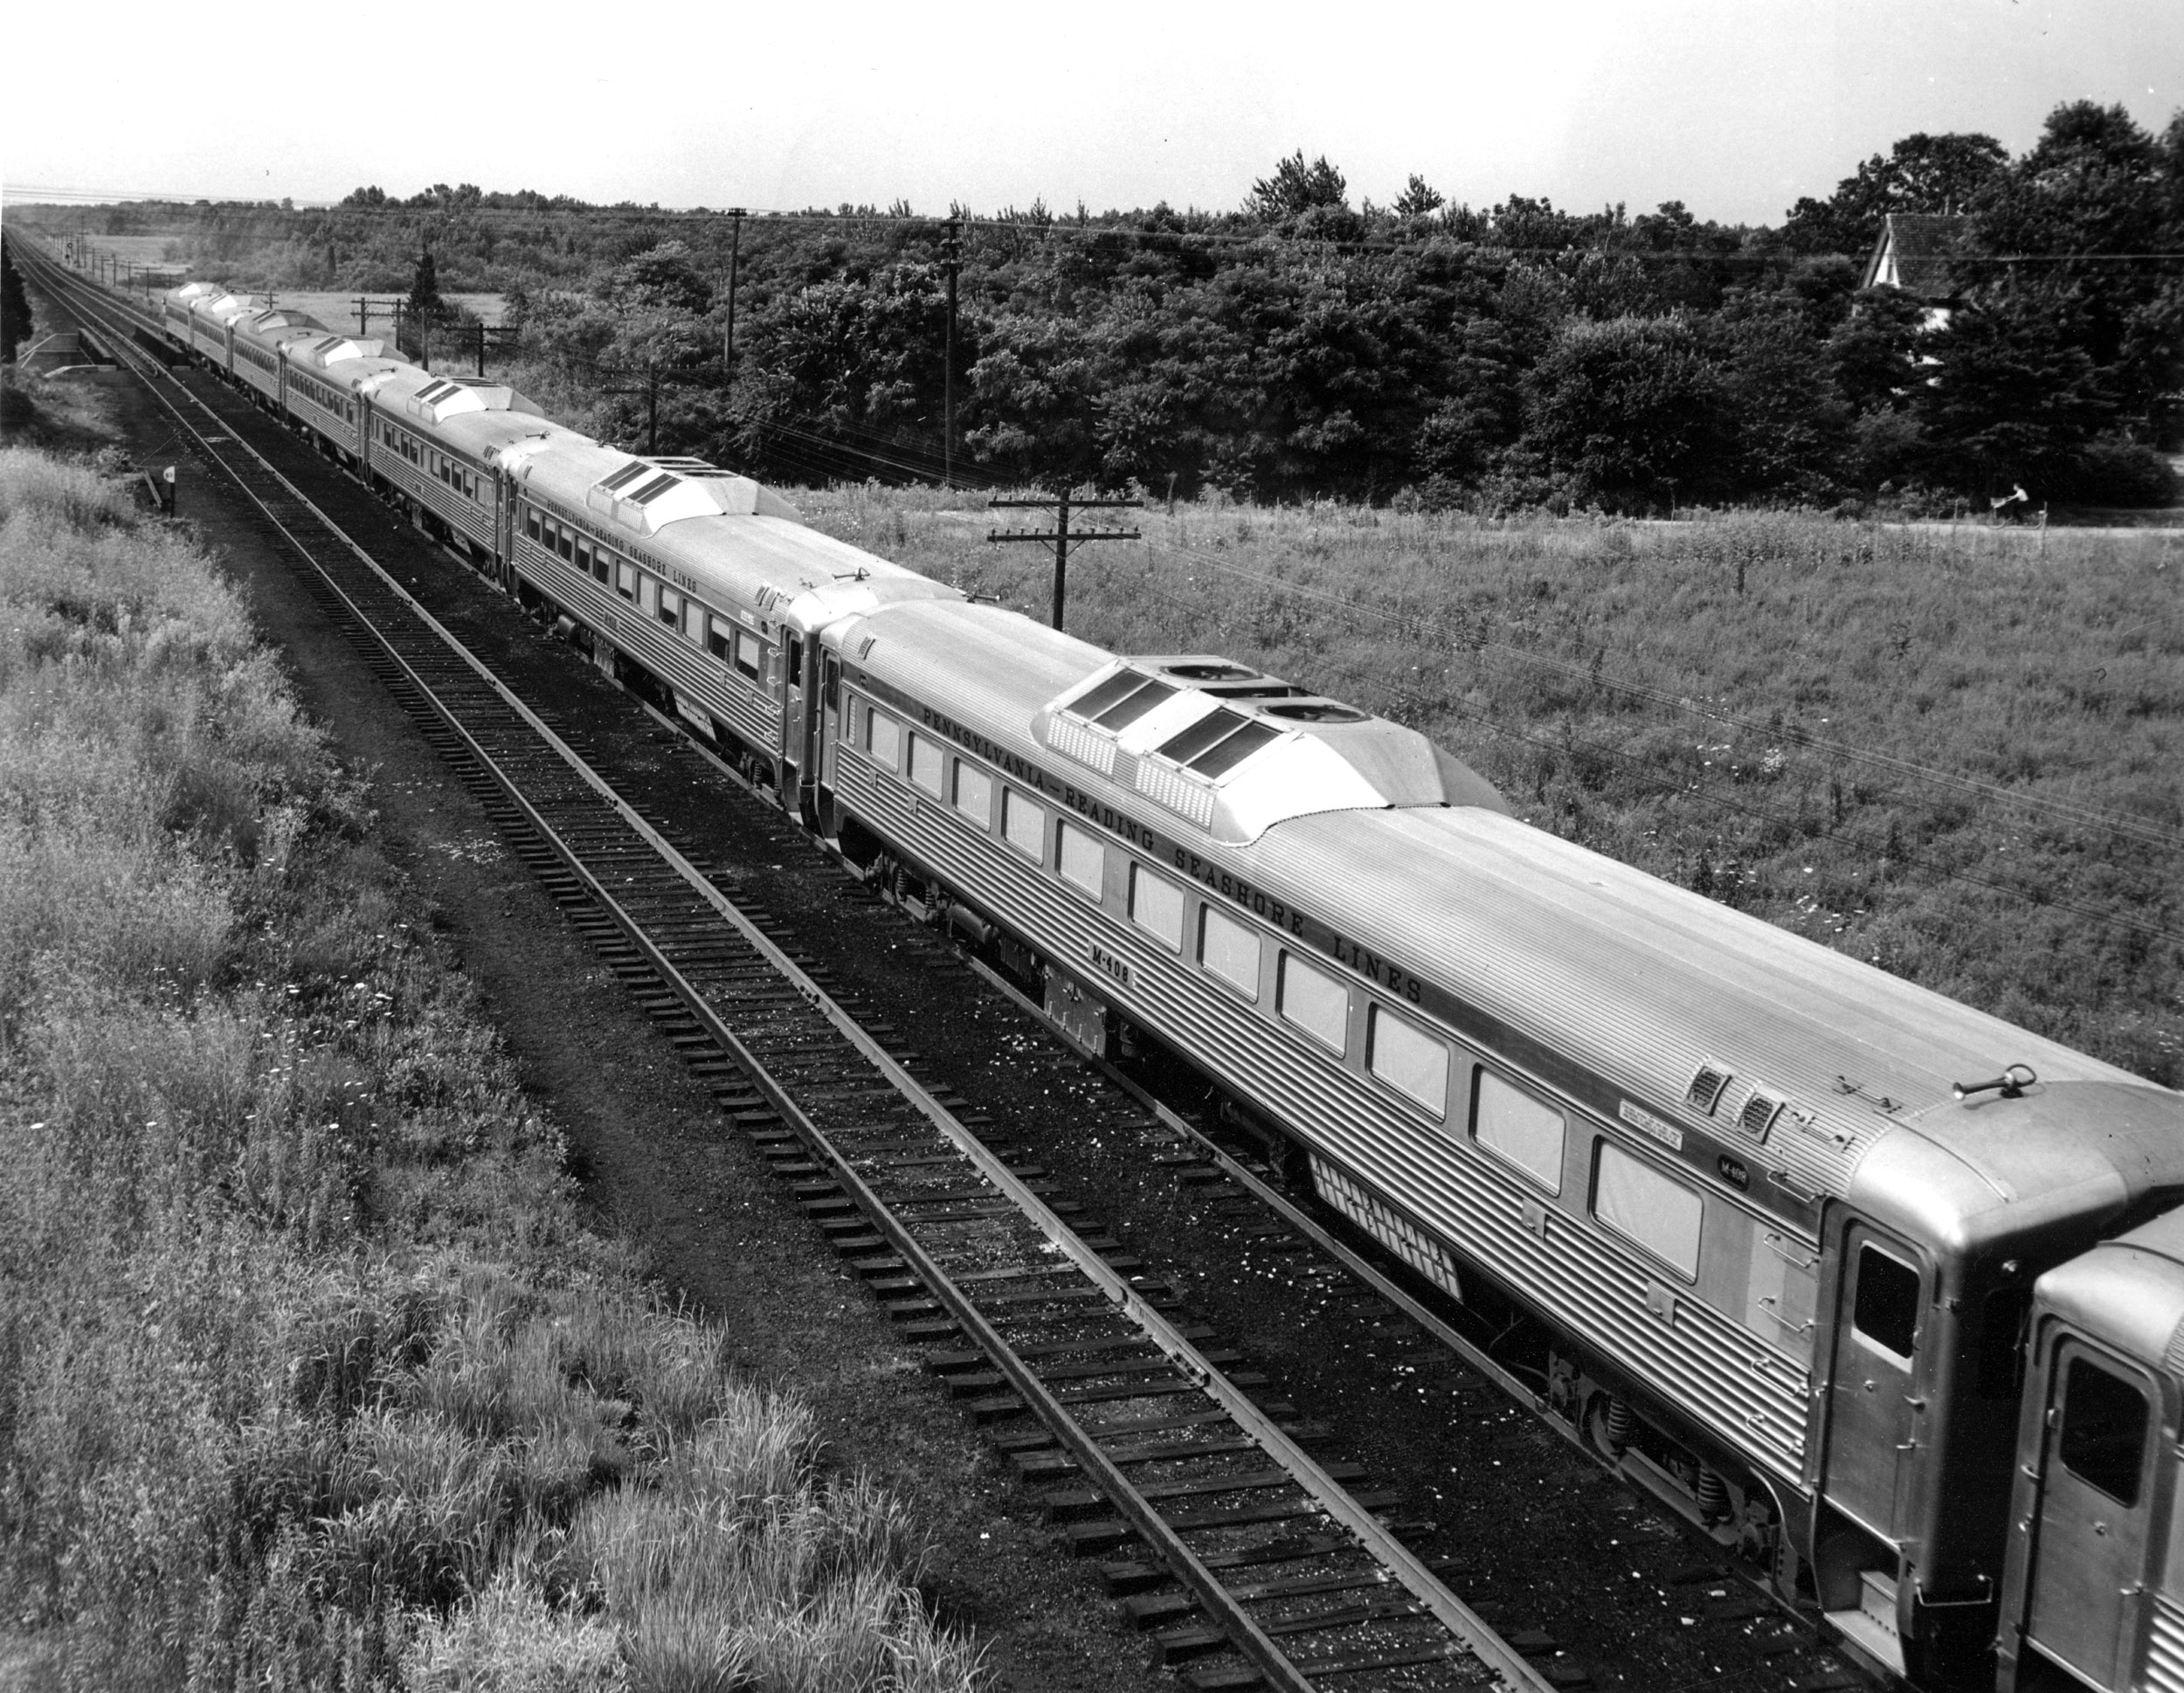
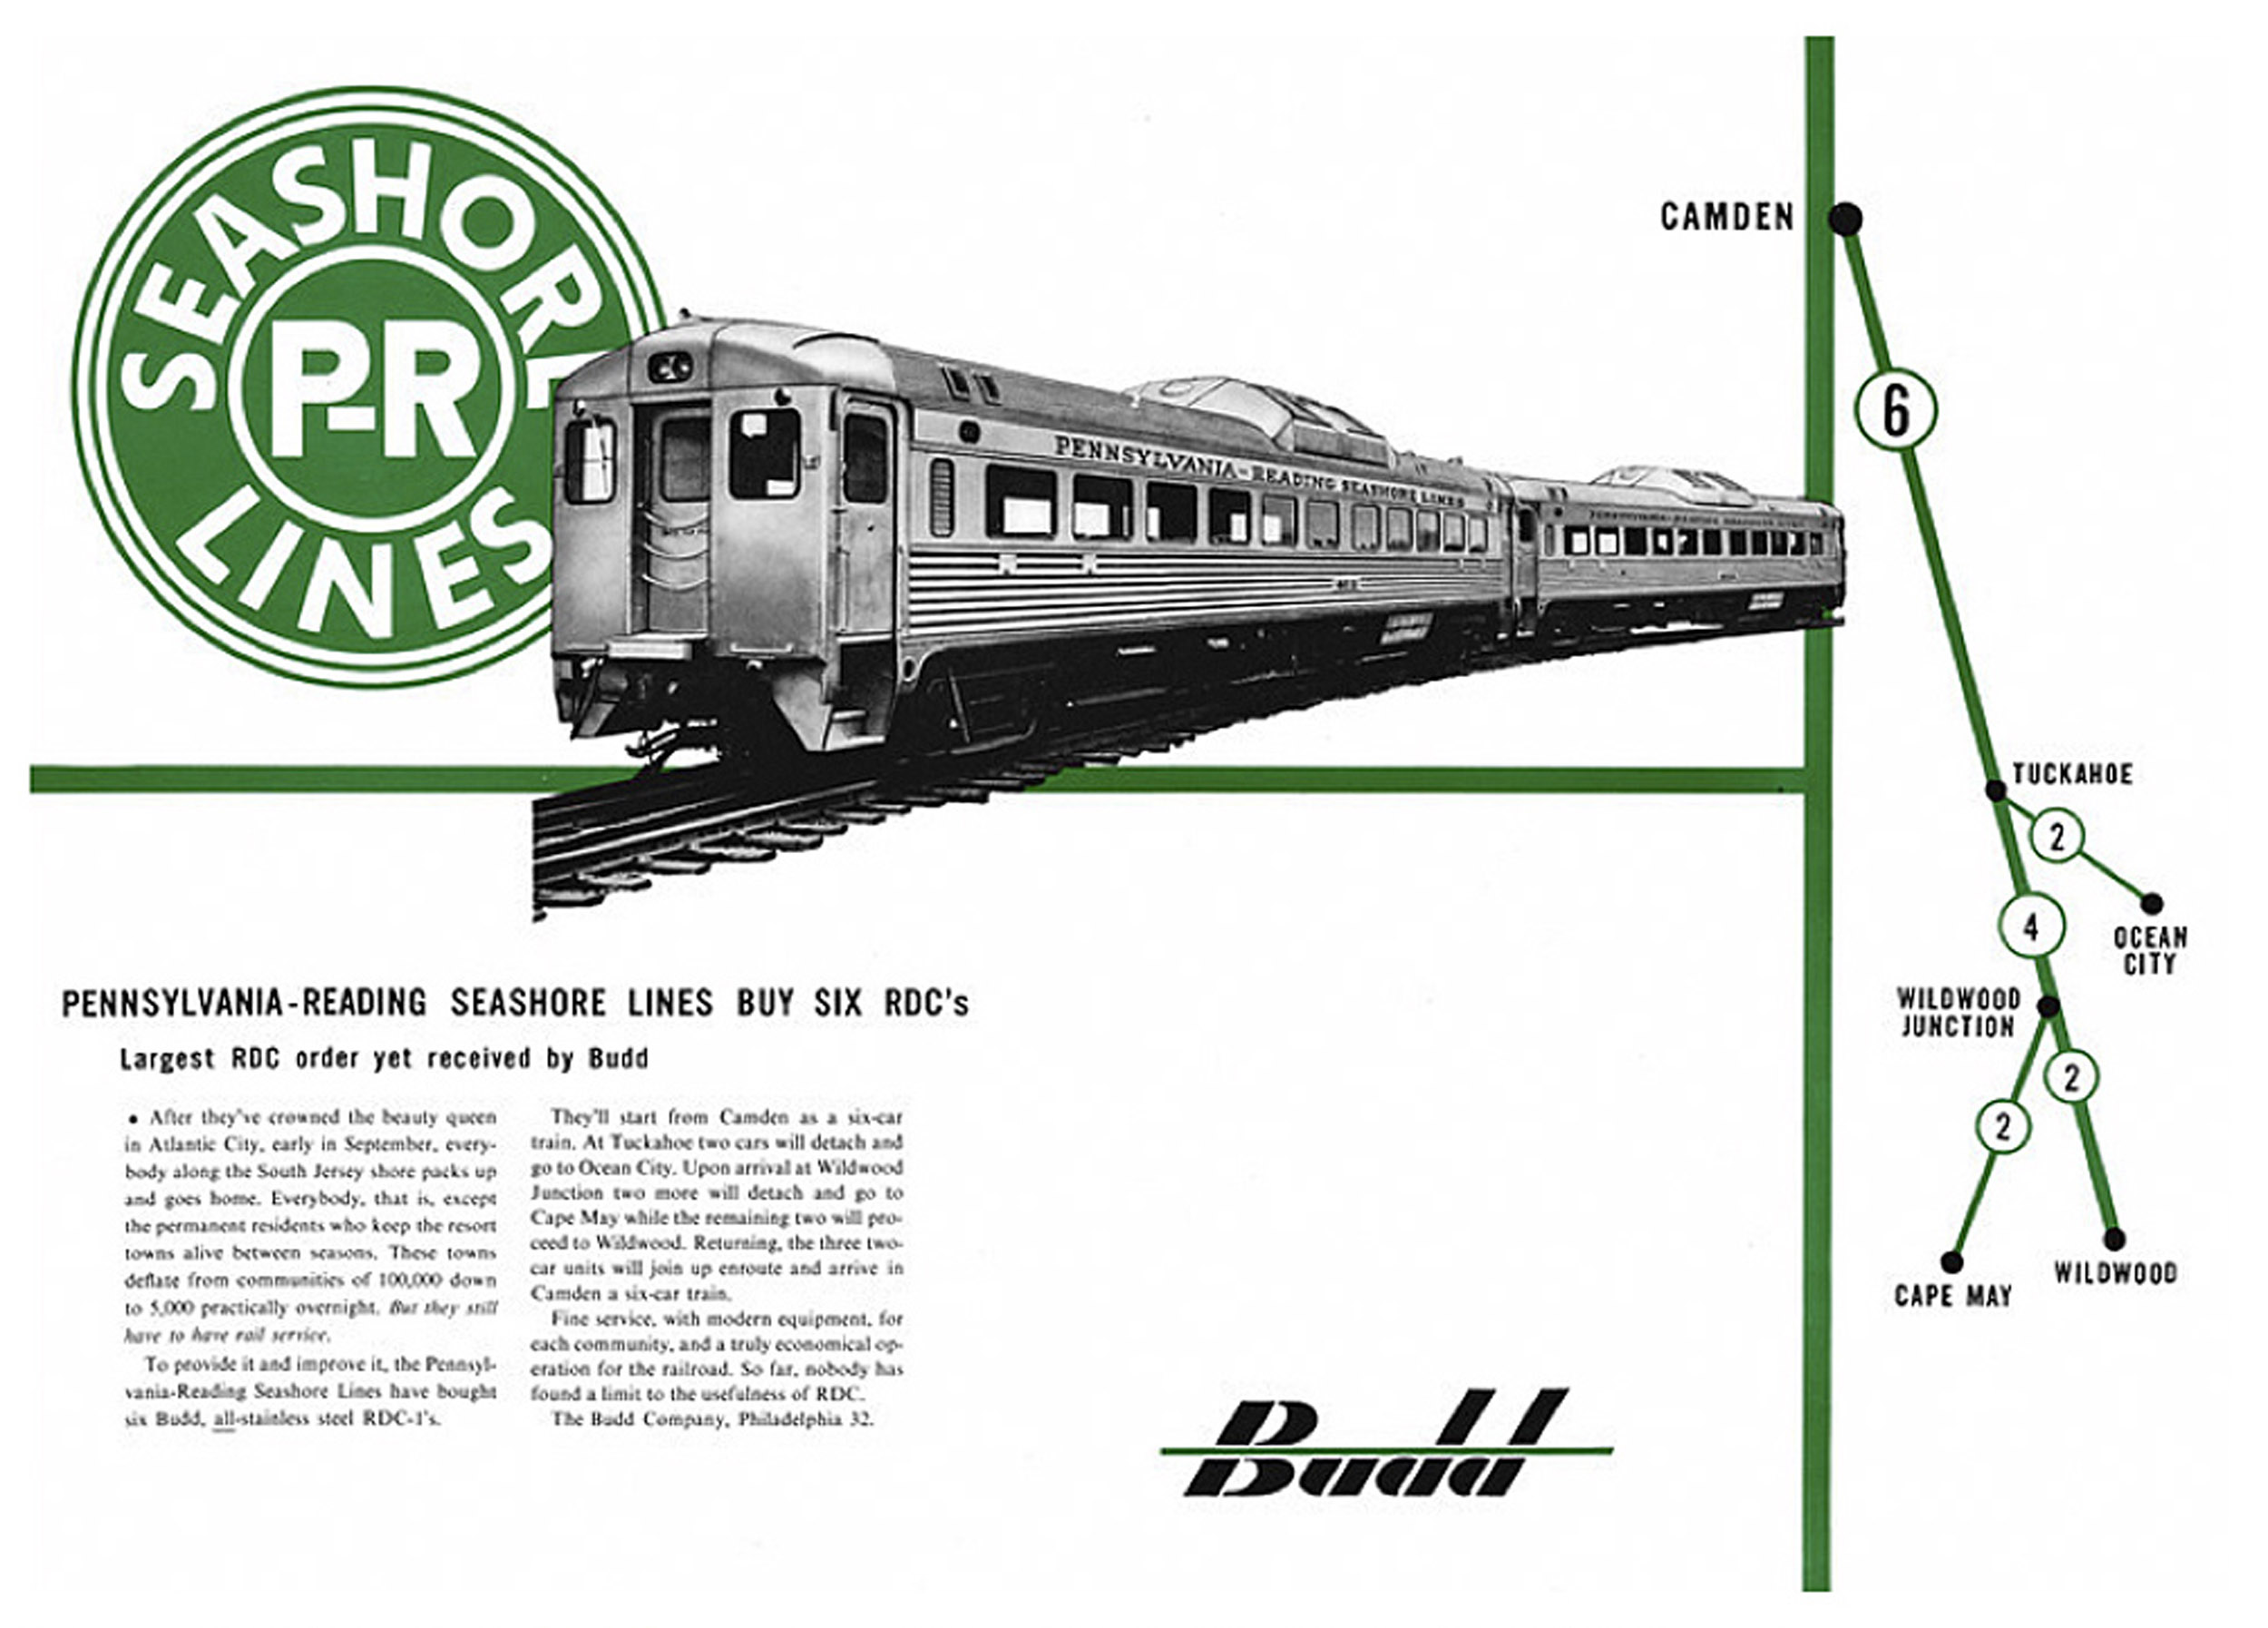
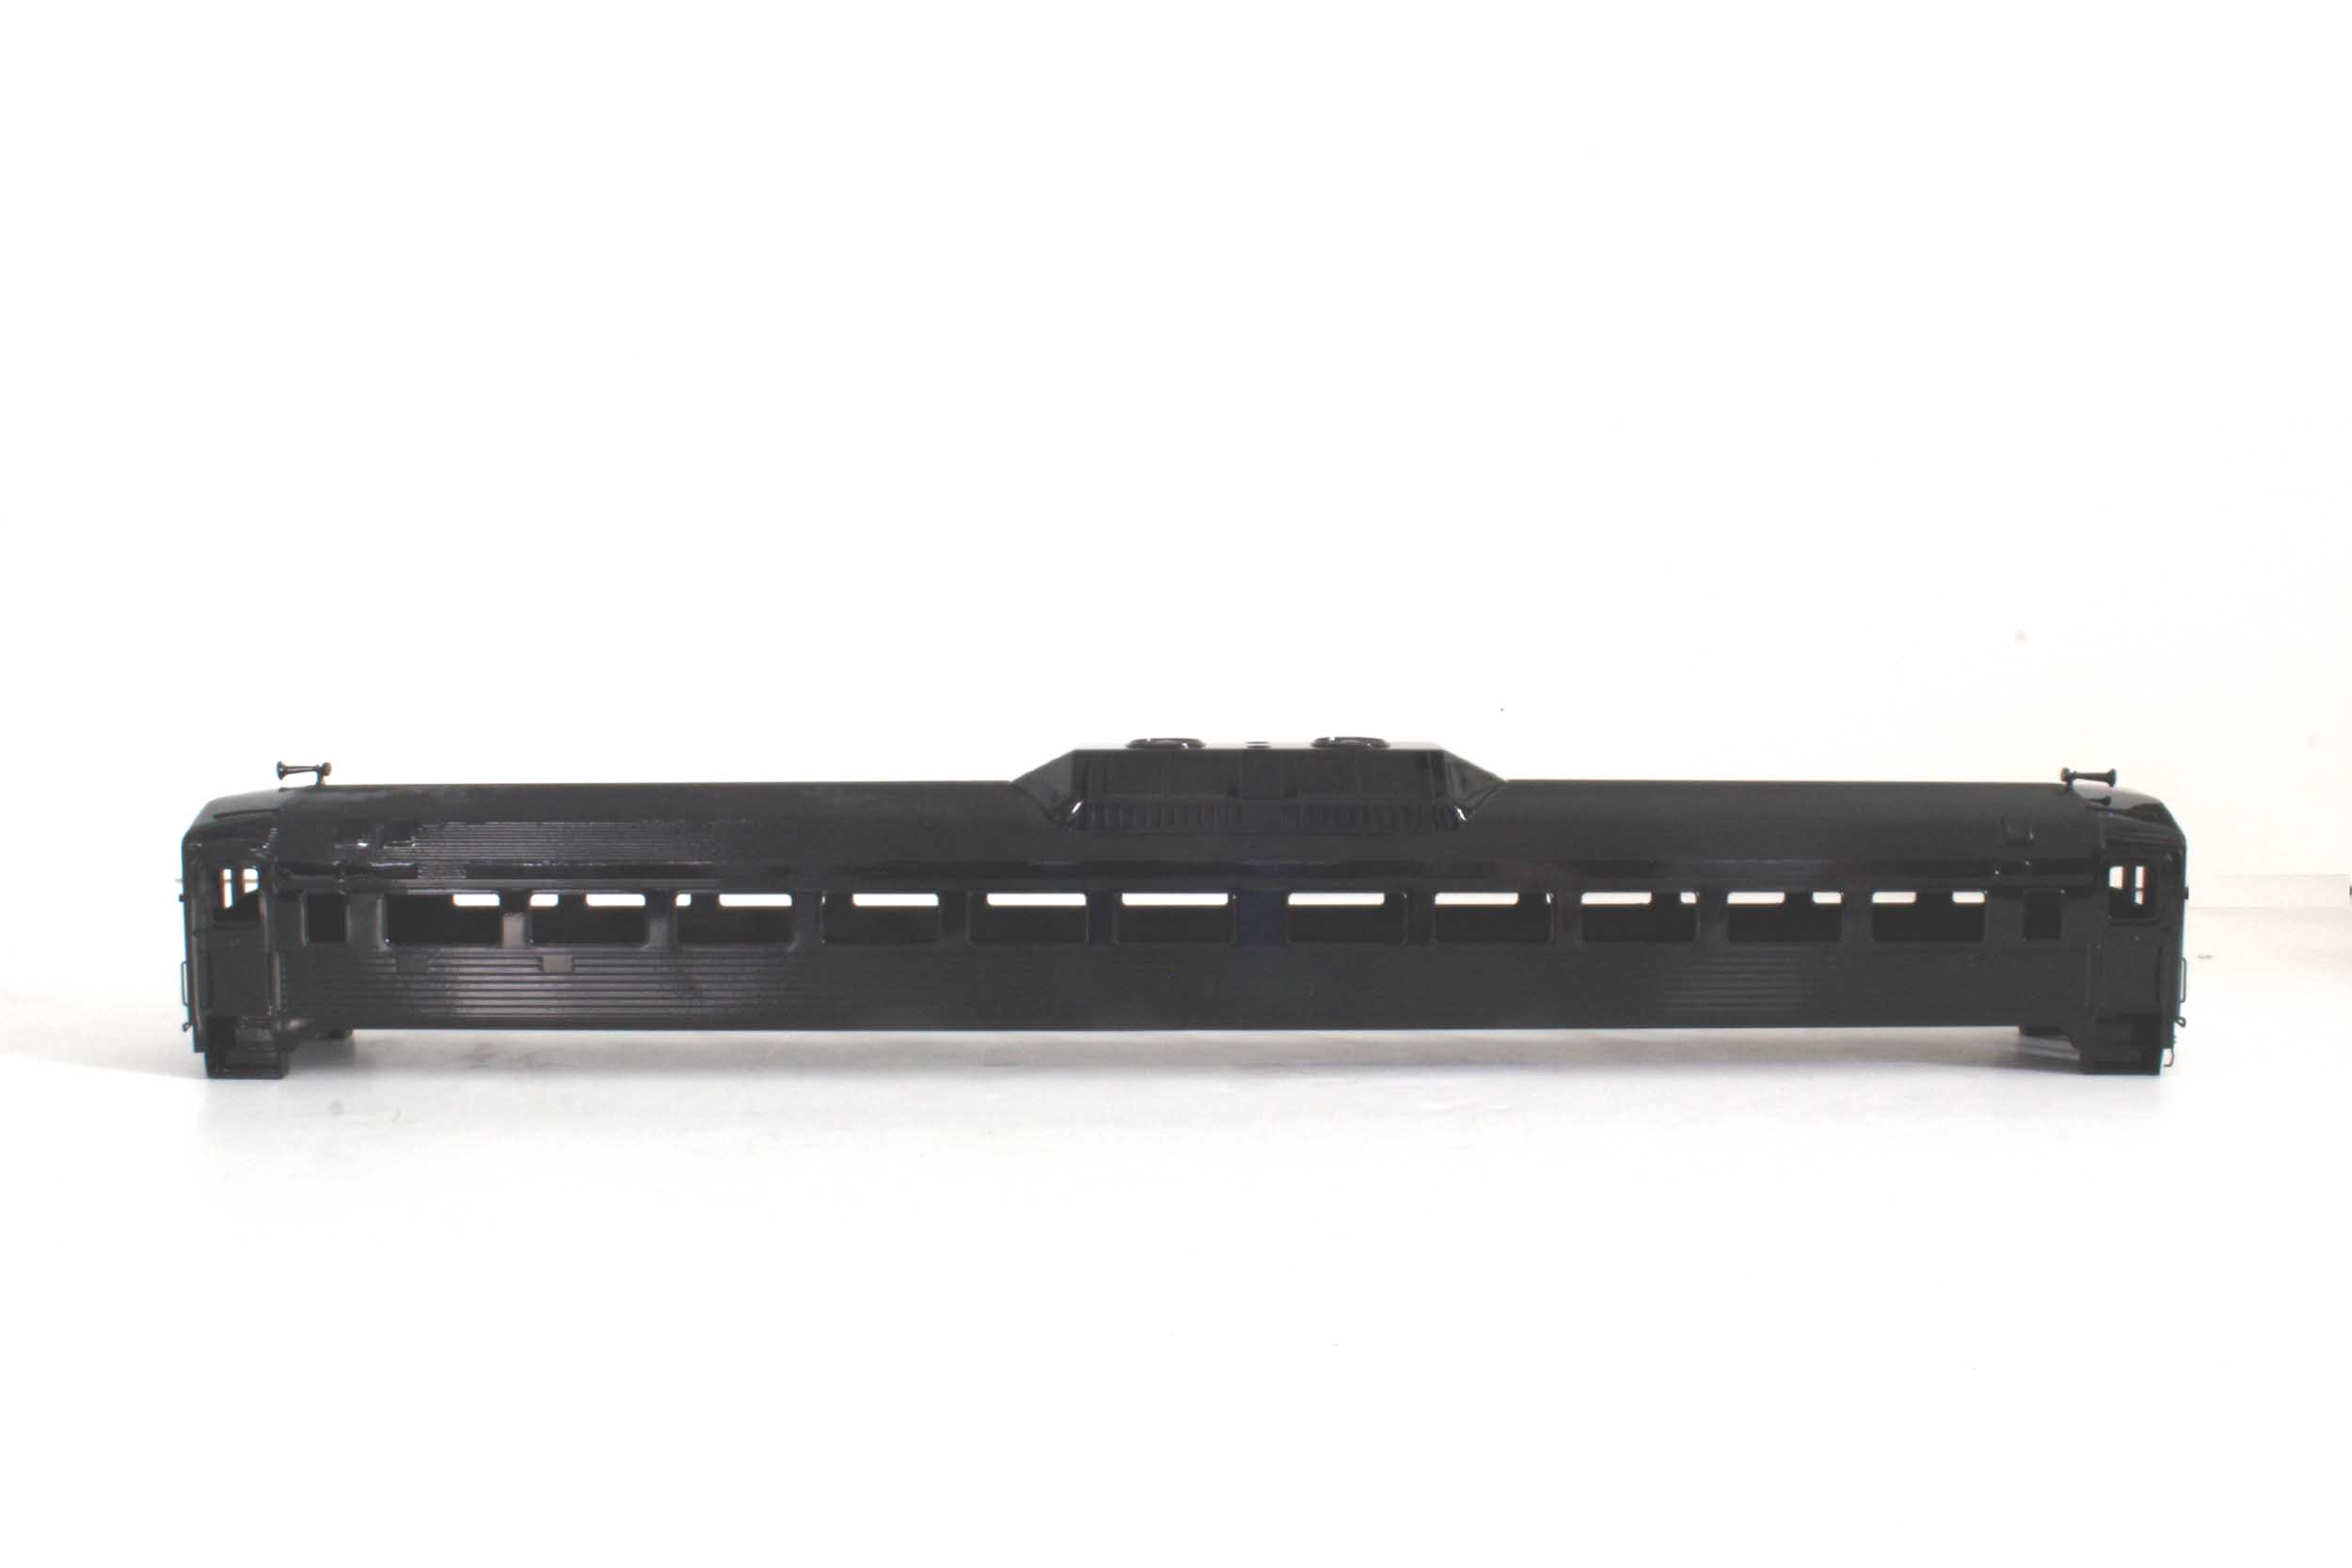
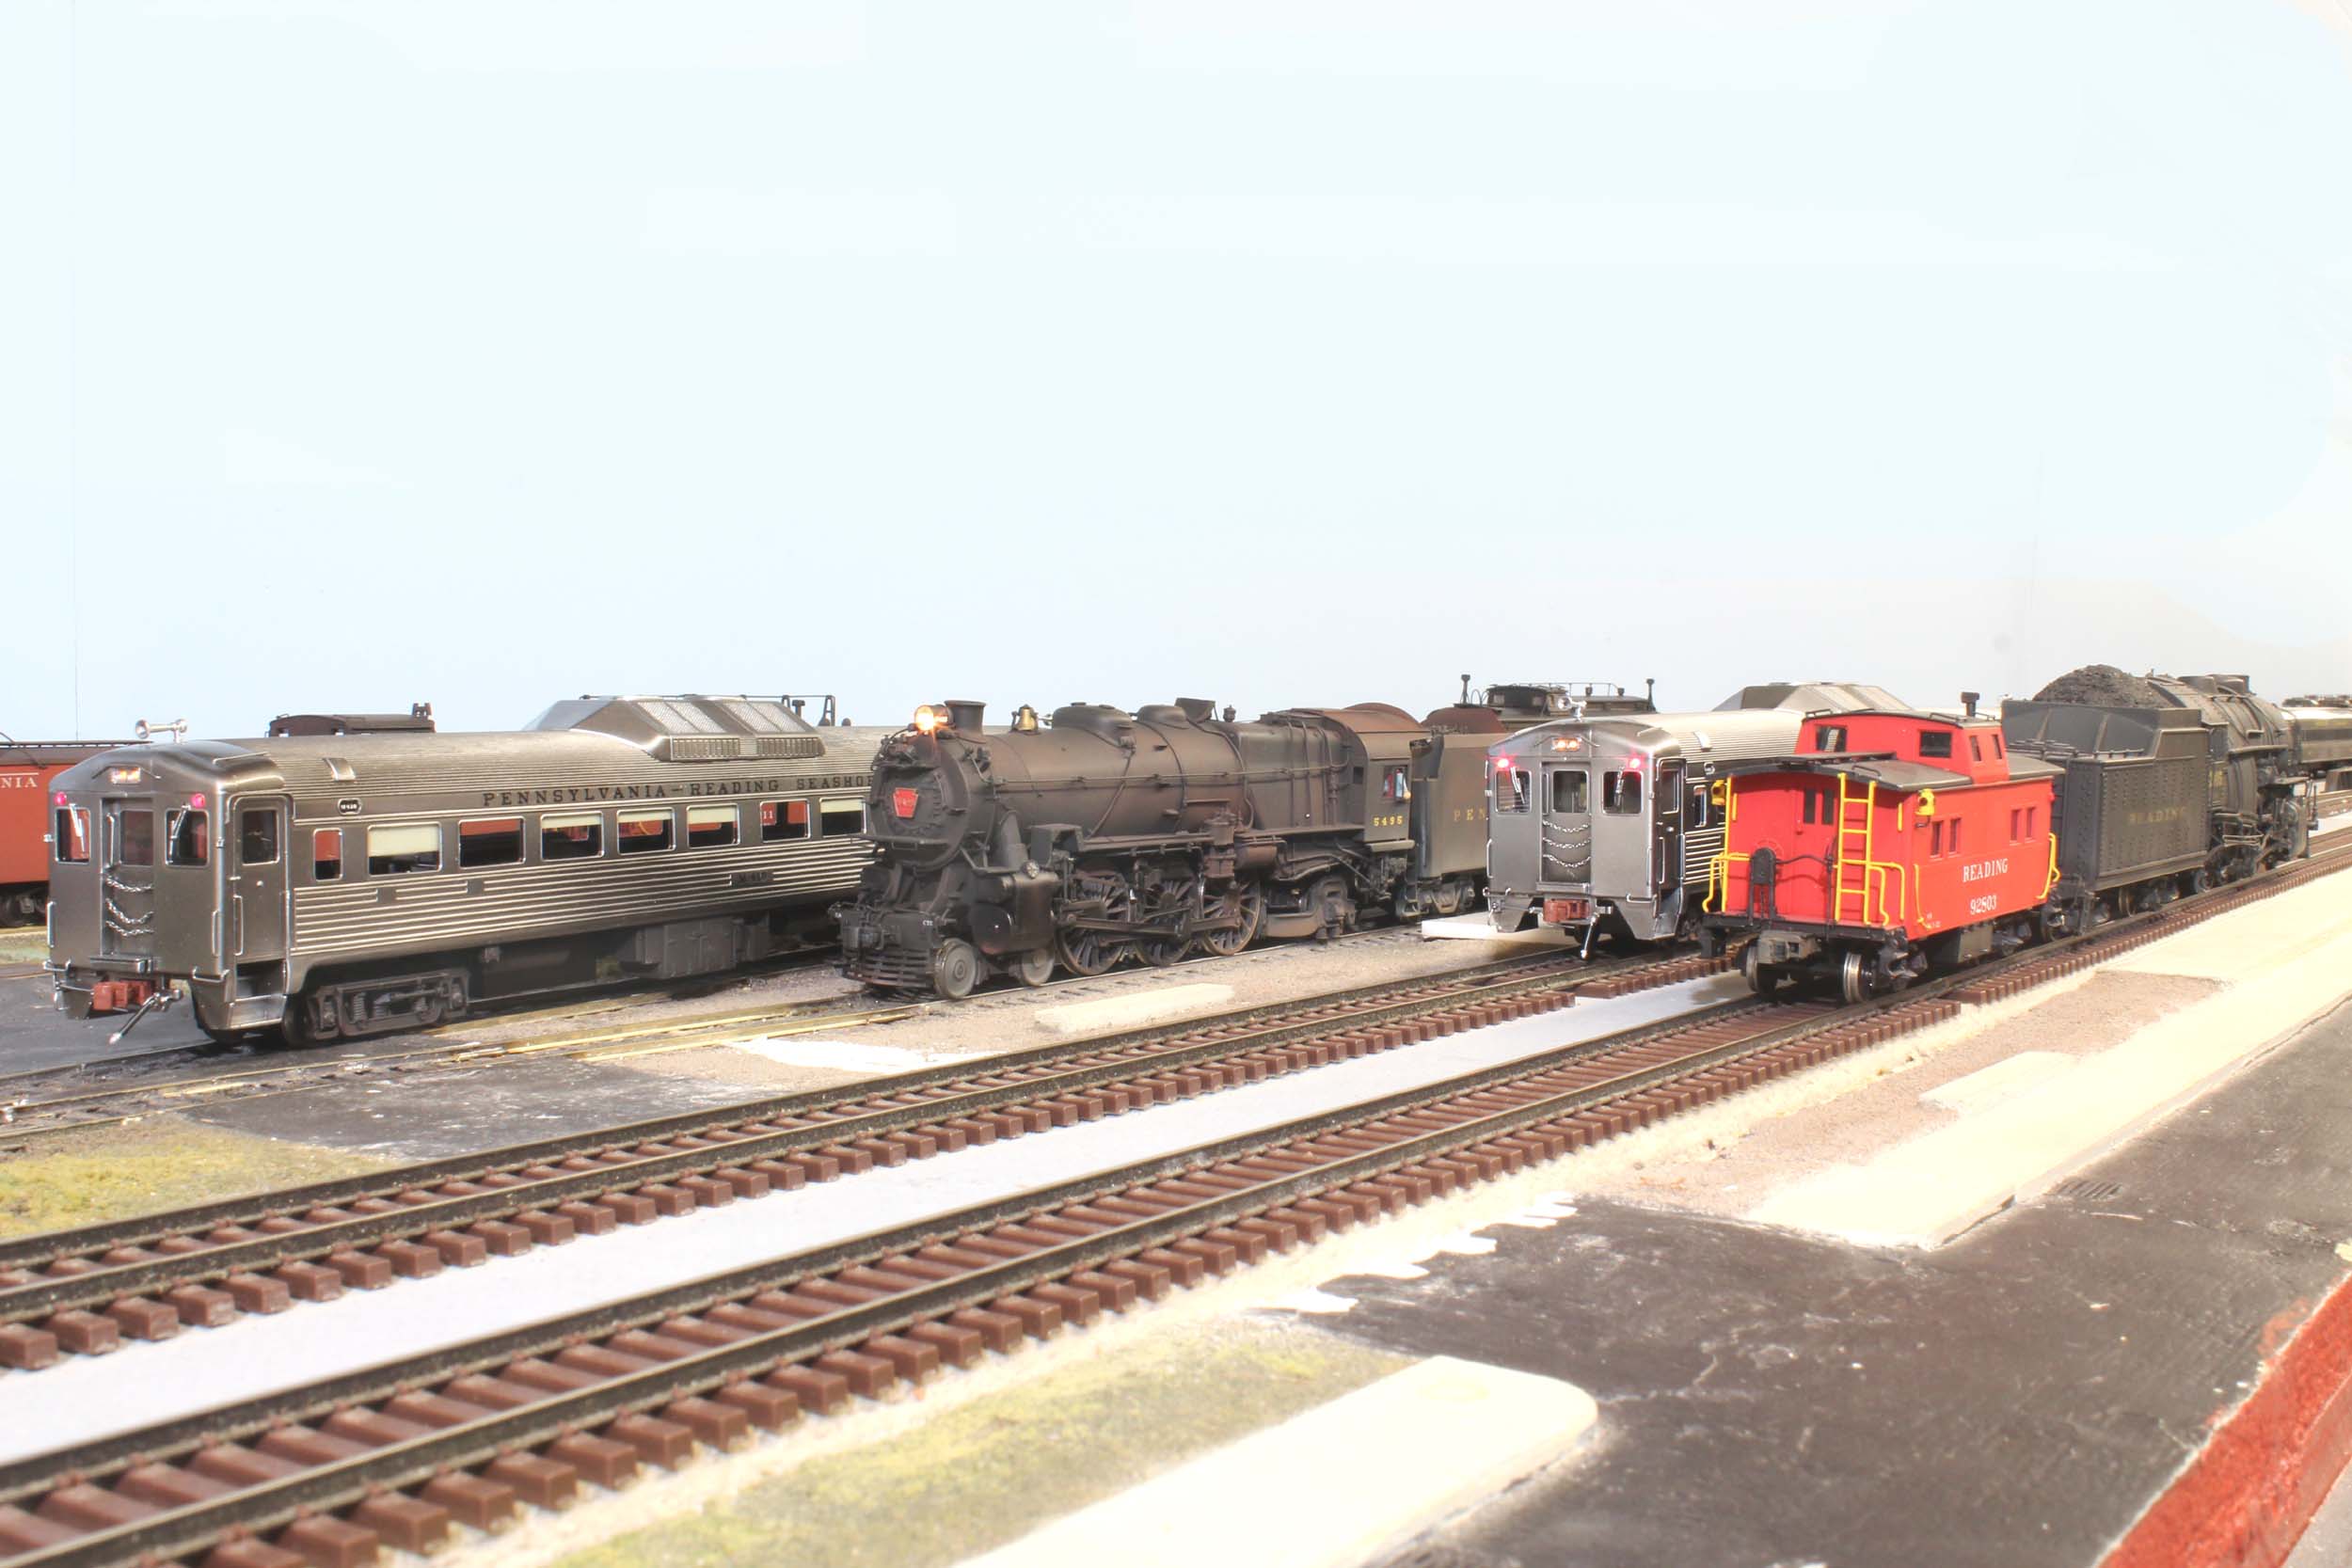
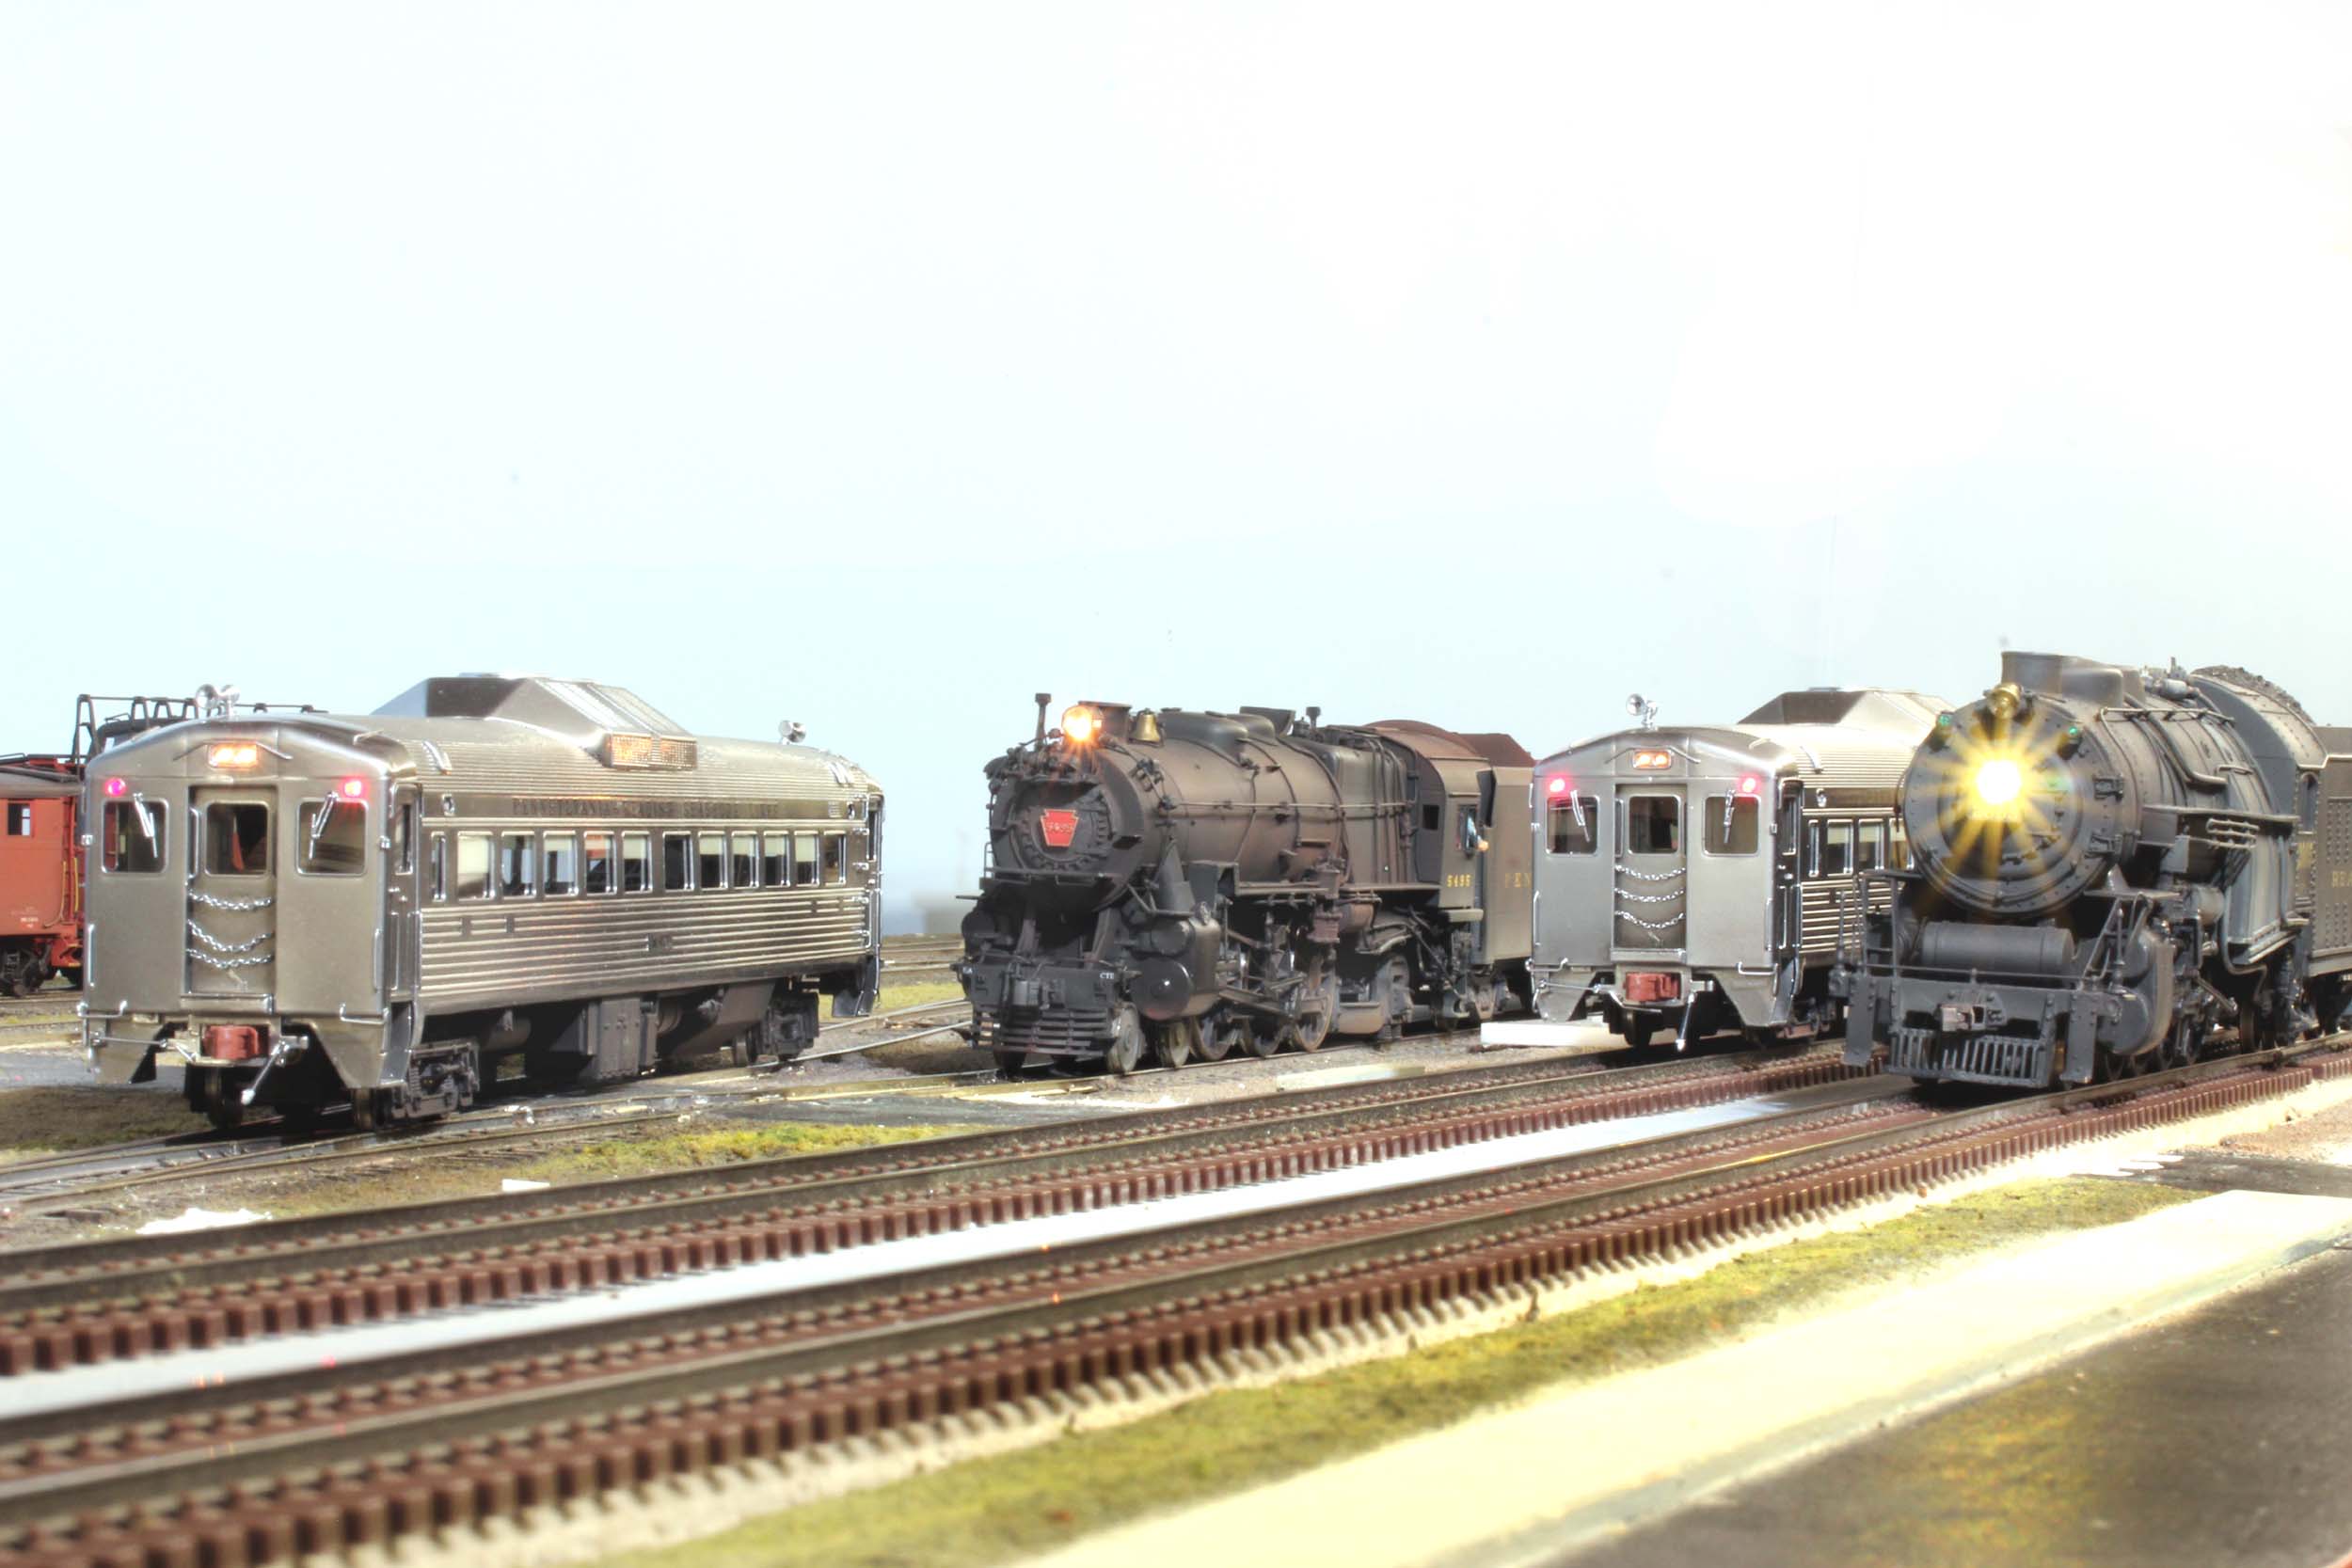
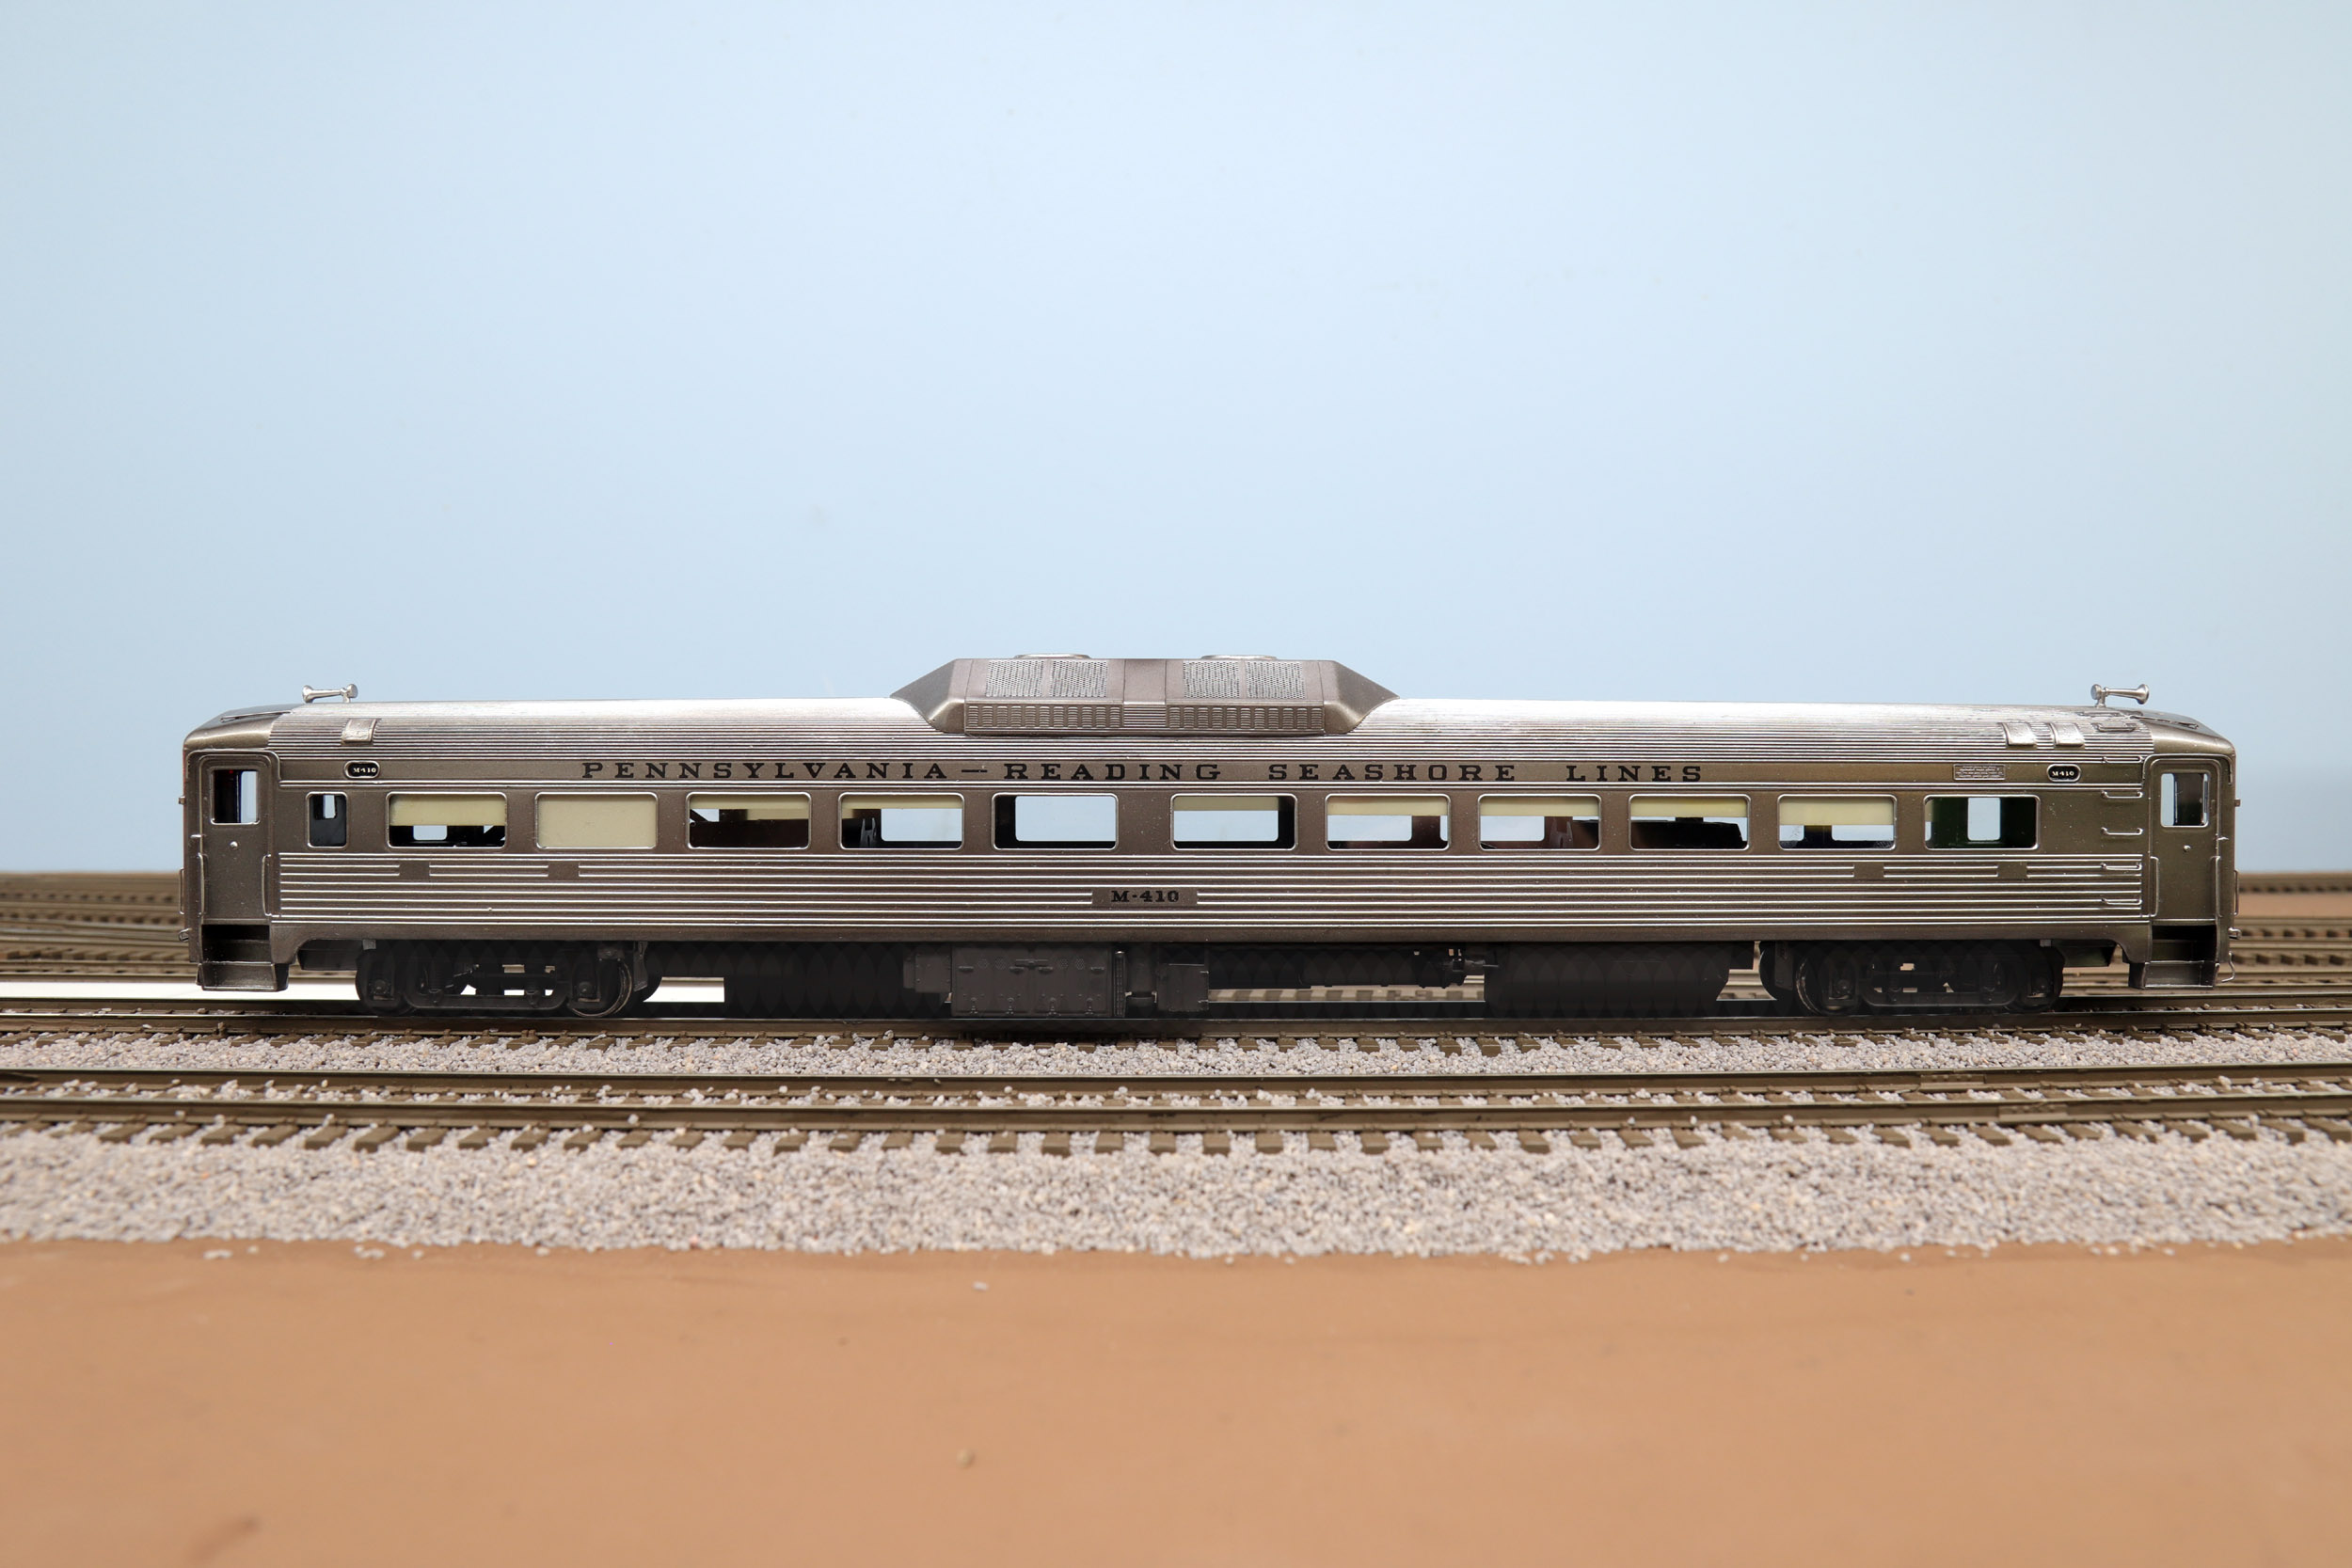
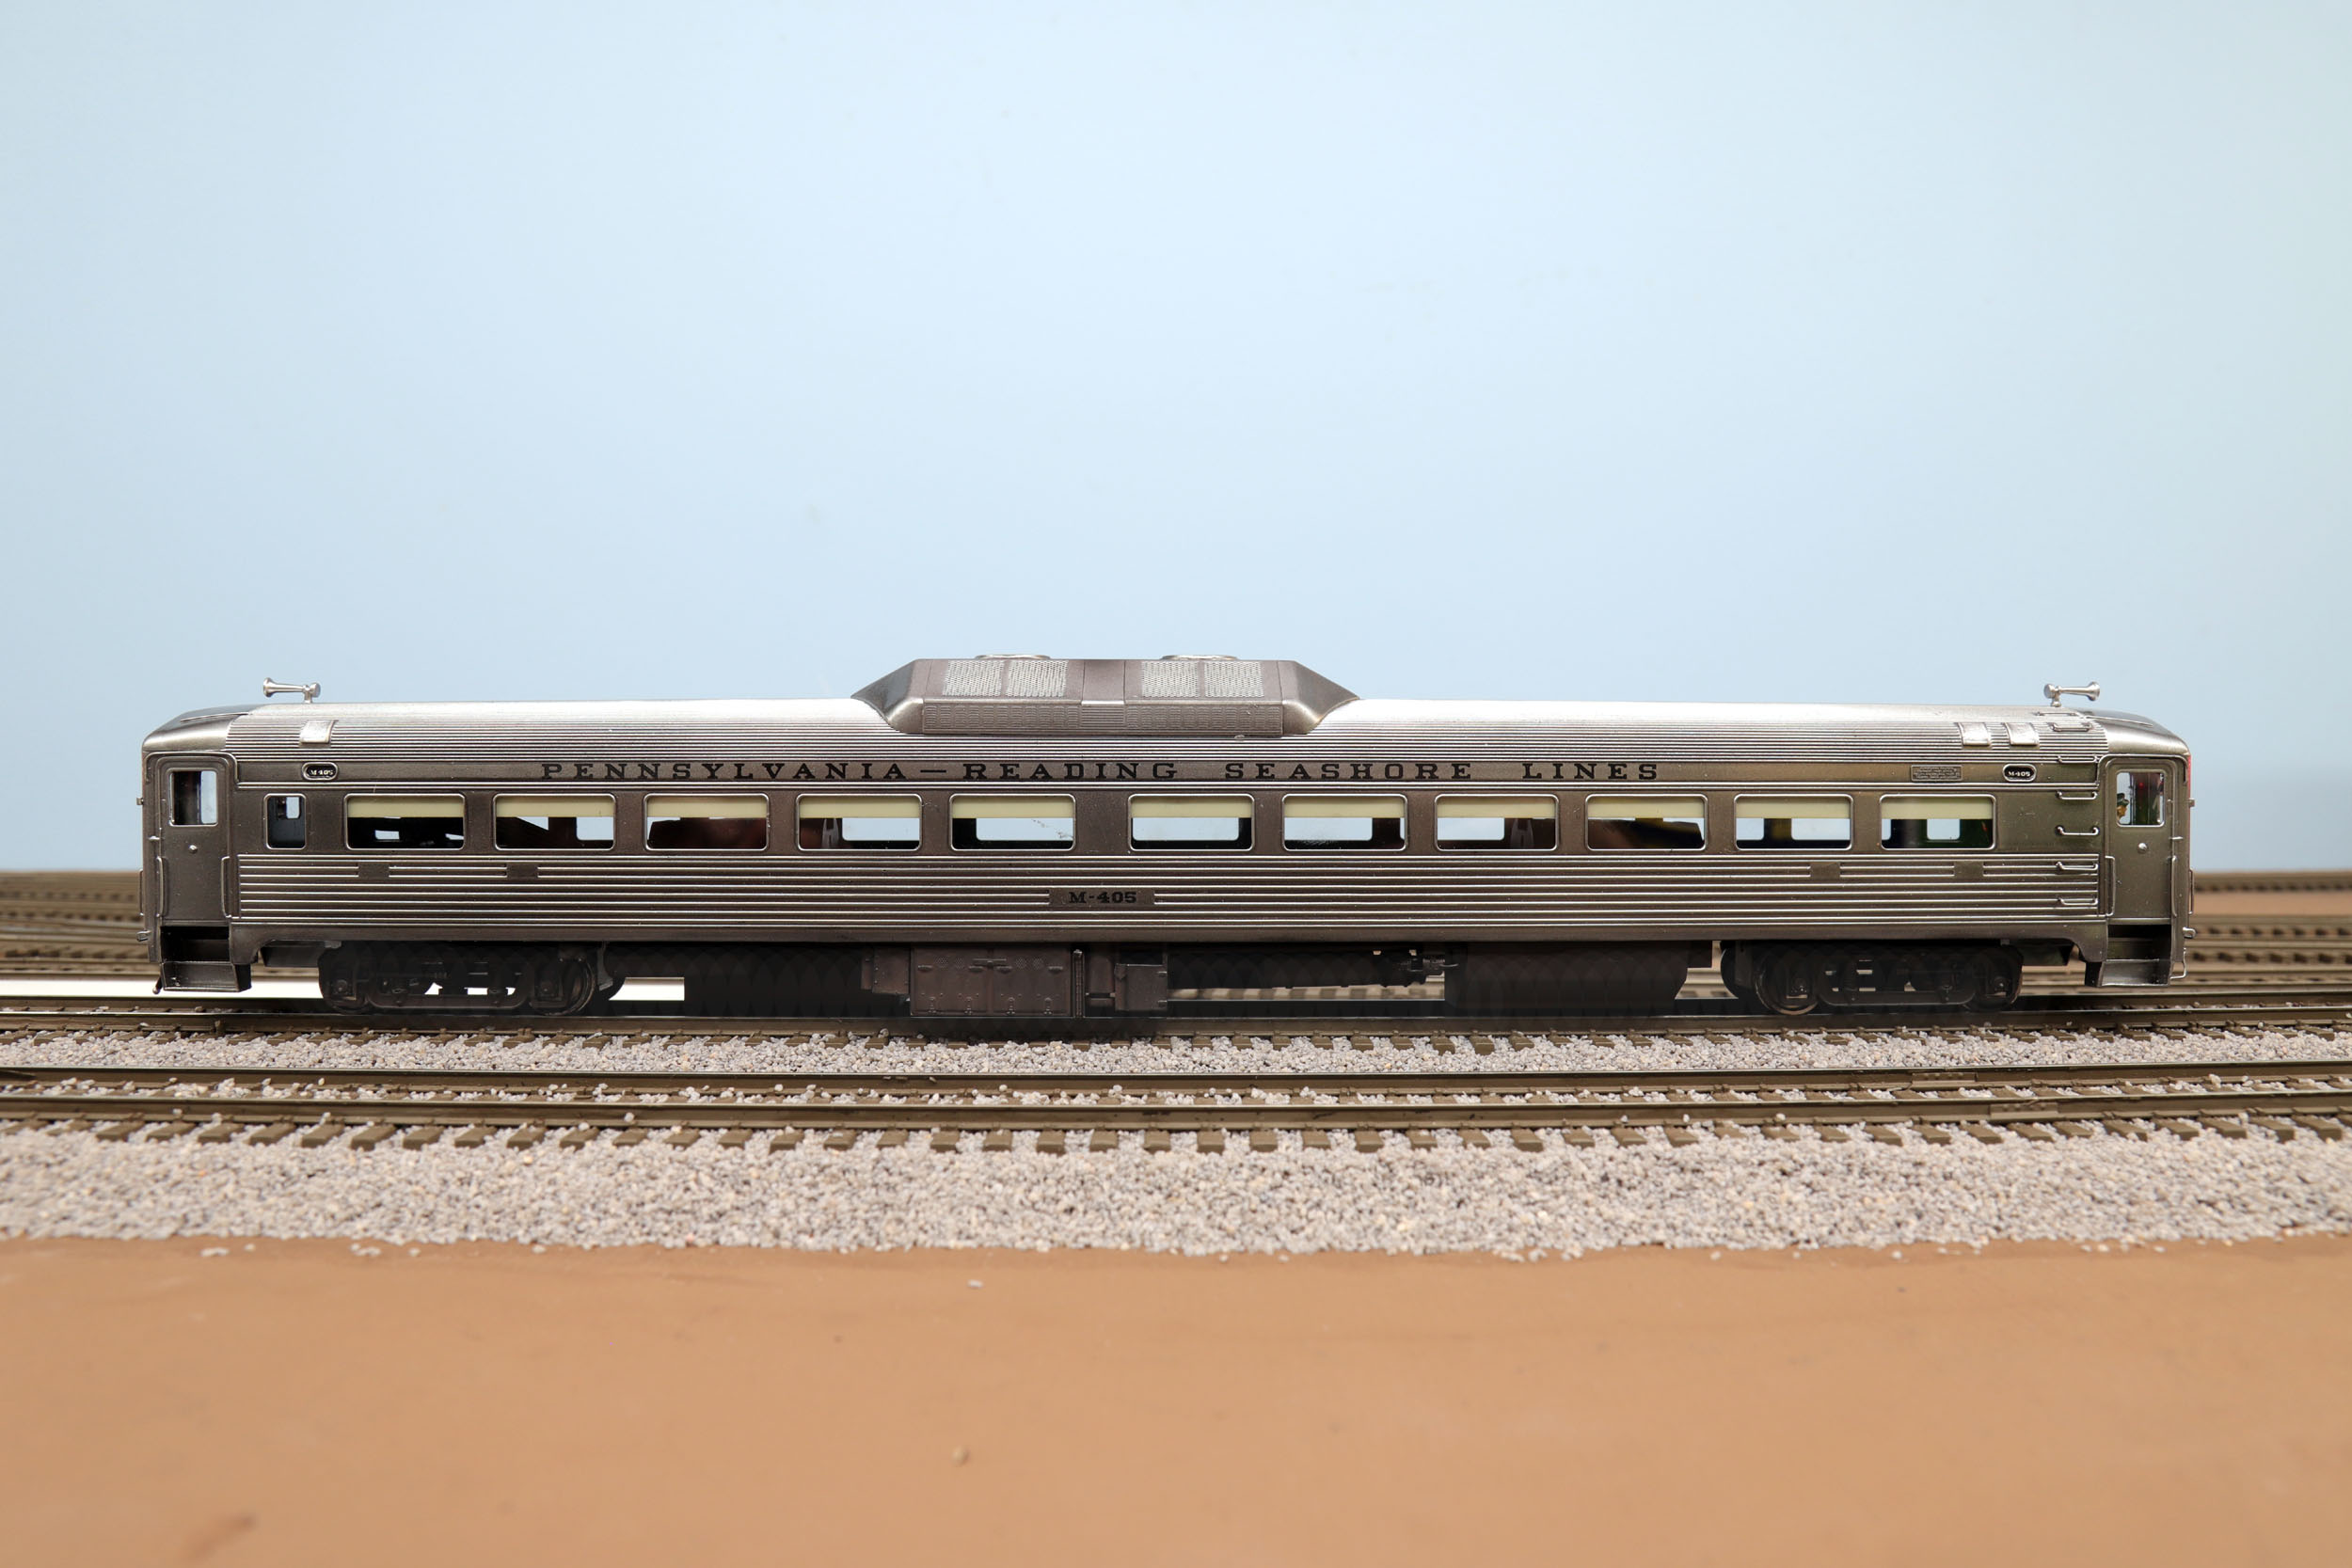
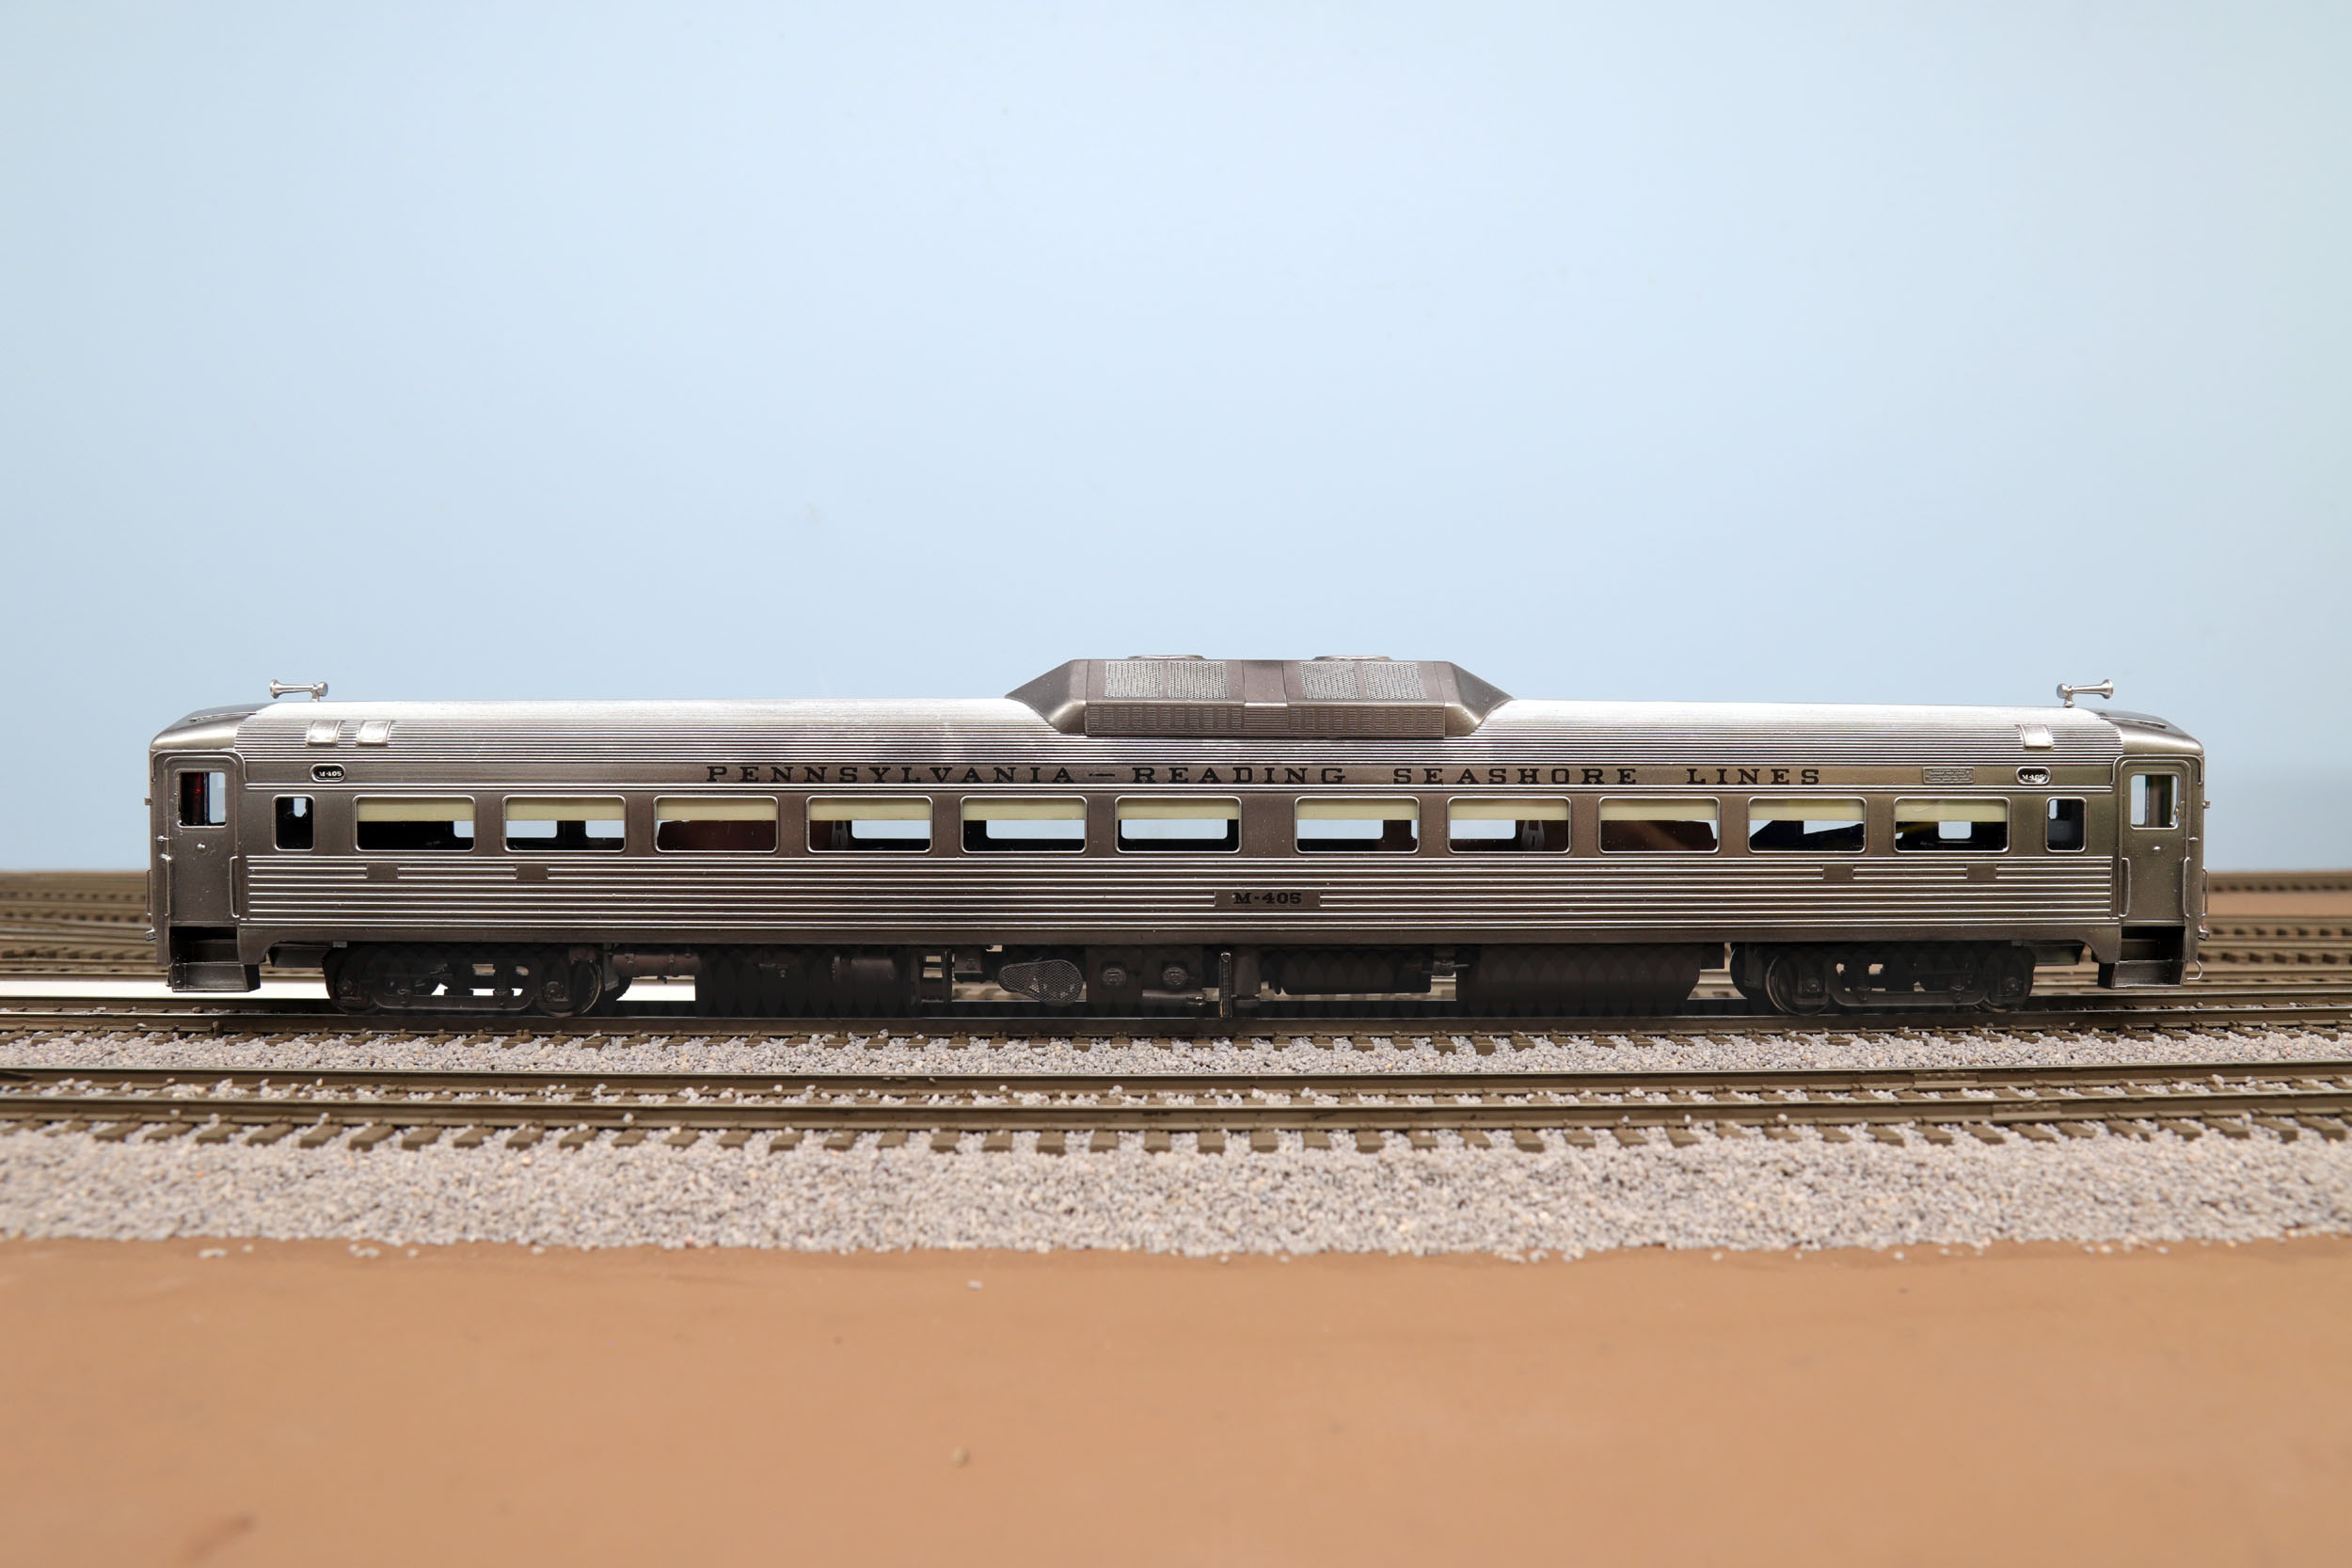
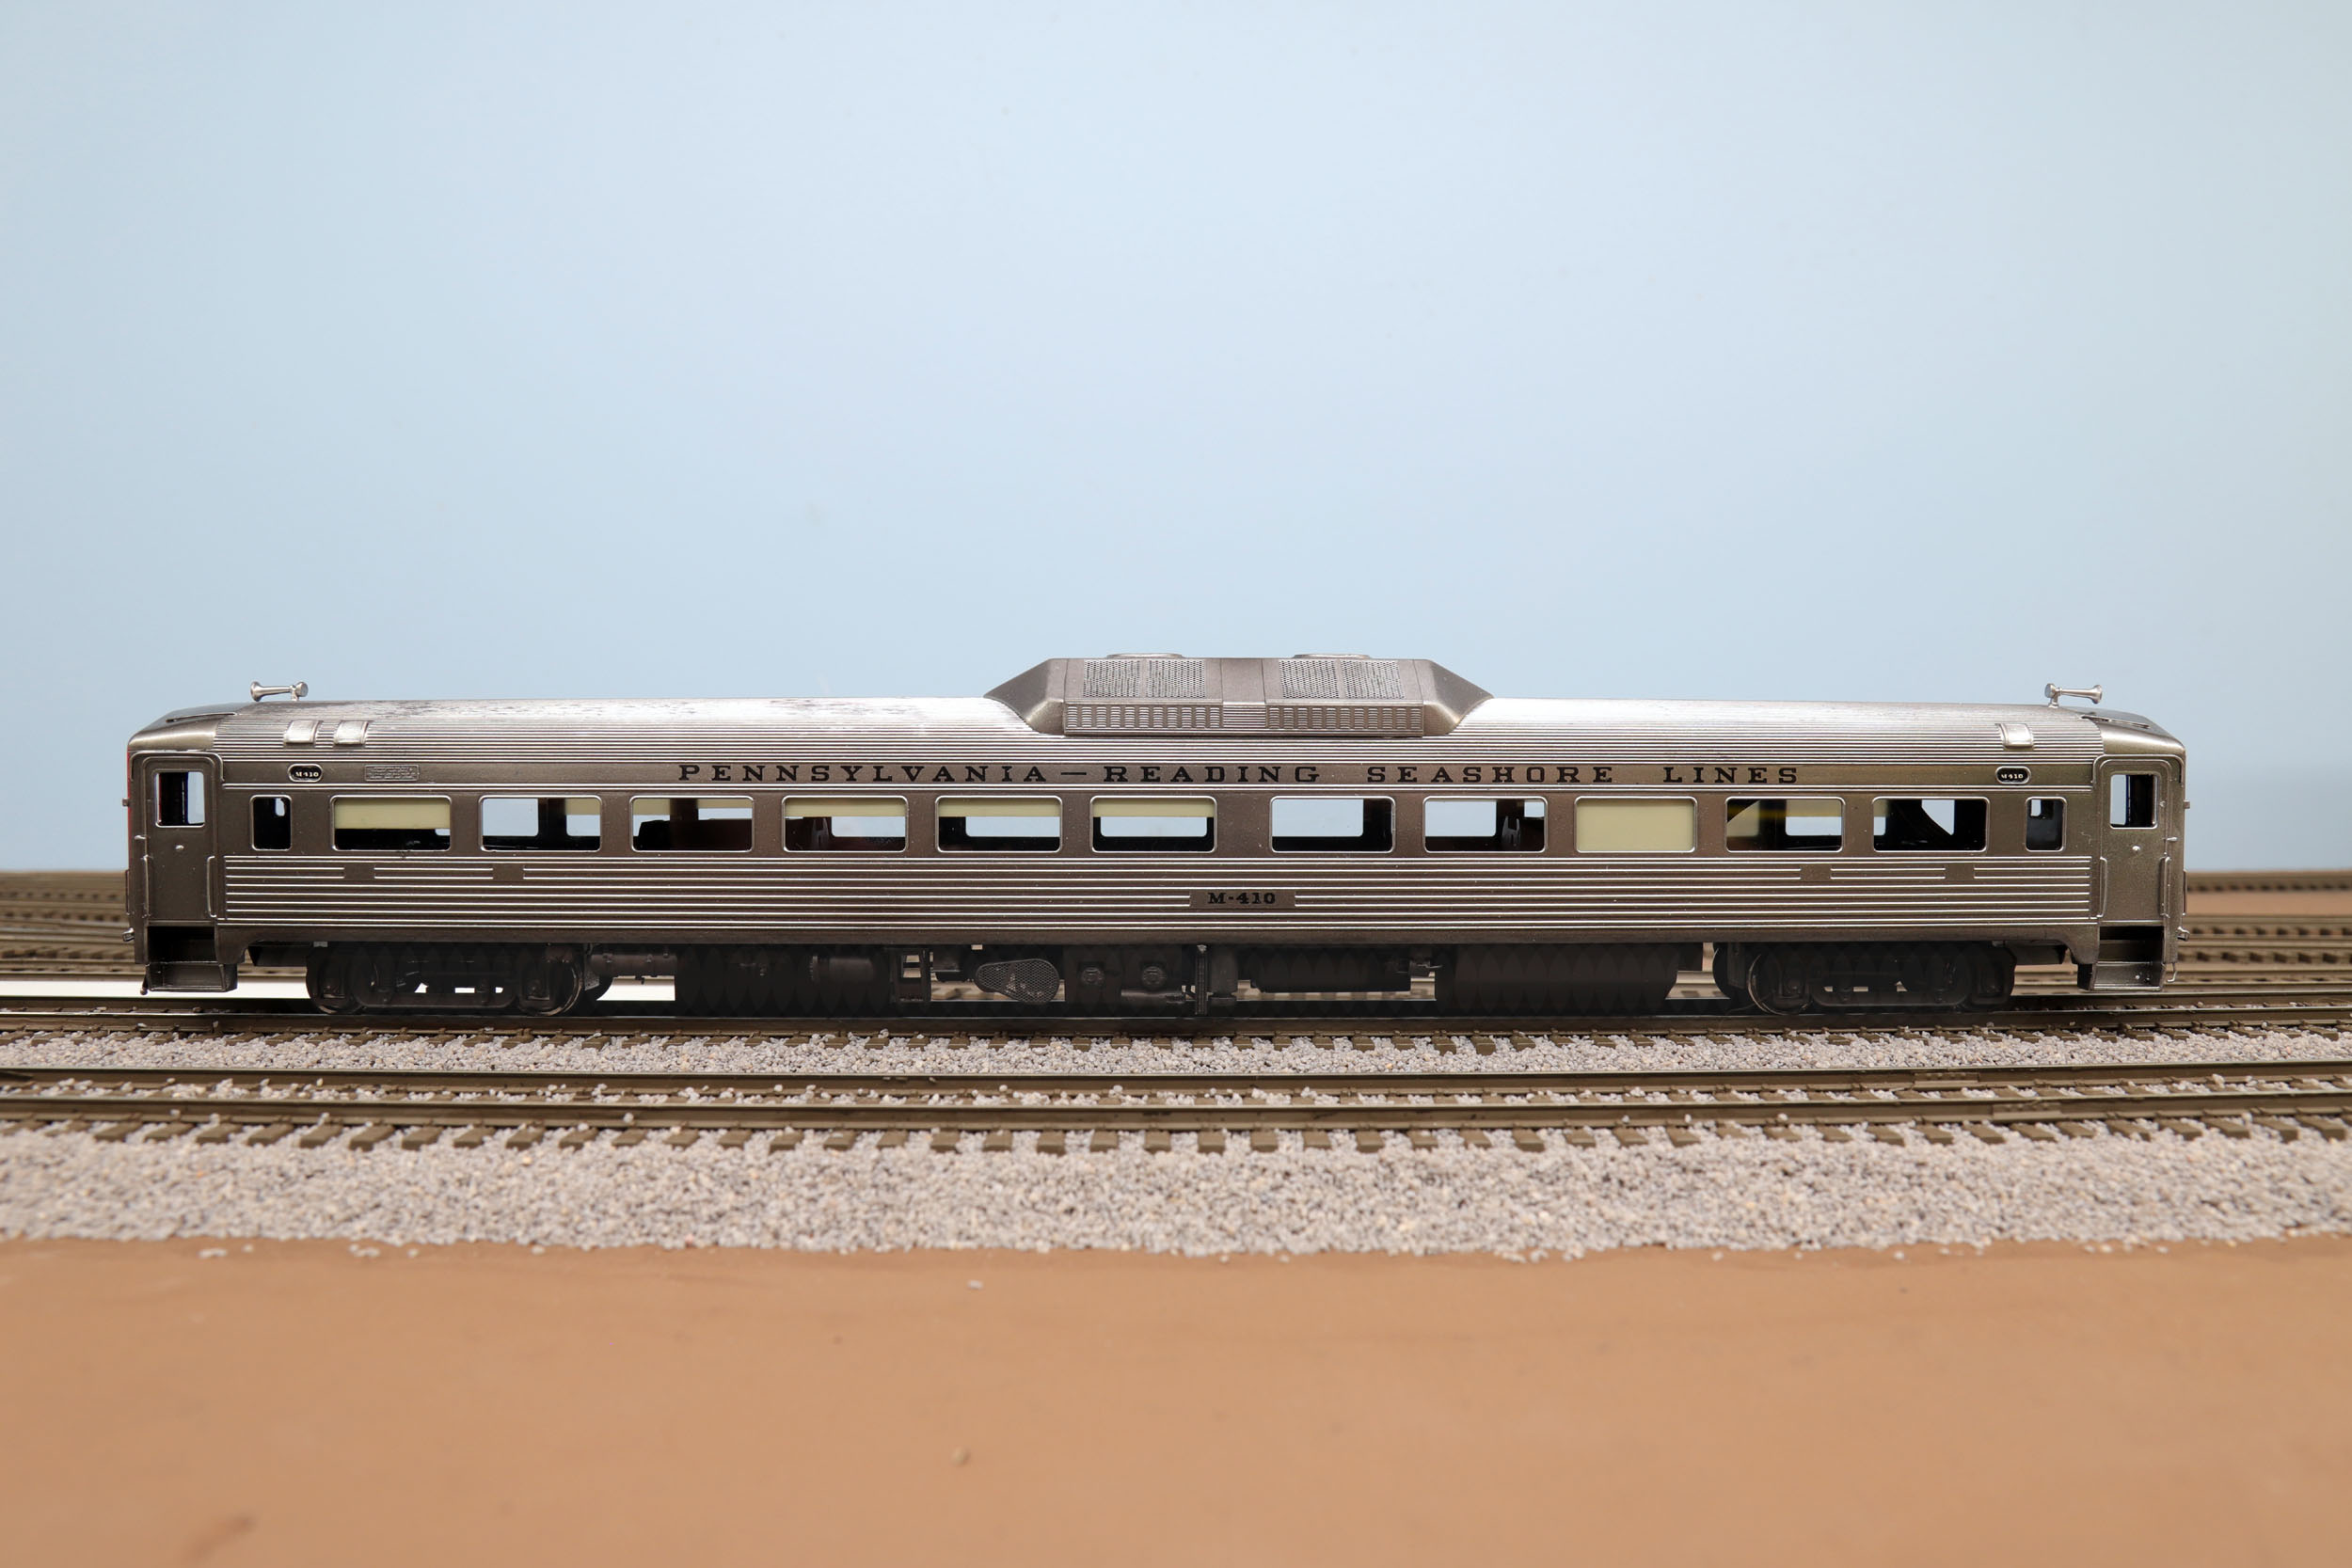
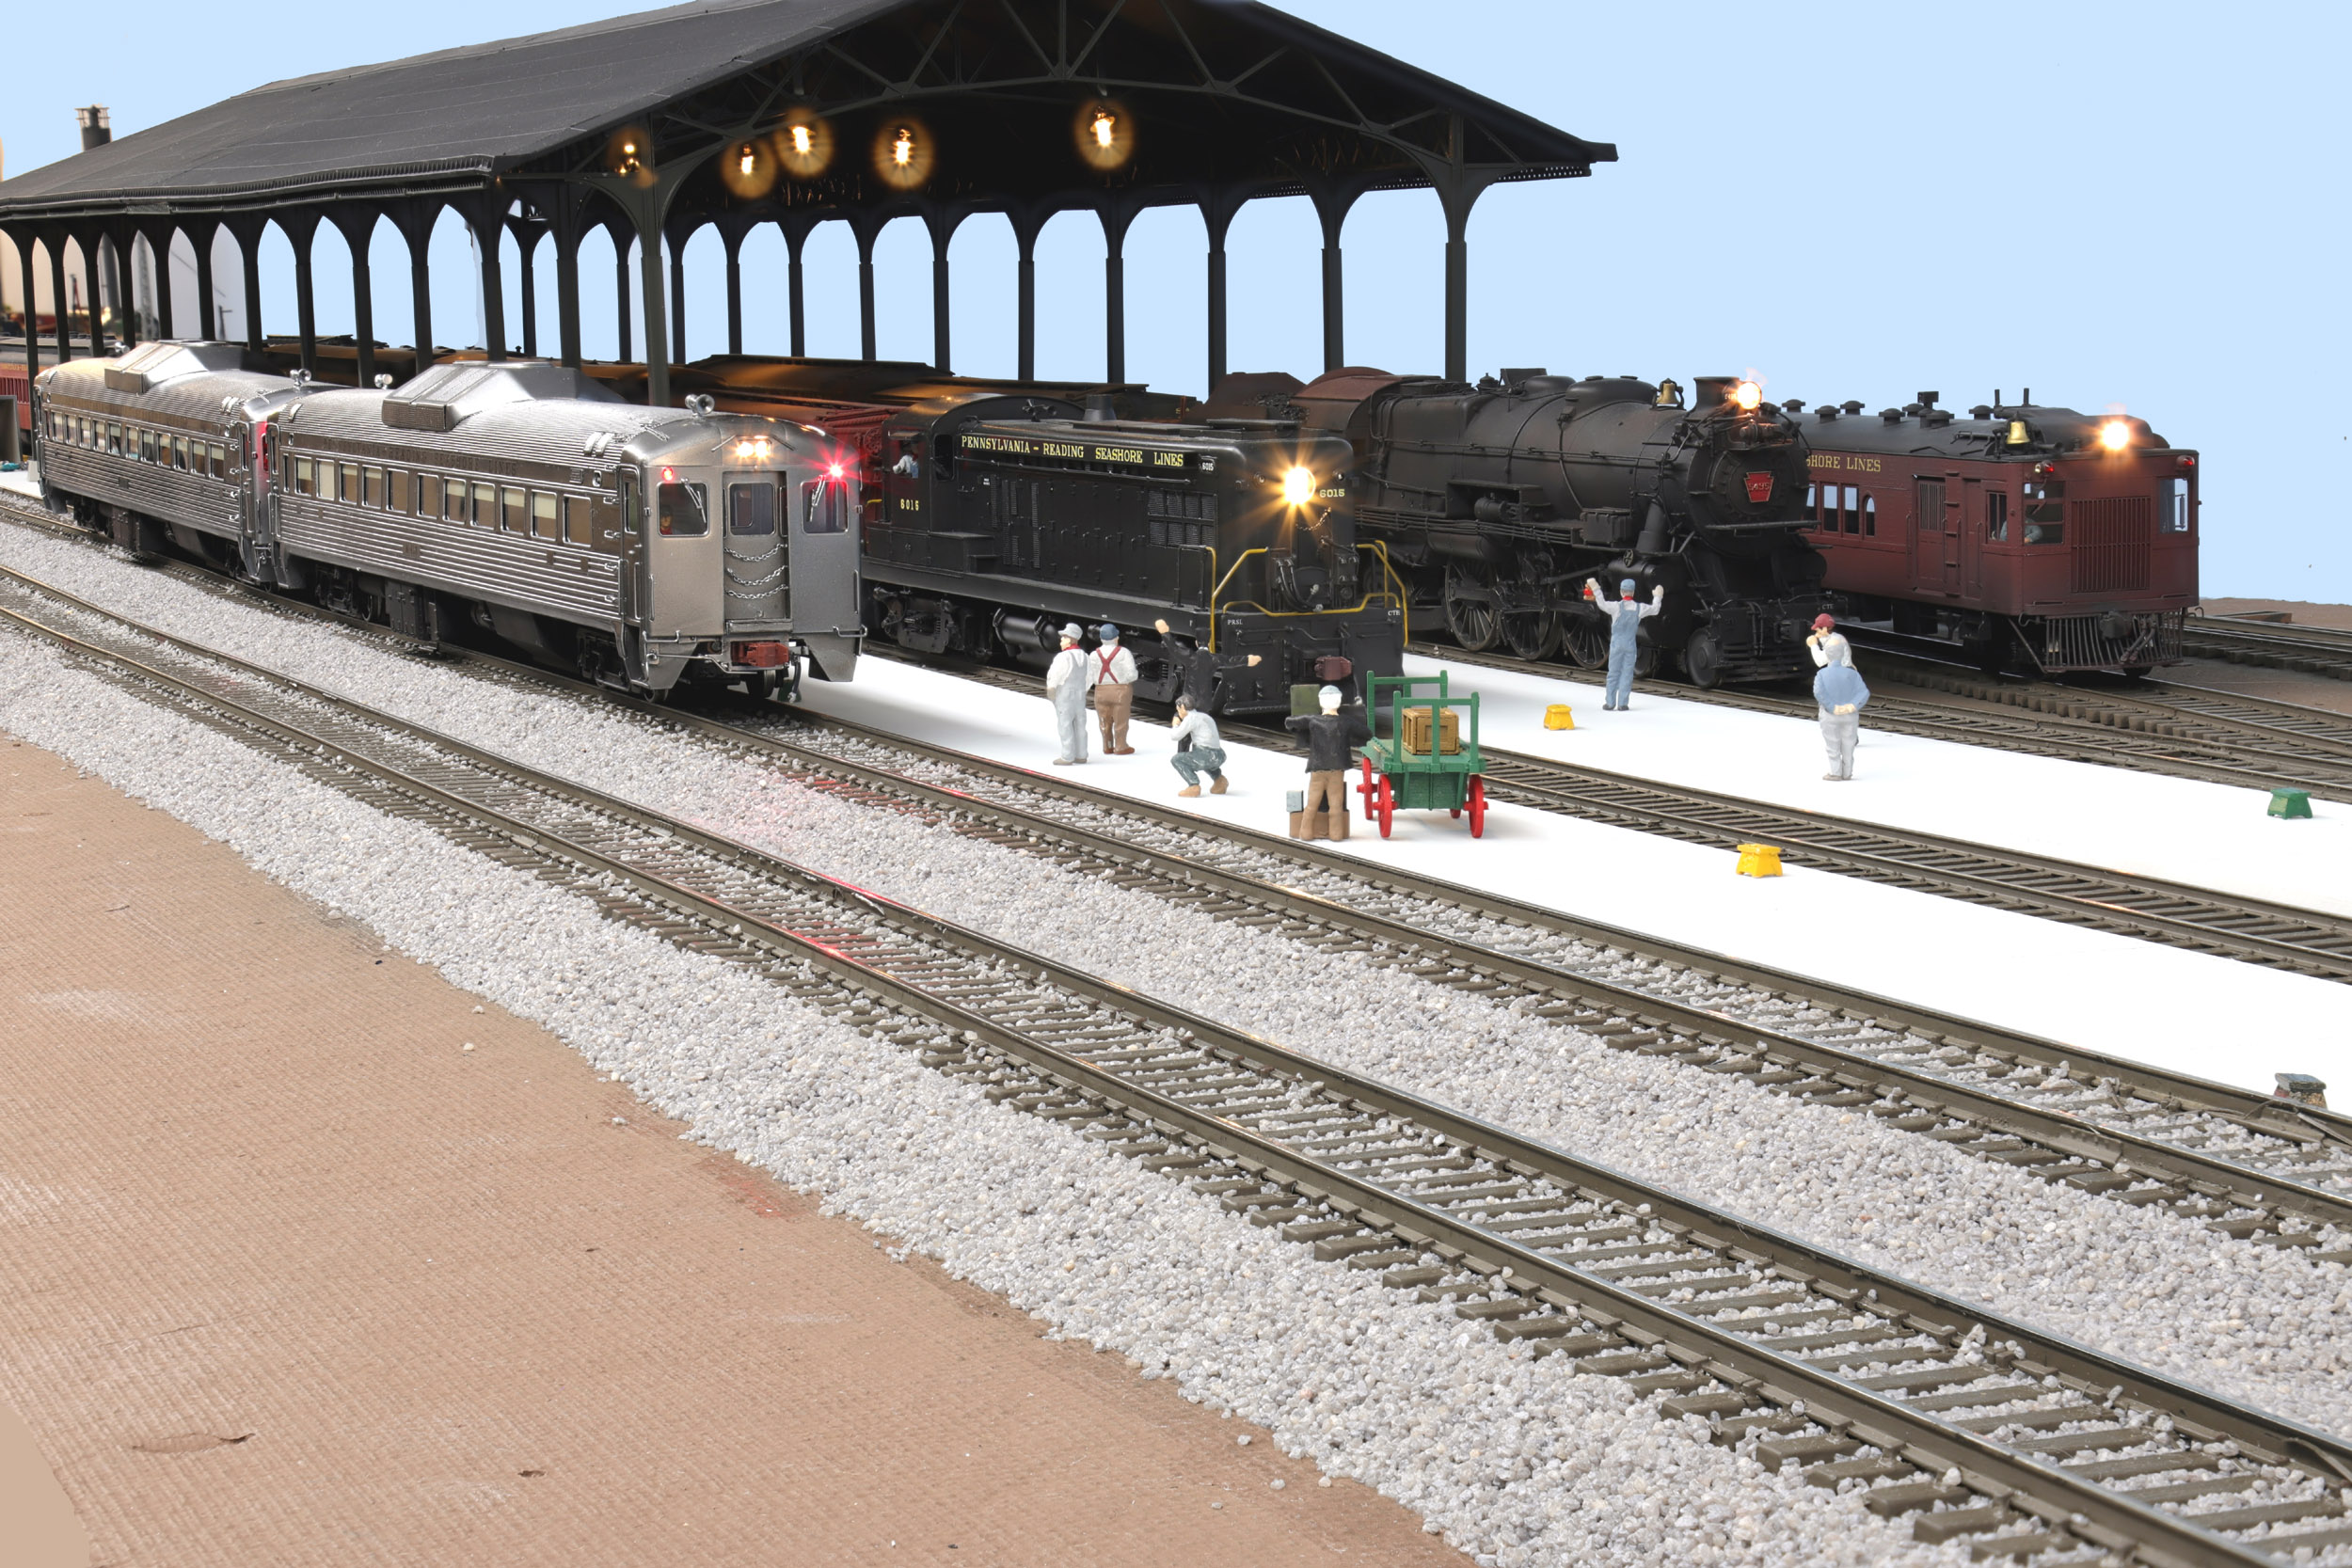
These
are Budd RDC1 made by Samhongsa and imported by Omnicon in 1987. There was
RDC1, RDC2 and RDC3 made. They were about $400.00 when new and have pretty
much remained at that price at least for the RDC1. You simply cannot model
the PRSL without the RDC1. They had 12 of them. It was some of the last and
longest running PRSL trains when used by New Jersey Transit into the 1980s
after the PRSL was gone. I have owned both of my RDC for many years now
knowing they would be completed for the PRSL someday. |
|


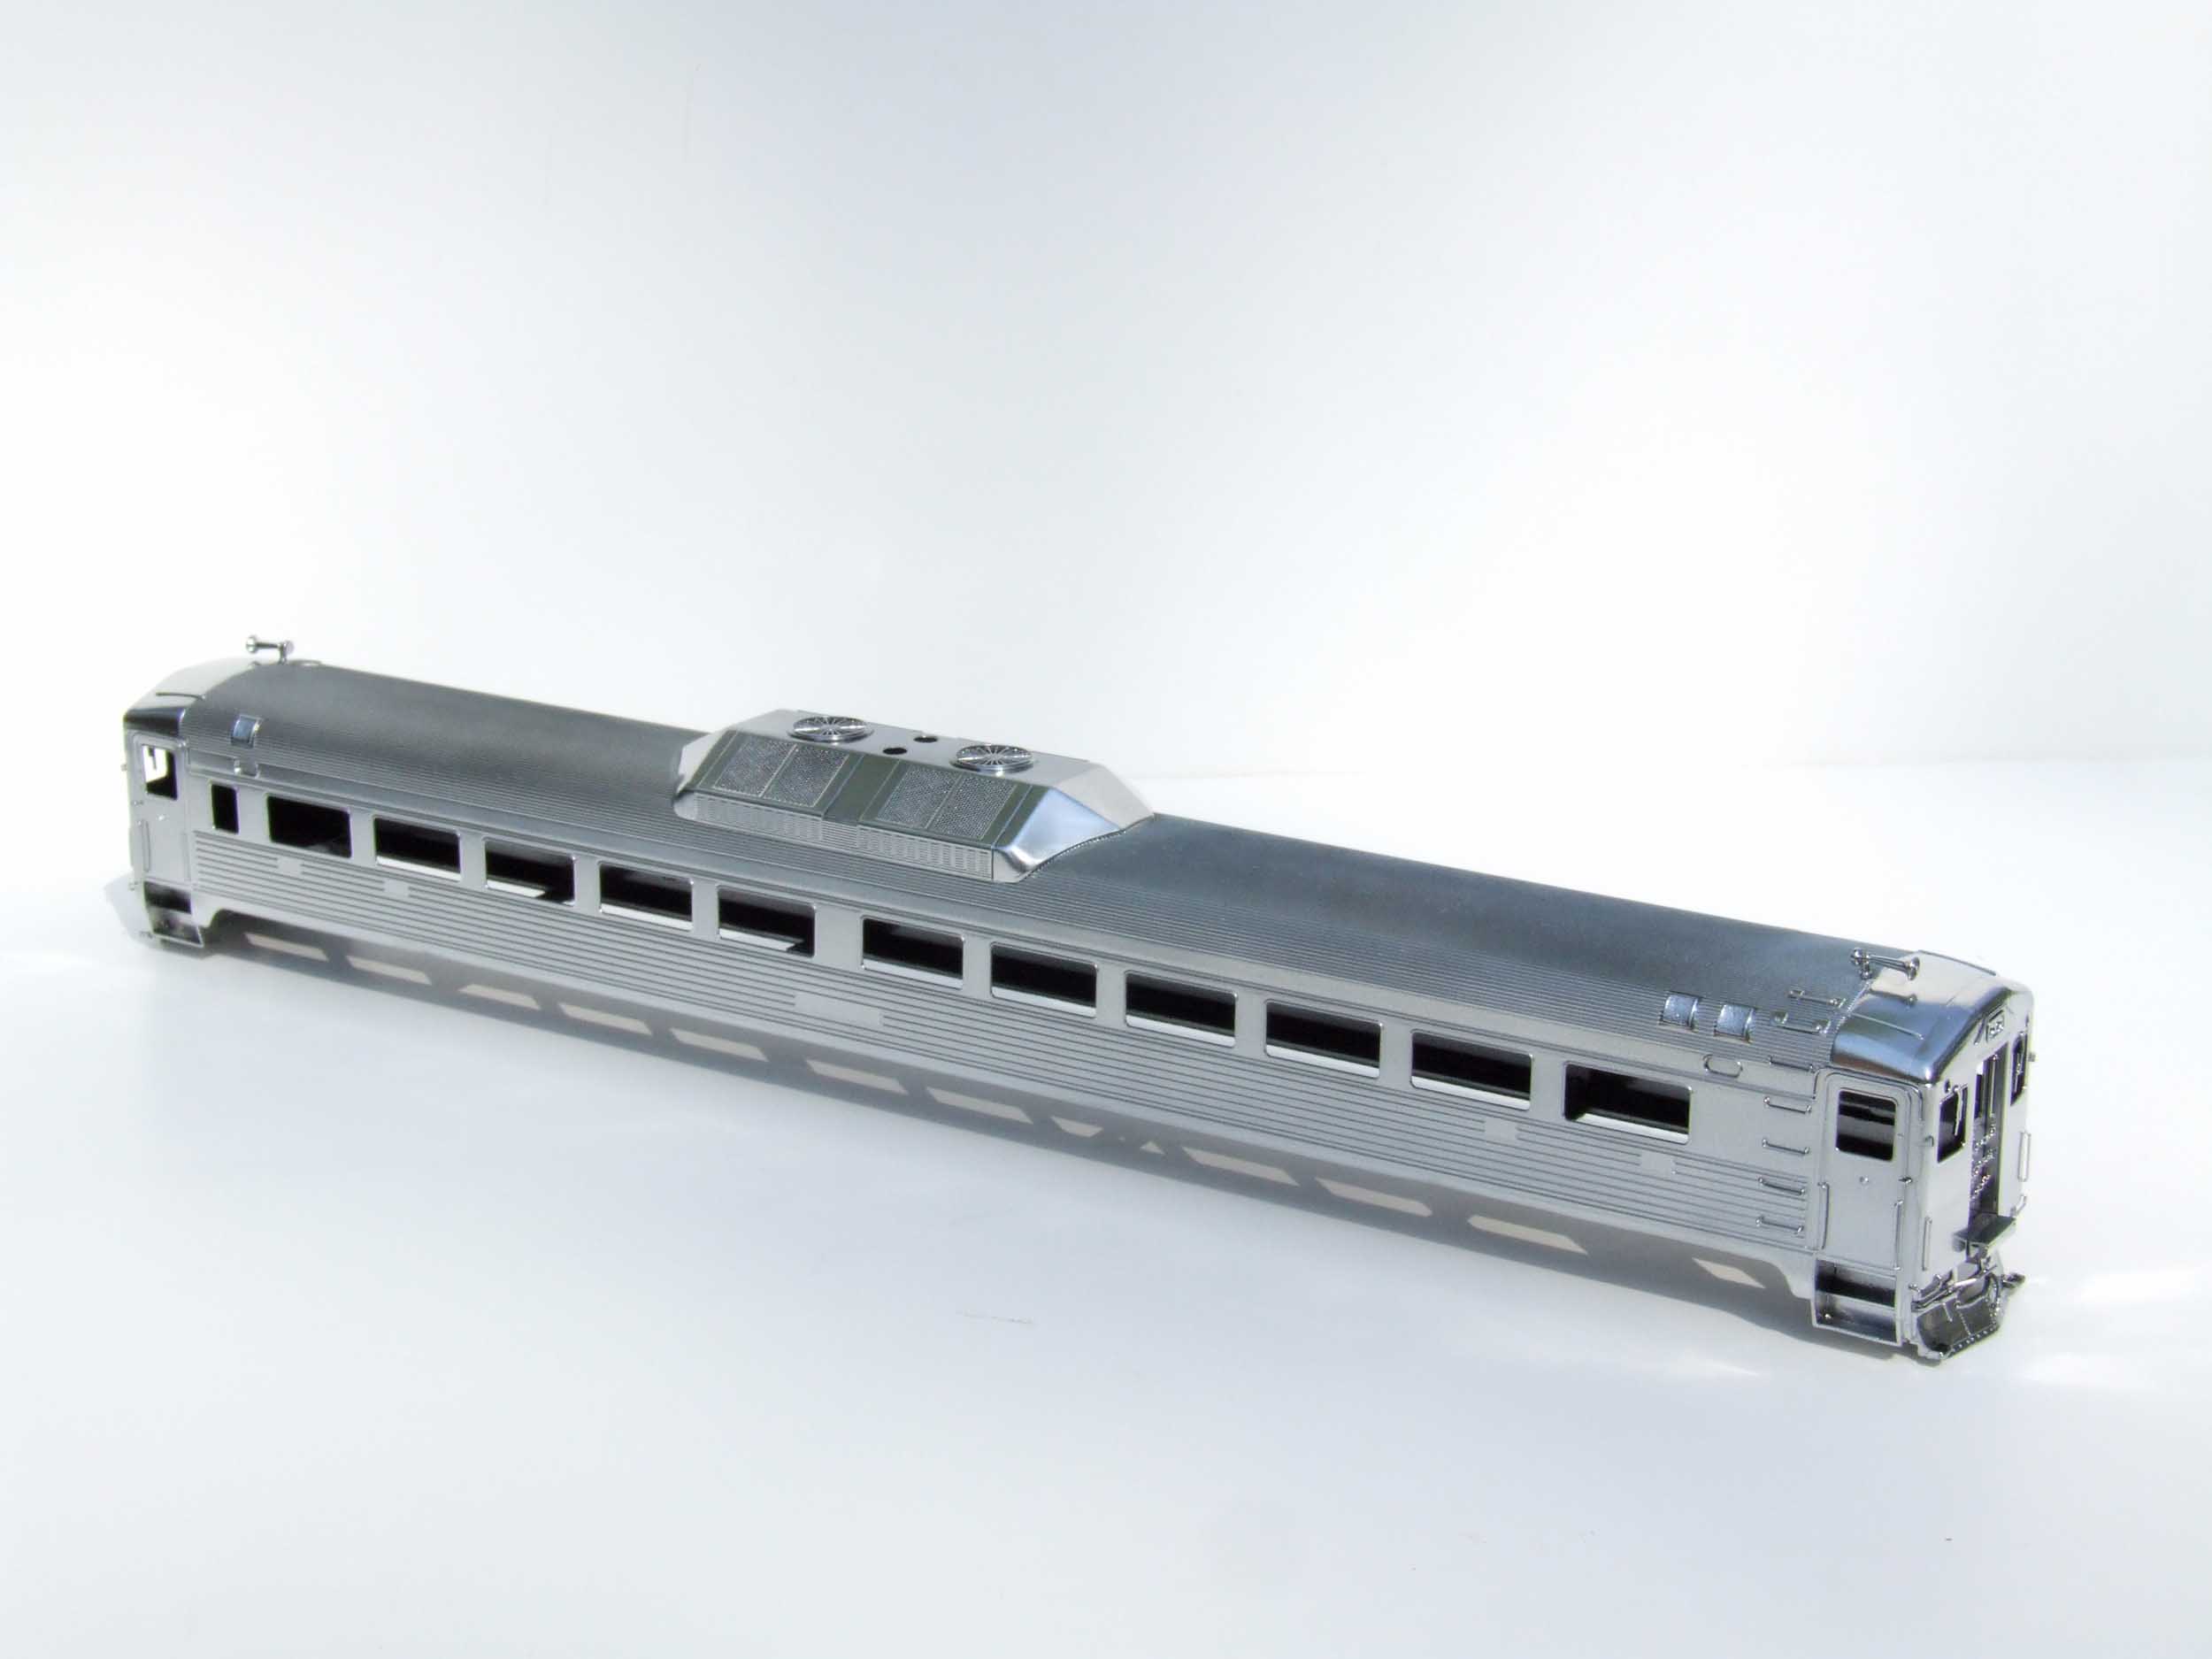
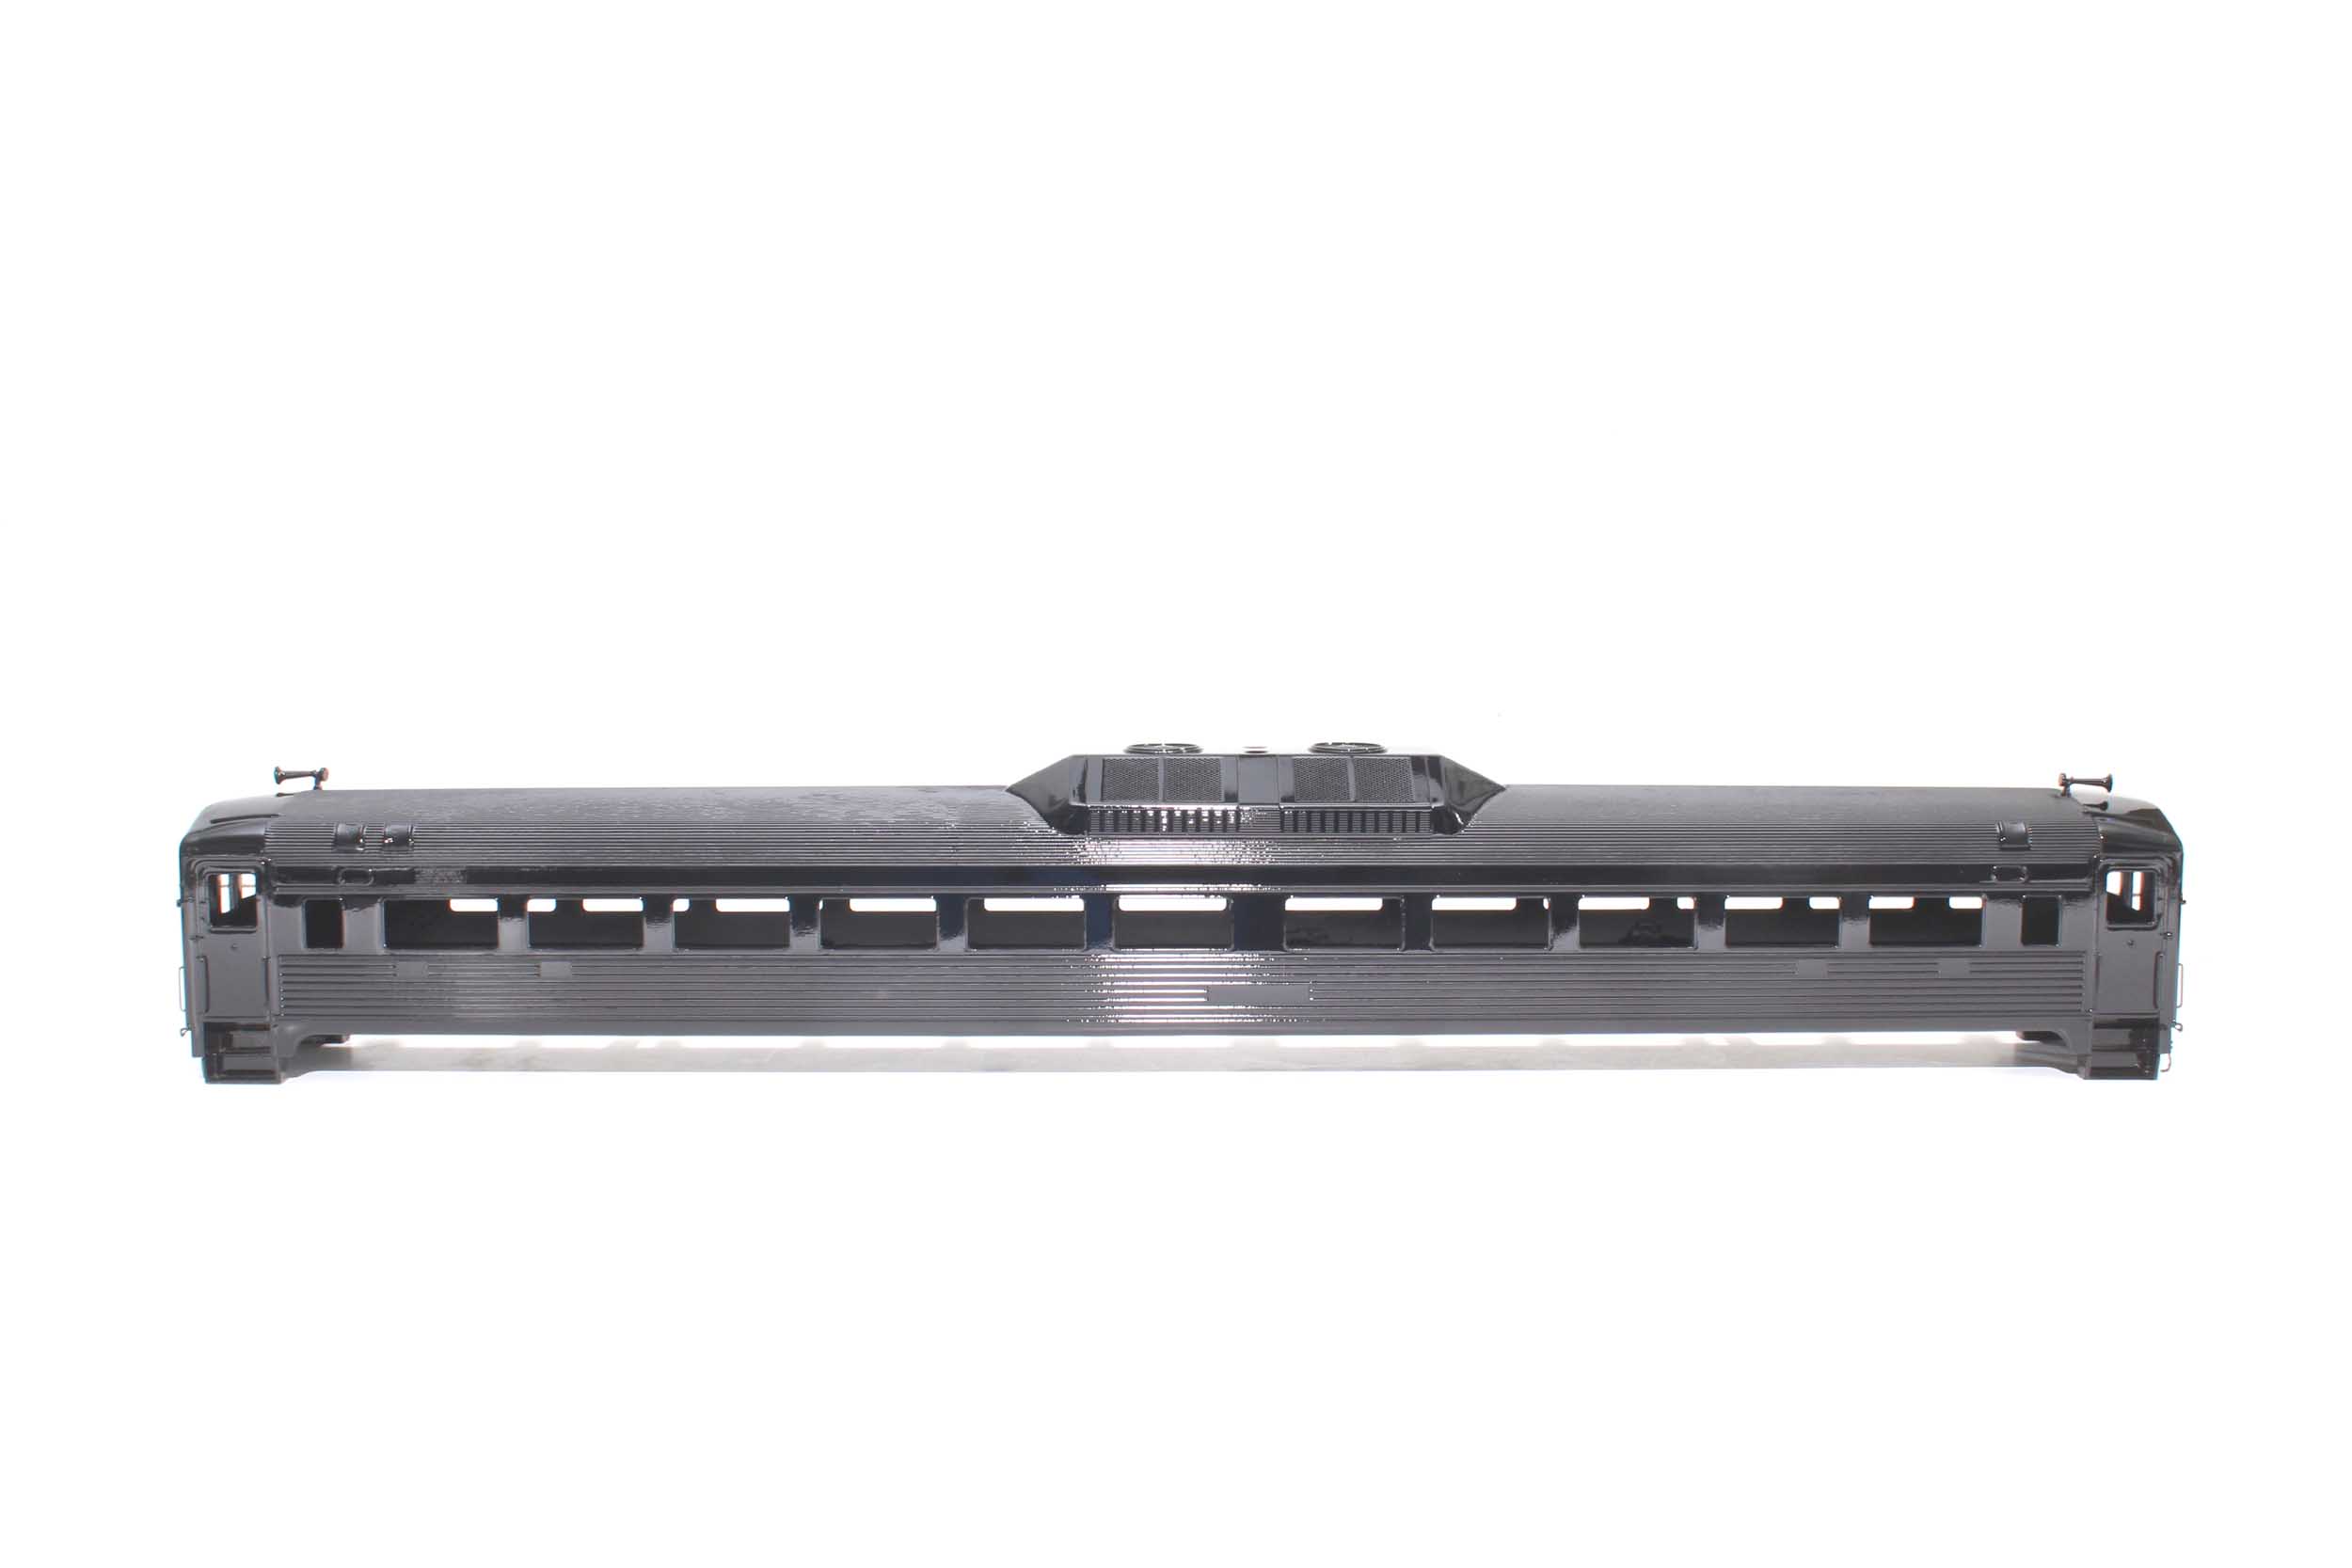
There was lots of procrastination for a long time for many
reasons. The first and biggest factor was I did not know how to handle the fact
that the silver paint was easily rubbed off the nickel plating. I spent
considerable time fitting the shells with brass tubes for the headlights and
marker lights – 8 light bulbs total. I decided to not light the numberboards so
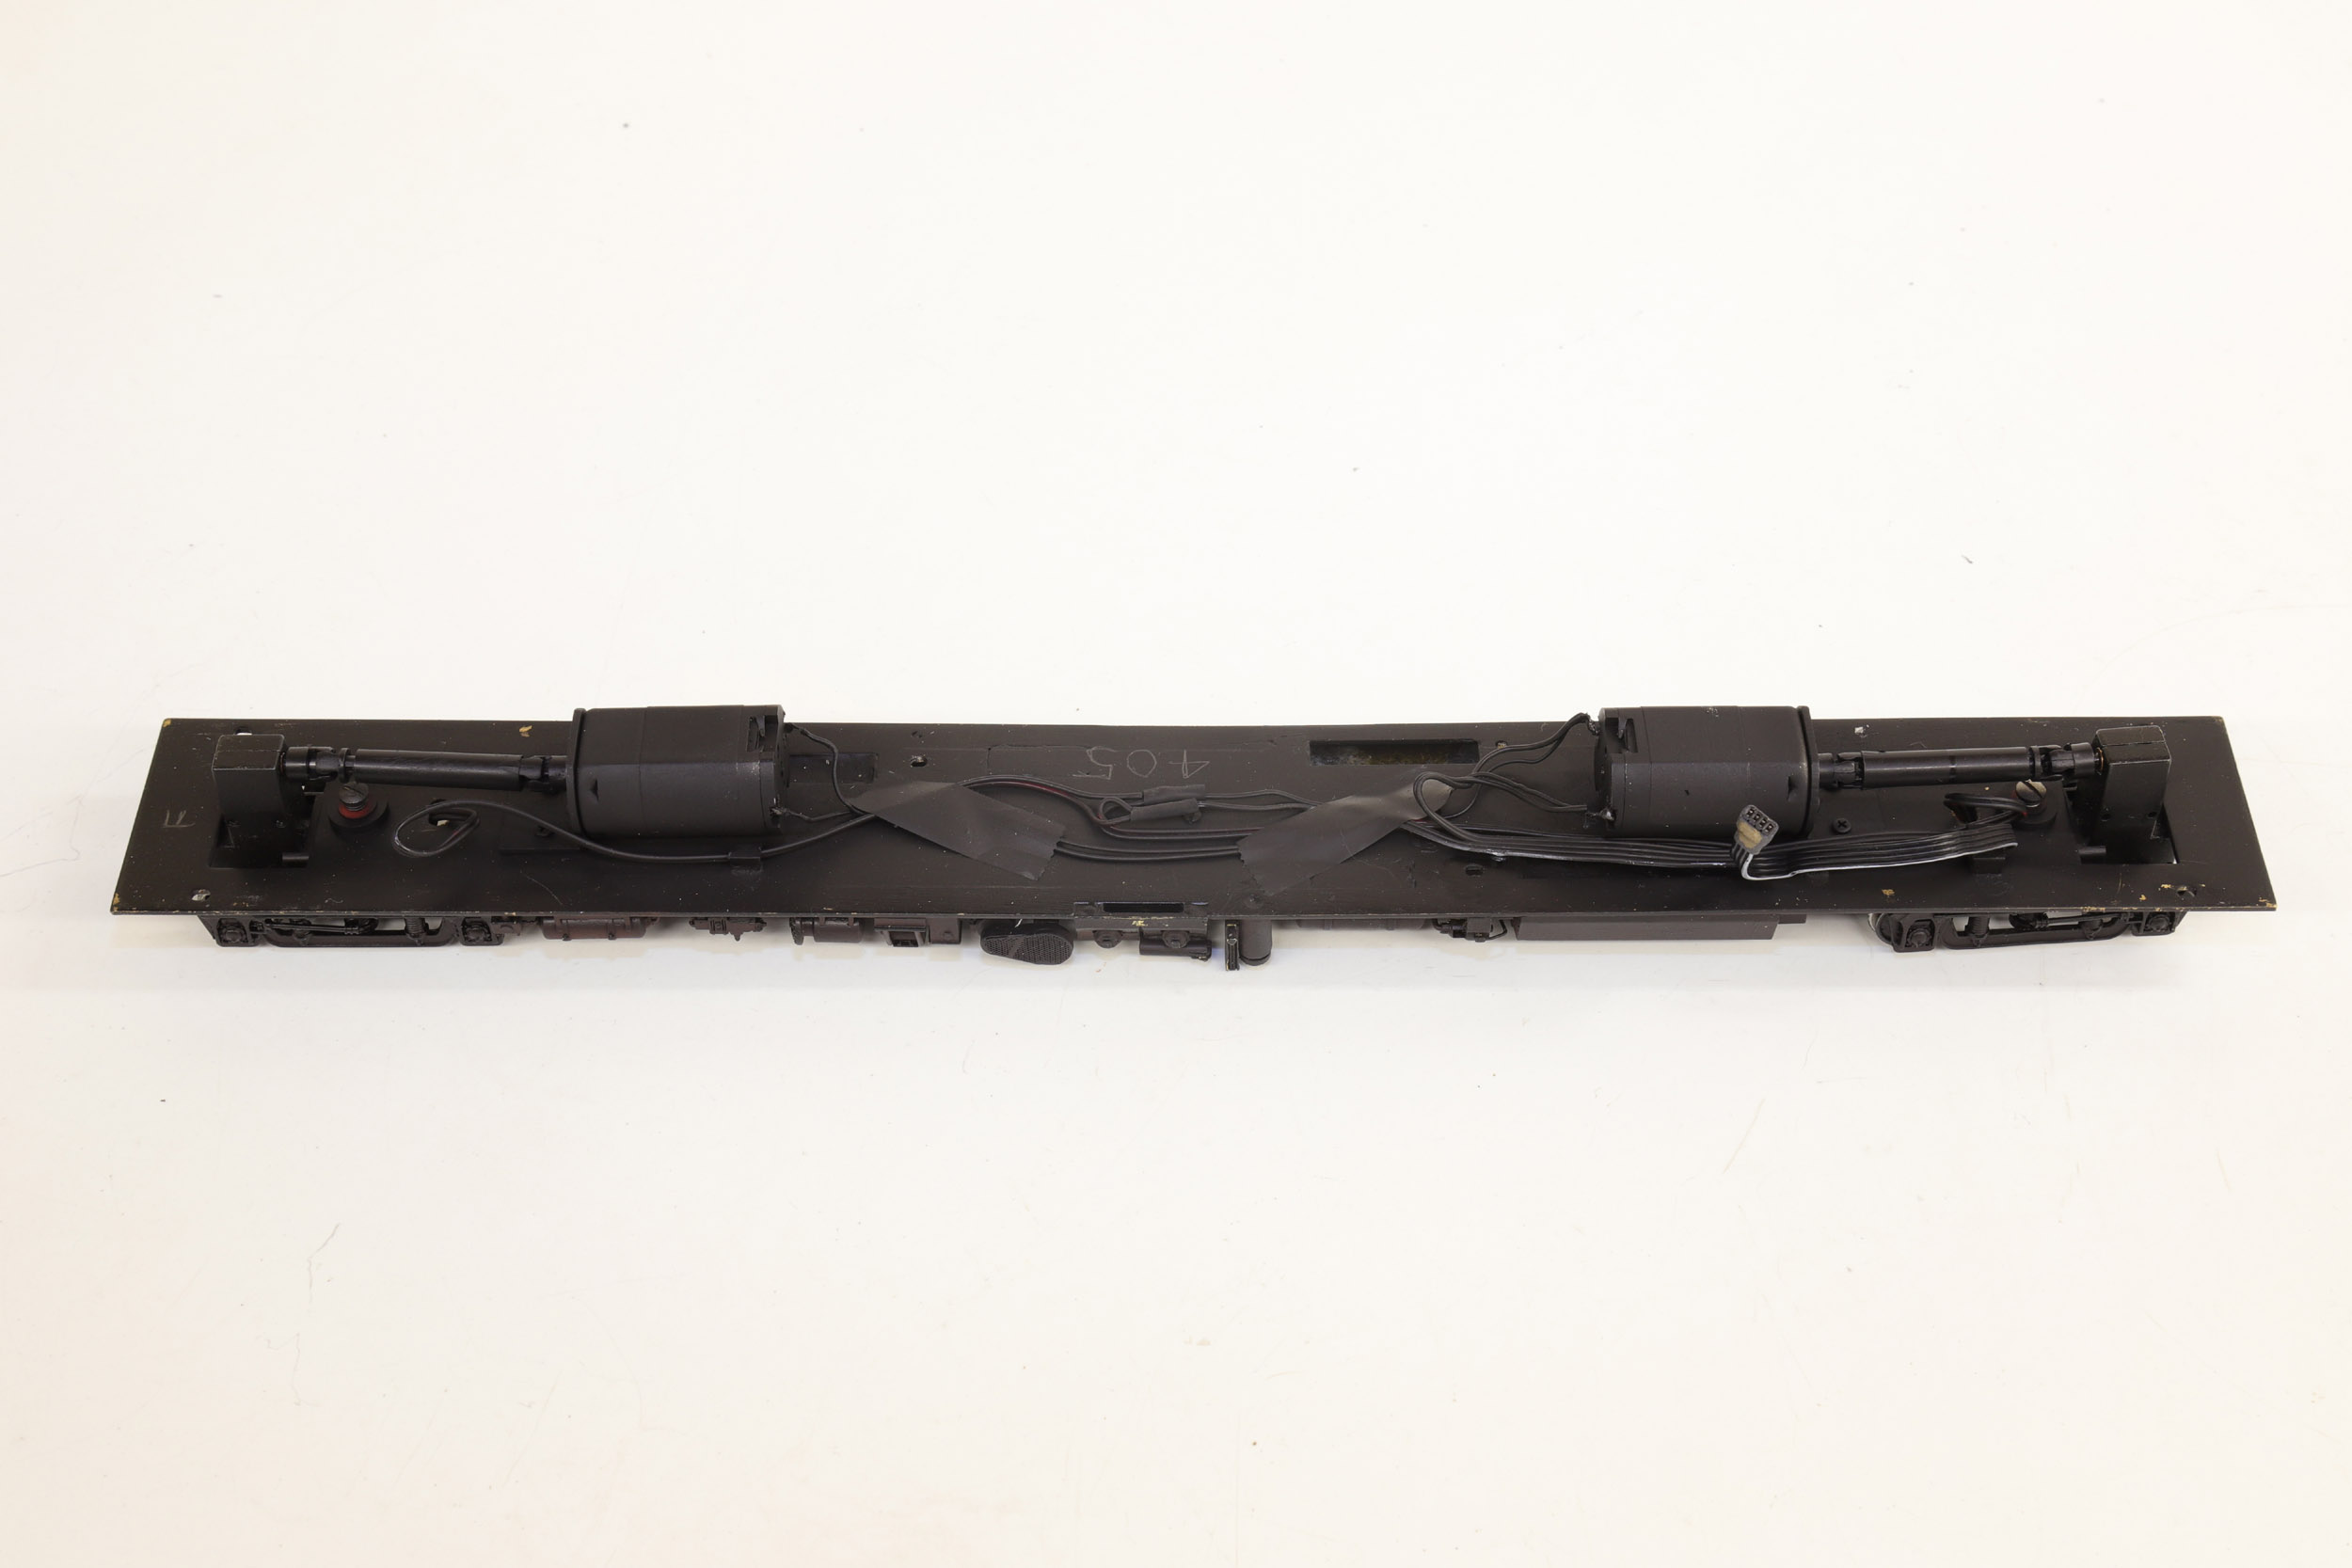
they had to be blocked off. Since the 2 motors were very noticeable in the
middle of the interior there would be no people or seats inside. Lots of black
paint stops most from looking in the large windows! This is a rather heavy
model. Even though the real RDC1 was not designed to pull anything these easily
pull 20 cars.
I
found out about Alclad metalizing aircraft paint and painted them in 2010 but
that wore off the nickel plating too! I had no good artwork so I did not have
decals. When I got the cars DCC was not mainstream for
at least 15 years. I actually had them wired for just a motor decoder for a few
years. The solution sort of all came together when I bought the QSI RDC
decoders and got decals made.
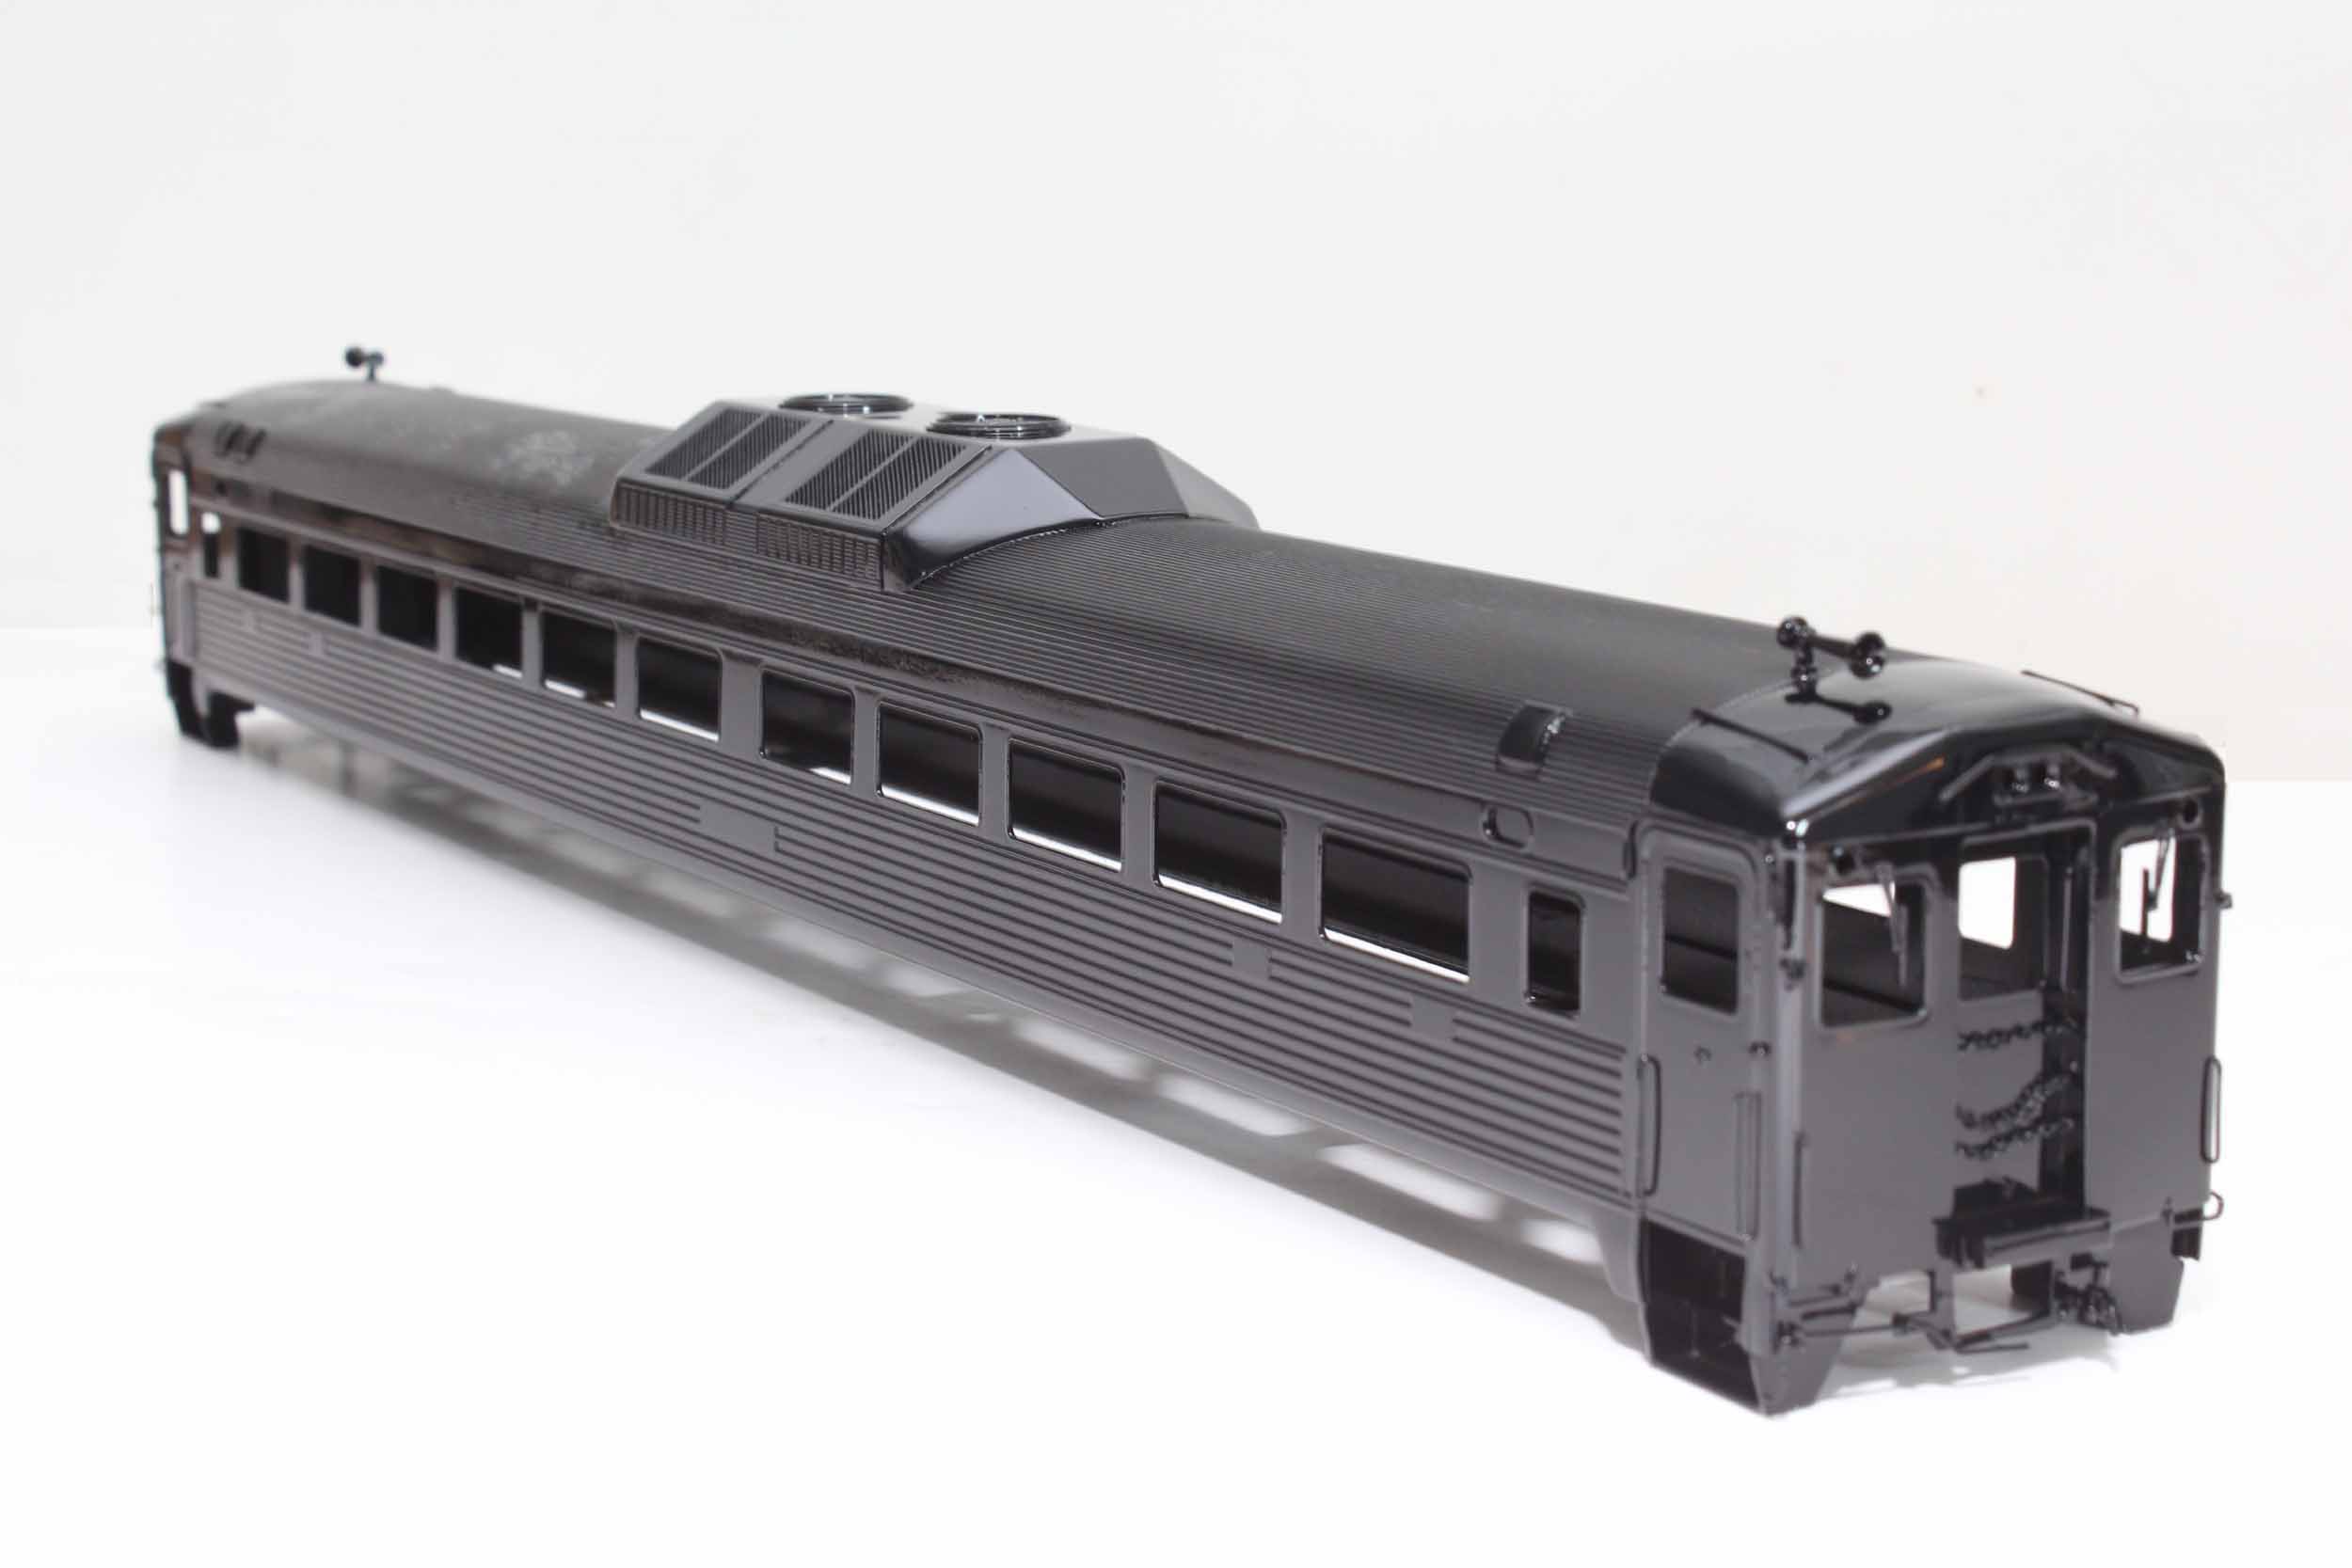
In
2010 I put a shell in the blast booth and went at it. No turning back now – I
was committed. The blast booth stripped the silver paint and all but took the
nickel plating off.
This
was the first time I painted the shells with the Alclad paint. They turned out
pretty good – actually much better than
the second time I painted them. But it was quickly pointed out to me that the
PRSL RDC did not have the snow plows/pilots in the 1950s. When the stainless
paint started to instantly and very easily wear off they went back in the box
for about 3 years.
Blasting
In
April 2013 I decided the pilots HAD to come off at the same time I knew I had
to repaint the shells. The Alclad paint was BRUTAL for stripping and getting
back to the bare brass. Even with a stripping dunk in lacquer thinner and
another trip through the blast booth it was hours of clean up.
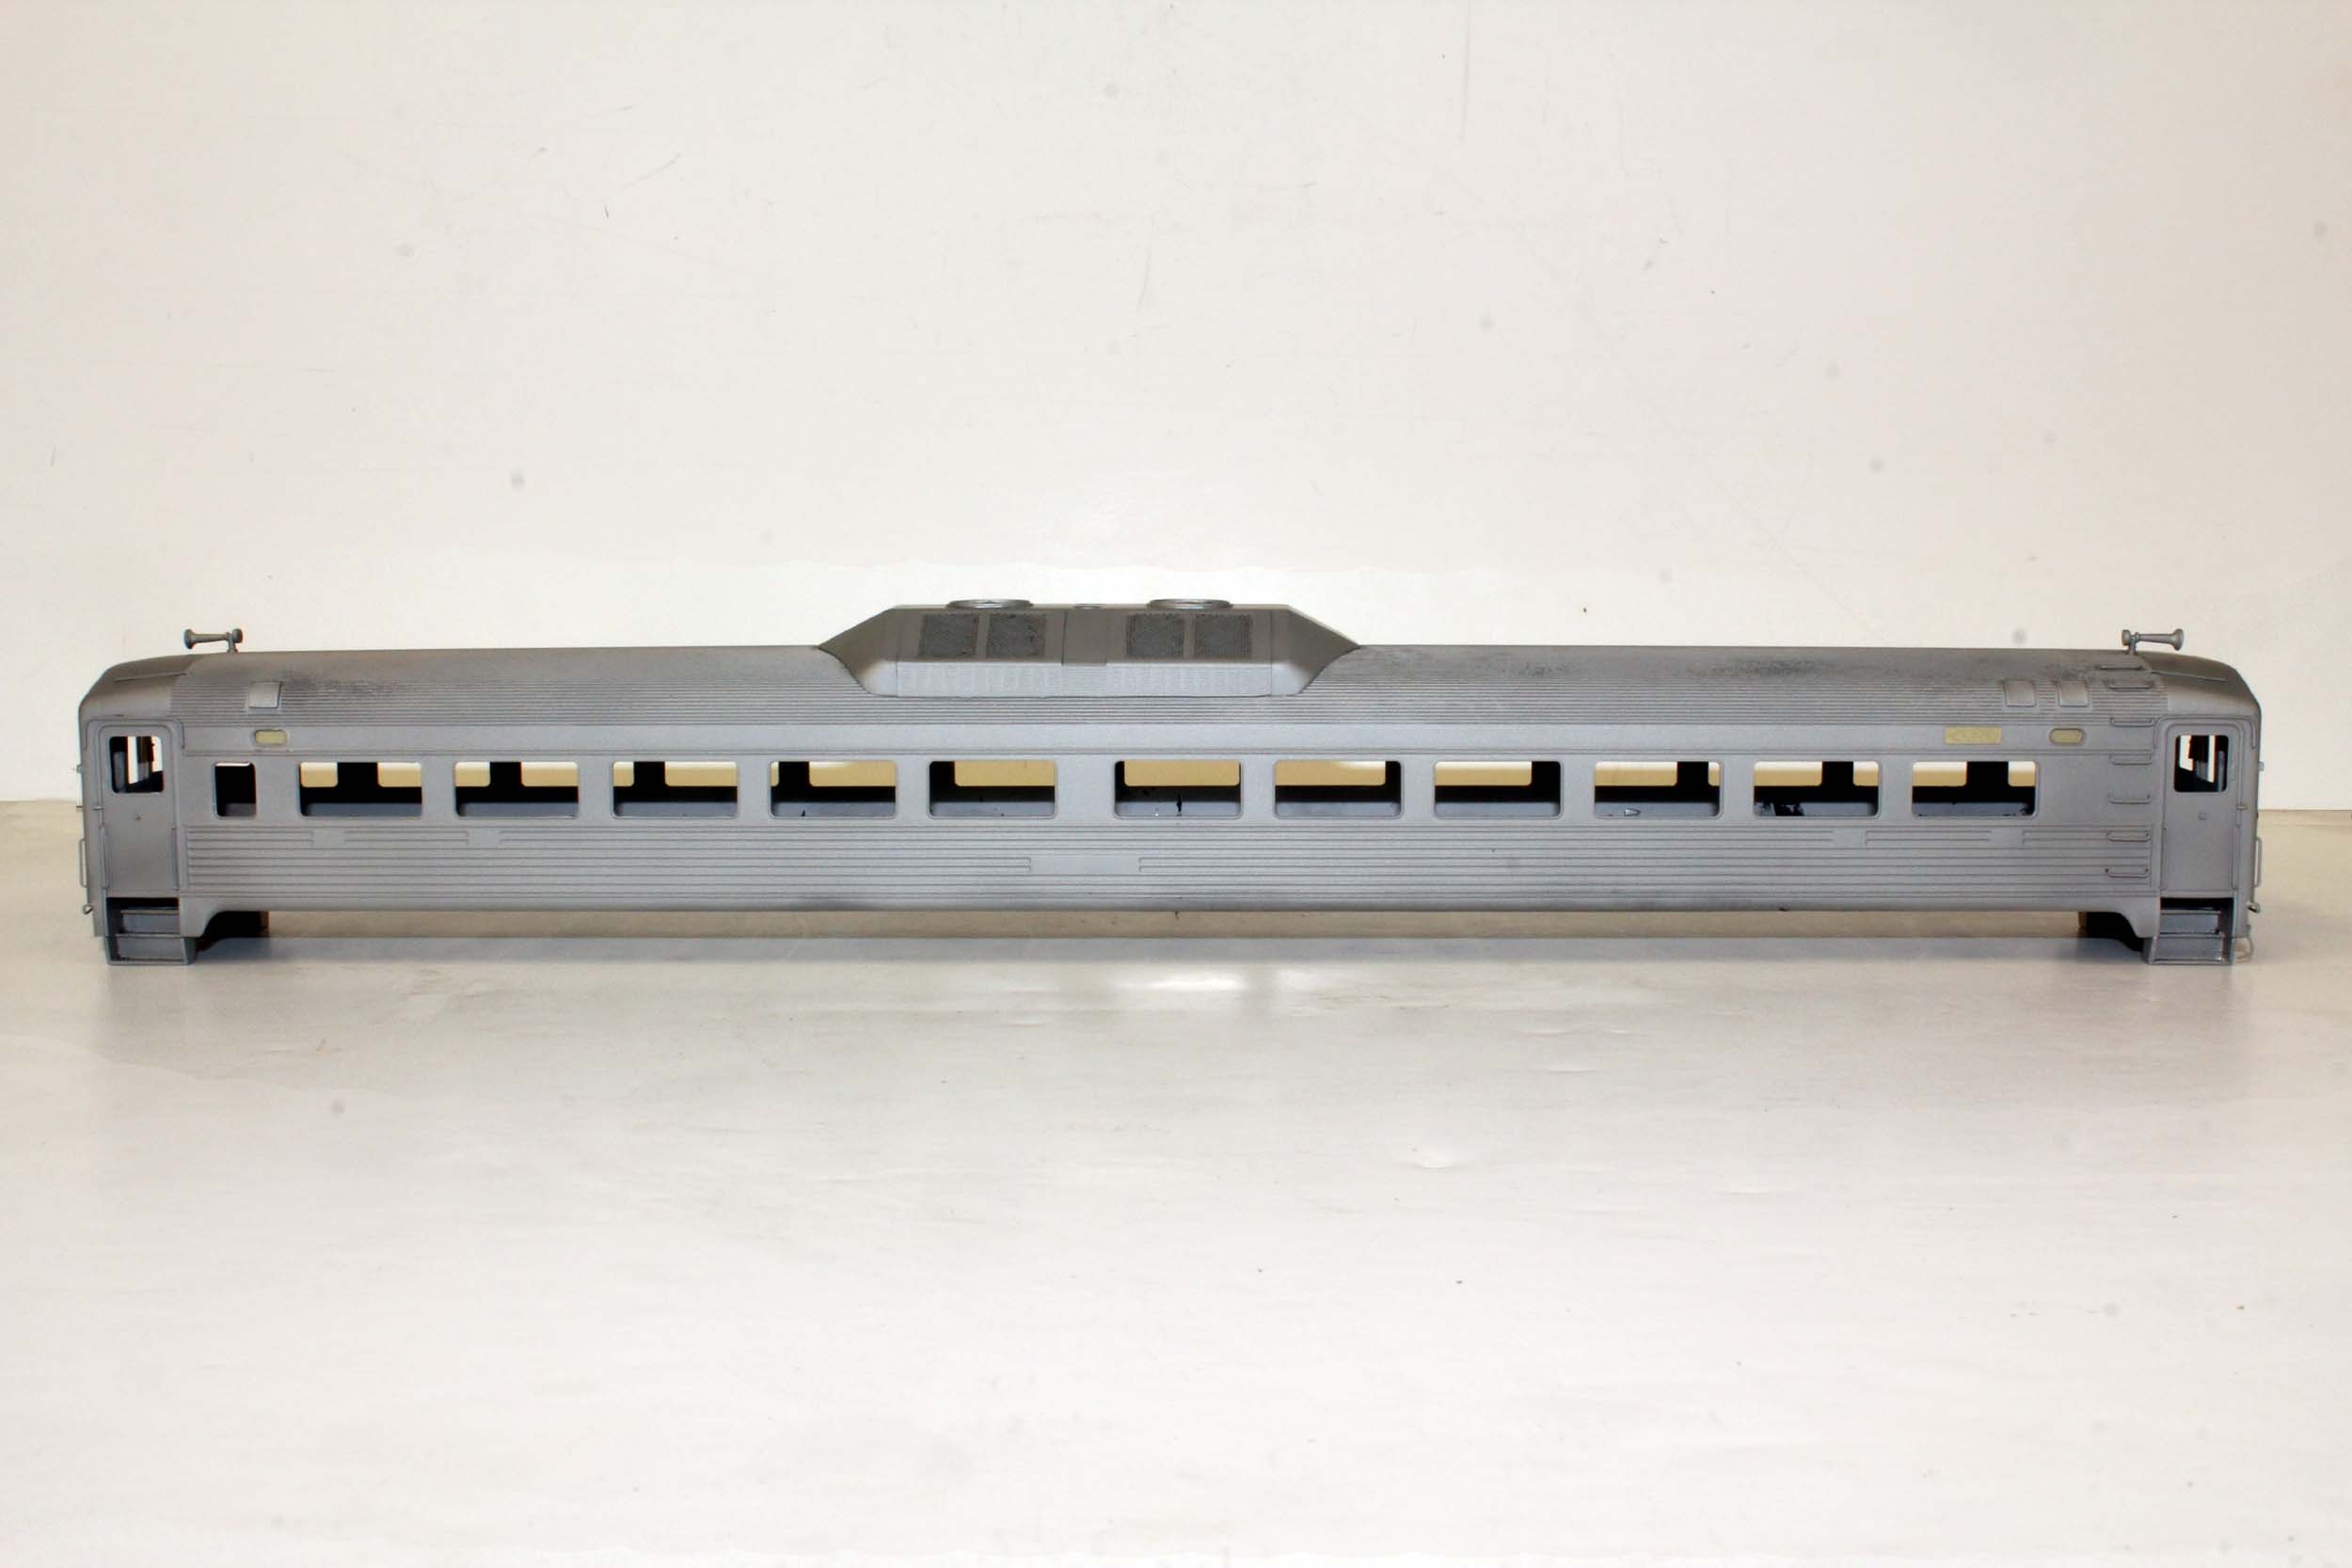
These photos are after the blasting of
the first Alclad paint job. You can see in the right photo I removed the
pilots. I thought I would just unsolder the pilot and maybe fill some small
holes – easy! I never would have imagined that the pilot was all a part of 1
huge casting with both steps, cab floor and the
coupler pad – essentially the whole end of the car. It required delicate
cutting to remove and extensive wet
sanding in very tight places to make the step sides look smooth and original
like there were no pilots.
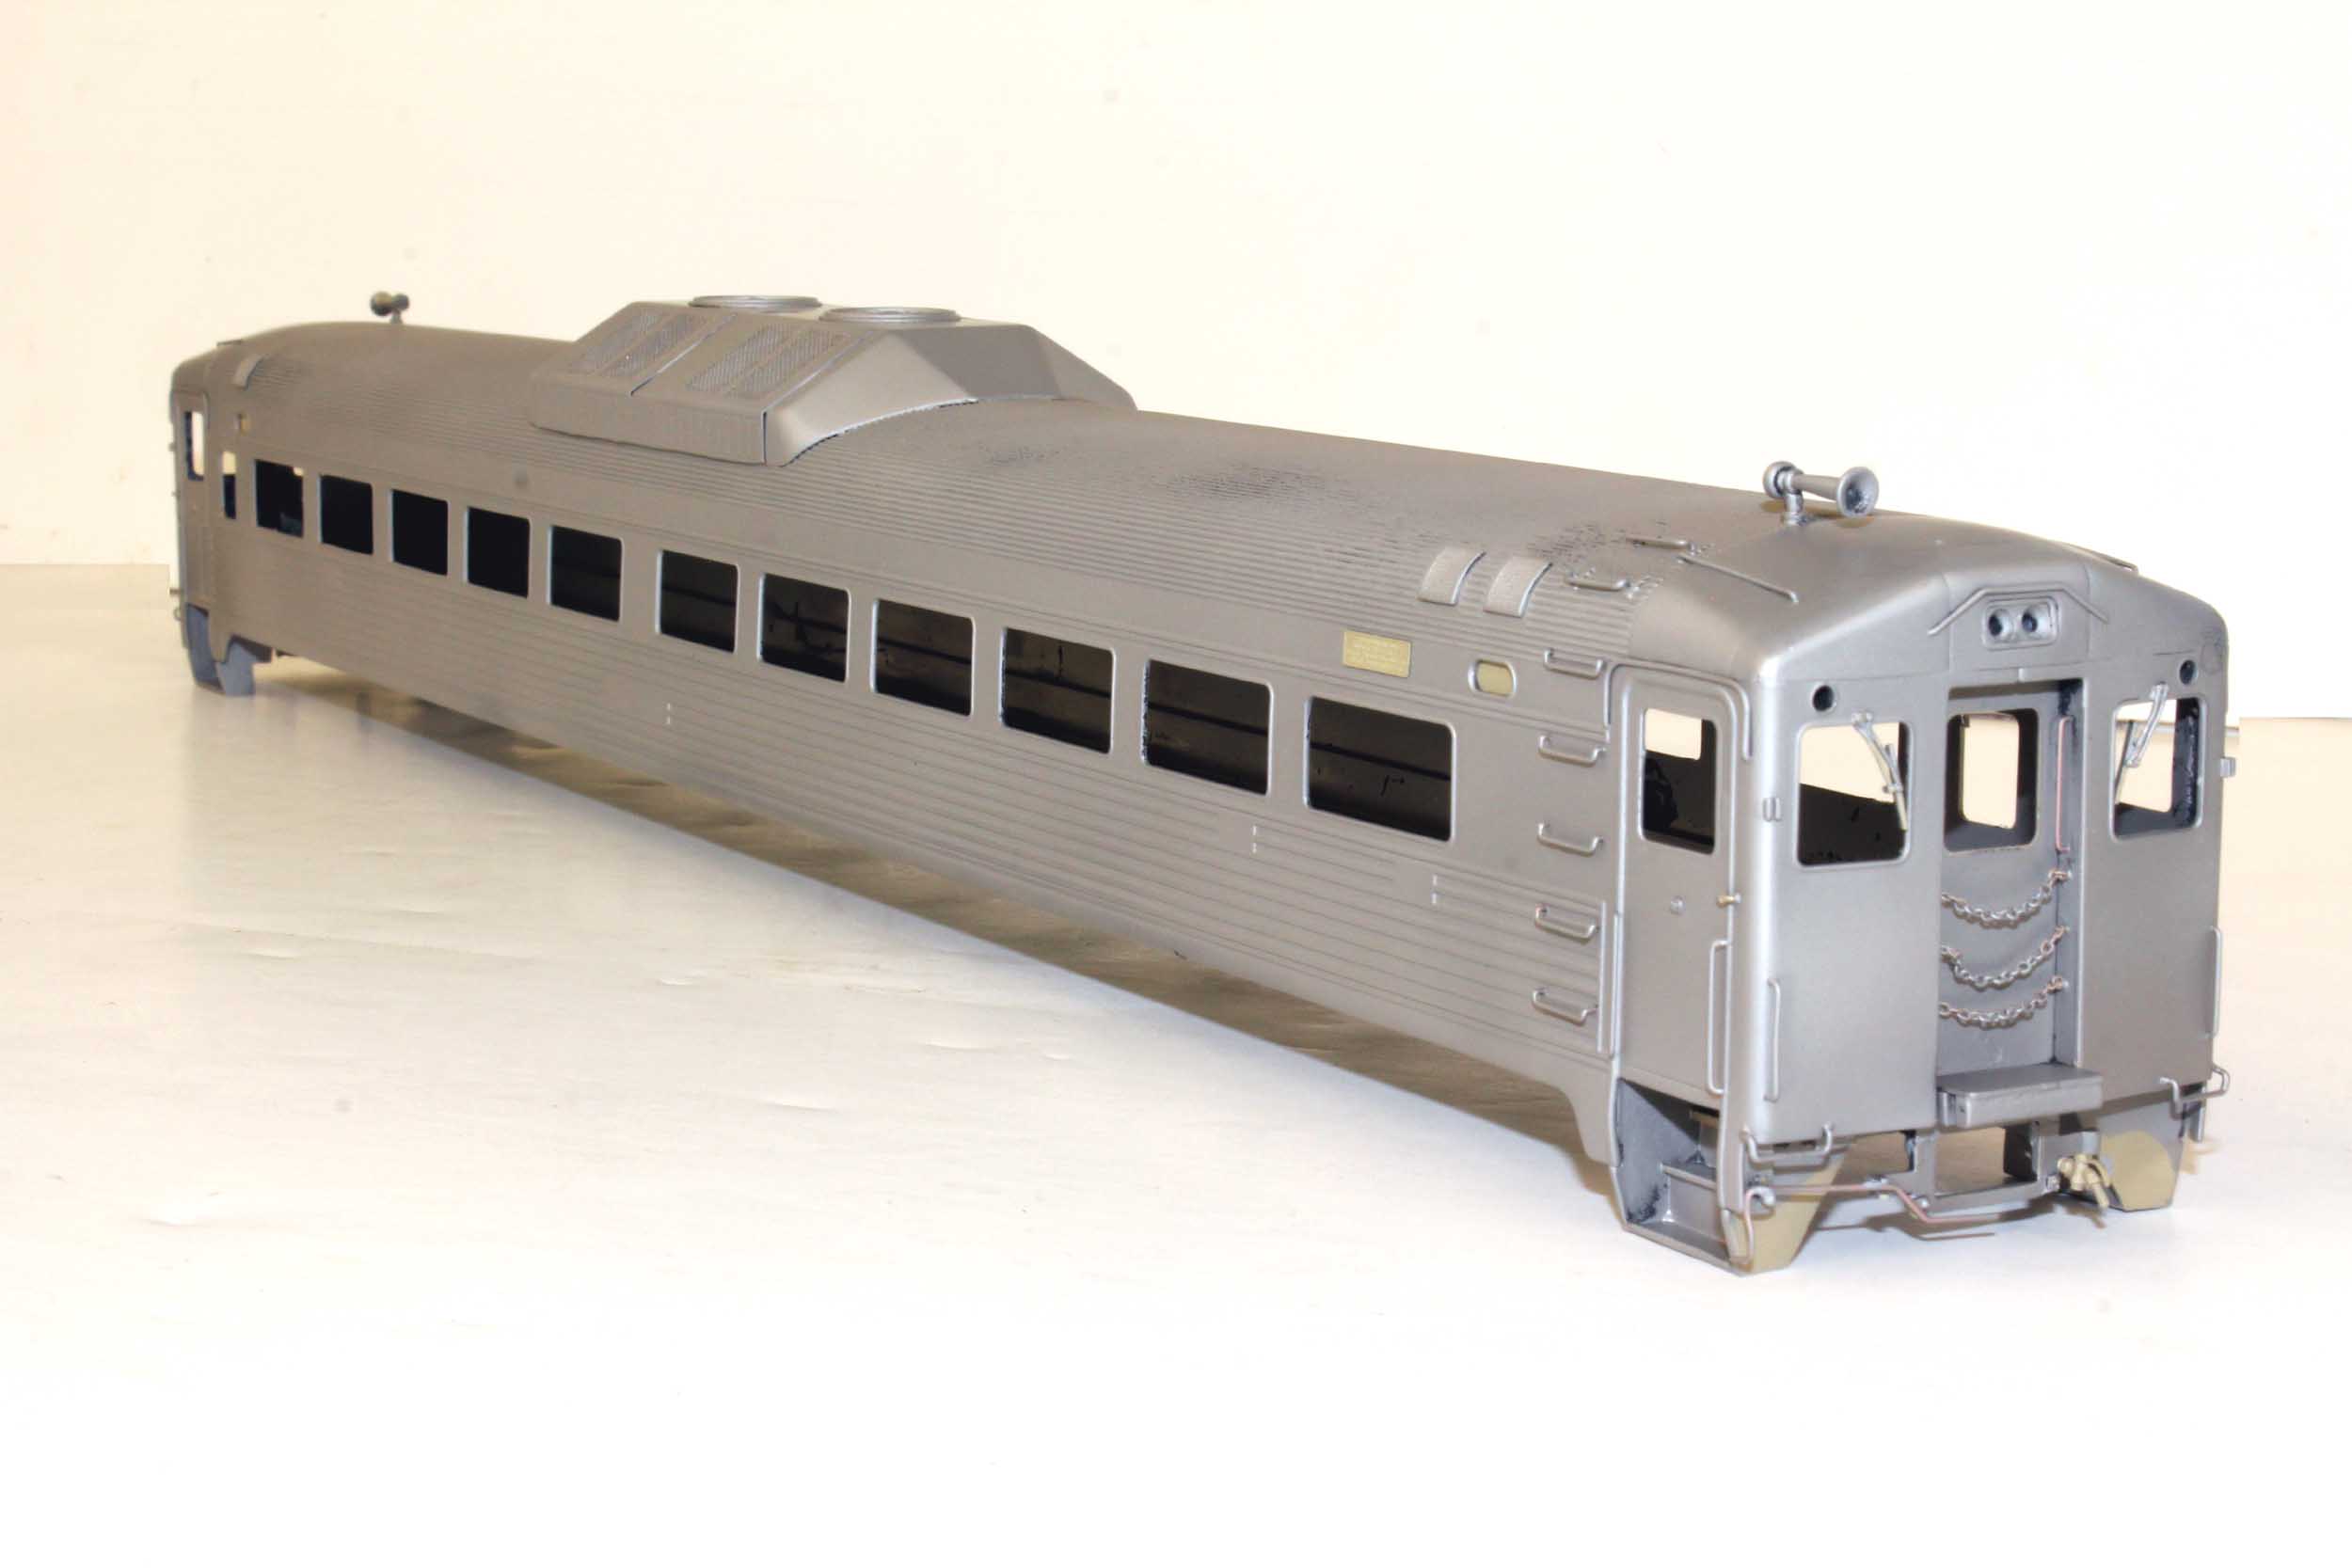
Painting
This
is the second Alclad paint job. You have to paint the car black first. It is very
strange paint to use. I used too much flash on 1 photo of the car painted black
and it looked like it was the stainless color!
I
used the same procedure as the first time for painting but they somehow appear
to be a bit darker. I learned after I bought more paint for the second paint
job that a glossy gray paint would have worked as the first coat and it would
have made the stainless color look brighter. But the biggest difference with
the paint this time was I picked up a lot of dust and schmutz in the paint. Just my luck. There were actually 3 coats of paint
before decaling – the black, stainless and a gloss clear since I was decaling
the car. With every wet coat is a chance for more dust problems. If I fixed and
redid every problem nothing would ever get completed. I had to move on.
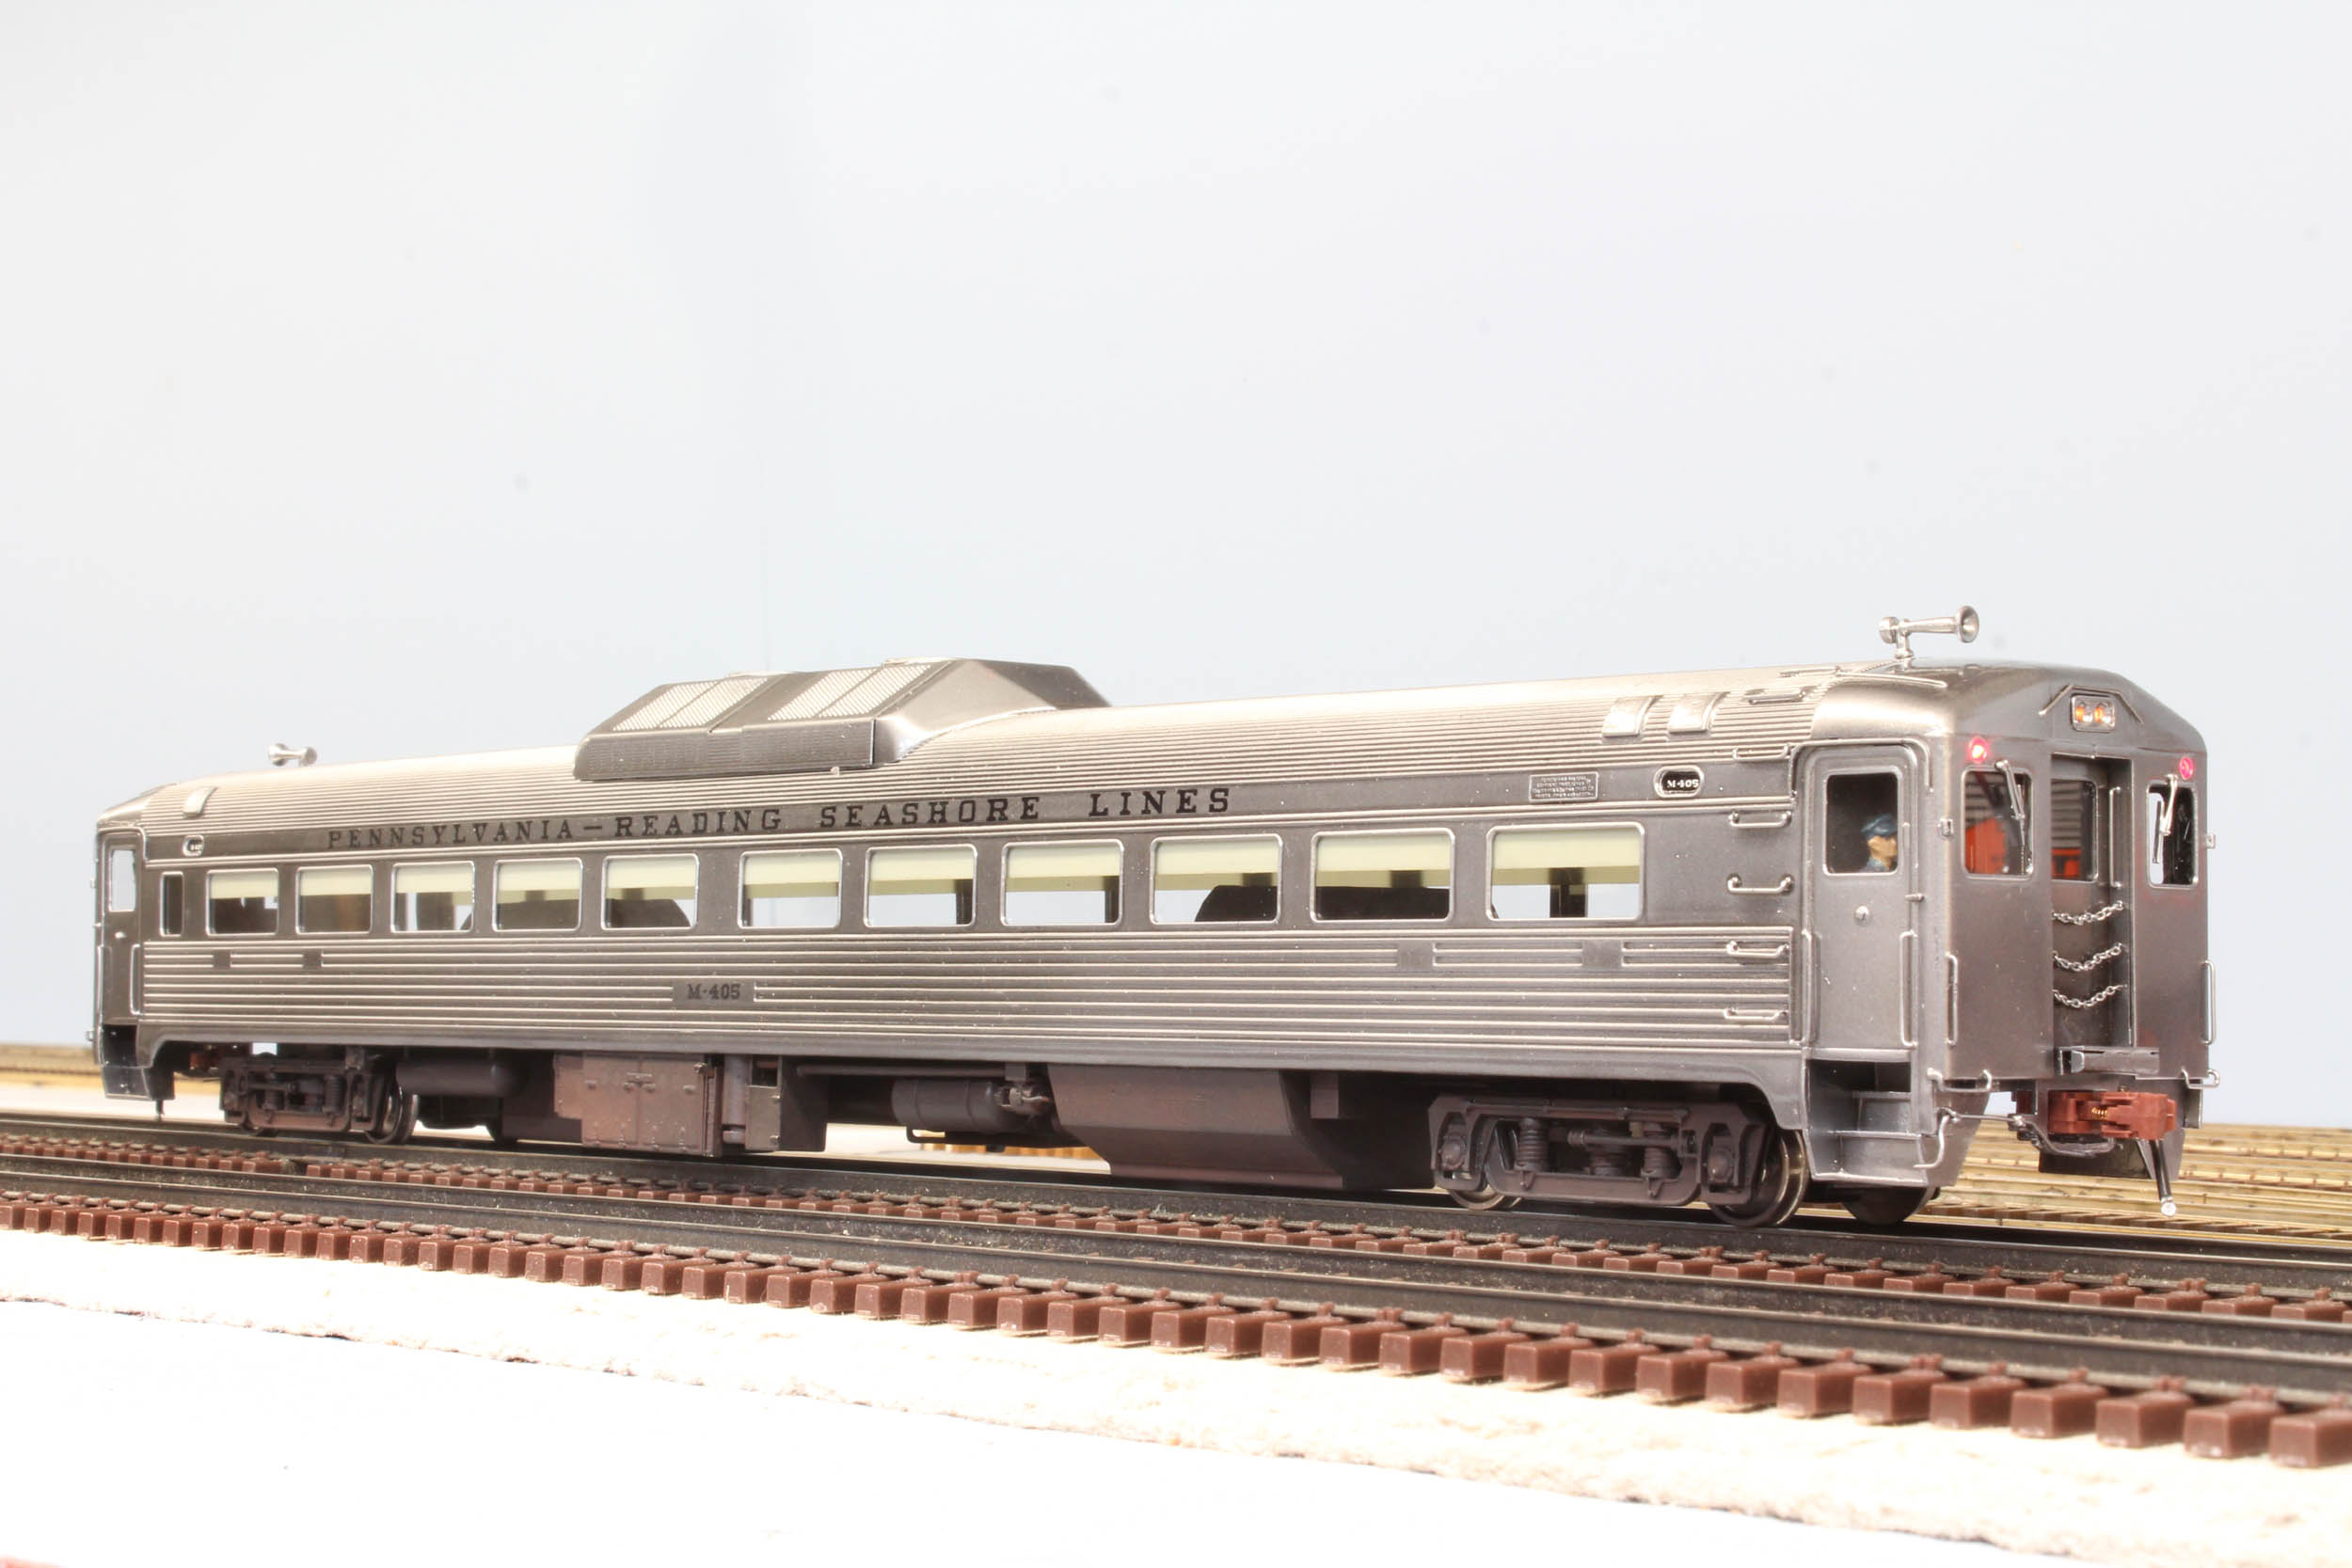
The
decaling was pretty straightforward. I just looked at some photos and got it
done pretty quickly. The “I” in “Reading” is centered on the car but the
lettering is NOT centered on the length of the car.
Glass & Finishing
Much
of the wiring was competed from when I had a NCE motor decoder installed. I
unplugged the NCE and plugged in the QSI. But programming the QSI decoder
proved to be a real challenge. After 2 calls to QSI tech I sort of got it, but
the lighting was still not what I wanted. All lights including the markers
lights are directional and go completely off when I stop. This all can be
changed with programming. I have heard programming the QSI is easy with their
programmer but I am not getting one. I don’t plan on using more QSI decoders
any time soon. The incorrect lighting issues will be addressed at some point.
For
20ish years I have been using real glass exclusively but for this I thought
about using an acrylic for the windows as a long strip. Plastruct makes .030 canopy plastic for airplane models that is really nice – it
has the shine of glass. After some not so good tries with the plastic I decided
to go back to the glass. It was hours of cutting glass. The glass broke many
times especially after trying to put the “blinds” on. It is really Scotch 218
plastic auto masking tape. But trying to get everything straight and pulling
the tape off many times broke lots of glass. It was all really trying my
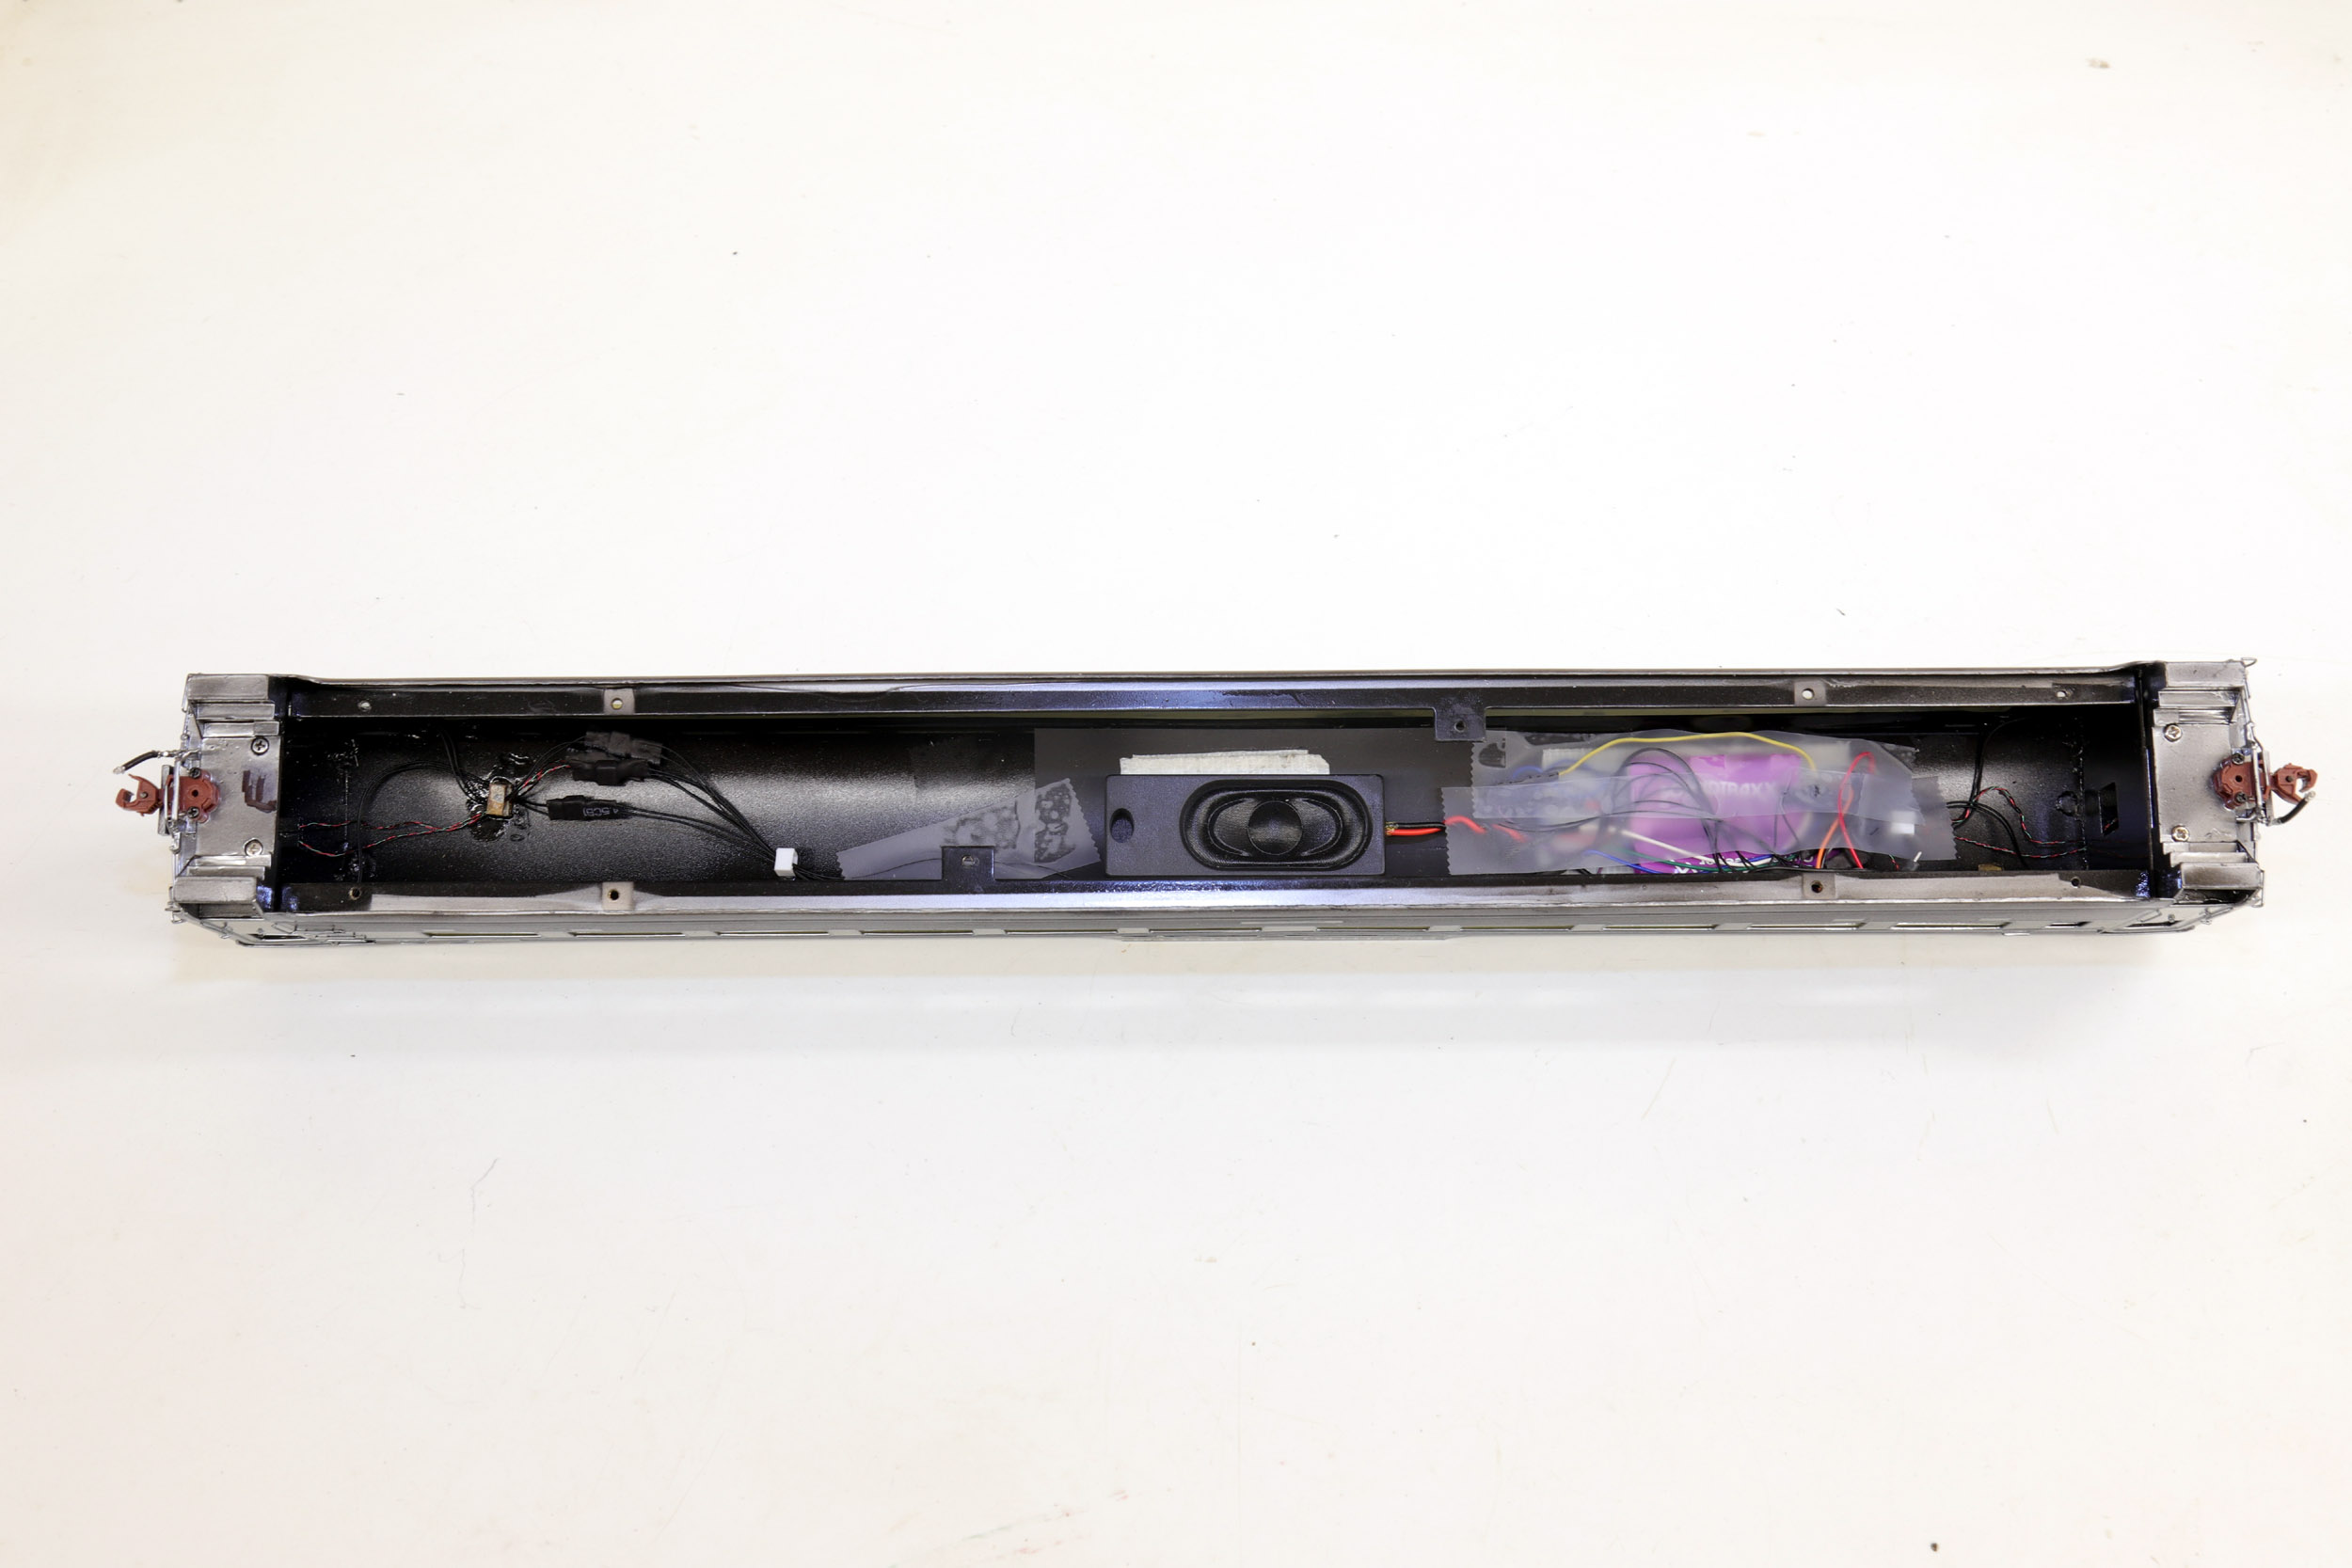
patience! All of the electronics and speaker is stuffed up and taped in the
arch of the roof. I used a 4 wire Miniatronics plug to disconnect the shell
from the drive in what I call “power up – motor down”. The plug makes it much
easier to work on to disconnect the shell form the drive.
Completed on the layout
On 5-30-13

Added 2-14-21
TLC Repairs & Decoder Upgrade
My
RDC were in need of some TLC. Windows were broken, a speaker and wires were hanging
down where you could see them, and I wanted to change to LEDS for the
headlights and marker lights. I also found I put 1 of them together wrong years
ago making the coupler height very high so that got fixed.
After
waiting for over 4 years for Soundtraxx or TSC to make another RDC I had
enough. I have been rather brutal in postings on the TCS Facebook page for over
a year asking when the decoder would be available. I have 3 year old emails
from TCS saying it is “coming soon”. I just snapped one day. I was done with
waiting. The QSI decoders have been removed. I bought Tsunami2 faking the RDC
sound with a dual Whitcomb. I also wanted to get a decoder with a Current
Keeper. They are running good and the lights are working normally now. Whenever
someone in some future century graces my wallet with a RDC decoder it will
likely be just a plug in swap out.
These
are new photos taken 2-14-21 that should have been taken earlier. Some are
showing how I set the drive up and did the decoder and lights.
I have better cameras now so these are new photos also taken
2-14-21.
Updated 2-14-21
All
photos and content © Lanes Trains 2005-2021