|
|
In S Scale As
I write this text on 12-1-25 I completely believe I am the only person to
have this car running in model form in any scale. It was a fun project but was
a lot of work. North Woodbury NJ 8-23-25
|
|


North Woodbury NJ 10-4-25
This train is usually 1 mile long of gondolas only.

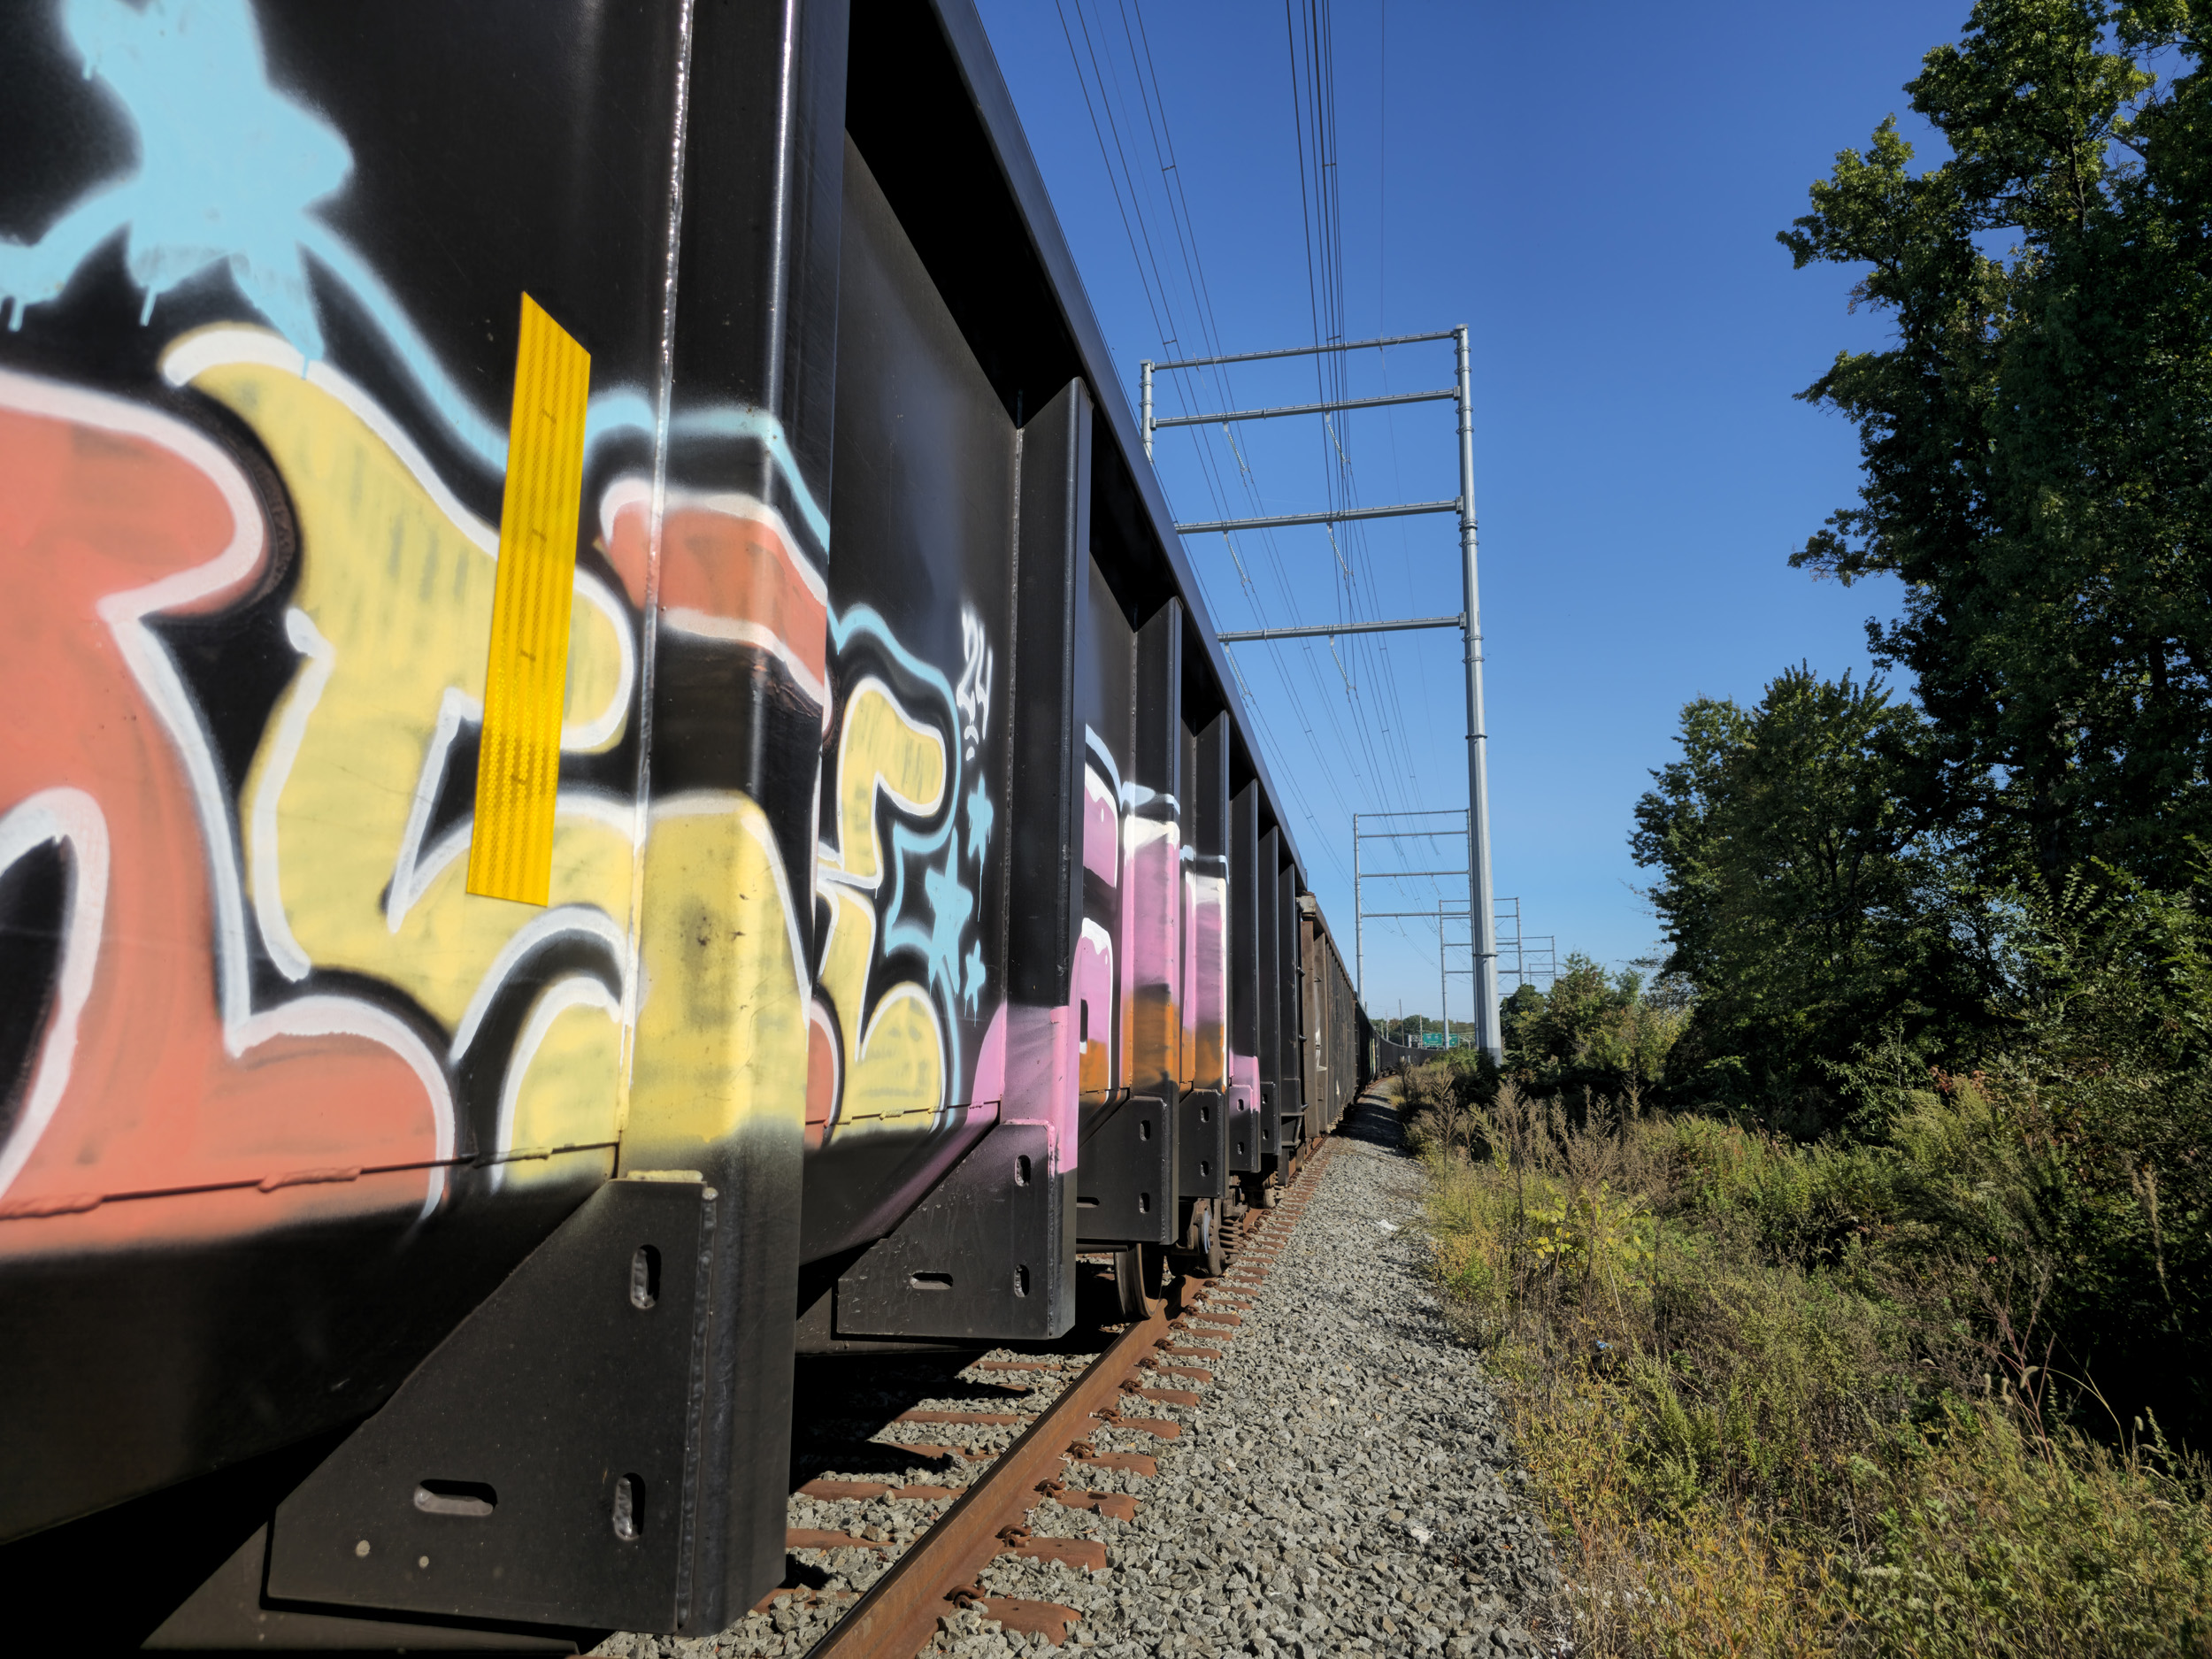

This was a photo from a Facebook group photographer unknown.
The
former Pennsylvania Reading Seashore Line (PRSL) mainline is at the end of my
street running today as Conrail Shared Assets (CSAO) which is still alive and
very active. Nothing is newly painted as Conrail. The locos are a mix of
Norfolk Southern and CSX. There is a train running north or south about every 6
hours as well as the other branches from Camden south which I think is
significant given it is just South Jersey.
In
2013 there was a new 1 mile long siding built that starts near the end of my
street. When completed there was a constant cycle of mile long unit tank trains
of Bakken crude oil for the refinery 2 miles away.
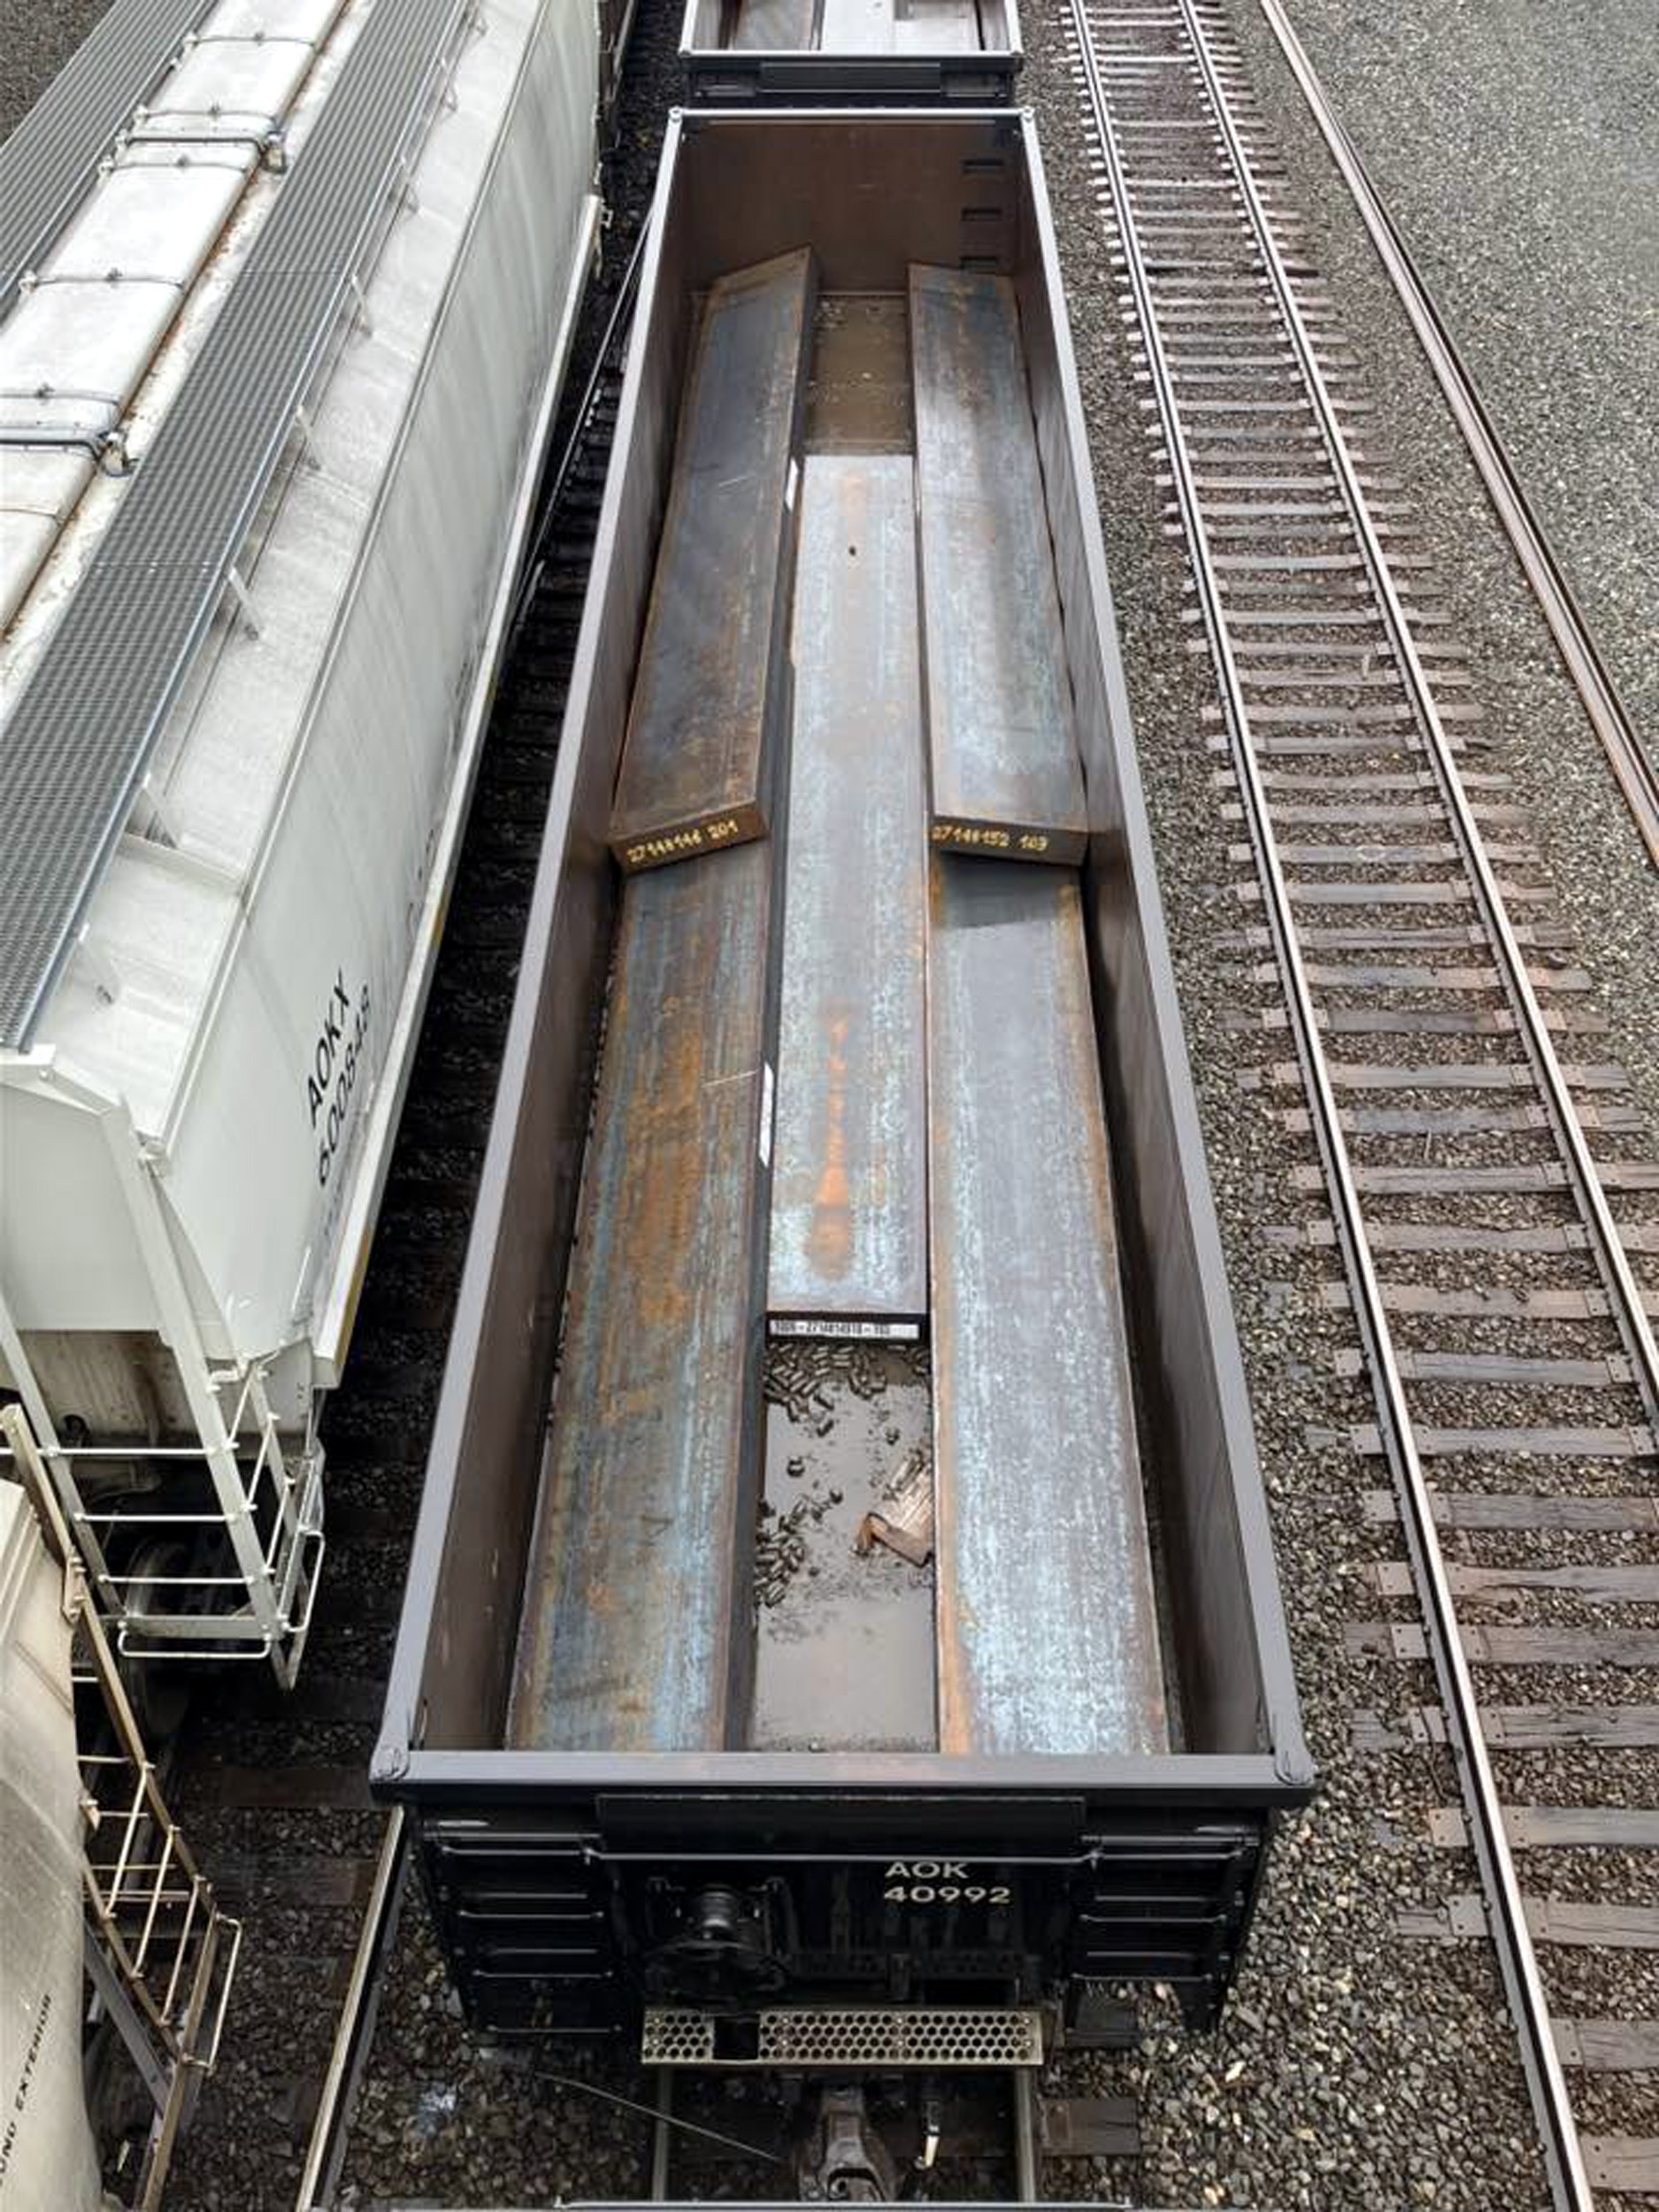
That faded after a few years but was quickly replaced with gondola trains with various
old battered cars. In 2017 the Port Of Paulsboro opened offloading steel slabs
from Russia into unit gondola trains going to Ohio. The cars eventually became
all new from Norfolk Southern.
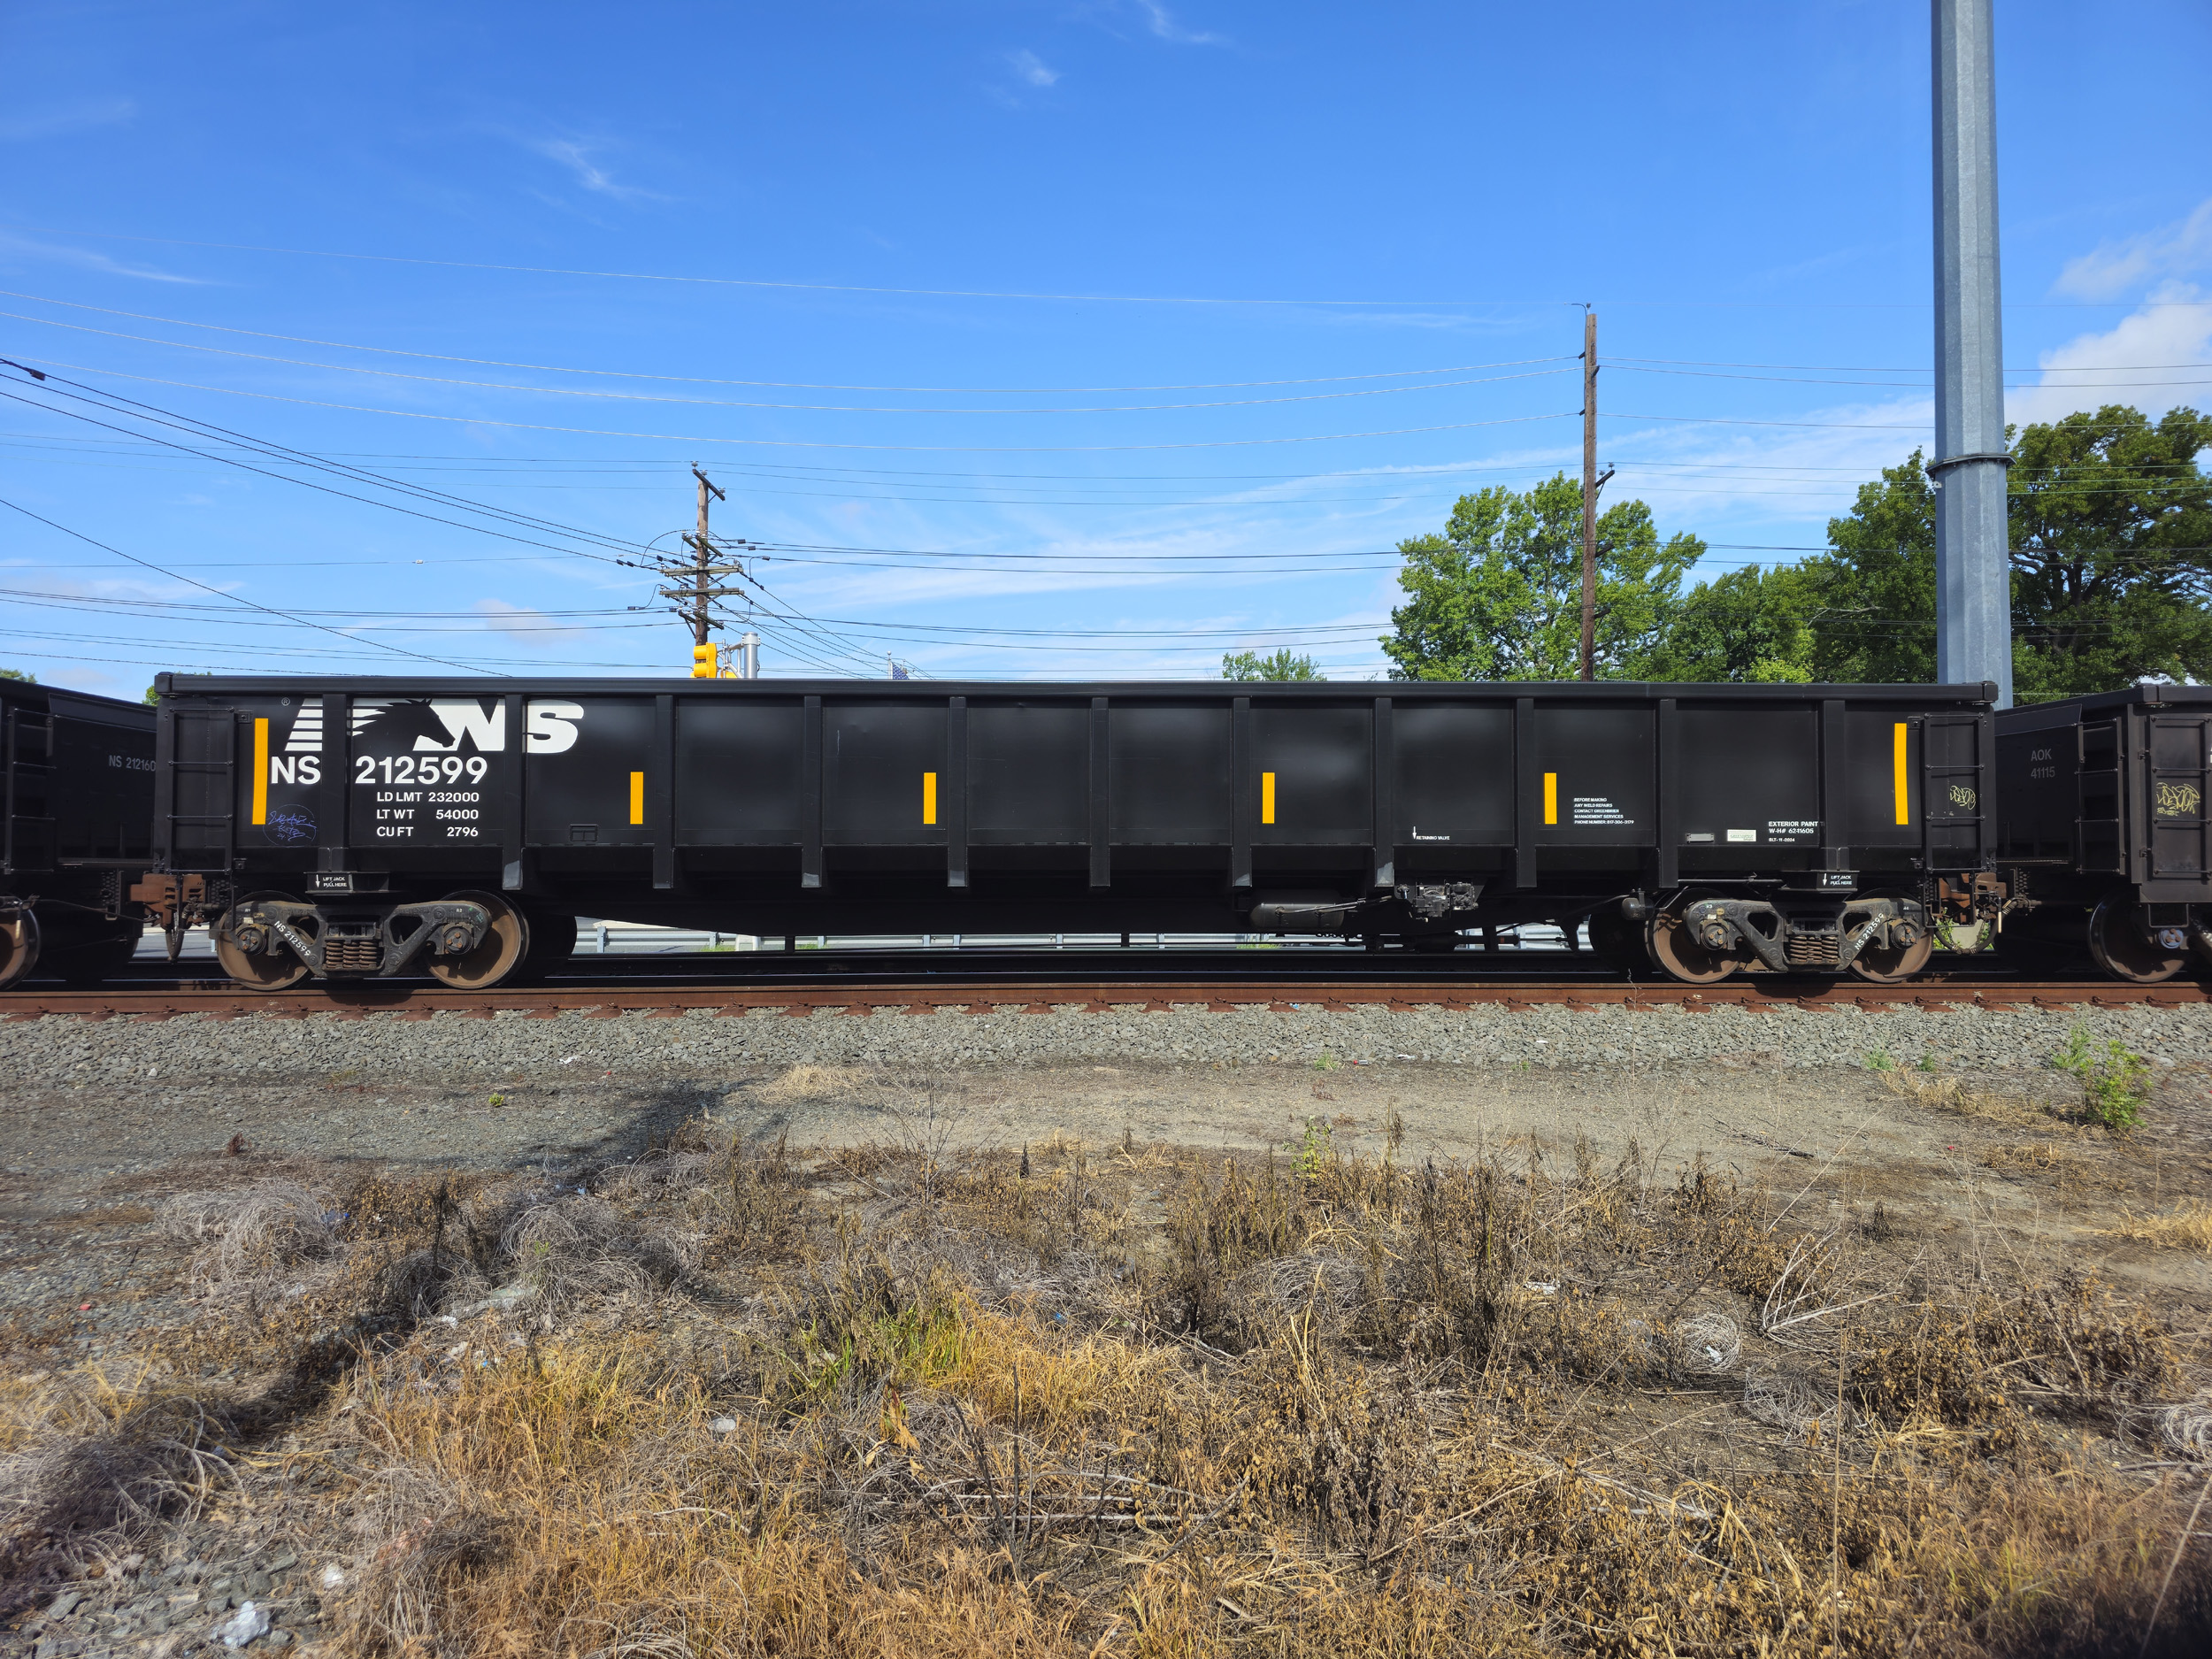
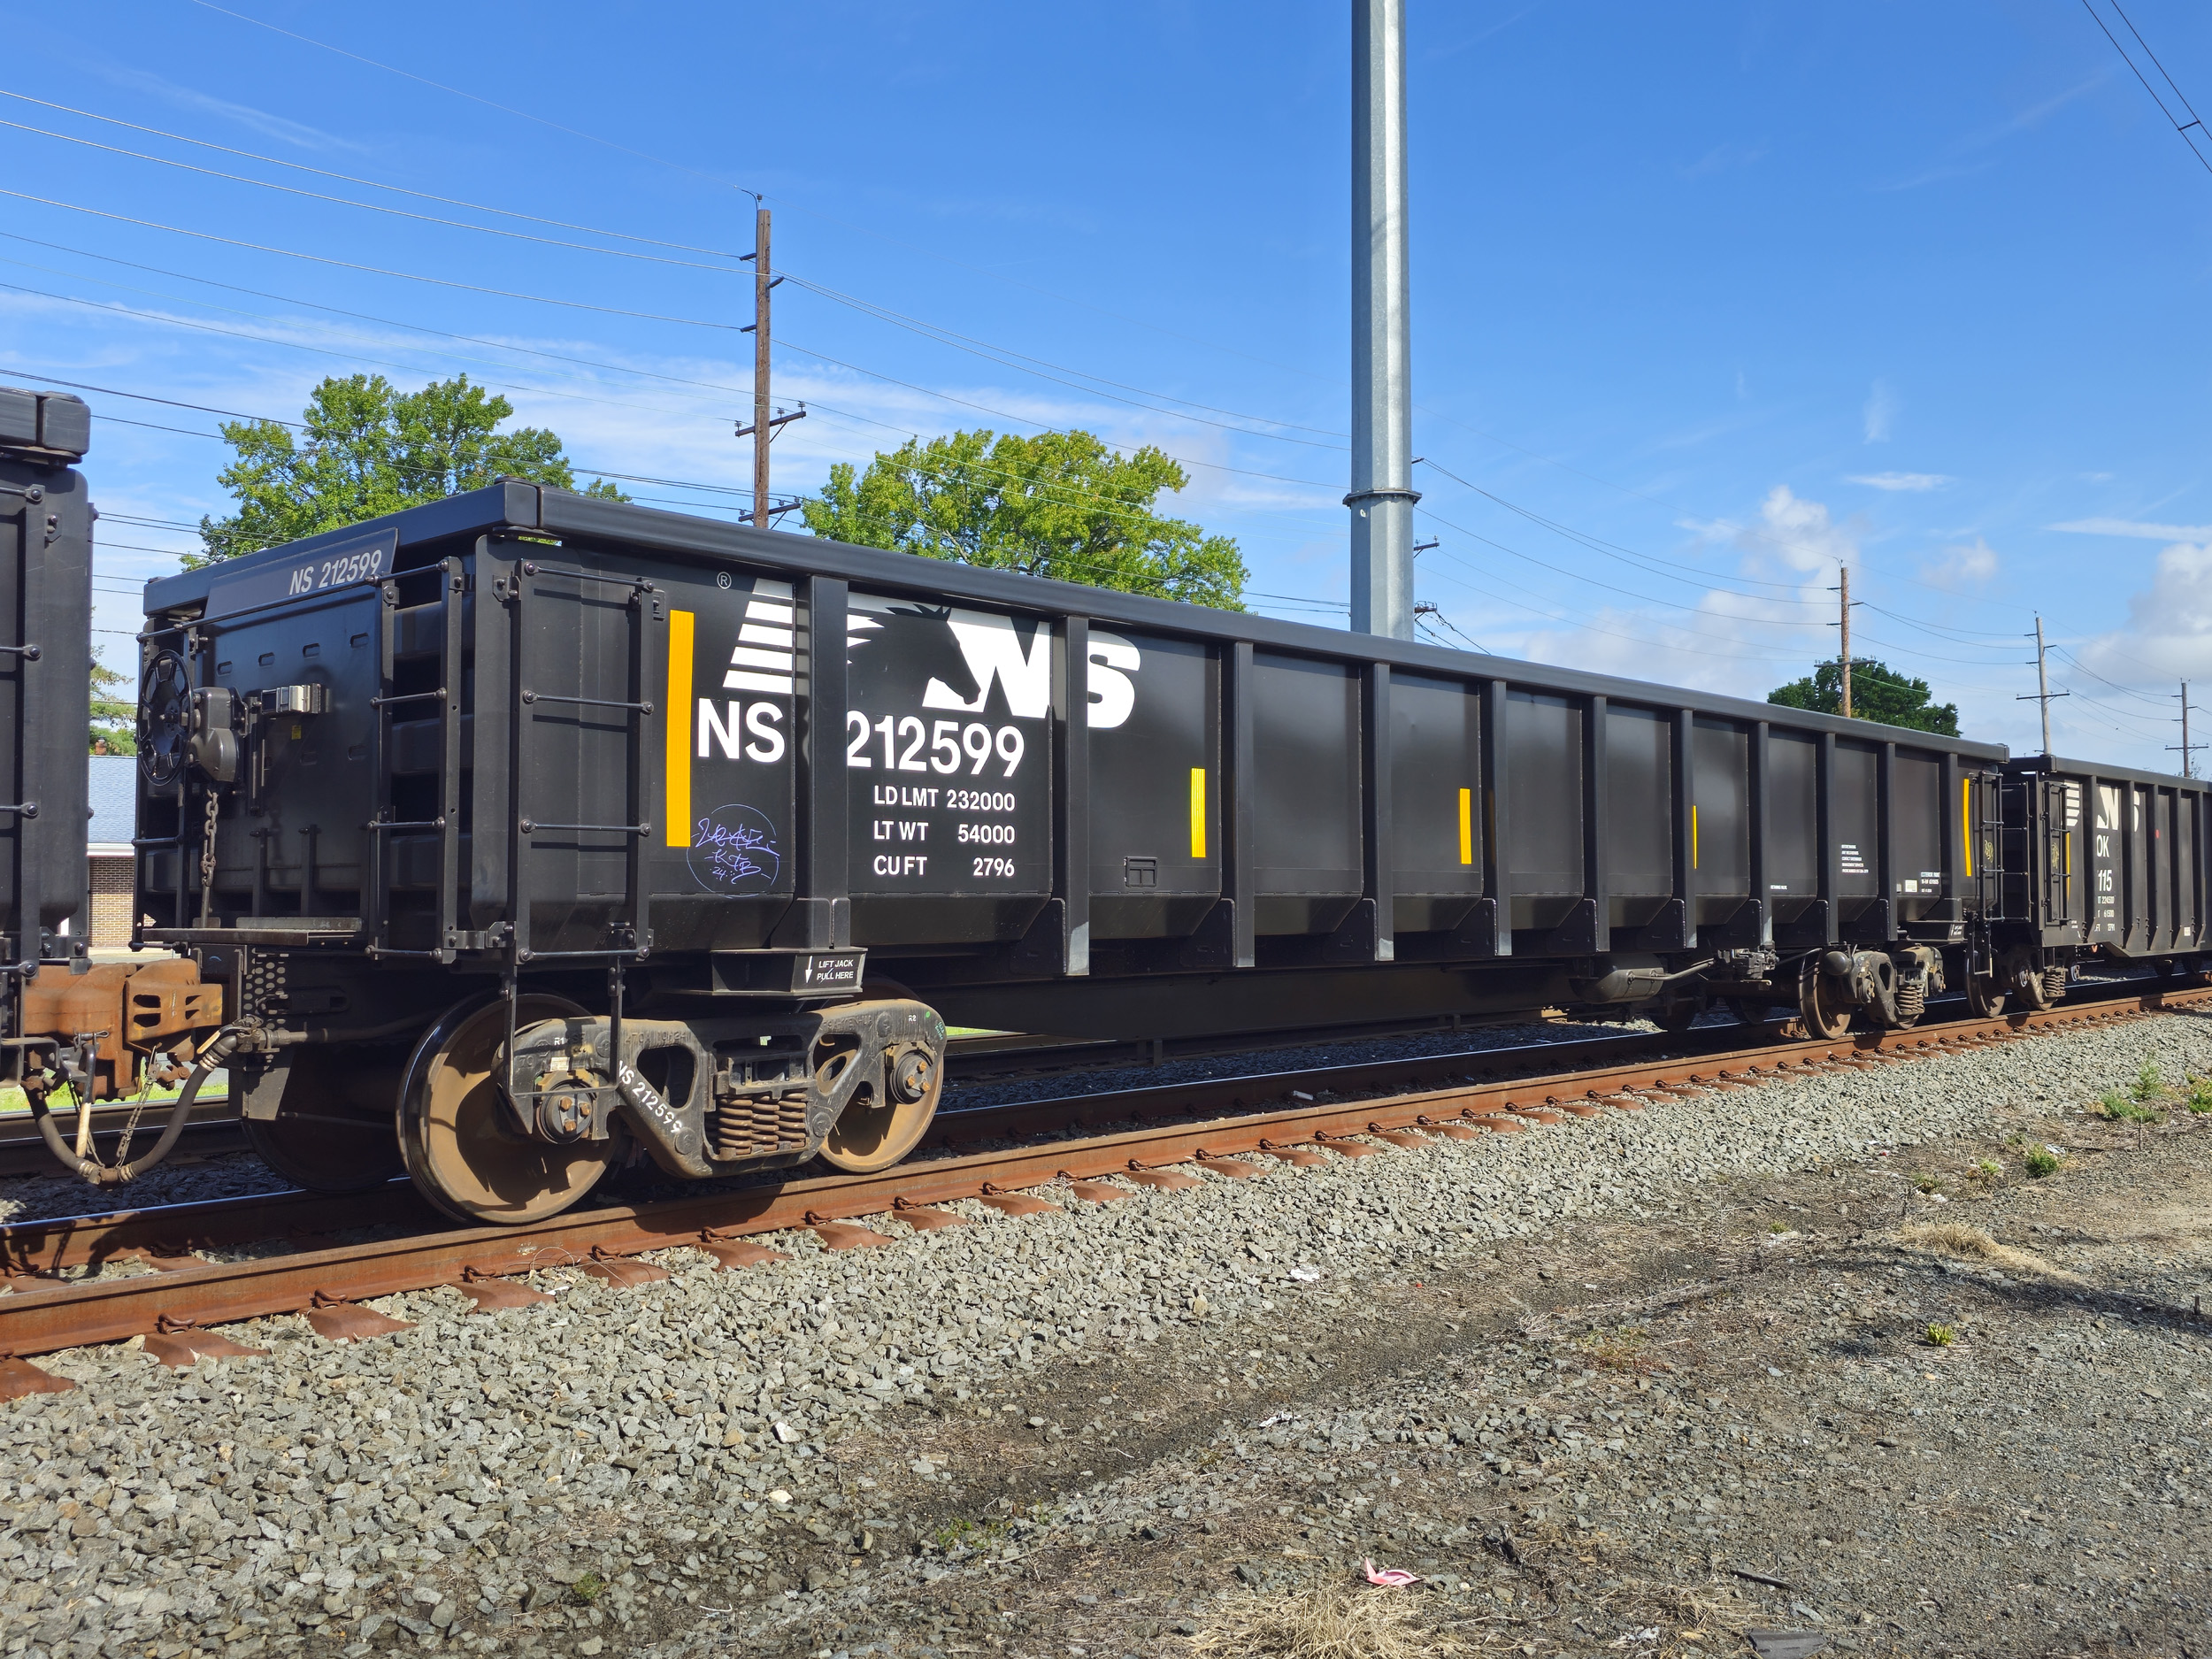
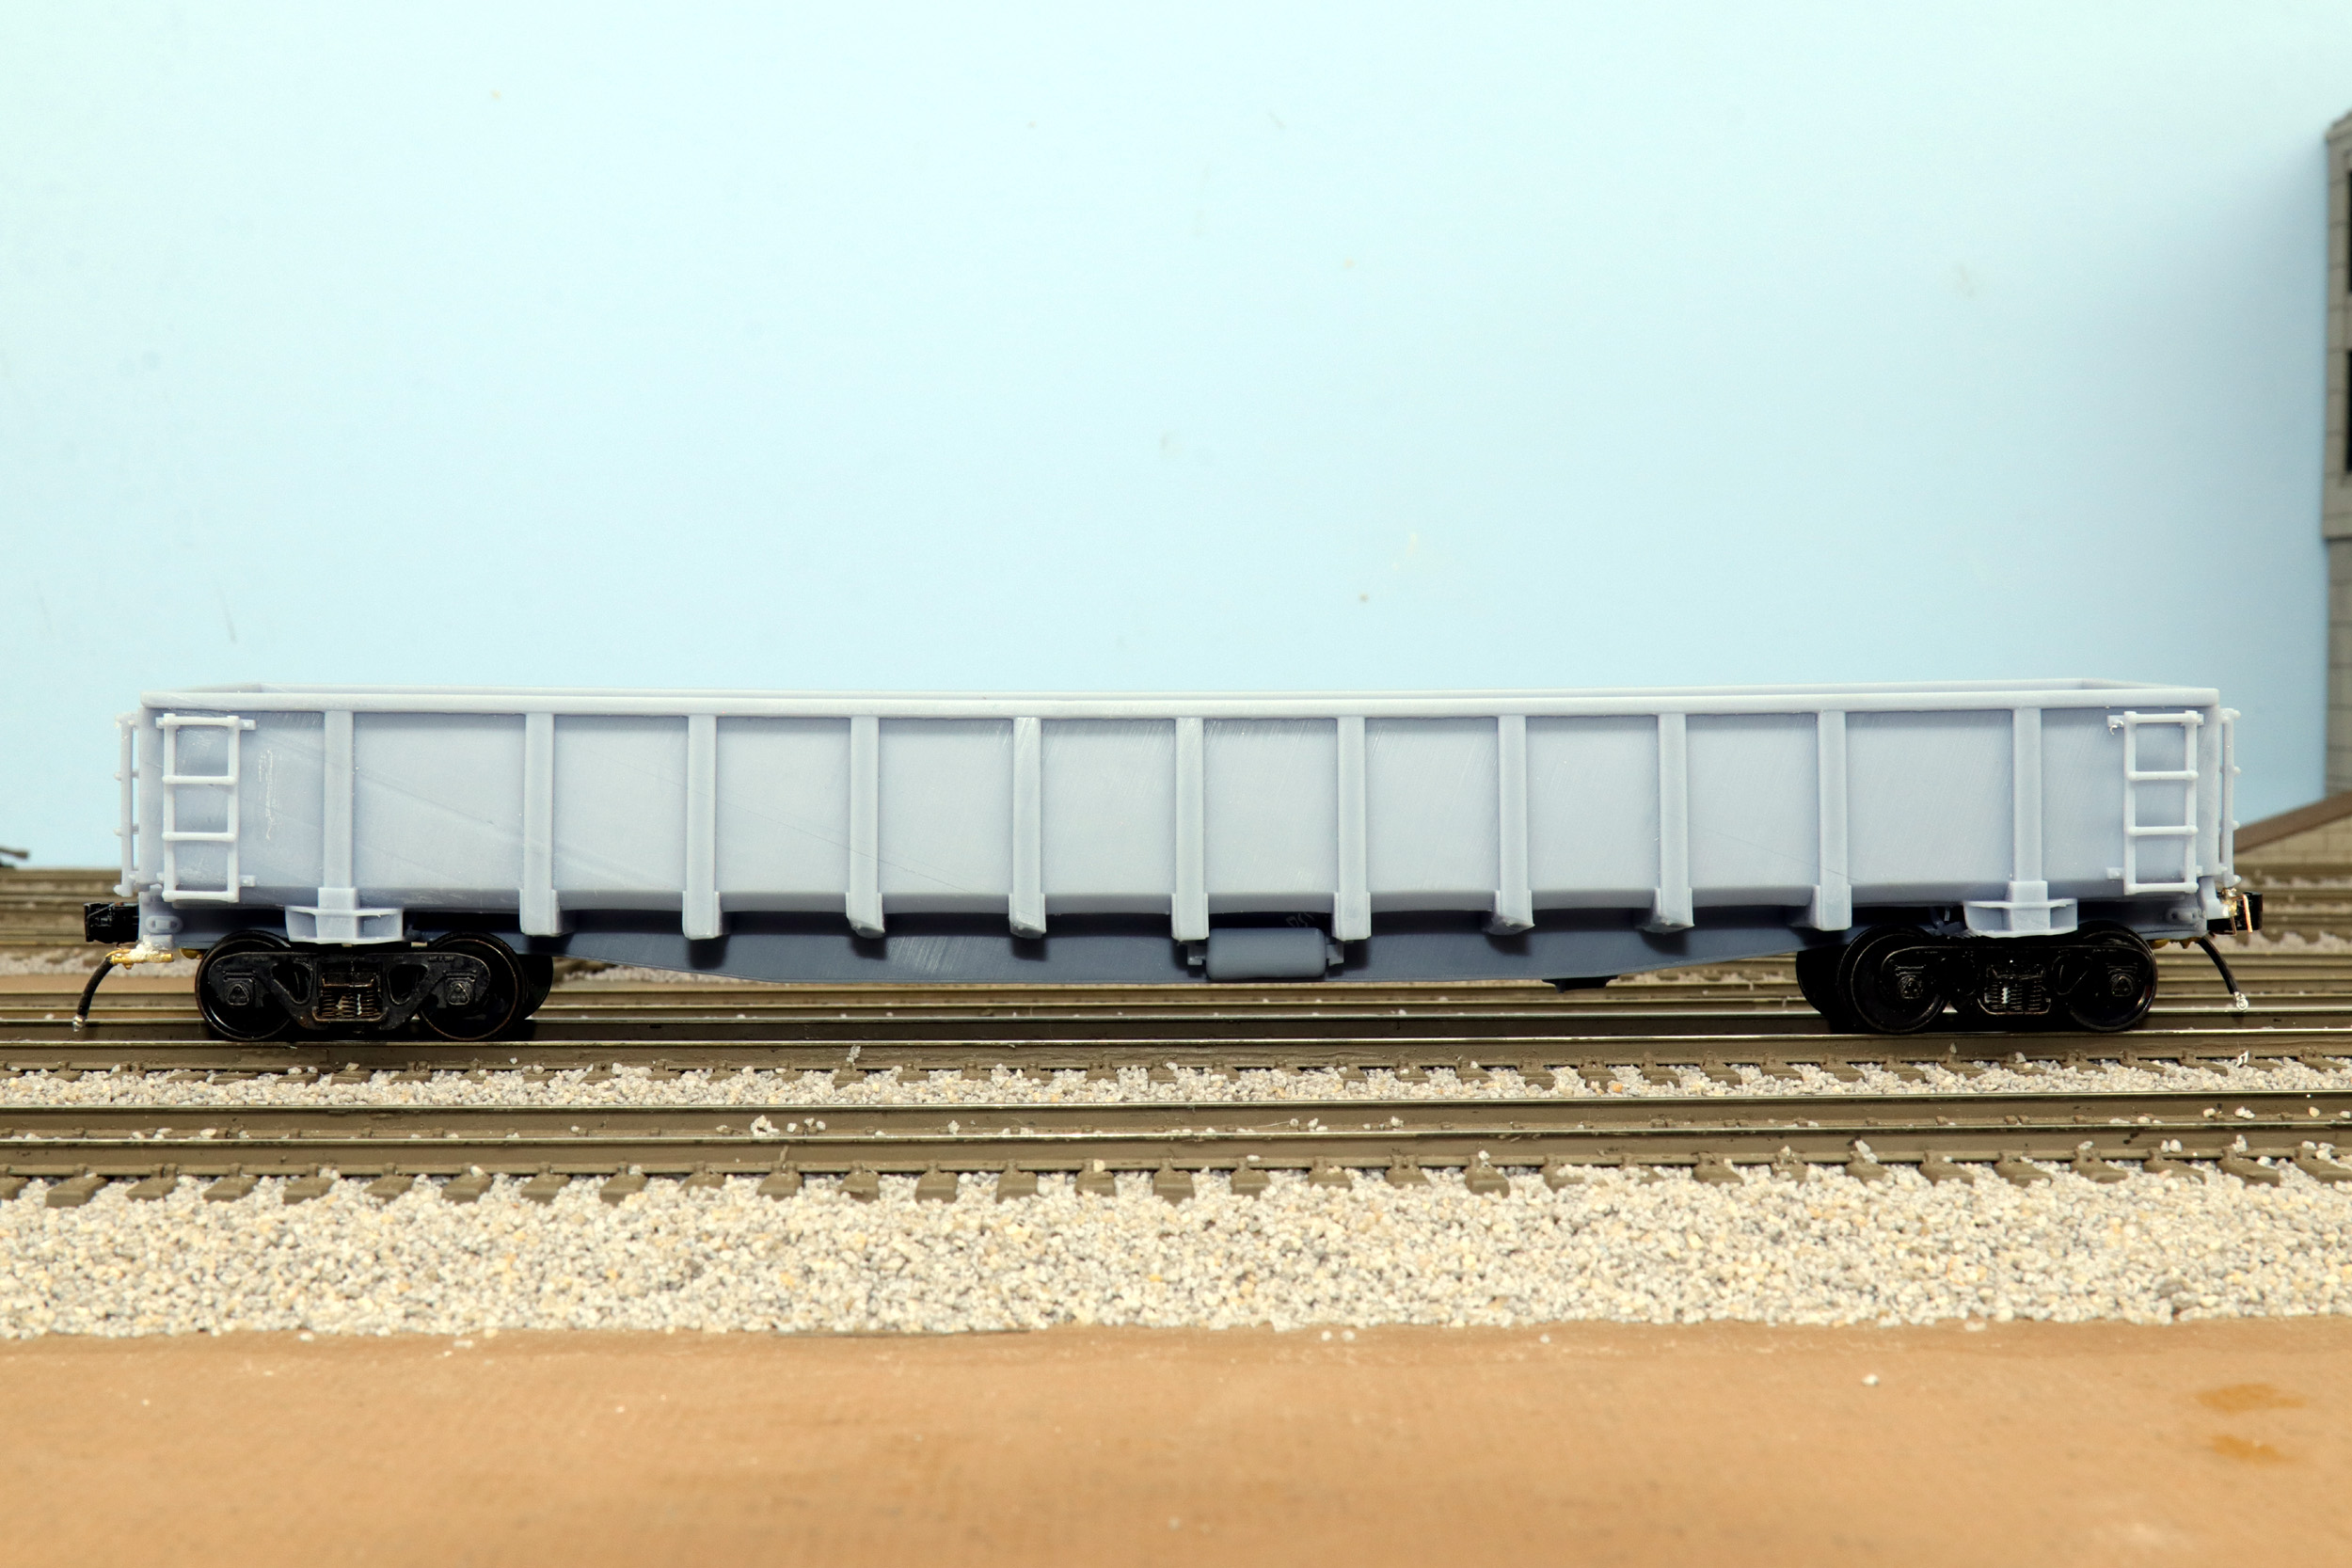
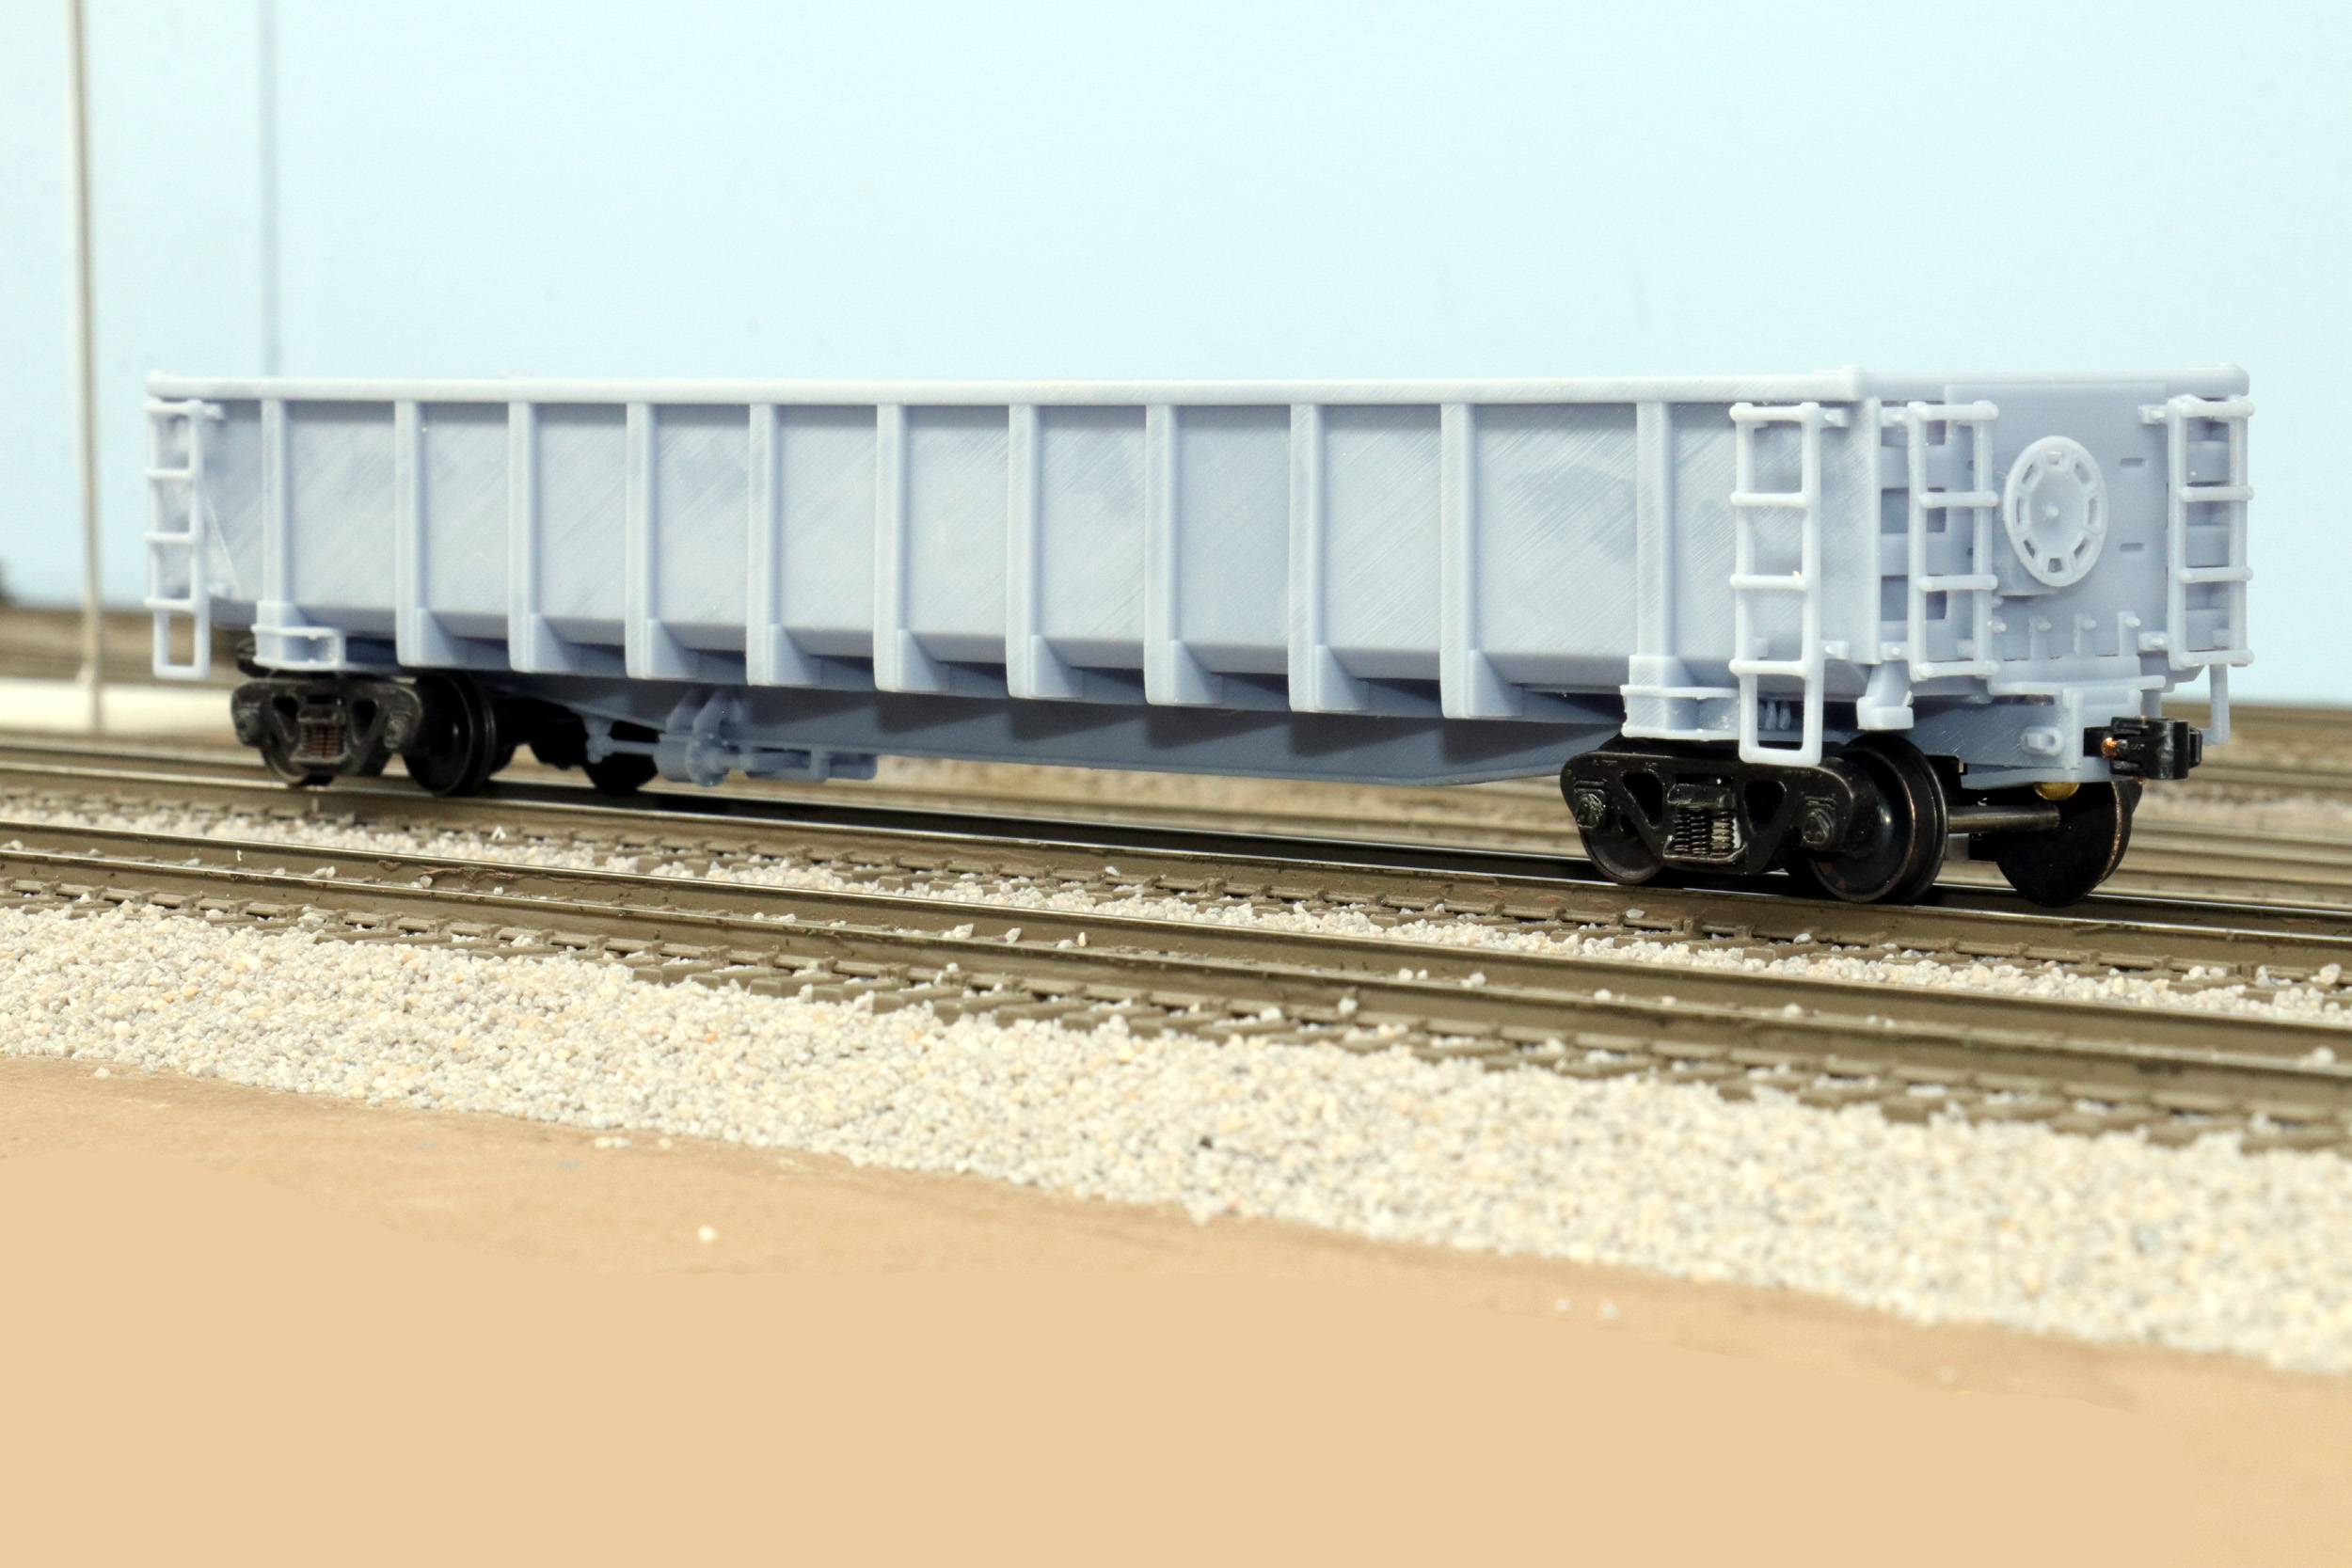
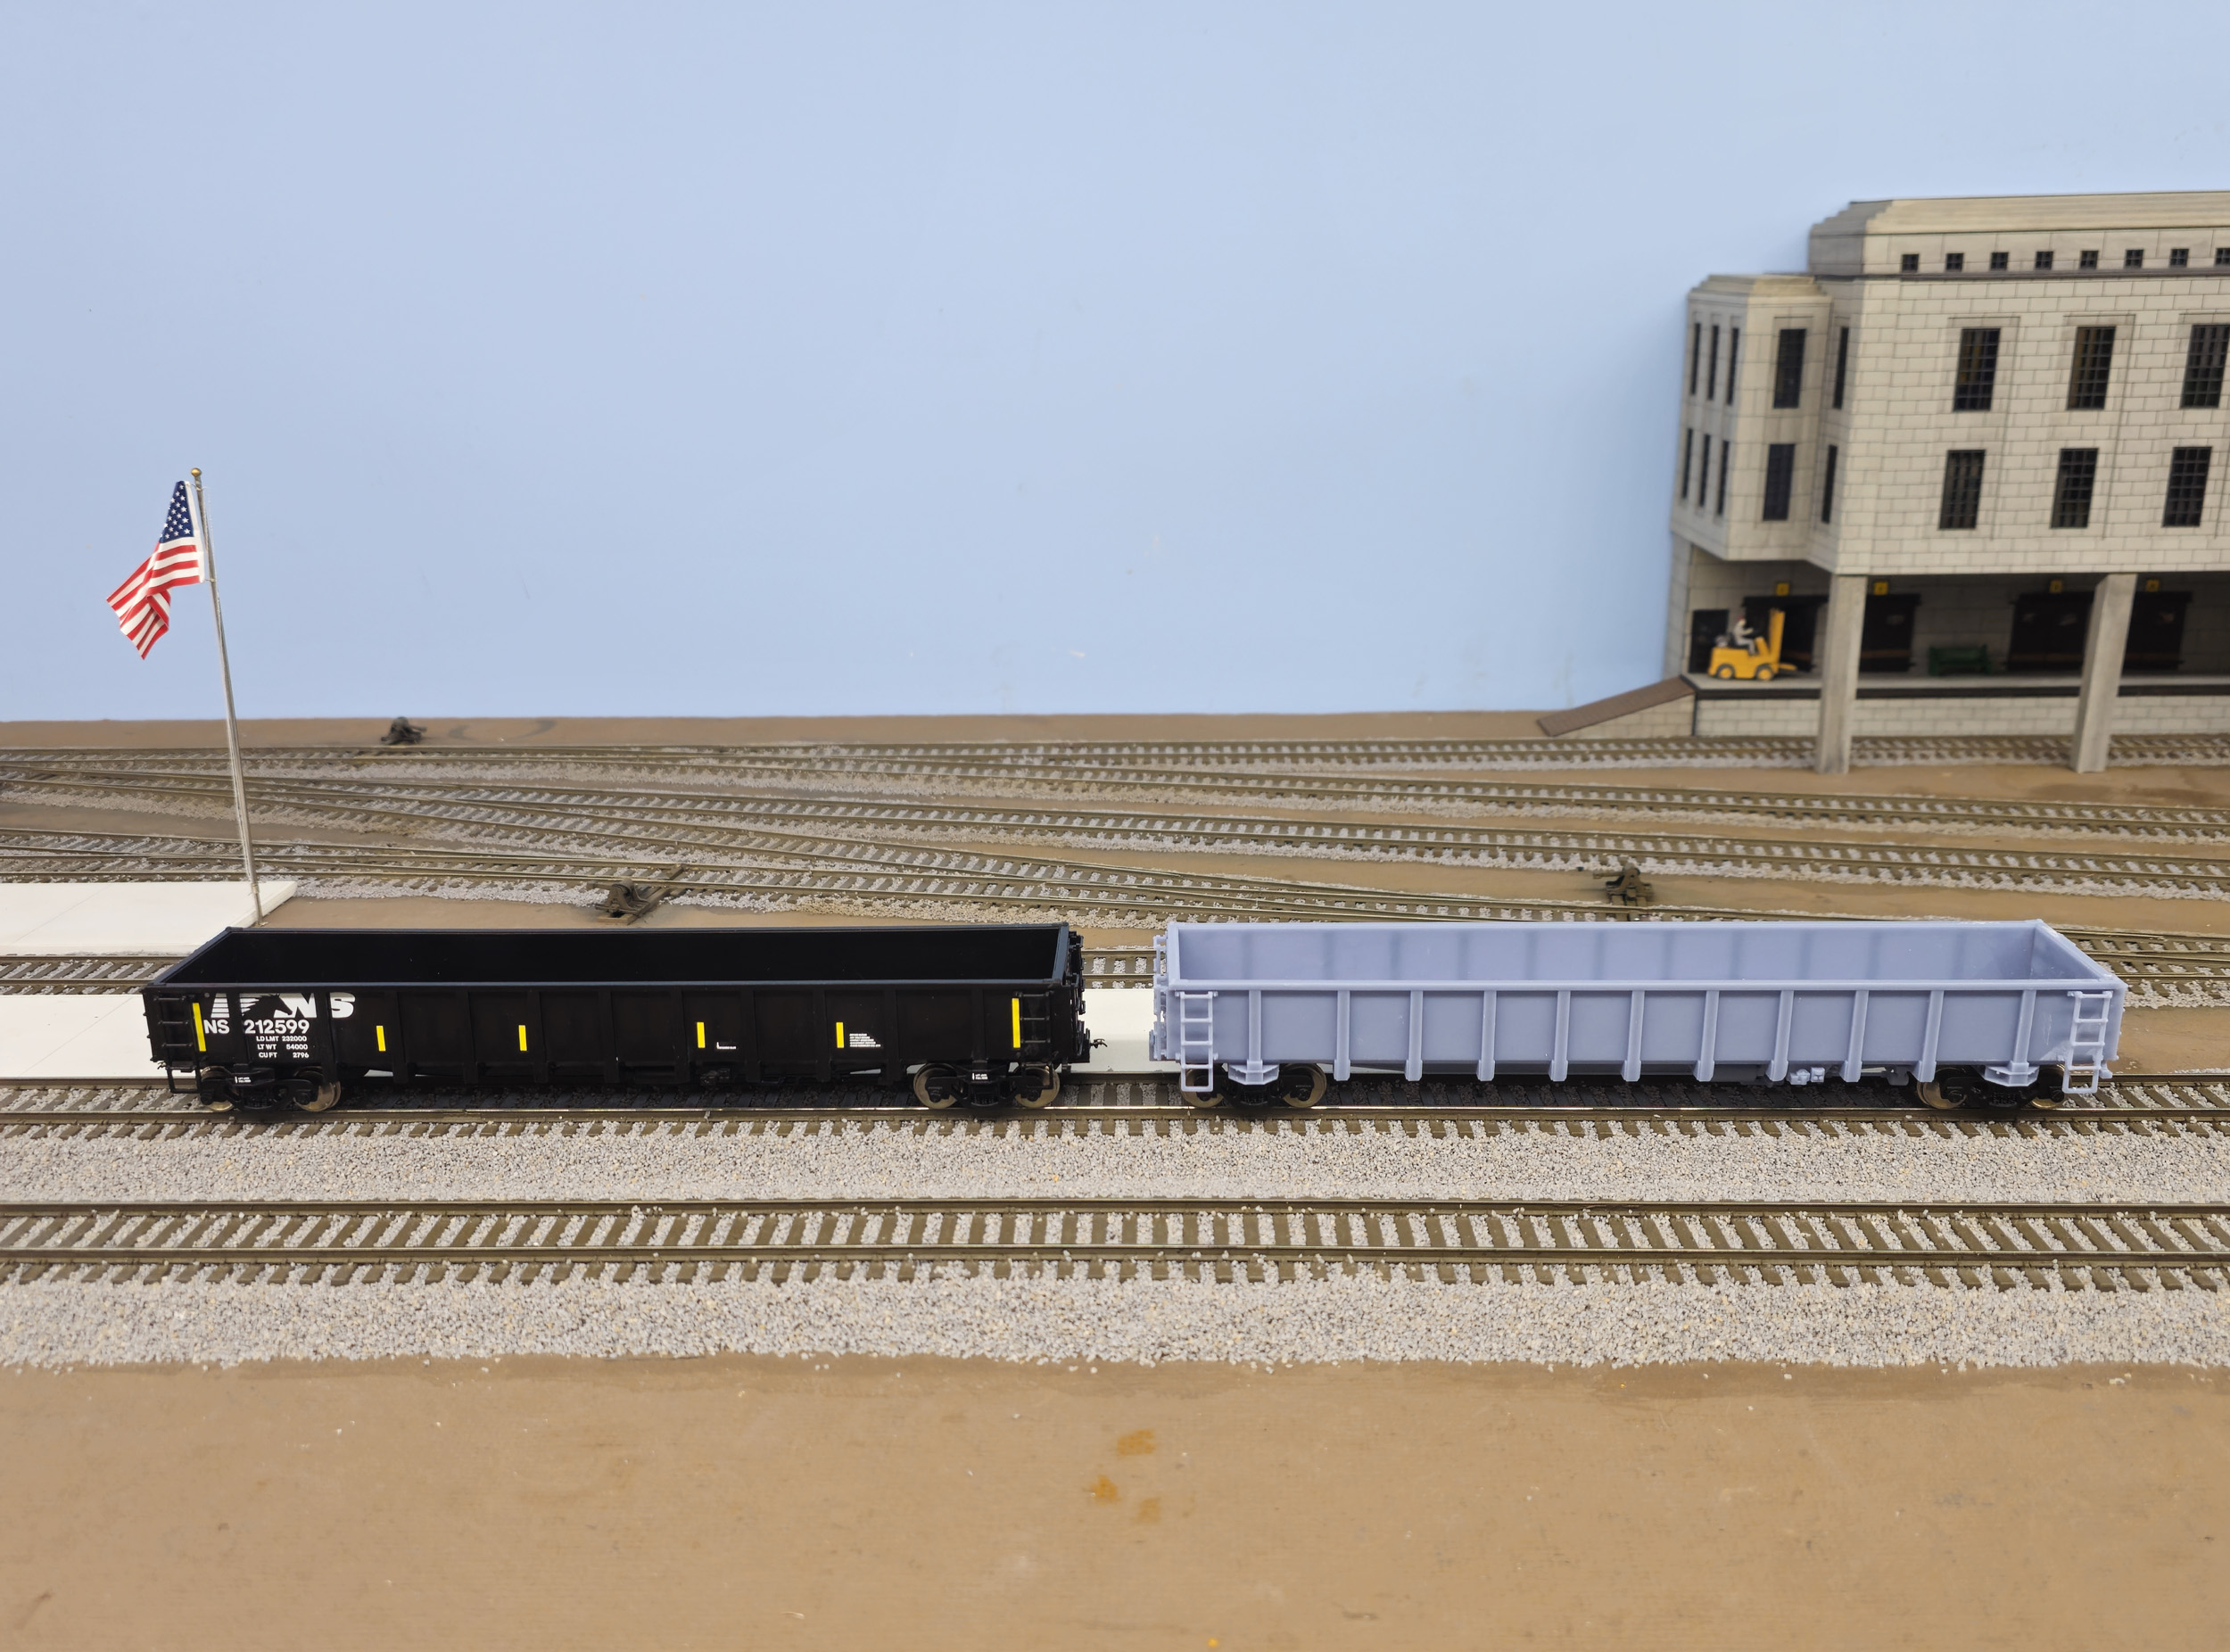
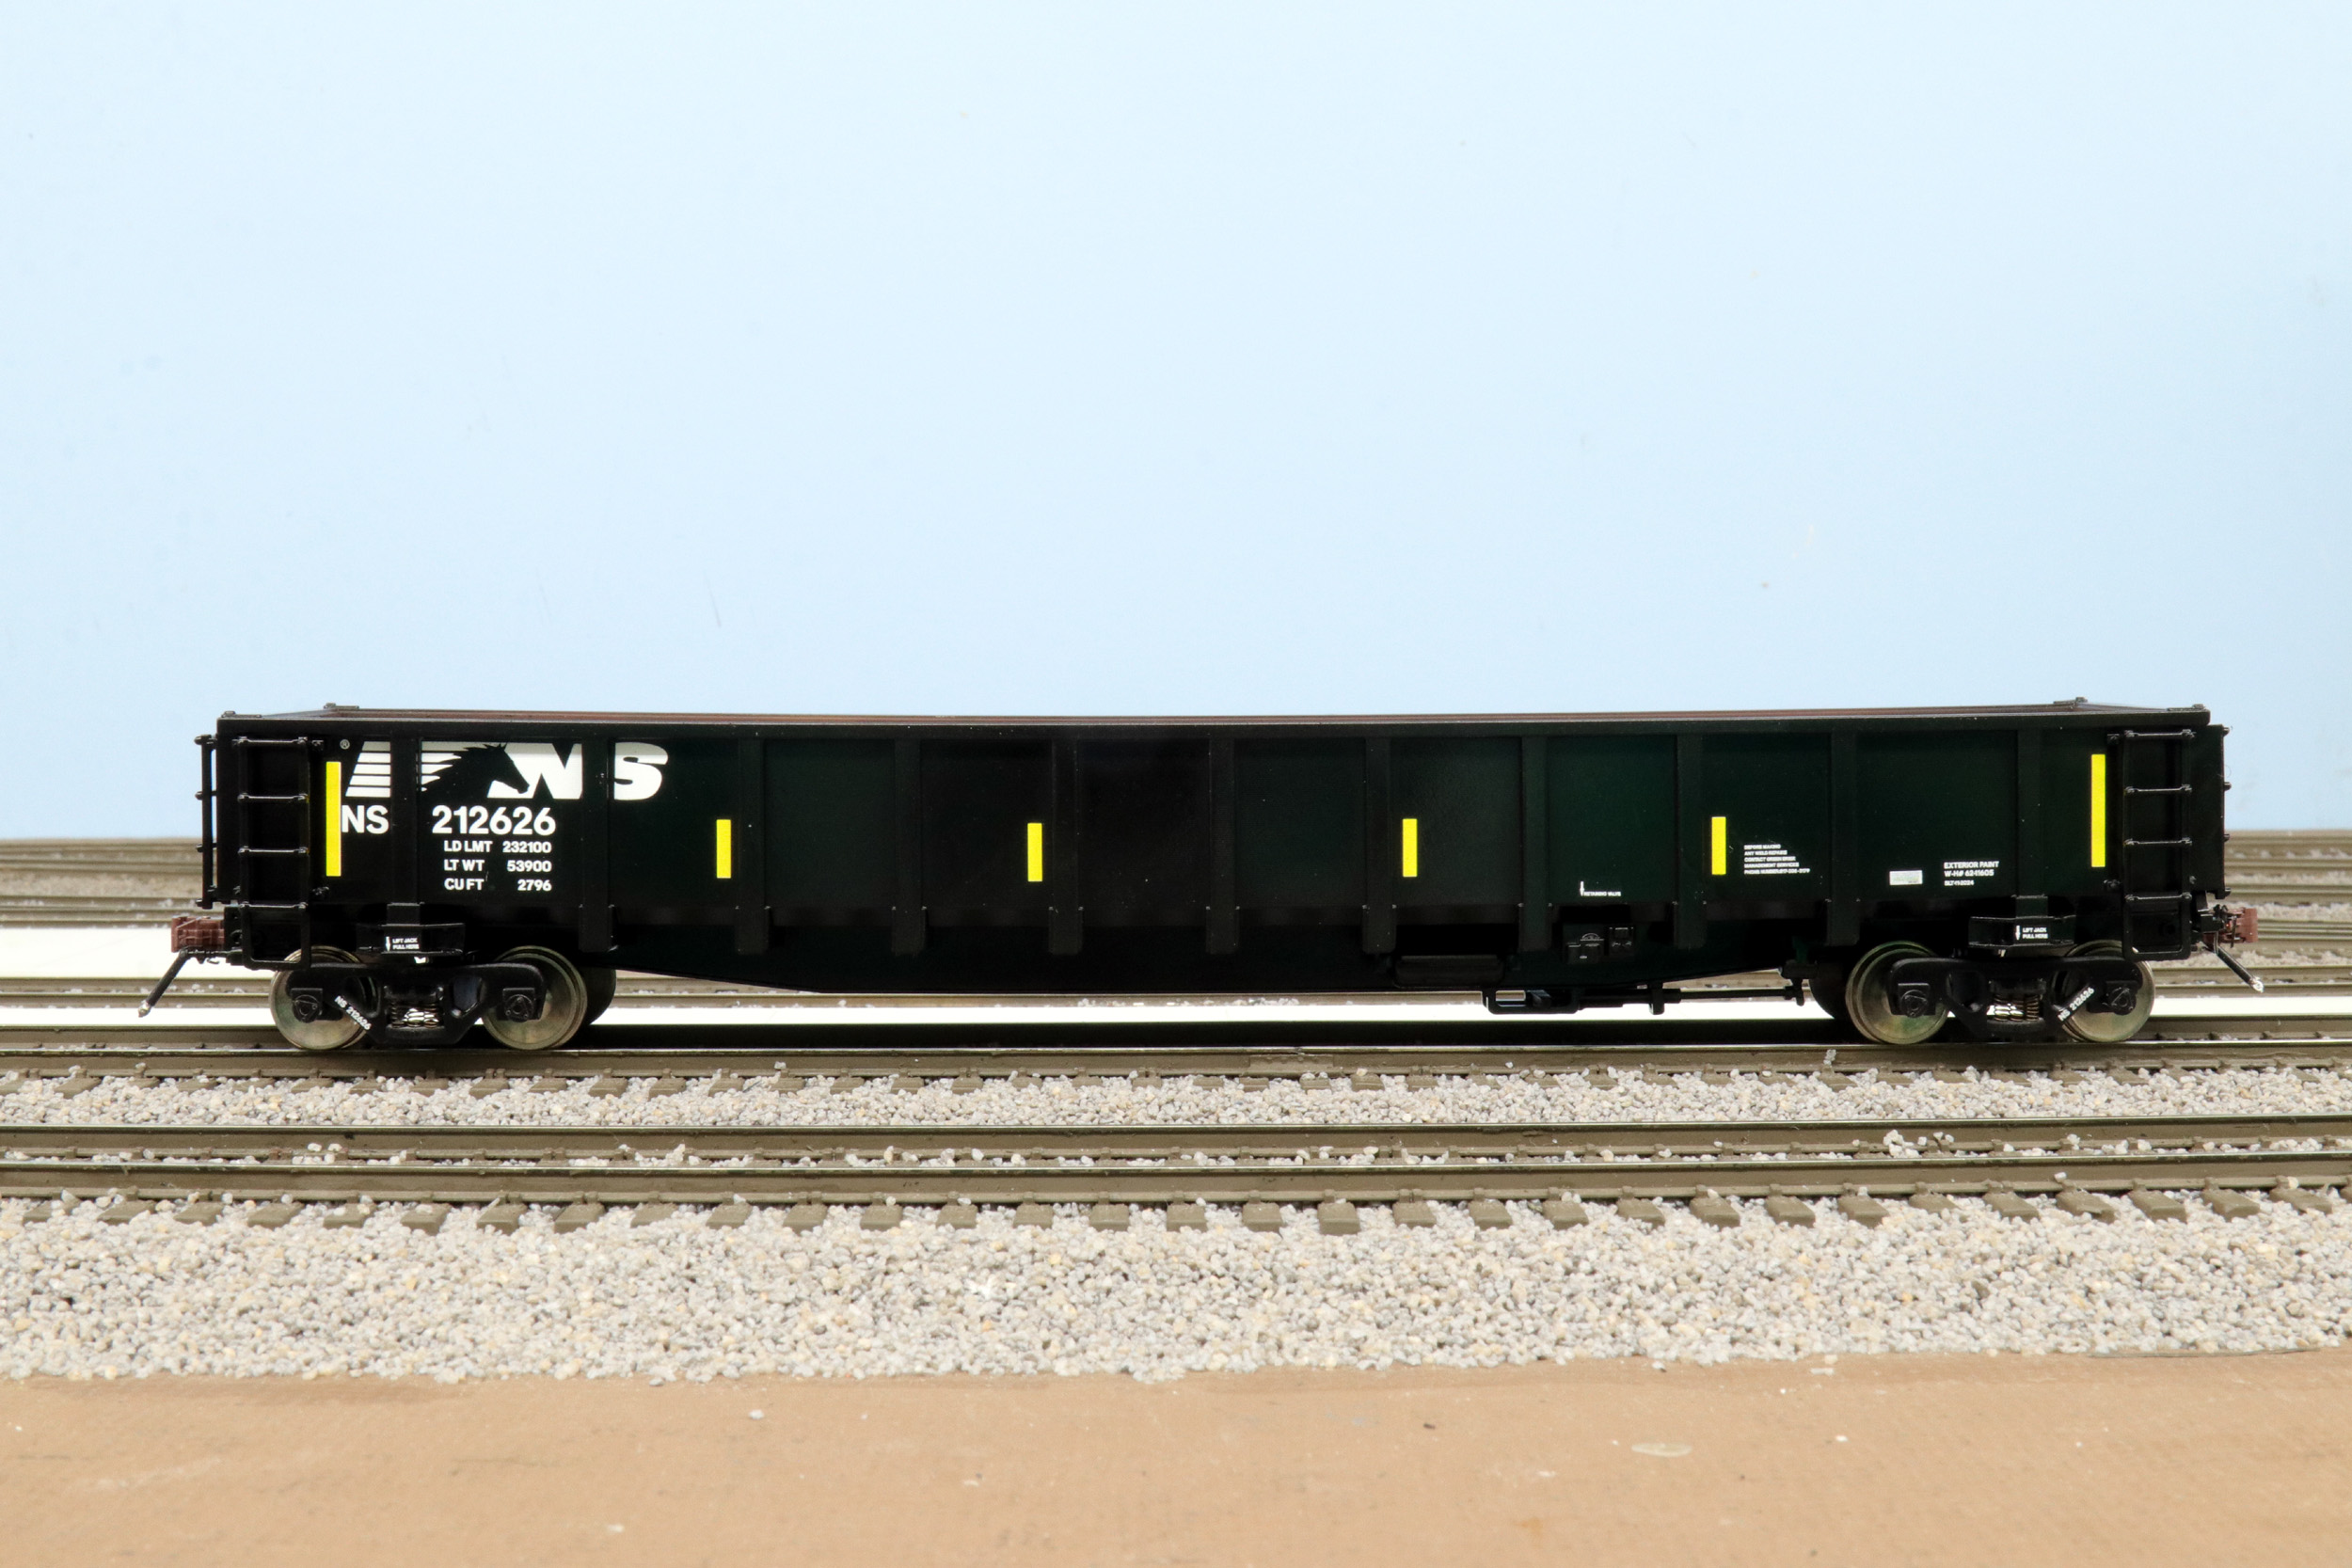
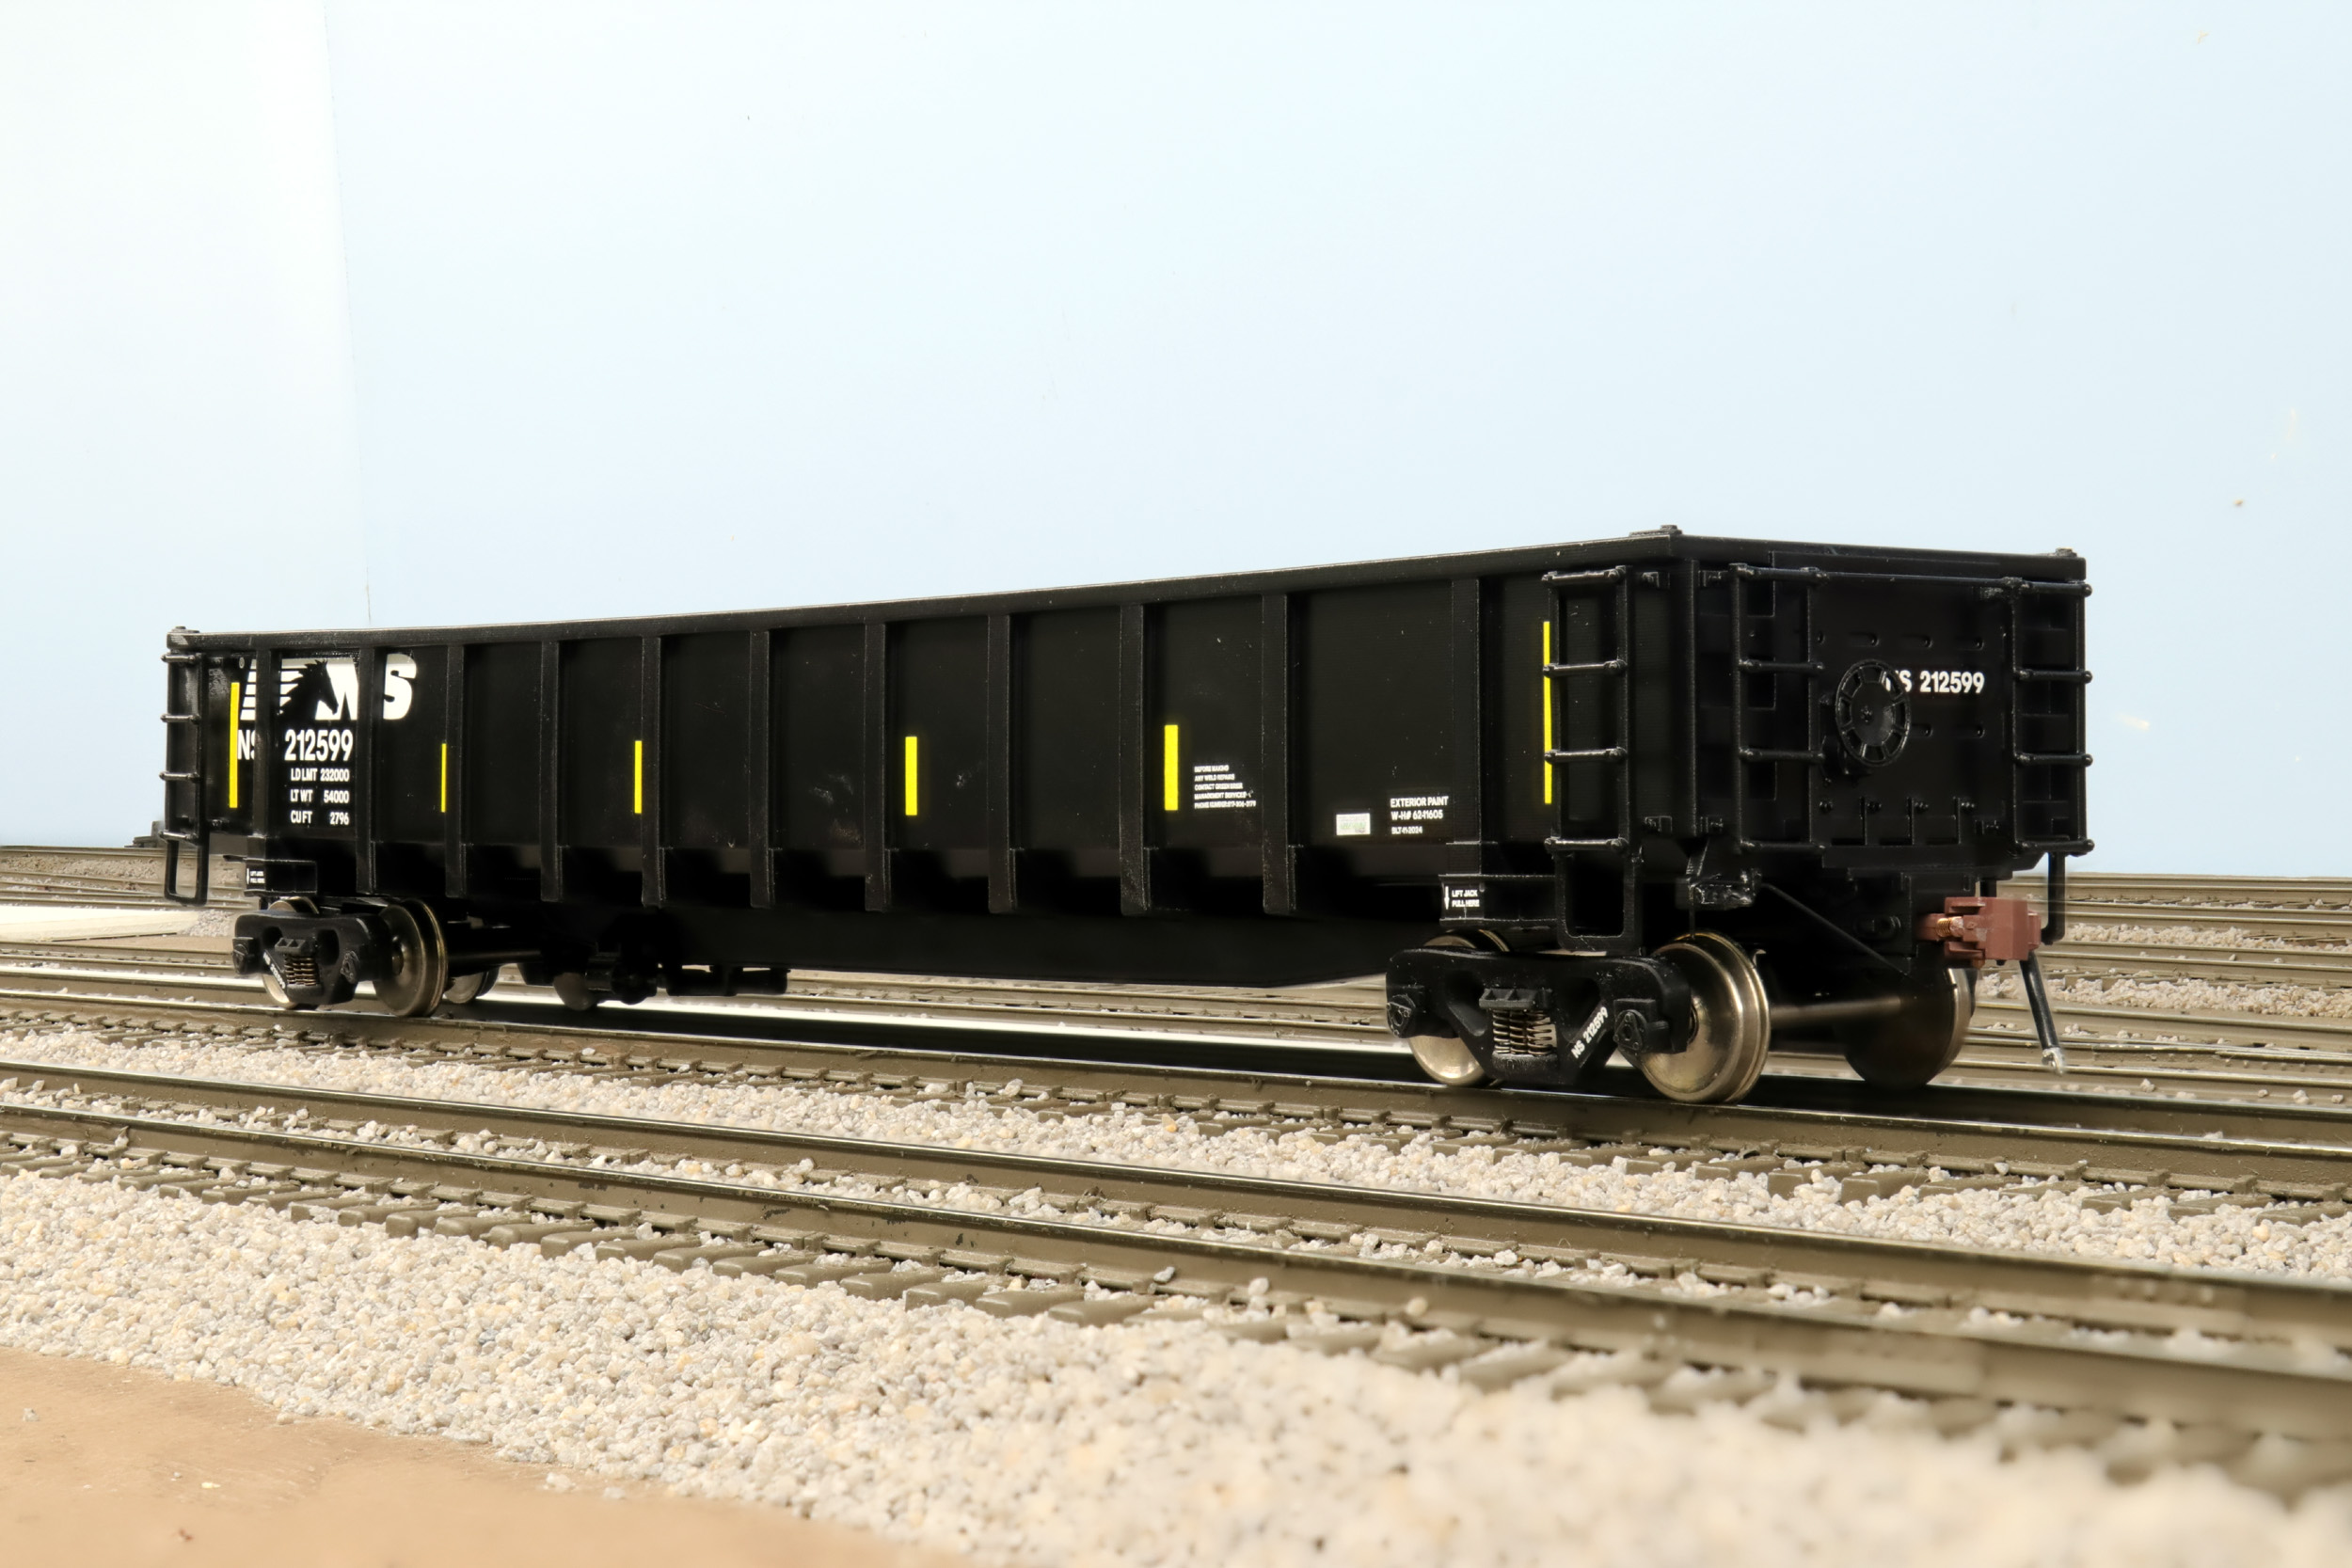
In
2024 I noticed this one brand new gondola I thought was different and
interesting with a very large centersill. There were large blocks of these
shiny month old cars right near my house. I was firmly in my “modern” modeling
mode and thought it would be great to have THAT car in S. Something
truly NEW in S Scale at a time when nothing NEW
in S was happening. 212599 was built 11-24.
3D Printing is BACK
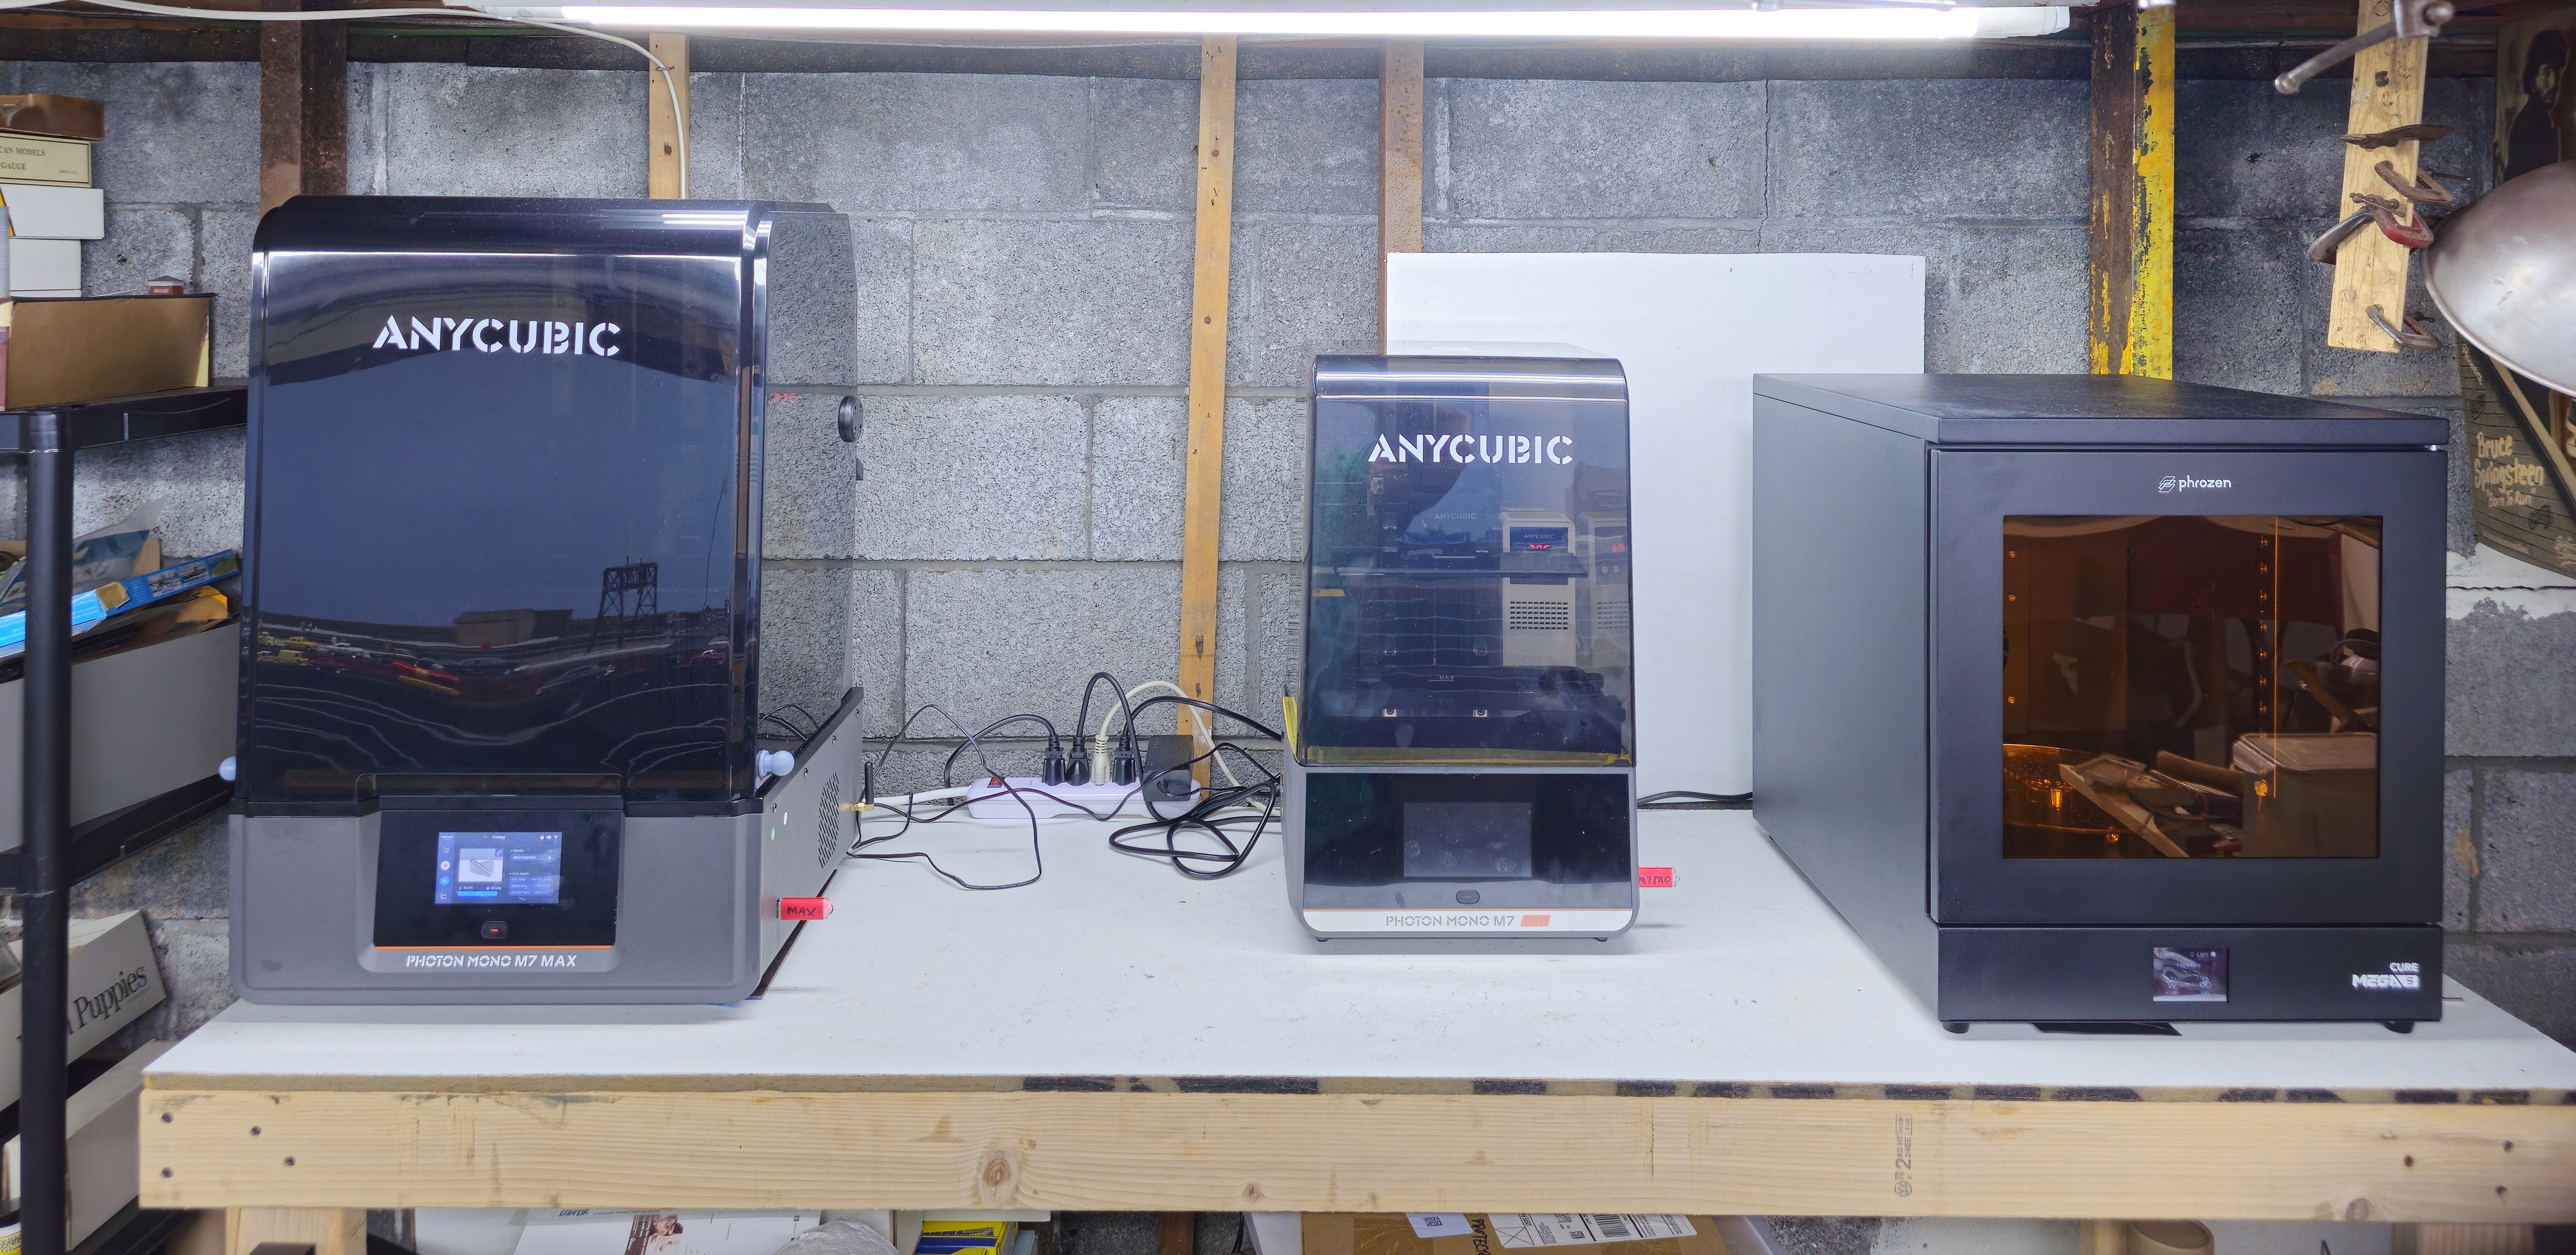
In
August 2024 I got back into 3D printing after not having a working printer for
about 8 years. It was great to be able to make my parts again but I have always
wanted to make new rolling stock of things that do not already exist in S. That
became possible in July 2025 with the purchase of new LARGE 3D printers.
Printers this large did not exist back then but now are great quality and
reasonably affordable. I have Anycubic M5s, M5S Pro, (not shown) M7 MAX, and M7
Pro. The M7 MAX build area is about 12” x 6” x 12”. Lots of S will fit in there
meaning I can print complete cars. No piecing them together. GAME ON. The unit
at right is a Phrozen Mega resin curing cabinet. This will be a totally new
direction of my modeling skills and projects by being able to make cars and
locos.
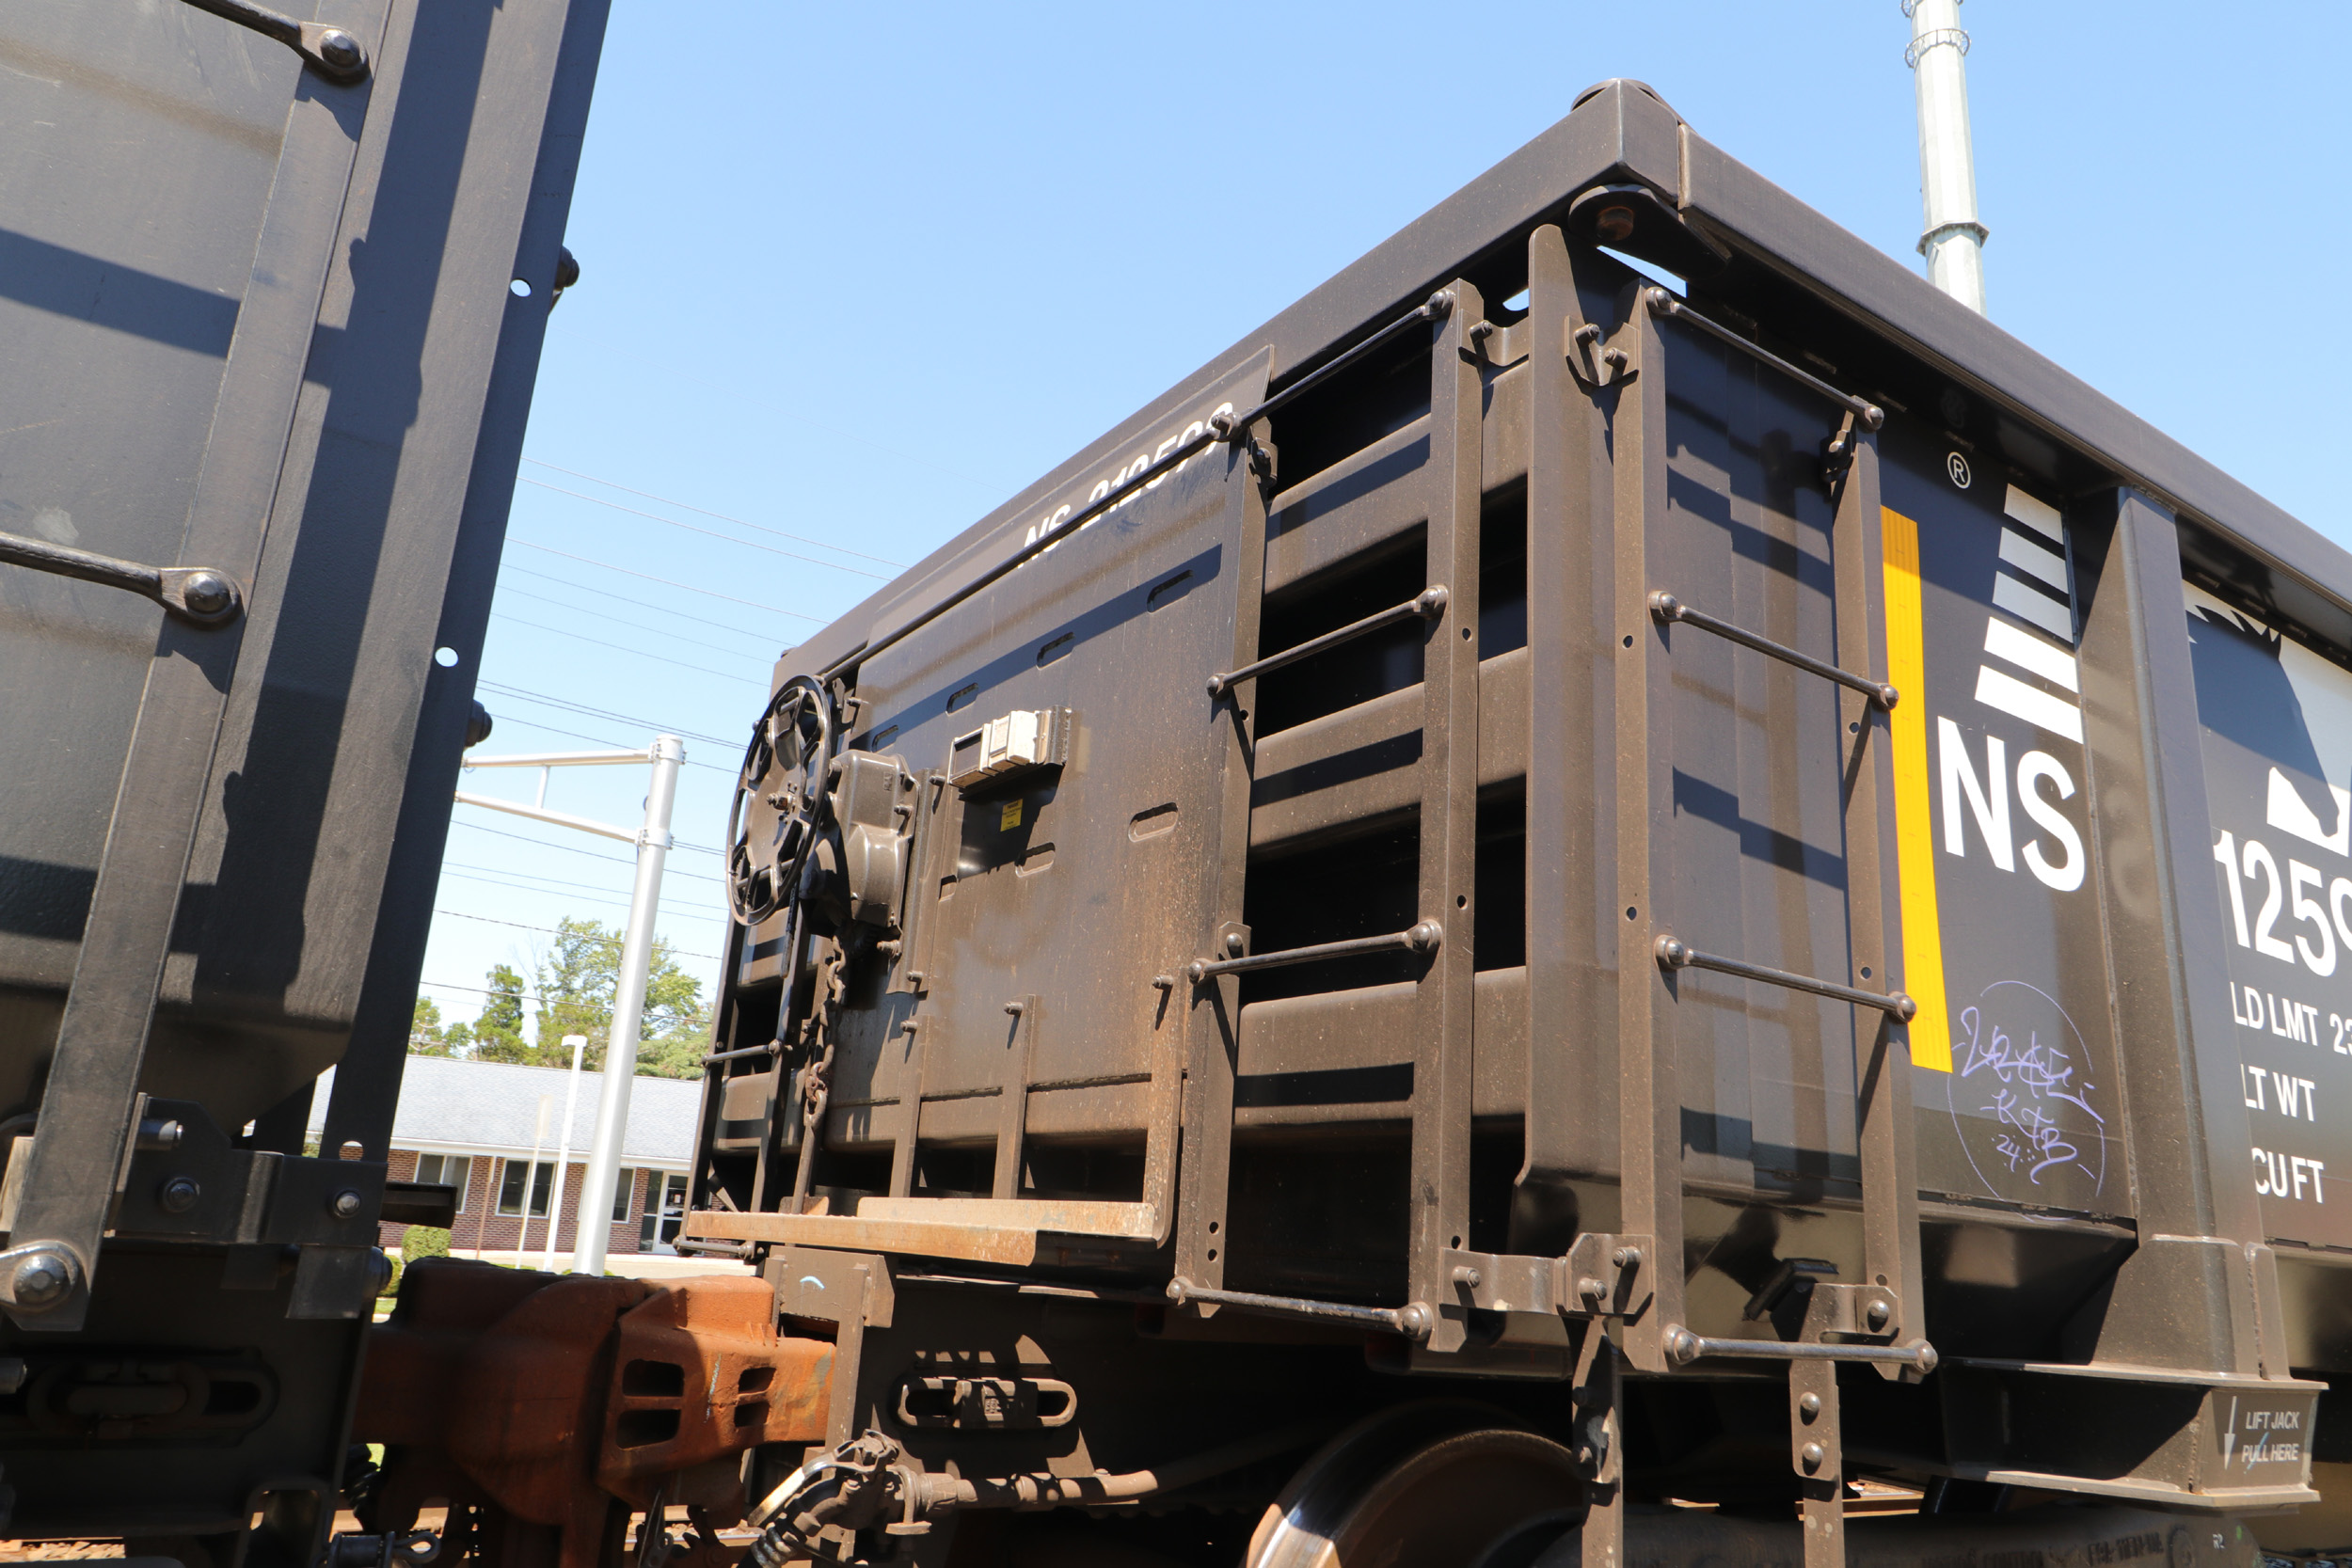
I
found out this was a Greenbrier car. I emailed to see if they would send me
drawings but they did not reply. It was not my intention to make this car first.
I had 4 cars here in HO and O Scale to measure and reverse engineer into S
Scale cars. My mood struck me and great weather on August 23, 2025 I was off to
measure a gondola very conveniently placed where I could drive right up to it.
There were 8 trips and 6 hours total in getting the info needed. I did the
measuring completely by myself. This is measuring the length with my 100 foot
tape measure. I taped it to the car as I went along.

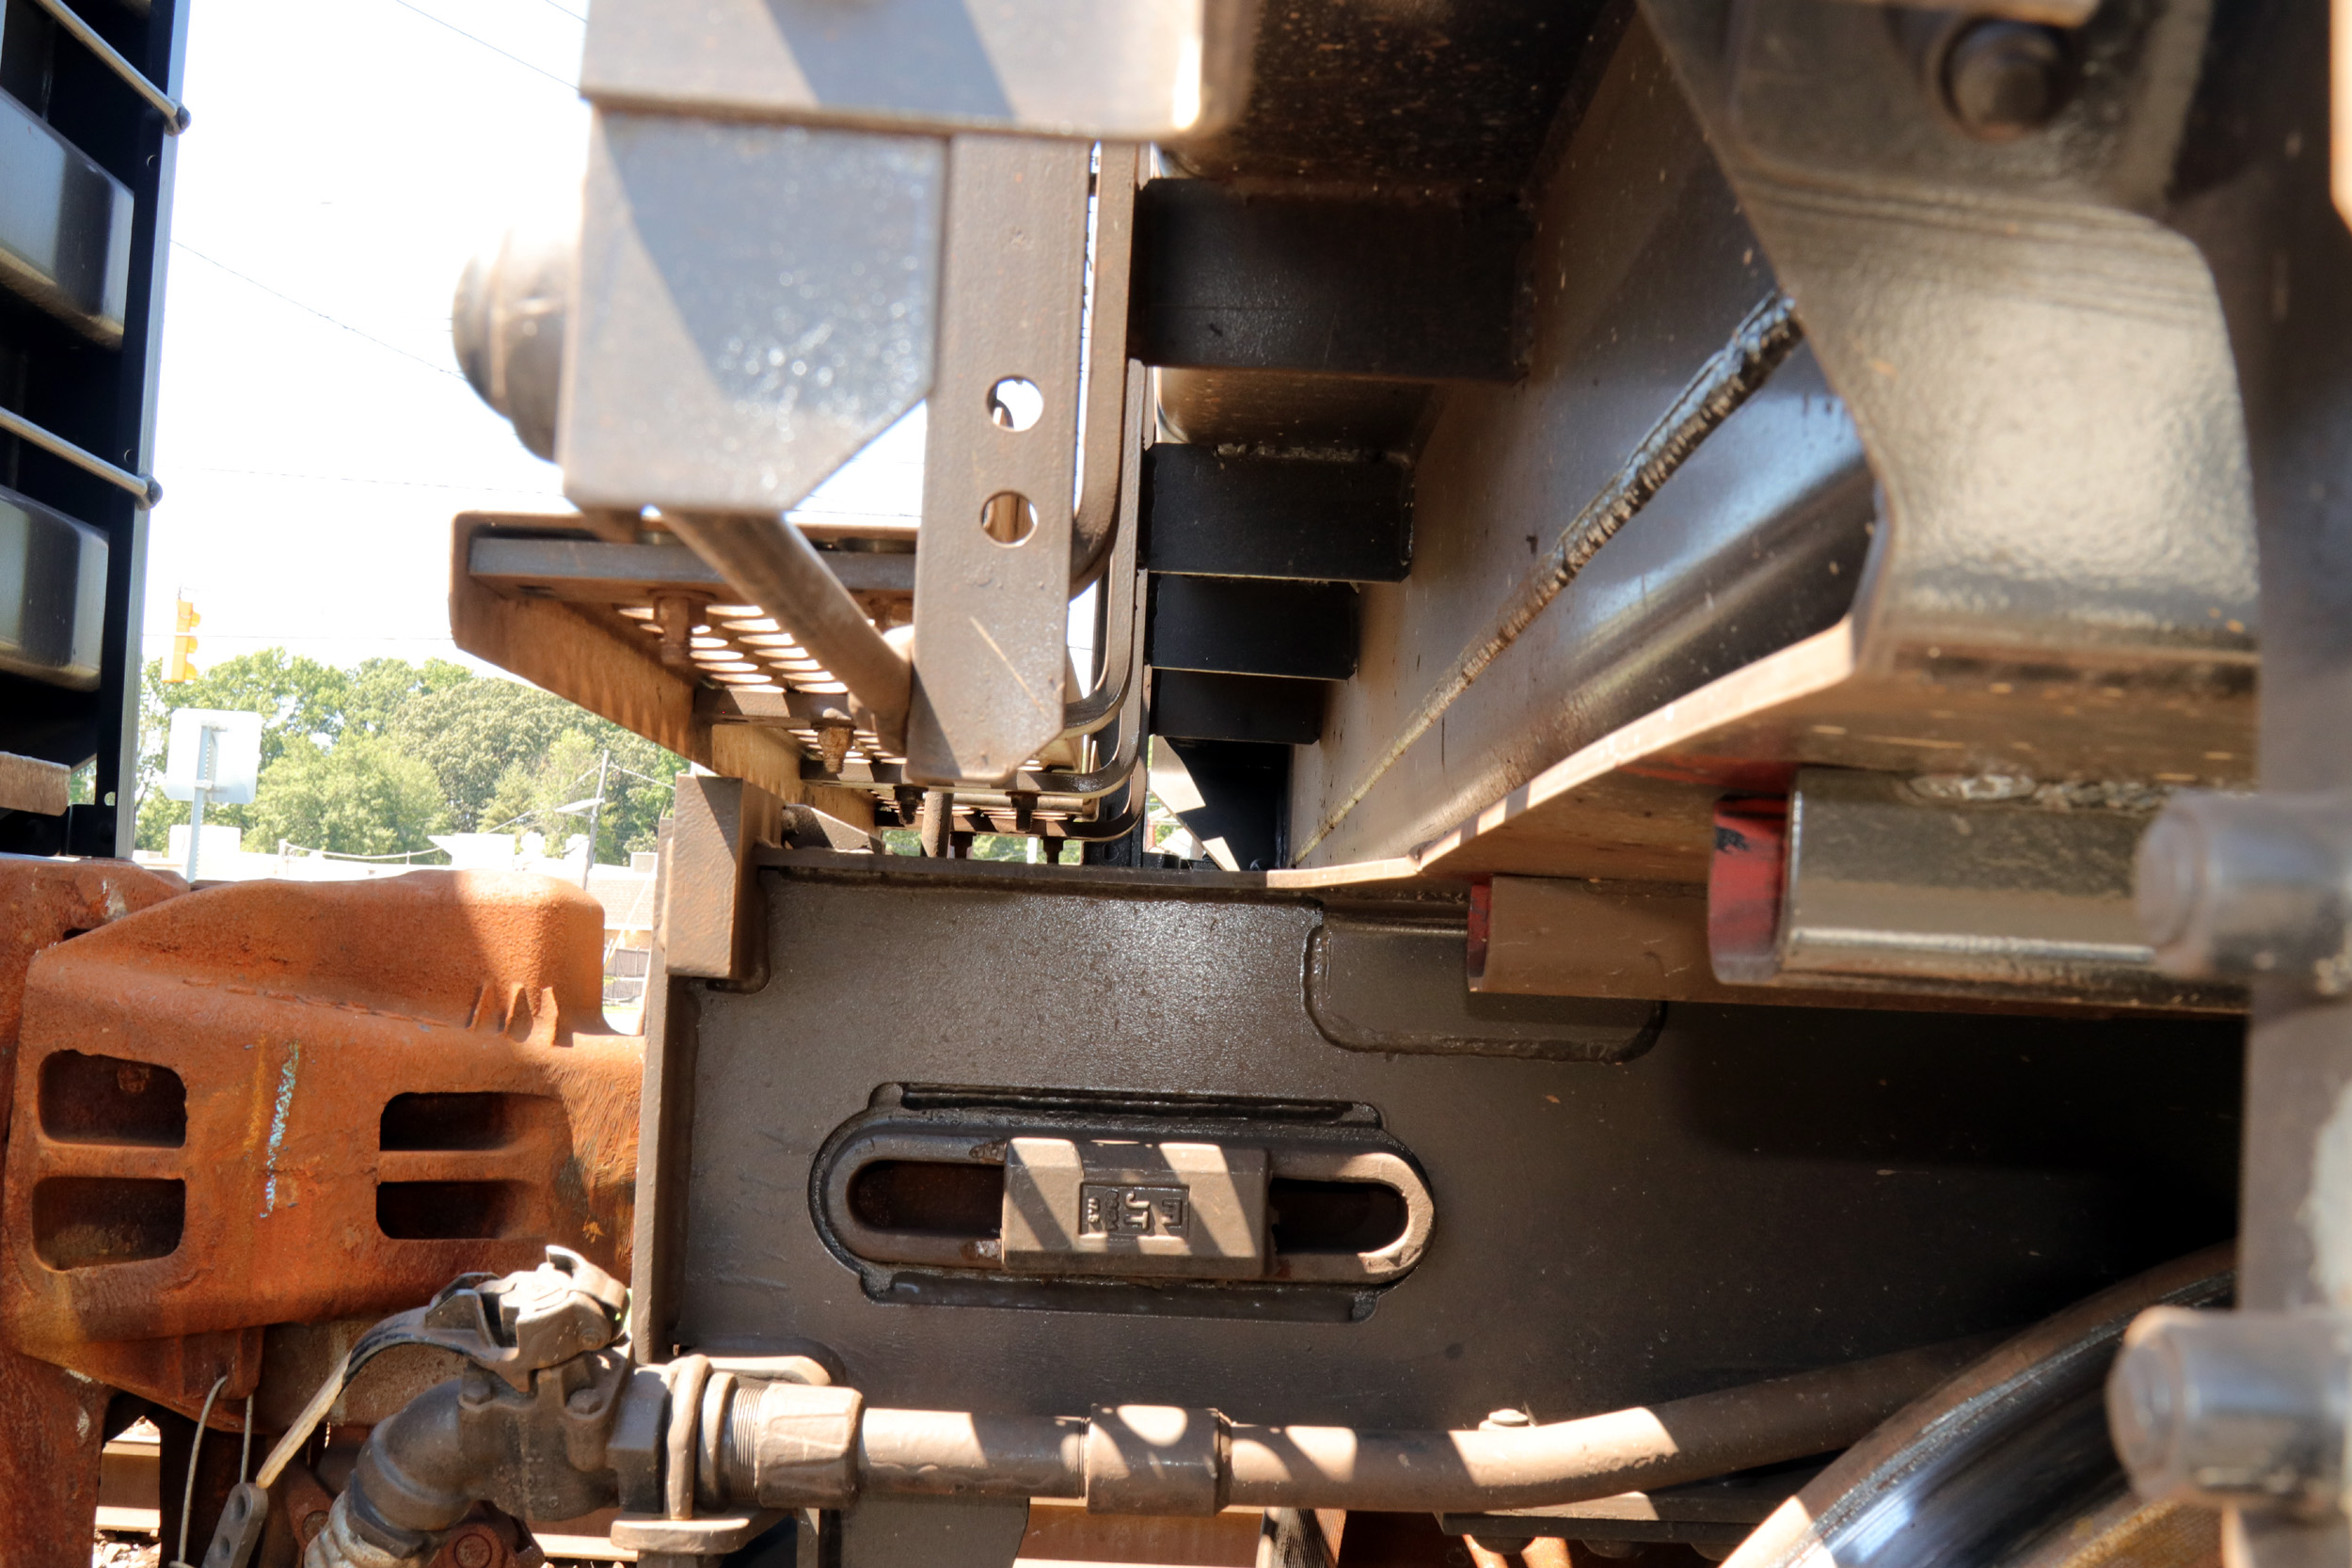
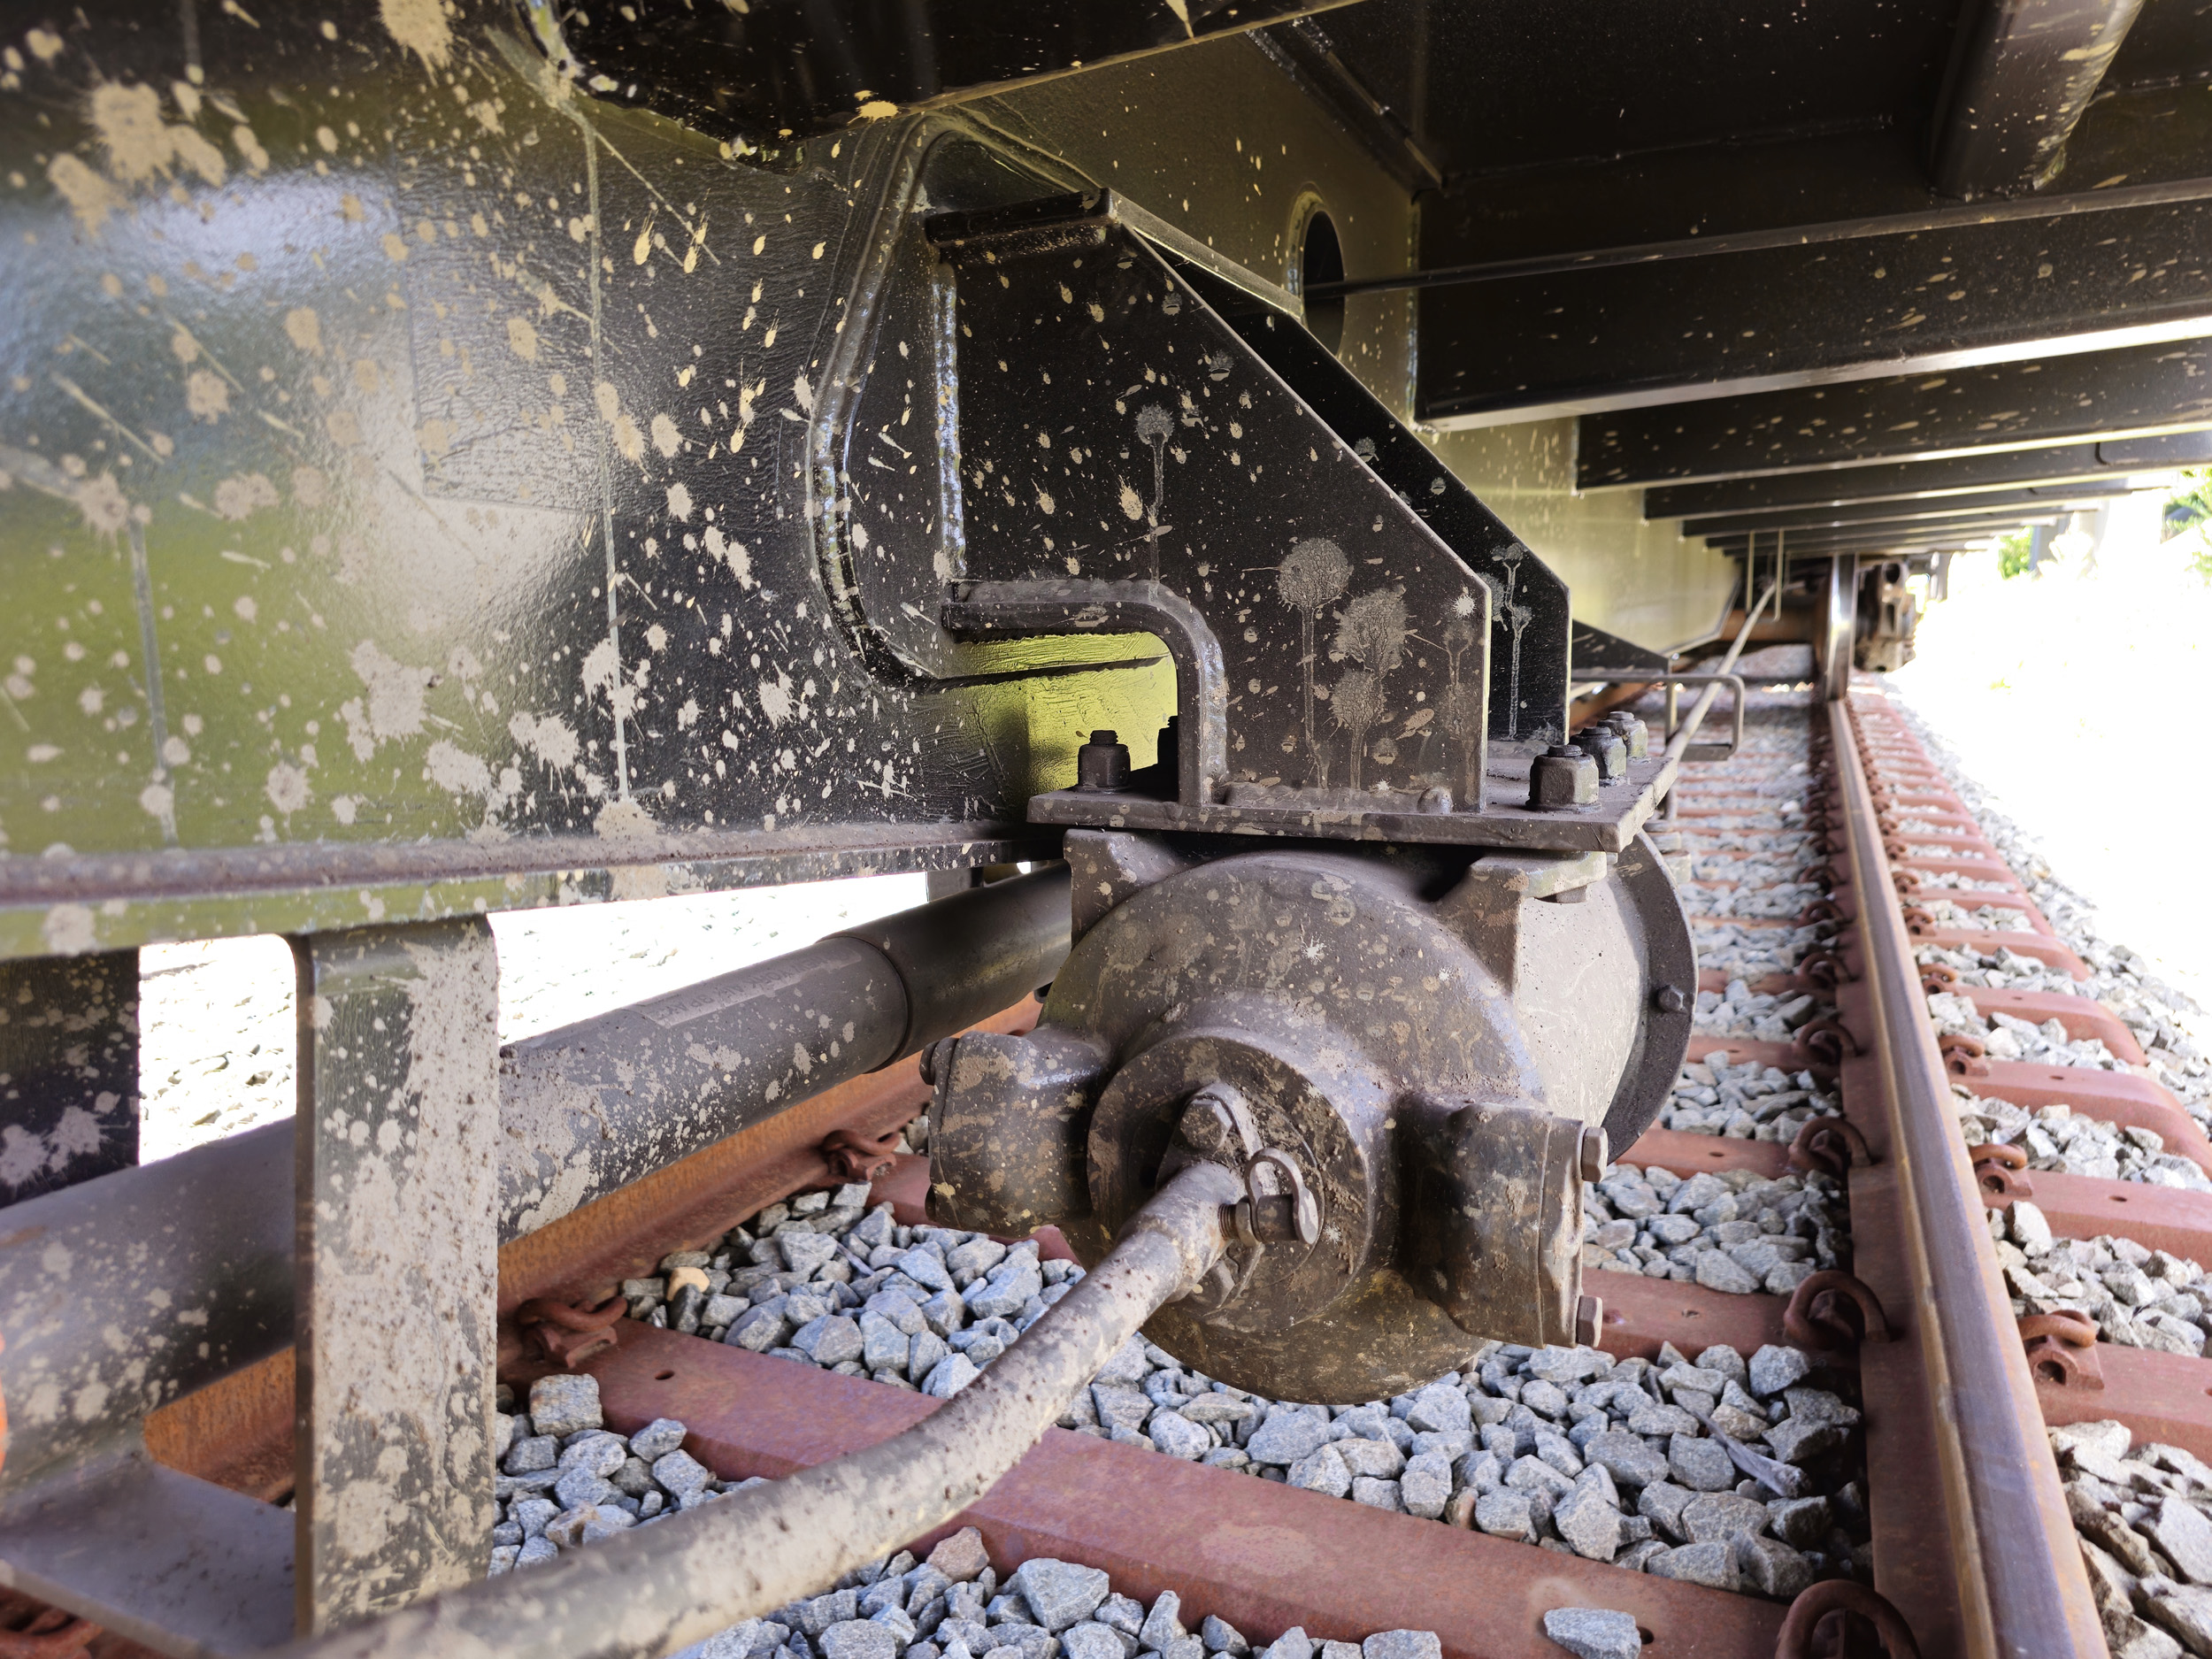
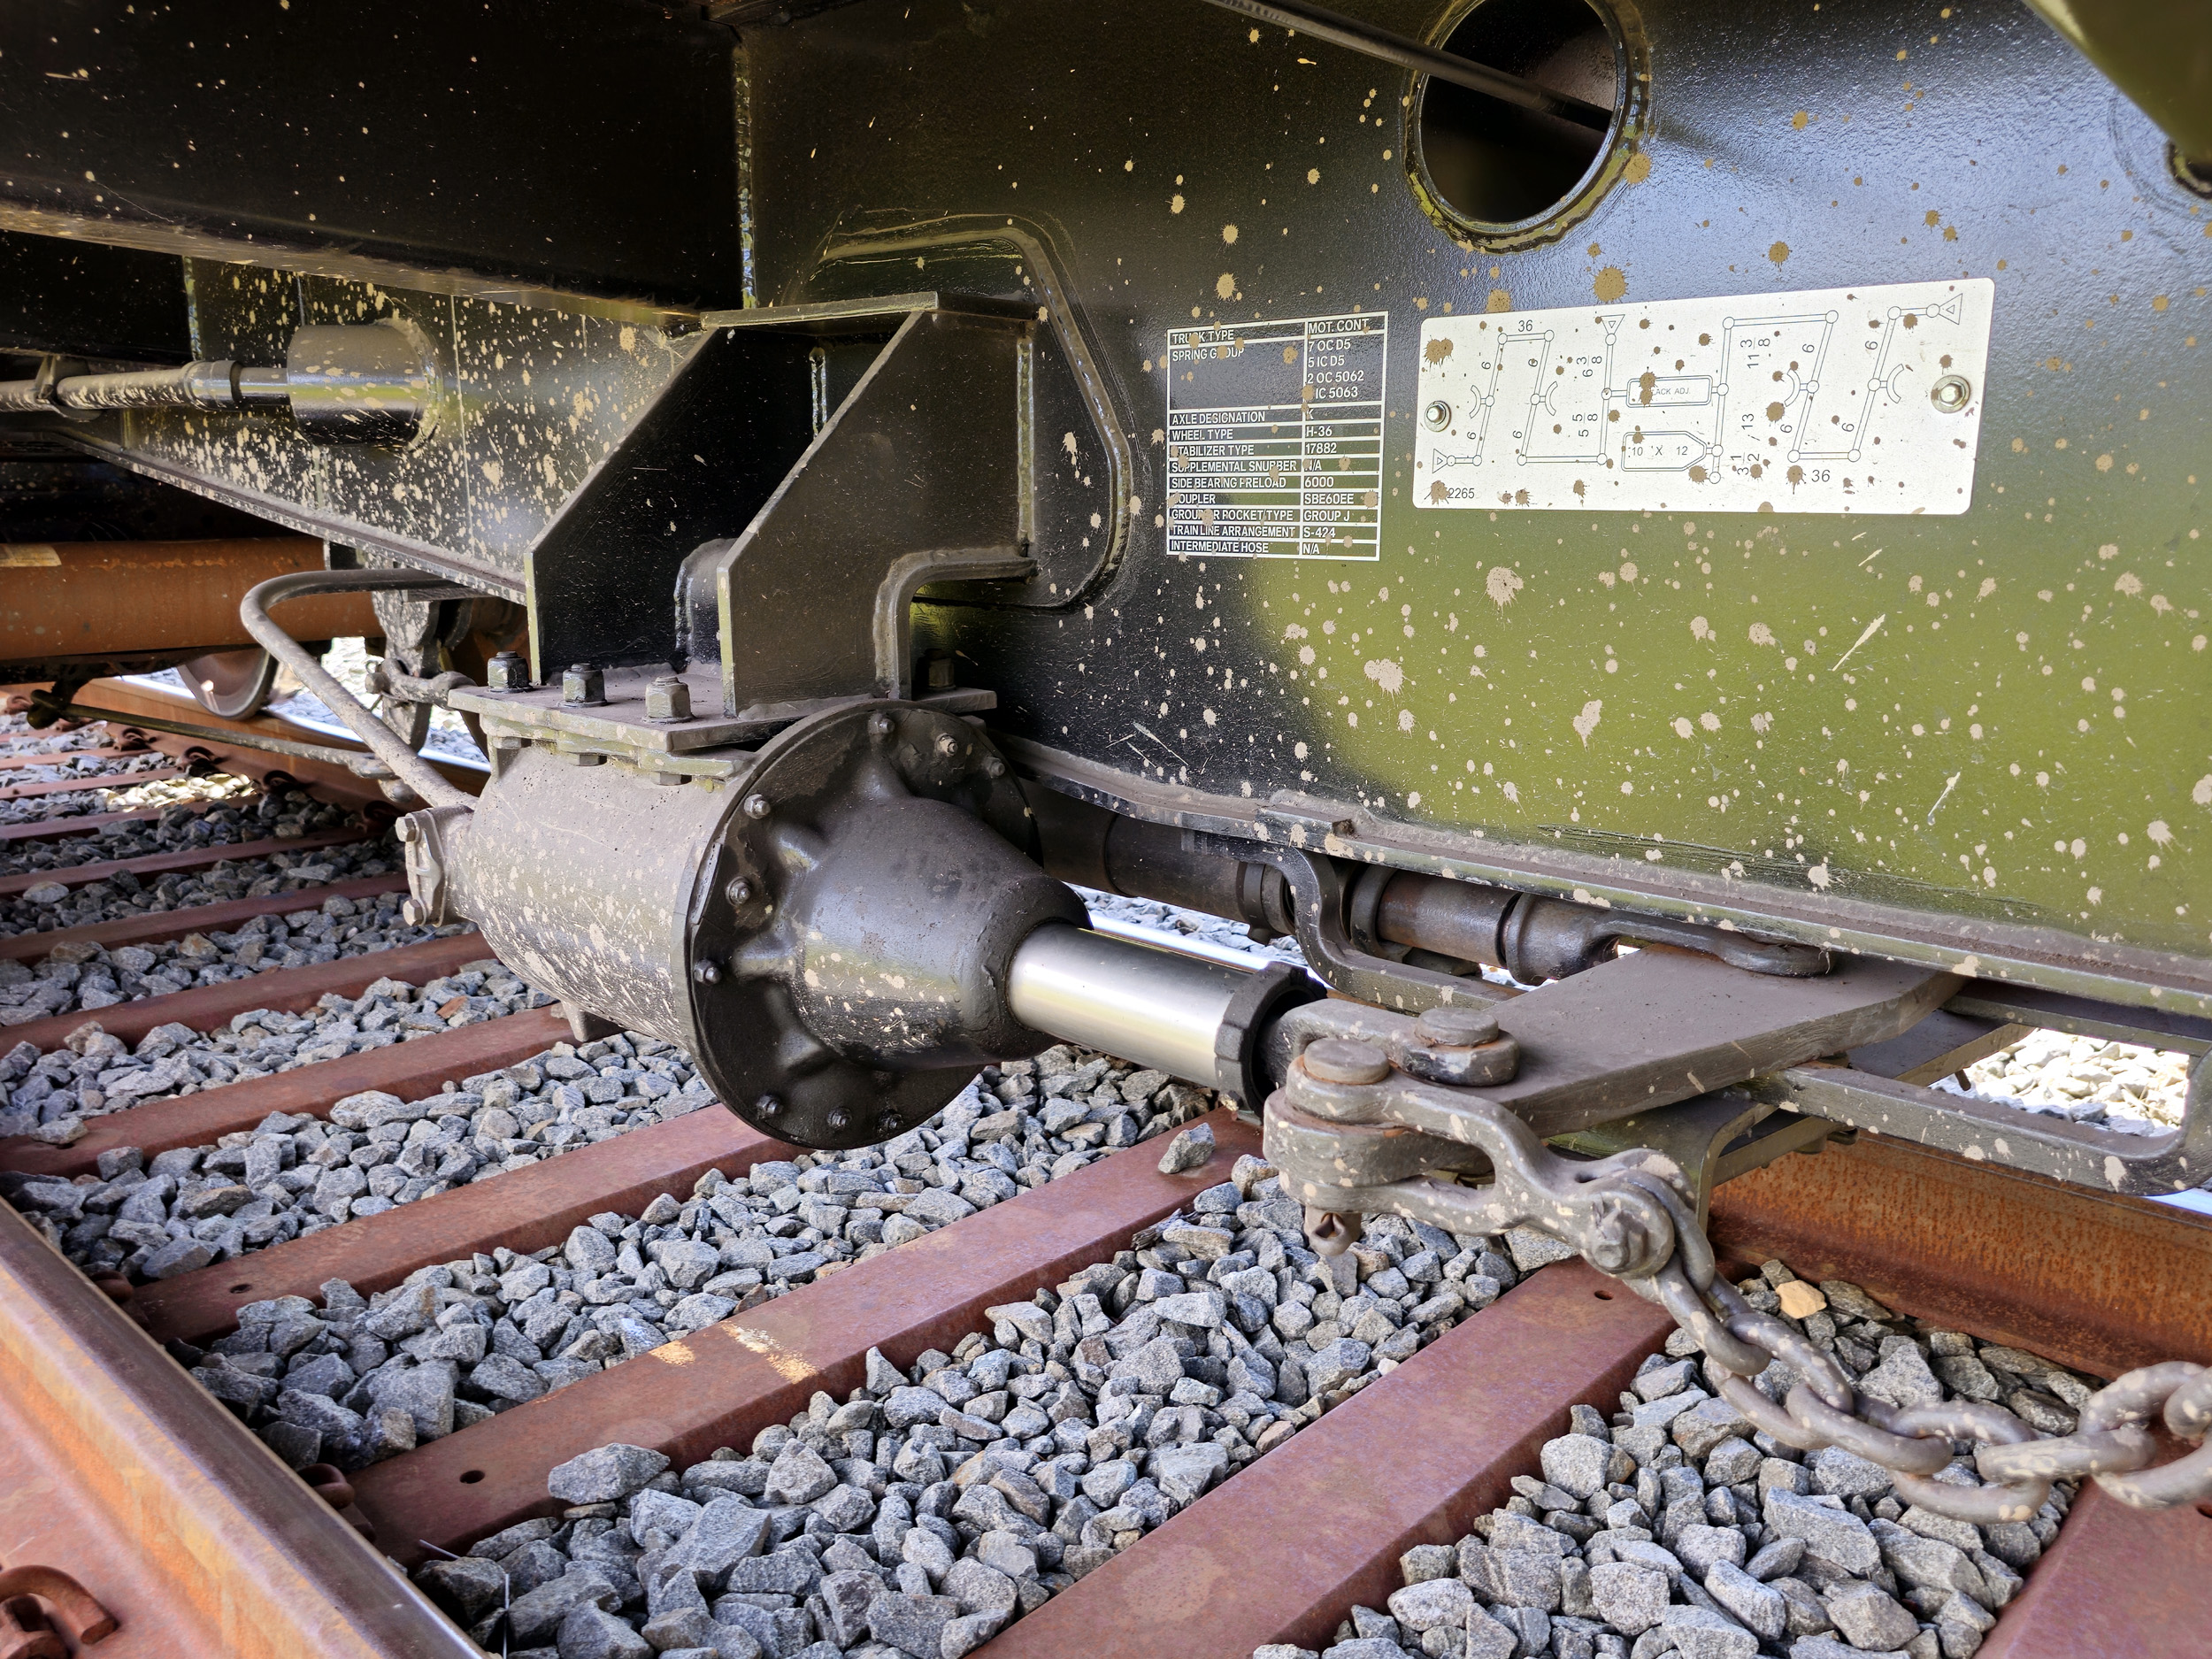
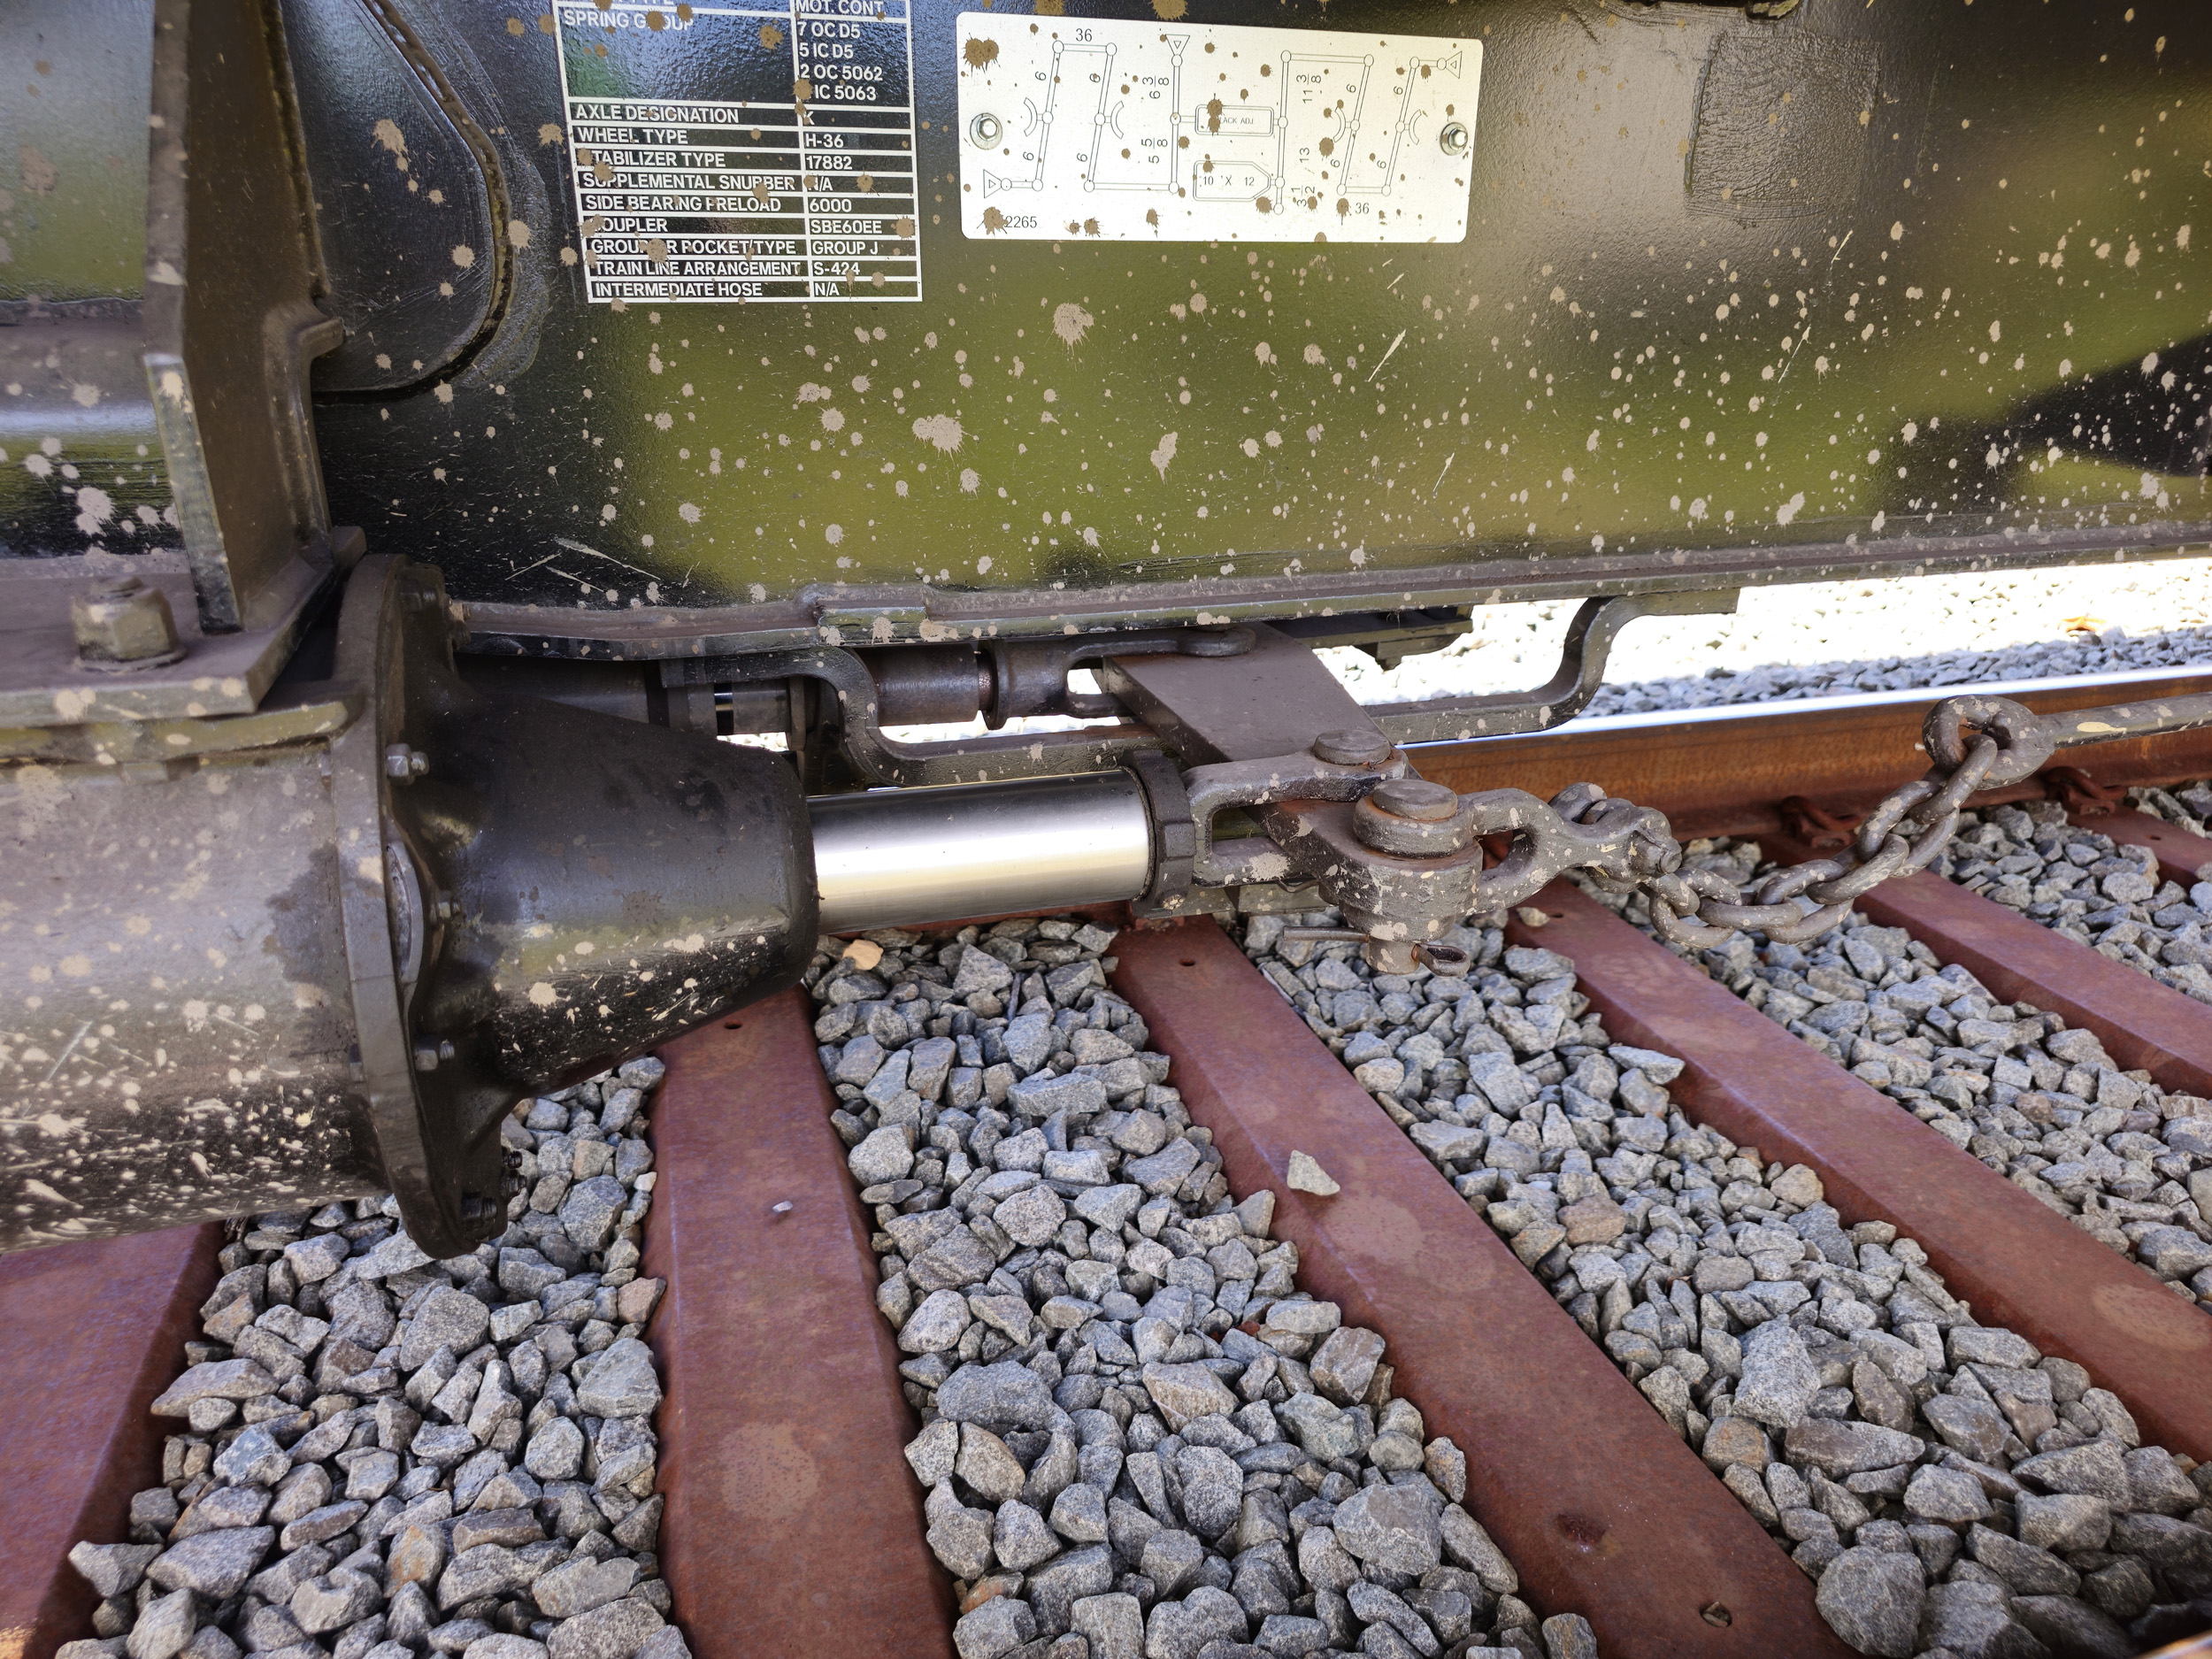
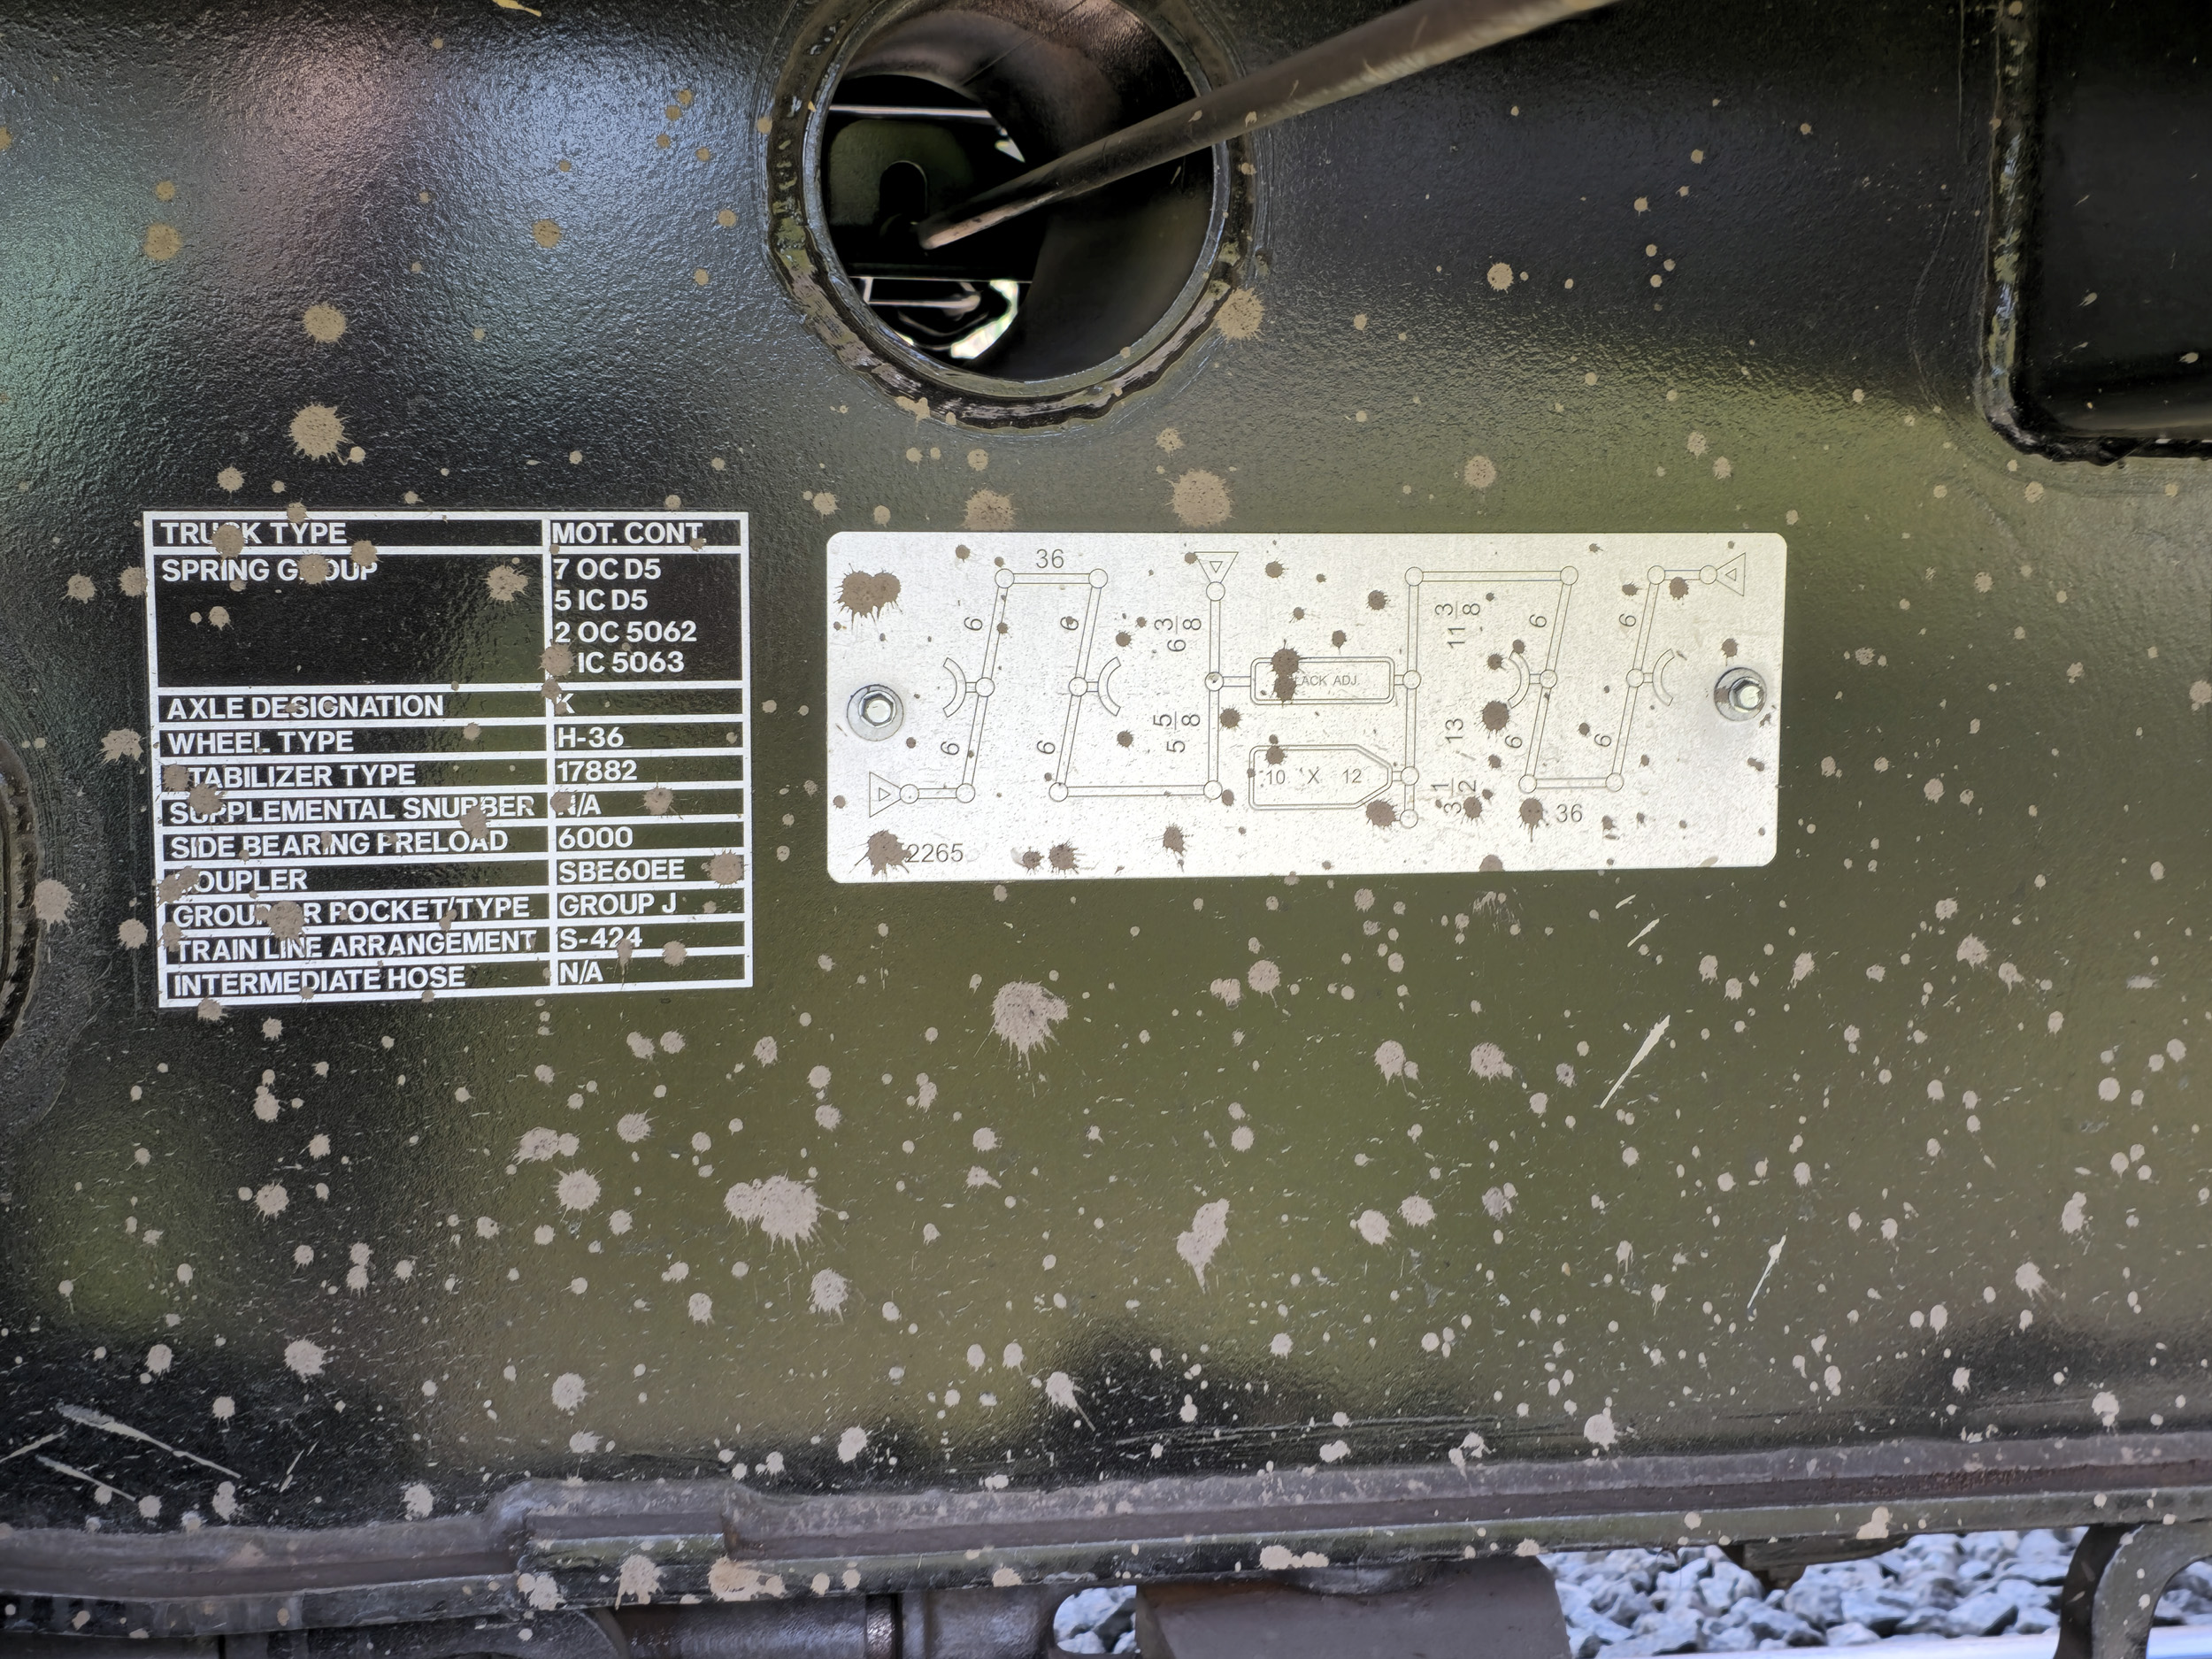
Small Details Matter
These
are just some of the many detail photos I took. I would measure an area and
design it in Solidworks right away.
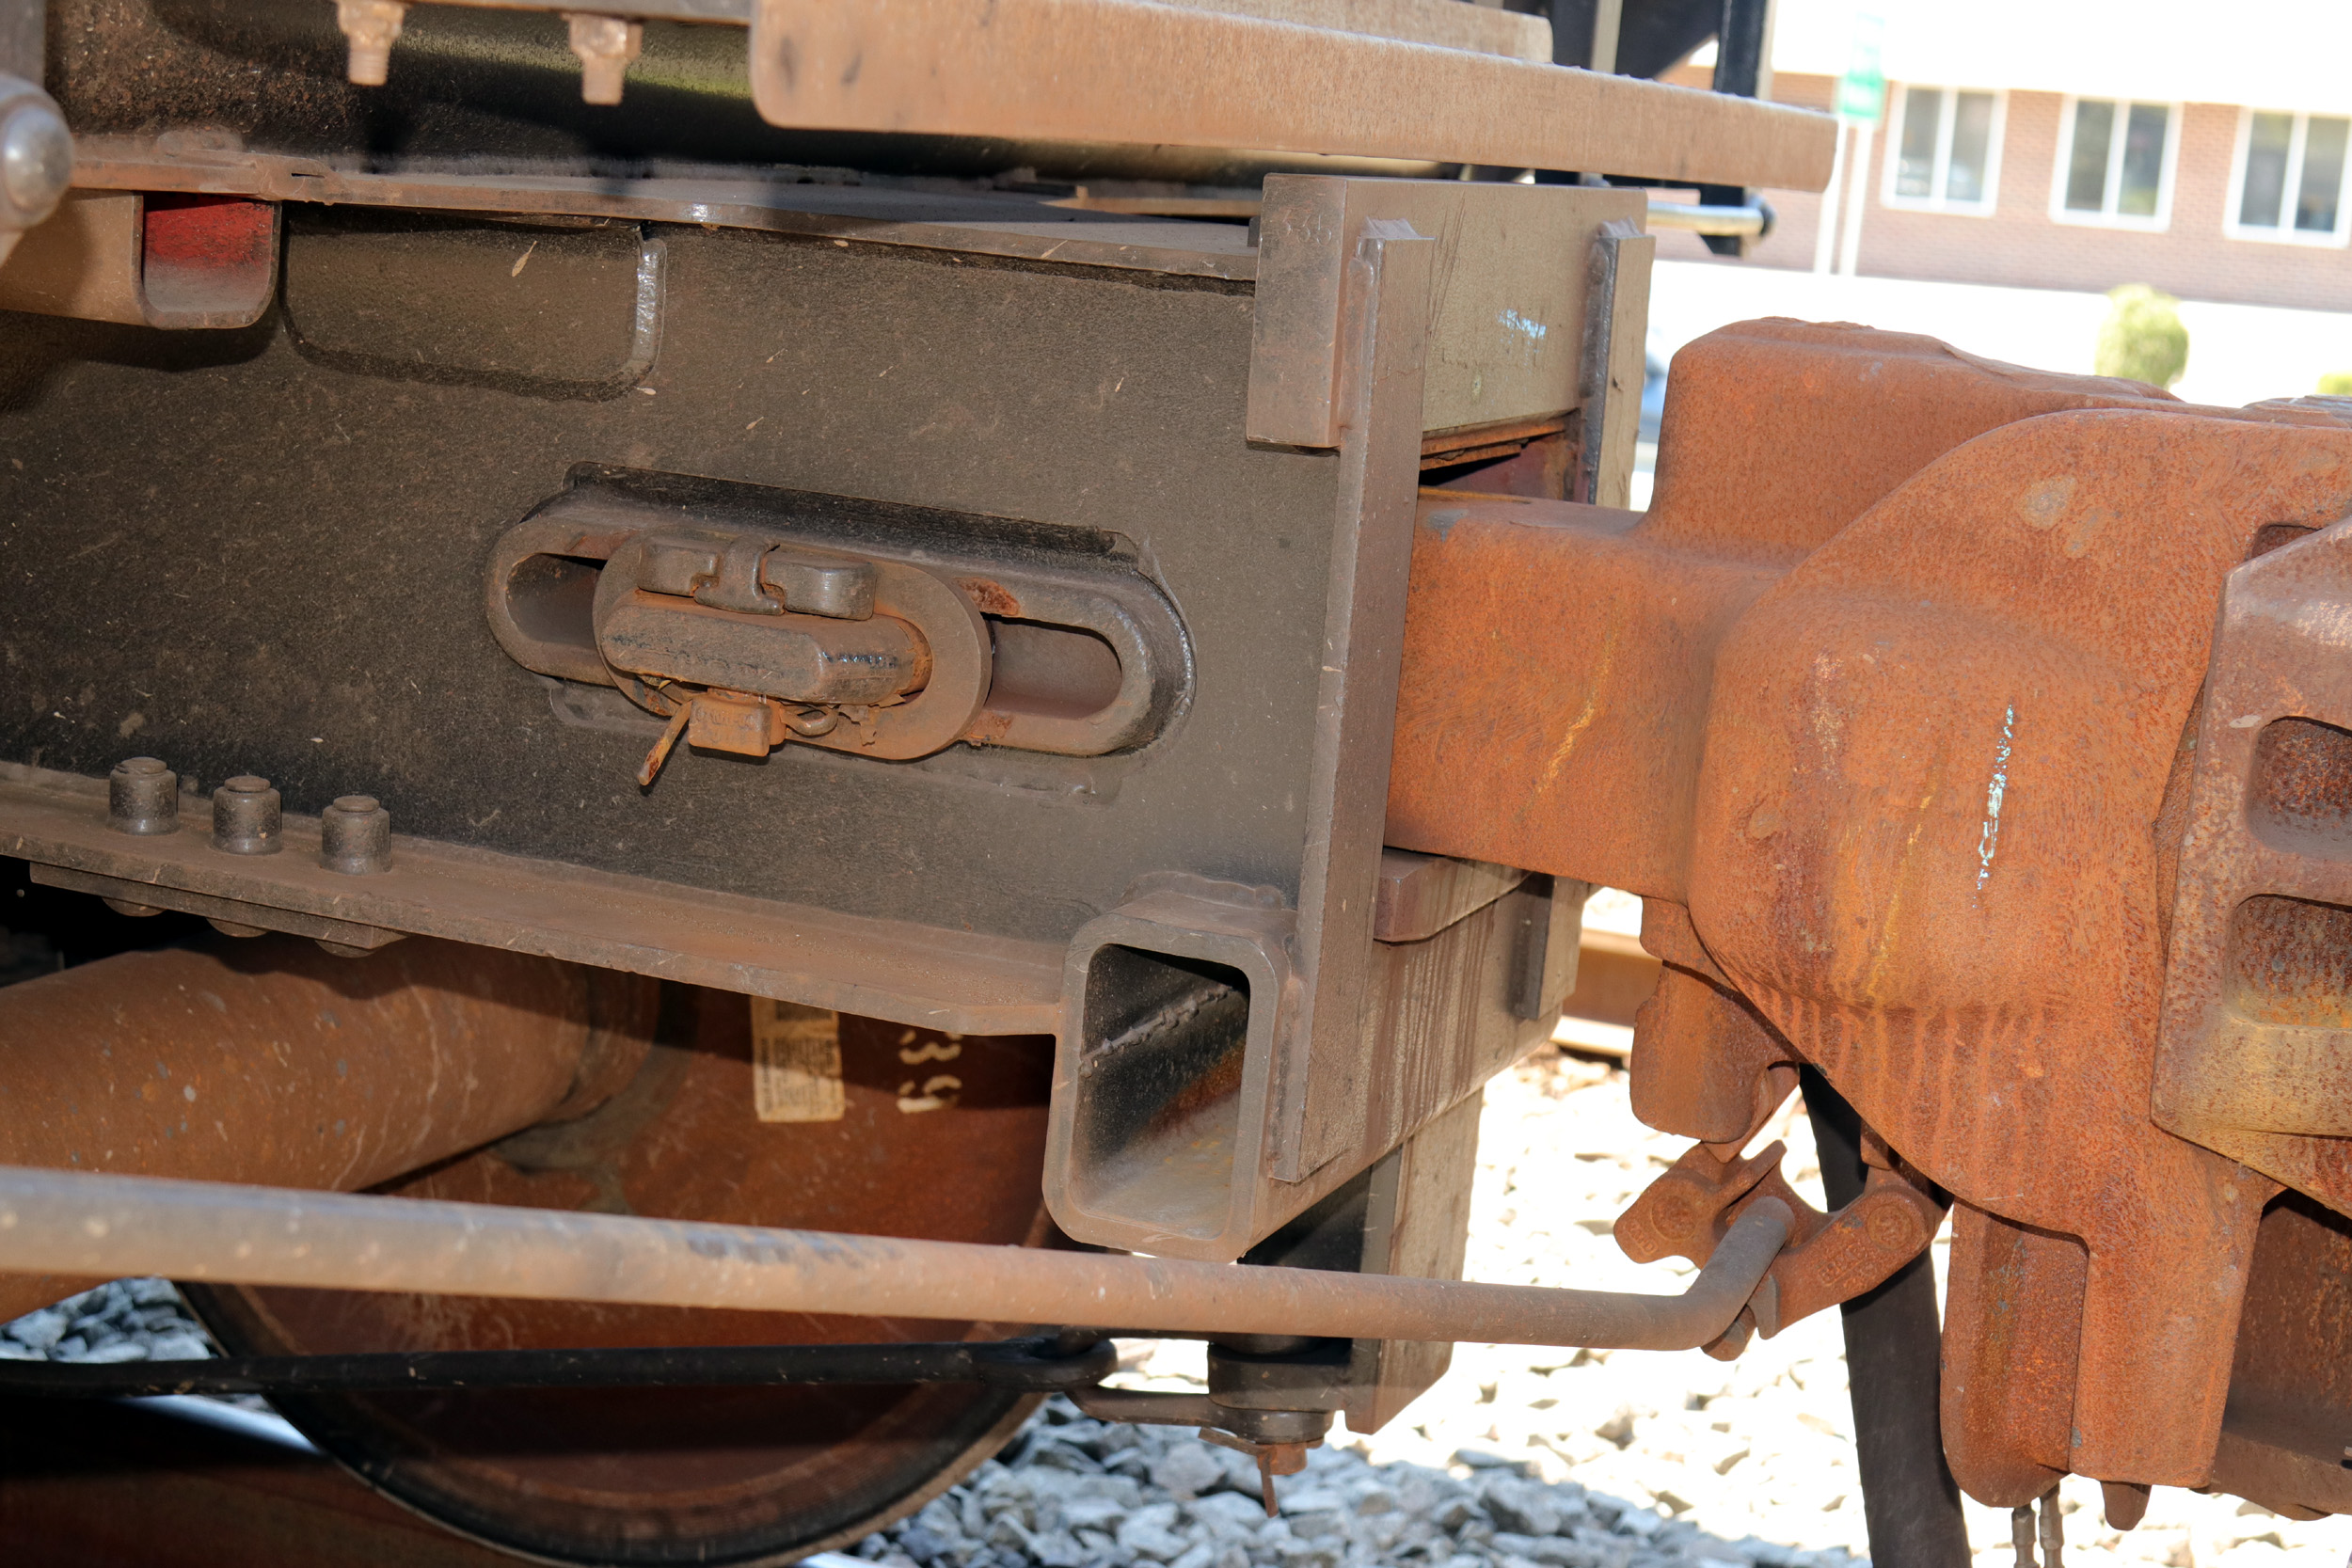
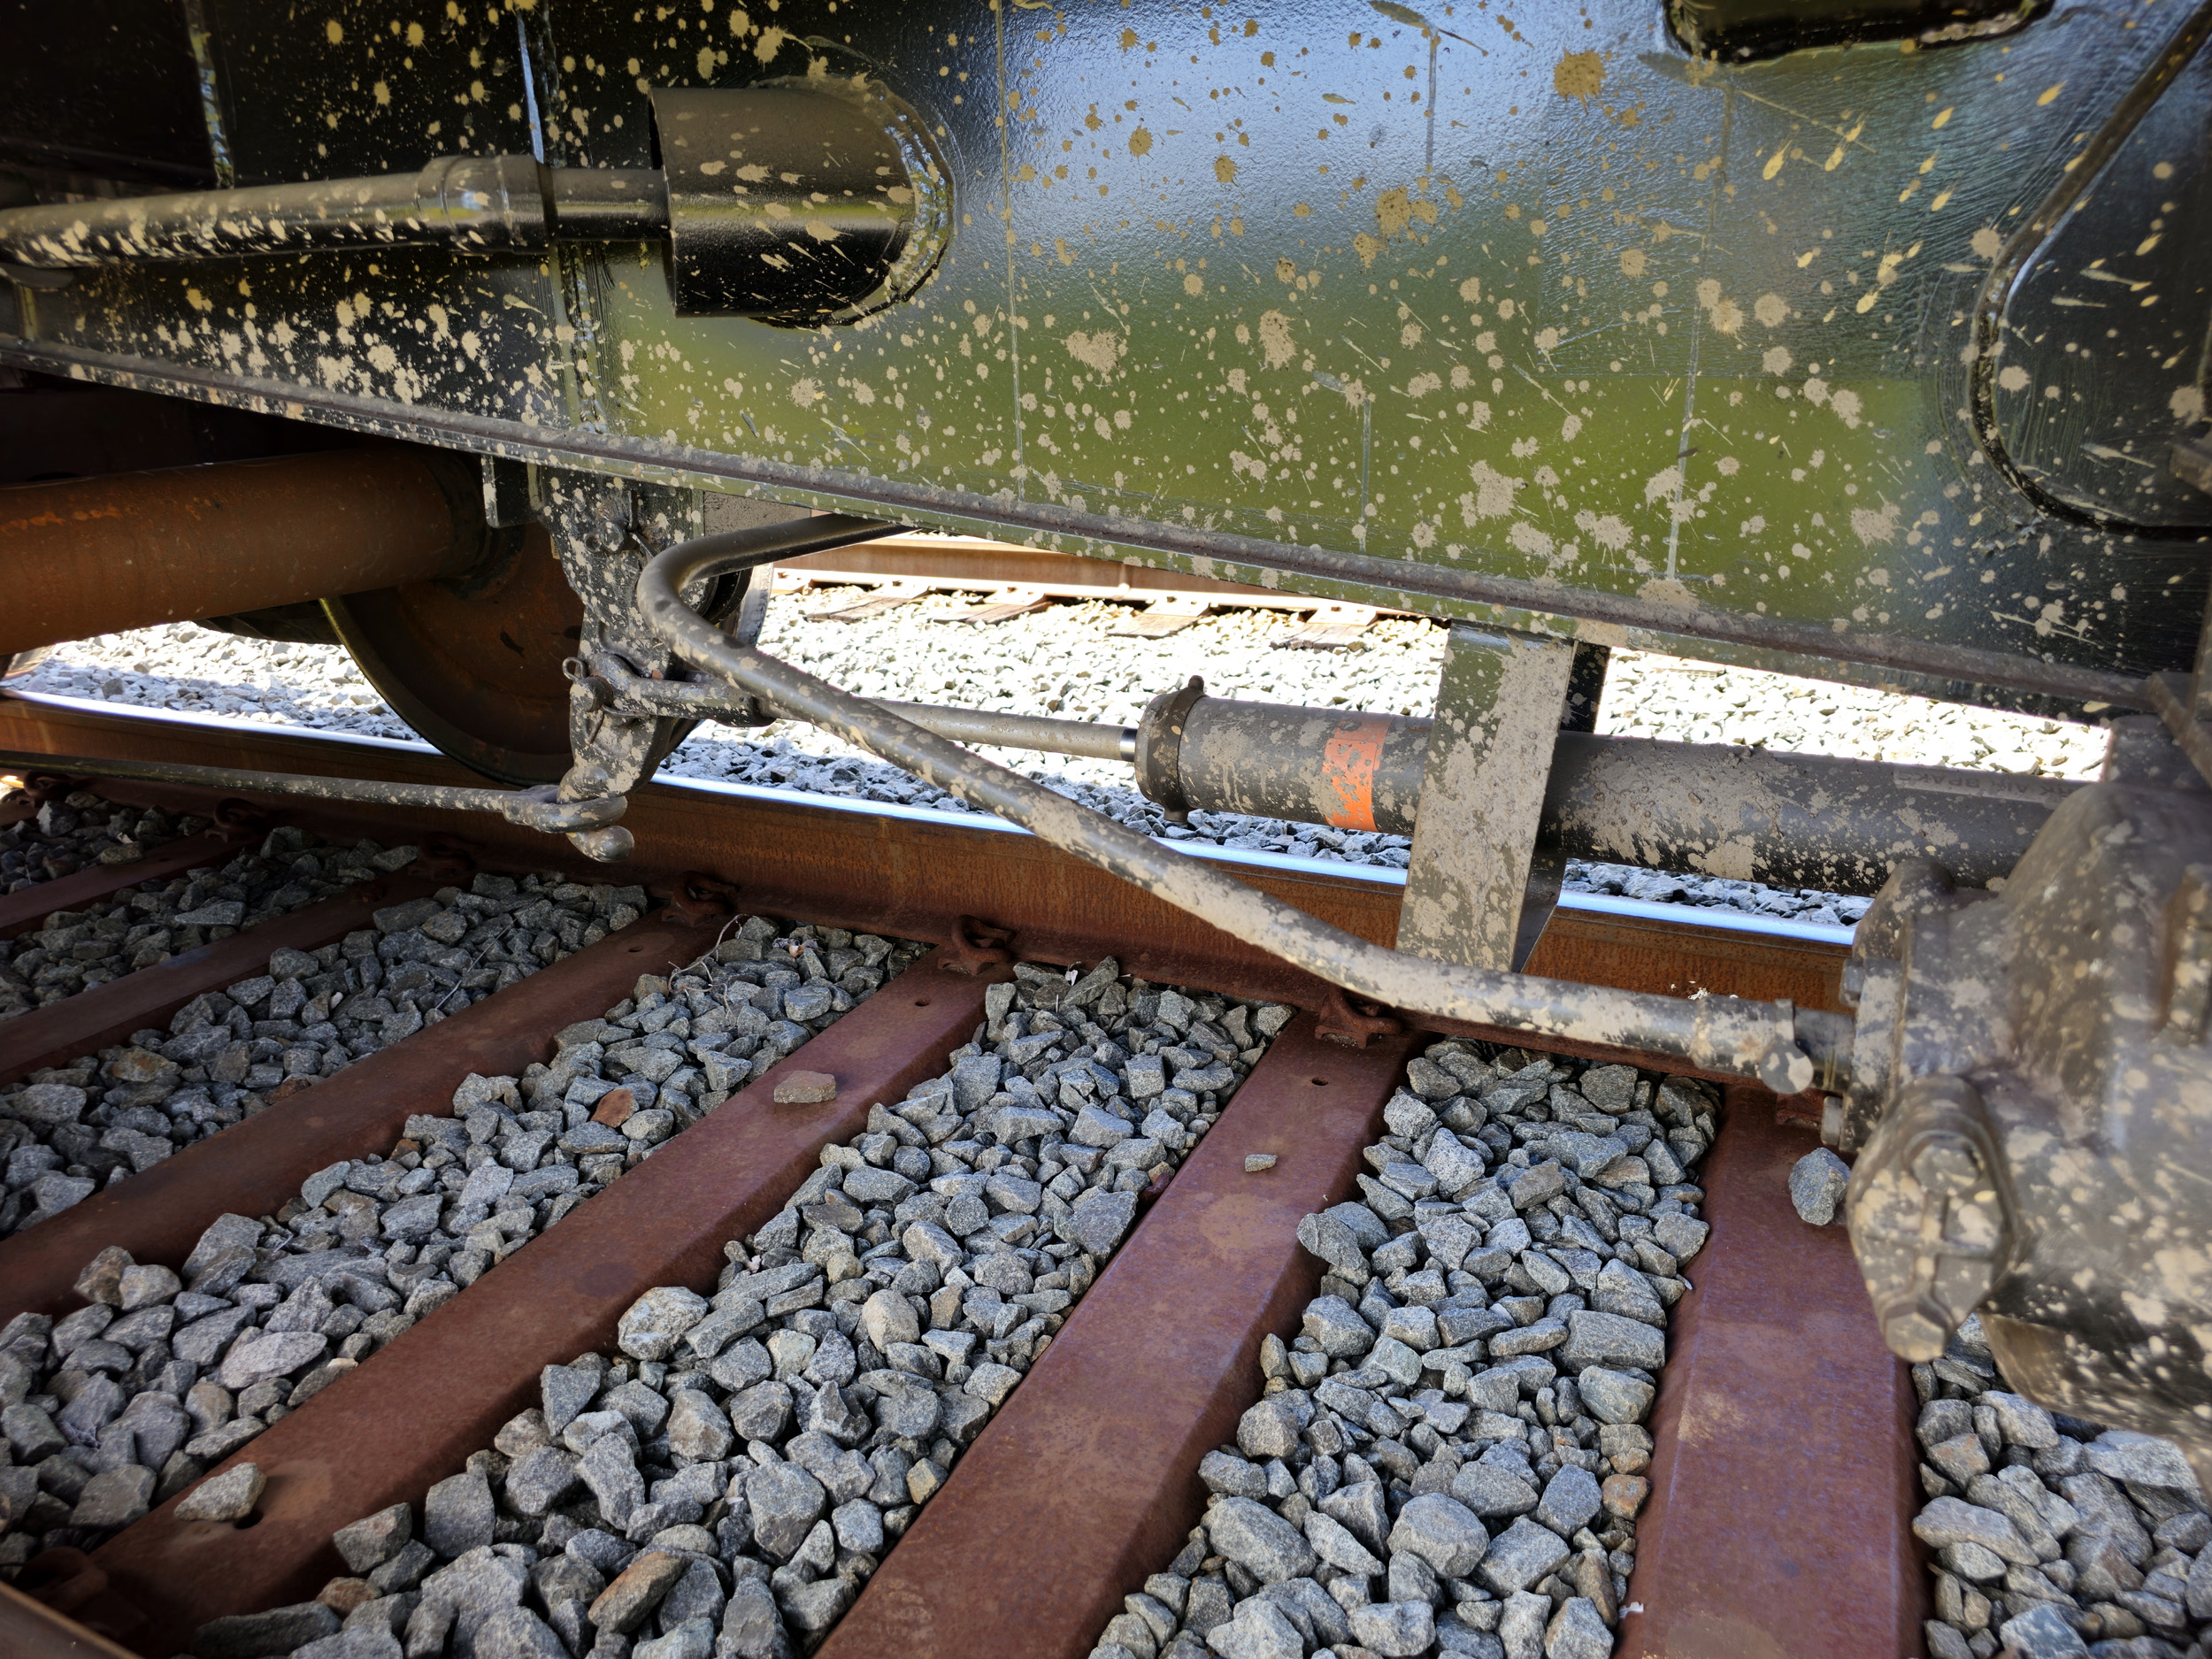
There
are 2 brake cylinders. The large one is for brake application. The small bore cylinder is a slack adjuster.

Added
9-3-25
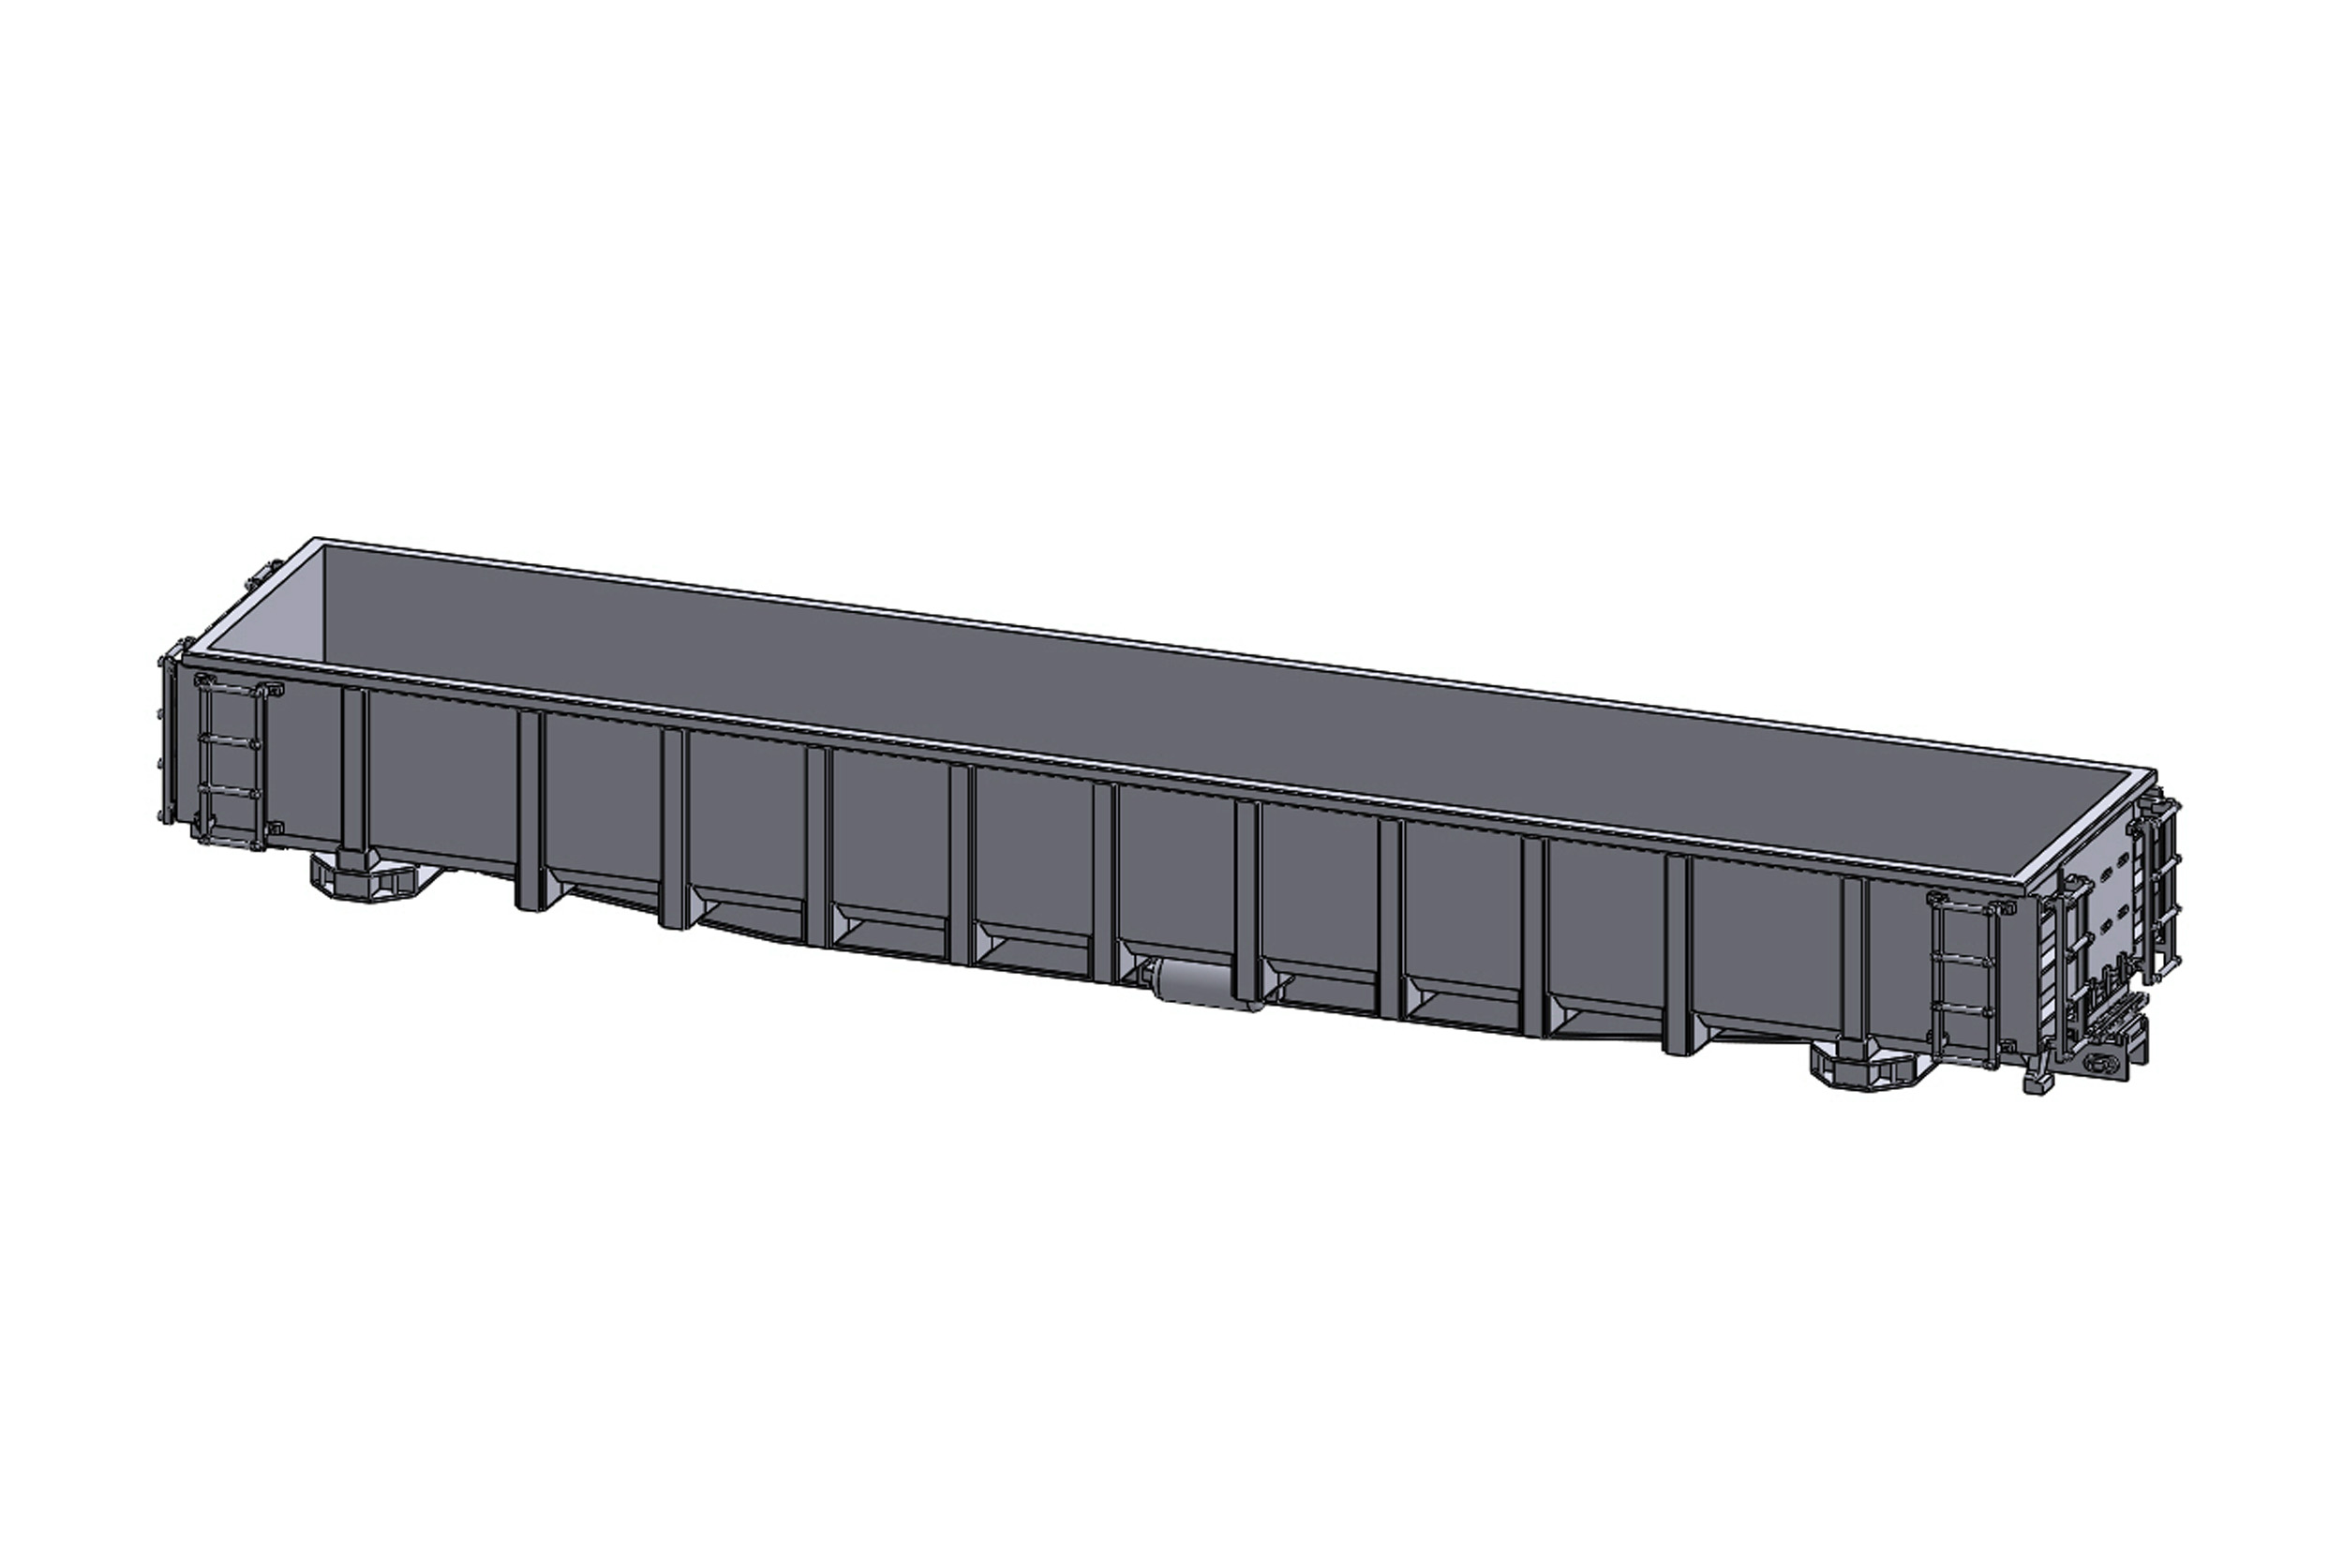
Some
Progress
My project pages usually show “progress” photos. For this car being designed in Solidworks that is not really
possible. I was designing and printing the latest version almost every
night. There are more details to come but the basic body is done. I originally
designed this as having some separate parts like ladders to glue on after the
print. But they have done pretty well in my test prints attached printing all
as 1 piece. That really surprised me. I want to try printing everything at once
including stirrup steps when it is done.
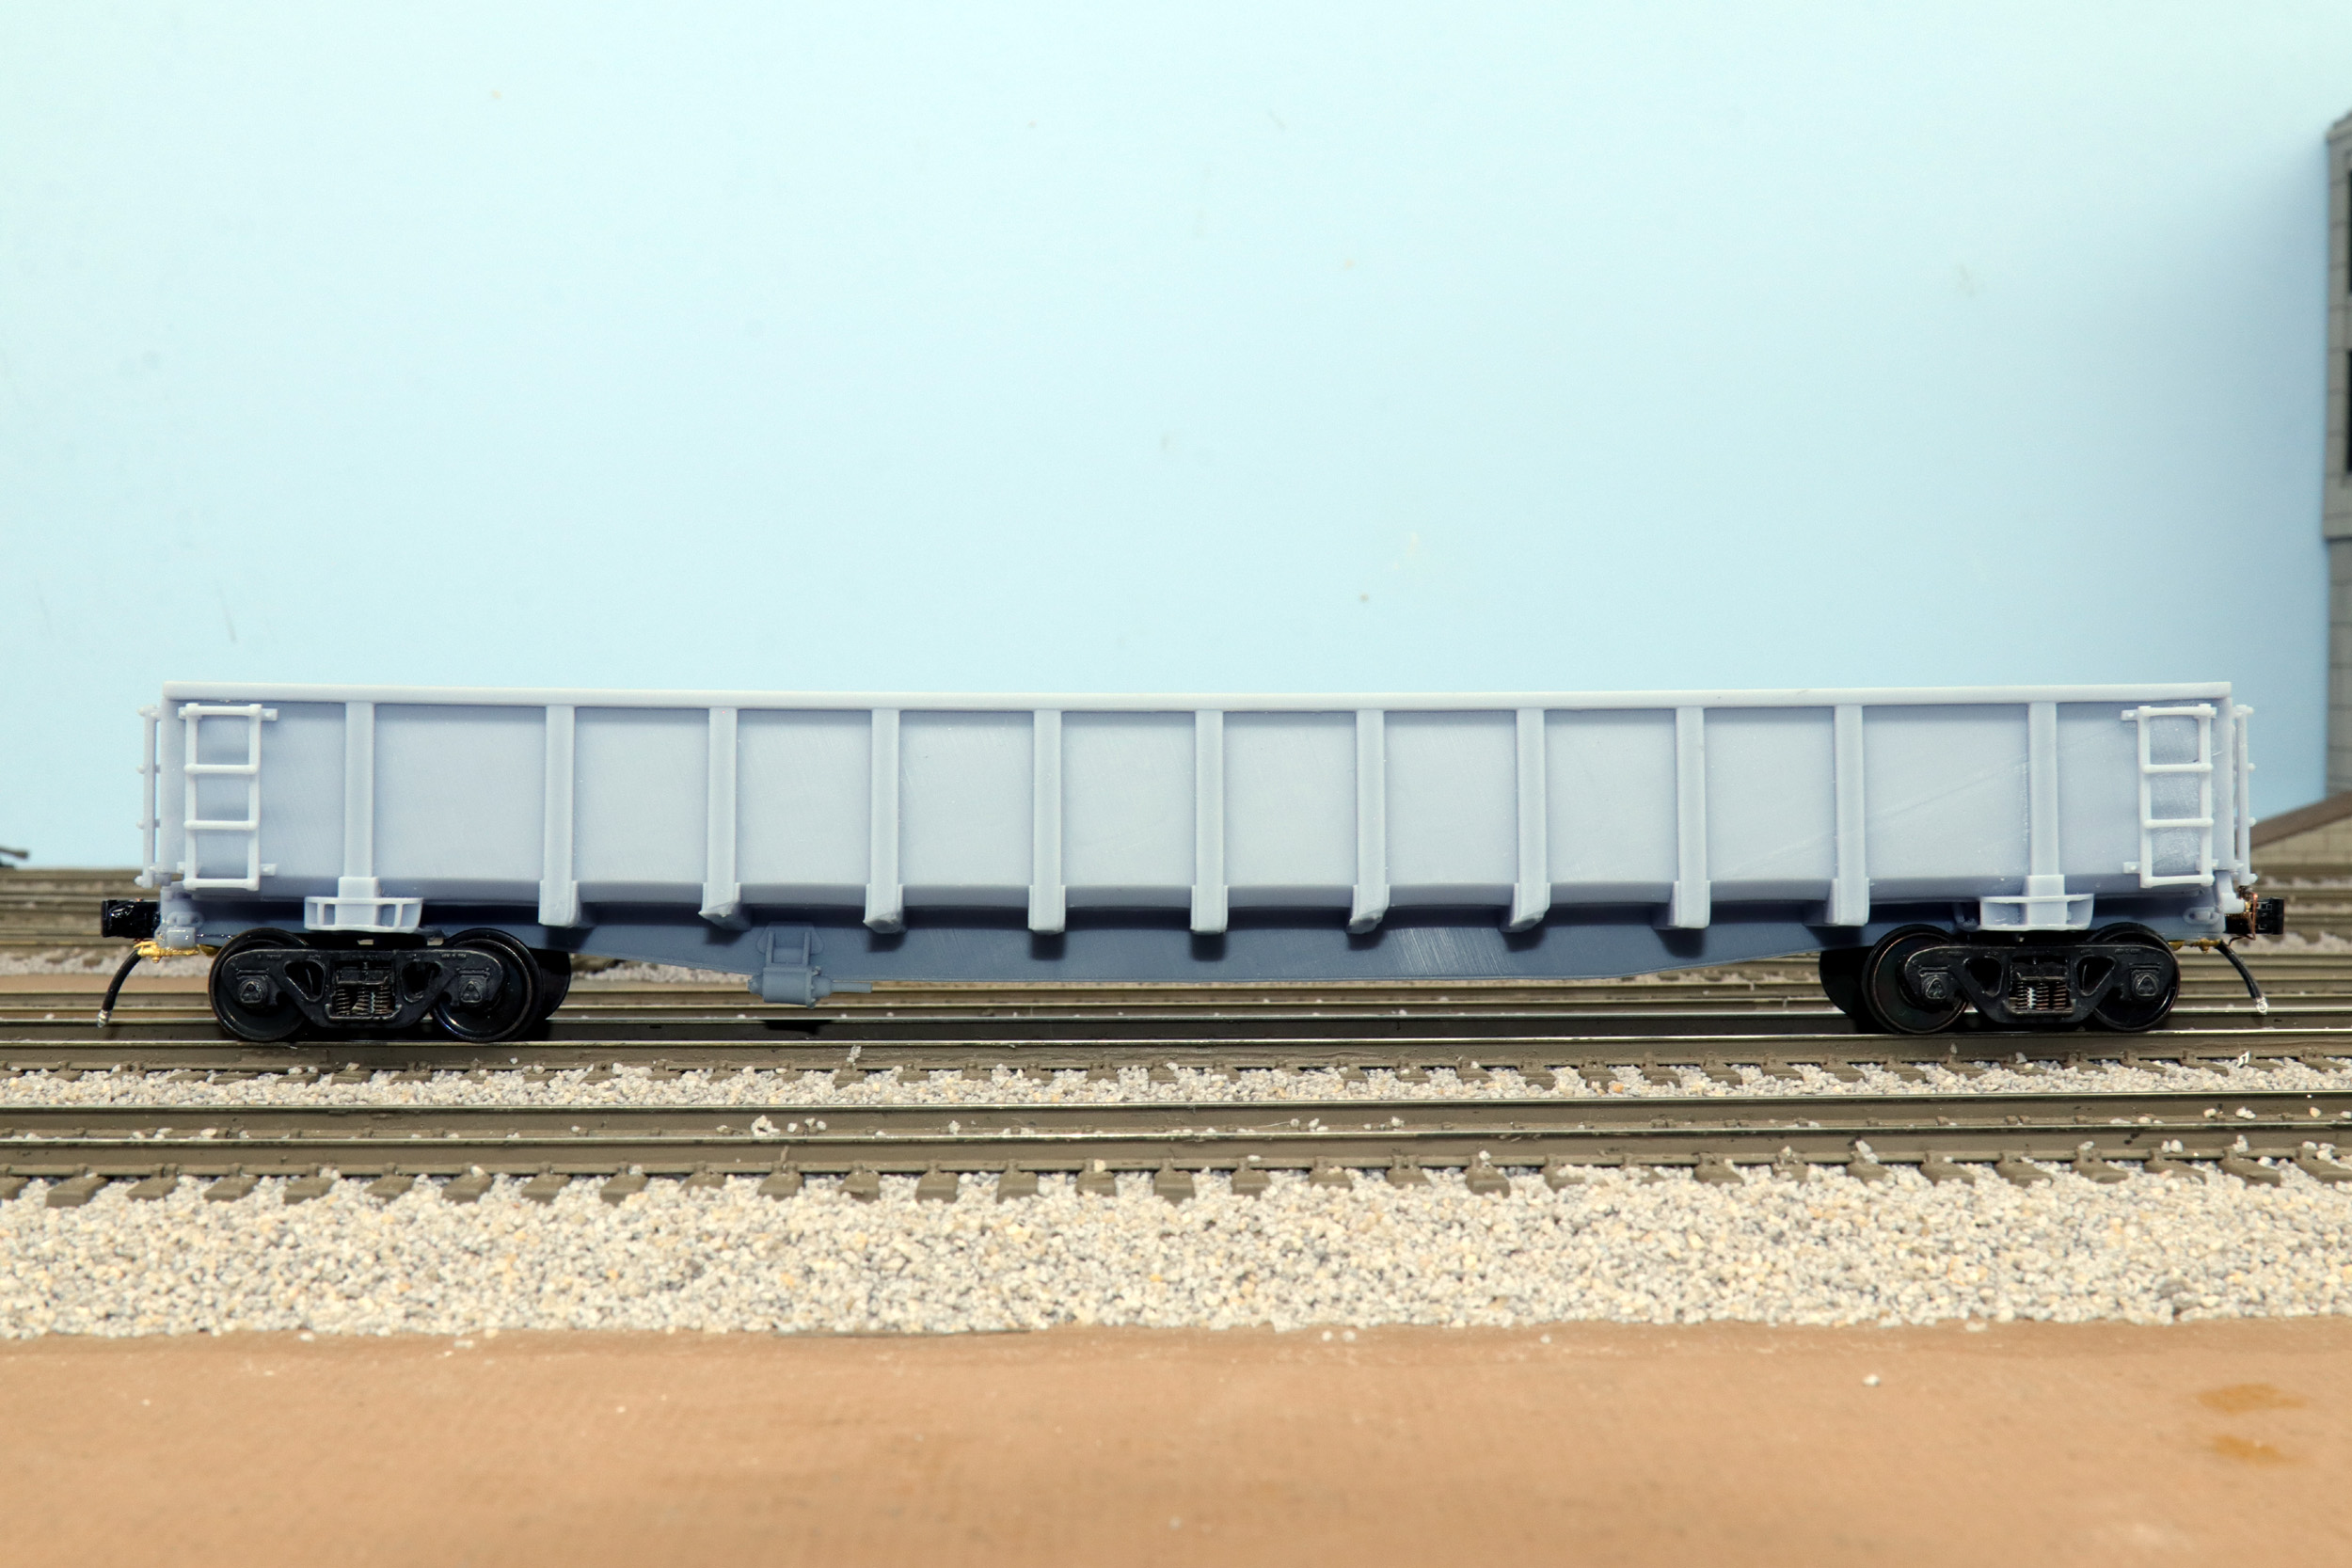
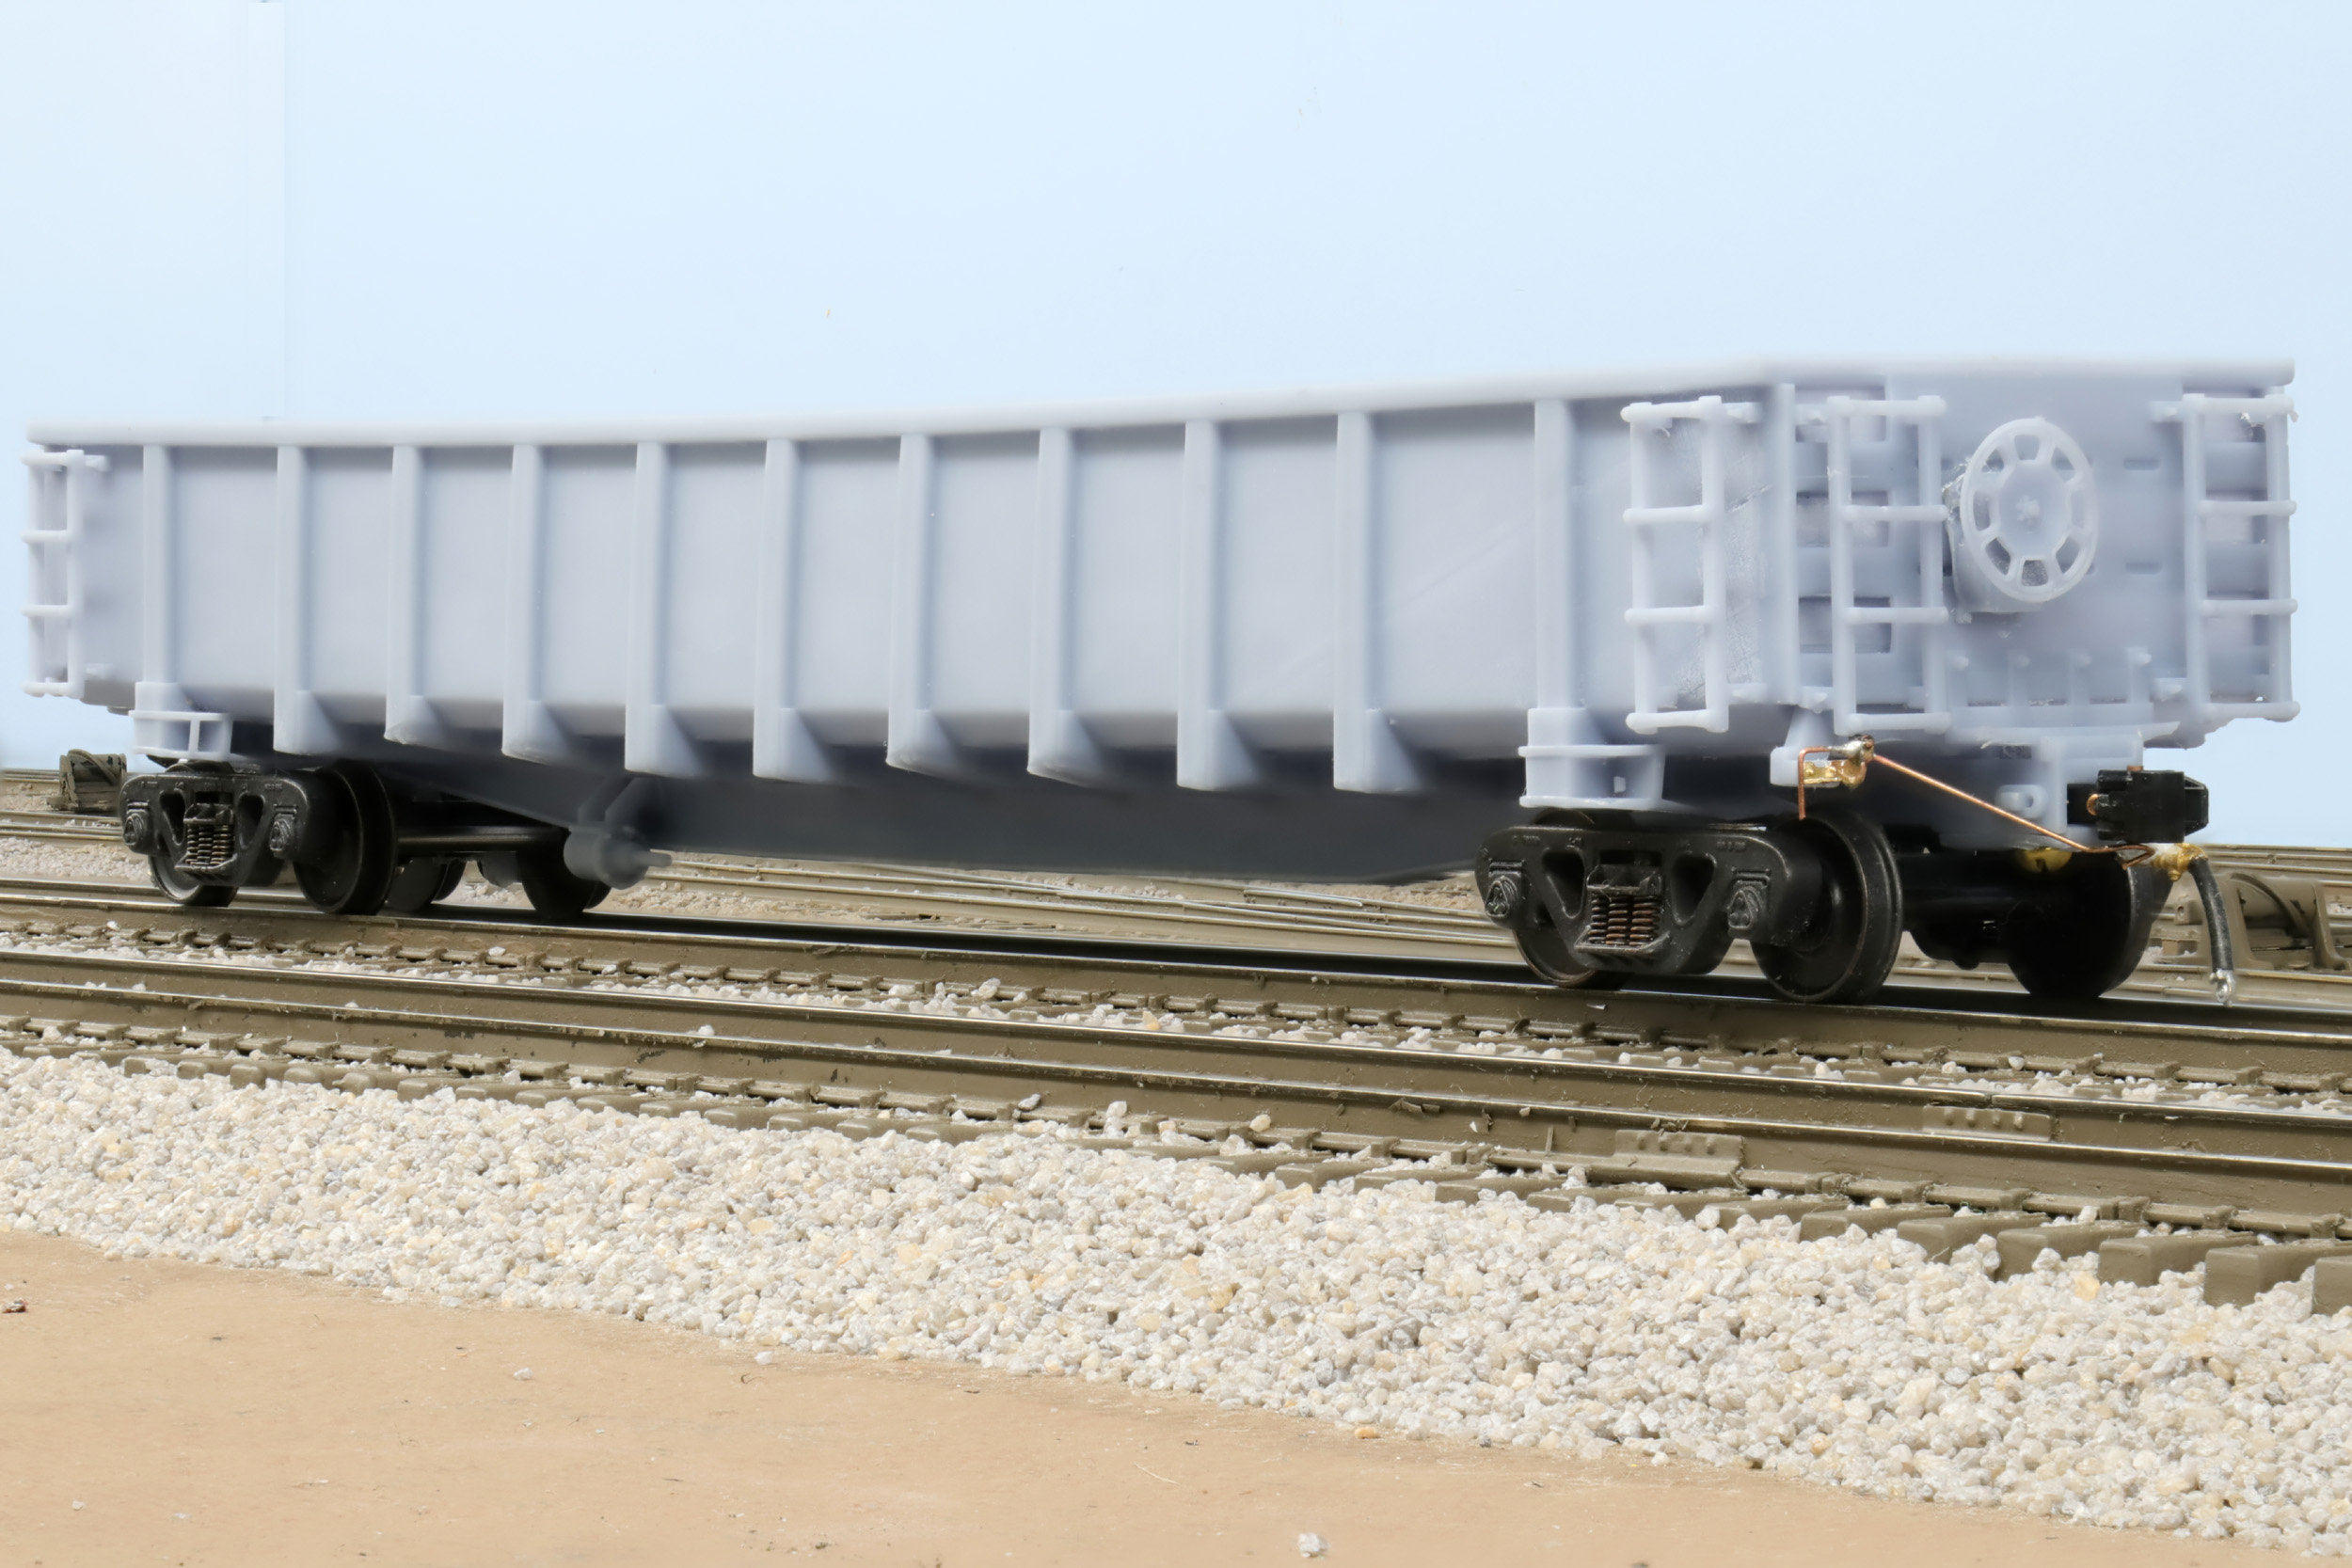
I am having some issues with the cars warping after curing I have
to figure out.
This is the most complete car to date. I added some of my brass
parts. The warping is obvious here.
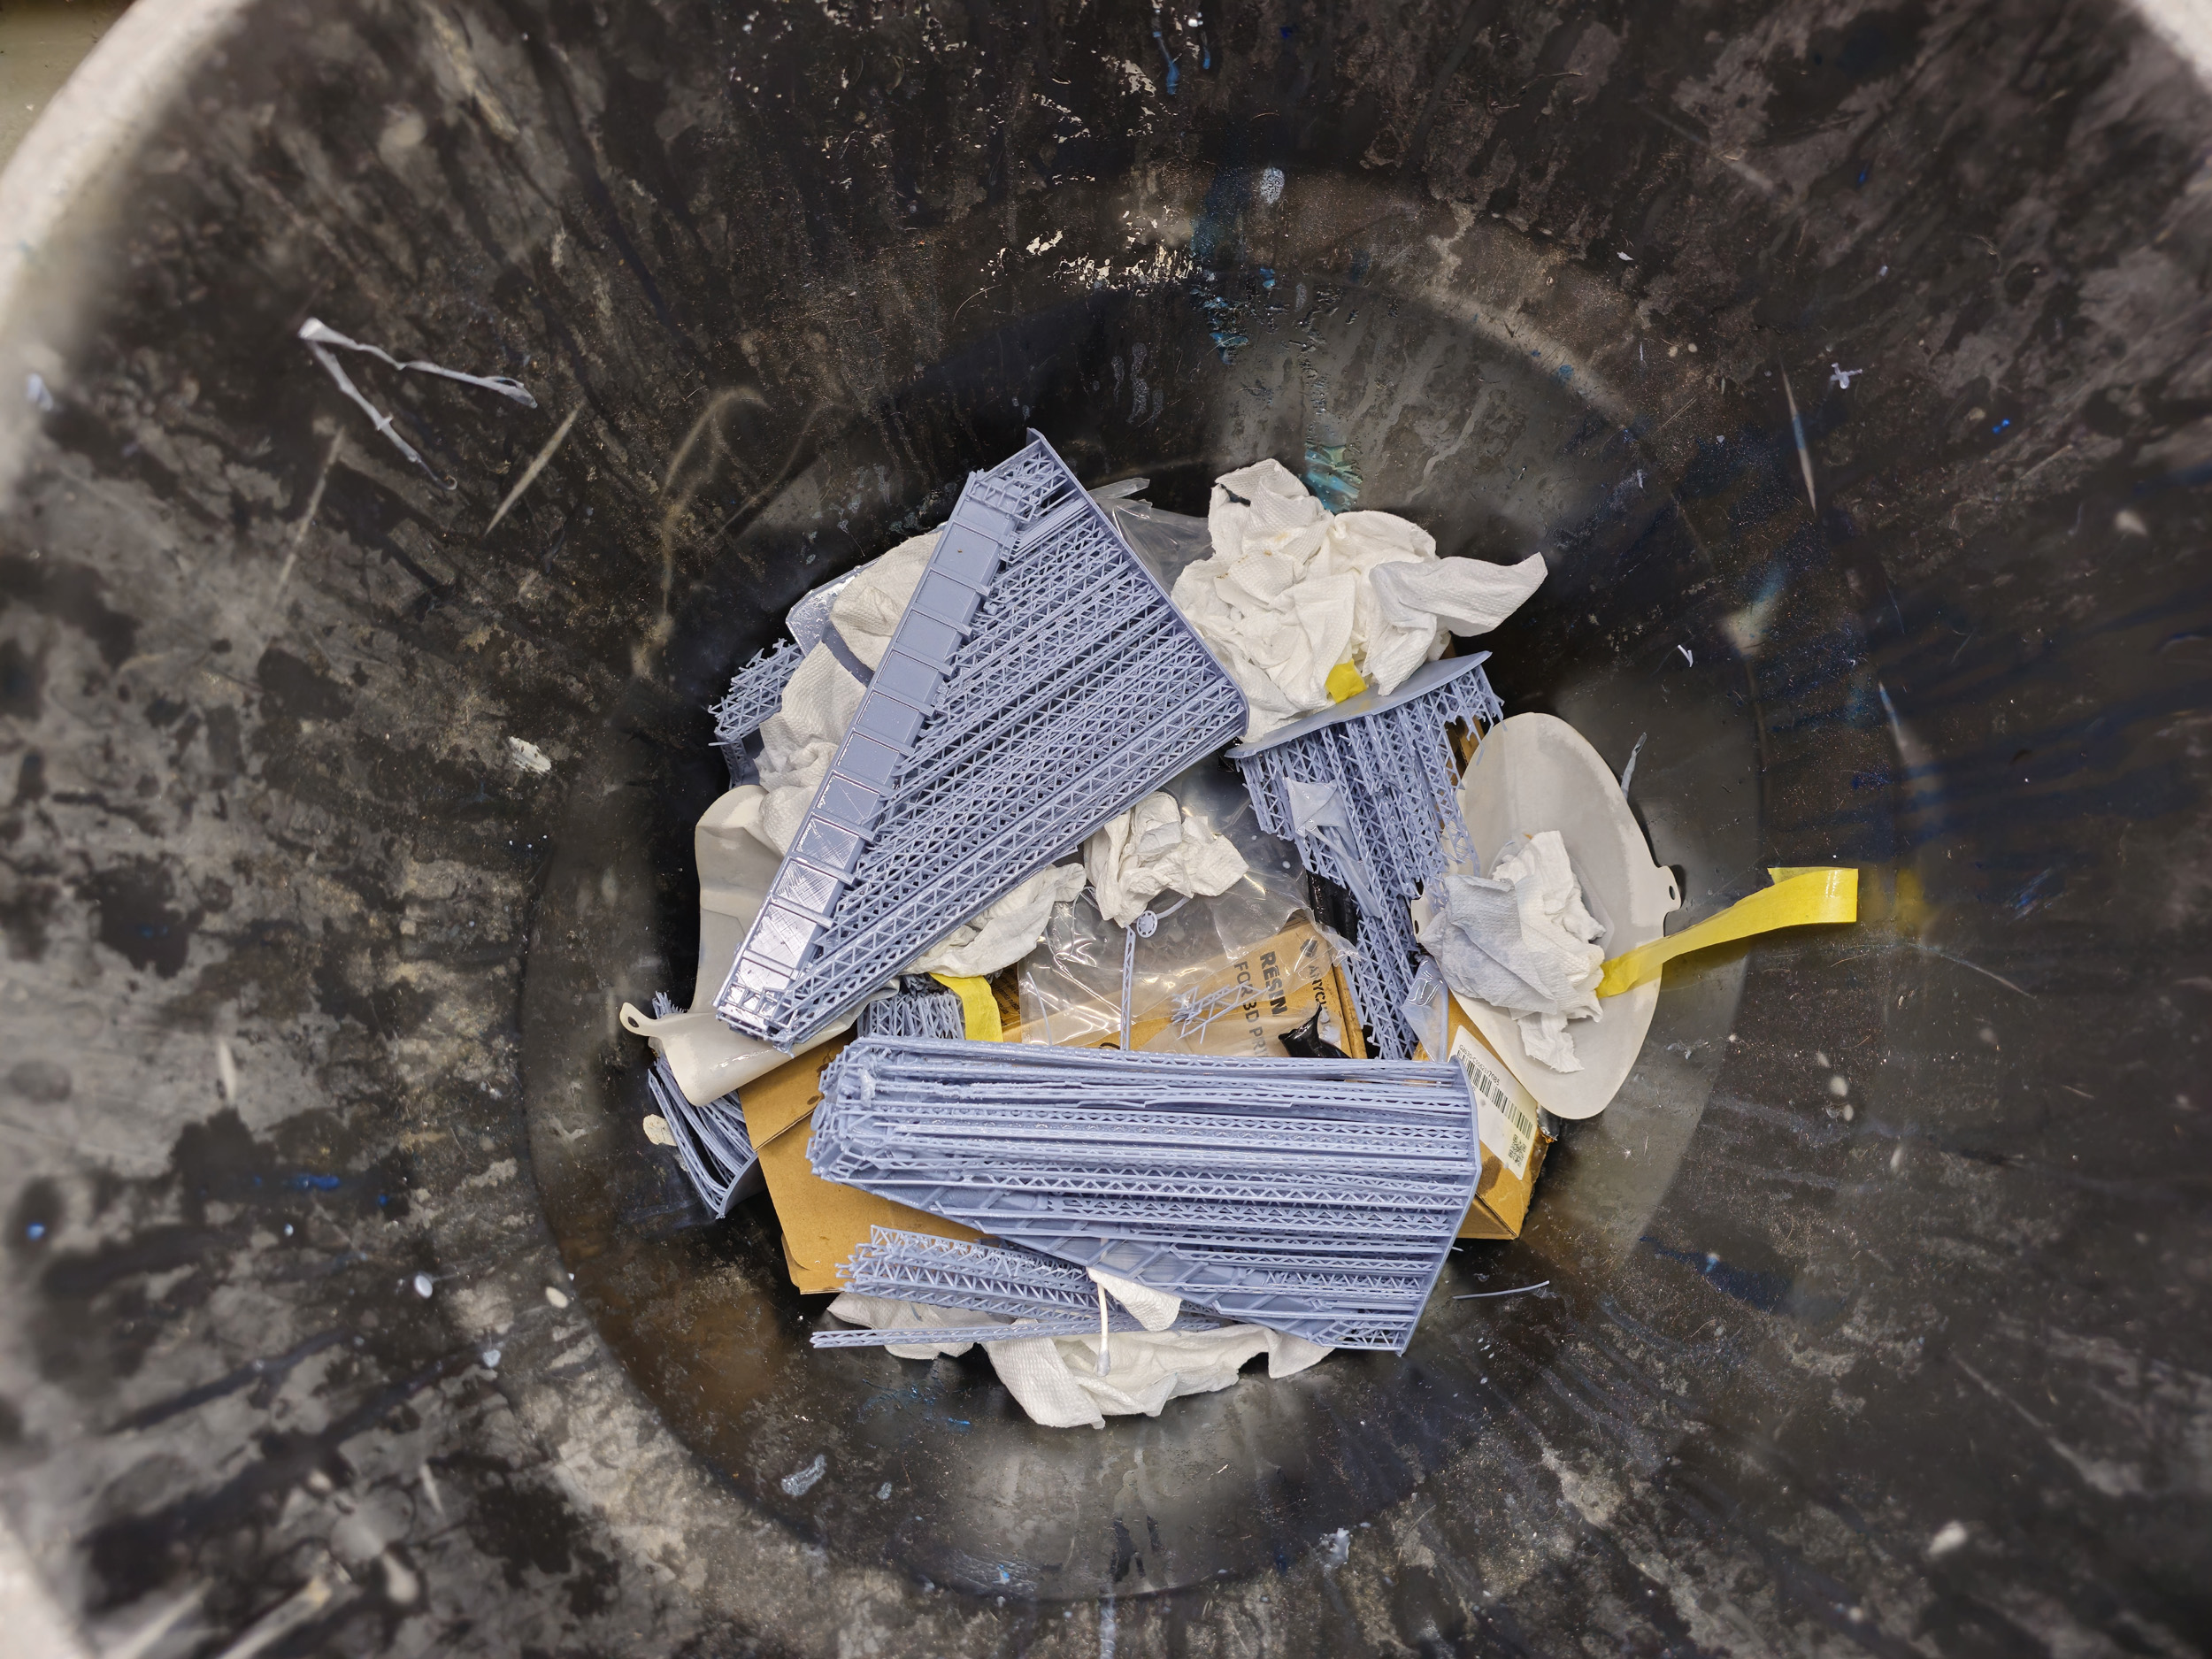
The
Trash Can Of Shame
Added
9-18-25
In spite of getting “experience” not every print turns out well.
I was experimenting with removing some of the mass supports that get created in
using Auto Supports. It did not always work. Also, this car uses a significant
amount of resin in the supports and raft. That is all waste.

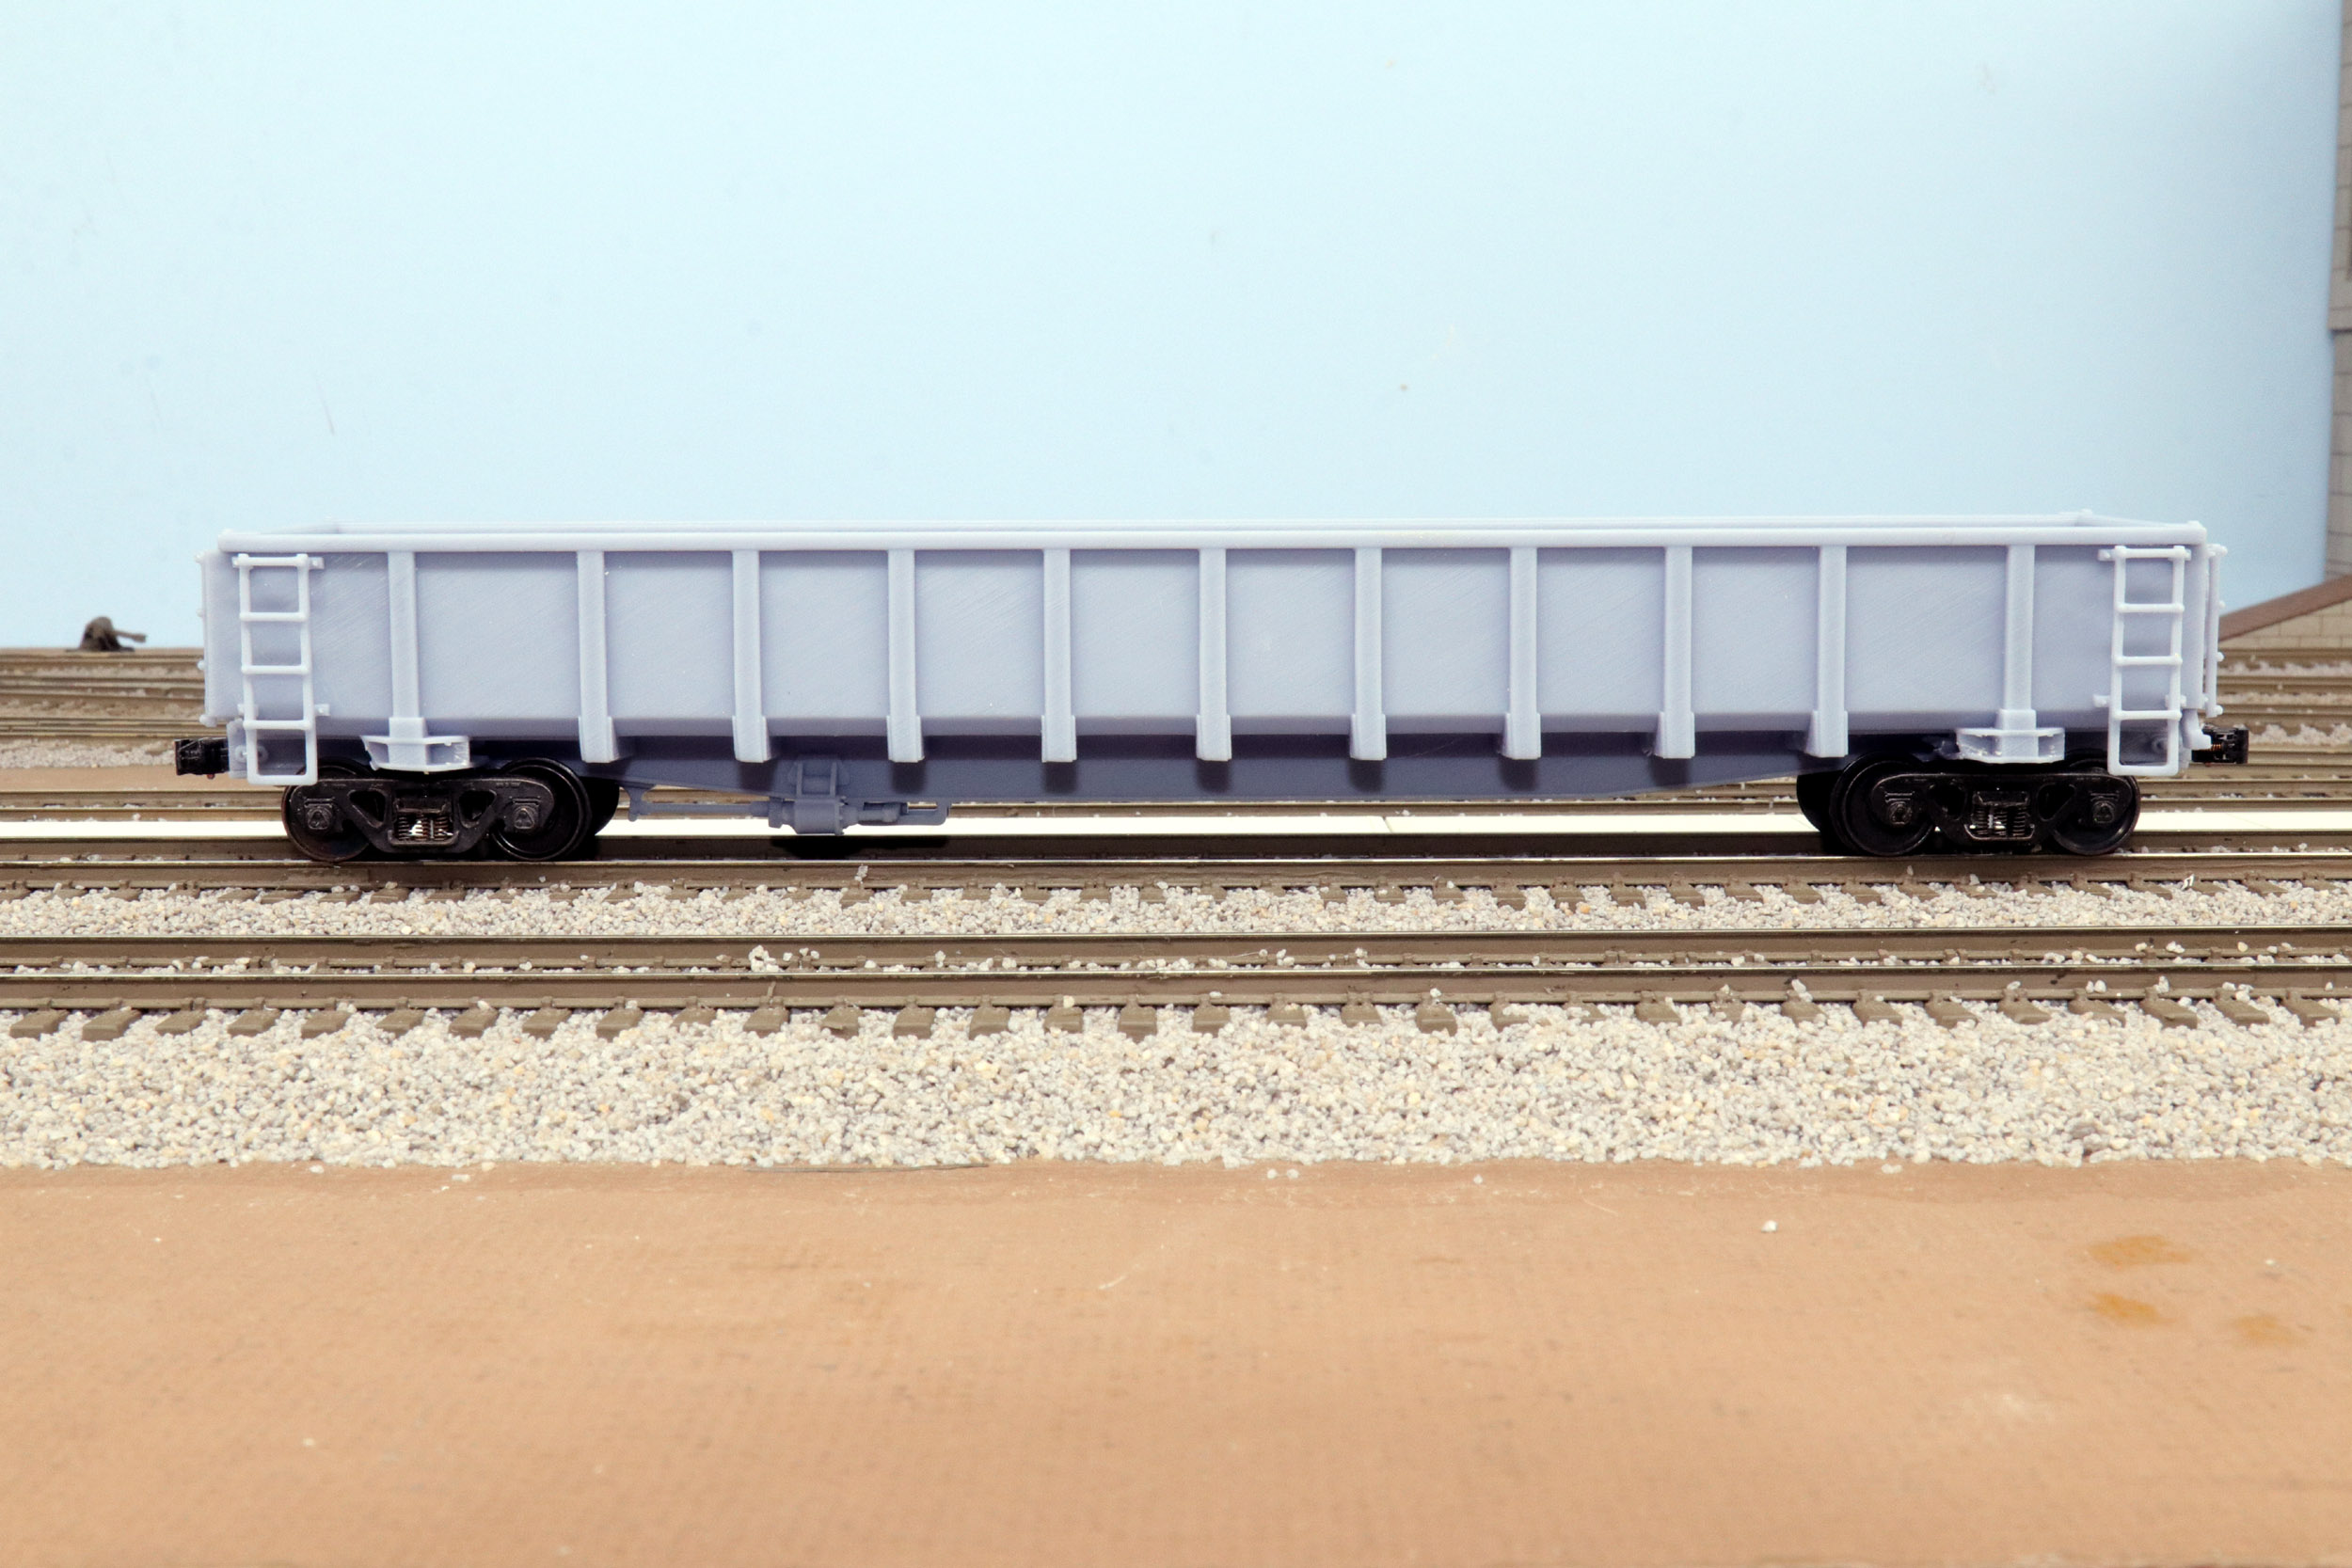
I am mostly done designing at this point. I have to see what it
looks like following the Ajax brake chain under the car. I did not originally
get any photos of that. I made the walls thicker. They were .030 when I
started. I made them .050. That has helped with stopping most of the warping.

My cars are completely designed and “built” in the USA. It is
unfortunate that Greenbrier chose to have the real cars assembled in Mexico.
When I first posted to some Facebook groups I was making this car I exchanged
private messages with someone that was laid off in Chelahis Washington because
of the move to Mexico. Booooo!!!

These 2 cars were featured in my YouTube here. I dare say that
given how new the real car is, I am the first person in the world to have and
run this car in ANY scale. I will have decals from Circus City soon. I plan on making
a slab steel unit train. My current limiting factor is my supply of roller
bearing trucks. I am working on that now.
Added
10-19-25
There was one more detail I wanted to add that I did not
previously take detail photos of or sketch. It took a few weeks for another
train to be staged on the Woodbury siding. I got the photos and sketches on
10-5-25. Once I added it to the car it was so small it is barely noticeable.
But I will have something to attach the chain to down from the Ajax.

Roller
Bearing Trucks
As mentioned above my supply of spare S Helper Service roller
bearing trucks is not endless. You don’t see them for sale often anymore. There
are other really nice 3D printed roller bearing trucks available. I have had a
stash (2+ pounds!) of NWSL wheels bought at an auction 6 years ago. I have not
used any of them yet. They are 33” wheels not what probably are
40”of the real car but 33” wheels are good enough for me. So the
thoughts of having a car I MADE running on trucks I made really appealed to me.
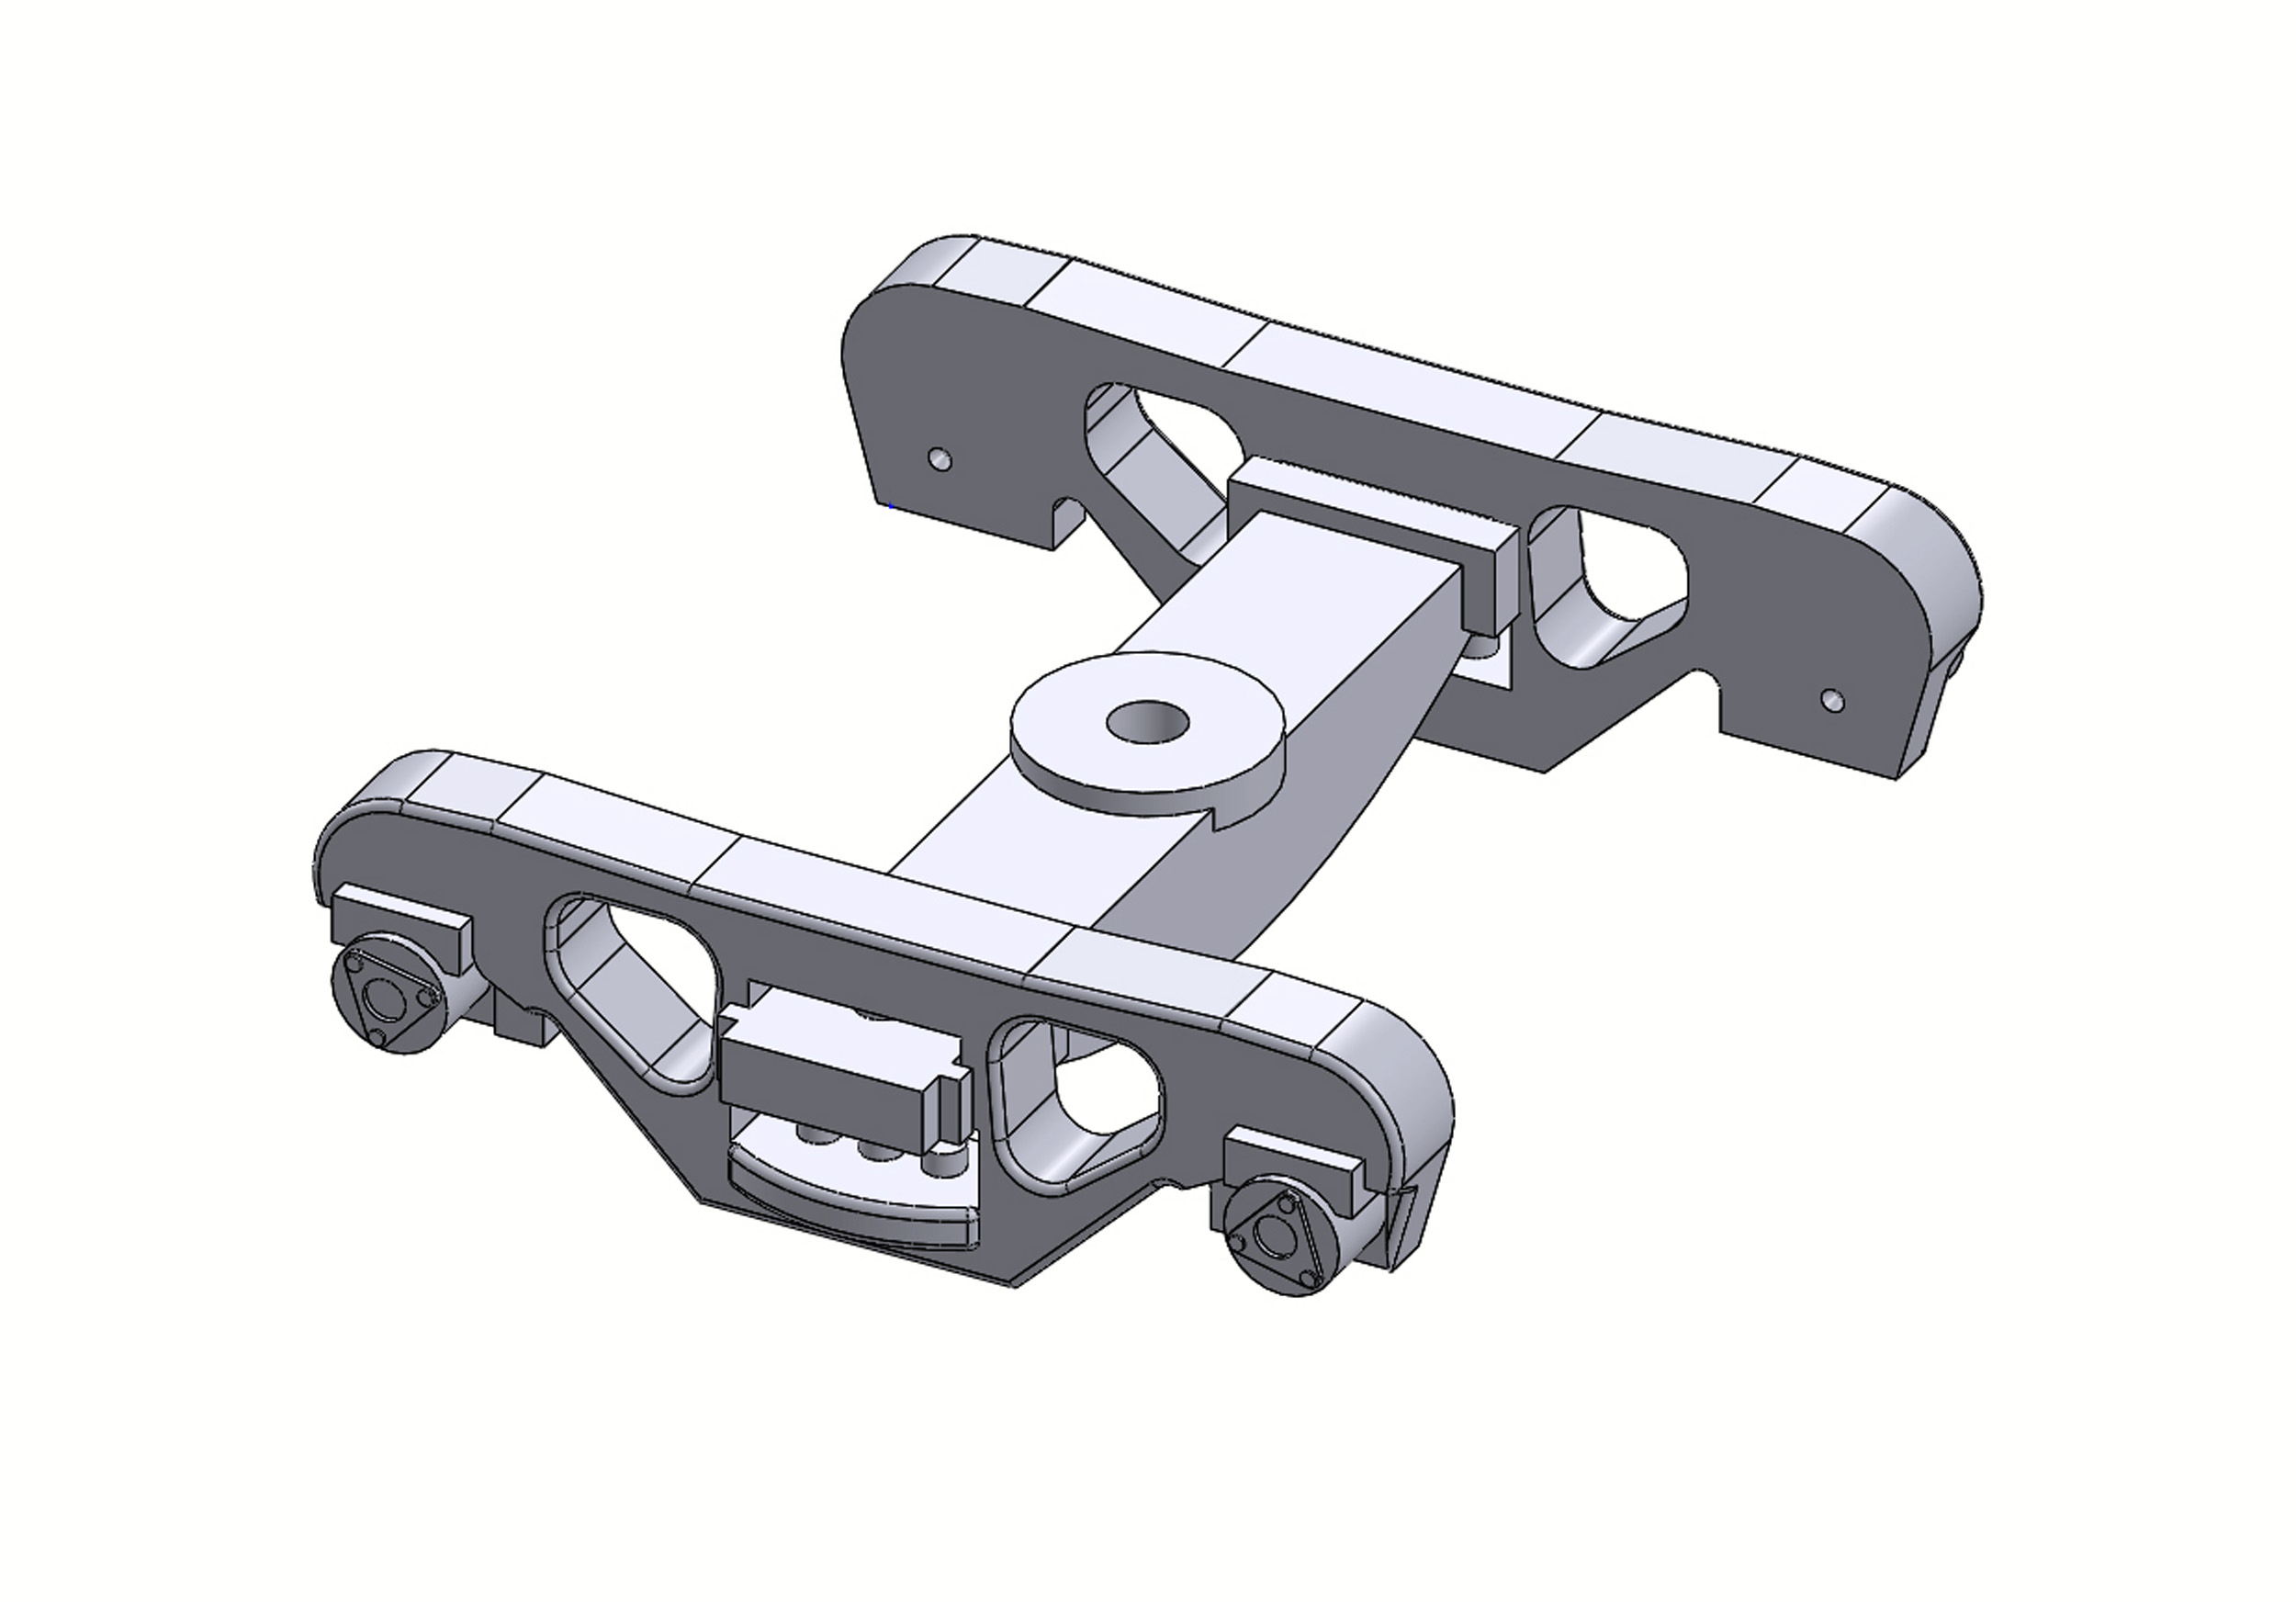
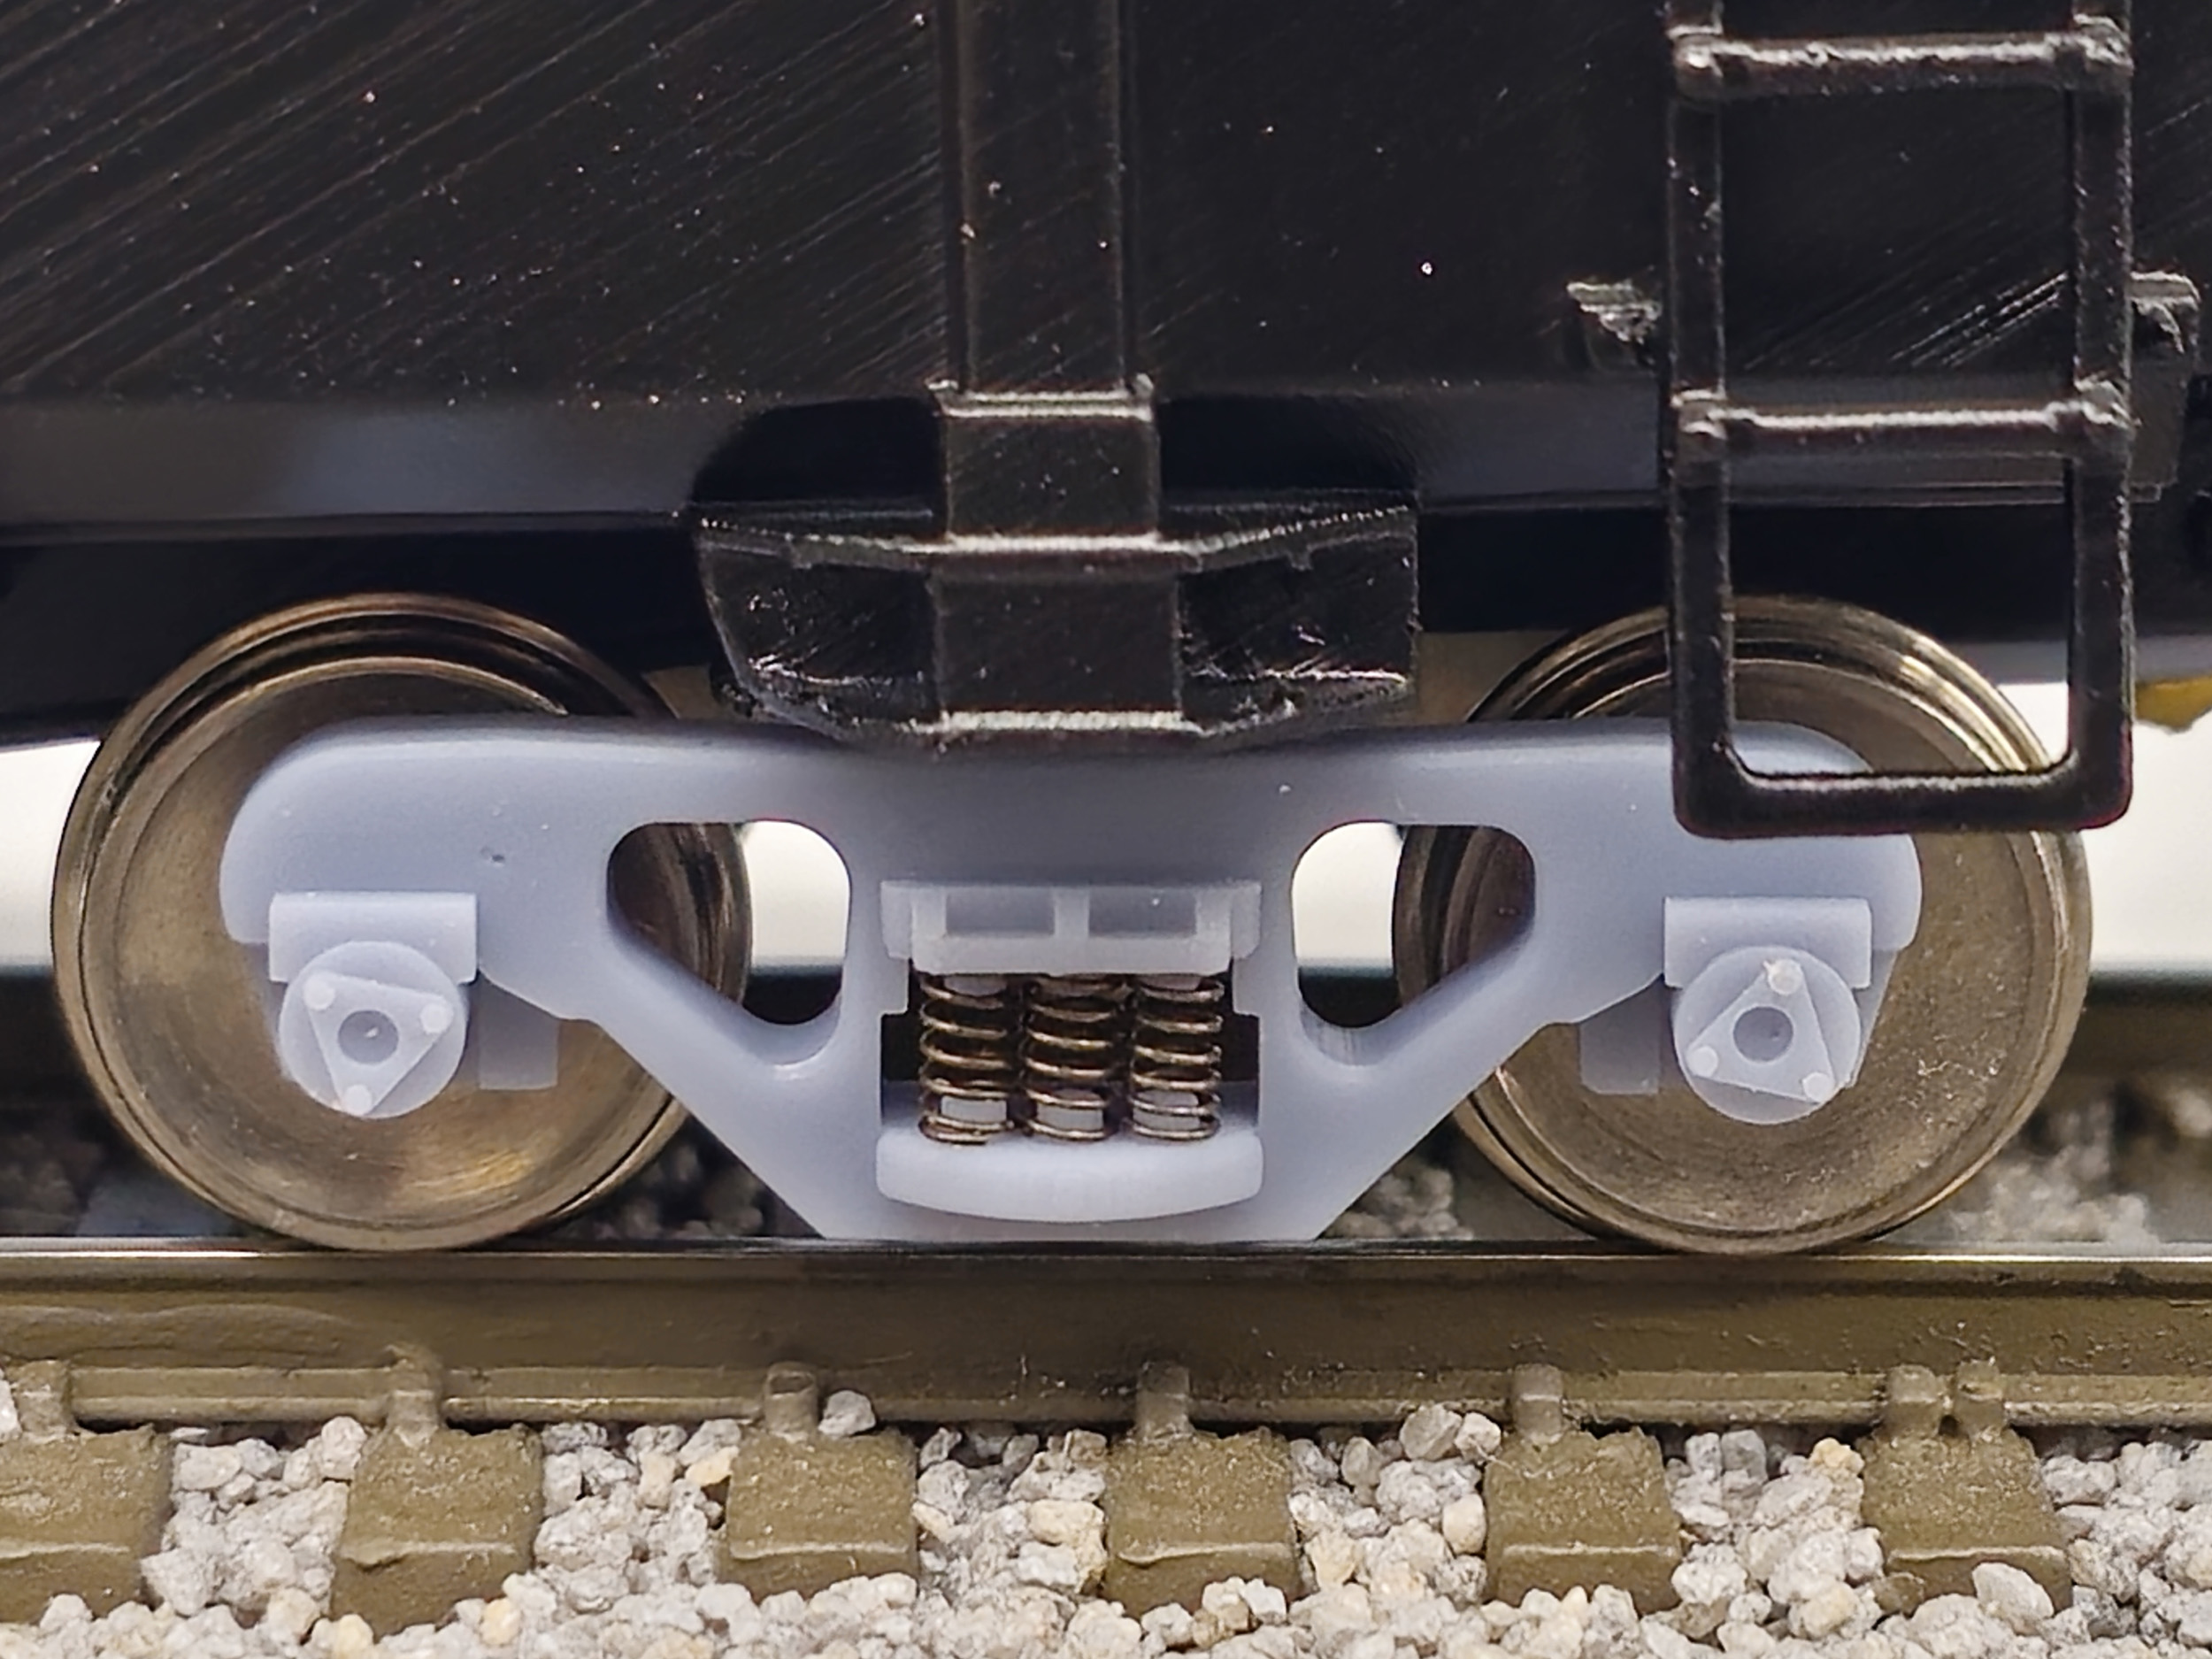
So I designed my own roller bearing truck.
I started by accurately measuring an Atlas O Scale truck.
Reducing 25% is really easy. When reduced it was really close to S Scale. I
cross cobbled with a S Helper Service bolster. It was
not my original intention to make it sprung or have
nylon axle bushings. I was going to make a 1 piece truck that was not
sprung. Printing accurate axle holes
with conical ends to match the pointed axle ends was just not going to happen.
3D printing is good but is not THAT good yet. So I tried “Tichy 3059 nylon
truck bearings”. I also used NWSL 1412 springs. Both parts improved my design
100% over what I was going to make. The thoughts of a truck actually wearing
out while running are all gone now. My M7 Pro printer is my highest resolution.
The finish is just amazing. I am very happy with the results. I now have an
endless supply of roller bearing trucks!
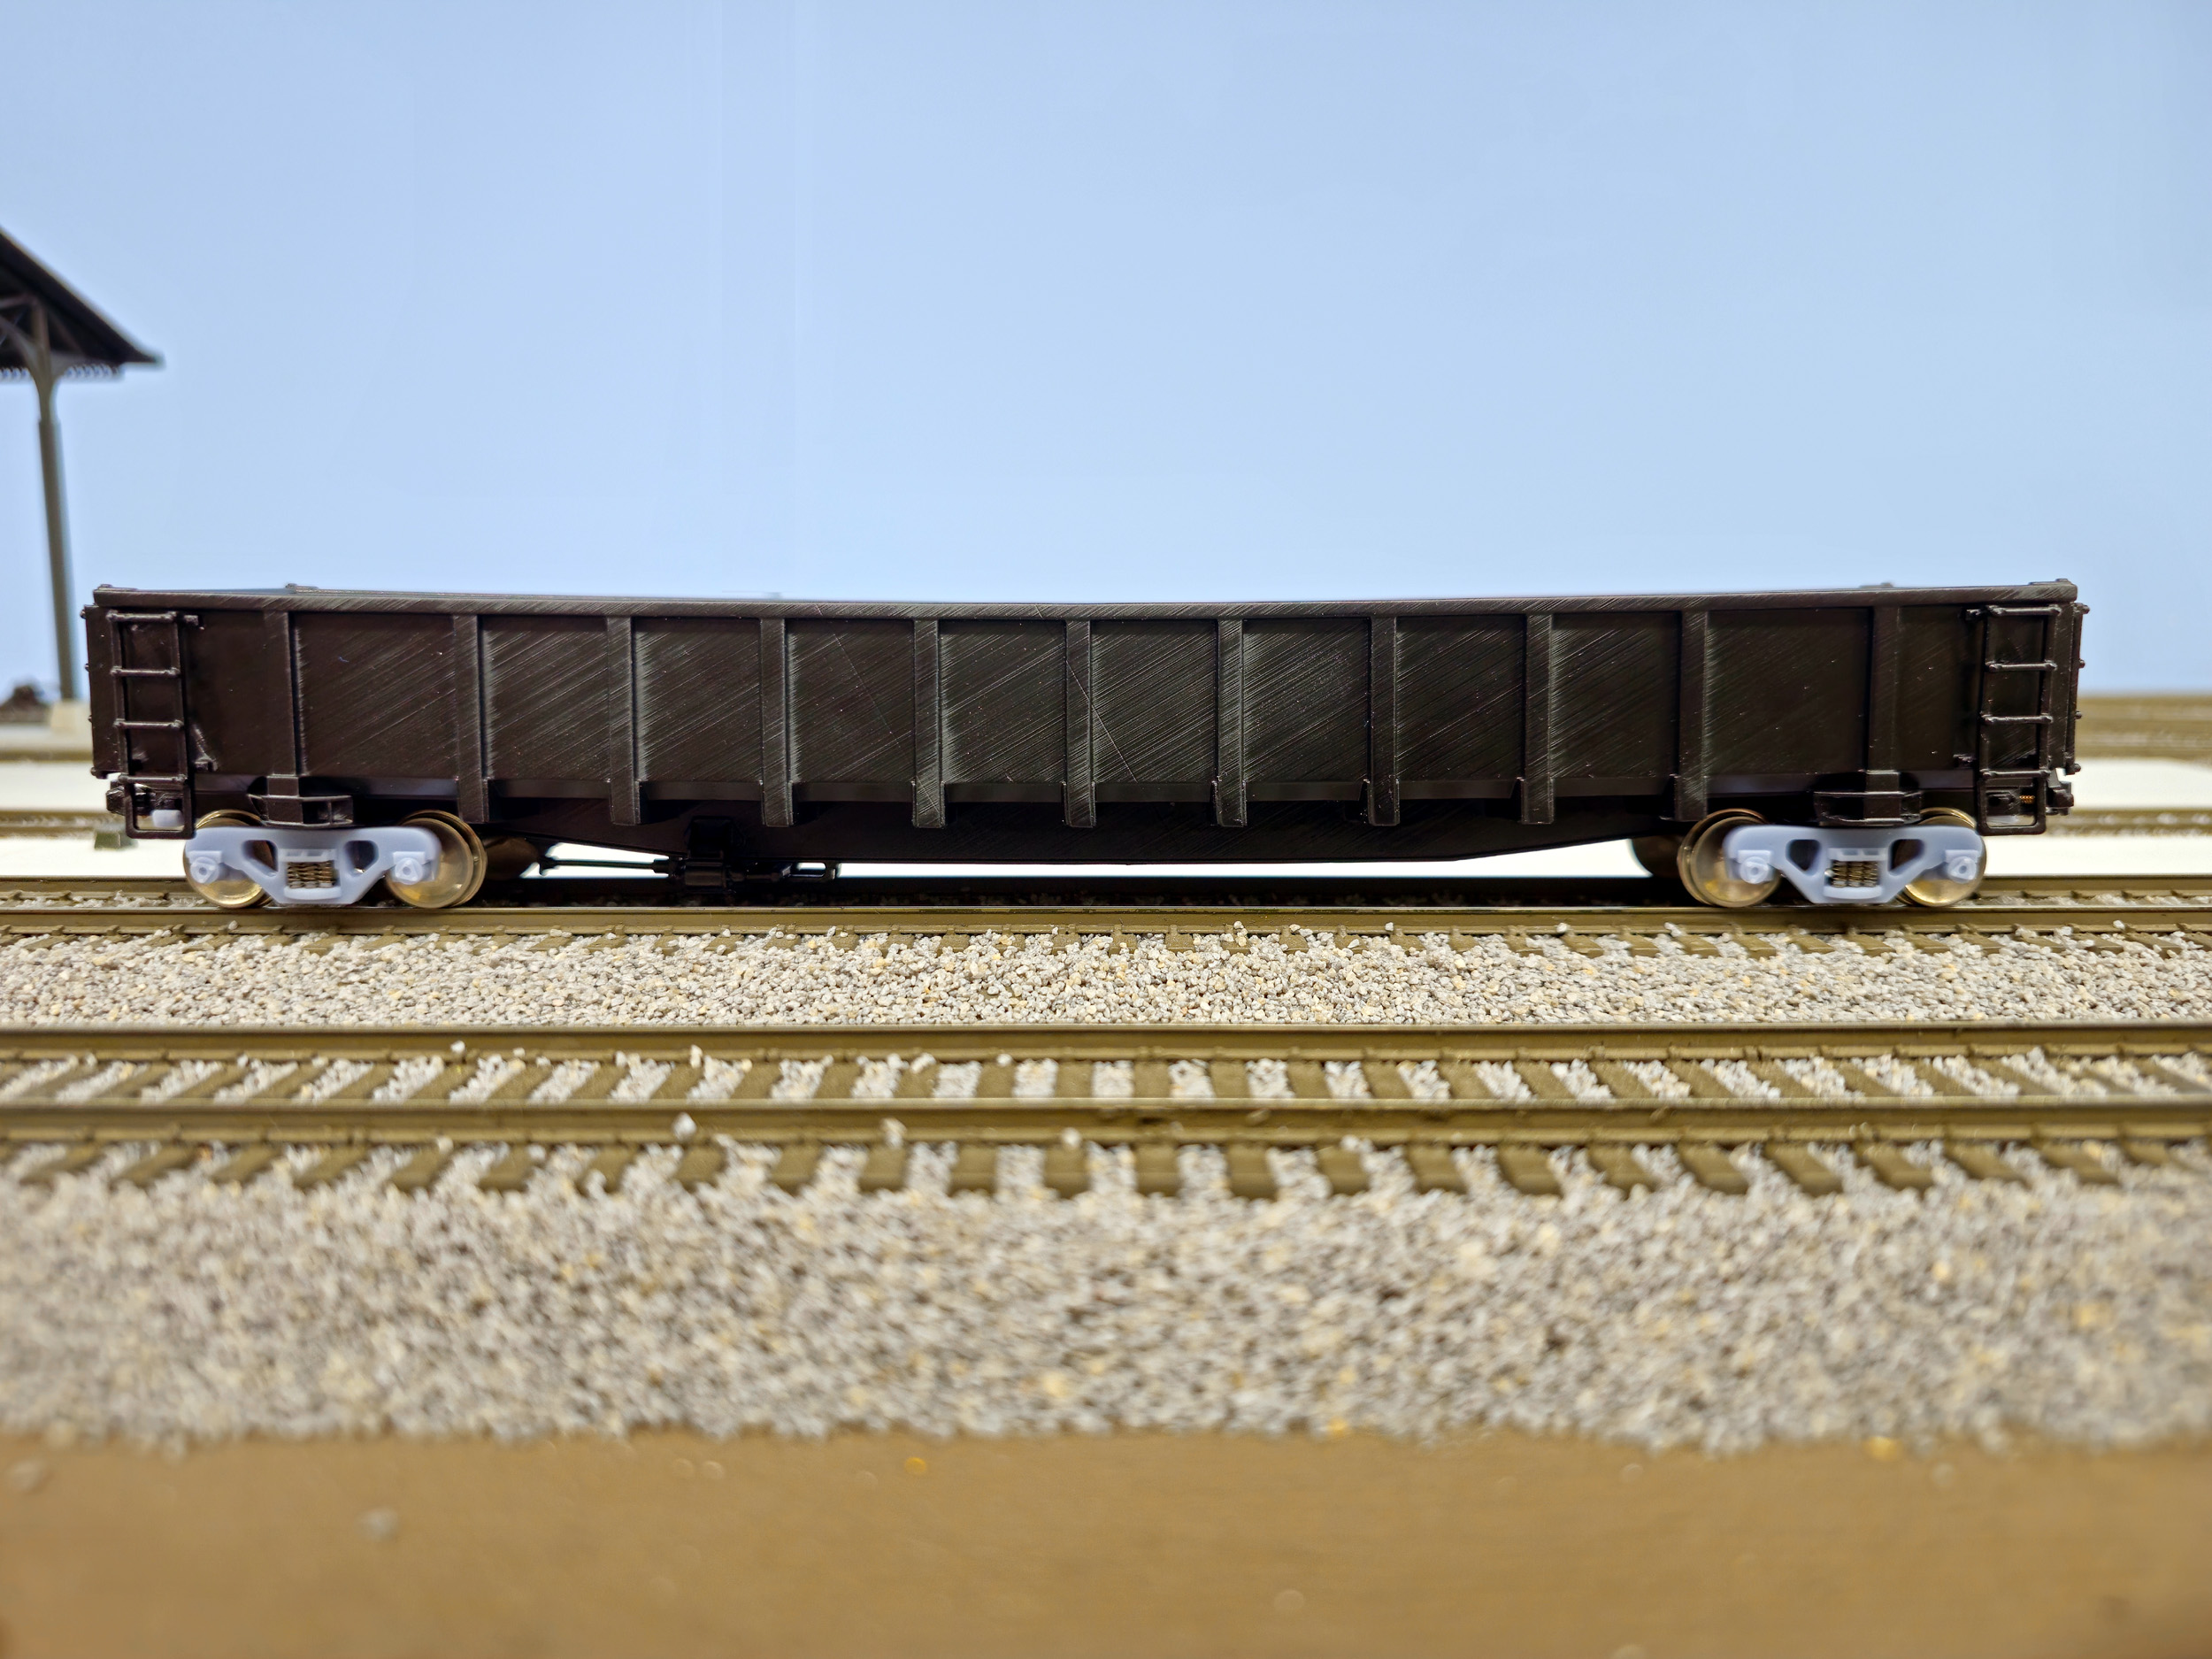
My next big problem I have to solve is the body warping into a
swayback shape even after getting painted as seen above. That effect is fine
for an older abused gondola but these cars are almost new. I want them to be in
good condition.
Dead
Almost New Printer
Just as I was getting close to the final body design my 3 month
old Anycubic M7 Max printer died. That annoyed me to no end. I fought with
Anycubic for a week trying to get a new printer sent. I also called eBay for a
courtesy replacement since I have been a VERY ACTIVE user for over 25 years. eBay was NO help. The
ONLY offer being made was for Anycubic to send a new LCD screen that I had to
install or truly nothing else. I never heard of that before – ever. I was being
forced to fix my own 3 month old printer. No return and replace – fix it
yourself. That is just what happened.
Since the printer was already emptied I tried a different resin –
Anycubic ABS Like Pro that is not supposed to warp. I
was using Anycubic ABS Like V2. They are different! The first test print was
pretty good. It absolutely is stiffer.
Added
11-9-25
I
fixed my printer and got it to print with the ABS Like
Pro resin that has not warped – yet. I don’t think it will. I have had cars
printed for over a week. They are still perfectly straight. I thought finally I
can finish some cars so I started decaling one. Only then did I notice I put
the main air tank and brake valve in the wrong place. I have printed about 25
of these so far and never noticed that before. They should have been closer to
the slack adjuster. At this point with well over 100 hours in the designing I
can’t let that go. I fixed that and
other very minor issues. I THINK I have the absolute final design. There are
probably about 30 versions of it by now. As soon as I get some revised decals I
can start completing cars. Matt at Circus City Decals is awesome to work with
you get exactly what you want.
Added
12-1-25
Got
Steel?
I
liked the appeal of this car hauling large steel slabs as different car loads. I
needed to make steel slabs for my gondola. Why not use real steel? The gondolas need the weight anyway since
3D printed cars are too light.
There
is place called Joseph Fazzio, Inc. about 1/2 hour from me. It is Home Depot on steroids! (but normally no lumber) It is everything hardware but also
everything metal you can think of.
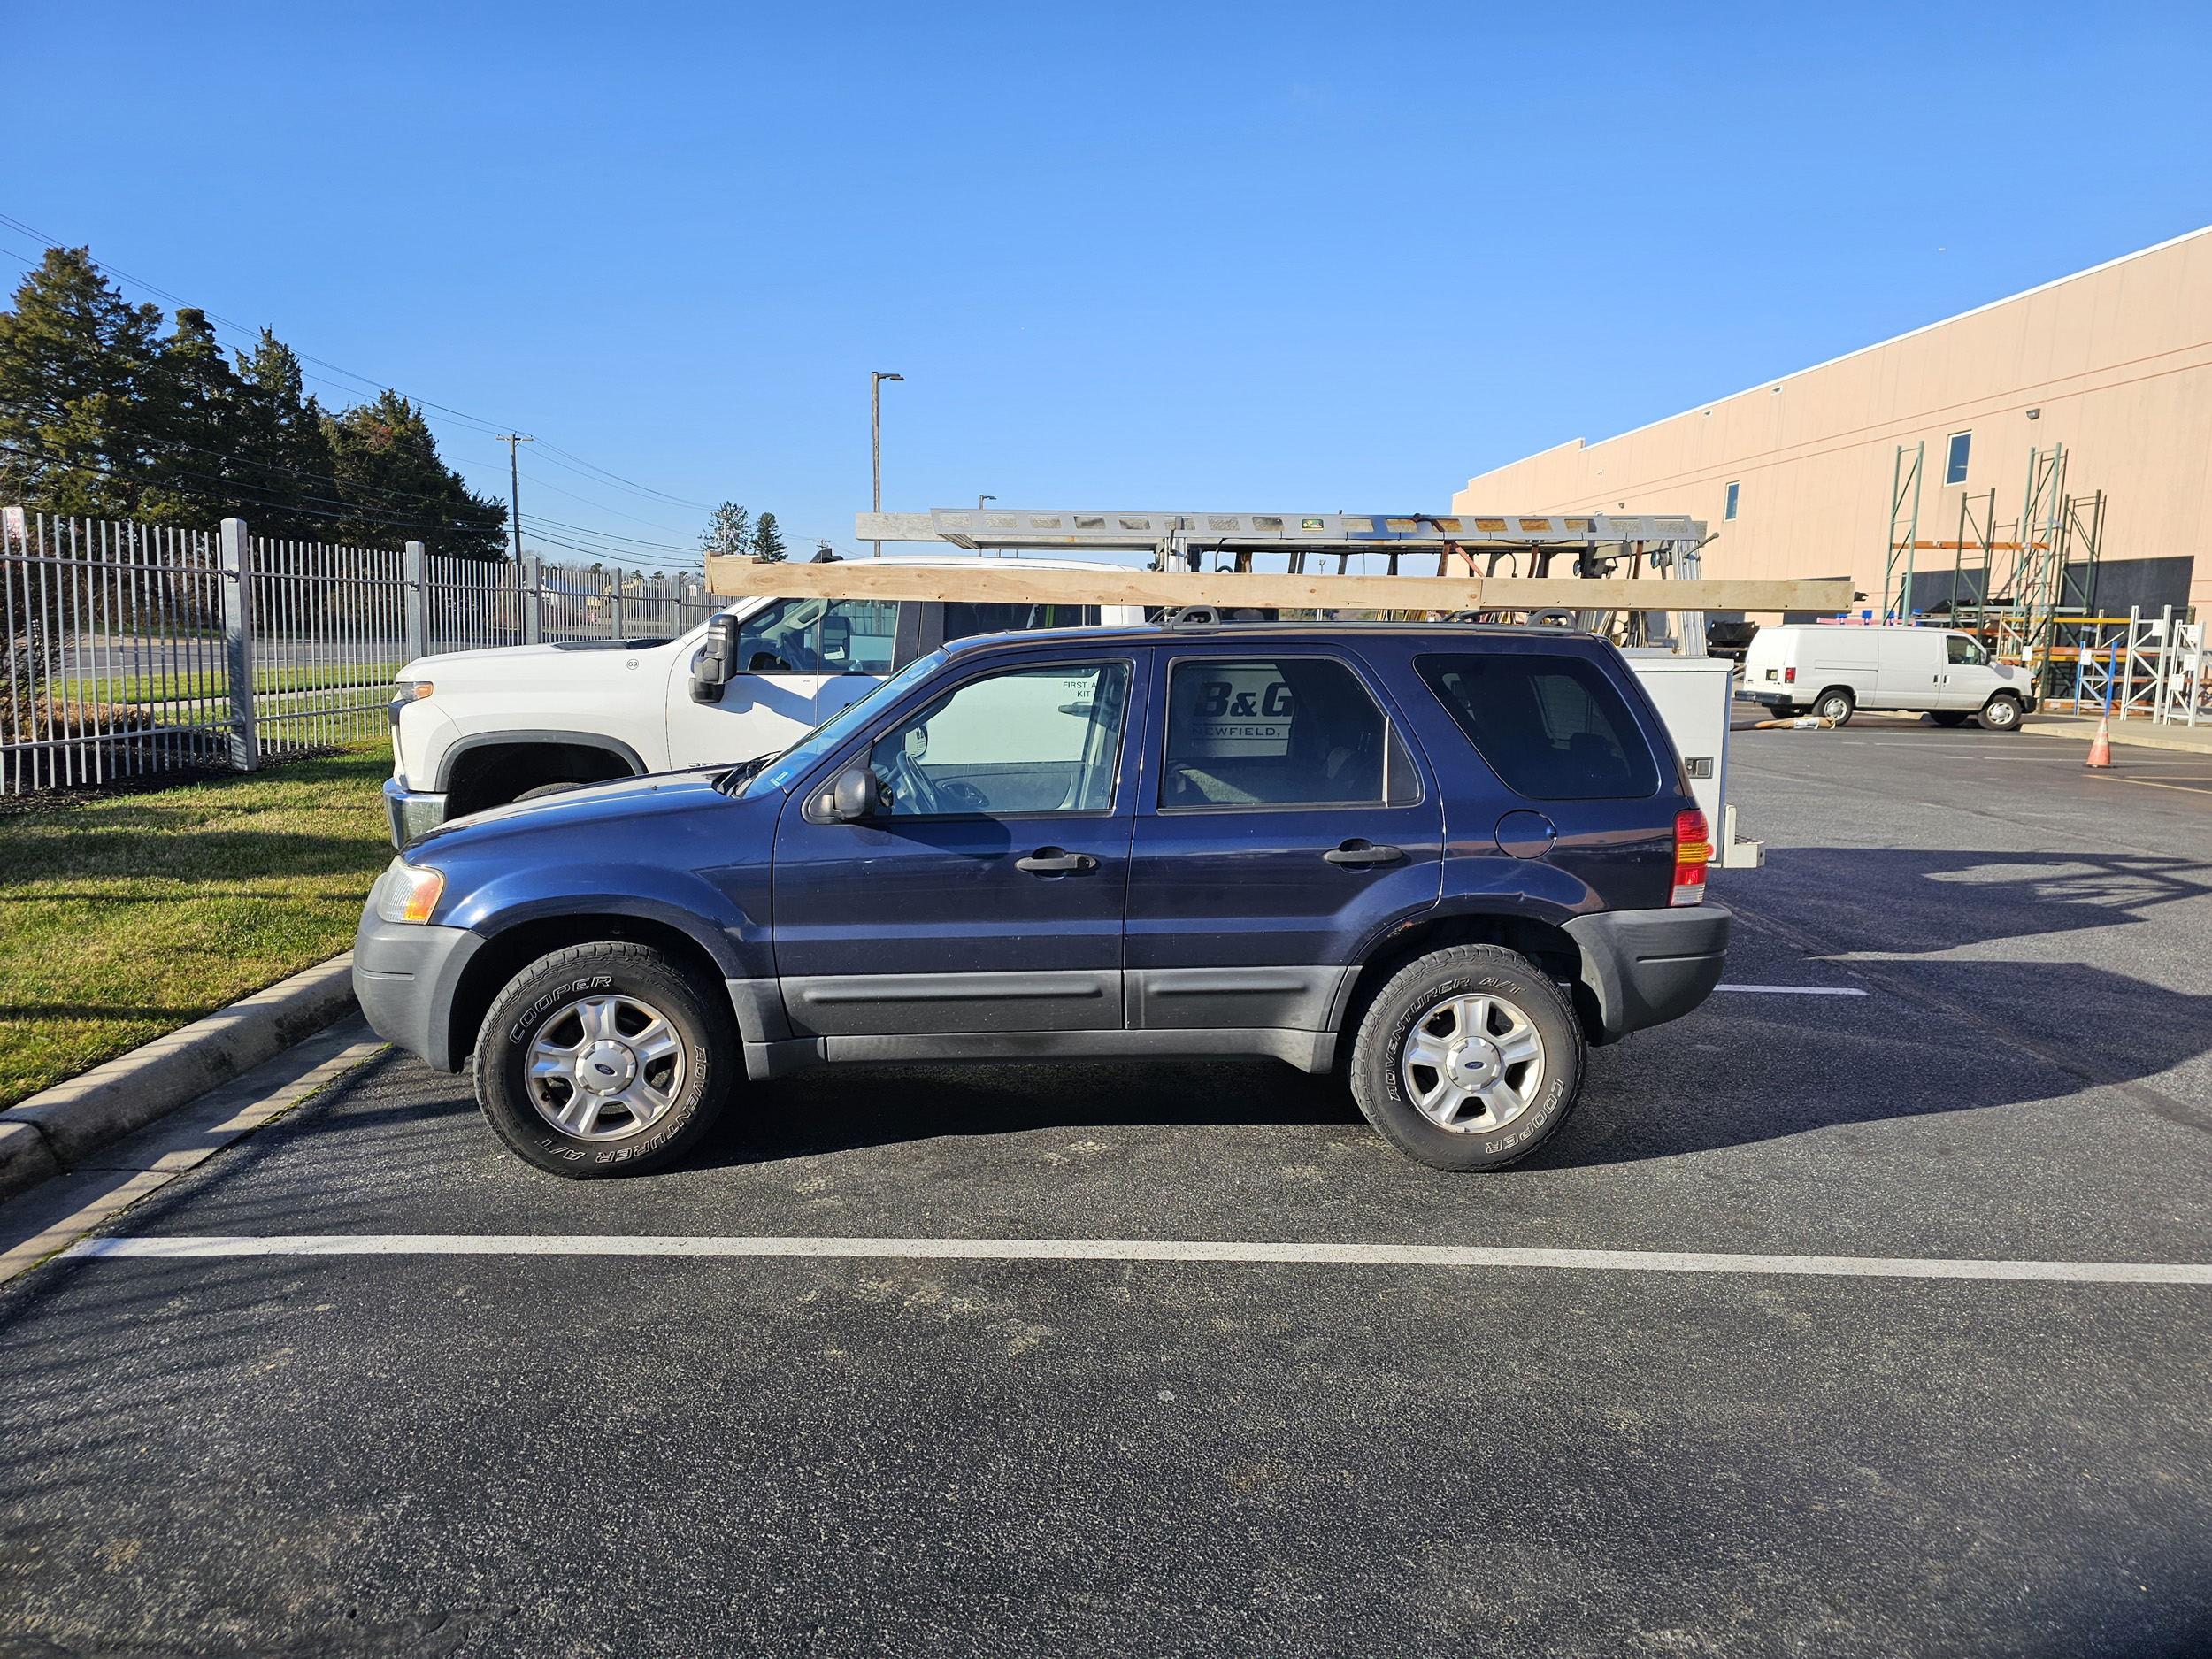
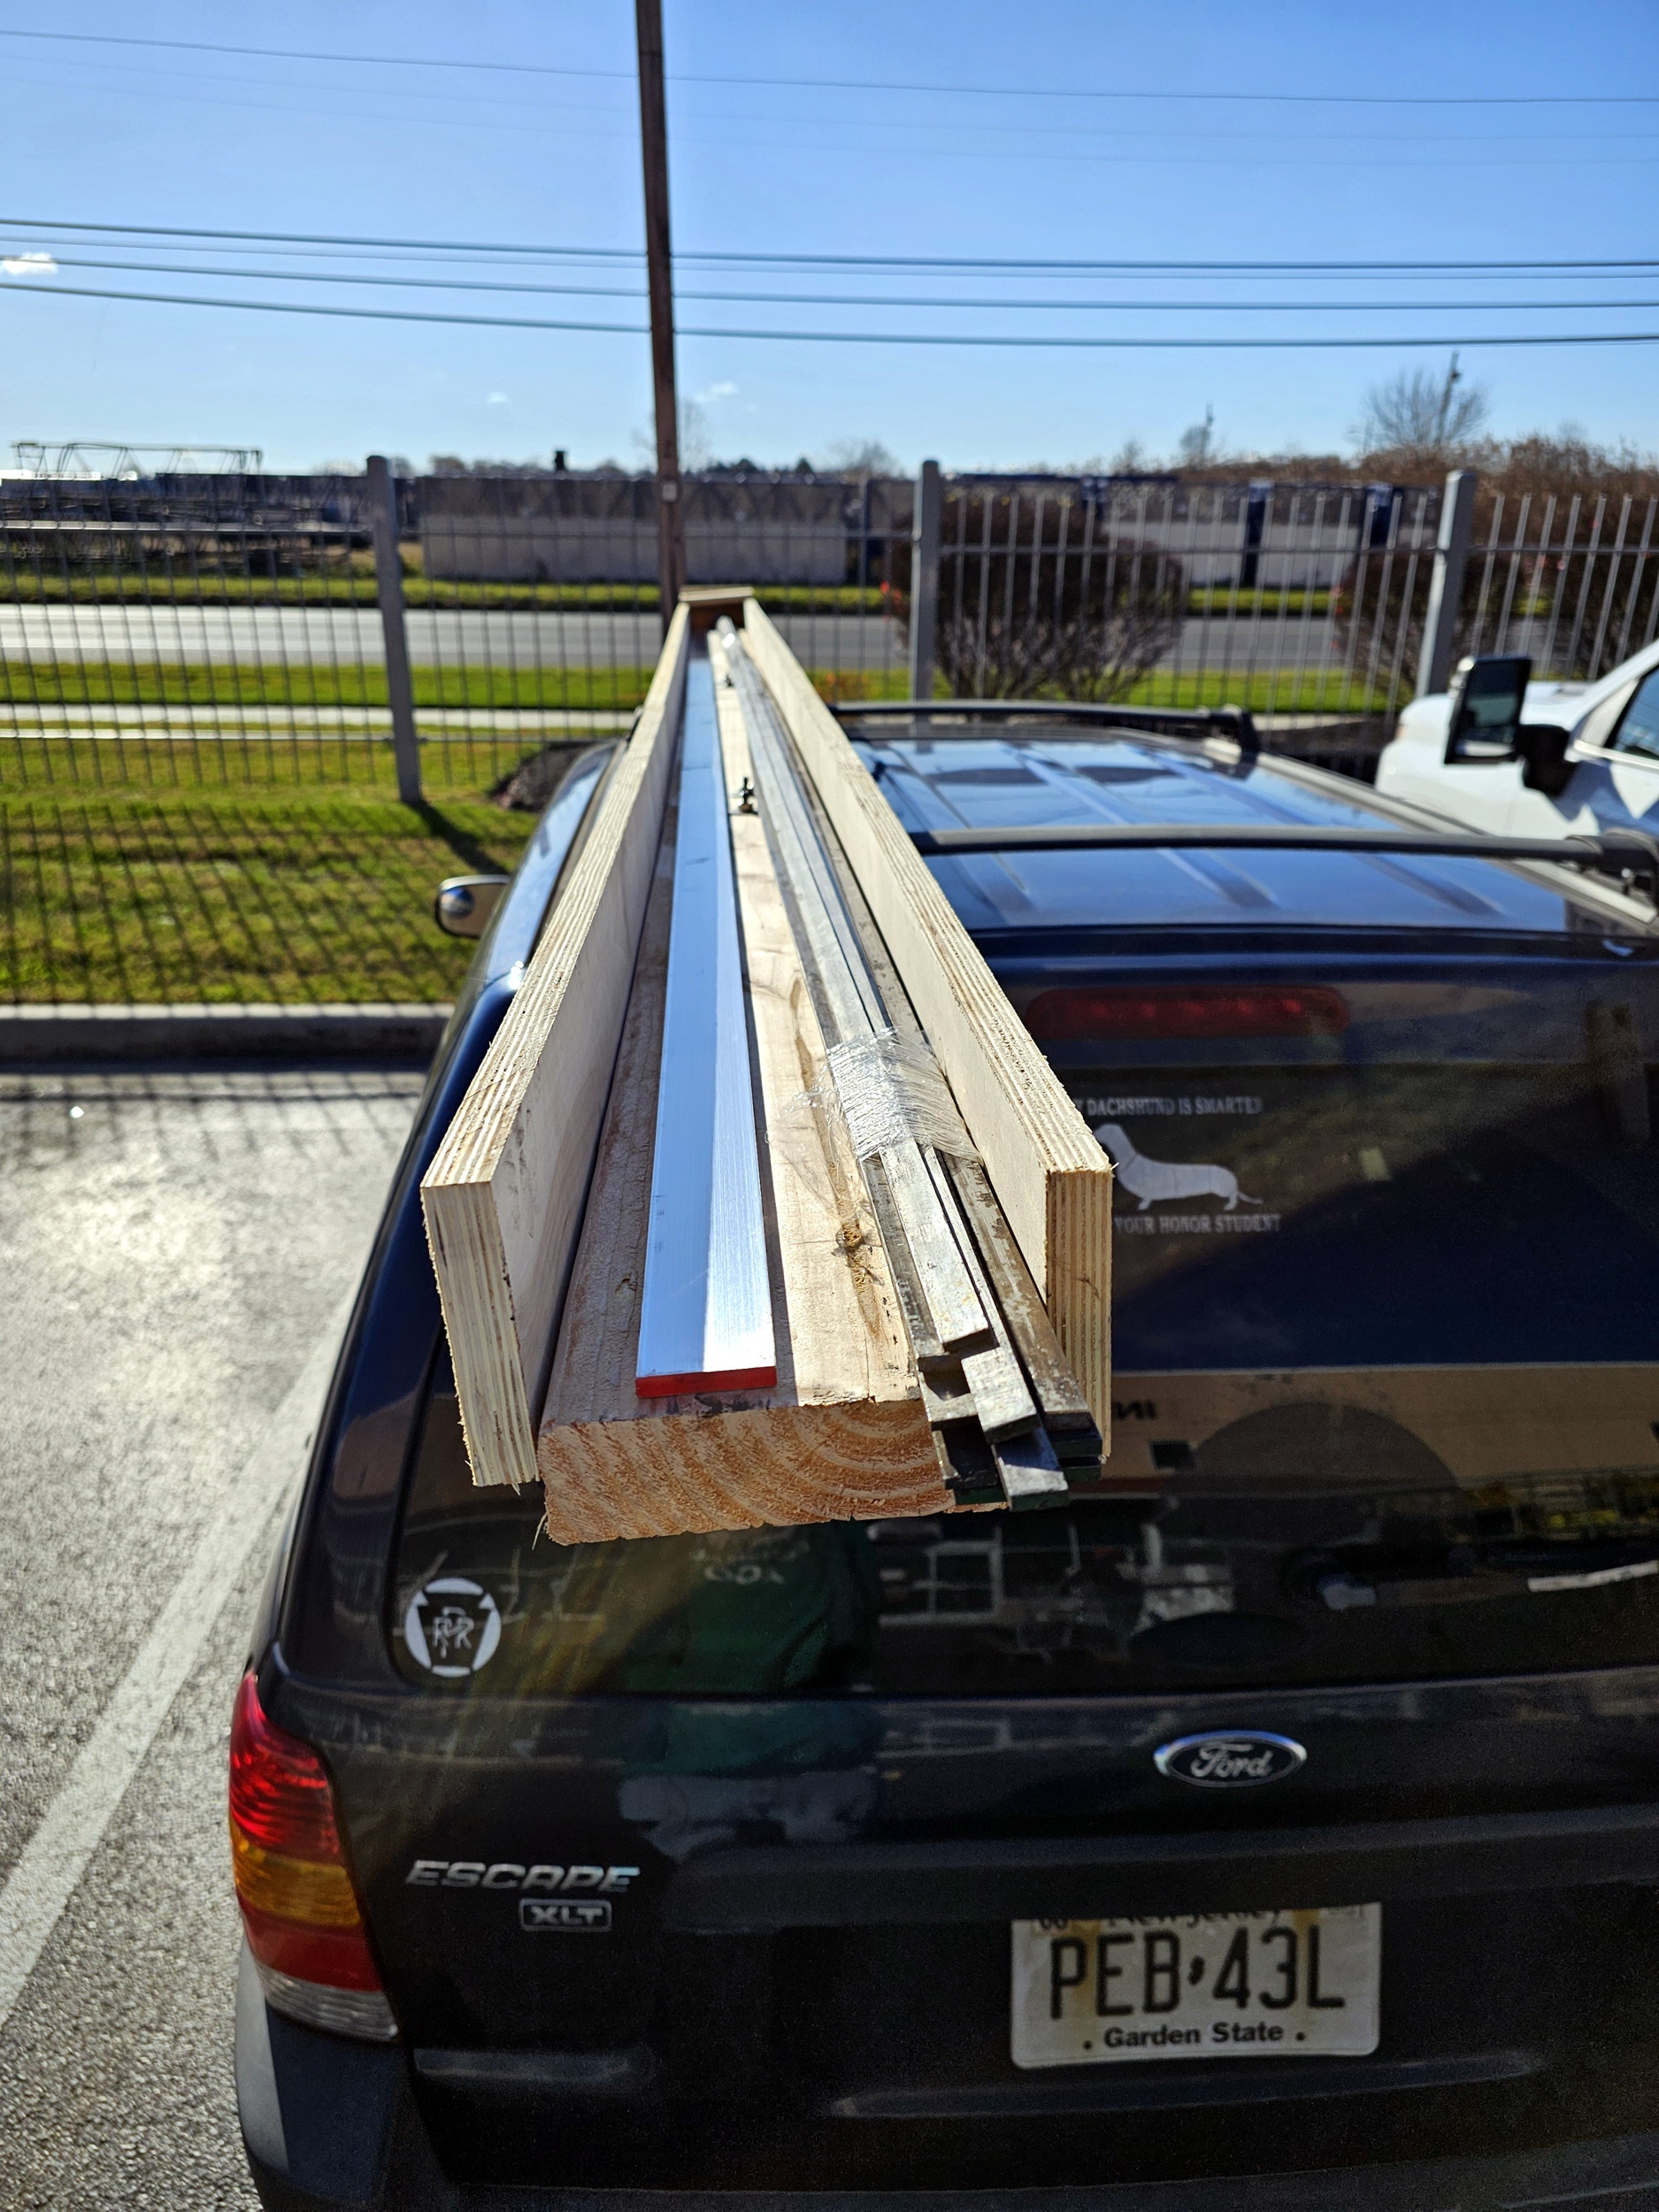
So
I wanted to get some steel flat bar. But the flat bar is in 12' lengths and Fazzio will not cut anything in half anymore. I had to make
a rack to get the steel and bolt to my roof rack. Not my most accurate creation
but it did not have to be. Just a 2 x 6 x 12 with sides I added. That came out
to be $45 at Home Depot before getting the steel.
I
got 3/16 x 1/2 cold rolled steel flat bar.
I
mounted shelf brackets to my garage wall. Now the rack is stored and the steel
is stored in it. A double win. I now have to cut the
bars up into about 5" long pieces on my milling machine. It will be about
20” of steel per car.
This is the level of obsession of doing
whatever it takes to get the job done for the trains but really this is all
just a normal day for me.
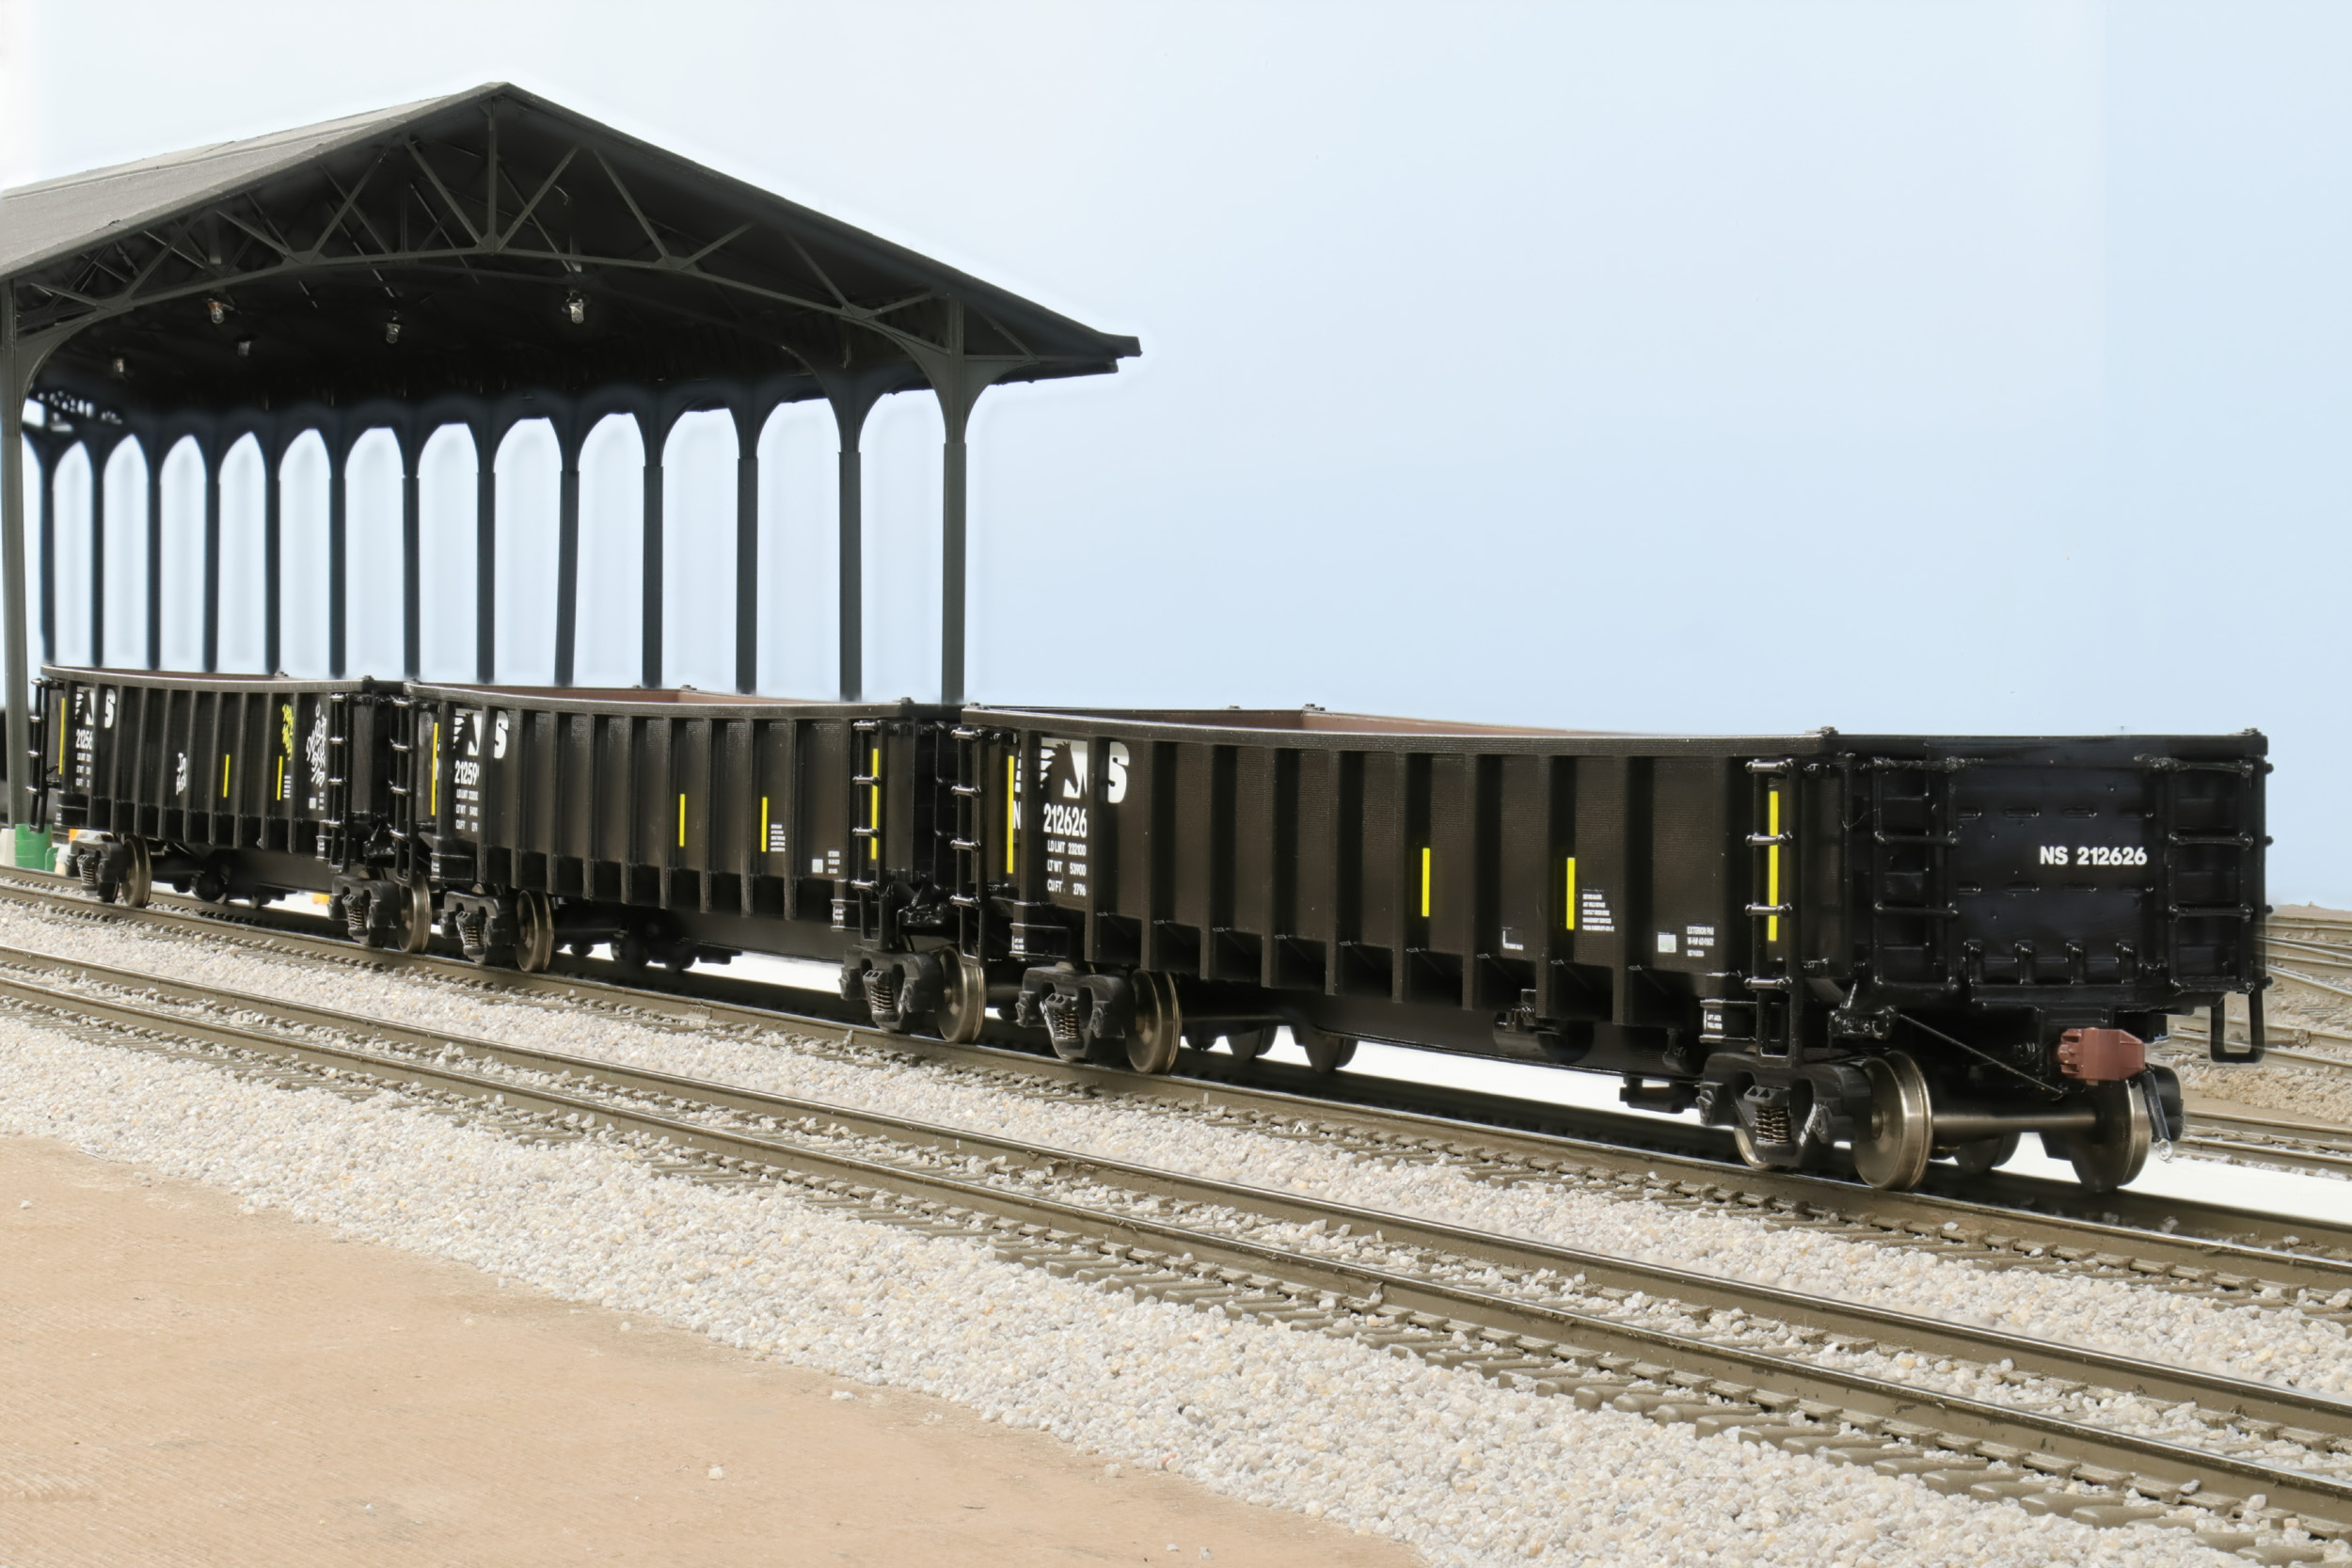
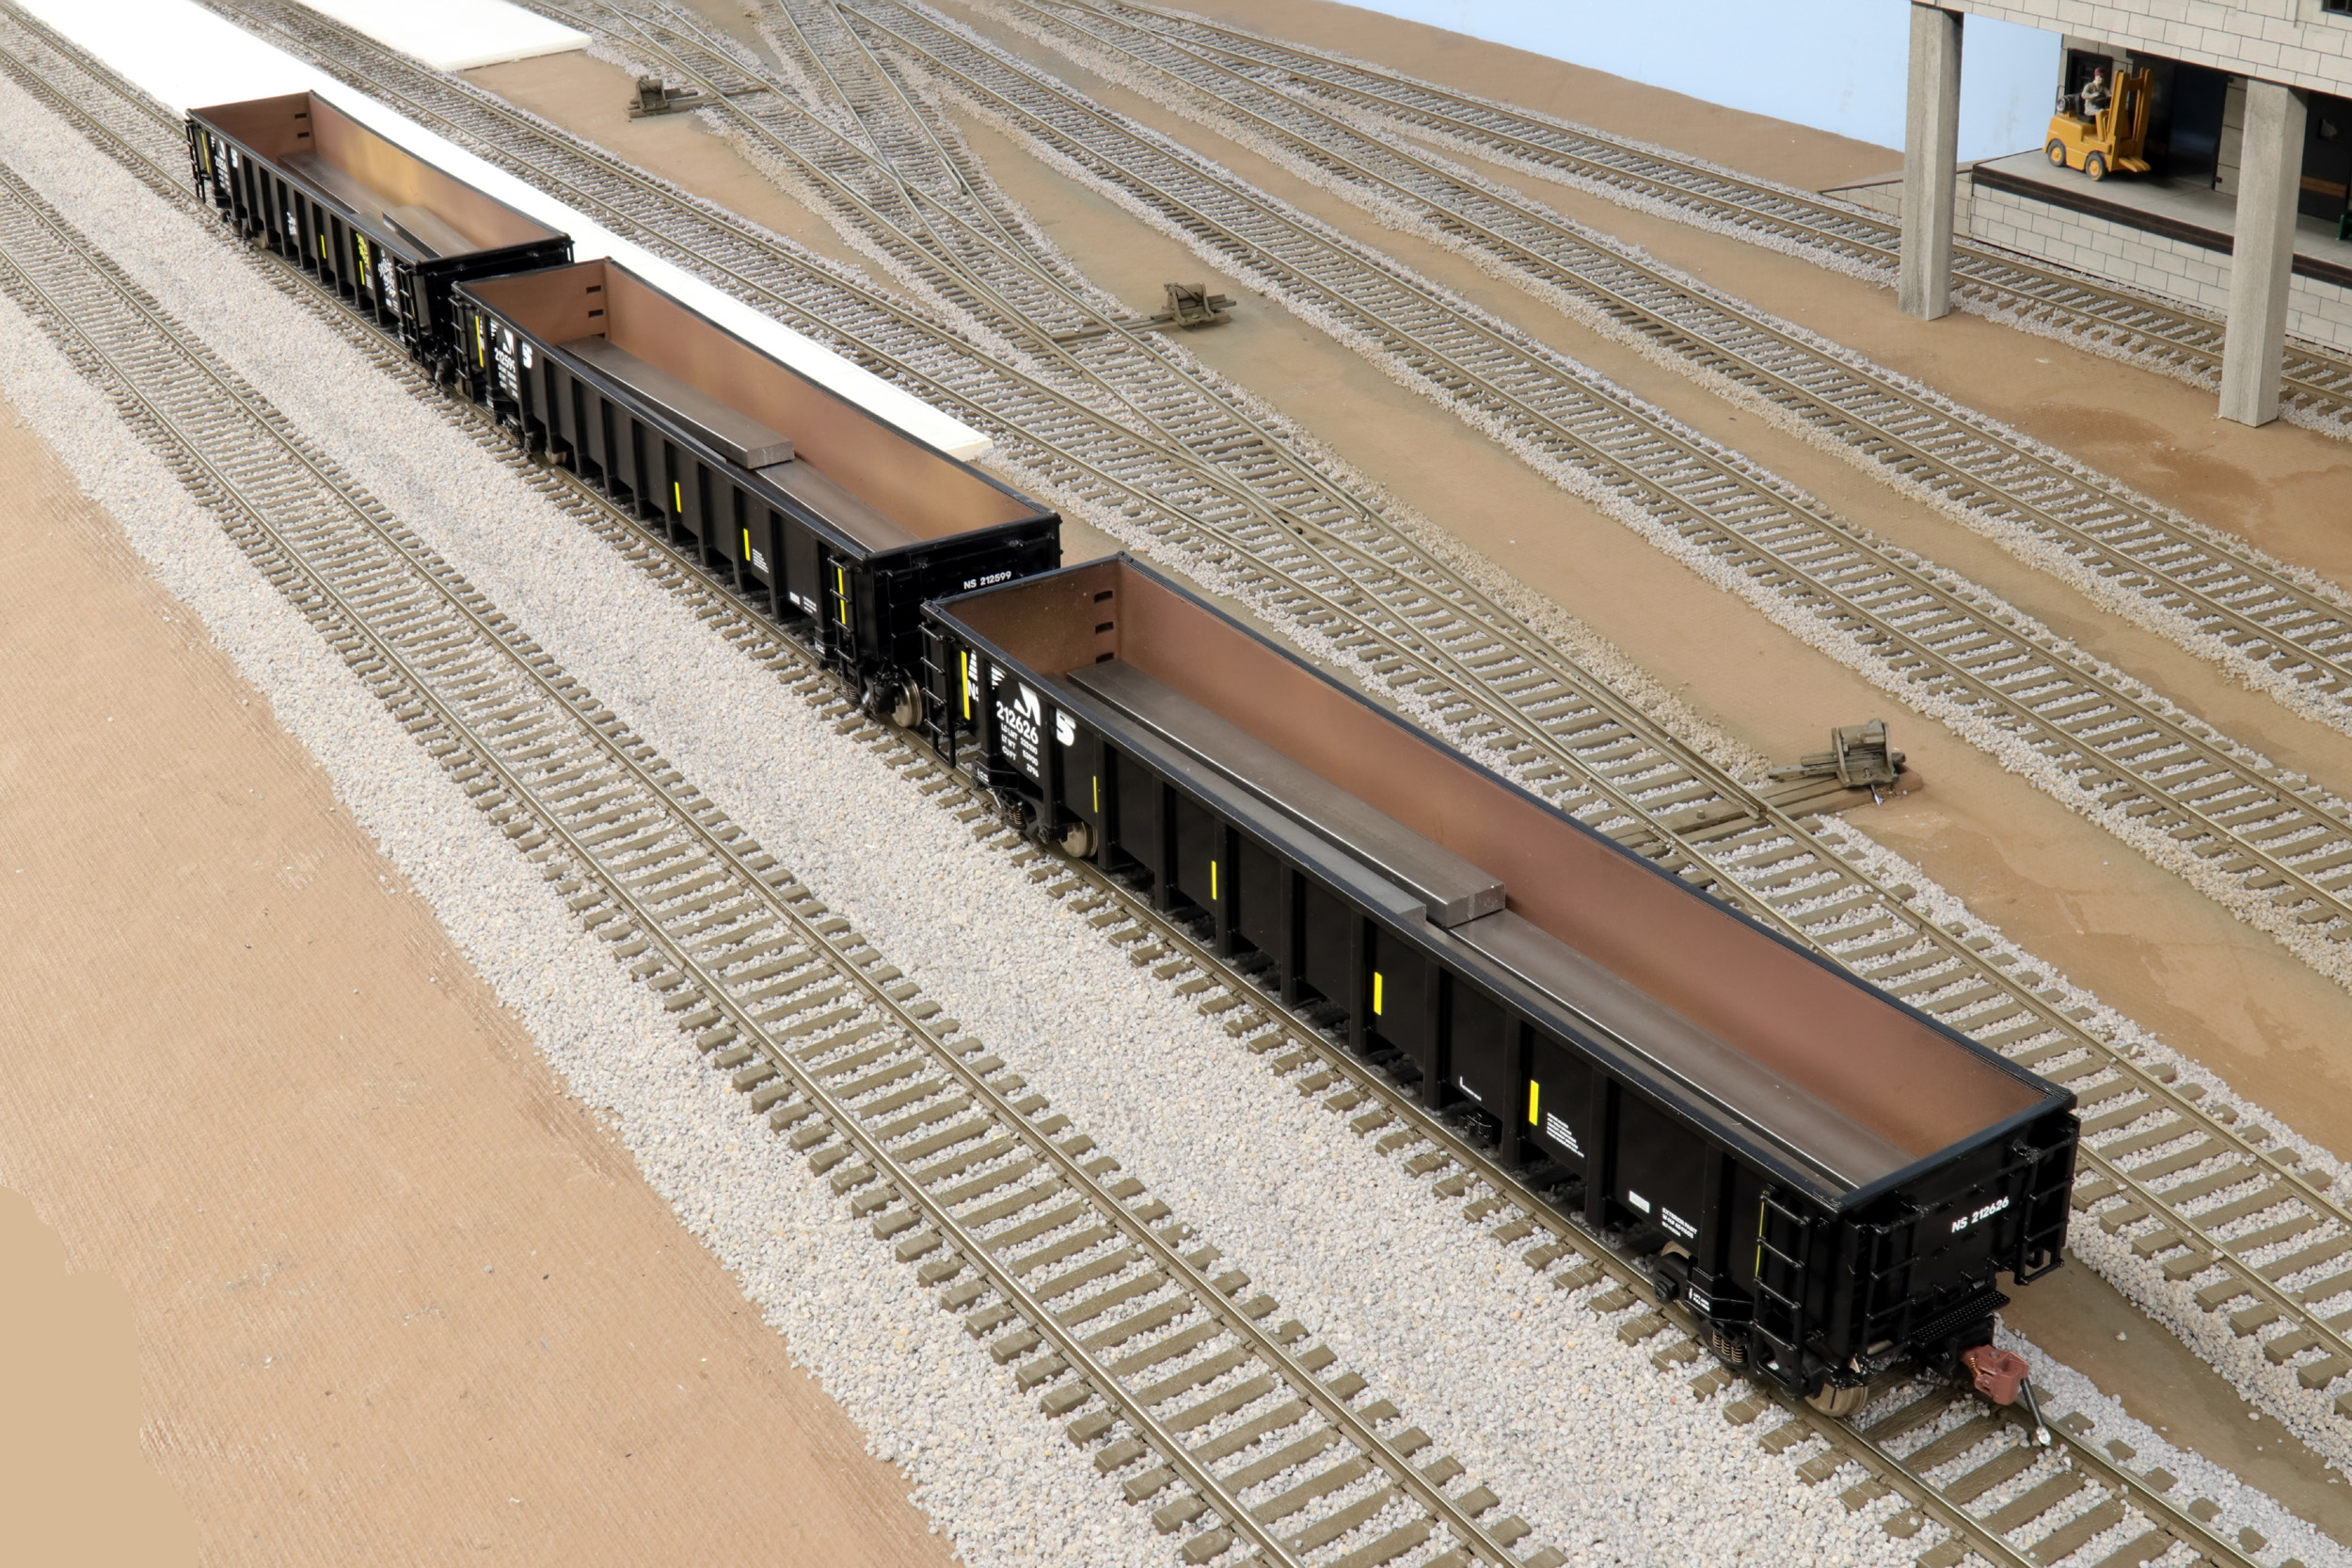
Completed
11-31-25
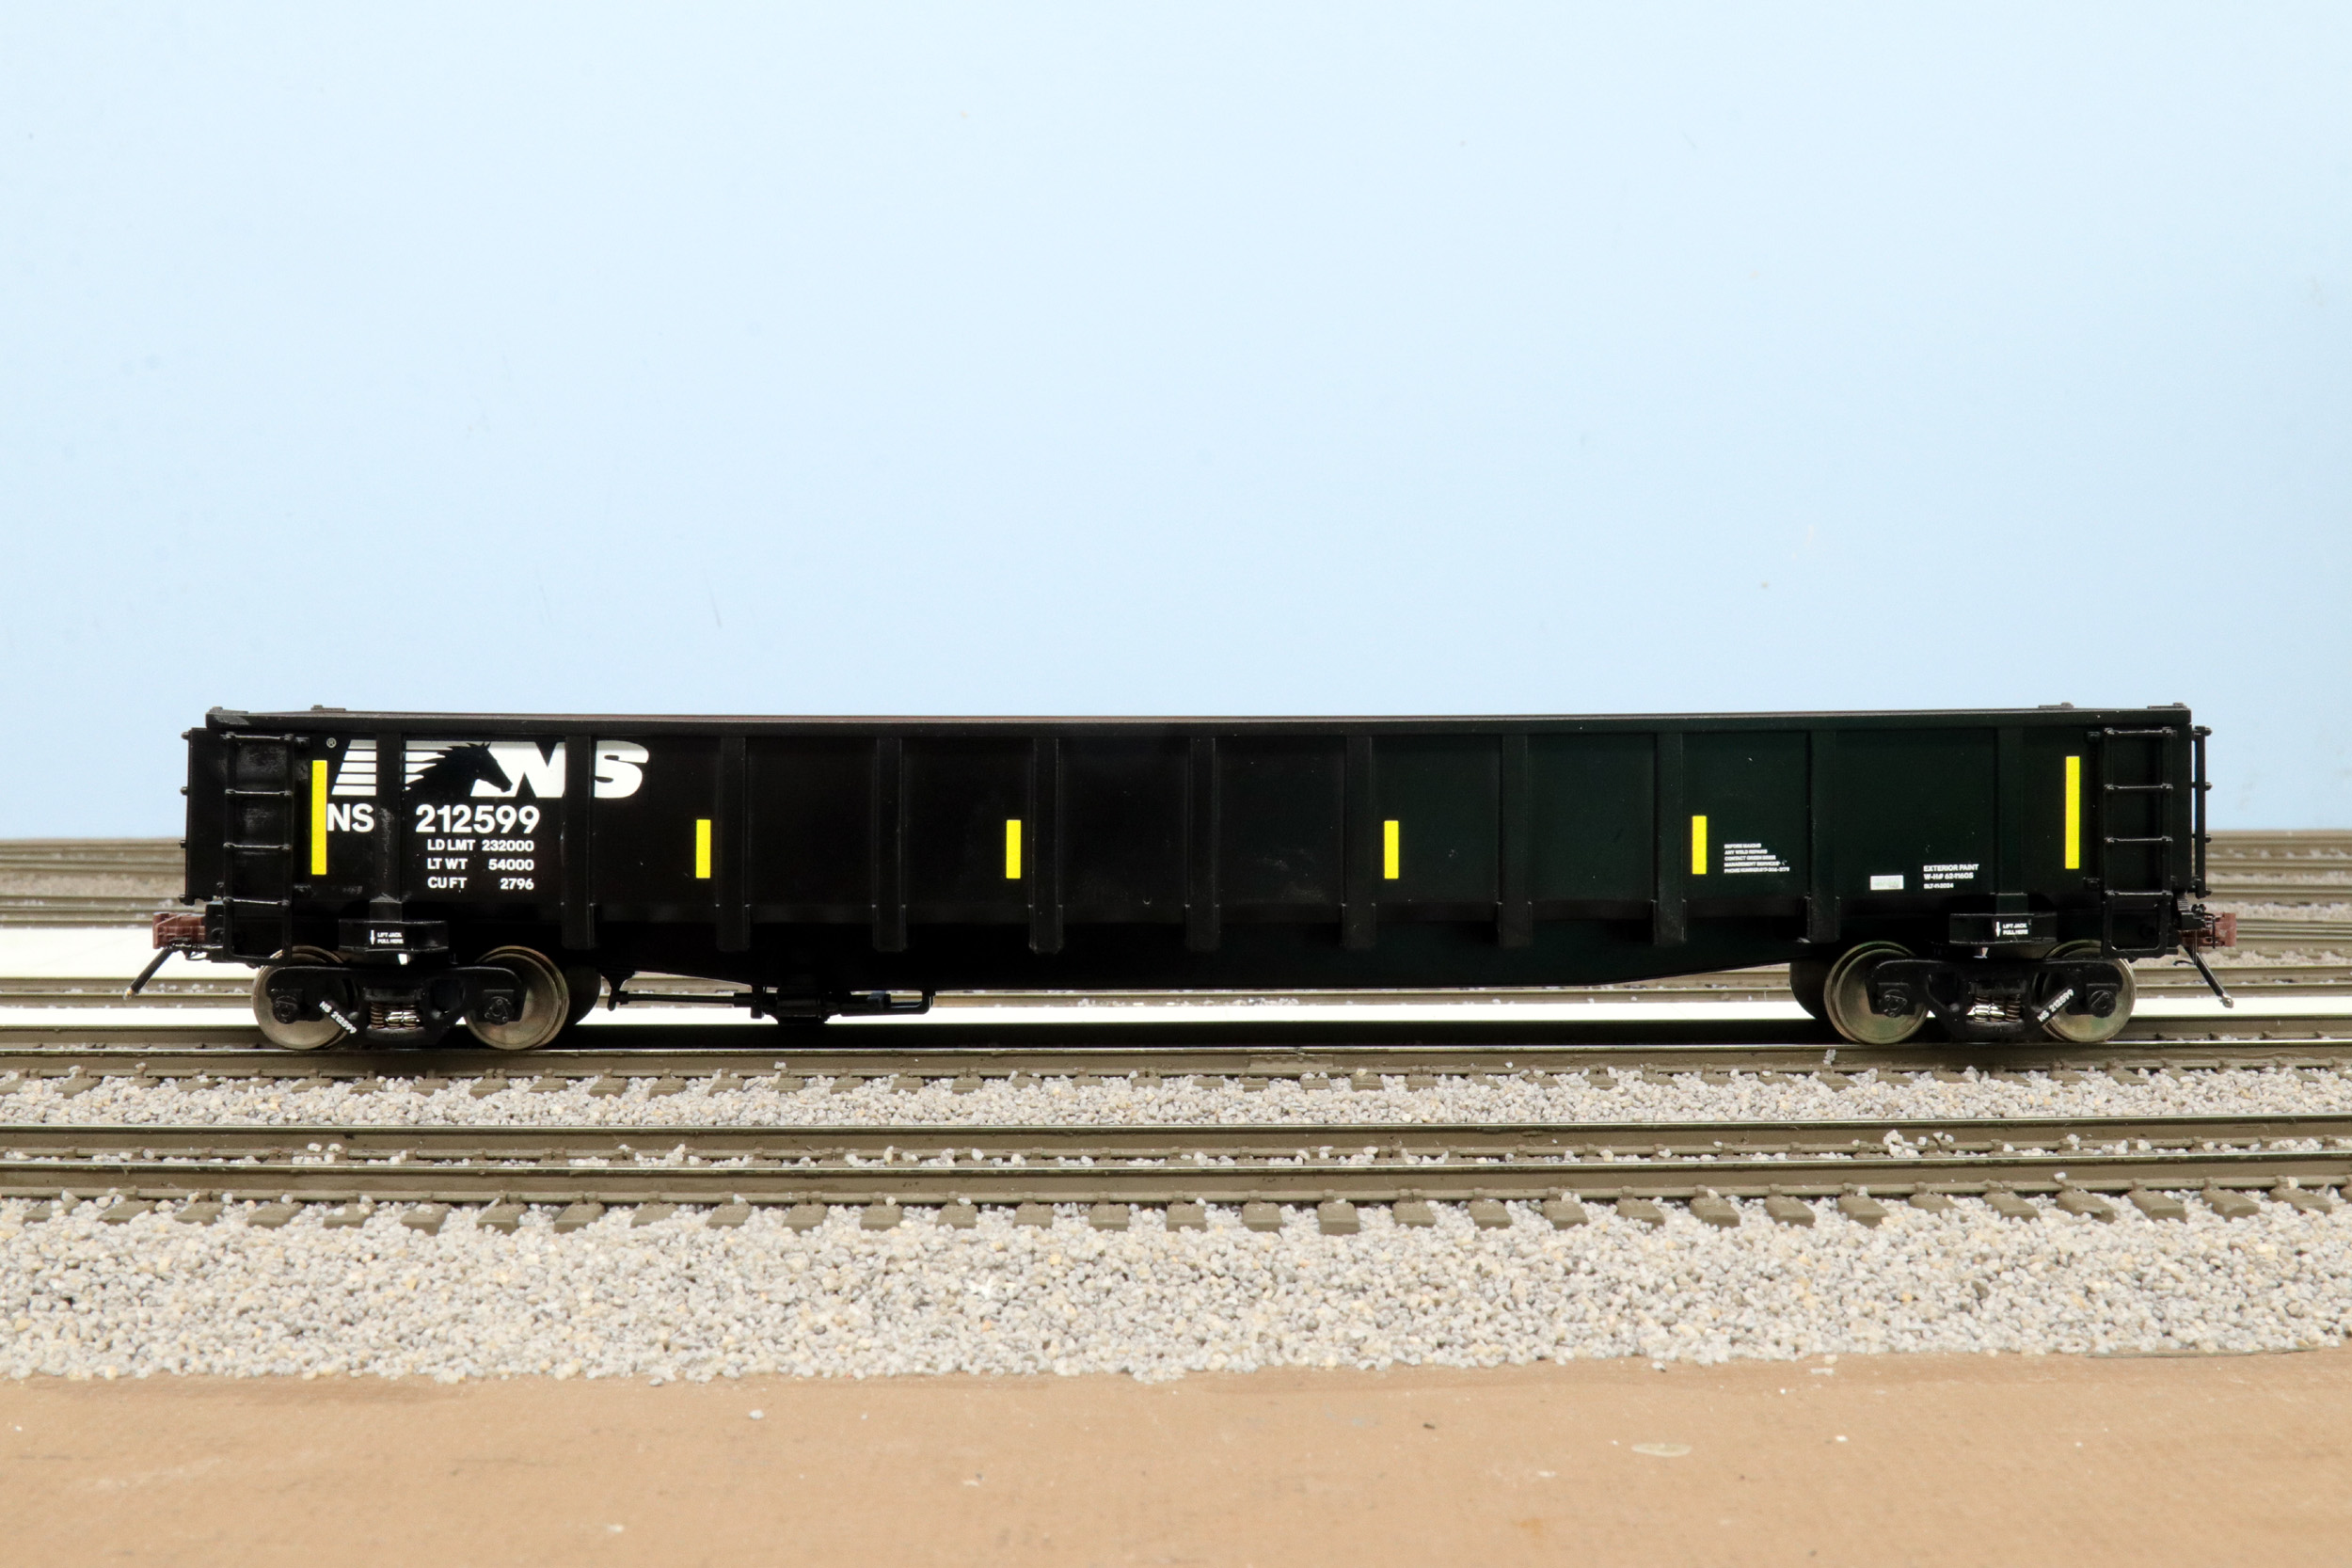
I got 3 cars “completed” on 11-31-25. This project was massively
more time consuming than I ever imagined. It is my “biggest” project in a long
time. I got 18 cars numbers made in the decals. The goal is to make this into a
unit train. Even with the new resin the cars slightly warped. That completely annoyed
me. I am getting a new generation 3D printer in early 2026 that promises no layering. I may pick this up again to make more
cars once I get the new printer figured out. The warping issue may stop me from
making all 18 cars. That is hugely disappointing to me. But 3 are done for now with
a slight bow to them.
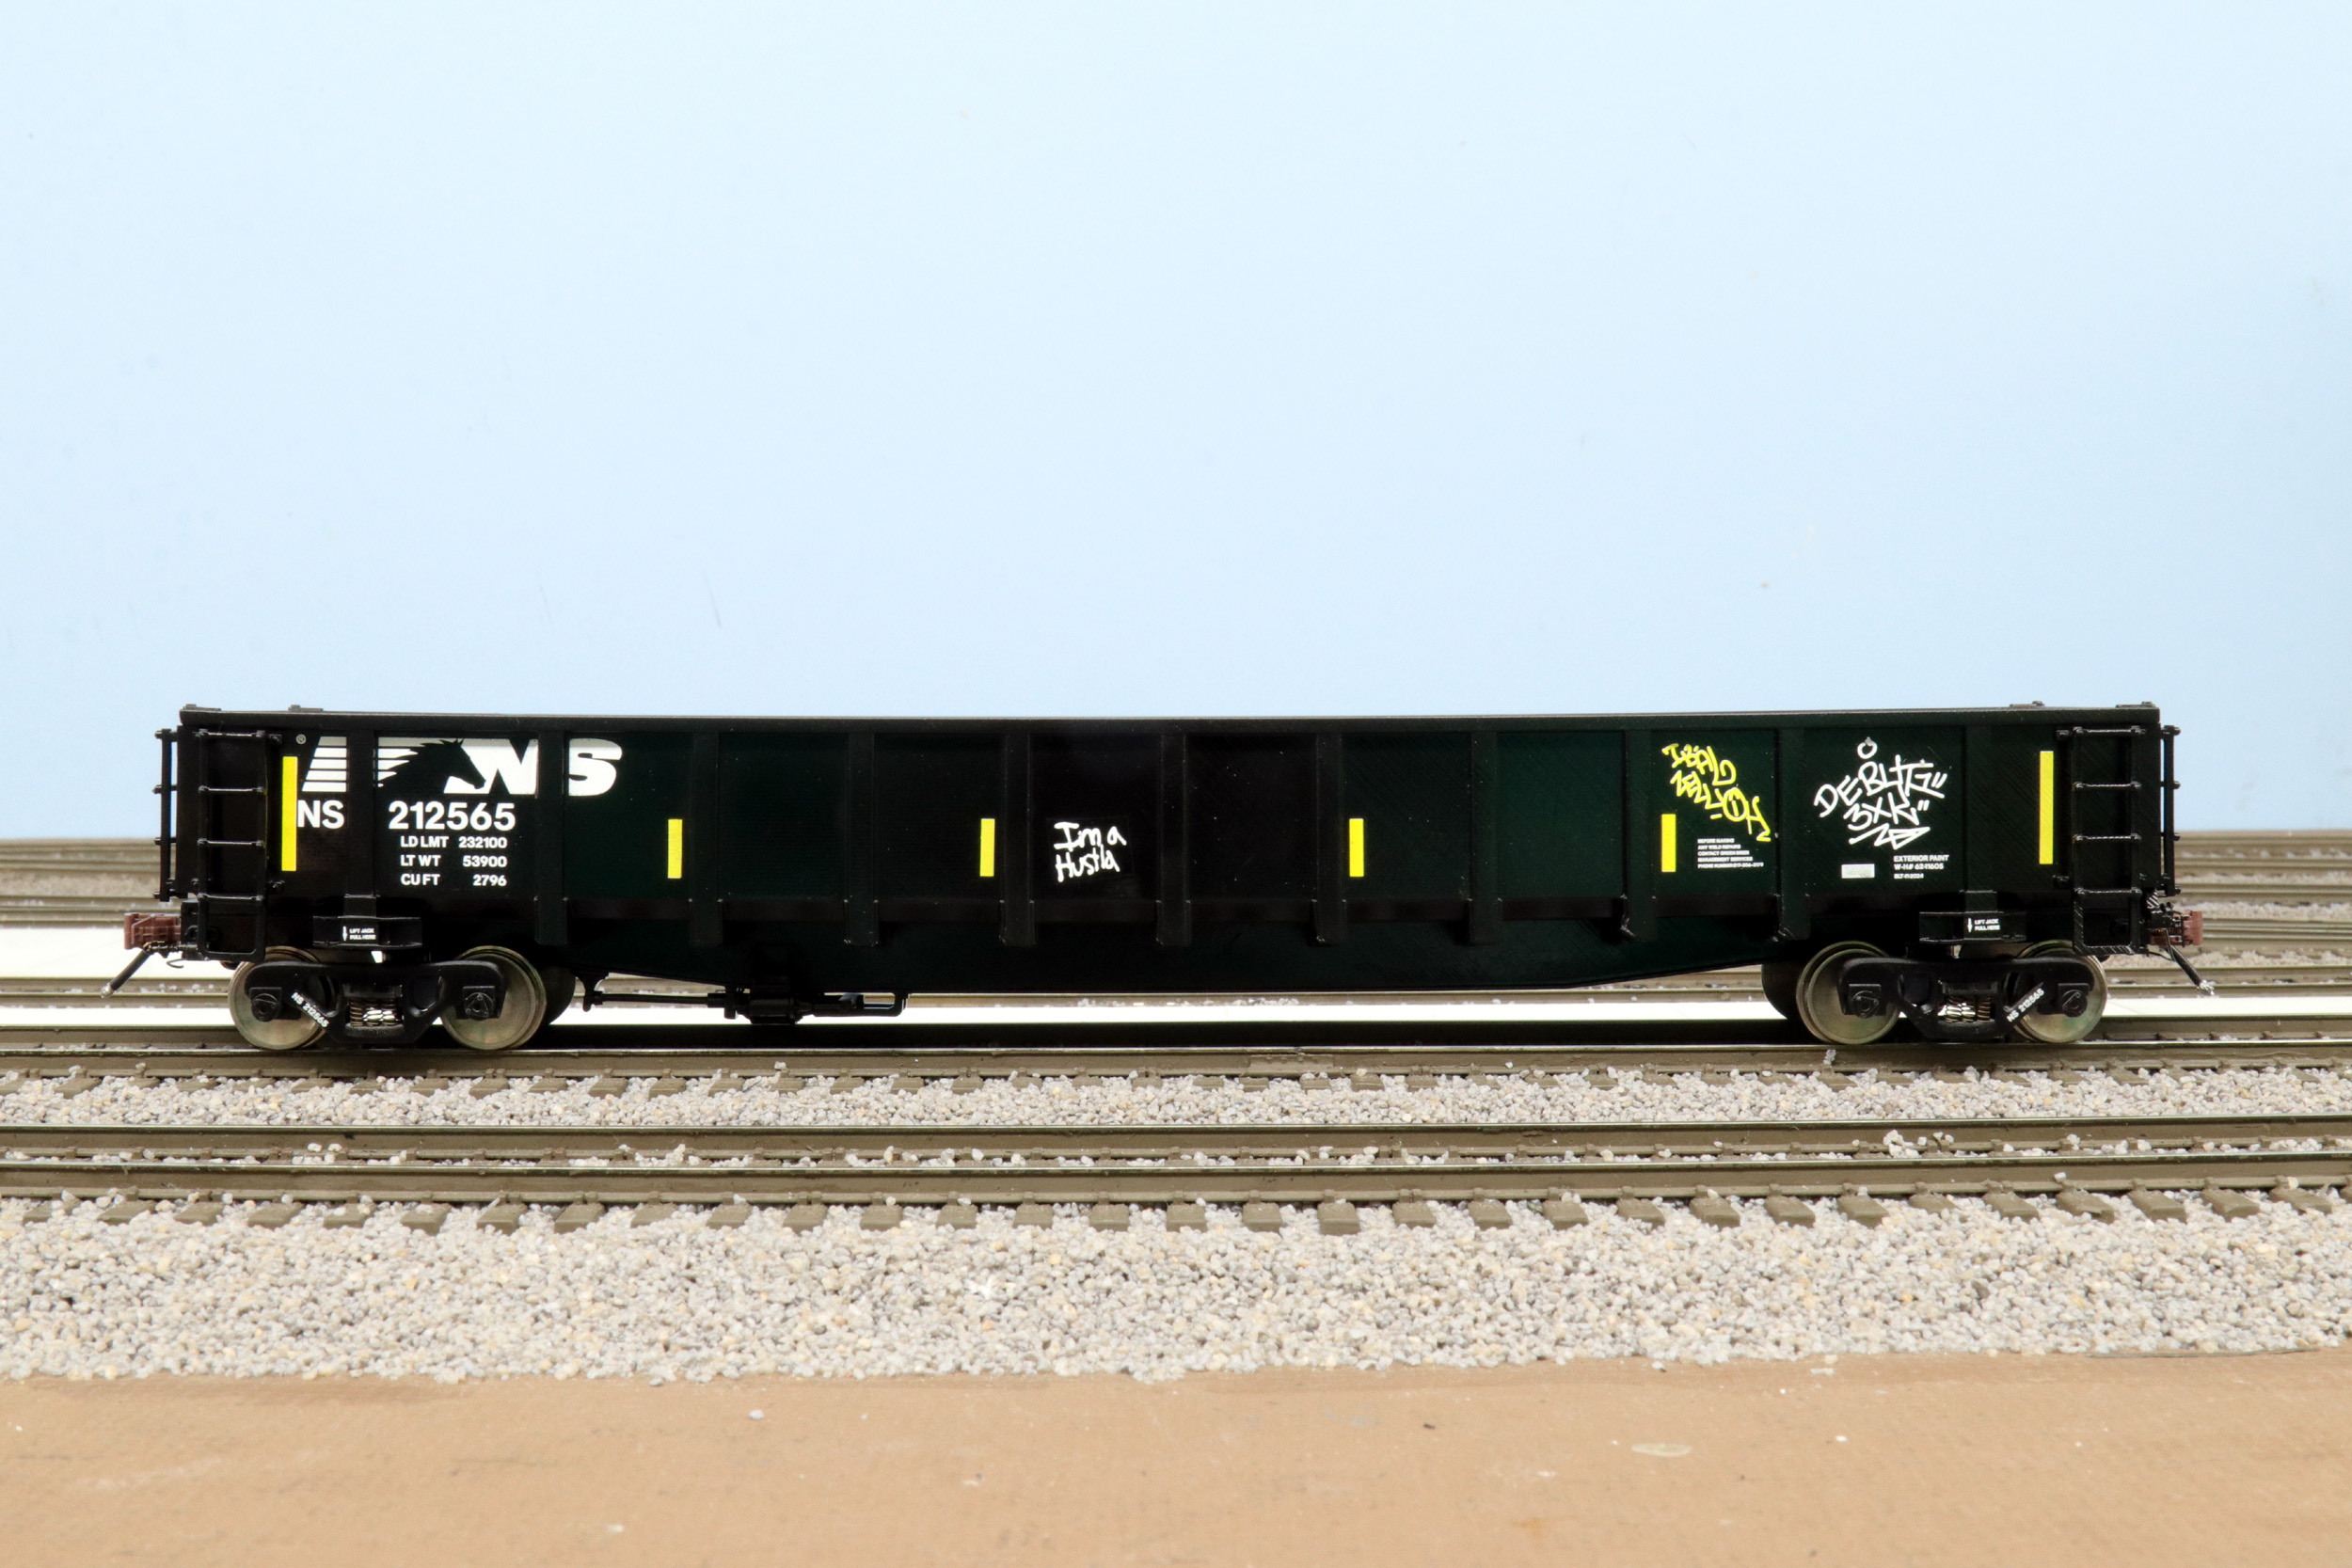
I will likely not show photos of every car I make. So far the build
date is correct for these 3 car numbers. Some cars will have graffiti. I added graffiti
to this car to help hide a significantly visible layering area.
All photos and content © Lanes Trains 2005-2026