|
|
This page is now dedicated the late Dave Bailey who passed 1-23-19. Dave was 1 of the pioneer “Modern” S Scale modelers in the early 1990s, and the reason I made this model. On 6-22-19 I went to the Ted Maurer Auction and bought some of his locomotives.
Added
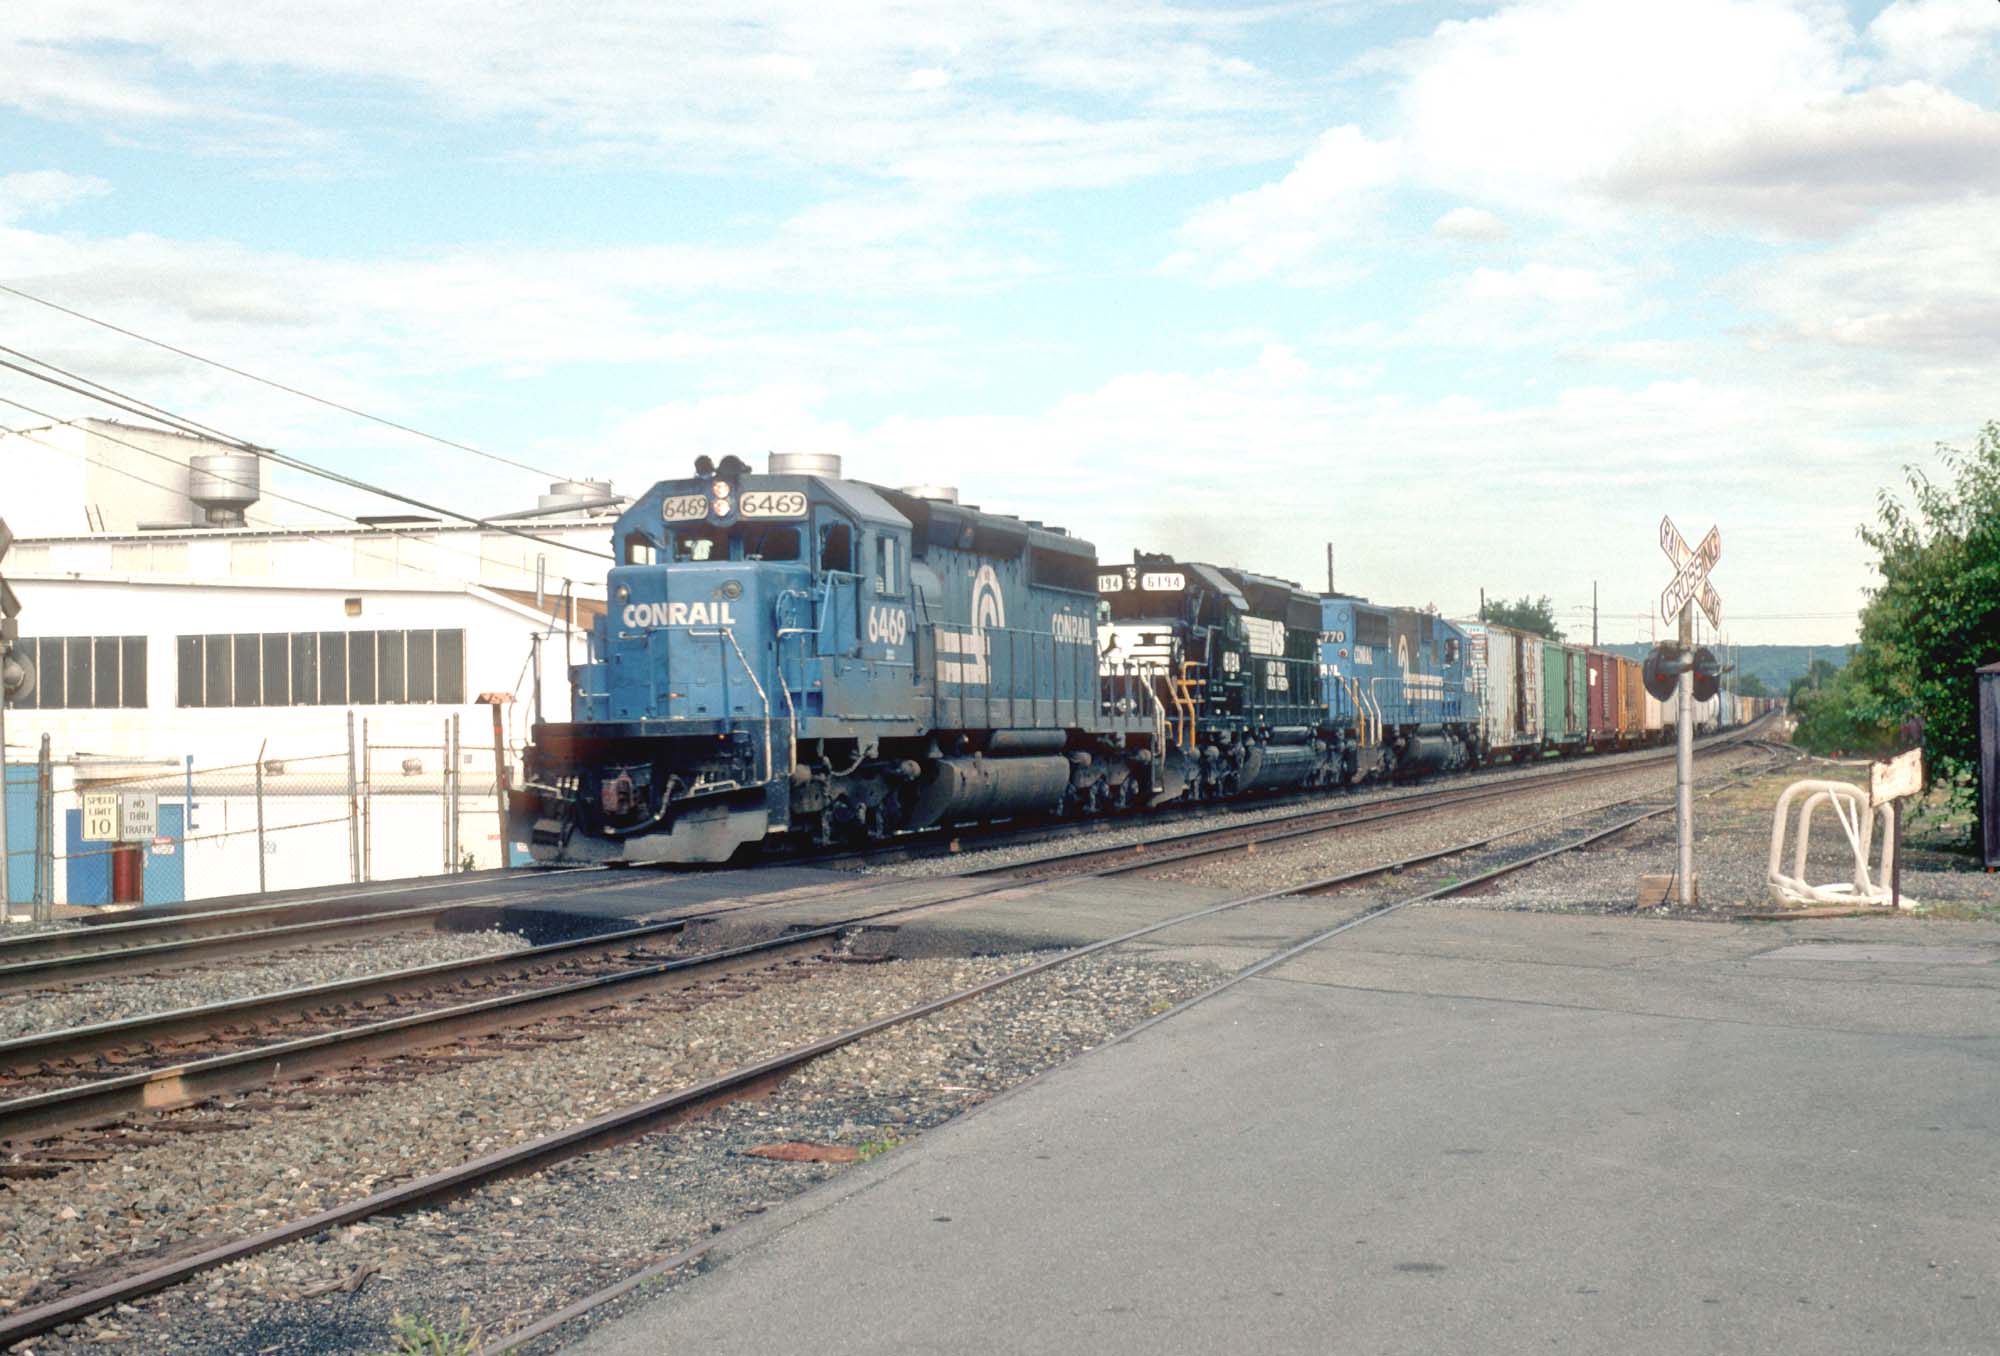
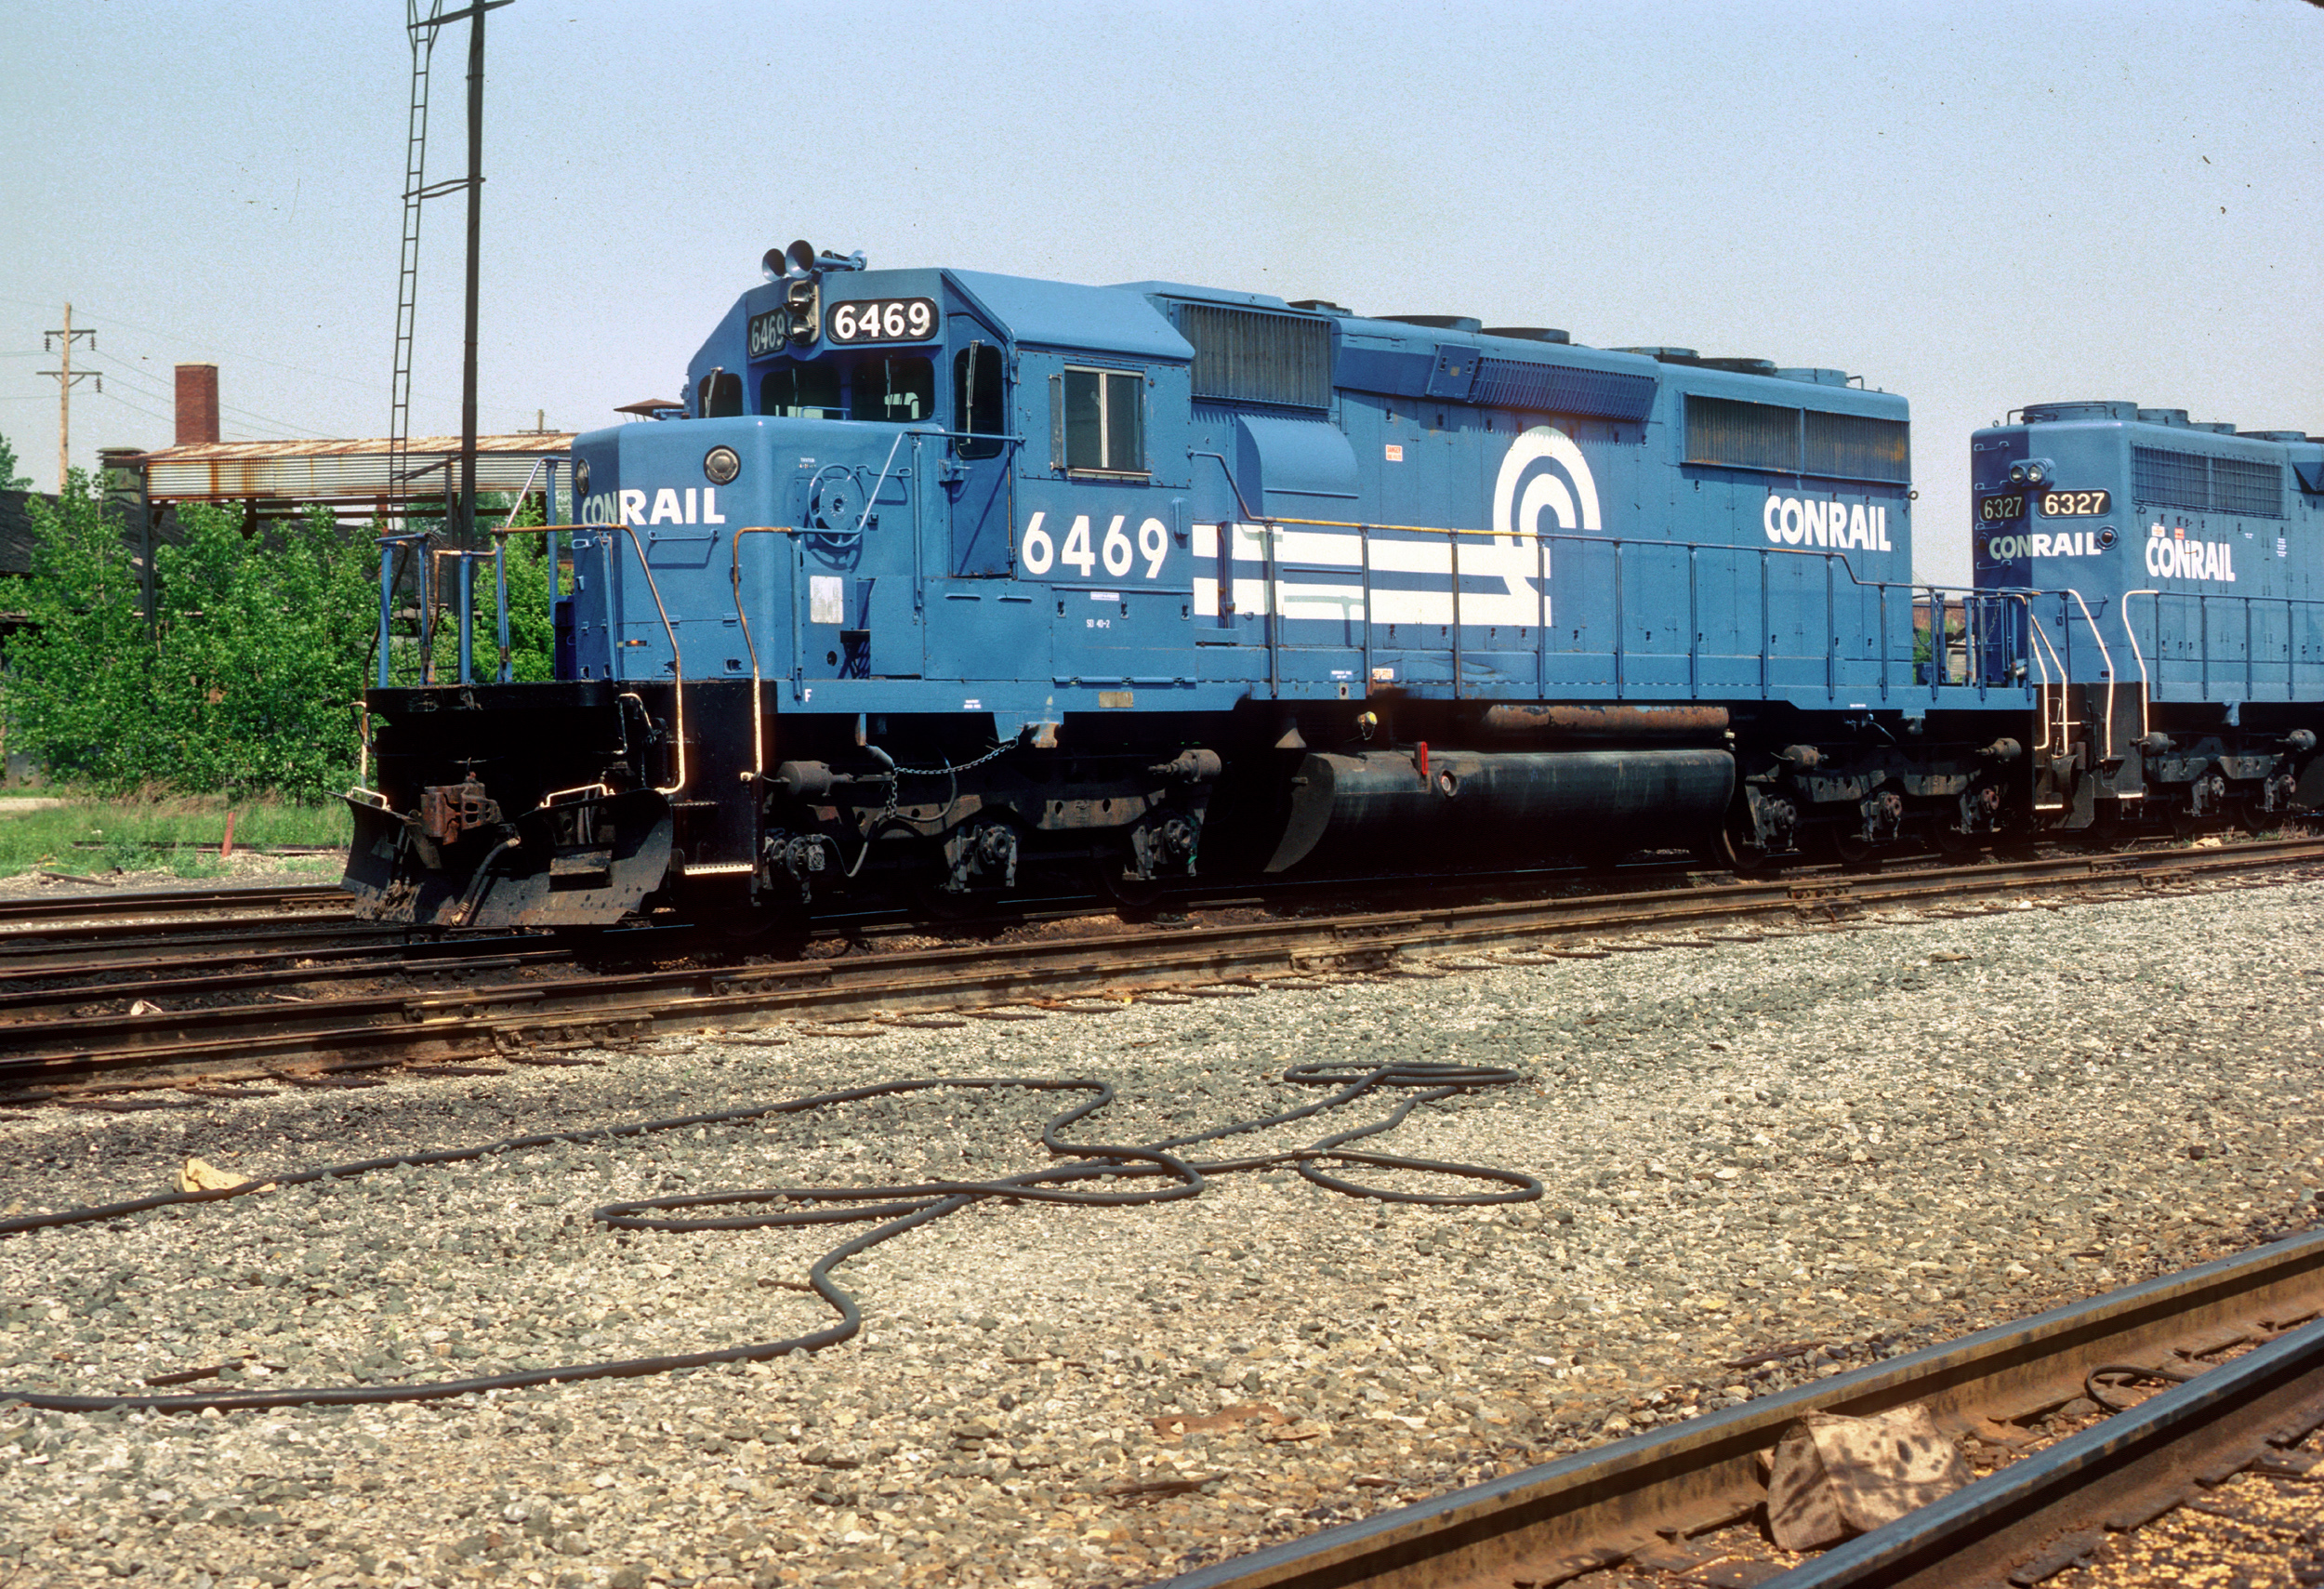
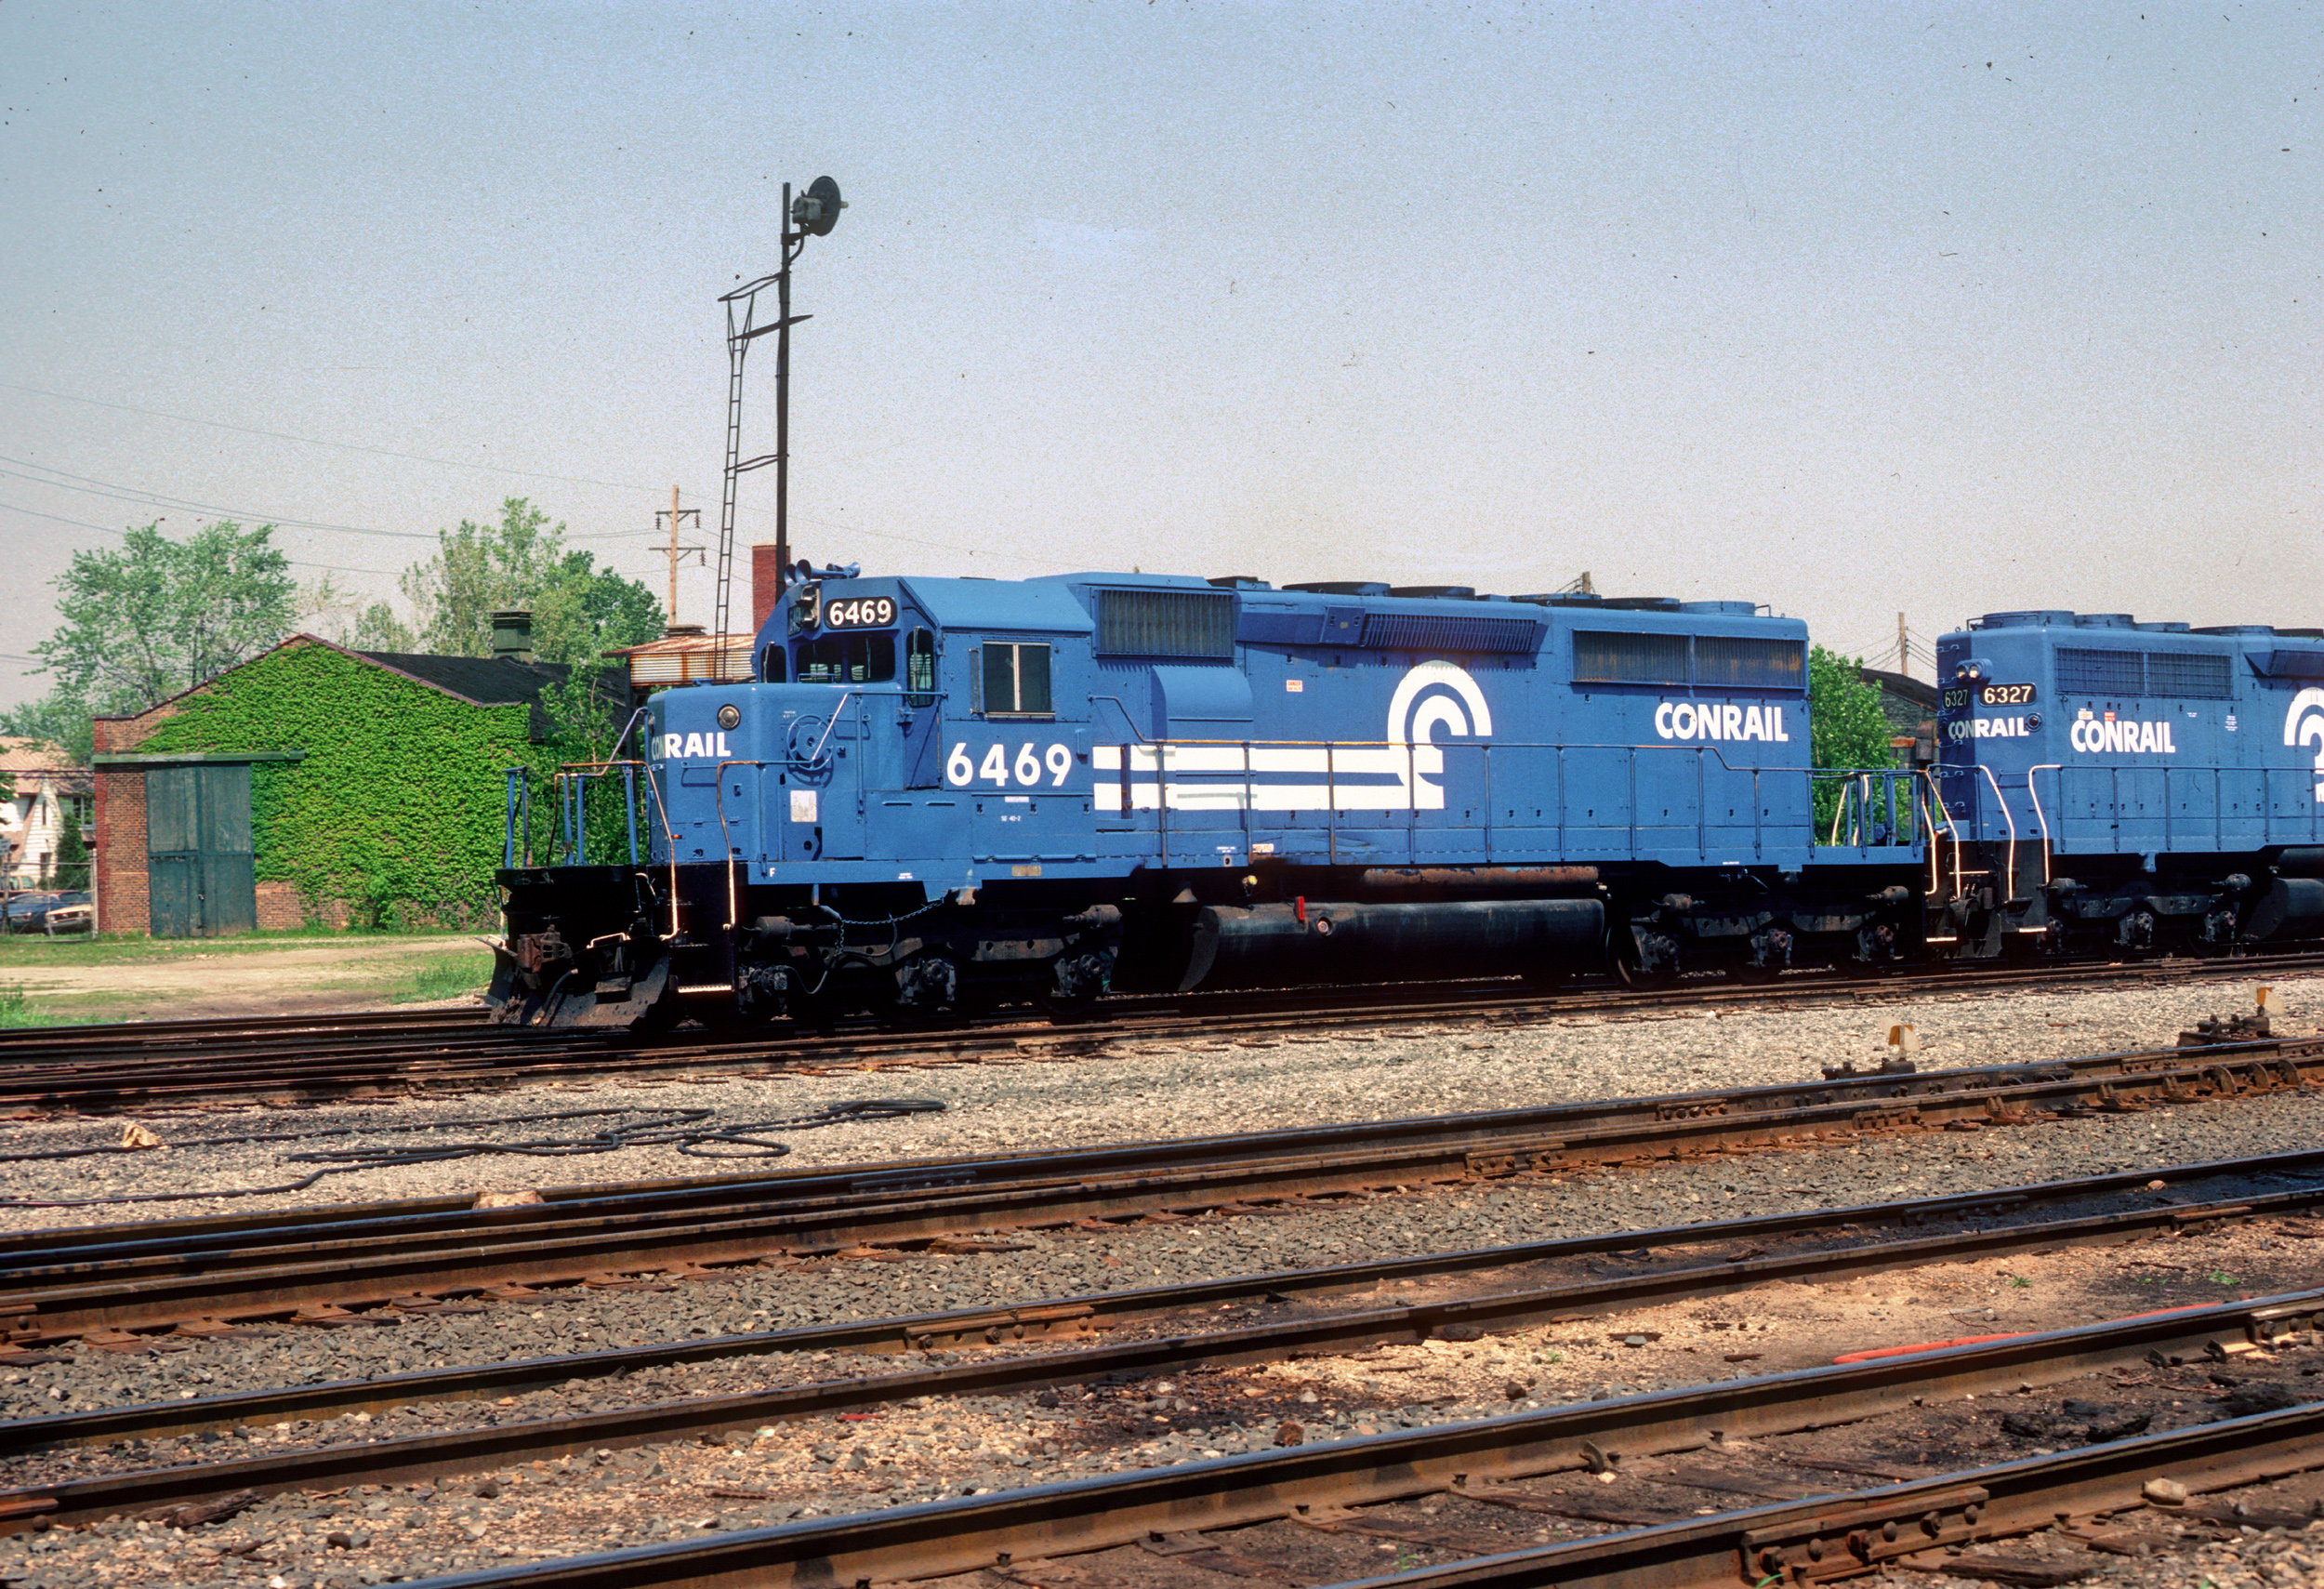
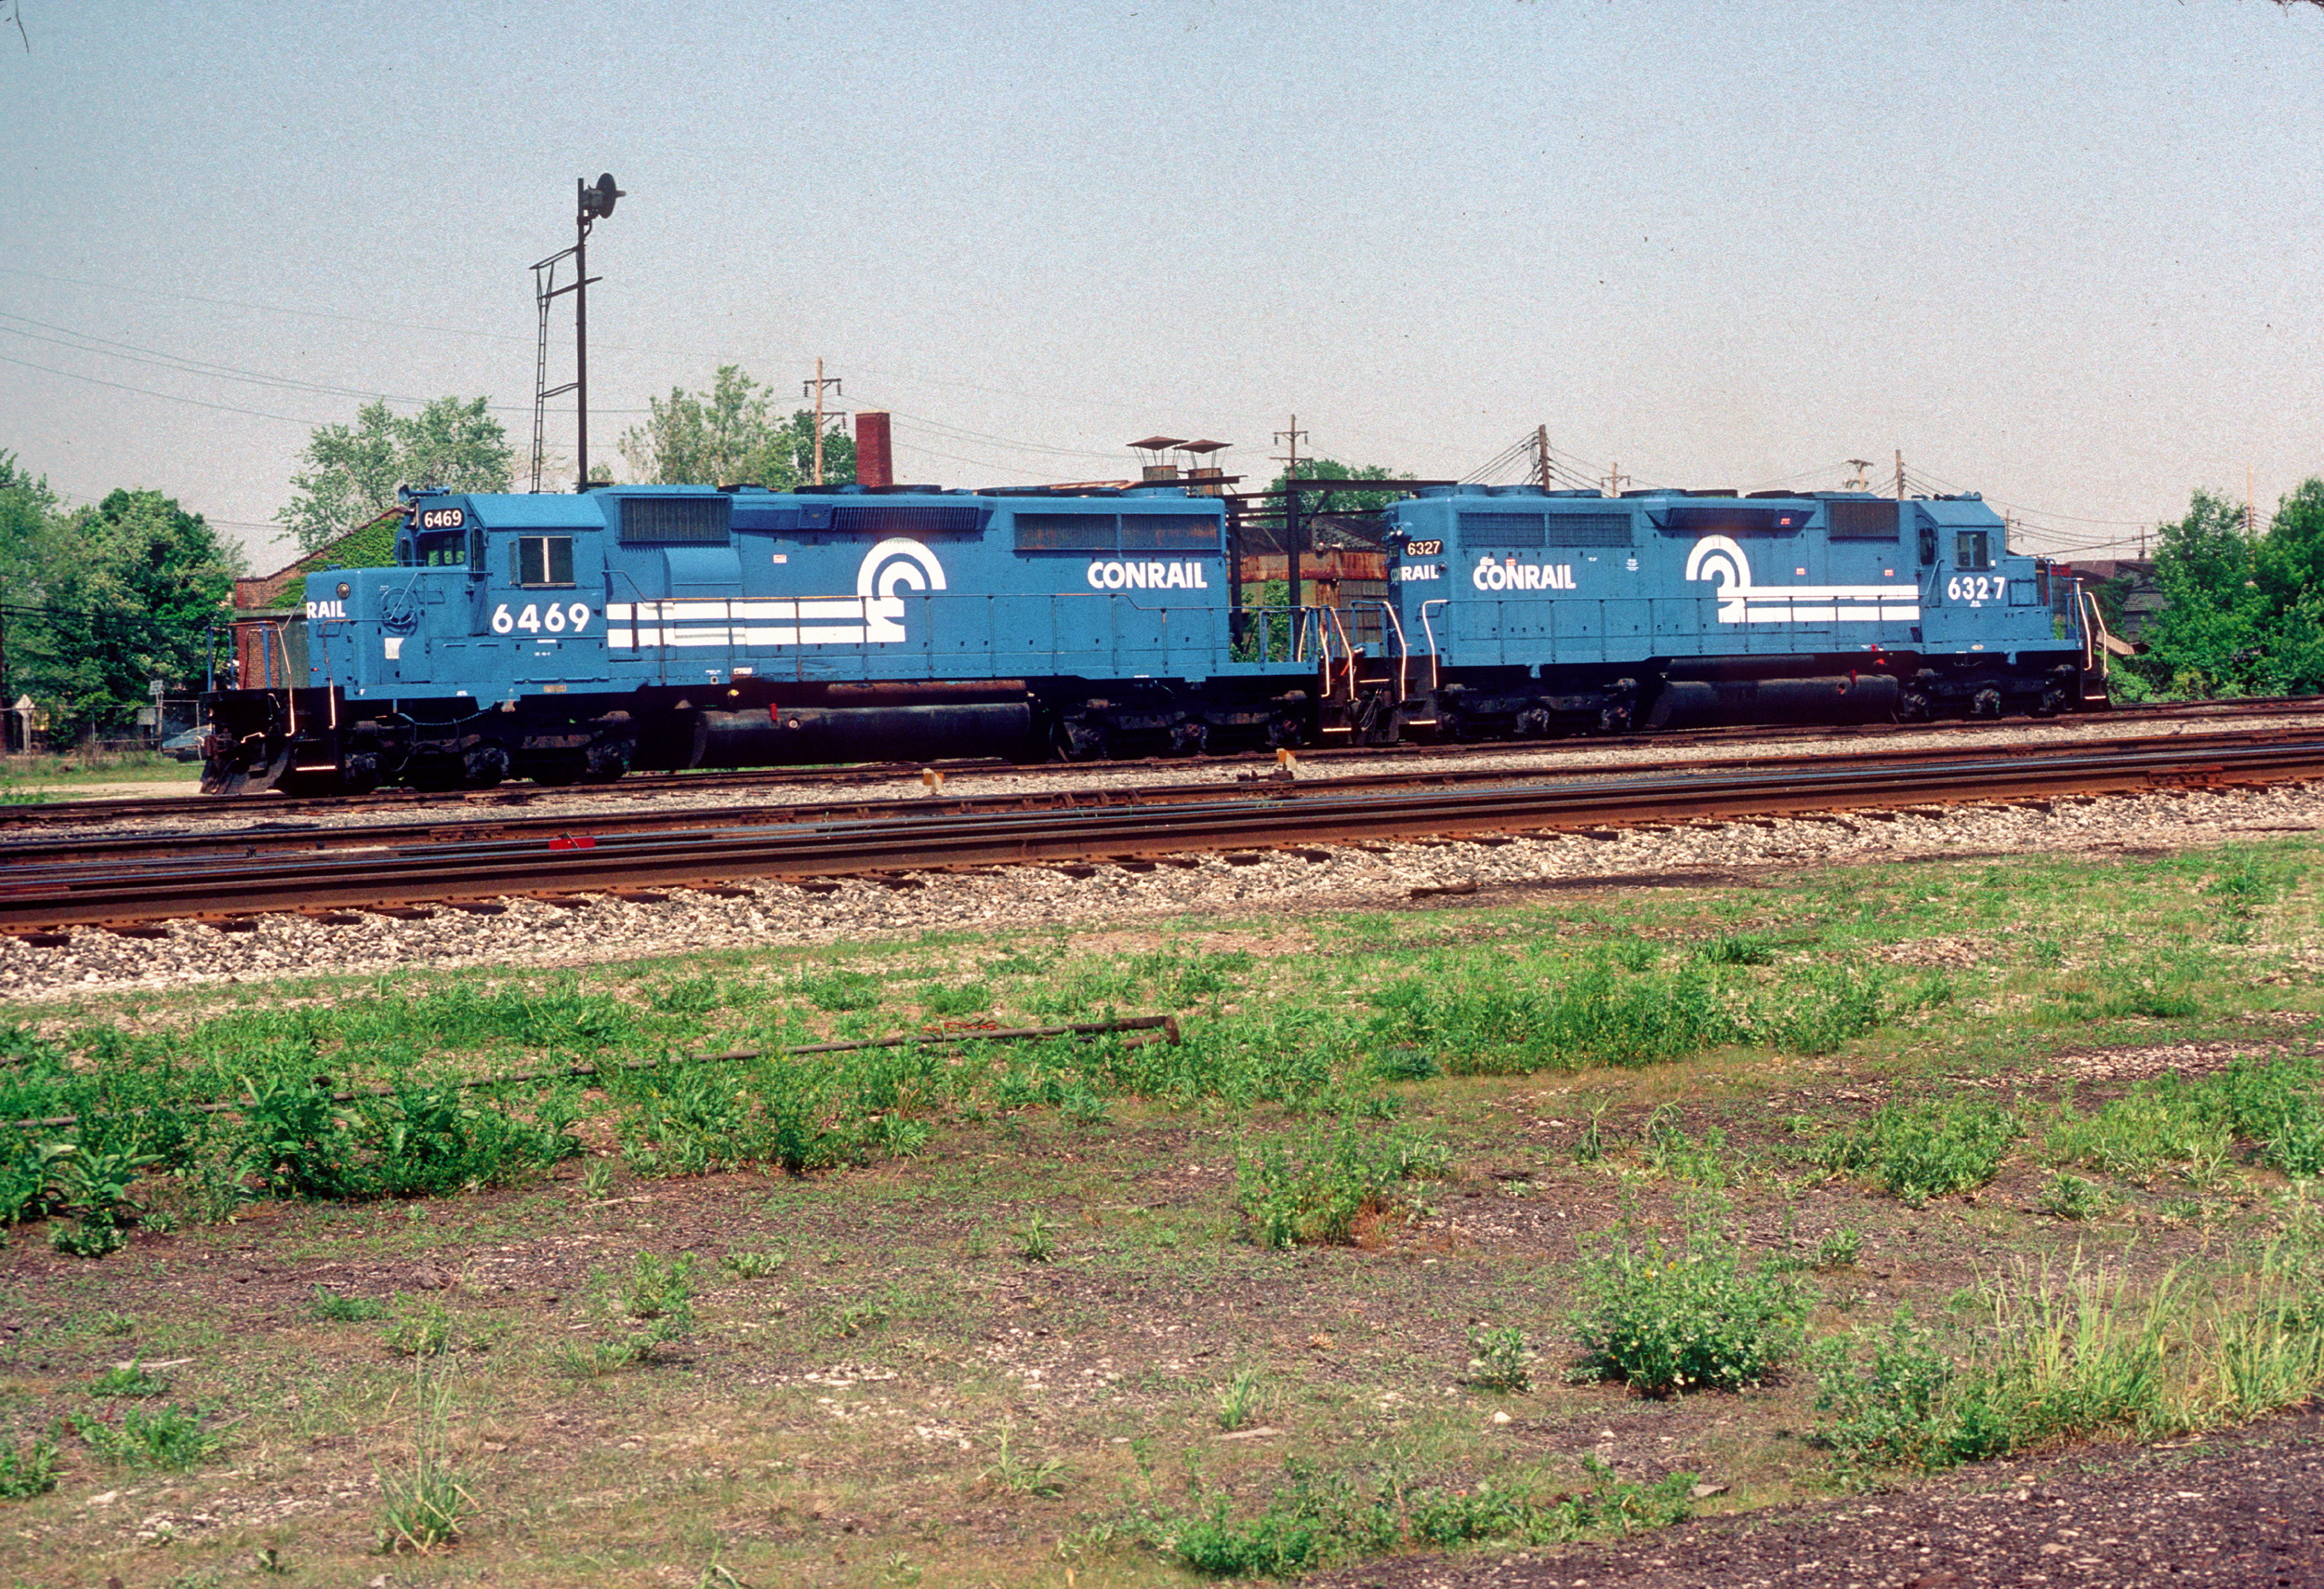
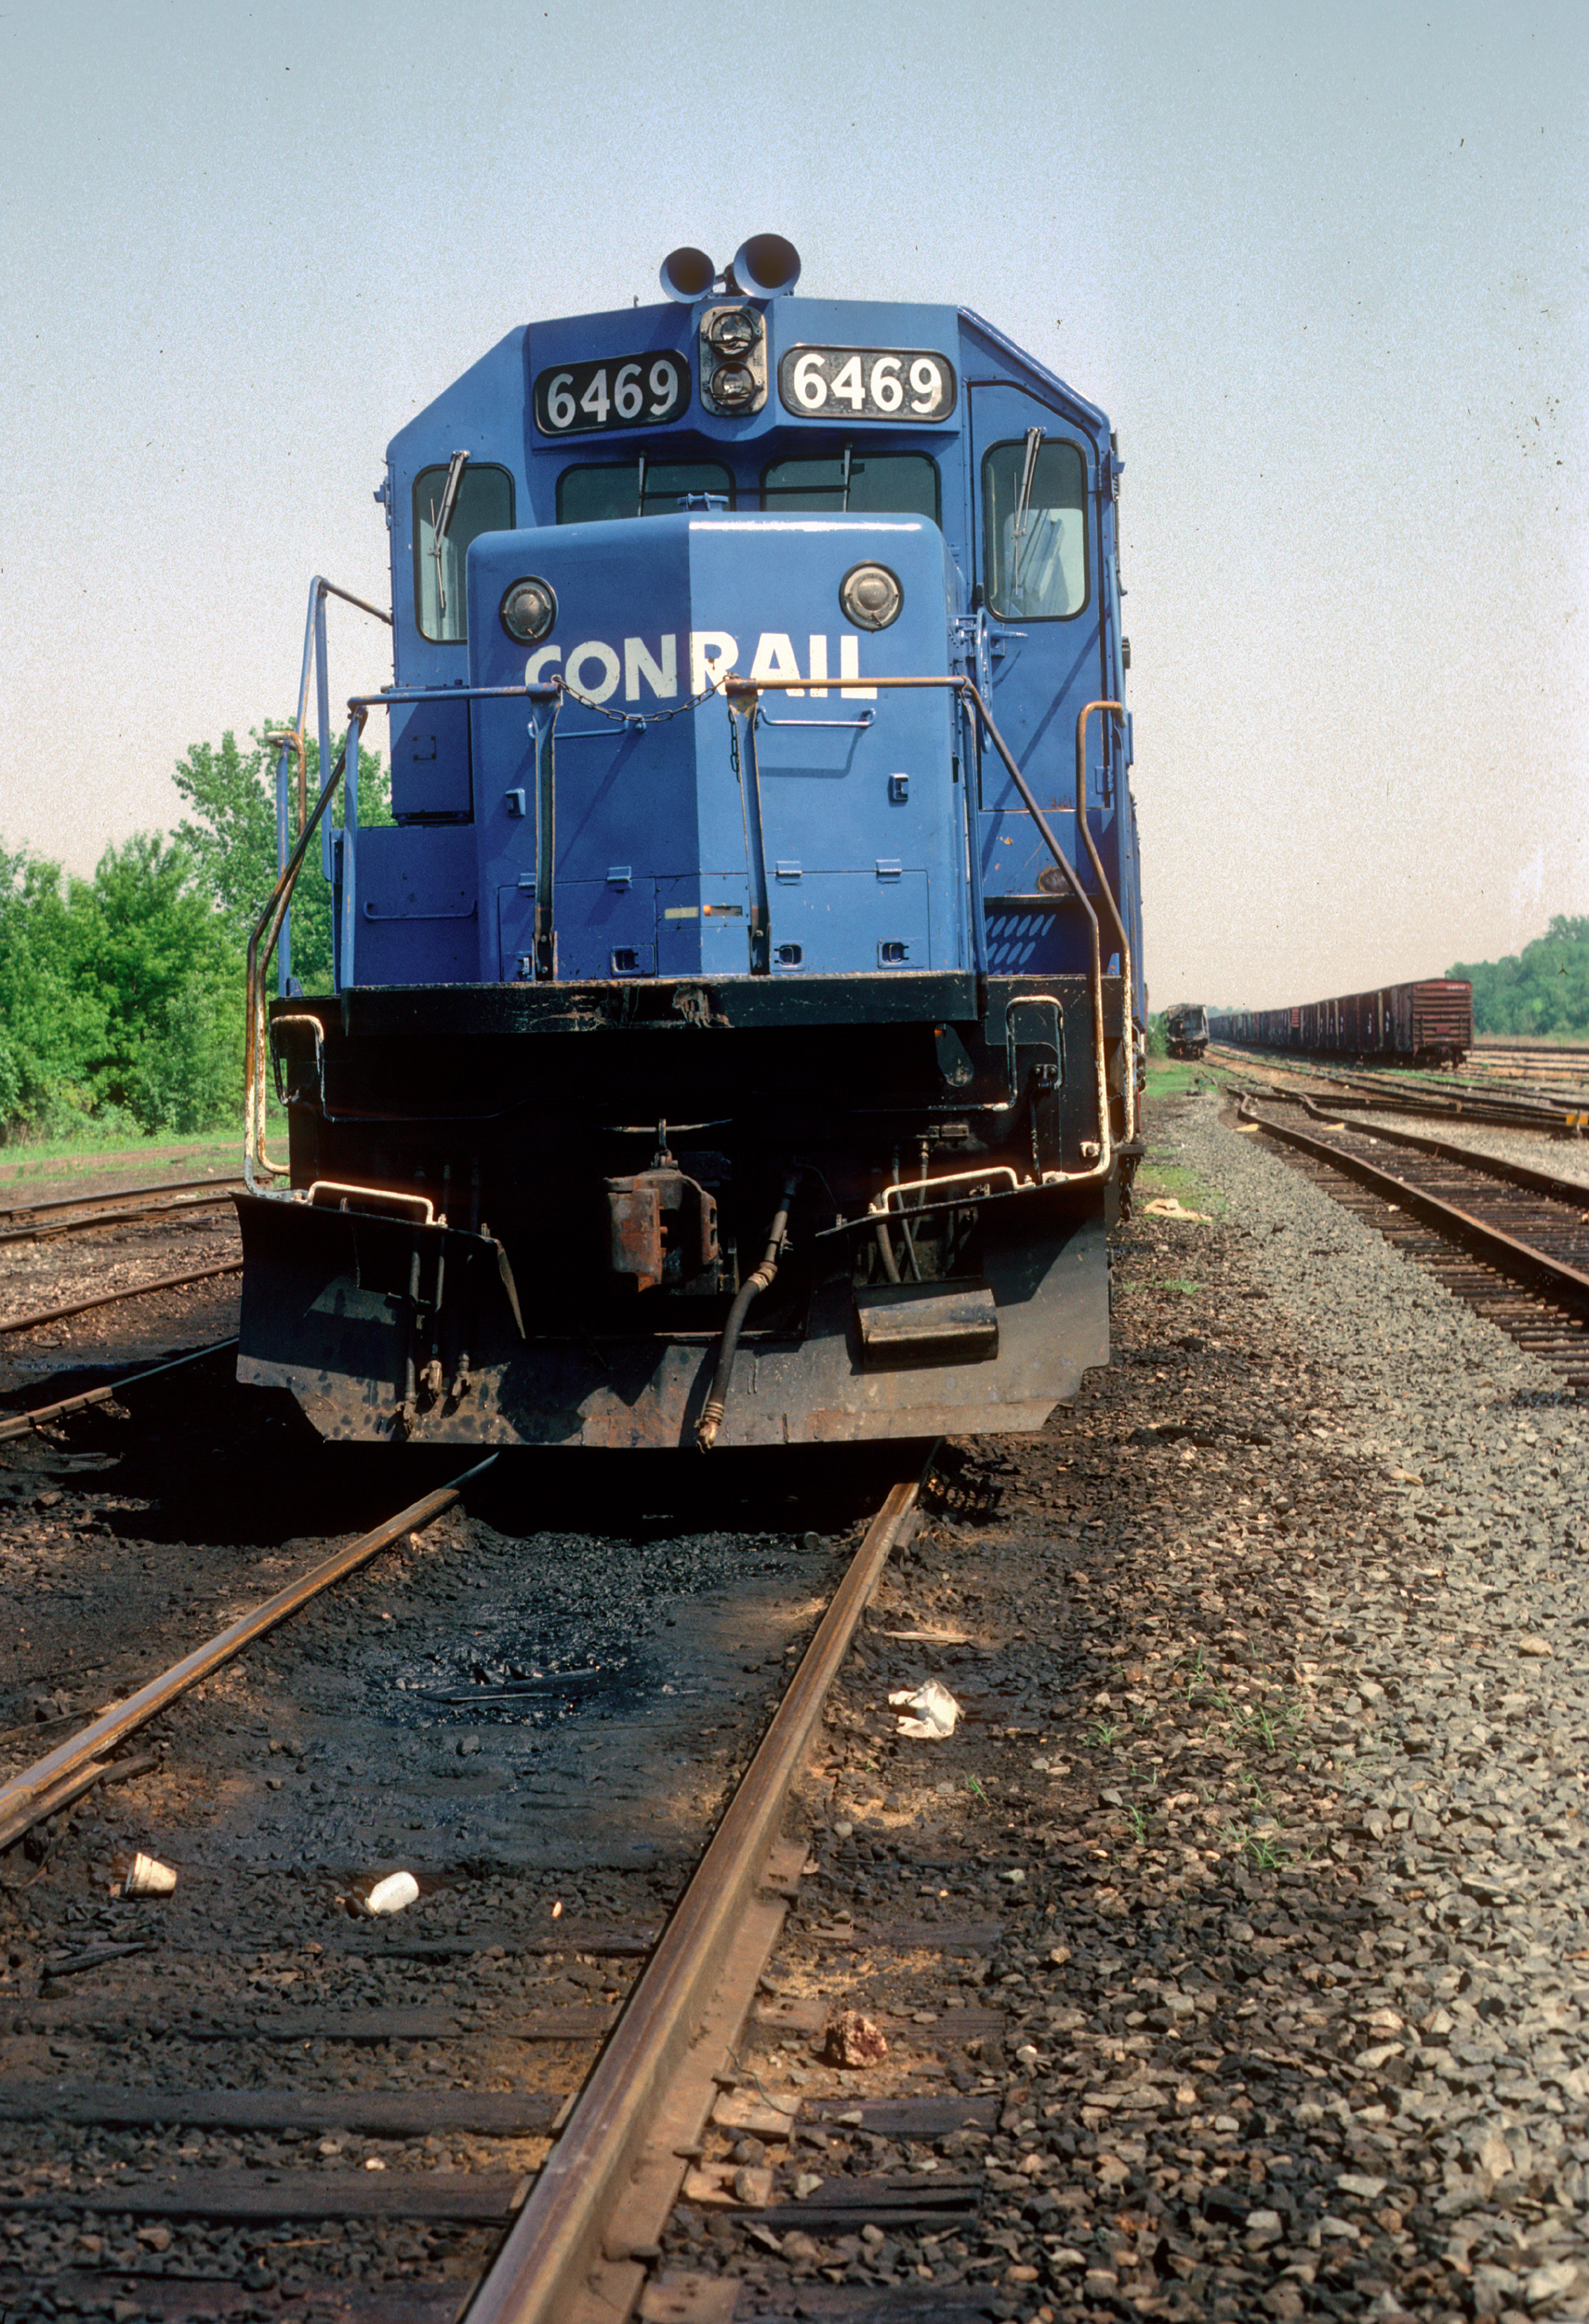
6-14-24 Just for goof I searched eBay for “Conrail 6469” and saw this
really awesome series of slides taken 5-17-87 I think in Piqua Ohio. The
handwriting on the slides is not the best. I bought them all. They are much
better quality than the above “borrowed” internet photos.
|
|


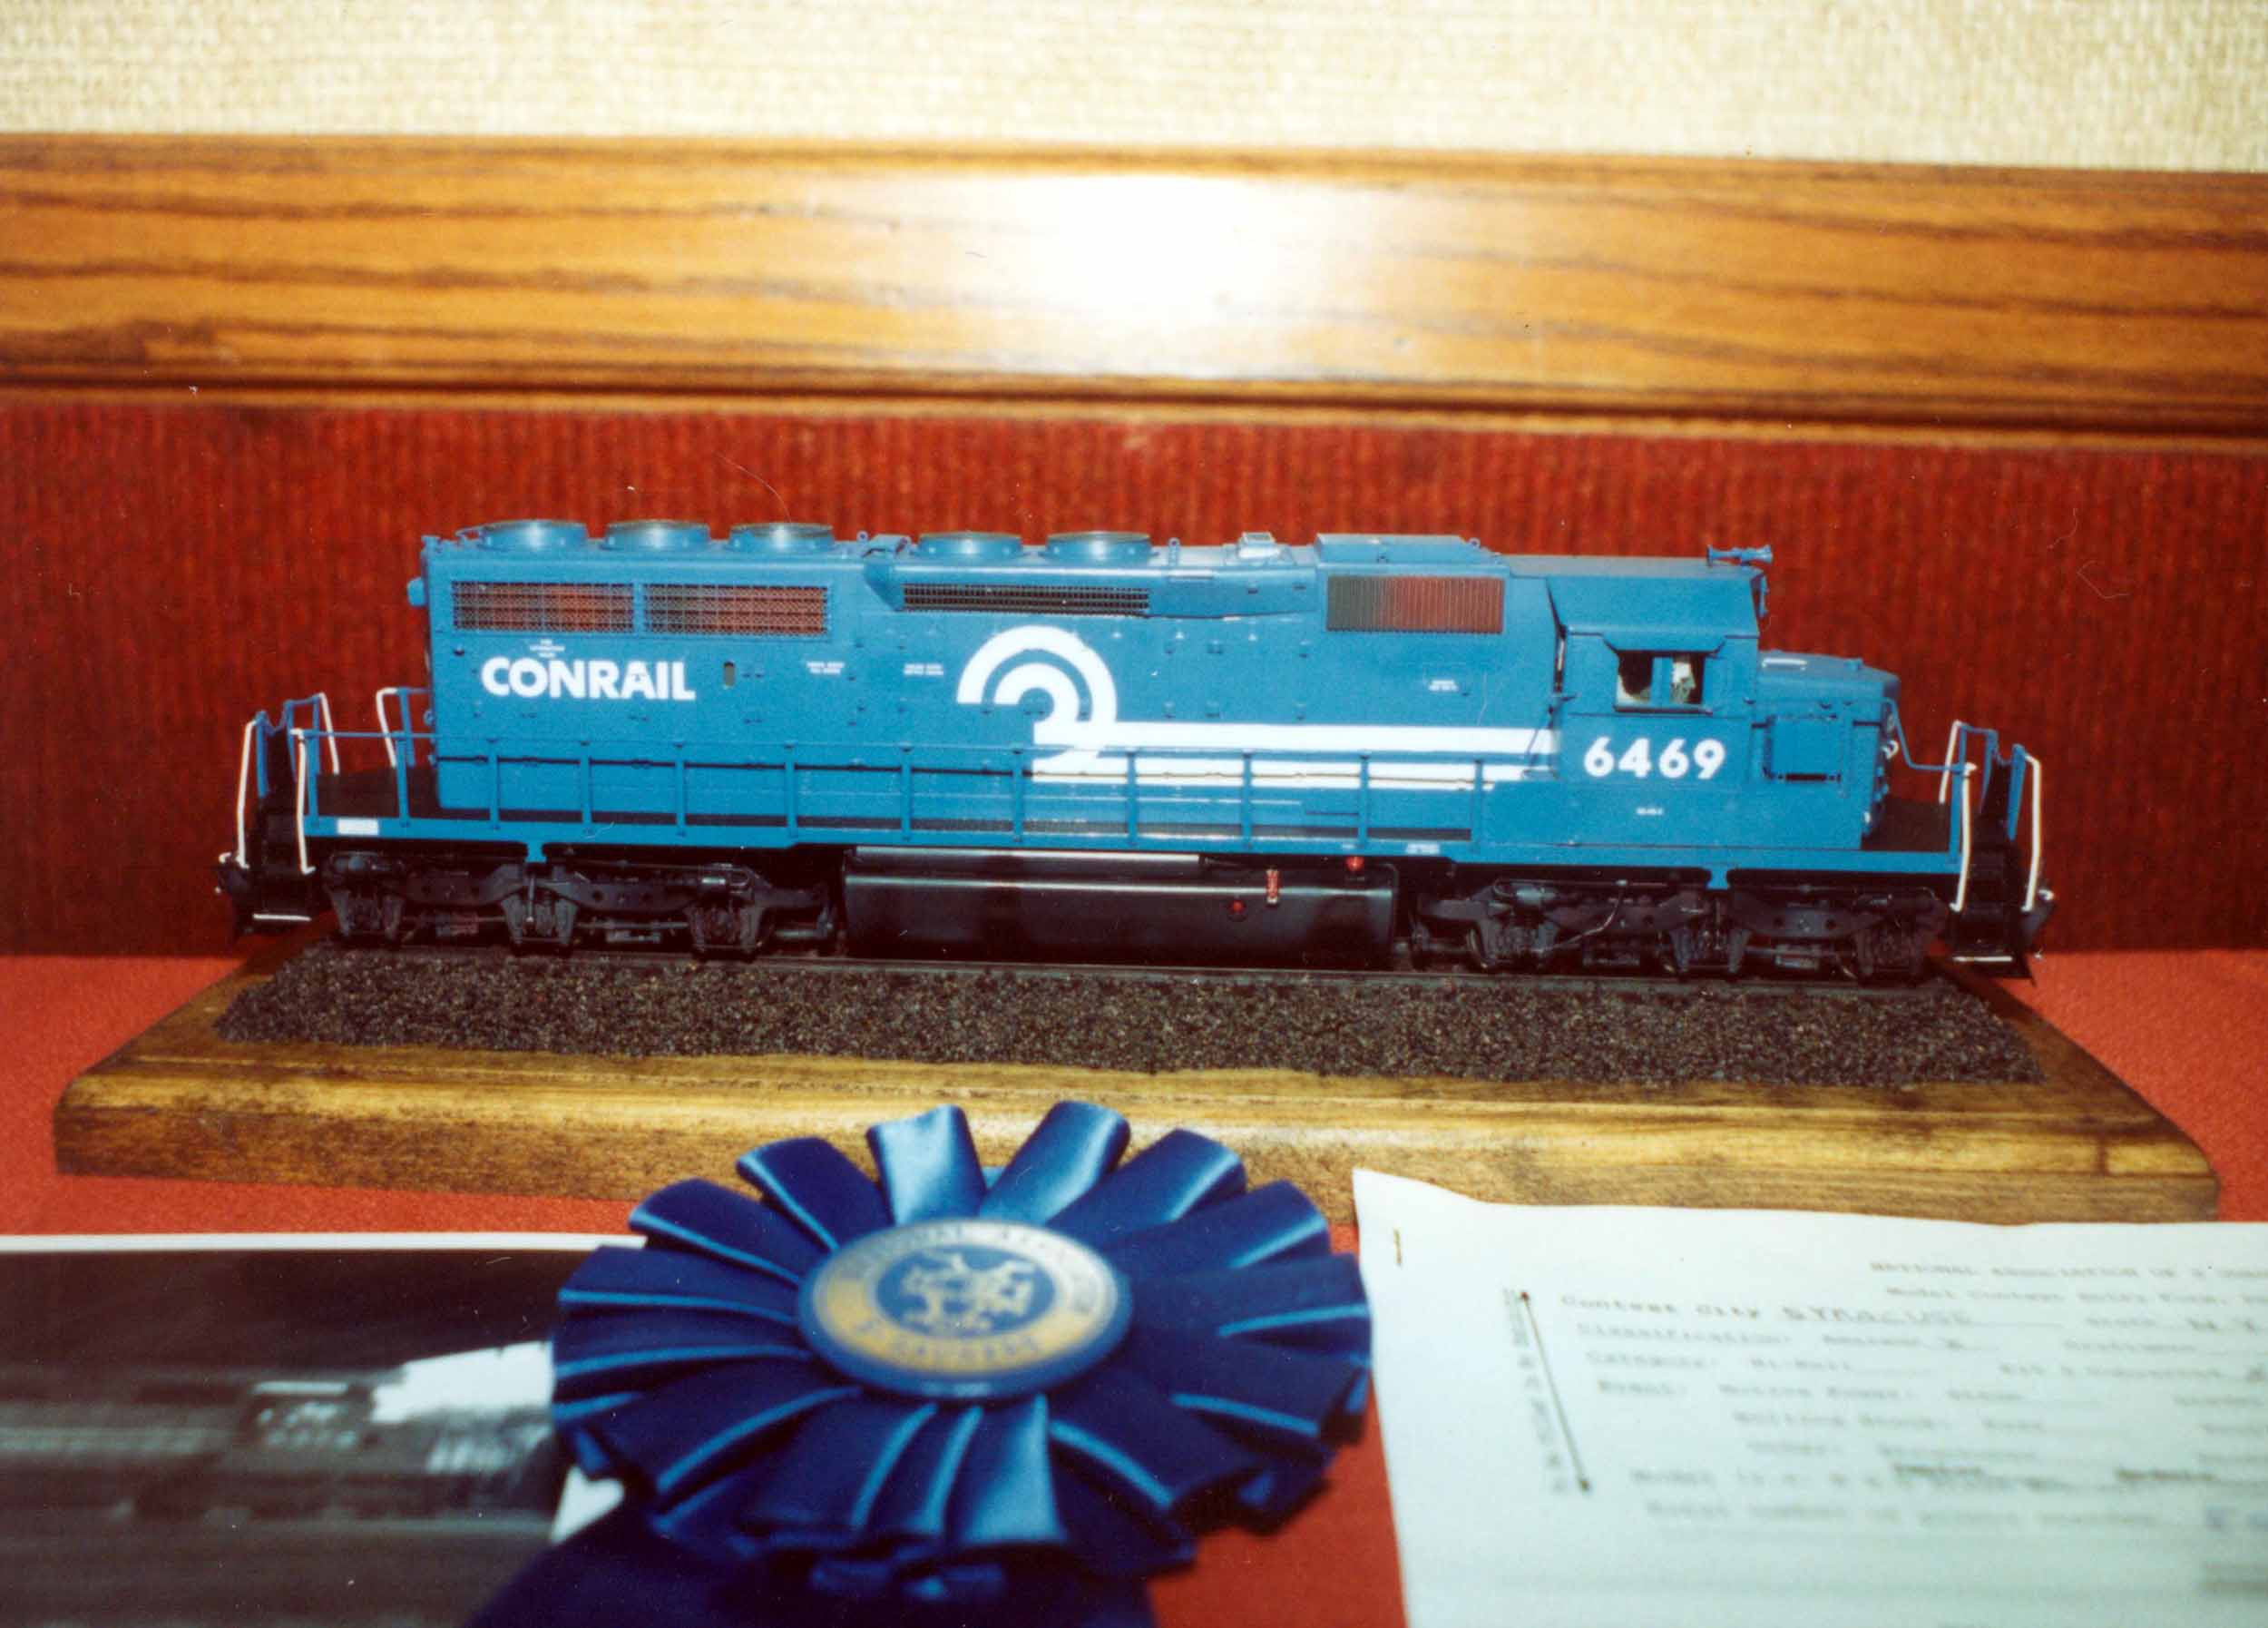
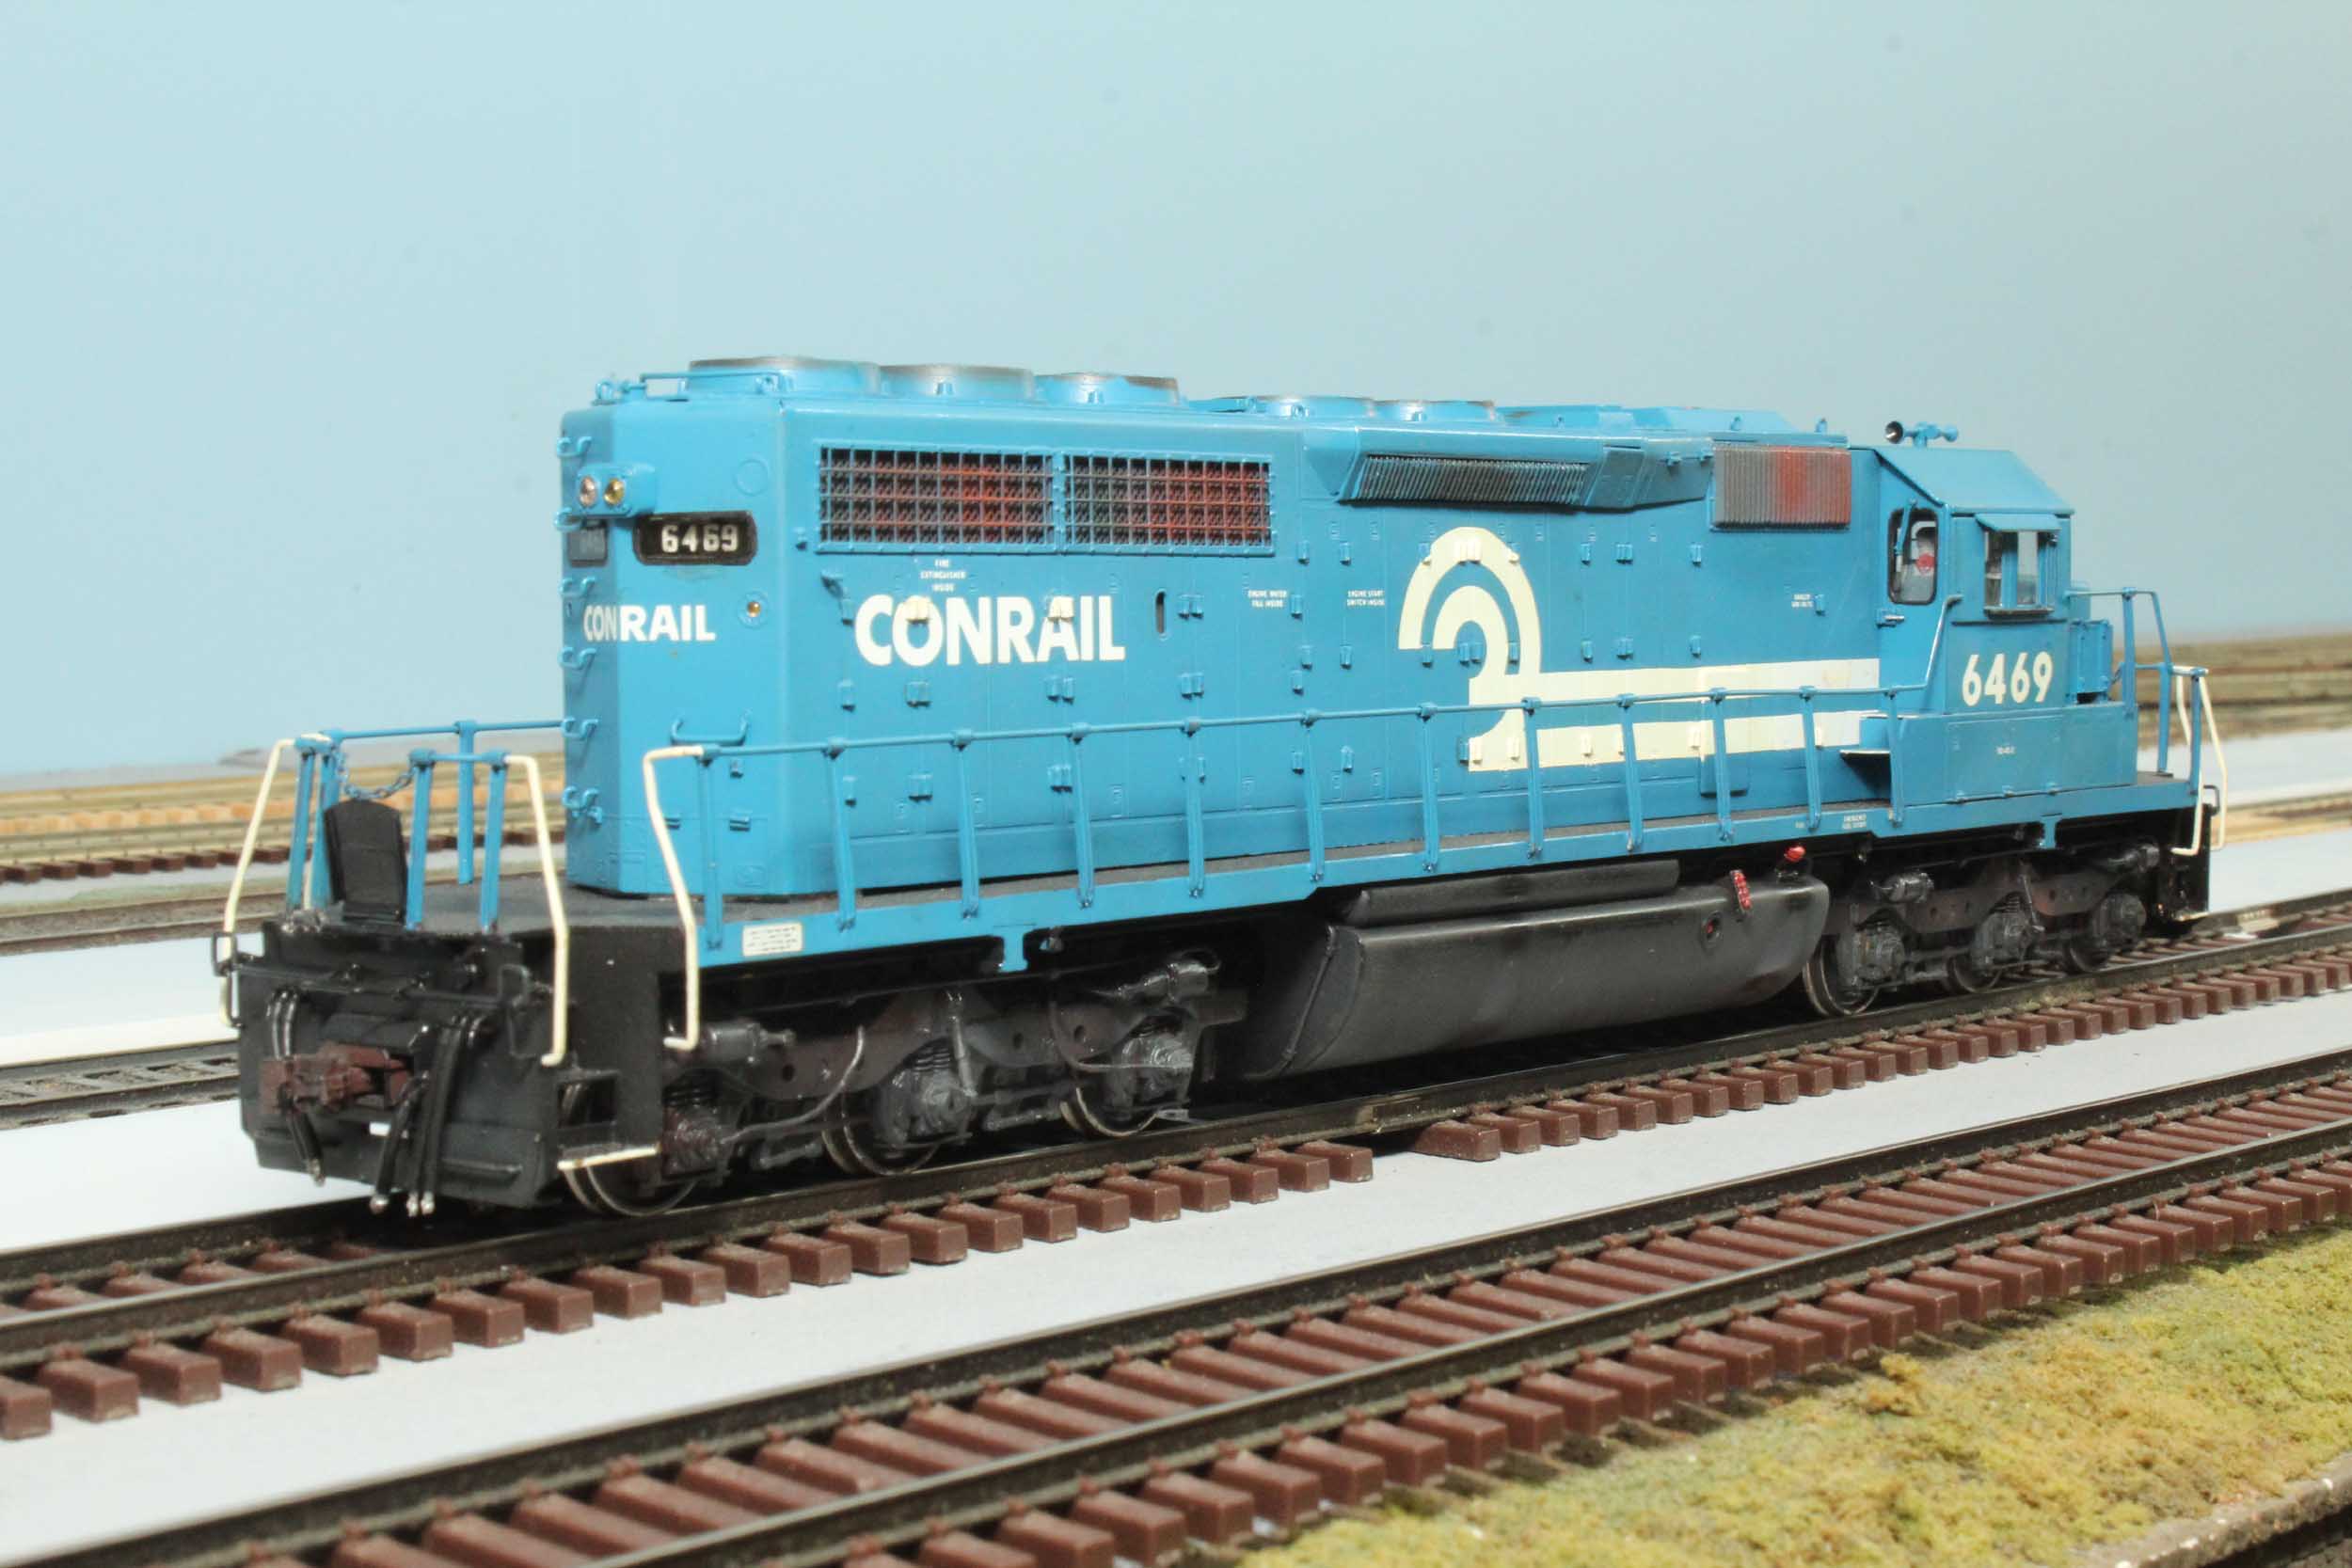
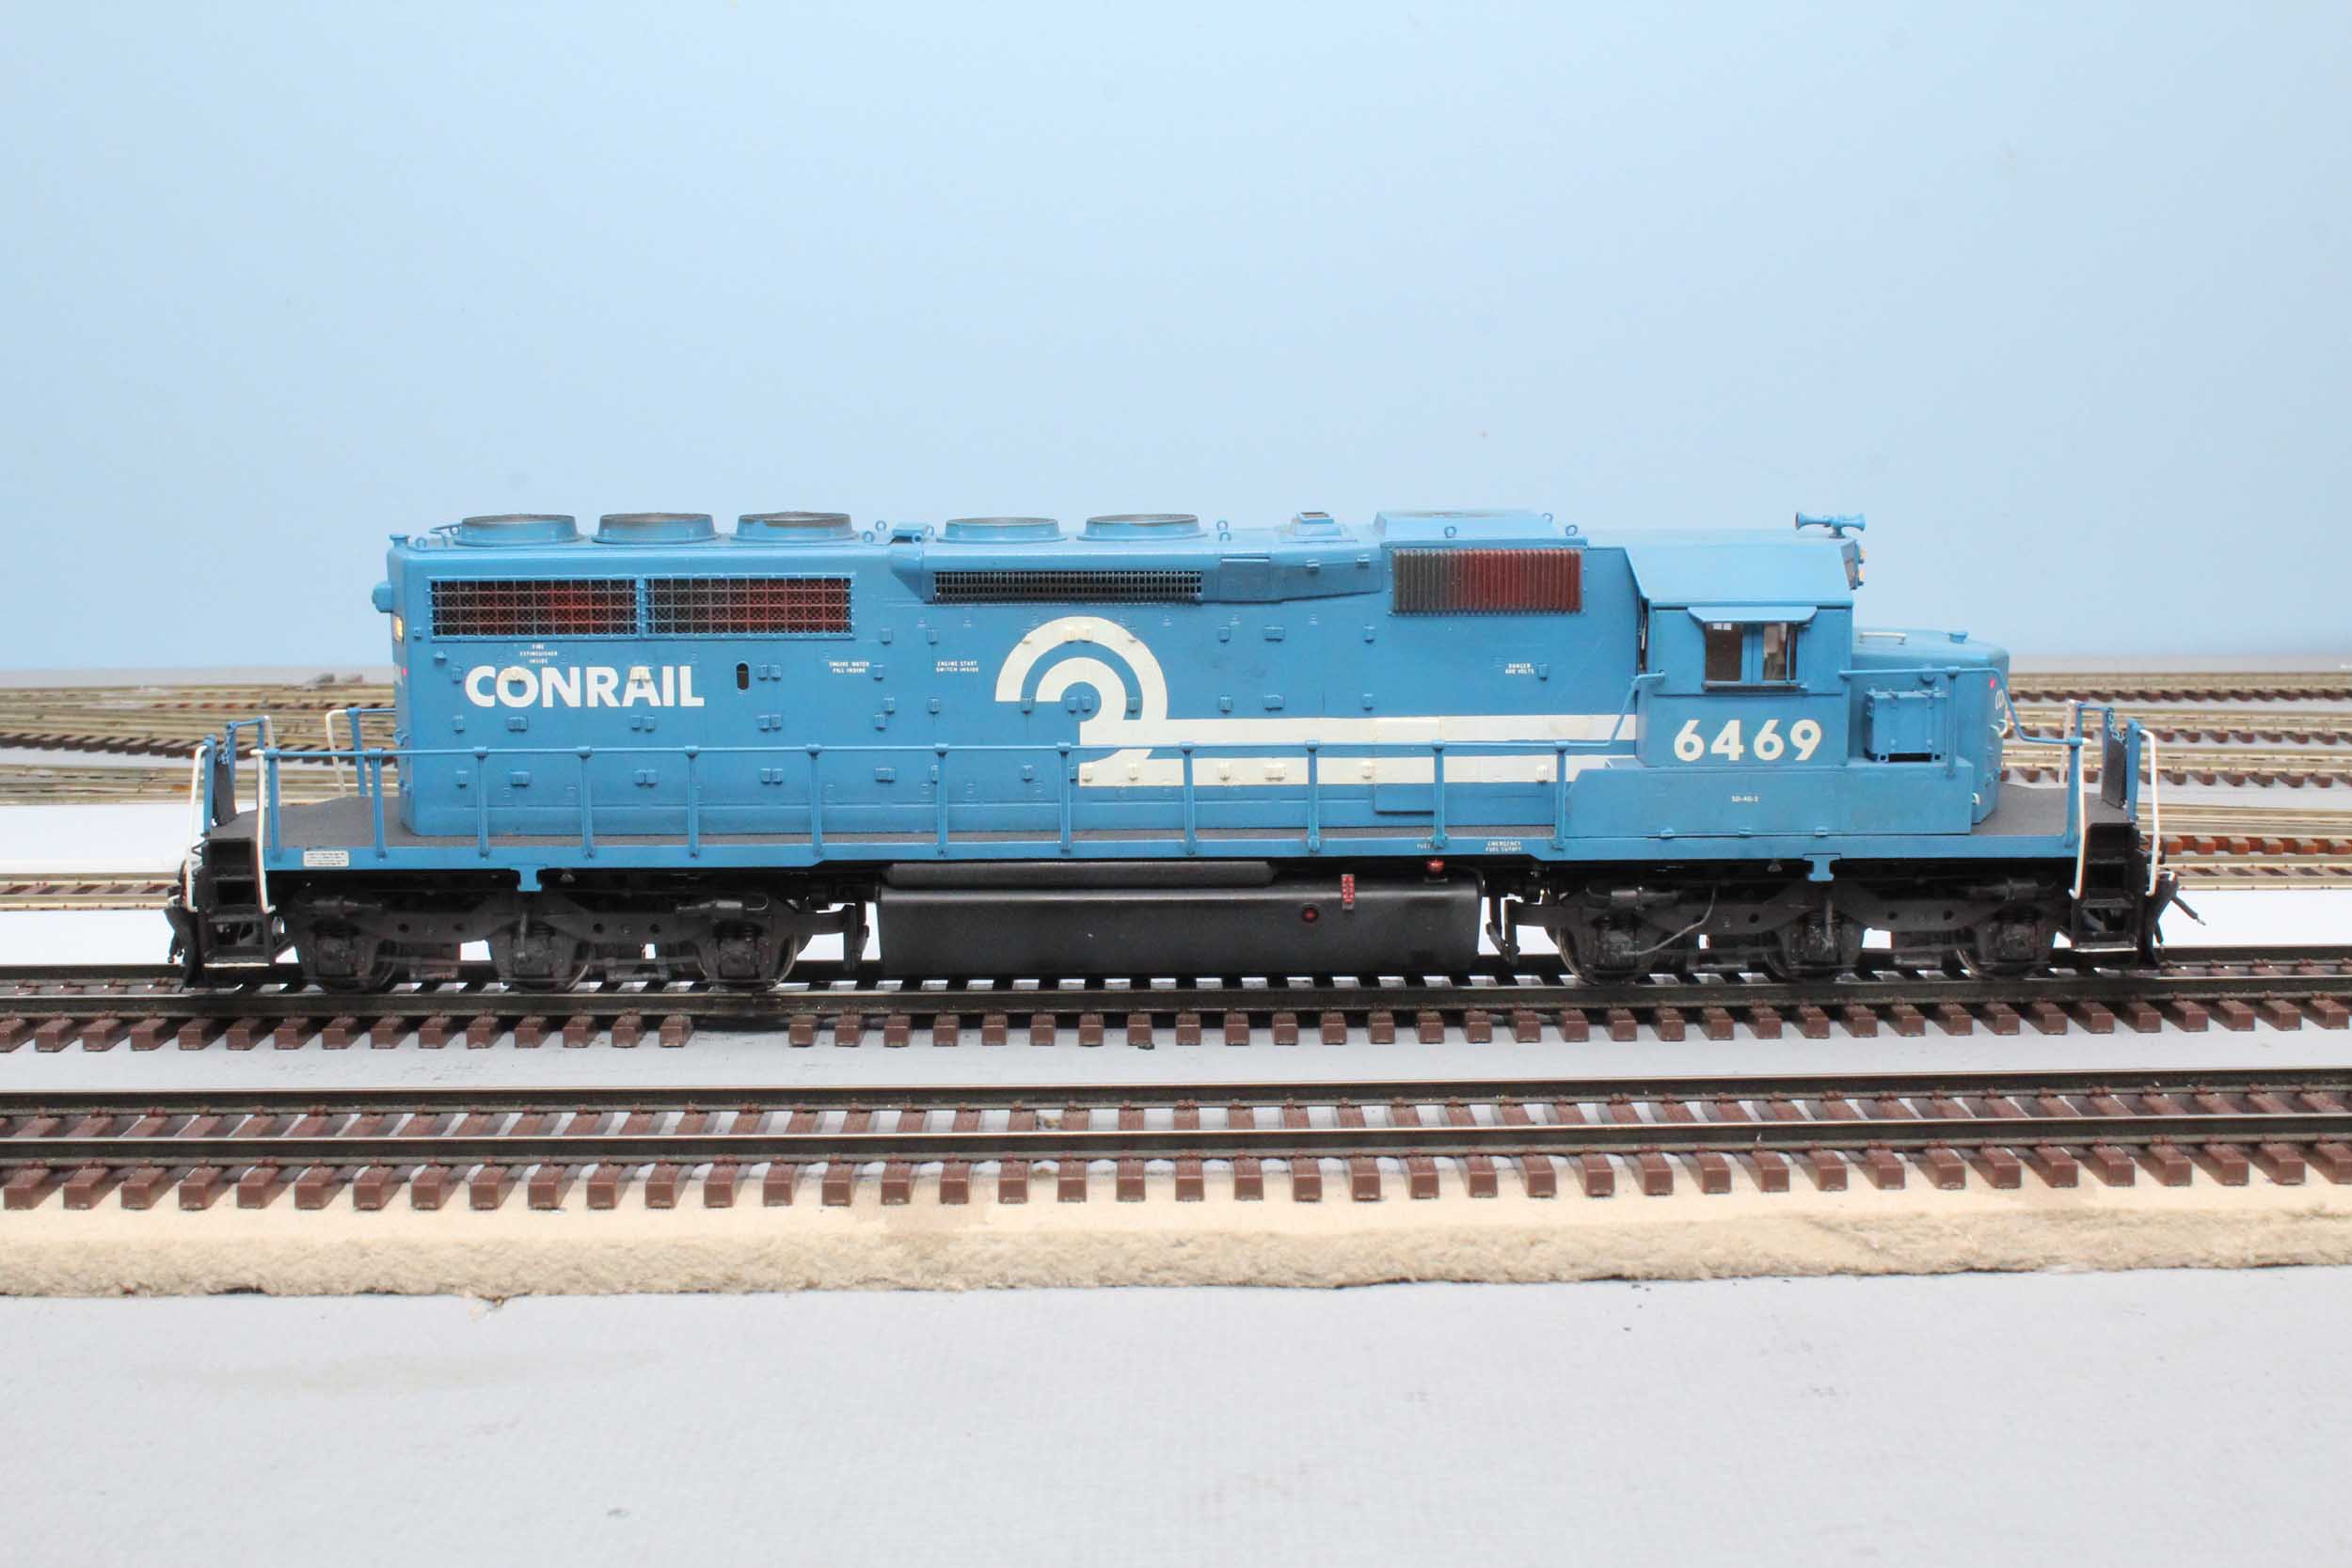
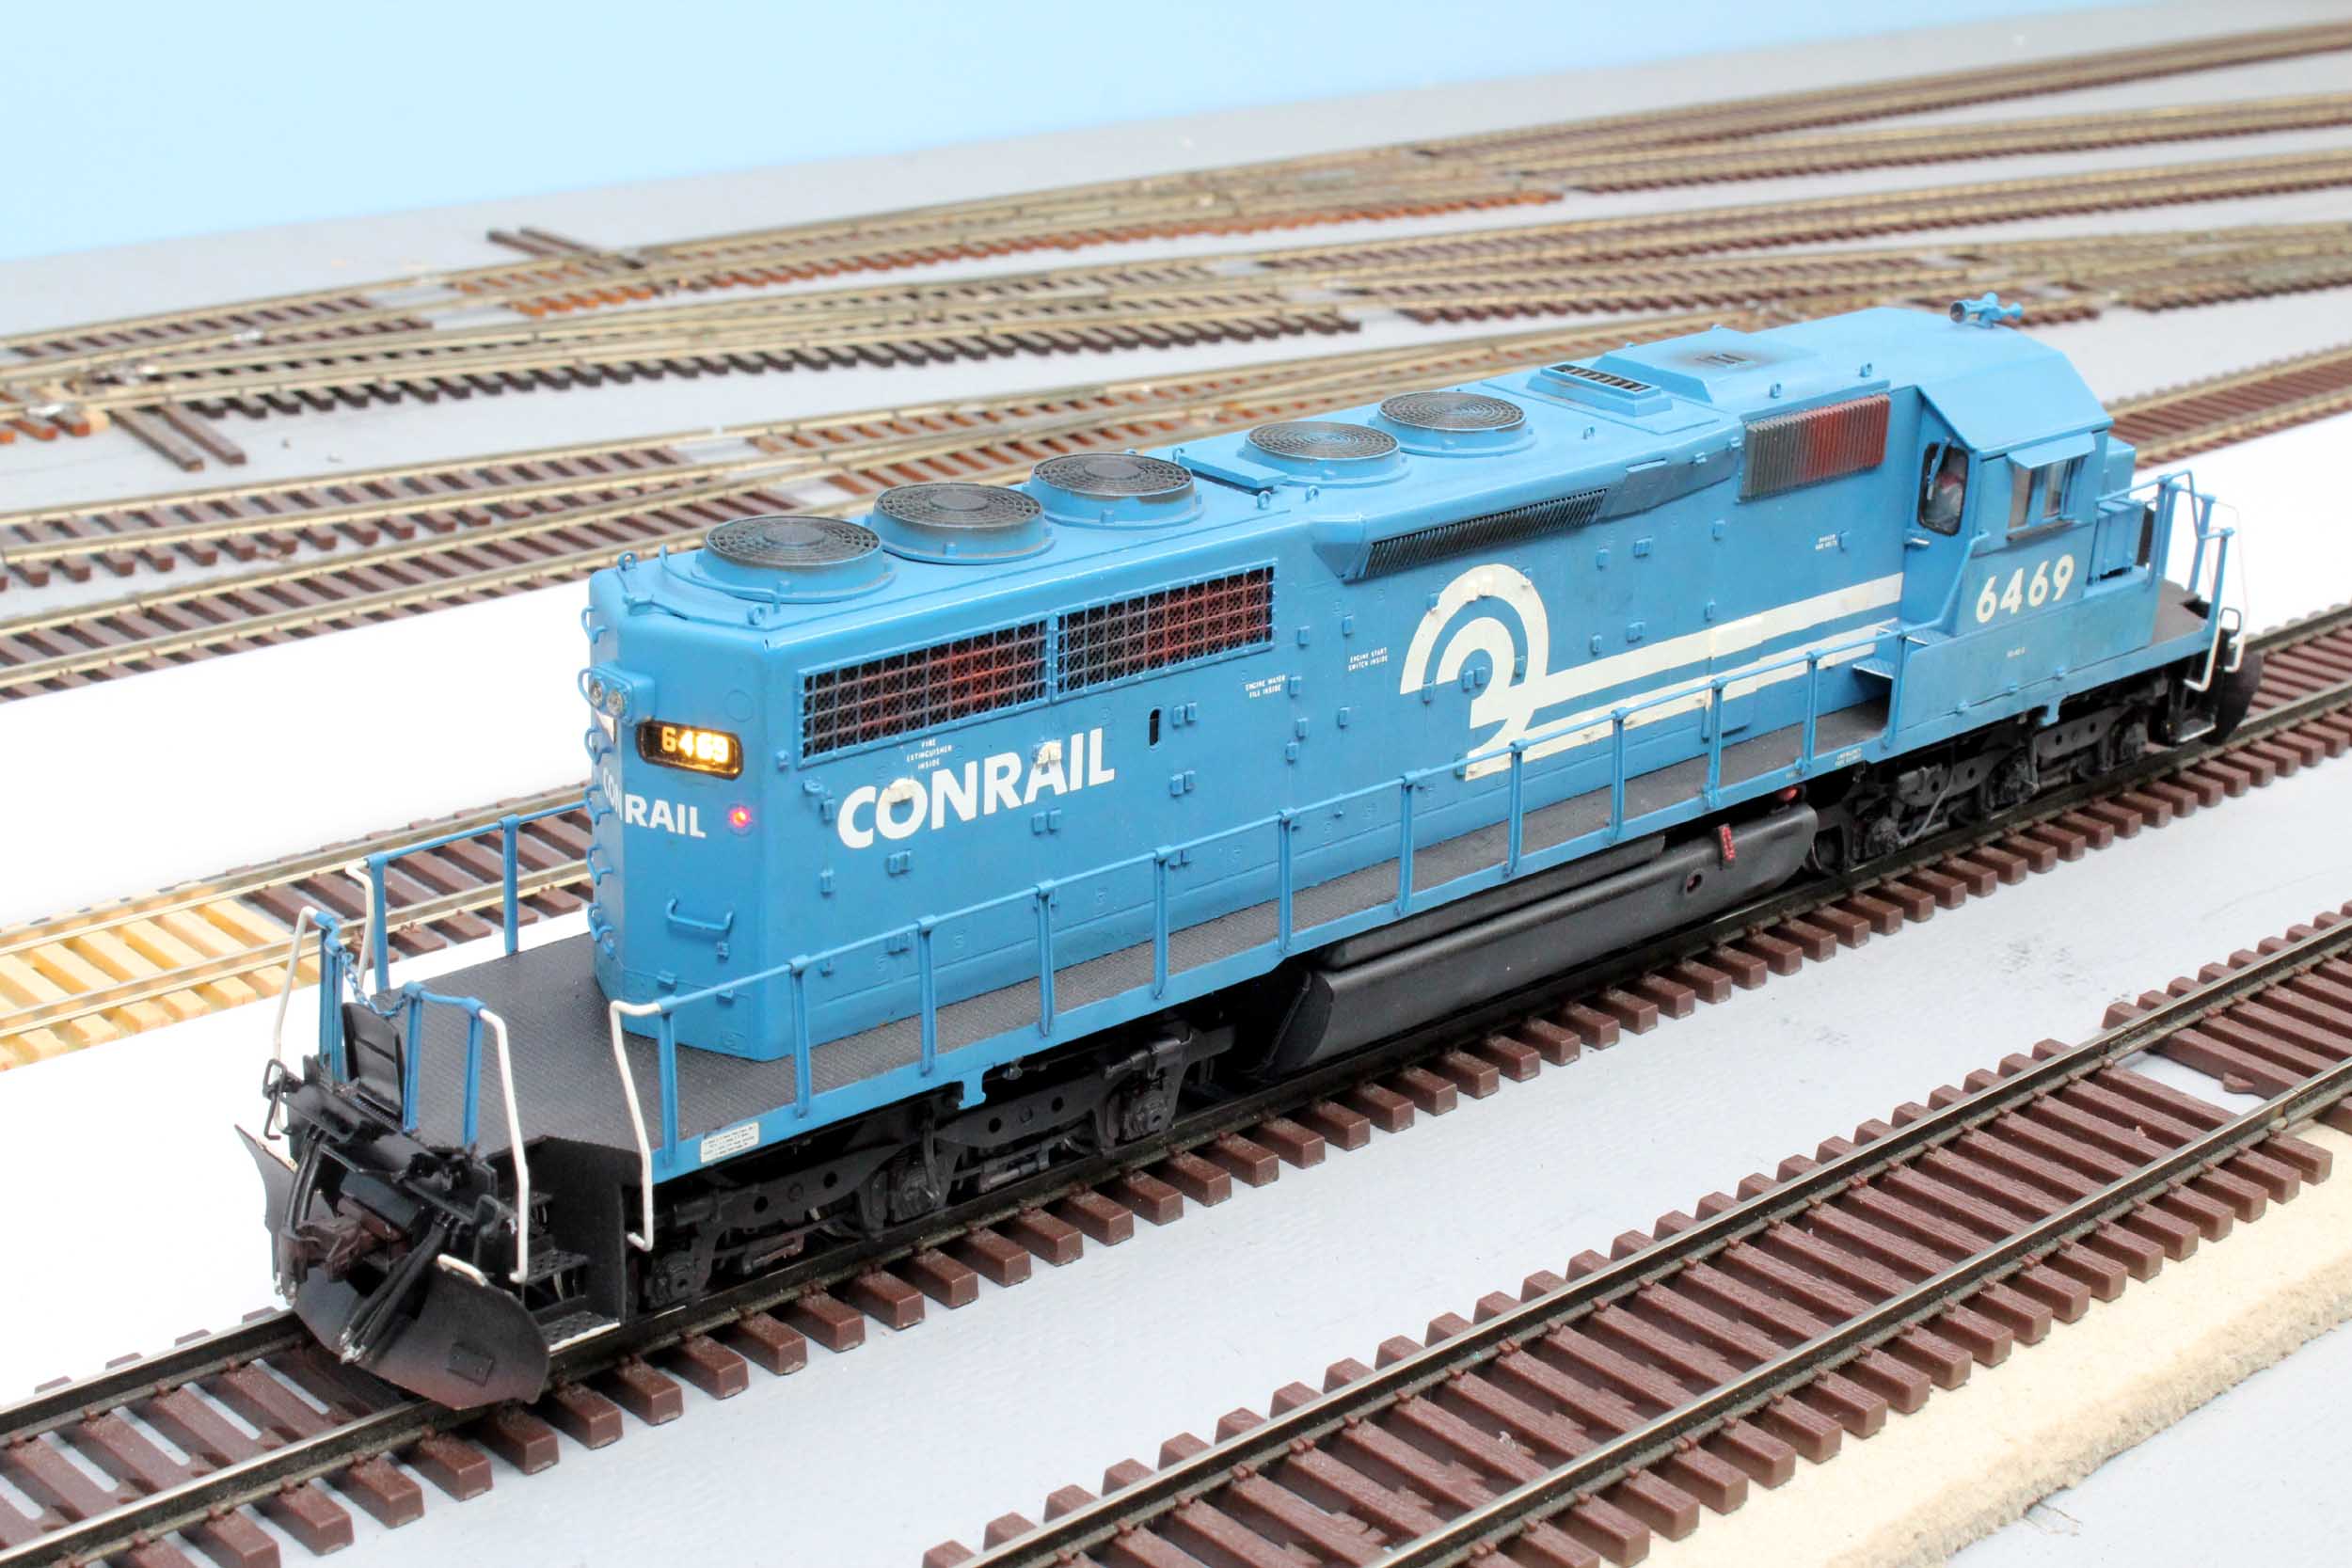
In my early S Scale days of the 1990s, I was buying S Scale brass indiscriminately, without any real “plan” as to how it might all fit together some day. The S Mod Modules were being used frequently. We were getting together as a club with the Central Jersey S Scalers on a regular basis. Dave Bailey’s 32 foot long “Allen” hump yard had his 3 Conrail SD40-2 putting on an amazing modeling show moving cars over the hump with a working car retarder. I wanted to join in on this action. This SD40-2 was my second “big” project after my PRR GP9 was originally completed in 1988. Since I was making railfan trips to Altoona at that time, the SD40-2 were truly everywhere, and became a favorite of mine. They still are to this day.
This
model was made by Overland in 1983 as Overland model 1744. I got this one in
about 1990 and had it painted by the 1991 NASG Convention in Syracuse NY. I
would eventually have 3 of them, but sold the other 2 without finishing them
because at that time I focused more on PRR transition era. That has all changed
greatly. I am now very much into “modern” S Scale modeling as best as it can be
done with the limited number of cars and locos available.
Syracuse
NY 1991 NASG Convention Contest
First
Place!
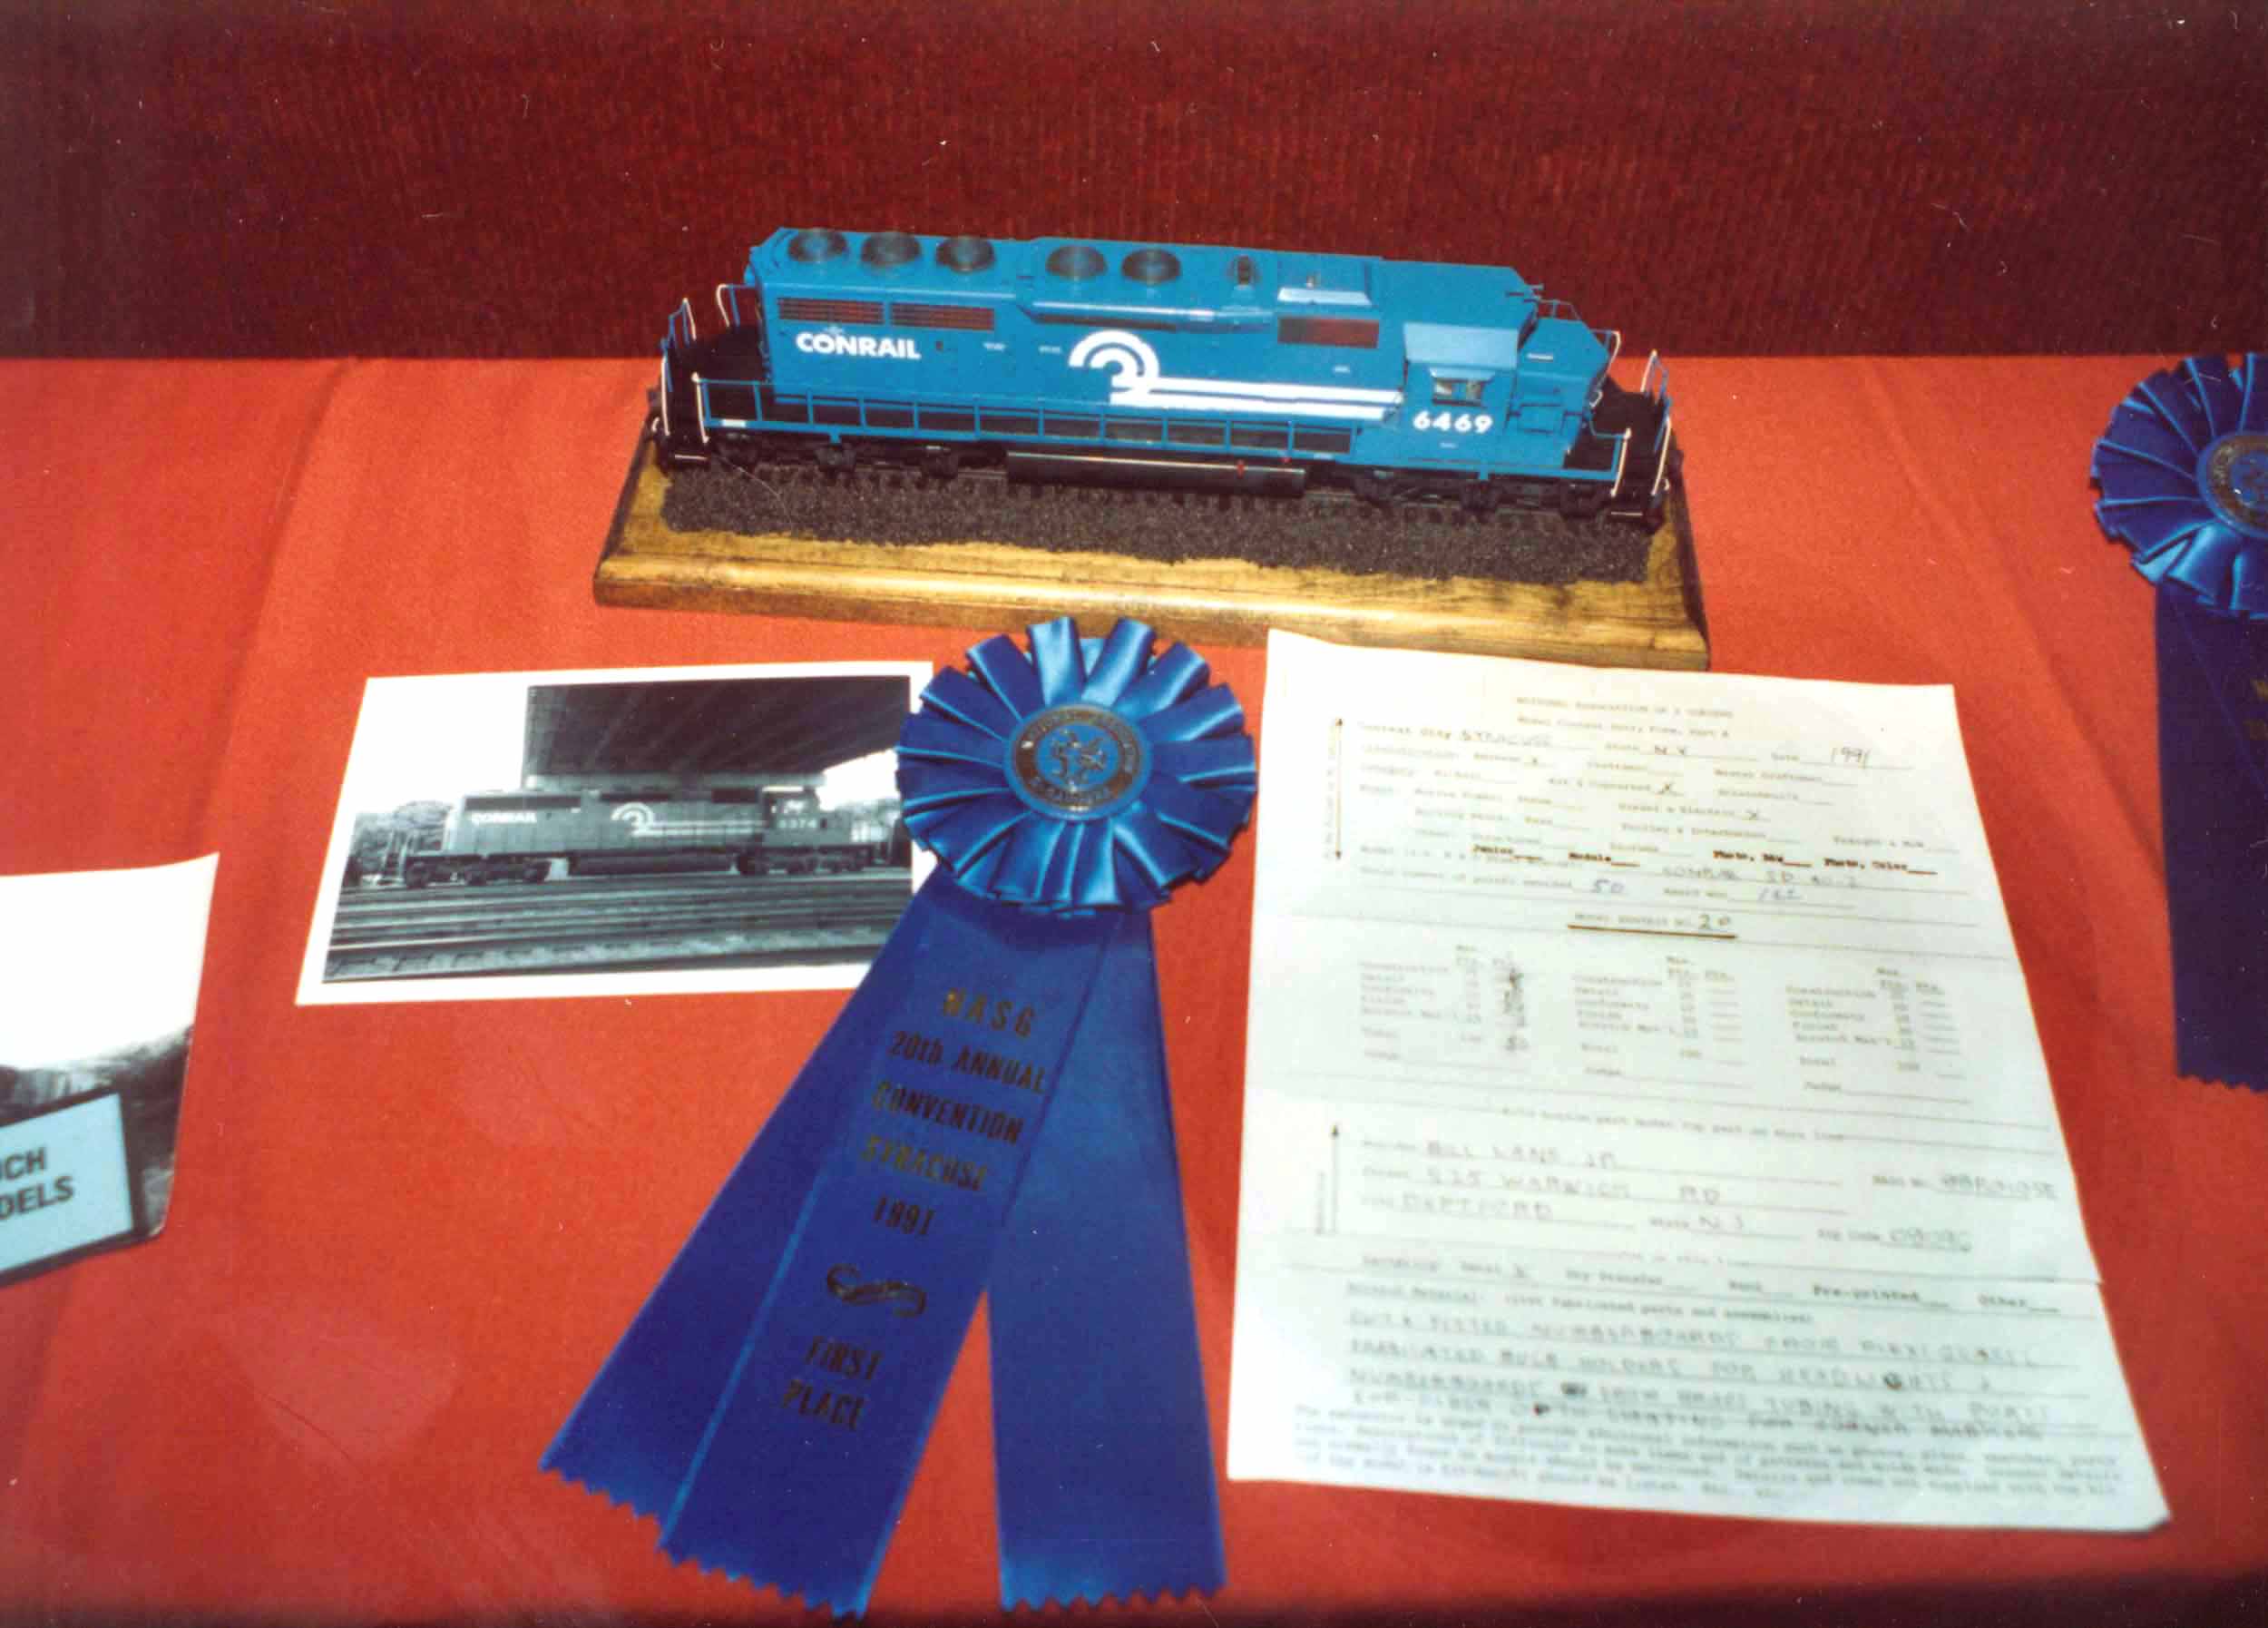
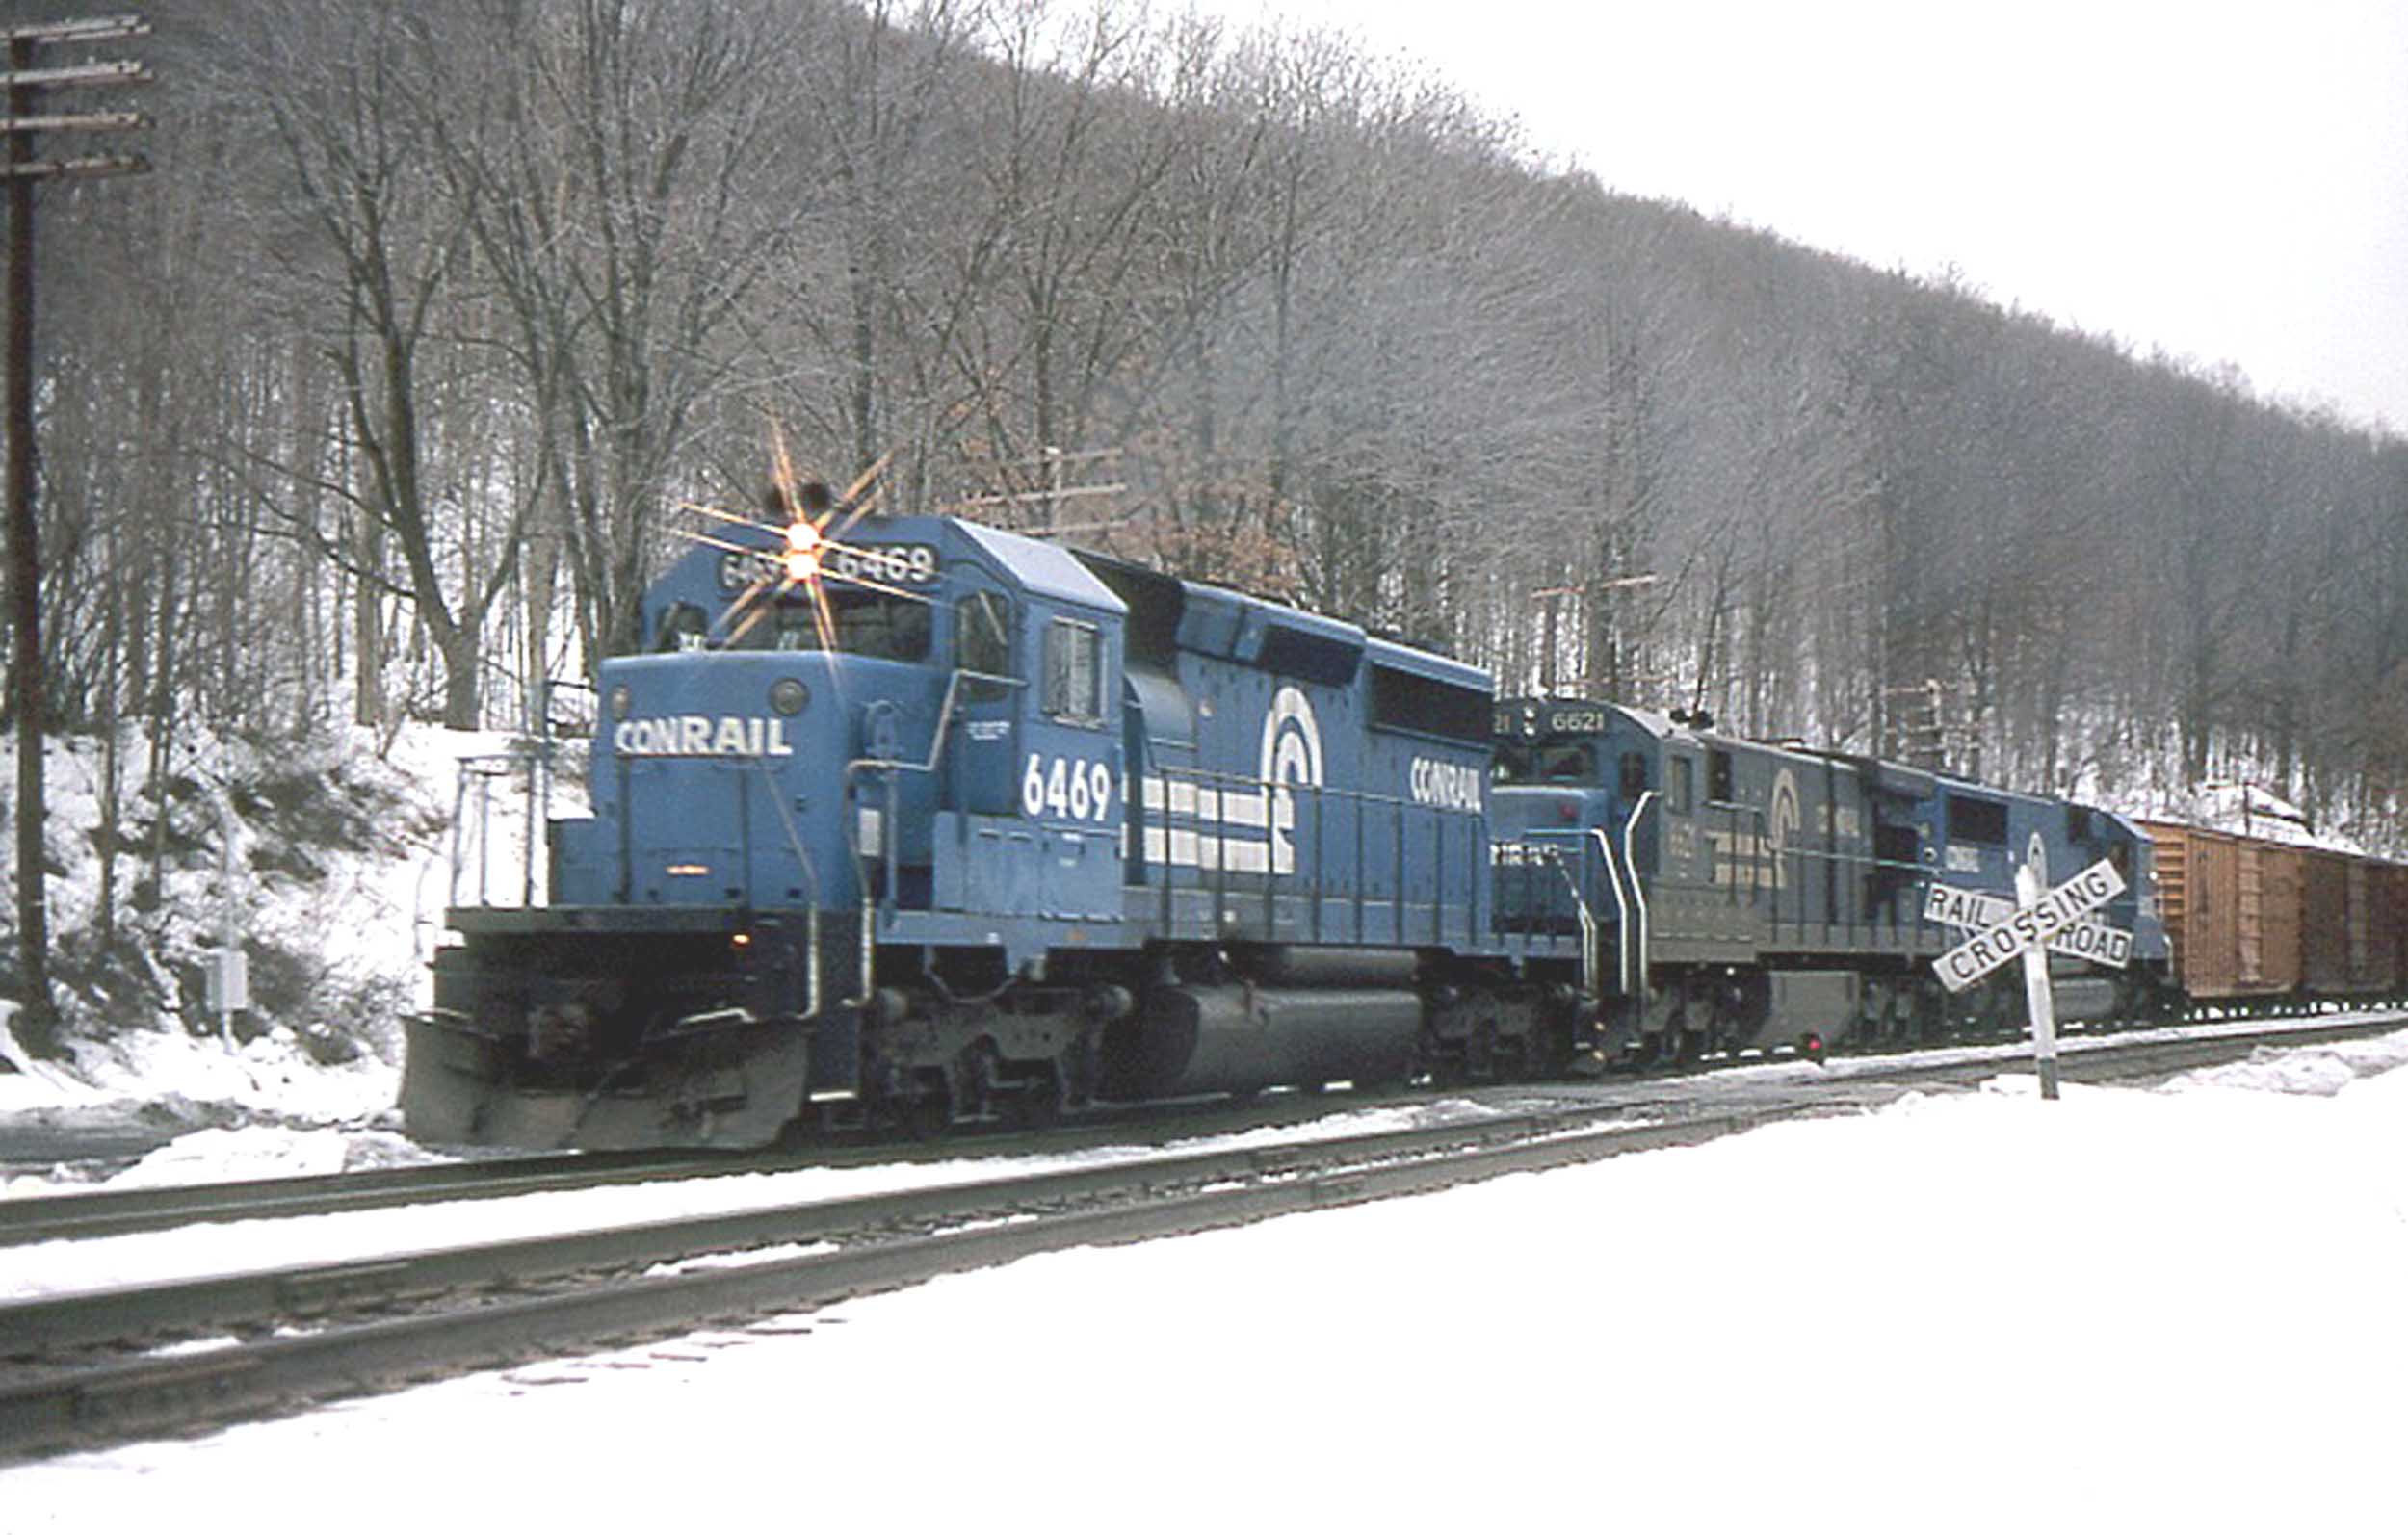
In
the pre-internet days of 1990, I relied on Dave Bailey to help me pick a number
of a Conrail SD40-2 that did not have anti-climbers. Those models in S Scale
with anti-climbers were particularly rare. In 2016 a quick internet search
showed 6469 had anti-climbers, as seen above. Either the anti-climbers on the
real 6469 were added or Dave was wrong! Does it really
matter now? I am not changing the number!
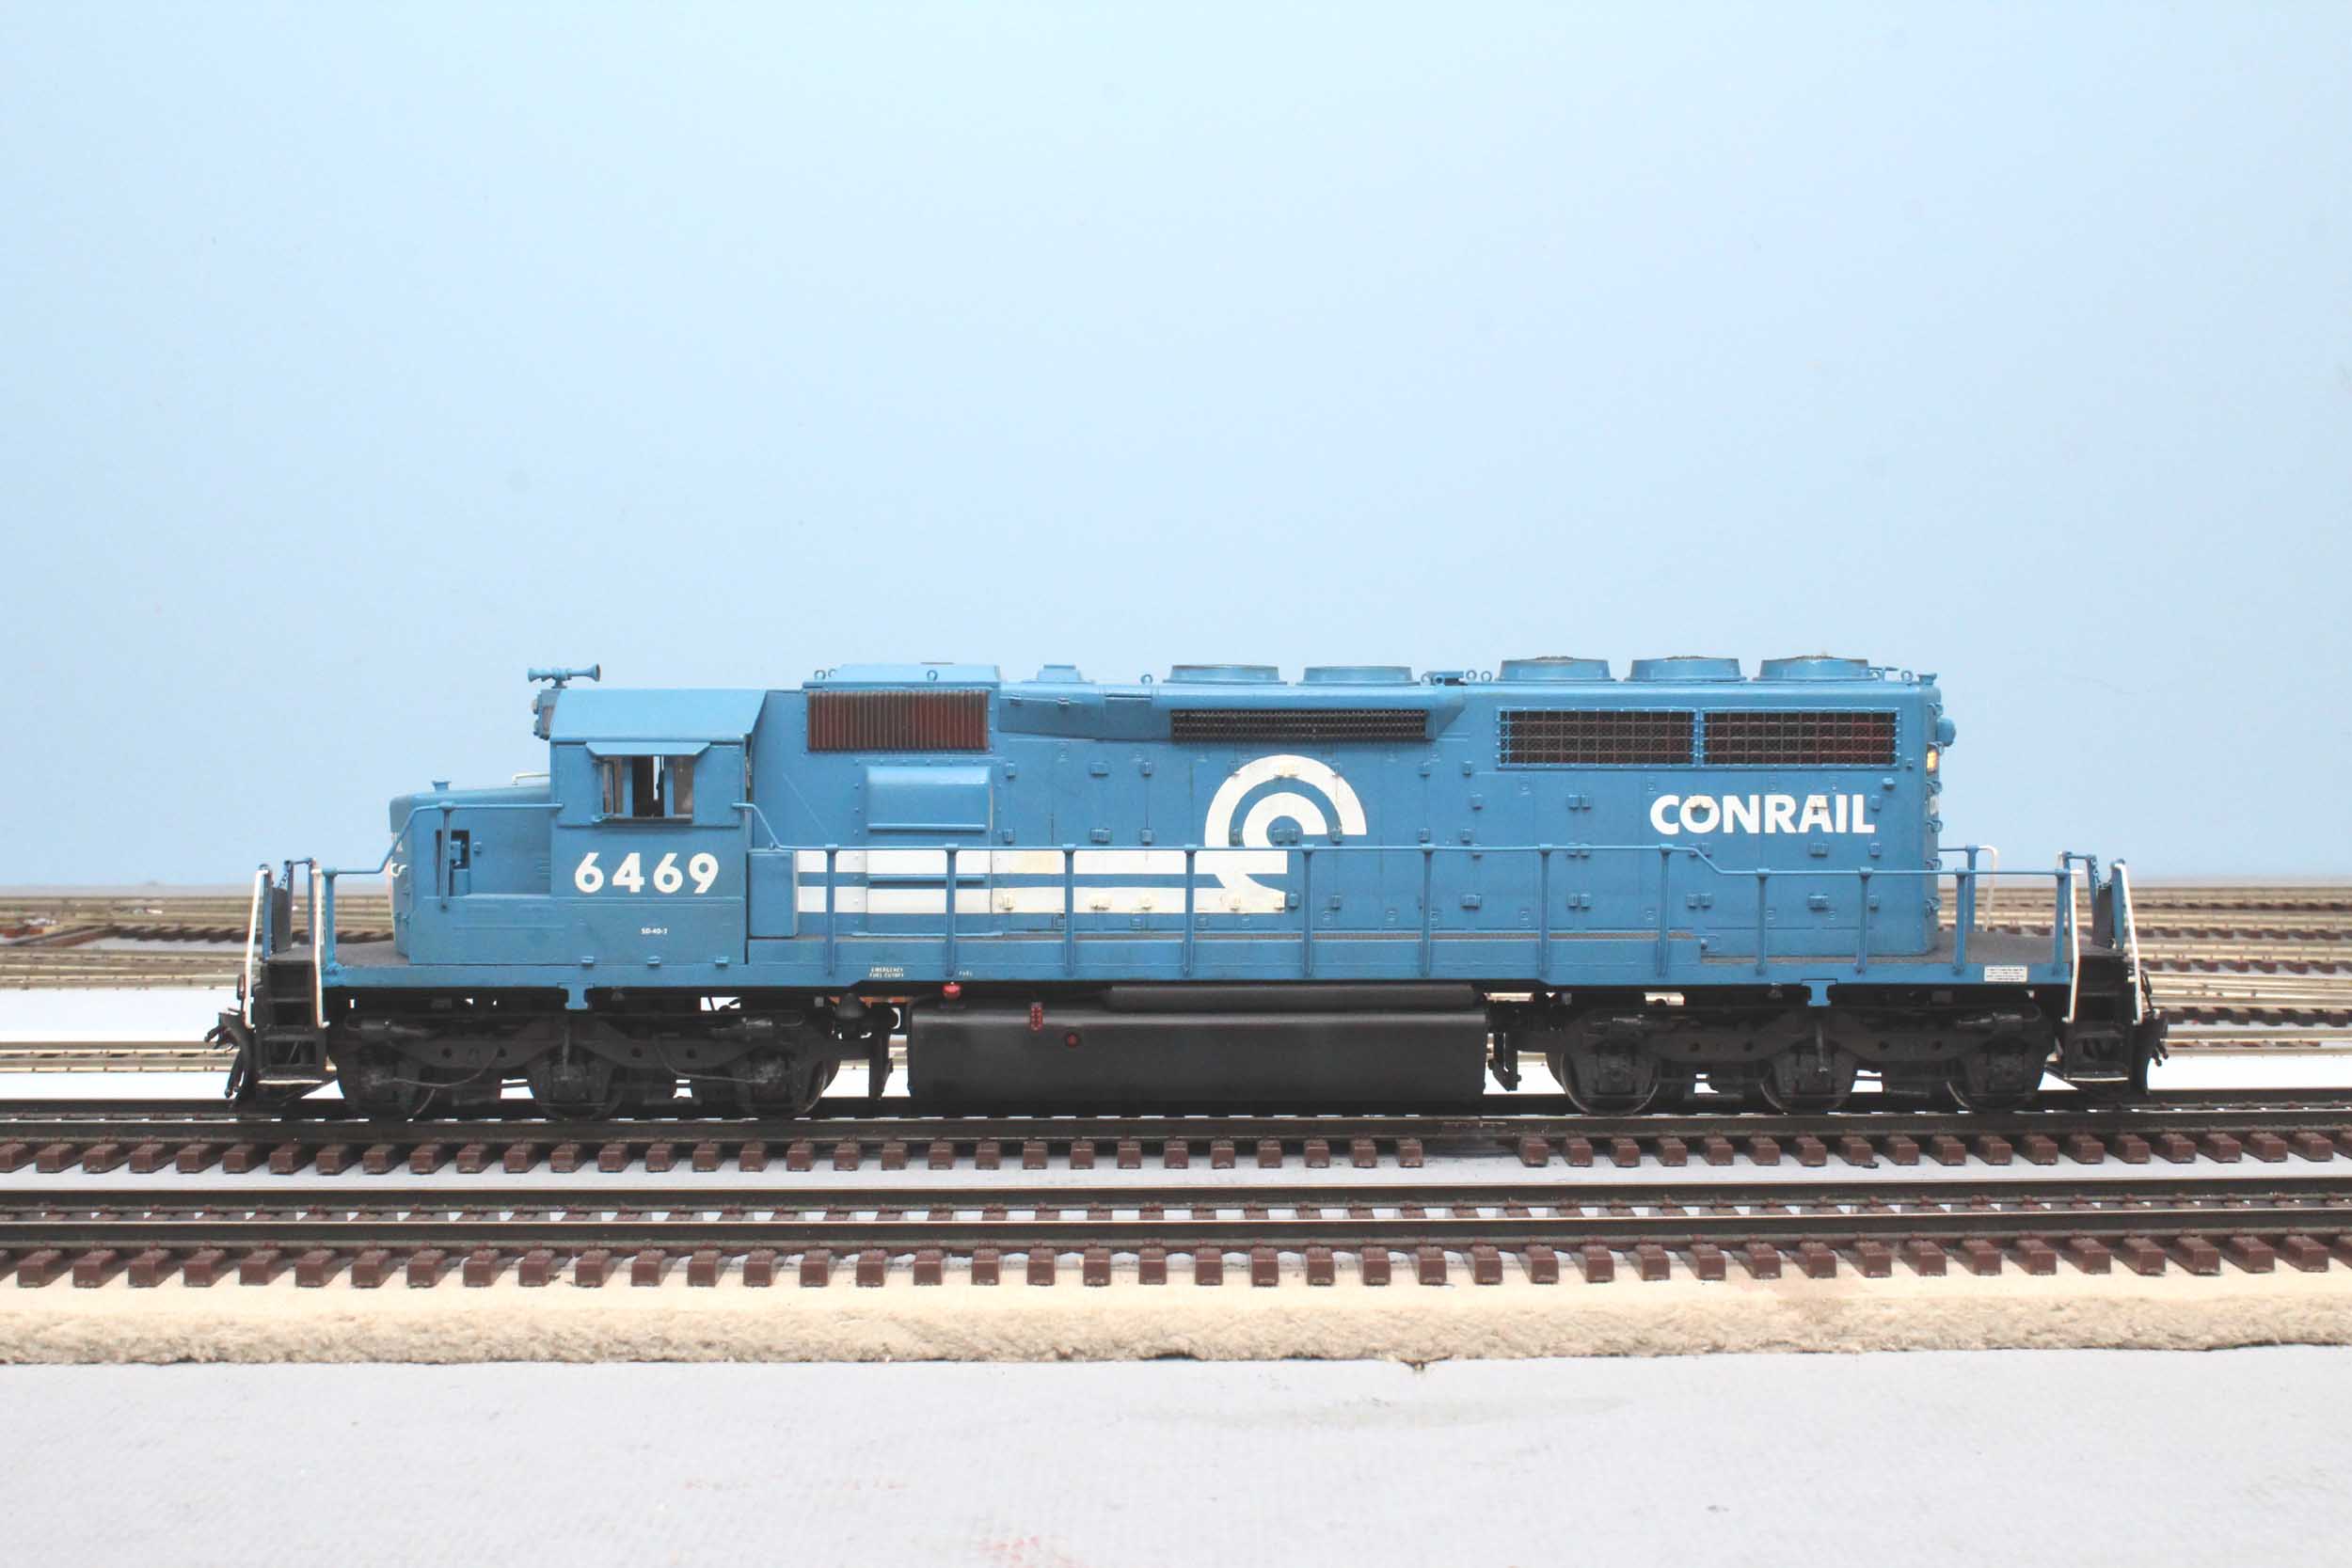
I did not want to weather it much as that was a new concept for
me at that time. Unfortunately, you could not accuse Overland of using too much
solder on this model. Some of the handrail stanchions and major hood cross
braces have come loose. The thought of matching the Conrail blue paint for
the needed repairs was so very discouraging that lead to a very long time with
it not running. When I changed to DCC I could not run it at all.
September 2016
For no particular reason other then, “why keep it if I don’t run it”-
Conrail 6469 was run for the first time on 9-8-16 in maybe 20 years. I flopped
down 3 pieces of flex track on my layout and clipped a DC transformer to it. It
ran OK but my 2016 skills should be able to make it run really well, and add
the modern electronics of a sound unit and significantly better LED lighting.
The constant lighting units never worked well anyway.
Photos
taken 9-8-16
I
am going to keep the 1991 paint job as much as possible.
1990
Electronics
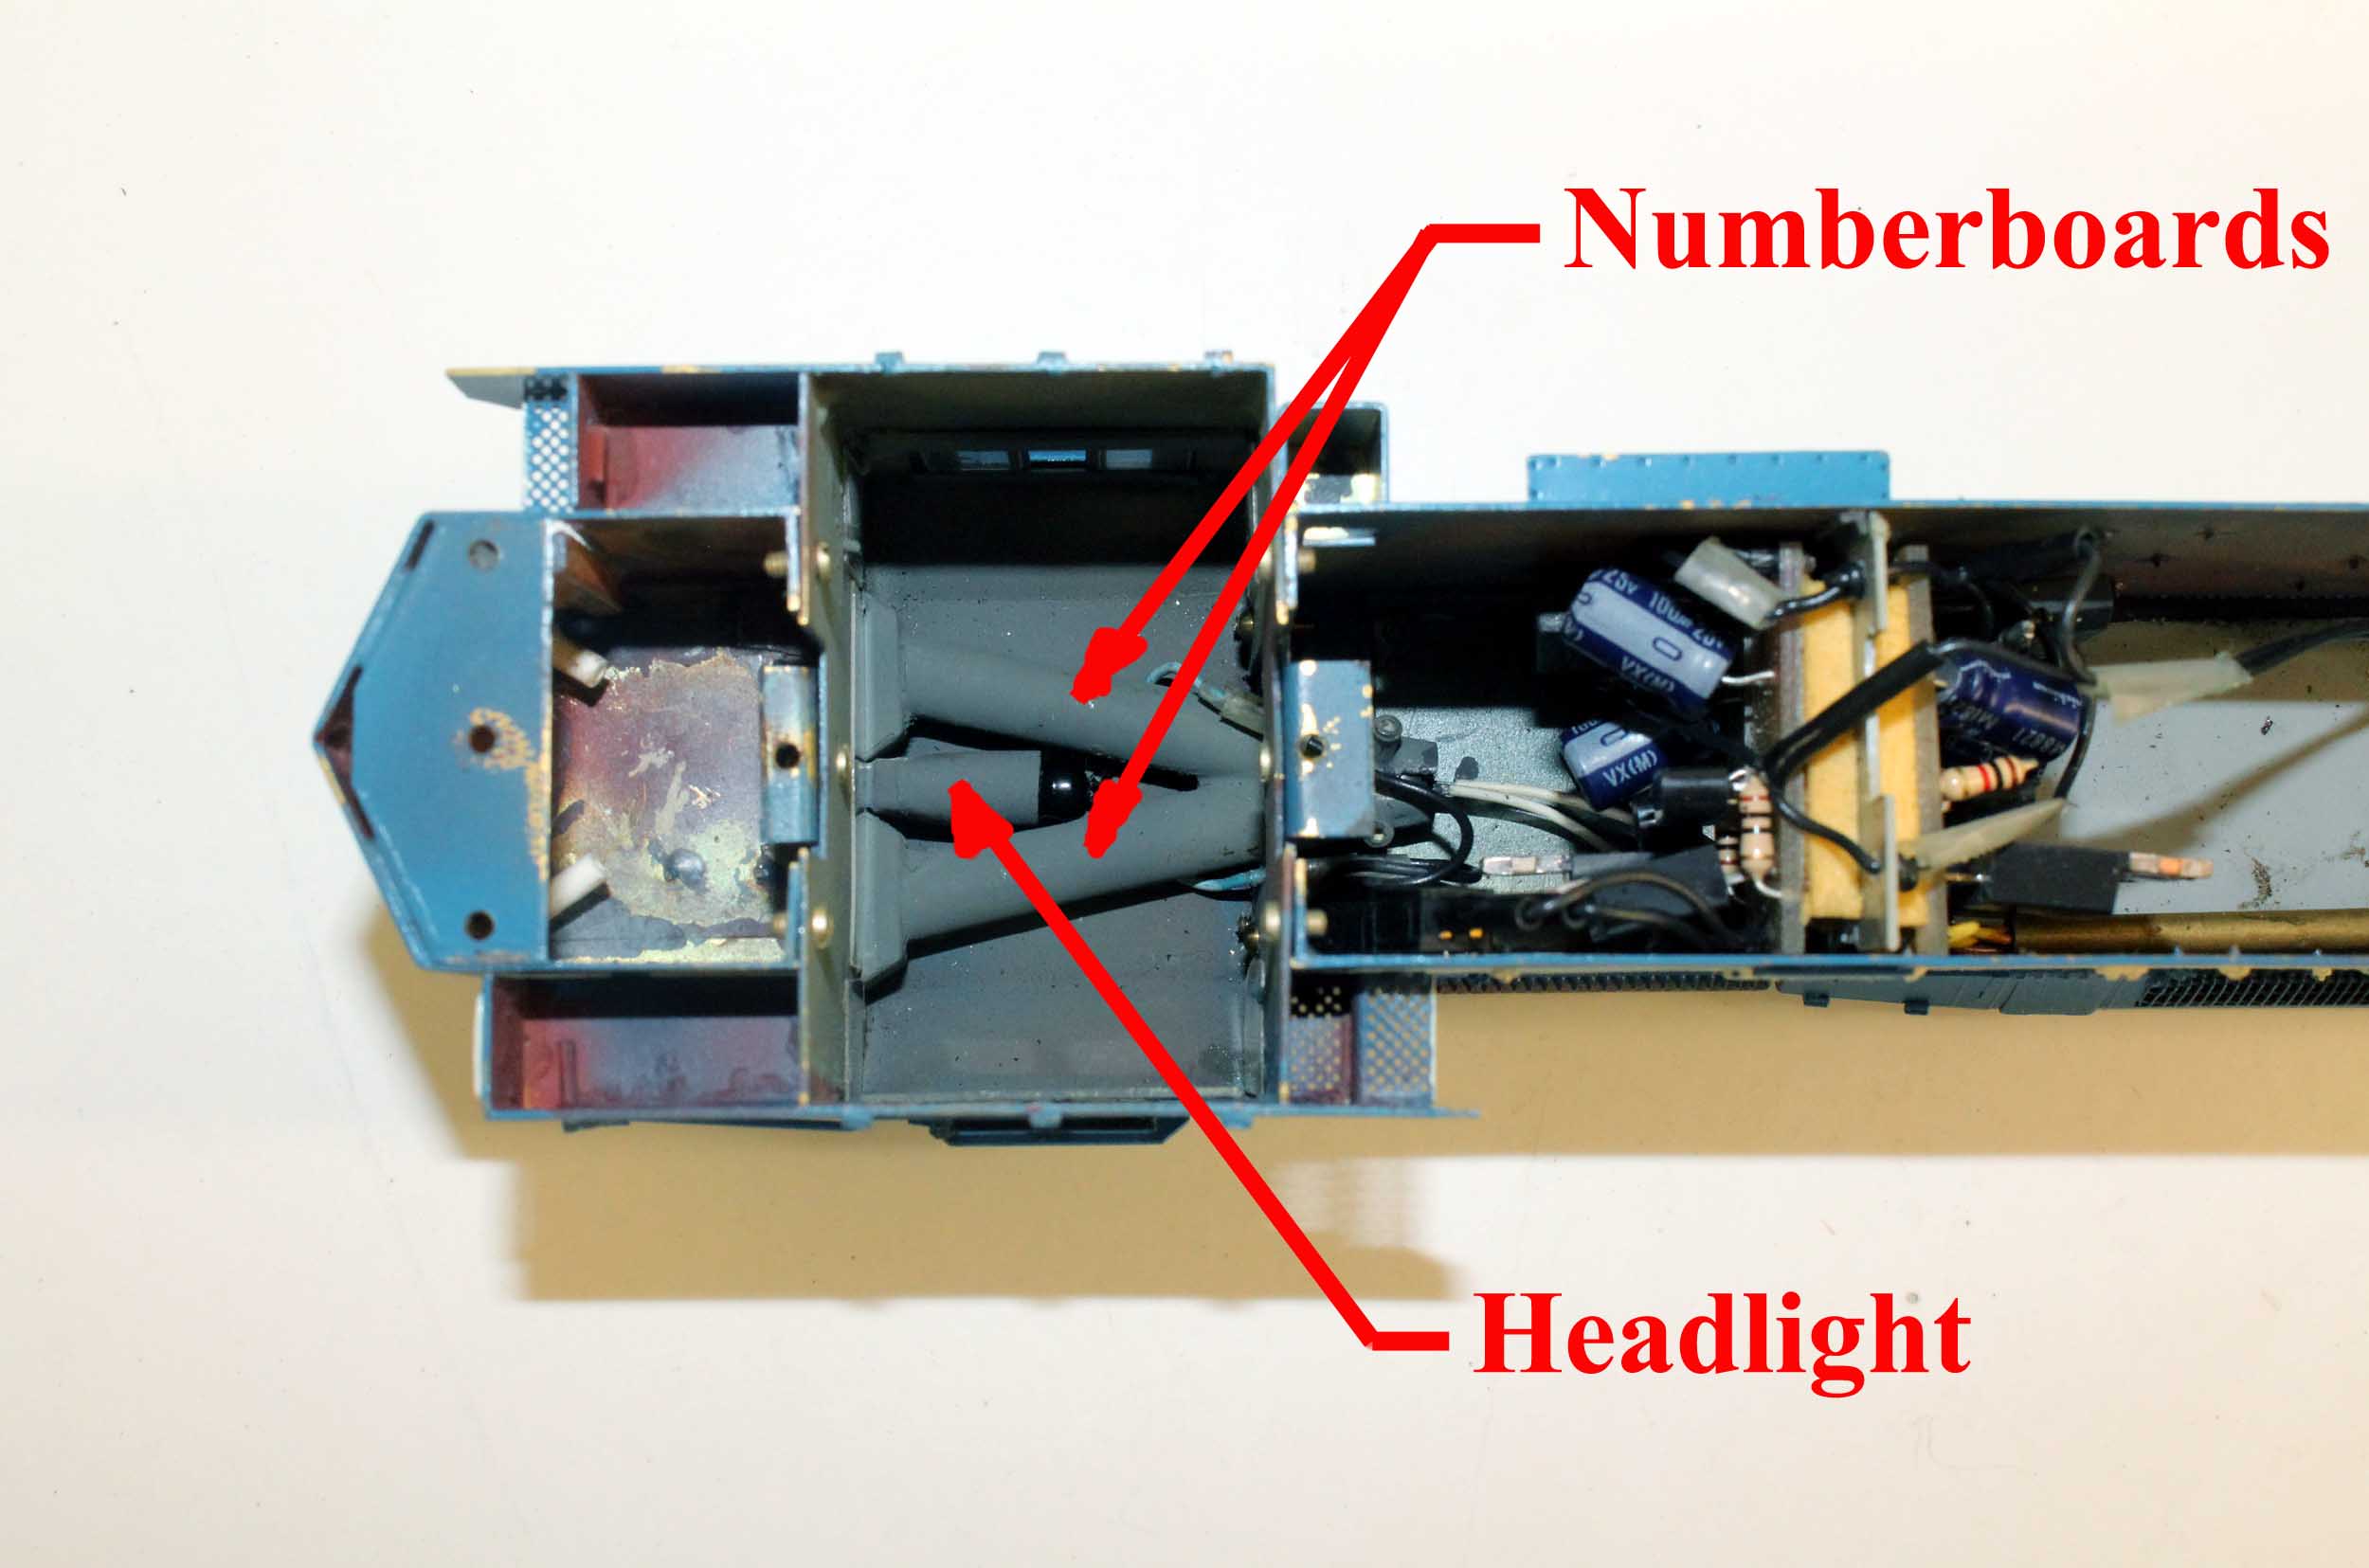
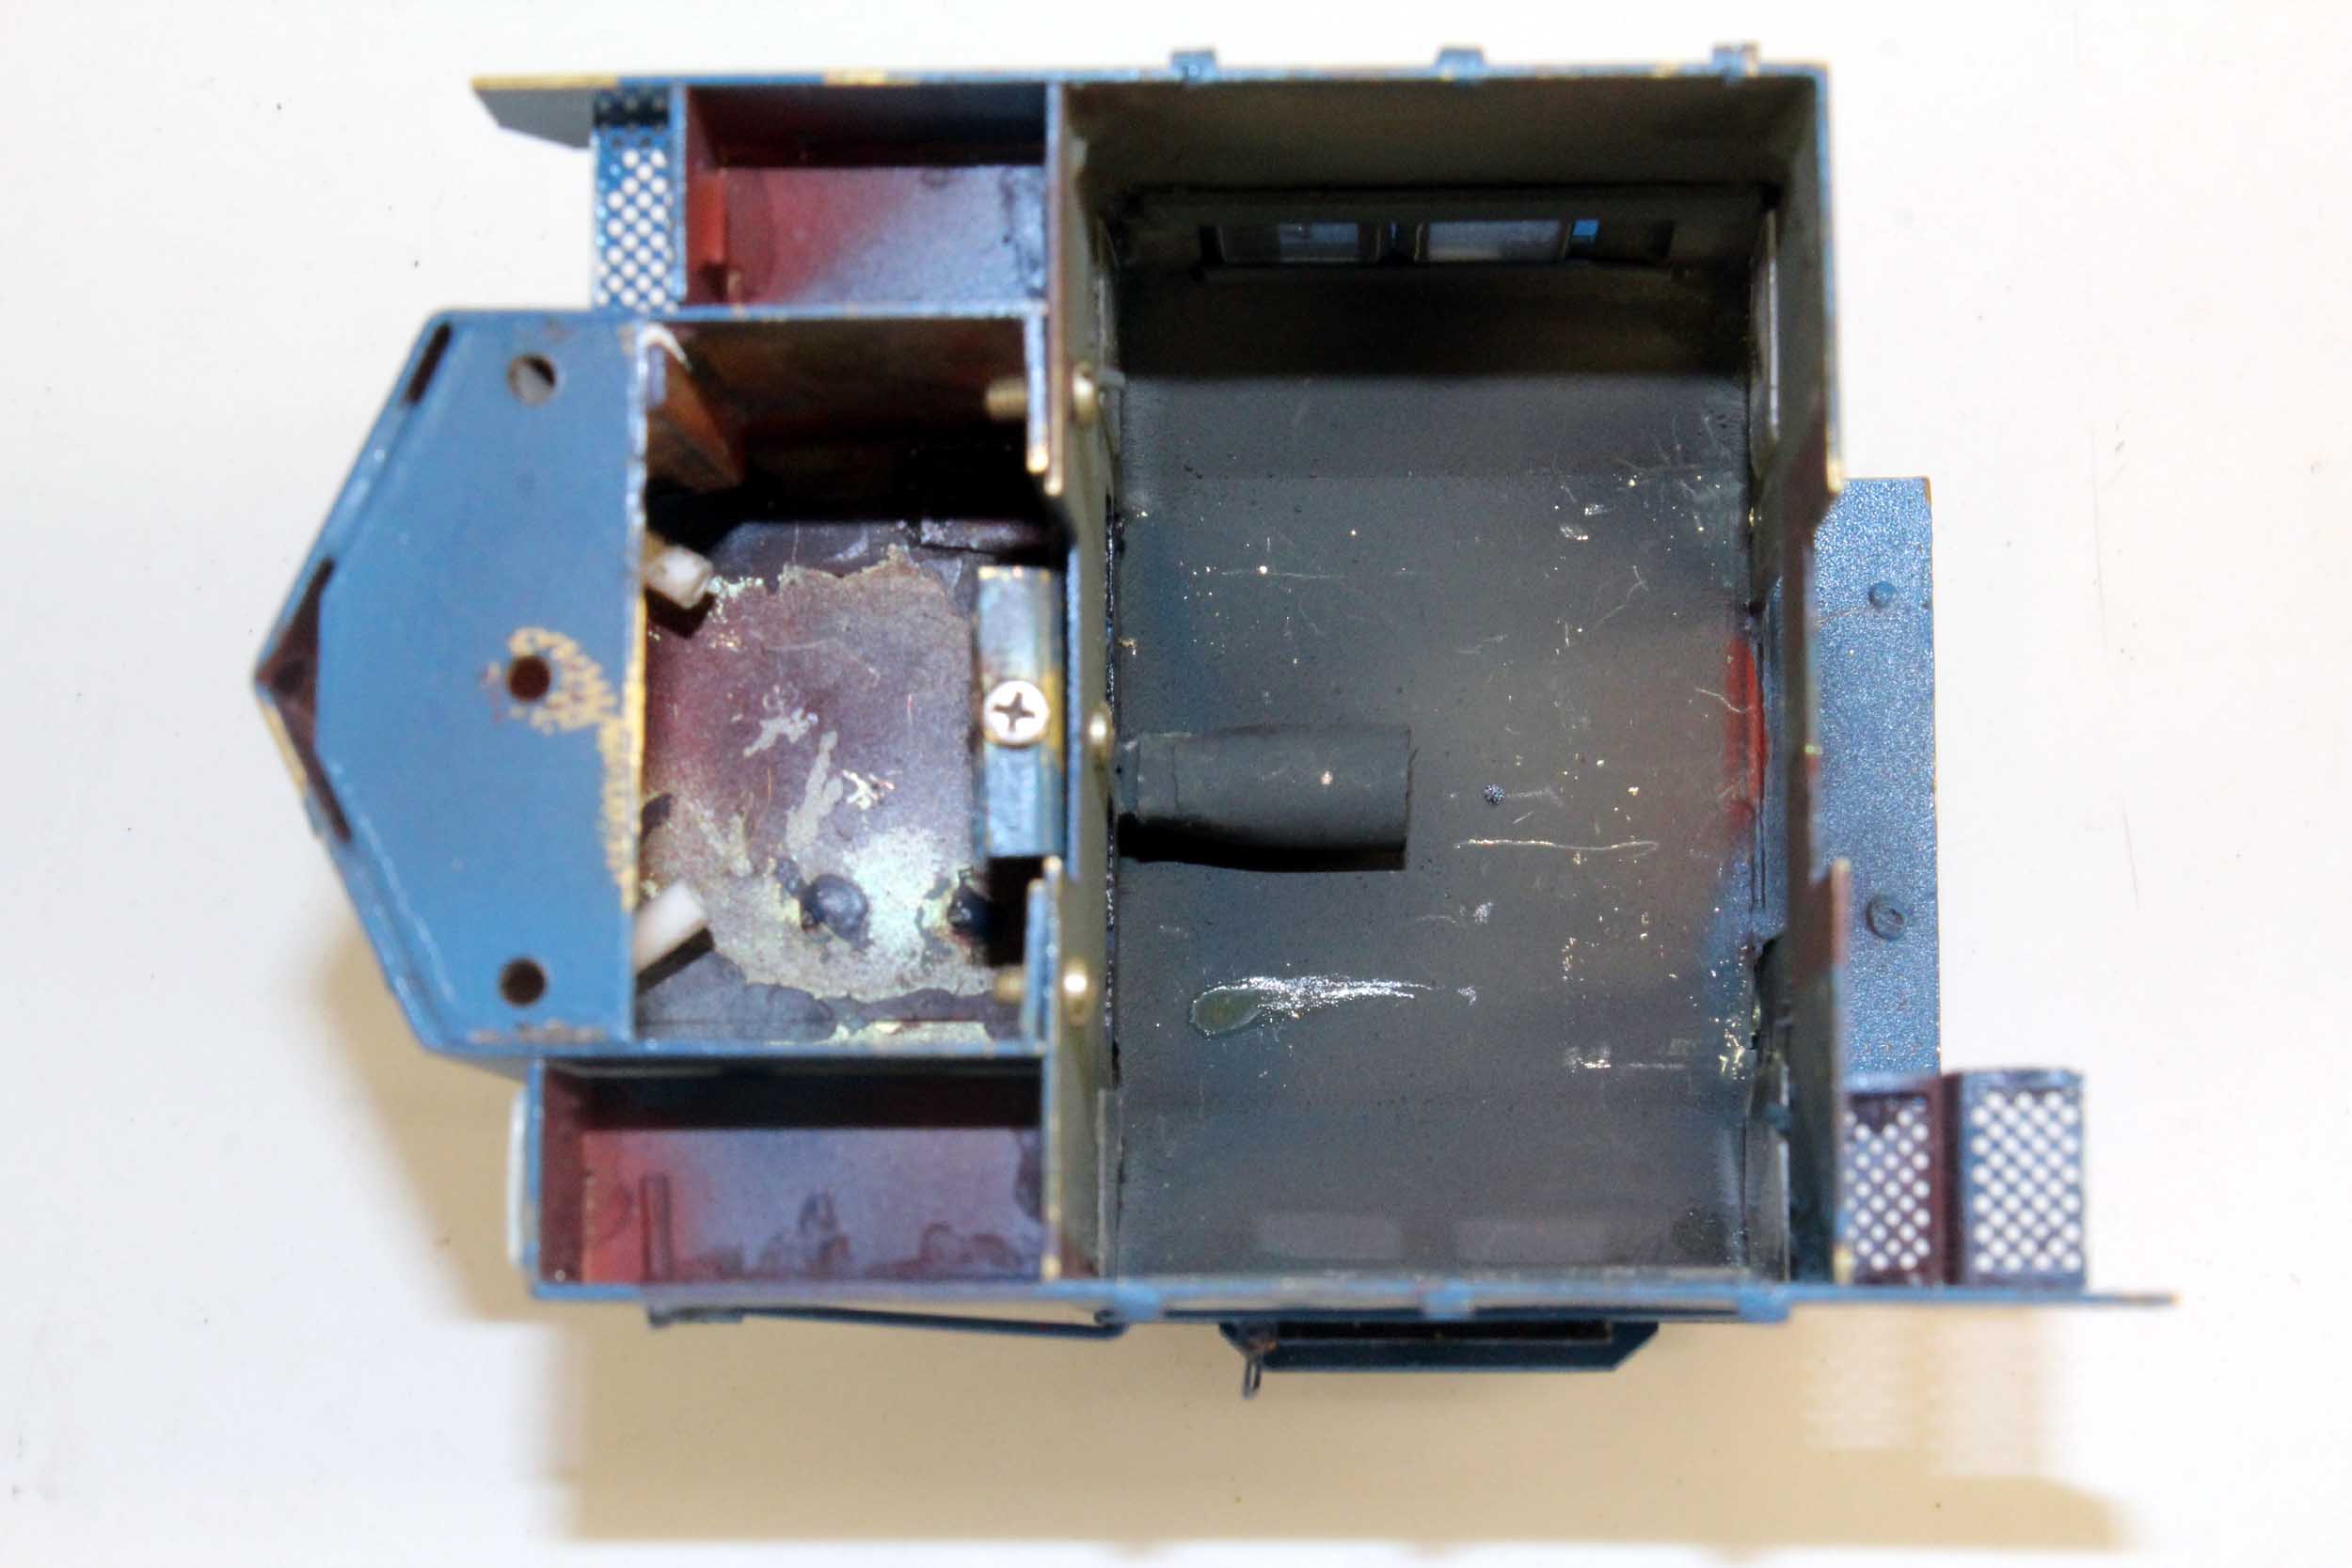
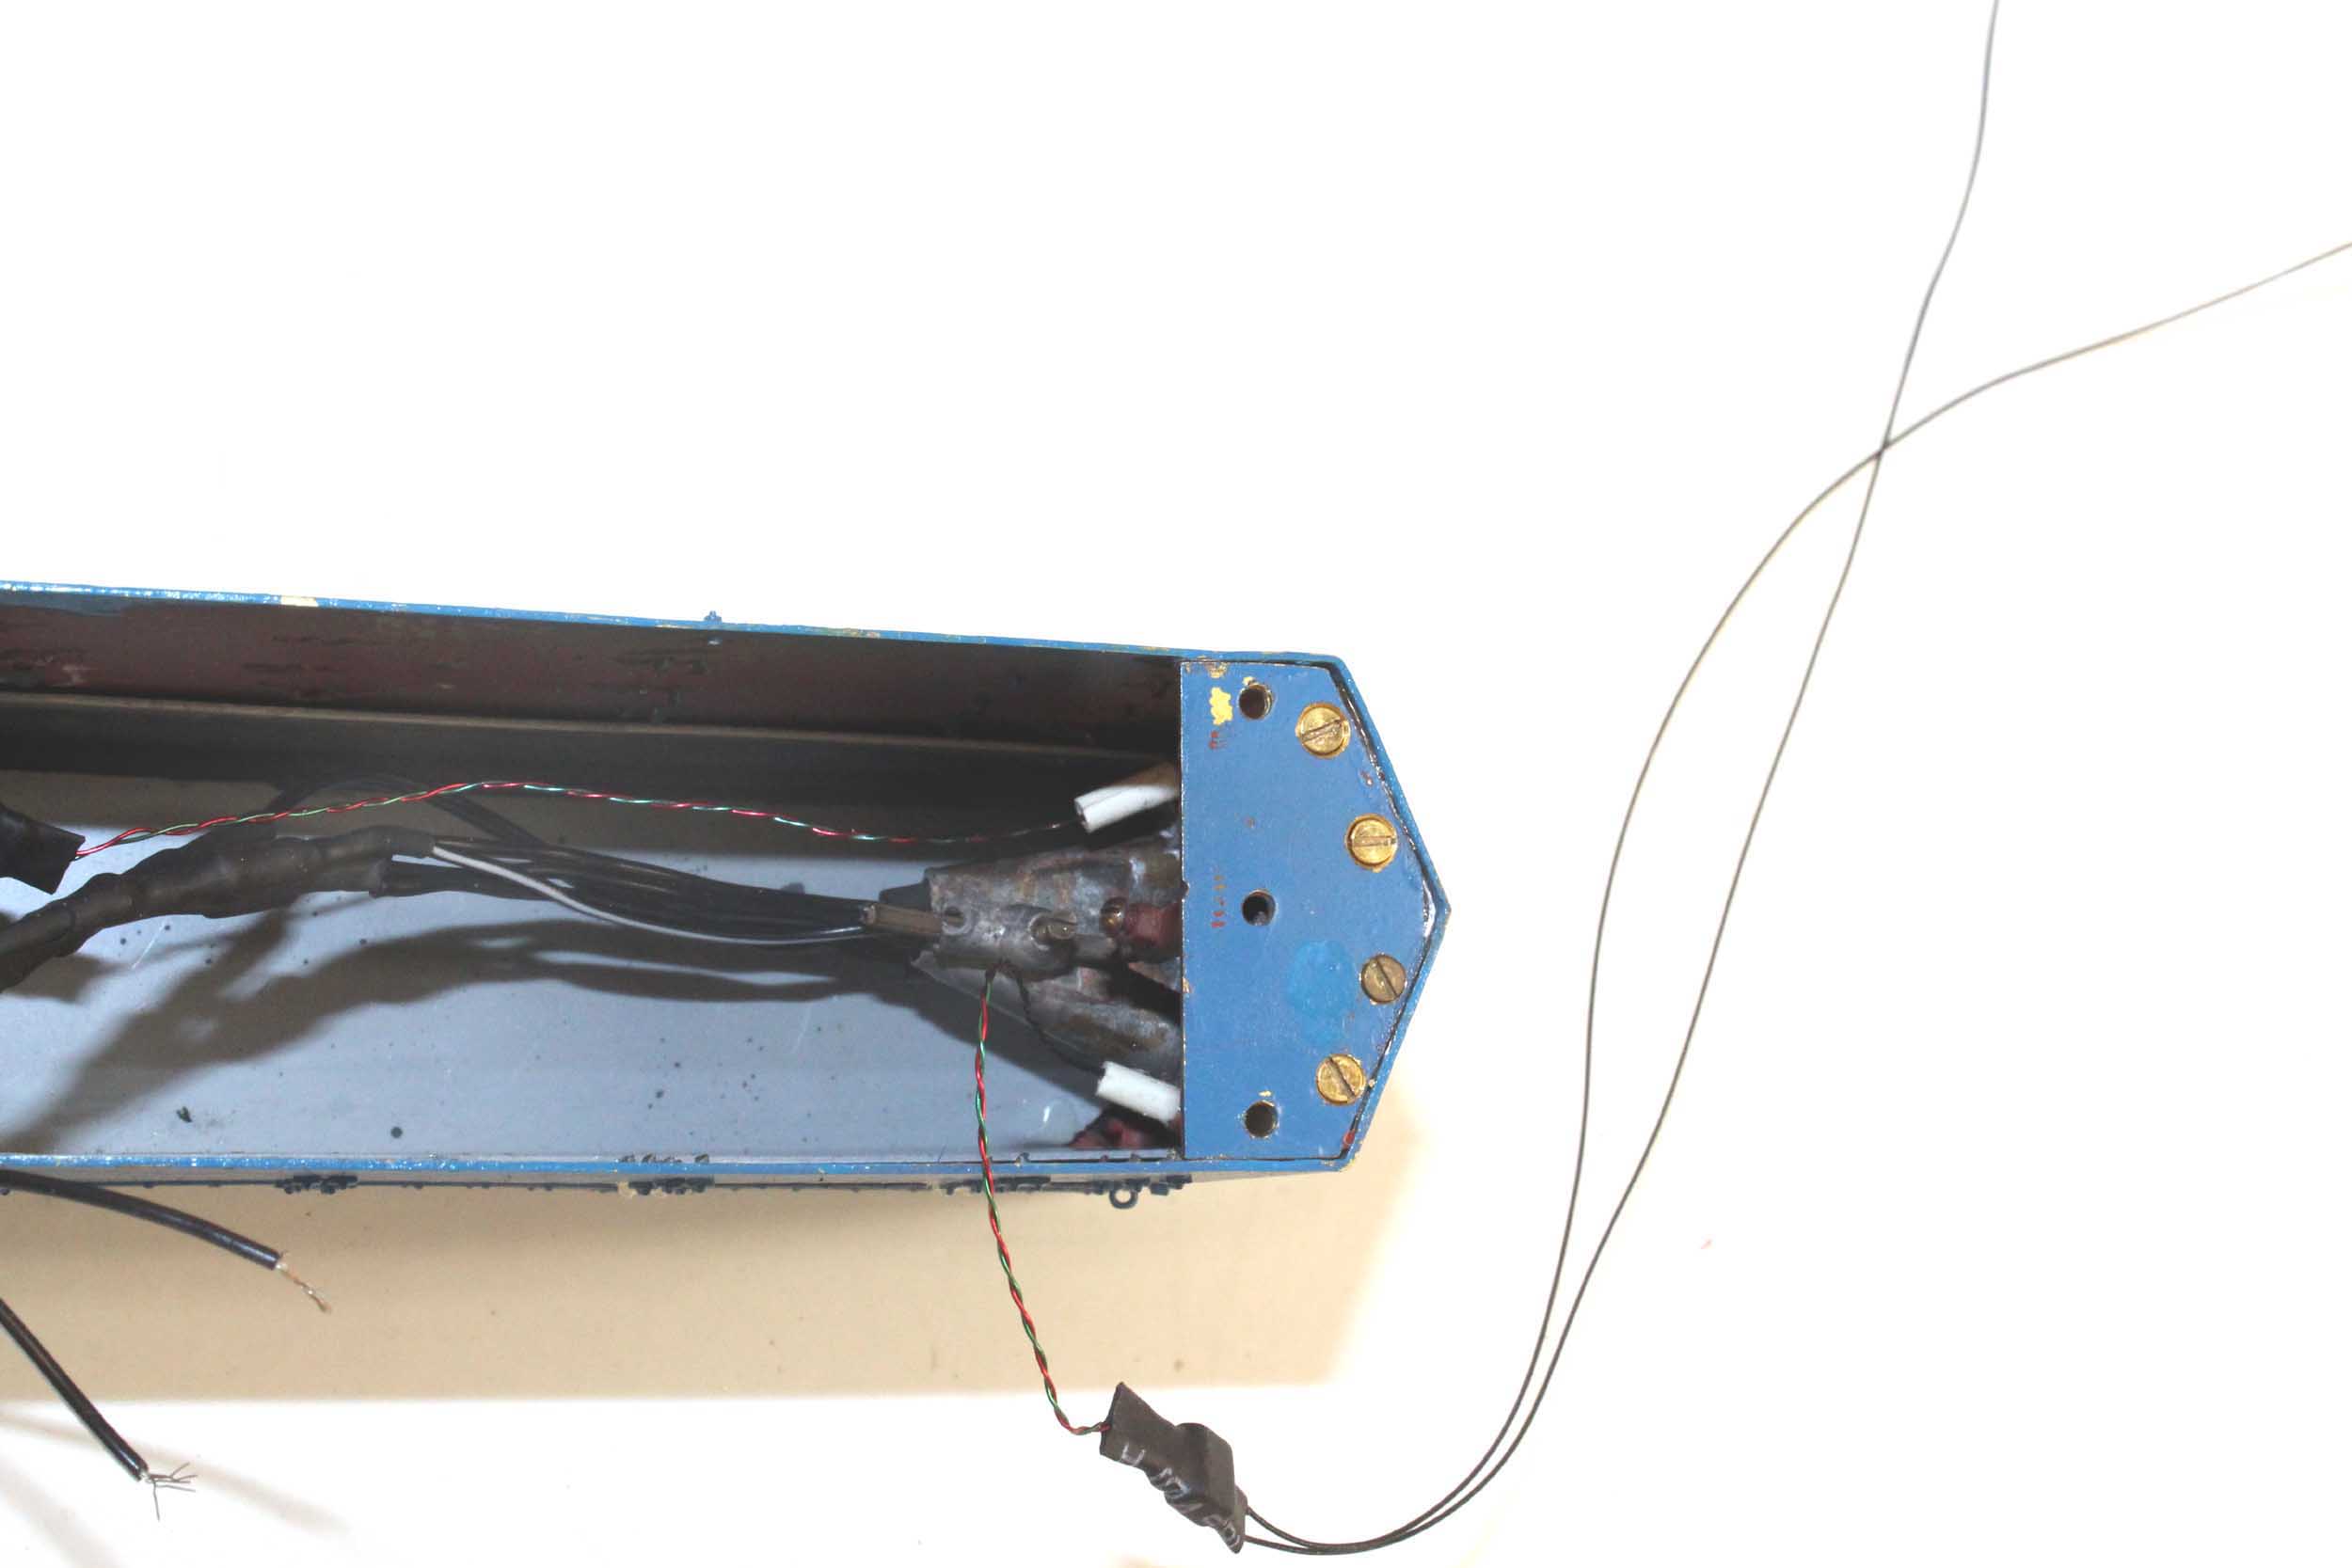
This
is what I did in 1990 as an extensive rework, with me trying to light the
headlights, numberboards and corner markers with 4 light bulbs total. I was
concerned about the overall amperage draw and obviously what would fit in the
shell. There are 4 Dallee electronics constant lighting units crammed in here.
Two are constant and two are directional. I tried to light the corner markers
with fiber optics strands from the numberboard bulbs. The bulb holders were massively time
consuming to fabricate. It all failed miserably. There was not much that got
brightly lit. The good thing is the Dallee 3 volt bulbs were massive compared
to today’s LEDs. I recycled the bulb holders to also hold the LEDs.
The
below photos are for historic record. Again - the lighting system failed! You
just can’t replace a constant voltage for model lighting to emulate the real
thing. DCC fixed all of these problems. But maybe there are ideas here that can
be adapted for other locos.
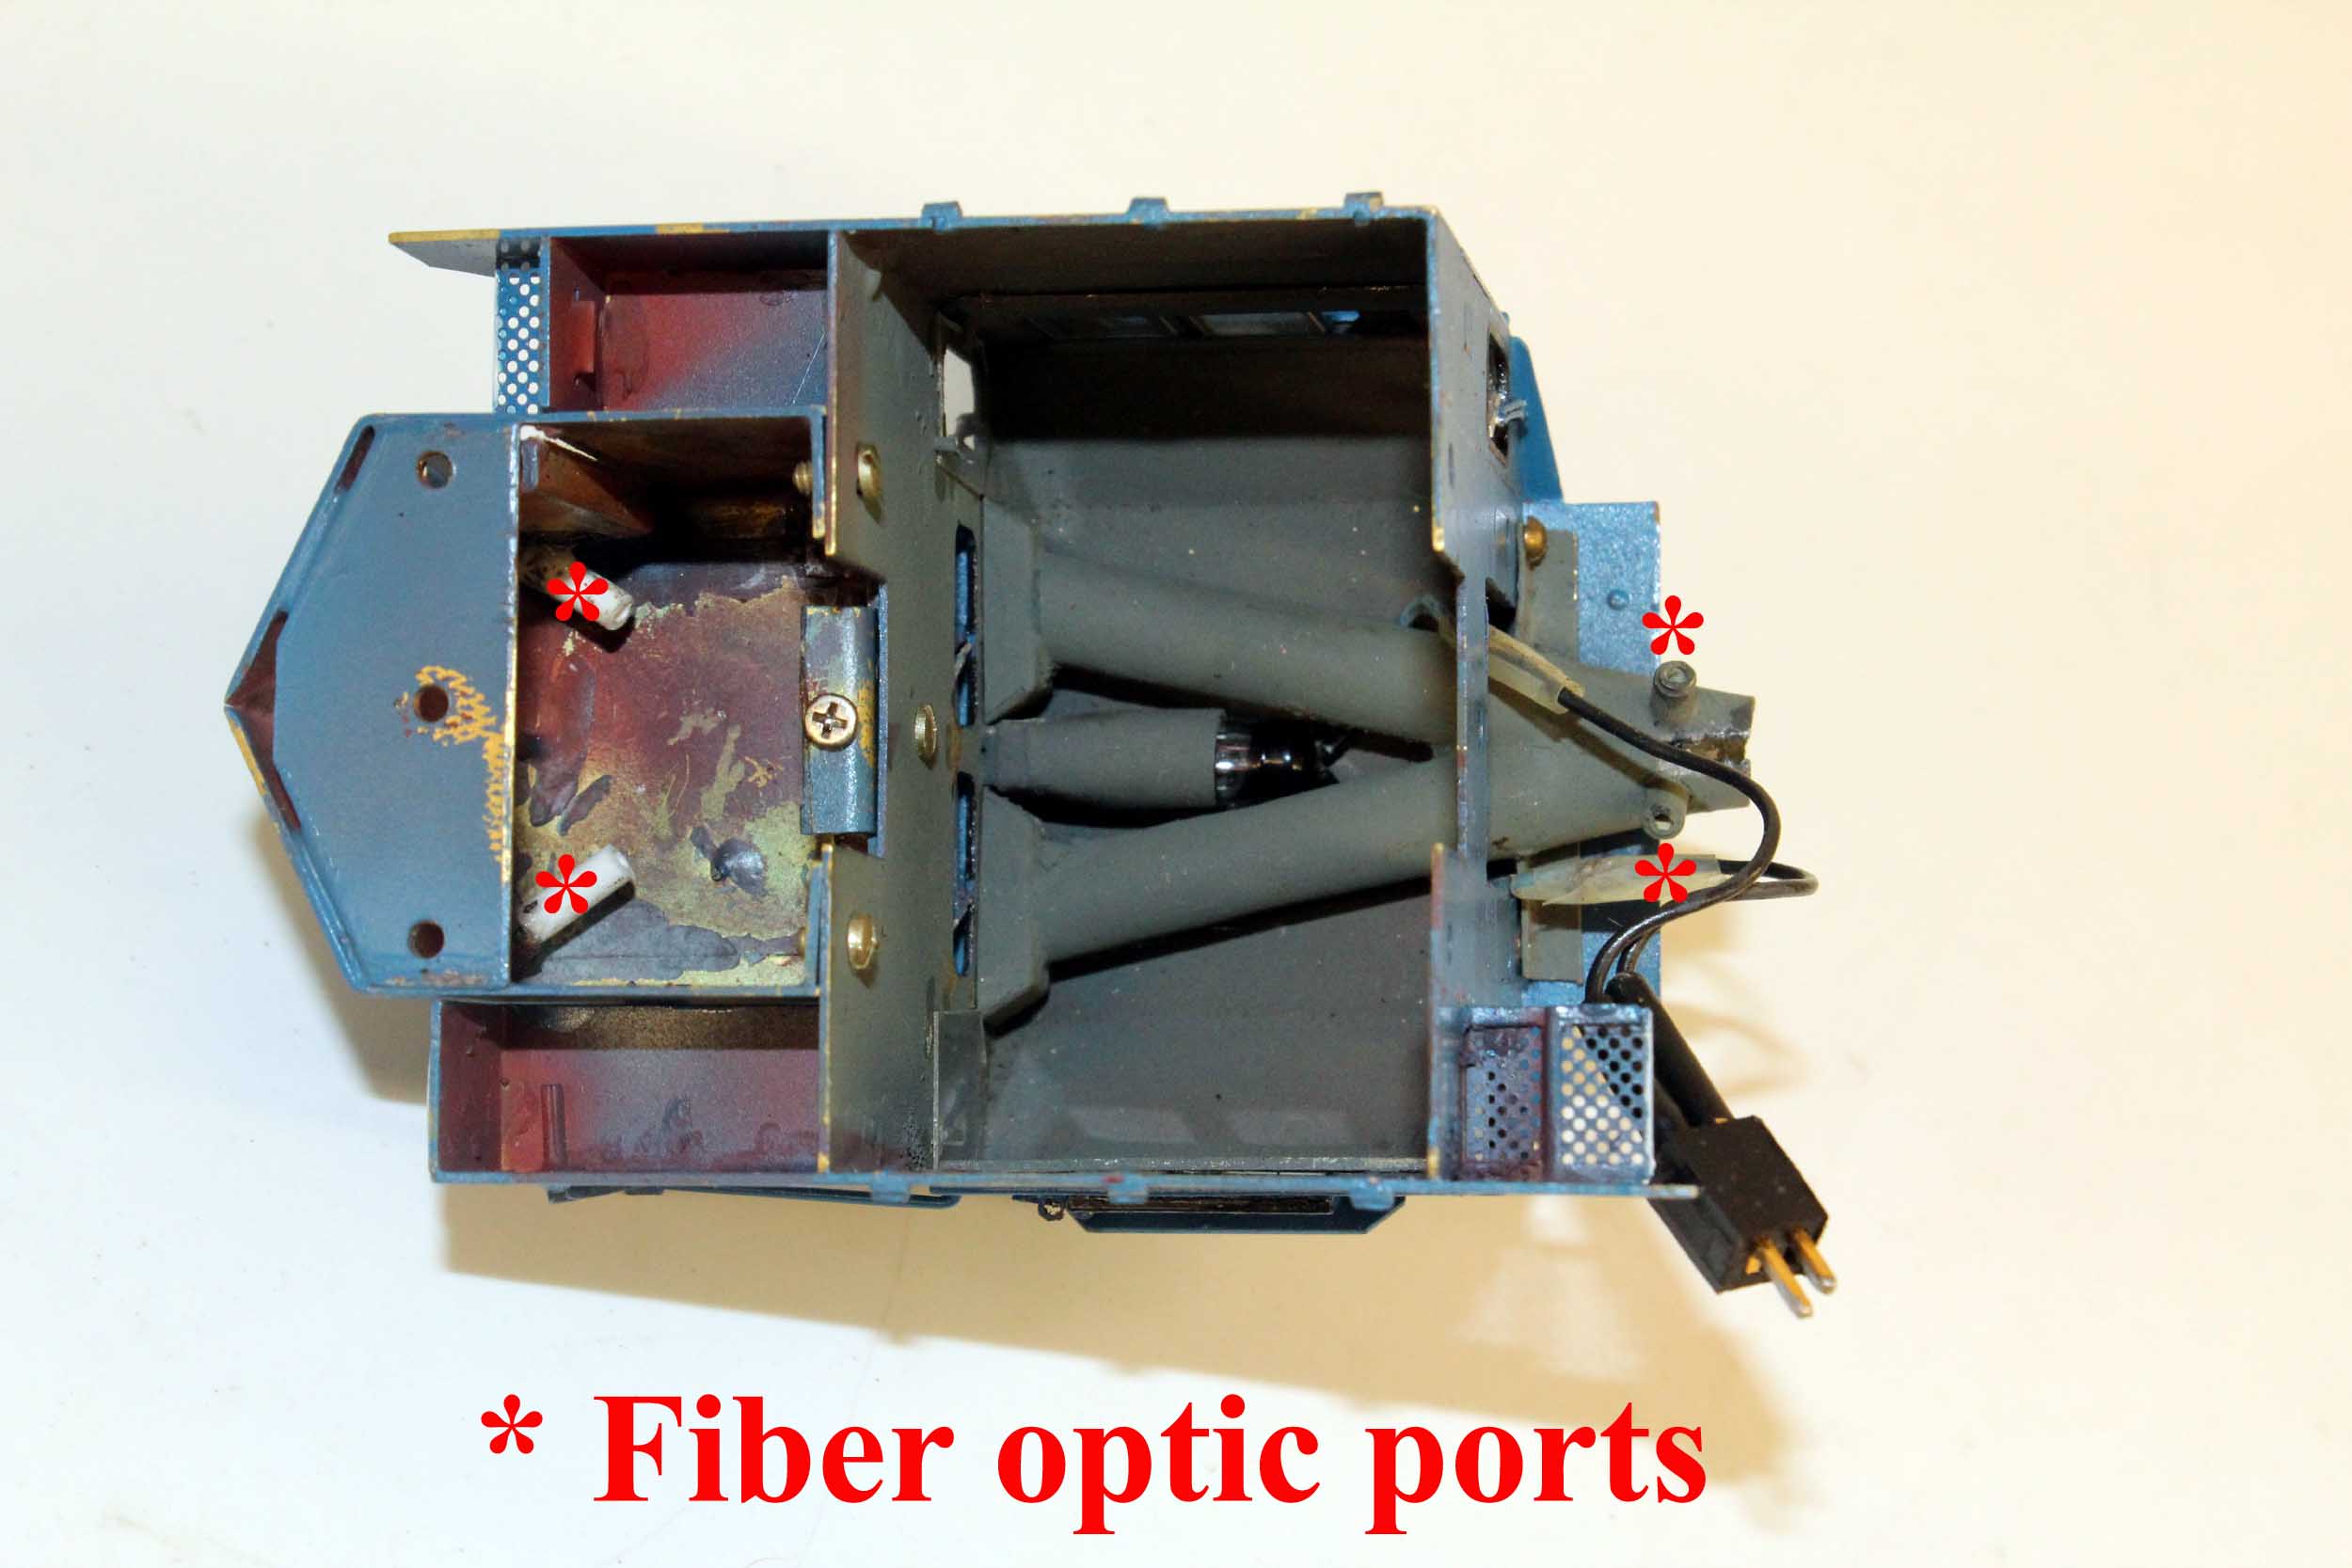
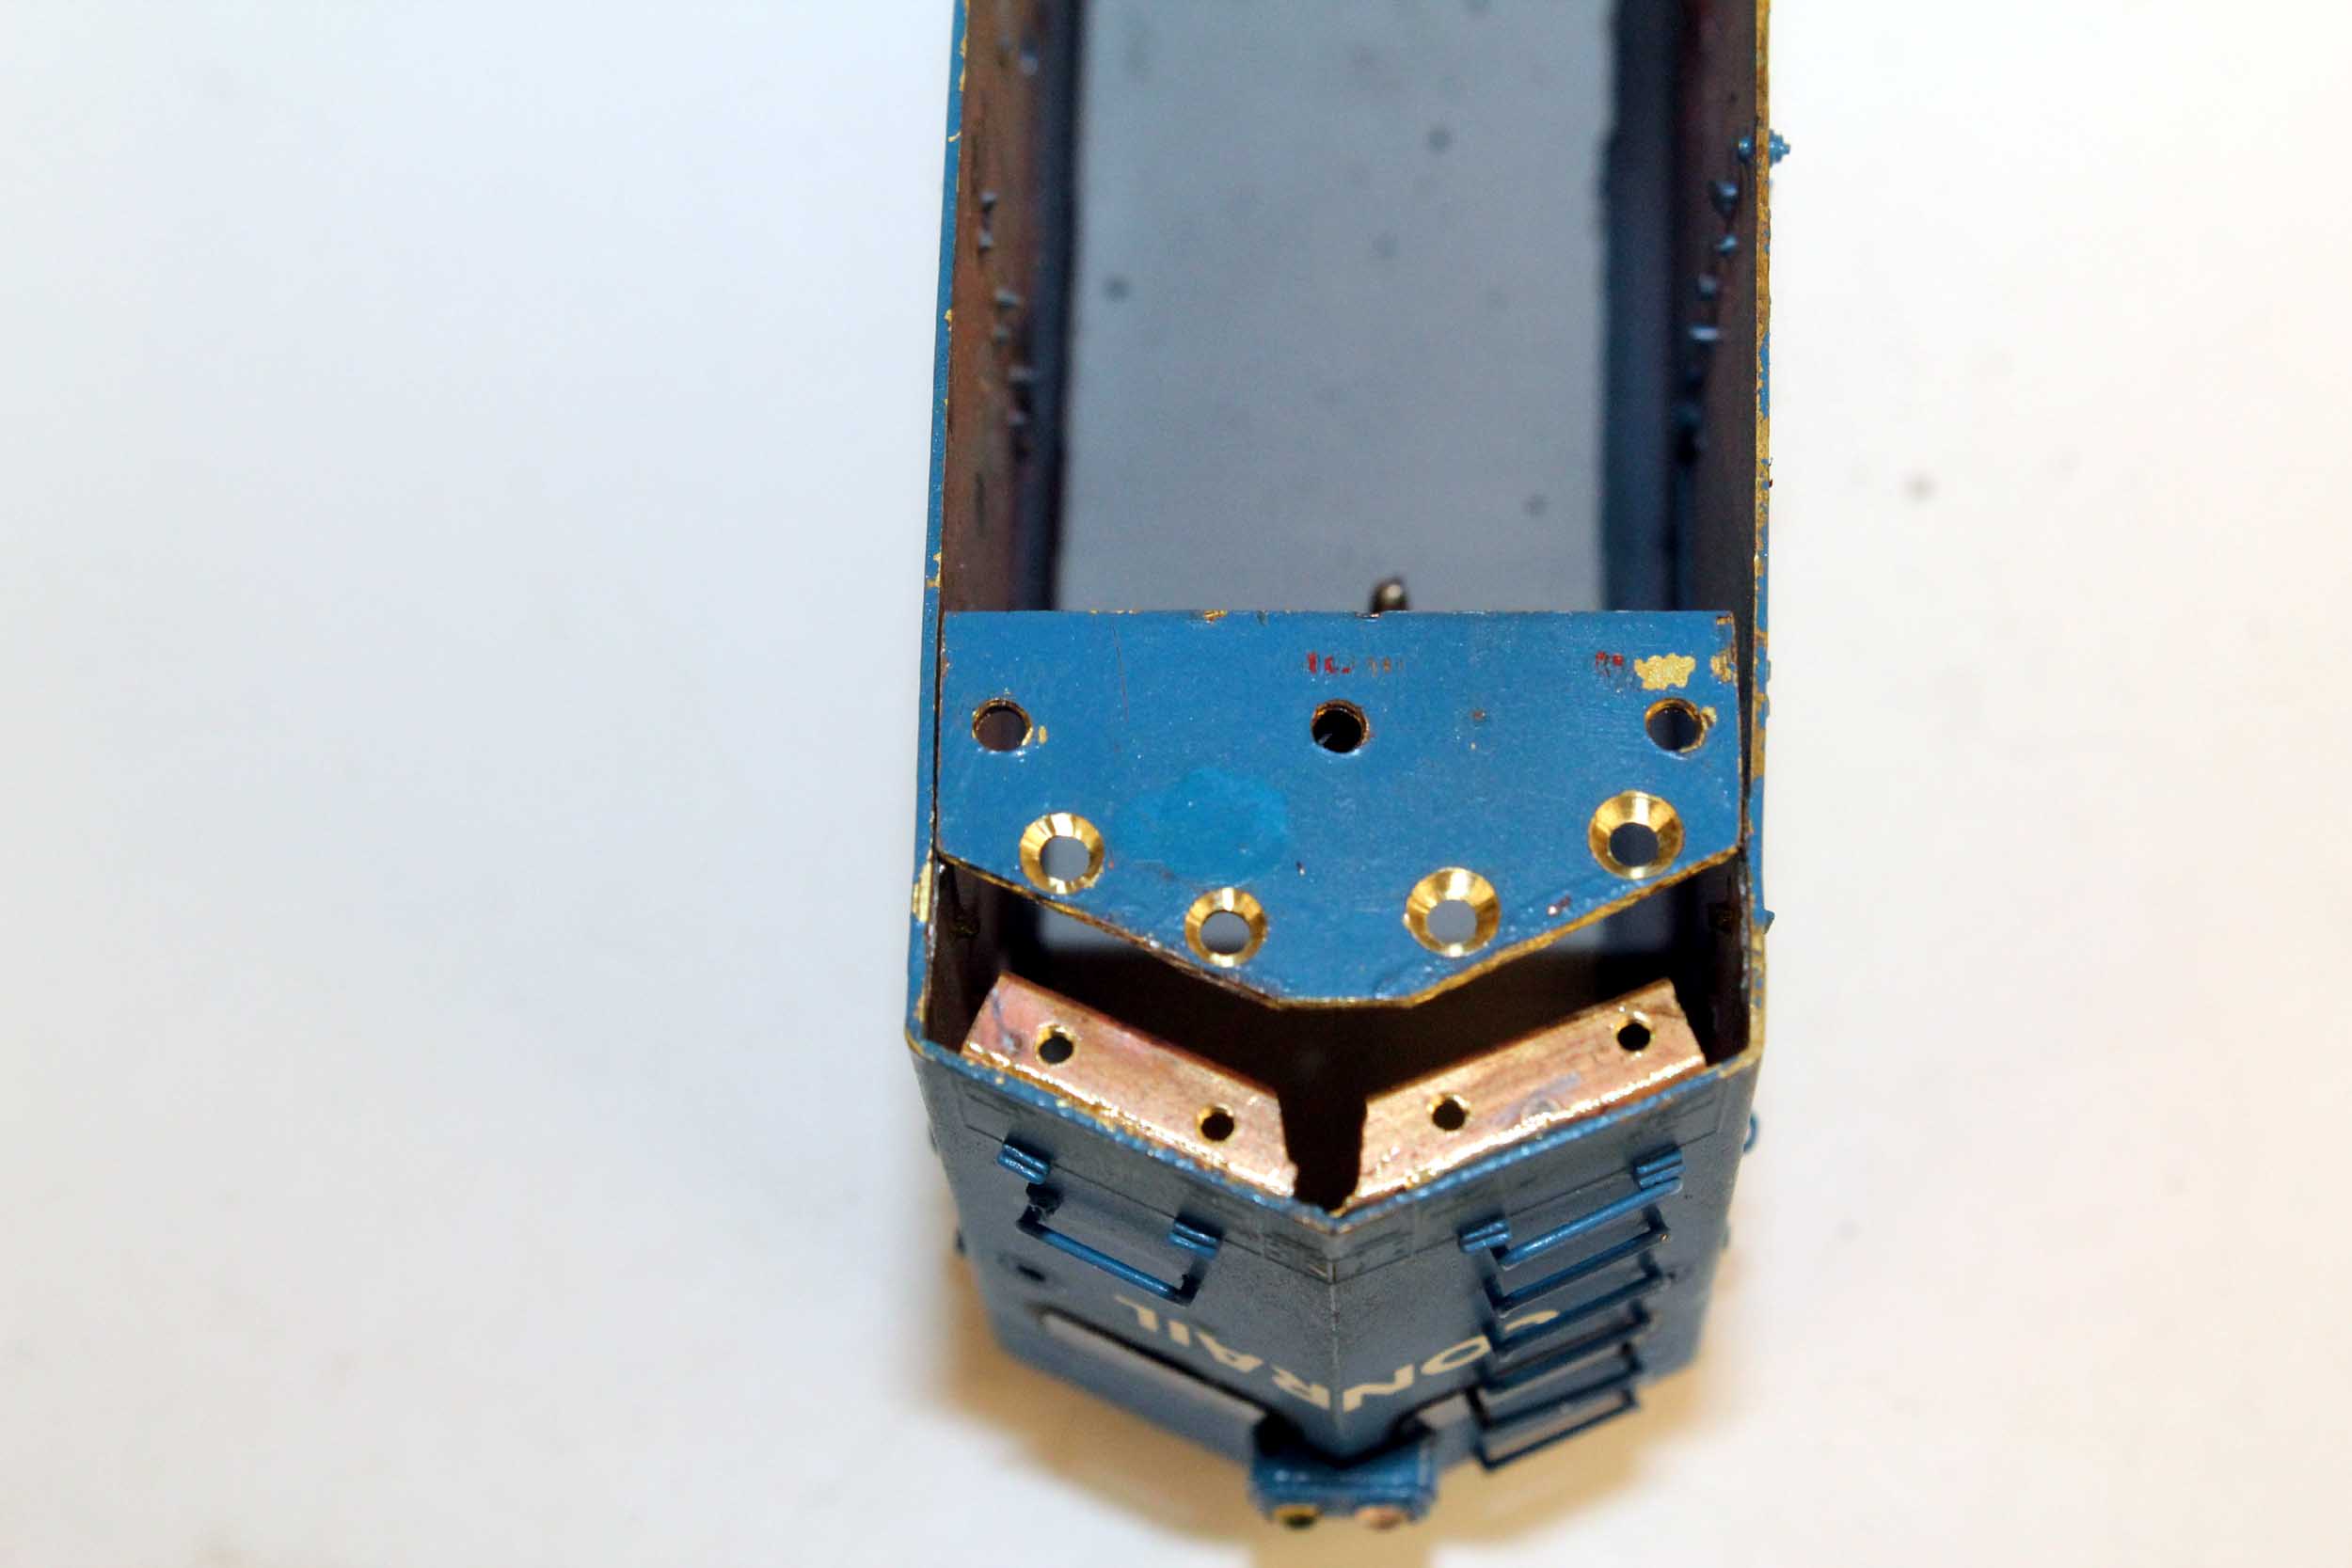
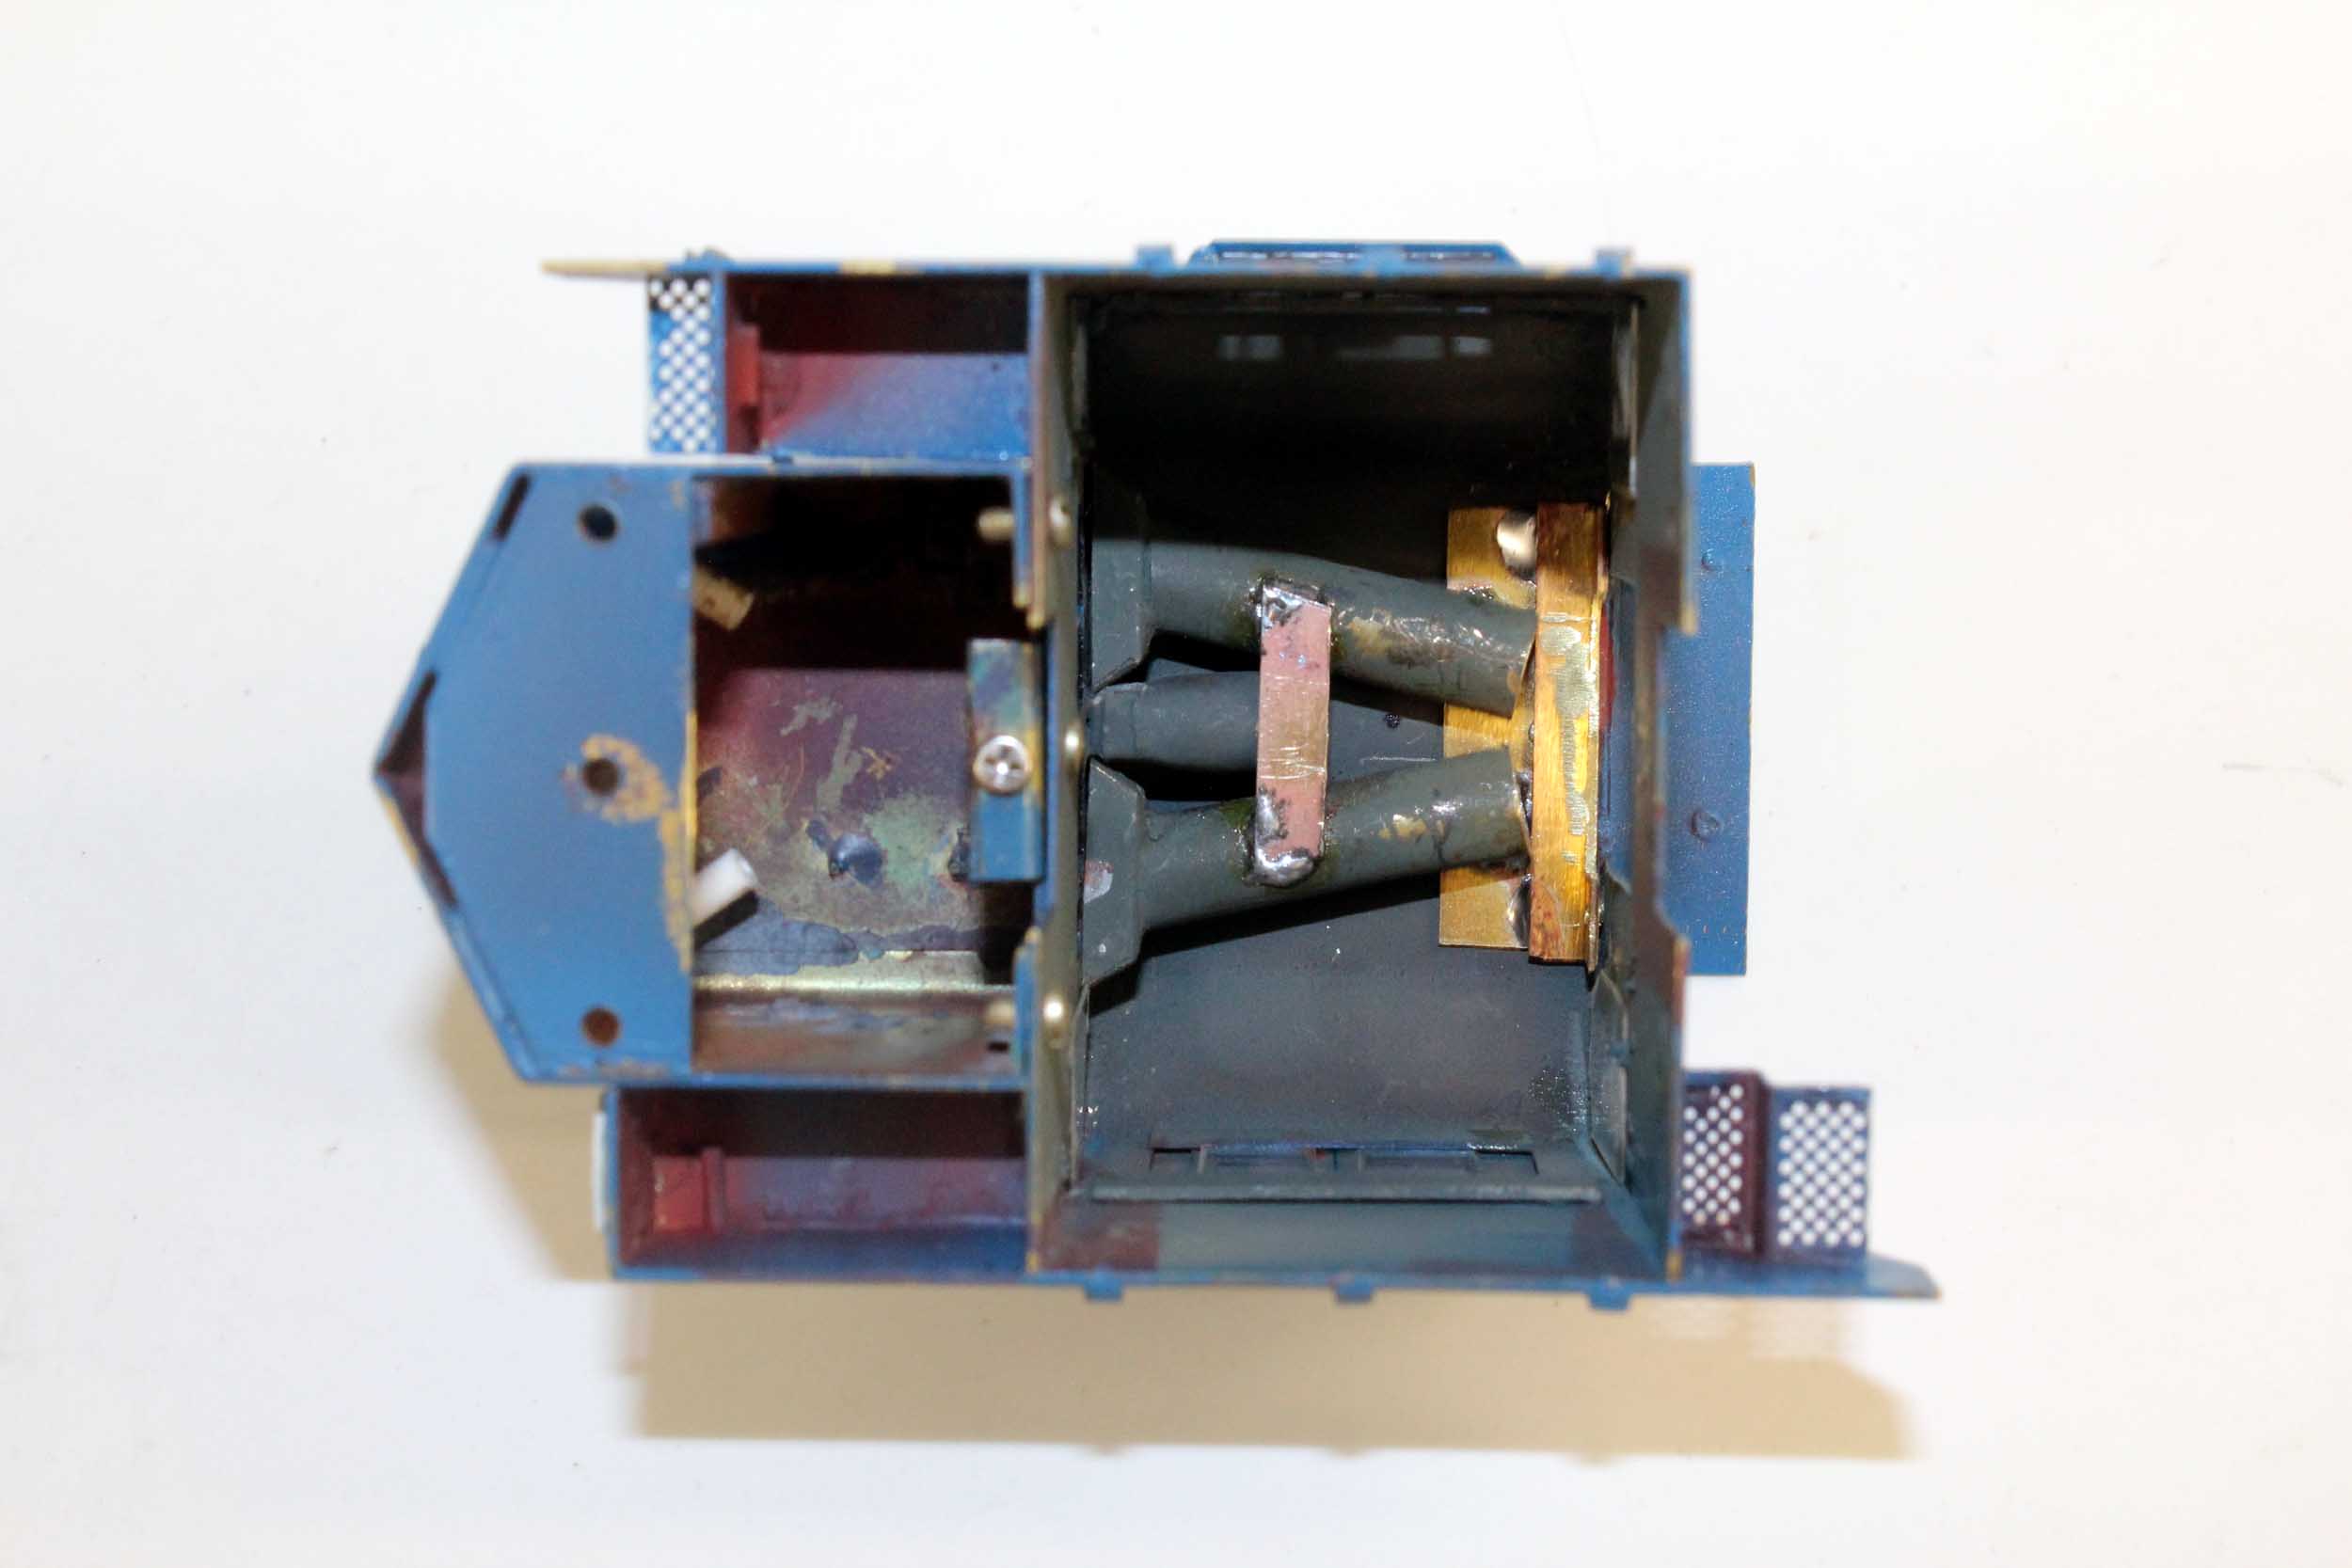
This
is the light manifold for the long hood showing the headlight at the top and
numberboards at the bottom. I put tissues in as a lighting diffuser. The
triangular plate at the bottom should still be soldered as a mounting crossmember in the long hood. Overland Models were full of
cold solder joints that frequently failed. I probably cannot solder this back
in now because it is painted.
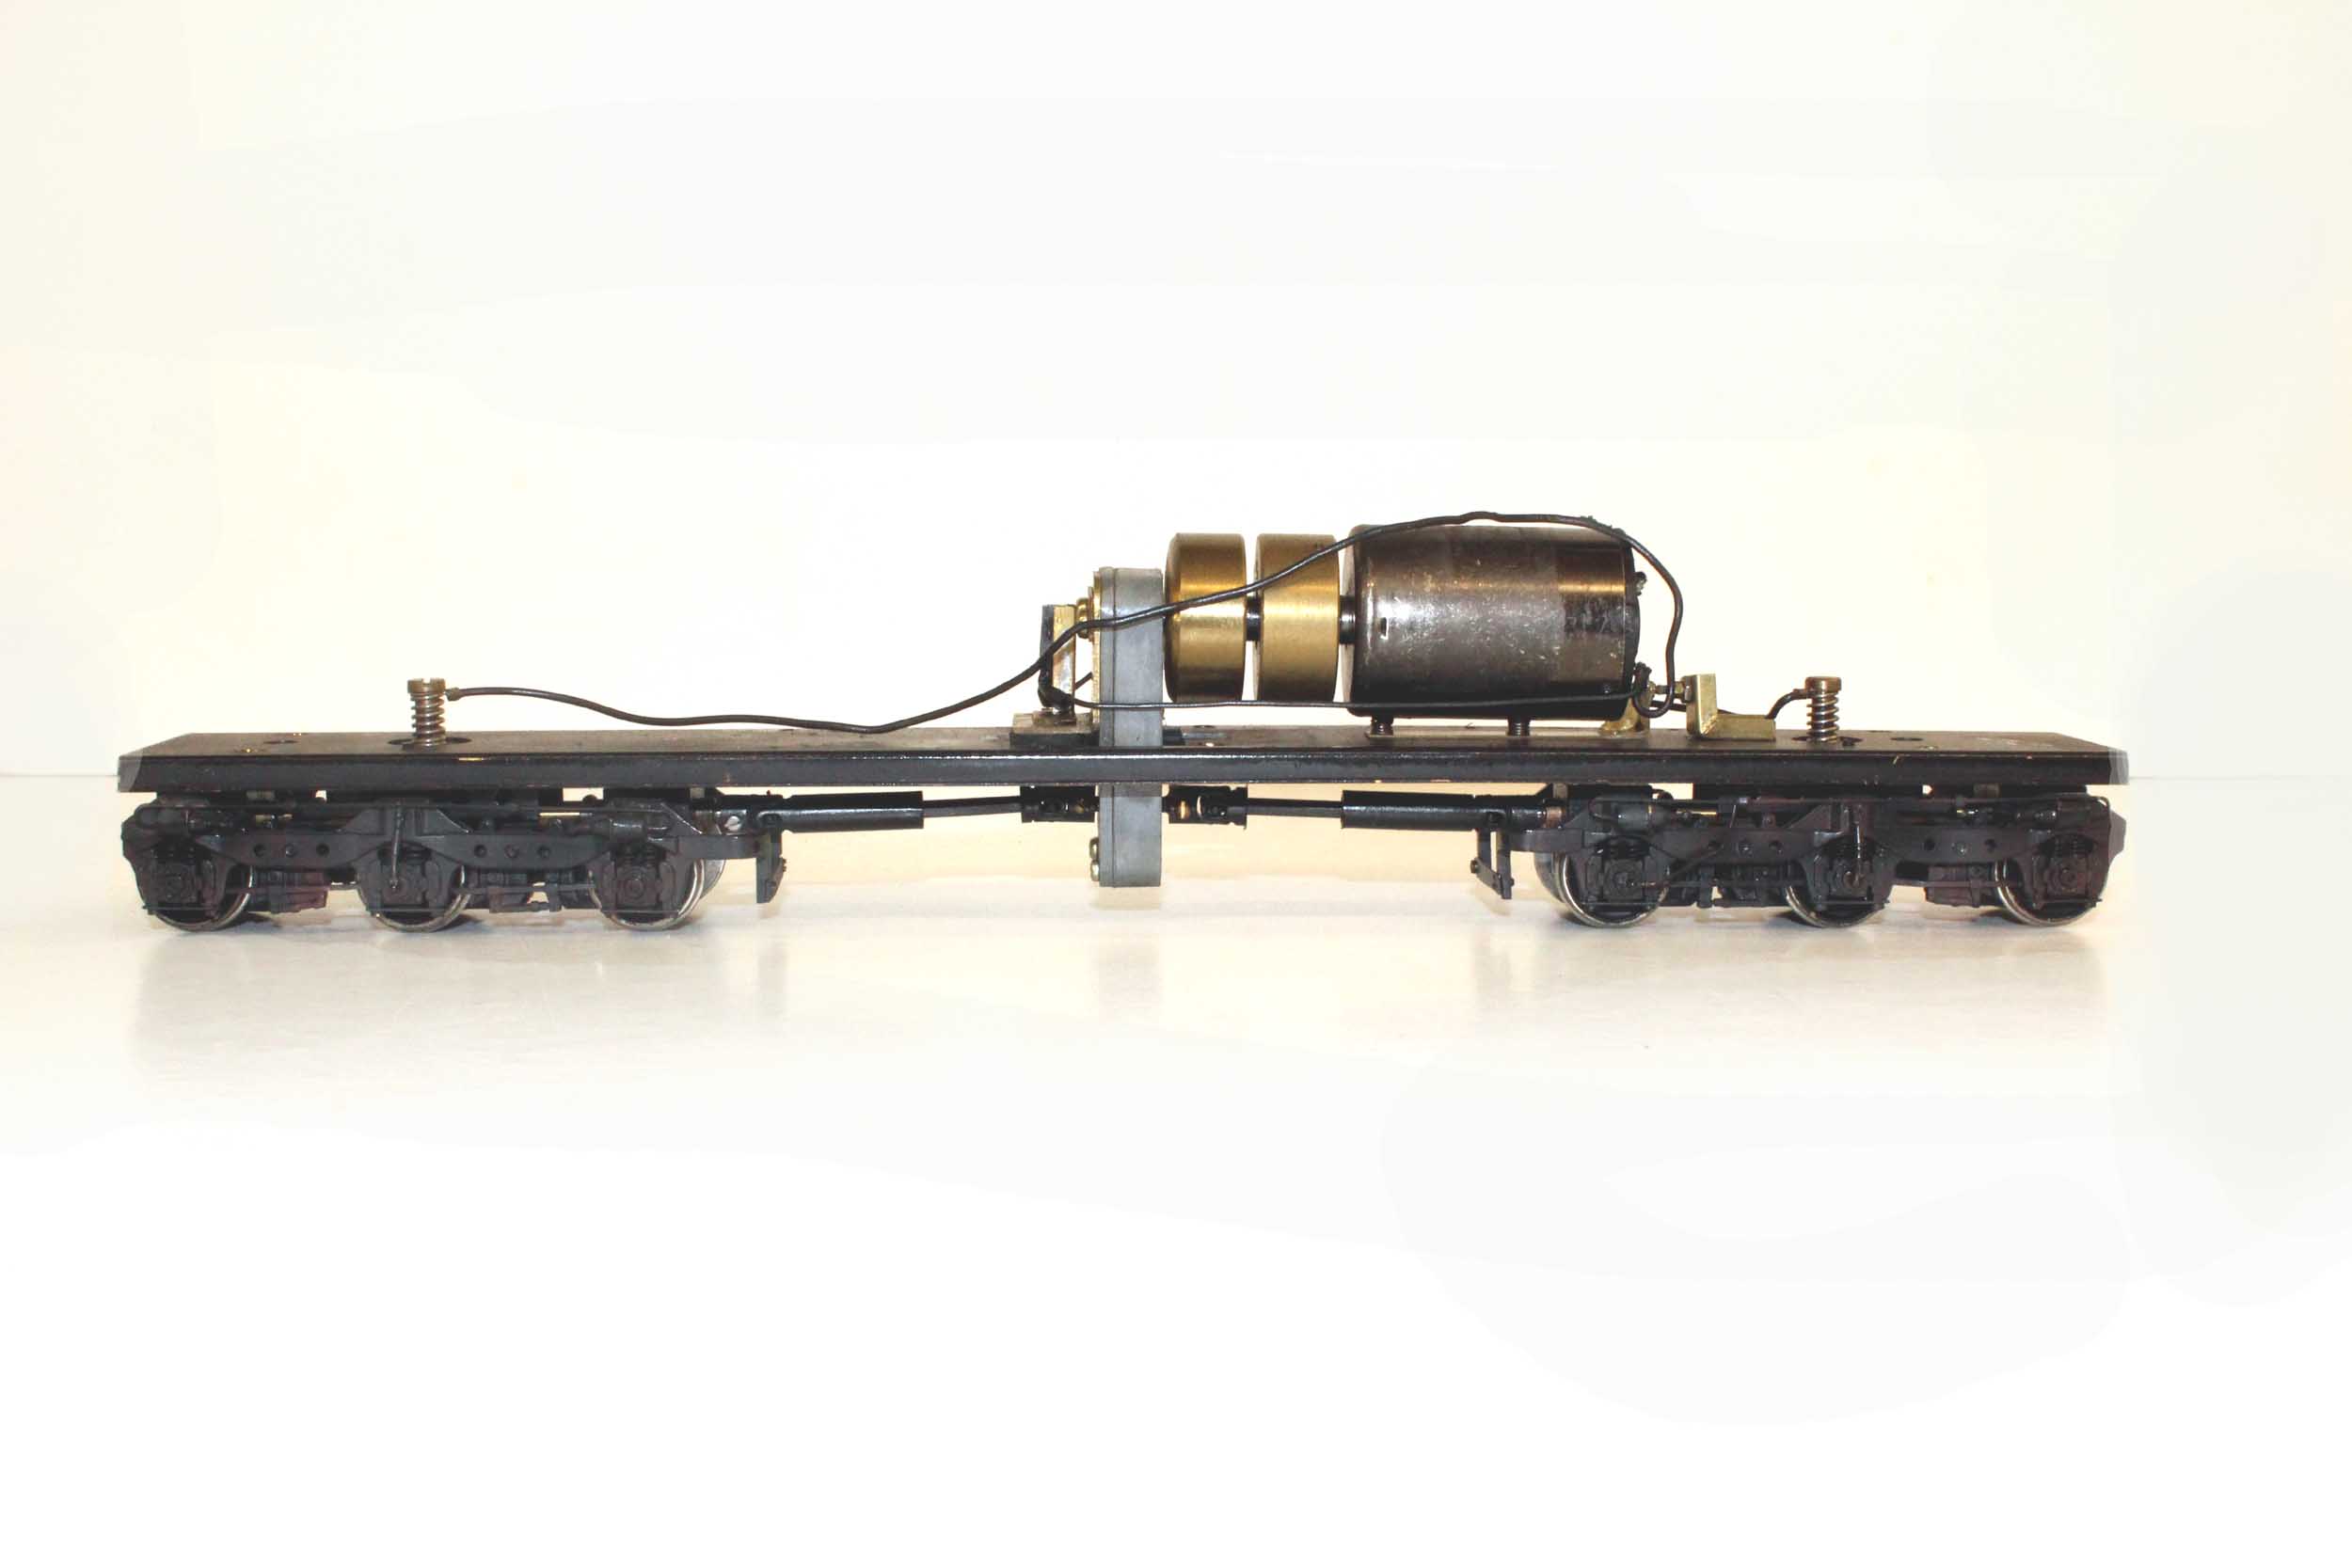
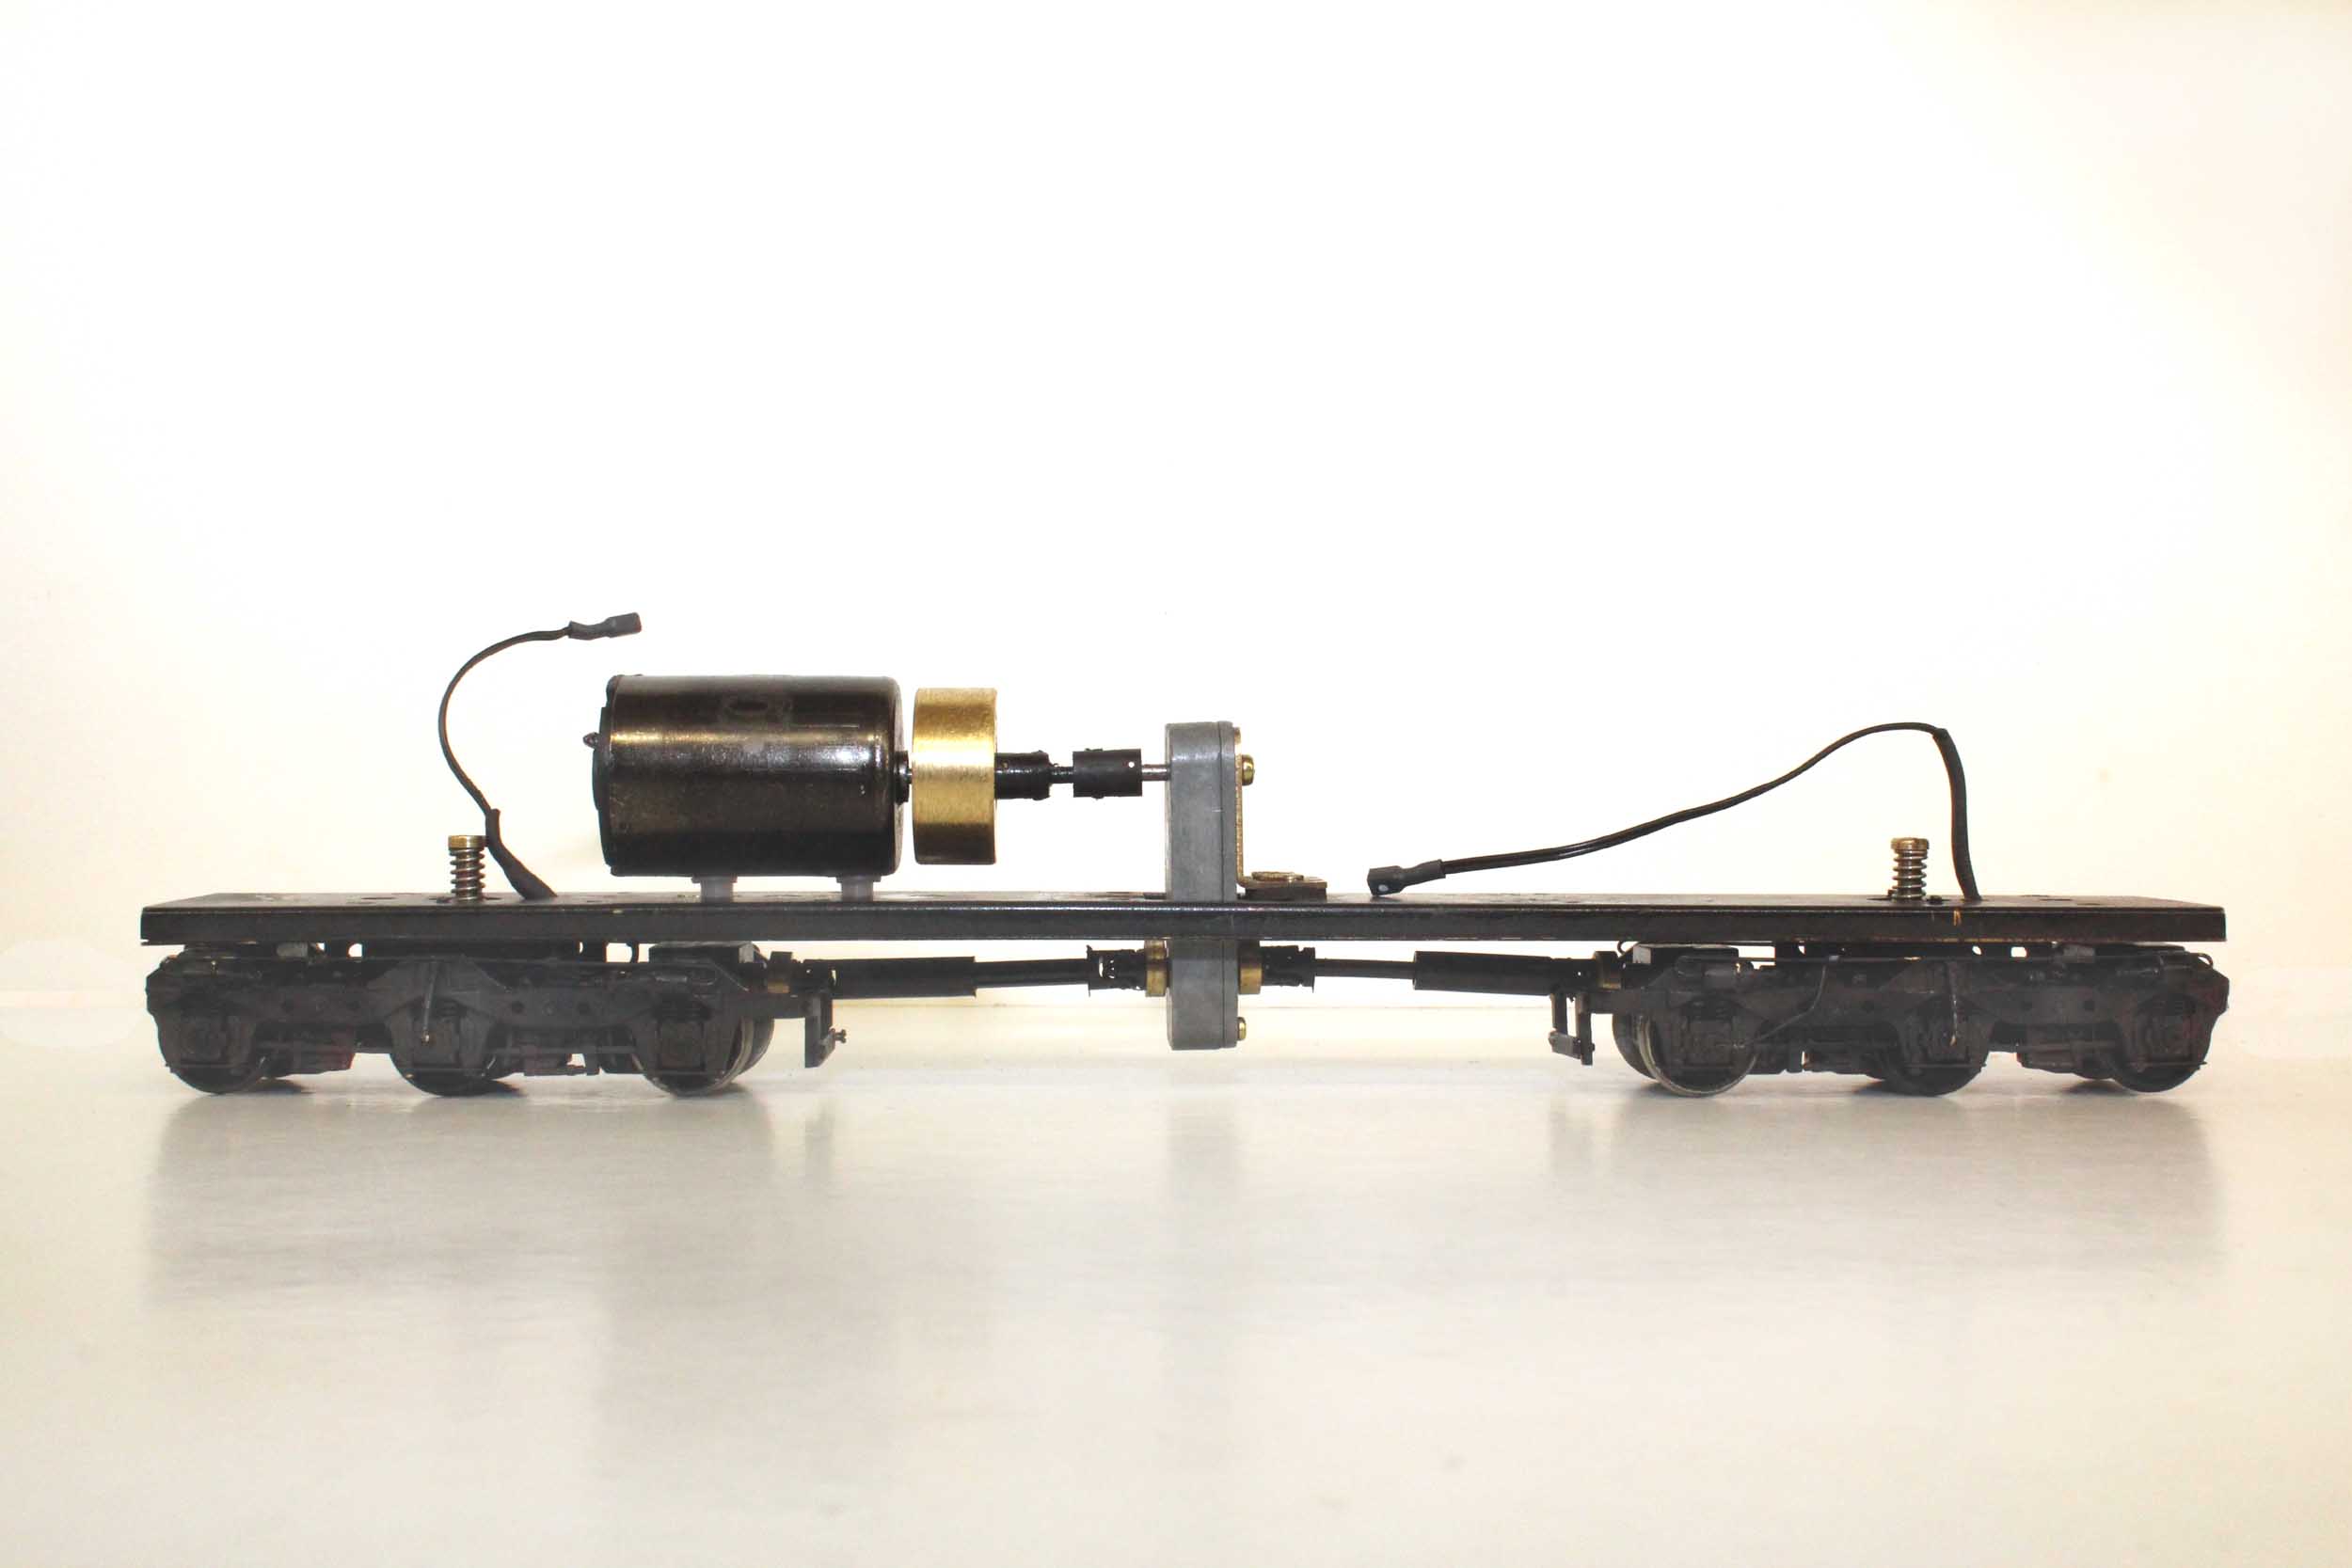
This
is mostly a stock Overland drive for this time period. I went flywheel crazy. At
one point I had three flywheels here, but could not fit the drive into the
shell! It is likely to lose at least 1 and maybe both flywheels before this
project is over.
Repairs Begin
9-11-16
As
mentioned the long hood crossmember popped off the
shell. After some procrastinating, I decided to “go for it”. Major soldering on
a painted model is not for the faint at heart. I bought a JB Weld kit for this
repair but always prefer solder over any adhesive.
With
some liquid flux and my Hotip only set to 2 I tinned the shell without burning
any paint. Burning paint would have been a deal breaker in keeping this paint
job, and why I love Scalecoat paint. It can take the heat! I put the plate back
in place and 4 flathead screws later it was fixed, better than new.
10-8-16
It
might not look like much but I have put MANY hours into upgrading this drive. I
removed 1 flywheel I added in 1991. There is zero chance any shaft or U joint
will slip when I am done.
I
am big on all wheel pickup. But for the SD I only use 8 not 12 wheels. I cut
grooves into the backs of the wheels for my phosphor bronze wipers to ride in.
They won't wander and possibly short. They have to be custom bent and fiddled
with so they make constant contact but make no additional drag, then
liberally oil the grooves. The electricity does not care.
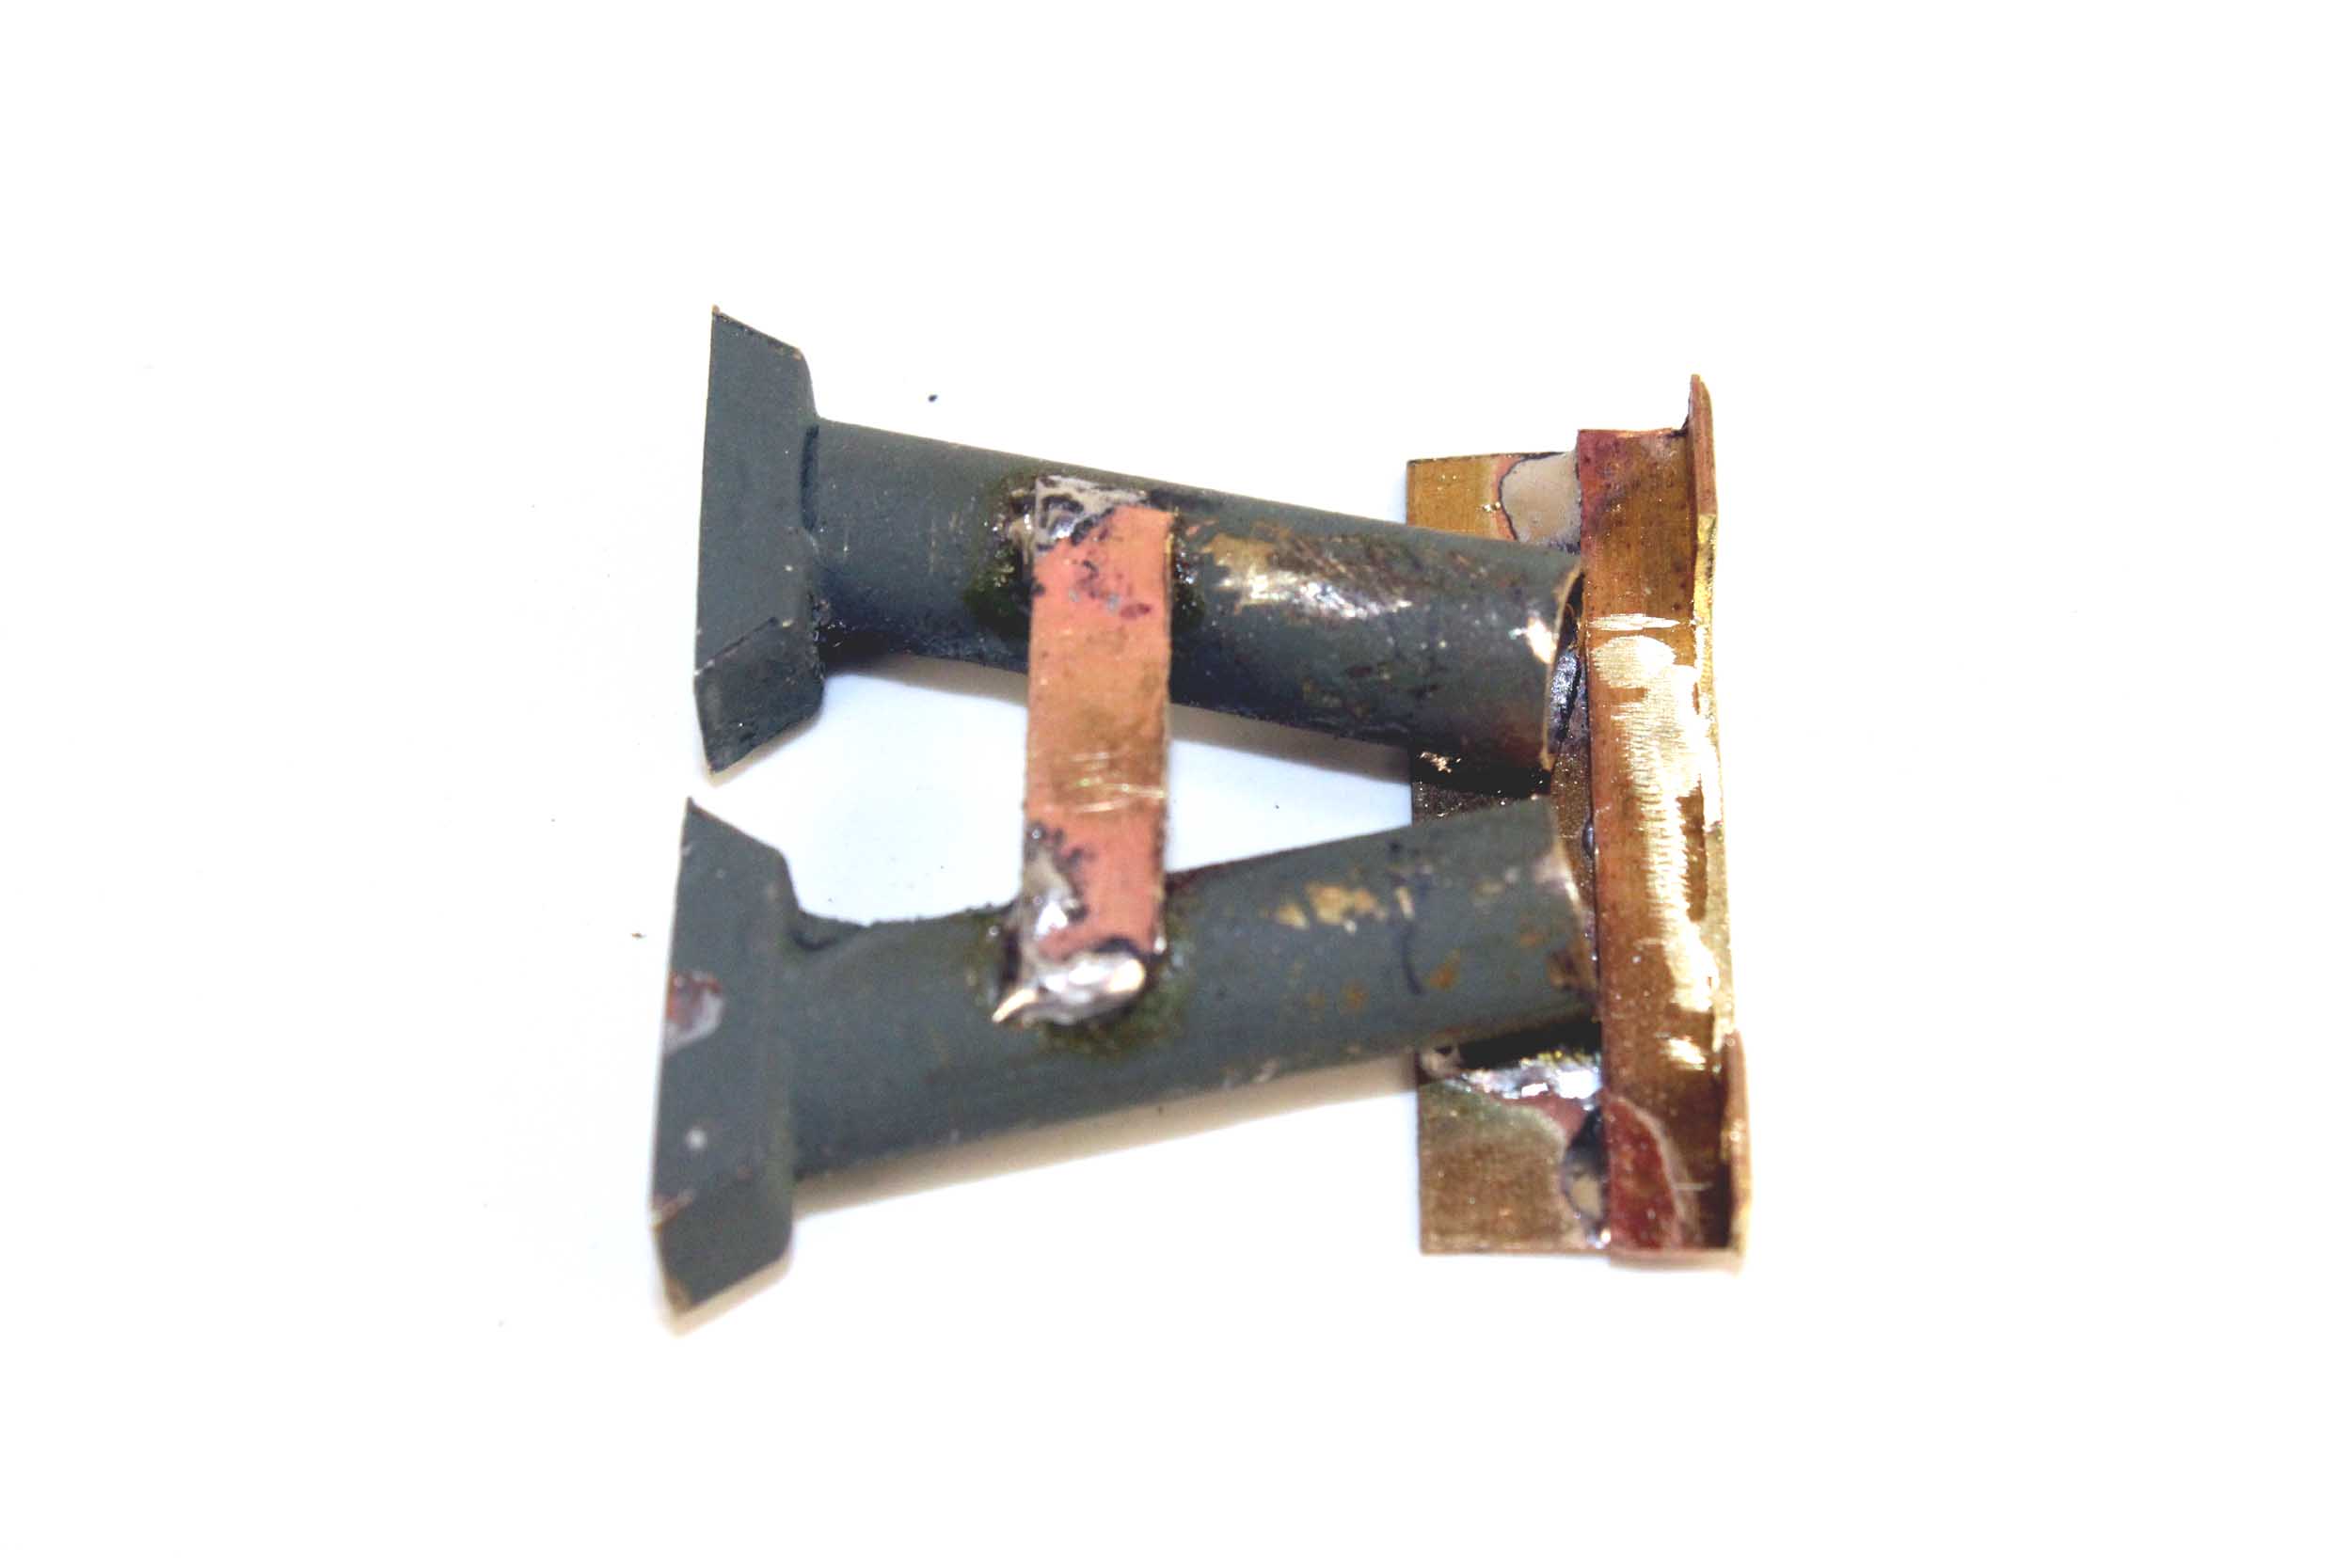
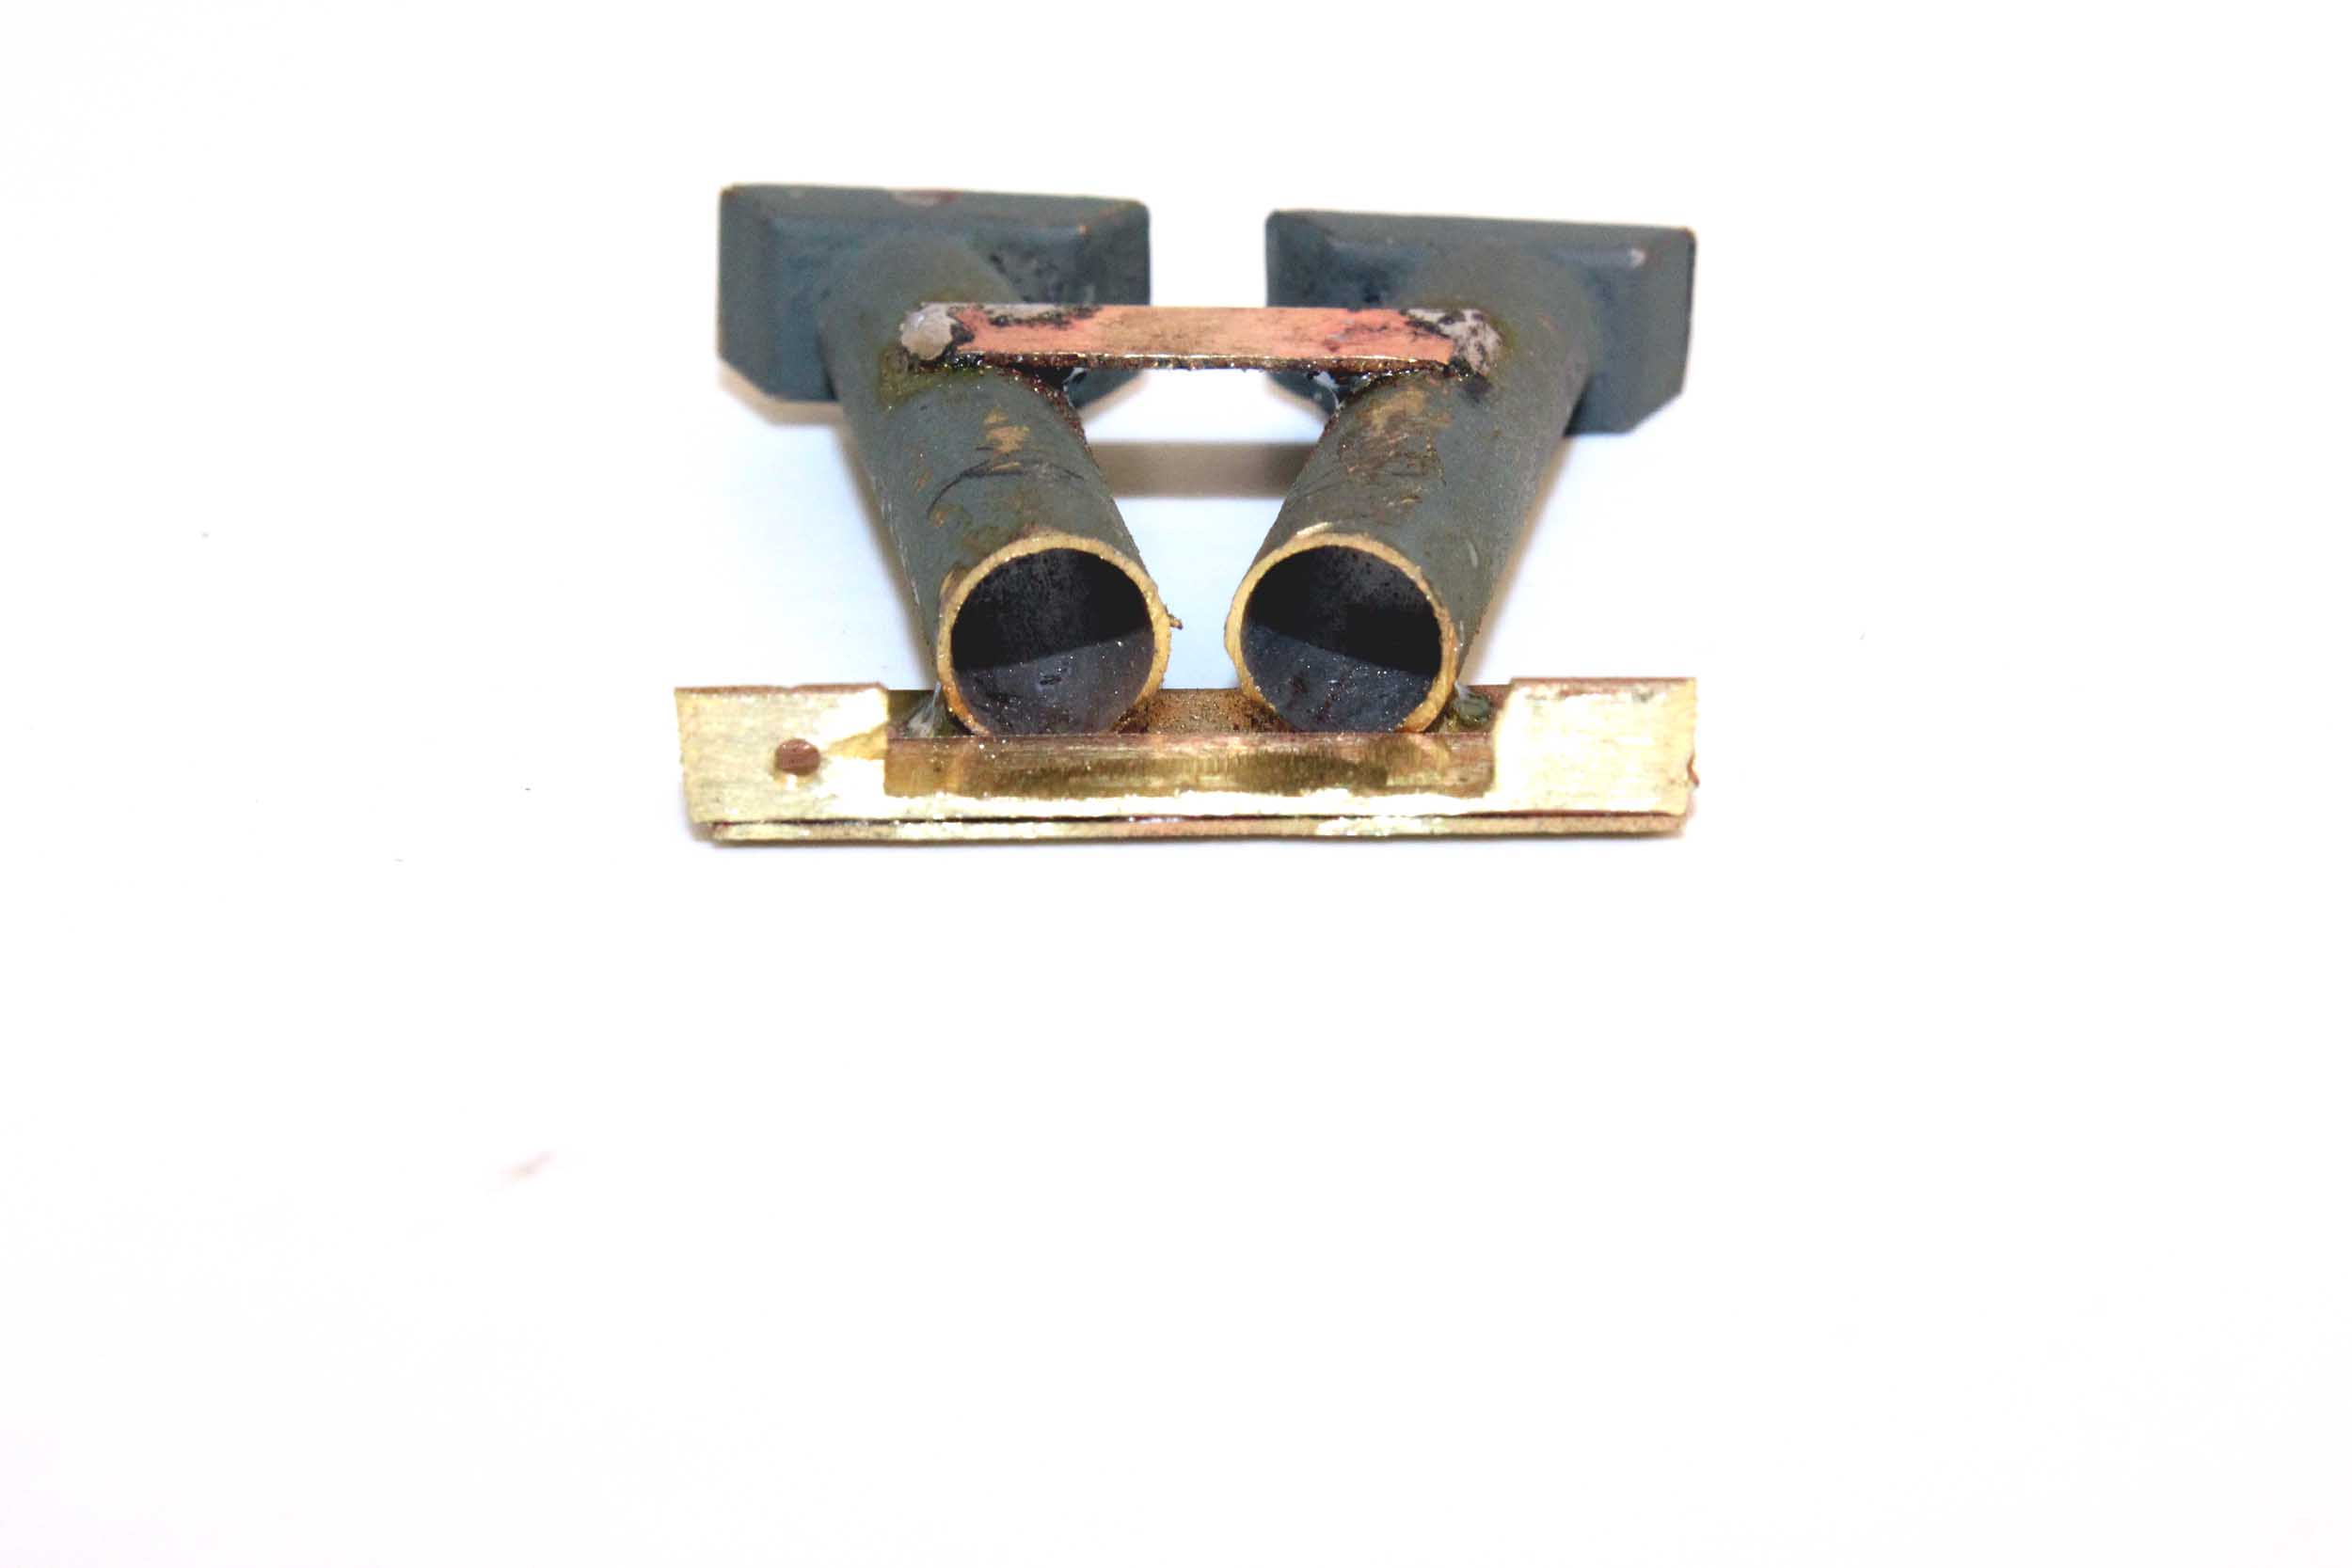
I
machined collars for the ends of the driveshafts to the tower and trucks that I
can use a set screw with significant torque. You can sort of see them. For the
tower and motor cup I cut a slot in the end of the shaft. I drilled a .025 hole
through the center of the cup hole, insert a piece of wire and key it all to
the shafts. You would have to shear that wire to have the cup spin on the
shafts. No slipping there.
I
modified and mostly recycled the V shaped light manifold I made in 1989 to light the
numberboards. I used 5MM LEDs, and now wanted to use them individually instead
of trying to light both numberboards with 1 bulb or LED. I had to install the
headlight LED before installing the light manifold. In testing the headlight
was going to be very dim because of the very old MV lenses. That was not
acceptable to me. More on the headlights later.
Added
10-25-16
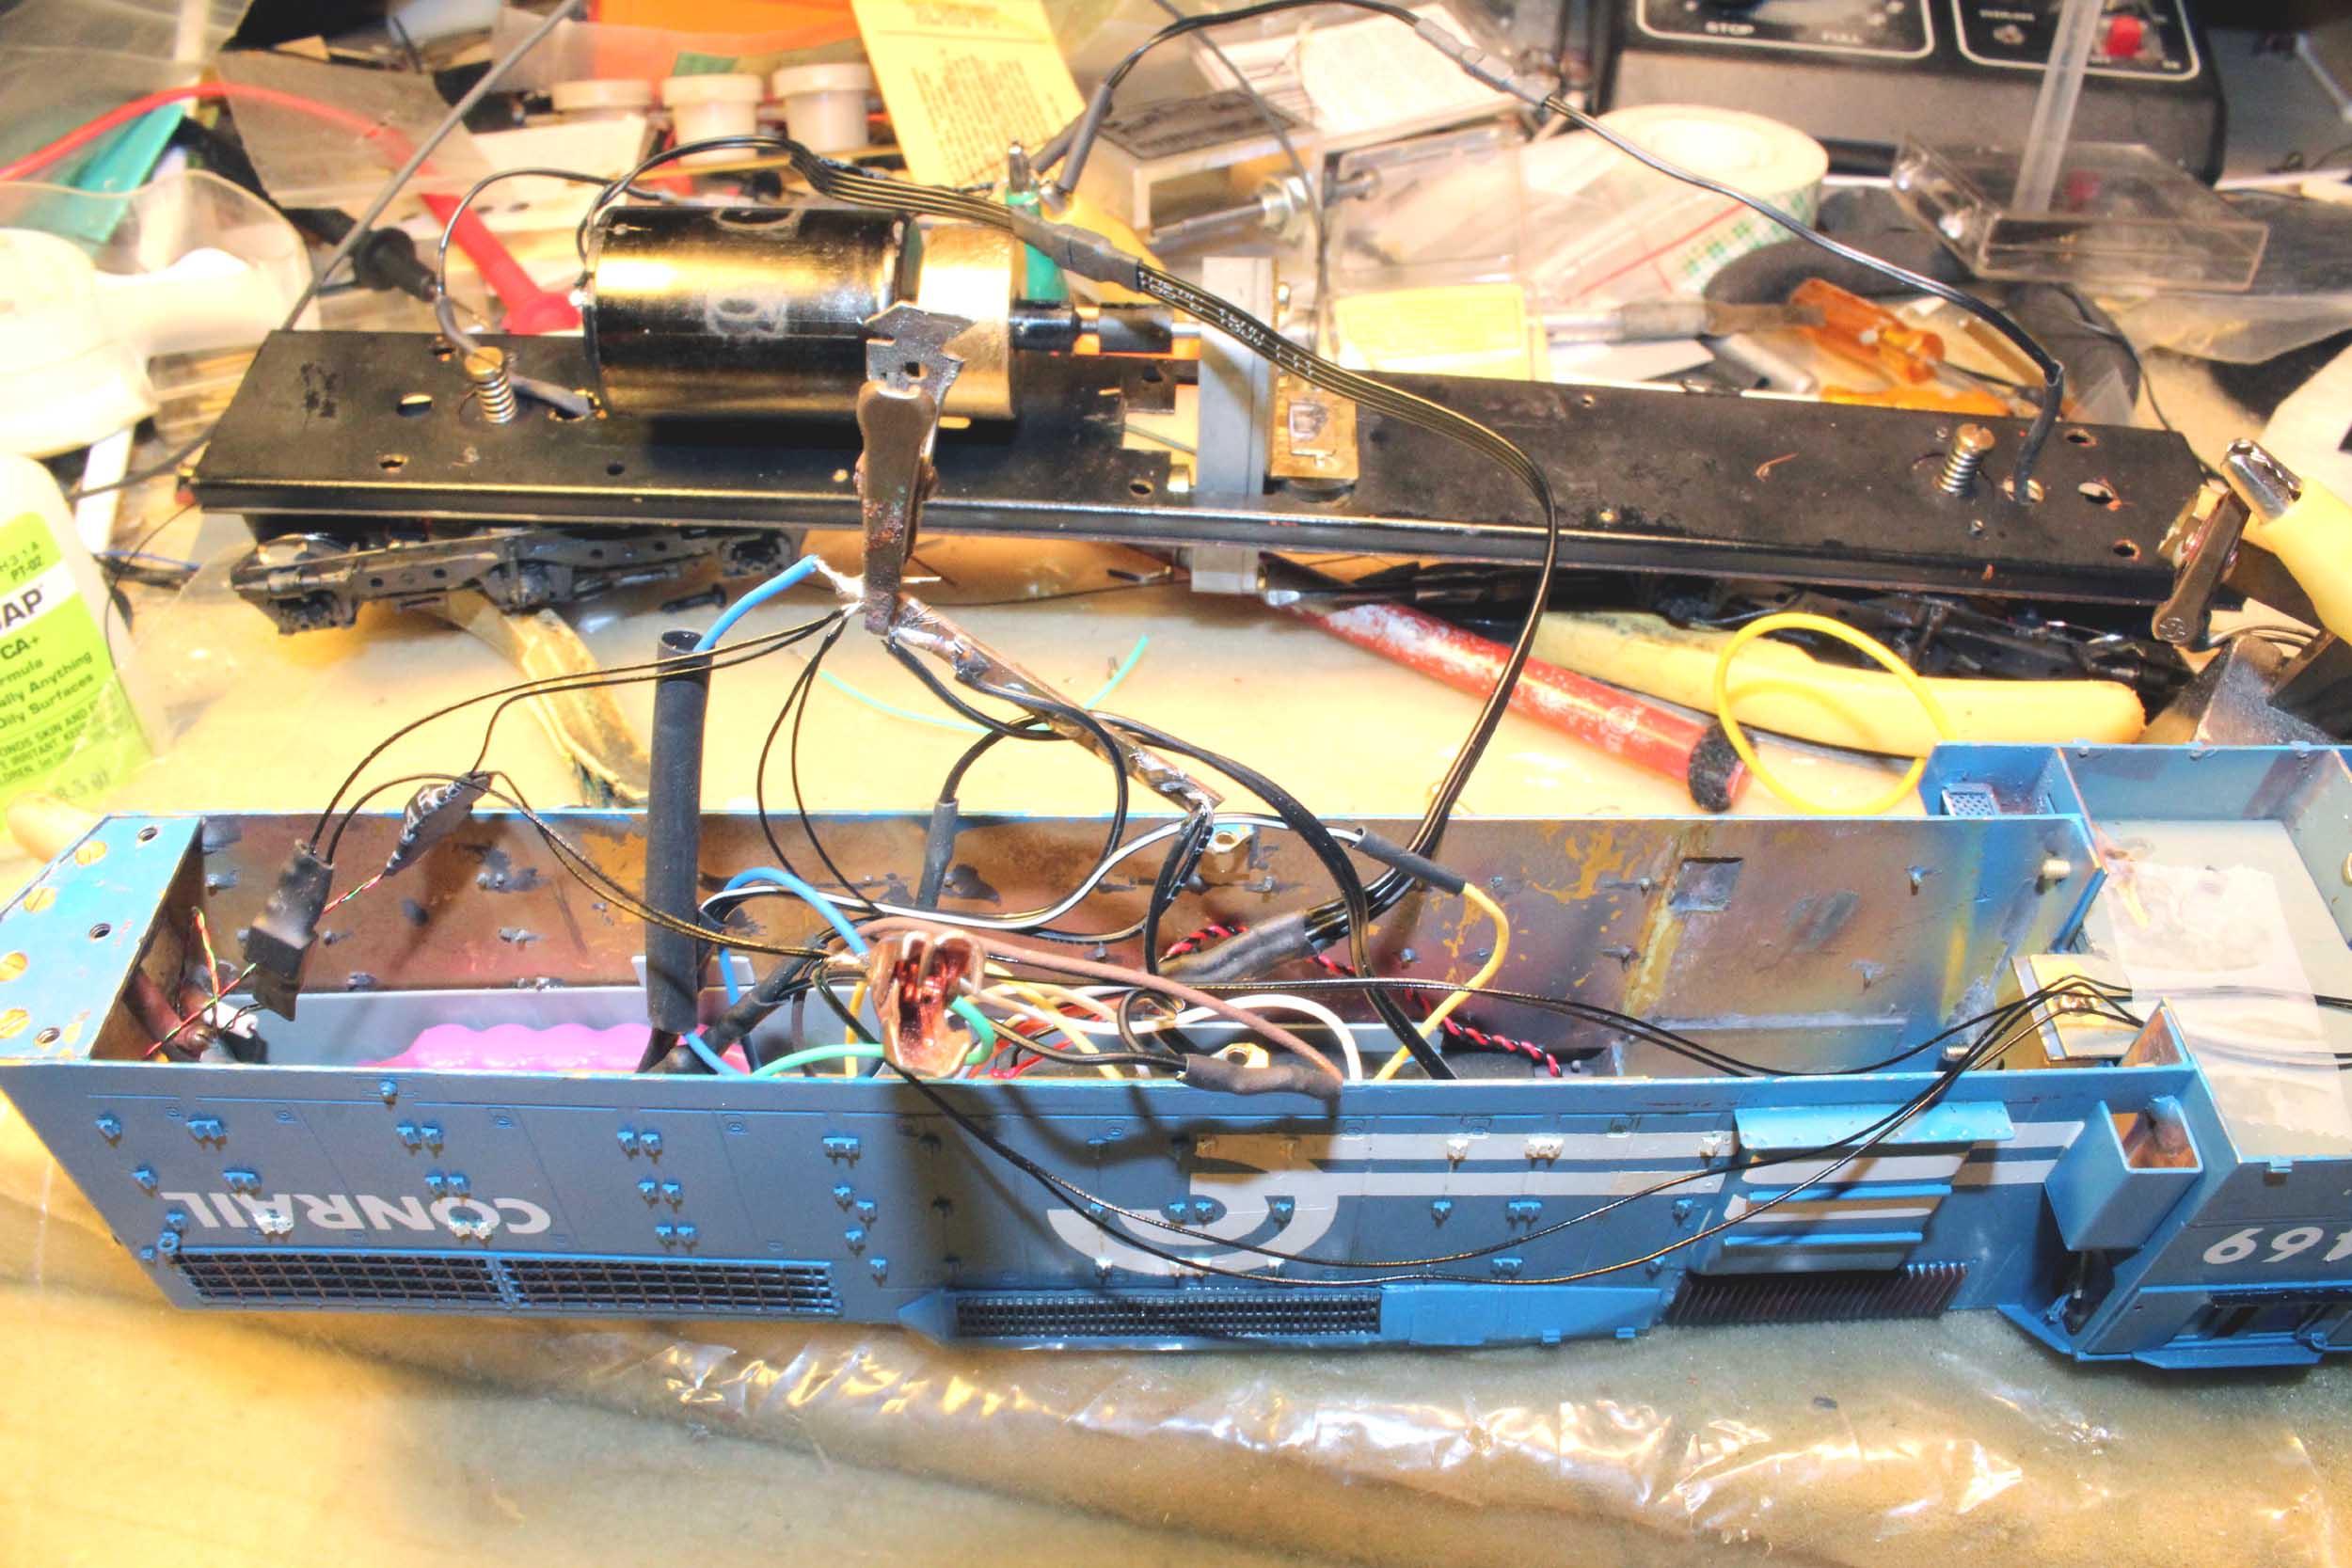
Lighting
This
loco has always been about the lighting system I designed, starting in 1989 and
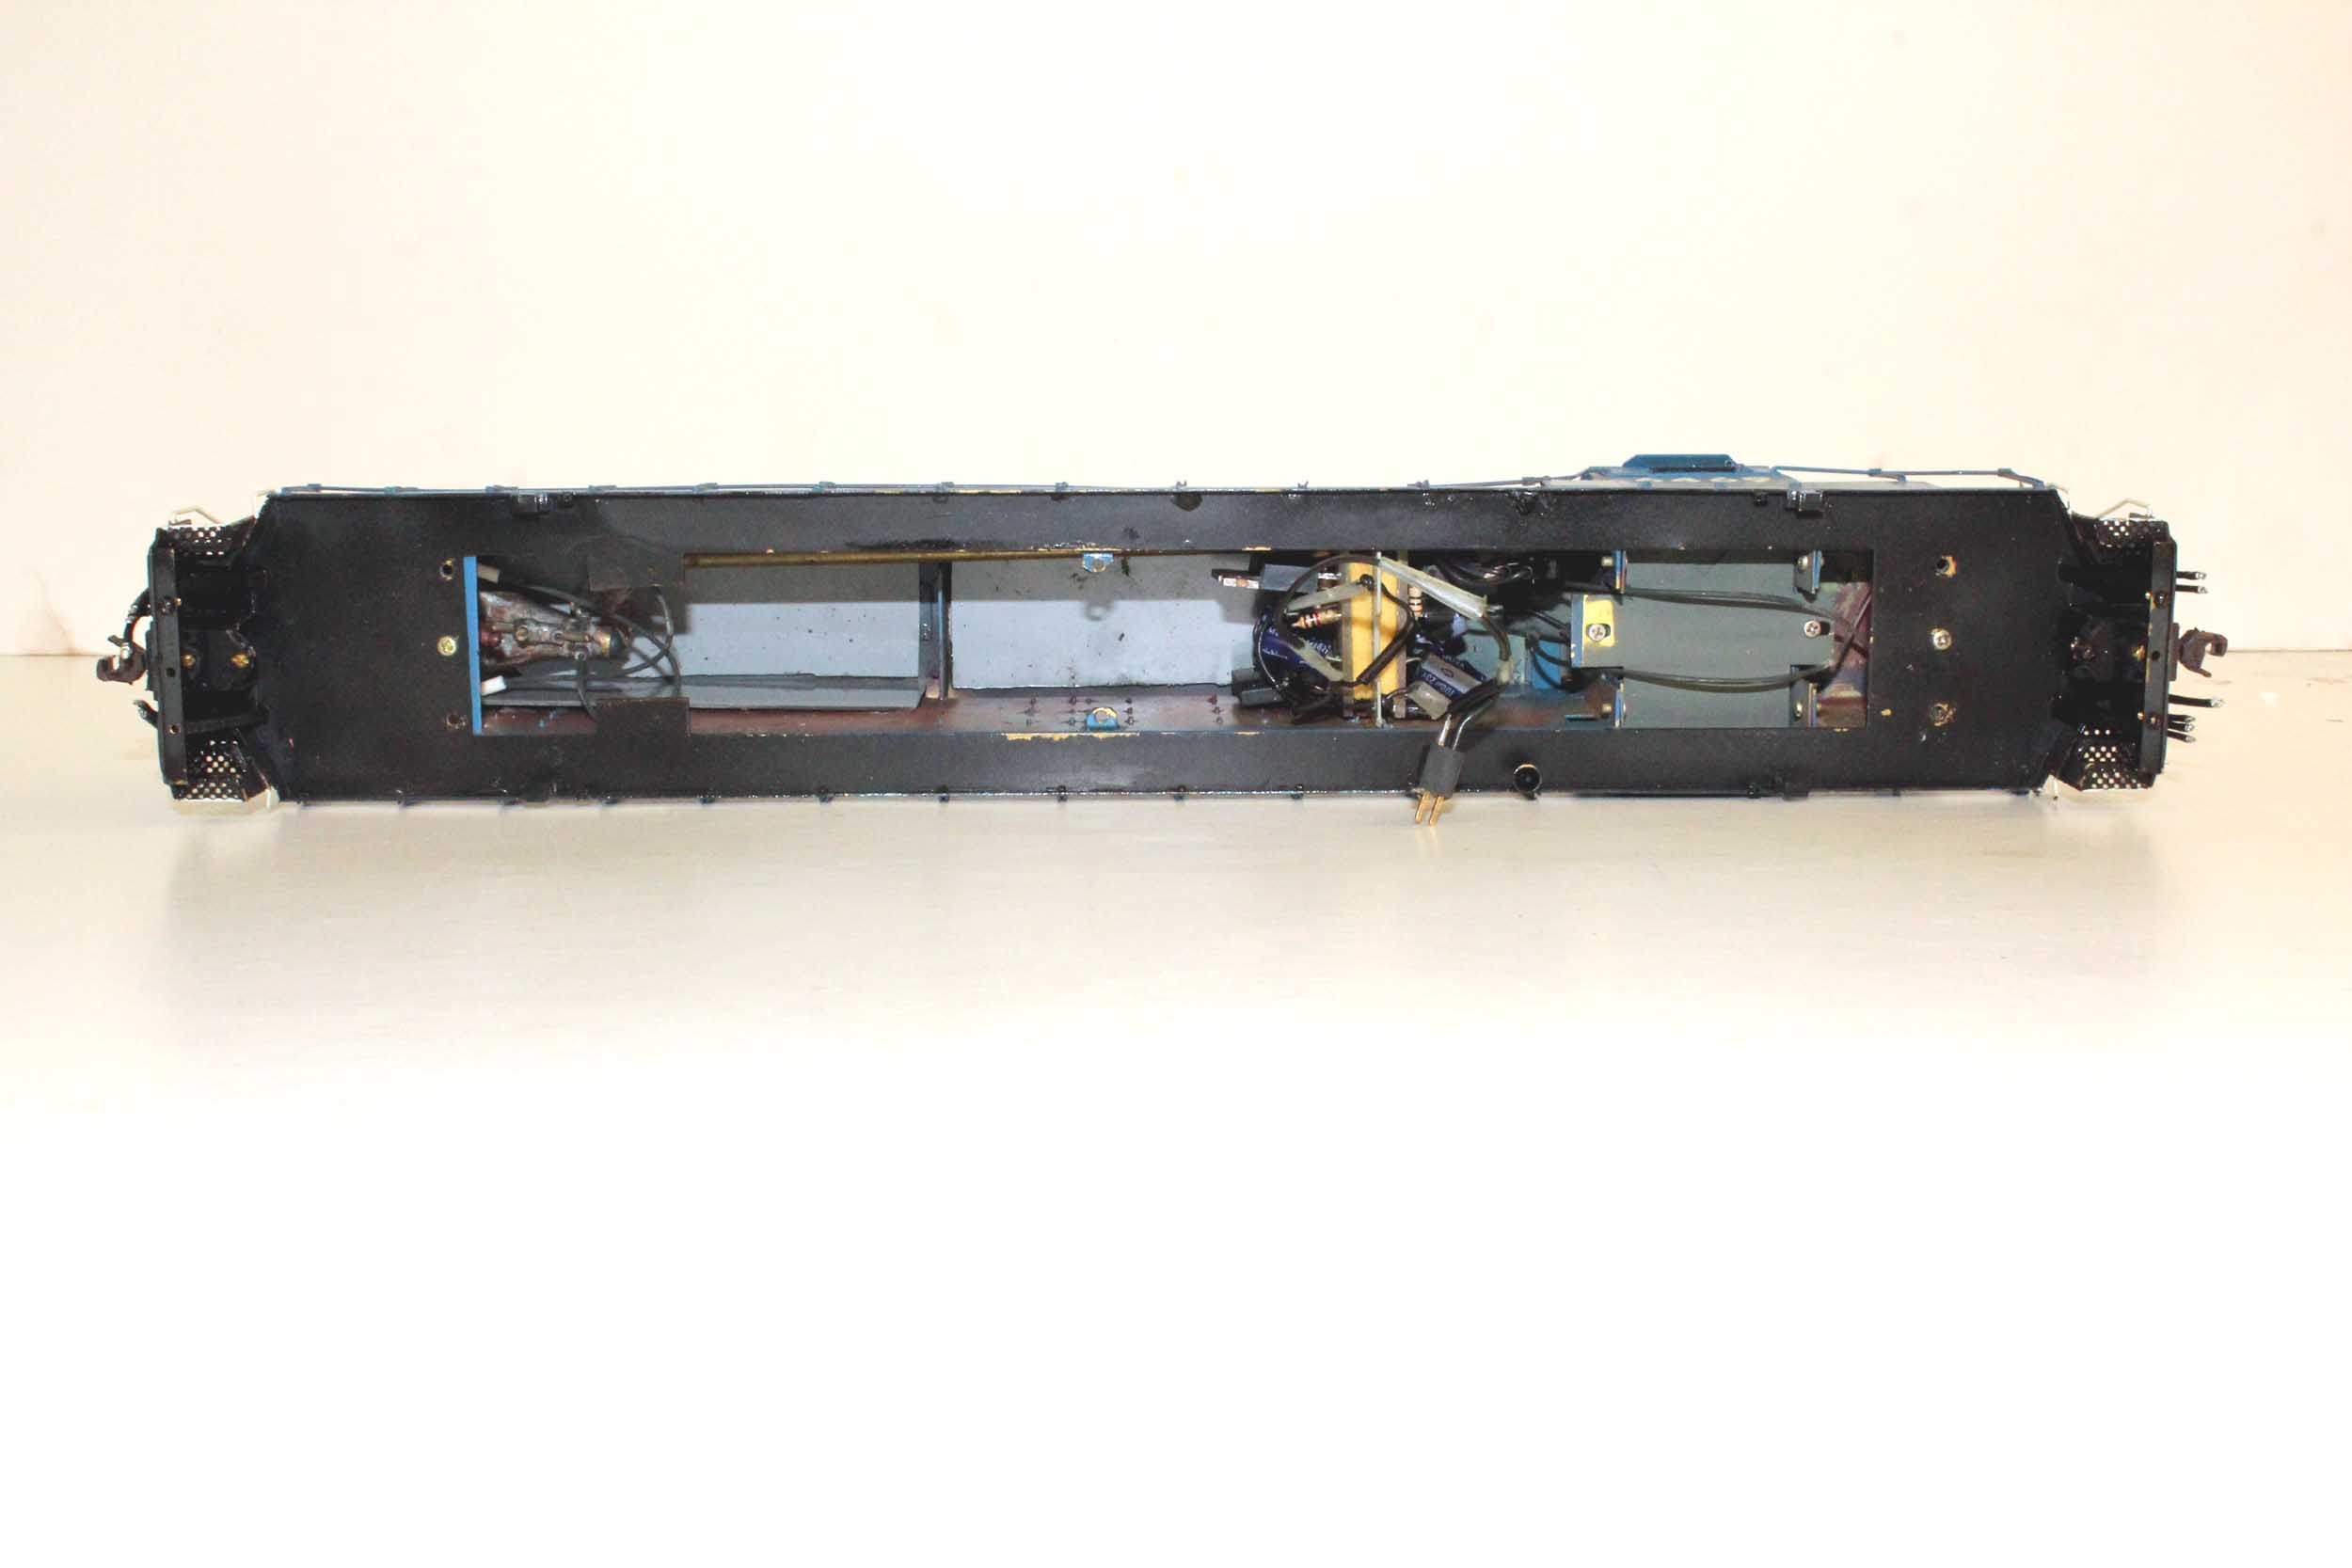
revising it in 2016. I knew this wiring would be a beast and it was. I mounted
the decoder and speaker on a piece of brass flat stock, facing upwards to the
roof. There were 2 dividers going across the long hood that I used to mount the
brass flat stock. There was a truly obscene amount of time spent on getting
this lighting system wired and working.
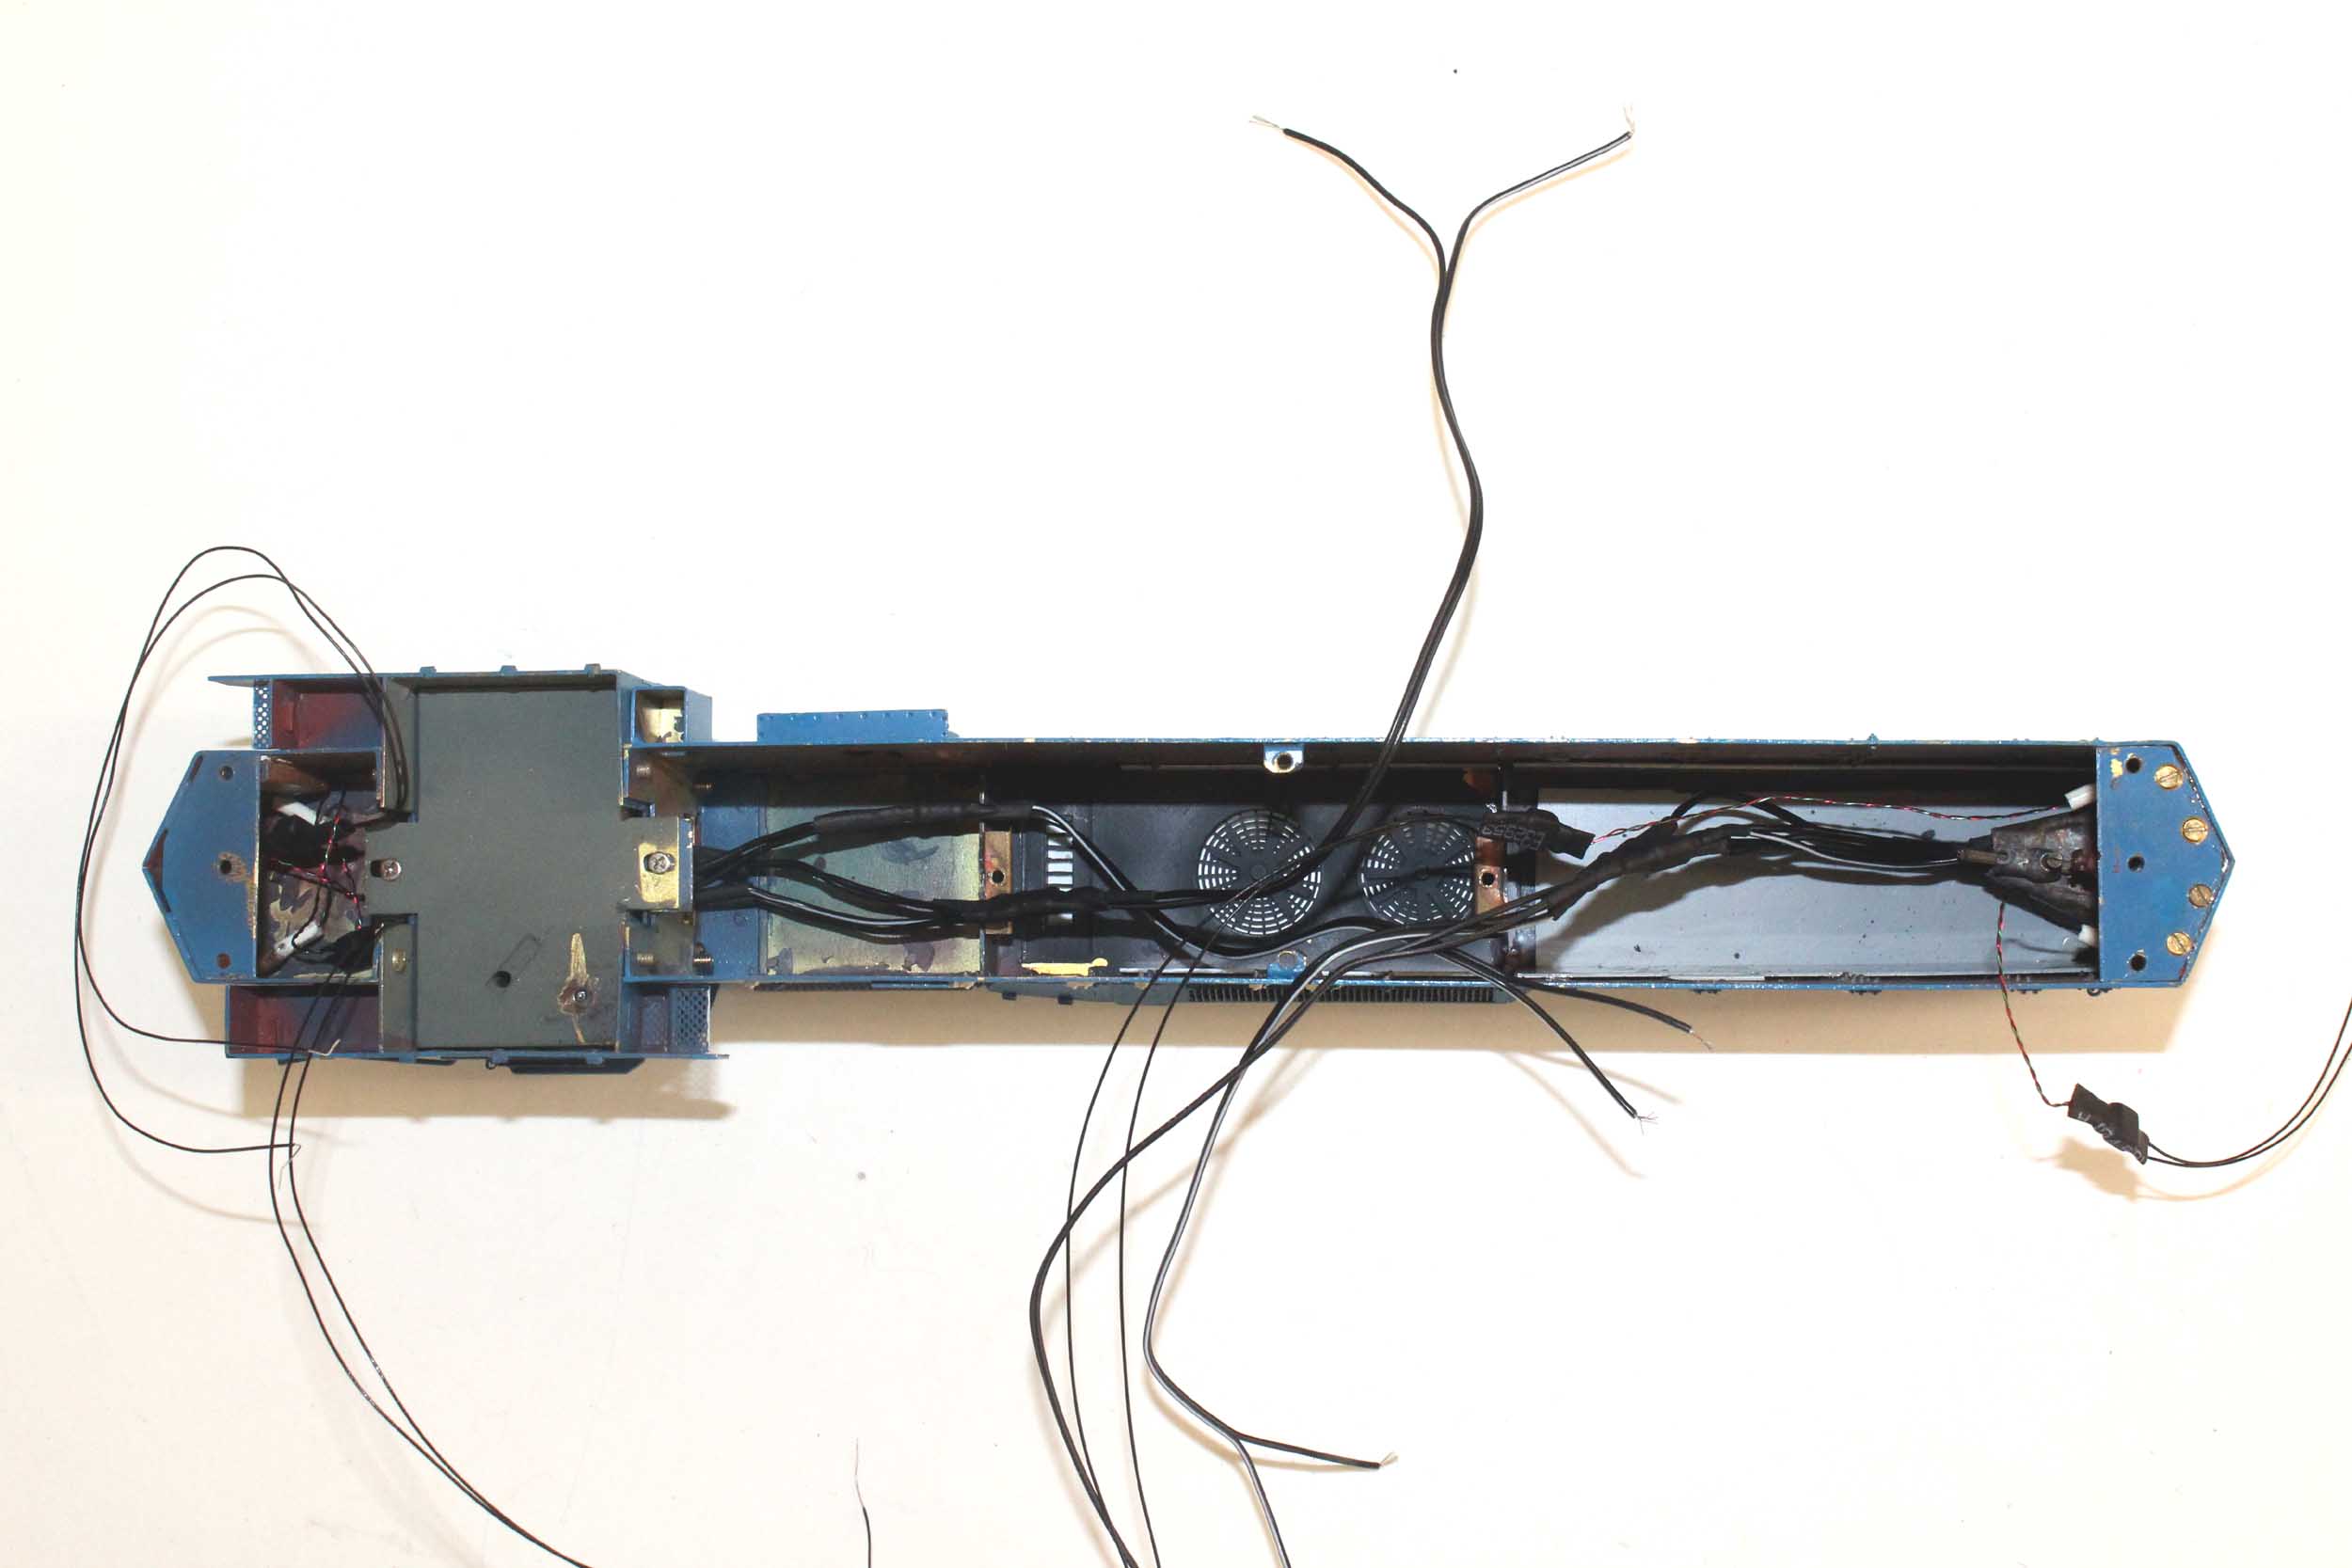
Rats
Nest!
This
is what I had to deal with and hook up. I used a piece of brass flat stock as a
“terminal strip” for the blue common wire. All the LEDs needed to tie into the
blue wire.
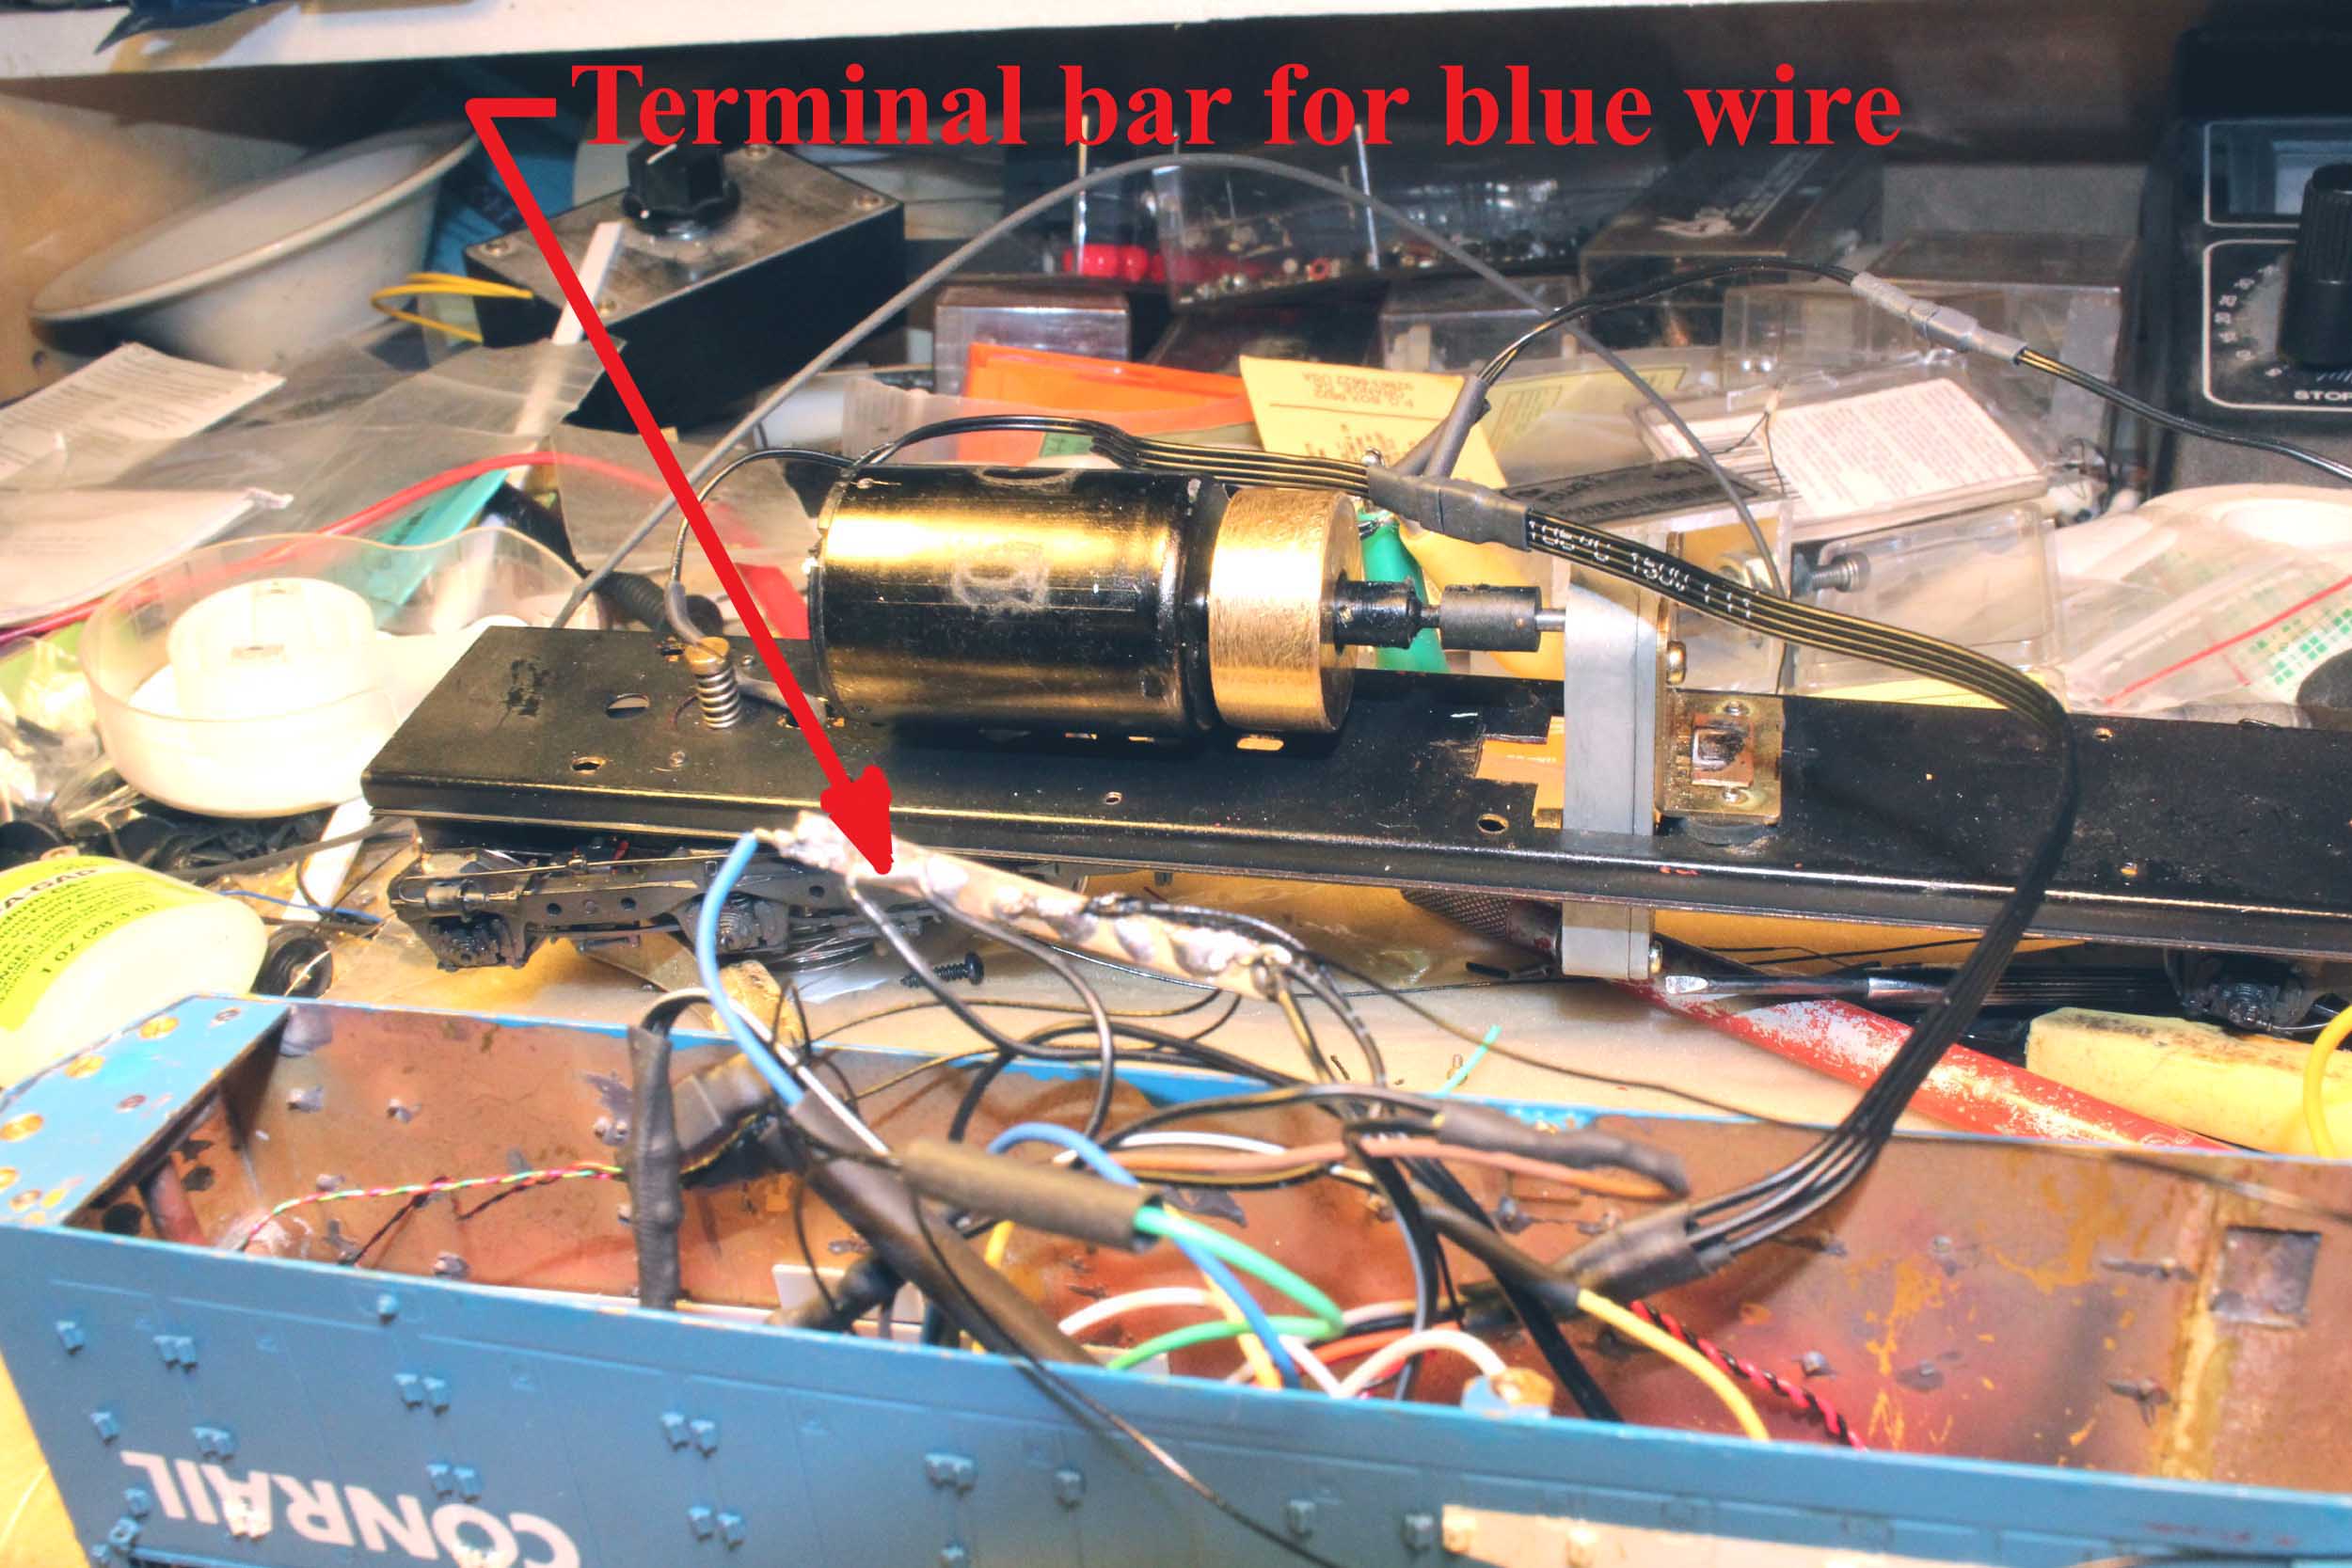
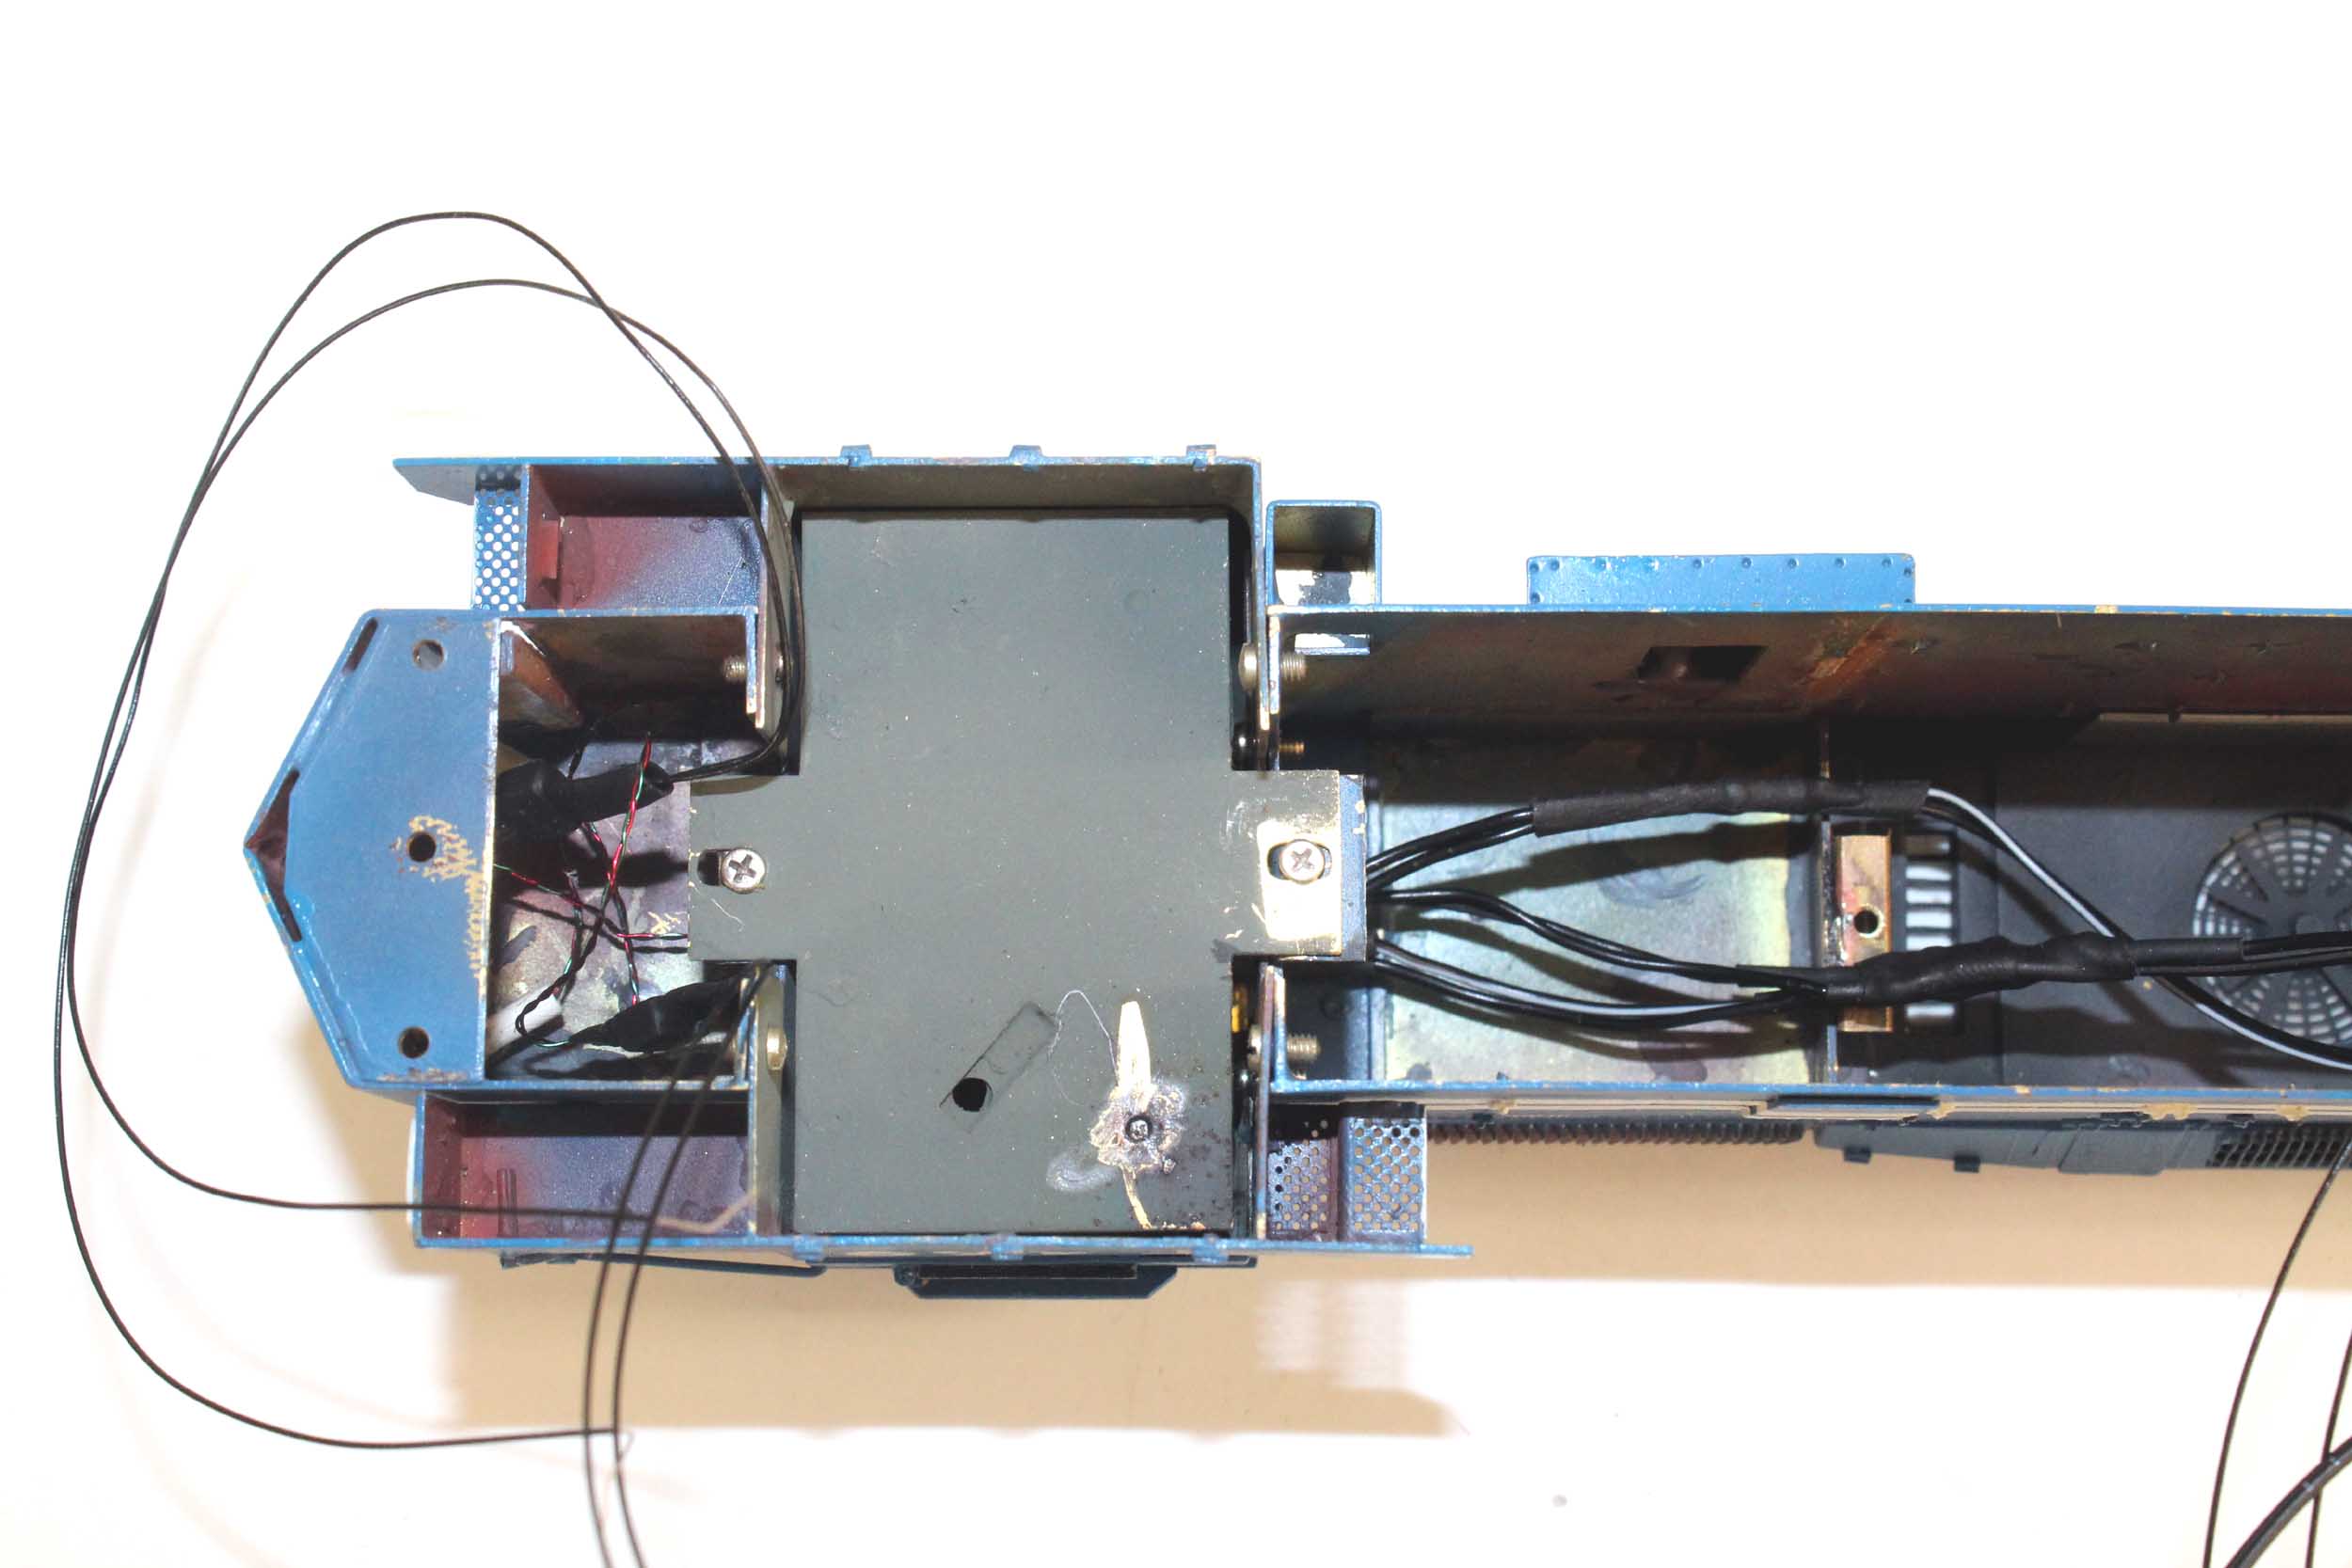
This
is all tucked up as much as possible. Lots of Scotch Tape is hopefully going to
keep it all in place. It is a Tsunami2 EMD 2 amp decoder
with a Current Keeper capacitor bank, visible at the purple item at lower
right.
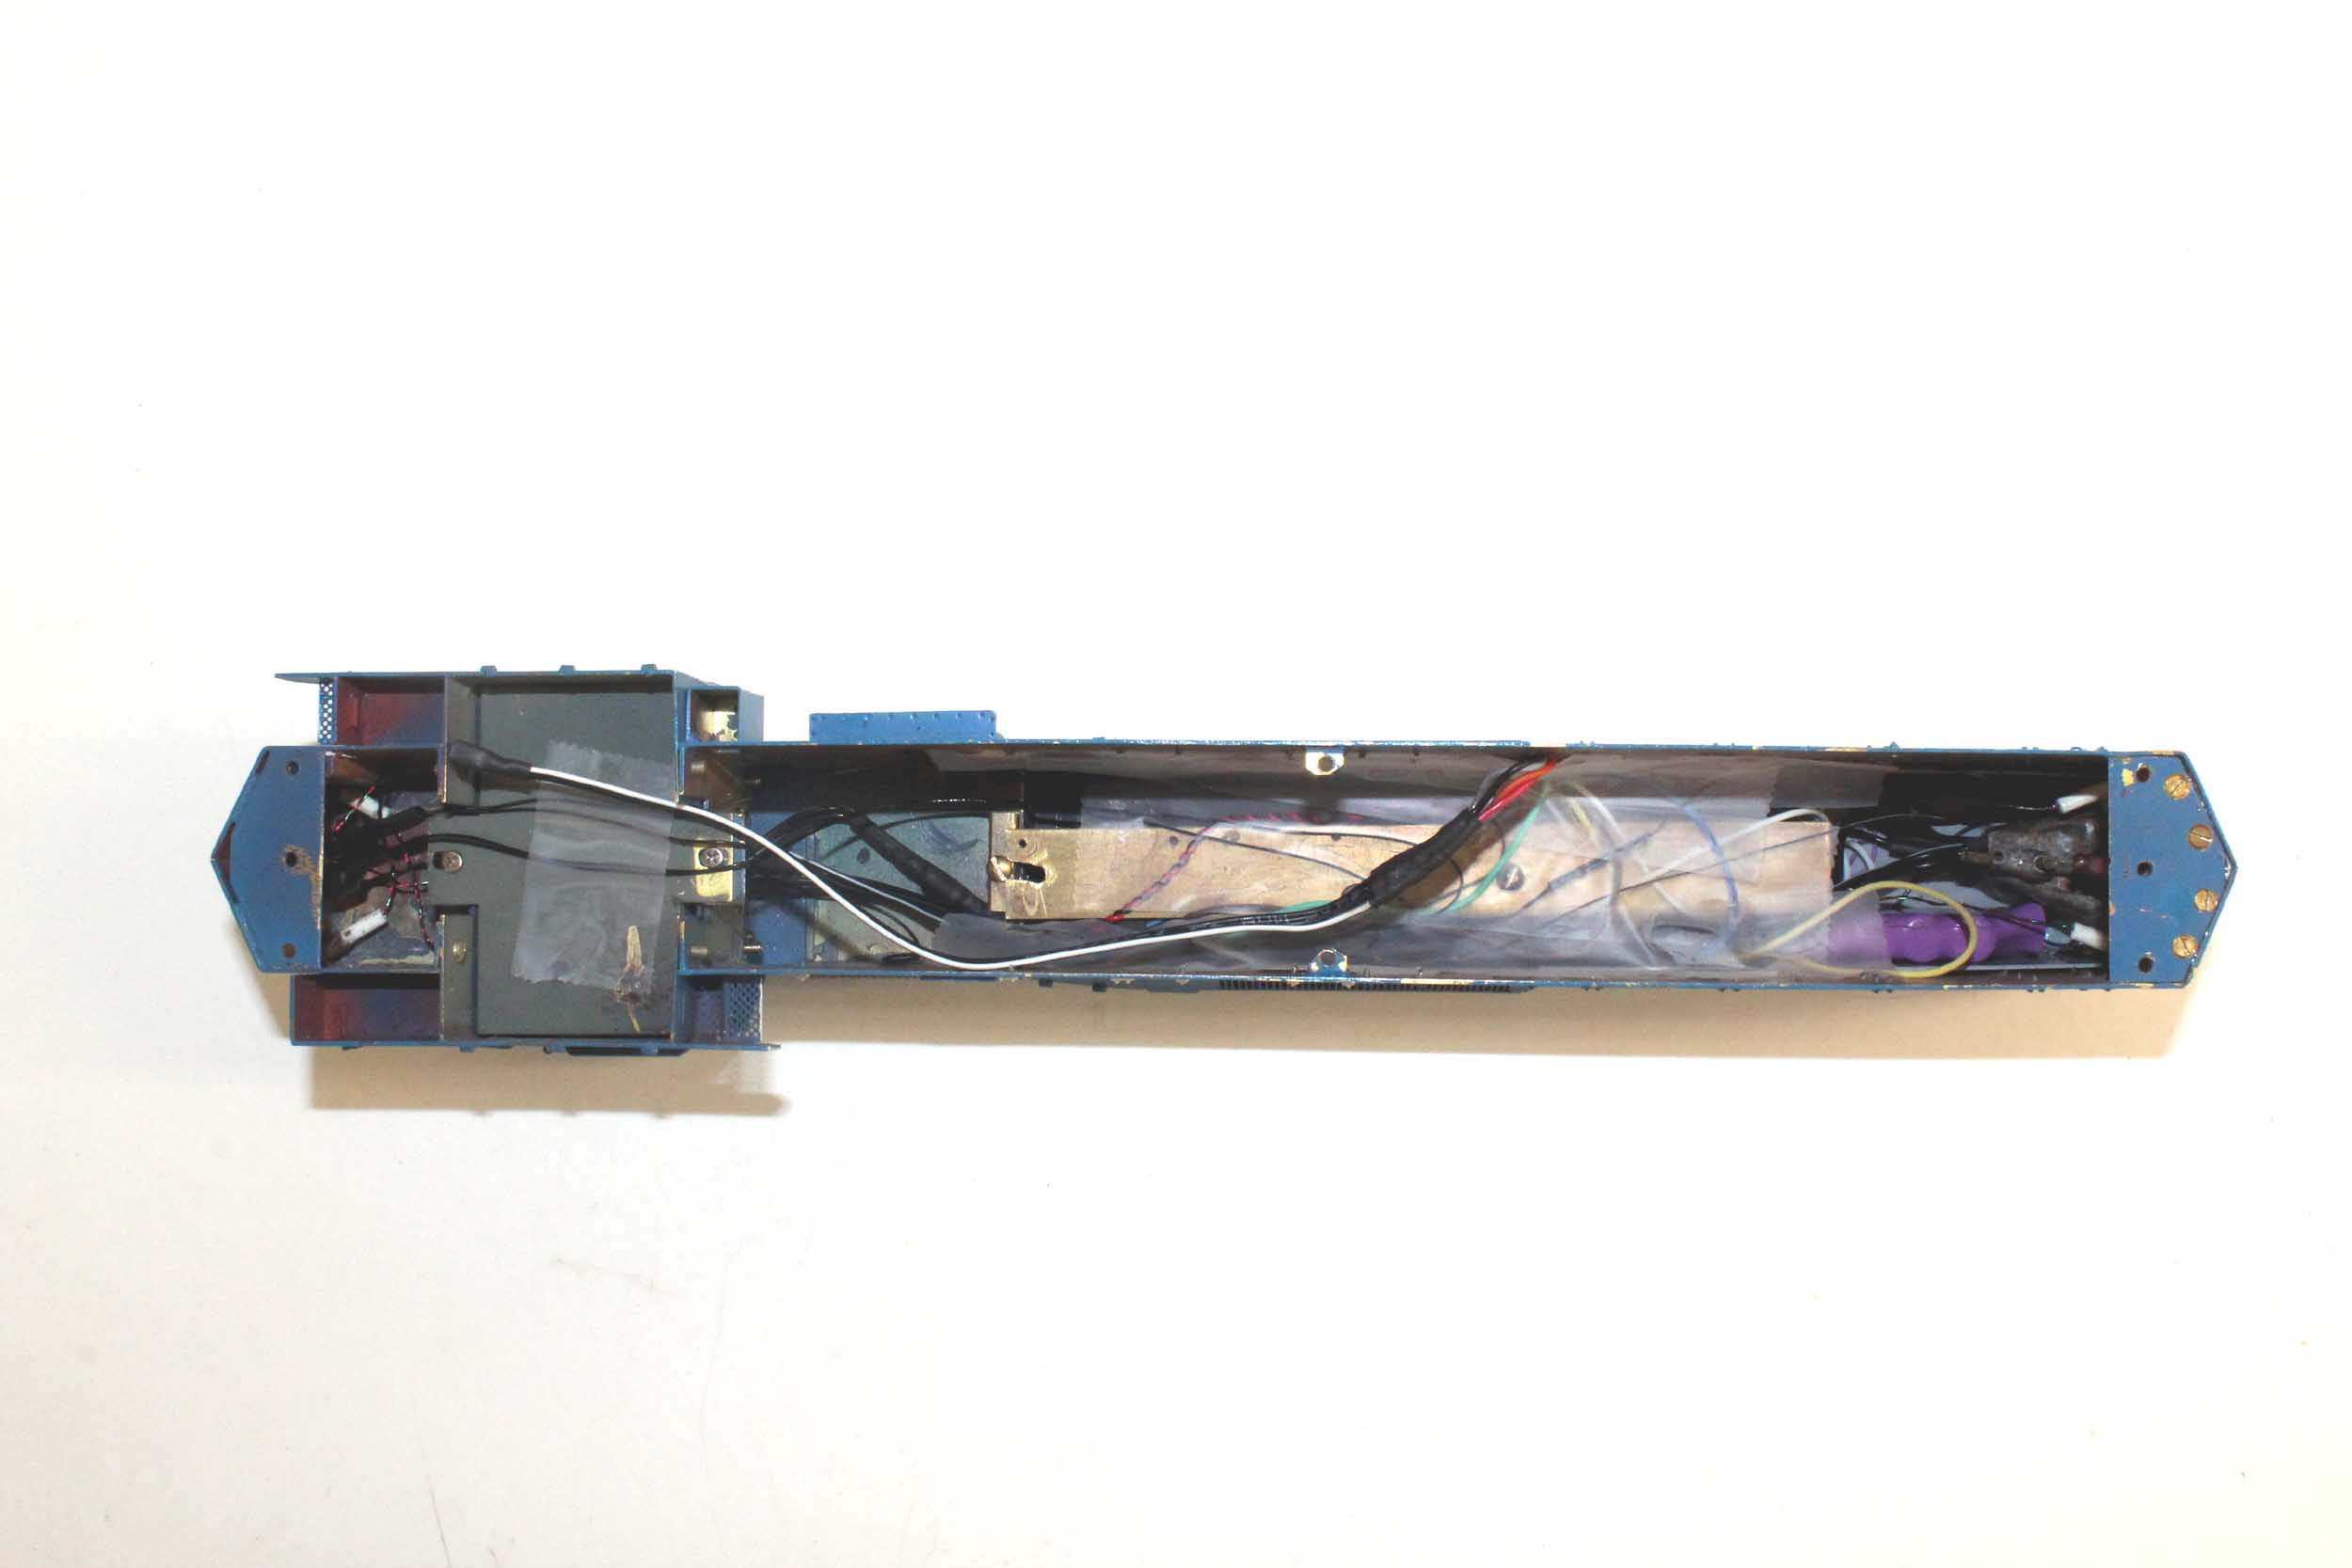
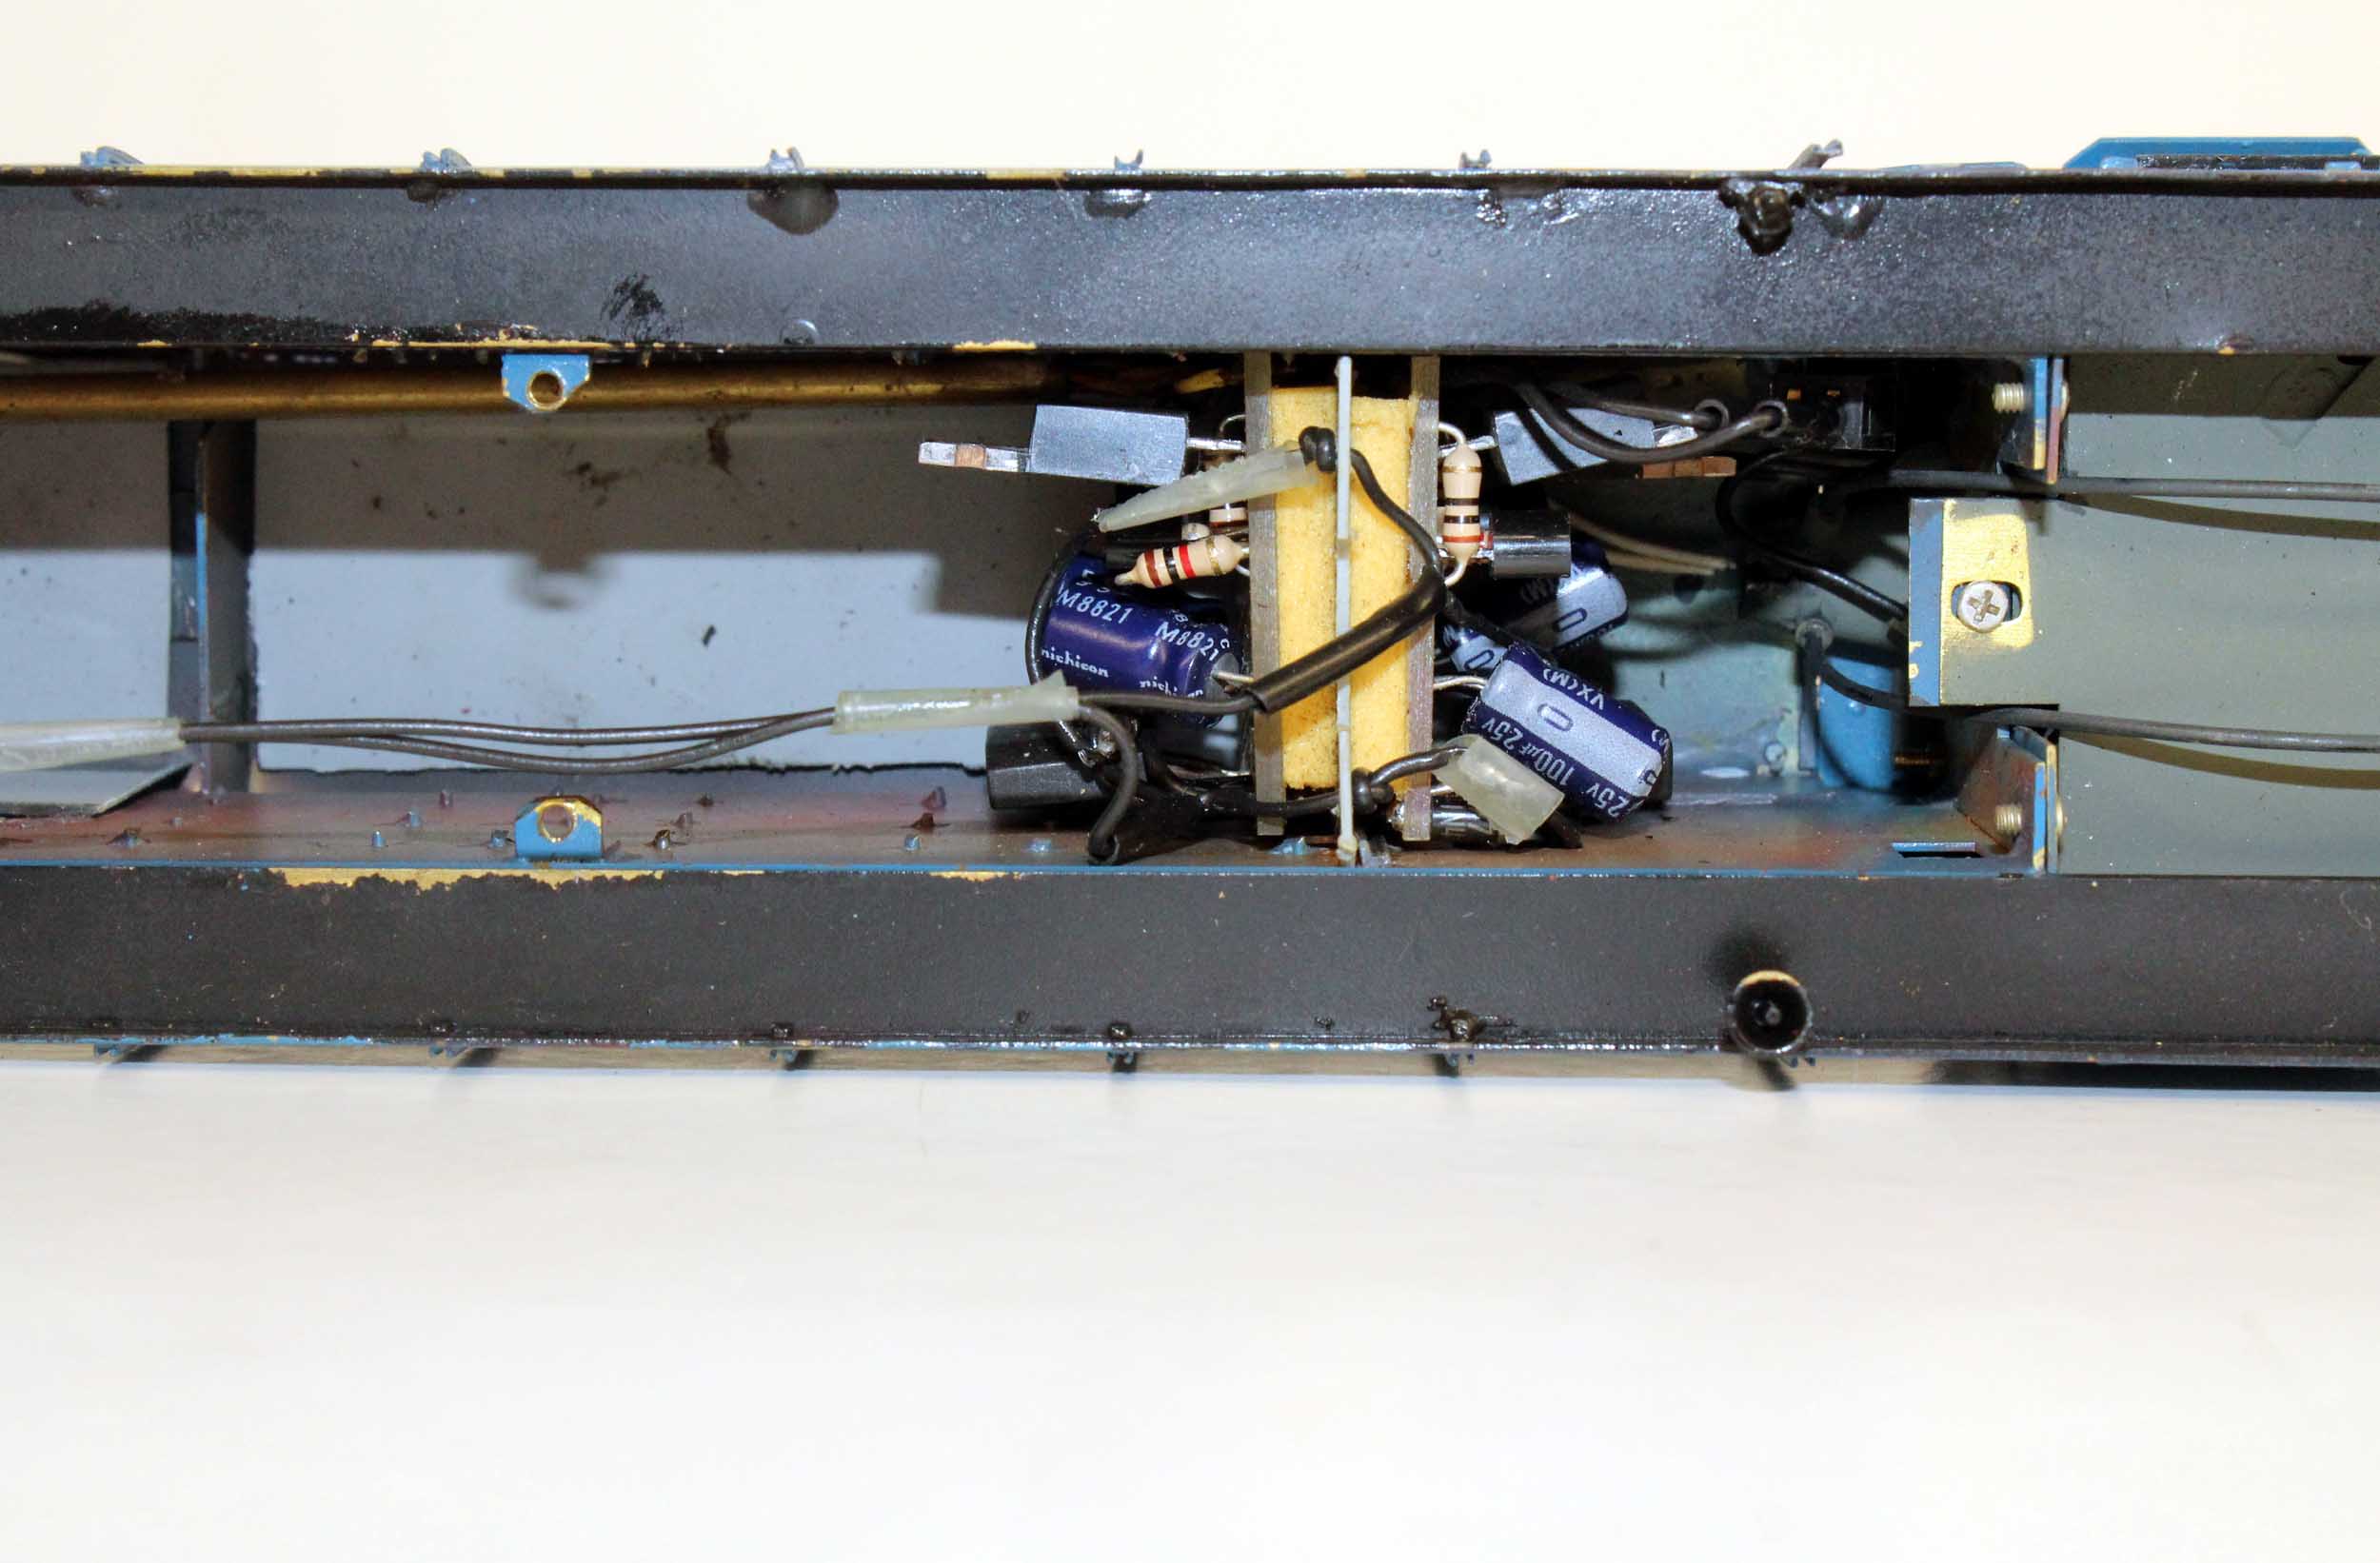
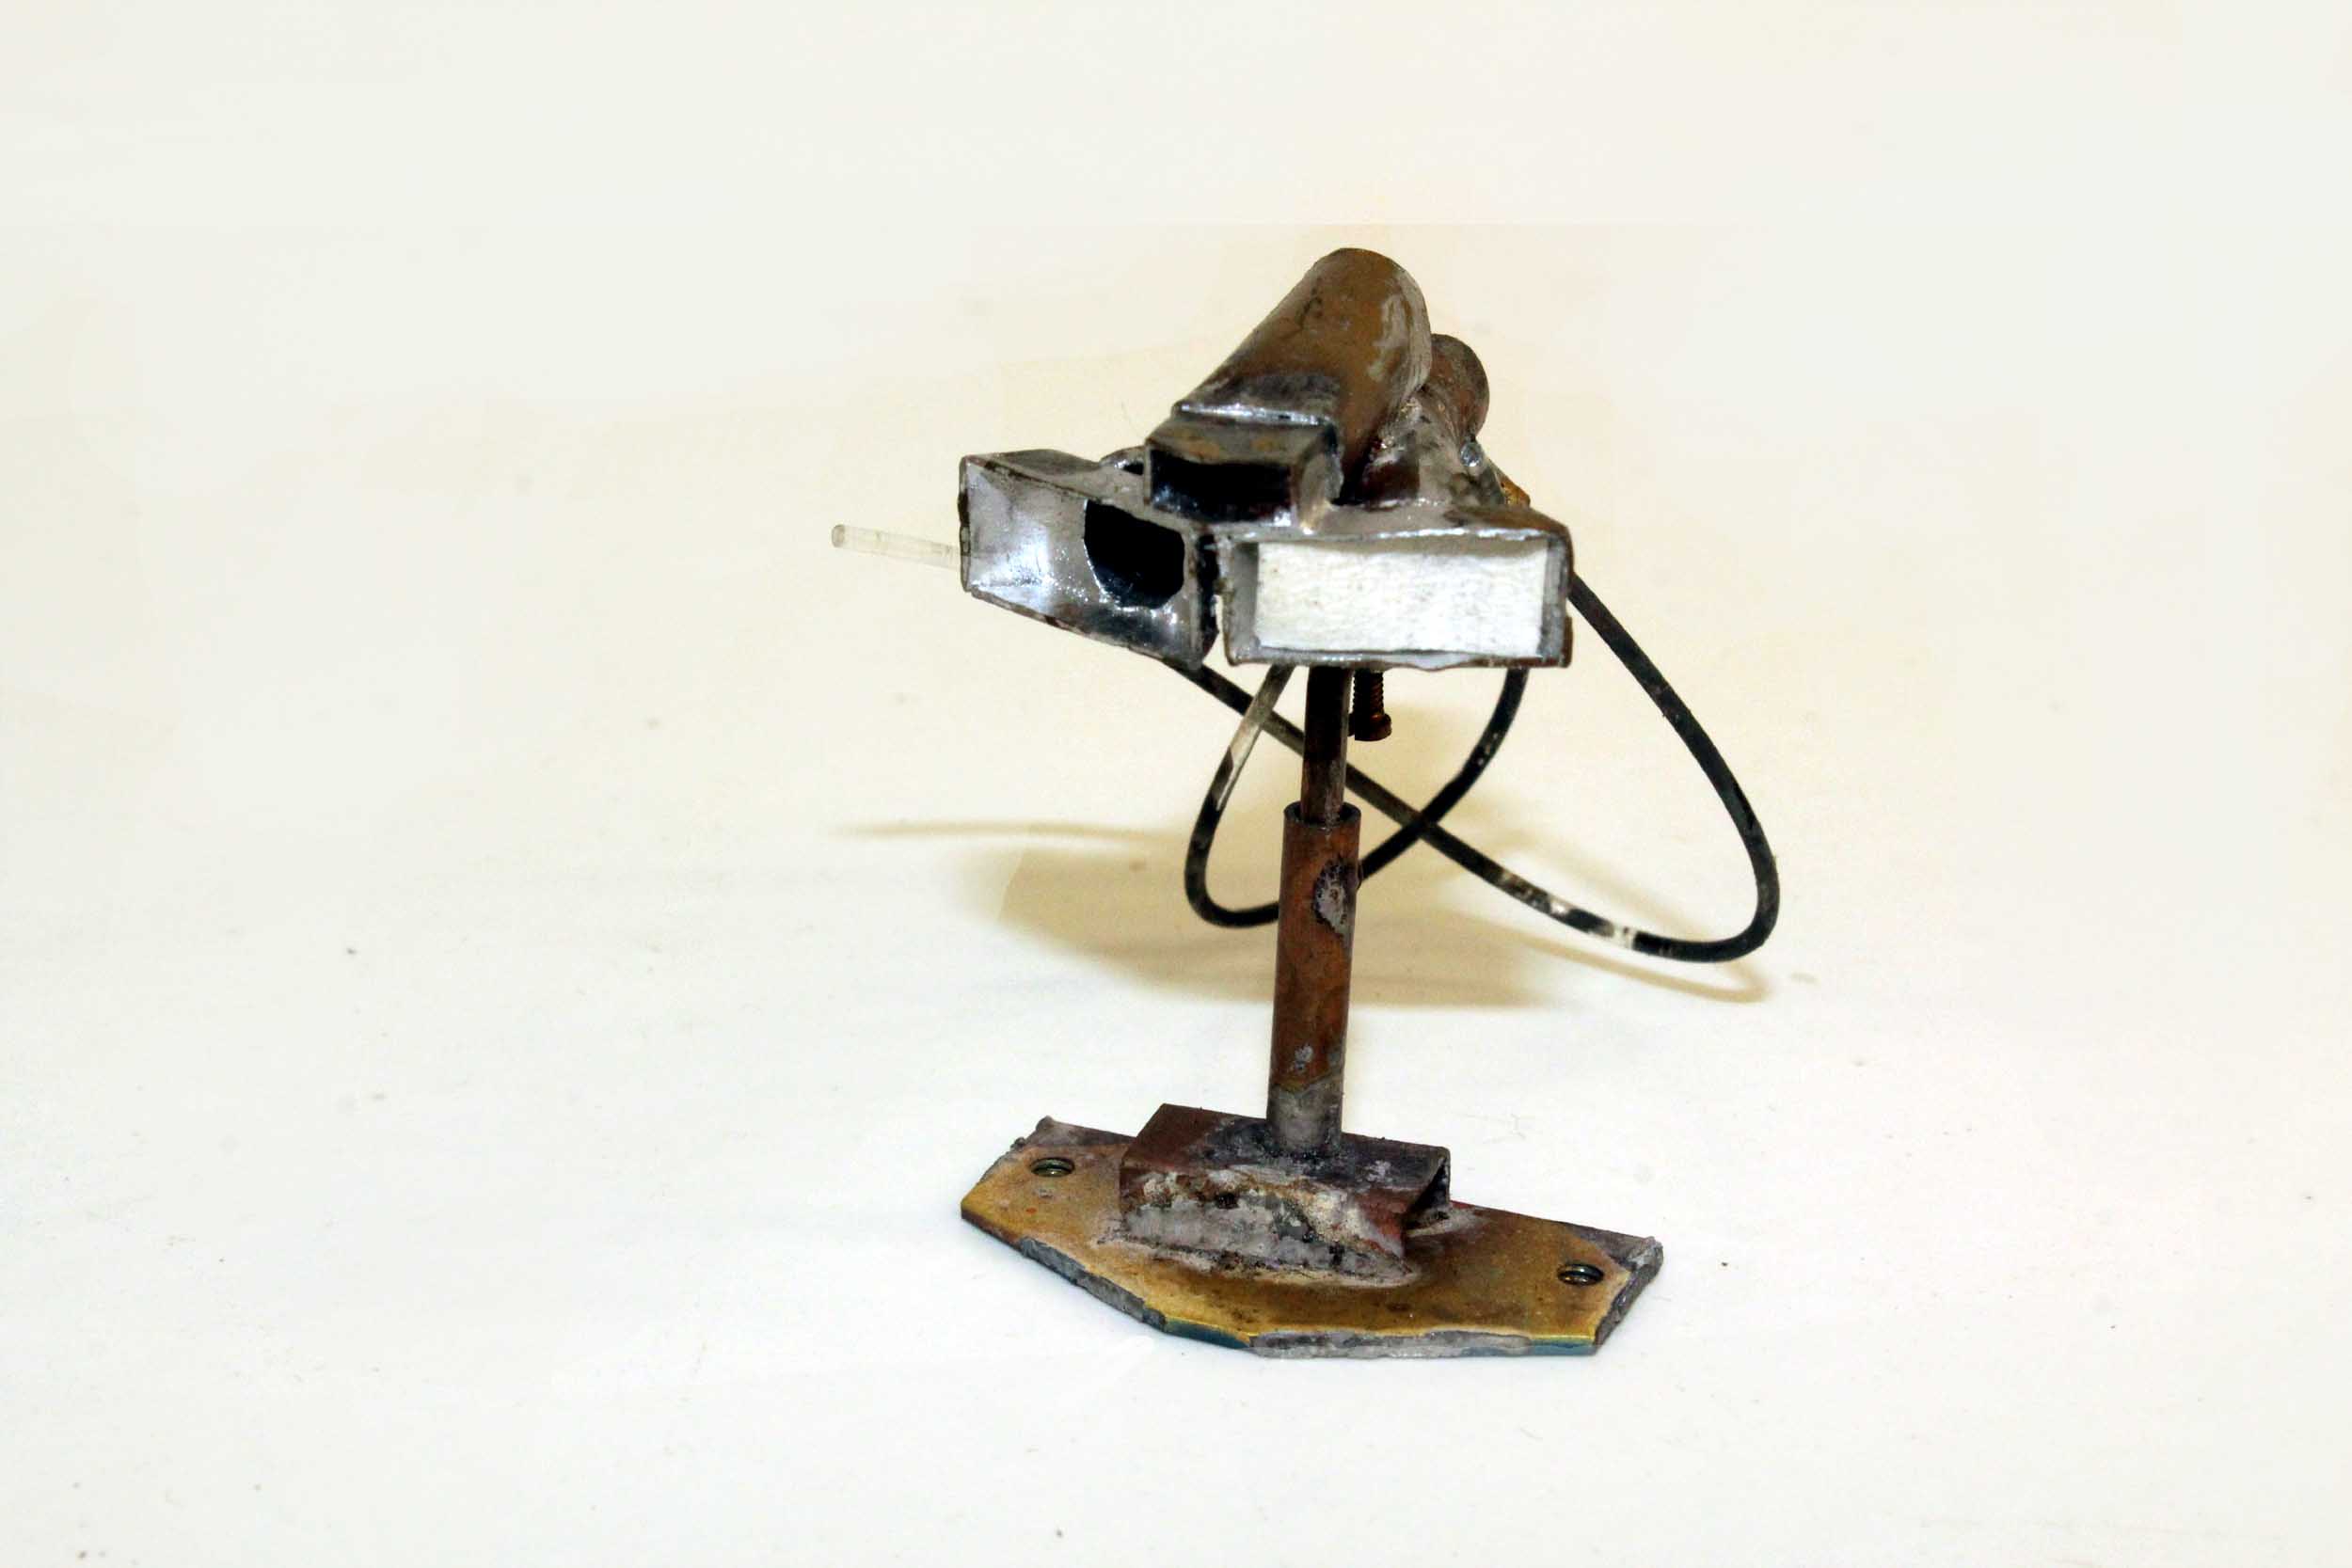
I
did not like the very dim headlights from the original 1989 completed project.
The MV lenses went yellow with age. Sort of keeping with the old idea of using
fiber optics, I turned some clear acrylic rod on my lathe and inserted them to carry
the light forward. They were about .070 x ½” long. I glued a new MV lens to the
end of the acrylic rod. Not perfect and not scorching bright like I prefer, but
MUCH better than it was. It is by far good enough for me. The numberboards
turned out to be VERY bright which helped me to have to fix the headlights. All
this effort to upgrade worked out. I wanted to SEE the loco lighting with the
room lights on. It runs very well.
Added 4-28-24
In
2022 and 2023 I bought more Overland GP38-2 and SD40-2. By that time I was much
more familiar and happy with the TCS WOW4 decoder. The Tsunami2 was now the odd
decoder in the new fleet making it not run the same as the others. I briefly
tried to tune it to run with the others but I changed the Tsunami2 to a TCS. It
is now speed matched perfectly and running REALLY well. Further if there was a
flash short with a Tsunami you always had to turn head lights back on which I
have long HATED. For this loco it is 3 separate functions to turn back on. The
WOW4 keeps the last light function enacted when the power returns. All MUCH
better!
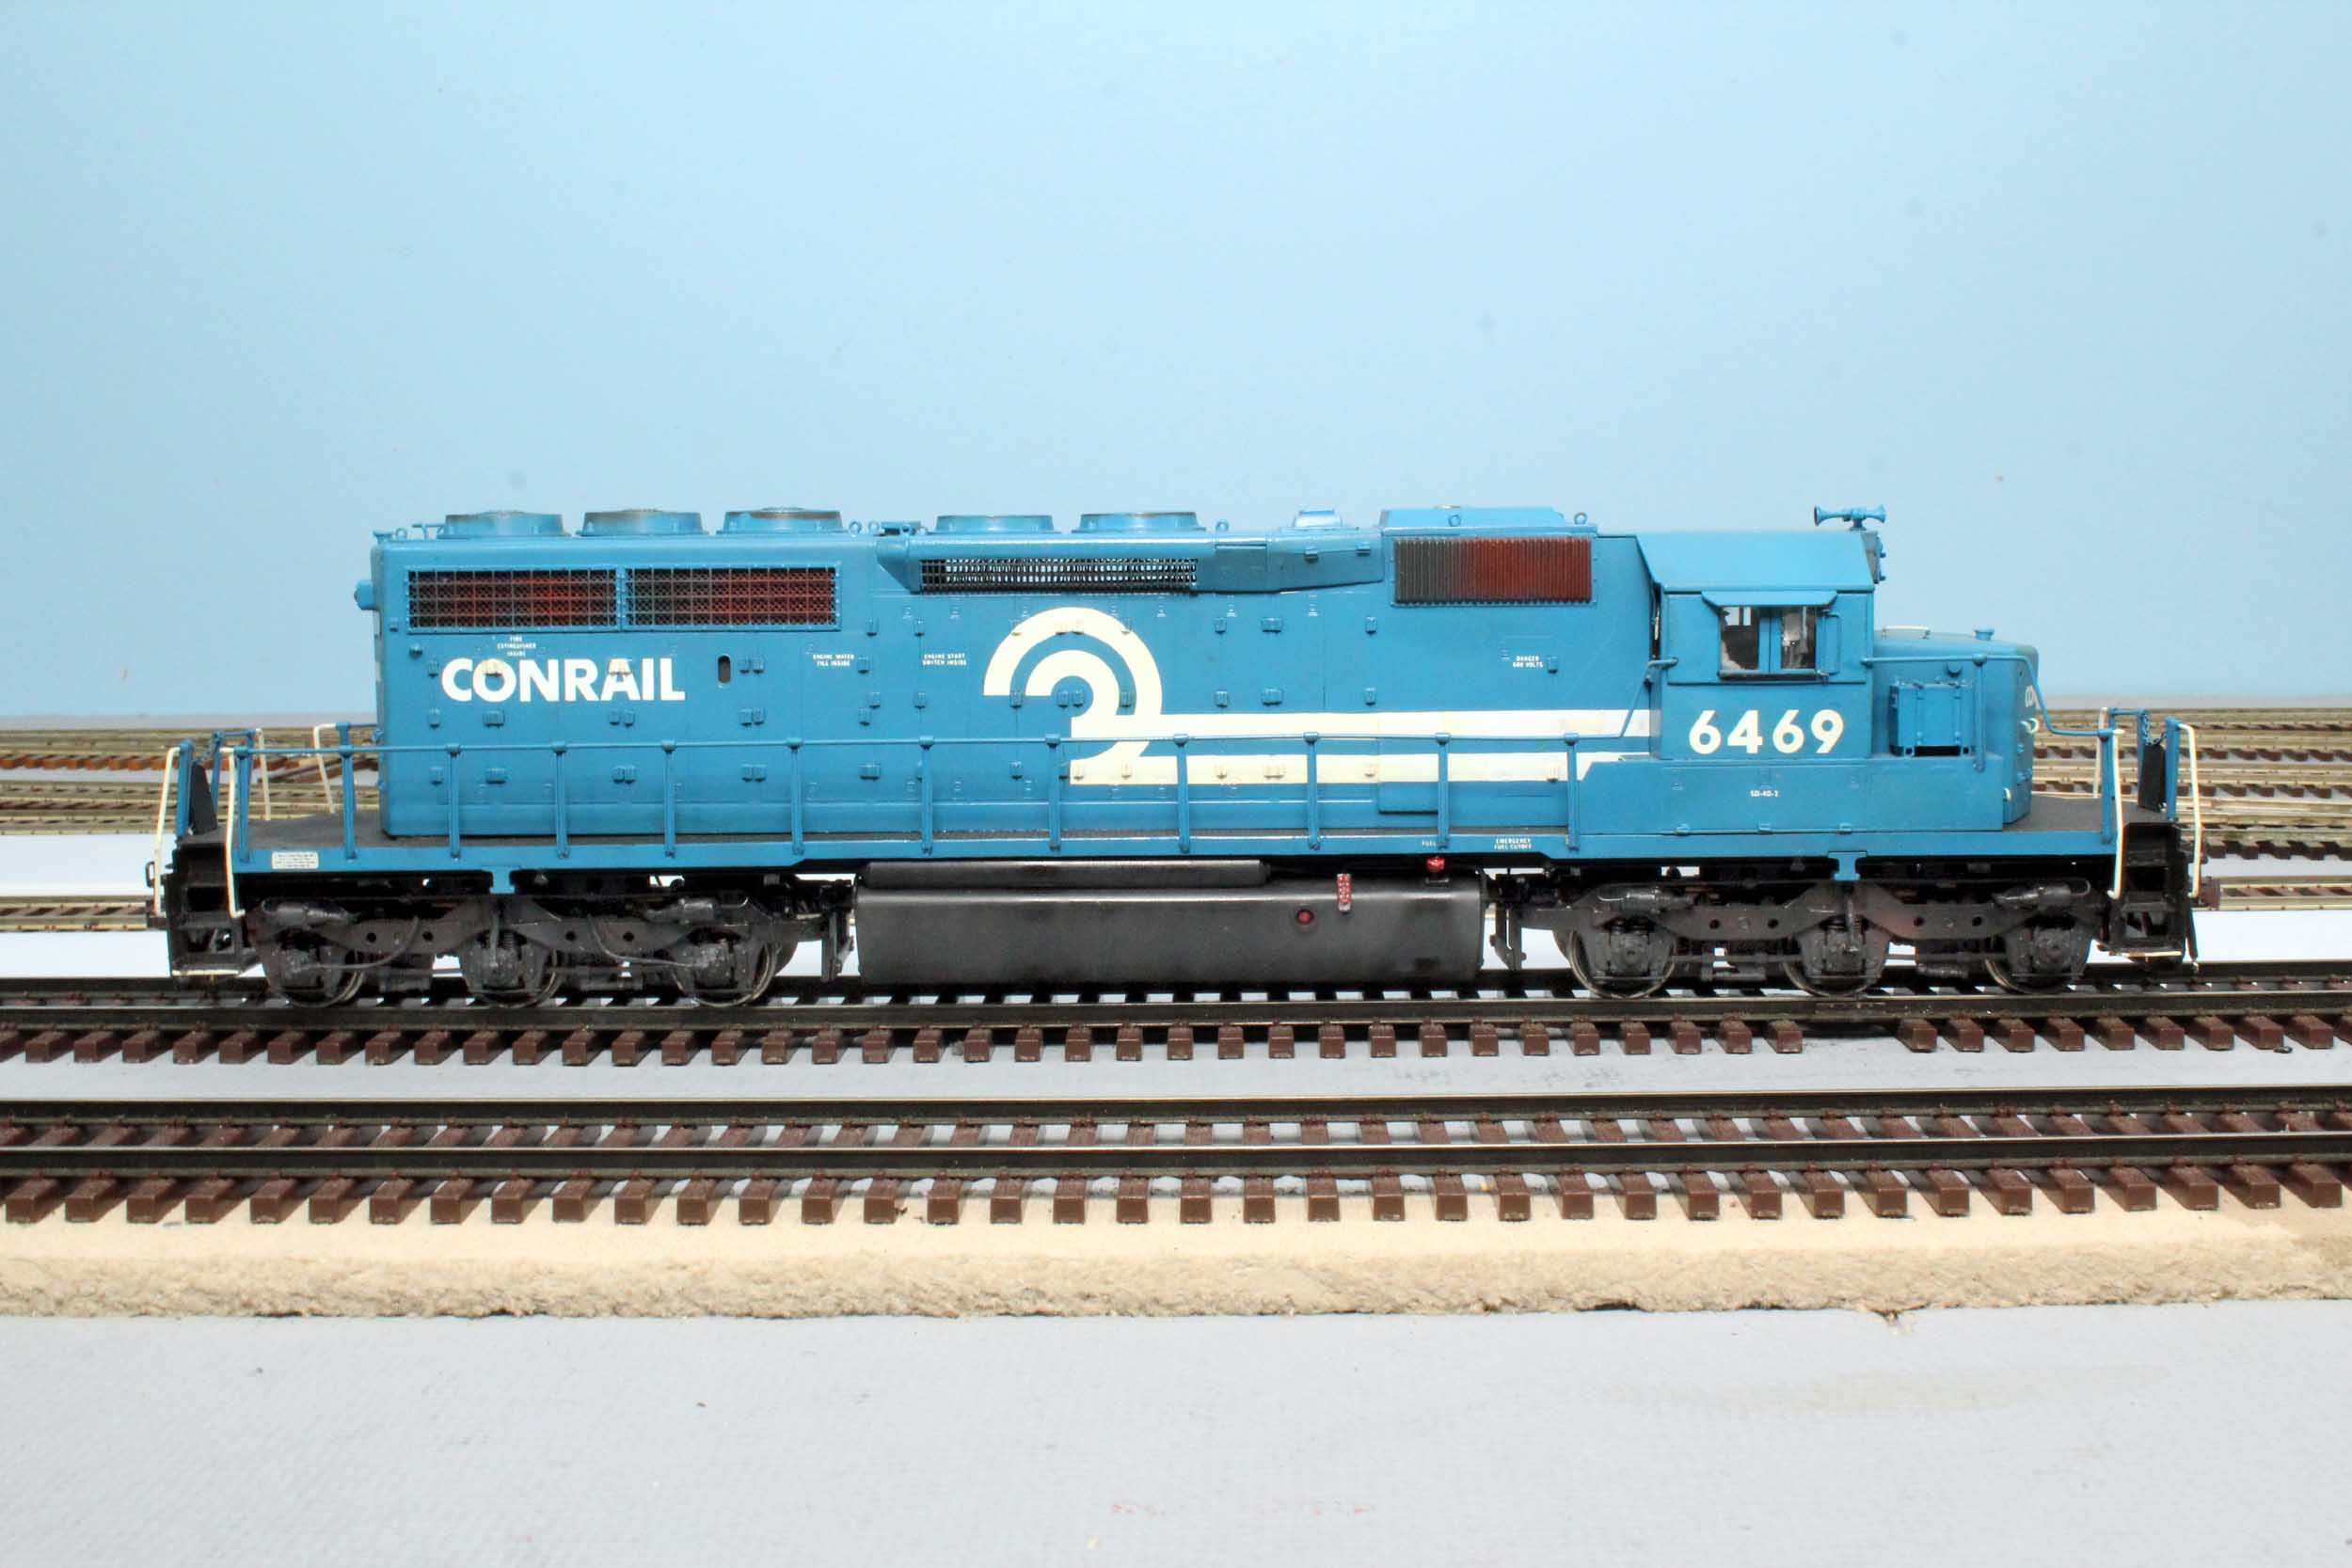
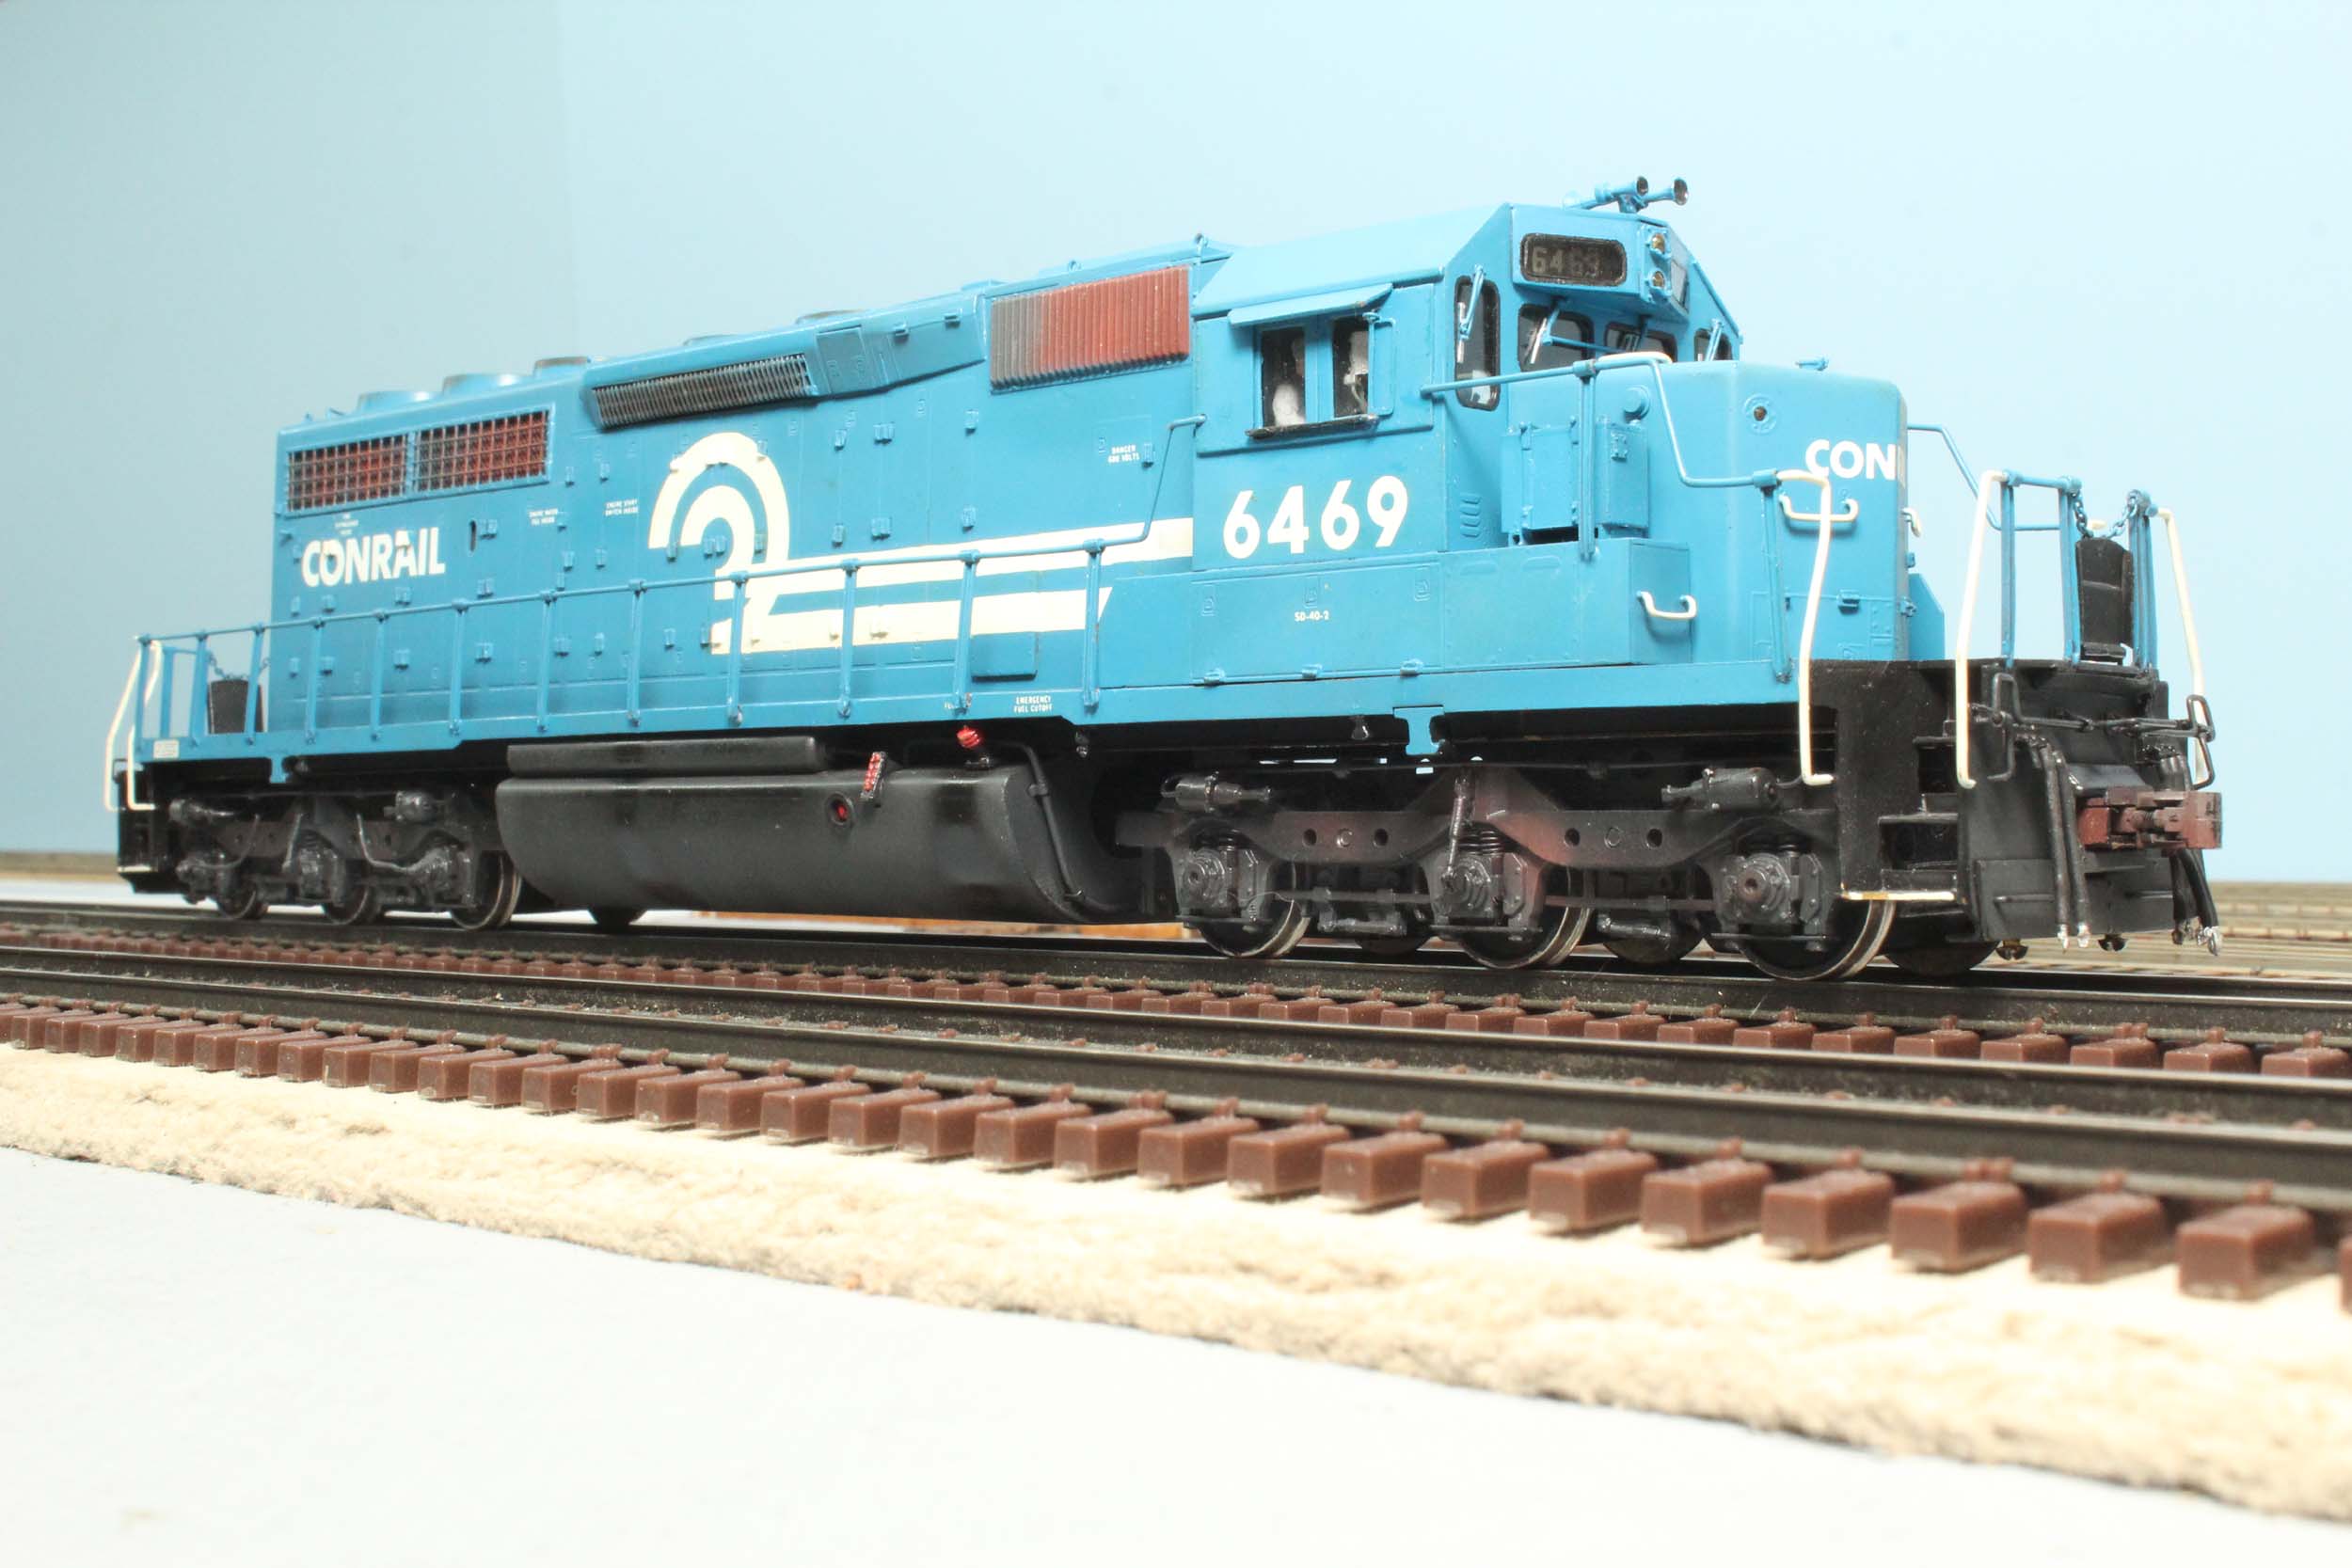
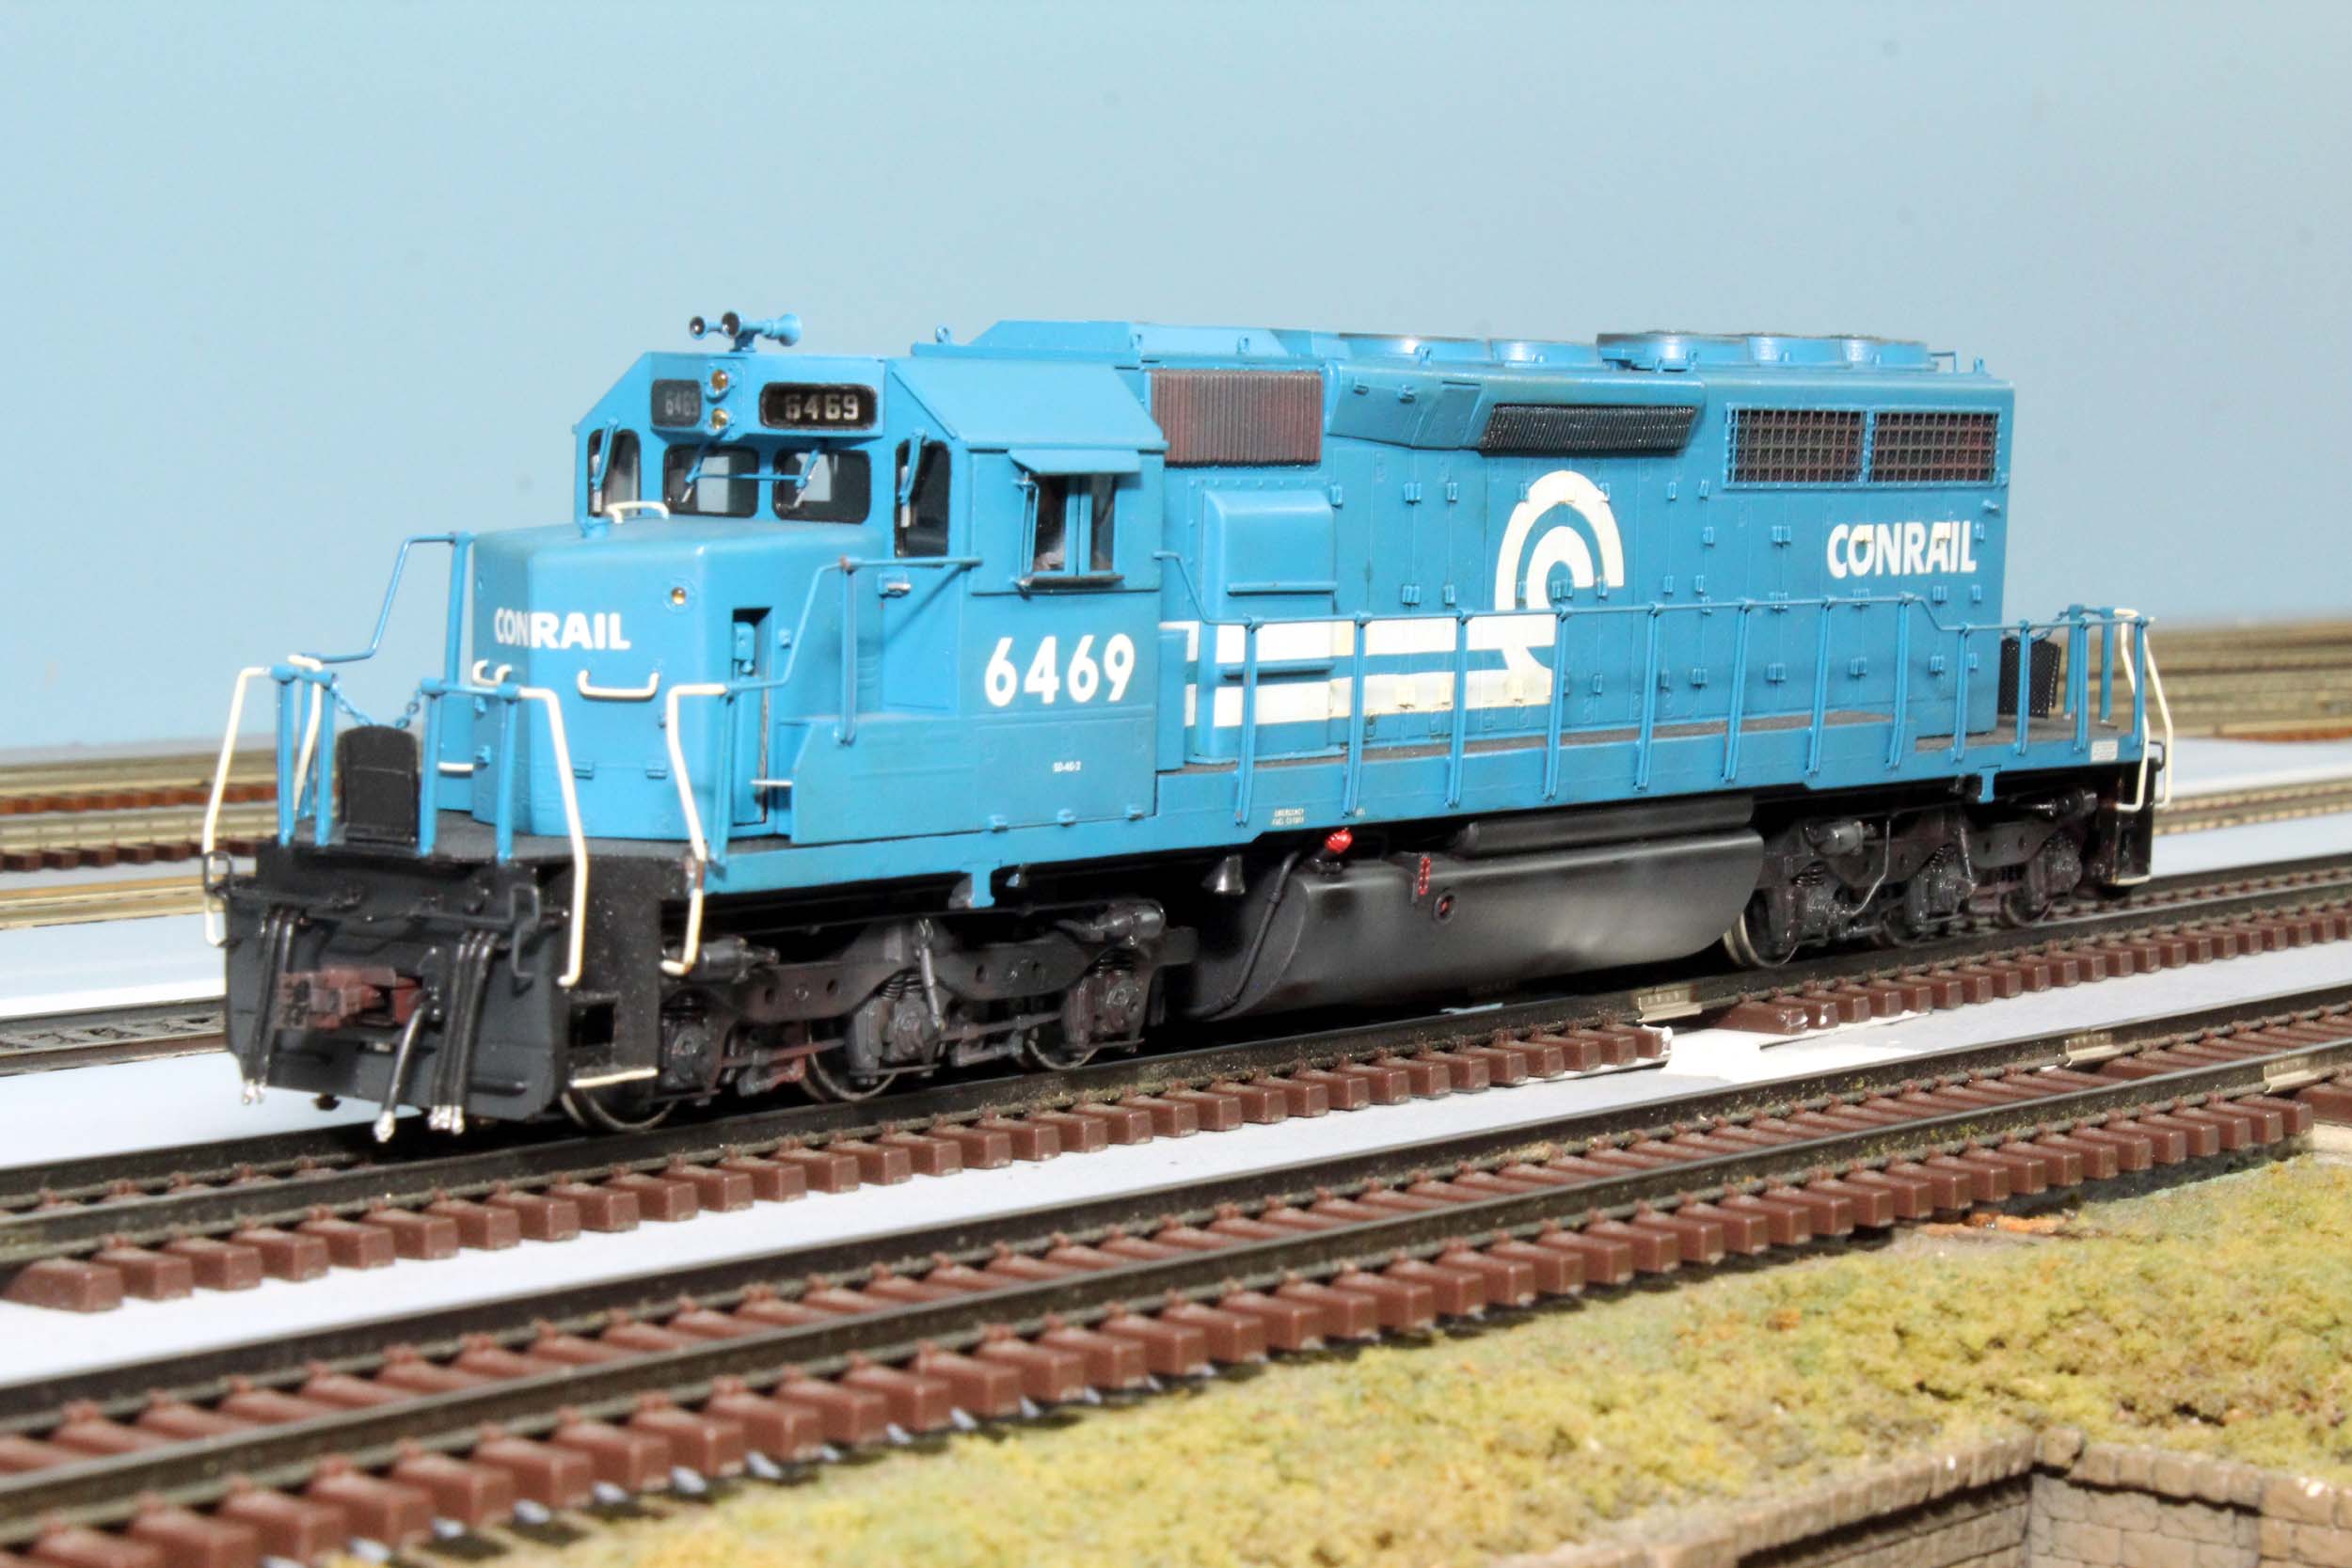
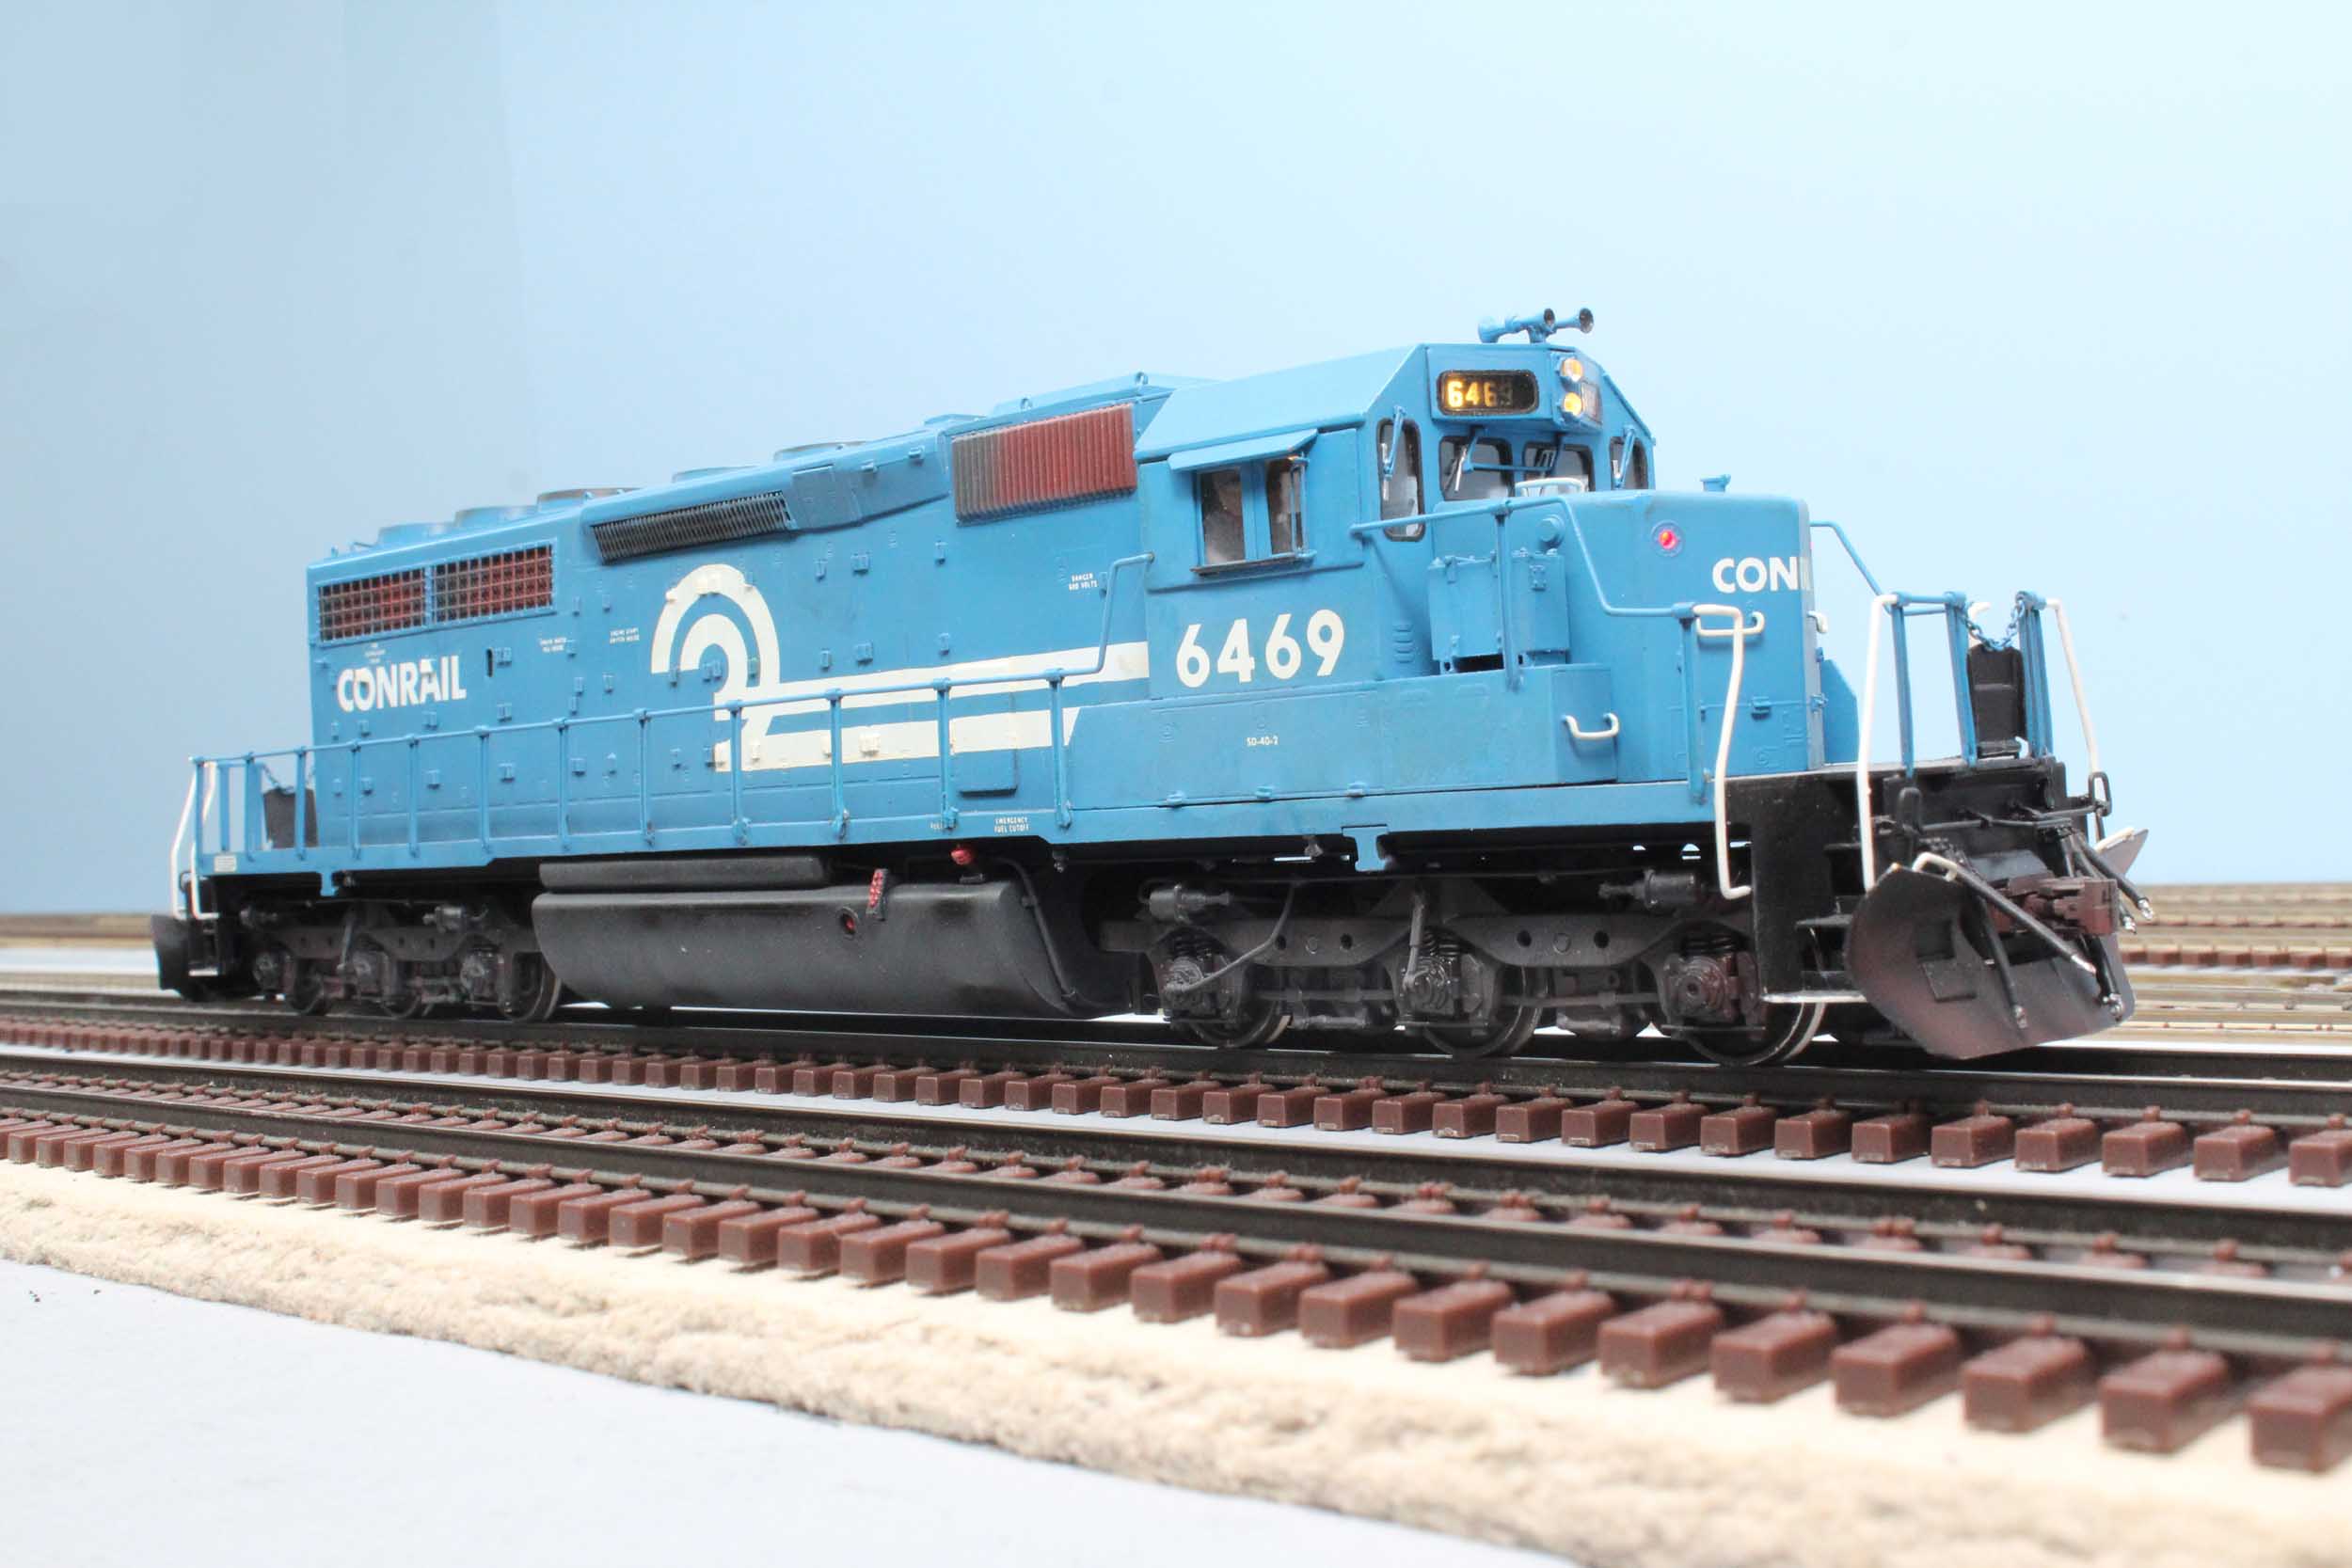
Completed
10-25-16
In
spite of some significant repairs I was able to keep almost all
of the original 1989 paint job. That was important to me. The Tru Color
Conrail Blue matched pretty well. The reworked lighting system mostly exceeded
my expectations, especially the very bright numberboards. Unfortunately 1 of
the corner marker surface mount LEDs that was problematic in the rebuild, has
died quickly. I am in no hurry to fix it. That would be at least a day’s works
to get back into this locomotive.

Added
11-5-16
My
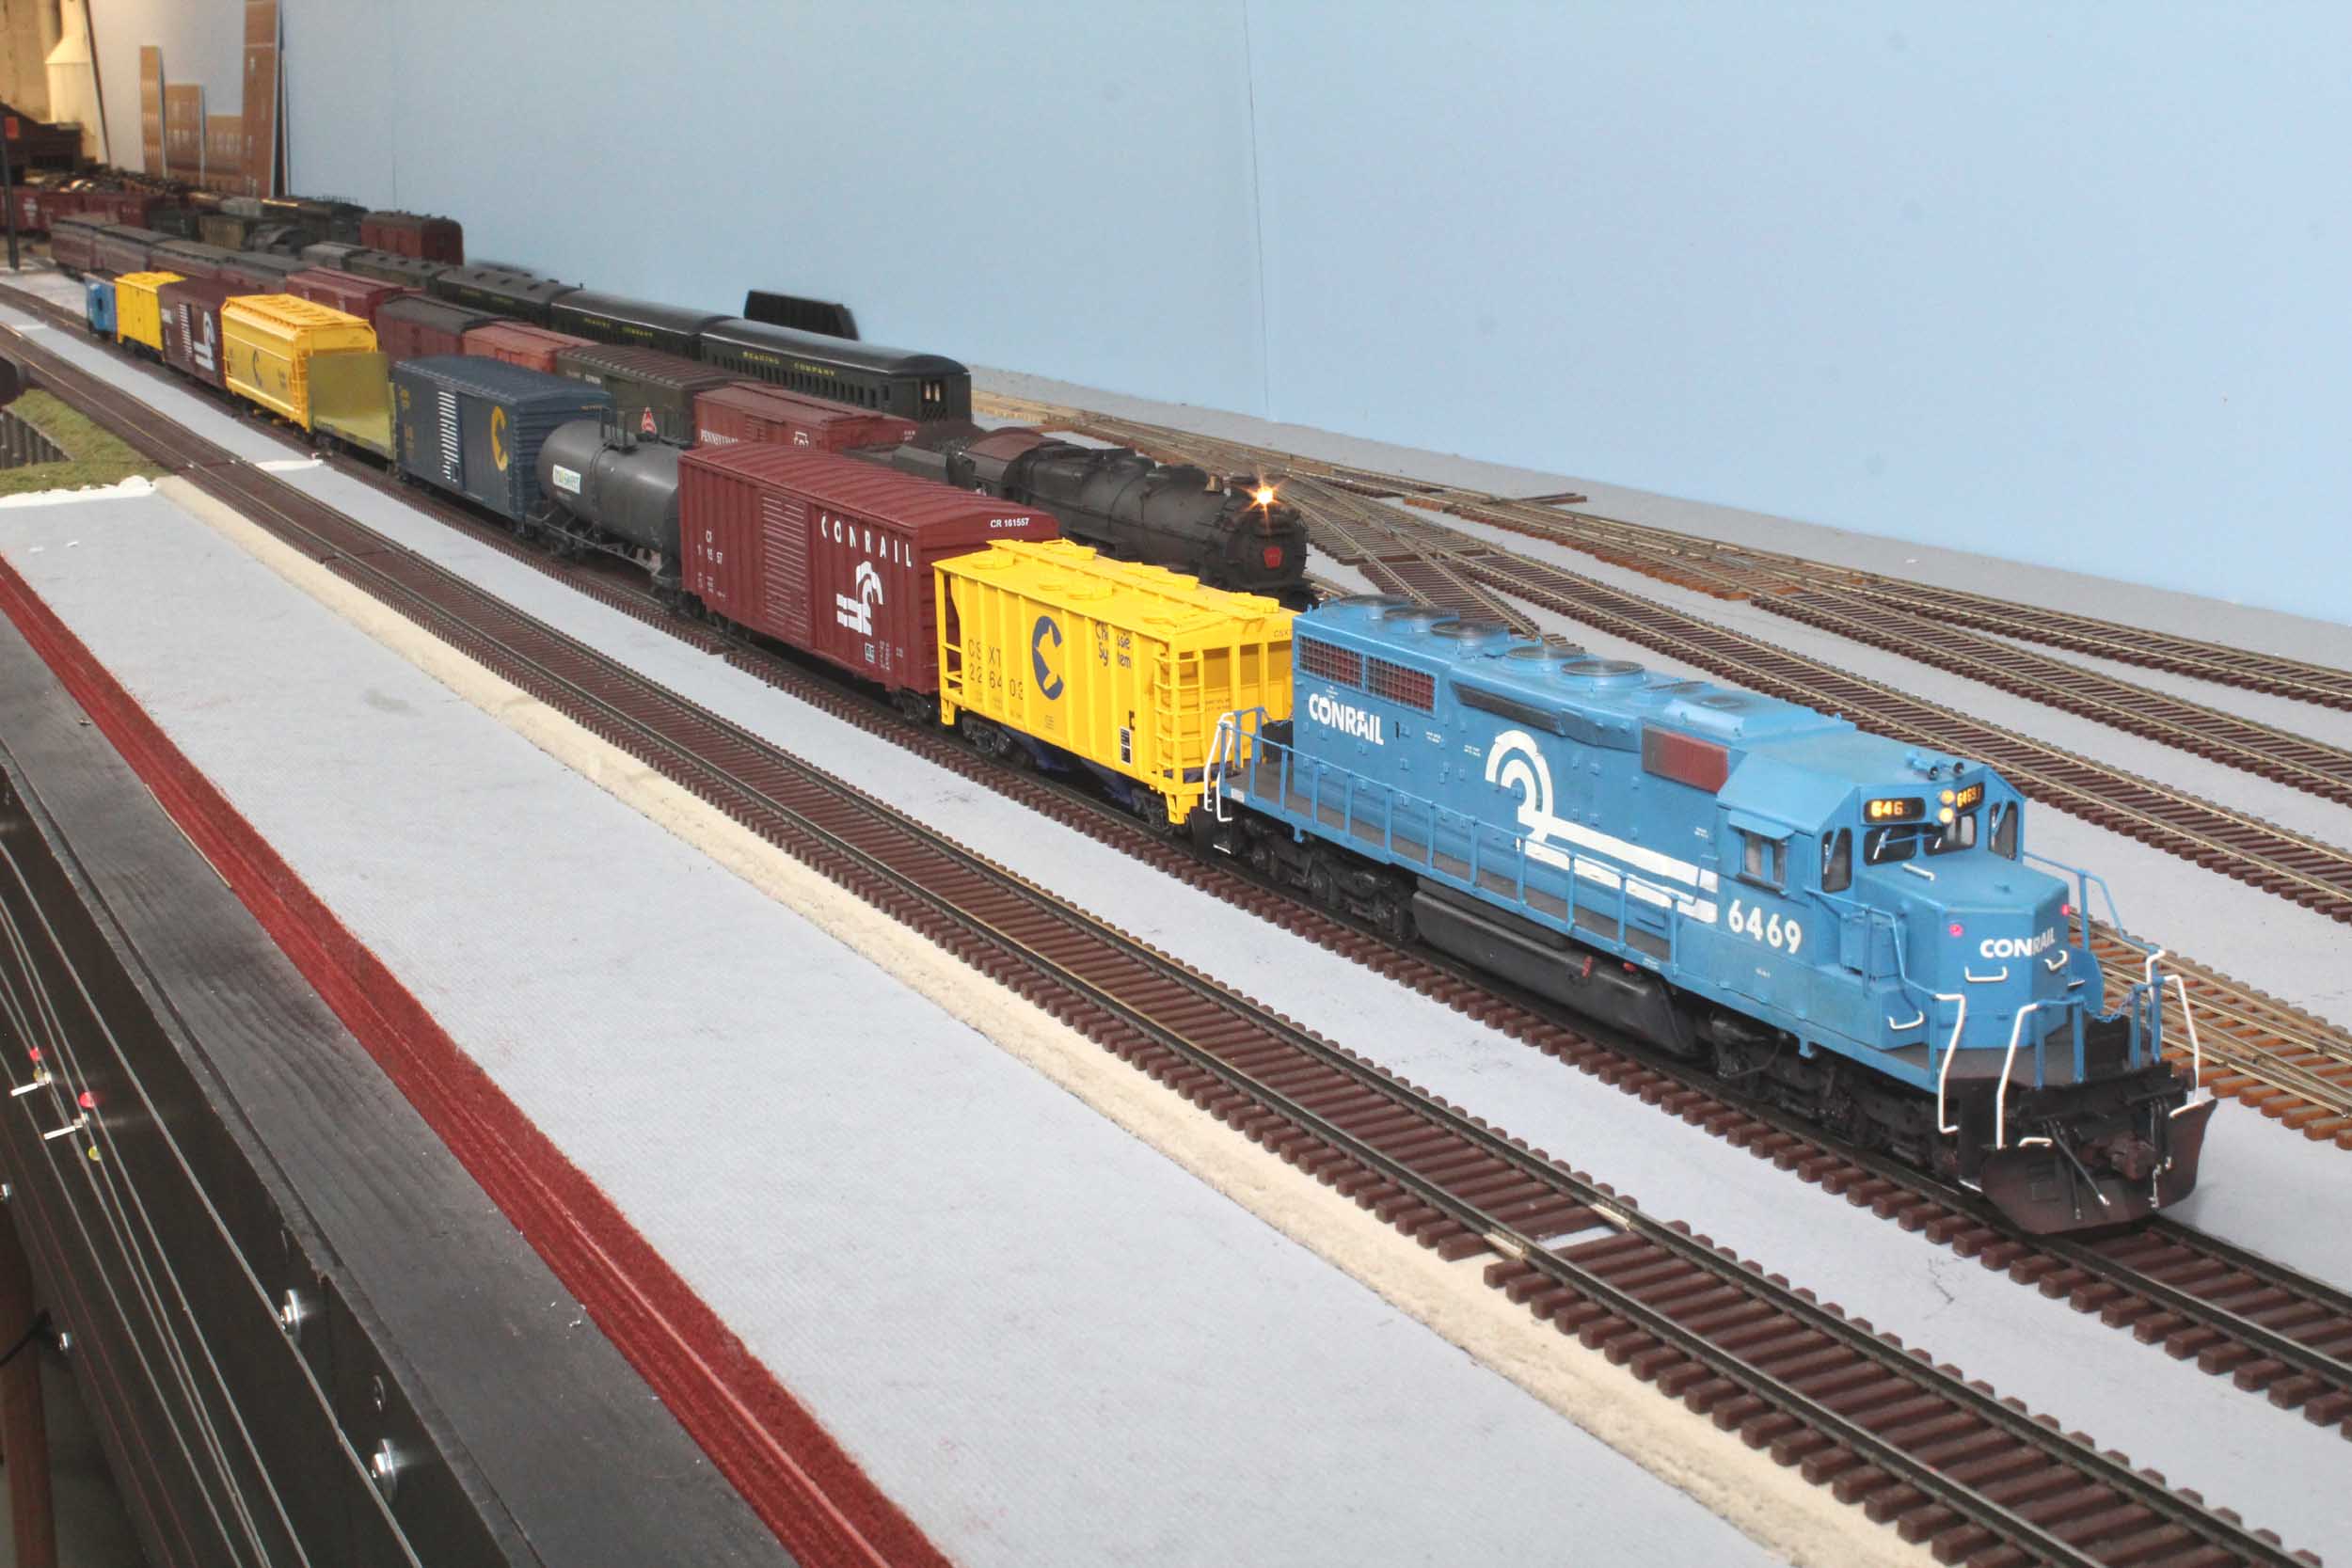
Pitiful “Modern” train
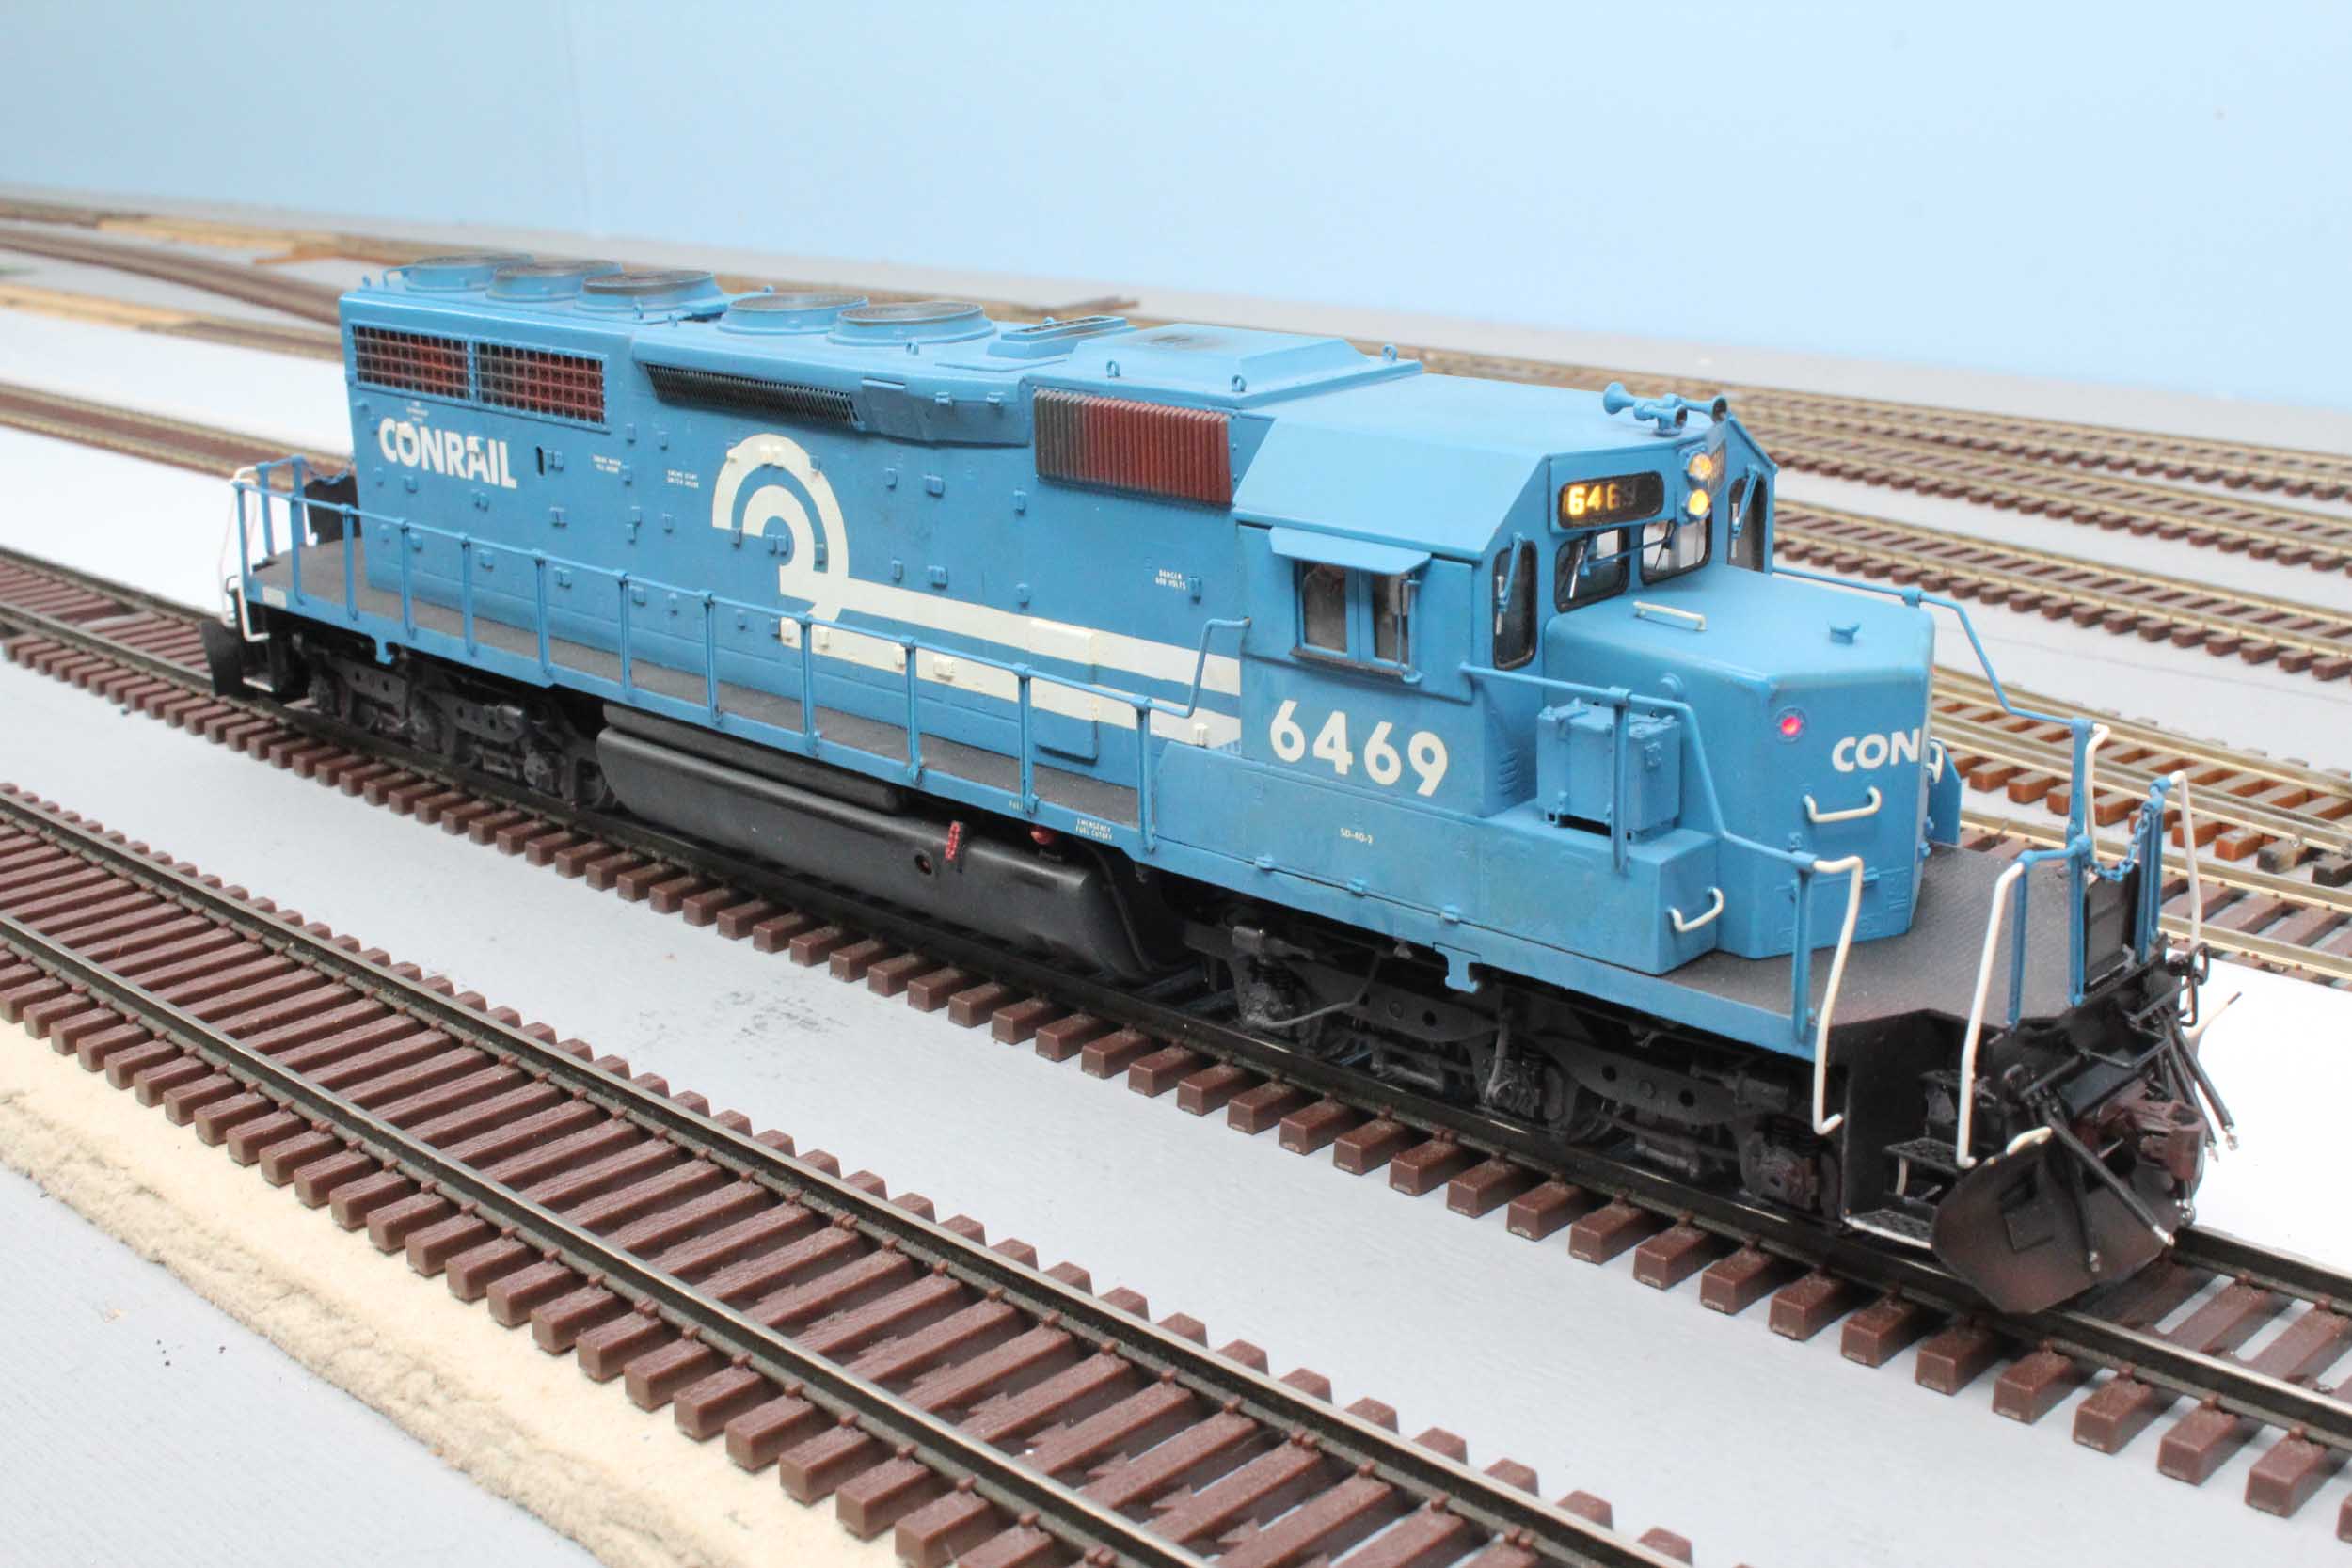
Now
that my SD40-2 is done of course I want to run it. I
have all but ignored buying cars that would correctly run behind a Conrail locomotive.
I currently have 2 Conrail boxcars. Everything else was
bought with a cutoff date of about 1958 for transition era rolling stock. On
11-5-16 I got out what I had and took 6469 for a spin around the layout. That
Tsunami2 decoder is really working it! It’s big fun running the 6469!
Added
12-24-19
Spark
Up The Barby
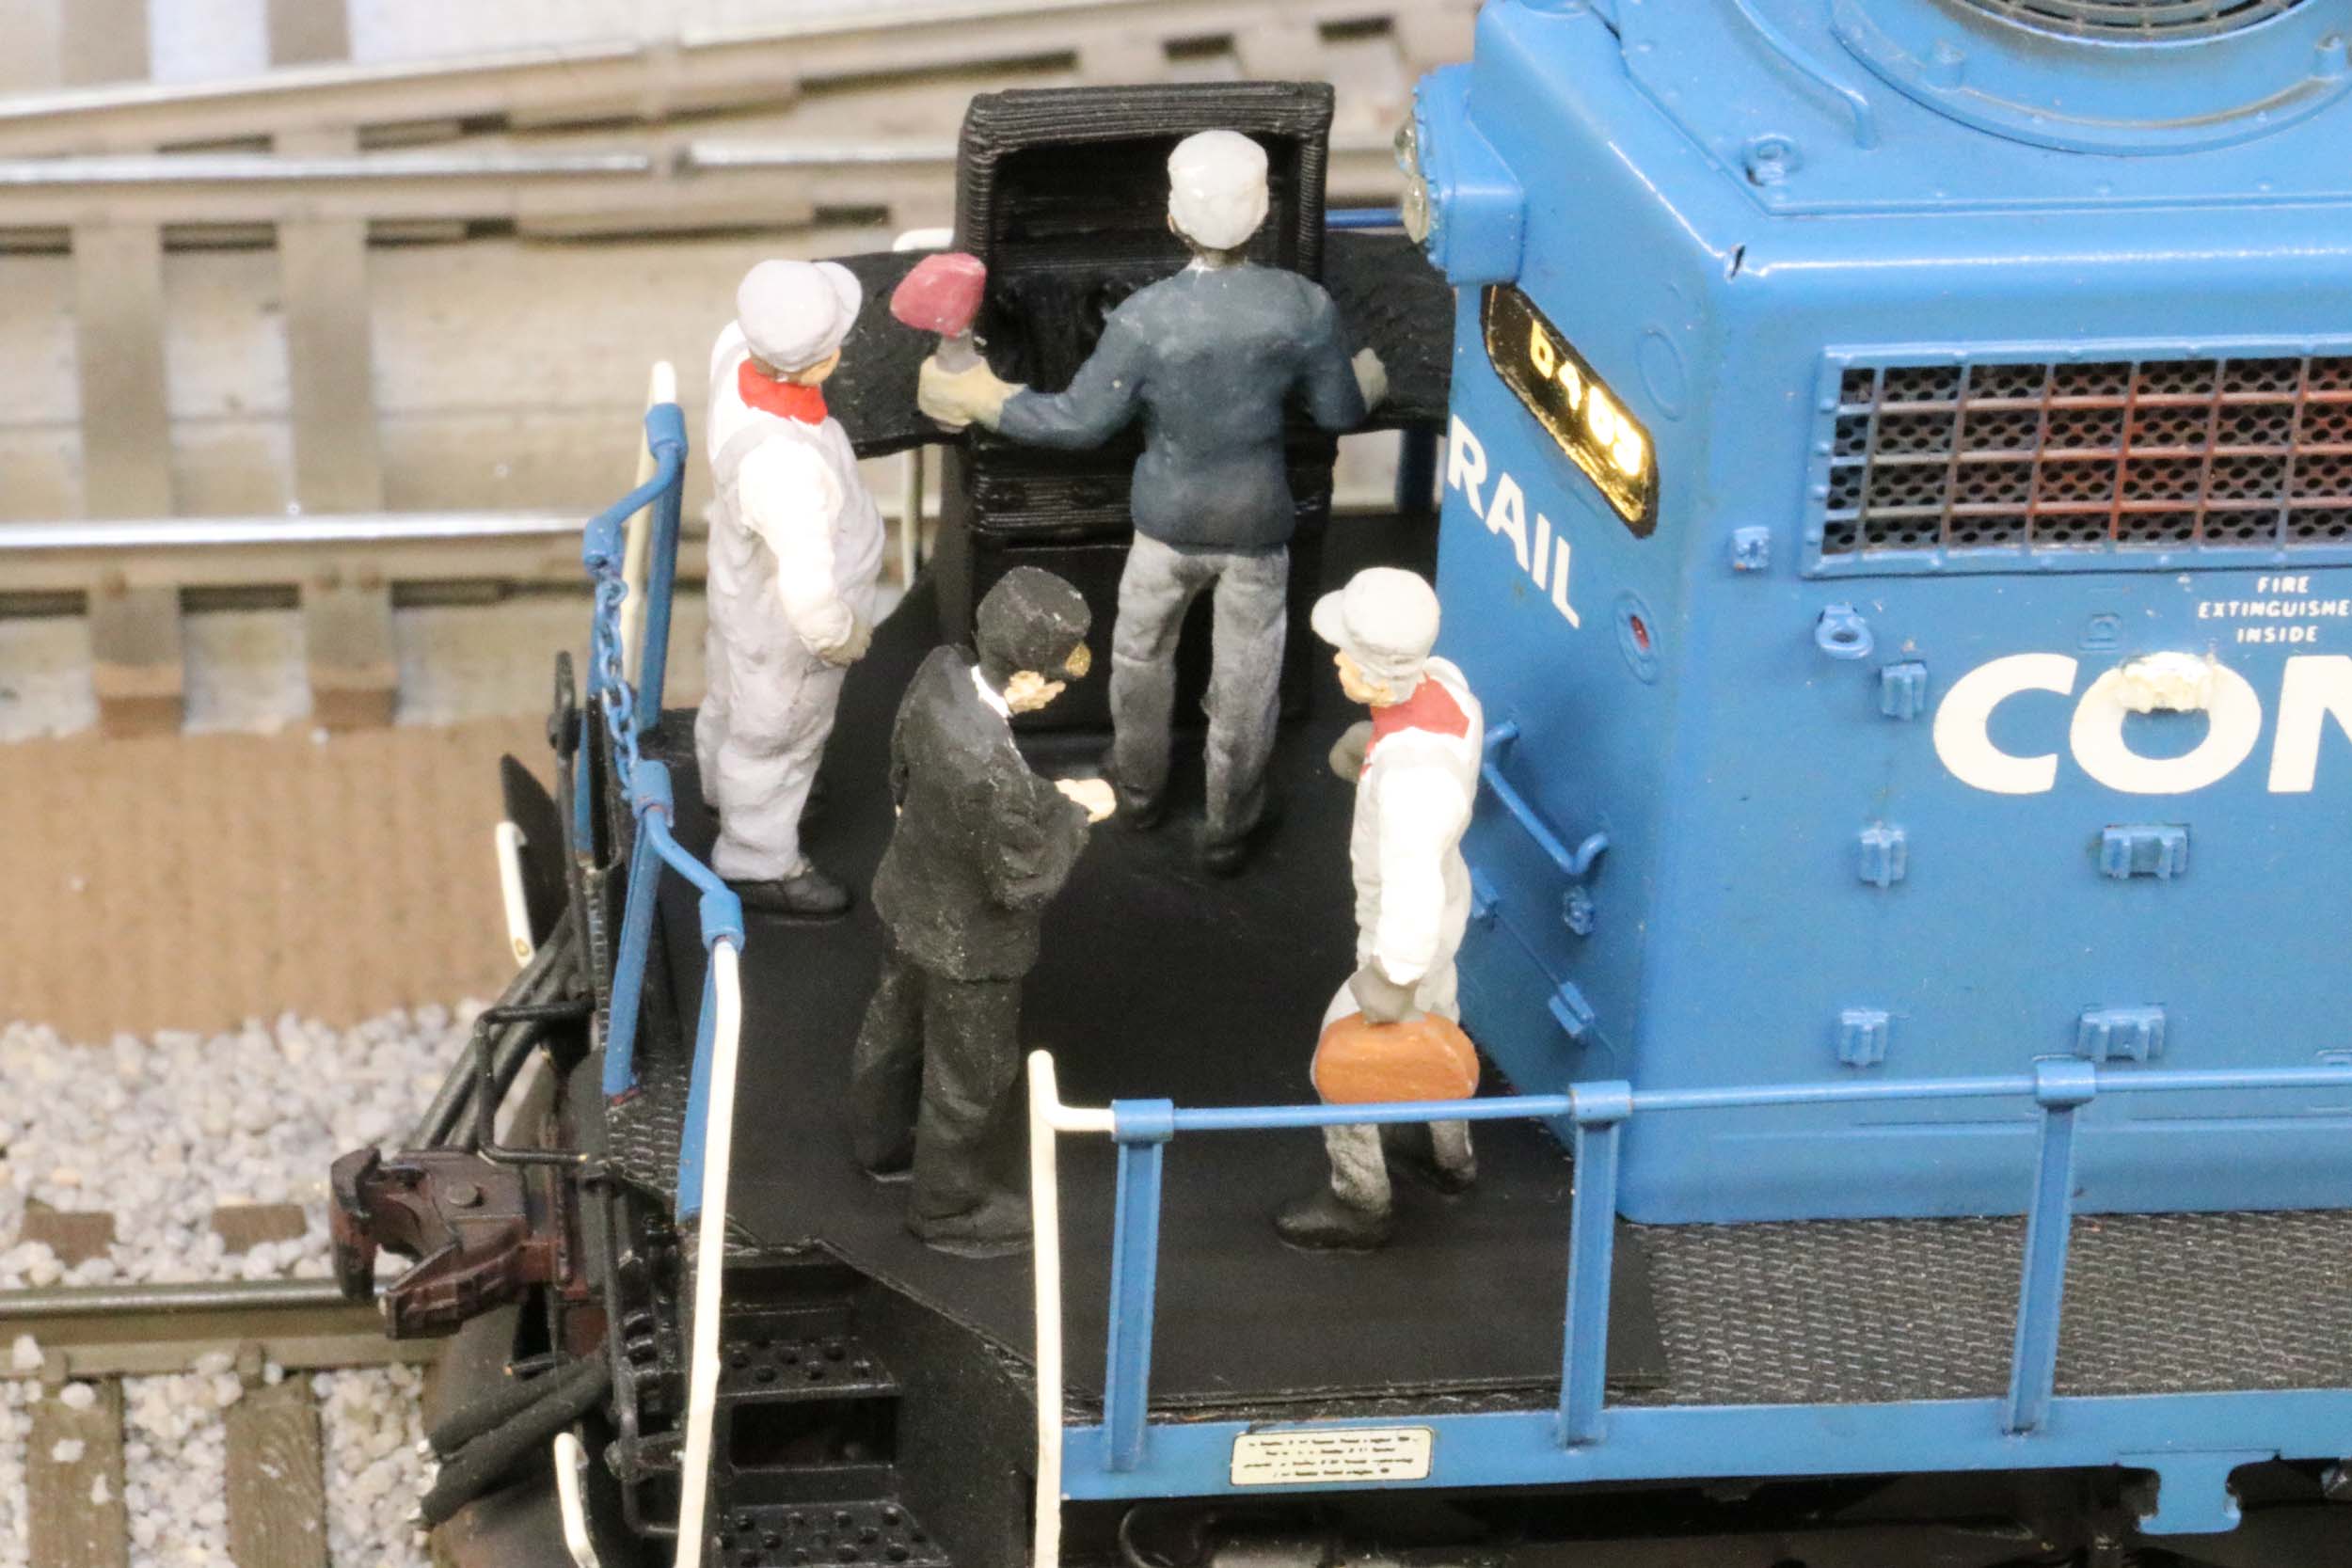
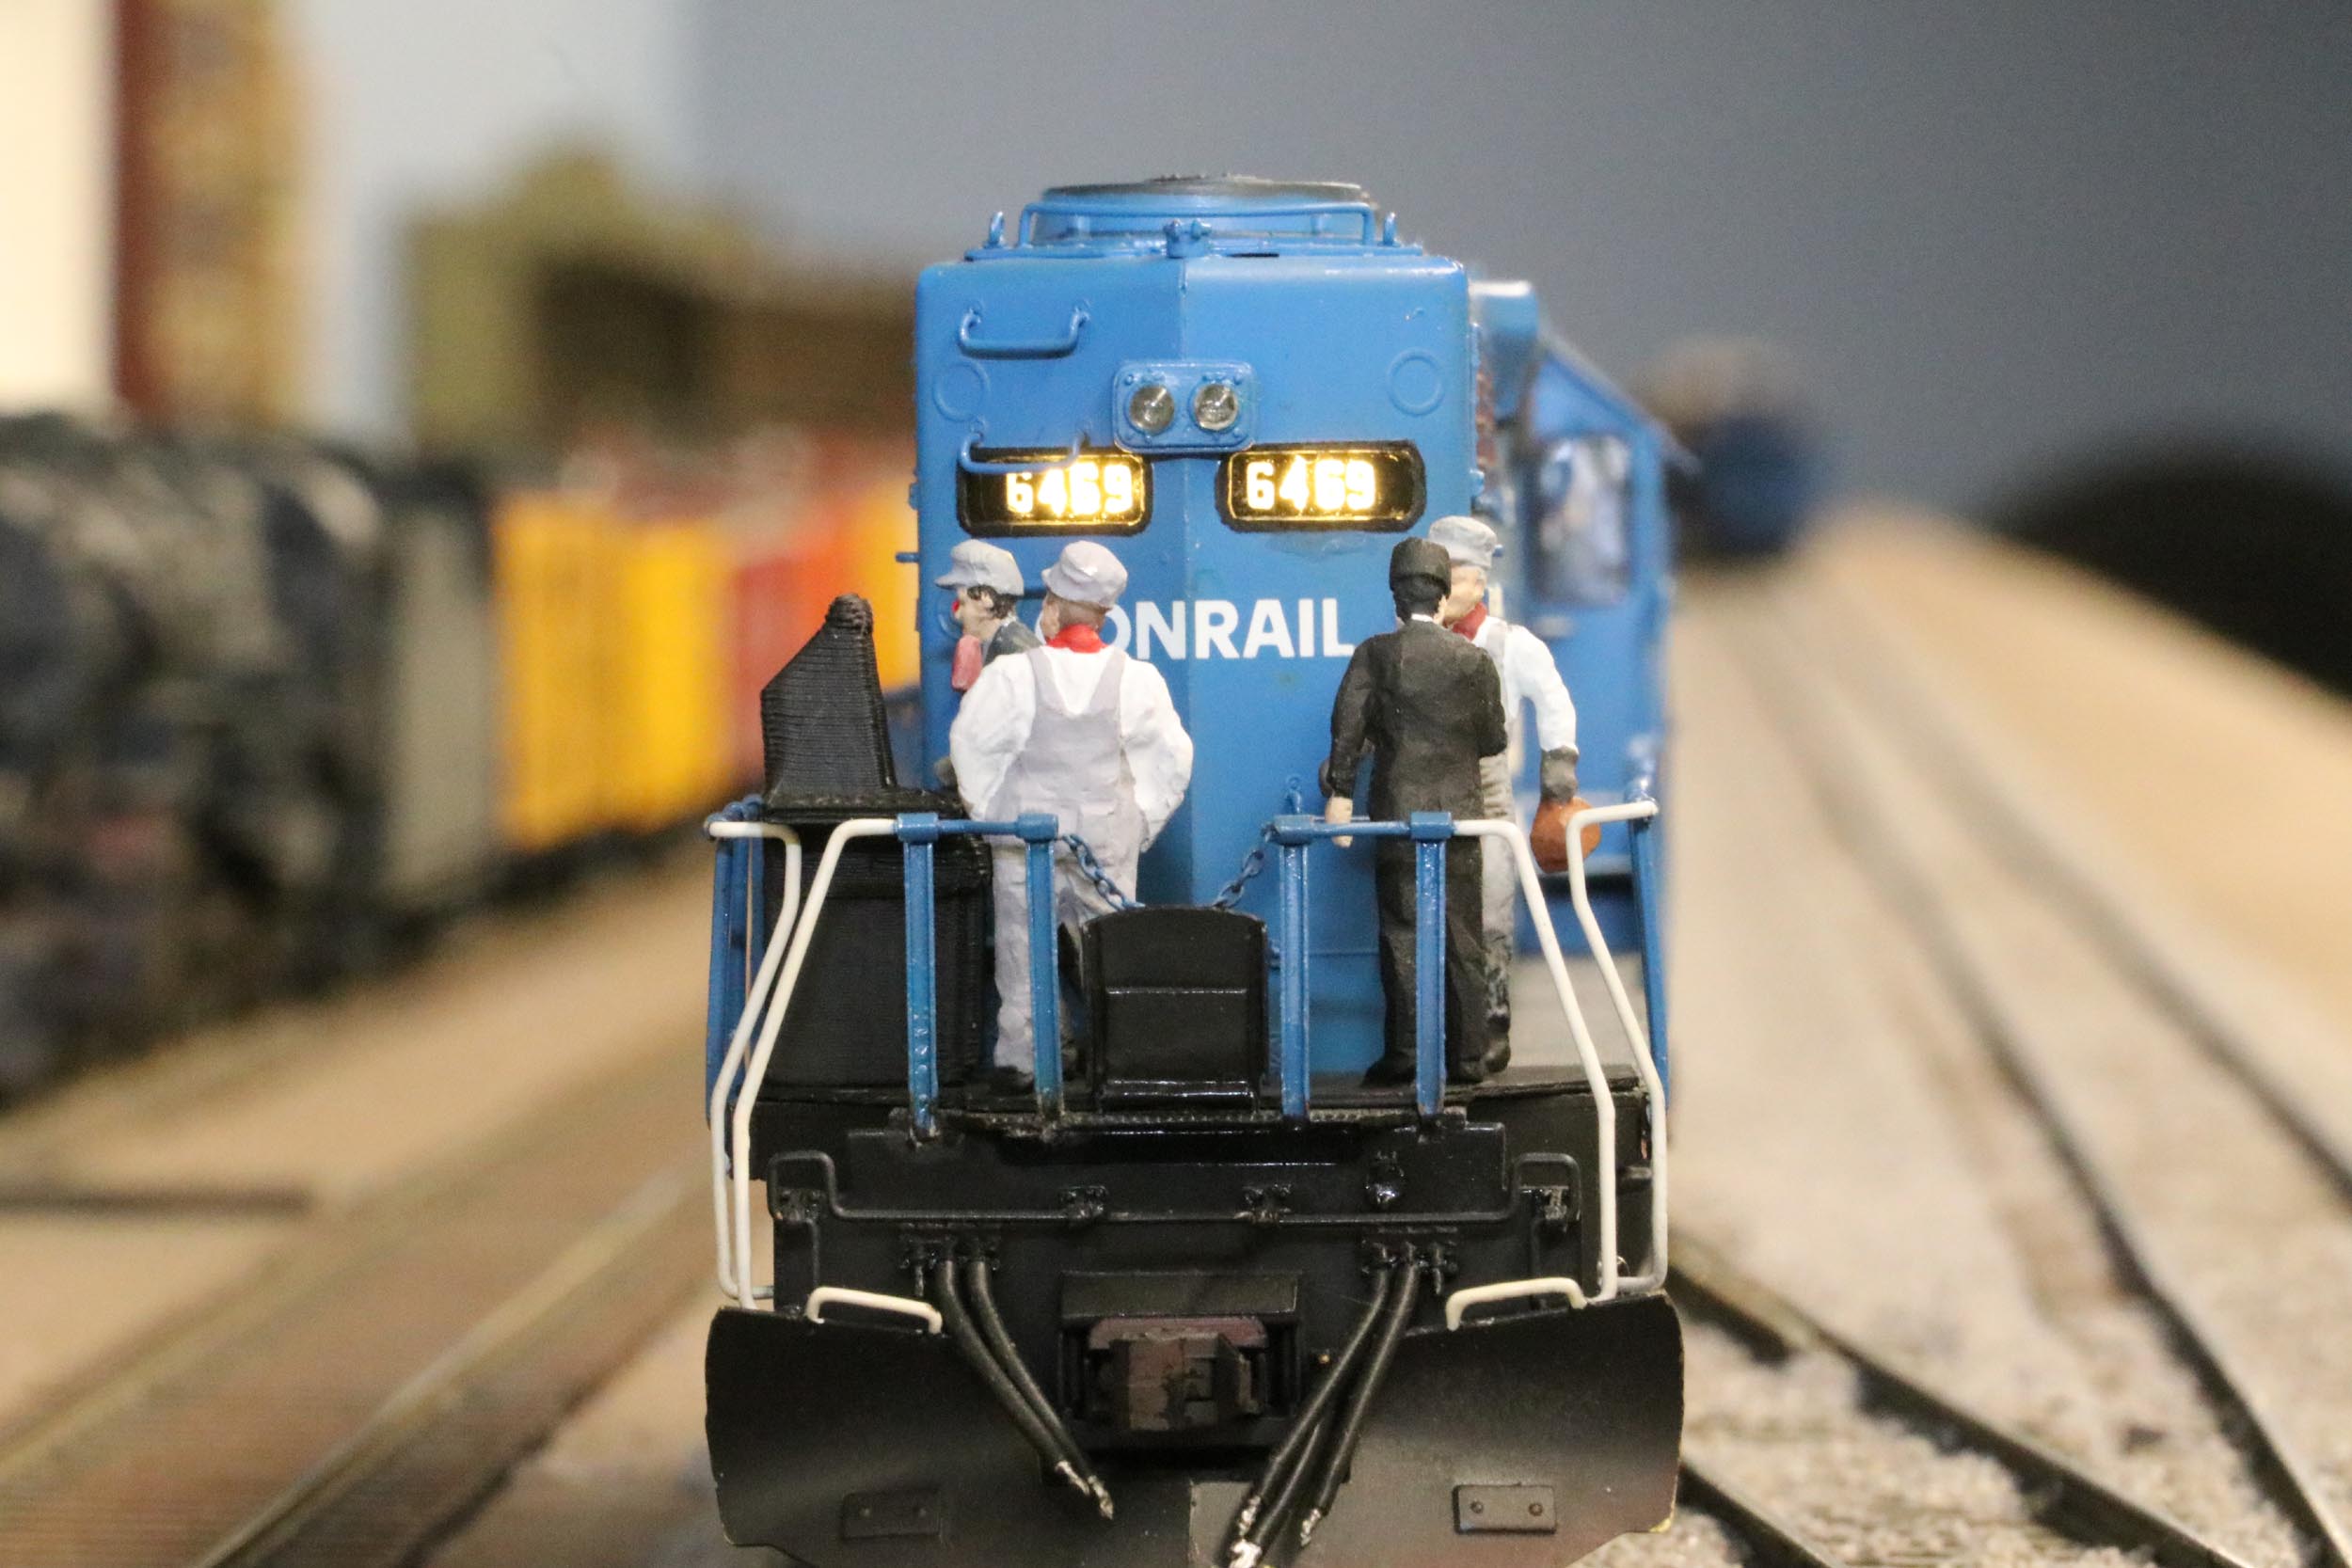
Ever
since the days with Dave Bailey I always thought how huge the SD40-2 “porches”
were compared to earlier EMD locos. I thought about doing a goof of the crew
having a barbeque on the “back porch” as they were running. It would make for a
good layout scavenger hunt item. The original idea was to have a colorful
awning roof and sneak it onto 1 of Dave’s locos. It took over 25 years for me
to finally get it done in October 2019. The conductor is checking his watch.
The whole thing is removable but I like it as is.
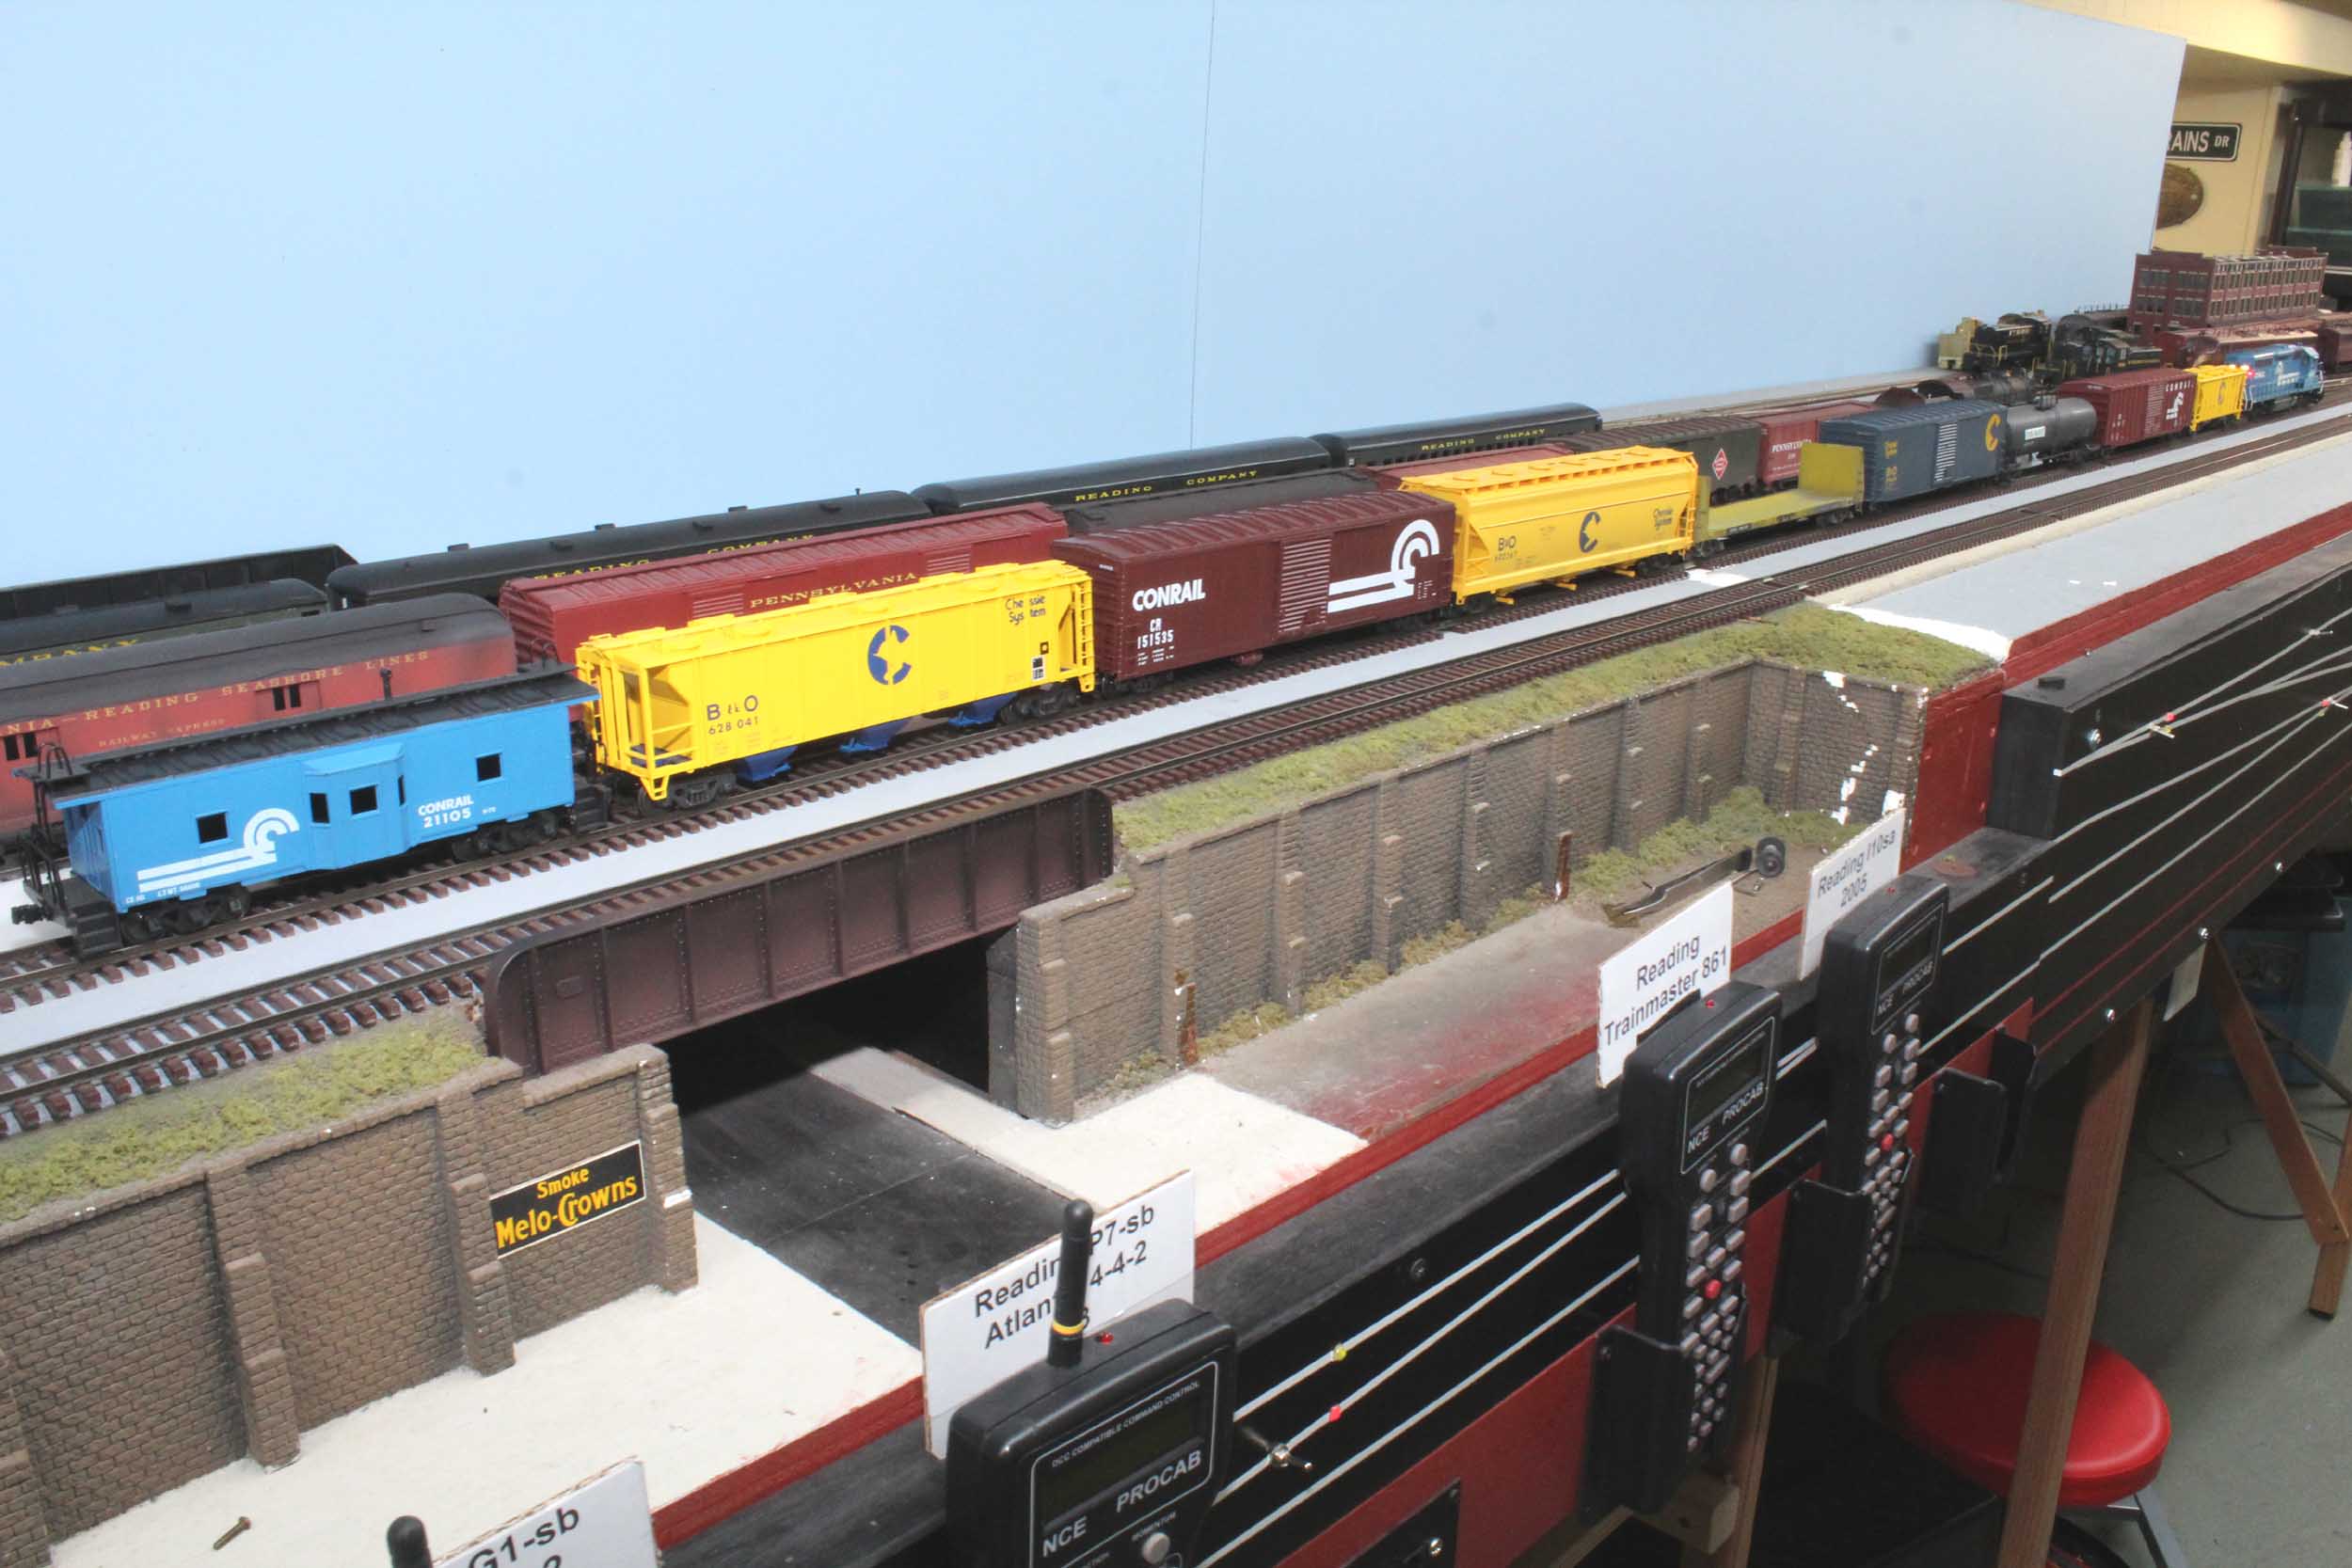
My
Much LESS Pitiful “Modern” train
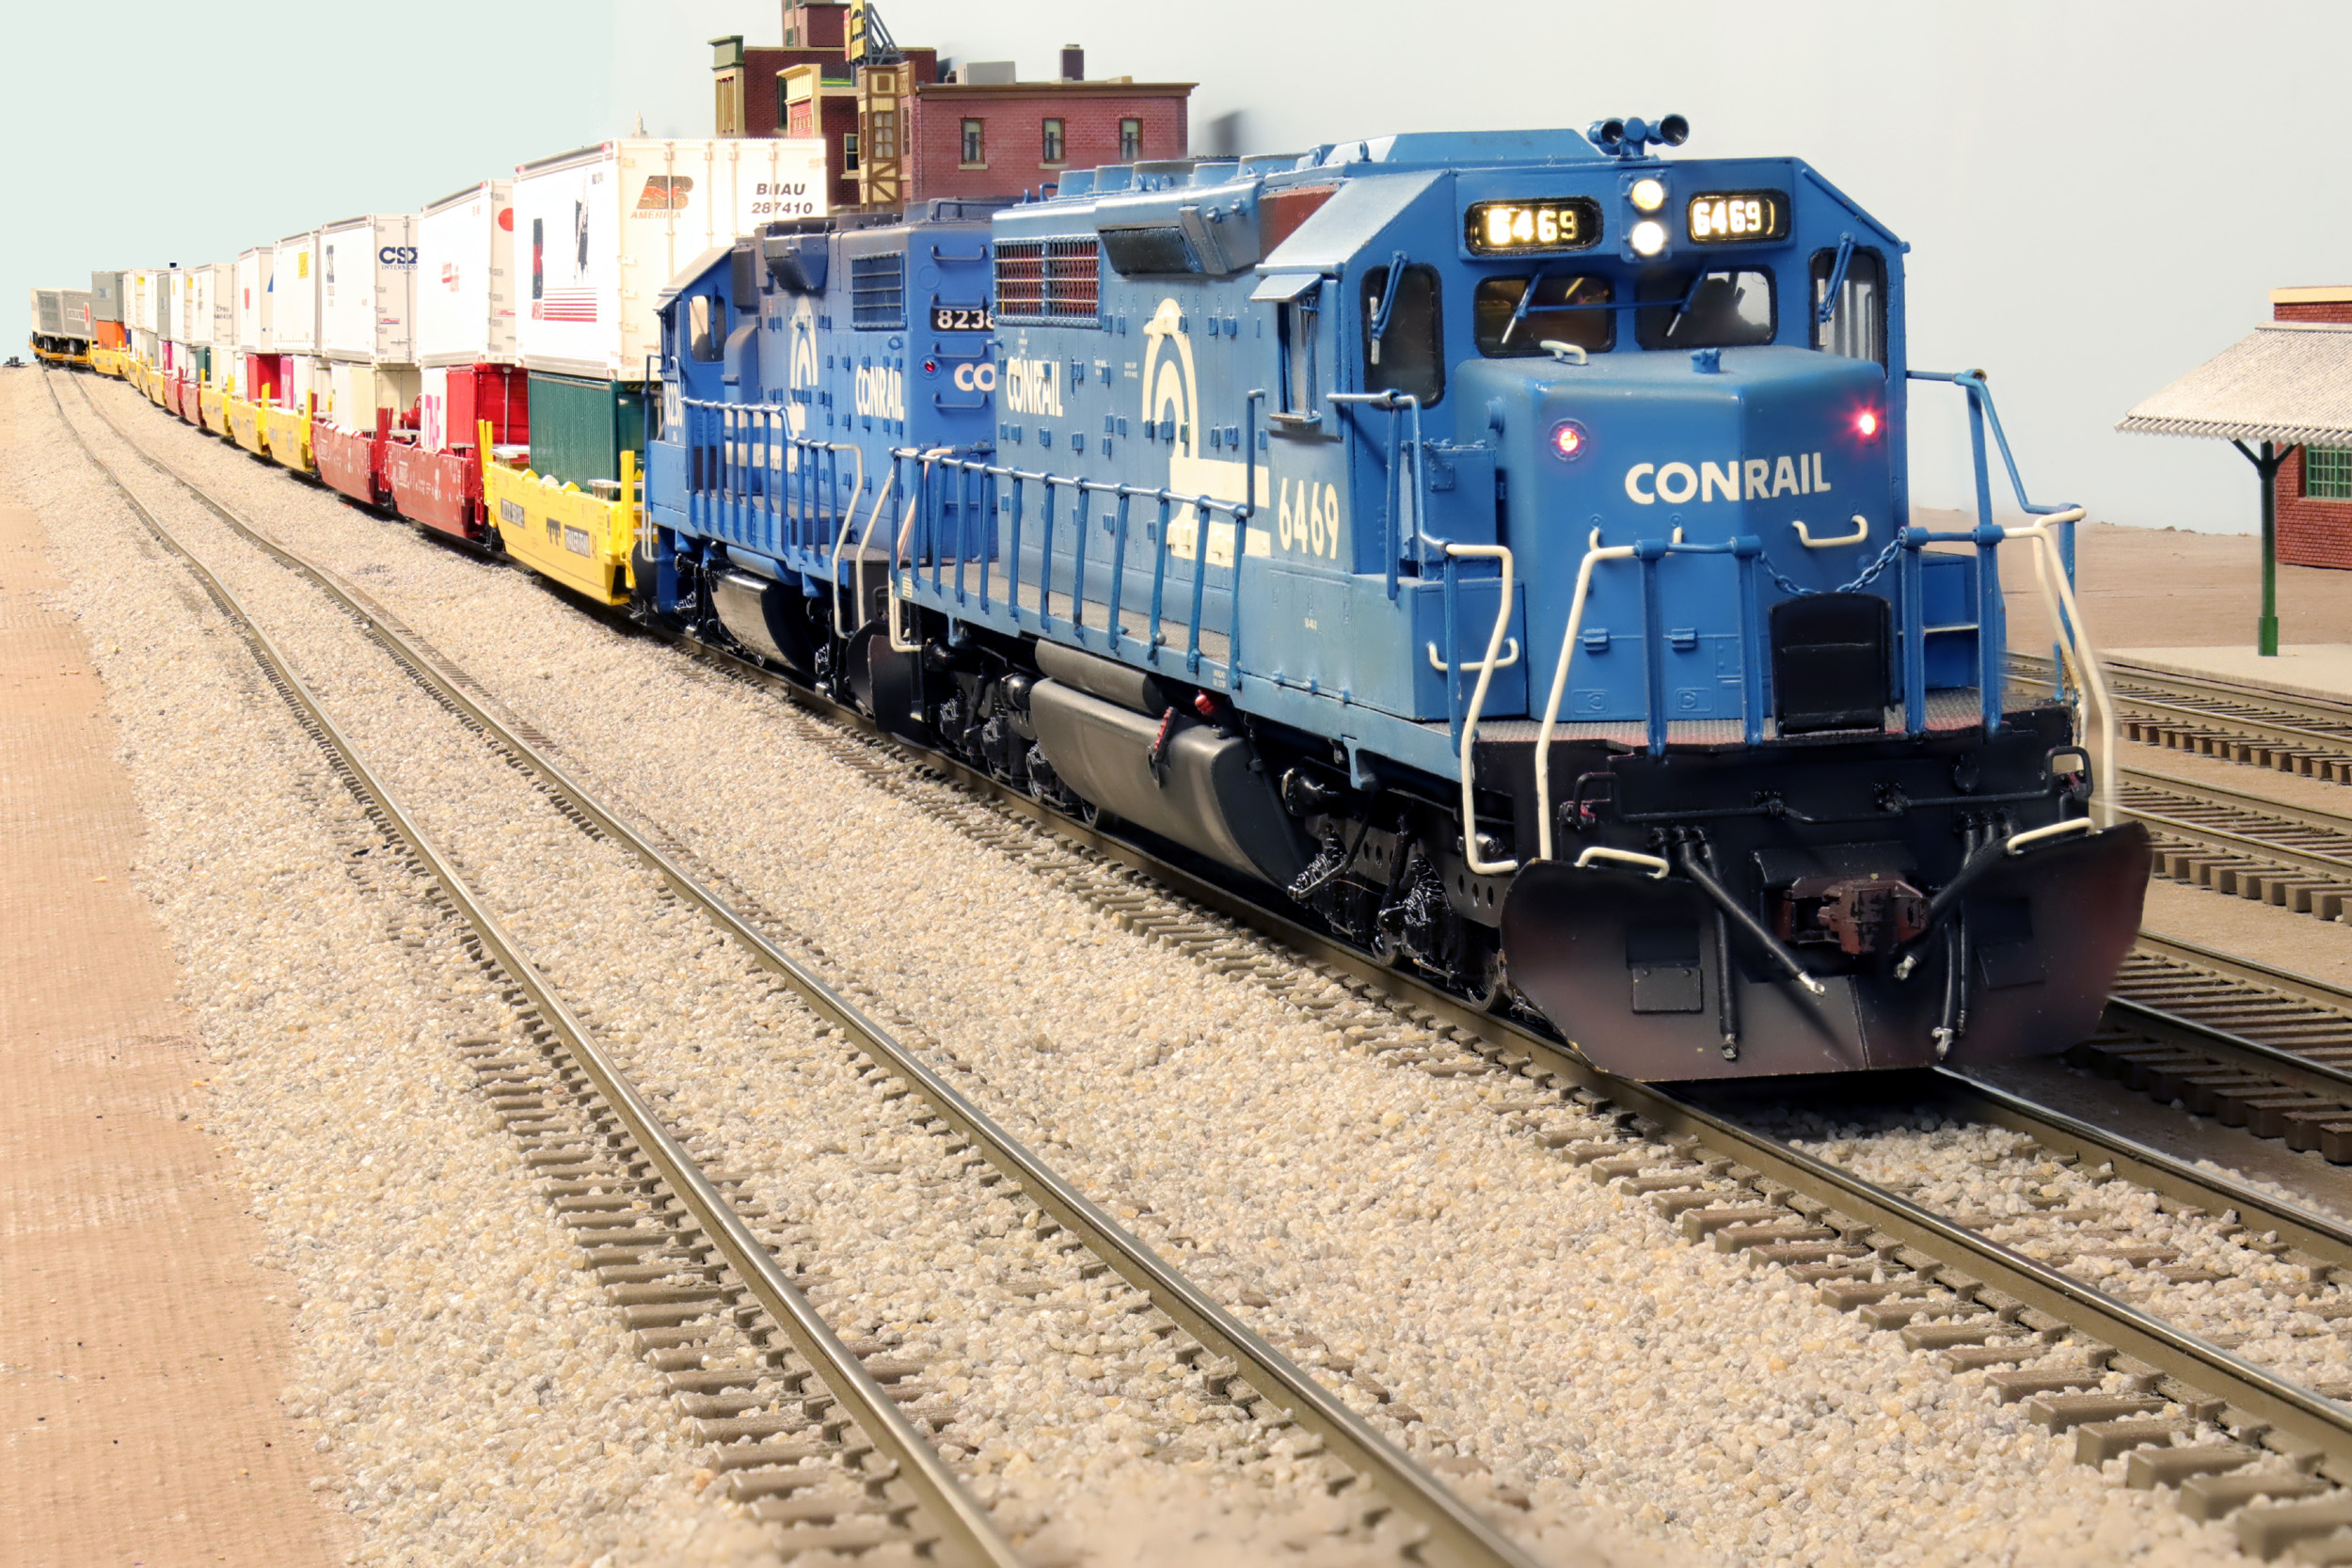
In
the past few years I have added substantially to my “modern” collection. I now
have over 30 feet of TOFC and Husky Stack cars. I also got Downs Model Railroad
“Tank Train” tank cars. It is all a 1970s + based collection of cars from Penn
Central, Chessie, and Conrail. I don’t claim era perfection here. The below are
Stack Photos of stack trains and video of a better version of my modern train. I
have also added an Intermodal page.
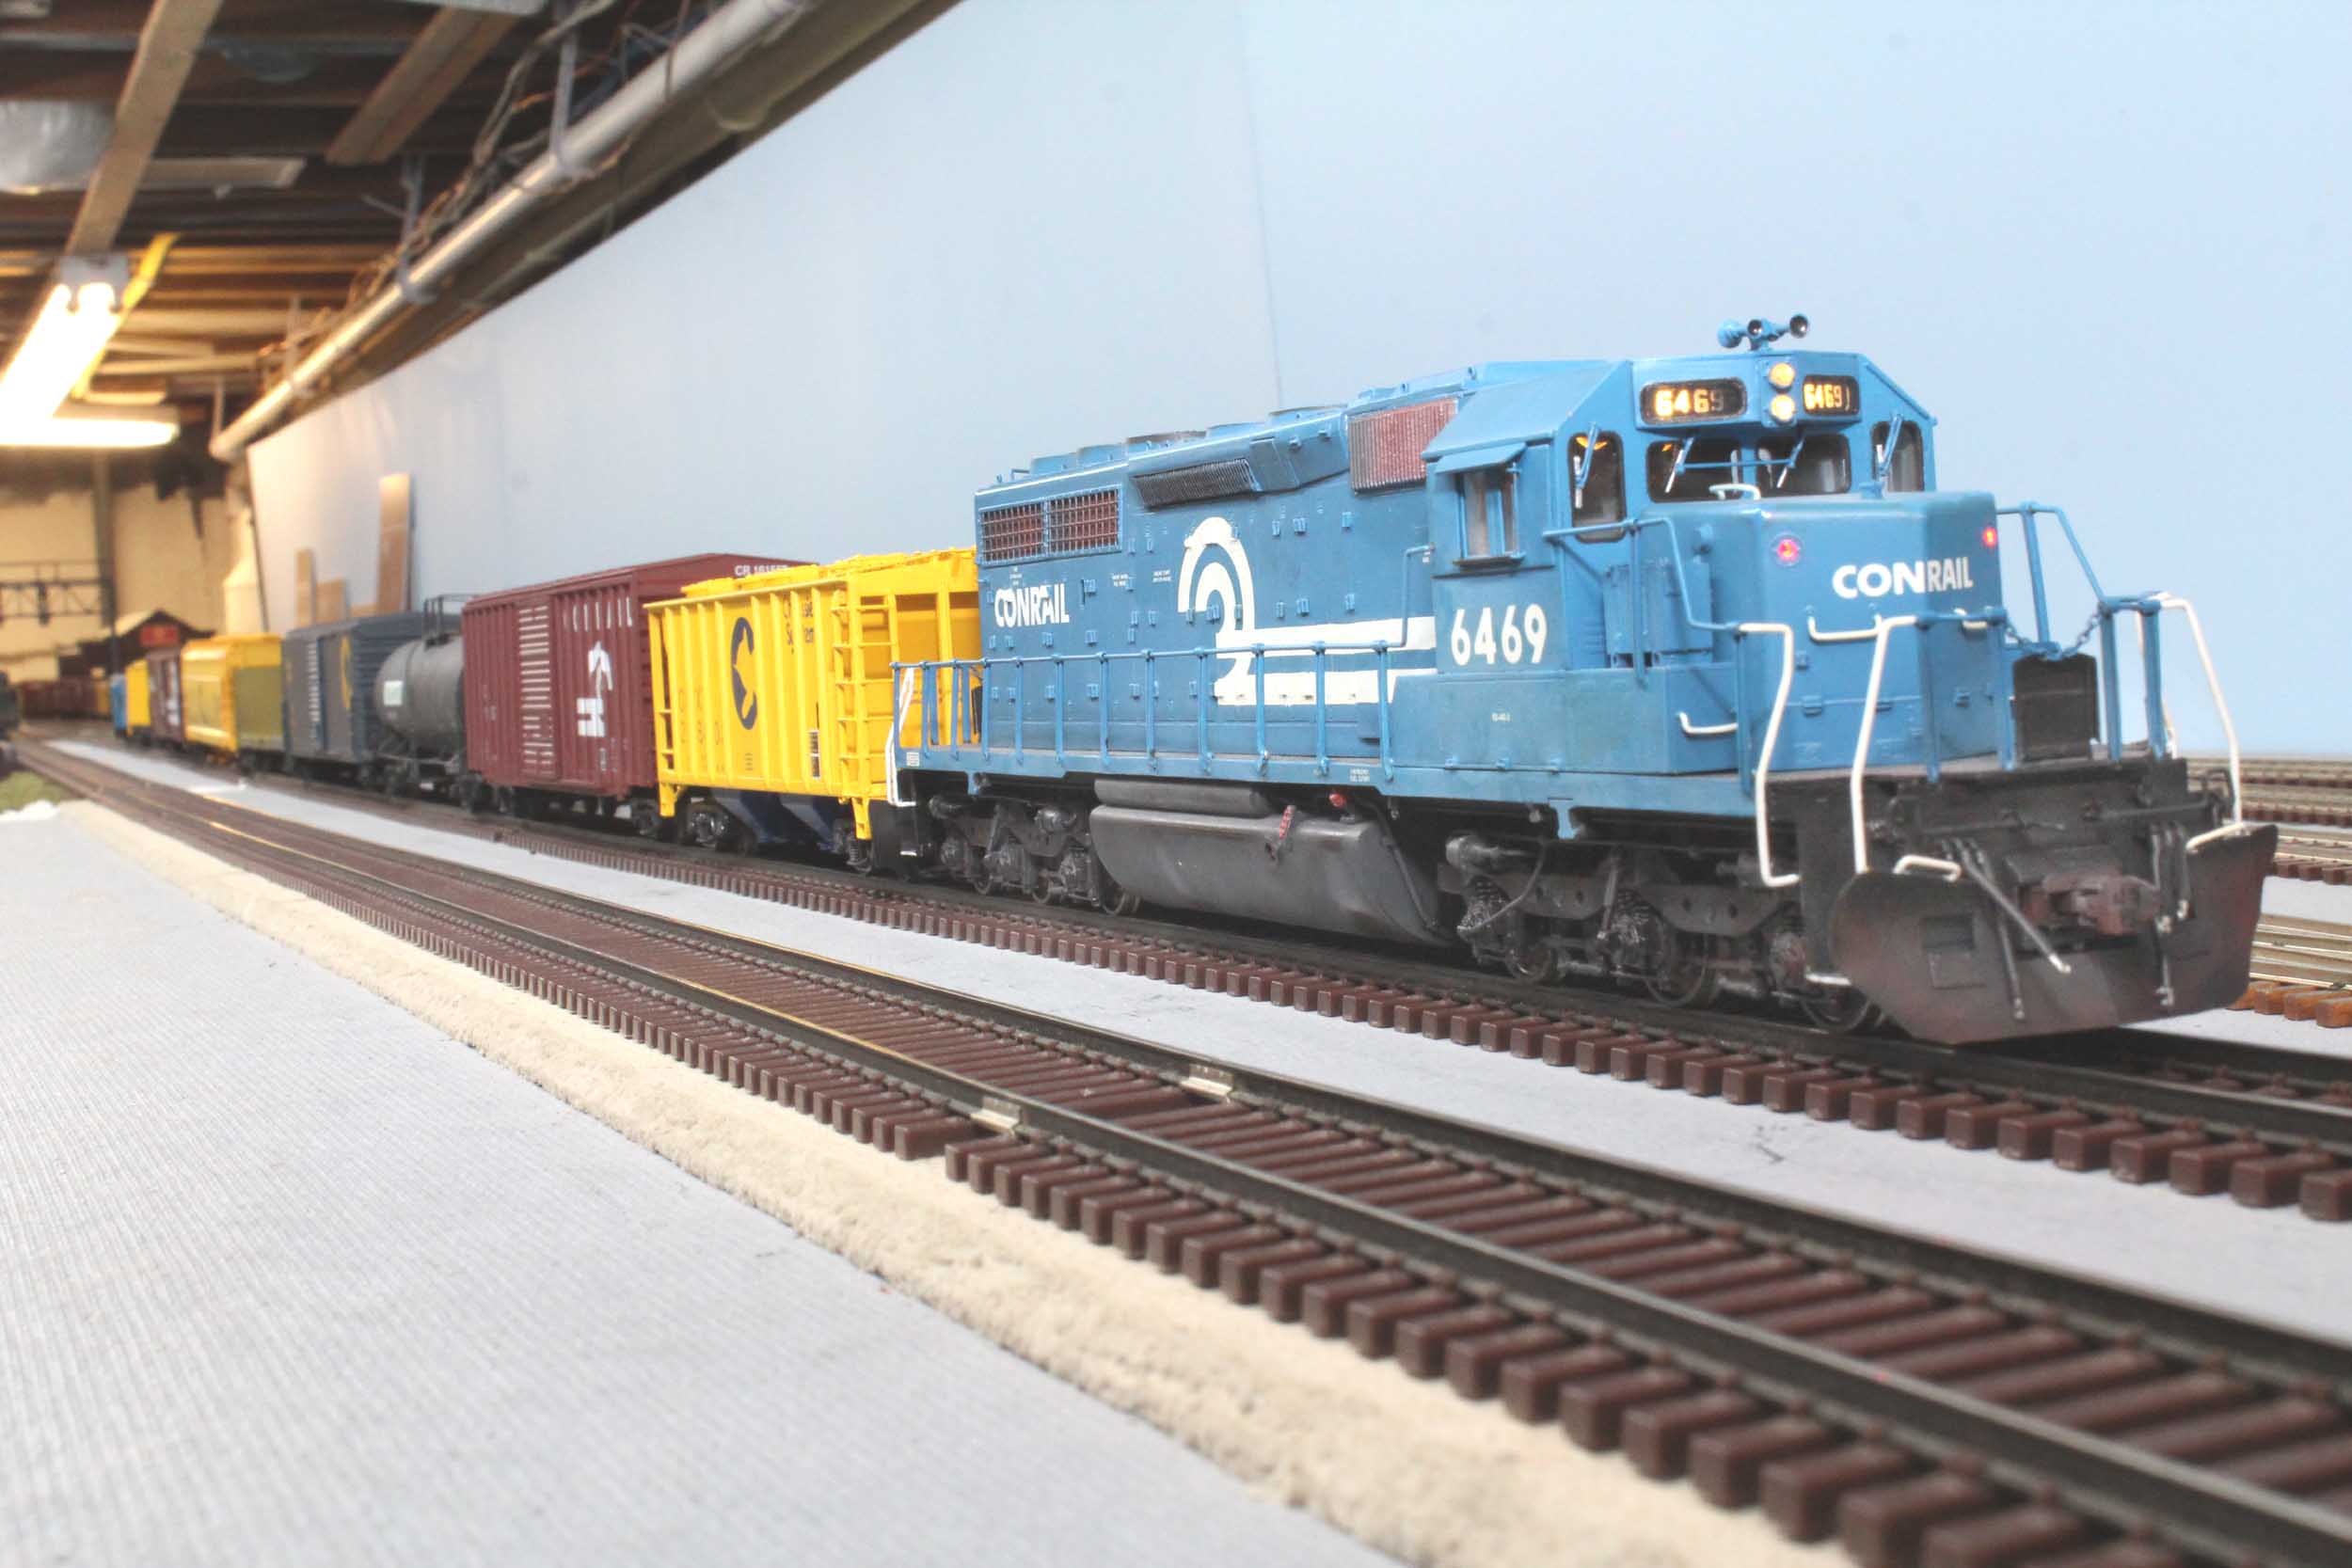
I
am not much on trying to speed match locos. I usually have the same loco with the
same decoder programmed the same as the others. This had a 2 amp Tsunami2 until
February 2024. I changed to a TCS WOW. It was really simple to do. Now 6469 runs perfectly with my growing fleet of Overland EMD locos.
It is just awesome.
Updated
4-28-24
All photos and content © Lanes Trains 2005-2024