|
|
AKA Rusty Green I
have liked Fords and especially Mustangs since I was about 15 in 1977 mostly
of which was because of some of my neighbors that were a 2-3 years older than
me were always working on their Mustangs for drag racing. I have the same
birthday as Henry Ford so maybe it was just destiny for me to be a Ford fan.
As I write this in 2026 I have ONLY owned Ford vehicles. At
that time in 1977 compared to now cars were not JUST transportation. They
defined who you were to some degree and very likely who some of your friends
were. The allegiance and loyalty to a car brand was massive as a FORD guy or
Chevy guy especially in High School. Even back then there was a lot less Ford
fans. The General Motors brands dominated the car culture. Just look in the
student parking lot at that time to see the cars driven. All of the path less
followed and very much a “dare to be different” philosophy which would later
become a huge part of my personality. Even
with my Ford Fandom 1960s Mustangs as daily drivers and at times my only car
needed much more maintenance. I was frequently going to work just to earn the
money (under $160.00 a week gross) to buy the parts needed to be installed on
the weekend to make it drivable again to get through the next week without
much money left over. After a few years of that it got to be really old and
annoying. Constantly working on them to have a car to drive burned me out. I
quite literally hated it and never wanted to do it again which eventually did
happen for about 30 years. I did not even do my own oil changes for a long
time. |
|


The
restoration of my 66 convertible was a constant money drain especially after
getting a complete floor and frame rail replacement. Then there was the rear
ending accident repair in 1987 which was not done correctly. The passenger side
quarter panel was compressed and pushed upwards. It was supposed to be put on a
frame rack and get the rear frame straightened but that did not happen. The car
was welded together crooked with very expensive NOS Ford parts. The body gaps
on the trunk lid were awful from almost touching on one side to ½” wide on the other.
You had to slam it to get it to shut. I tried to sue for a bad repair job but I
learned a life’s lesson that even though it was a BAD job it still had to be
paid for. I could spend $5000.00 in lawyer’s fees to win $1000.00.
I
had enough. Constant wrenching on Mustangs completely burned me out. So cars
came and went as they usually do in life. But I have long said that those that
still have their Mustangs as long time owners are the smart people. They did
not sell. Most cannot afford to buy a great condition survivor or completely
restored 1960s Mustang now.
Mustangs and other vehicles I have owned in the order of purchase
This
is every vehicle I have owed in my life. Again note that they are ALL FORDS.
The exact bought and sold dates are long gone to my memory. During the 1980s
and 1990s I frequently had 2 vehicles at the same time.
1965
Coupe bought in the spring of 1980 - 6 cylinder body
with a 302 and 5 lug rear in it when I bought it. It was not roadworthy in time
for me to drive to my senior year in high school. I later completed the 5 lug
front suspension conversion.
1973
F150 AKA Orange Crate

1966
Convertible bought from my father’s boss in about 1981. I may have very briefly
owned the 1965 Coupe, F150 and the 1966 Convertible at the same time.
1969
Grande I traded a friend even up for the F150. I had the 1966 convertible and
1969 Grande at the same time for maybe 5 years as my best and most reliable
Mustang time period.
The
1969 Grande became a giant leak of everything. I stopped driving that waiting
for repairs that never happened leaving my 1966 convertible as my only daily
driver for a year or so, and accelerated its demise. The paint was failing. I
was growing tired of the money drain keeping “old” cars running. With heading
into another winter the awful Mustang heating system I wanted something new,
more reliable and capable of better driving in snow.
I got
my first brand new vehicle - a 1988 Bronco II. The 1966 convertible was being
driven less and eventually not at all. That sat years before I decided to sell
it in about 1993 leaving me with no Mustangs and ending that first Mustang era
for me.
The
Bronco II was not overly reliable as well. The transmission first failed at
70,000 miles when I was still paying the loan on it. I got it repaired. The
transmission failed again at 160,000 miles. Some automatic transmissions shops
I called would not even work on them they were so awful. I installed a new
motor at 210,000 when the transmission failed for the third time at 230,000
miles ending my Bronco II era. But I liked it because it was higher than a car
and turned really sharply for parking. The motor was a little lame though.
2003
Escape I bought new and still have that has been beyond extremely reliable. As
of 6-16-26 it has 184,000 miles on it.
Bucket
List #1
Even though I did not have a Mustang for many years as time went
on I always wanted another one but with the expectation it would be bought 100%
restored. In the absence of having a Mustang my obsessive train buying habits
kicked in BIG TIME for 30ish years taking any money that could be used to buy
and maintain a Mustang. The dream of getting a Mustang again was always there
but was never seriously pursued. I would occasionally look at my train
collection and think how much I would have to sell to get a NICE Mustang. I
just could not do it considering much of my train collection was “built” by me.
It would be like selling parts OF me.
And the buying prices of Mustangs has
ZOOMED especially for the 1969 Mach 1 I would want. What was $40,000.00 10
years ago is now (in 2026) $90,000.00 or more. That is still not going to ever
happen for me without a real lottery win.
In December 2025 I went to the repair shop I have been dealing
with to discuss work needed on my Escape. The owner I knew for many years
retired with an employee buying him out. After a short time we were discussing
Mustangs. Tom said he had 1 for sale and invited me to go look at it. It was
sitting for 3 years TWO BLOCKS away from my house. I am not sure if I saw it
before.
I was not considering buying it at first. I had a 10 minute look
over with Tom when I took these photos. I wanted to see the car on a lift for
rust inspection. I really wanted to see it running and driving. But we had some
significant snow on the ground for months. It took until April 4, 2026 until
the car could be moved to Tom’s shop. That 4 month wait was what did it. By the
time April 4 came I was in full obsession mode. I wanted the car.
These
are my first photos from 12-21-25.


Photos
taken 4-4-26
On April 4, 2026 the long awaited big day happened. Tom moved the
car to his shop so I could see it on a lift and try to get it running. I was buying the car. Unfortunately we did
not get the car running on April 4th so I did not get to drive it
before purchase. Also there was absolutely NO brakes
so any driving would not have been possible anyway.


Of course there IS rust. They are called Rustangs
for good reasons. On a scale from 1 to 10 of which 1 is no rust and 10 being
extremely rusty I would give it about a 5. Overall the floors are in good
condition. The passenger side is worse than the driver’s side. There is rust in
places not expected like in the trunk next to the gas tank. I have no plans of doing rust
repair. This is going to be a driver car. Welding, metal fab and painting a real car are not skills I have. Paying
for the rust repairs would make me upside down in the car’s worth. I am really trying
my best for that to not happen
Again this is just about satisfying my #1 Bucket List spot.


The factory power steering is really power assisted. Not shown
well at right is the control valve. There is a ball stud on the Pittman arm
that shifts the valve when steering and actuates the hydraulics in that
direction. And they frequently leak. I tested that and it did leak voluntarily
without the motor running. In theory you can drive the car without the pump
running. But I was advised by 2 long time Mustang restorers that if the car was
driven as manual steering the ball stud can pop out of the control valve and
have NO steering. A complete professionally done rebuild was in order
here.


In
my garage on 4-4-26


There are other huge factors in the purchase. Parts availability
is one of them. 40 years ago you were dependant on what Ford dealers had left
in stock as they were phasing out 15 year old car parts or you had to go to
junk yards. That world has drastically changed for the better. While mostly not
local you can get truly everything needed to build an ALL brand new 1966
Mustang (and other 1965 to 1973 years as well) from 20 different places. The
parts are truly available everywhere. I have my own house and garage now with a
20 x 20 workshop. I am not working in a dirt driveway in whatever weather.
YouTube is a BIG help in tech help and how to reassurance.
What was a big attraction and very important to me was the car
was in extremely original and untouched condition, especially the wiring.
Chopped up and spliced wiring would have been a deal breaker for me. That is
also mostly not a skill I do not have.
This is 60 year old possibly brittle wire insulation. What a nightmare
doing repairs that could be.
I believe the 40890 mileage to be original and correct not
140,000 miles which was another purchase attraction. Tom did not drive it at
all in his 3 years of owning it. So my 60 year old Mustang has 145,000 miles
LESS than my 23 year old Escape. While it is not my dream 1969 Mach 1 it does
fit my current needs perfectly as a driver quality car with an automatic trans,
power steering and now power brakes added by me. I can drive a manual
transmission and would have 1 in a collection of cars but for having one car I
want to drive it (cruise) not have it drive me. Old man left
legs are not what they used to be. The clutch even with a reasonable
pressure plate are a factor in local errand driving or if stuck in traffic.

Car
History
Decoding the door
tag 65A is a coupe with standard interior. Color R is Ivy Green Metallic.
Interior Trim 26 is black on black. D.S.O. 26 (where it was sold) is
Philadelphia. Date code 22K is October 22 (1965) Transmission code 6 is C4
automatic, Axle code 6 is 2:80 standard differential. I also have factory power
steering.
In the VIN 6 is 1966. T is the Metuchen NJ Assembly Plant.
I was lucky enough to get the original owners manual. That had a
warranty card inside showing the Ford Dealer that sold it as Rice & Holman
Pennsauken NJ, first owner James Hildenberger and
sale date 11-6-65. There car was sold 15 days after it was made. There were
also registrations and insurance cards for many years of the 2nd
owner Cayrl Amana.
She was a judge in Lawnside NJ. The trunk had
2 trash bags full of lawsuit papers from 1980. James and Caryl
are now deceased. I made contact with Caryl’s
daughter Selassie through Facebook. Selassie drove the car to West Deptford High School as the
student parking sticker on the window shows which I am keeping in place. It was
last registered in 1989. It had to have been stored indoors for a significant
part of from last on the road in 1989 to when Tom bought it in 2023 or it would
have had MUCH more rust than it does now. So the car has had a very local 60
year history which I found to be interesting. I am pretty sure I am the 4th
owner. It is my goal to NEVR let it get rained on again.


The
only thing I had to fix was everything…
Getting a 1960s Mustang “that has been sitting for years” safely
running again is all encompassing. This is what I did and HAS to be done to any
Mustang bought as not running, and maybe even if it
was running when you bought it. Every rubber part and hose has to be replaced
it is dry rotted by now.
Note that most of the below work was all done in about 7 weeks
while working full time.
I was somewhat naïve in knowing what would be involved in getting
a car that has not run in 37 years back in running condition. You start off
hoping and thinking most parts are still good but eventually end up in
replacing almost everything. Take your best guess at the initial parts list
needed and you will be extremely wrong. I am at 5 times my initial parts
purchased estimate and almost none of that was to “make it pretty”. All things
were needed to get the car running and roadworthy safe. NO system should be
assumed to be good. Truly everything has to be inspected.
Don’t skimp especially on the brakes. New cylinders, shoes and
drums are a must buy. Some even recommended new brake lines. I reused most of
mine.
Brakes
I will say that a ***complete brake inspection*** is needed when
buying a new to you Mustang. The only thing original I kept was some of the
brake lines. Everything else had to be replaced.
The brakes were a huge replacement effort especially when I was
converting from the original manual single bowl master cylinder to power dual
bowl. It was an eventual flashback to 1981 redoing the brakes in my dirt
driveway hoping the car did not shift off the jackstands.
All new wheel cylinders, drums and shoes and the 3 rubber hoses from the body
to the wheels were installed. The front drums were so worn or illegally cut
oversized thin when I pressed out the center bearing hub rusted together the
drum broke into 2 pieces. You can easily see how dangerously thin this drum
was. There was no way the car could be driven with it. The wheel cylinders were rust filled – no
reusing them. I wanted to convert to power front disc brakes but that kit was another $1000.00. I got Leeds Brakes FC0035HK power
dual bowl cylinder for drum brakes.
While you are at it you should consider new wheel bearings and
studs. That is all going to take a significant hydraulic press to do it
yourself.


Carburetor
Because of the cars originality I was fine with keeping the Ford
2100 2 barrel carburetor. There are date codes tying it to the car. It was dirty
but mostly working fine on the first times running. Then I found the fuel
filter port for Fram G-23 was cross threaded and
stripped out. I could not leave it with any chance of leaking – like it was
with Teflon tape. Ed’s
Carburetors was nice enough to tell me how to fix it with brass adaptors
made by Holley. As a side note I still can’t believe Holley has the BALLS to
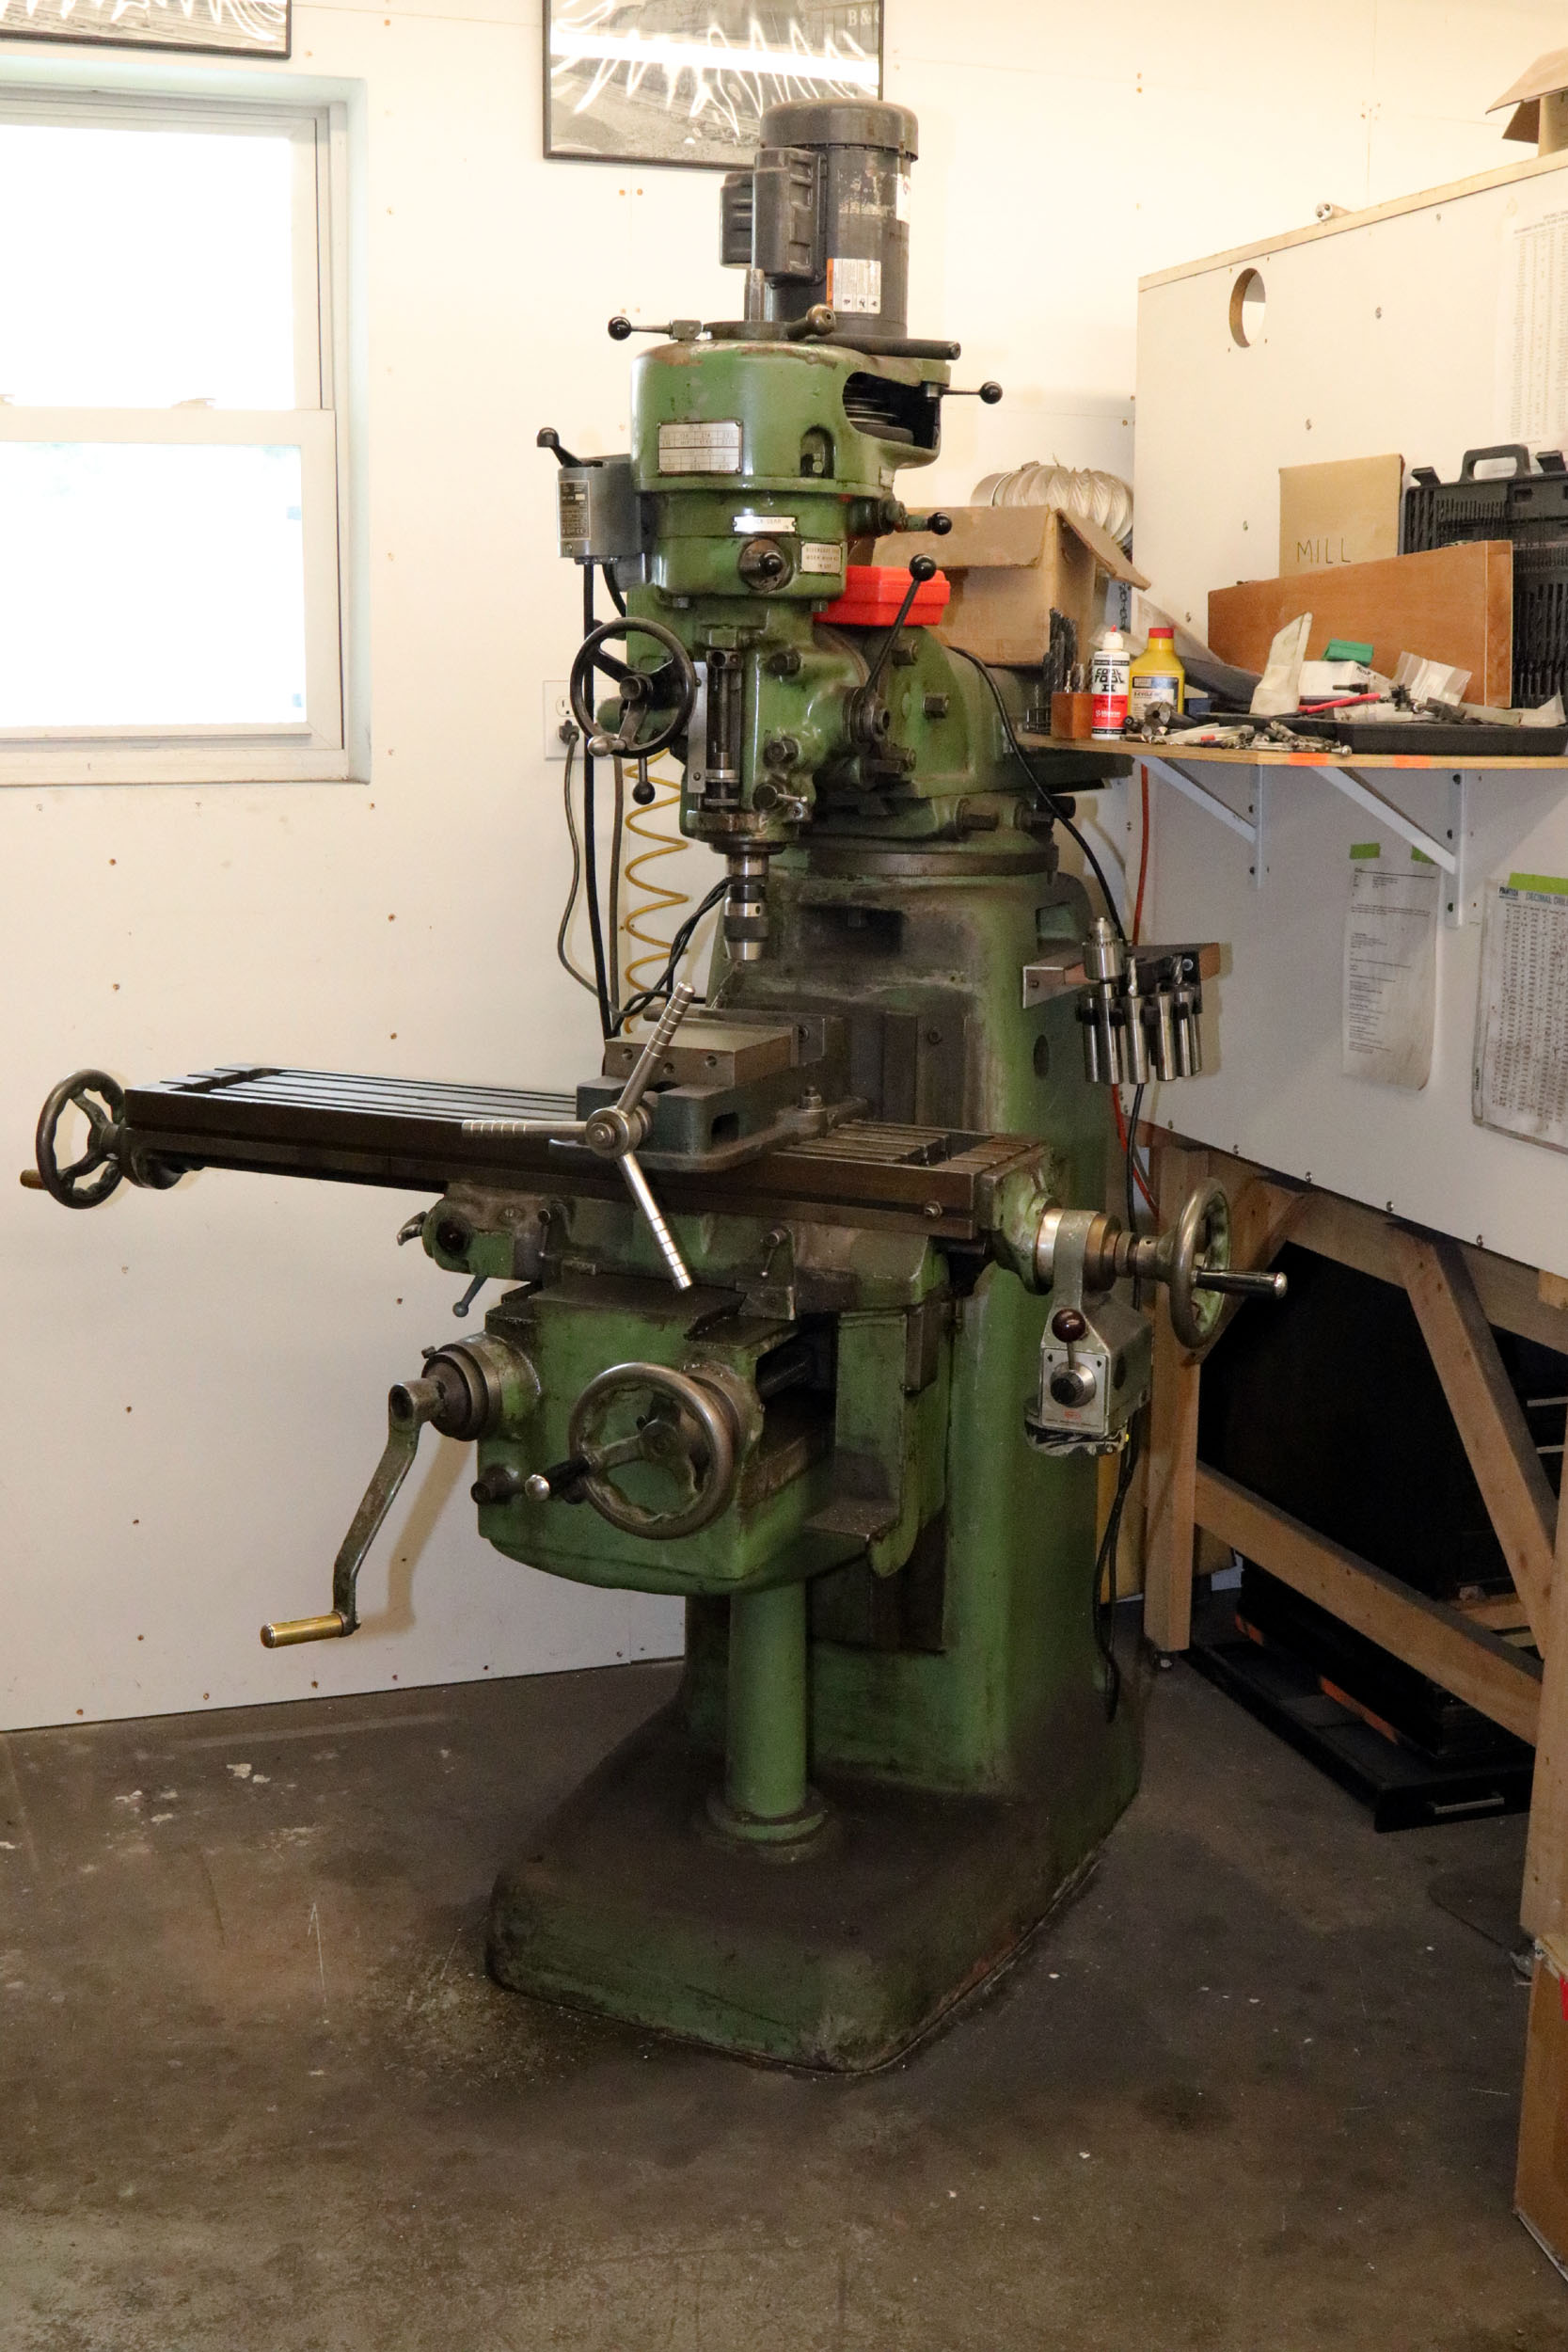
charge $25.00 for this LITTLE BRASS PART. The first adaptor bought was not correct.
Being the machinist I am I had to fix this with my milling machine.
I had to redrill the carburetor for a 9/16-24 thread.
The tap mostly tore out the aluminum needed for new threads but I got a very
few good threads at the bottom. I slopped it all up with multiple coats of Red Loctite. I baked the Loctite and
got it done –no leaking. I am planning on sending the carburetor to Ed in the
winter for a real rebuild when I am not going to be driving the Mustang.
I ruined a brand new drill bit to get more of the full diameter
drilled in the limited space had.

These are the new threads. Really not good! I milled almost 1/8”
the boss off to get the brass adaptor biting deeper into the better threads.


Red Loctite and a nylon washer to the
rescue! Good to go.

Electrical
There were a lot of small electrical things that did not work
when the car was bought. They slowly moved to working again with a lot of
effort.
This is a list of electrical items replaced so far as of 6-14-26.
Alternator
Voltage regulator
Starting solenoid
Ignition coil
Neutral safety switch
Temperature Sender
Oil Pressure Sender
Headlight switch
Turn Signal switch
Tail light bulbs (with LEDs)
Likely future replacements
Headlights (with halogen)
Dash lights with LEDS
Variable speed windshield wiper switch
Engine
Early 289 and 302 had a nylon covered timing chain gear “to
reduce noise”. I found this all this out the hard way with my 65 coupe when I
sprayed the nylon gear ring down into the oil pan getting caught up in the oil
pump and breaking the driveshaft off and causing NO oil pressure. This was so
burned into my brain I remember lying on the very frozen driveway on January
25, 1981 looking up at my crankshaft fixing it all including a new oil pan
gasket. I was so surprised that there was no apparent motor damage running for
maybe a minute with no oil at all until I realized something was really wrong
and turned it off.
Now in 2026 that nylon gear ring was SIXTY years old. I could not
let that timing chain stay in place. When I finally got the timing chain cover
off I was surprised it already had an all metal single row timing chain set but
had some slack. I replaced it with a double row set anyway.

On 5-19-26 I took the valve covers off to paint them. I was
horrifically surprised to see RUST everywhere on the head, rocker arms and under
the valve cover. By this point the motor had already been run a few times in
short bursts for about 20 minutes. The driver’s side was much worse than the
passenger side. My guess is the driver’s side was exposed to open air by the
breather cap. The passenger side head is sealed in with the PCV. The Facebook
groups said a complete teardown was needed. Only a few said go for it – what do
I have to lose - so I did. As it turned out MOST of it was surface rust only
that mostly wiped off. Between lots of wiping with lacquer thinner and various
wire brushes I got it all pretty clean. I eventually ran the motor for a few
minutes until hot and changed the oil. There was no debris in the drain pan. I
added a magnetic drain plug but I am not concerned about this rust at all now.


I could only initially run the motor for a few minutes at a time
because the radiator had a small leak. When I went to get it repaired I was
quoted $625.00. They were only reusing the top and bottom caps and replacing
everything else. I really wanted to keep and use the original radiator but a
brand new original looking 3 row radiator was $375.00. I could not justify the extra cost. There
also will be no shiny bright aluminum radiators in my car.
After resolving the rust issue I took to making the engine look
better. This took most of a weekend. It will never be show car nice but is
better than when I started.


Photo
taken 6-14-26
I like stock looking motors without bright colors standing out.
This will stay as is for a while. But I want to occasionally switch back and
forth to the “Cobra Powered By Ford” valve covers and
Cobra oval air cleaner that has not been bought yet.

Gas
Tank
The Facebook Mustang groups said this is mandatory to replace the
gas tank for a car that has been sitting. And in this case they were completely
right. A new filler neck, gas tank and sender kit was the very first thing I
bought. The original tank was totally rusty inside. When I removed the tank
there was a LOT of loose rust flakes rattling around in the tank. I also blew
out the gas line from back to front. It was full of unknown debris that cleared
out of the gas line with a POP.
I needed a new gas cap. I know this is the 1965 cap but I like it
better than the 1966 gas cap. Good enough.

Interior
This will be some of the last things I redo. It
badly needs a new dash pad, 2 front seat covers and carpet. That all costs
about $800.00
Steering
I have already fixed some of the steering issues mainly by
getting the complete power steering system professionally rebuilt. I highly
recommend Randy stanger53@gmail.com at https://www.stangerssite.com
(Website has been down for a while) I cannot say enough good things about my experience dealing with him. He
rebuilt the cylinder, control valve and refreshed the pump to show car
standards for just under $300.00 plus all shipping.
It arrived just as shown. This is most of what he did just before
I started installation – pump is not shown.

After driving for about a week I noticed a strange shake and body
roll when going over some bumps. I did the front wheel shake test just before
any driving was done. They were solid. This issue happened because of driving.
The driver’s side lower control arm rubber bushing vaporized letting the tire
go in many bad directions. I drove it like this for almost 3 weeks including
some at 80 MPH. That was very dangerous I am very lucky the control arm did not
break. I would have crashed for sure. New ball joints, shocks and all rubber
front end parts got replaced.
This is my original steering wheel all cracked and missing parts.
The horn did not work. I did not see the worth in fixing this. The original
center hub is a wall ornament now. Sealing the deal was I
got a real original Pony interior steering wheel which is my all time favorite
steering wheel in GREAT condition with NO CRACKS and all of the chrome dots
were intact for a very good price. The center hub is repro but I did not do any
polishing of the steering wheel. So the purchase justification was not just
about looks. I got the horn working too.


Transmission
The transmission has been the best part of the project. It has
shifted well but goes into reverse a bit harder with a clunk then I remember from
my other Mustangs. I don’t remember the “Green Dot” option on my other 66
allowing shifting first to second and third where selecting drive actually
starts in second. Researching this I now have an earlier C4 transmission. Later
C4 did not have Green Dot. It has a small whine when in first gear. I do want
to get the transmission inspected and serviced.
Future
work
New shock absorbers
New dash pad, carpet and front seats recovered
New rear springs. I hate the driving up hill stance it has now
from the very tired rear springs
Possibly U joints there is a vibration at 40MPH +
The transmission has a leak now that it did not have during the 7
weeks it was sitting and getting worked on.
Time
to DRIVE it
The
first engine fire up with LOTS of new parts was on
5-27-26
First
ever drive on 5-30-26 at 2:00
This was the first street legal driving since 1989. I was still
unsure if the transmission would shift properly until THIS moment.

Rusty made it 30 miles first round trip back and forth to work on
6-3-26 cruising at up to 75 MPH. It is a little sketchy…

Stella was my first passenger going for a nail trim on 6-6-26.
She loves going for car rides but not without the other dogs.

First Sunday morning
Grocery Getter at Acme in Woodbury on 6-7-26 with Willie, Lizzie and Stella.


A little goof taken on 6-7-26 parked back where it all began at
Tom’s storage yard when I first saw the Mustang. The bare dirt patch is growing
in quickly.


A
Little A I To The Rescue
Brooks Stover has become quite the expert in making A I photos and sent me this. I thought it was really well
done right down to the possible “reflection” of me in the door that was not
actually there in the flat dead paint when taking the original photo. Making my
car look like this is at least $20,000.00 away to pay for professional rust
repair and a good paint job. NOT going to happen…. The A I photo details were
pretty correct except for the Mercedes logo in the hubcaps!

Car
Guy Stuff
There are LOTS of car shows in my area in warmer weather. The
closest is Woodbury in September. I used to go and take Pickles and Shelby with
me. Even though I have a “classic” car now I don’t see myself sitting at or IN
a “car show” very often totally consuming a lot of Saturdays.
Mondays
In Mantua
There is the former Kmart parking lot in Mantua NJ that is now an
indoor self storage that has an informal car event aka “Mondays In Mantua” weather permitting. It is not a judged or popular
vote “show” event just roll up with what you have and park. Also leave whenever
you want to. I went for the first time on 6-15-26. The place was packed. Easily
200 classic cars of all kinds.

Added
8-27-26
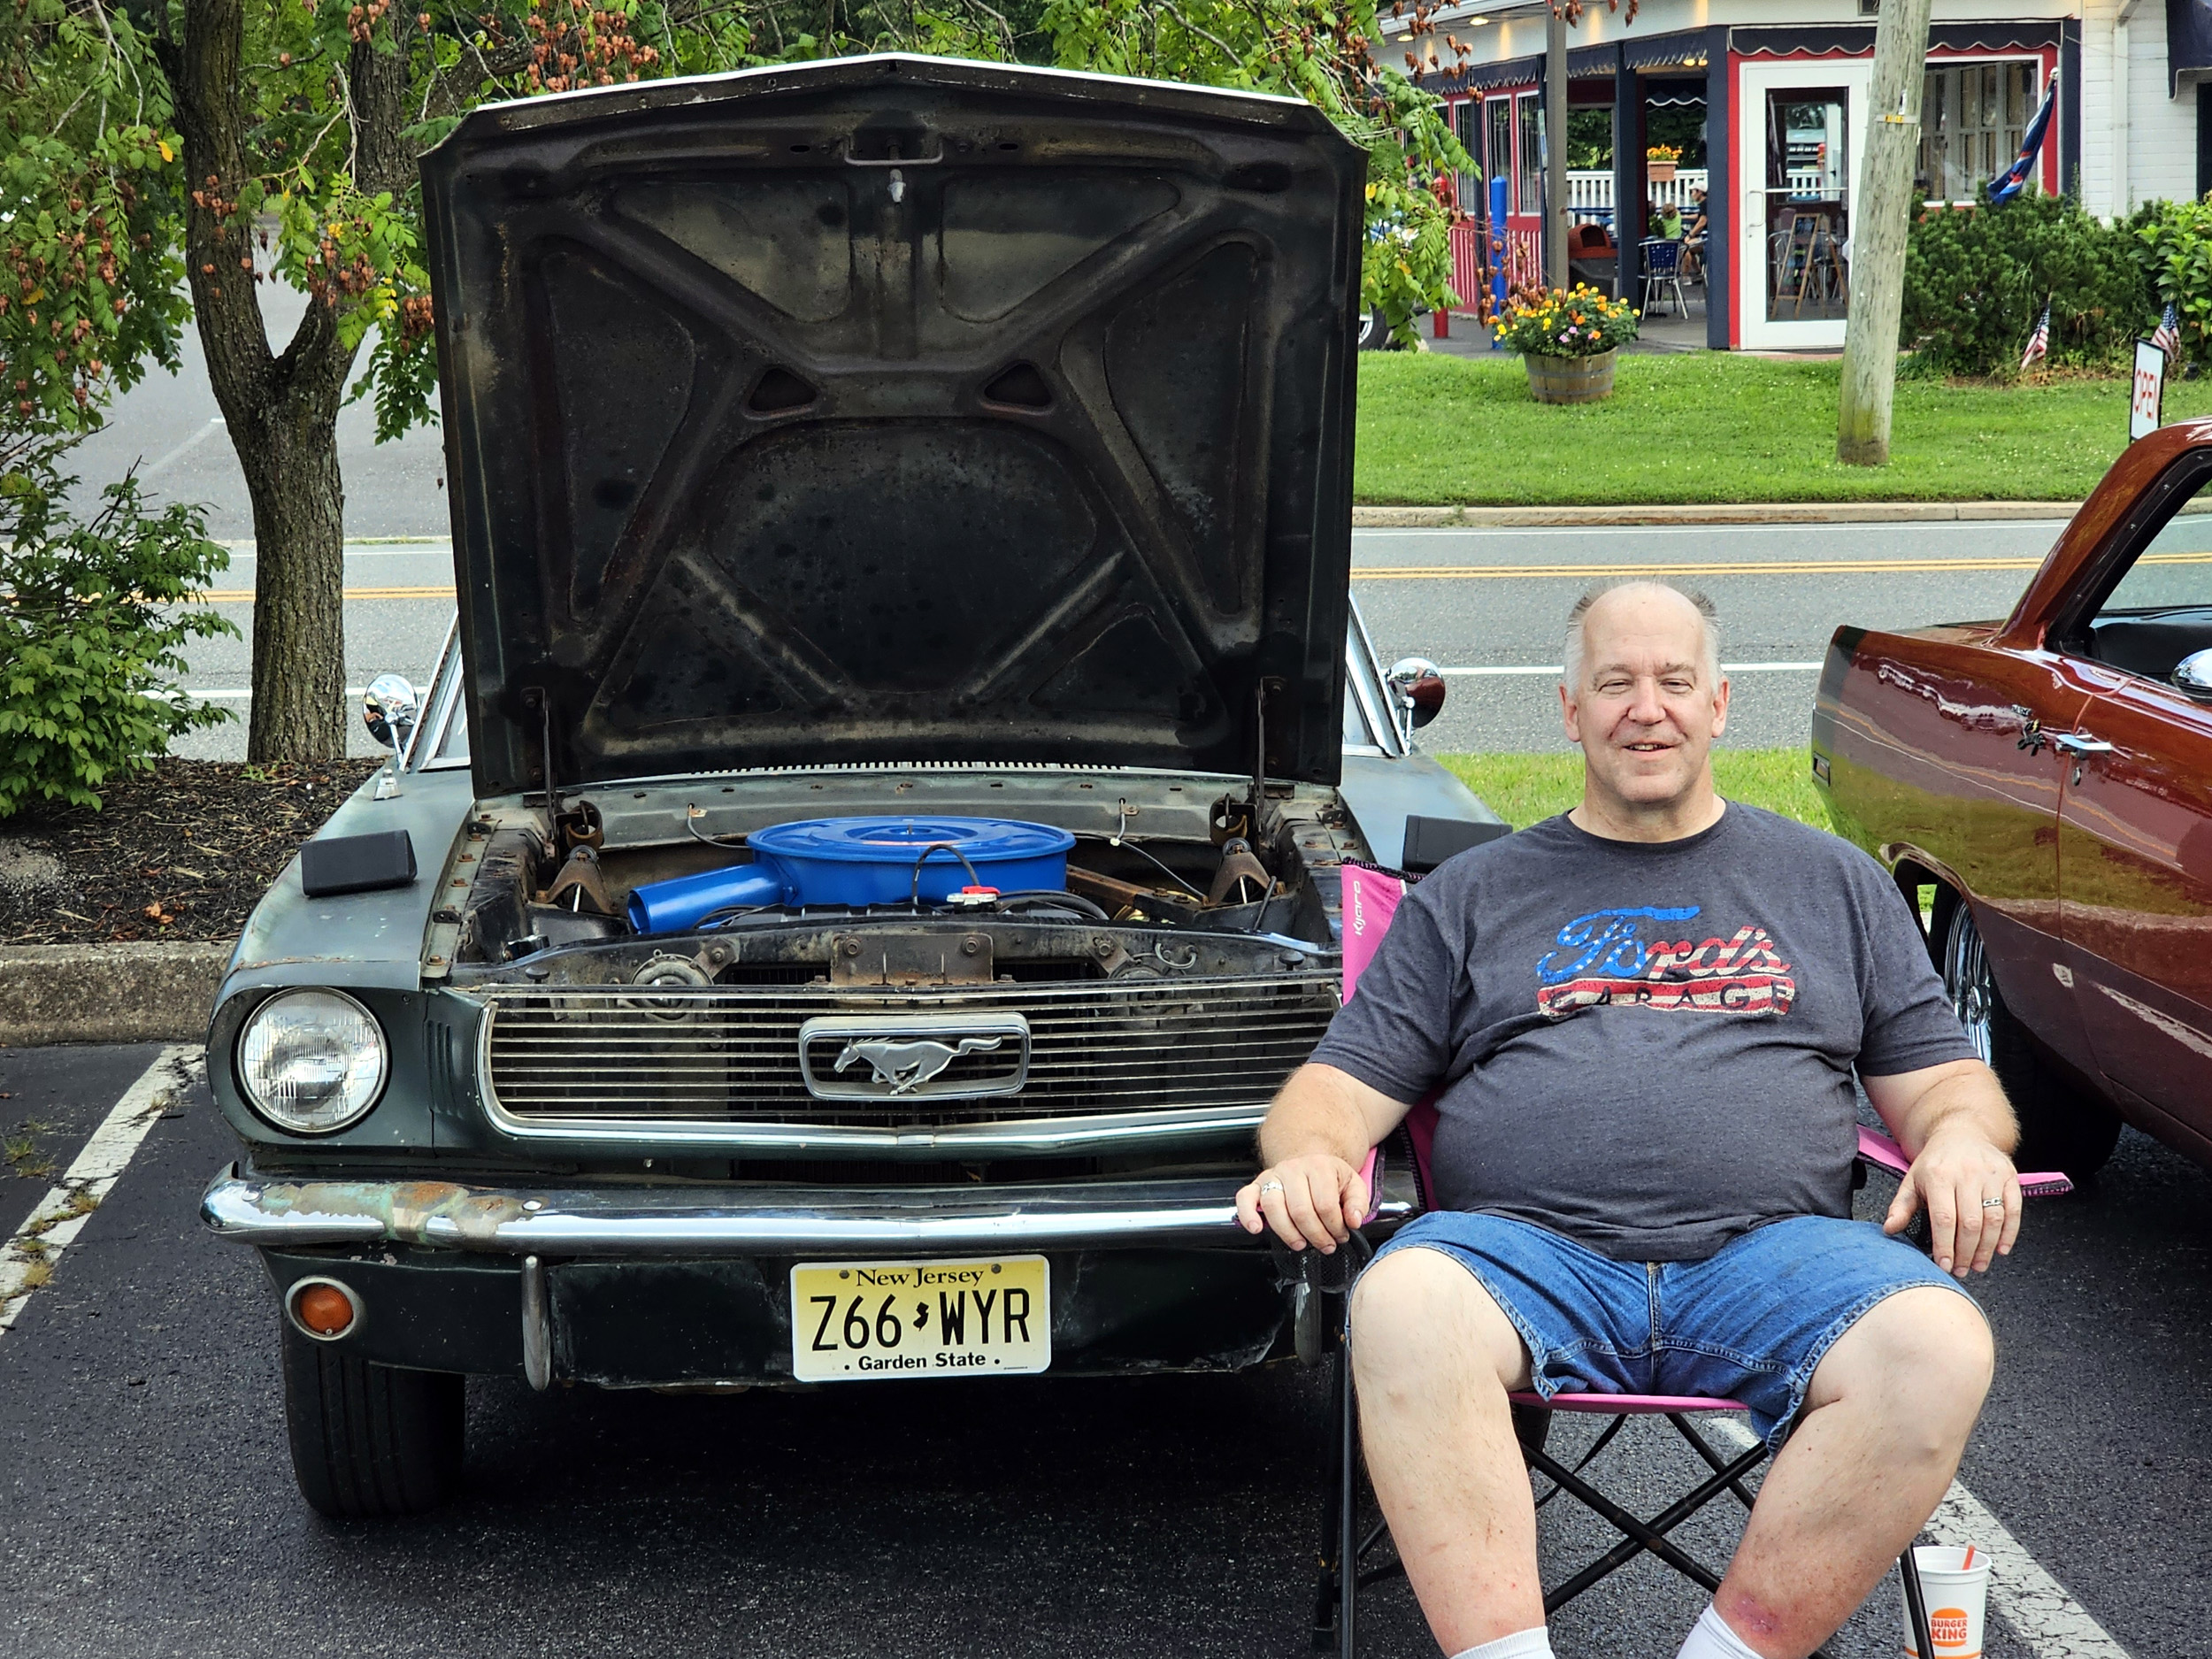
This is my most prepared “Mondays In
Mantua” visit yet with a chair and my Bluetooth speakers out on 8-17-26. I was
SO surprised at how many other Mustang owners came up to me and just starting
talking to me. I am not overly engaging like that. We talked the language of
Mustang! It was very nice to experience and I am sure will happen again.
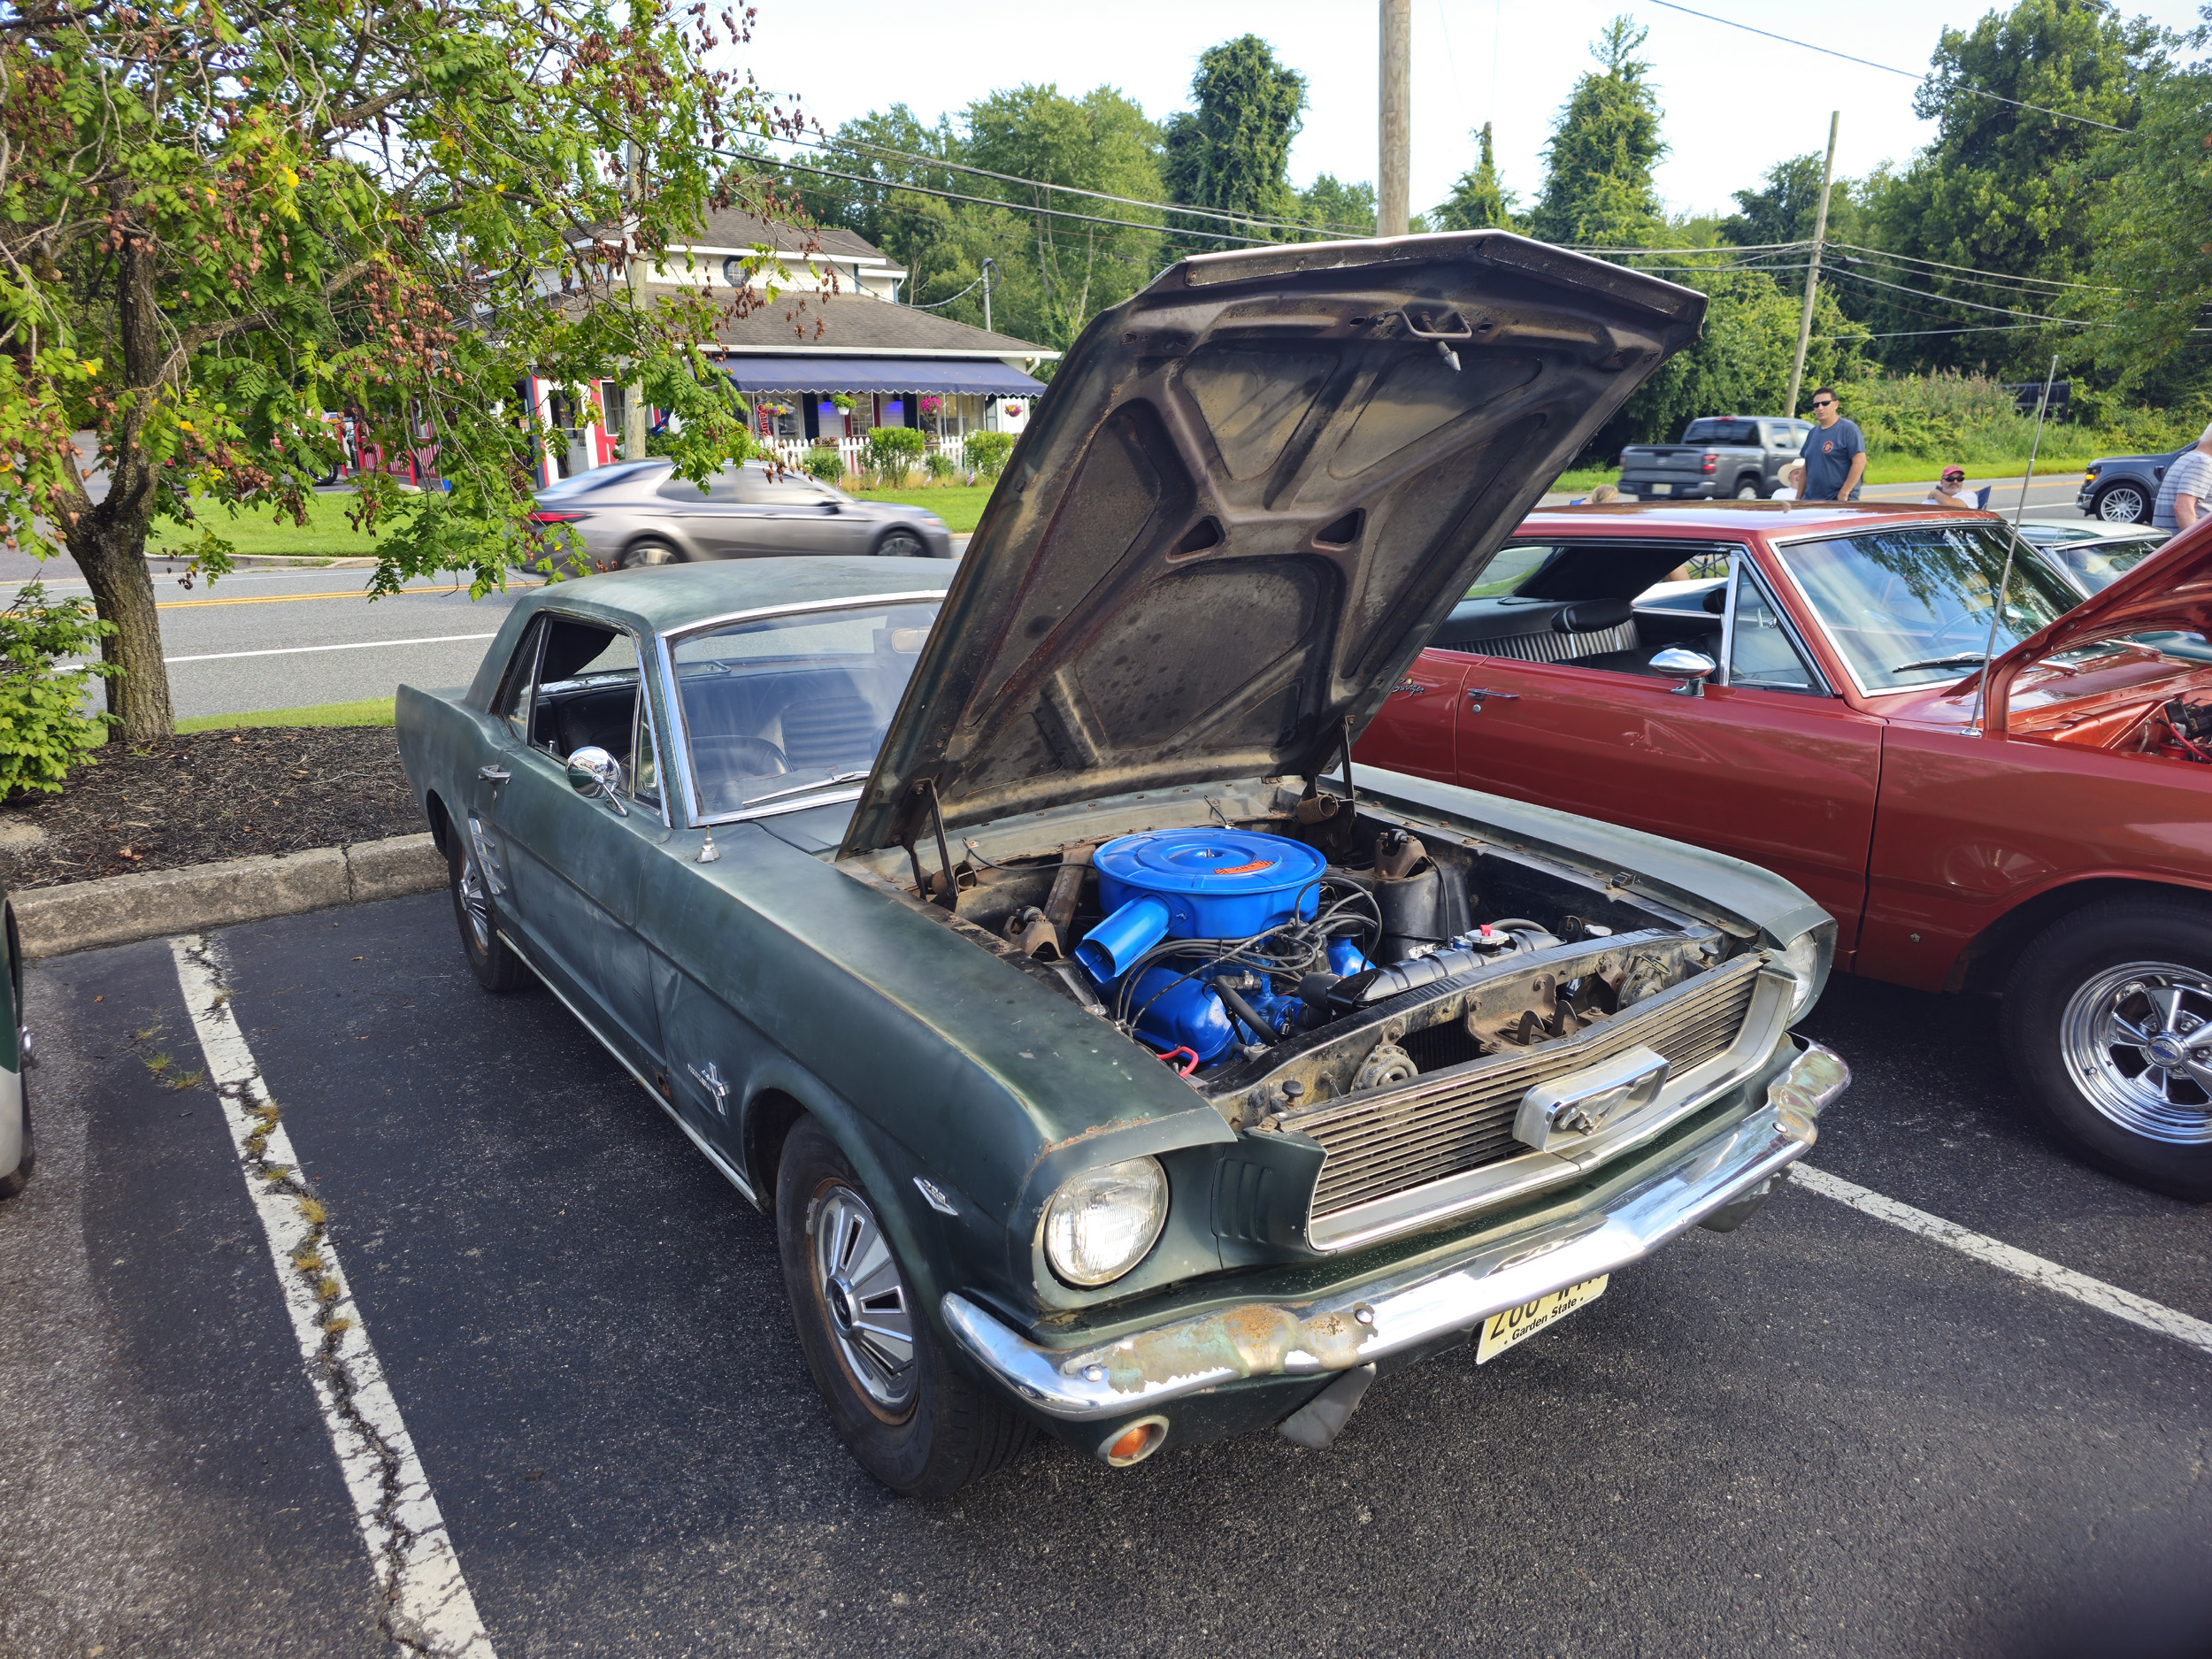
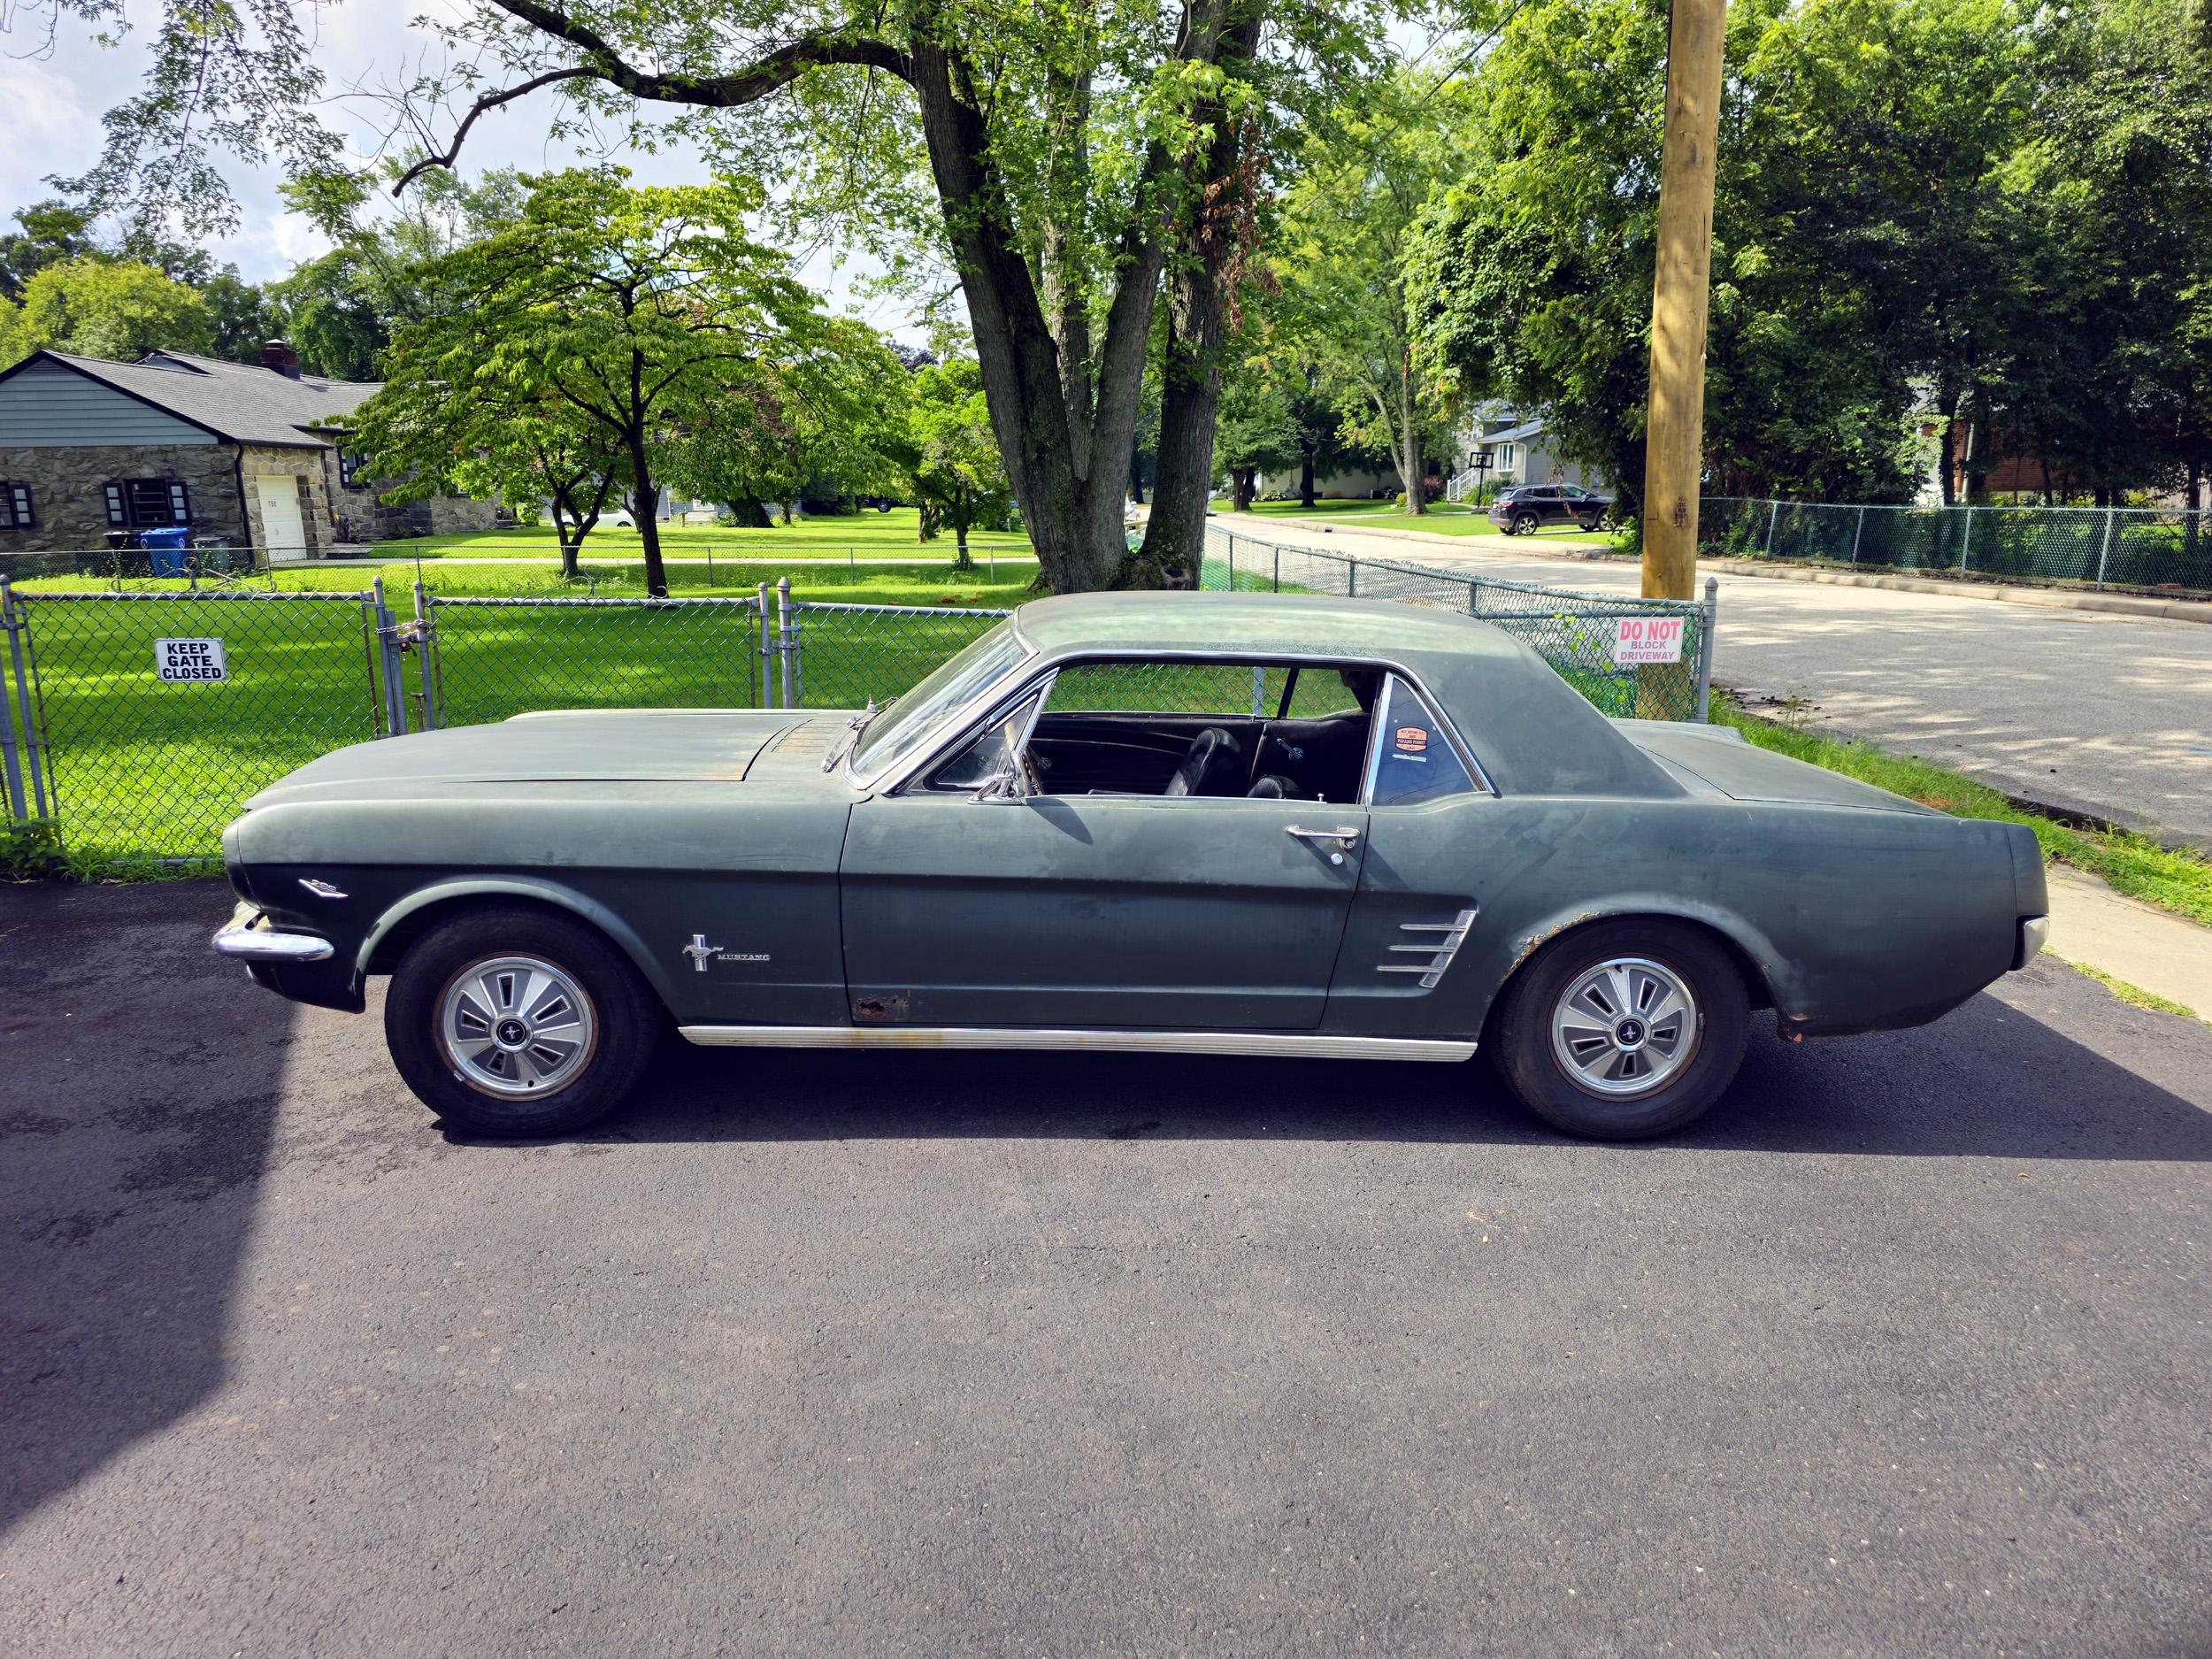
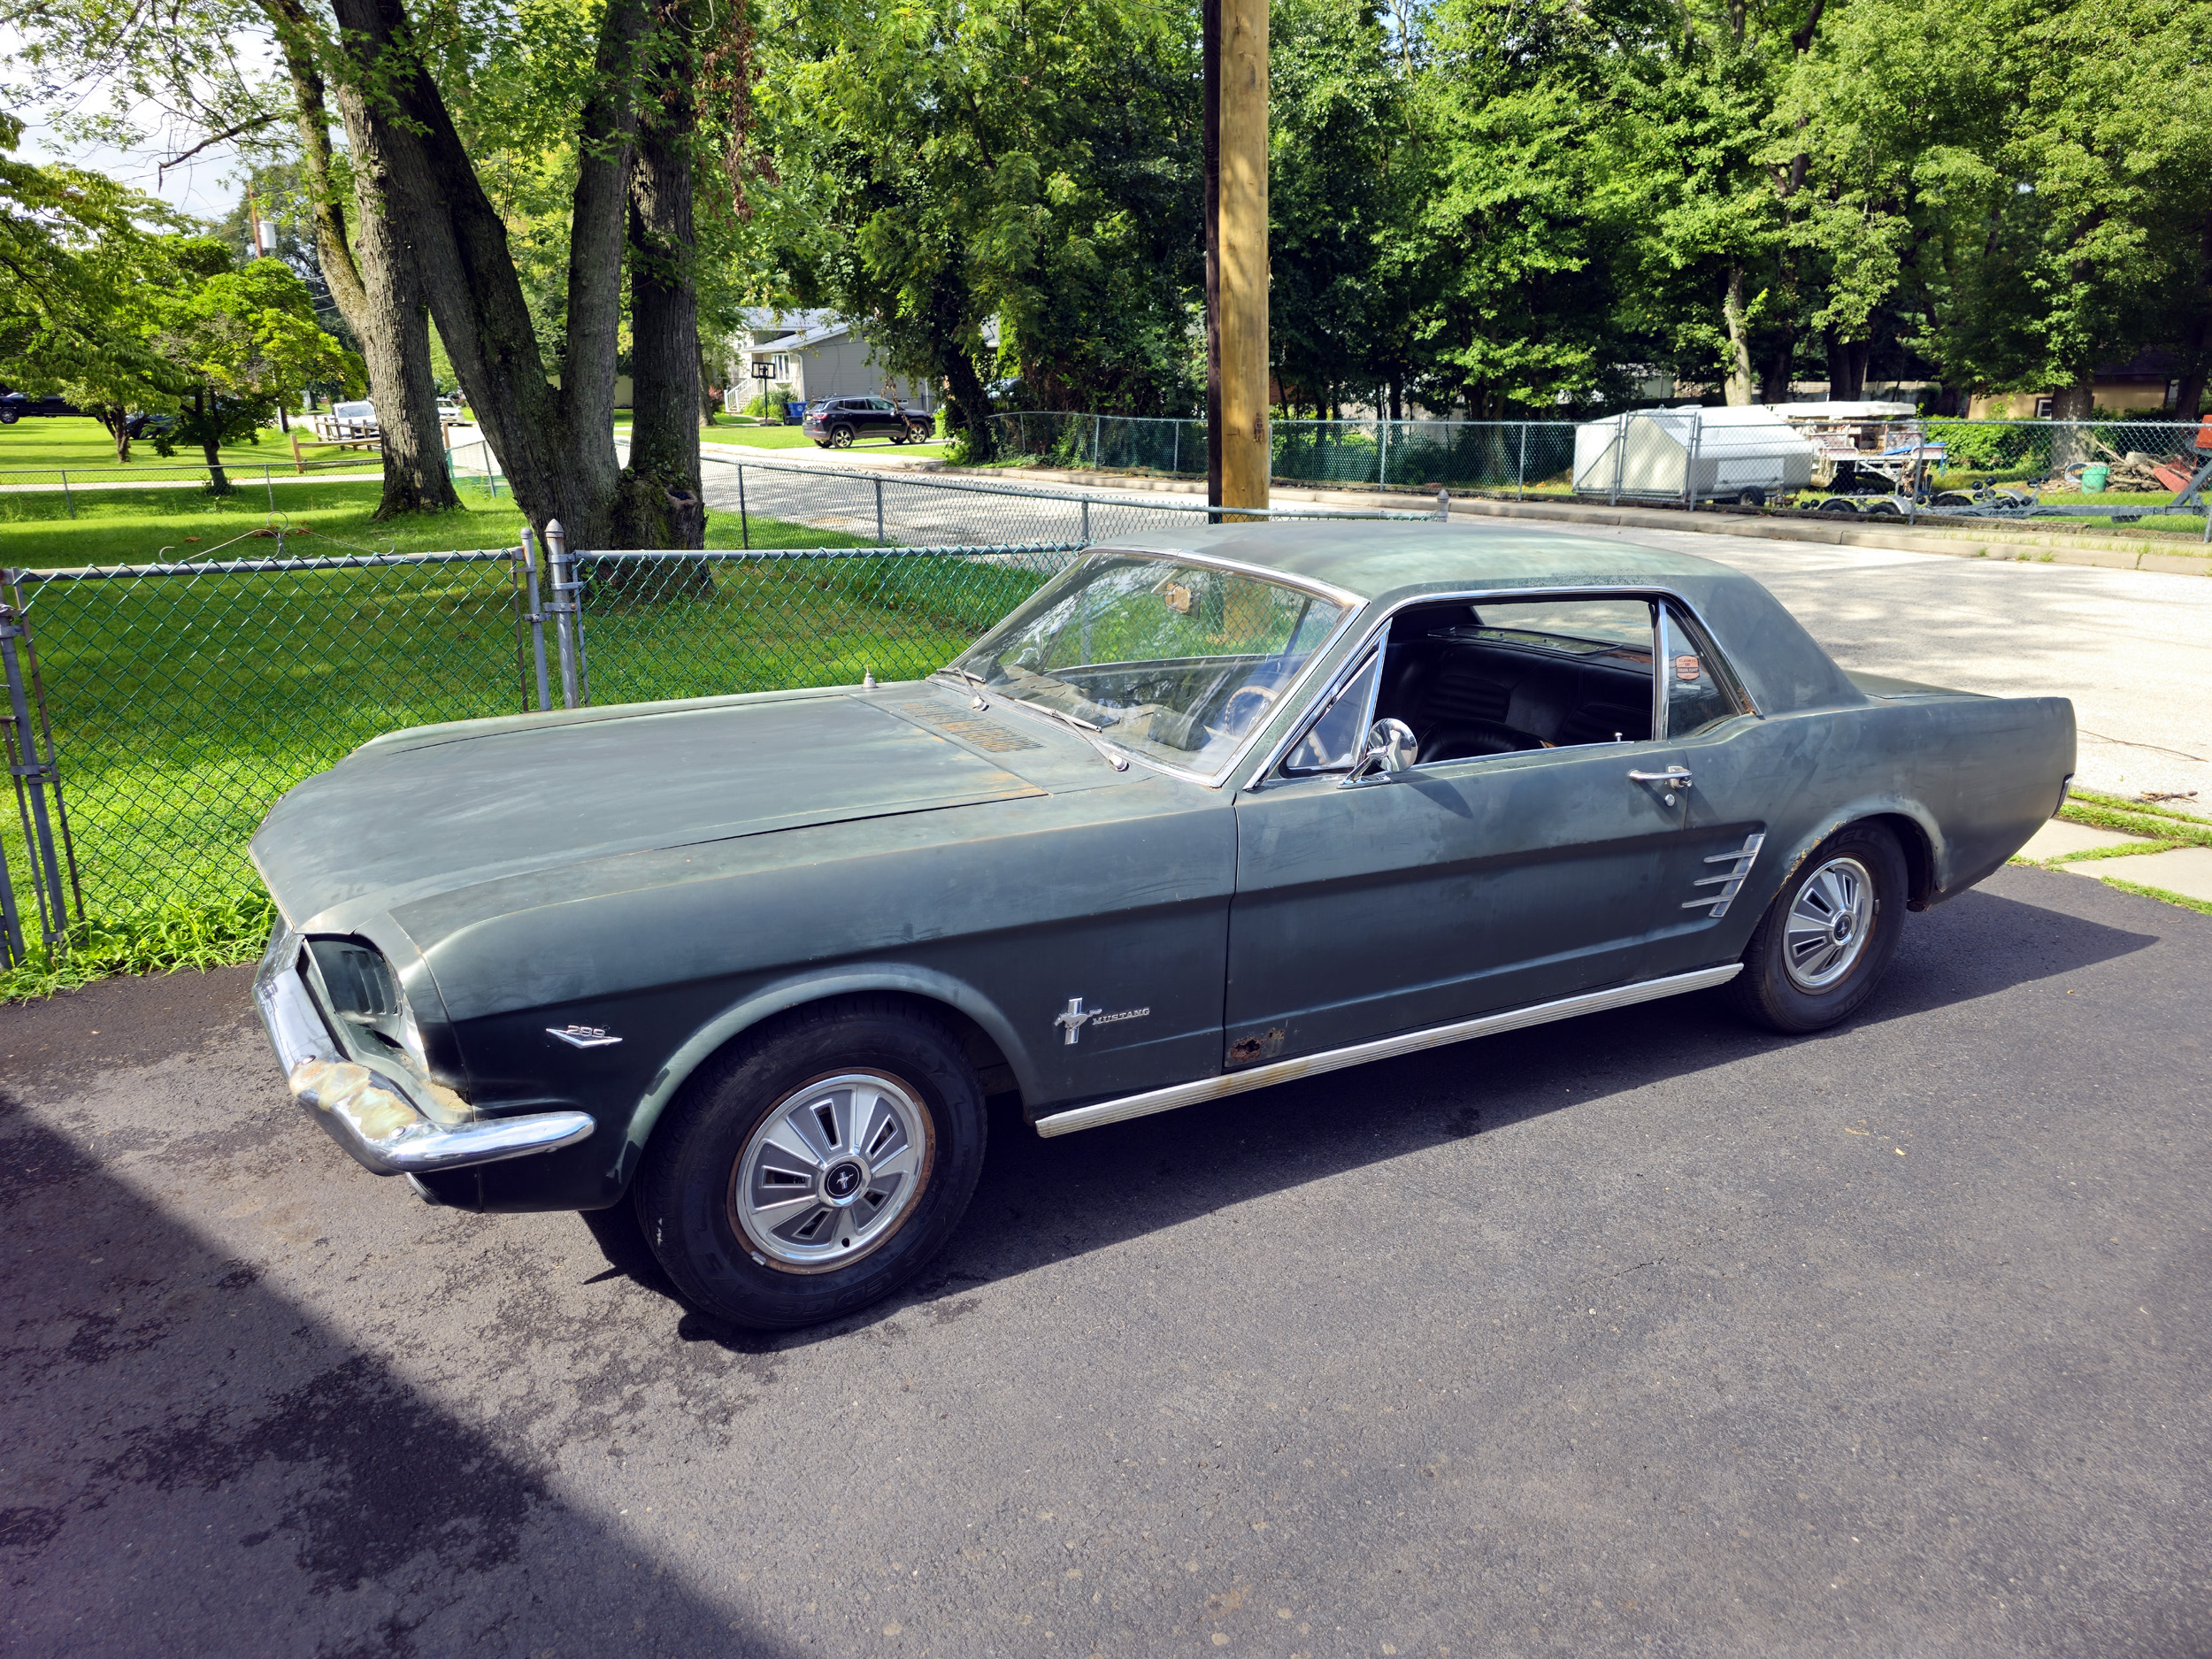
It has been a while since I took some “in the sun” photos not
that it matters much with the paint condition as it is. I am a bit surprised at
myself that I have not tried to buff it out yet. I don’t really like it but I am kind of used
to it now. I get some form of a compliment just as it is almost every time I
take it for a ride especially when I go to the food store.
Photos
taken 8-26-26
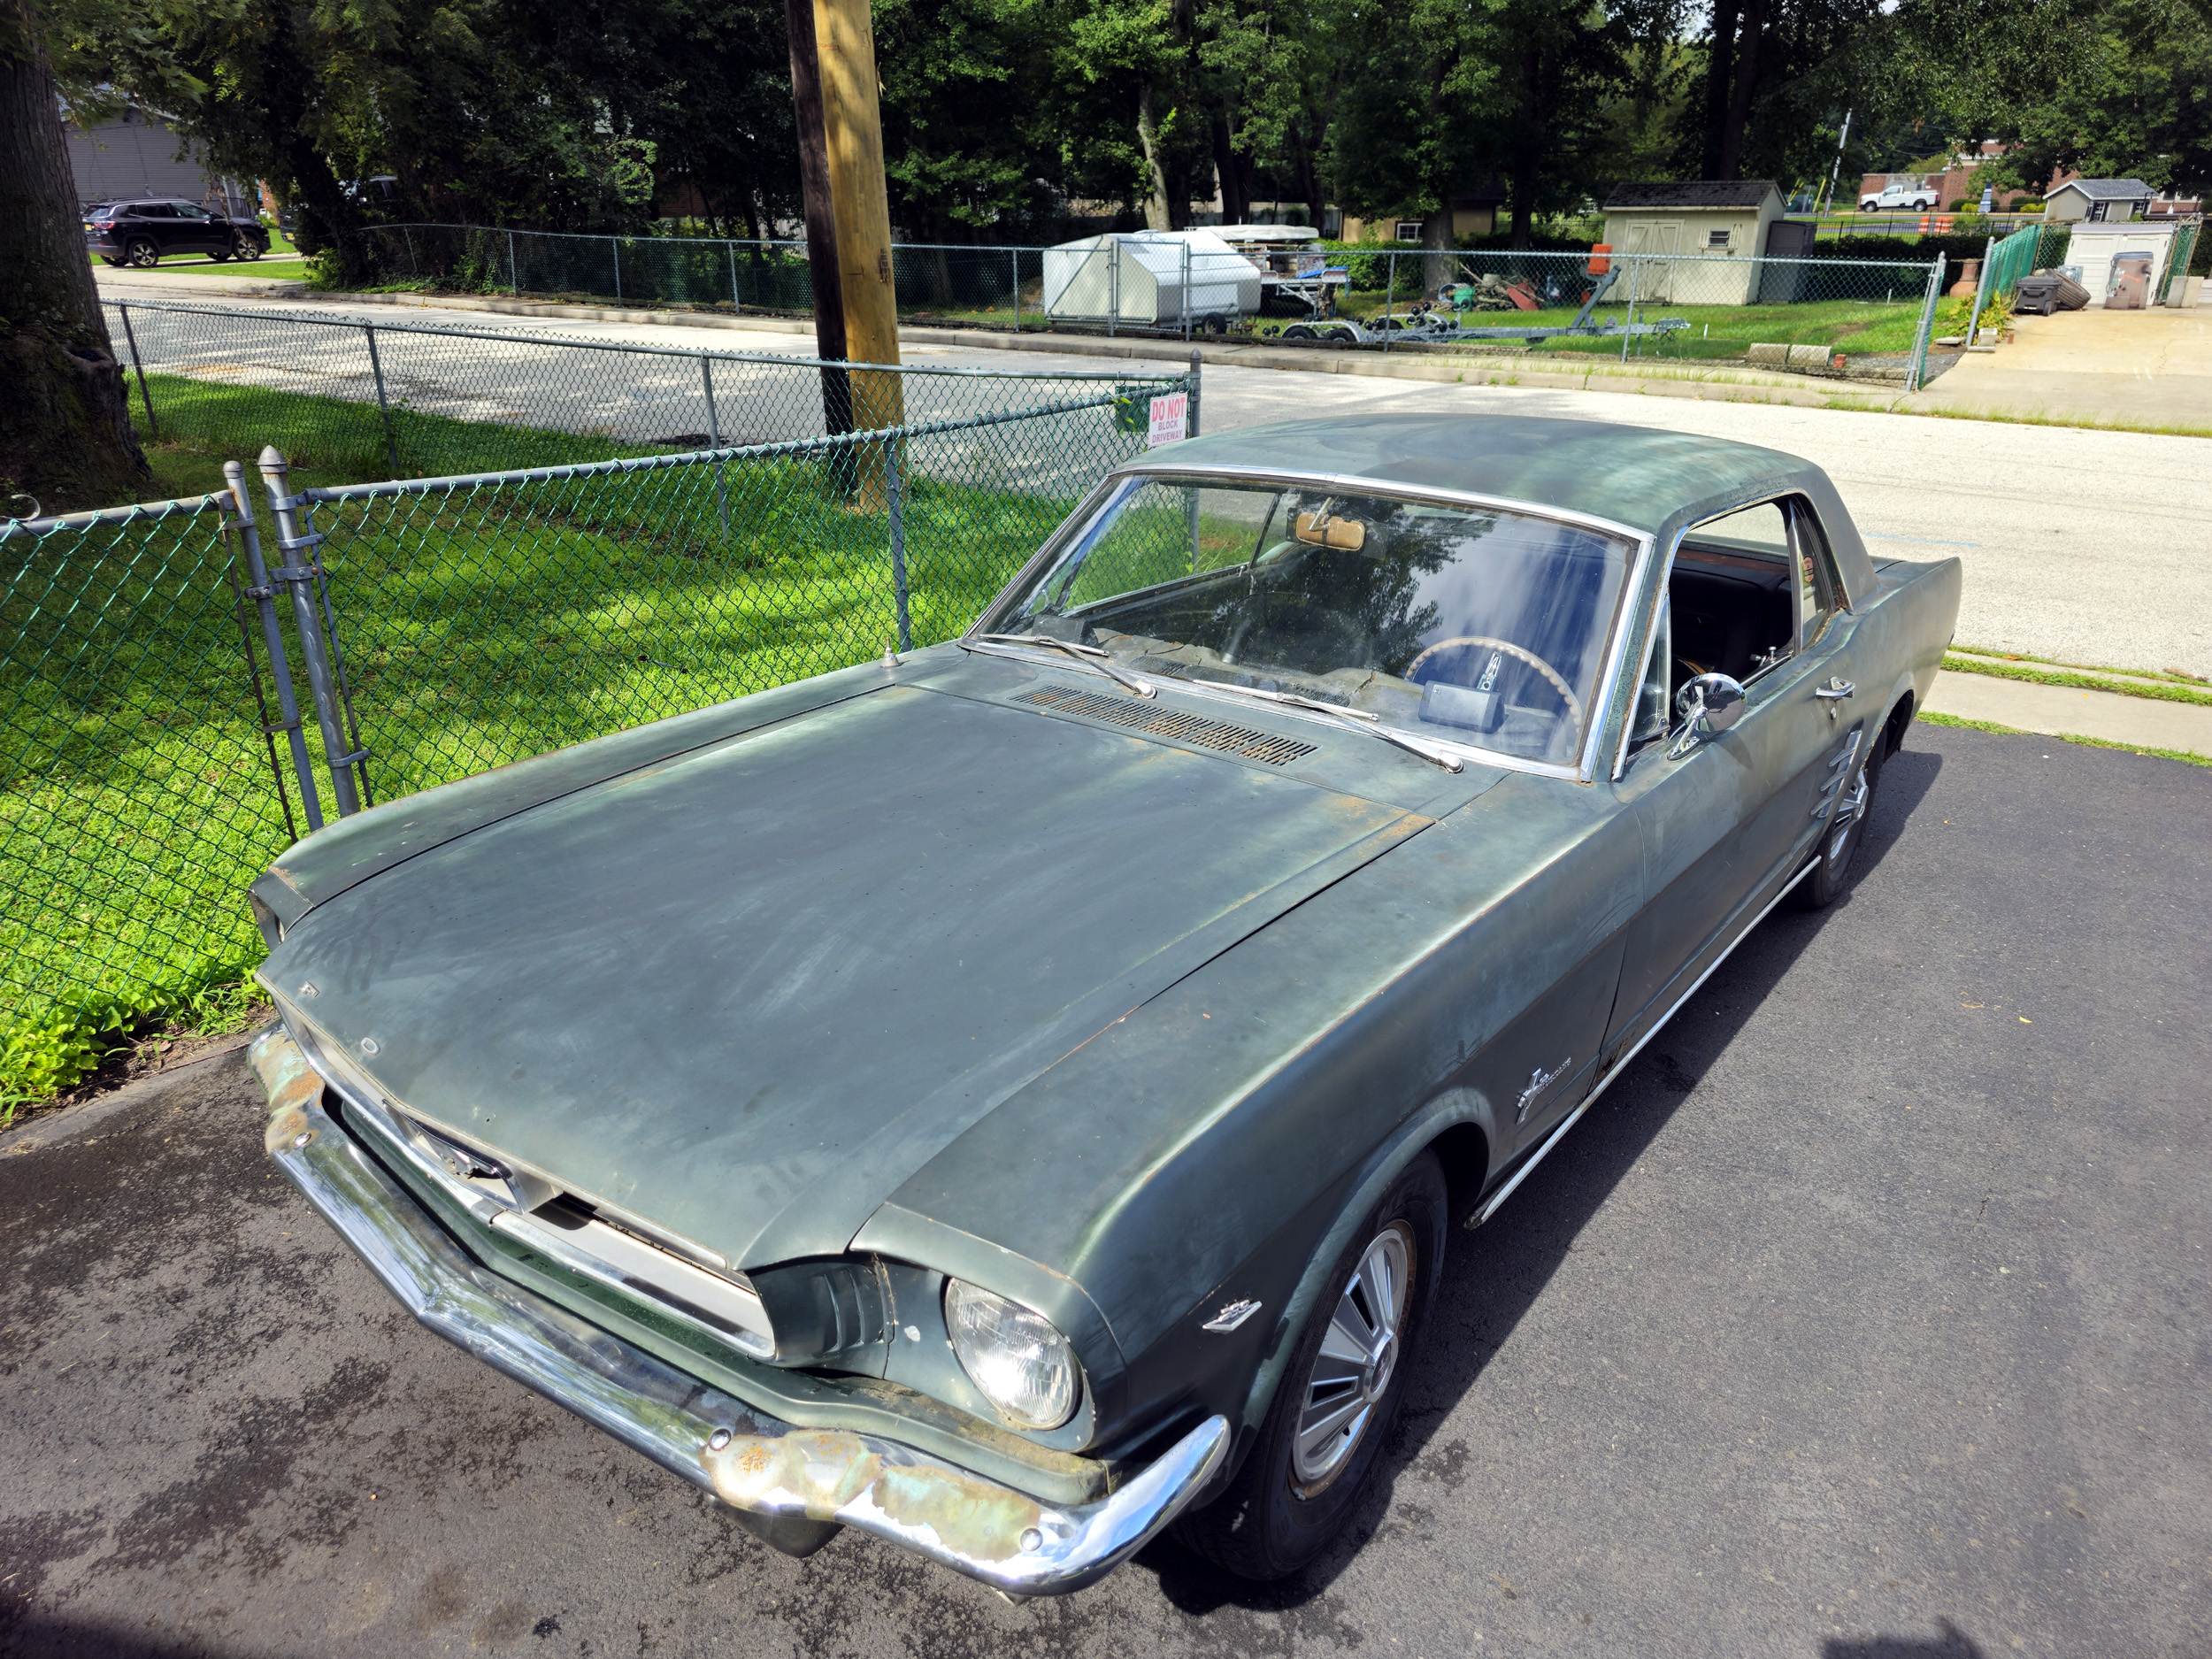
It is mostly still a short distance local driver car for now. But
I am slowly getting it in better condition to take on longer trips and be a
backup daily driver.
Mustang
Stuff
Added
8-29-26
I have been to Michigan at least 3 times before now. (August
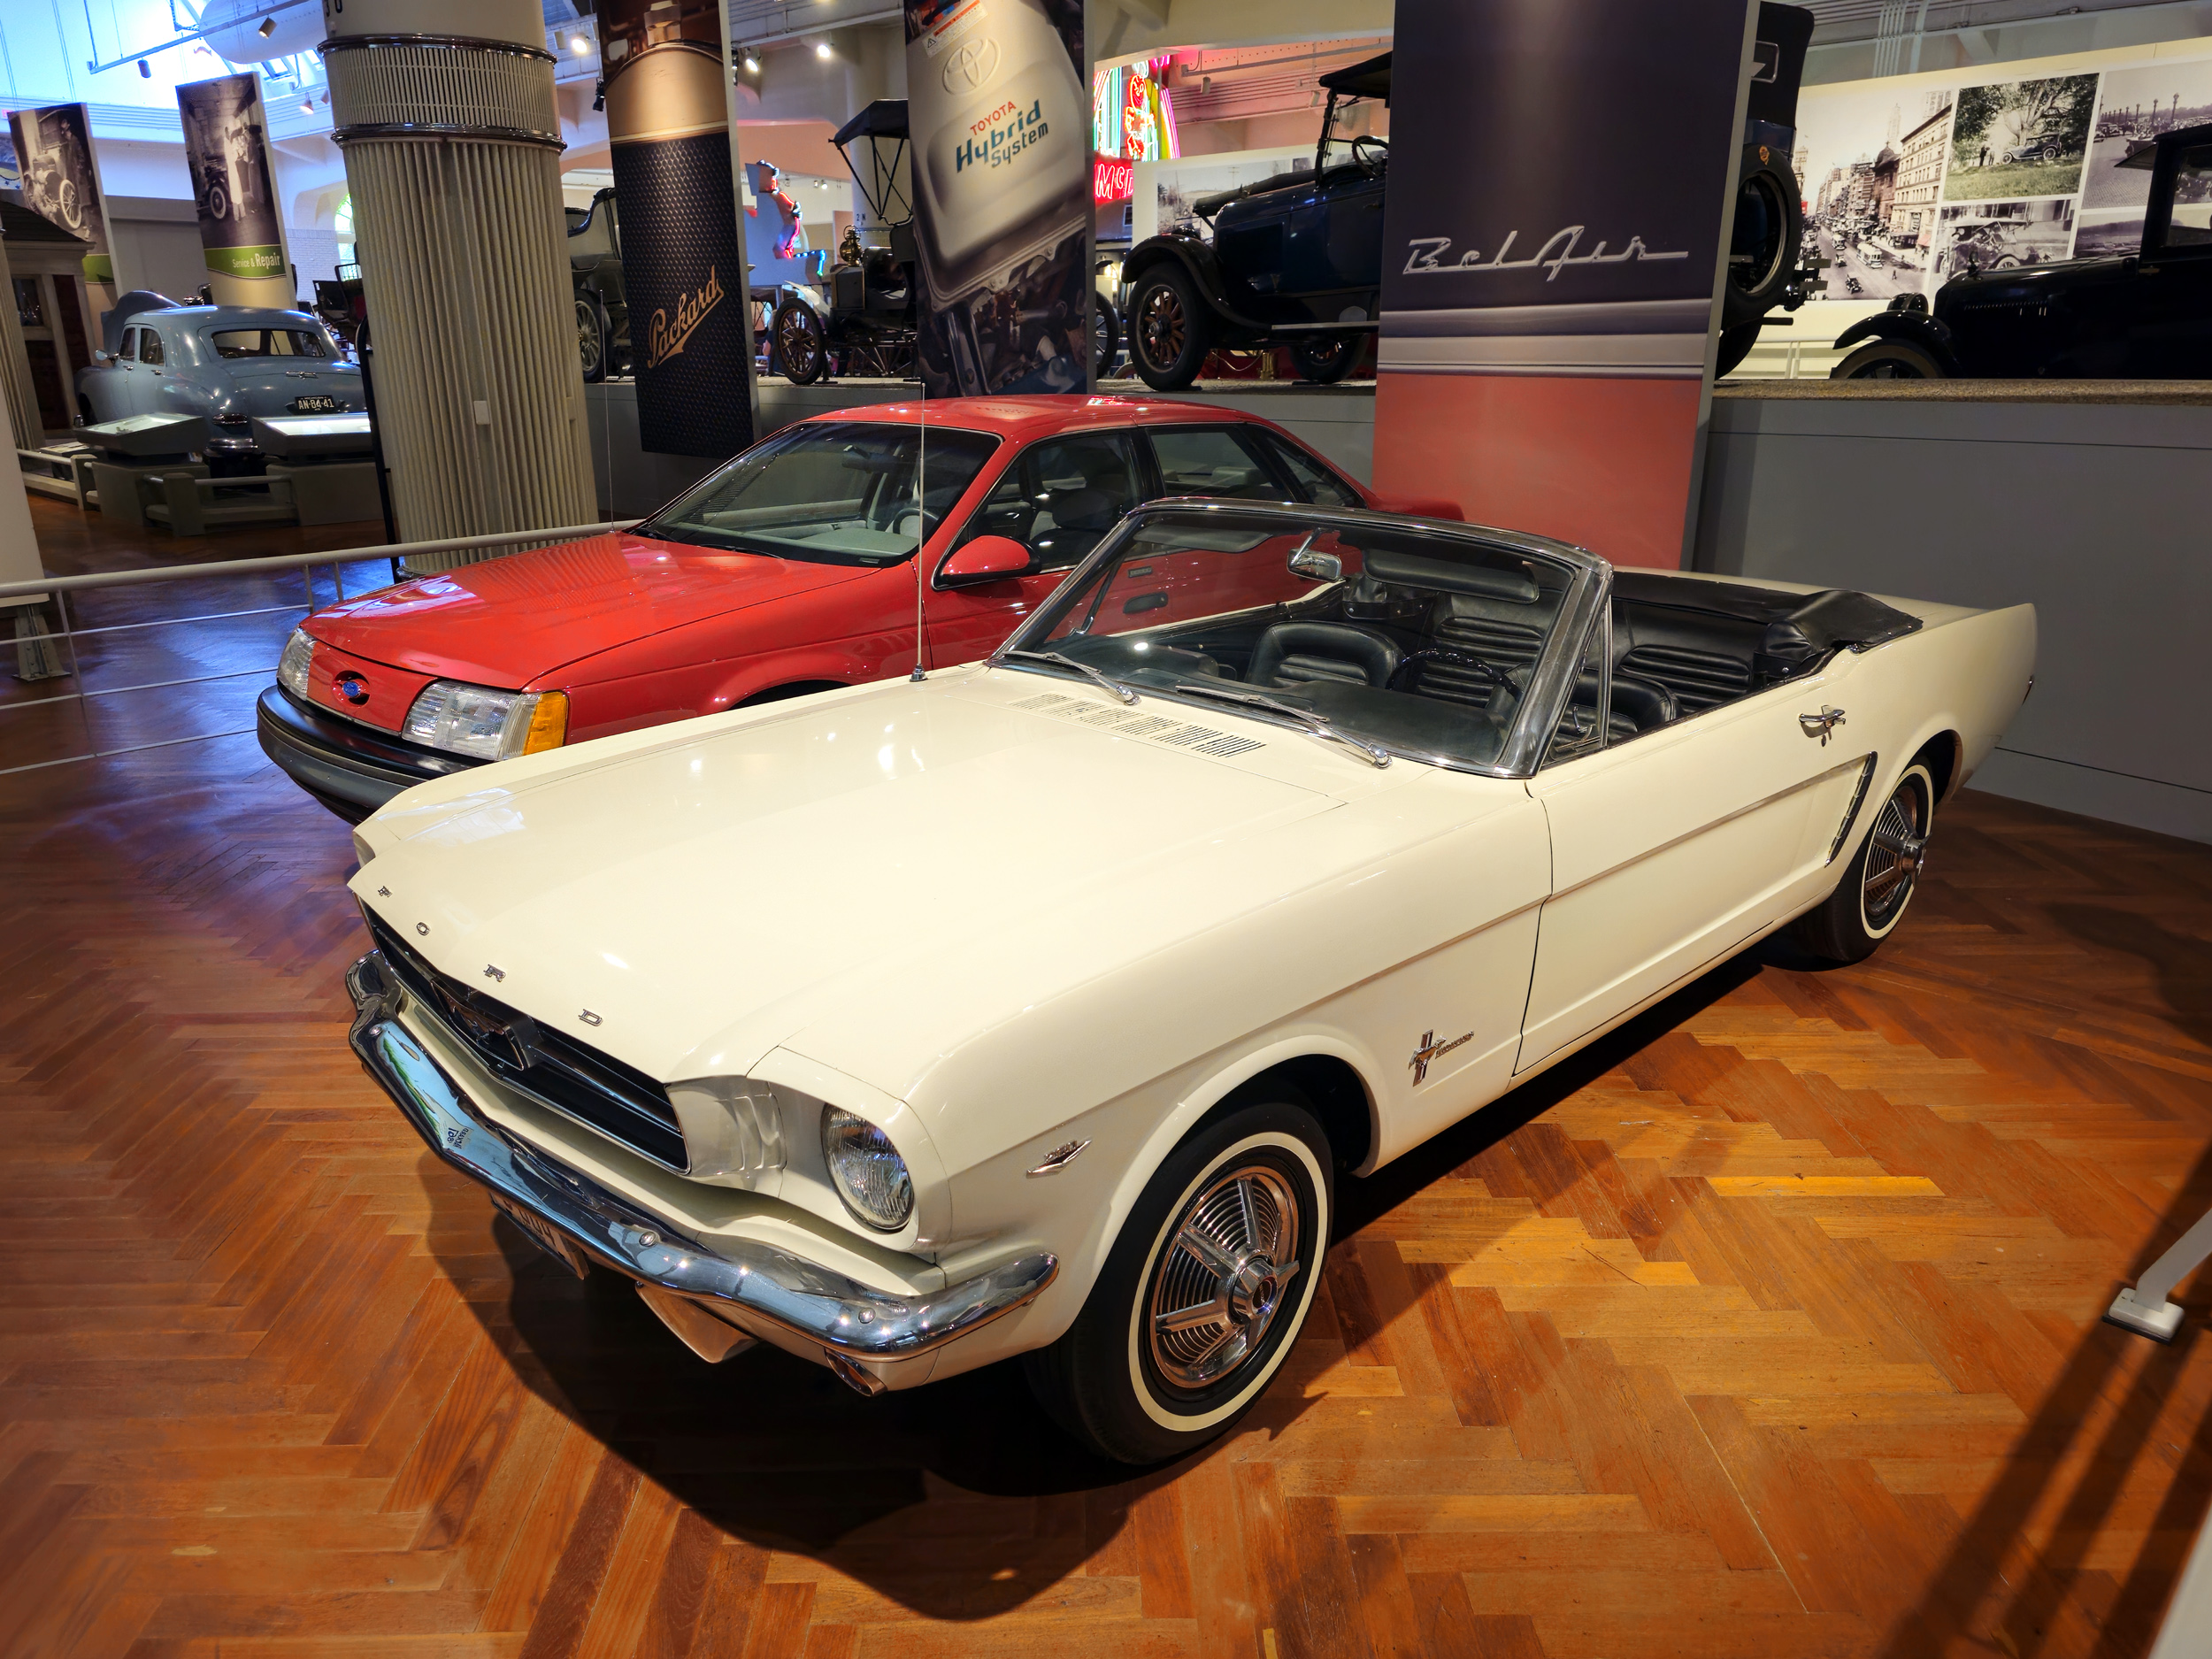
2026). I have chased and wanted to see the very first production Mustang VIN 5F08F100001 for over 30 years going to The Henry Ford Museum twice
but it was not on display. In August 2026 I spent a week in Michigan fully
indulging my S Scale interests at the NASG convention and my newly restarted
car guy interests visiting many places in Detroit and Dearborn. The car culture
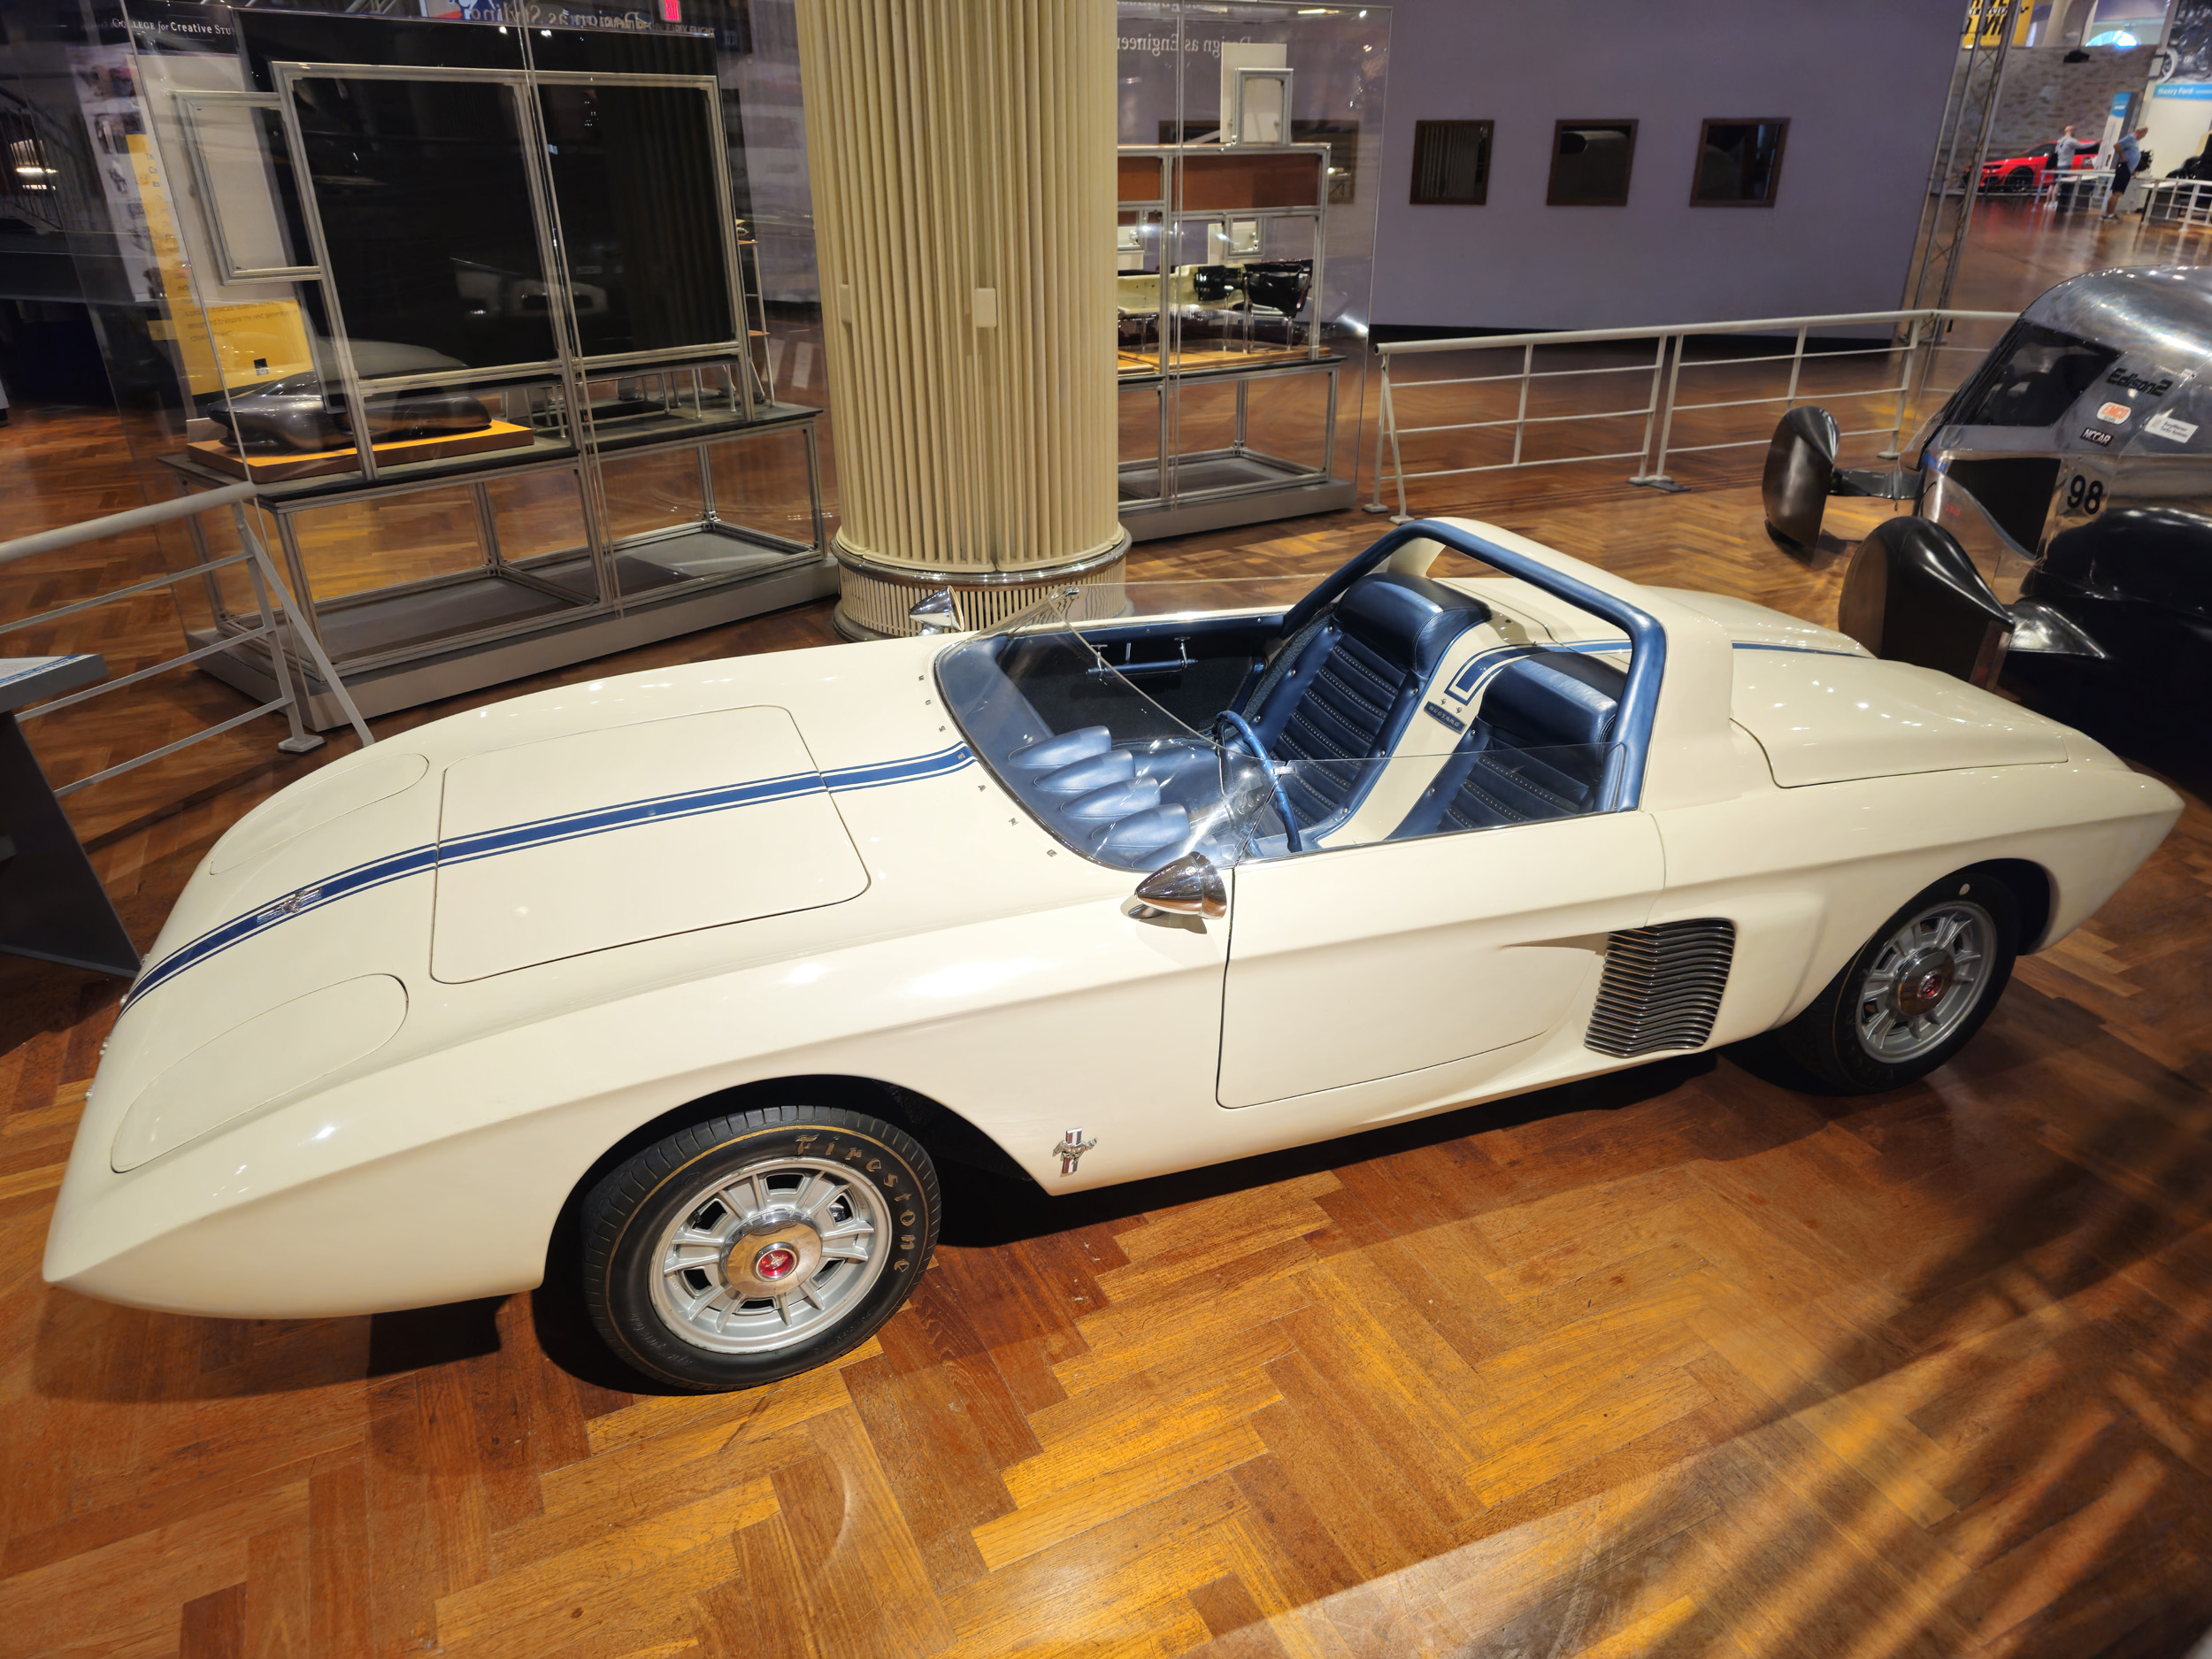
is still huge there. I finally got to see the 1962 Mustang prototype and Mustang 5F08F100001 on 8-10-26.
I
was greatly disappointed at how The
Henry Ford Museum had them displayed. The 1962 Mustang prototype was not
that bad. You could see around the entire car to take photos. But Mustang 5F08F100001 was seemingly just
parked where it is like there was no other place to put it and stuffed in next
to a Taurus! You could only see the front and drivers side. The rear view was
cramped. The first built of the most iconic car Ford has ever made needs more
than a small sign that you had to study to see if it was the first ever built.
What a total disgrace to Mustang and FORD fans!
And
the 1963 Mustang II prototype that looks a lot more like a Mustang is not even
owned by The Henry Ford Museum now. It
was given to the Detroit Historical Society in 1975. I tried to see it too. The
Detroit Historical Society does not even have it on display so the public can
see it! It is in a storage warehouse. They don’t even care about this very
significant car. The Henry Ford Museum needs to get the 1963 Mustang II
prototype back and make a proper display with the 3 cars all together in a
large enough space to completely see them and tell the early Mustang history
correctly.
As
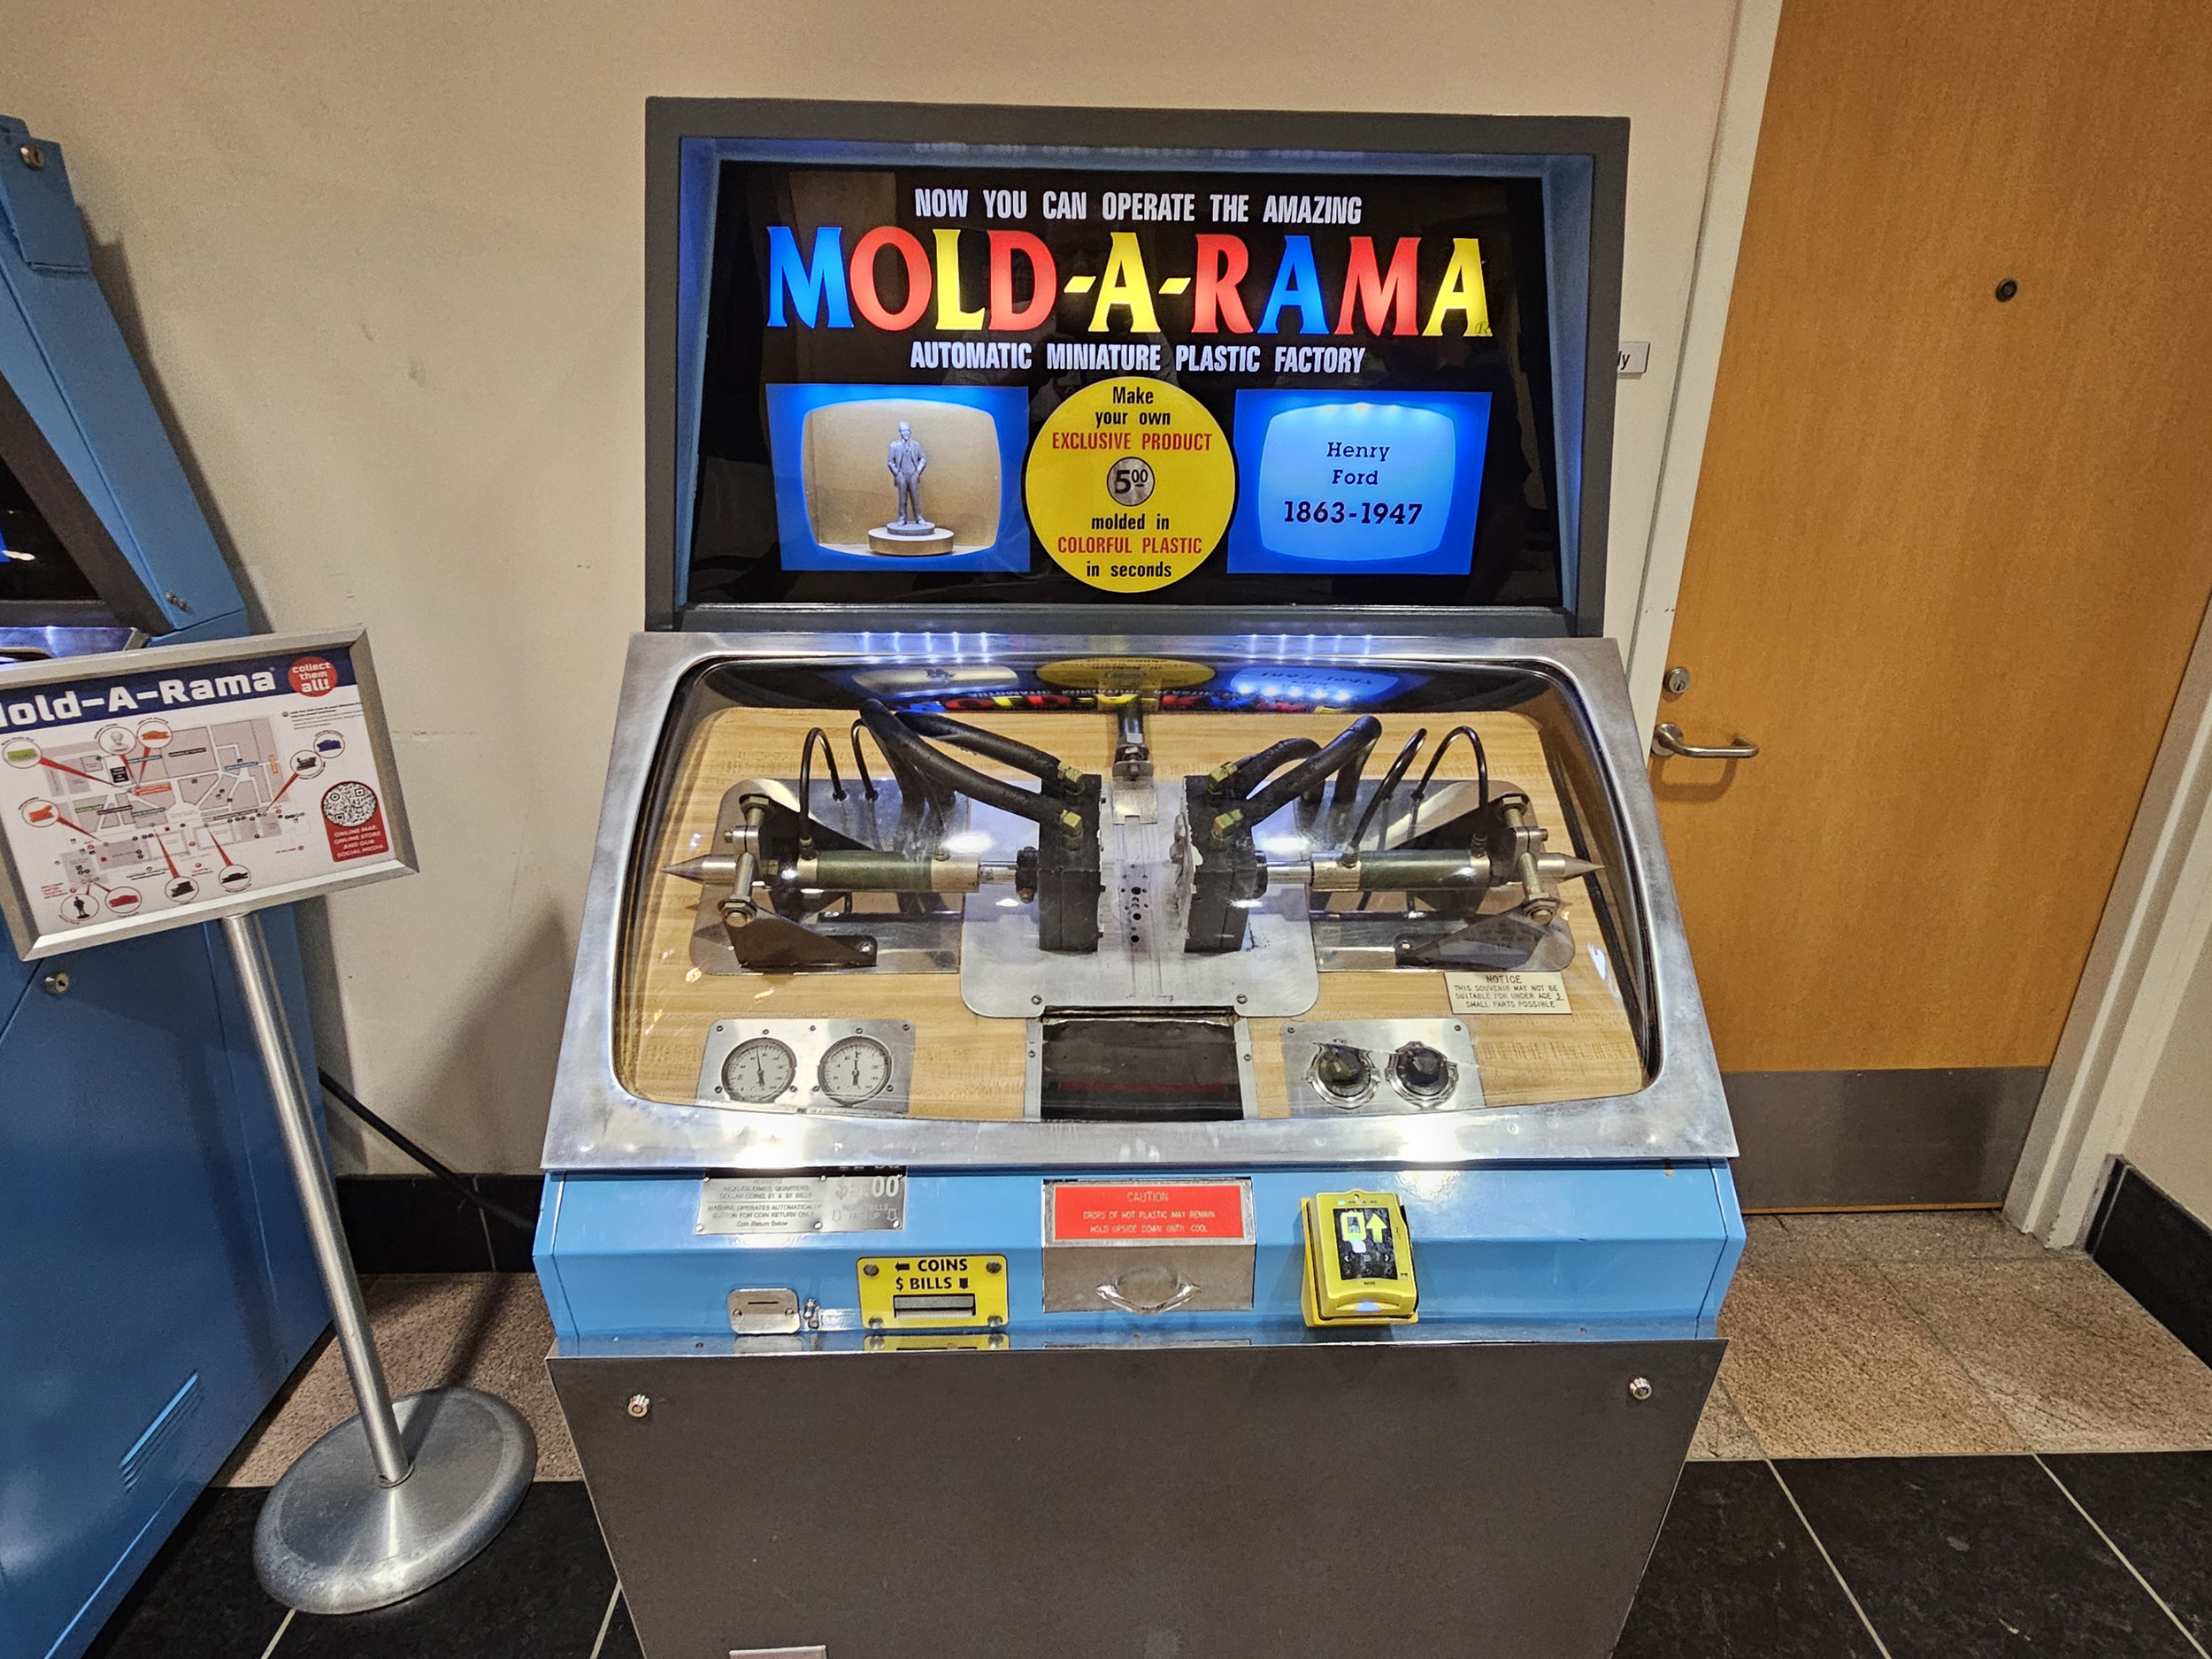
a souvenir of my visit to the museum I got a plastic Henry Ford figure that was
molded as you watched it being made. Once a get a new dash pad I might put
Henry on the dashboard in my Mustang.
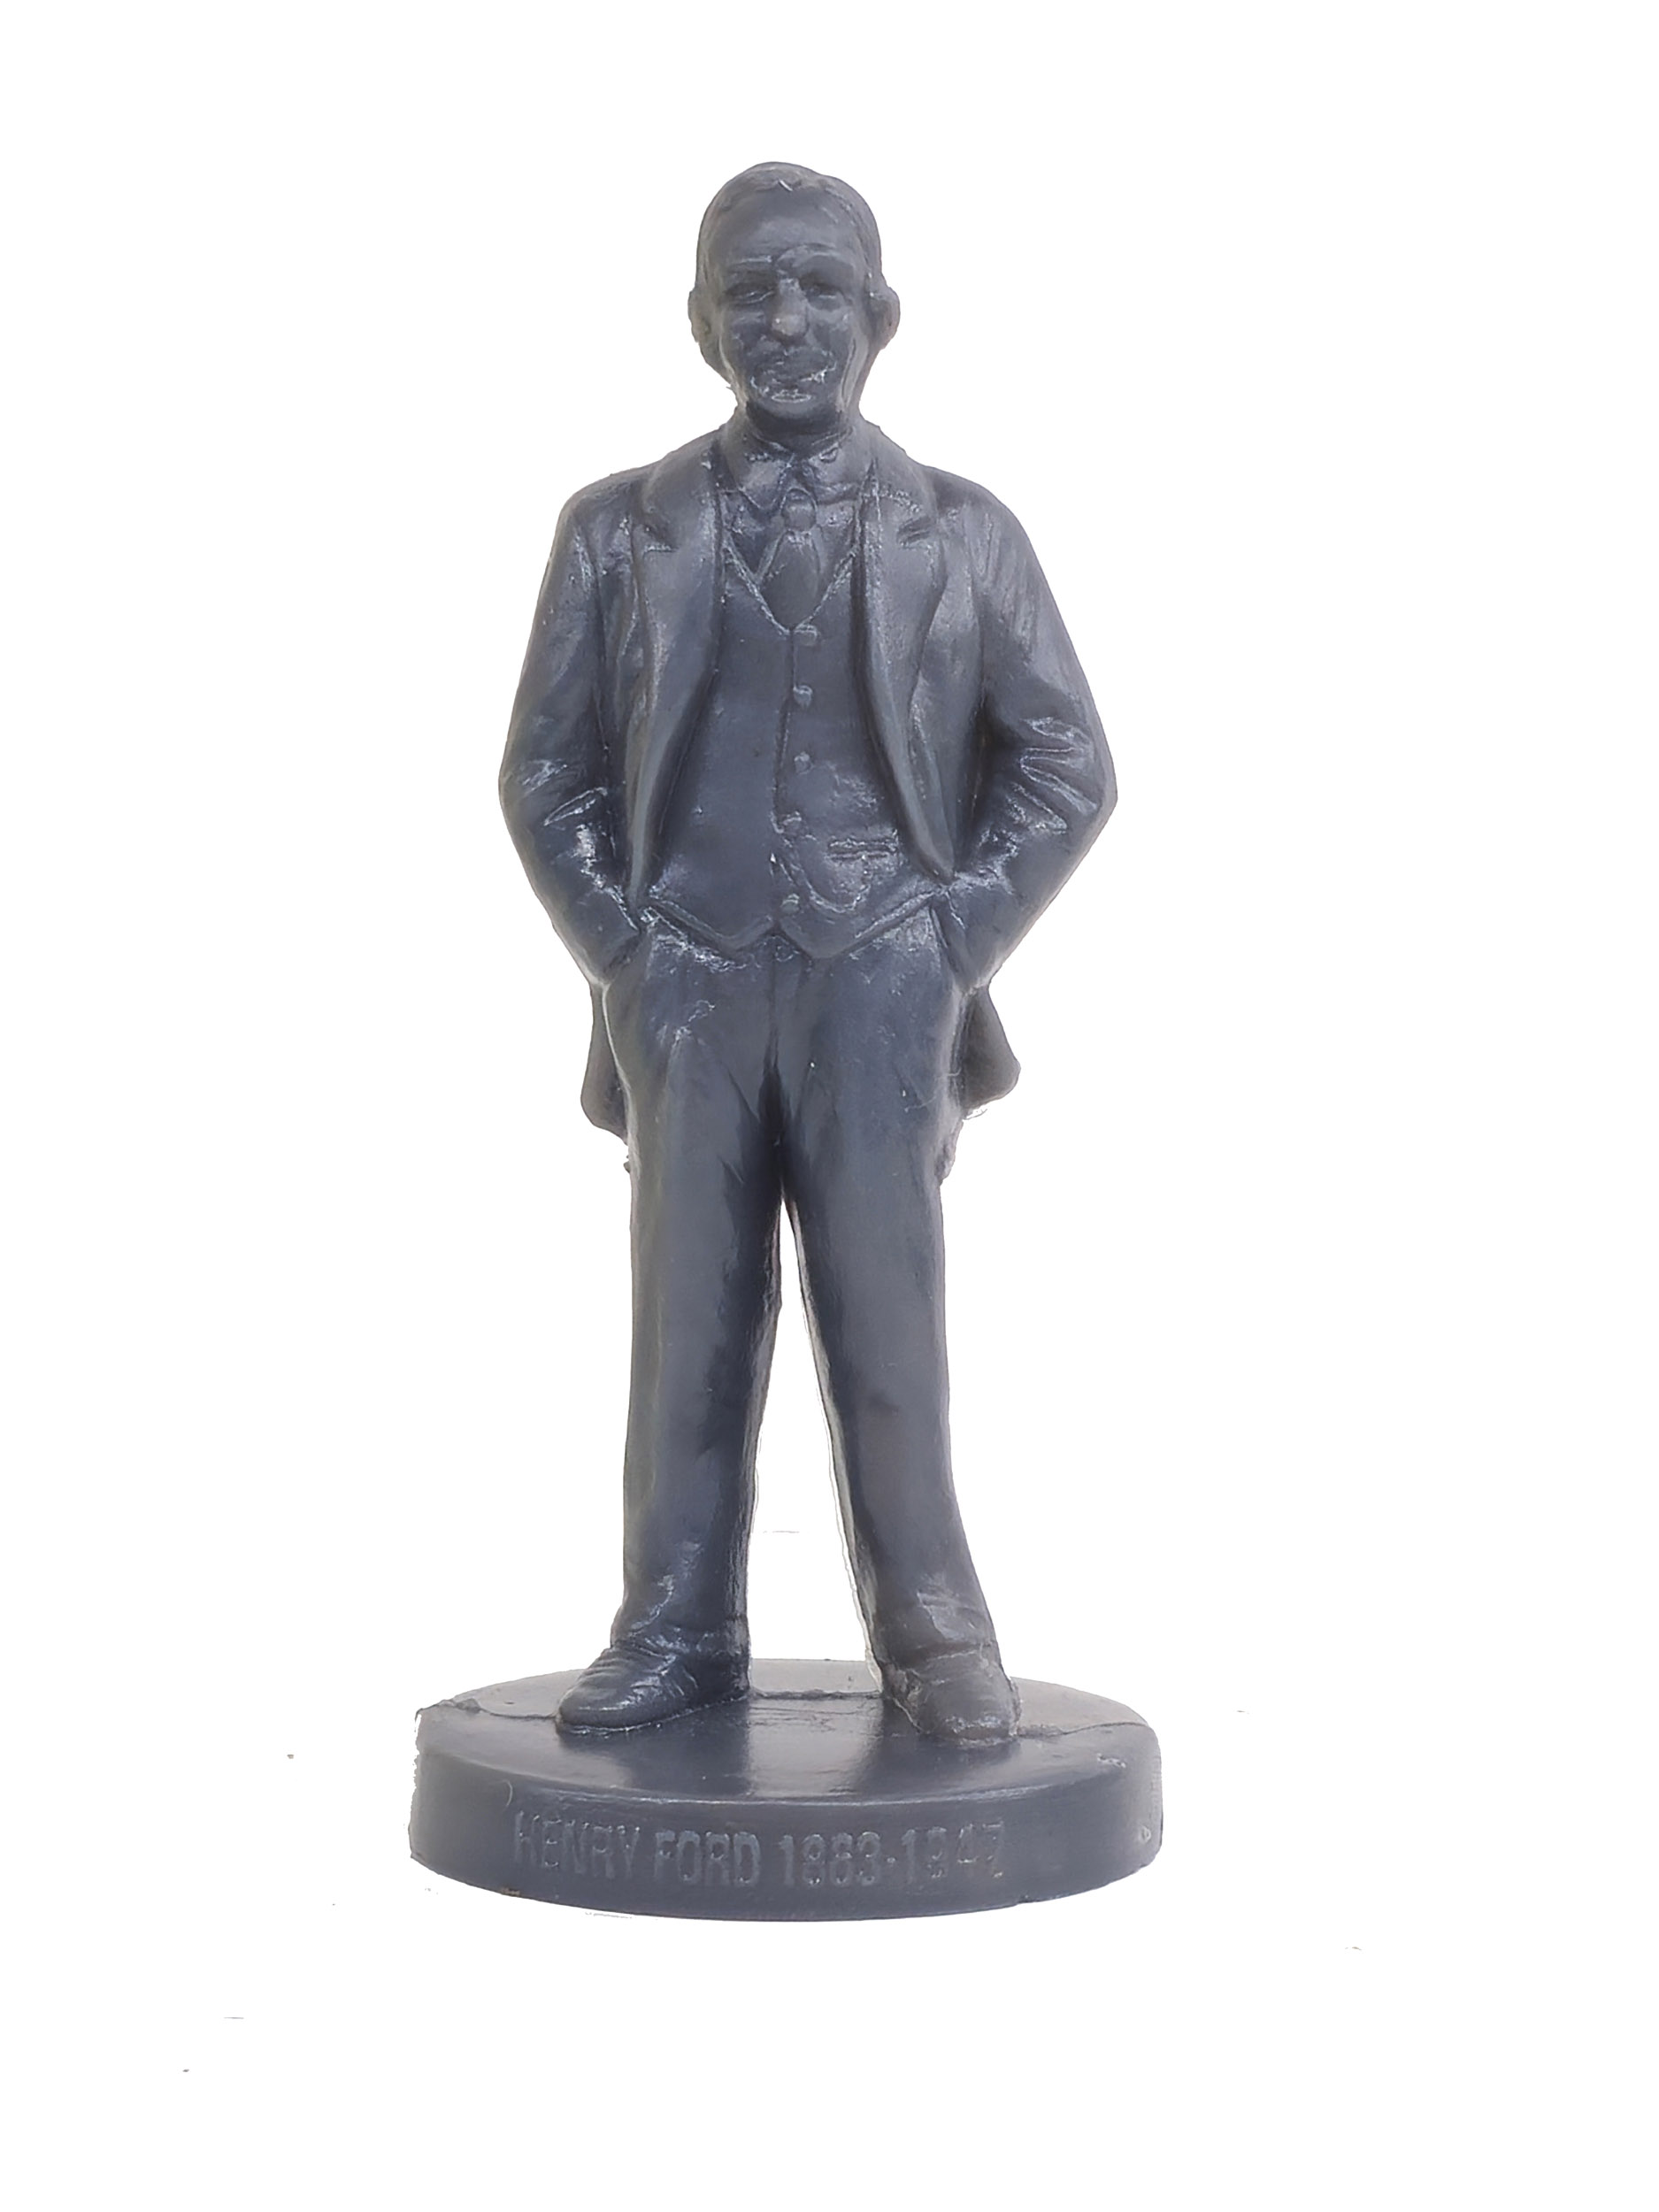
Massive
Update!!
Added
10-17-26
I
have been working on the car not updating here.
The weather has started to cool off. As planned there were parts
I had and parts recently bought that had to be installed. The 2 major areas
were new rear springs and shocks. Also and somewhat related to each other was
dashboard and heater work.
New
Dash Pad
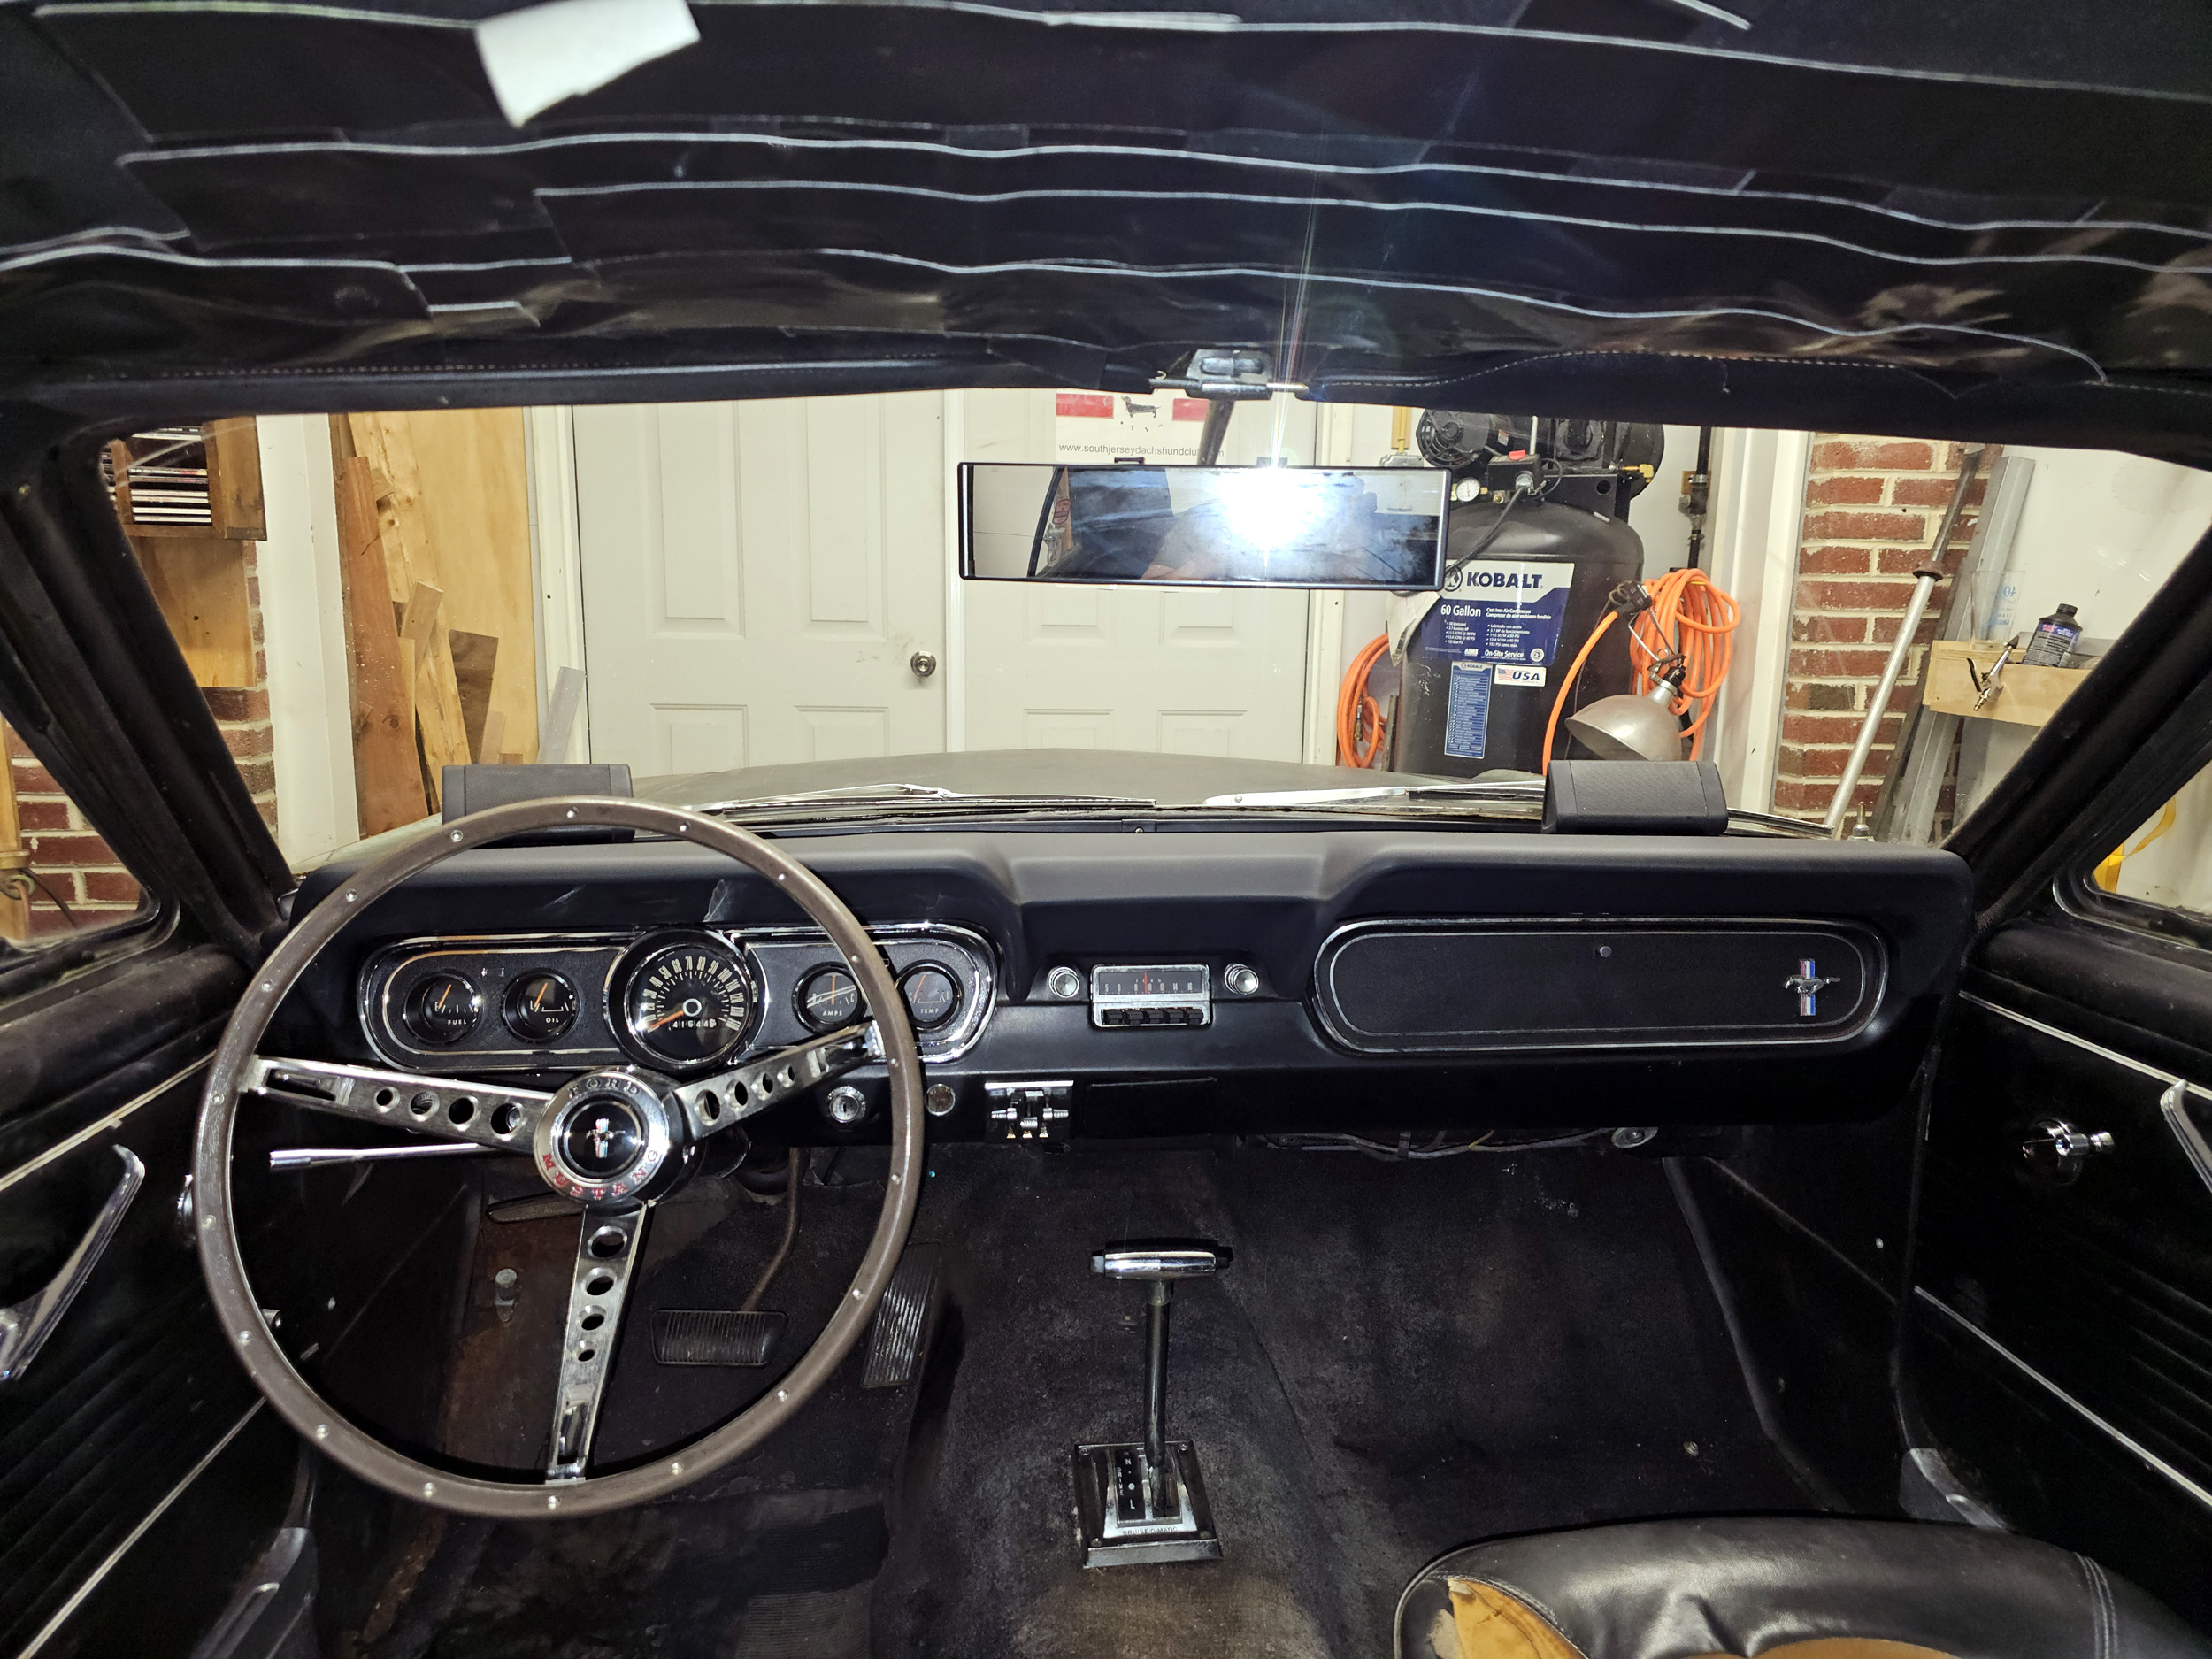
Up first was a new dash pad. I did not take any specific photos
of it but you can see the awful sun warped condition here. Ironically when I was
watching some YouTubes on how to do the replacement
more than 1 was removing a dash pad in much better condition than mine.
Removing the old dash pad was a big job. I got the new pad and
just dove in ripping the old pad out. The sun baked the old pad foam that was
reduced to either hard pieces or a foam rubber paste. It all came out on MANY
pieces. The directions with the new pad say to clean the mold
release off with Naptha. Ha! Try and FIND Naptha. Lowes had a gallon for $25.00 and it did NOT work.
The pad is still a bit oily.
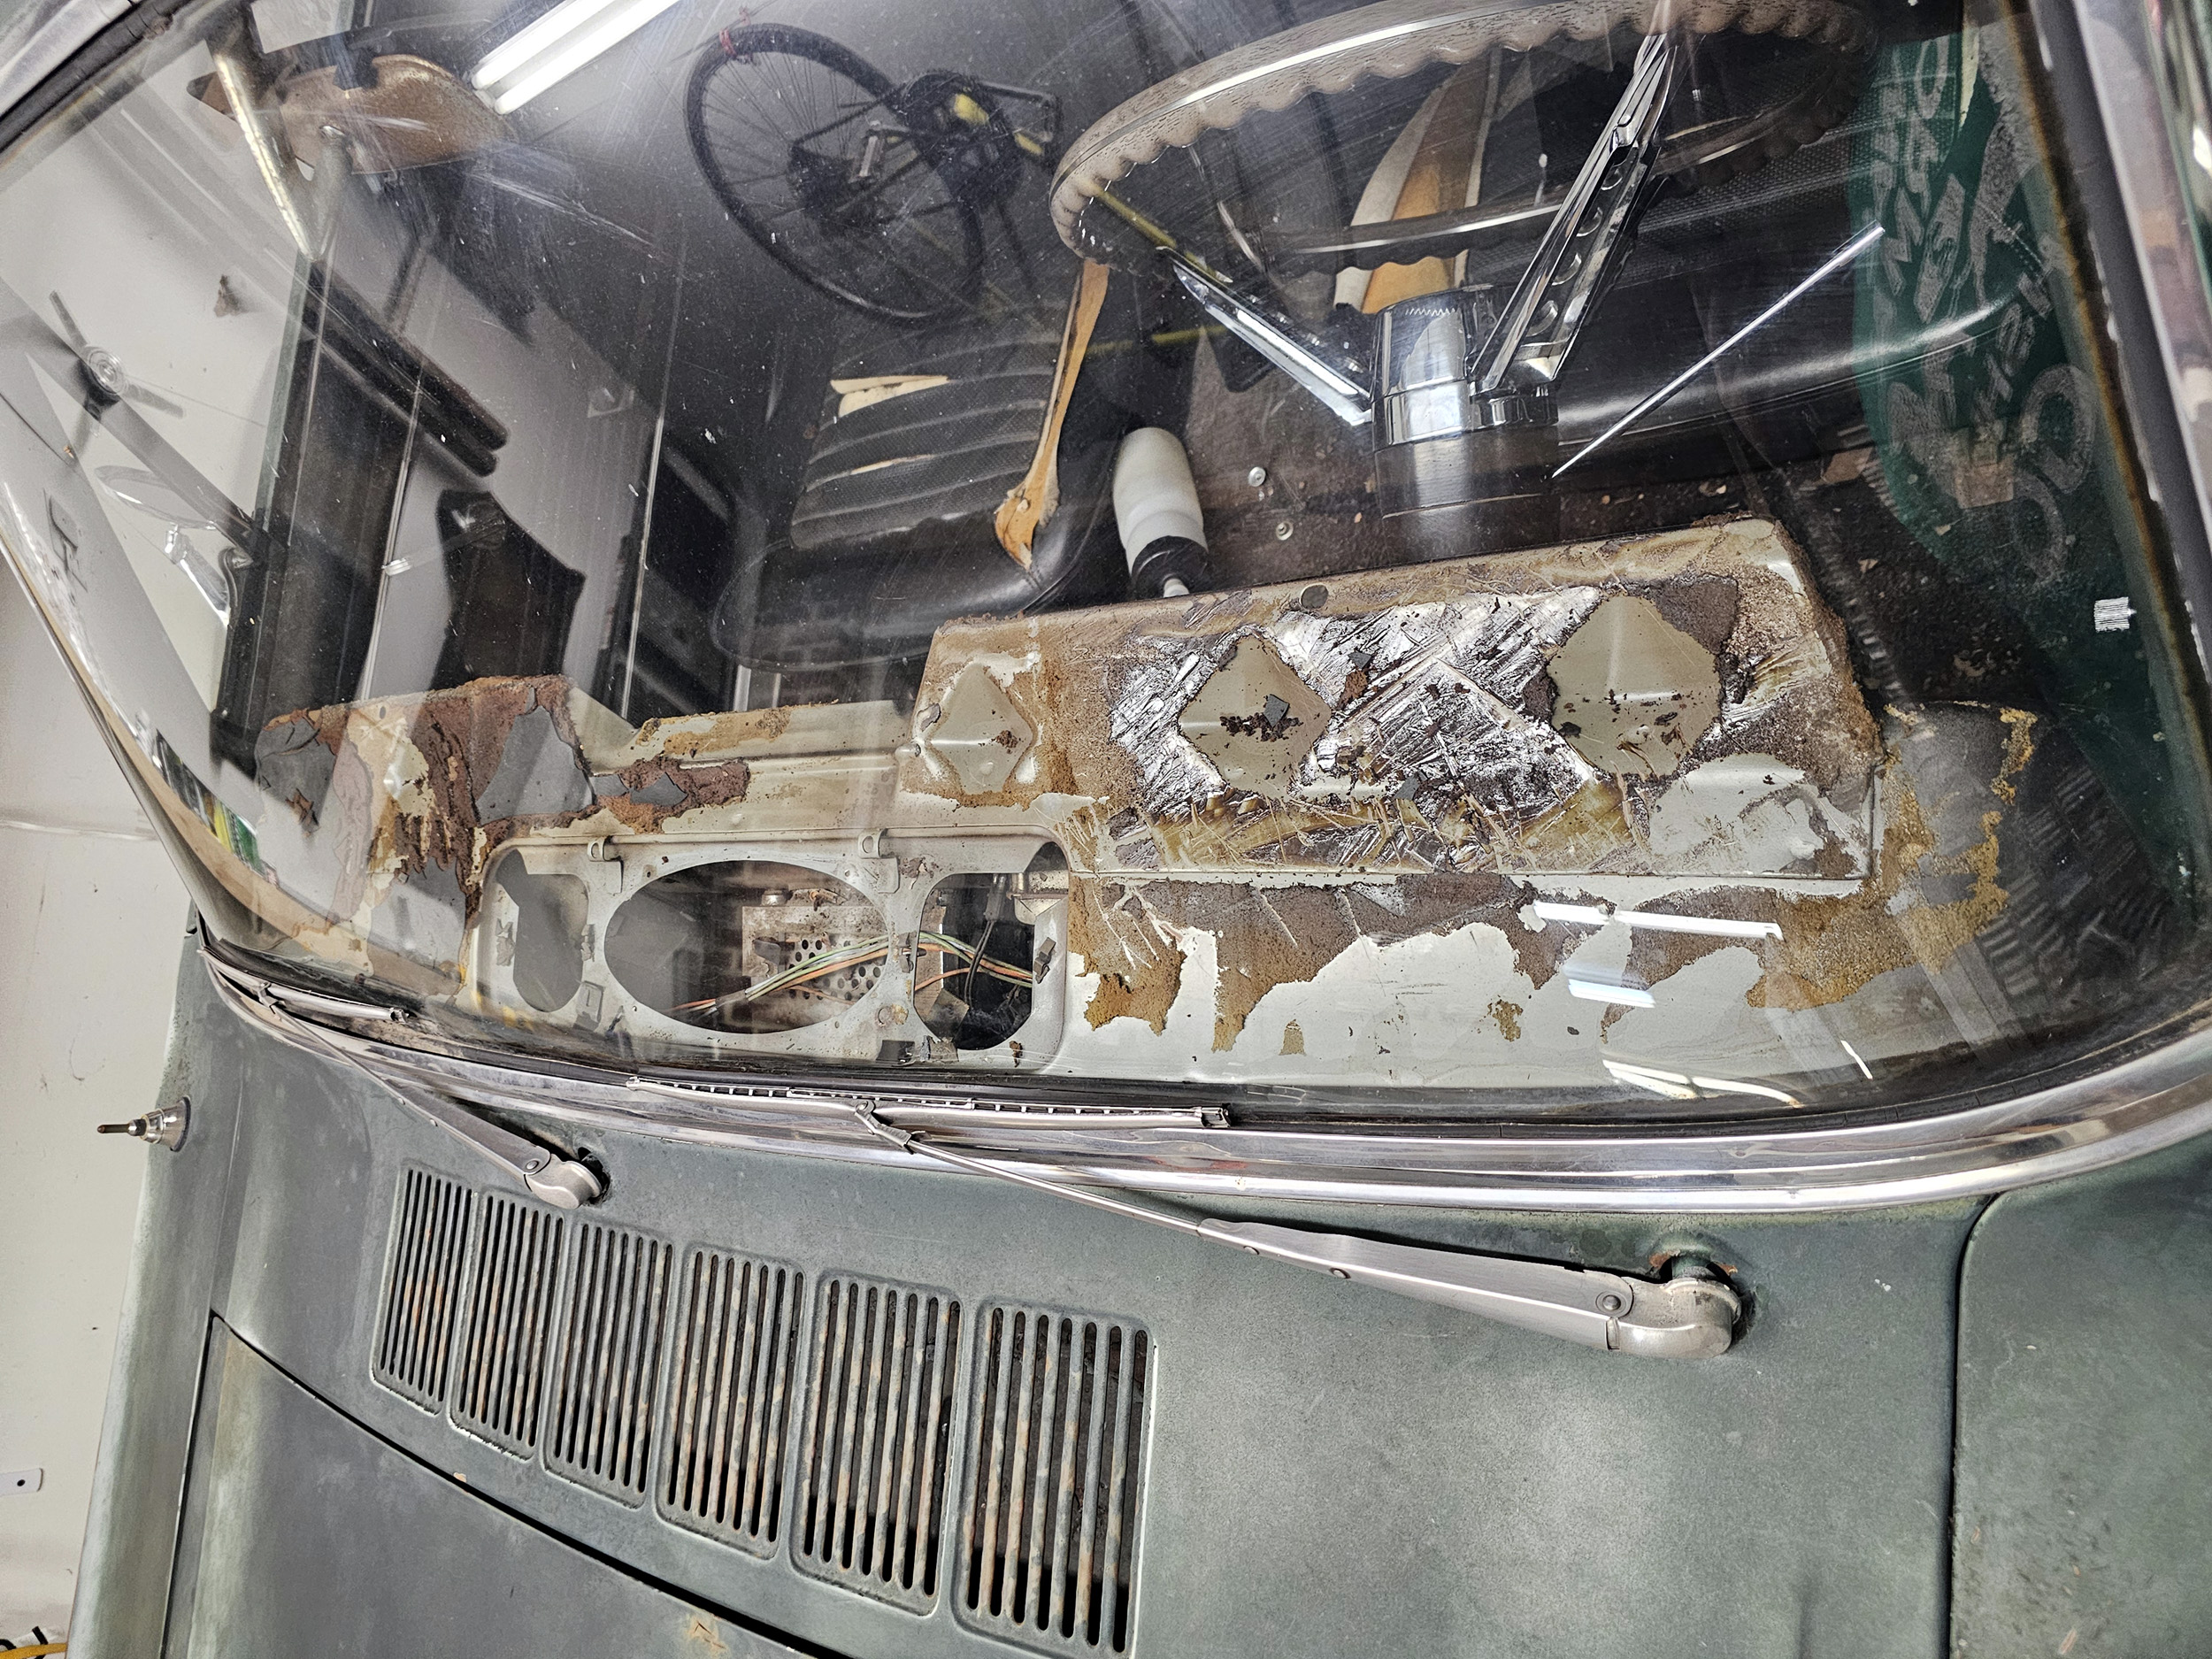
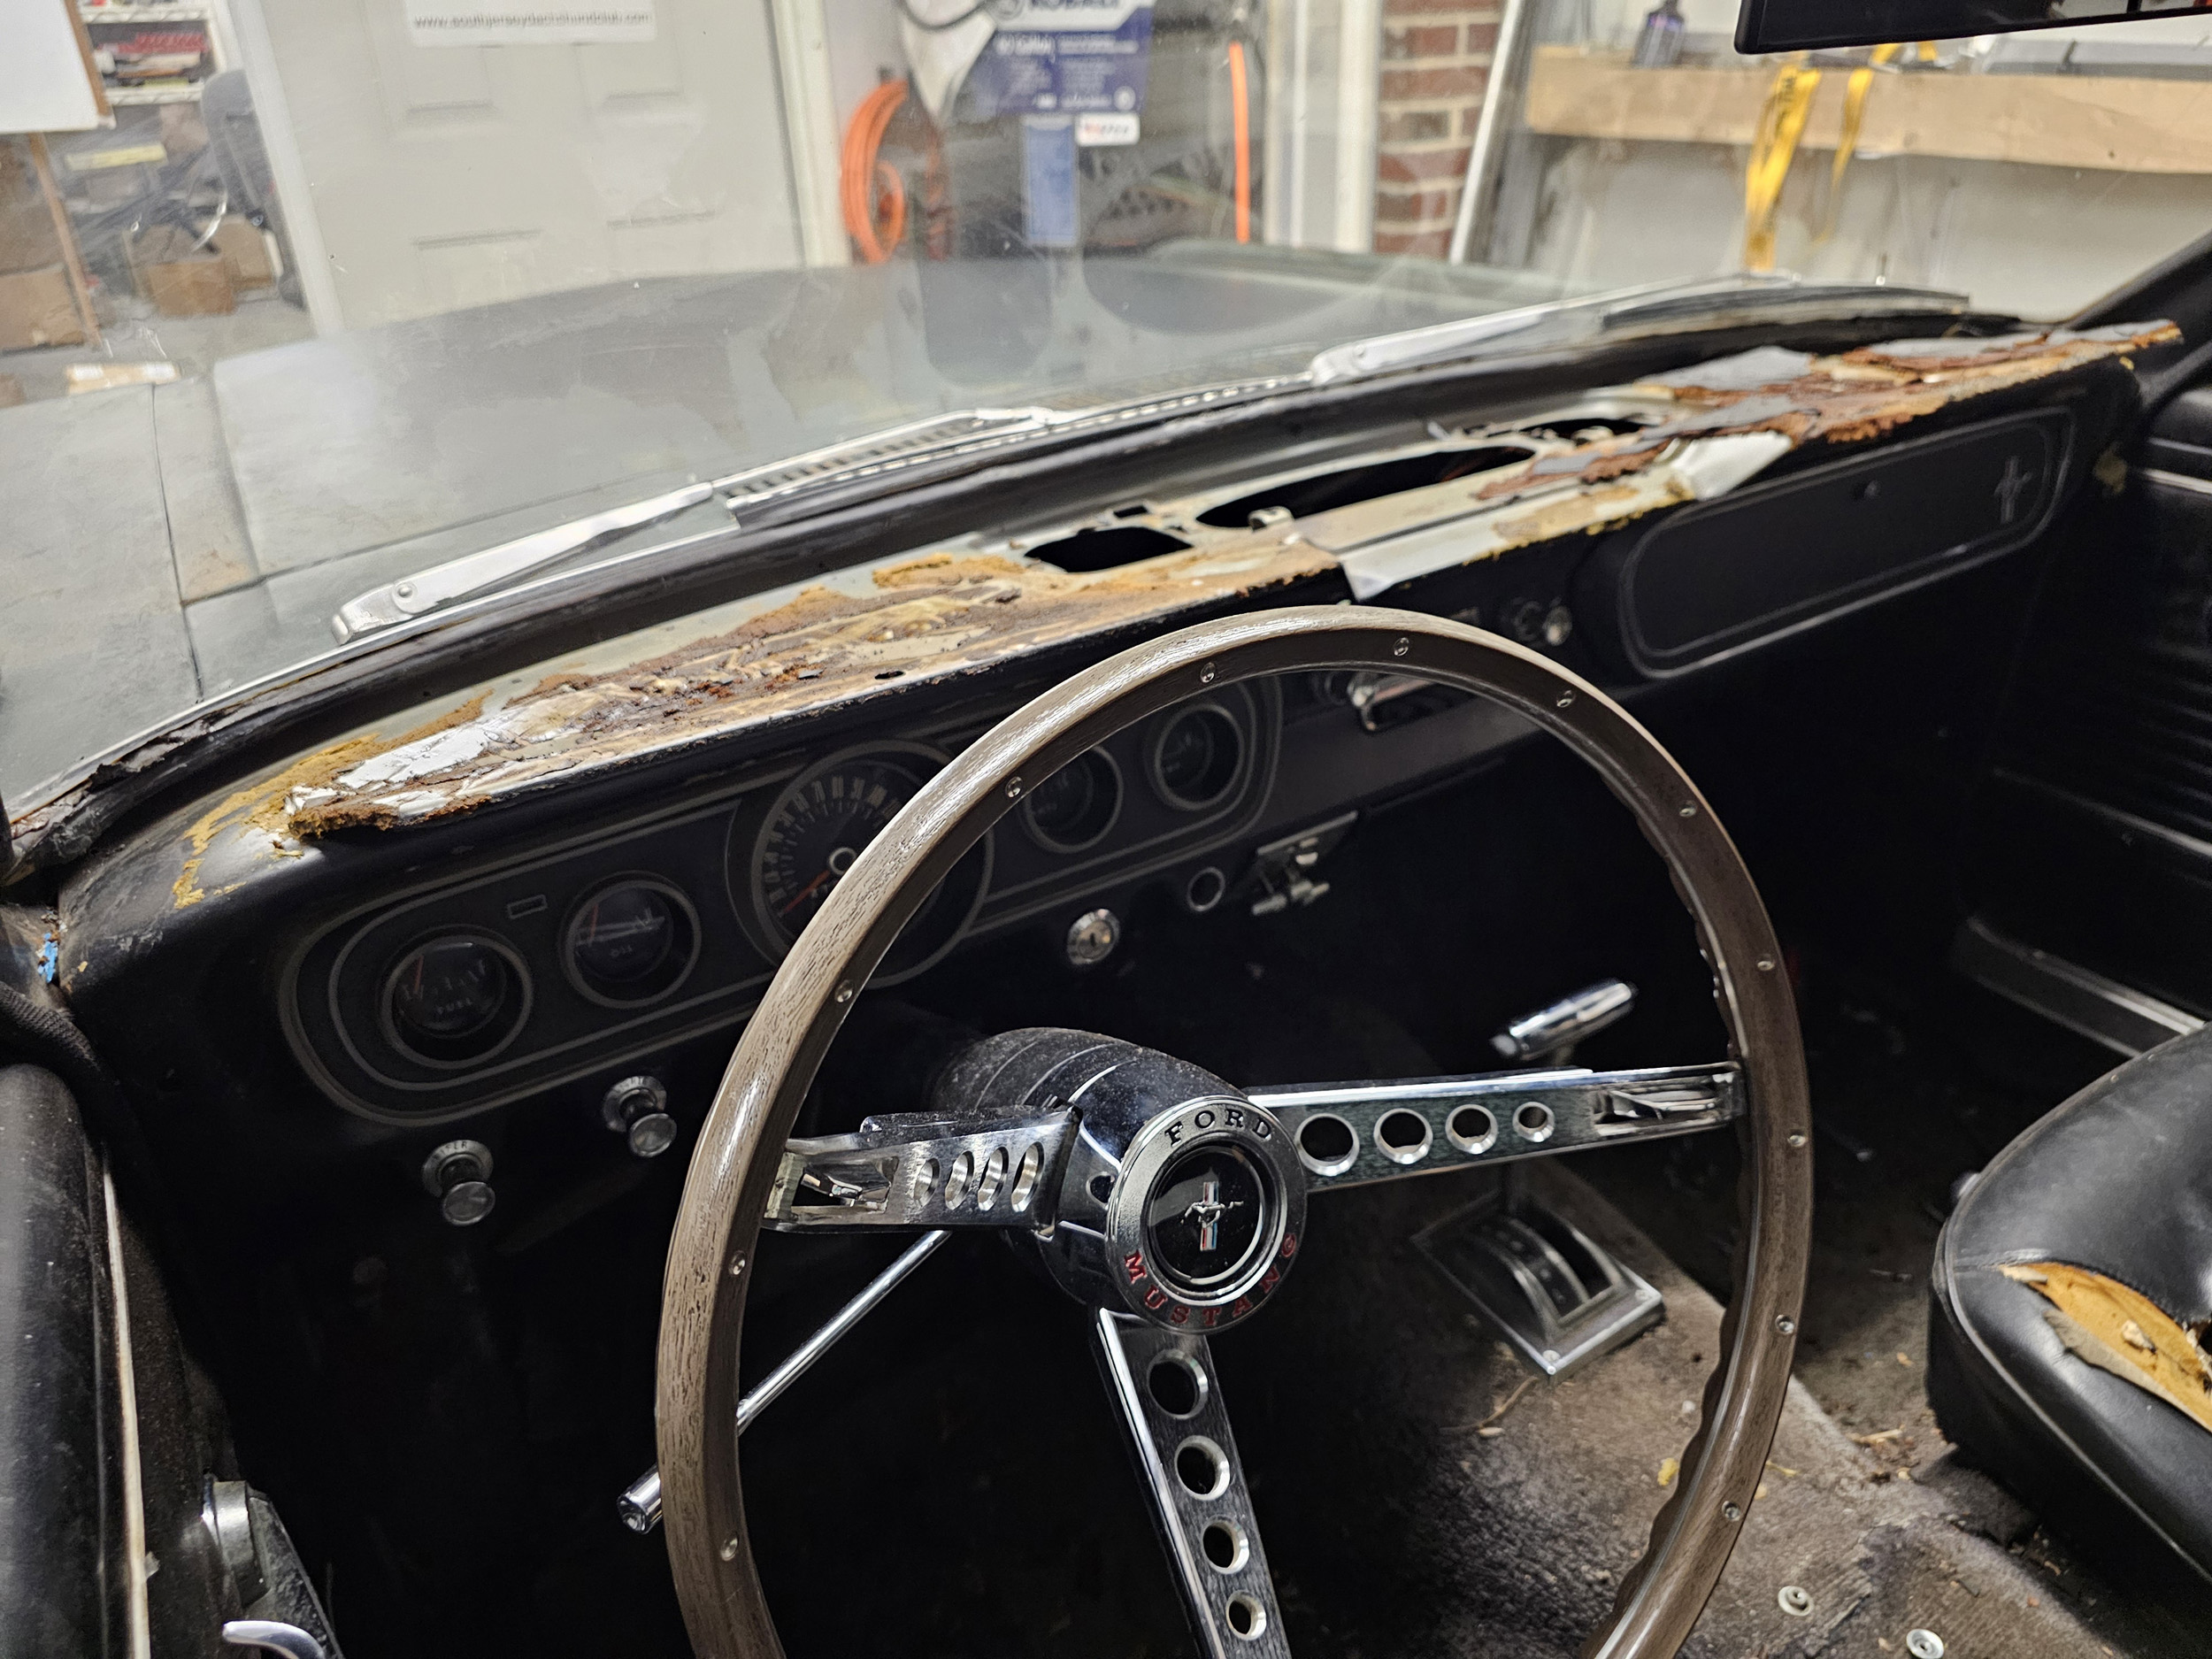
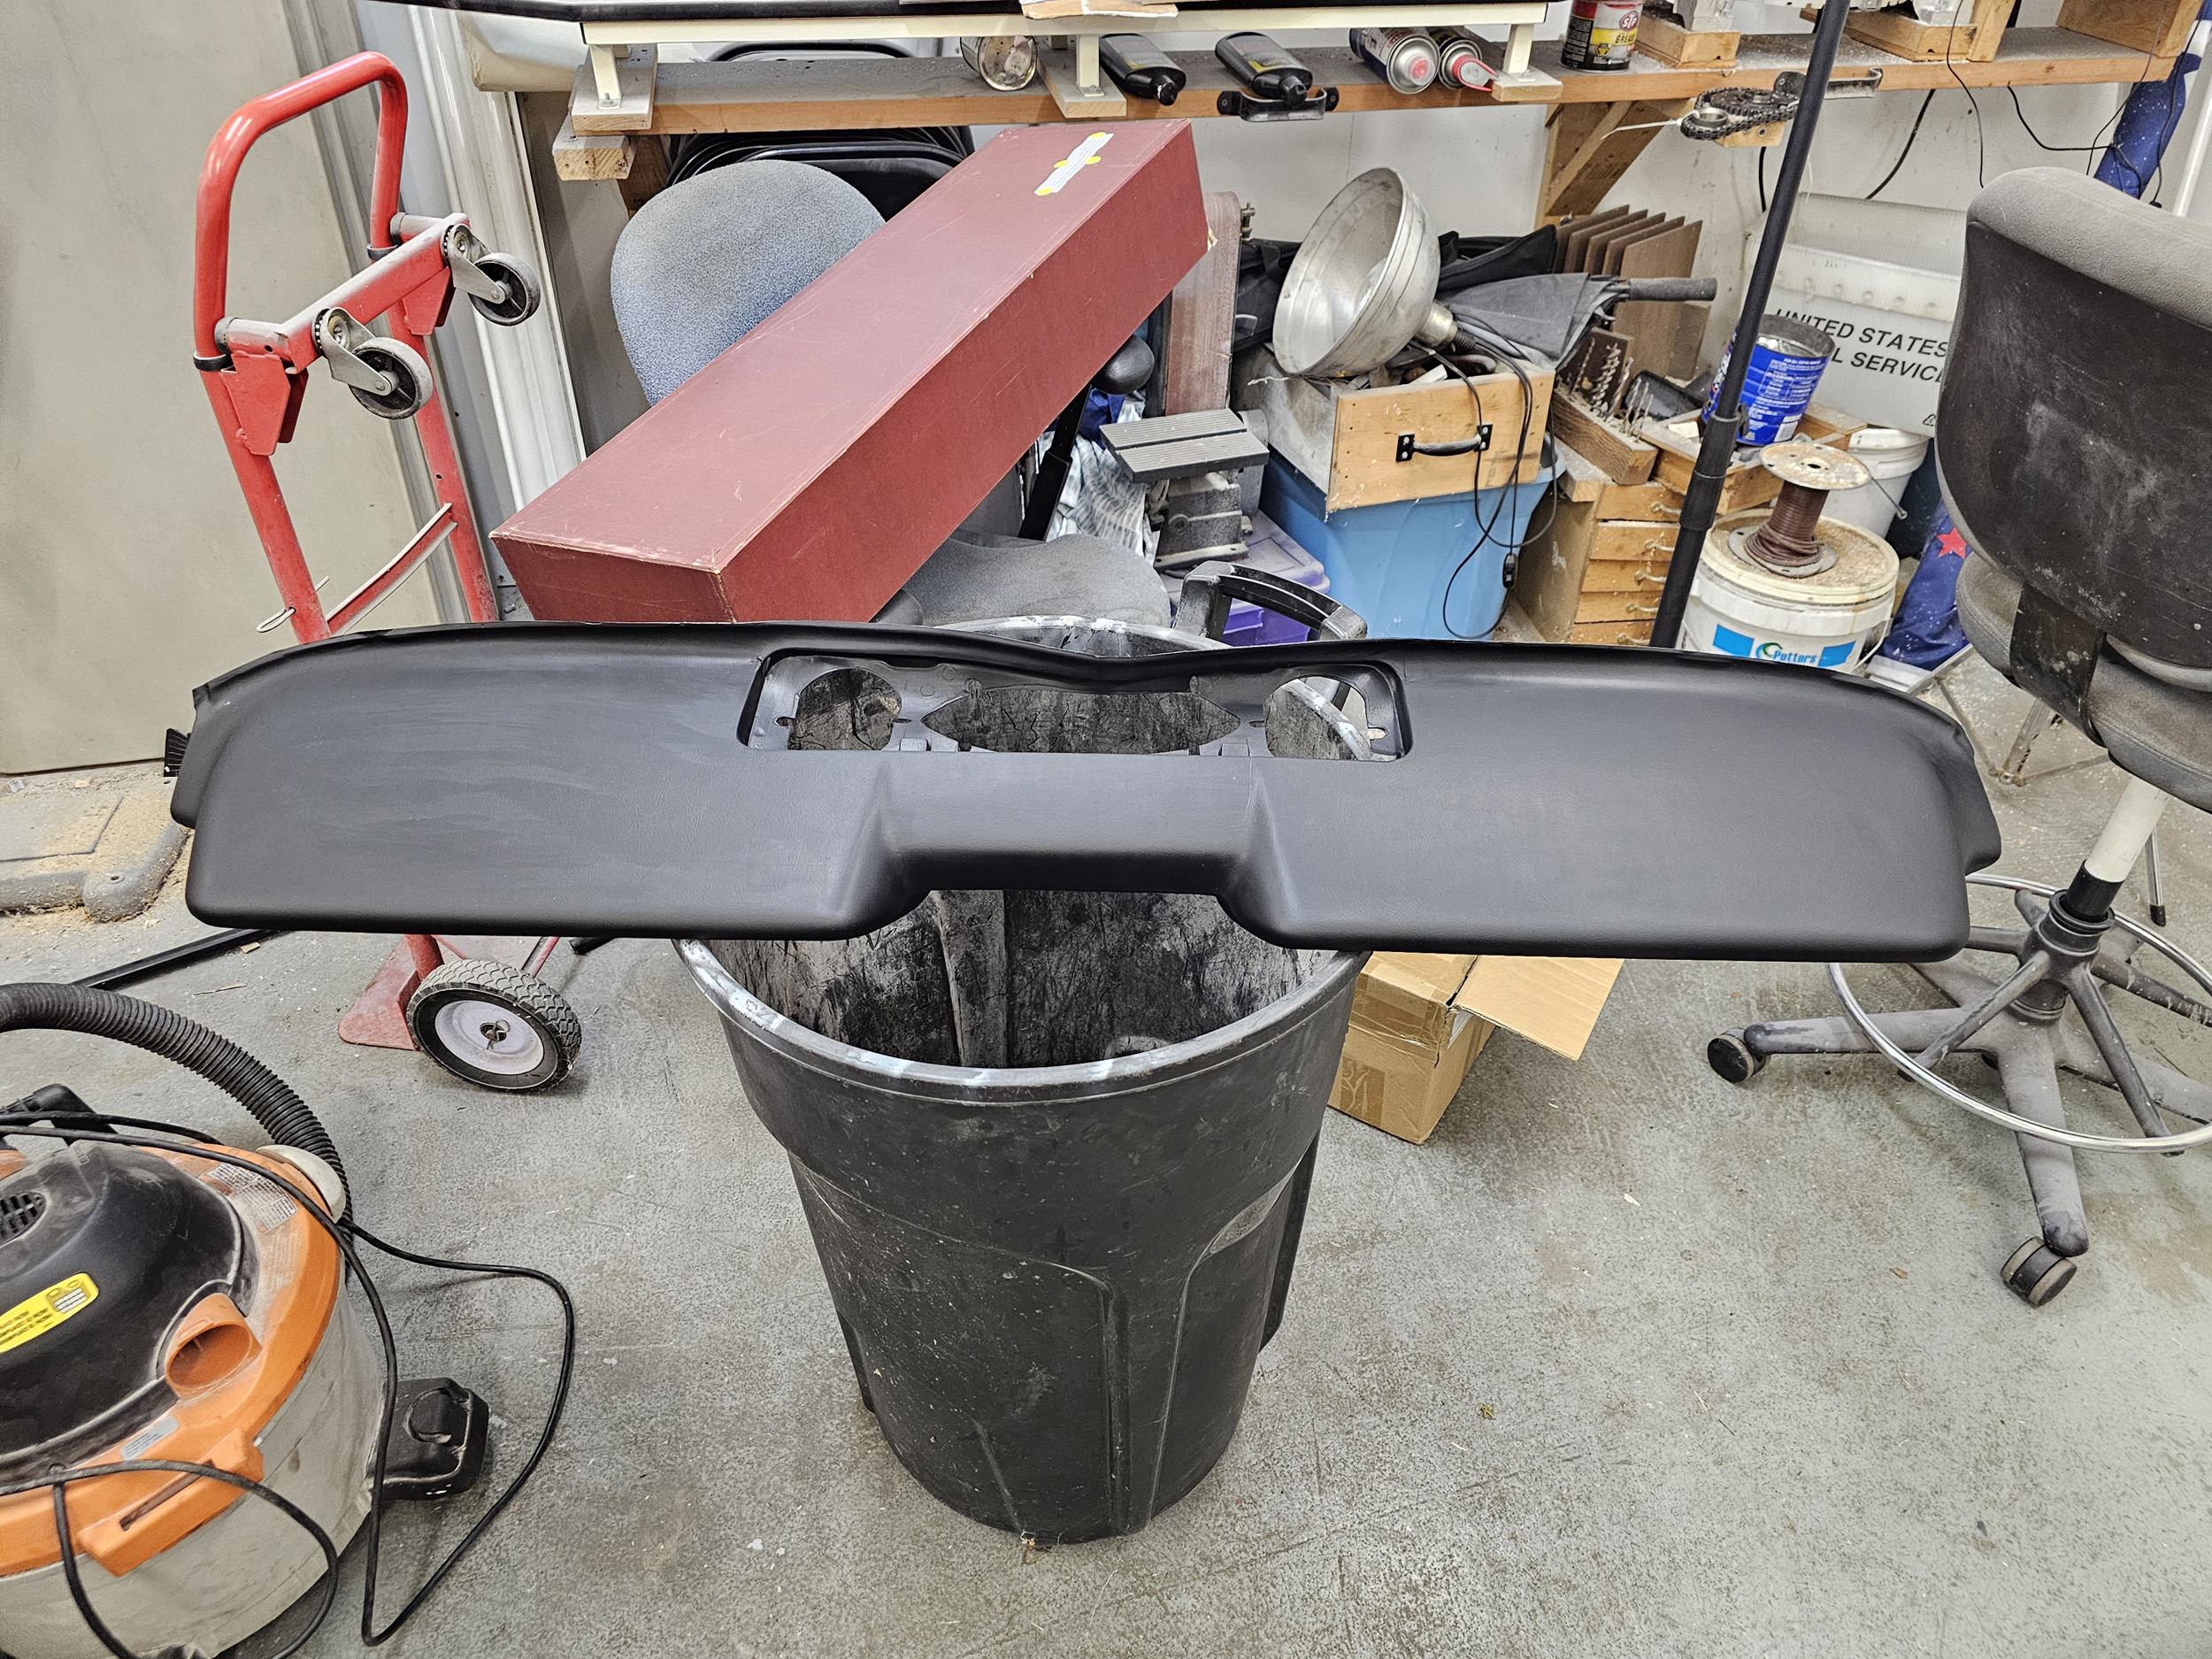
There are 4 studs in the foam pointing towards the metal dash
frame. The stud on the driver’s side is accessible with the dashboard removed.
From a YouTube gave me the idea to access the 2 studs in the center. The
speaker was completely disintegrated by now. I had no plans on replacing it.
With the speaker removed 2 more studs were very easy to get to. The passenger
side stud can be accessed with the glove box removed. It is 60 year old cardboard in completely perfect
condition. I am not removing it. So for now 3 of the 4 studs have nuts
installed on them.
Dash
Lights
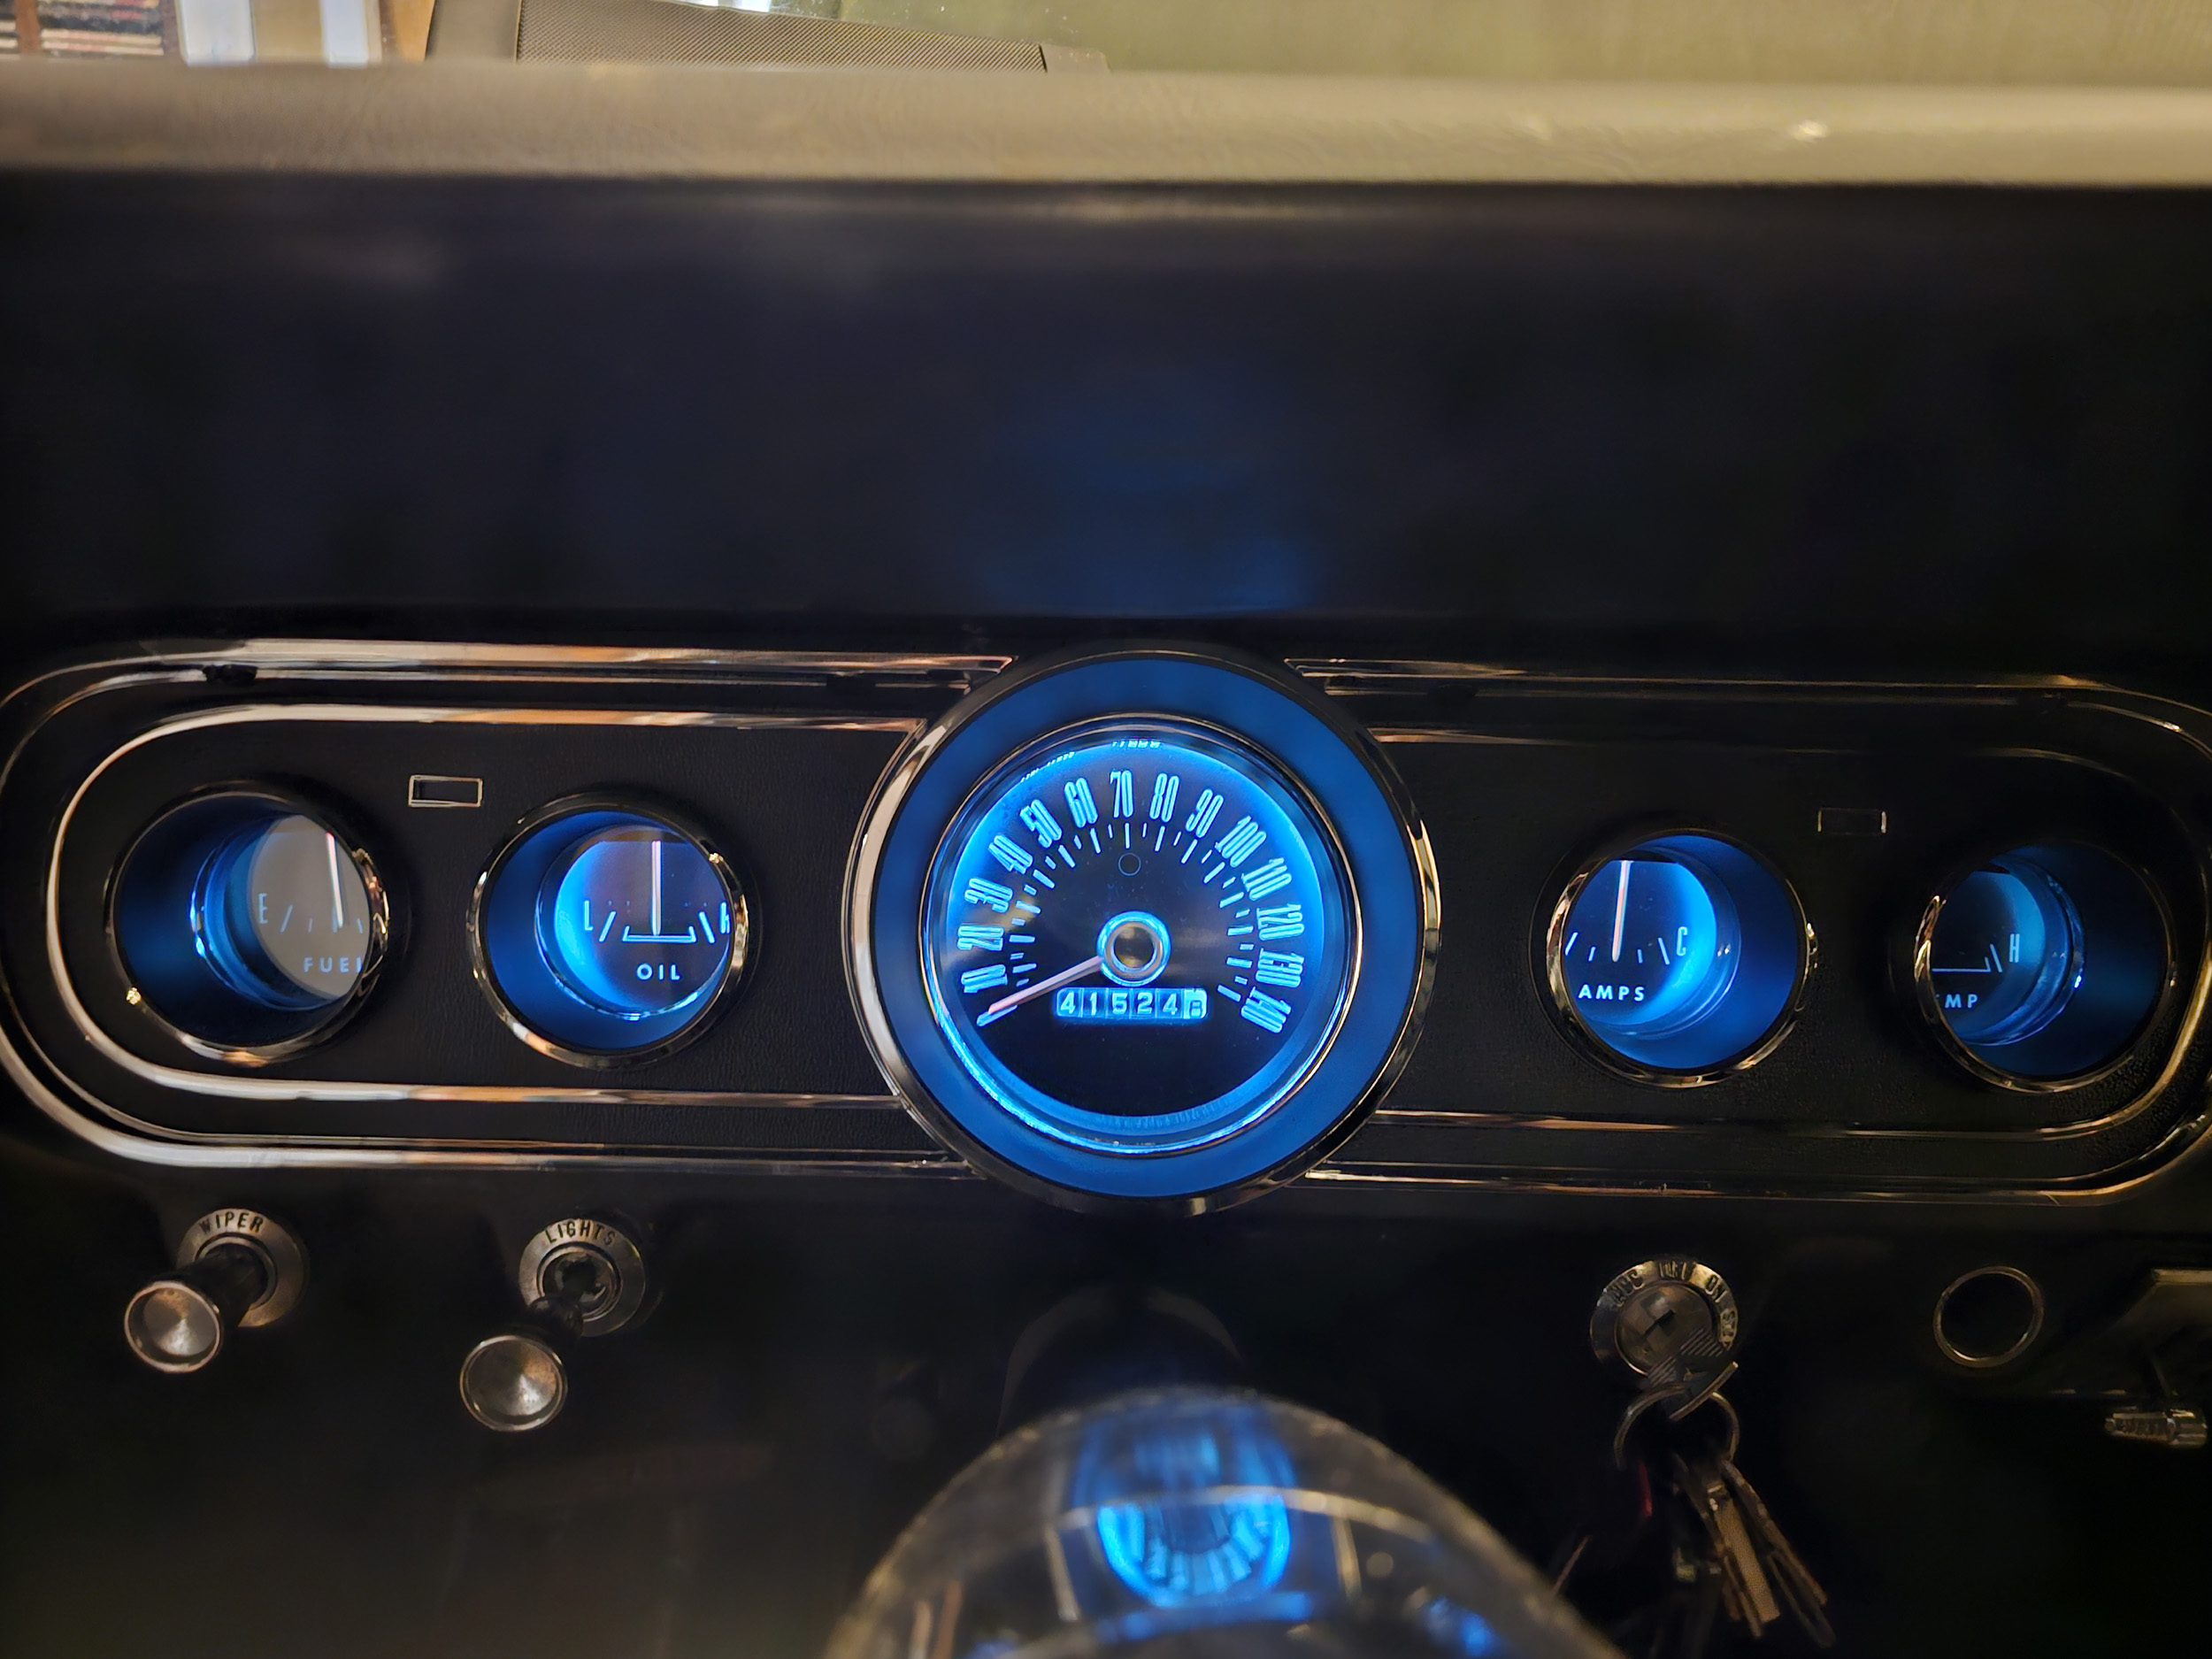
The dash lights mostly did not work as it turned out because they
were burned out incandescent bulbs. There are direct
replacement LEDs so I got a set of white that were much brighter than
the original bulbs. The gauge frame has blue lenses making the dash lights deep
blue. I don’t remember my other Mustangs having blue dash lights but I would
MUCH prefer white. Getting the complete gauge cluster out was a bit of work
between the wires and speedometer cable not having ANY slack to access it all.
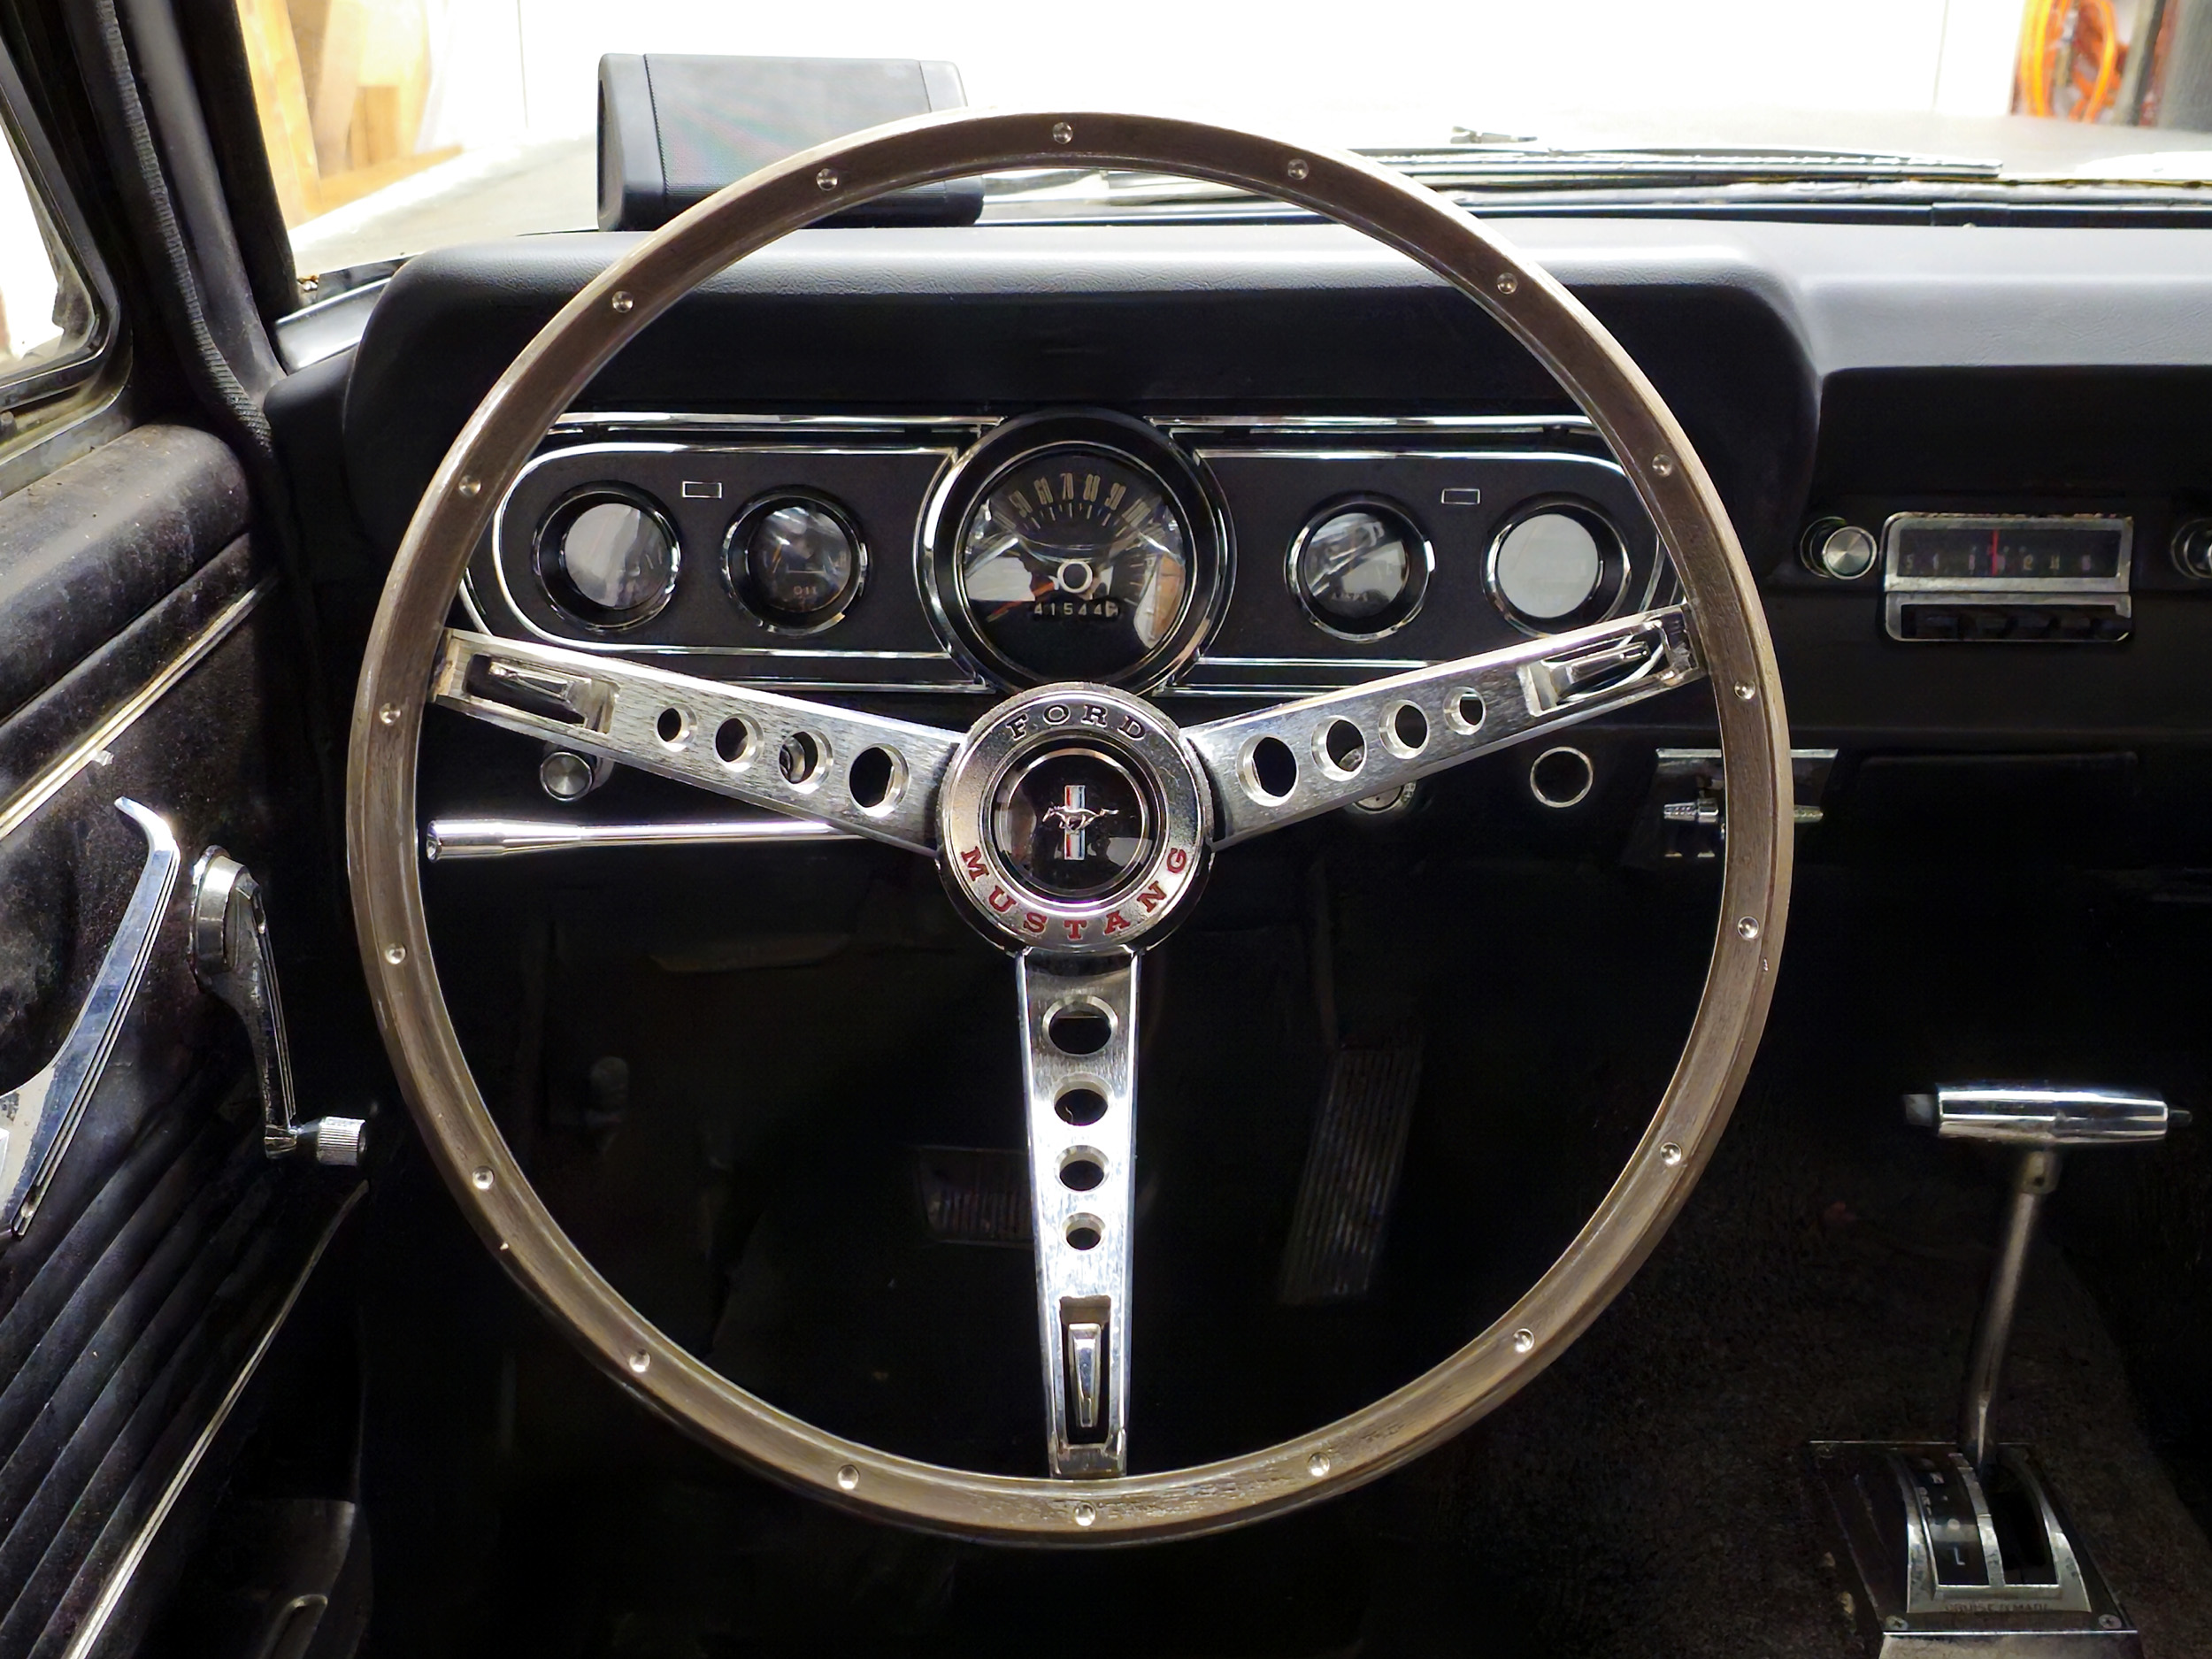
The gauge bezel was gray where the fake plastic chrome used to be so I got a
shiny new bezel and lens greatly improving the appearance with the Pony
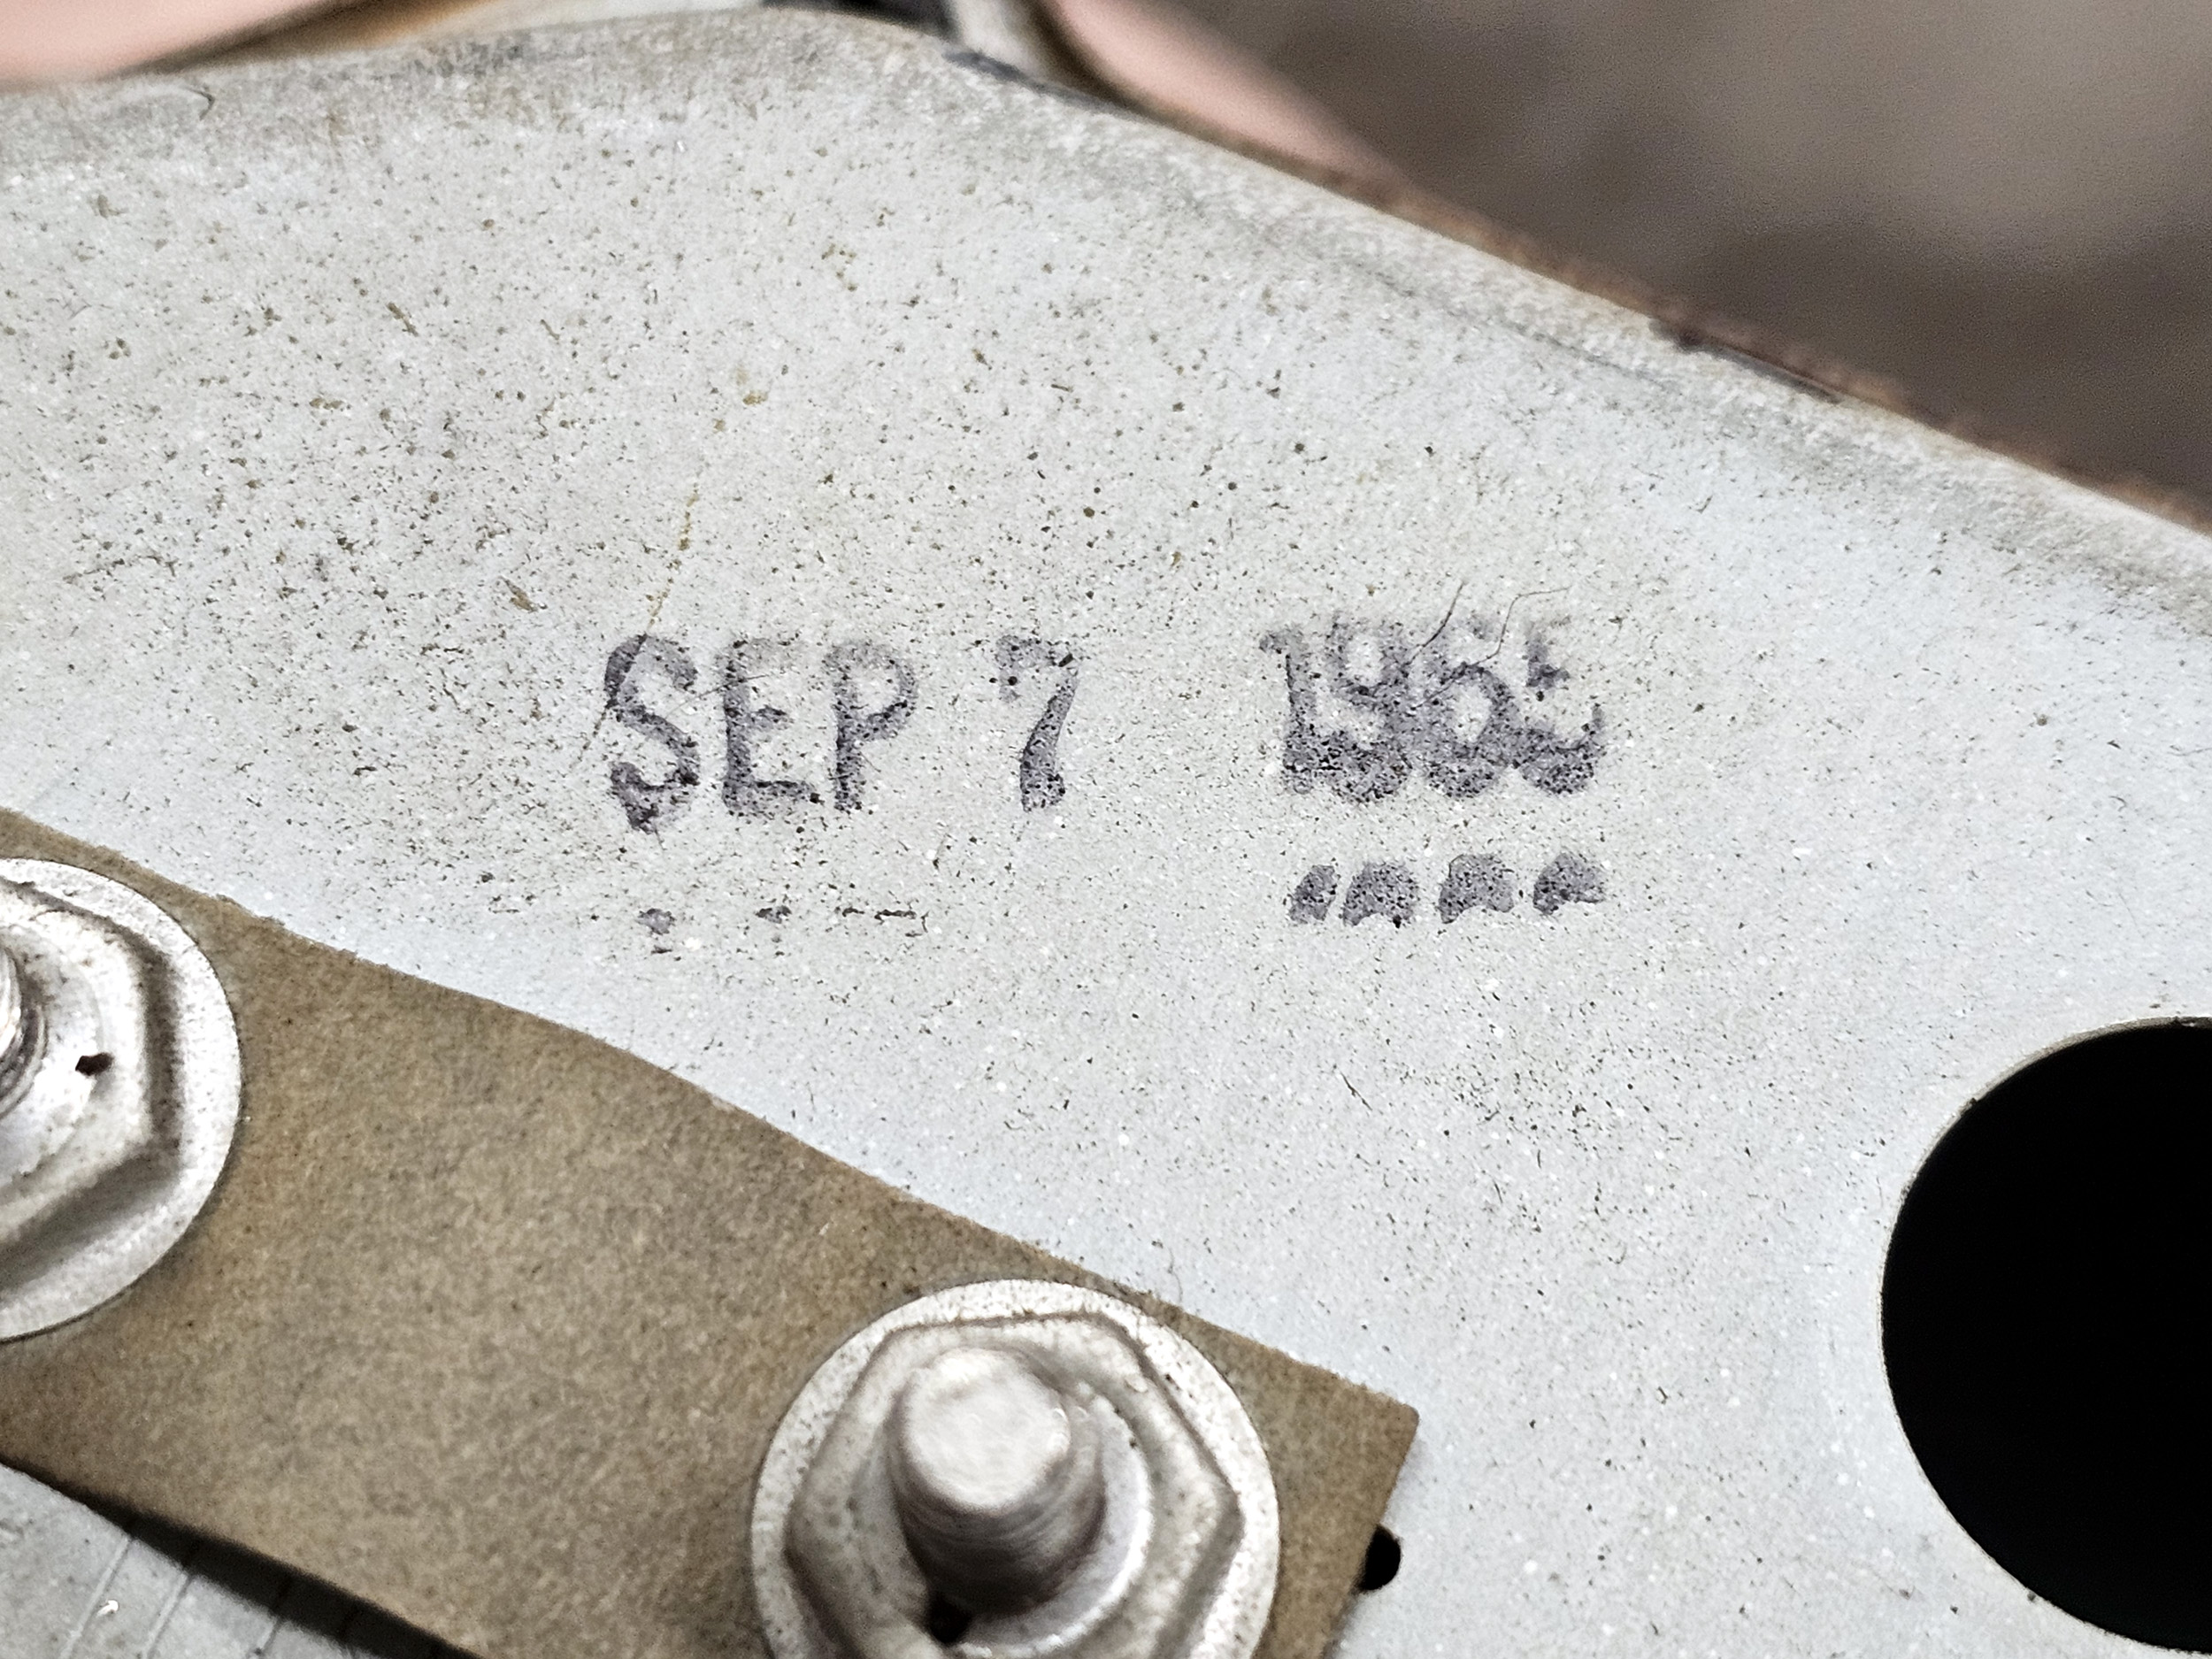
Interior steering wheel, new dash pad and gauge bezel. First photo is a date stamp on the back of
the gauge frame. With my favorite steering wheel and new dash
bezel it just great to look at while driving.
Heater
and Defrost
I have had the heater core bypassed with a hose right after I
first got the motor running. It was summer. Heat was not needed. I guessed
there might be a leak which later proved to be true. I did not want an
antifreeze dump into the car. I guessed the heater box was full of debris which
also turned out to be true. The only way to fix all of these issues was complete
removal.
These photos are documenting where to put the 3 cables back in
place.
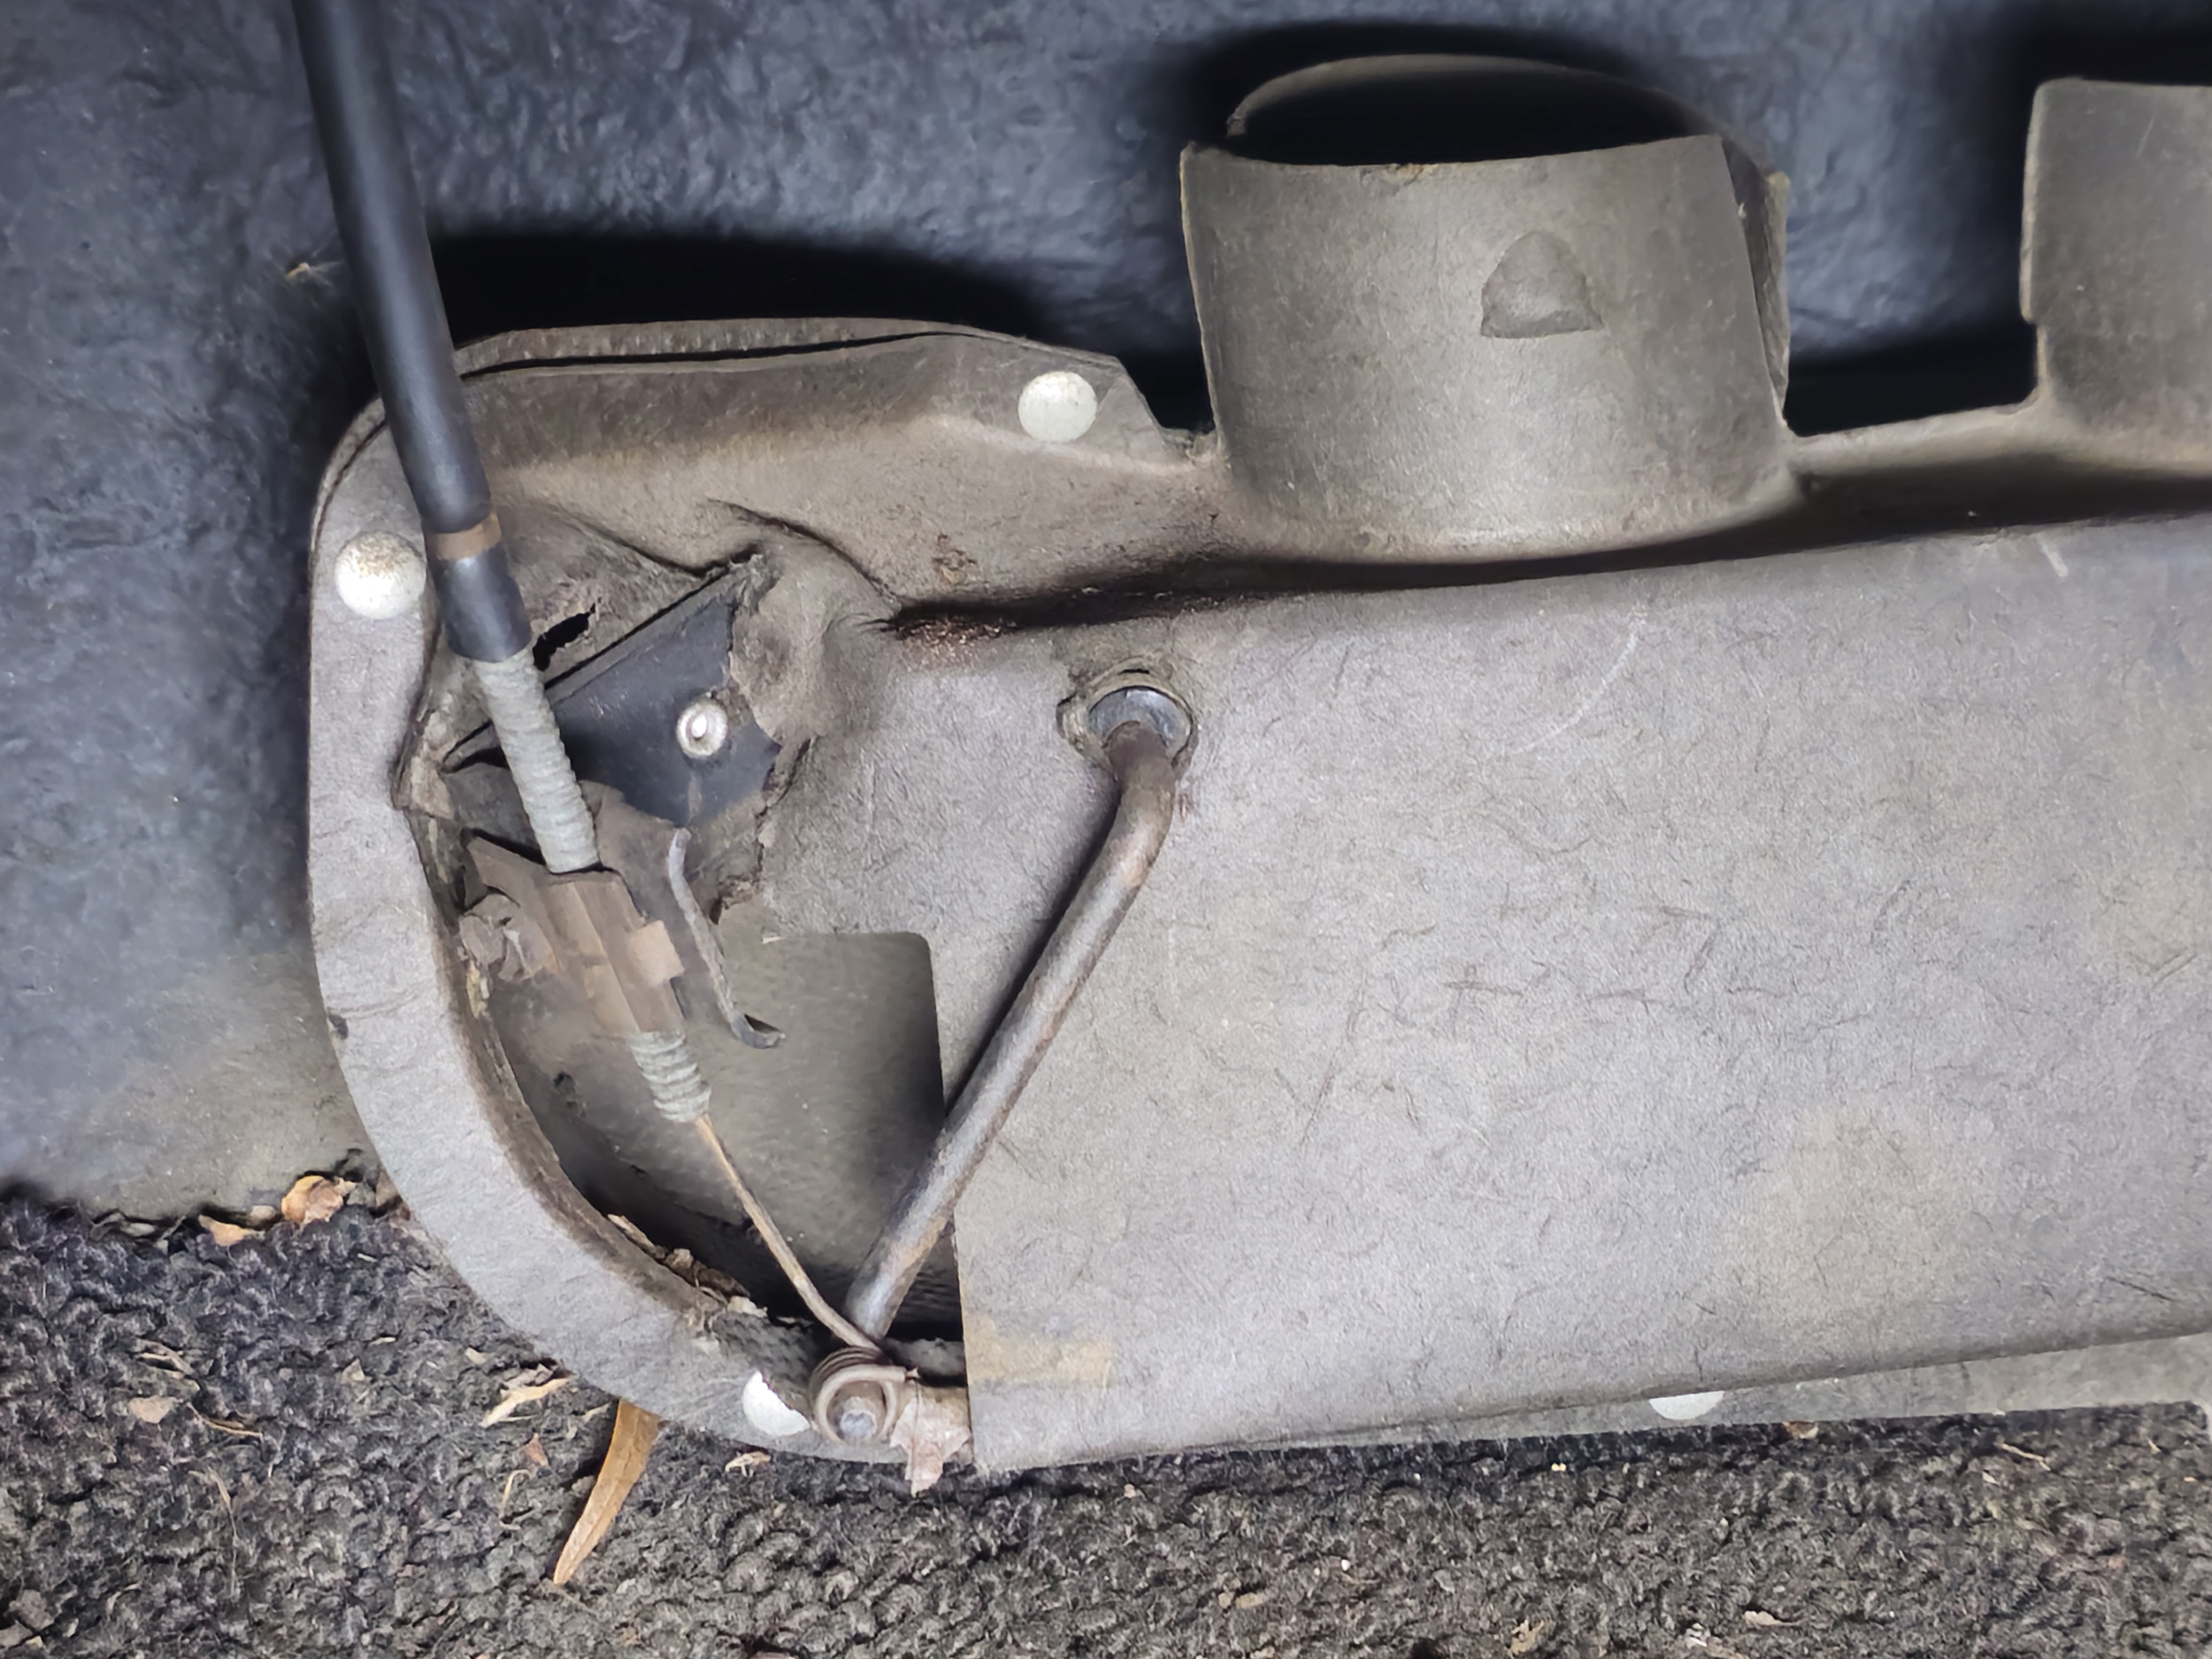
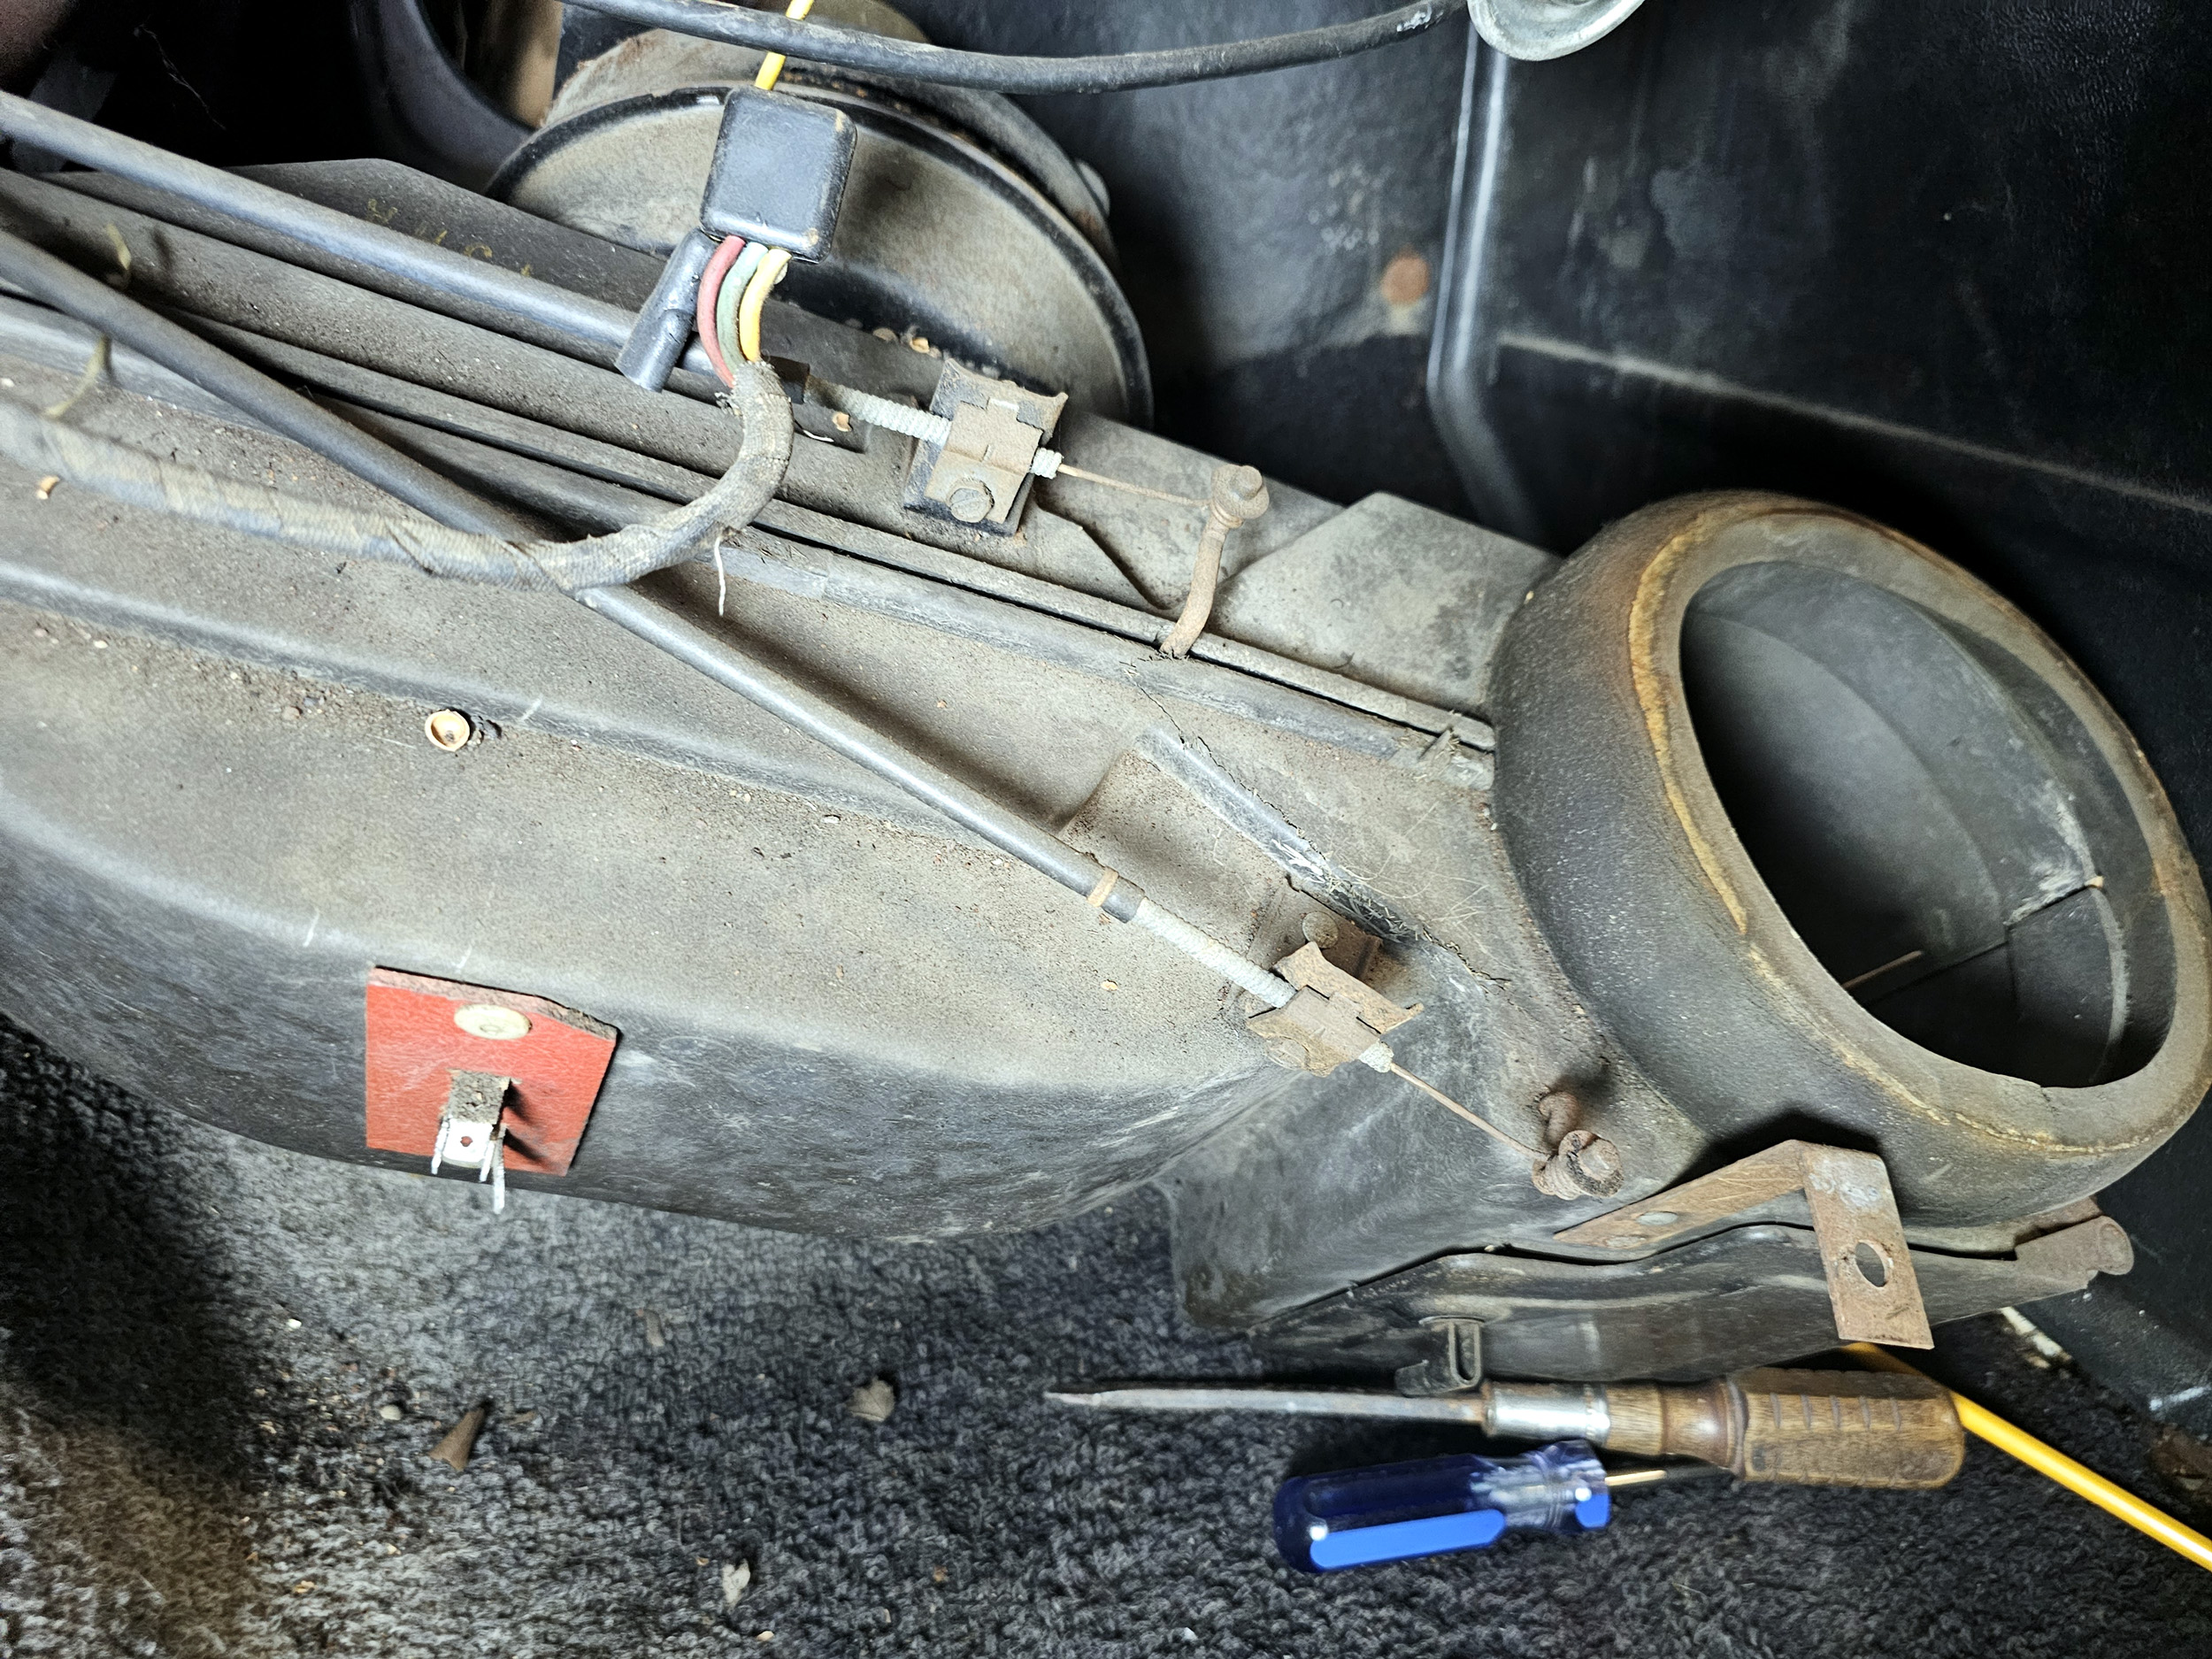
As I thought the heater box would be full of leaves and other
debris just like the rest of the car was. When I finally got to the heater core
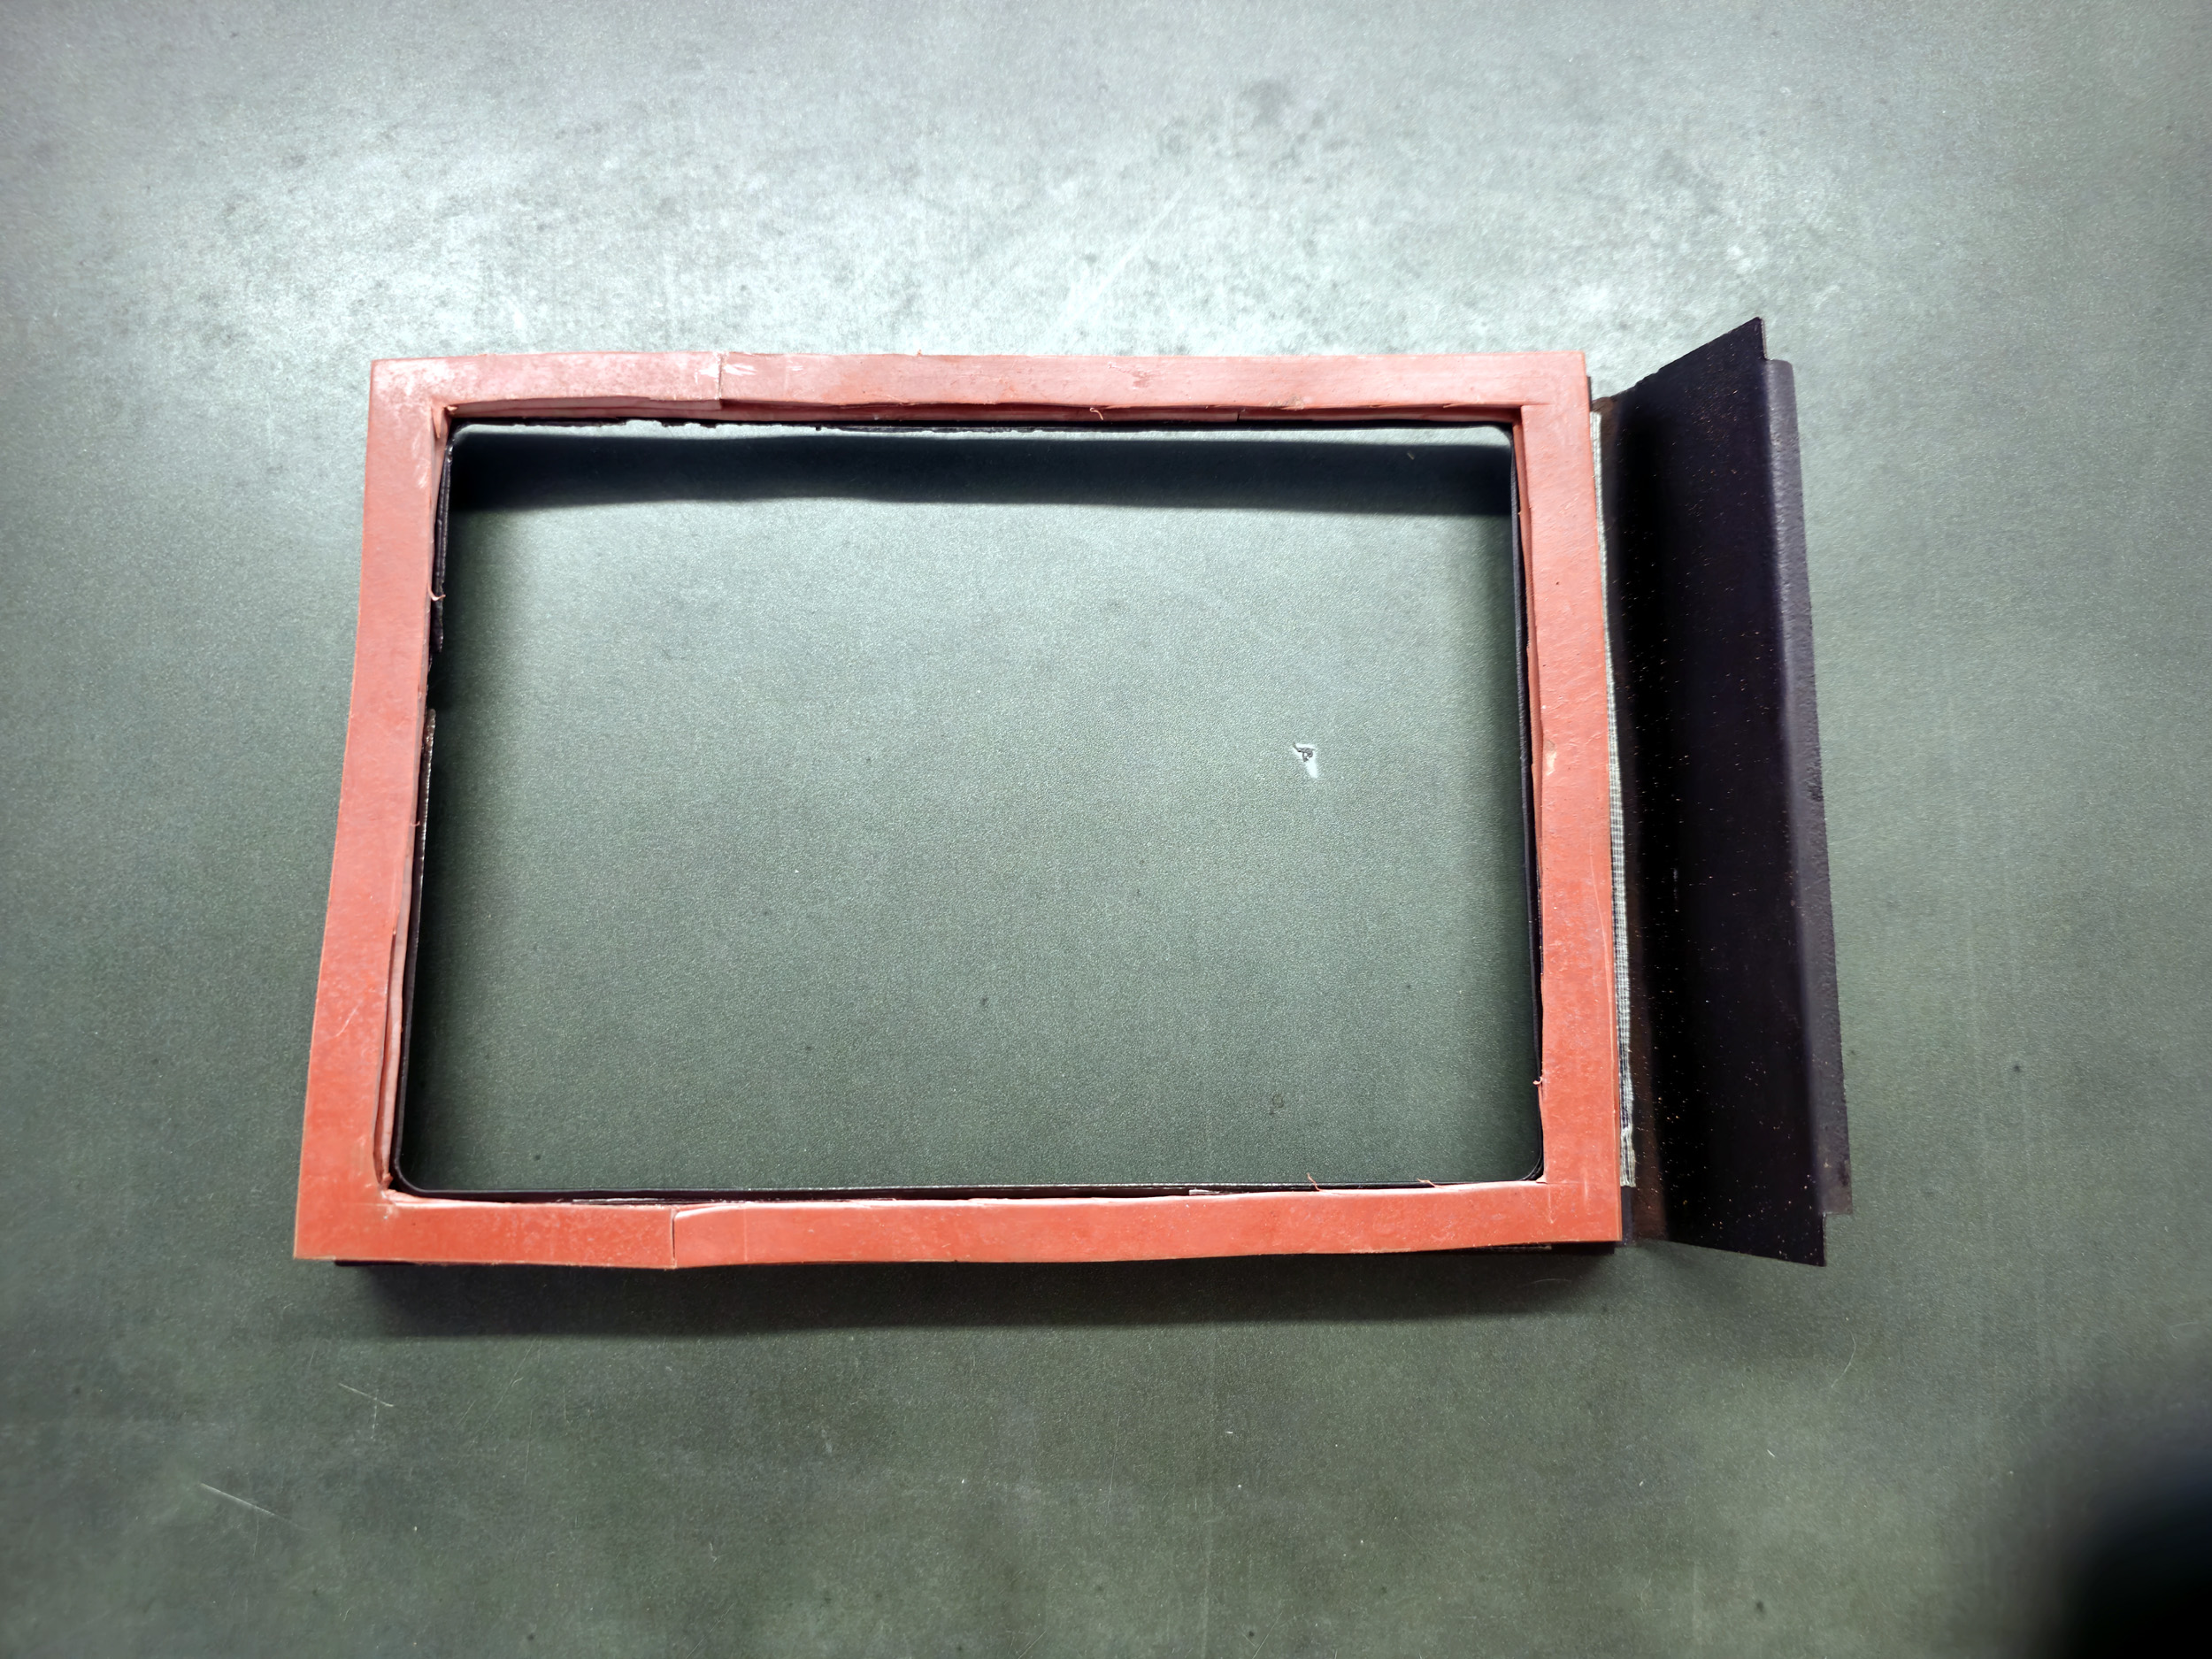
it was being held in place with 2 rubber gaskets that were dry and brittle.
This job was getting DONE so no waiting for more parts. I did not like what I
was seeing for heat rating for closed cell foam rubber sheets I had to make
another gasket. This orange rubber is from Home Depot section. 4) 6” x 6”x 1/8”
sheets were an annoying $30.00 but I got the new gasket made for one side. The
other side is still the original.
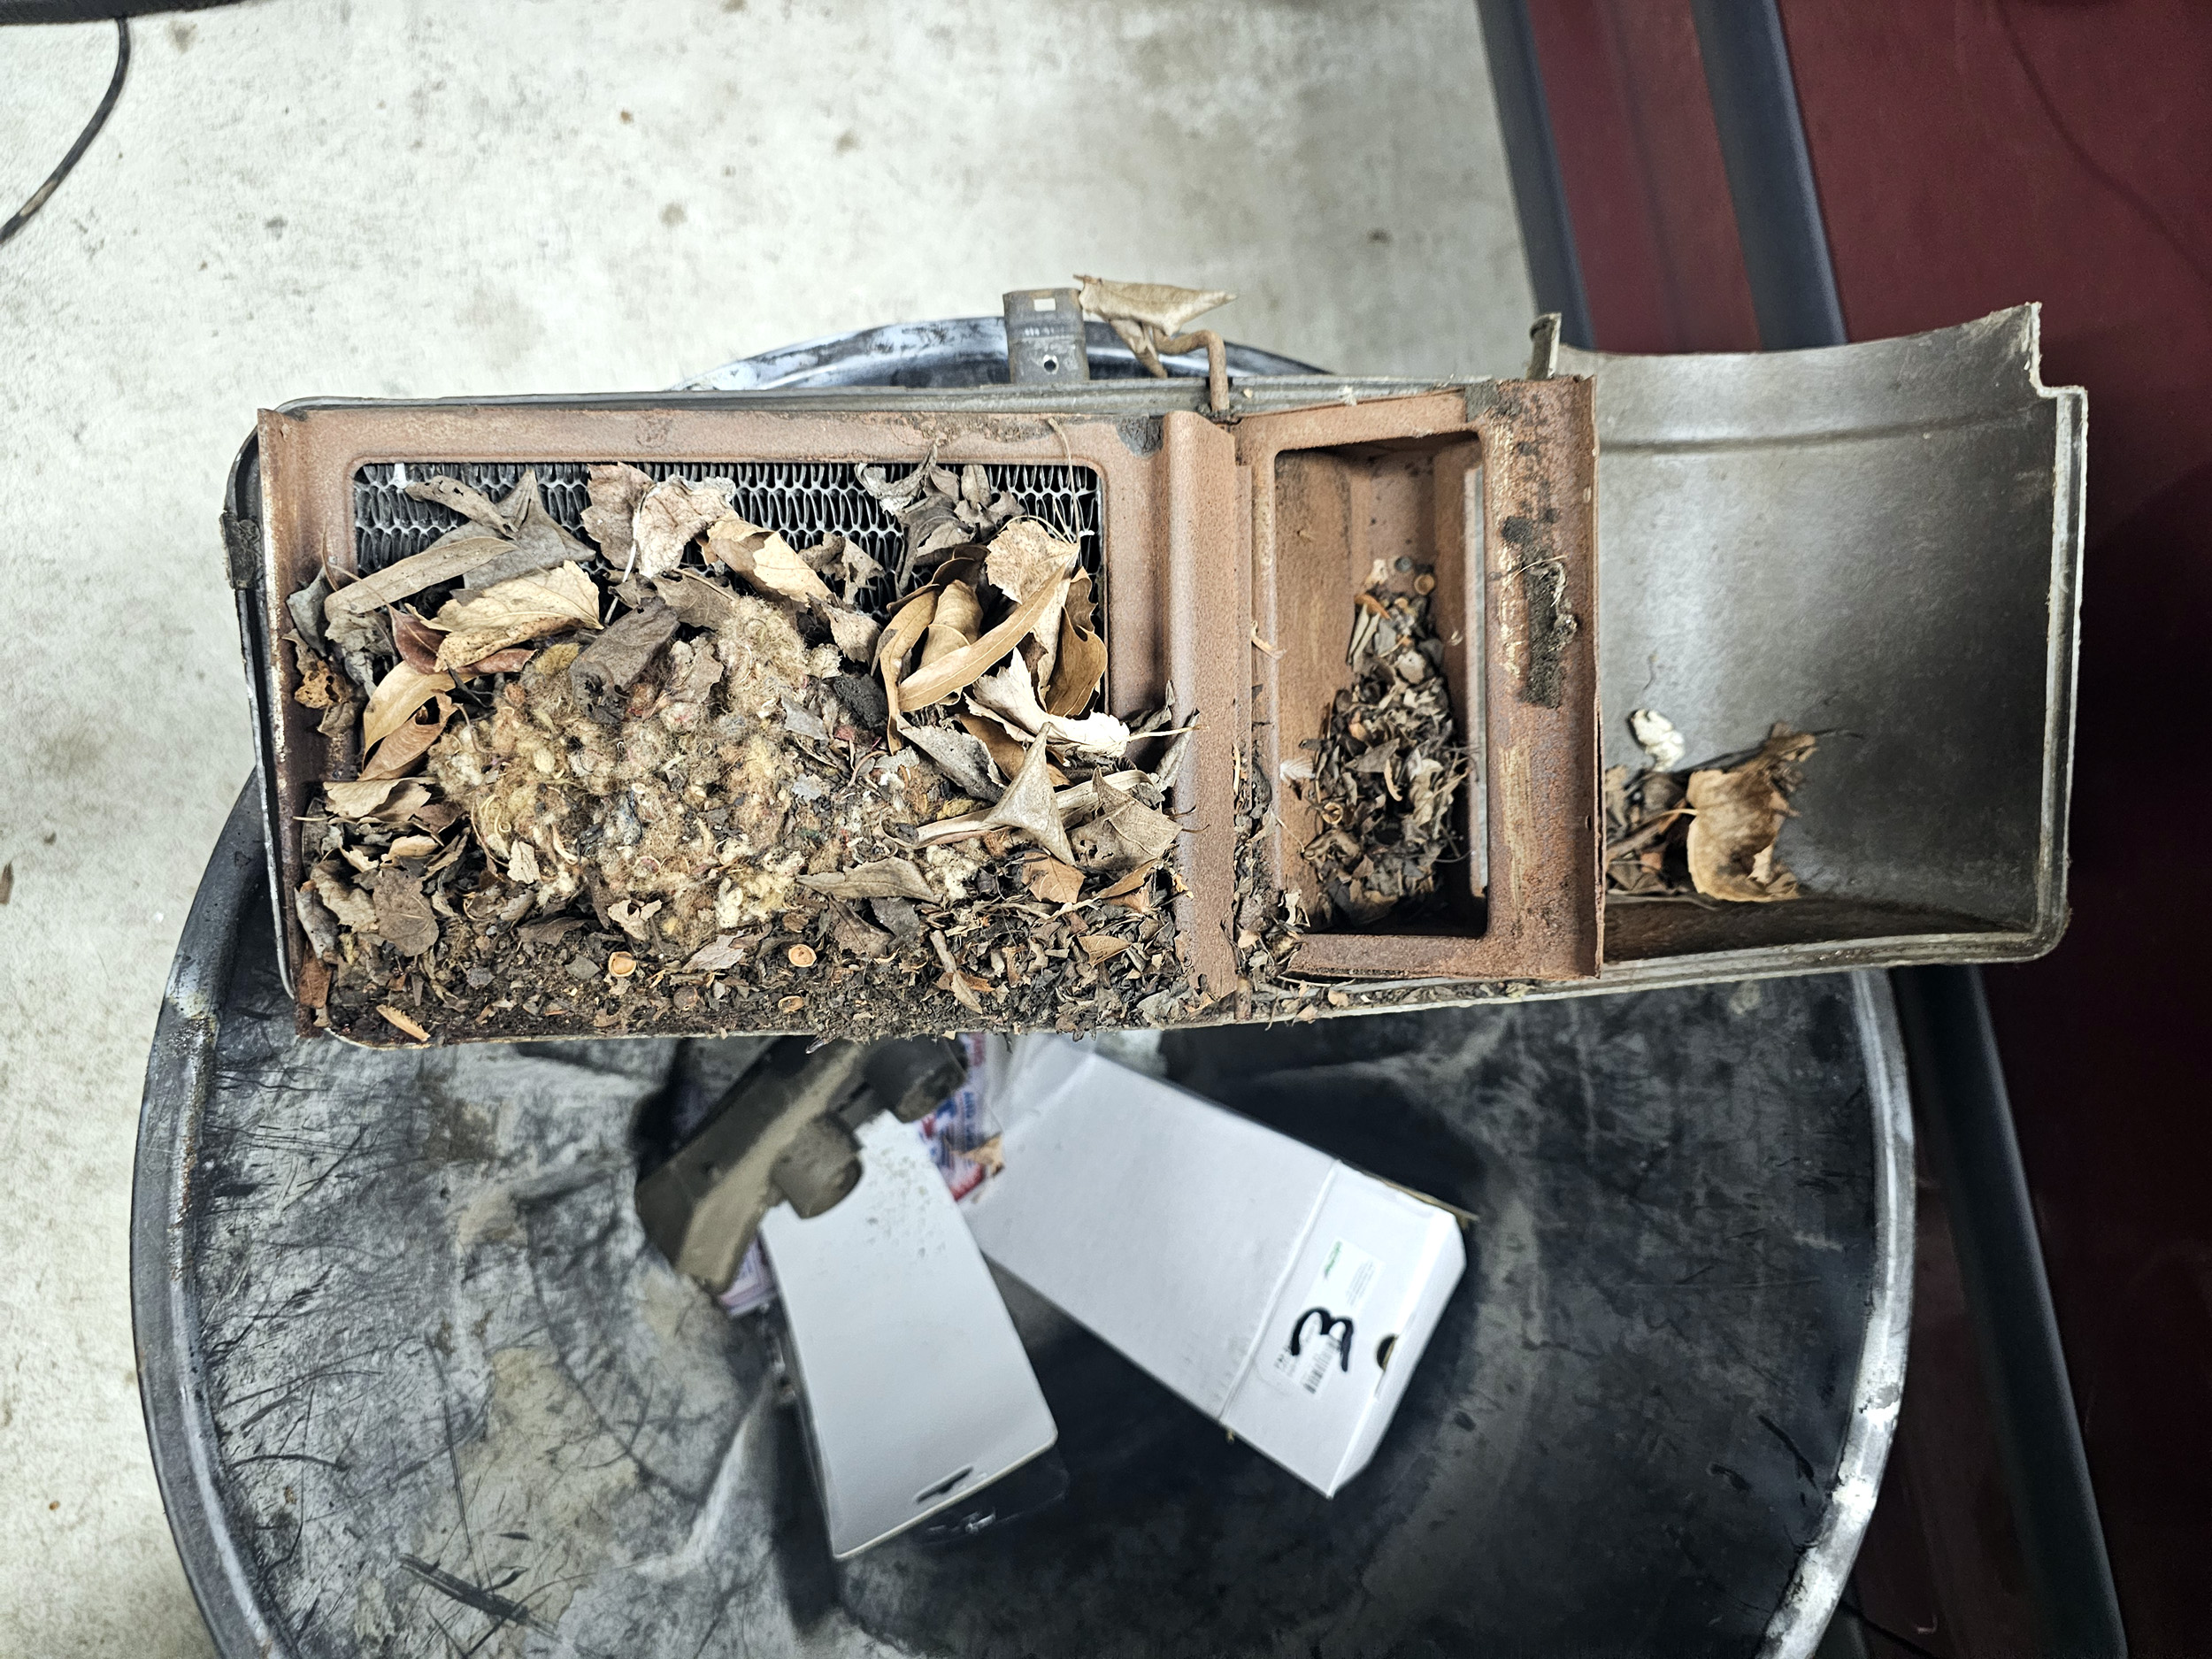
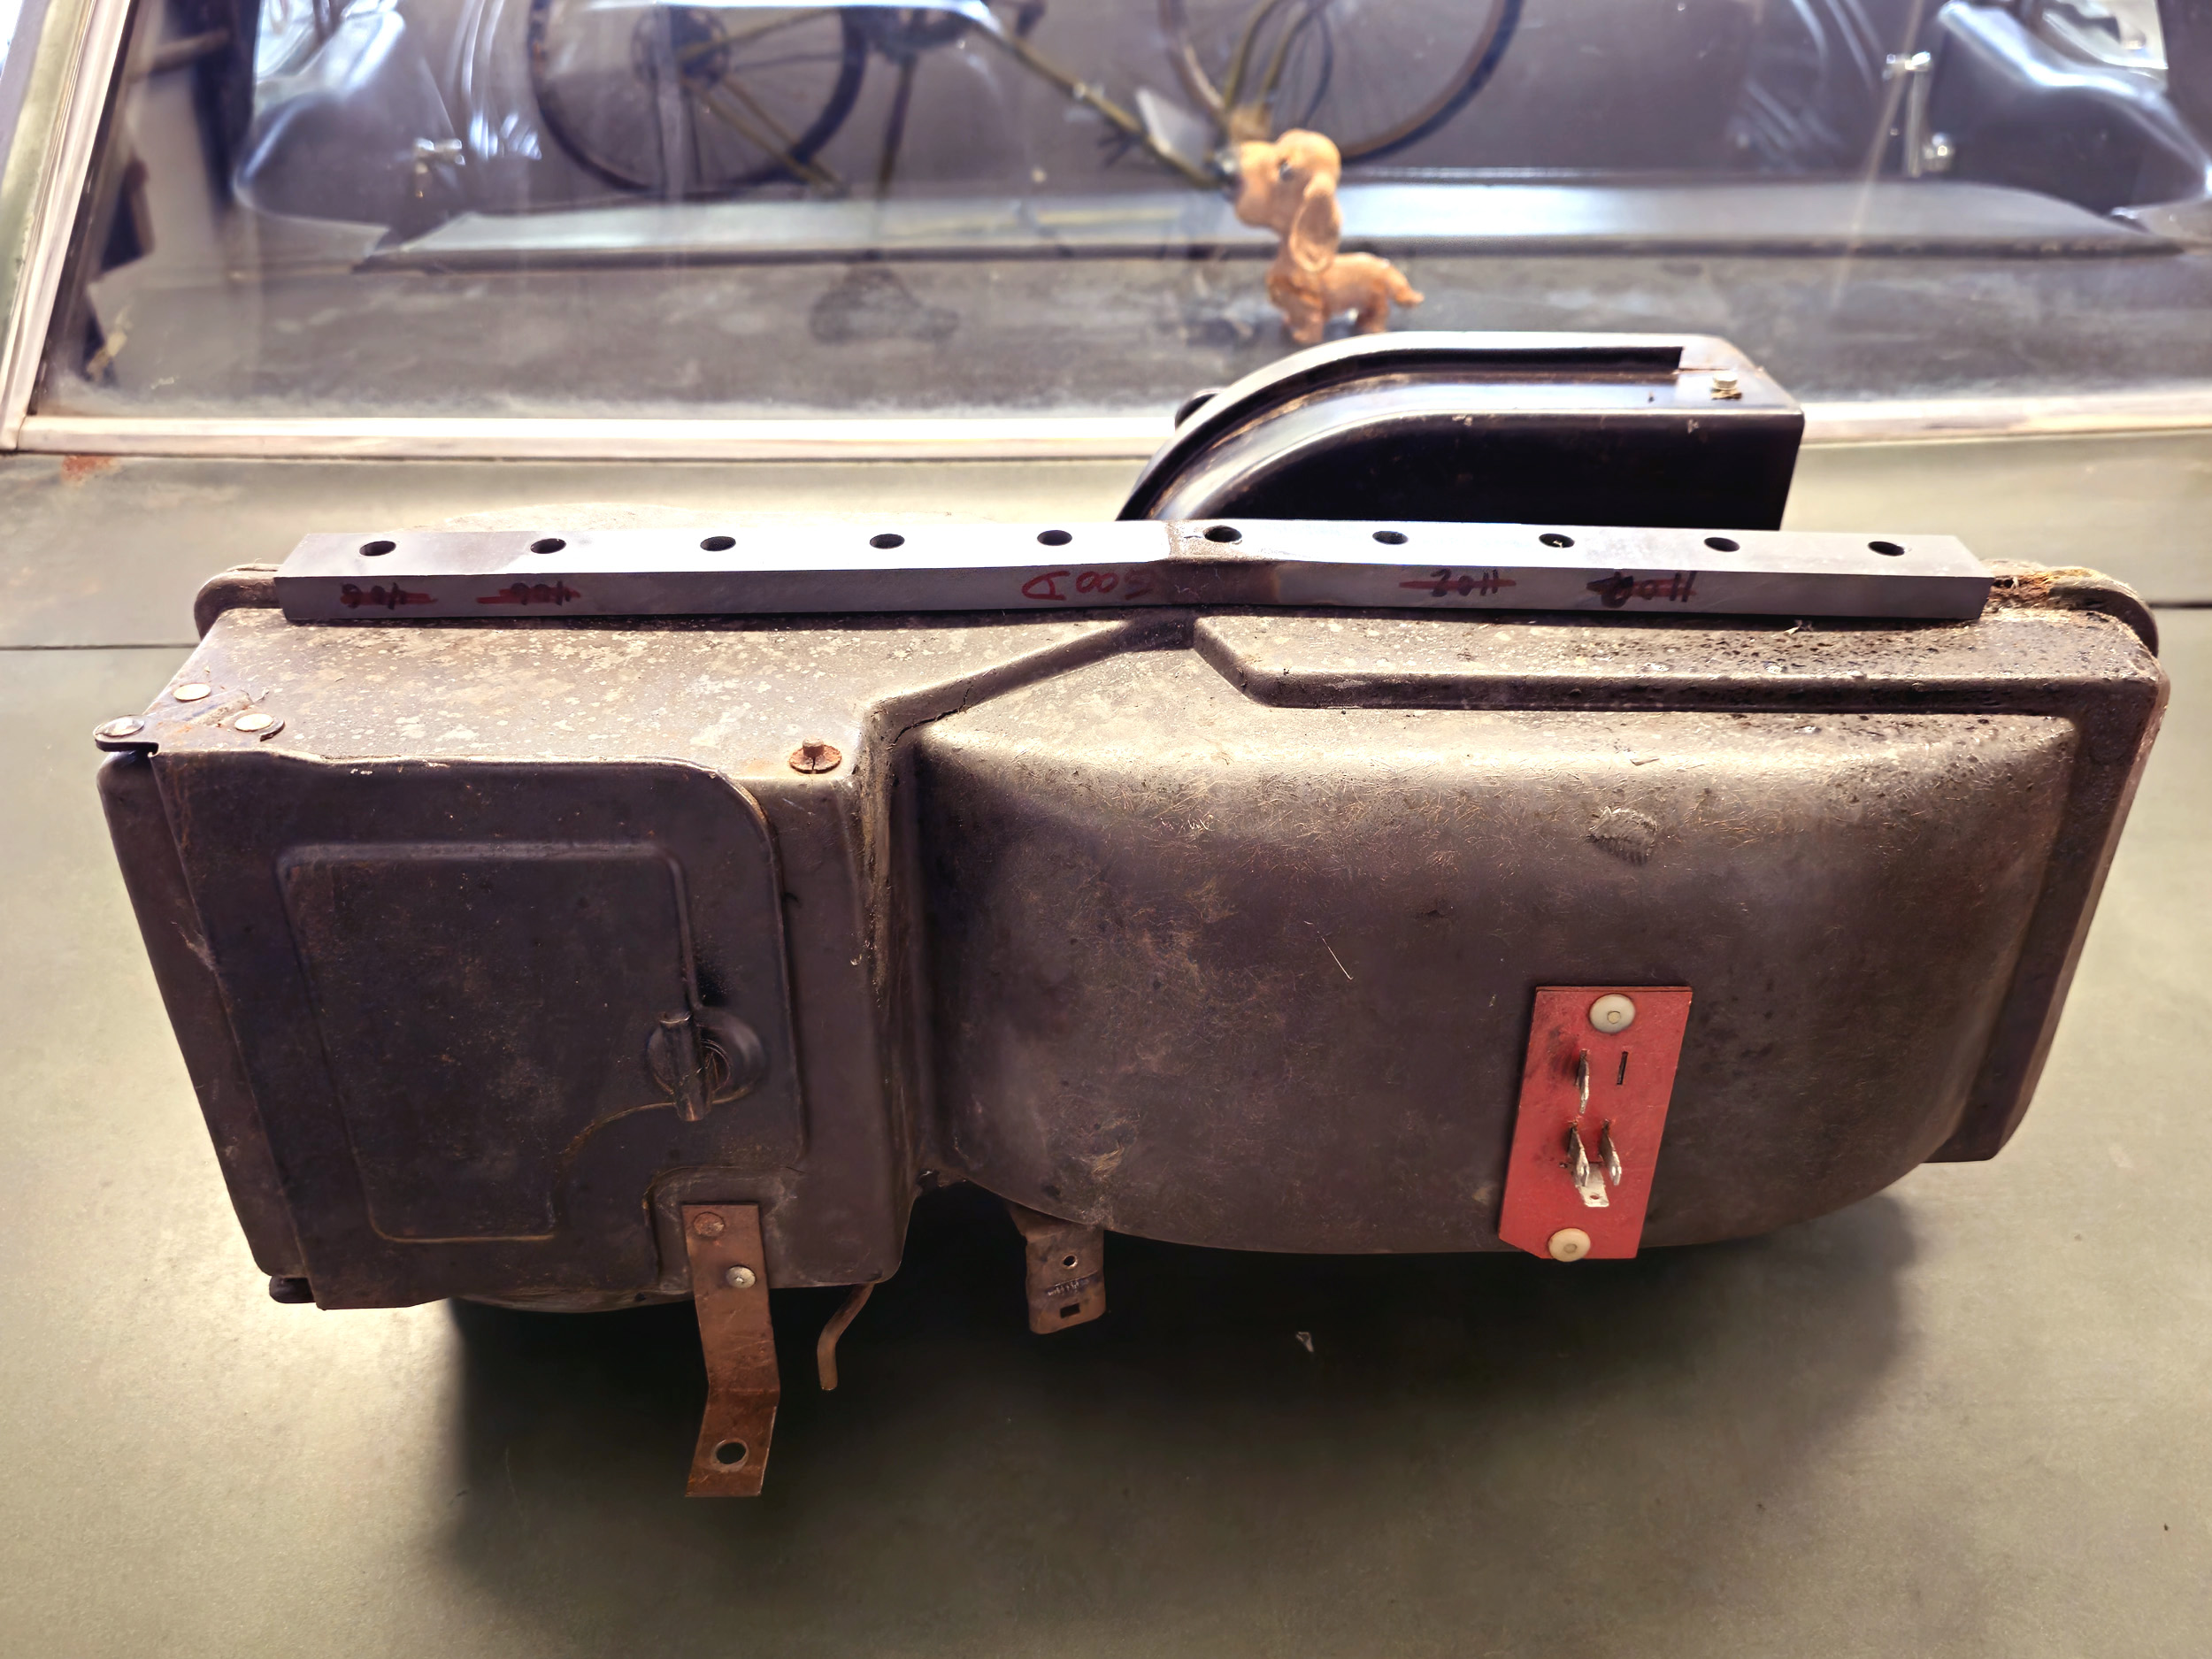
That is when another surprise hit –someone had been here before and
lost some parts. The main heater box is fiberglass with a second smaller box
that is cardboard. Ford sure did use odd materials for this. The main box is 2
parts. That is where the heater core is. It is held together with 10 metal snap
clips. I had 4 of them now. The fiberglass was slightly warped as well with
some open gaps that would be air leaks. Since I was now short snap clips I had
to close the bottom warp. I looked around my shop and round this gray PVC bar
that was about 1” x 1 ½” x 24”. It was a >>>perfect size<<<.
Since I am a machinist I cut a groove into the PVC bar with my milling
machine making it into a channel that snapped in place. I had to bend the
bar slightly in the center to fit better on the fiberglass warp. I dropped glue
into some of the holes. This is not coming apart again! With the new plastic
defrost box attached the unit was about 3 feet long. Getting it all back in
place by myself was a job. It would be much better
with a helper if possible.
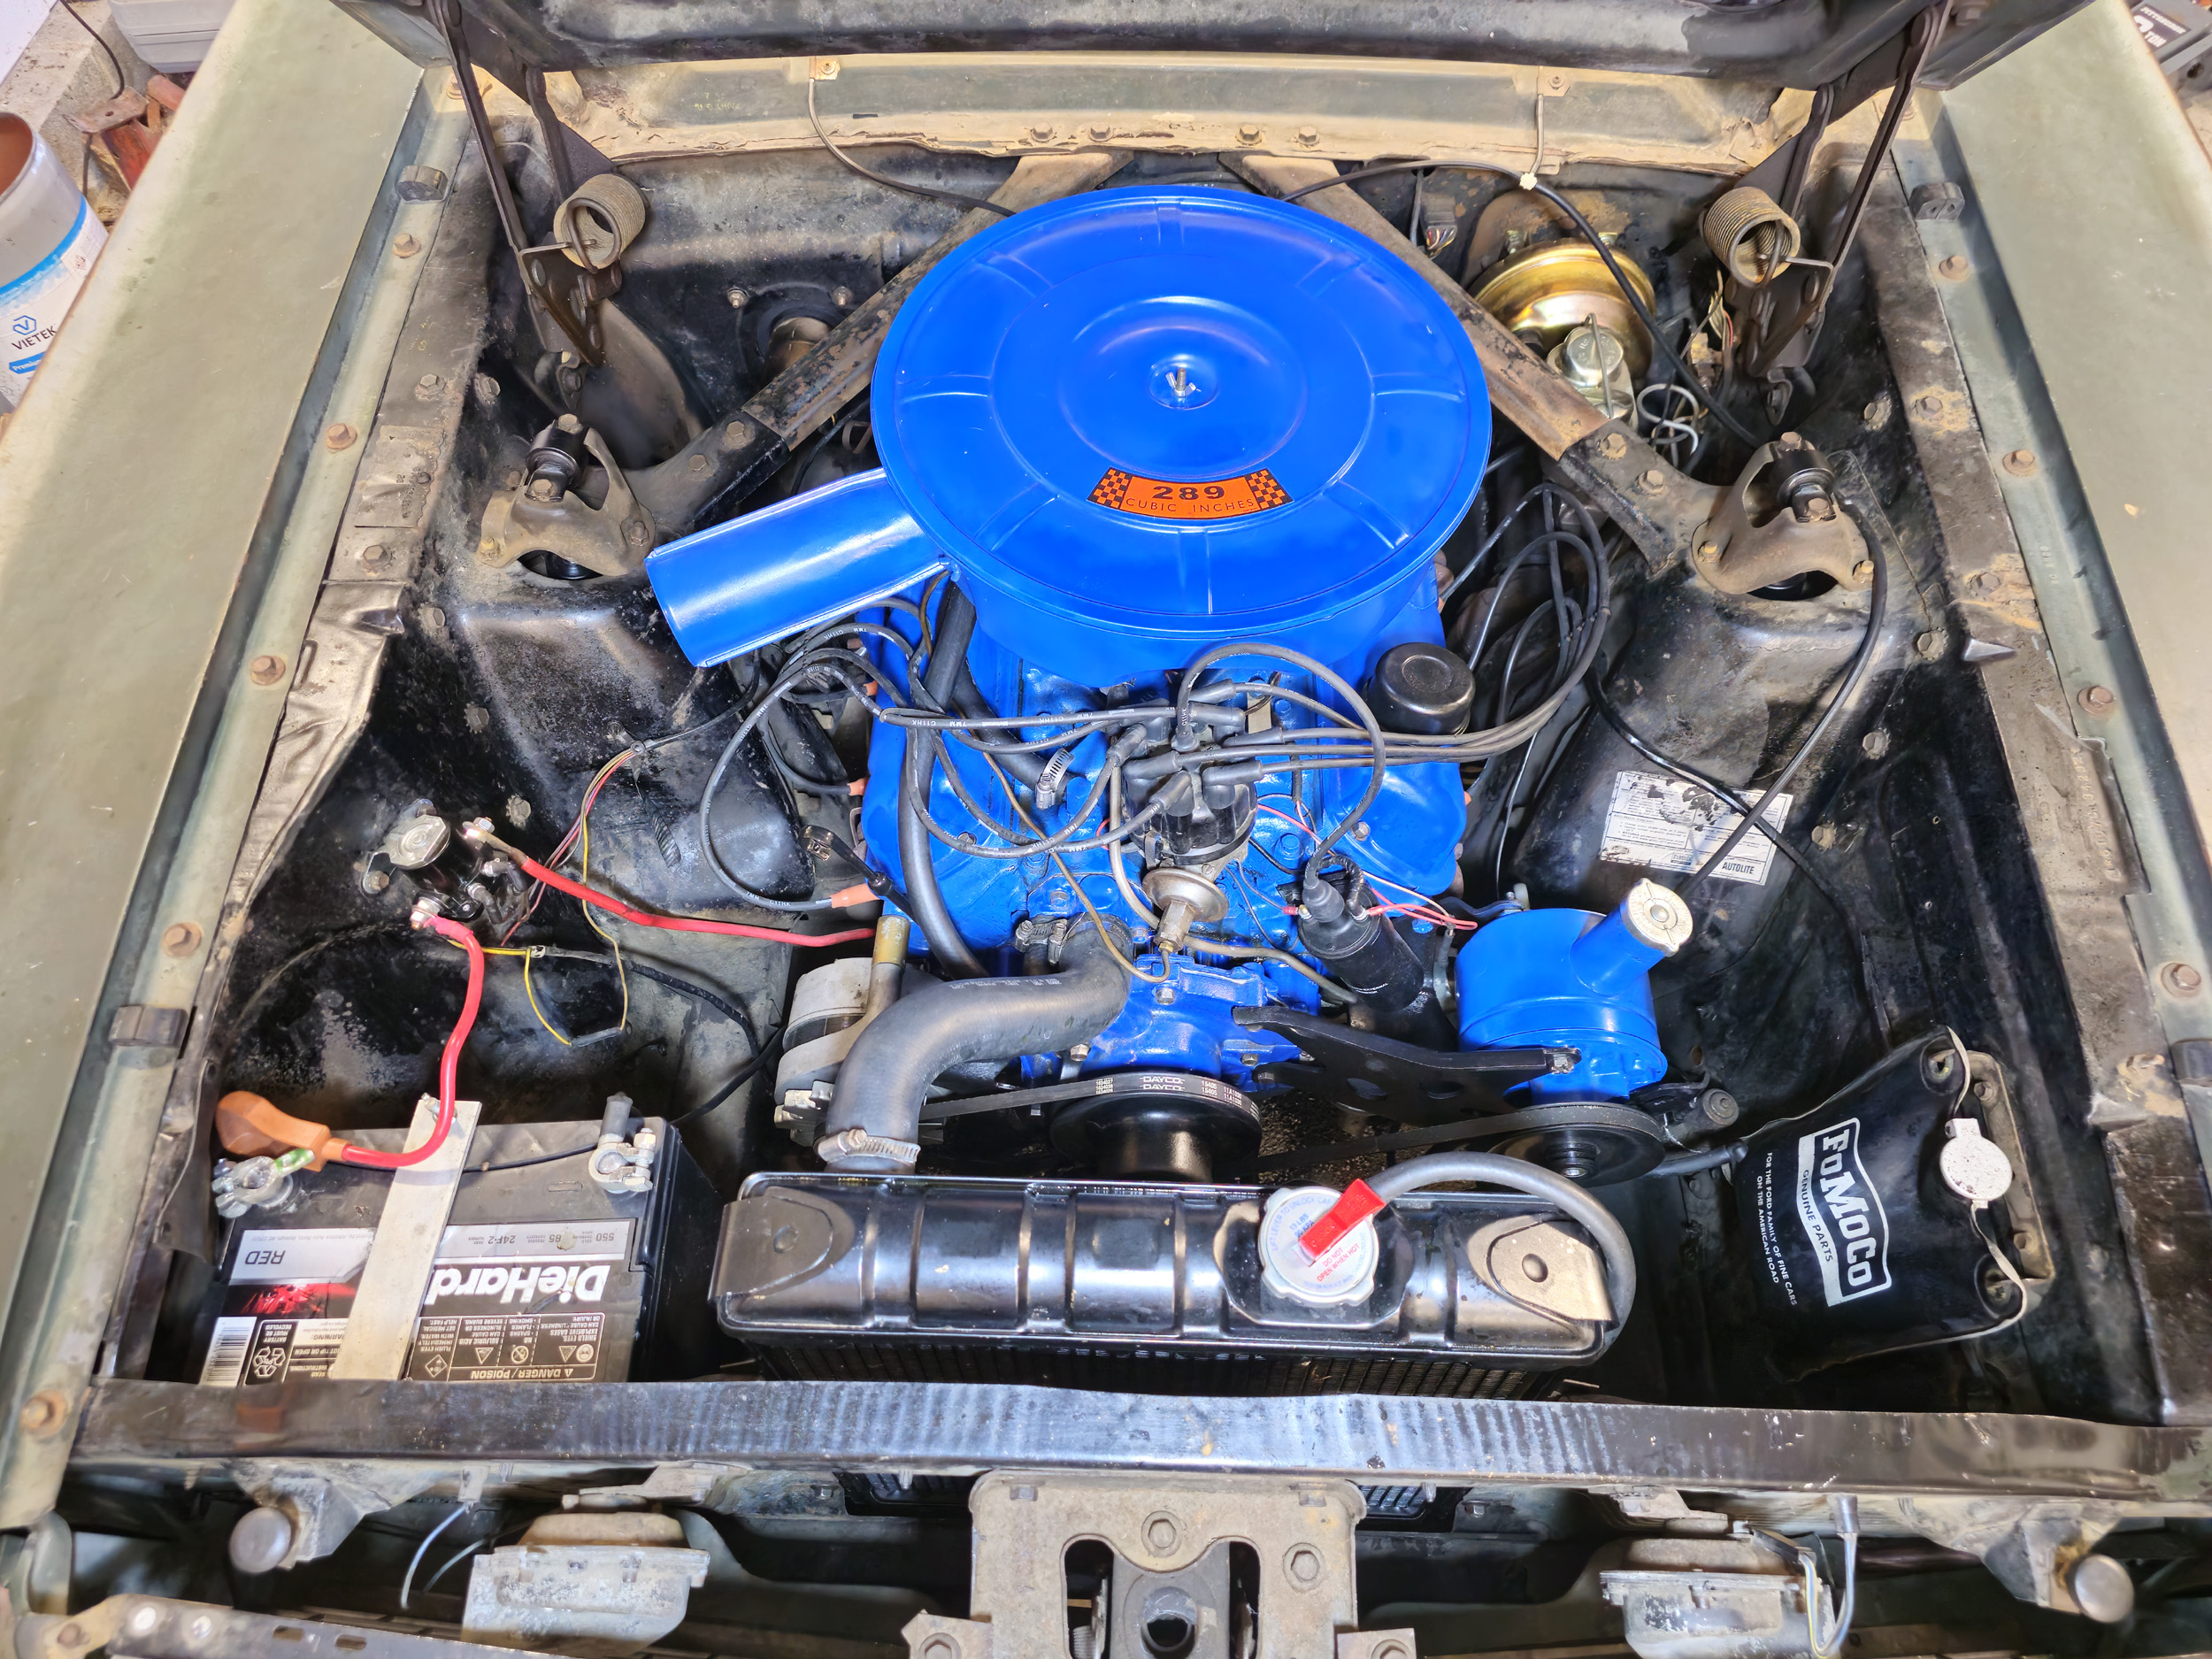
With the heater now installed this is the most correct photo of
the motor in months with the heater hoses in place.
New
Rear Springs and Shocks
I did not expect to get the new springs and shocks installed this
year but my driving experience was greatly affected to the point I could not
wait anymore. The original springs were straight with any weight in the car.
With 2 people it bottomed out on body bumpers going over bumps. It seemed the
hood was pointing upwards. The car was so low it was more difficult than ever
to get in and out of. I completely hated that. It was a really challenging job
but I am glad it is done.
If
you are about to swap out your old rear springs get the package with the
springs and all new hardware included. You are going to need it all!!! One of
the bolts is a grade 5
½-13 x 6” long bolt. That got cut into 3 pieces on both springs.
You are not going to get that bolt anywhere on a weekend.
Besides
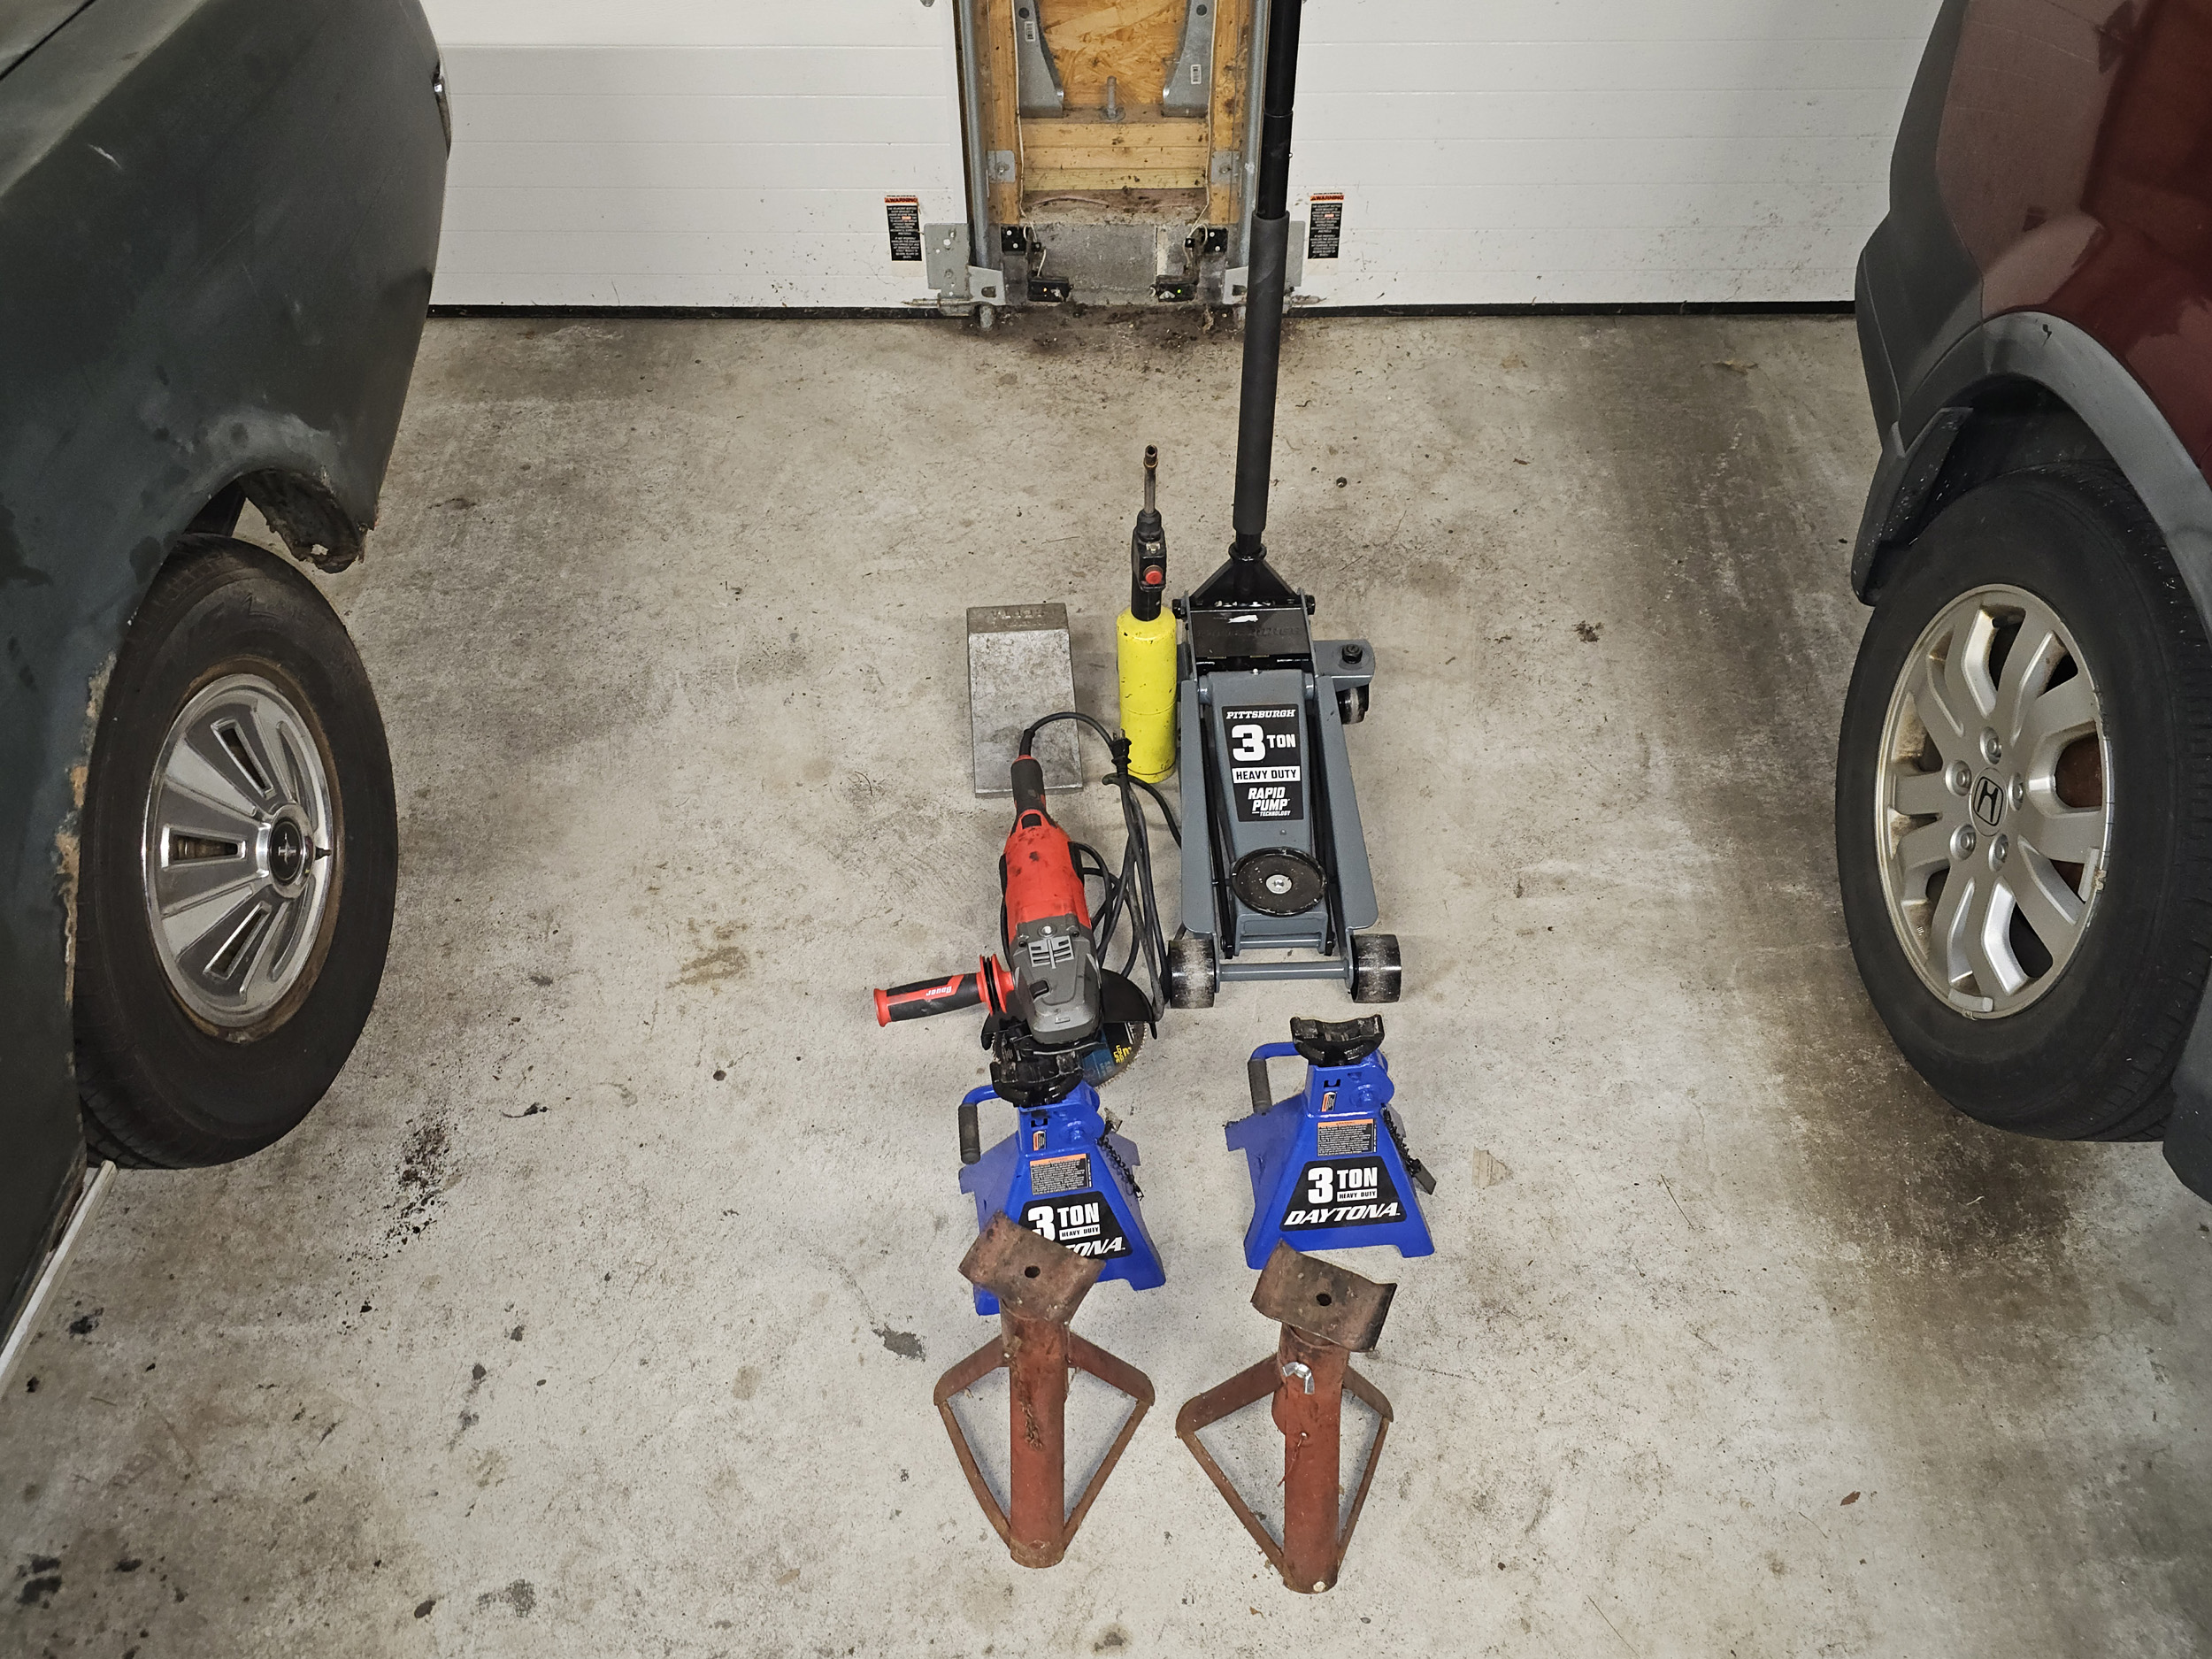
the needed wrenches and probably an impact wrench this tool "kit" is minimally what you will need to do the job. I bought the floor jack the
night before I started. It was SO much better than my other floor jack I had
that was half the size. The angle grinder shown is a 7" and also was
bought because of this work. I don't think a 4 1/2" grinder would have
worked. 4 jackstands are needed – 2 for the body and
2 for the rear axle. The red jackstands are 40+ years
old from Pep Boys and have had all of my previous Mustangs on them.
UPS LOST my springs for a week. They were out
for delivery and vanished. Kentucky Mustang almost sent another pair when they
were found and delivered.
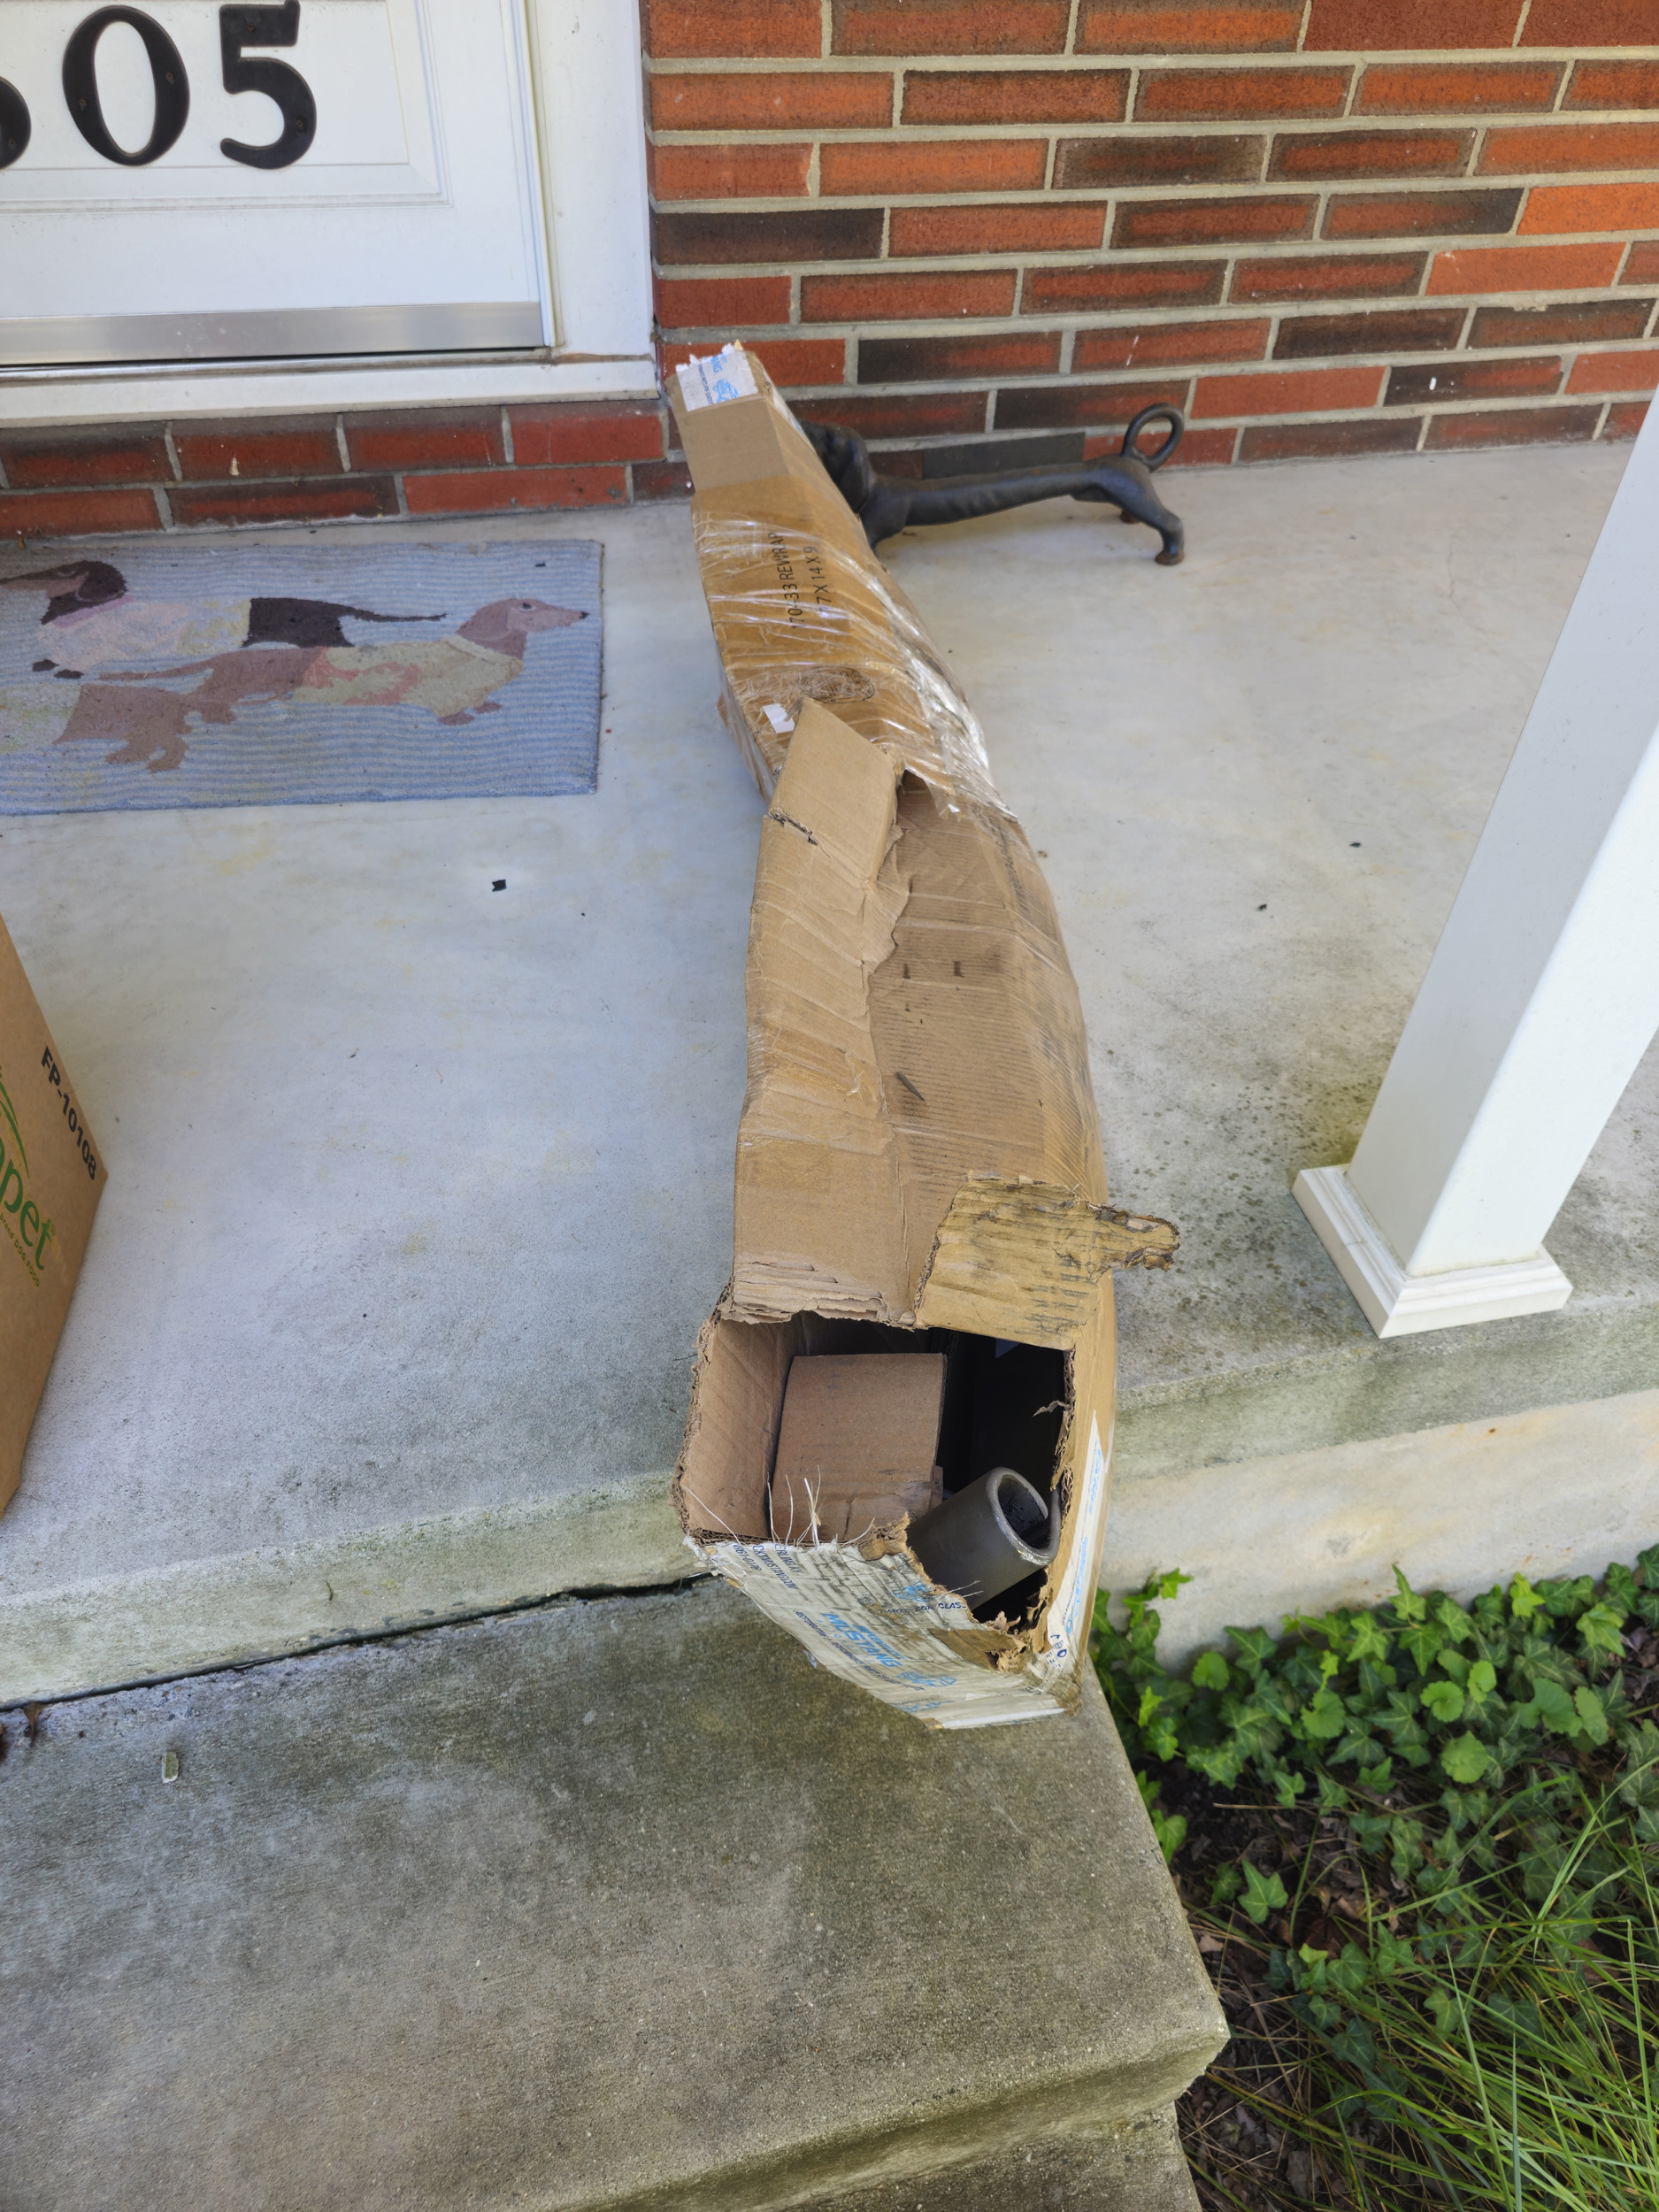
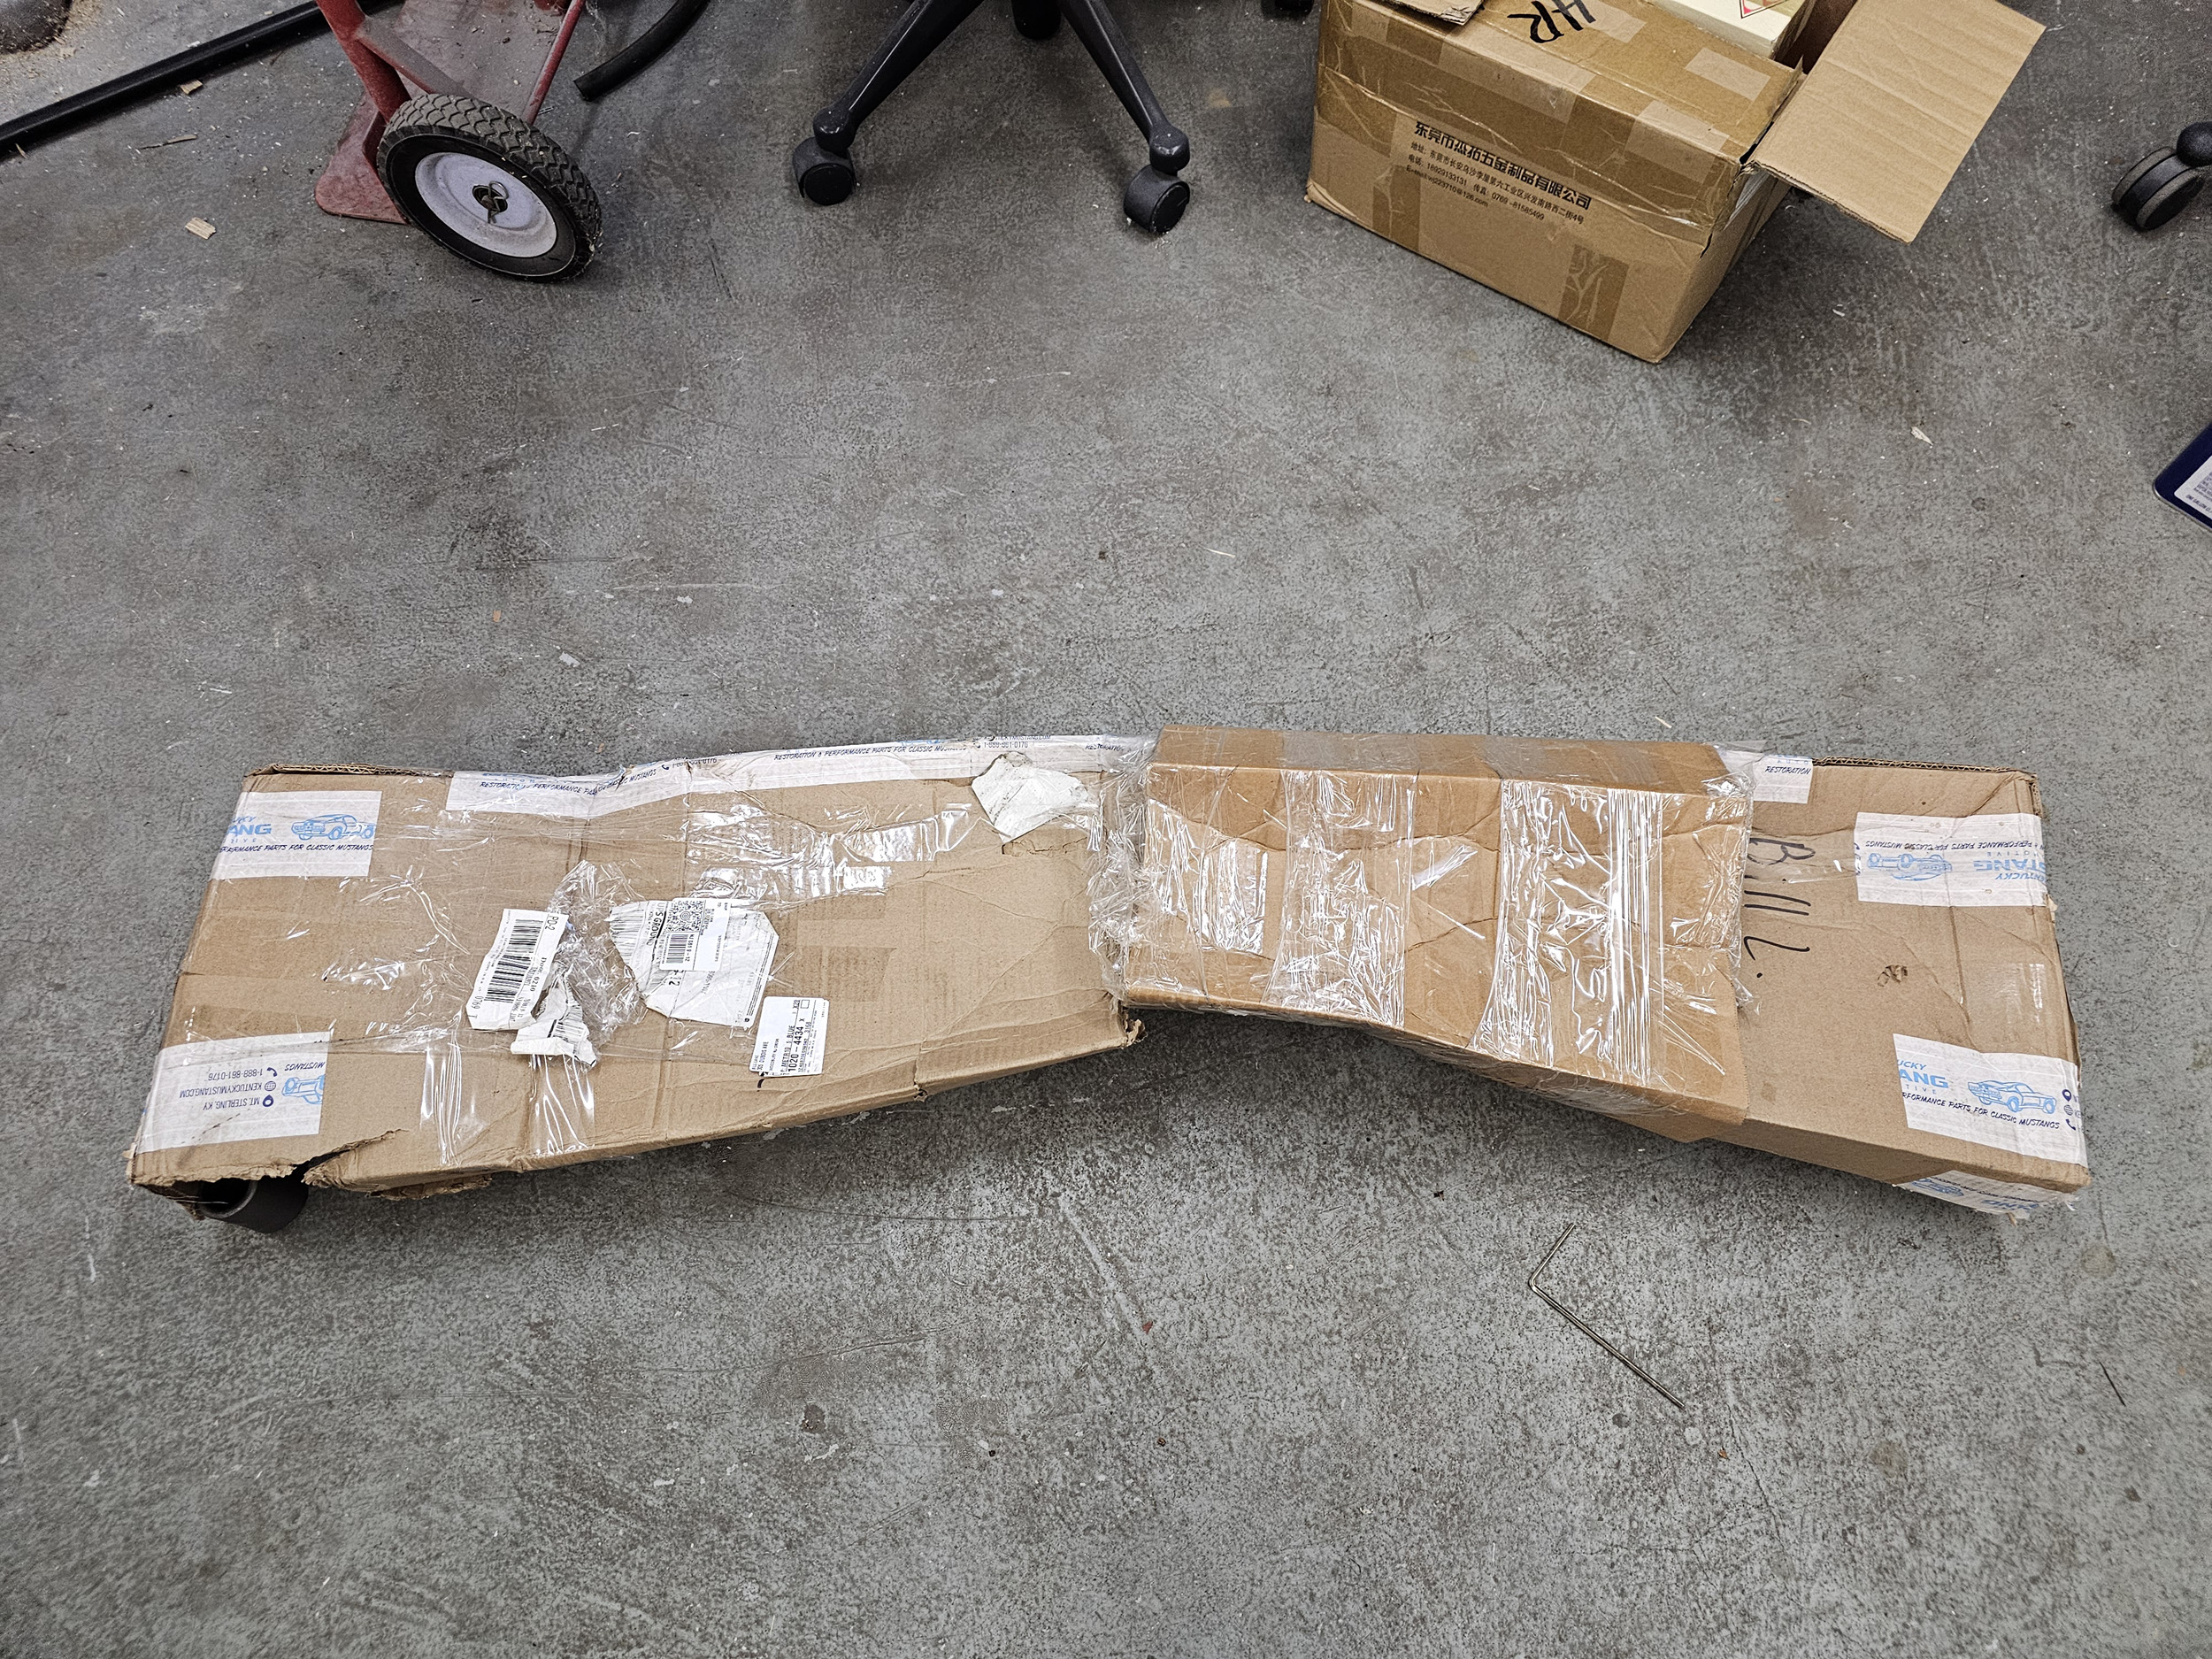
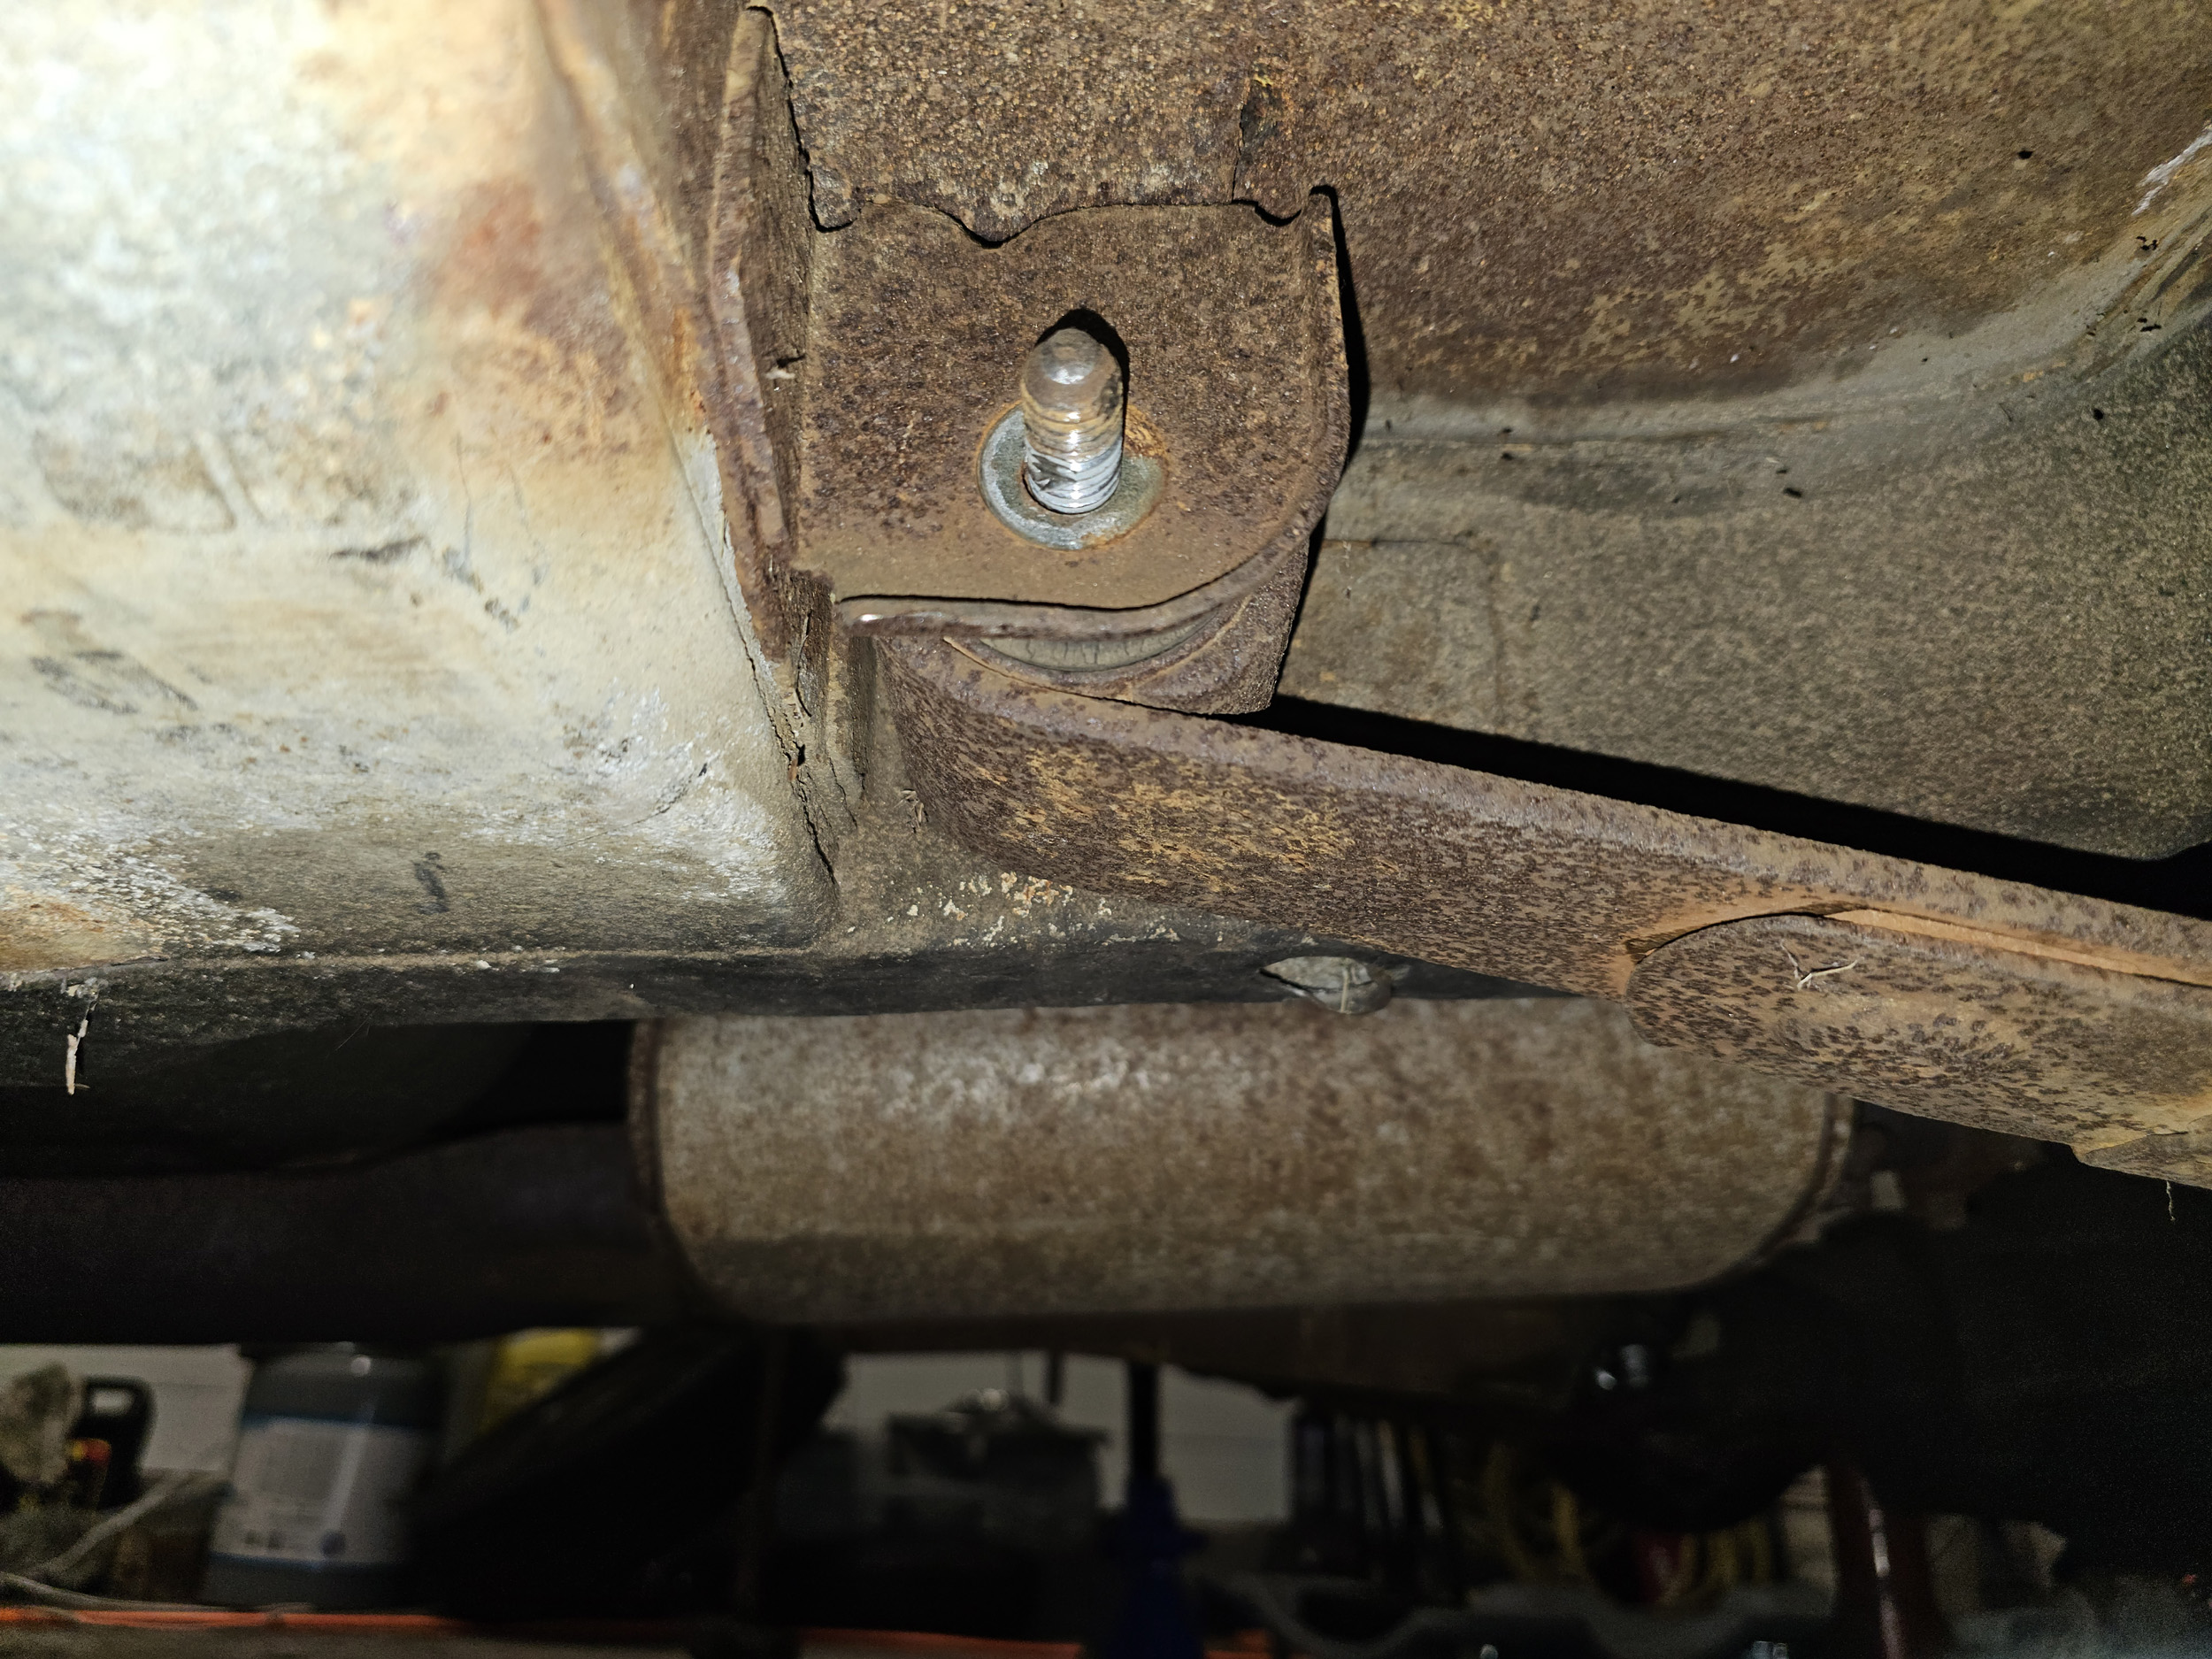
The
posts from the Facebook Mustangs groups said getting the front bolt out of the
spring eye was going to be difficult. That is completely correct. Impossible to
remove is the reality. It will be very rusted in place to the bushing tube in the spring
rubber bushing There is no straight shot access to that bolt to beat it out
which was the first plan. Just skip beyond that idea it is not going to work.
Up
next was heat and beat. I did not have much confidence in this but I tried it
anyway. I thought I might set the rubber bushing on fire so I had the garden
hose ready. That happened. It dripped flaming drops of rubber and burned my
hands in multiple places. The eyelet bolt remained in place.
The
reciprocating saw was briefly next. Again it is a grade 5 bolt. No blades I had
would cut a grade 5 bolt. The teeth were quickly worn off with no progress.
The only thing left was an angle grinder. I had not 1 but both of
my angle grinders die without getting anything cut. Off to Harbor Freight. I
got the 7” grinder. I did not think the 4 ½” would reach and cut the bolt.
Cutting with an angle grinder should be you first plan.
I decided to cut the spring and get most of the rest out of the
way. >>>There is no prize for getting a 60 year old spring out in 1
piece that is going to be scrapped anyway.<<< I cut the front eyelets
off and 1 at a time the rest of the spring was removed.
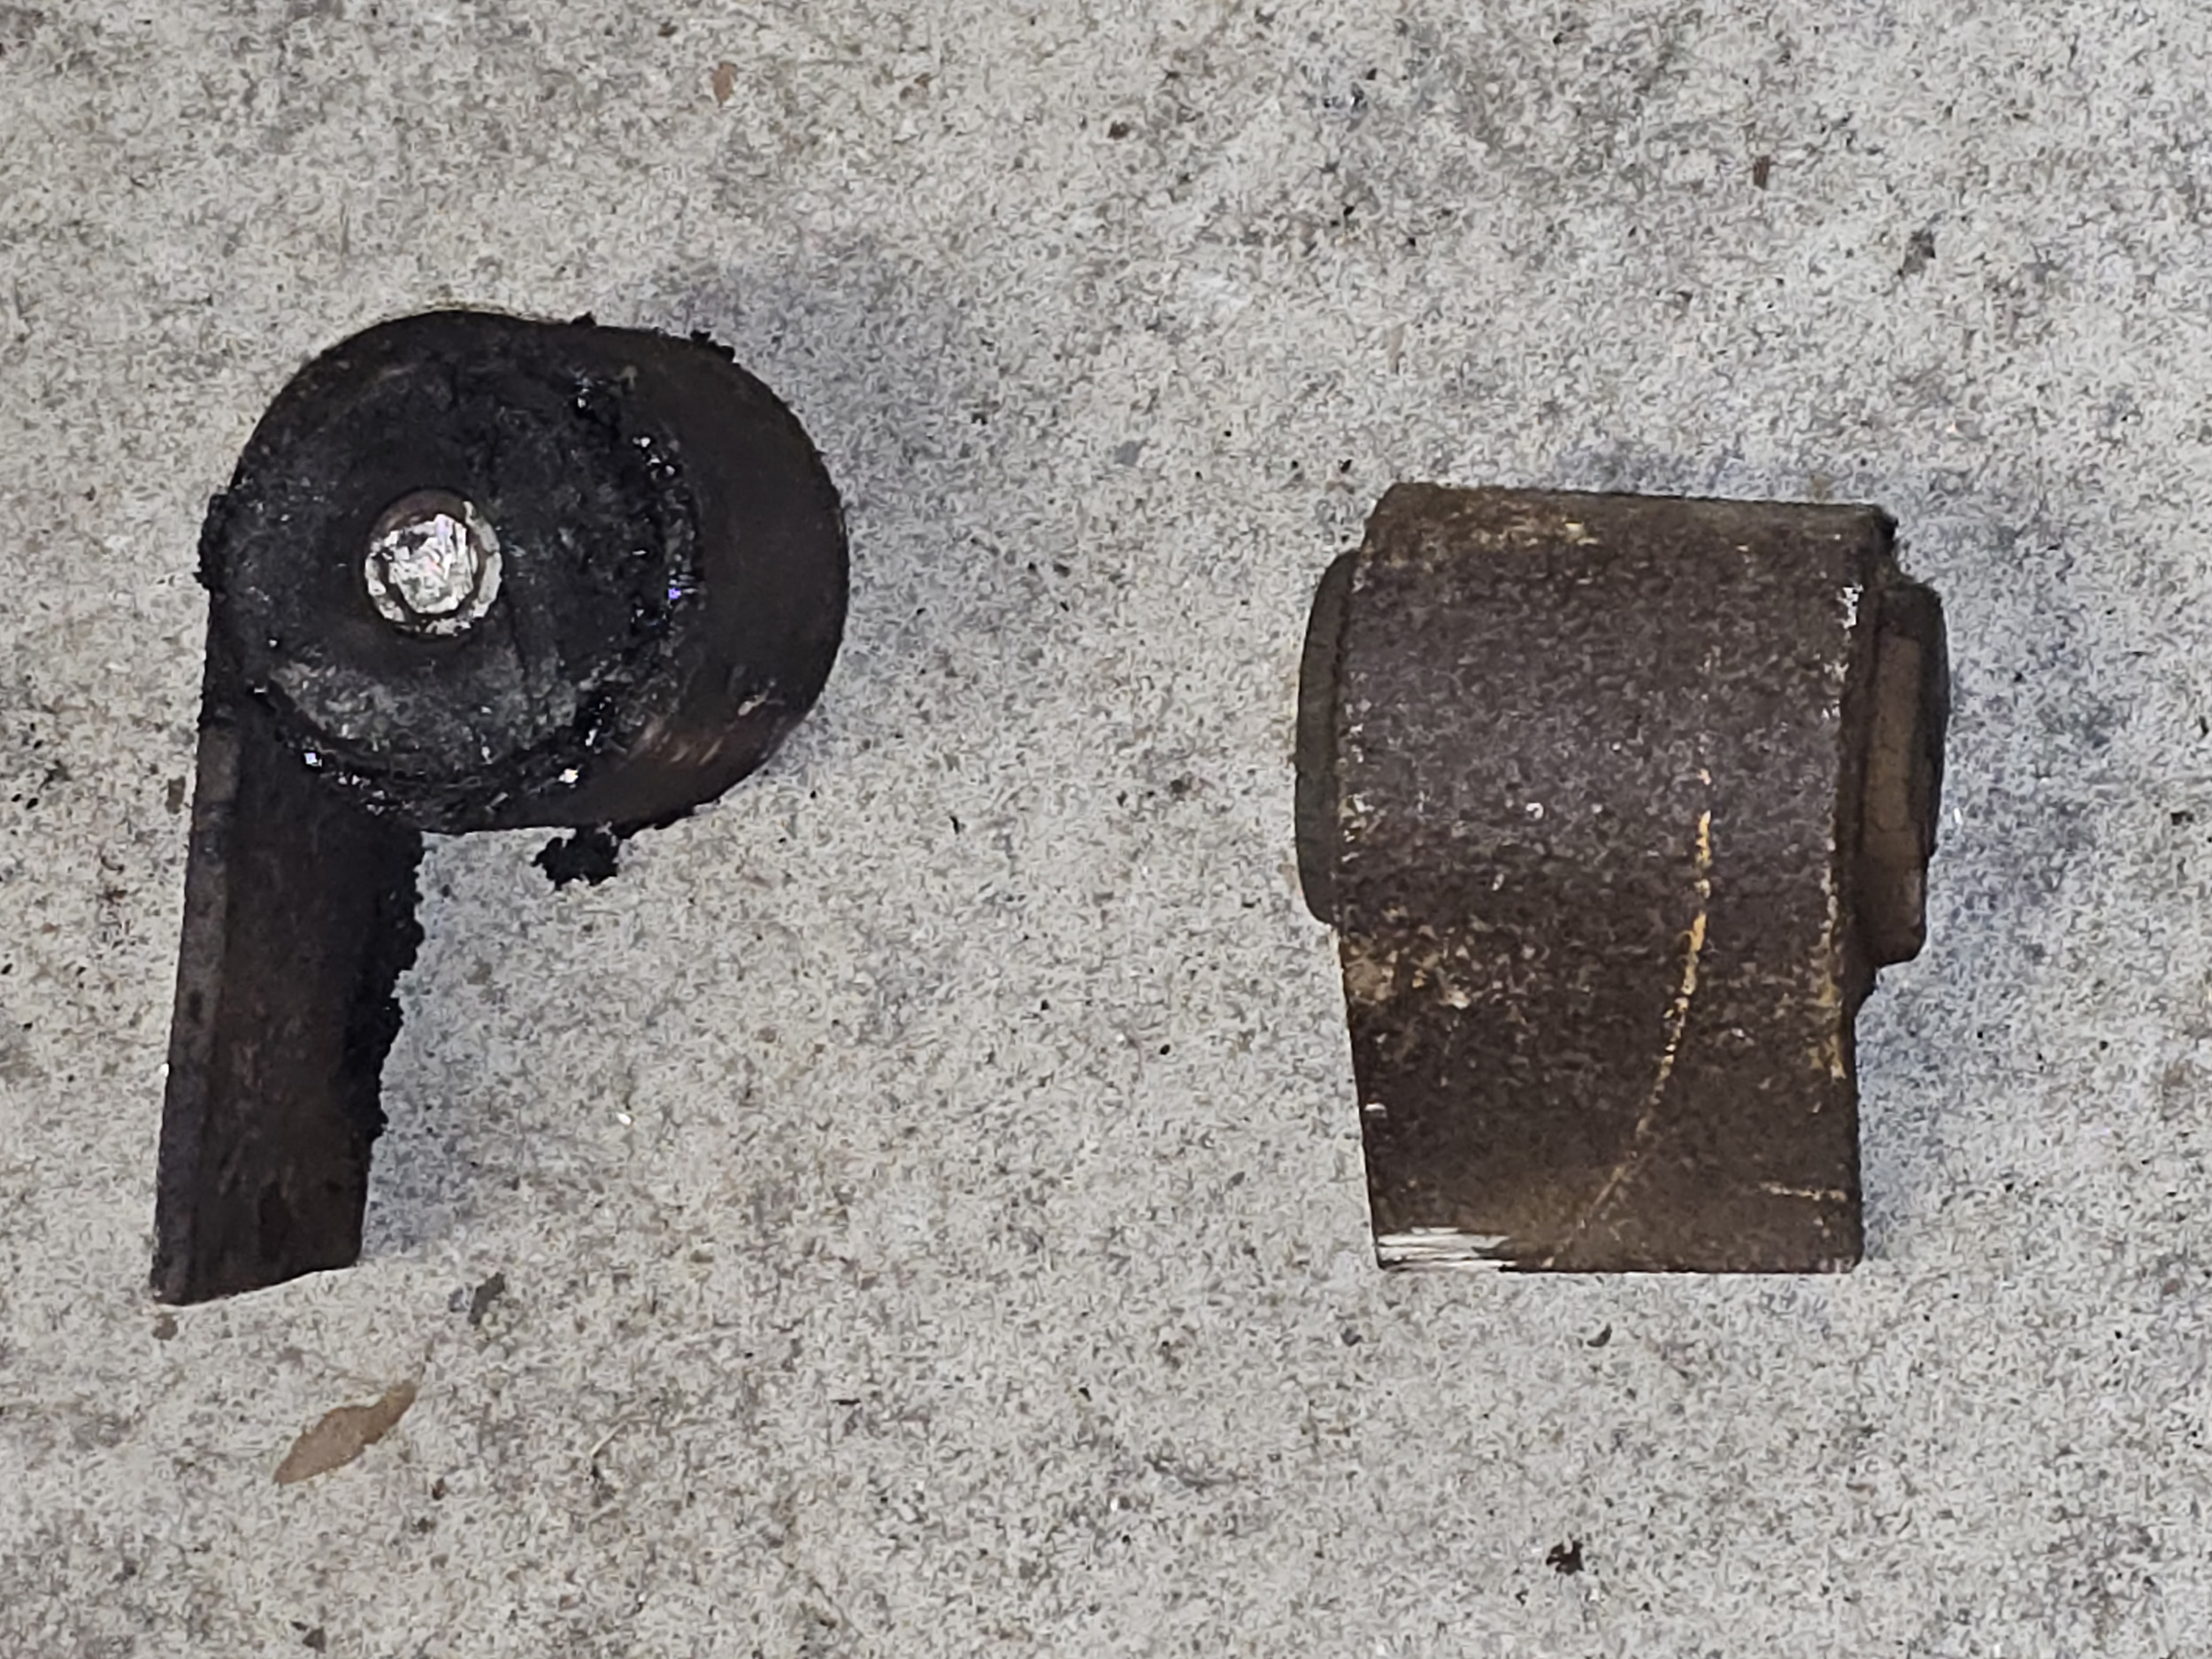
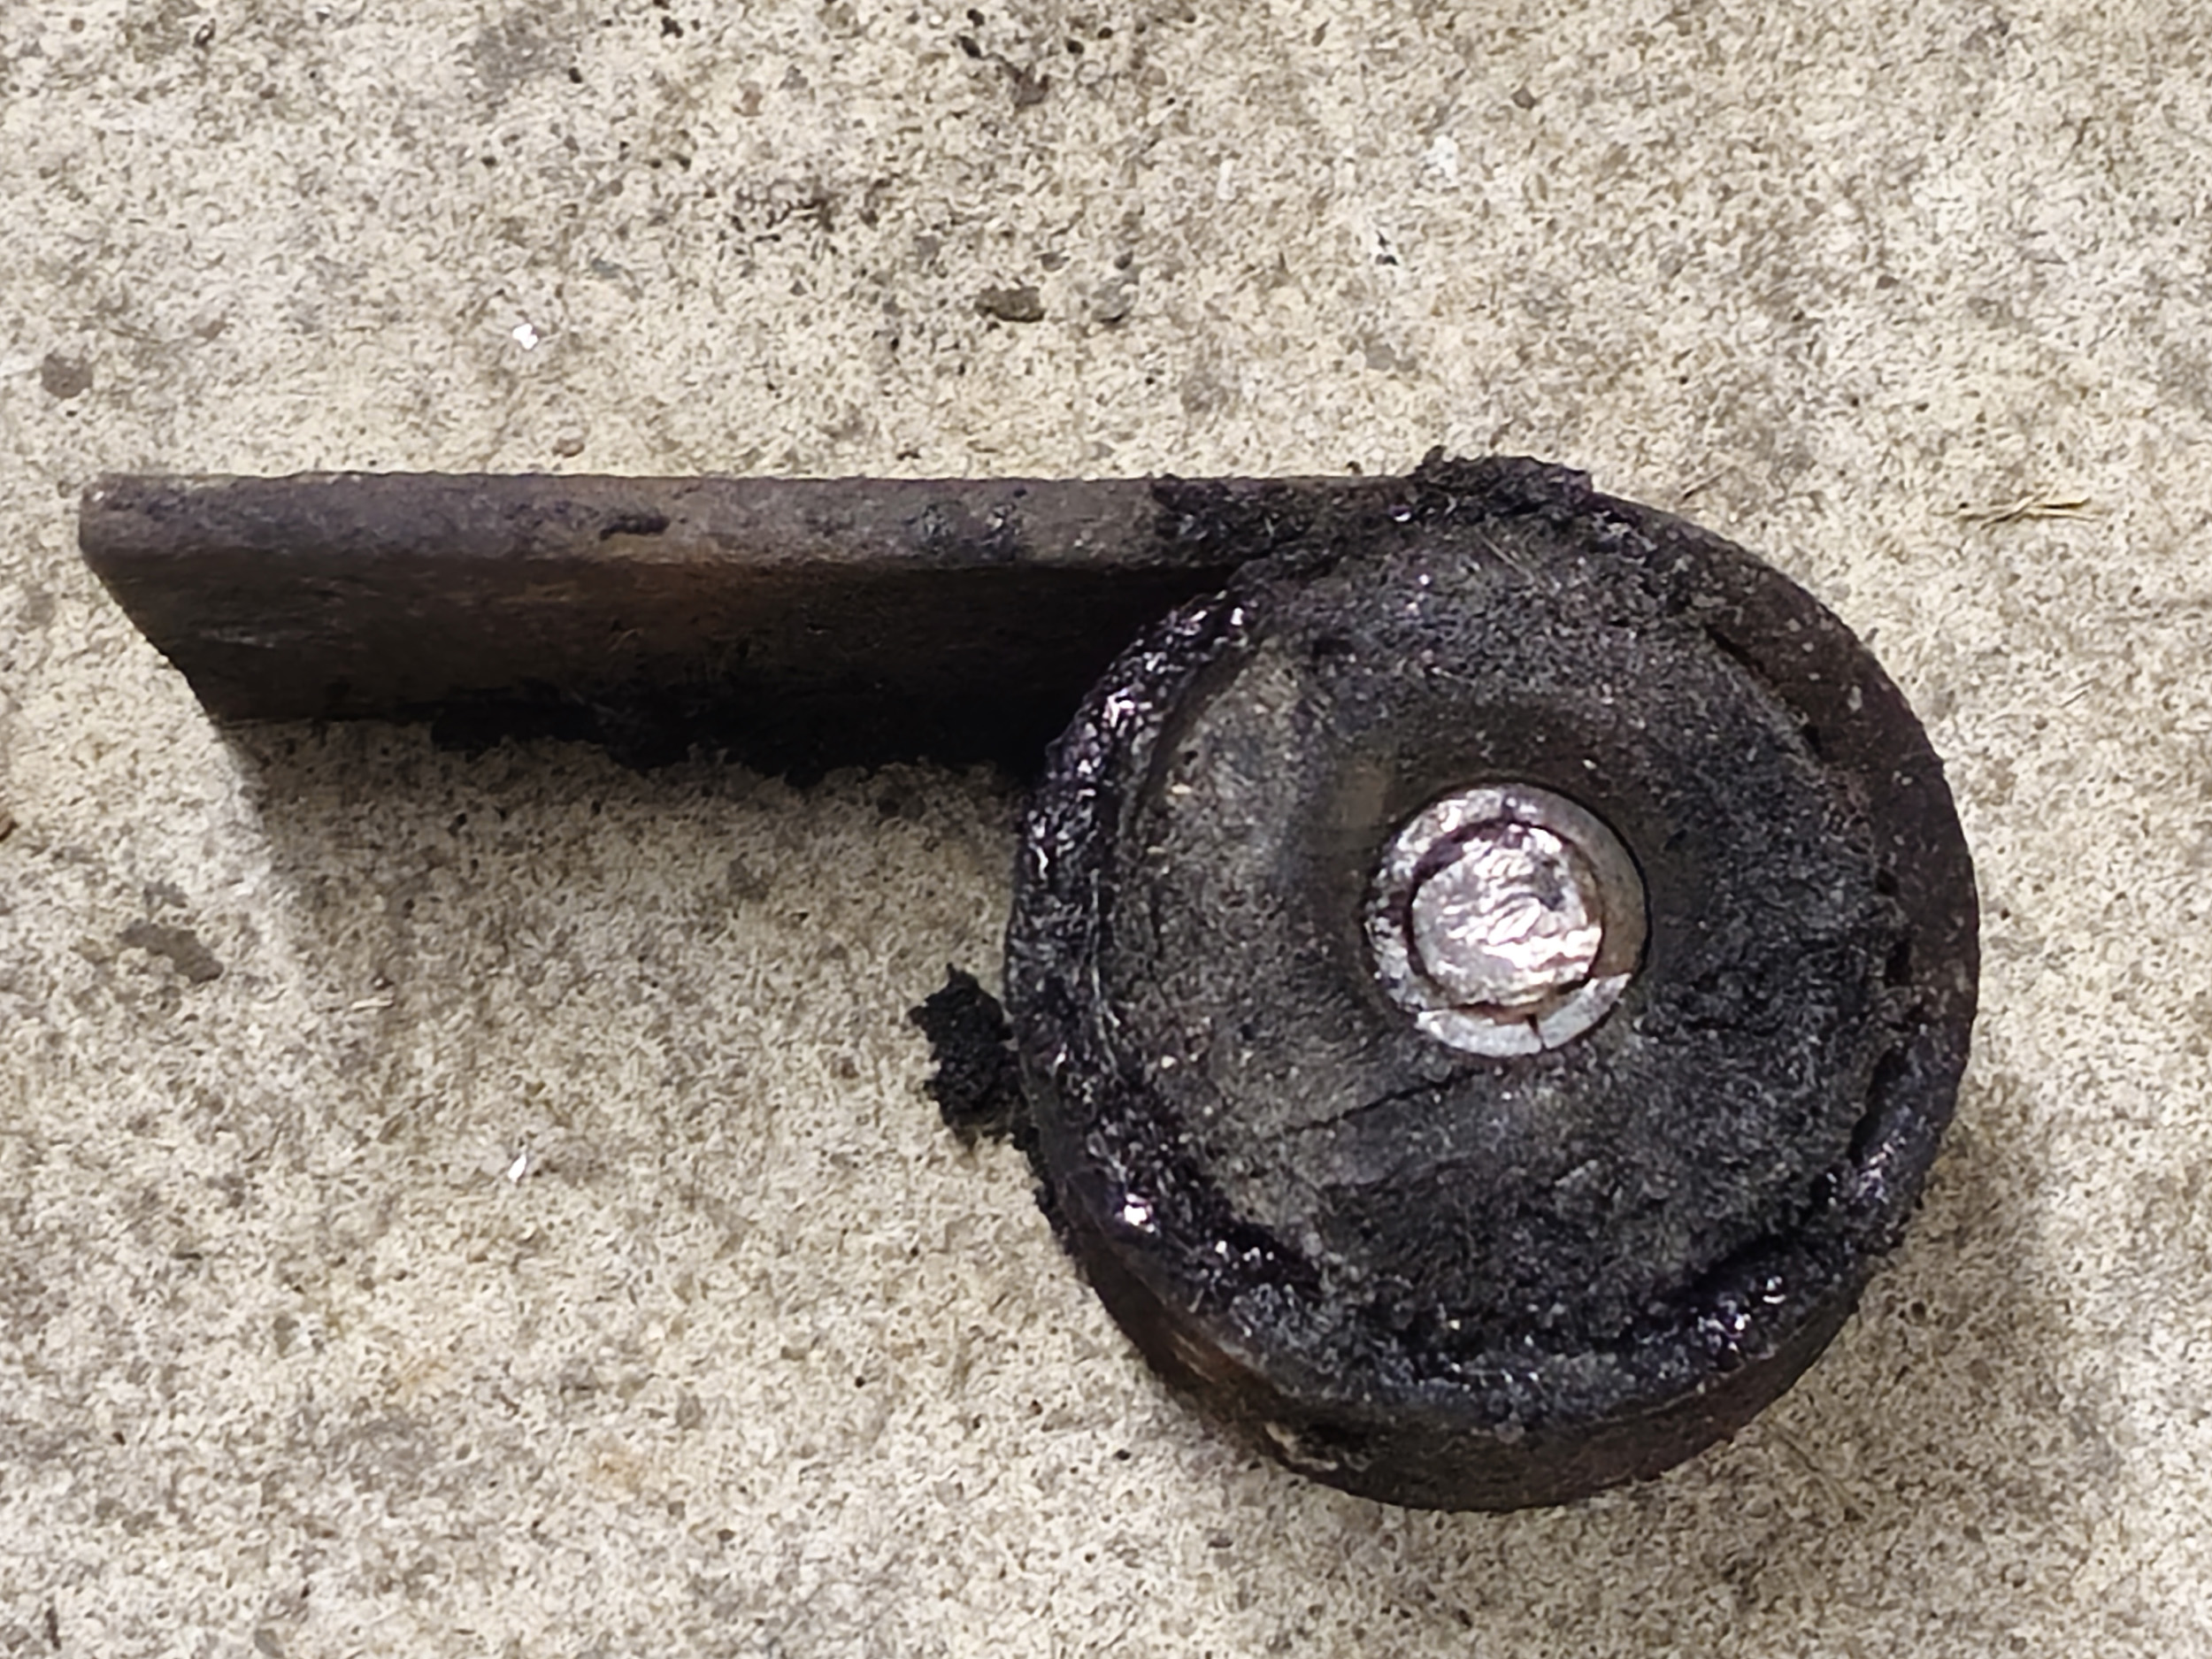
The thin blade reached up between the spring and body mount
quickly cutting the bolt. I got the bolts off the rear and the shackles out
pretty easily. I started at the rear and hung the new springs on the back
shackles and finished bolting that end together. Of course nothing is easy. The
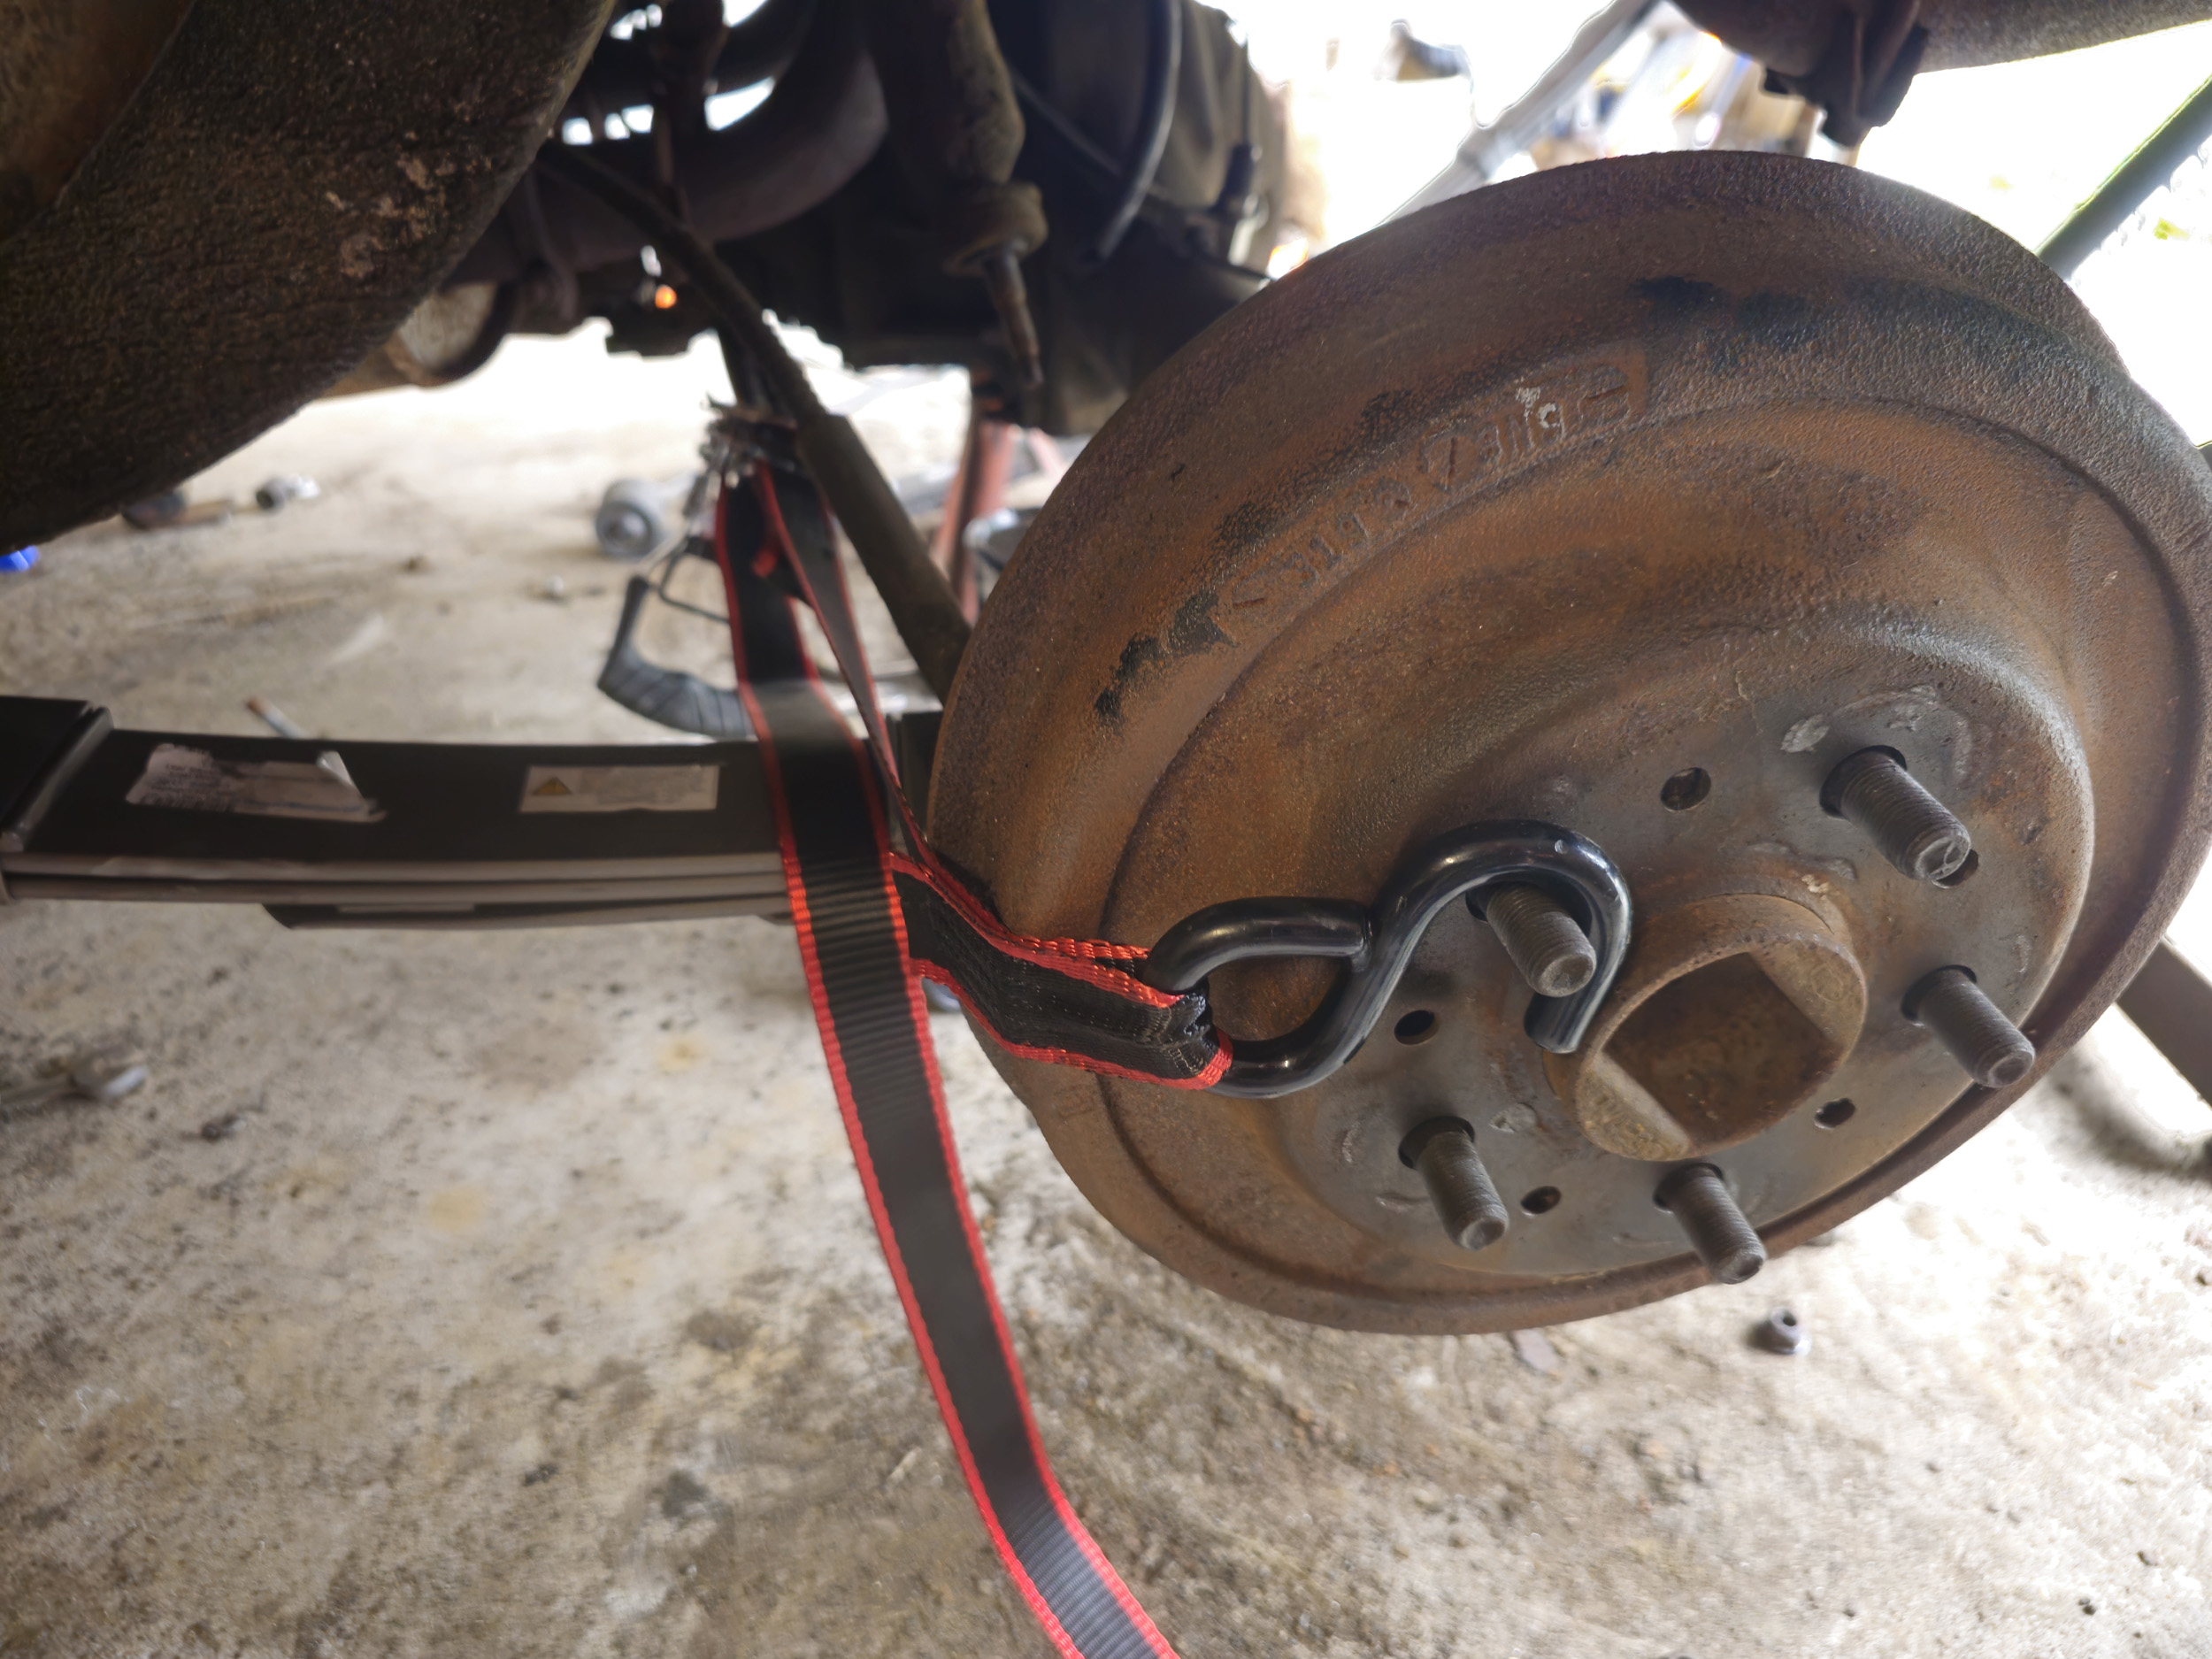
front bolt was long enough I could not fit it into the body. It hit on the
mufflers so I had to ratchet strap the mufflers out of the way. Then bolted the
front eye together and finished the installation.
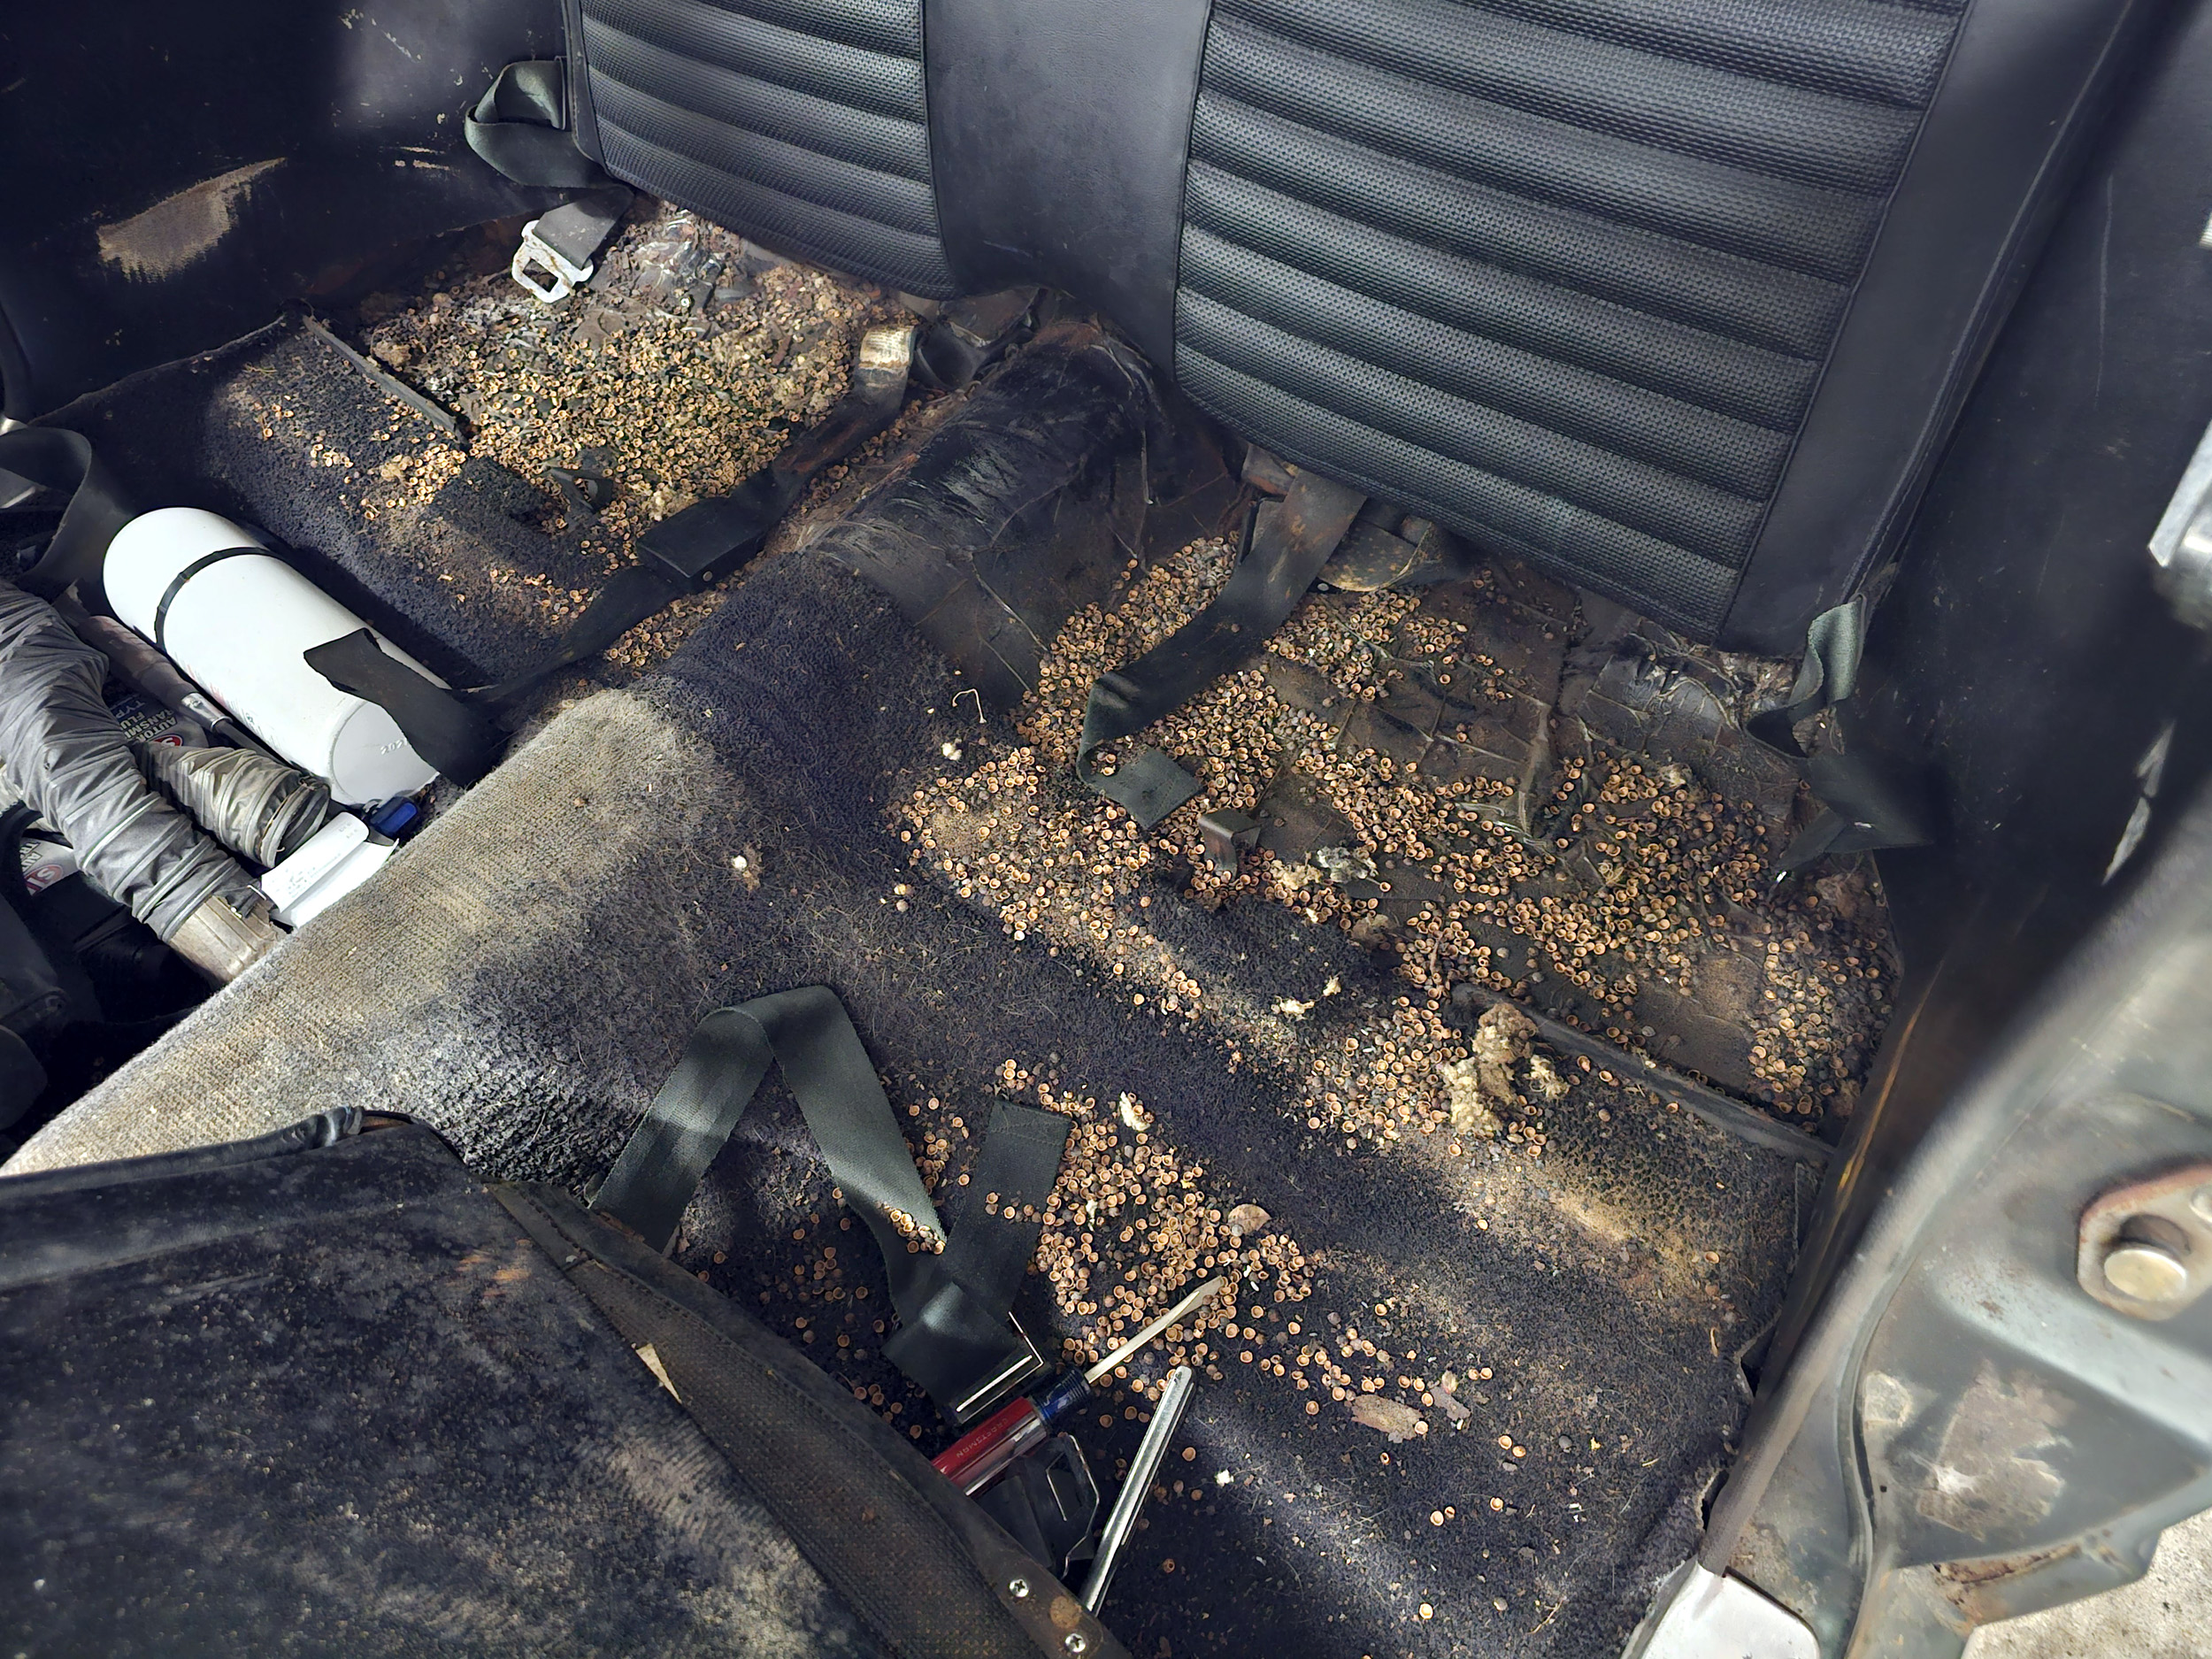
Knowing I had to install the shocks I took the back seat out. You
WILL need help installing them. The rear shocks are
KYB 343219 I got from Rock Auto. It was no surprise there was 1000s more shells
like there was everywhere else in the car.
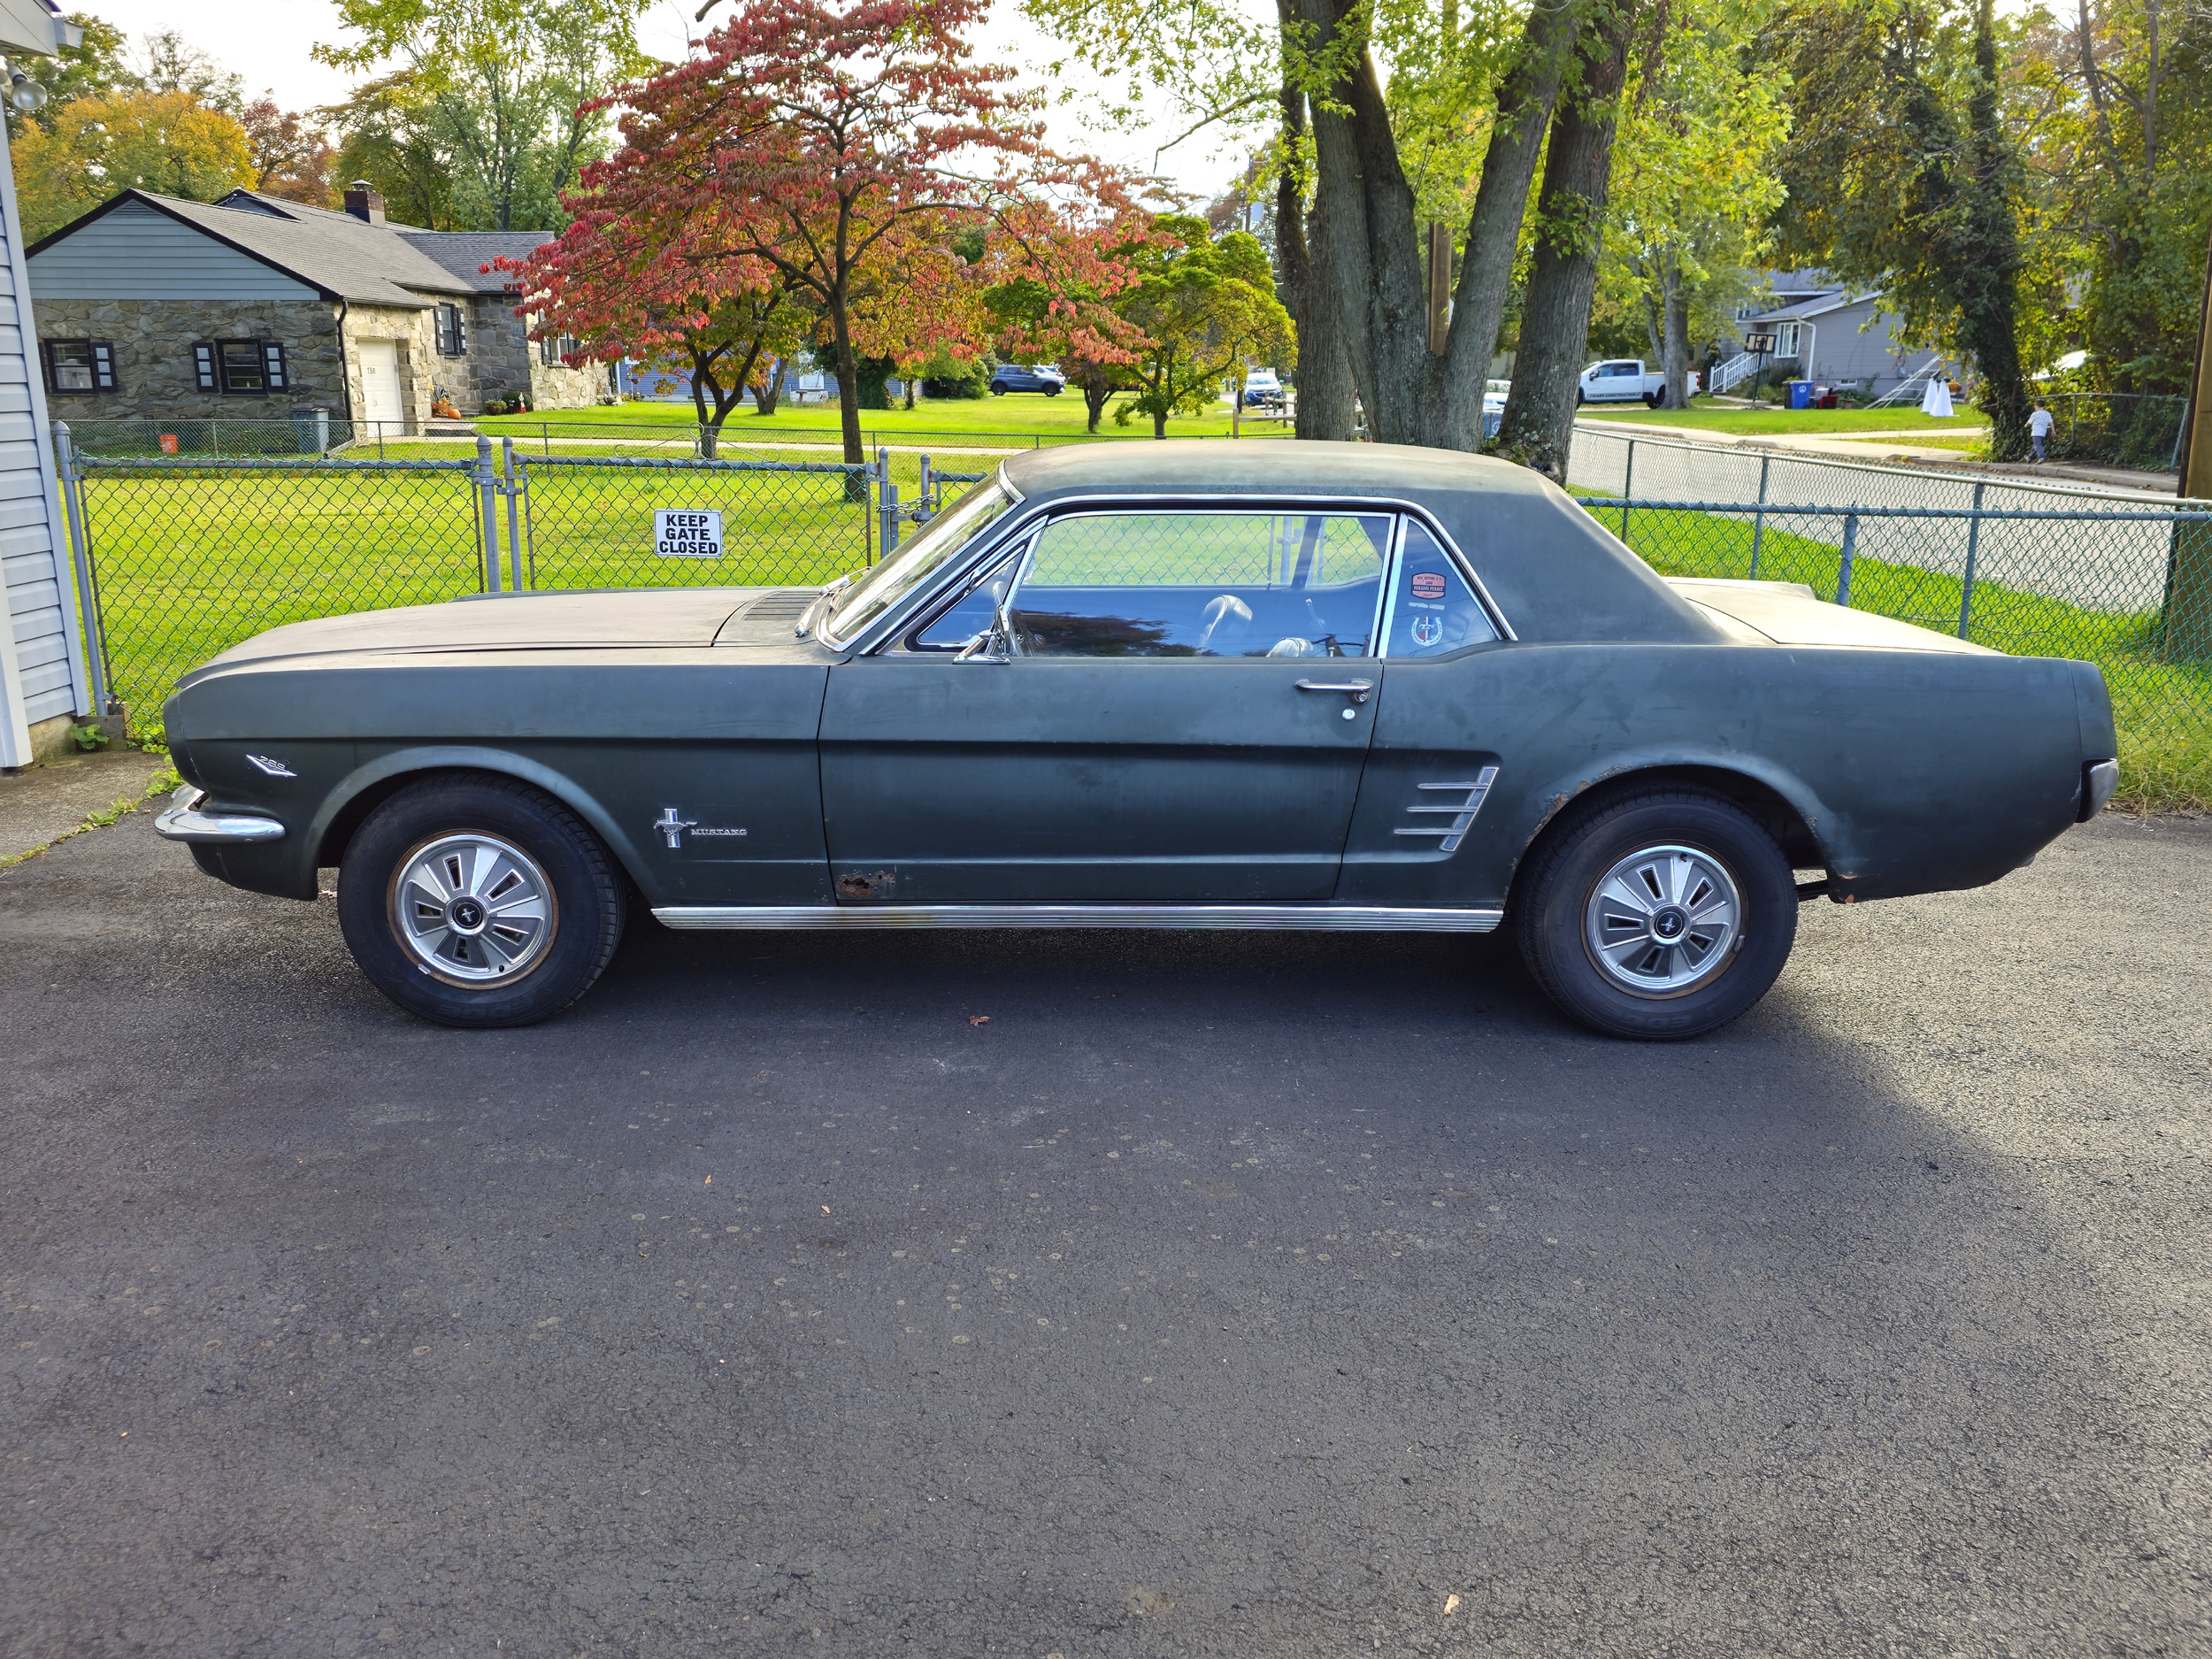
I can say there was no single thing that improved the ride and
handling of the car like these new rear springs and shocks. It does not roll in
all bad directions now on bumpy roads. The car is LEVEL and is noticeable
everywhere. Comparing the left photo with space between the rear tire and body
to this photo it is a
massive improvement. The hood looks flat now when driving. I can get in and out
of the car easier as well. I am SO glad I did it.
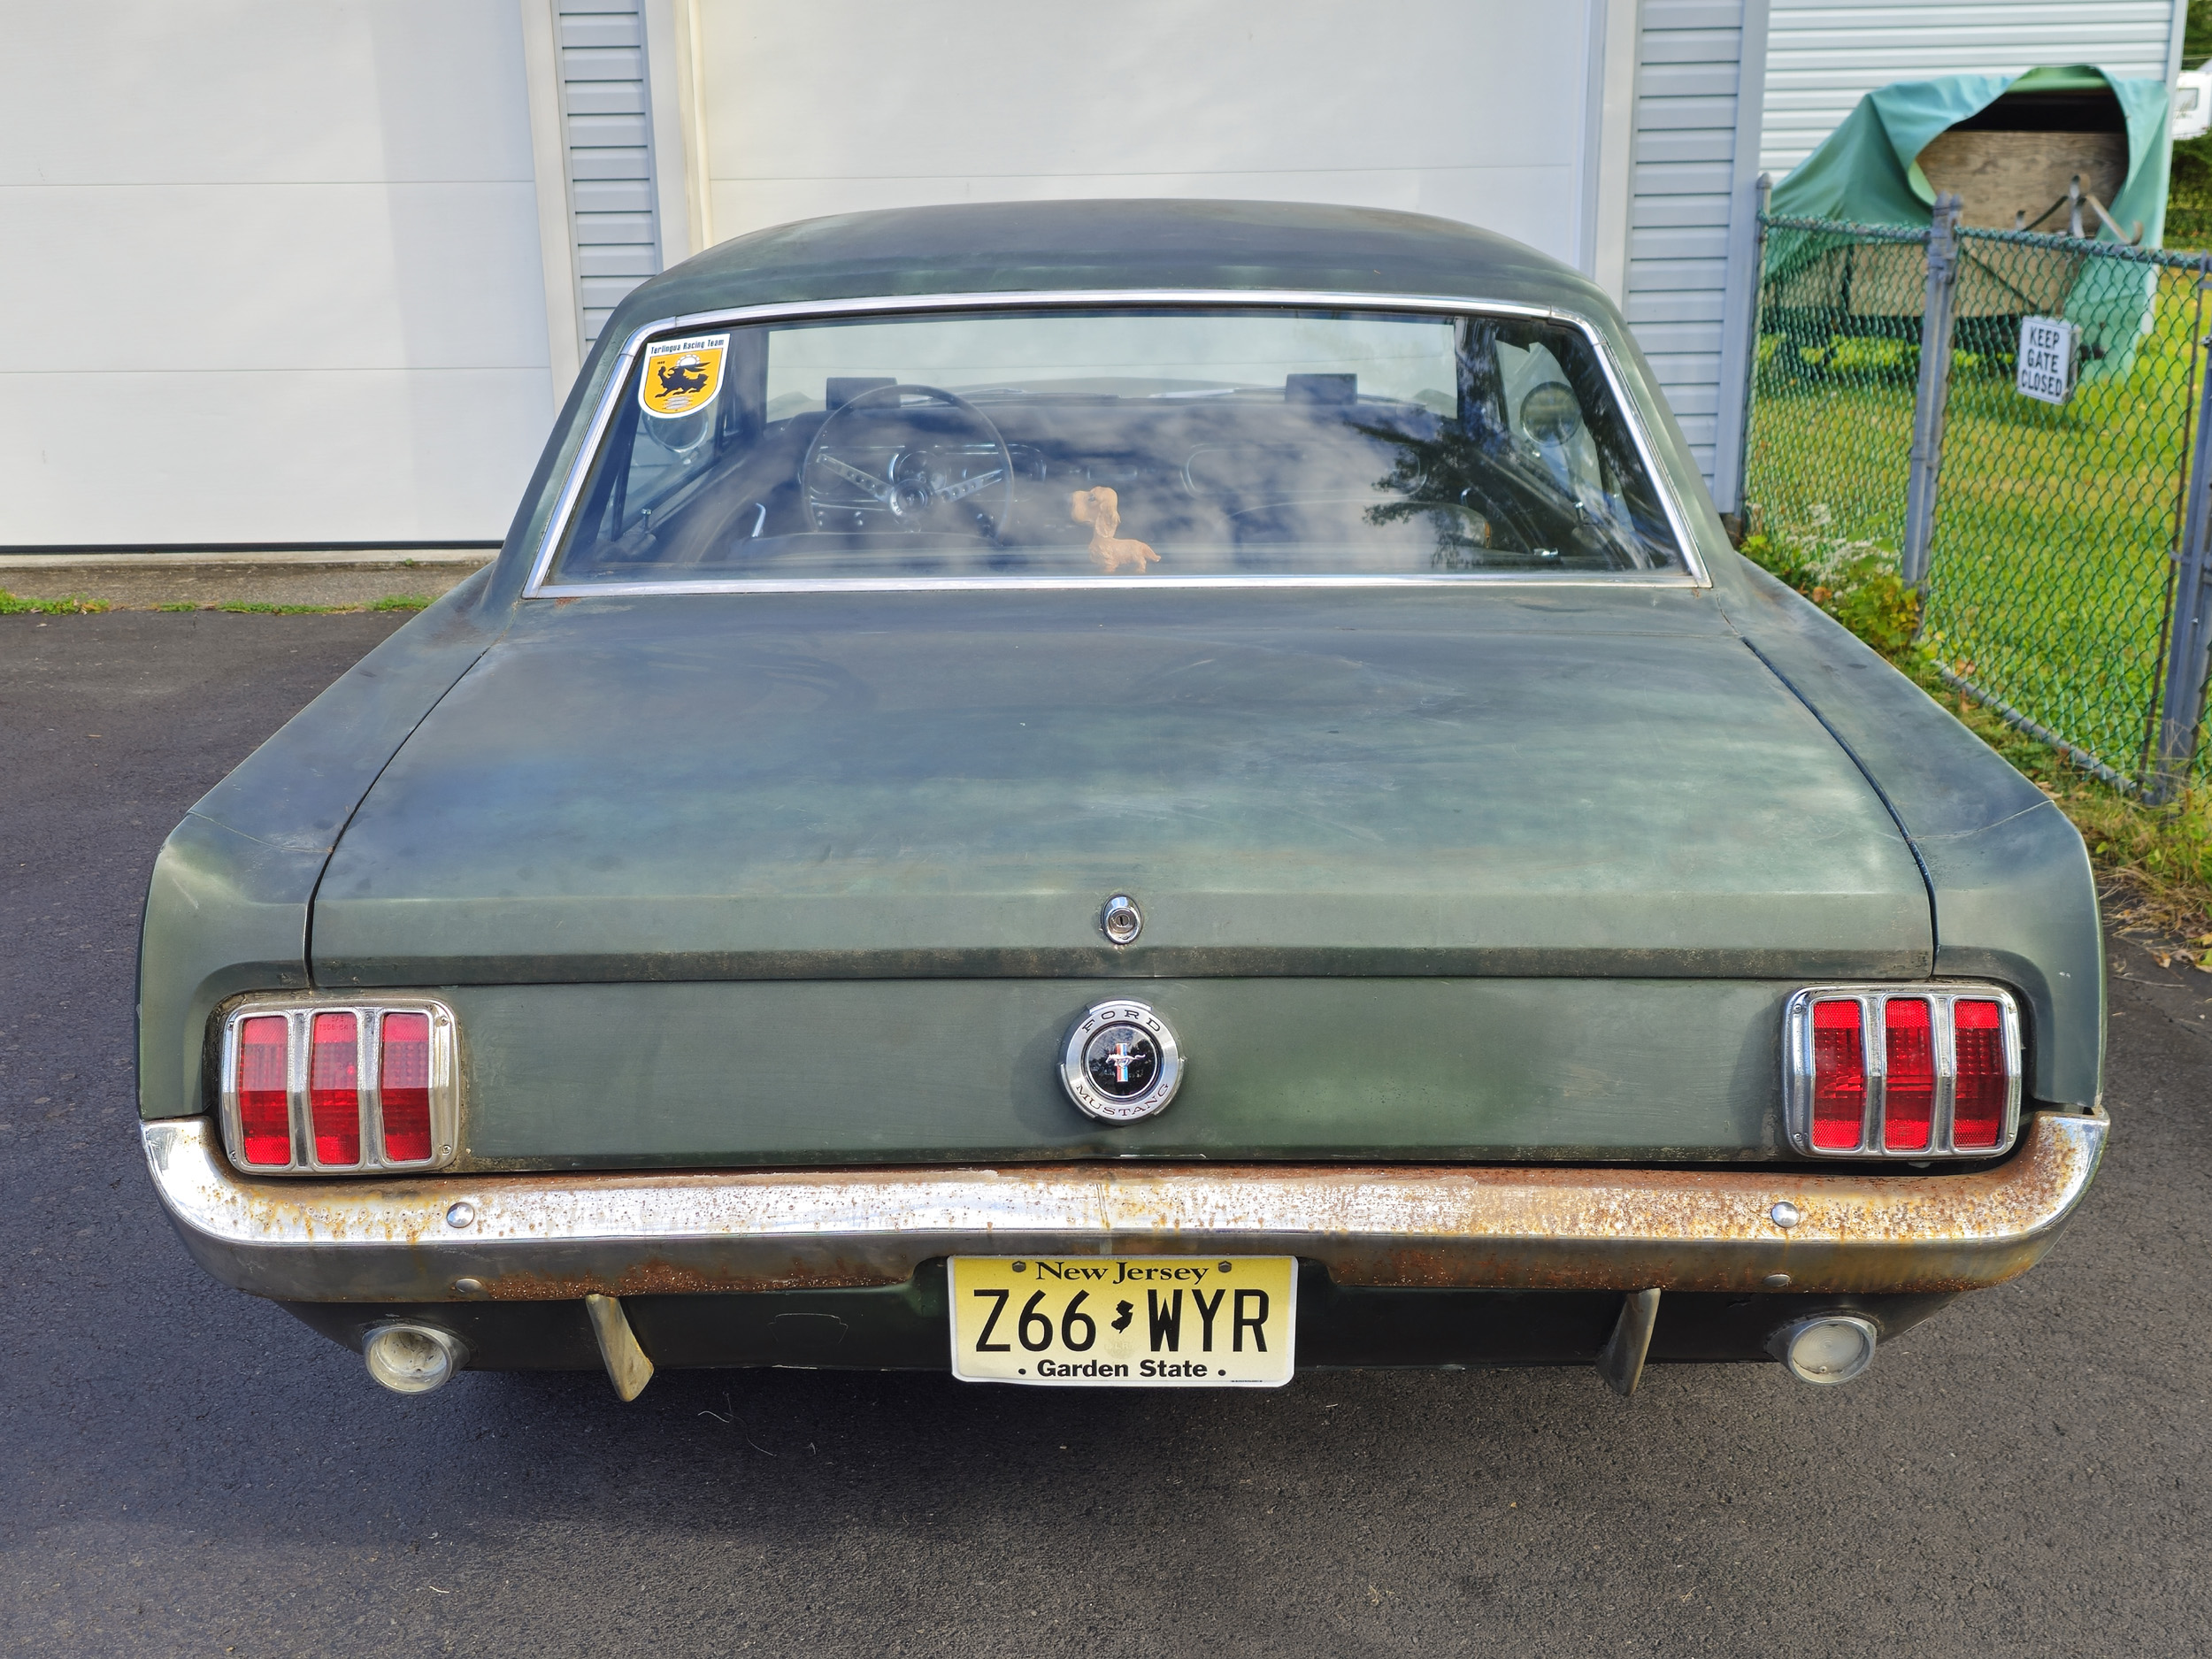
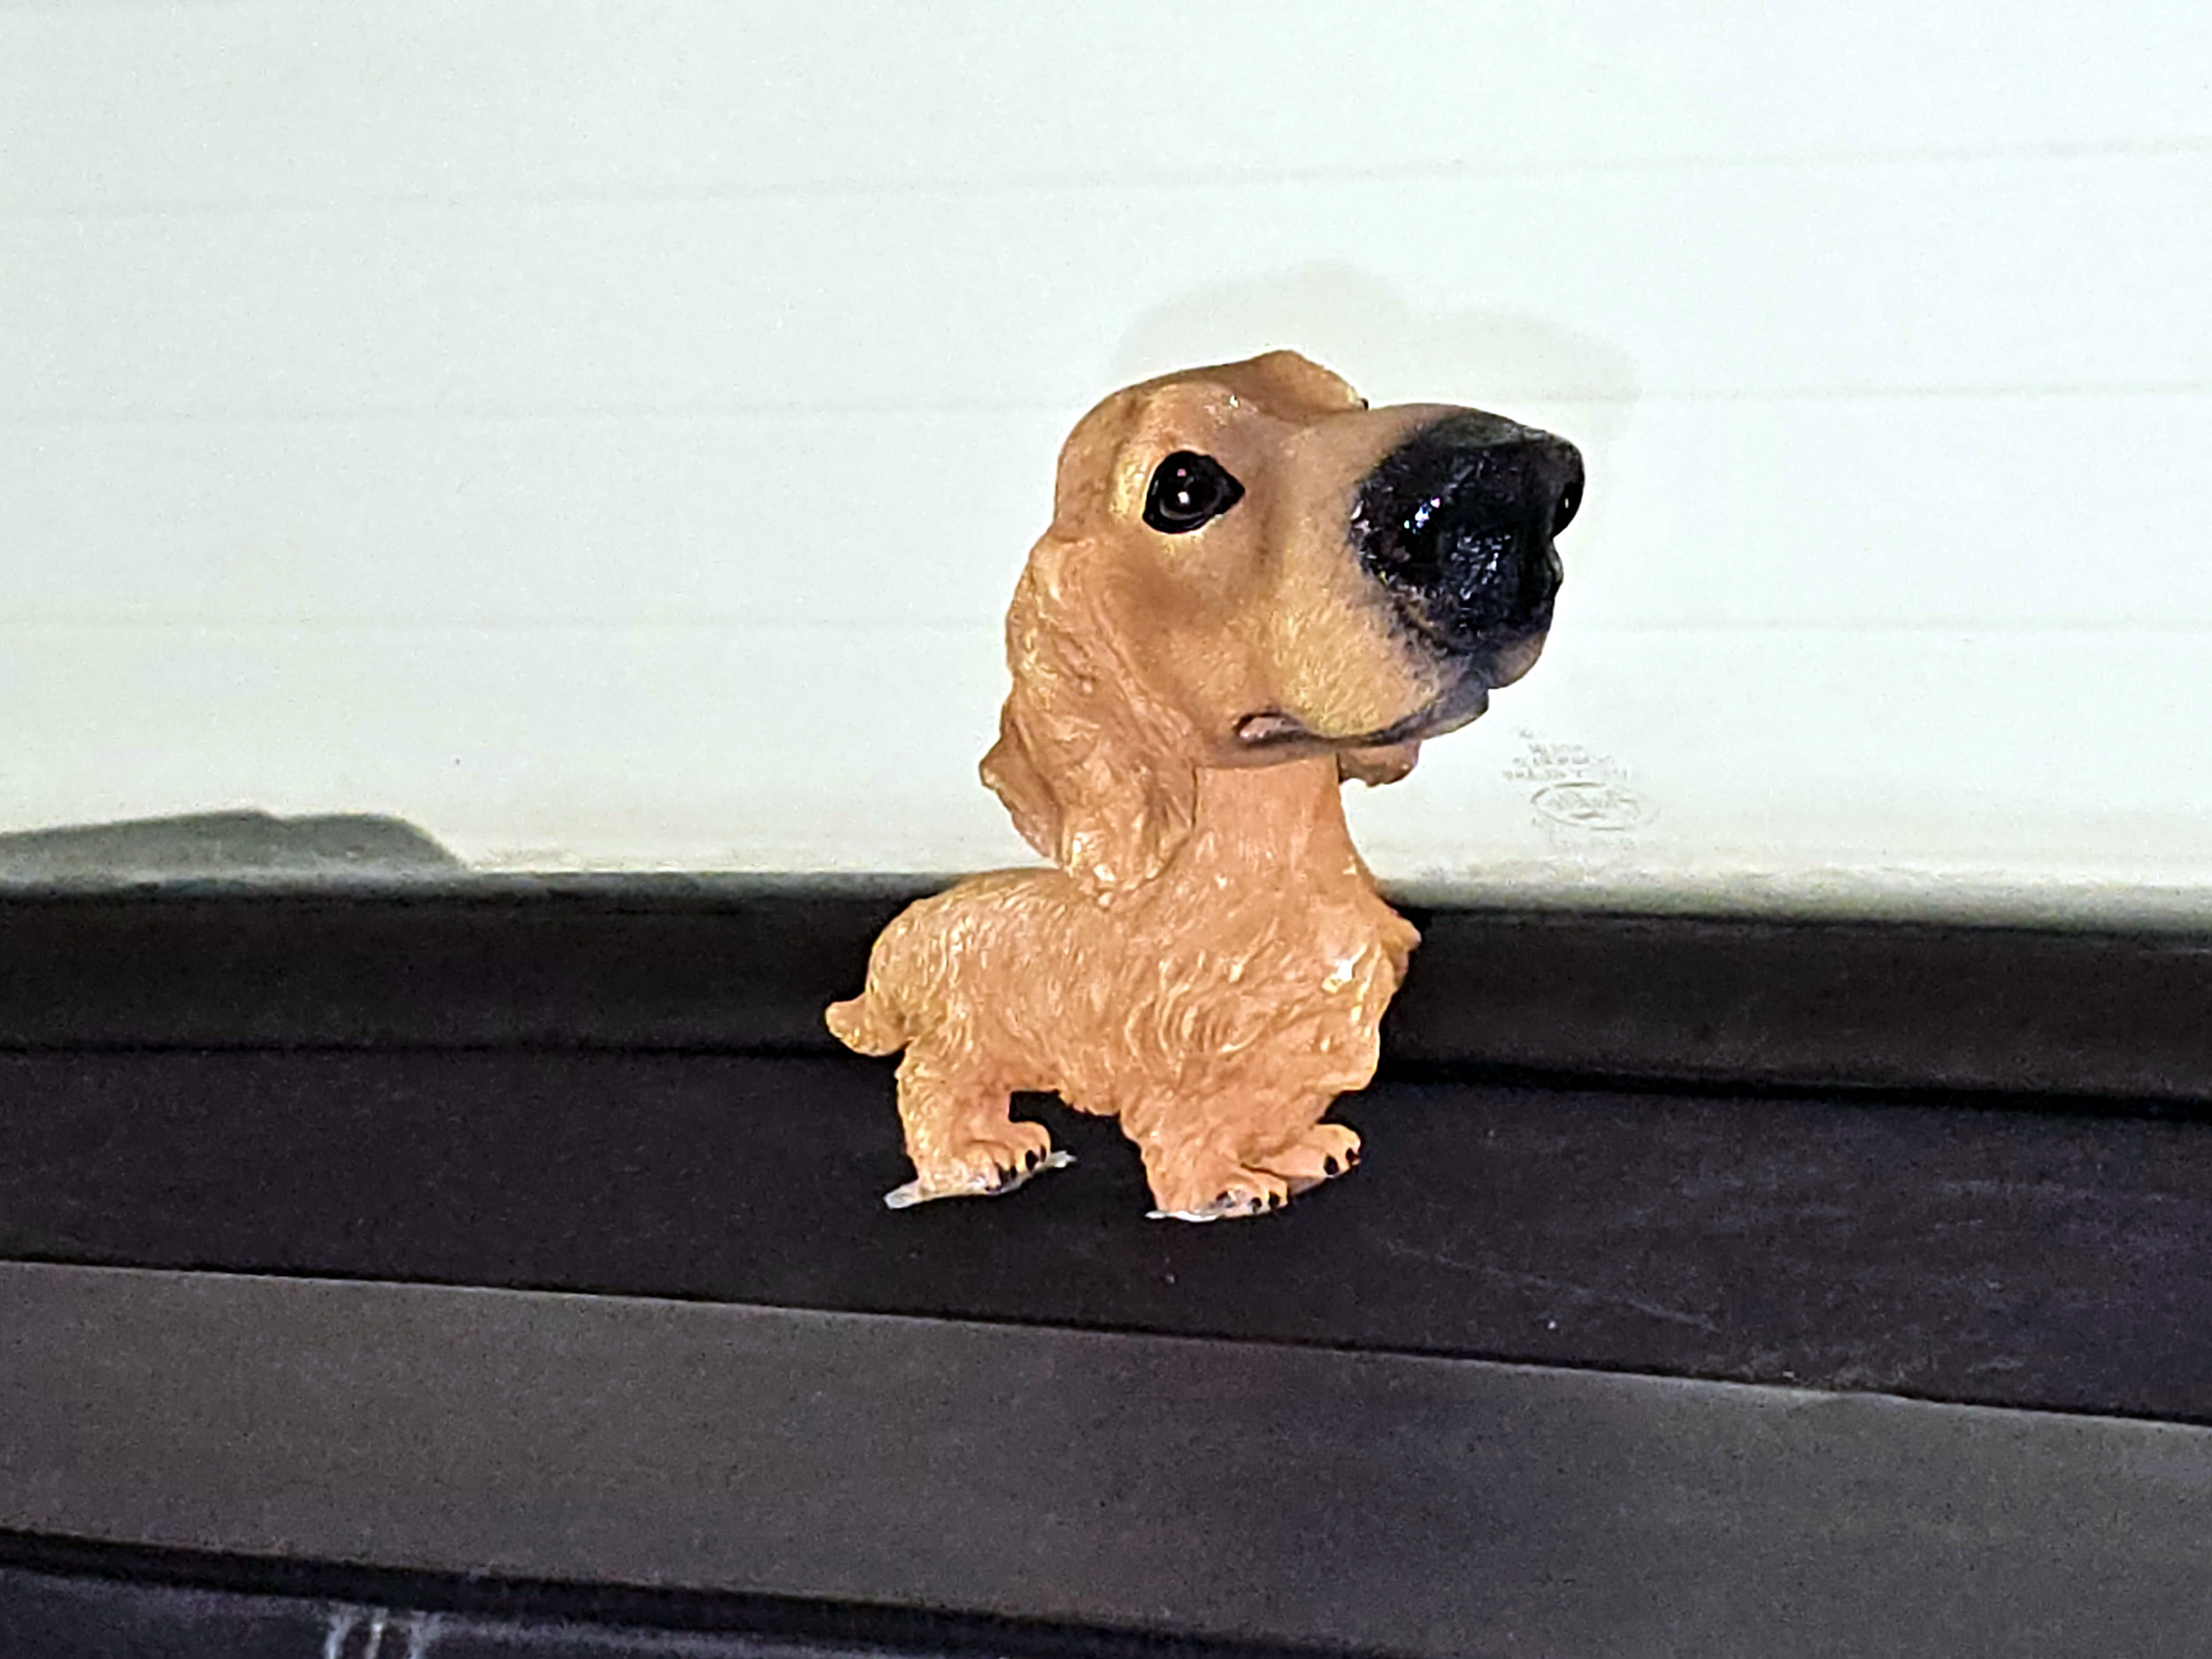
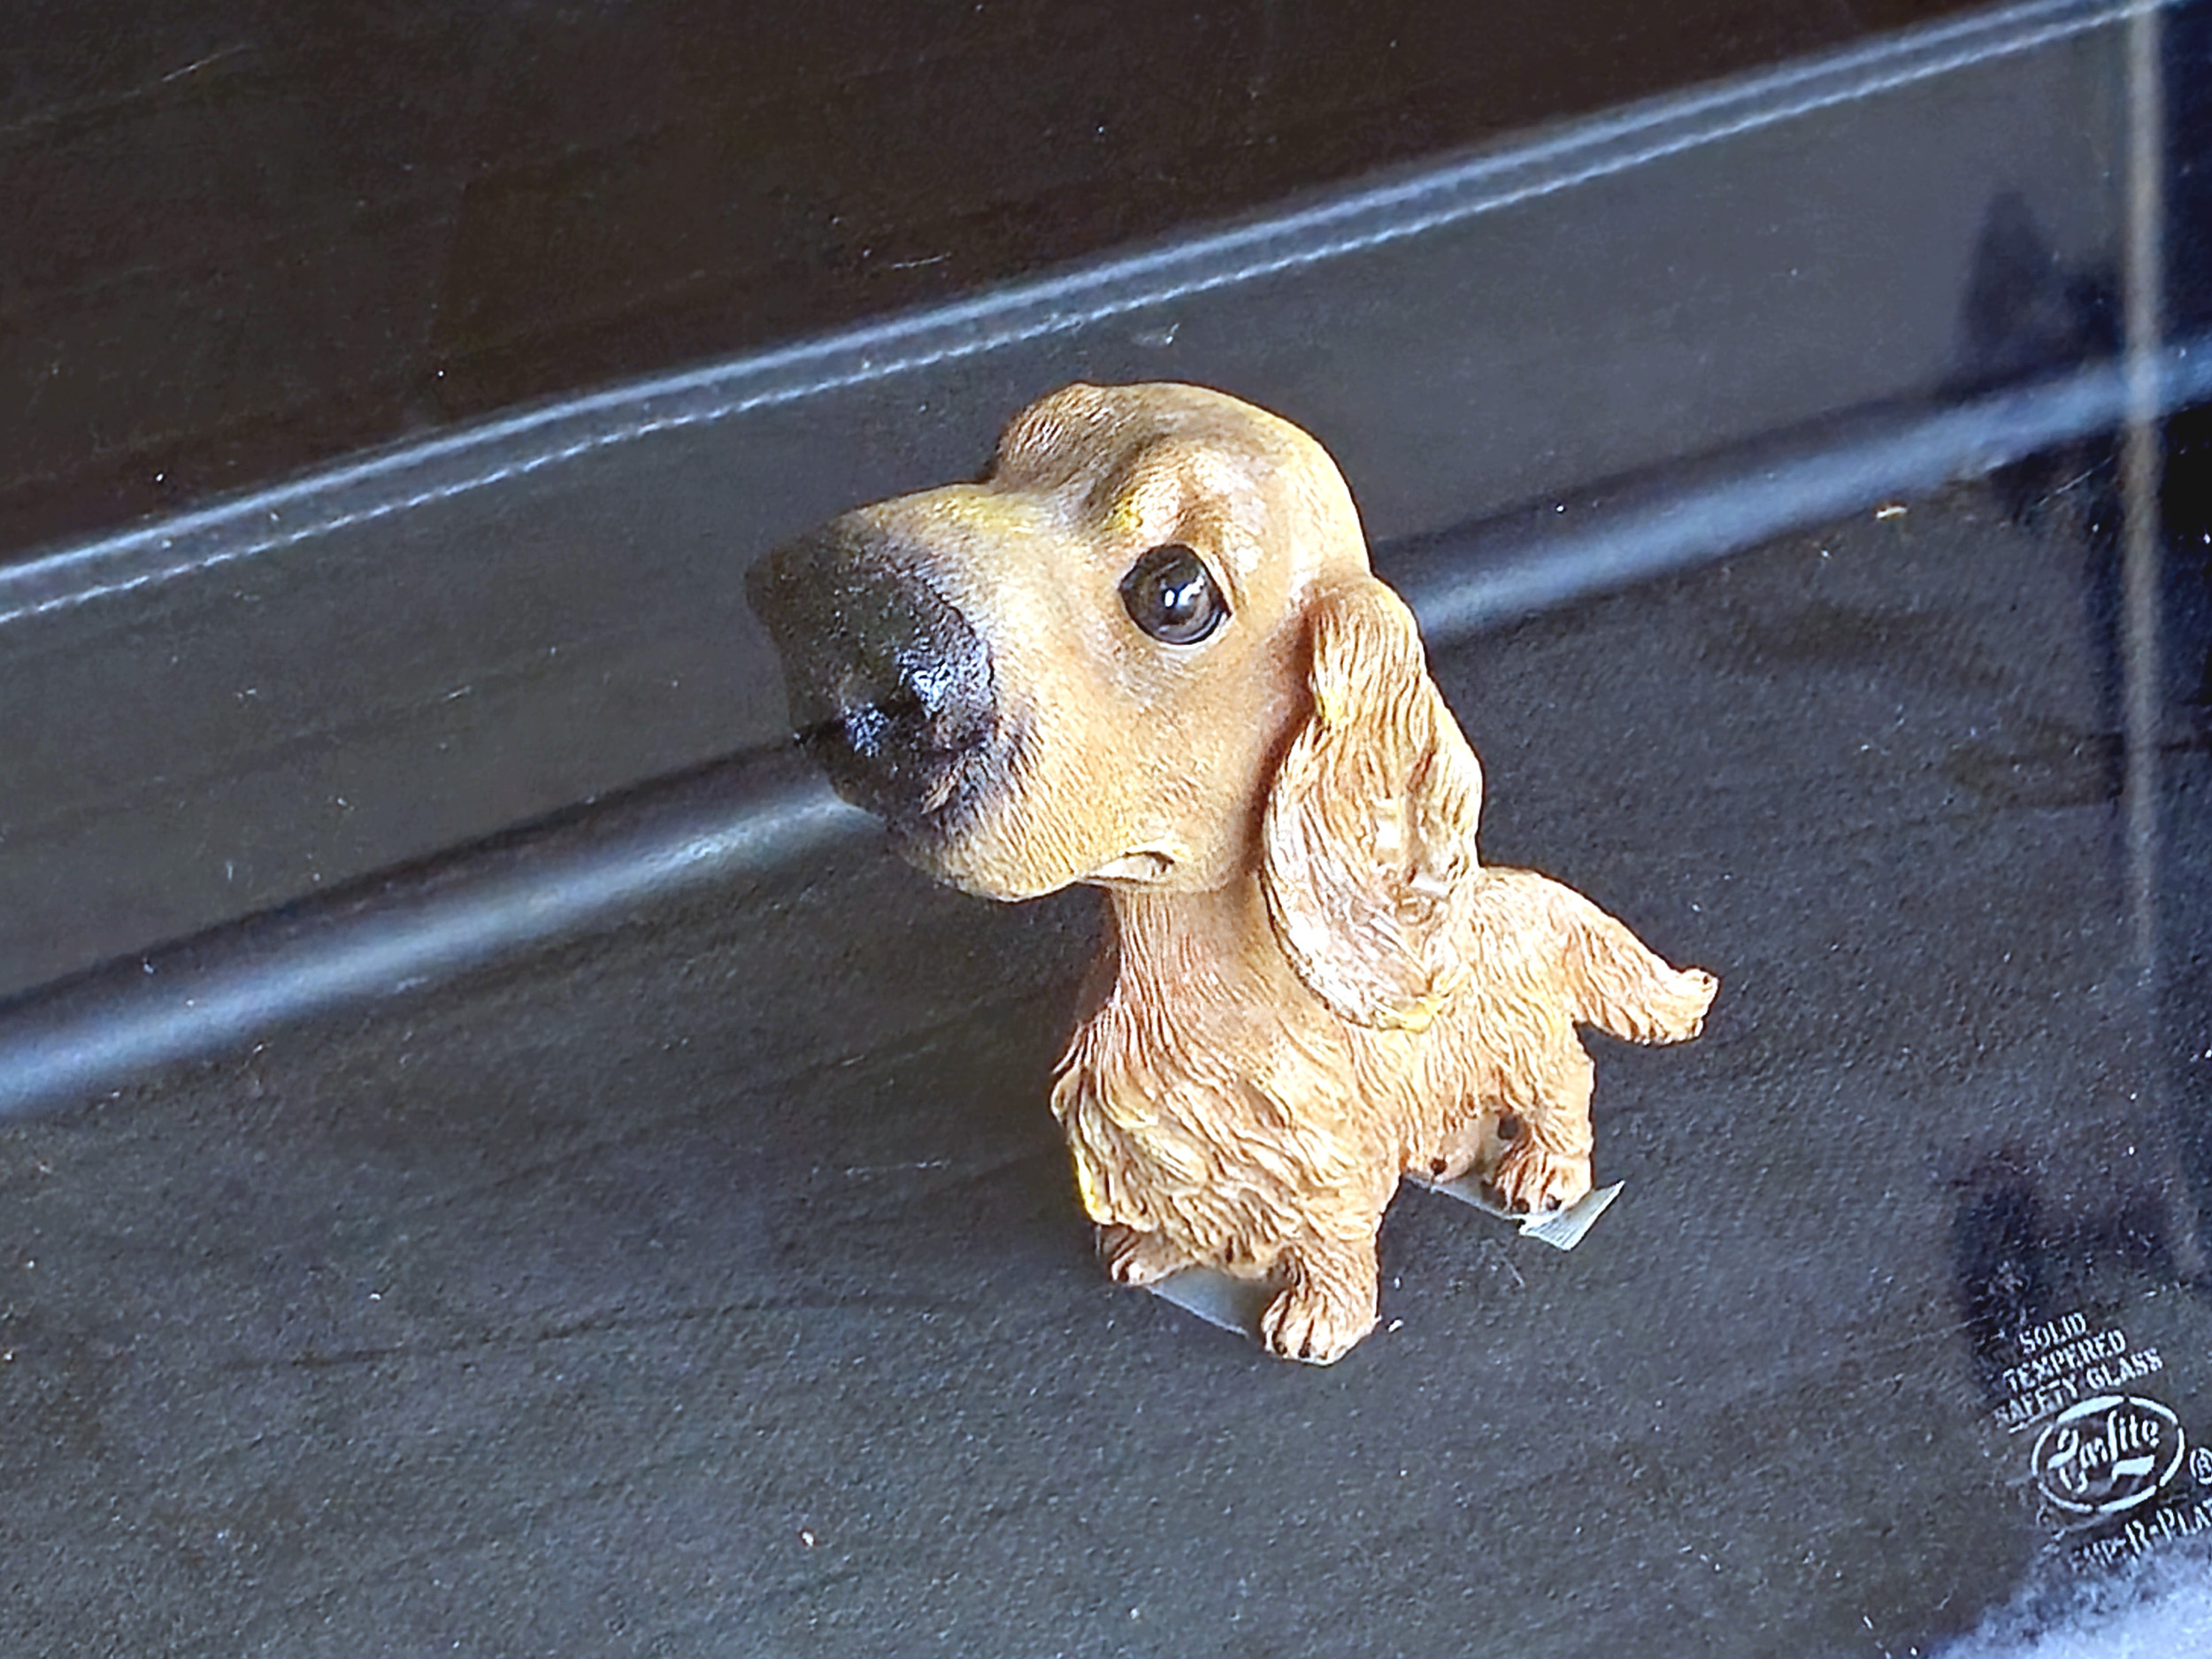
Bobblehead
Willie on the back deck
Added
10-18-26
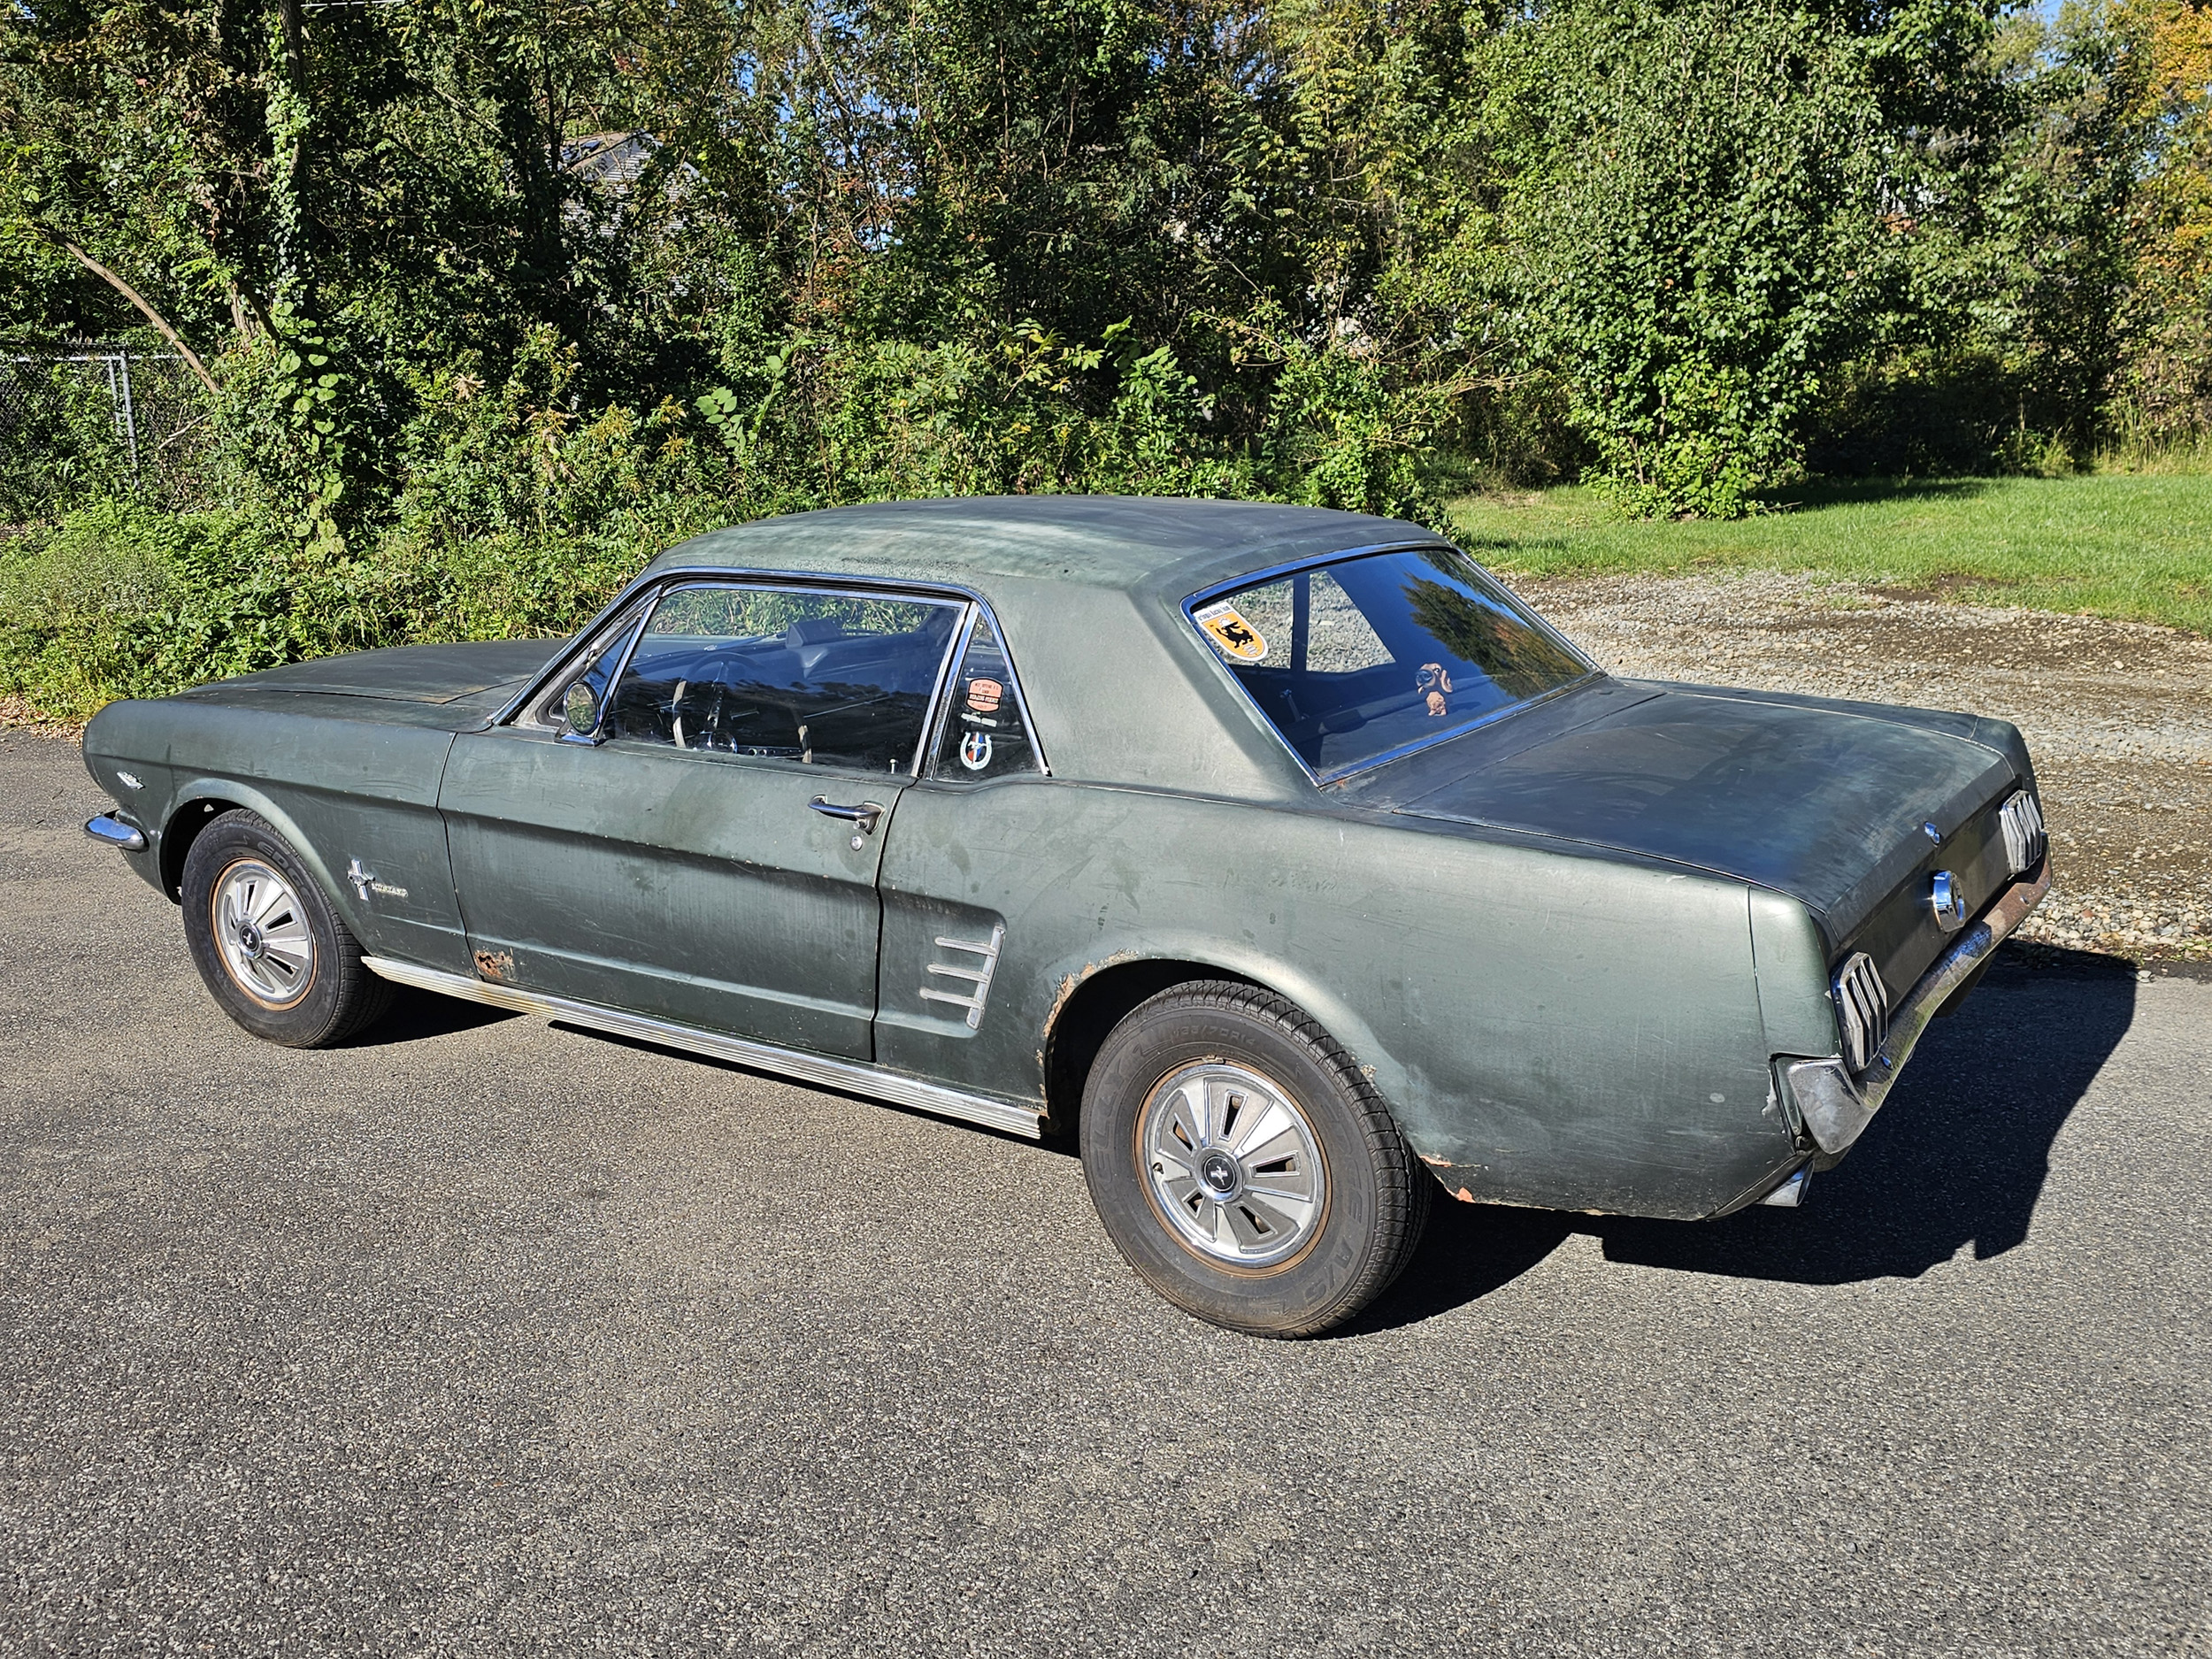
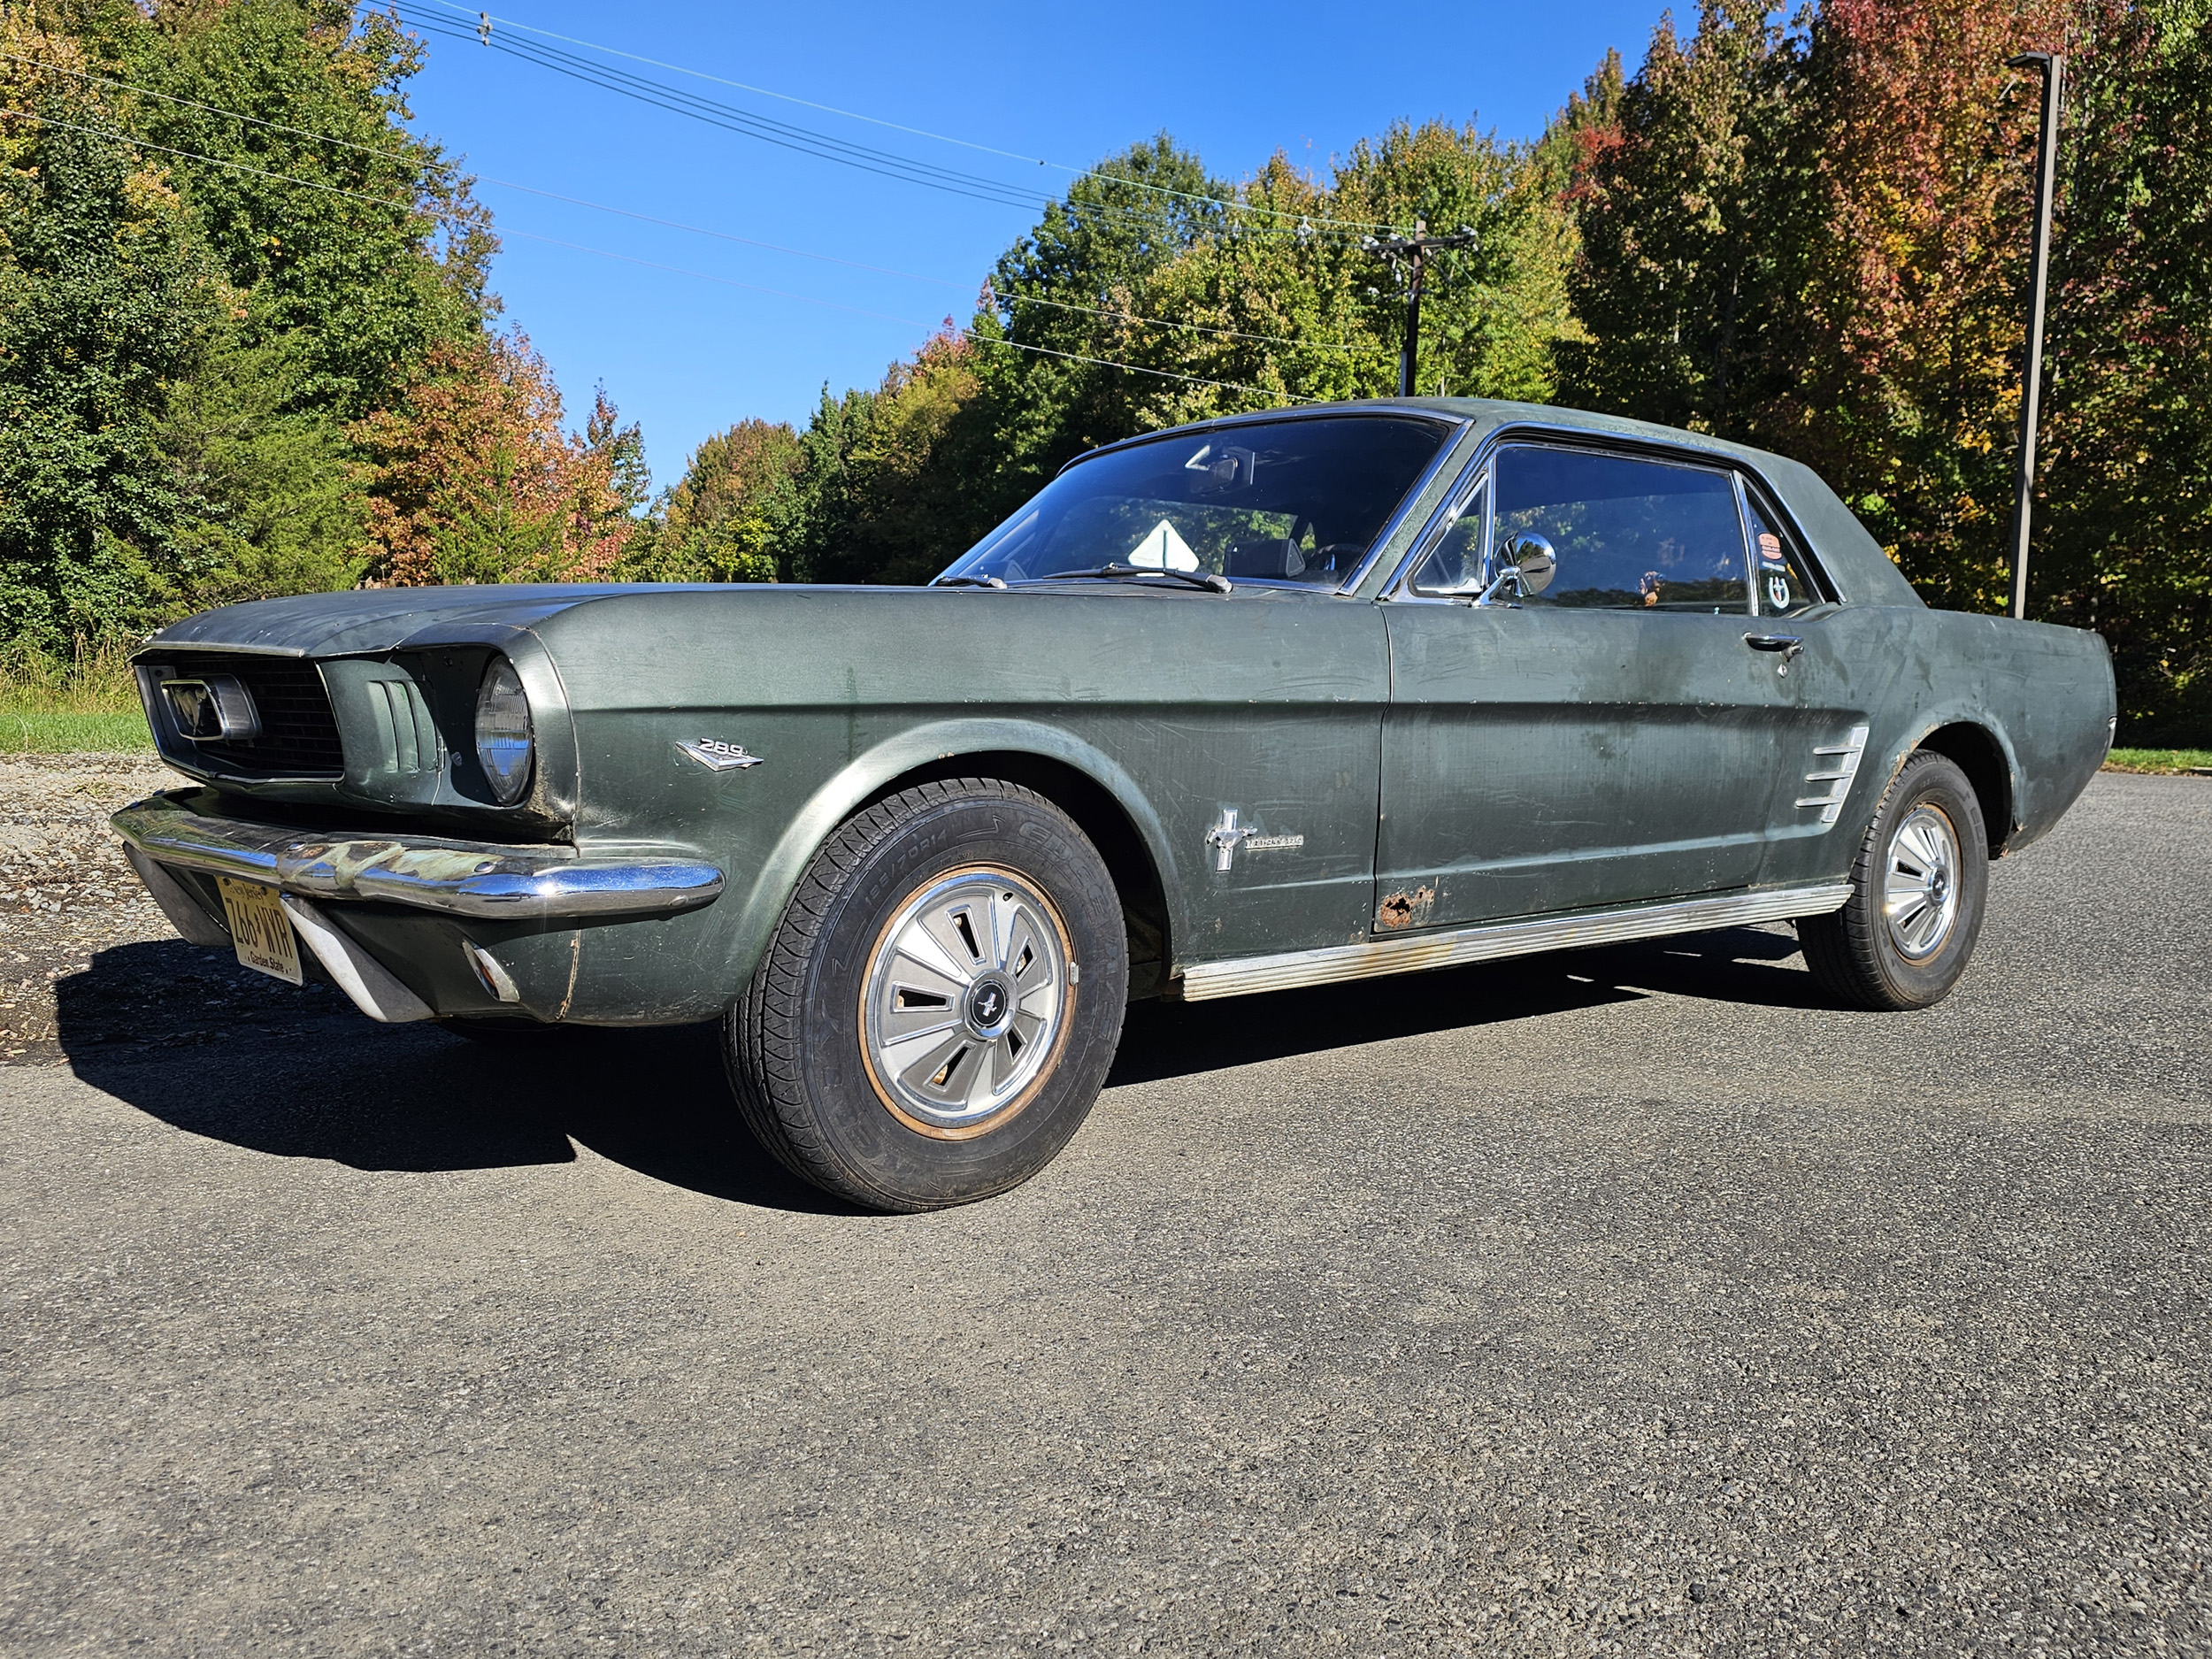
Patina
– translated from ancient Greek means “I can’t afford a new paint job”.
I don’t like my paint and rust at all but I am NOT spending a ton
of money getting it fixed.
It
is shiny – sort of….
With enough sunlight almost anything can be shiny. These photos
also show the car is level because of the new springs.
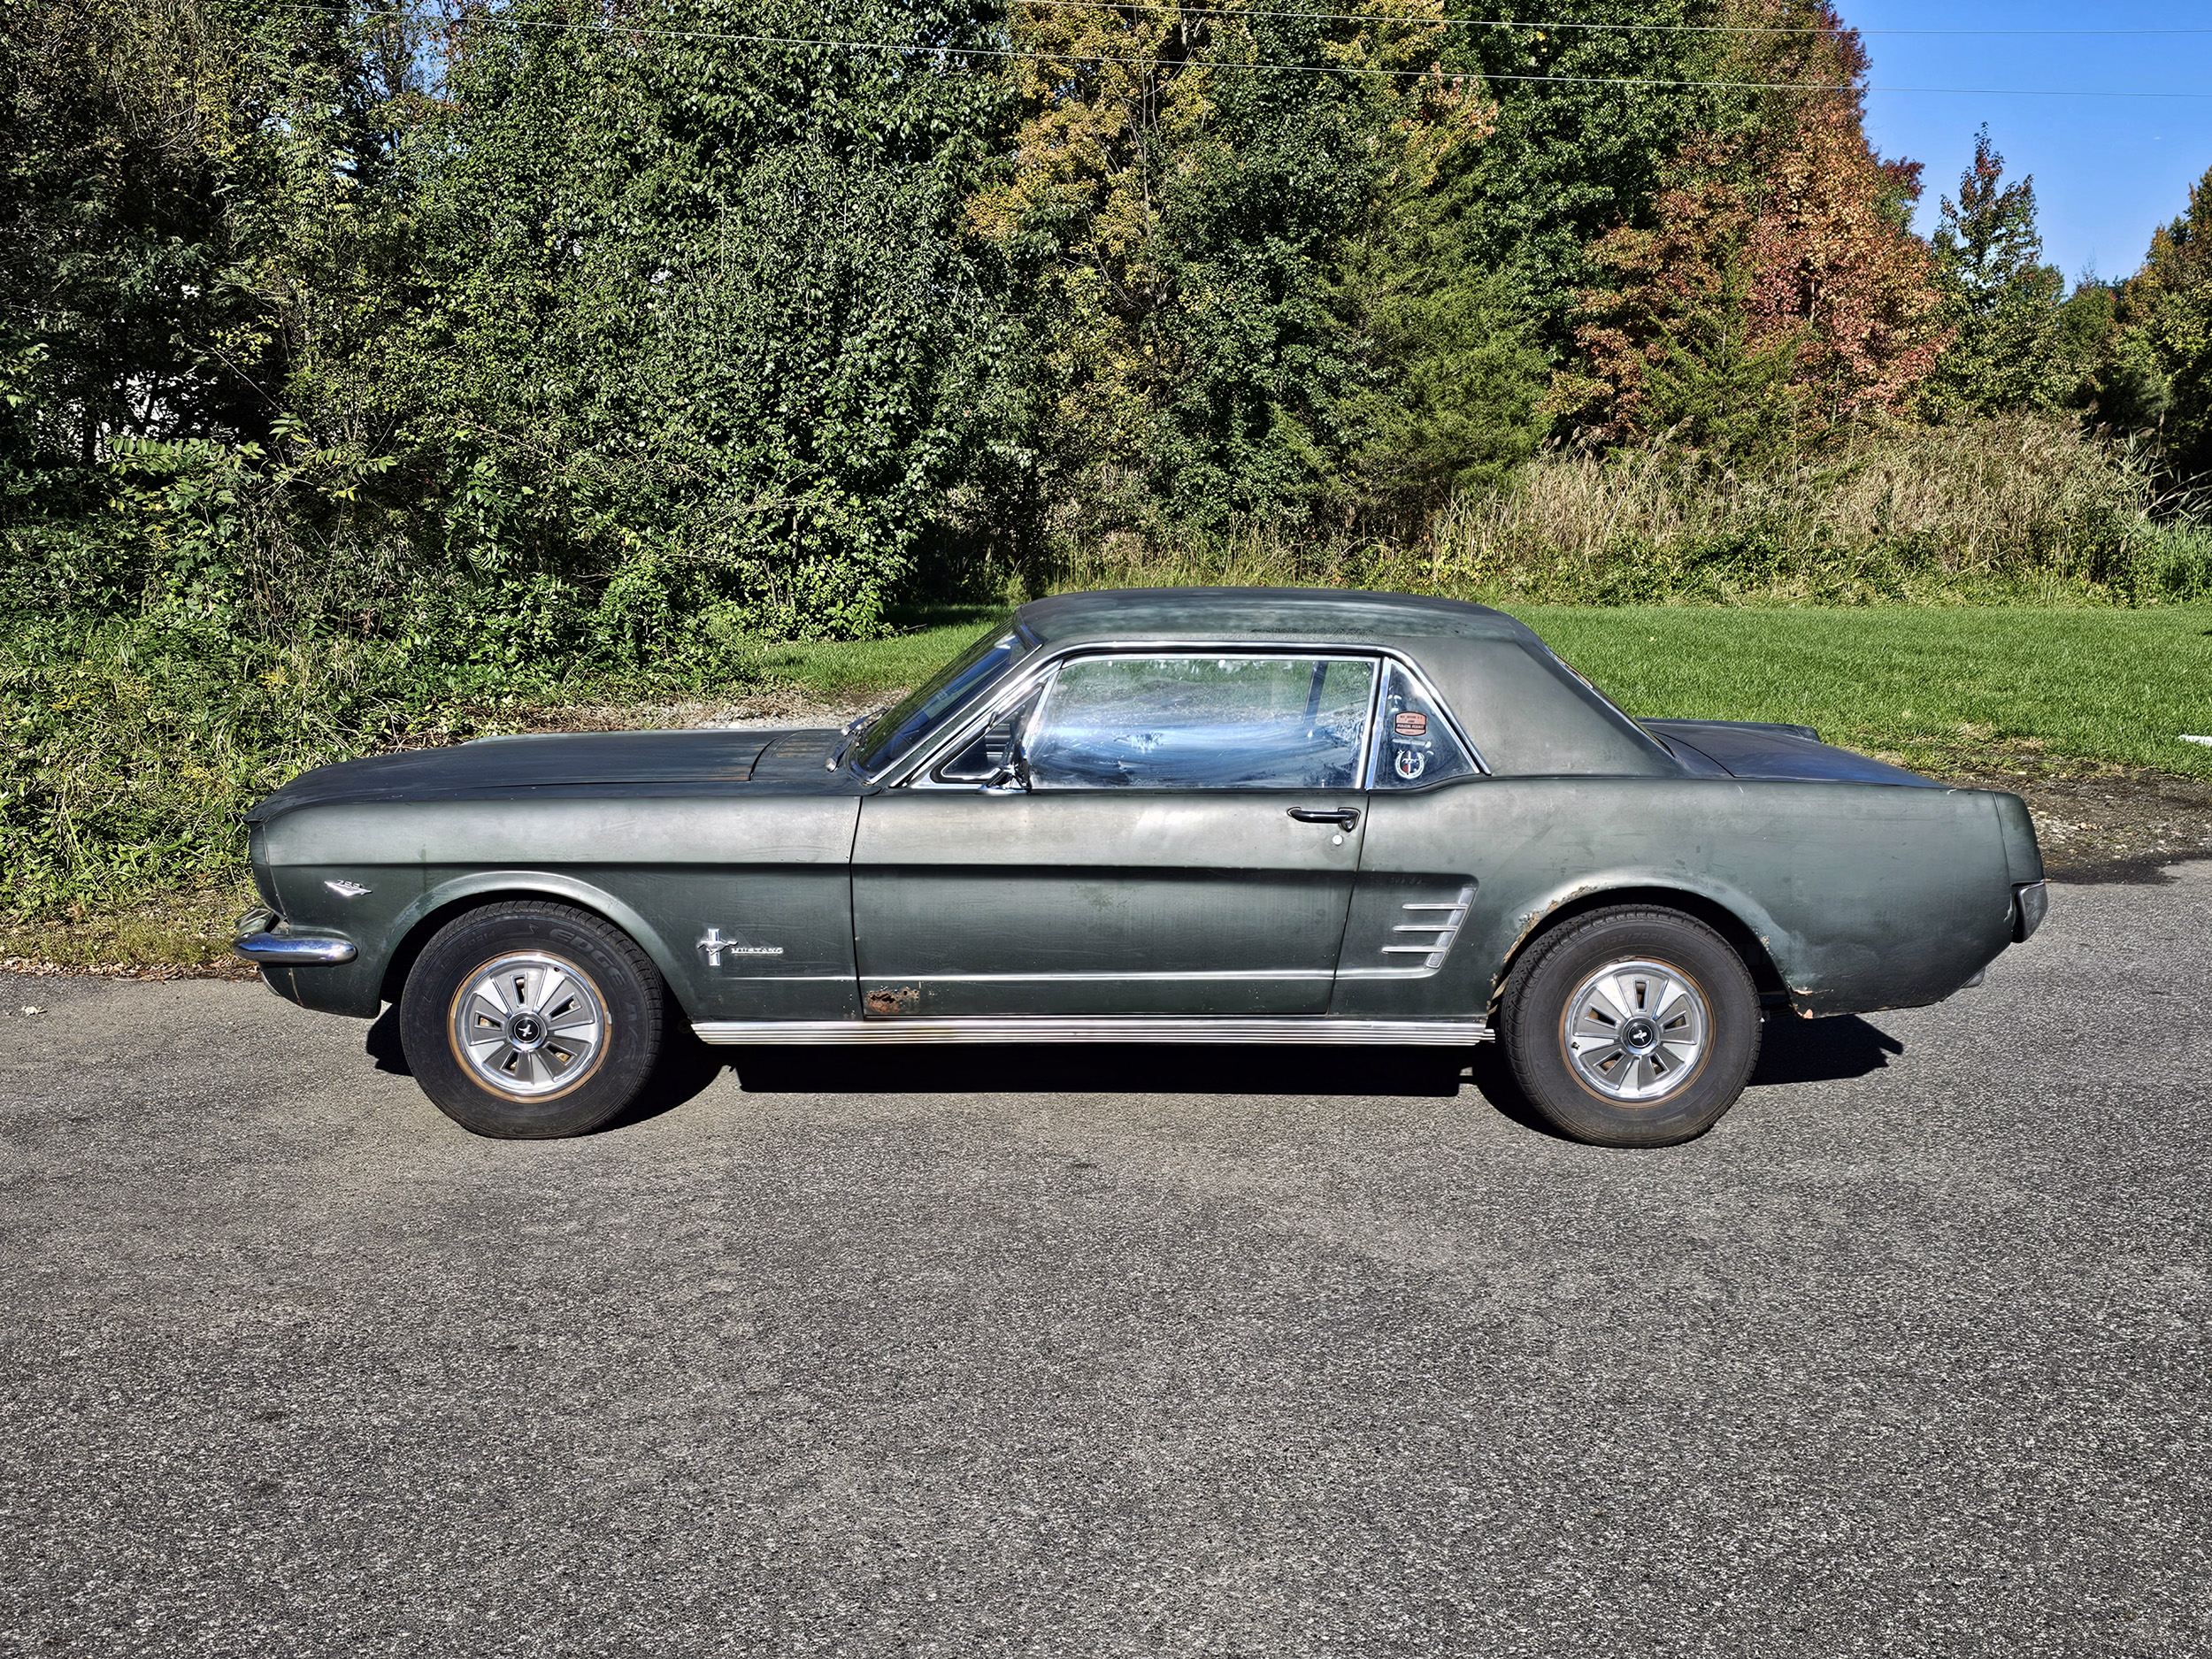
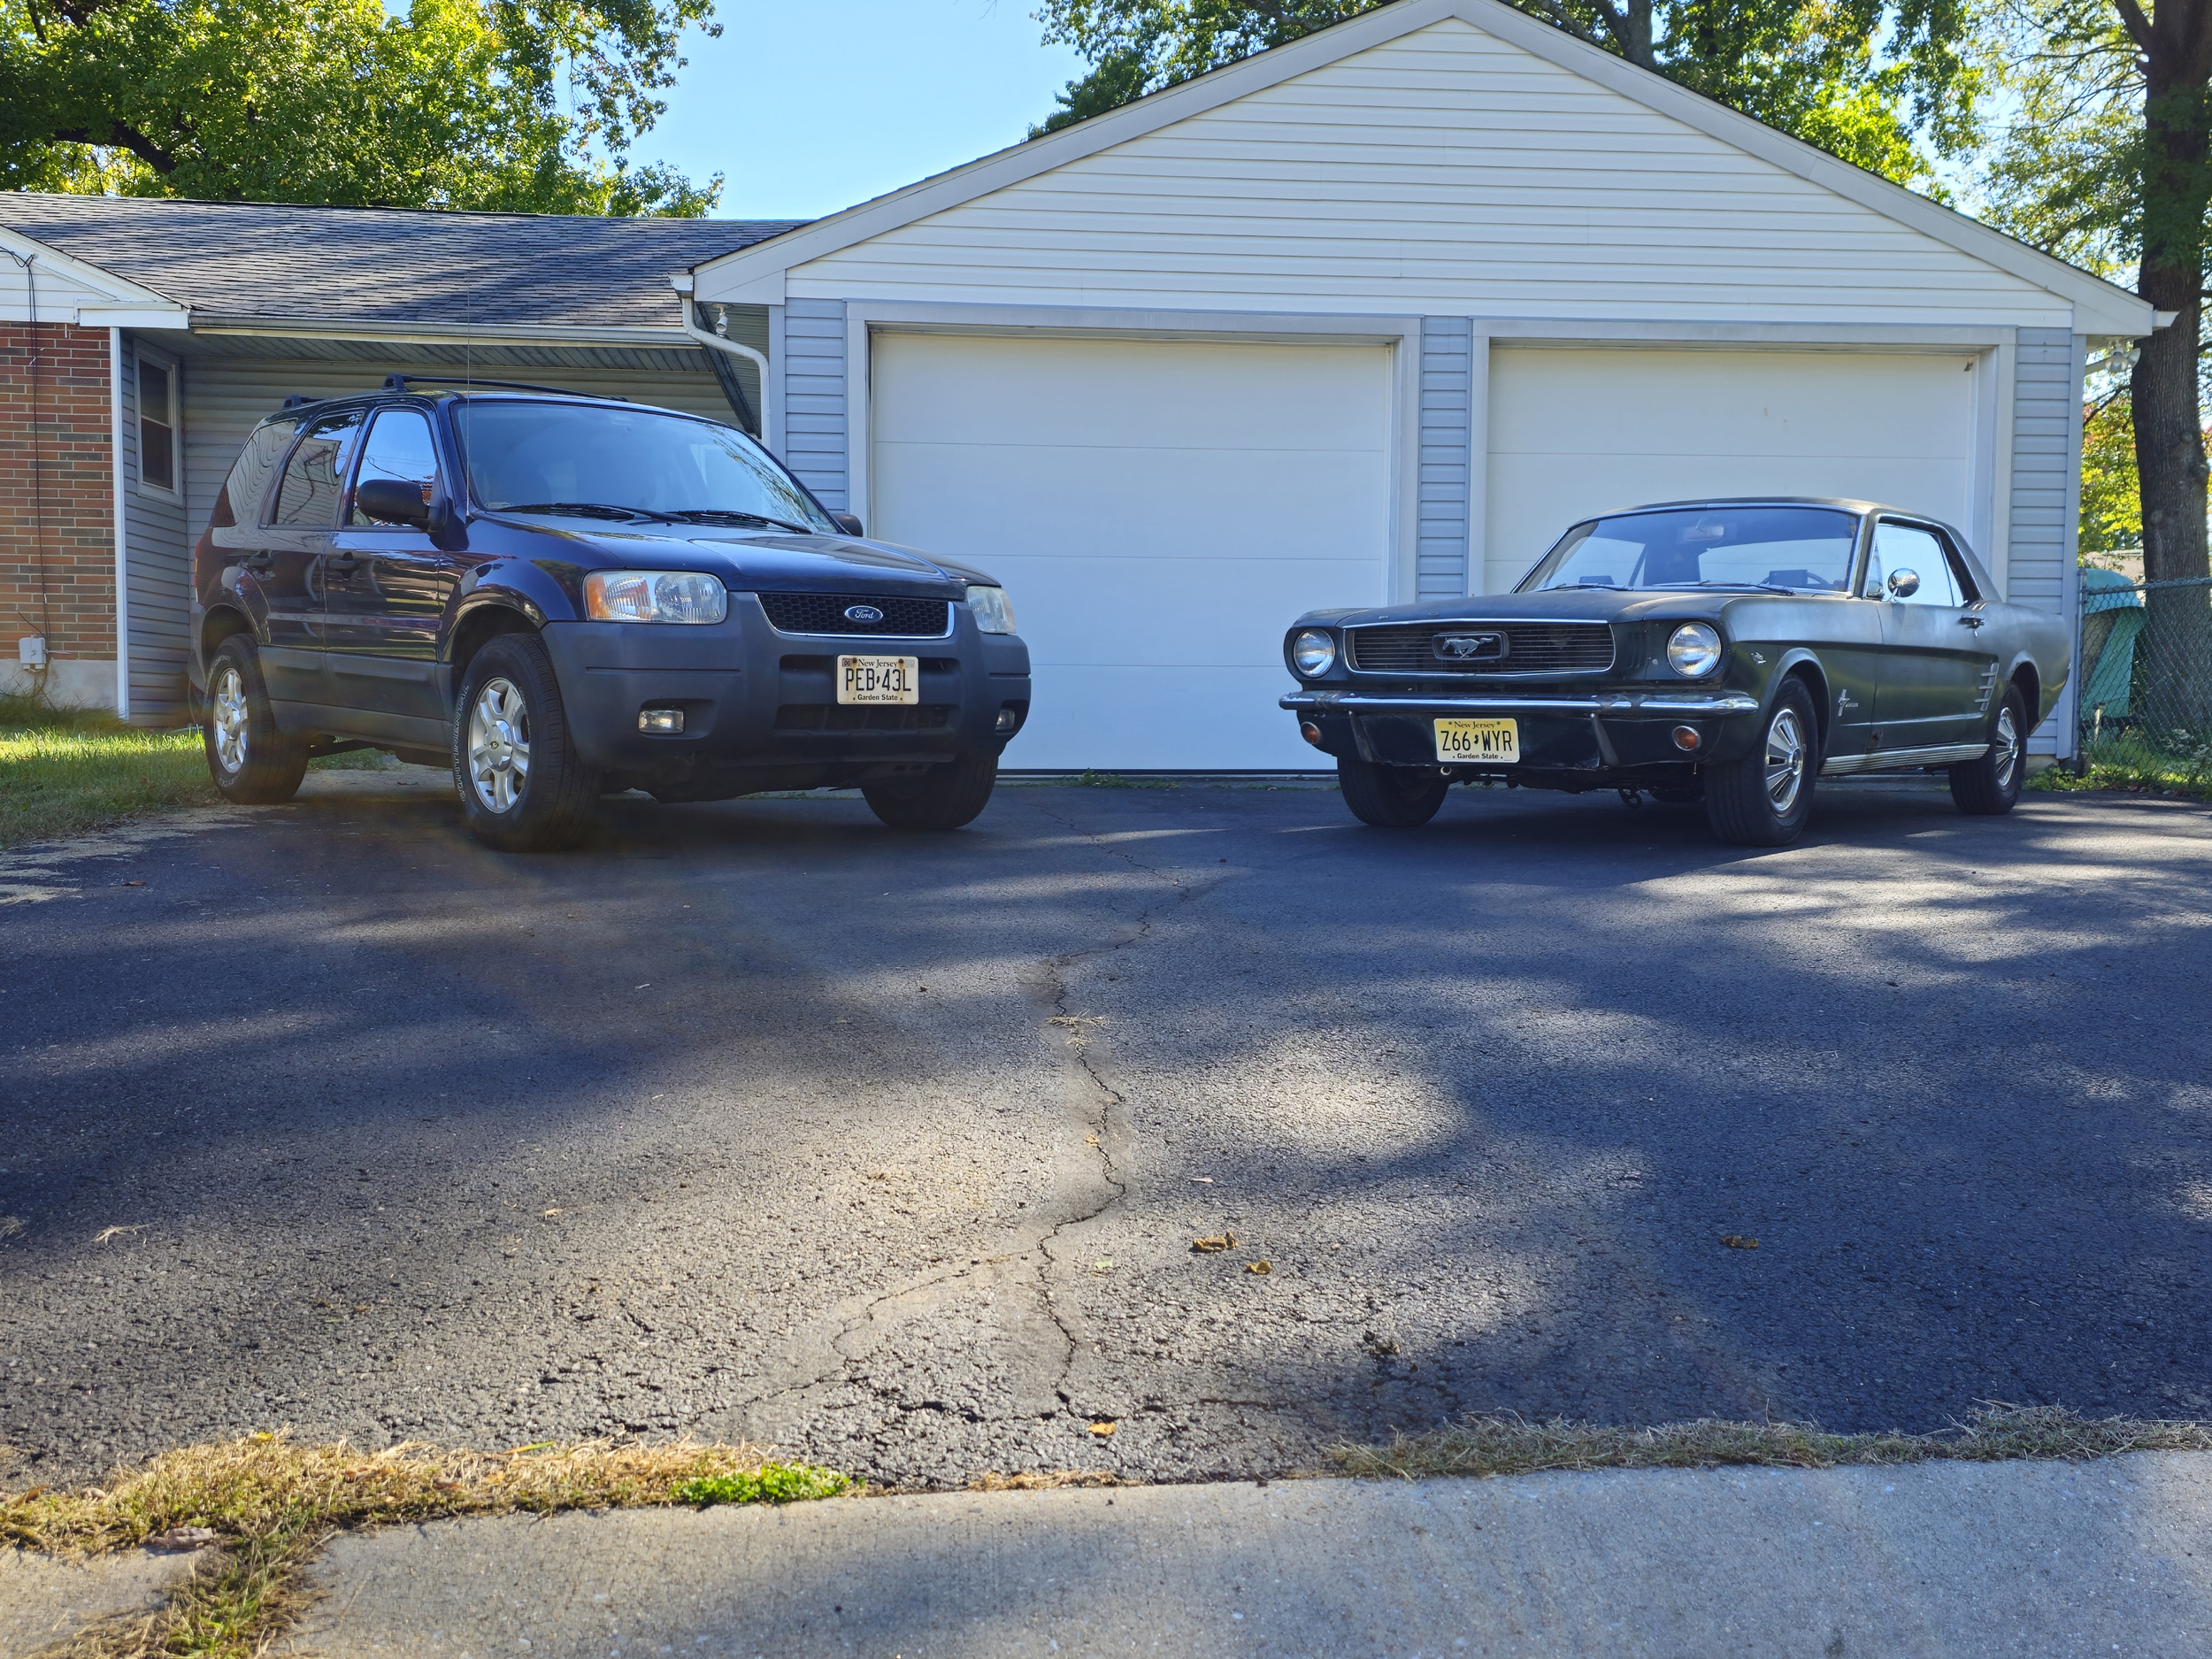
I
have wanted to take this photo for months. I bought my 2003 Escape new.
Currently has 186,000 miles. It has been absolutely bulletproof for years. But
part of my bucket list PSA for getting my Mustang was for just in
case. The story was I needed a “backup car” for my 23 year old Escape
so I got a SIXTY year old car.
I
can’t make this up. 8 hours after the Mustang was in my garage where the Escape
WAS every night for 15 years - the Escape started having issues it
never had before. The Mustang did fill in as occasional daily driver. The
Escape took a few trips to R N R (repair n return). New higher end tires and
front wheel bearings it is QUIET now like a new car. It is awesome.
Fingers
crossed both are currently in the best condition they have been in years. It
will be a few months until there is bright sun on my driveway. I will take this
again.
Thatsa
wrap.
Hopefully this is the last of the major Mustang work for this
year. It has taken a lot of my time and money!
The turn signals still do not work and the horn blows when the steering
wheel is turned. I HAVE to stop buying stuff for the Mustang for a while.
Up next in 2027 is new front seat covers and carpet.
New Bumpers.
MAYBE Styled Steel wheels and BF Goodrich TA Radials.
See if anything can be done to make the paint look better. It
will never be great.
Then that is really IT. Done. No rust is
getting fixed. No new paint. Drive it as is. That is the end of my plan for
this car.
Updated
10-18-26
All photos and content © Lanes Trains 2005-2027